


Making of the Dream House
I am very happy to welcome Hossein Yadollahpour back to the making-of section with The Dream House project. He previously shared his process of Making the Nasu Tepee house and today he breaks down the process of creating this little corner on earth and architecture and more by using. Enjoy!
Introduction
Hello! My name is Hossein Yadollahpoor. I am 29 years old and was born in Iran. Today I want to talk to you about my new project.
This project started when we needed a simple building to practice modeling for a workshop of Archviz, and the Fishbourne Quay project was suggested to me by one of my students.
After the class was over, I decided to continue it in my free time, and I have reviewed many references for this, and the final result became The Dream House!
Today I’m going to share my experiences working on this project with you, so stay with me.
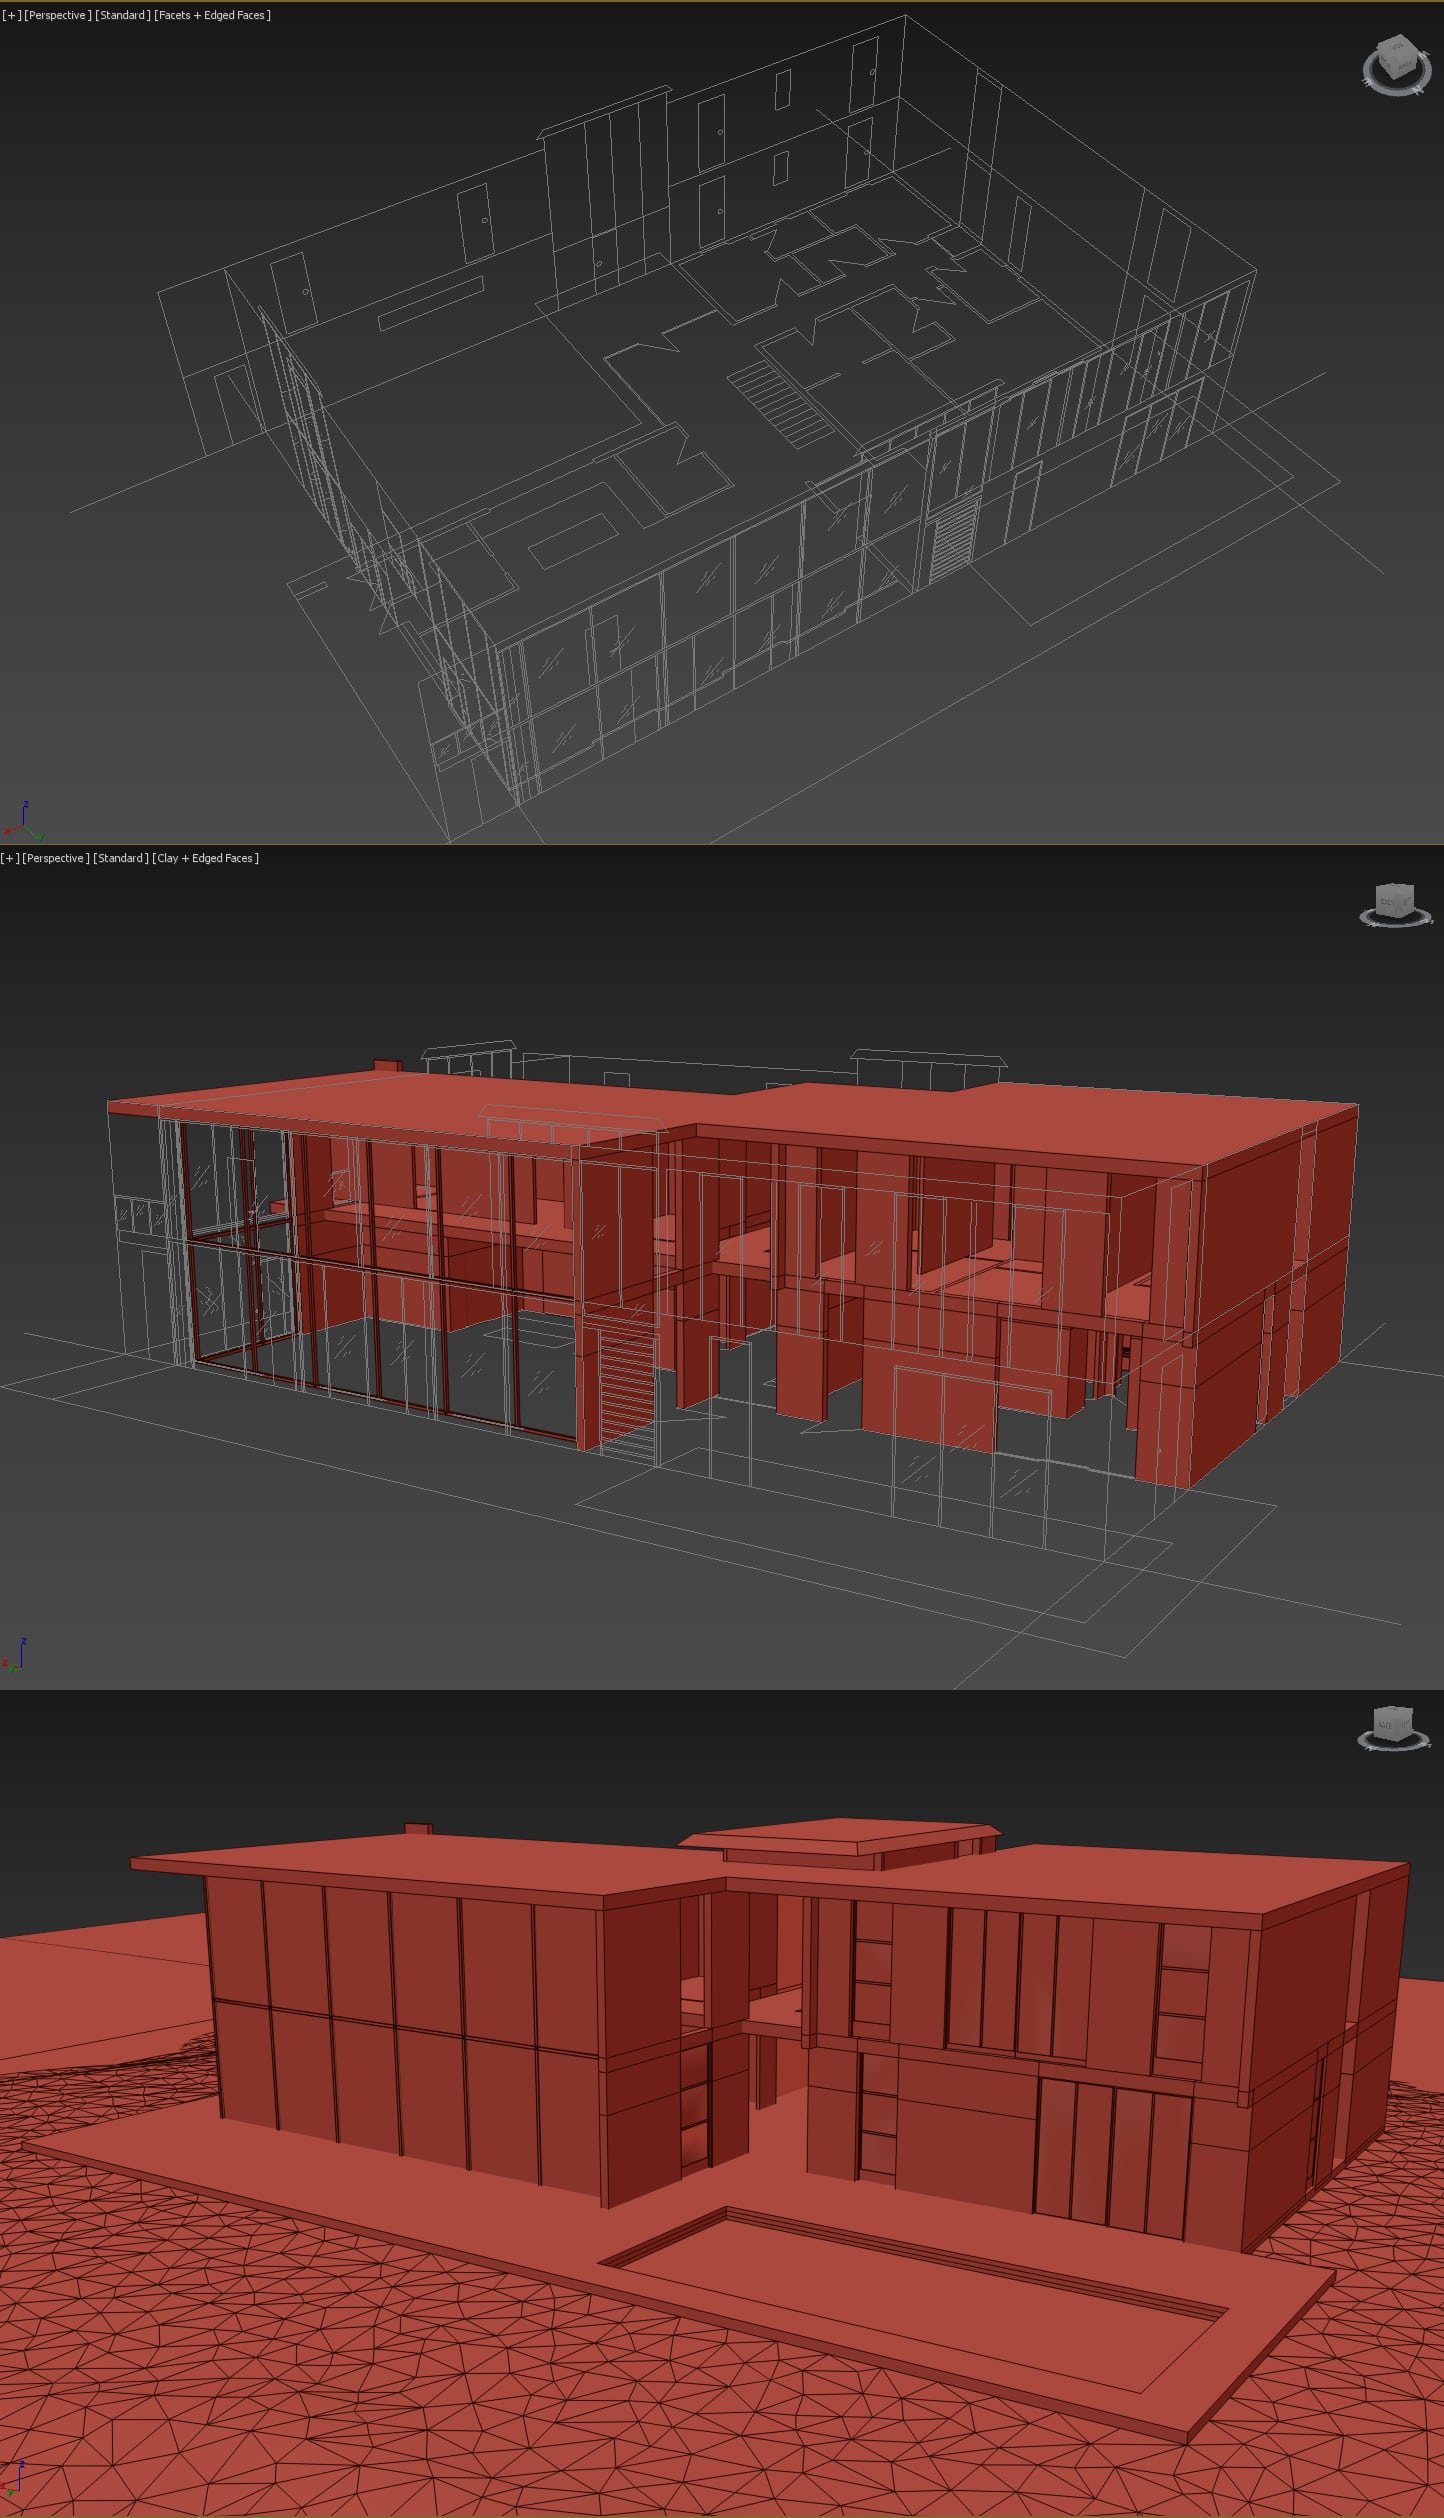
Step 1 – The Dream House Building 3d Modeling
After ensuring the desired units, we started the 3d modeling process. To do this, we first gathered project images and information from the internet and mapped out views and plans with AutoCAD.
Our 3d modeling method was so that at first, after entering the views and plan and defining it with lines and we made the initial model by extruding and edit poly.
I investigated many references and tried to modify it to my taste to build around the building.
Software & Plugins:
- The Artakan Create Stairs plugin – (https://www.cgsample.com/plugin/artakan-create-stairs) is a great and easy way to build a stair in 3ds max.
- iToo Software Rail Clone plugin for the fences.
- Floor Generator – (https://cg-source.com/FloorGenerator) plugin for the wooden parquet.
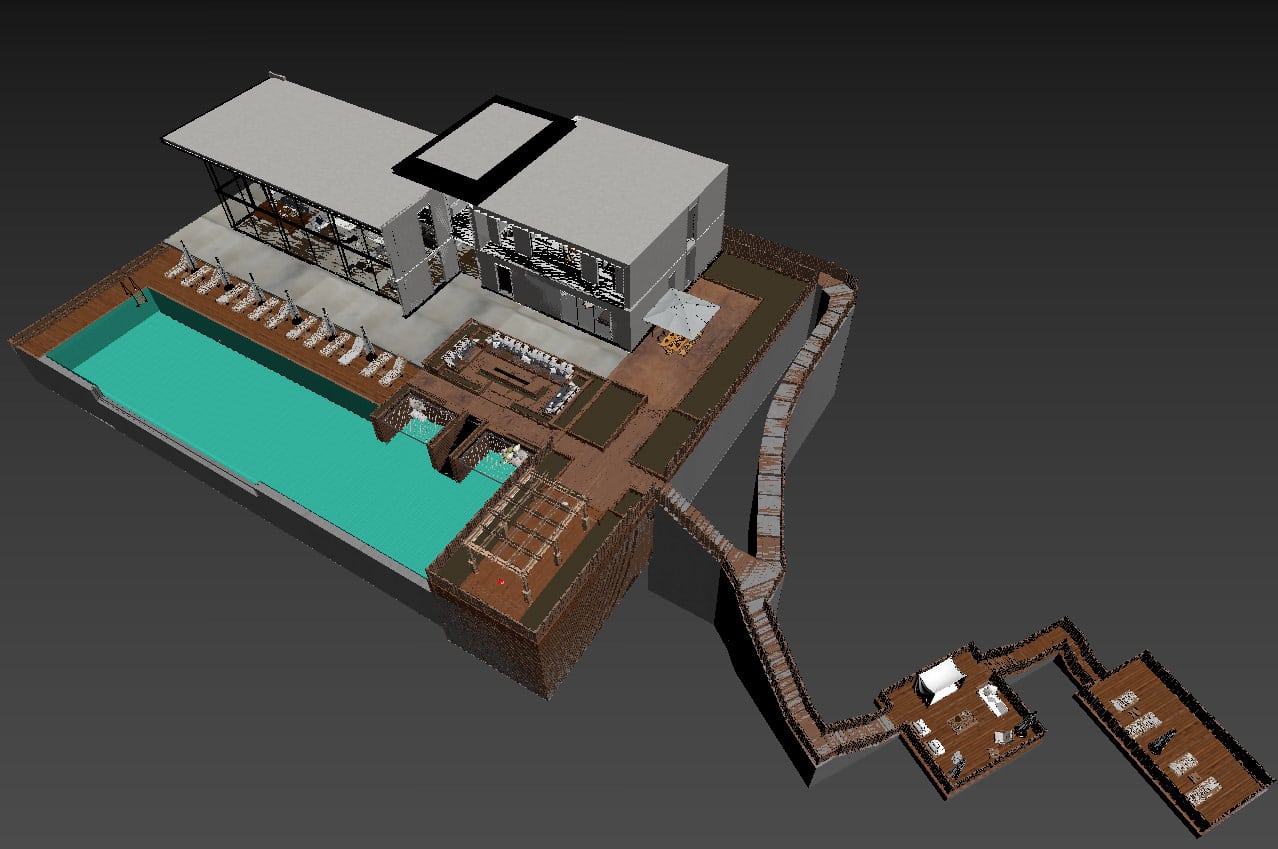
Step 2 – Swimmer
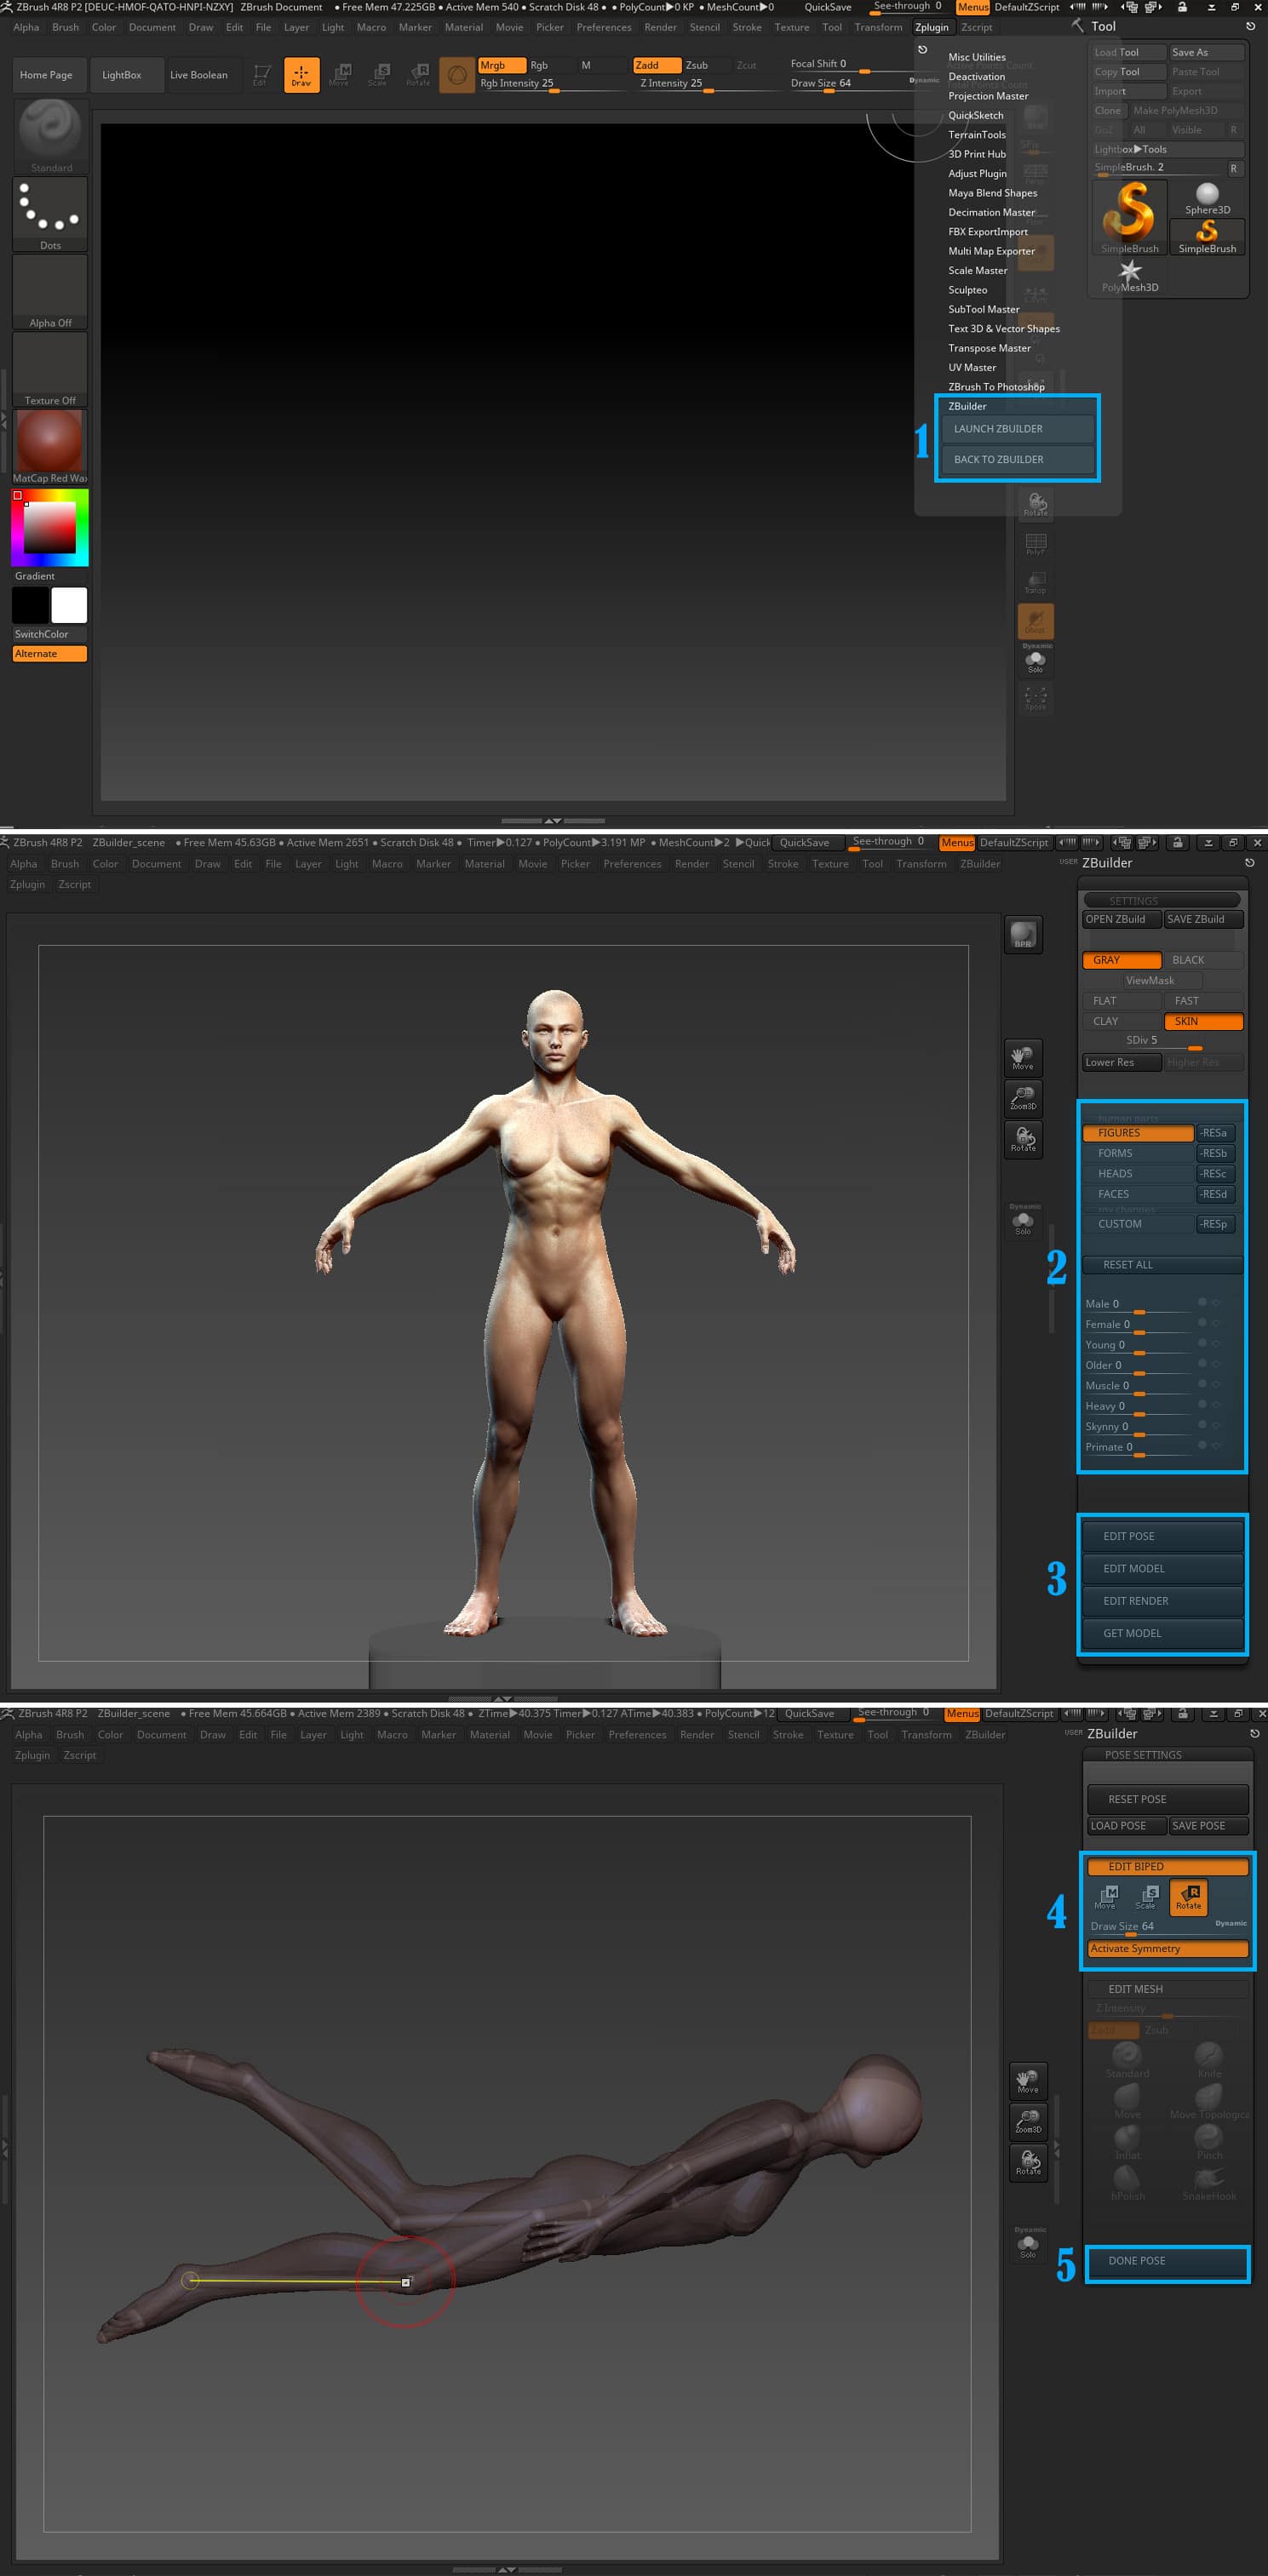
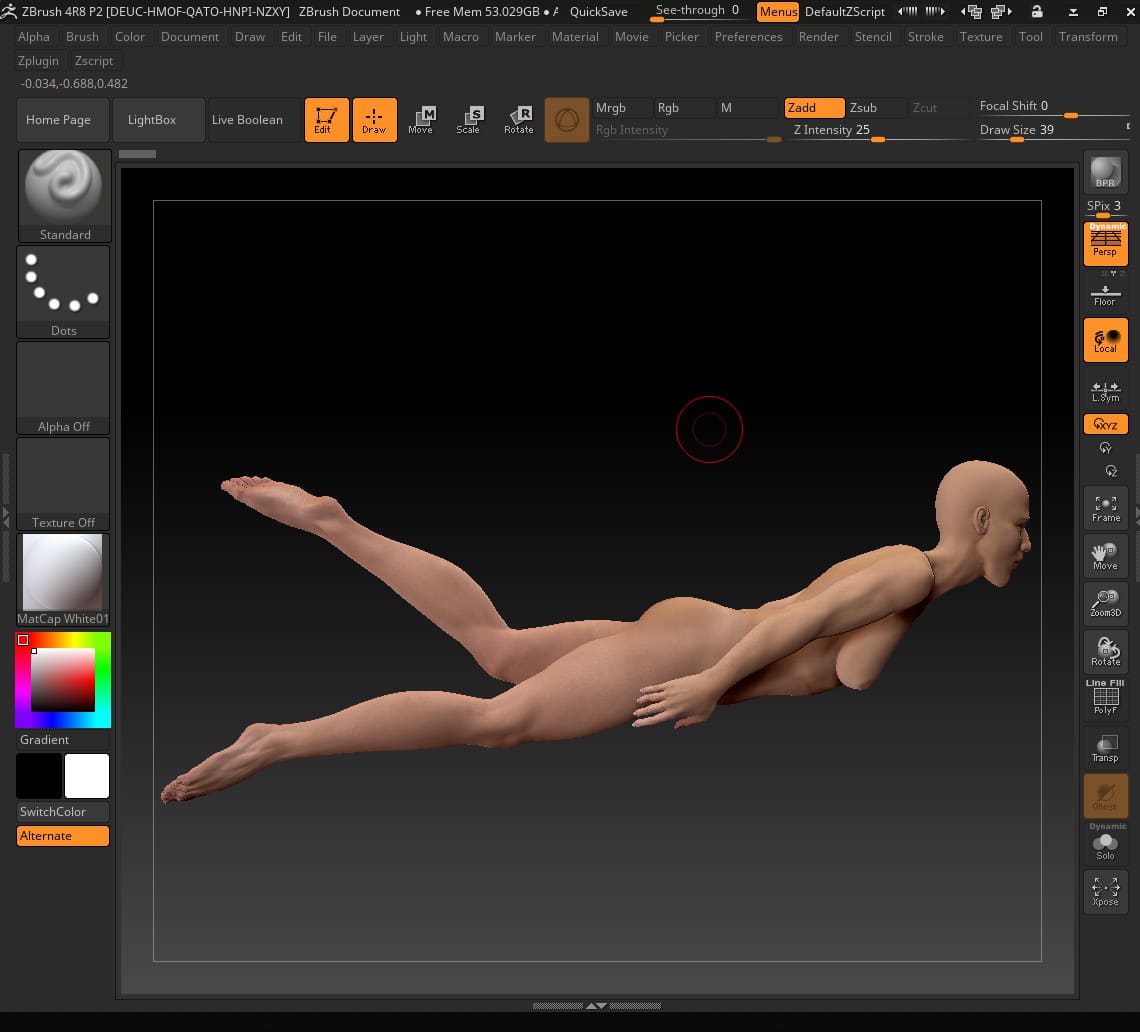
I used the Zbrush software and the ZBUILDER v2 (https://gumroad.com/l/bkElP) plugin to build the swimmer model.
Don’t worry, let’s review the process together!
- In this section, click in Launch Zbuilder to run the program.
- Click Edit Pose to create the desired Pose.
- Here you can control changes in the joints and see the changes by clicking on any part of the body.
- Once the changes have been made to Pose, finish the work with Done Pose, and then click Get Model to return to the Zbrush environment.
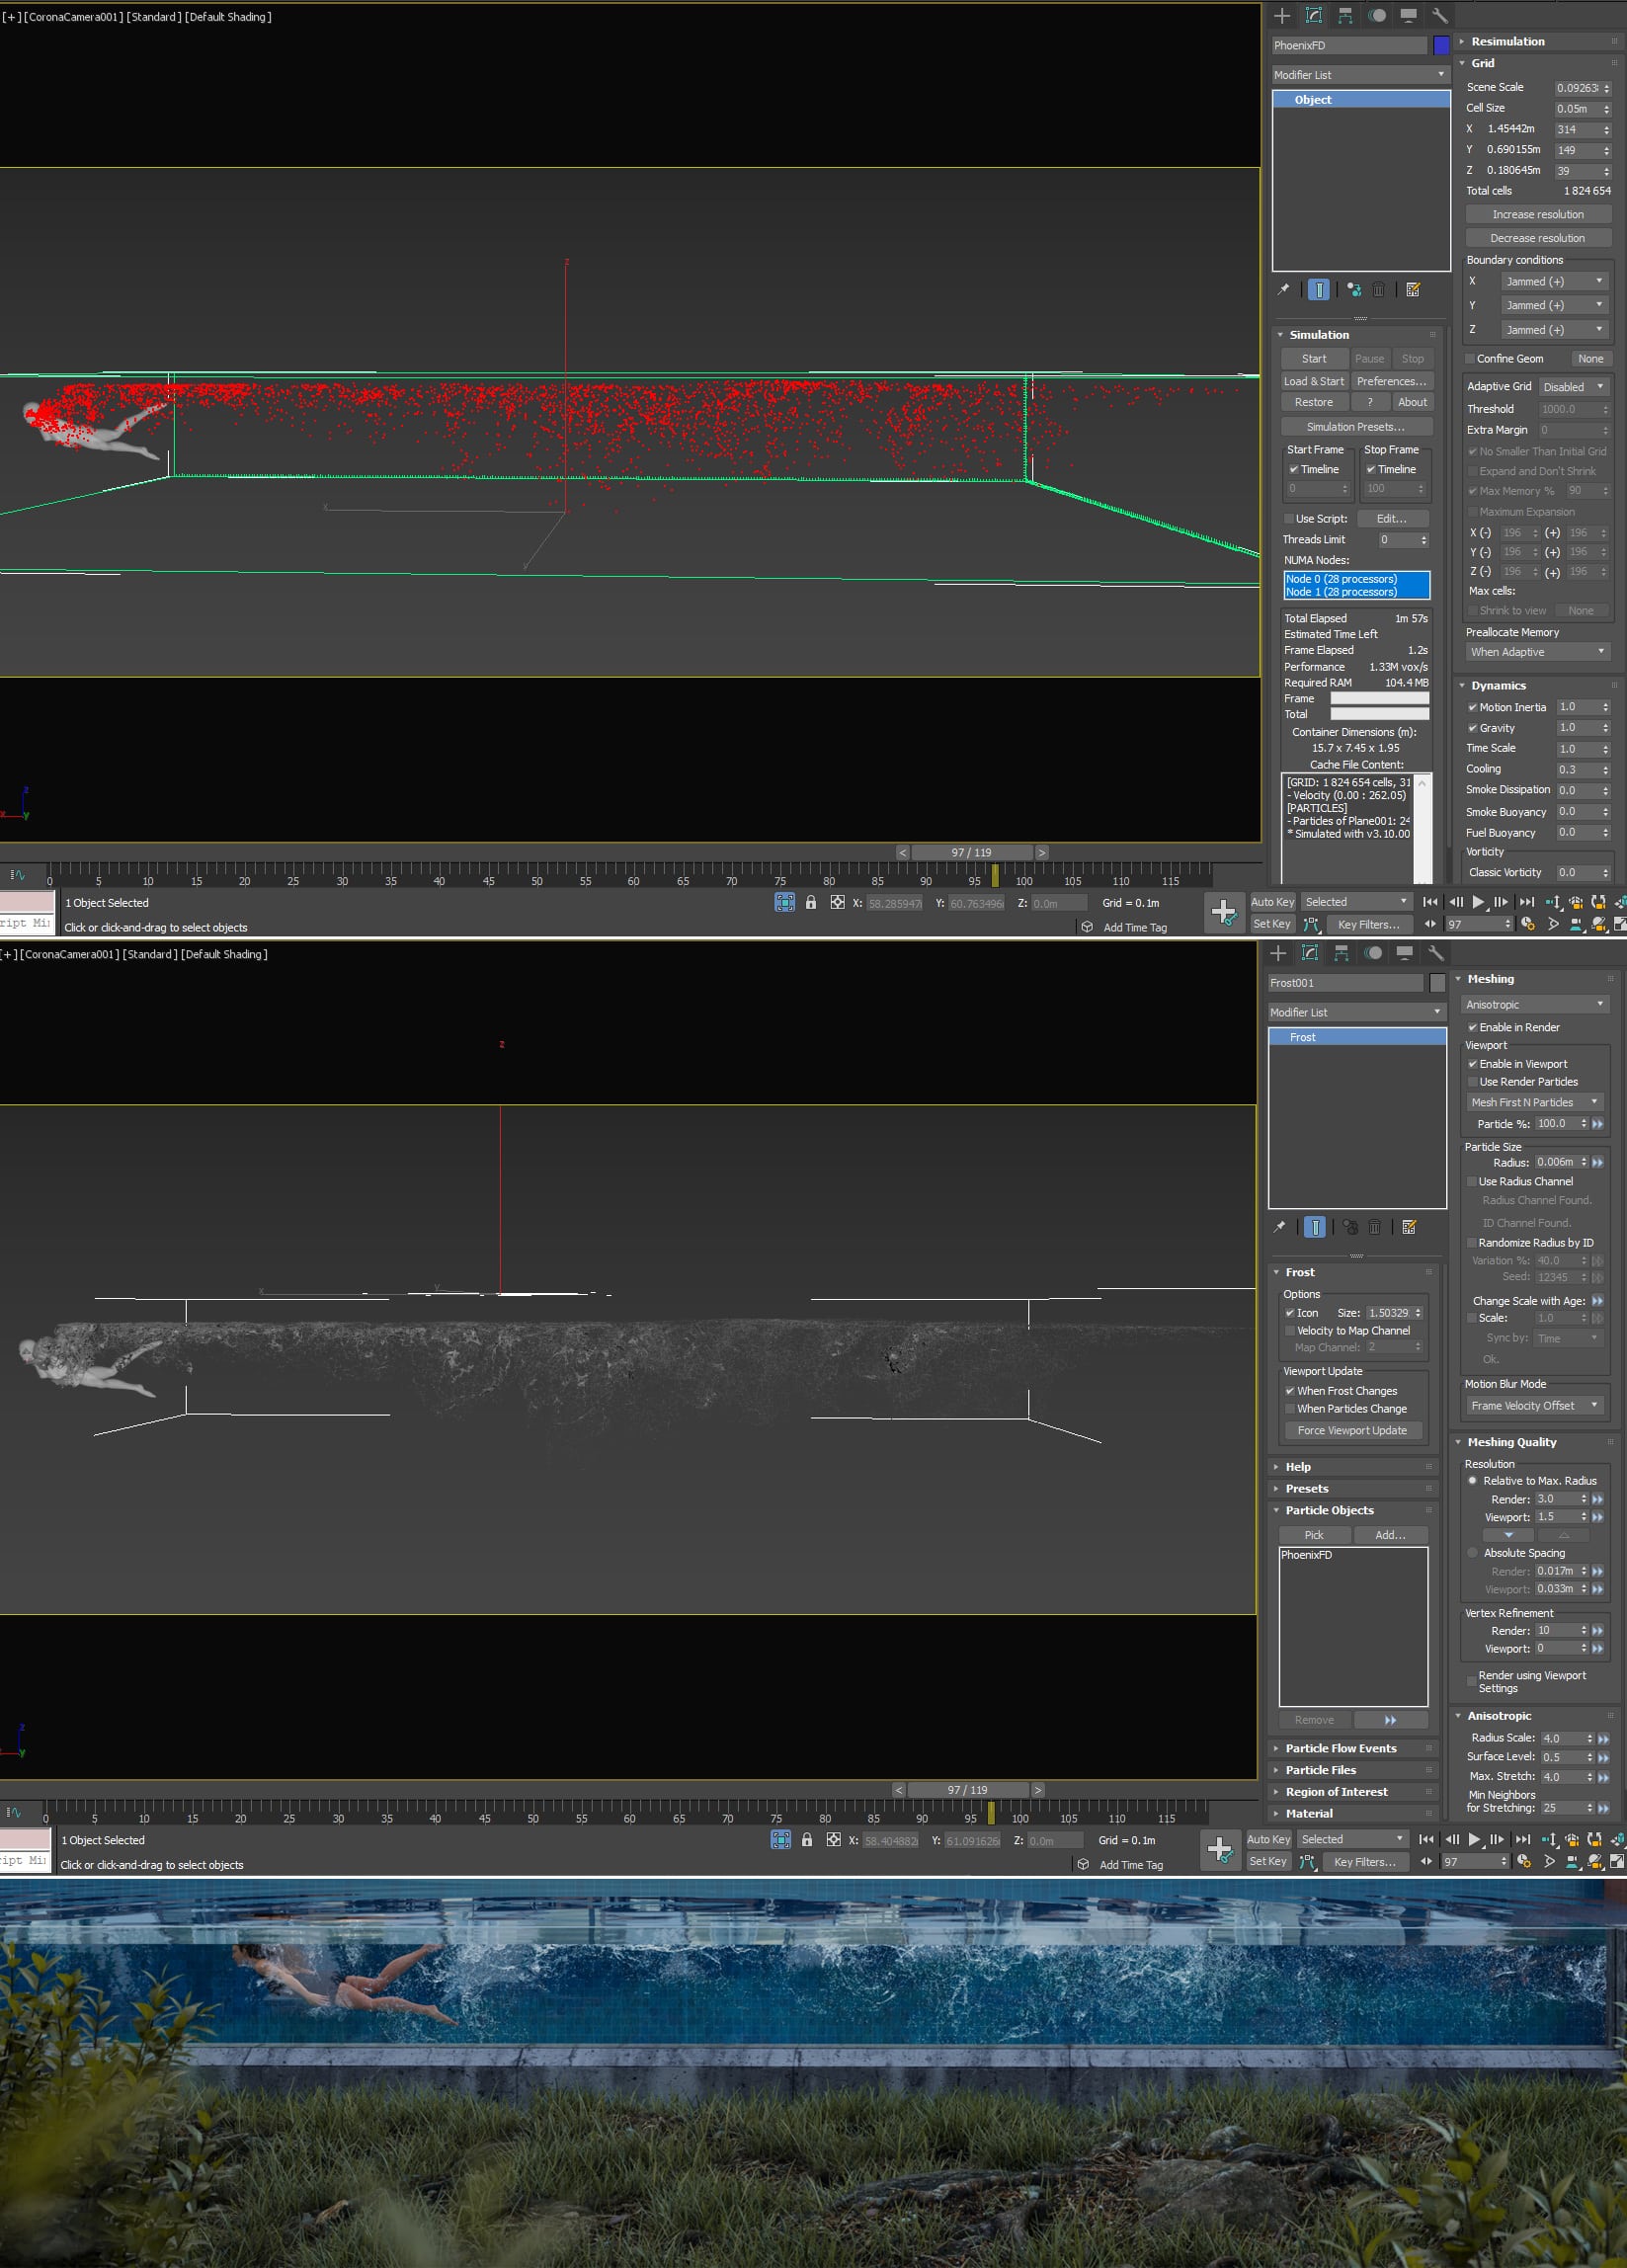
To make the water bubble I first simulated the Particles with the PhoenixFD (https://www.chaosgroup.com/phoenix-fd/3ds-max) plugin and eventually converted it to Mesh by the Frost (https://www.awsthinkbox.com/frost) plugin.
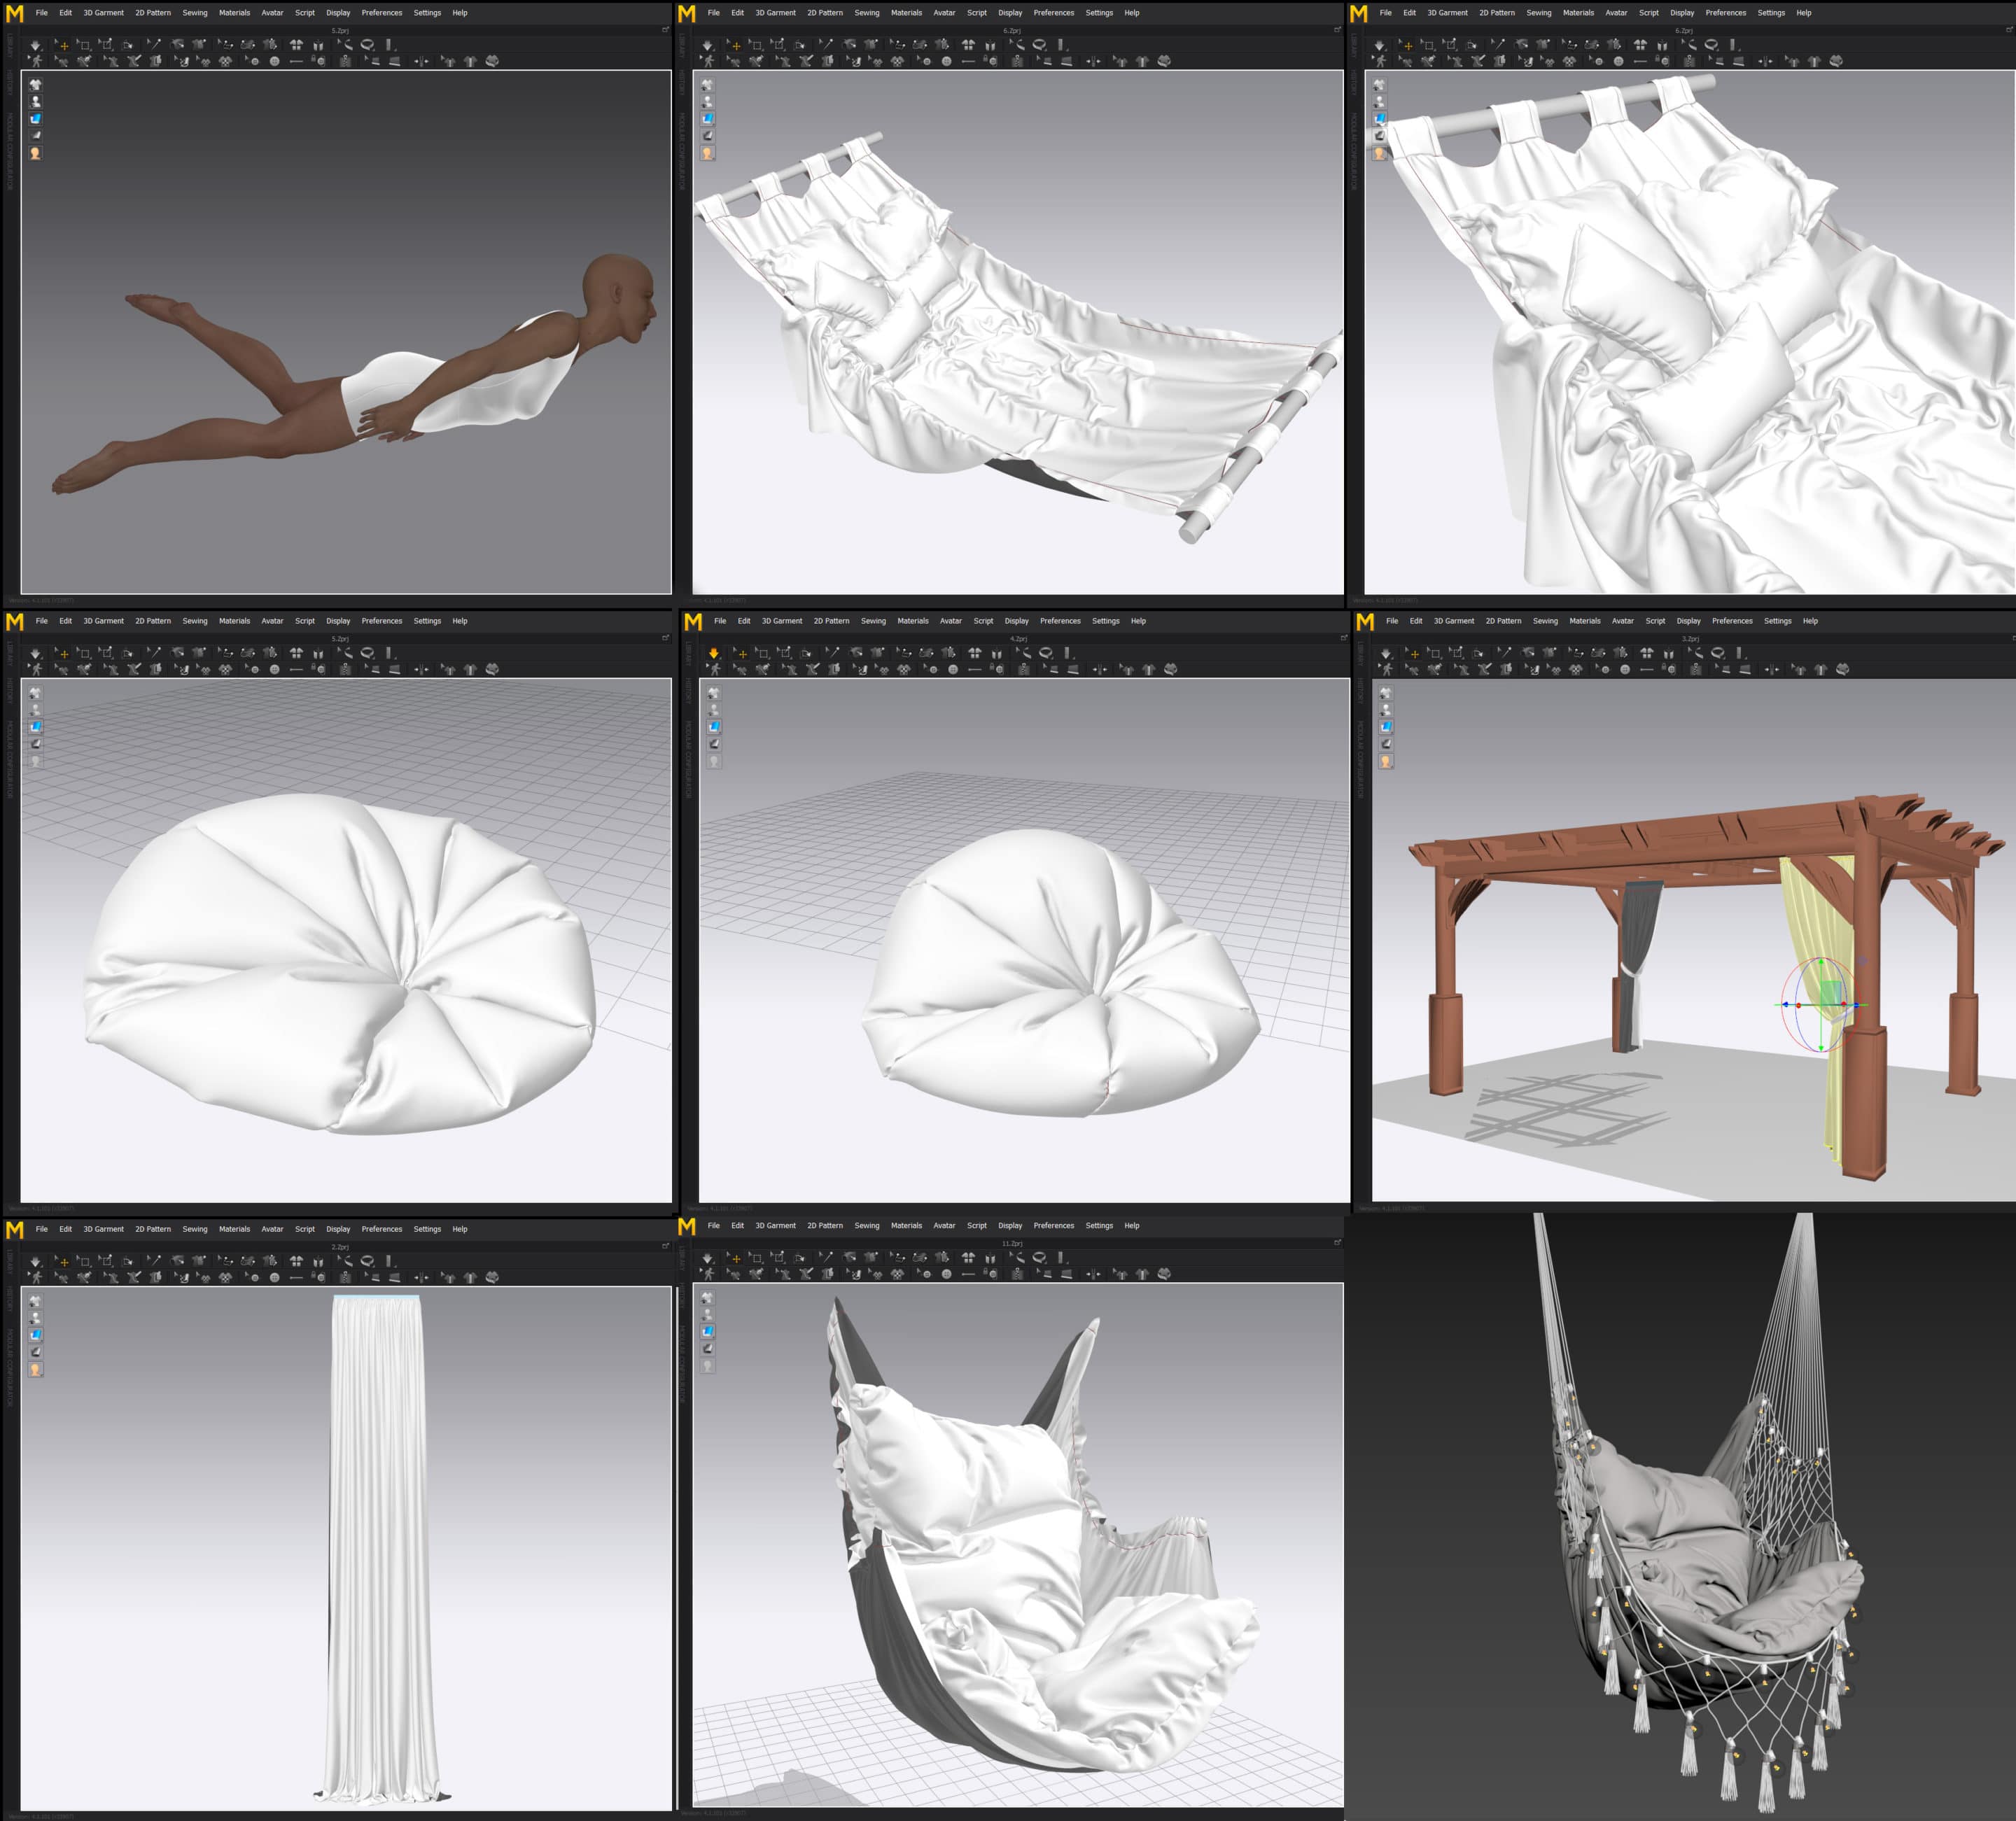
Finally, I created the clothes and hair of character with Marvelous designer and Max’s hair and fur, respectively.
Step 3 – Cloth Simulation
To create cloth, I prefer to use Marvelous Designer (https://www.marvelousdesigner.com/) because the simulation in this software is straightforward and enjoyable and gives you high-quality outputs.
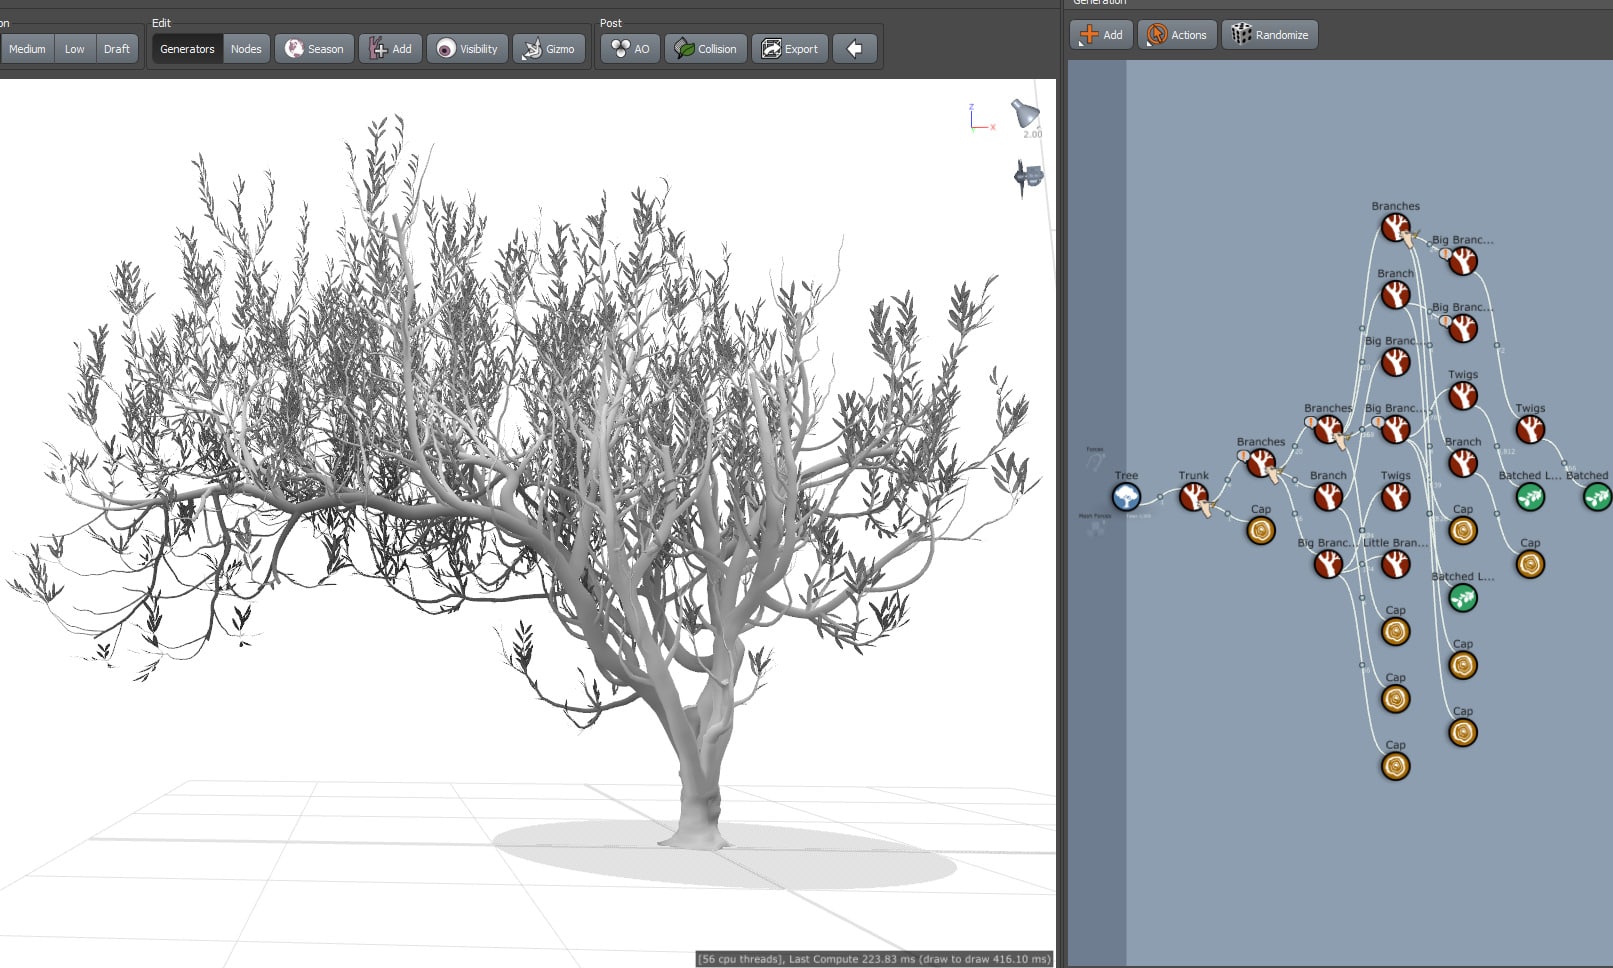
Step 4 – 3d Tree Modeling
I used the lovely SpeedTree (https://store.speedtree.com/) software to build the main project tree.
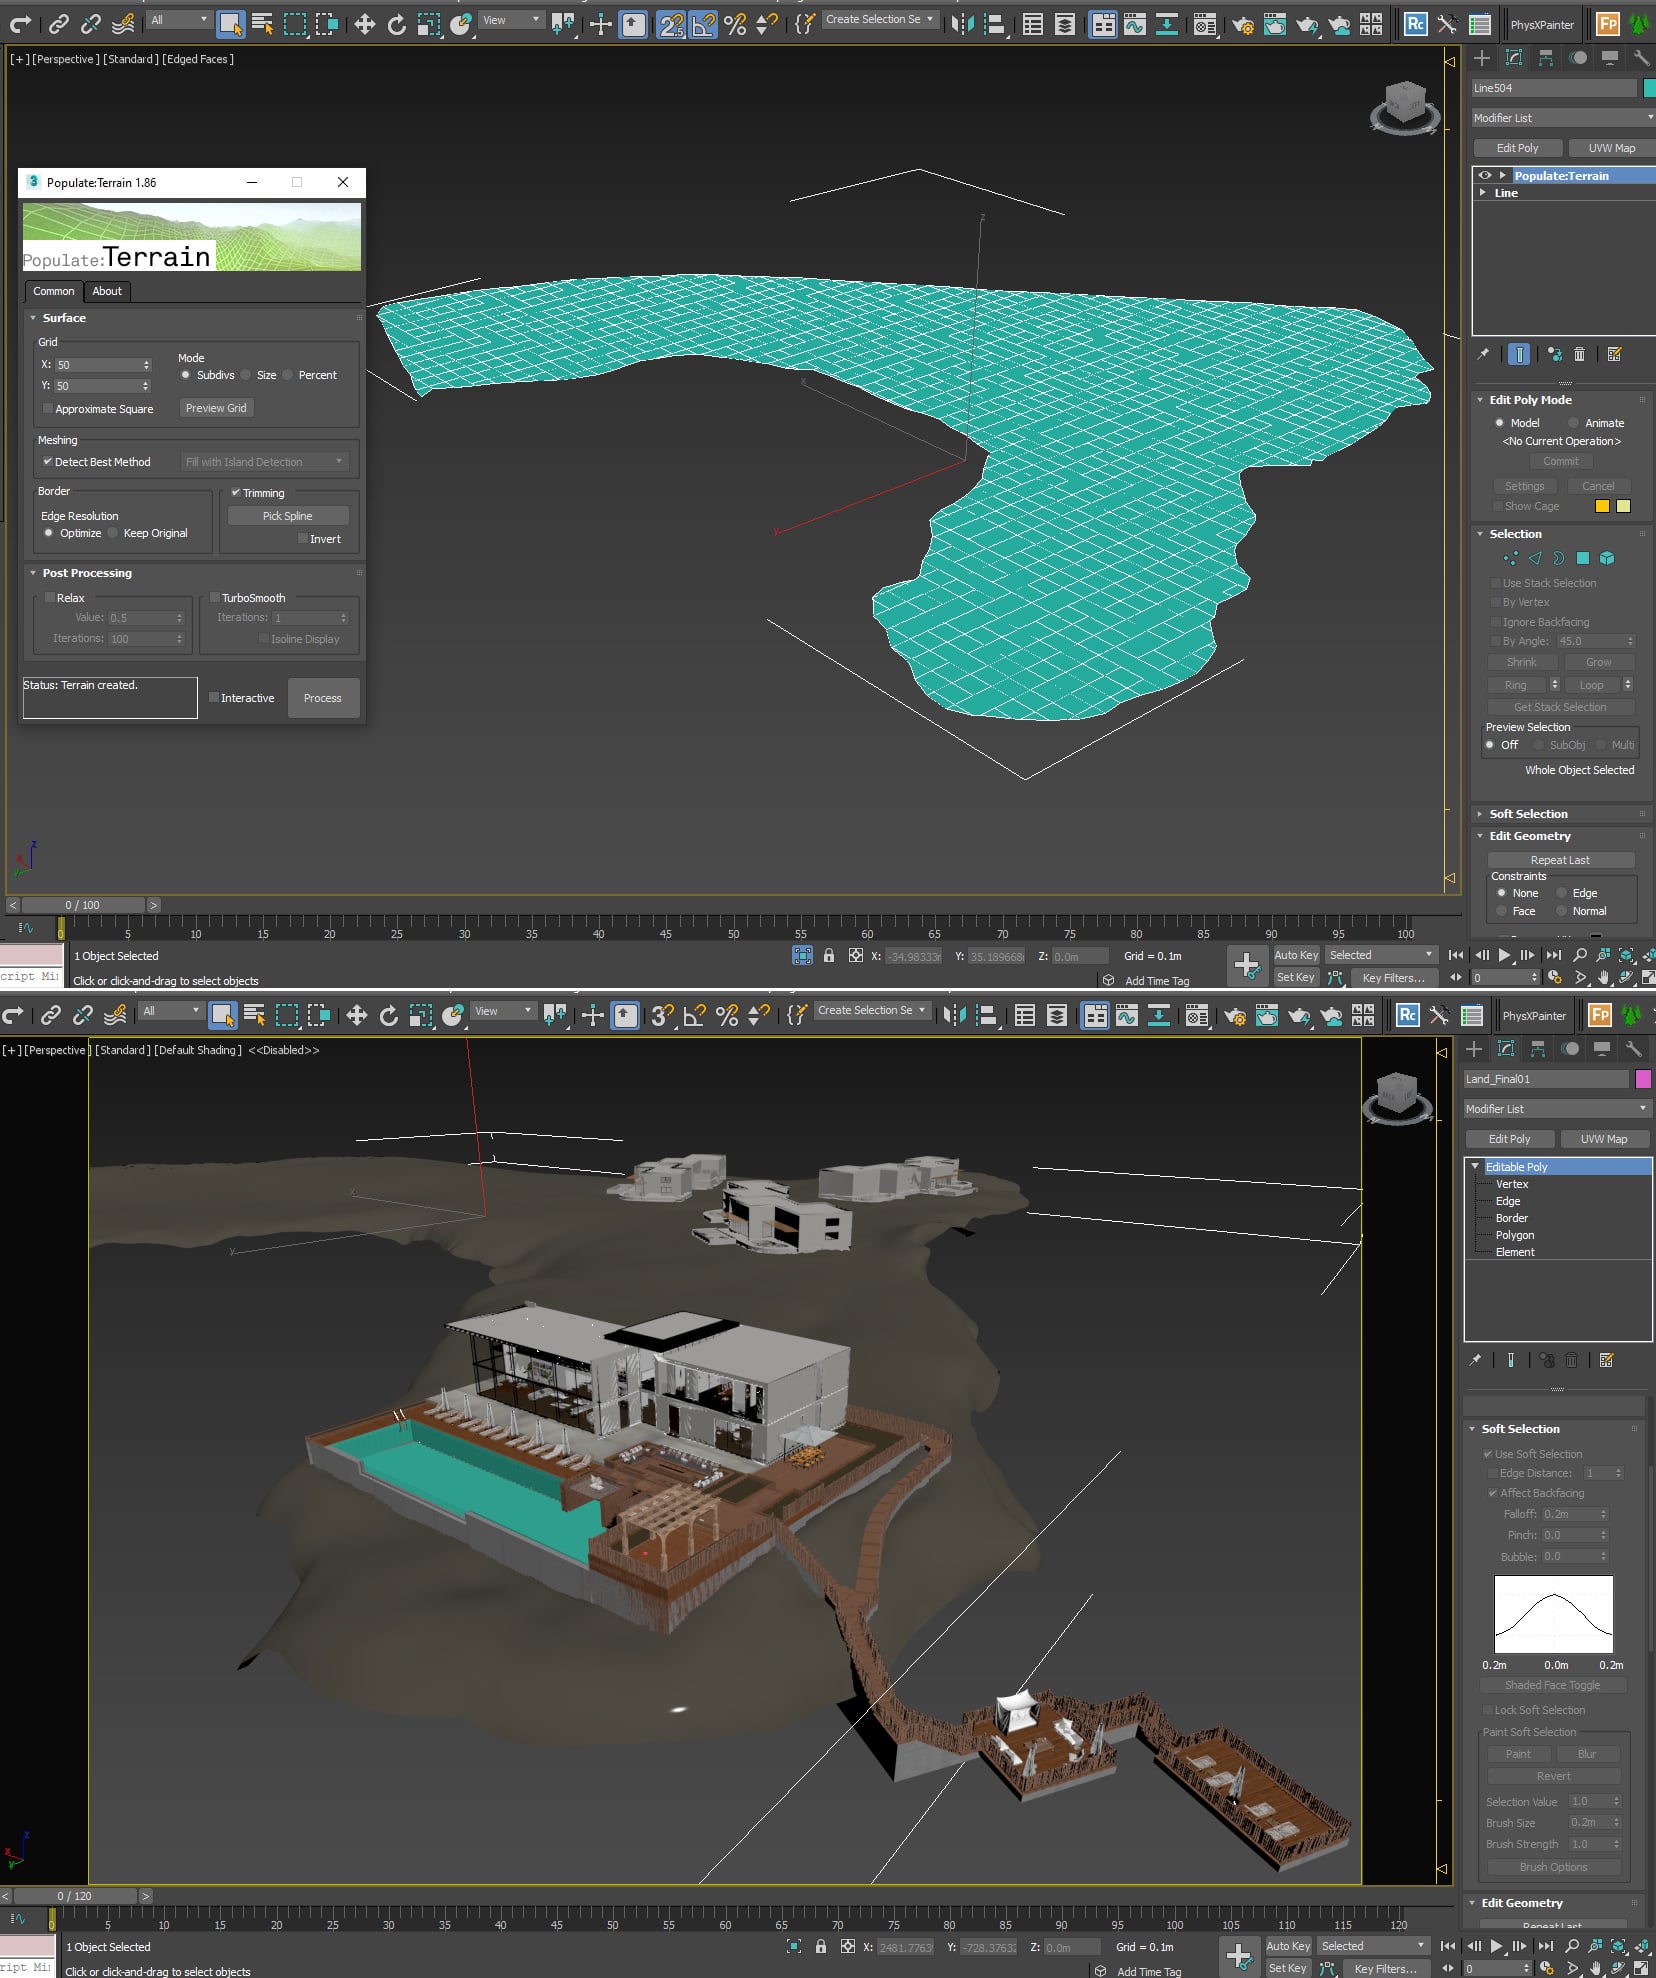
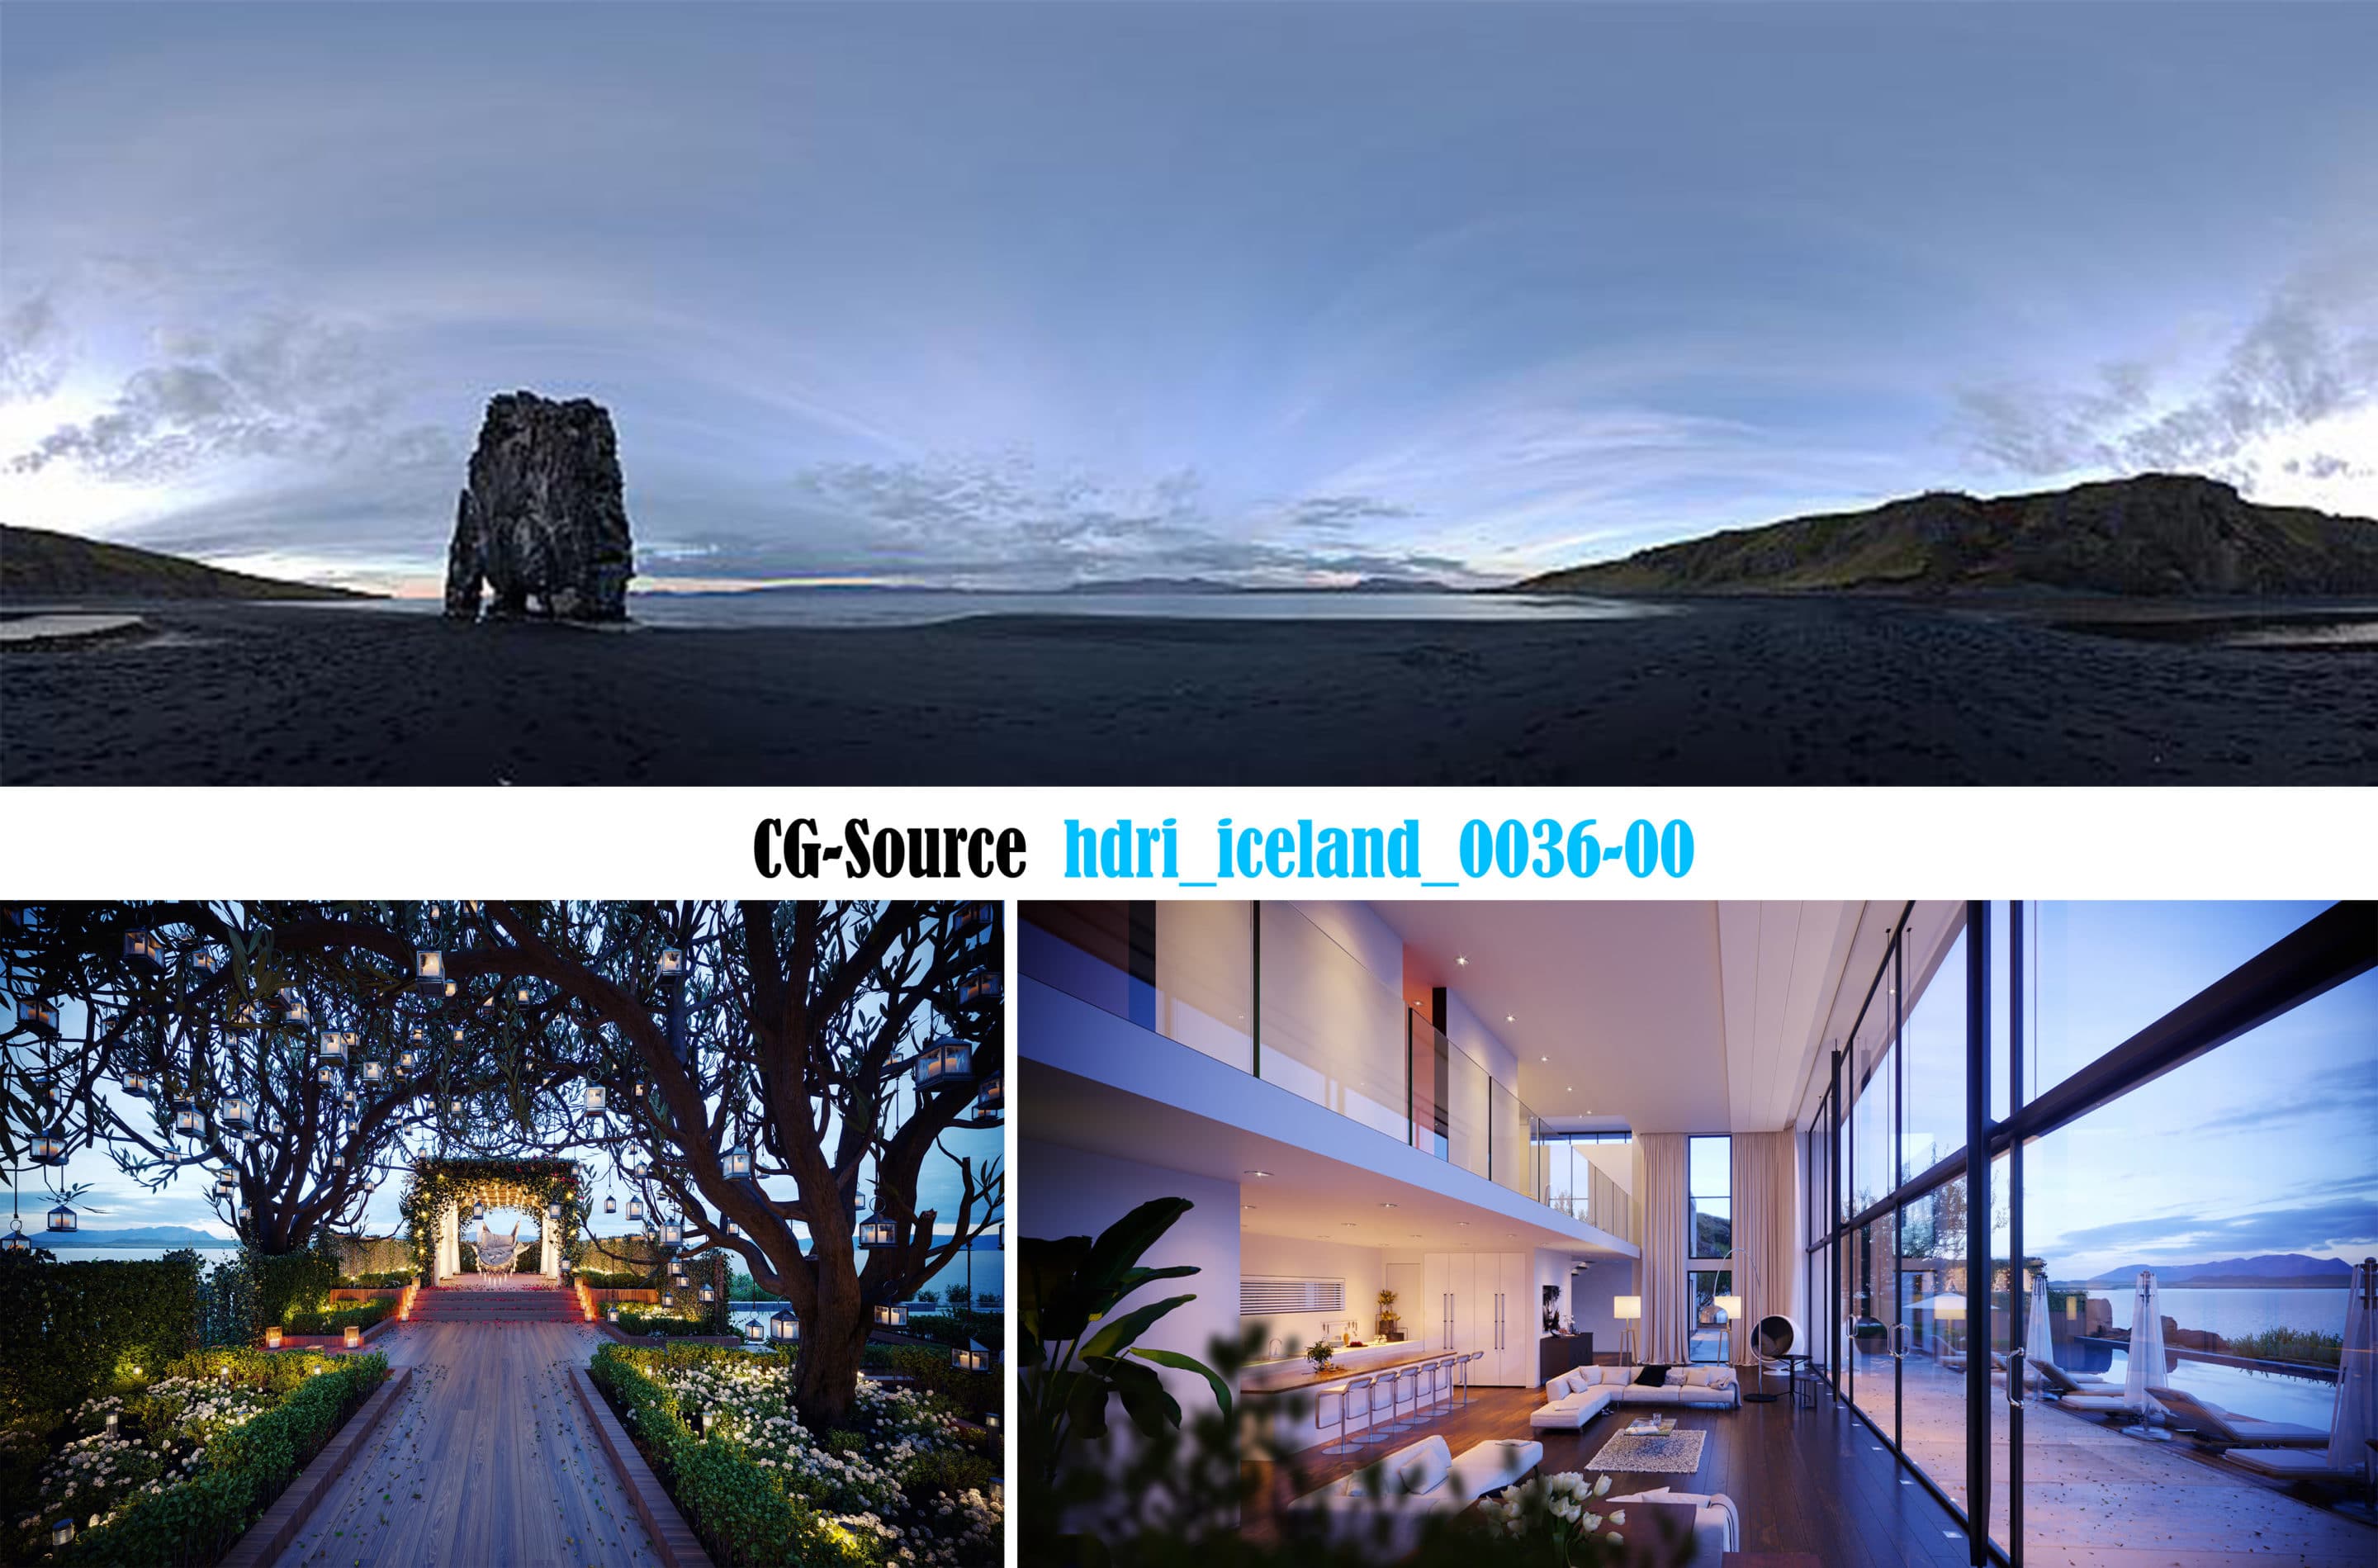
Step 5 – 3d Environment Modeling
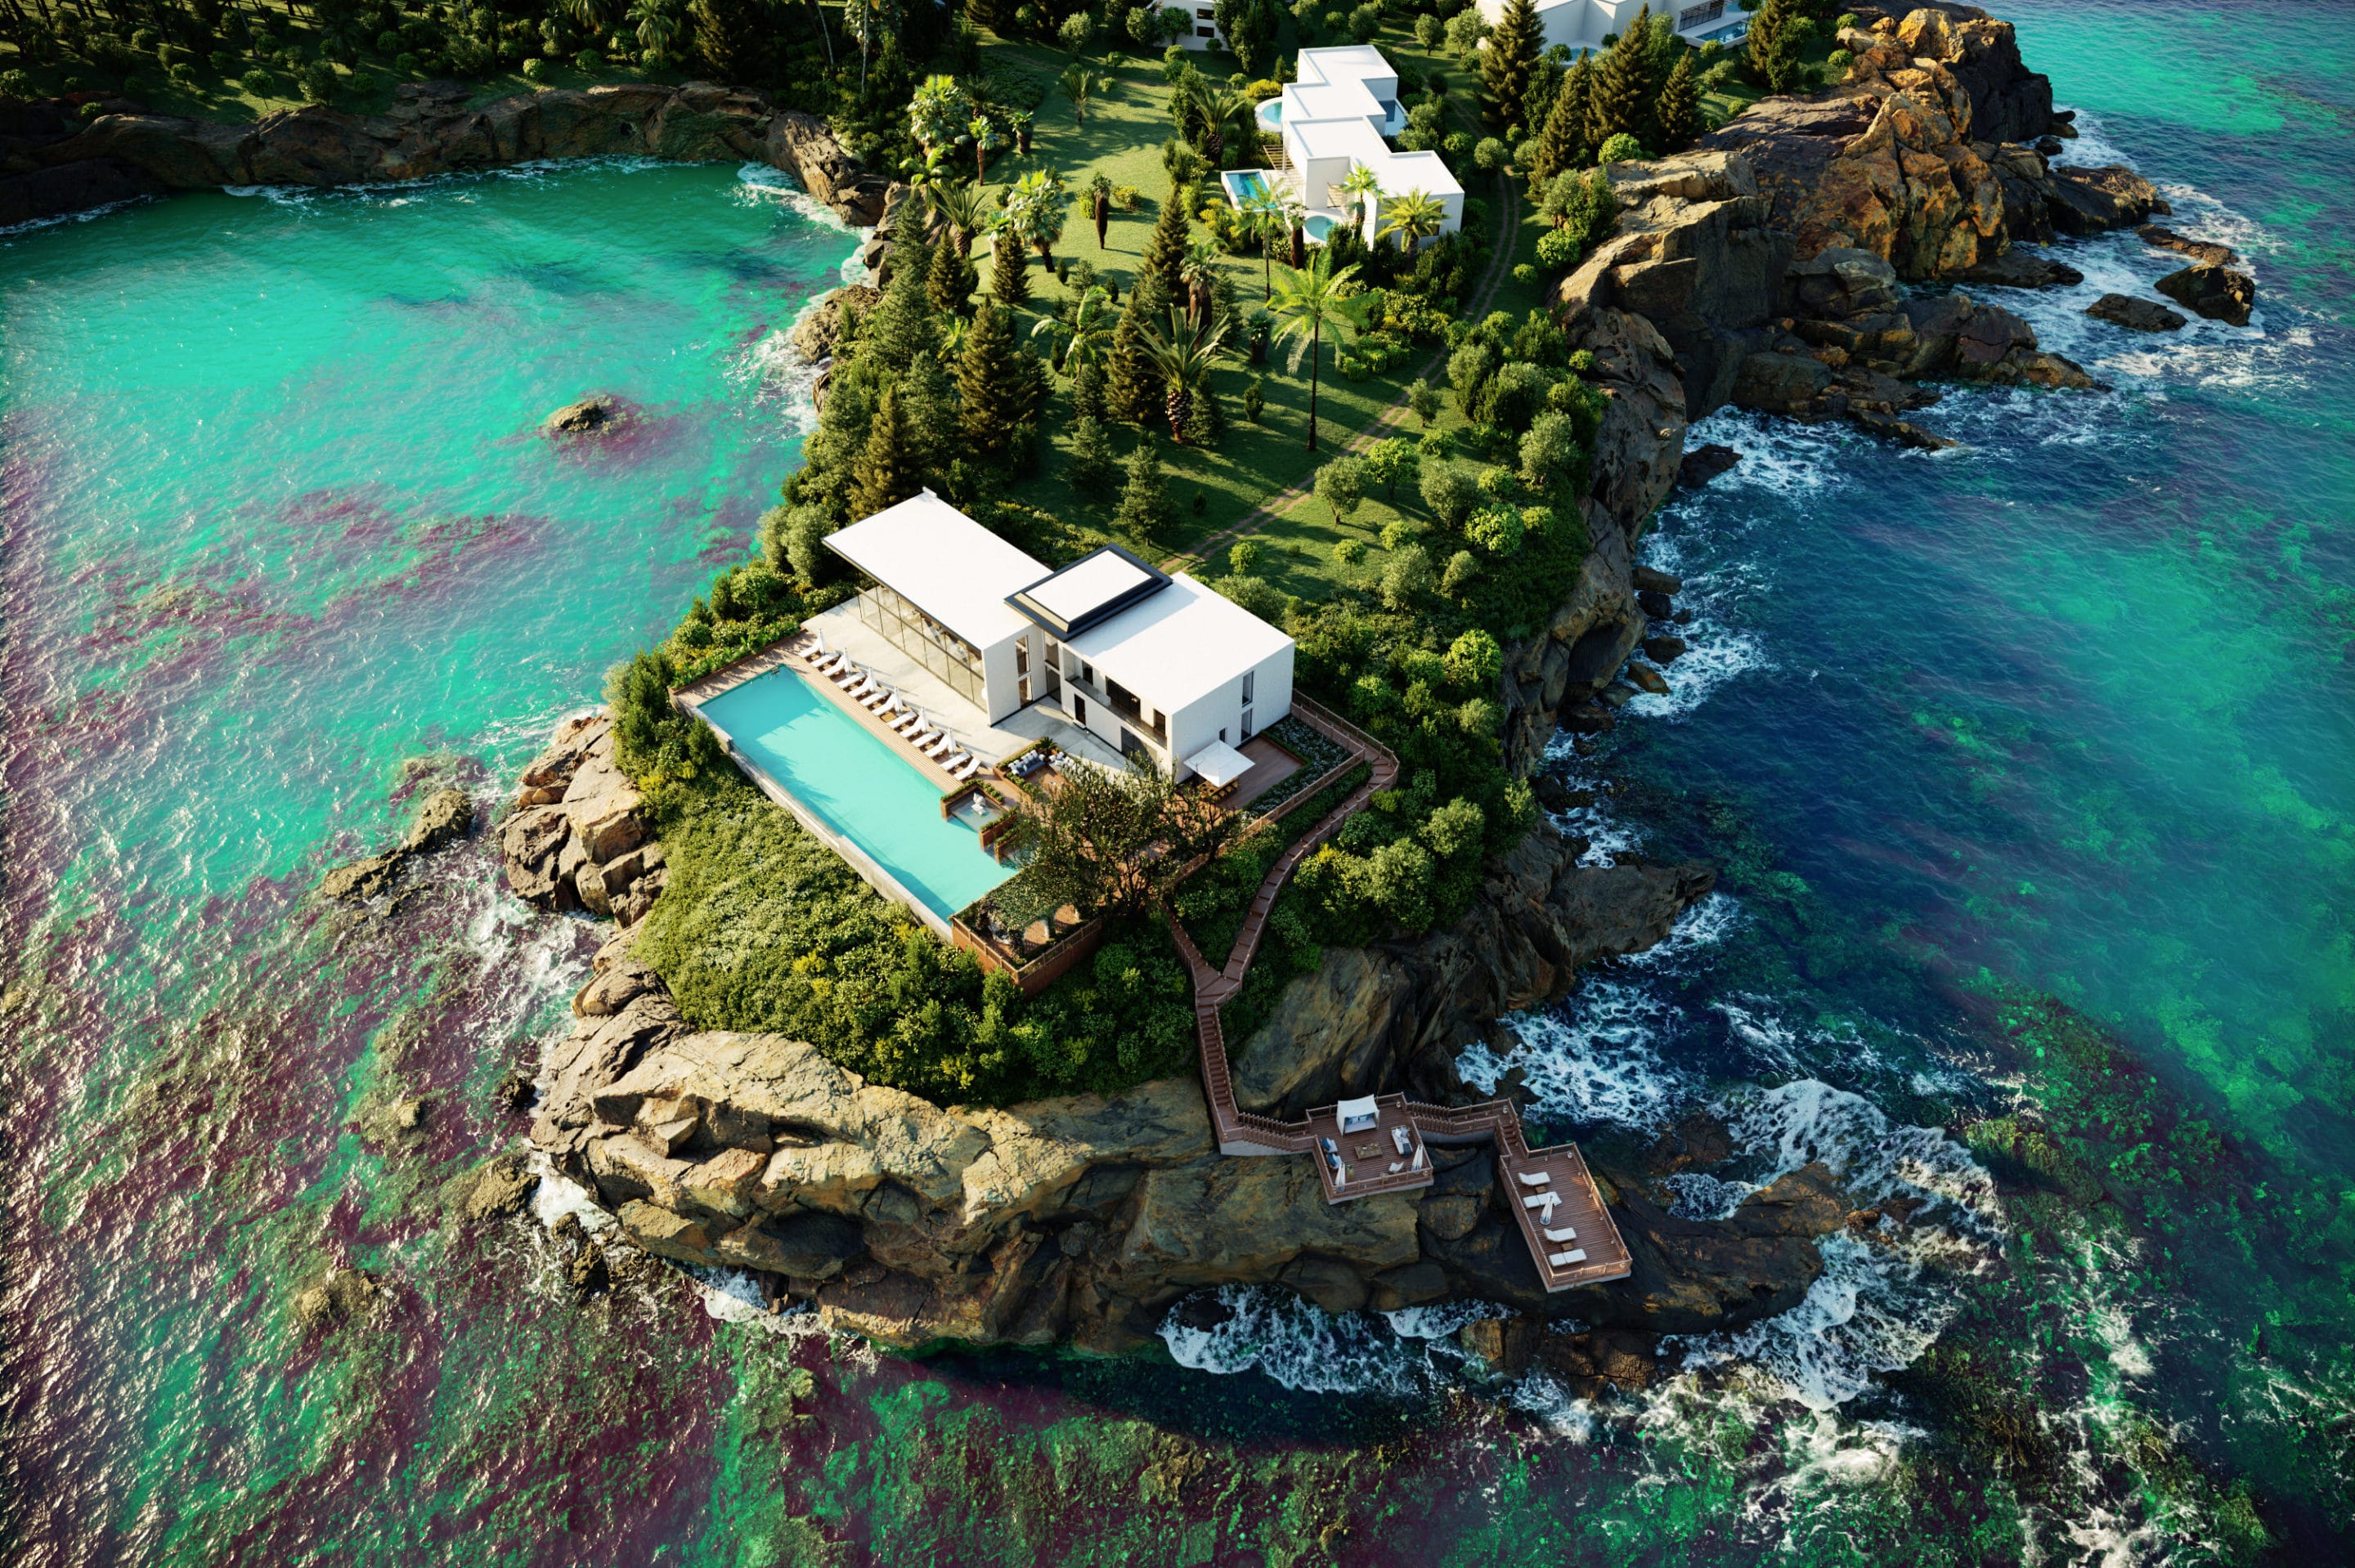
To build the environment, I was very impressed with the atmosphere and the setting of Villa Begonia in Greece and decided to have this space in my work.
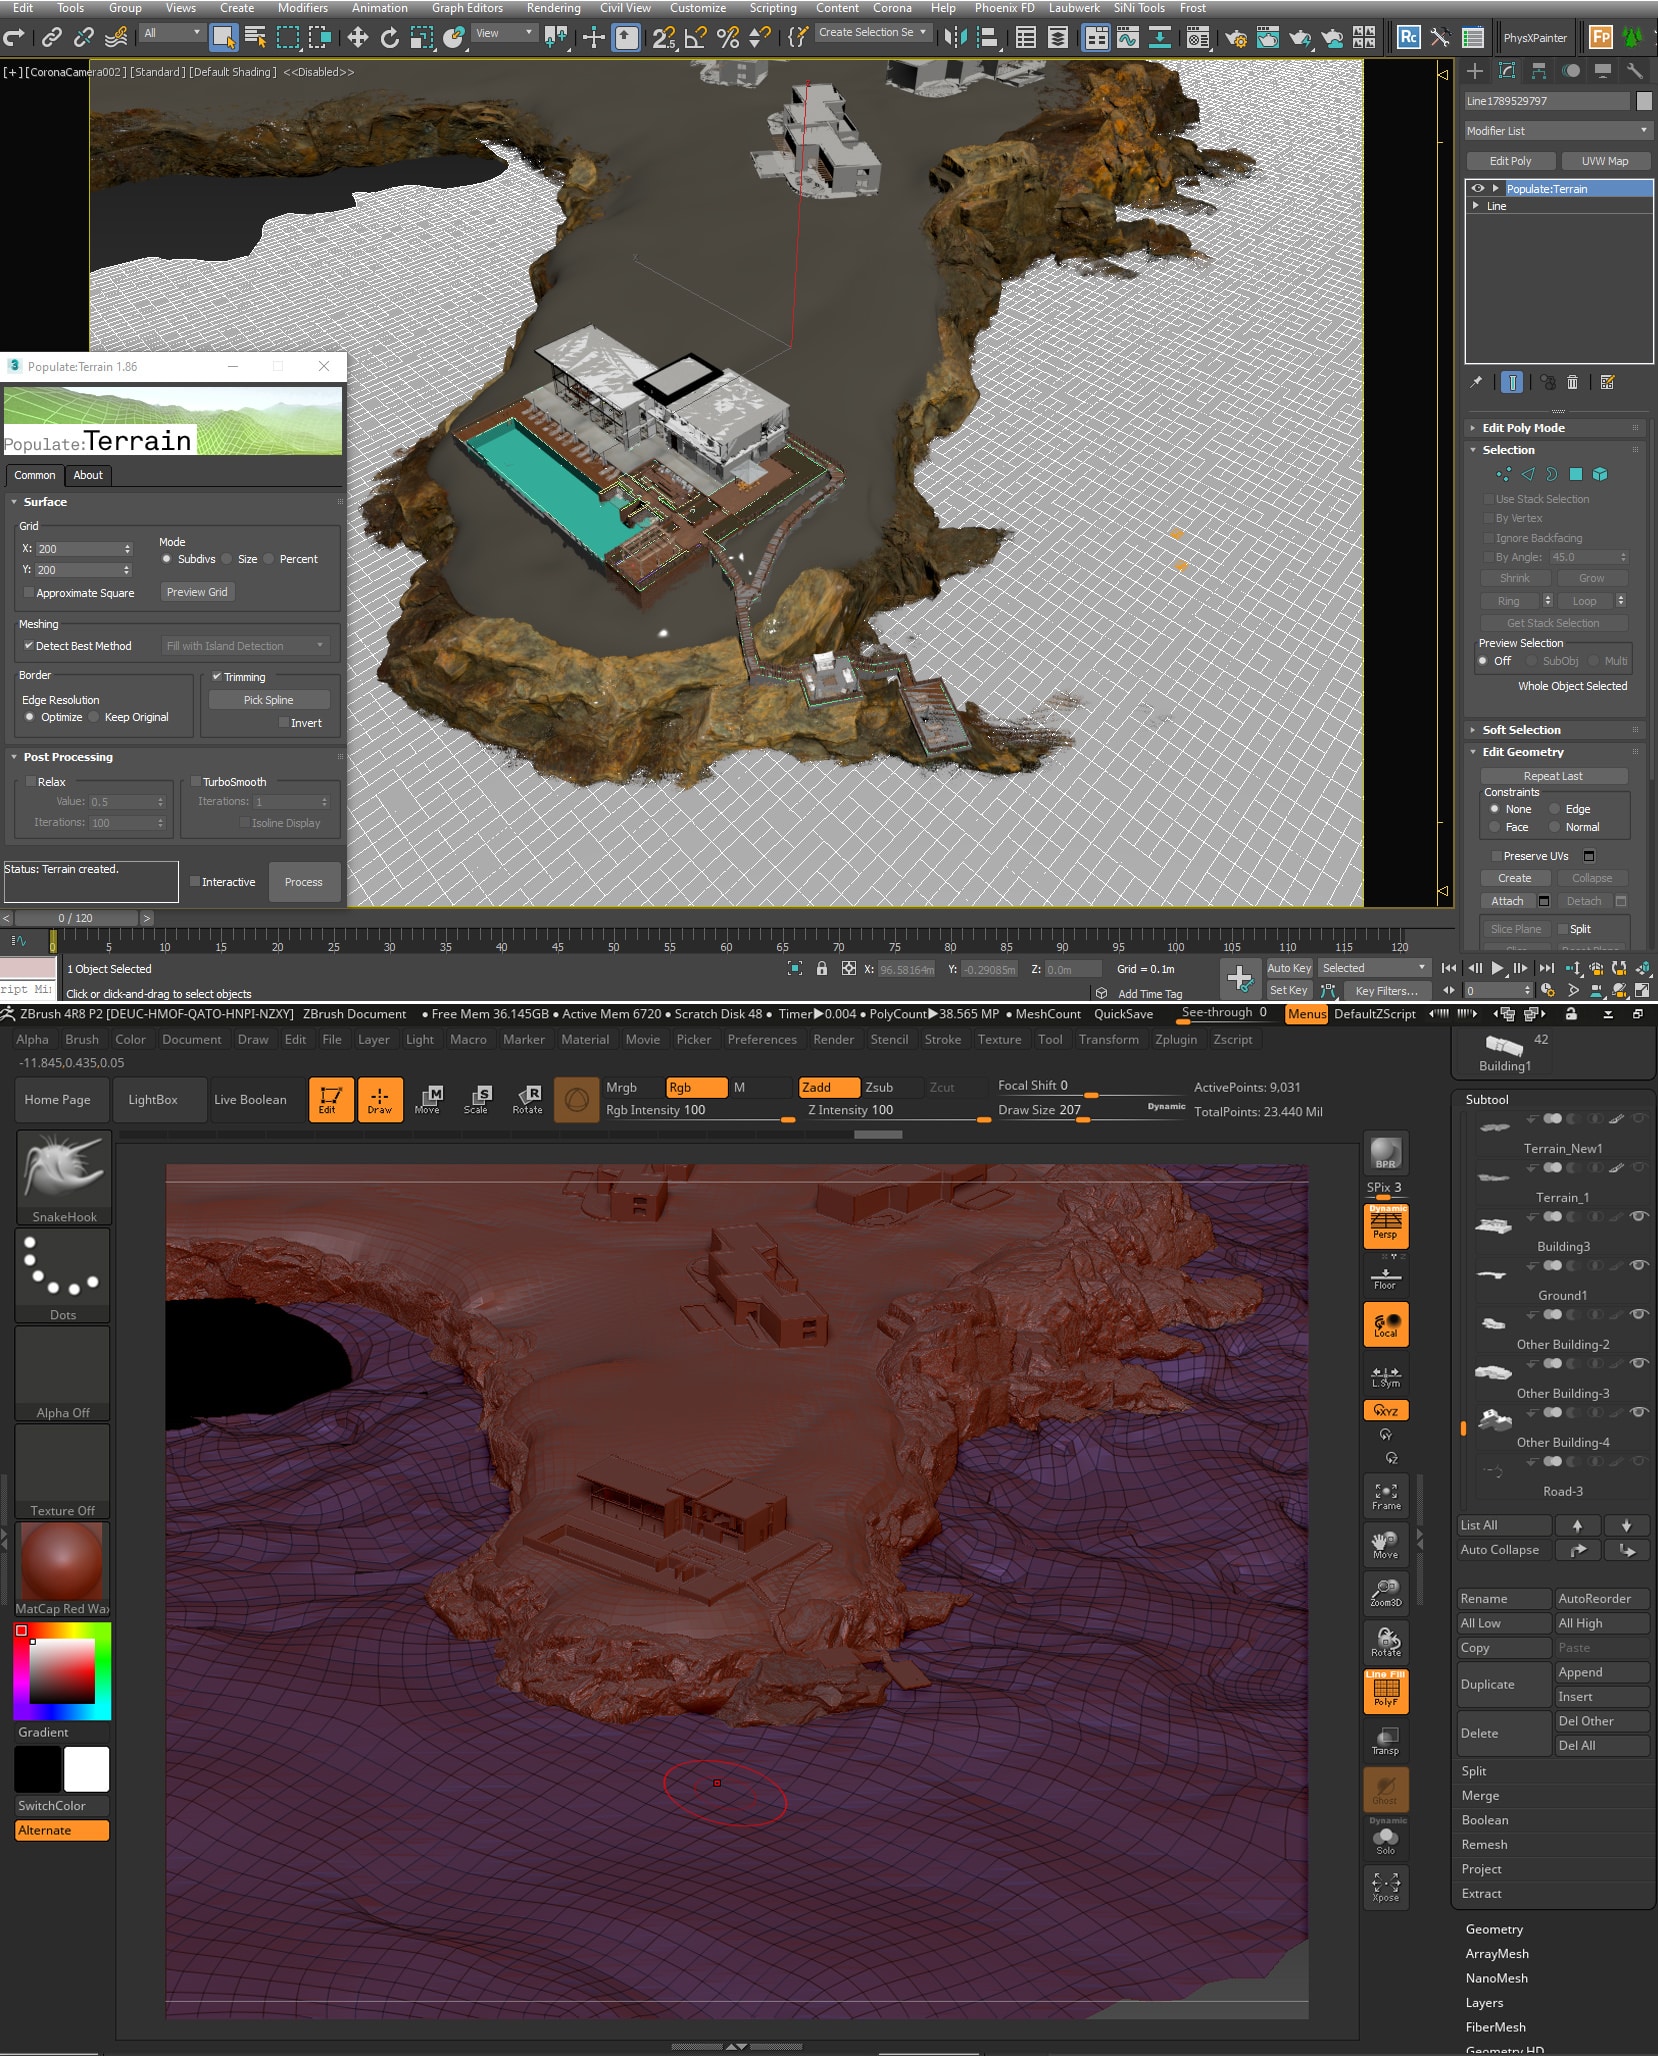
Well, first of all, I started modeling the terrain at 3ds max. I used the Populate: Terrain plugin and then went on to work with 3ds max features like Soft selection,
There are many ways to build rocks, but for this project, I decided to use Quixel Megascans models as the primary model.
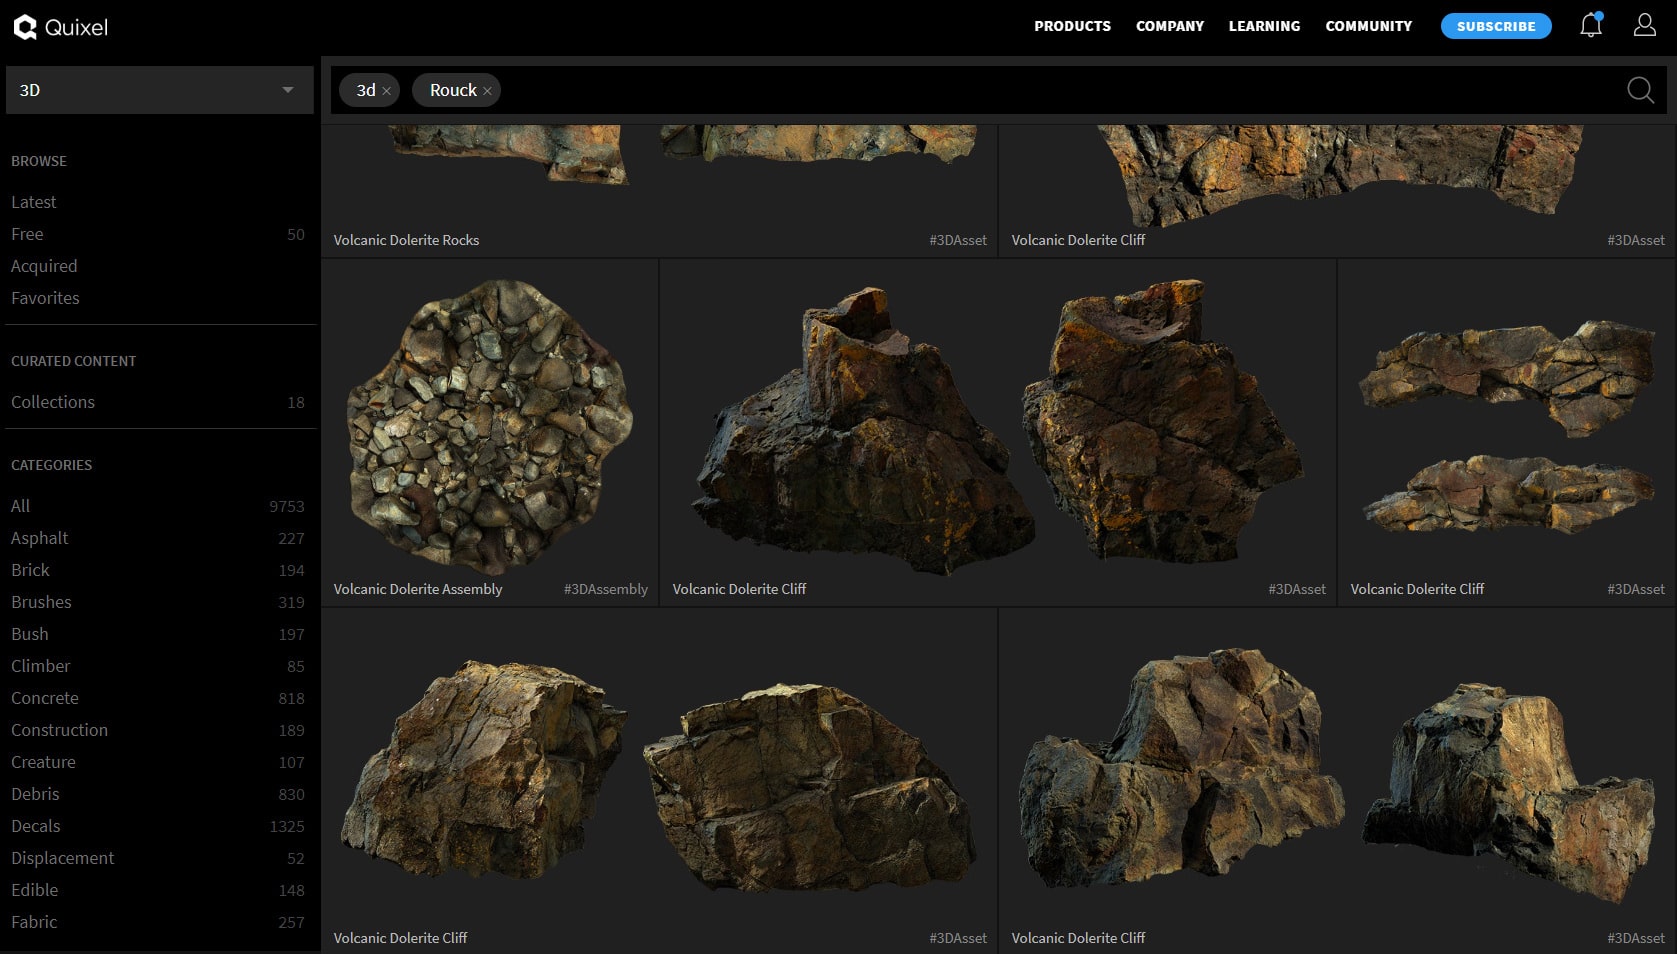
The way it worked was that I put together several Megascans models in 3ds Max, and with the 3ds Max features like FFD. I created the primary form, and then I brought them into Zbrush.

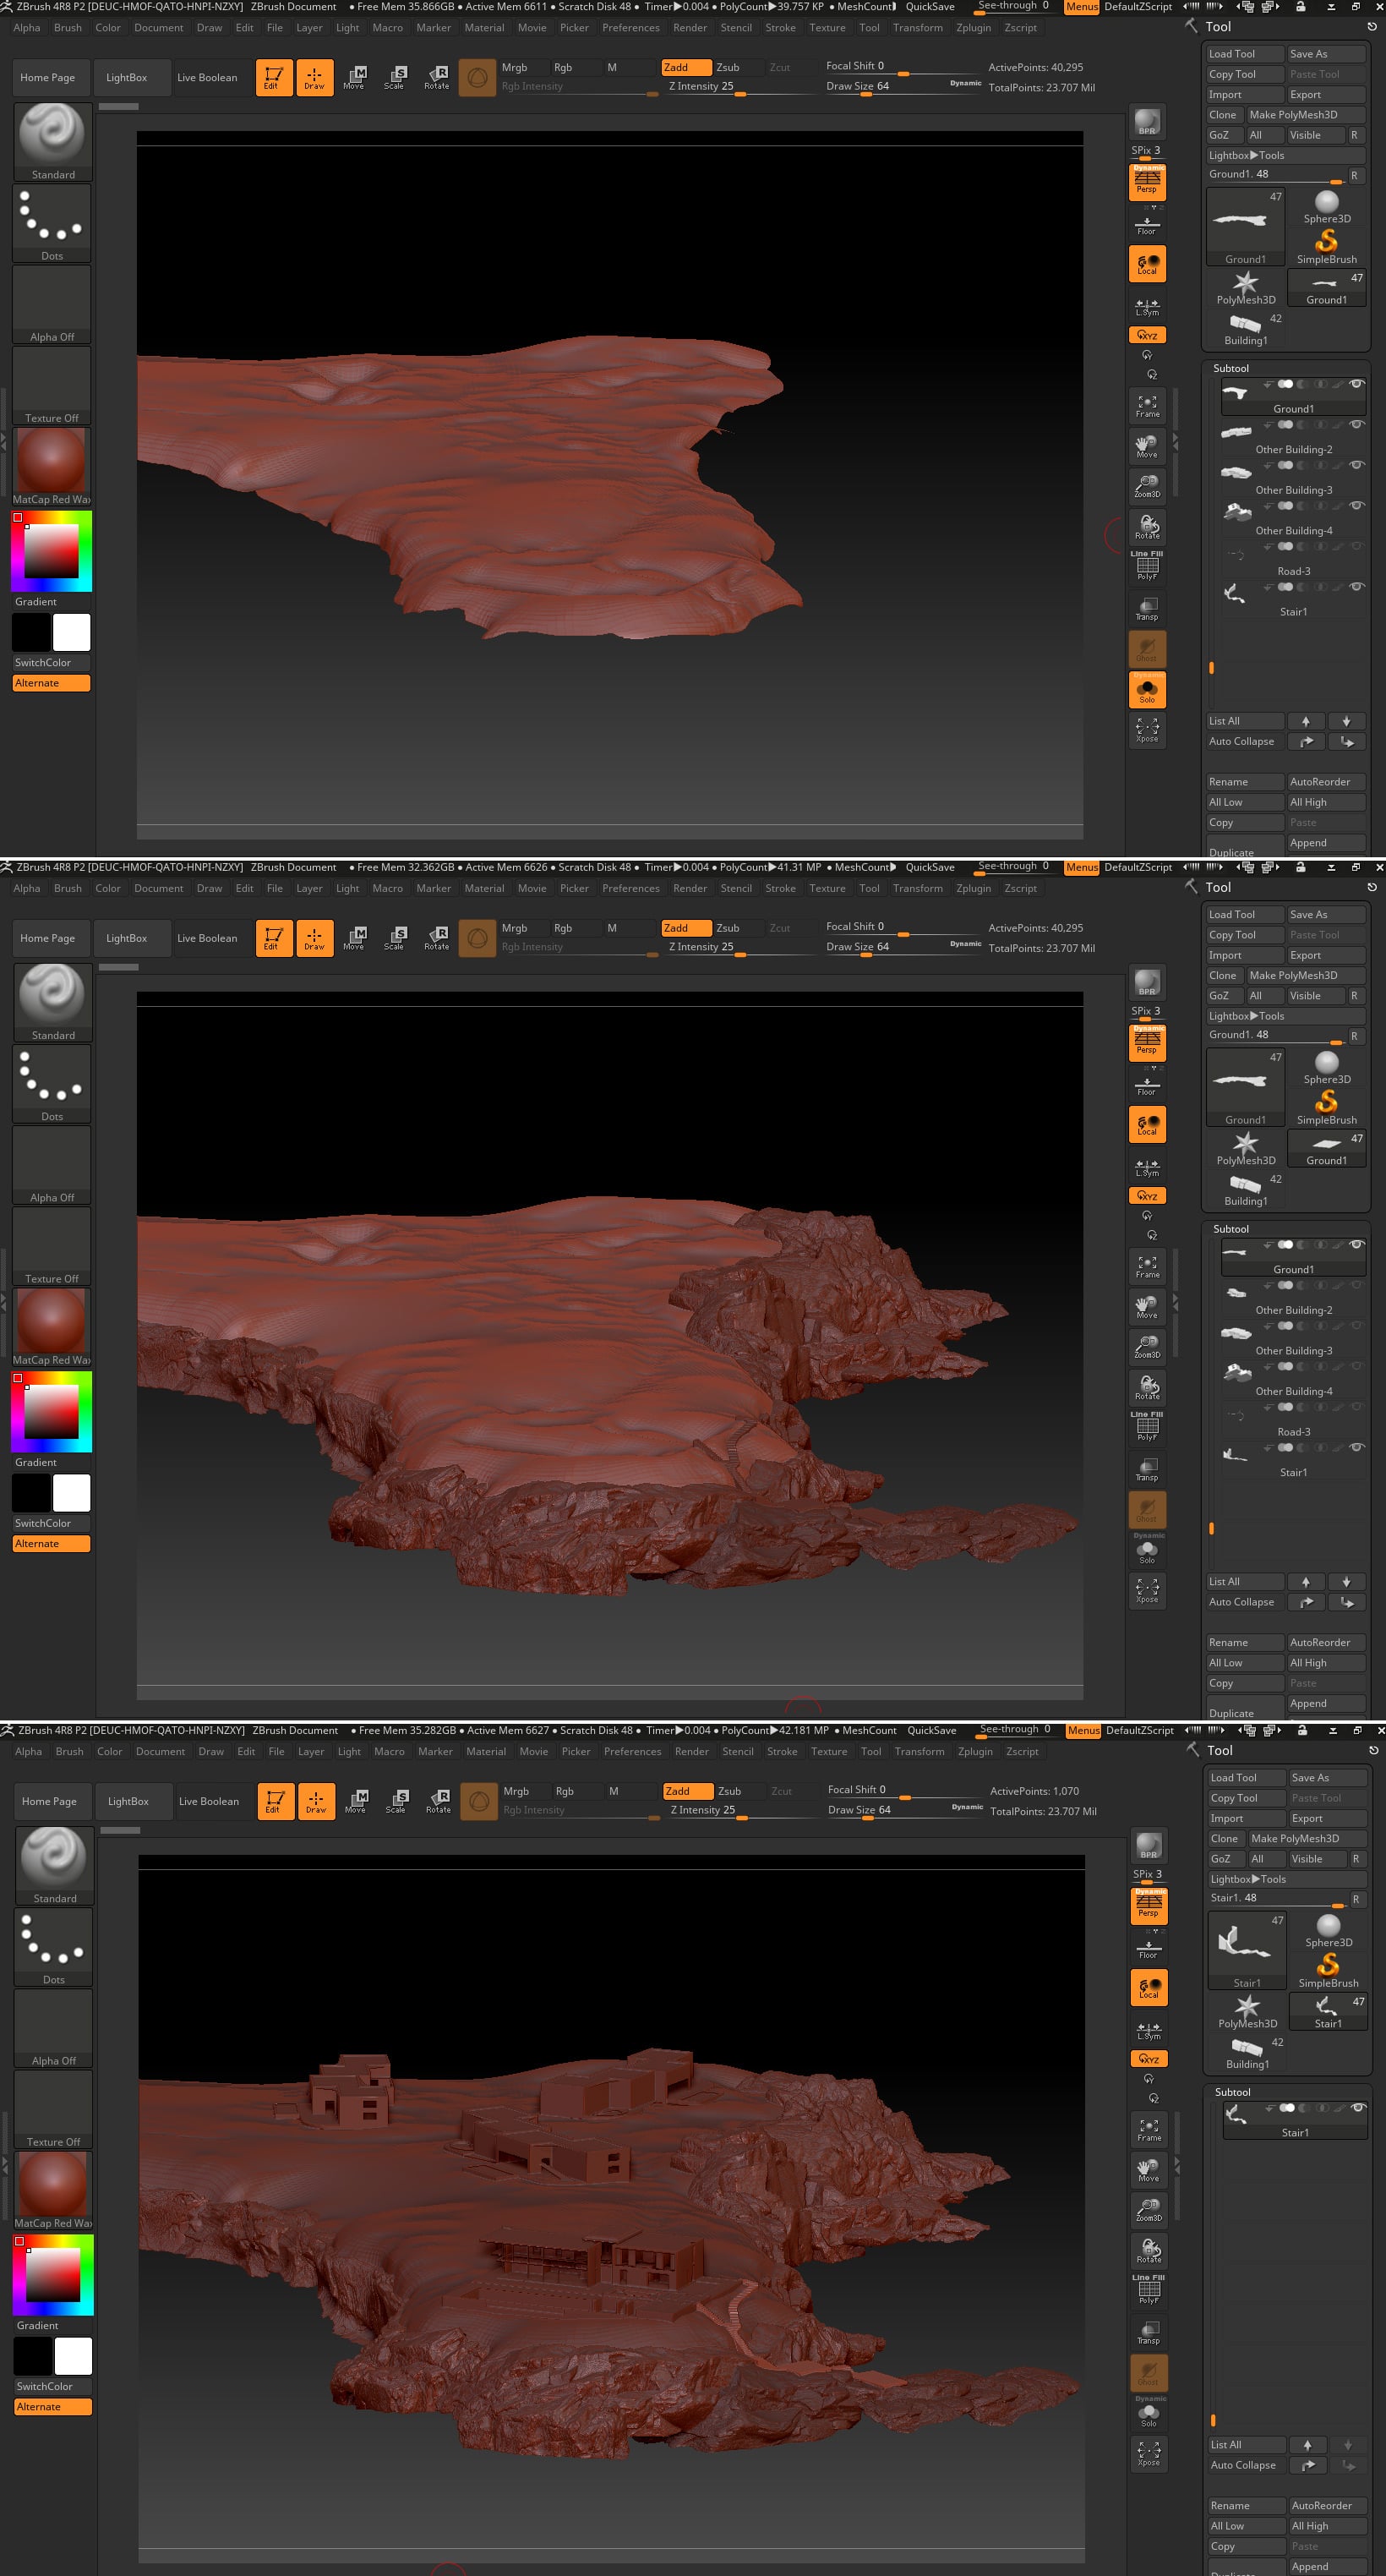
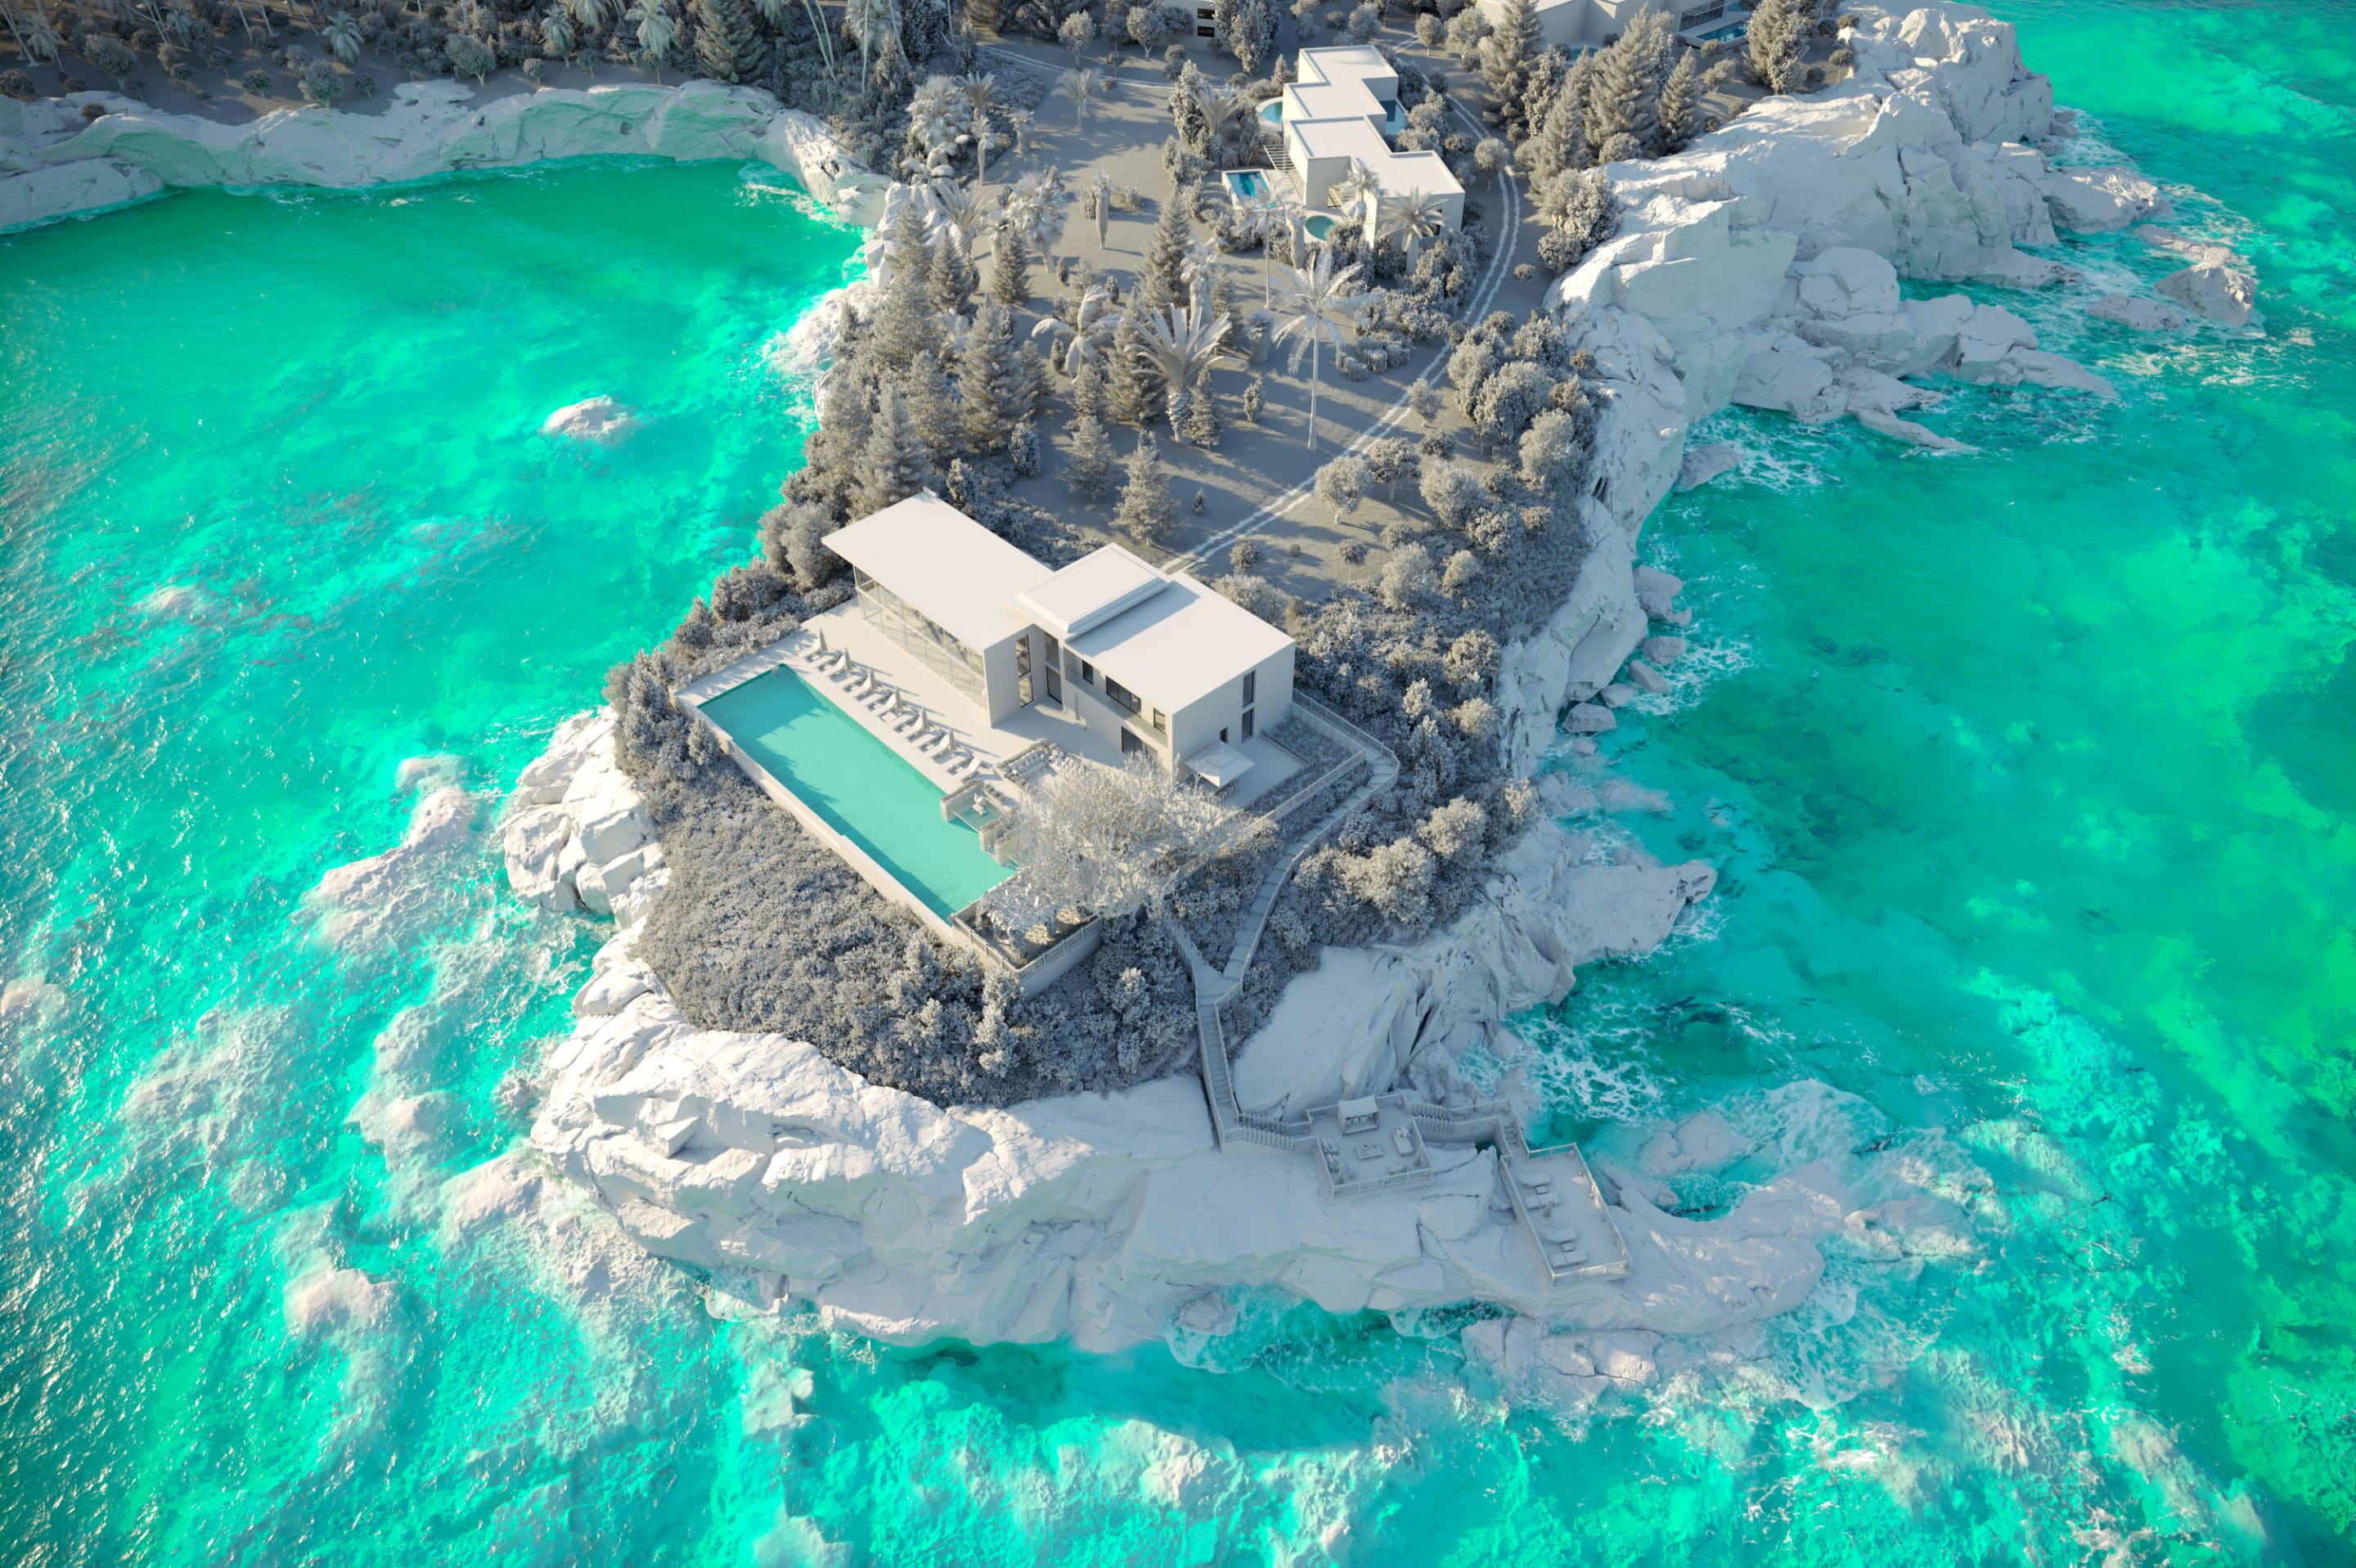
Step 6 – Underwater Ground
Before simulating the sea, one thing to note is that the land is under the sea because it has a significant impact on the outcome. I first created a simple surface with the Populate: Terrain plugin in 3ds Max and then embedded the model in Zbrush to make my ideal shape easier.
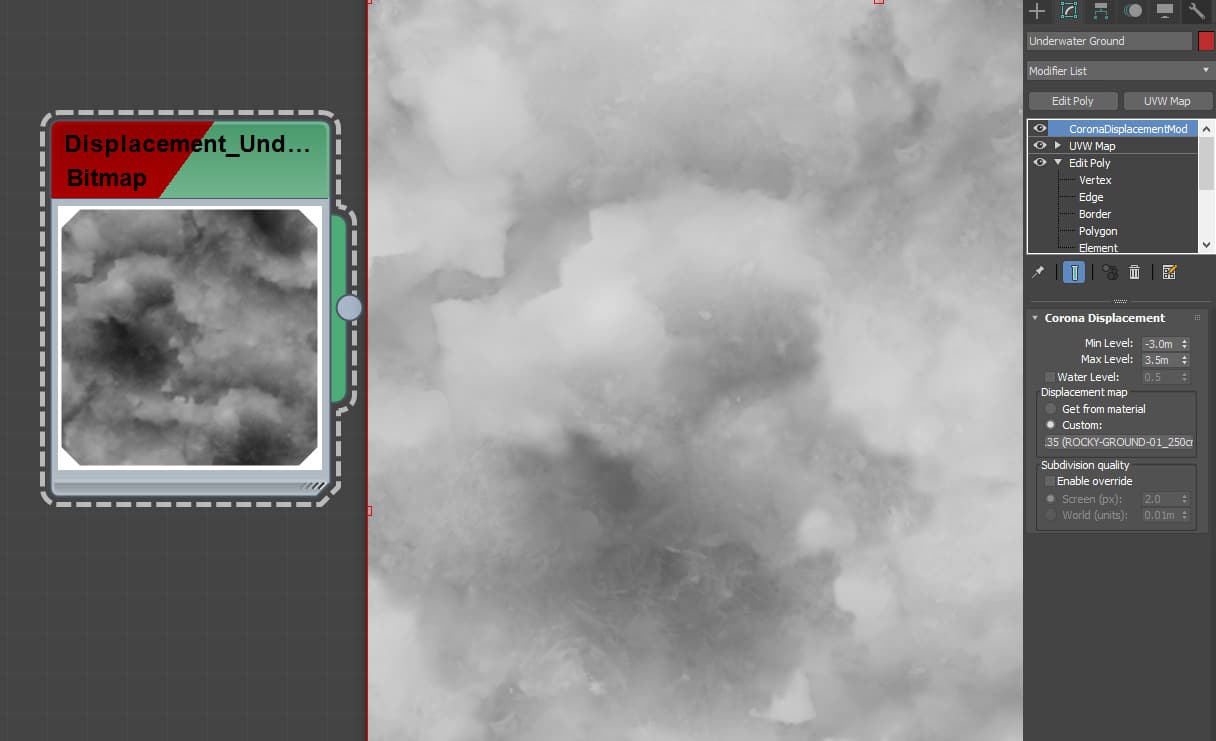
I also used the valuable collection of Substance Store – RD-TEXTURES Collection 1 / ROCKY-GROUND-01 for texture.

Finally, I created the final details with Displacement during render.
Step 7 – Sea Simulation
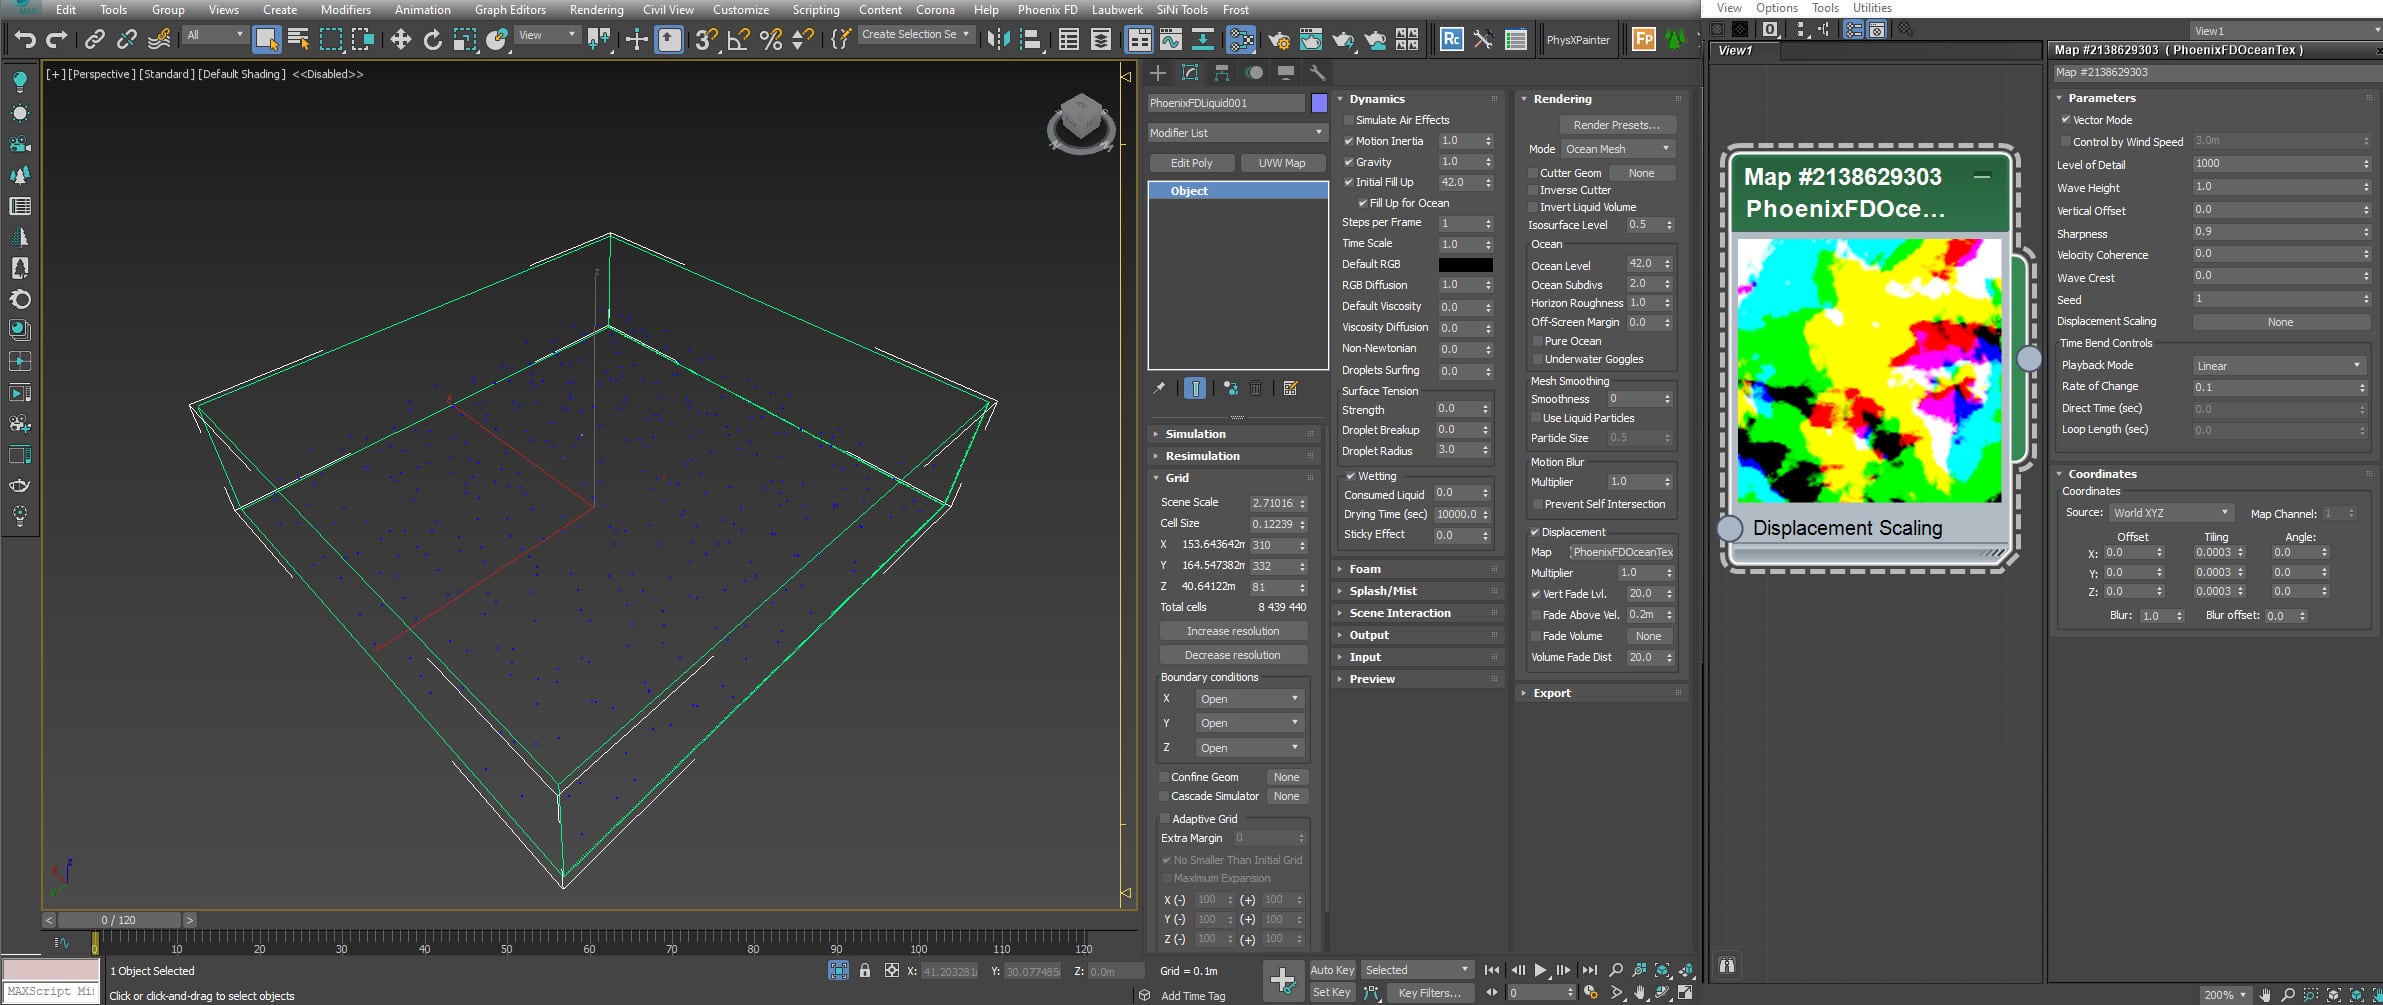
Simulating sea with details like splashes & foam, considering the high volume of the project was one of the biggest challenges for me.
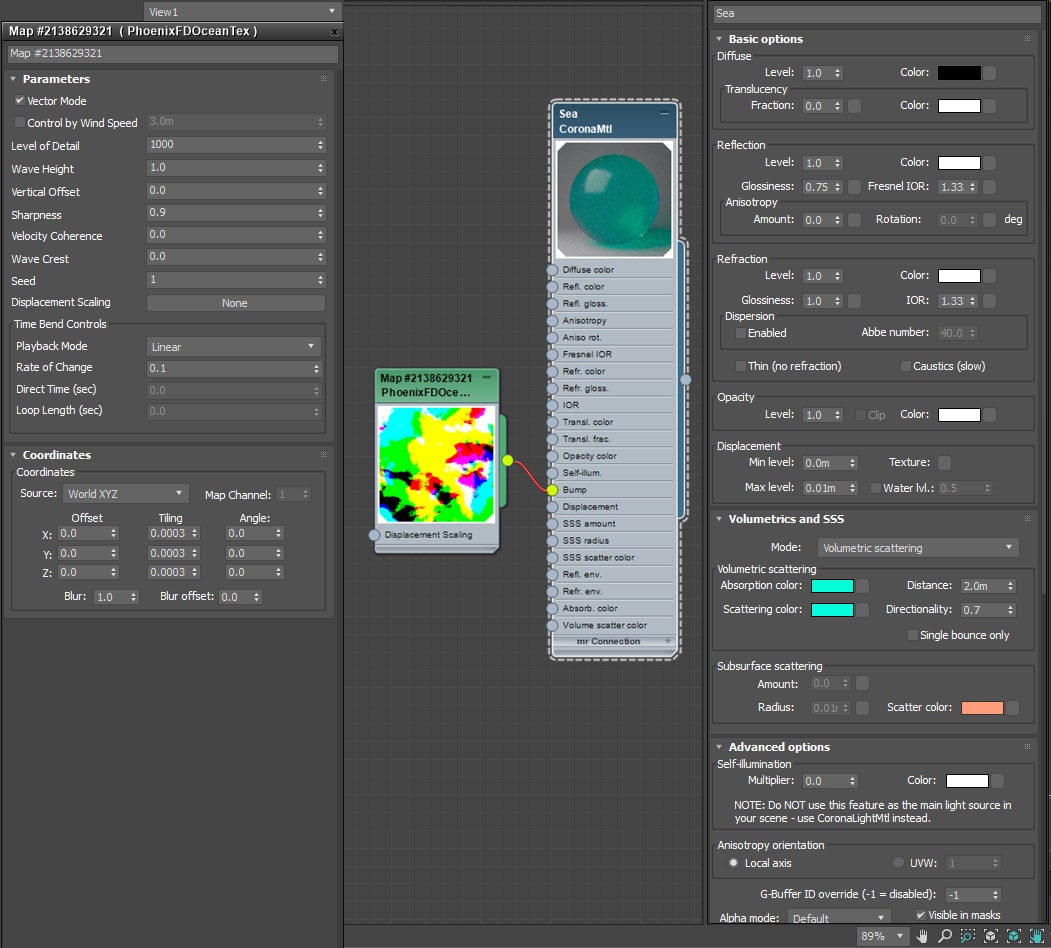
To build water, I used the powerful PhoenixFD plugin.
There were two important issues:
- Particle simulation in this high volume of work was challenging because it took a long time and required a robust system.
- I was using Corona Renderer and there wasn’t the possibility of rendering Foam and Splash made by PhoenixFD.
To do this, I first tried to simulate the sea without Foam.
To create details like Foam and Splash, I decided to make a non-traditional approach. So after searching the internet and finding Foam related images, I made plans in 3ds Max and attributed water as a material to them and deleted the image border with Opacity map.
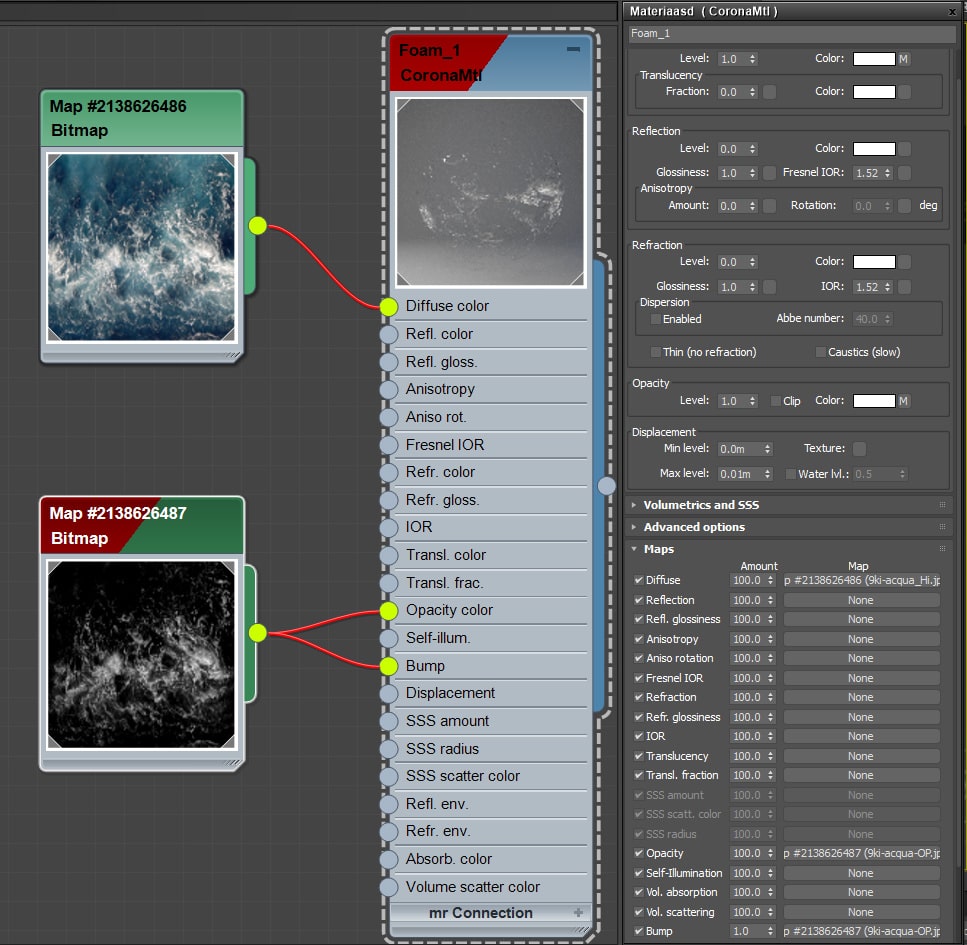
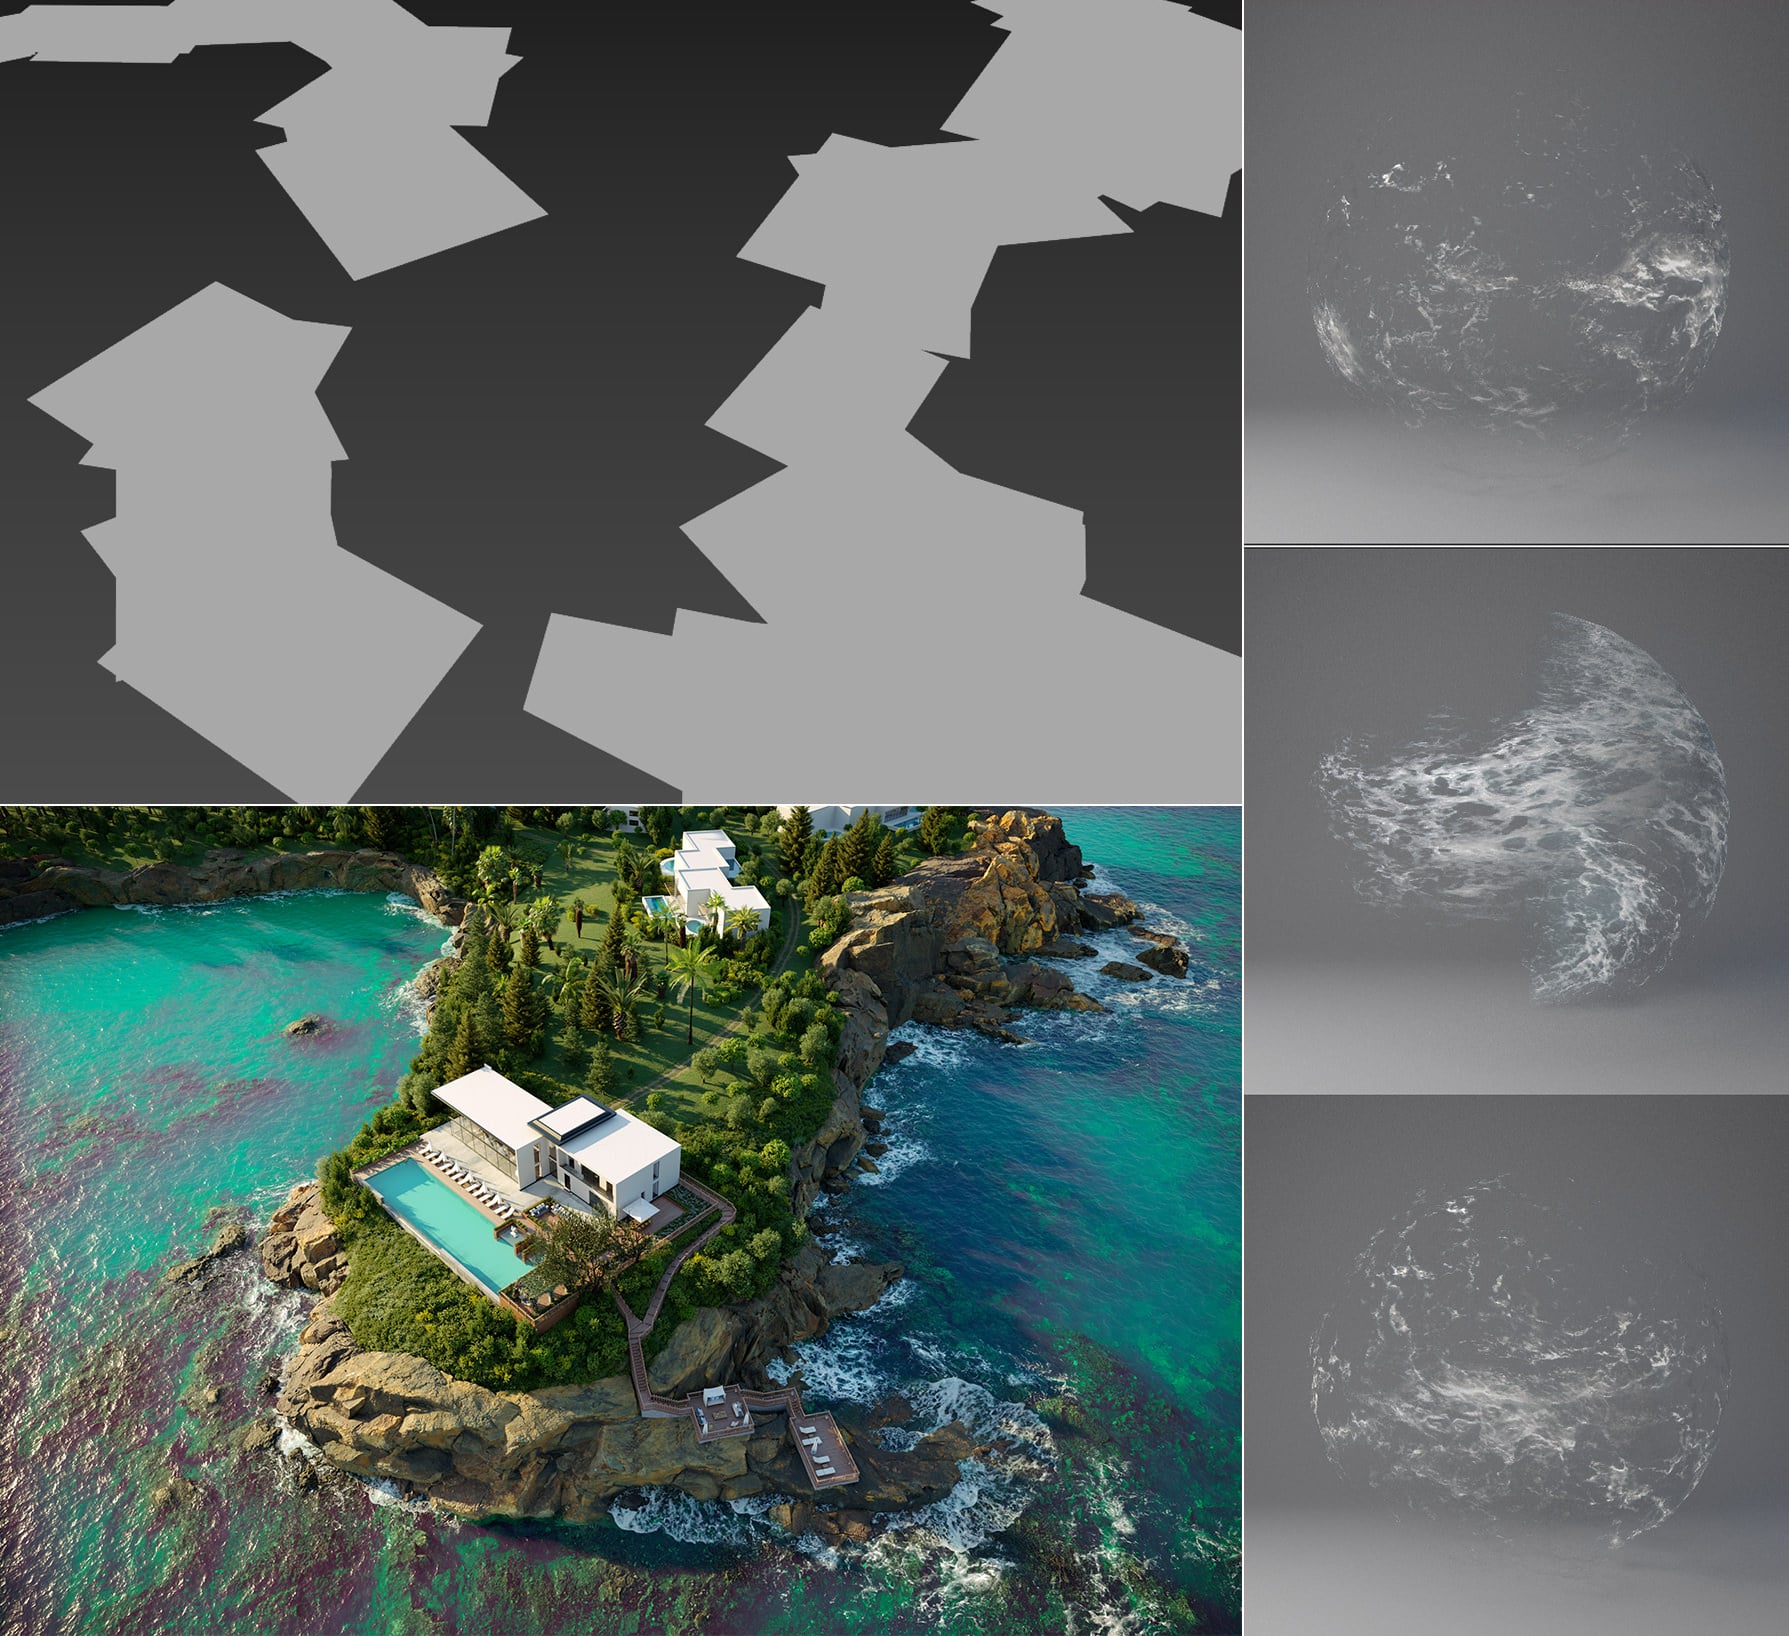
I know it wasn’t an ideal way, but I had no choice!
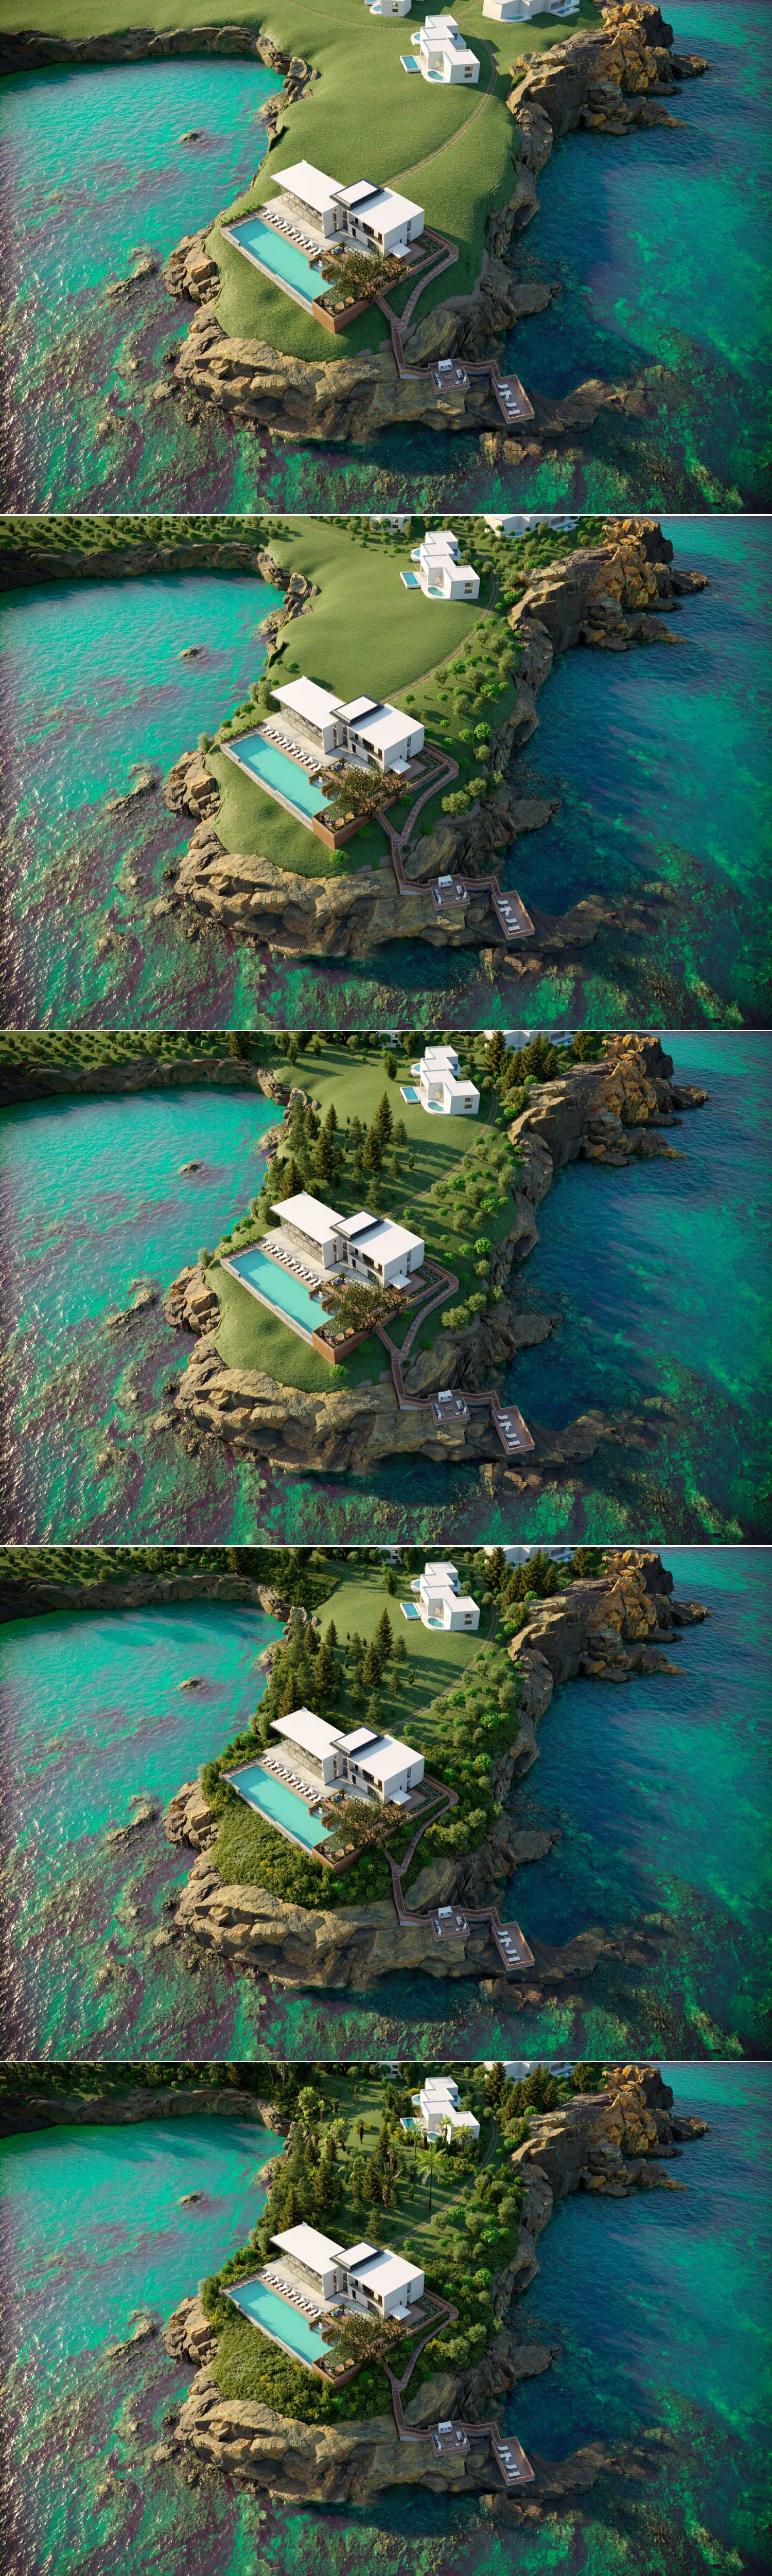
Step 8 – Scattering with Forest Pack Plugin
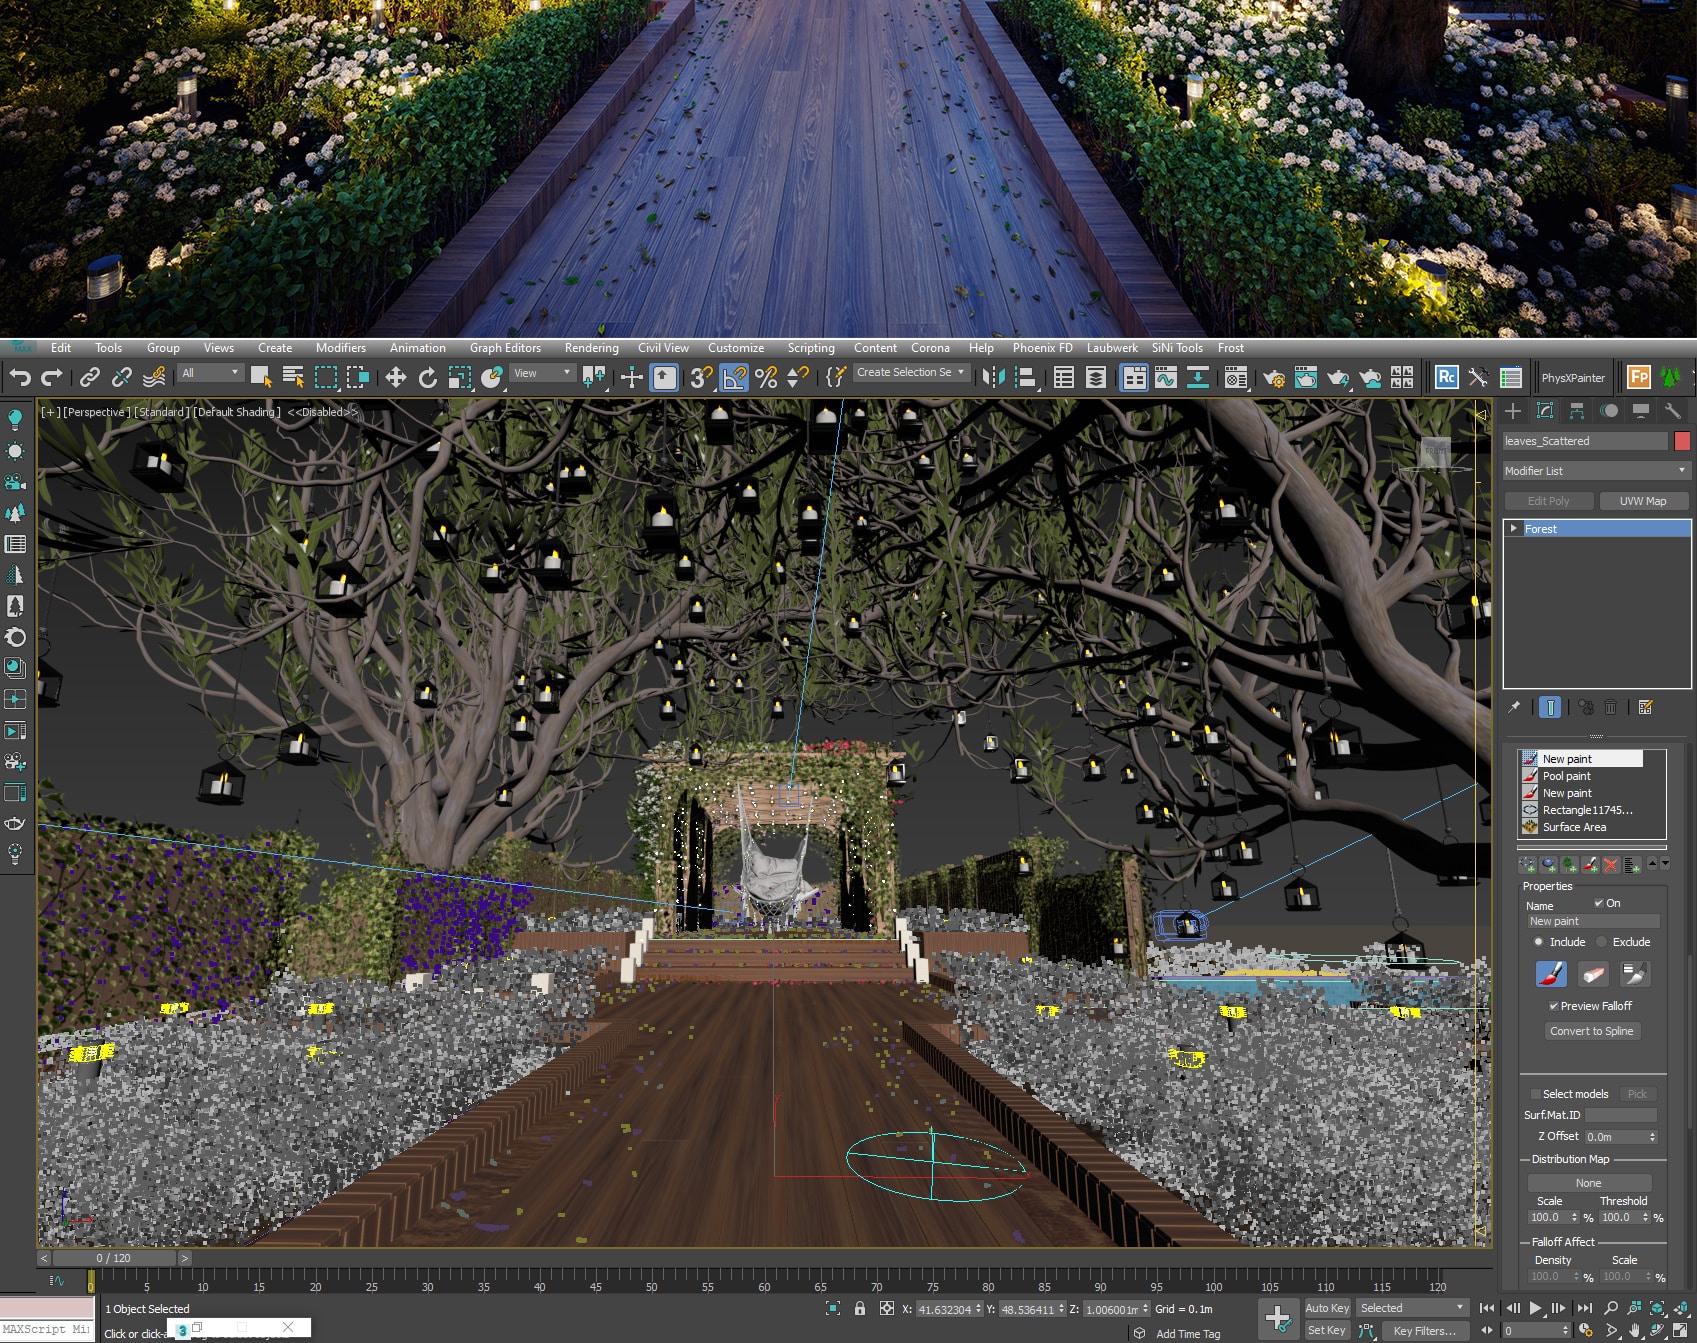
For the scatter and paint models on the surface, I used the powerful Forest Pack plugin. You can see the evolution of plants scattering on the landscape below.
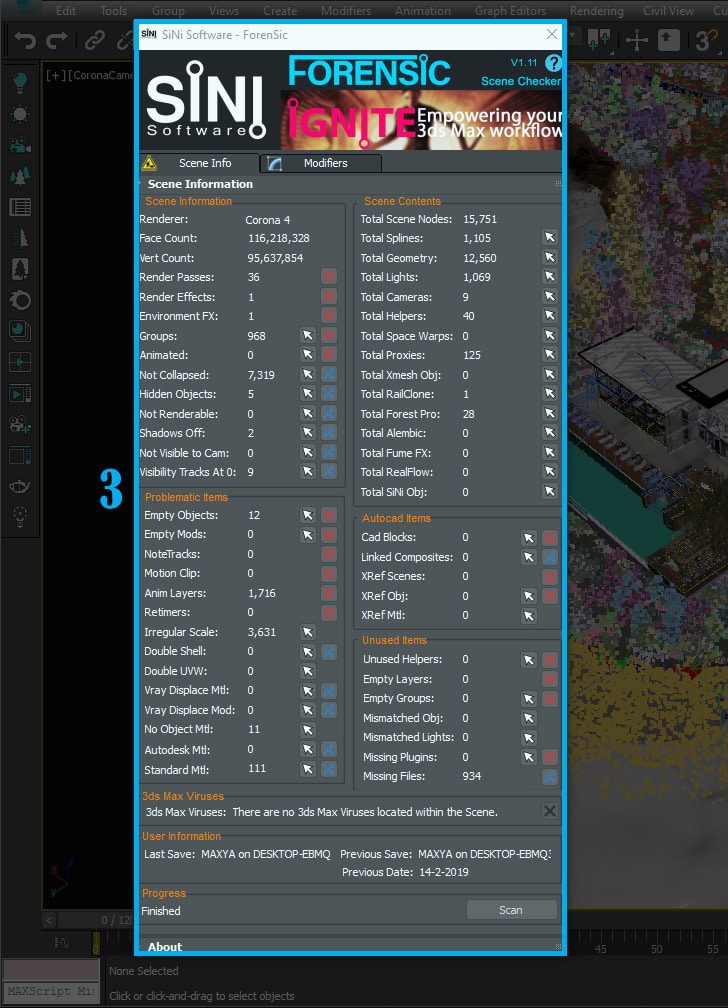
Step 9 – Project Management
When you do a project of this size, project management is particularly important. I used the Forensic tool for project management in this project.
You can see the steps in the photo below.
First, go to https://www.sinisoftware.net/ and download and install the program.
- Run this program (note that this program works online!)
- Scan the scene.
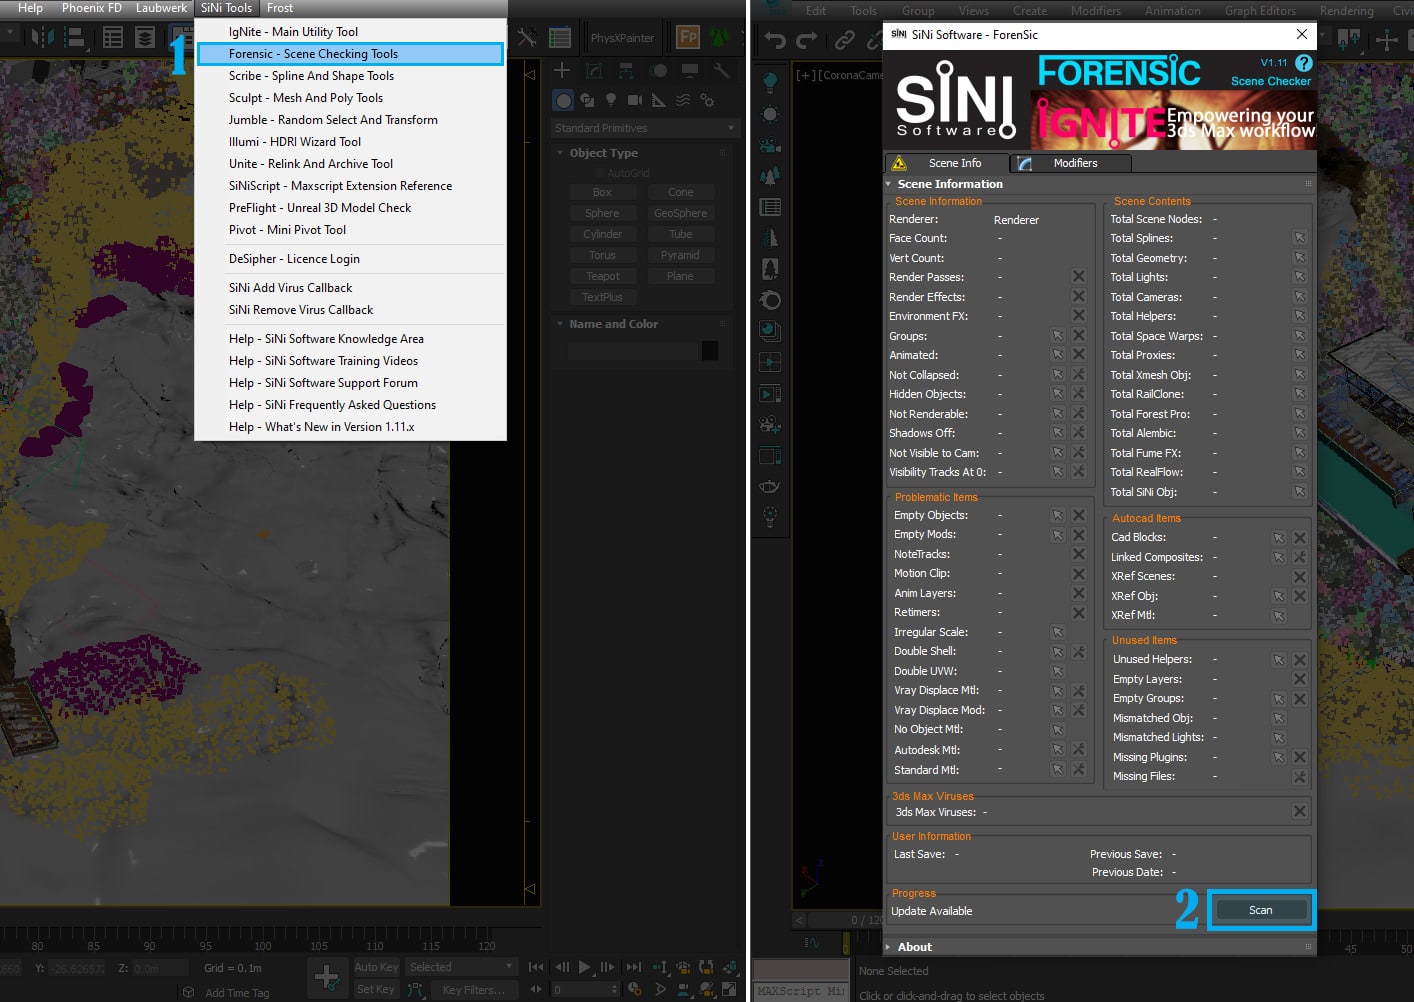
- Now you can manage the general scene information. Even if the scene has a virus, you can eliminate it!
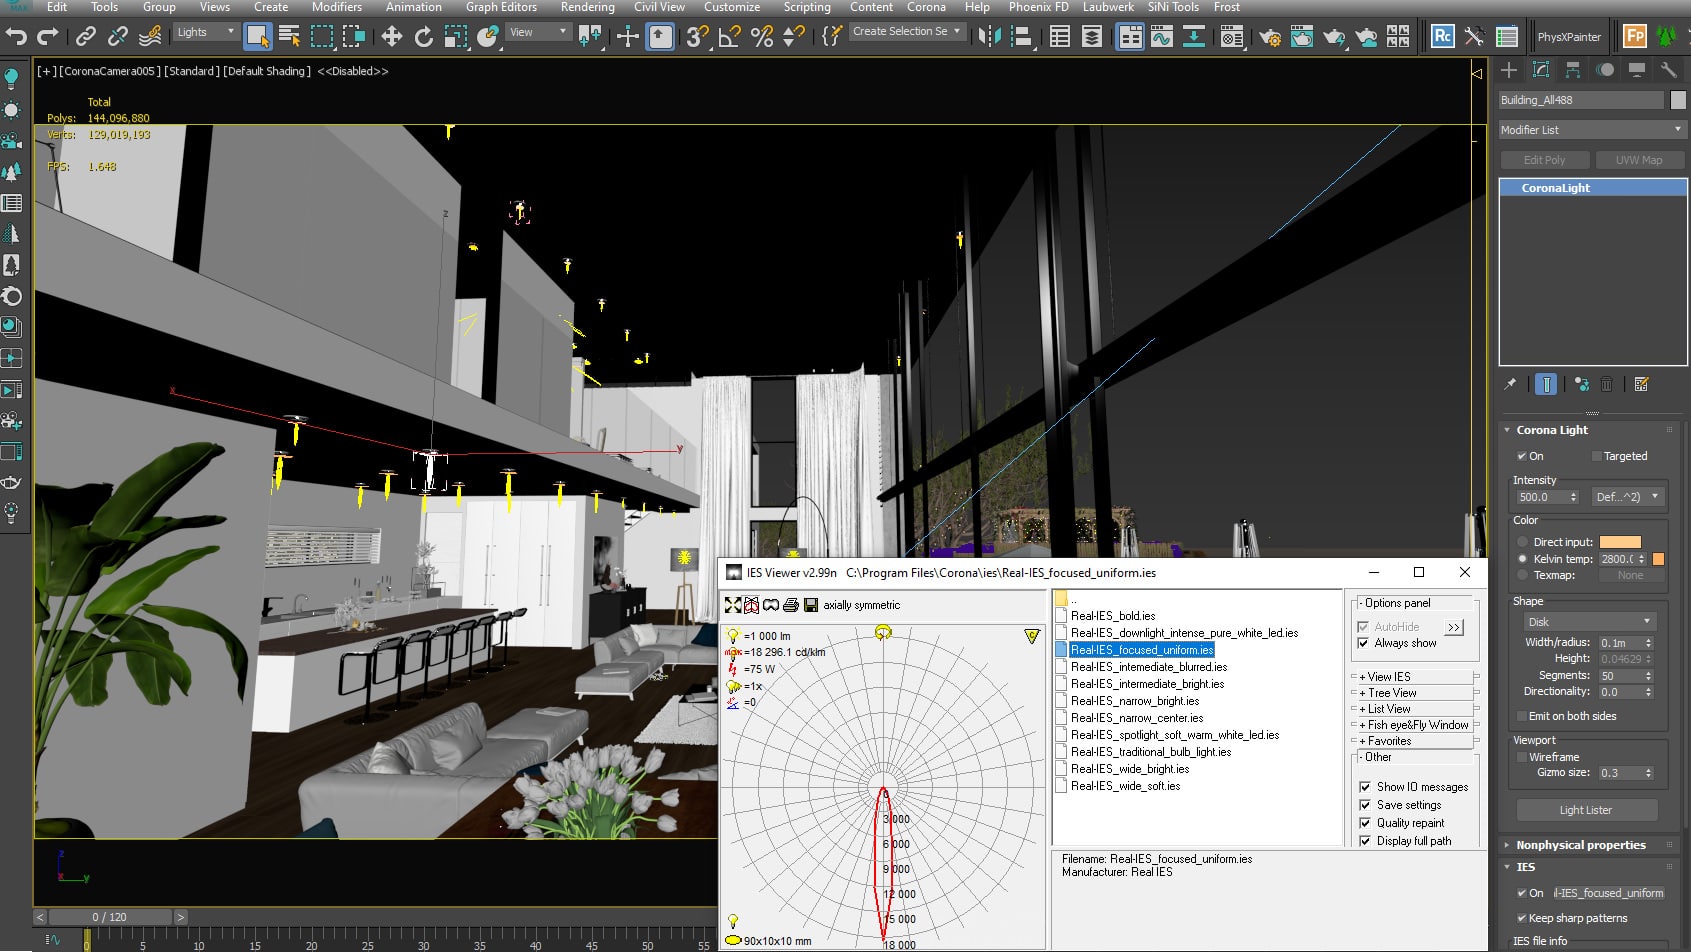
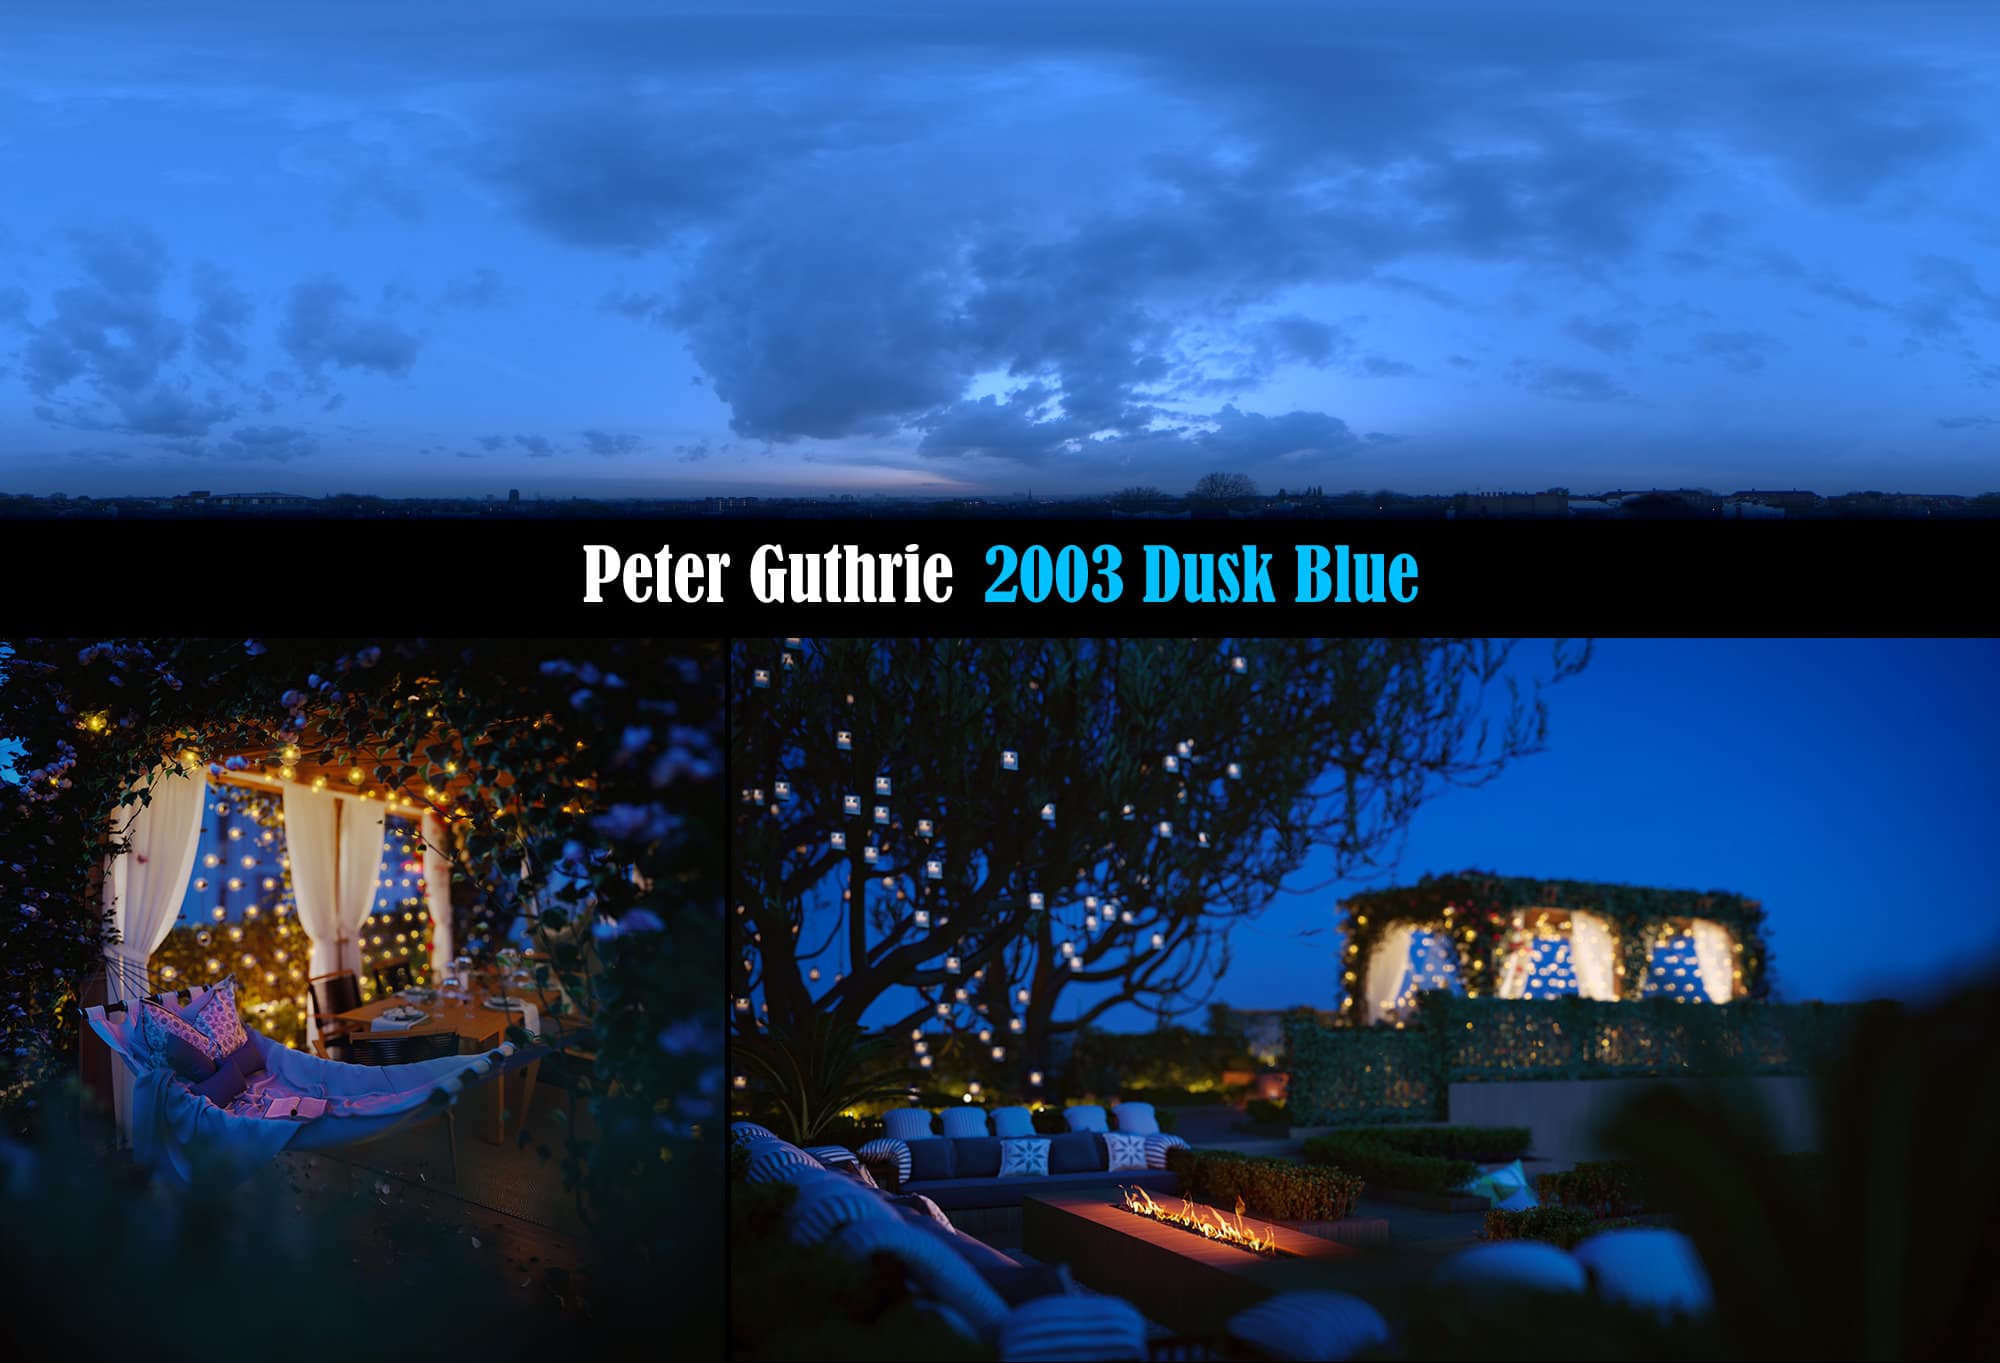
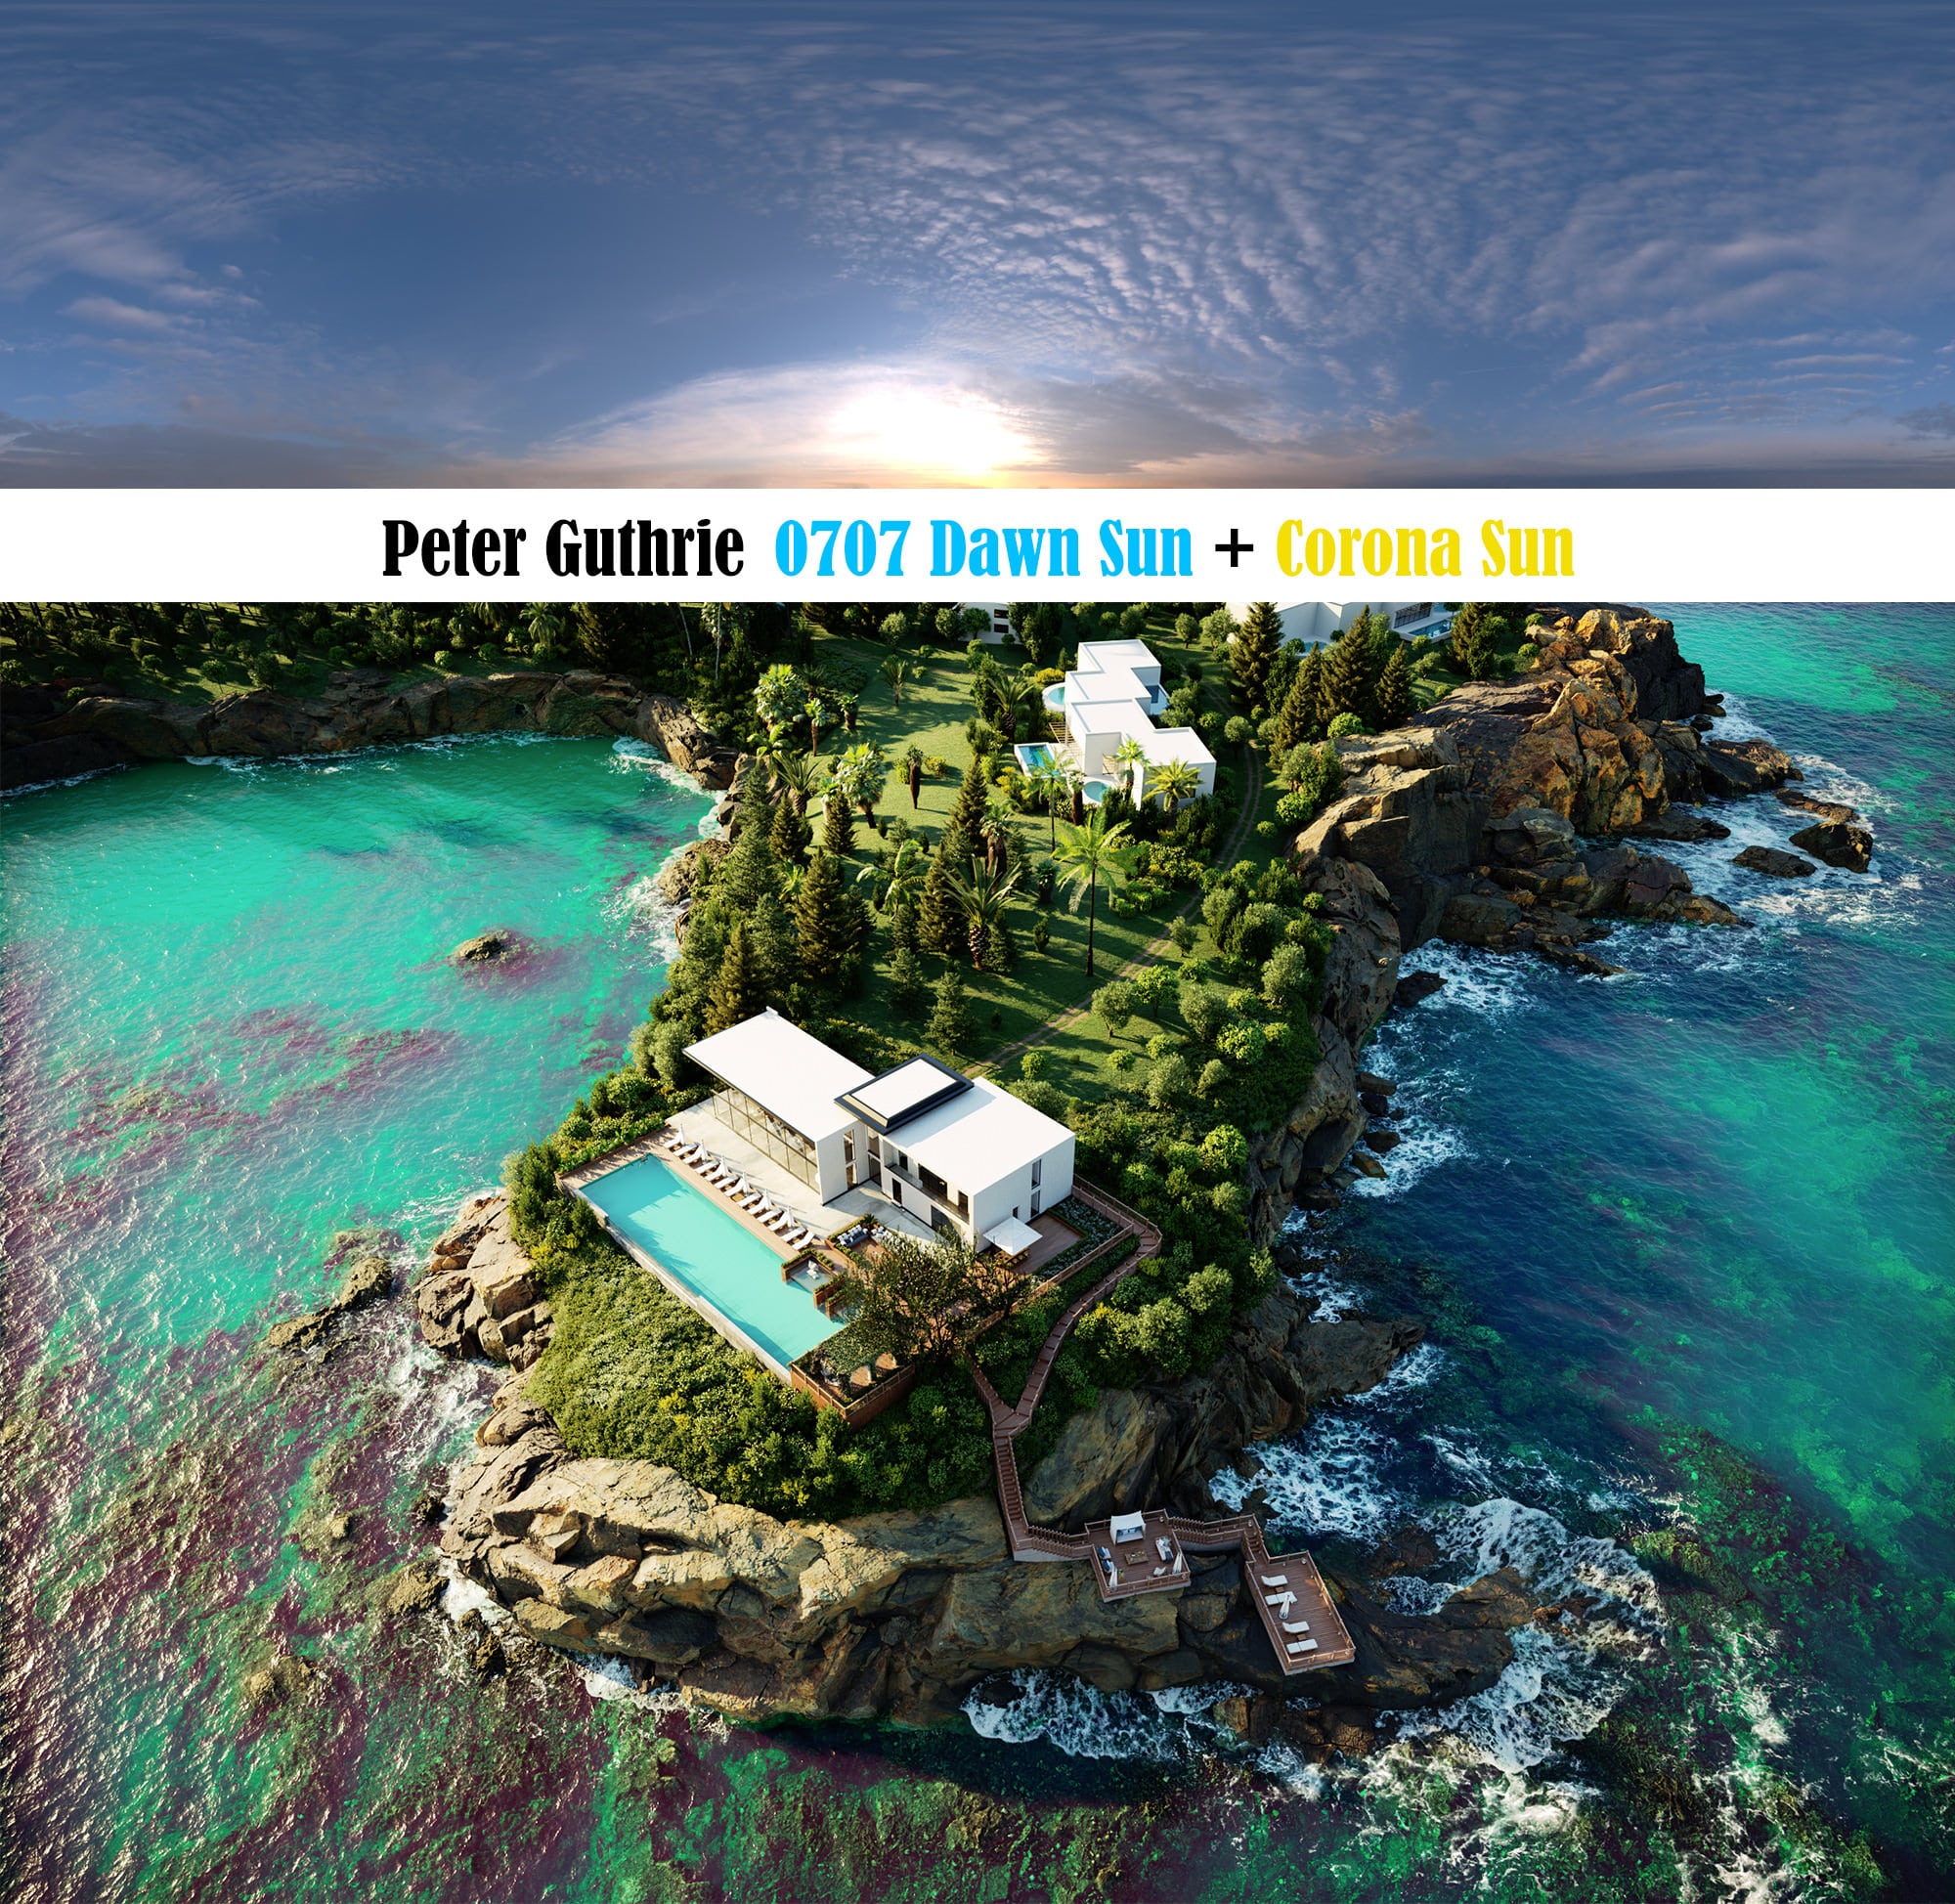
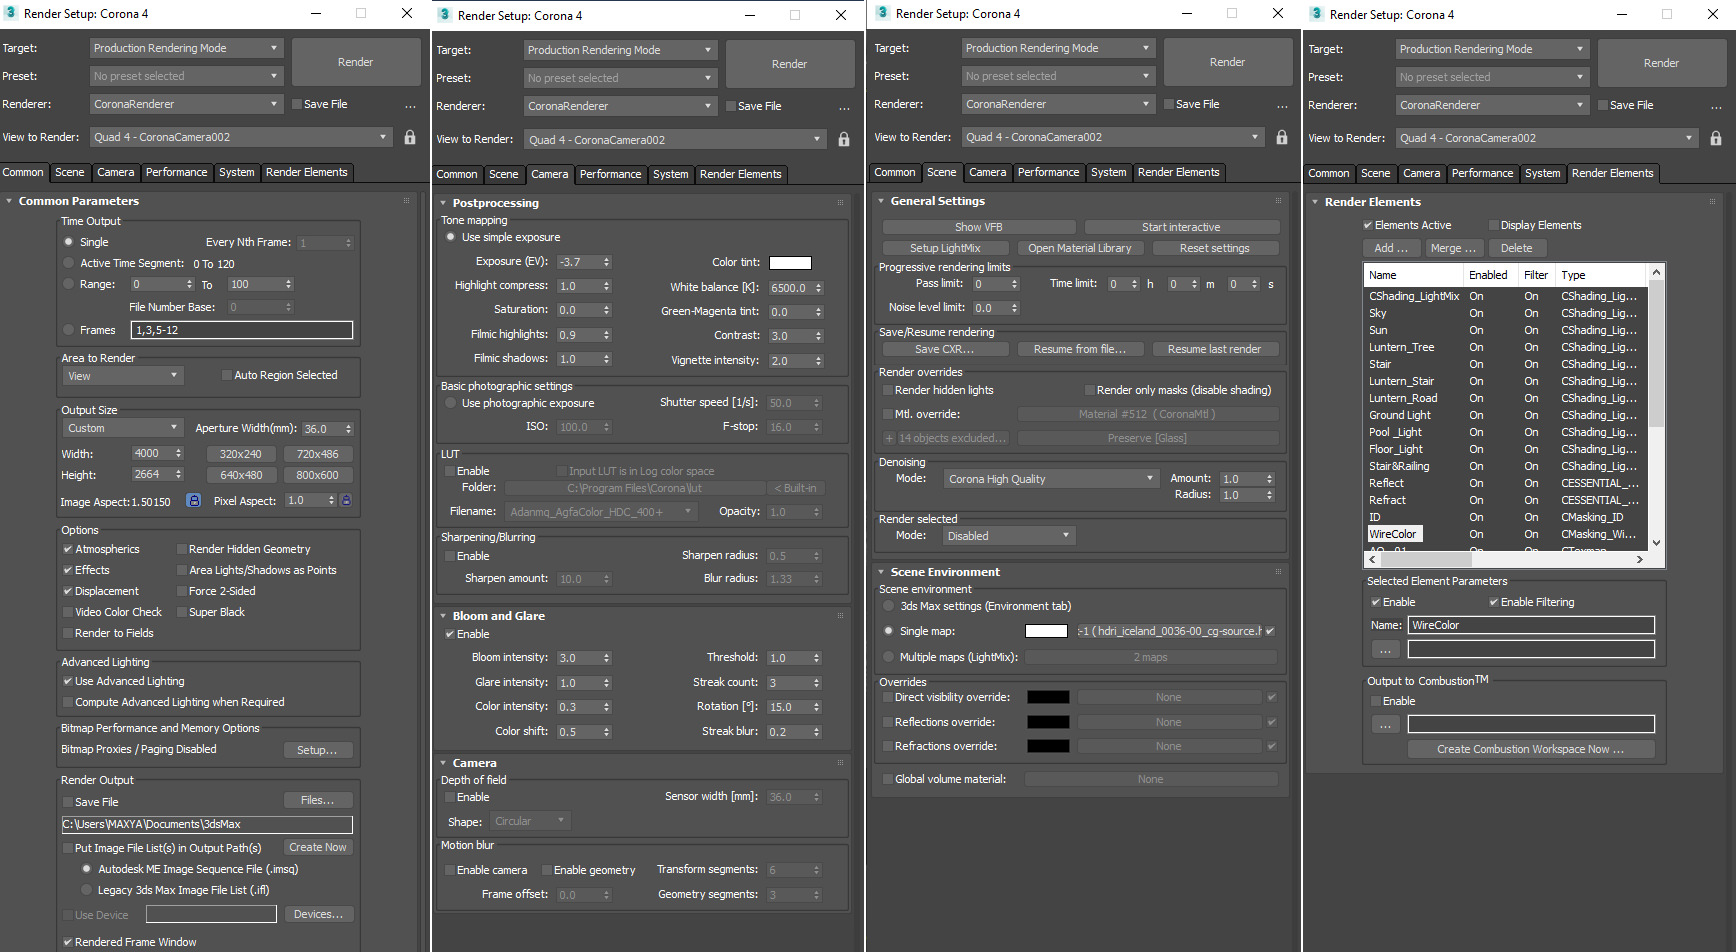
Step 10 – Lighting & Render settings
Do not worry too much when you’re working with Corona Renderer. Default settings are pretty much all you need most of the time.
In the following, you can see photos related to lighting and final rendering settings.
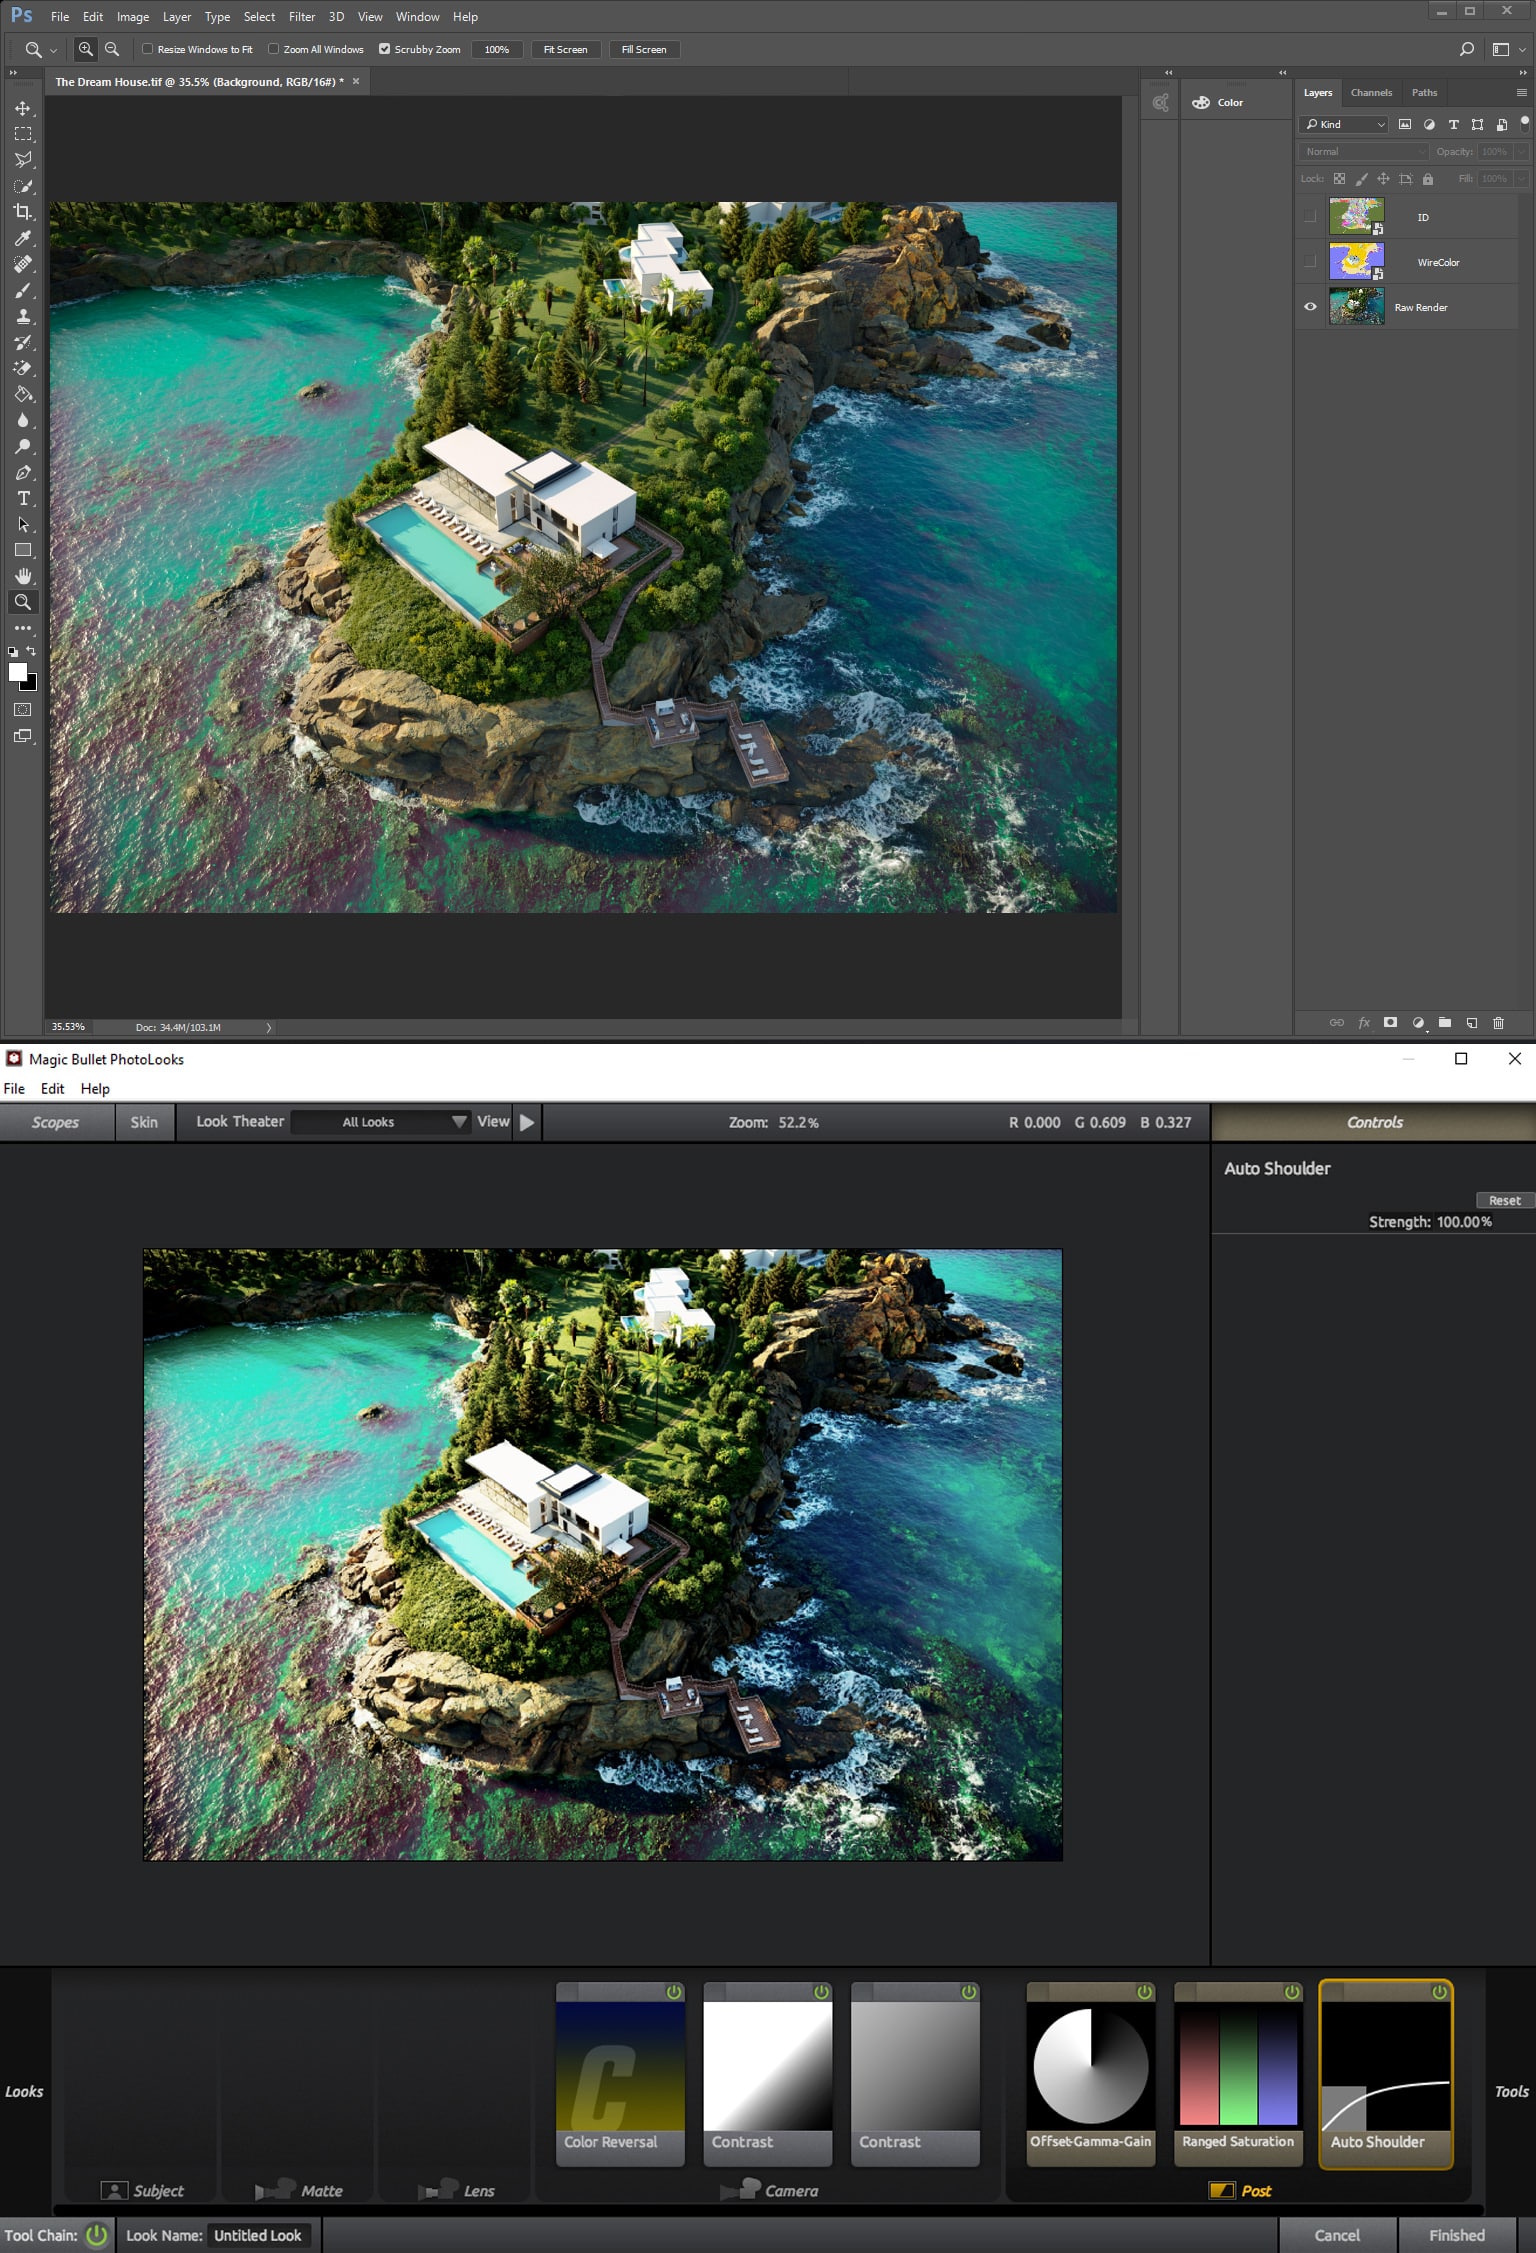
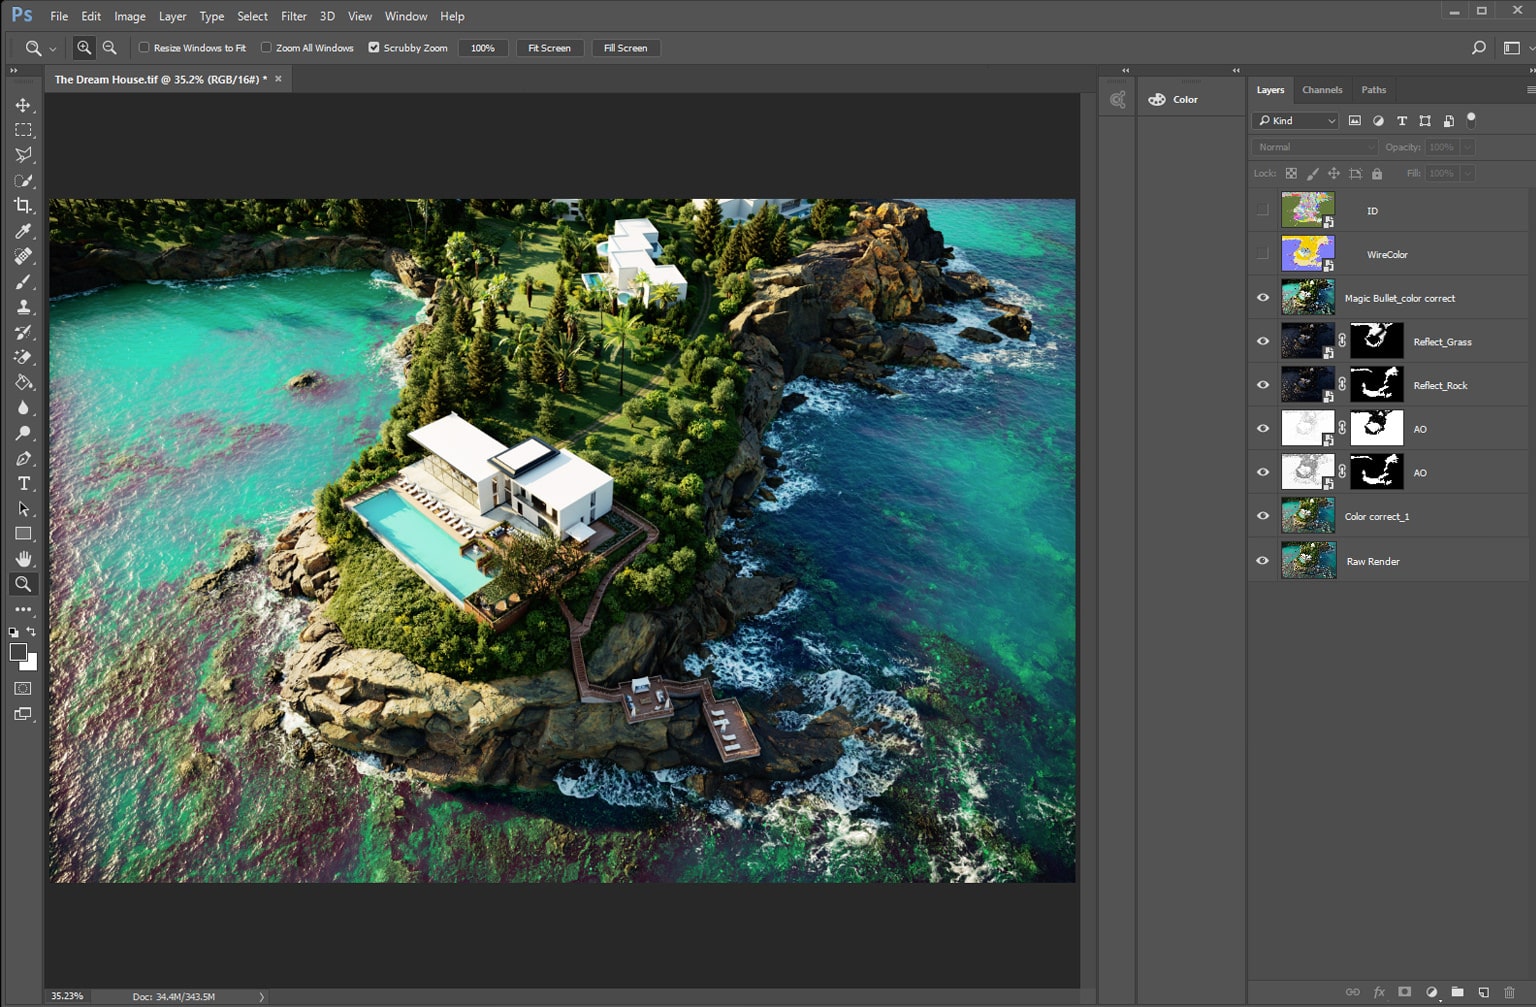
Step 11 – Post Production
Well, the whole thing was made in 3D, and eventually, I did some color correcting with photoshop and Magic Bullet (https://www.redgiant.com/products/magic-bullet-suite/).
You’re not tired, Yes!?
Thank you for being with me so far, finally, let’s have a brief overview of this process with this short video!
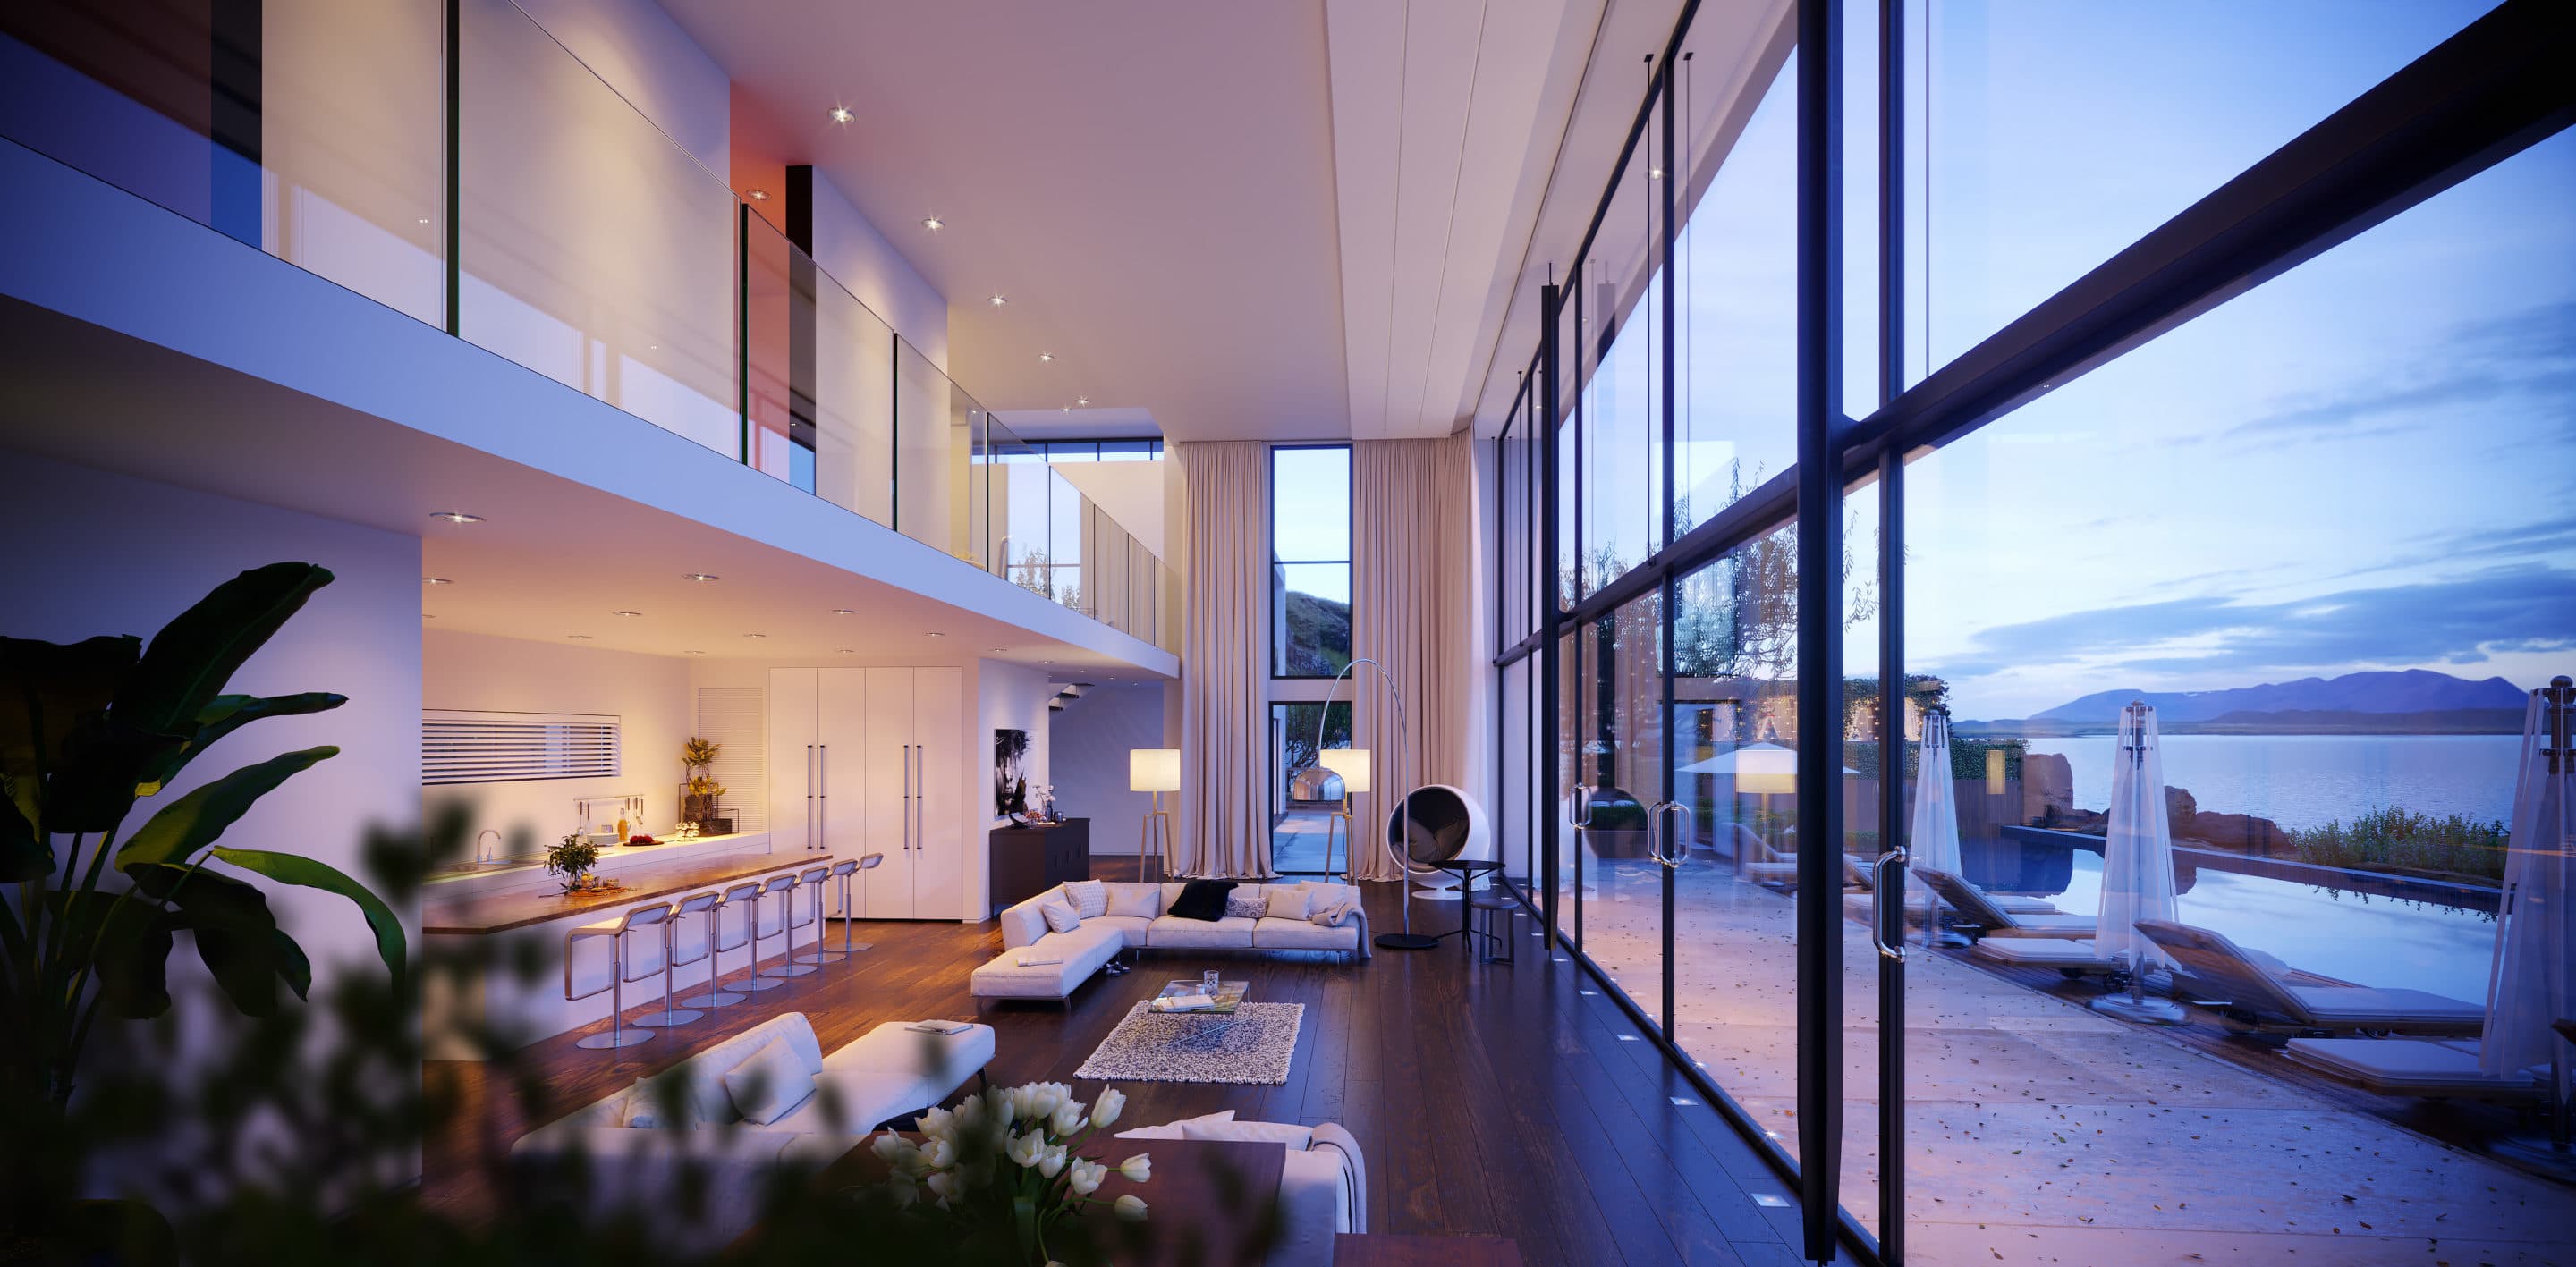
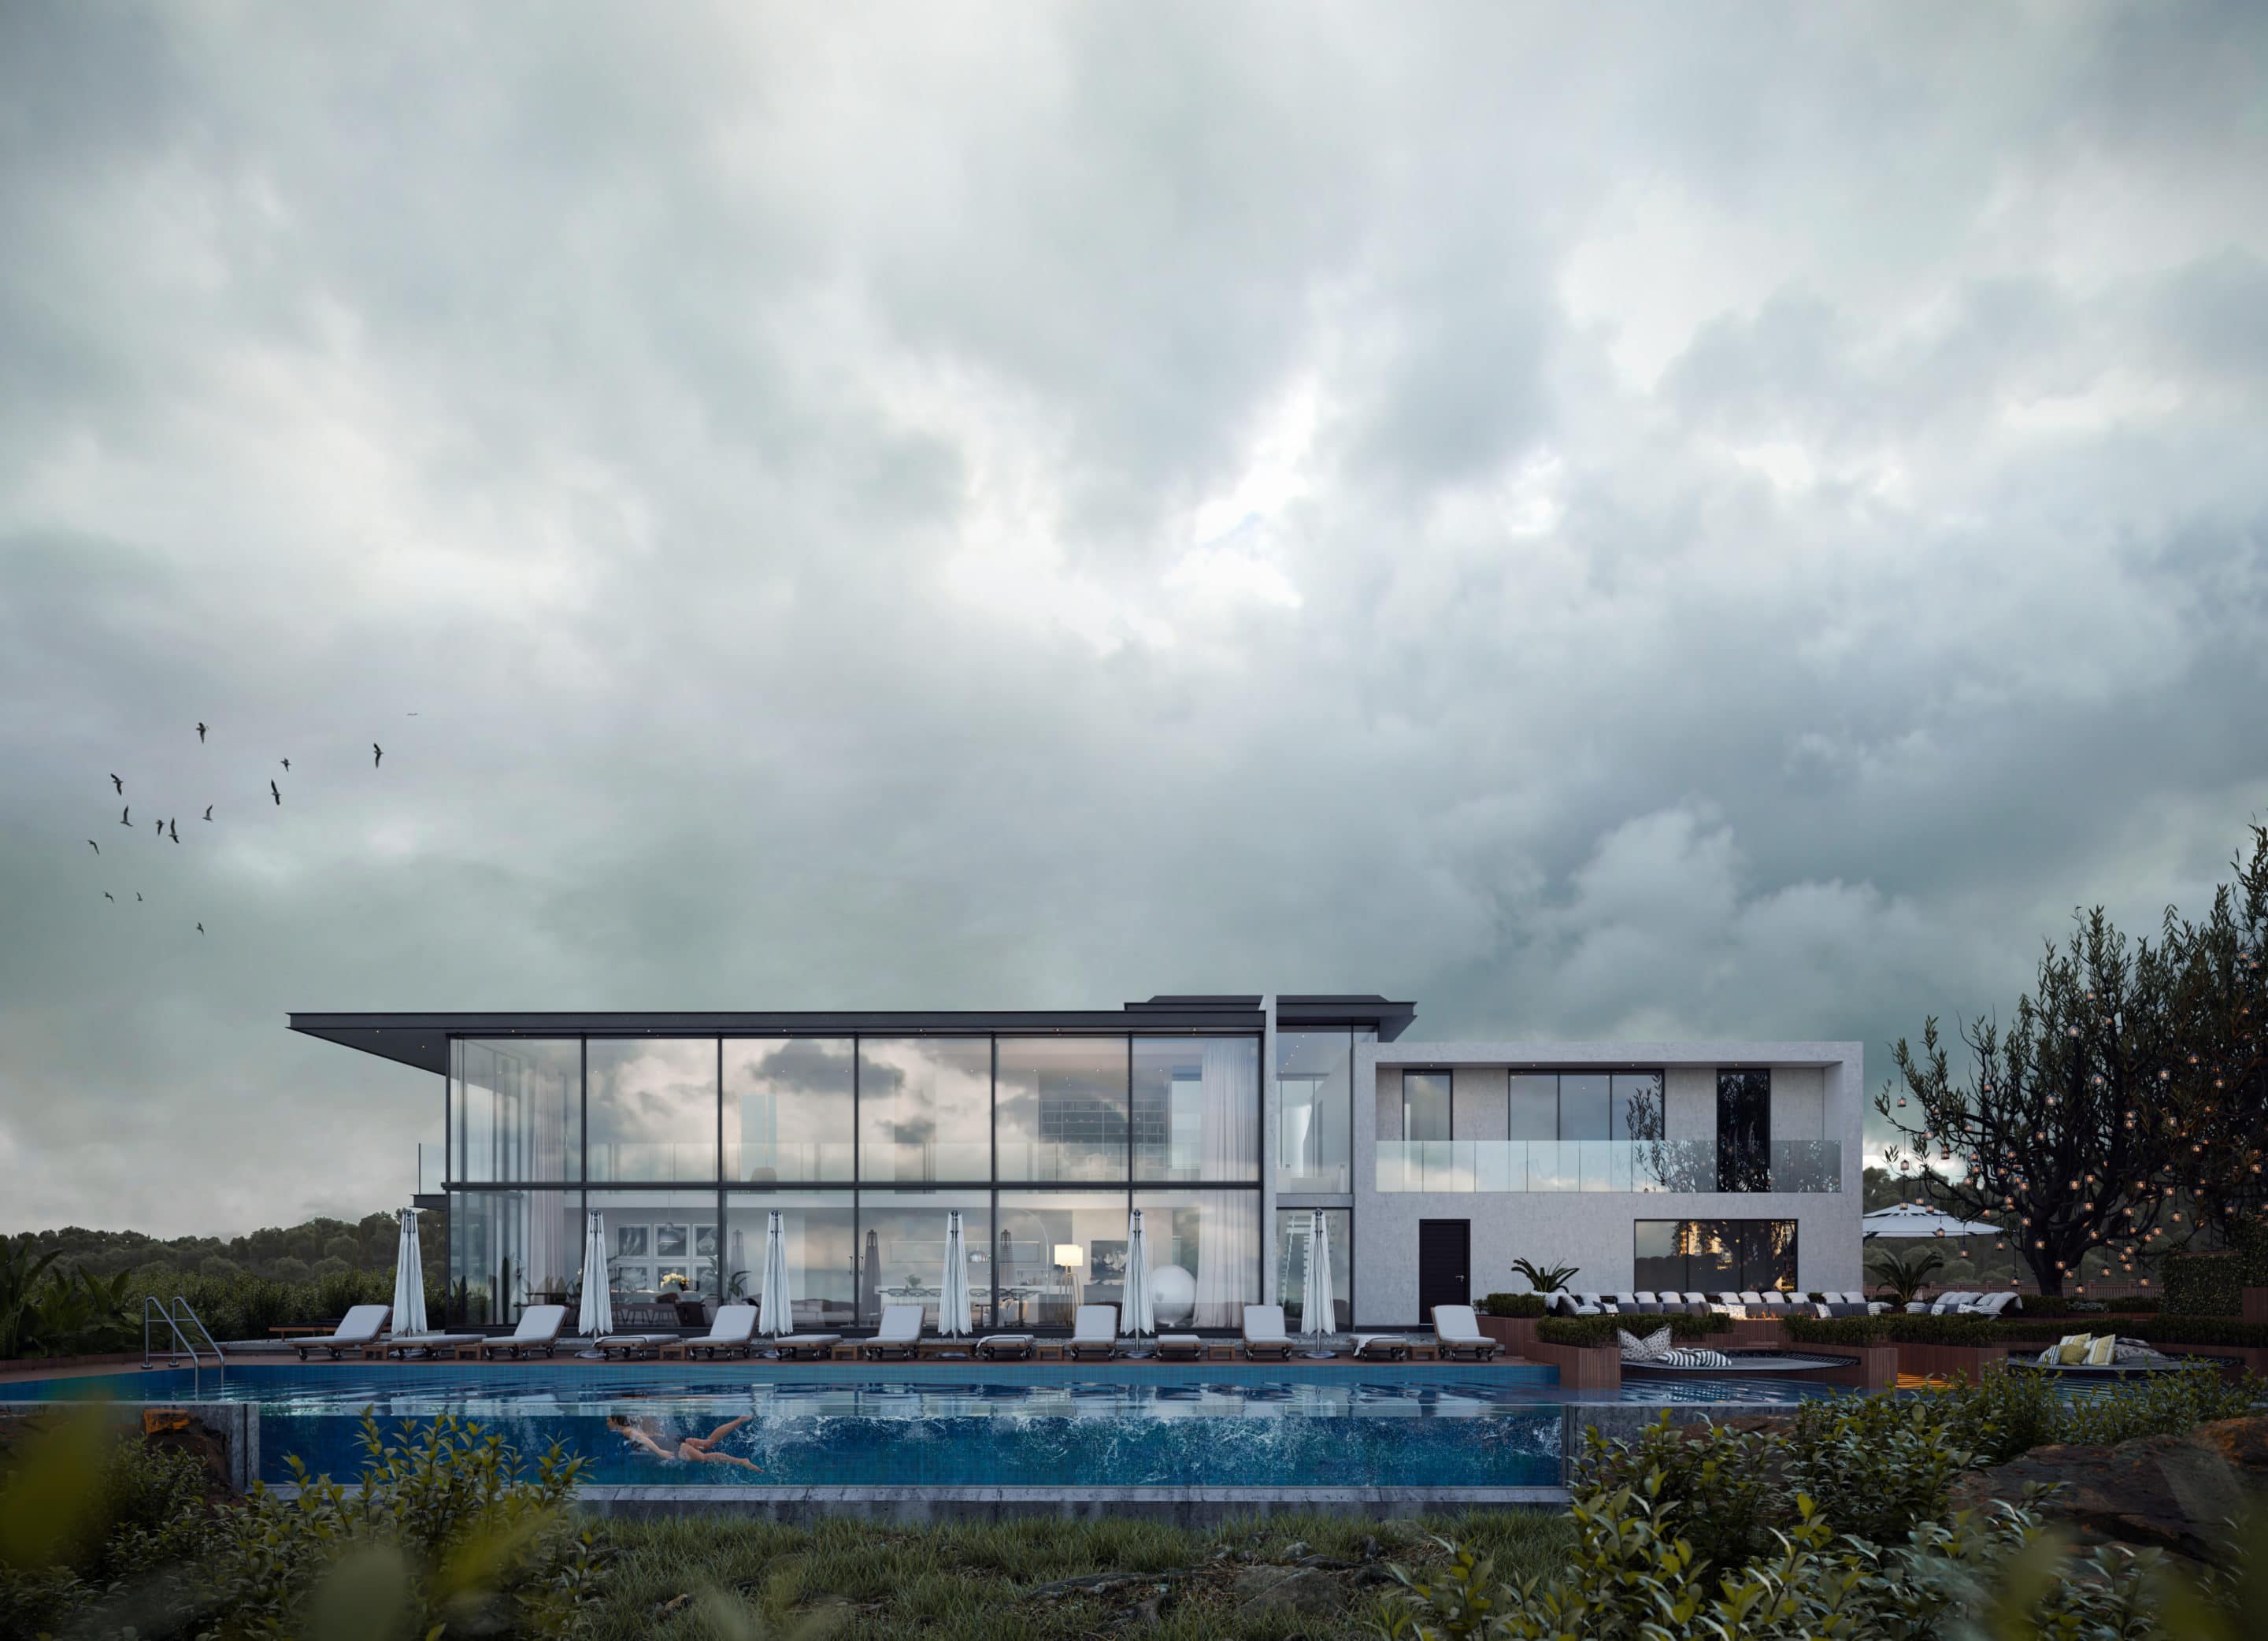
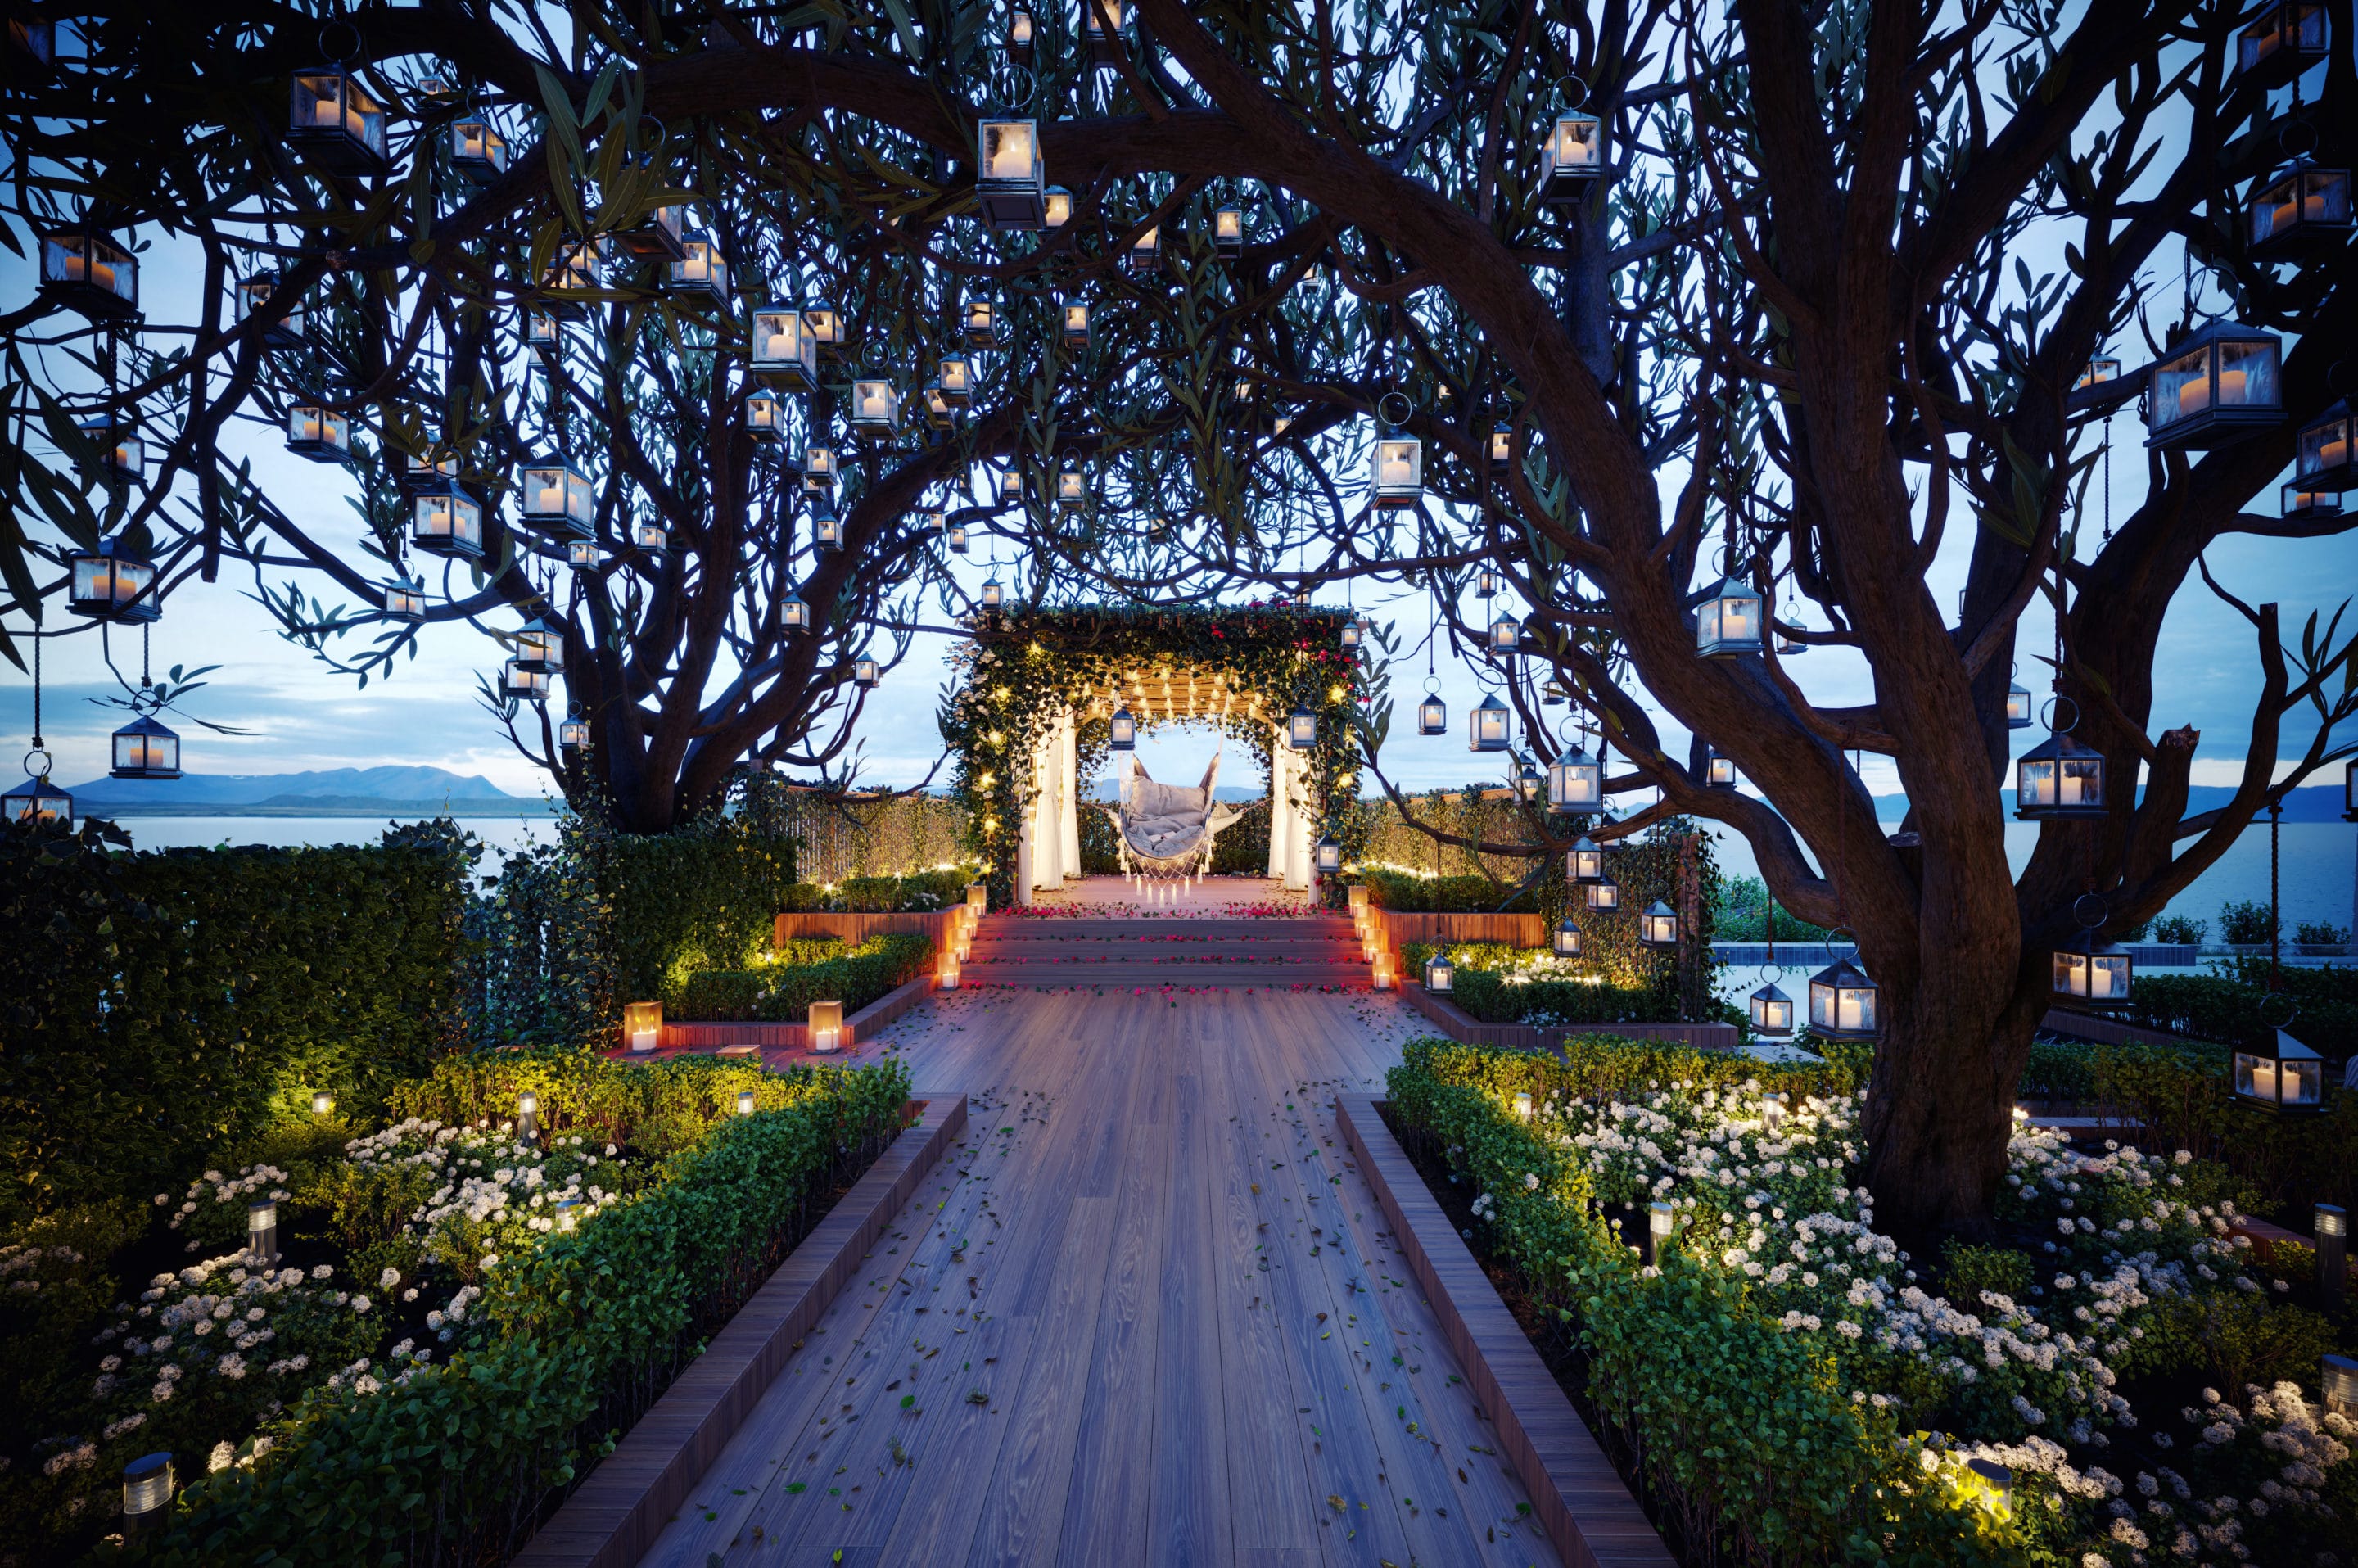
Final Renders
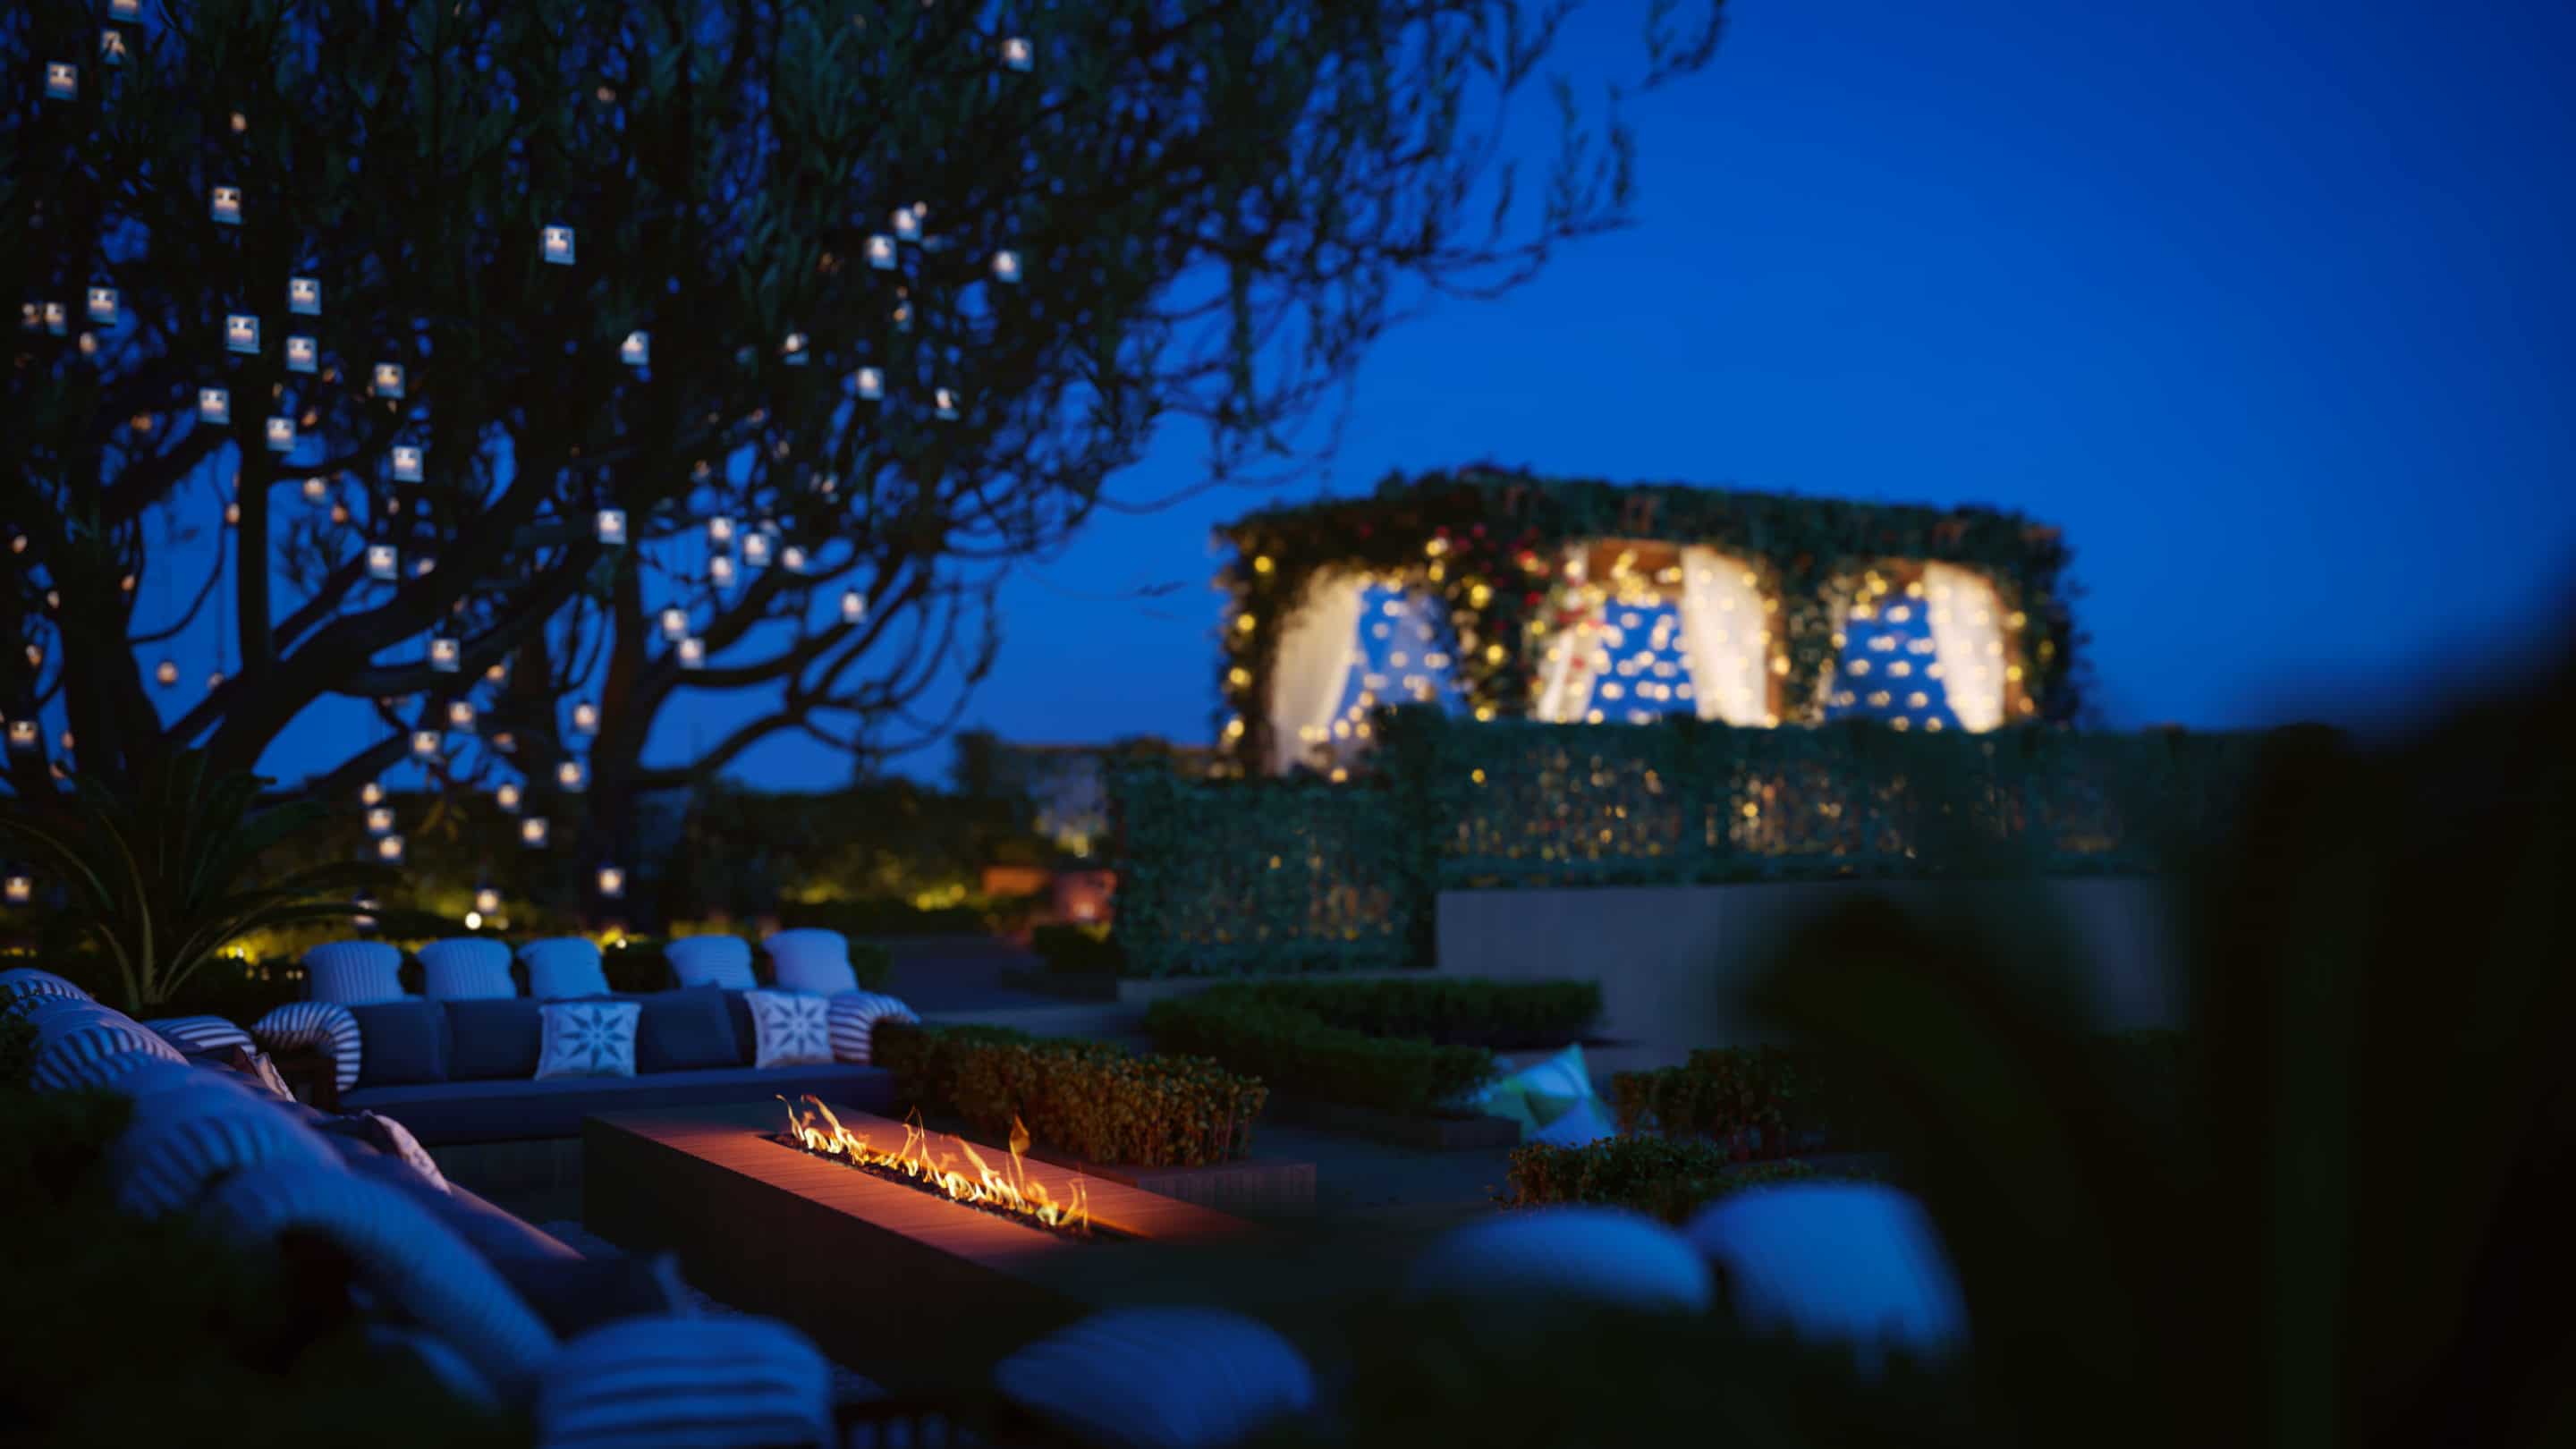
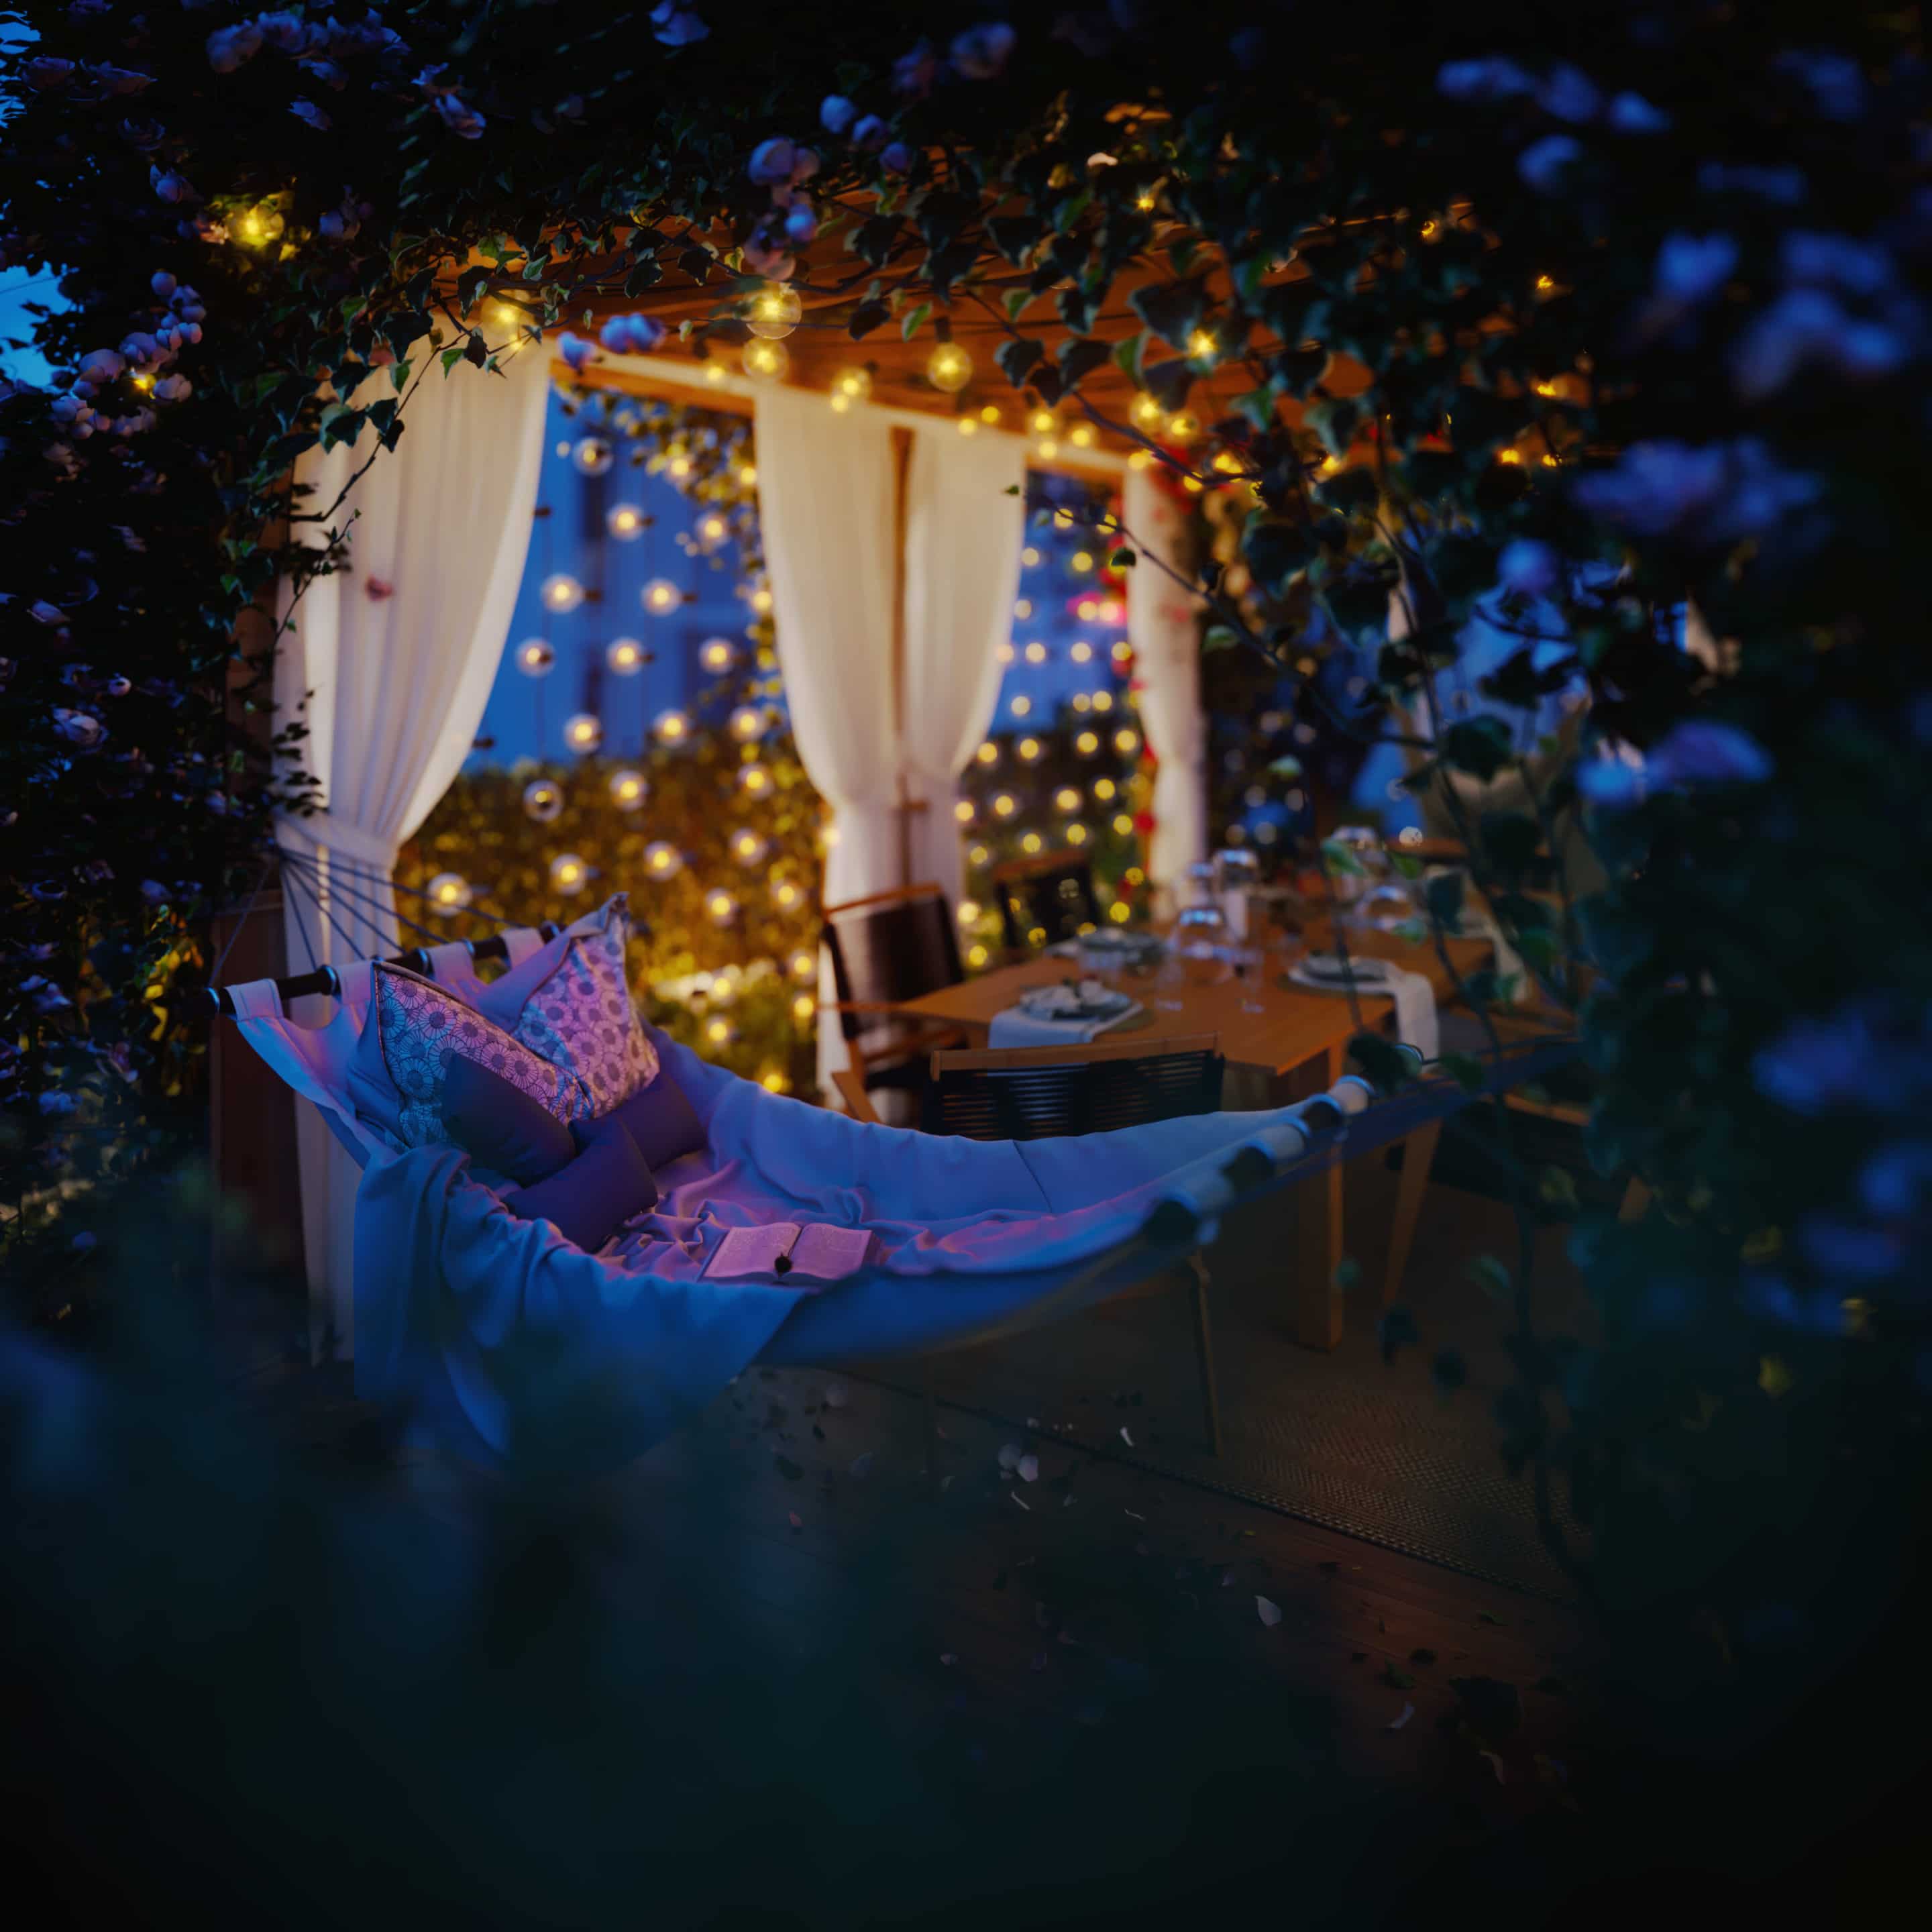

Name of Artwork Created: The Dream House
Artist: Hossein Yadollahpour – CG Artist , Architect
Links:

