


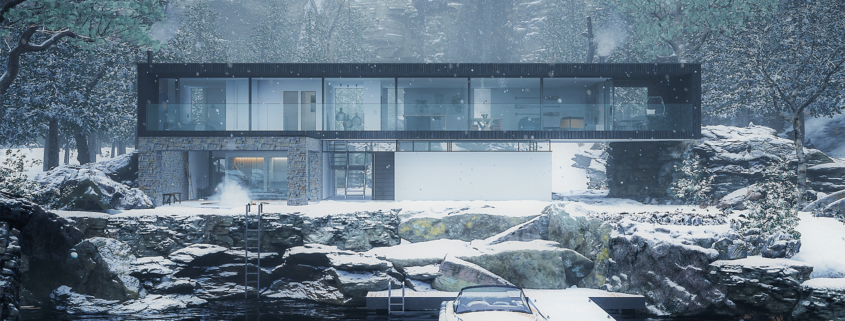
Quiet Reflections | UE4
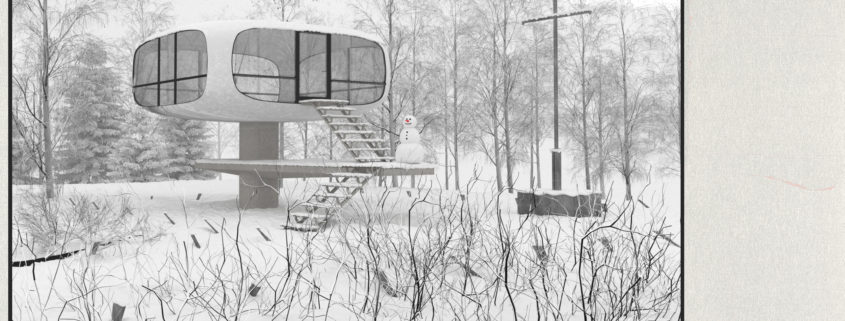
A personal project based on Hurst House by John Pardey Architects + Ström Architects. The aim of this project was to create a complete experience of a large home powered entirely by Unreal Engine 4. This scene offers compelling animation, interactive tour and full virtual reality support with HTC Vive, all running in real-time.
Interactive Tour Video :
The interactive tour in real-time…
Set in an expansive habitat; the user can switch between winter and spring seasons, explore the surrounding landscape and customise the design. The layout of the house has been adapted to suit the nature and views, this includes a home spa overlooking the misty lake. In addition to the animation and walkthrough, exploring this scene with HTC Vive offers the user a unique immersion and forms a powerful, personal connection with their dream home.
I believe real-time rendering and virtual reality are a key player in the future of architectural visualization (despite the Unreal Engine throwing every possible technical issue and bug my way during the project). I look forward to taking what I have learned here to improve rendering quality and workflow efficiency on my next scene.
Software Used: Maya, Substance Painter, Unreal Engine 4.