


Making of The Forest Balcony
VyD studio is a small studio with three members, based in Hanoi, Vietnam. Working in the architectural visualization field for five years. All team members are architects and interior designers, and today they share a bit behind the amazing set of images shared on the blog showcase this week – “The Forest Balcony”.
Introduction
Hello!
It is a great honor for us to present to you the recent work that we have done. Today I’m sharing with everyone “The Forest Balcony” MAKING-OF on this blog.
I hope you’ll enjoy it!
“The Forest Balcony” is the result of our self-practice. We aimed at creating emotional photos and photorealistic ArchViz using knowledge and experience that we’ve gained previously. Timing is often considered to be the most challenging part, but in this work, we have figured out the way to do that by combining the usage of 3dsMax, Sketchup, Corona Renderer, Bitmap2material and Substance Painter (and some minor part using Photoshop).
References
We only have two references for this work. The first one is a picture searched on Google and the second one is from Vietnamese artist MyoZuko.


3D modeling
We’ve set the units to millimeters – the most common measurement used in Vietnam.
Our first step is modeling the main house in Sketchup, which is a great and simple tool for modeling basic 3D architectural models, and we often feel comfortable when we use it at this stage.
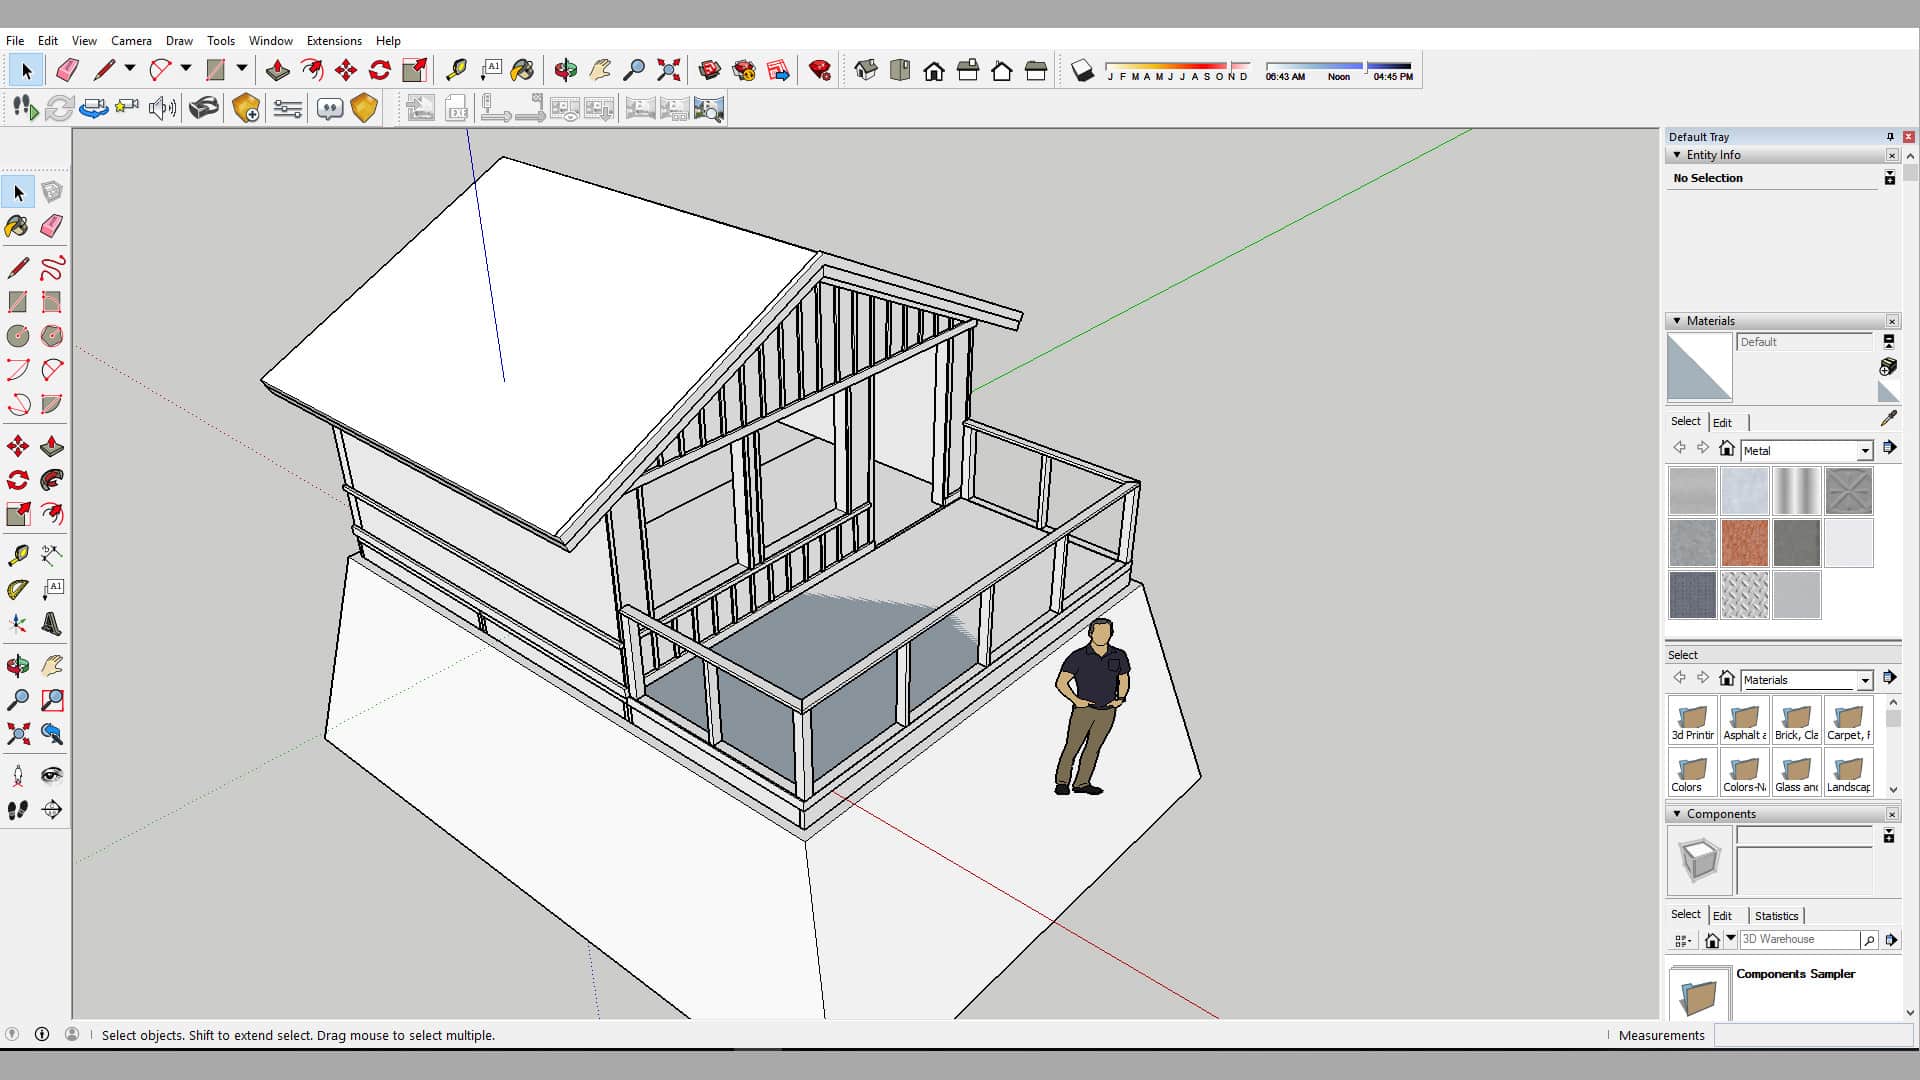
Then, we used 3dsMax for more detailed modeling such as balcony railing, wood planks floor, wires, steel poles, hillside, etc.

Otherwise, making use of 3d model libraries on the Internet is one way to save time. We used door and window models from CGAxis.

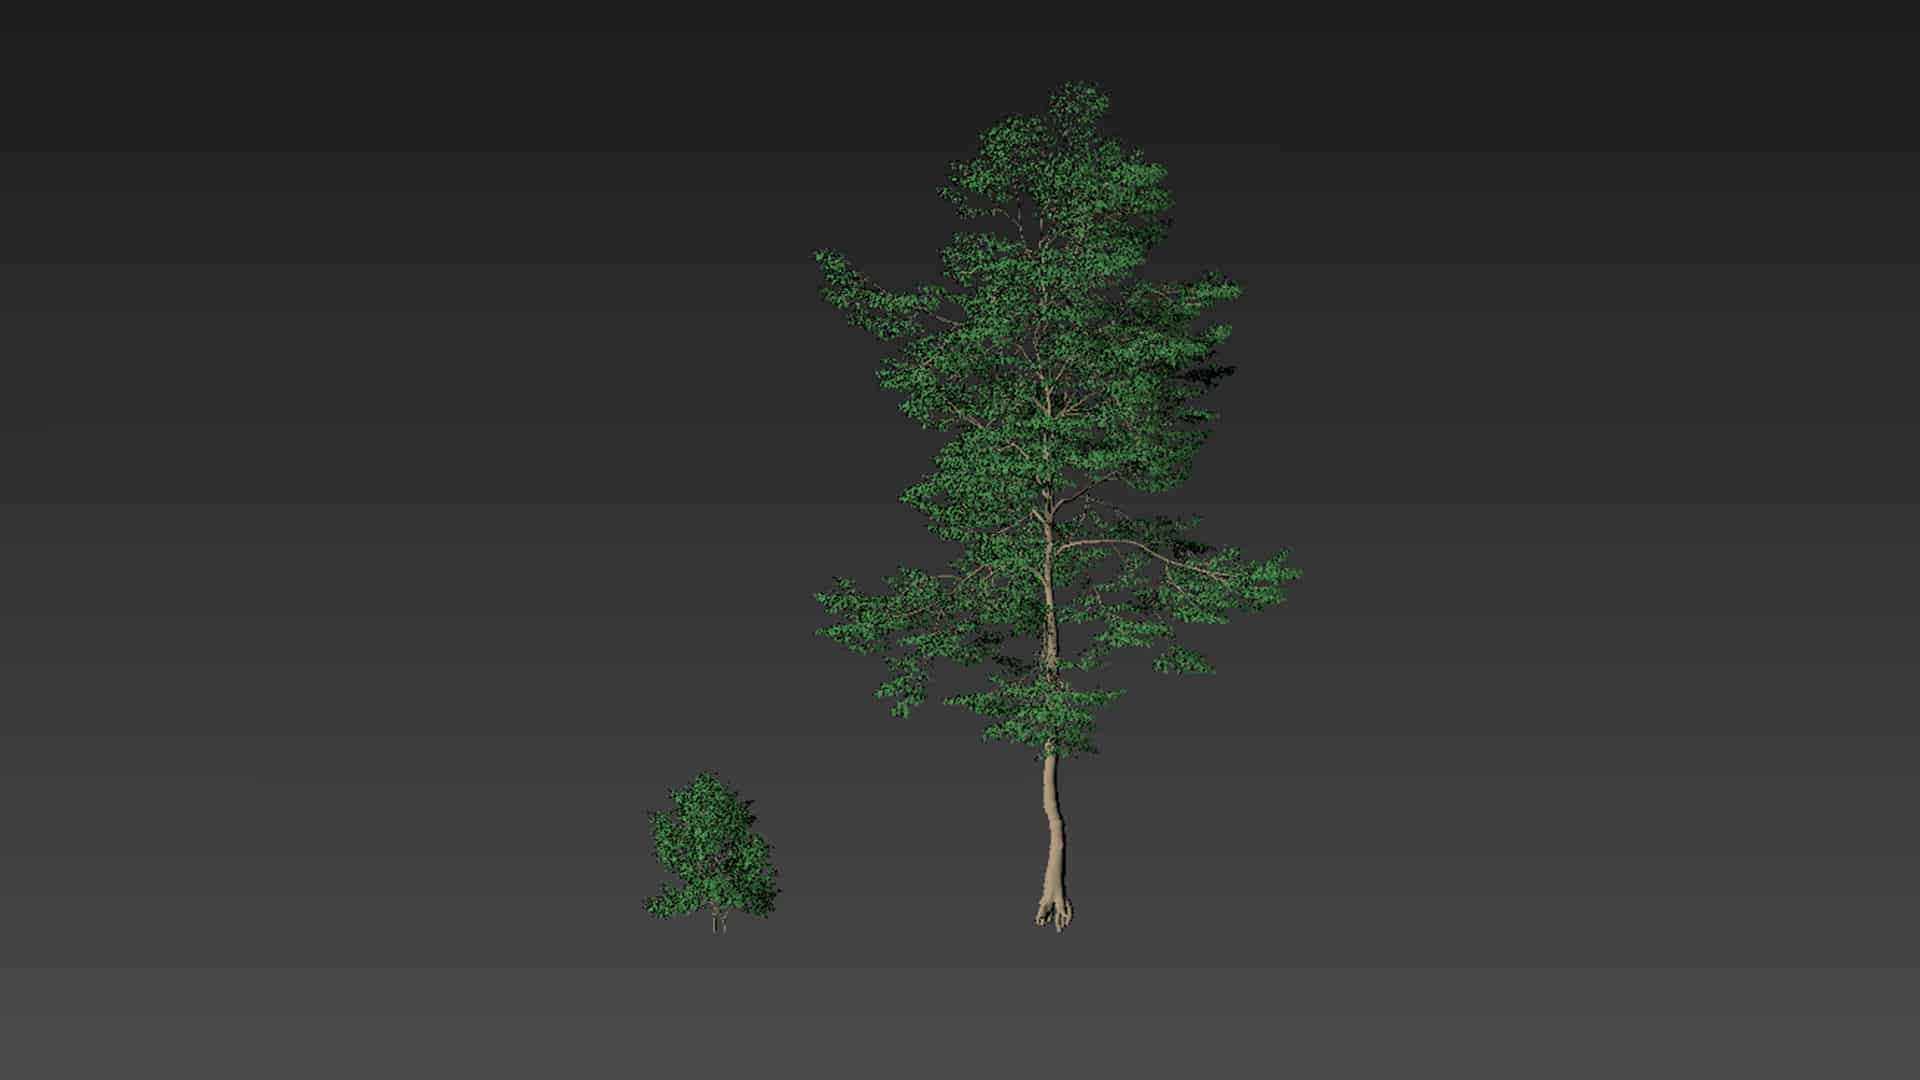
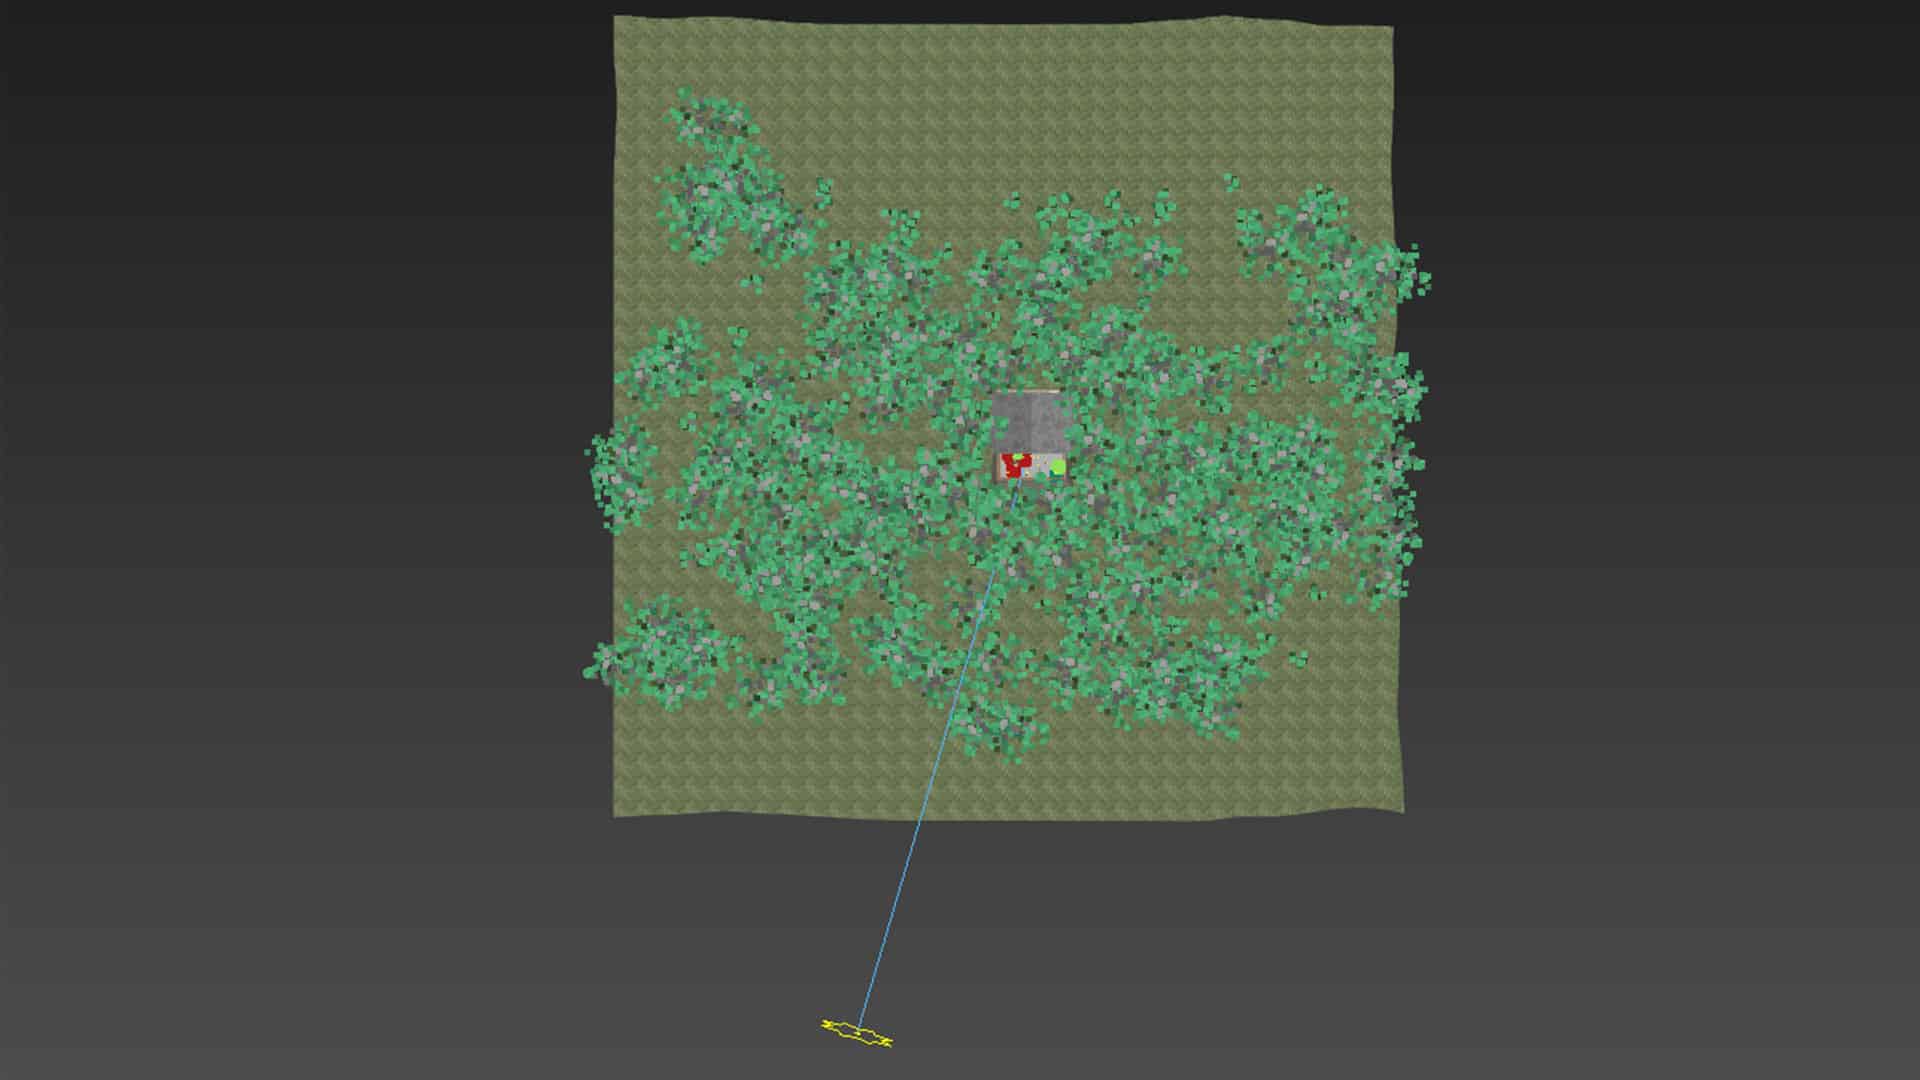
The foliage 3d models are from Maxtree. We only used two tree models for this scene because my computer hardware was a little bit weak.
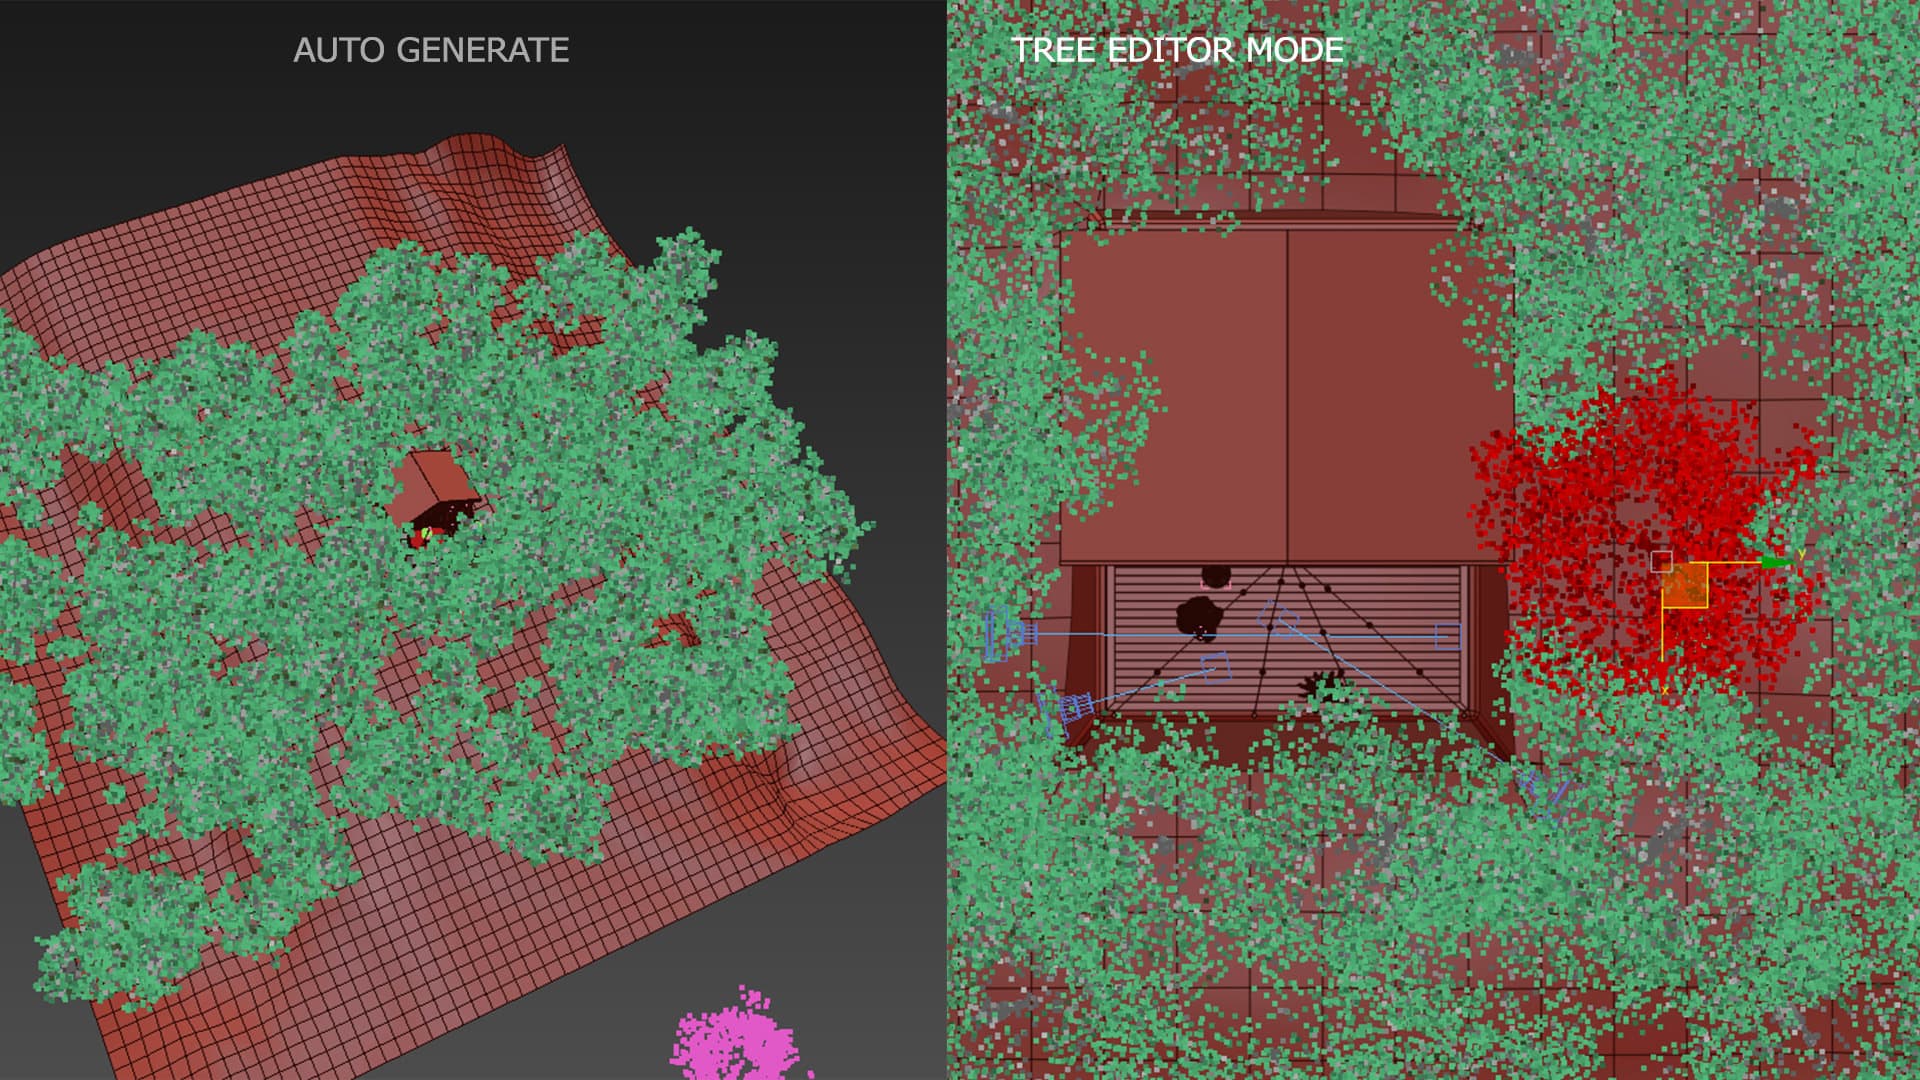
I made the forest by using Forest Pack plug-in from iToo Software. Firstly we used the Auto Generate mode to make trees and then we used Tree Editor Mode for arranging each foliage to be perfect with the camera views.
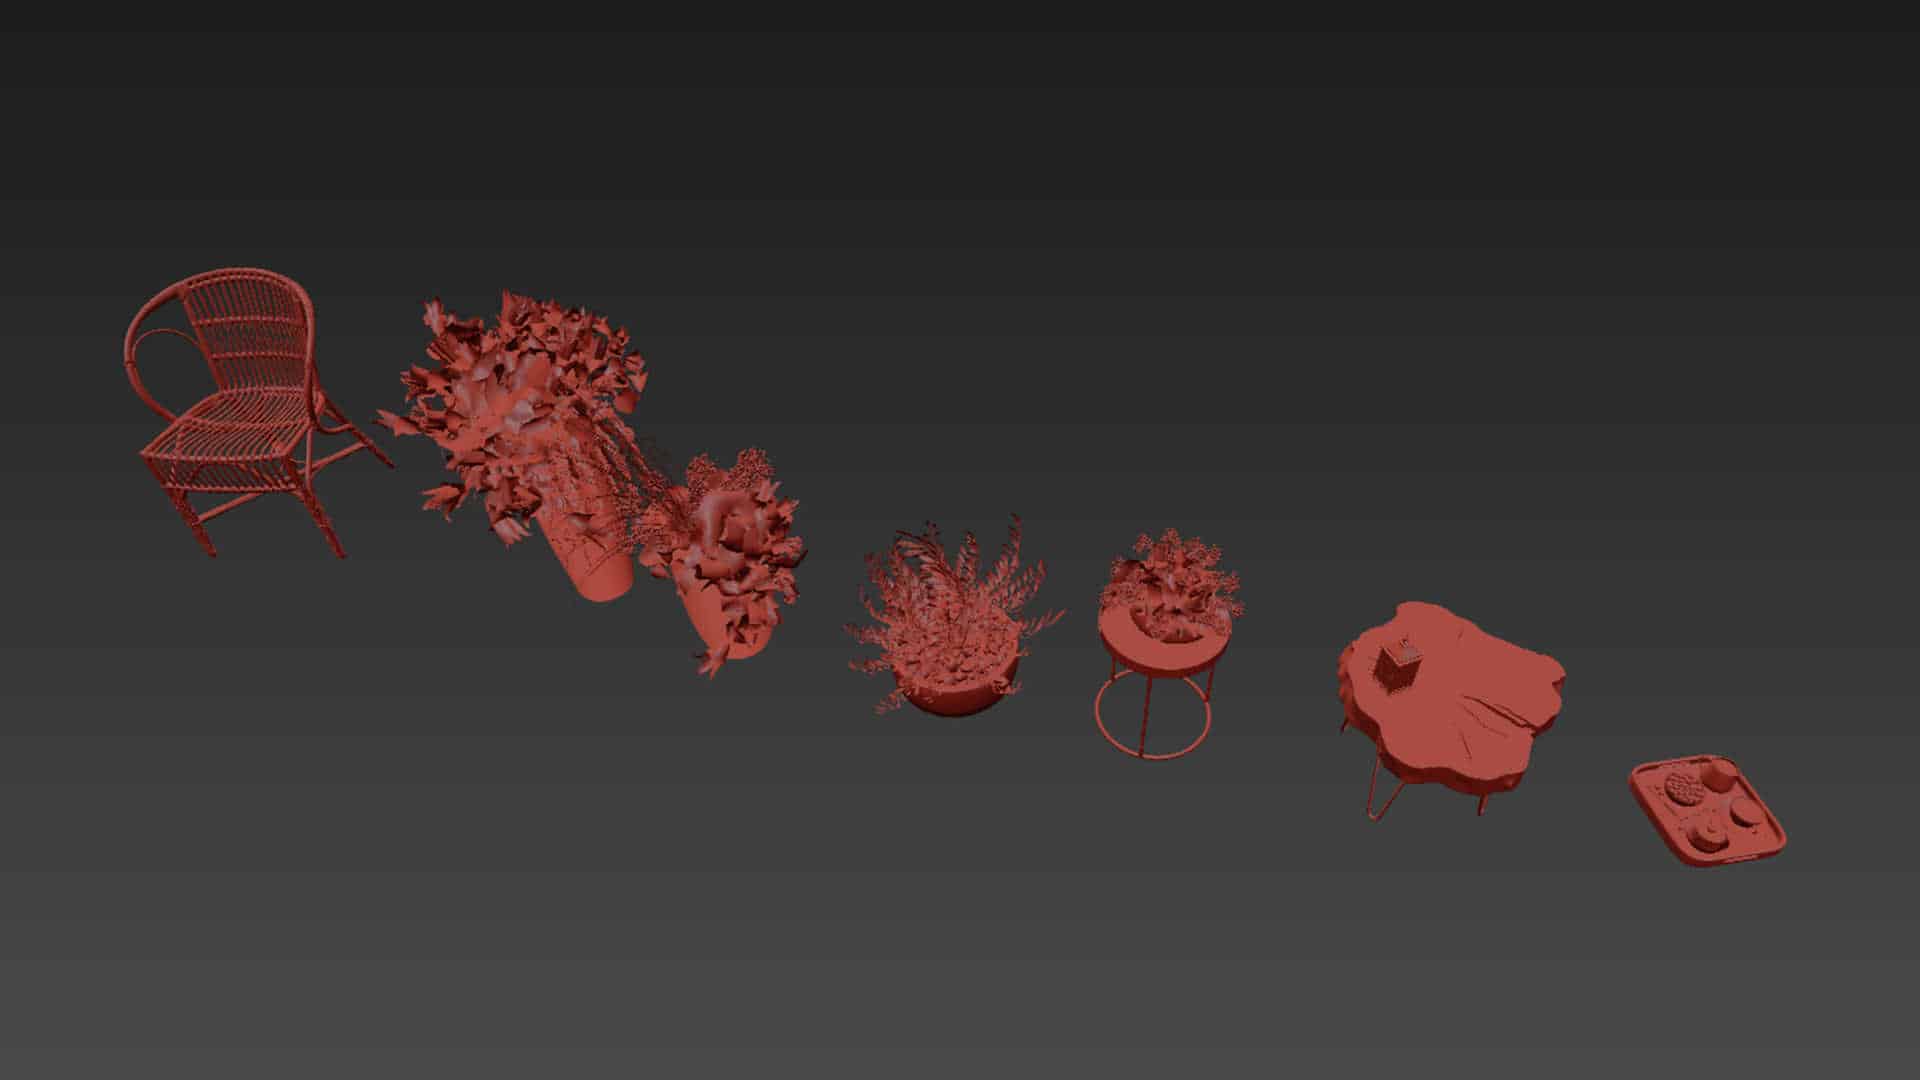
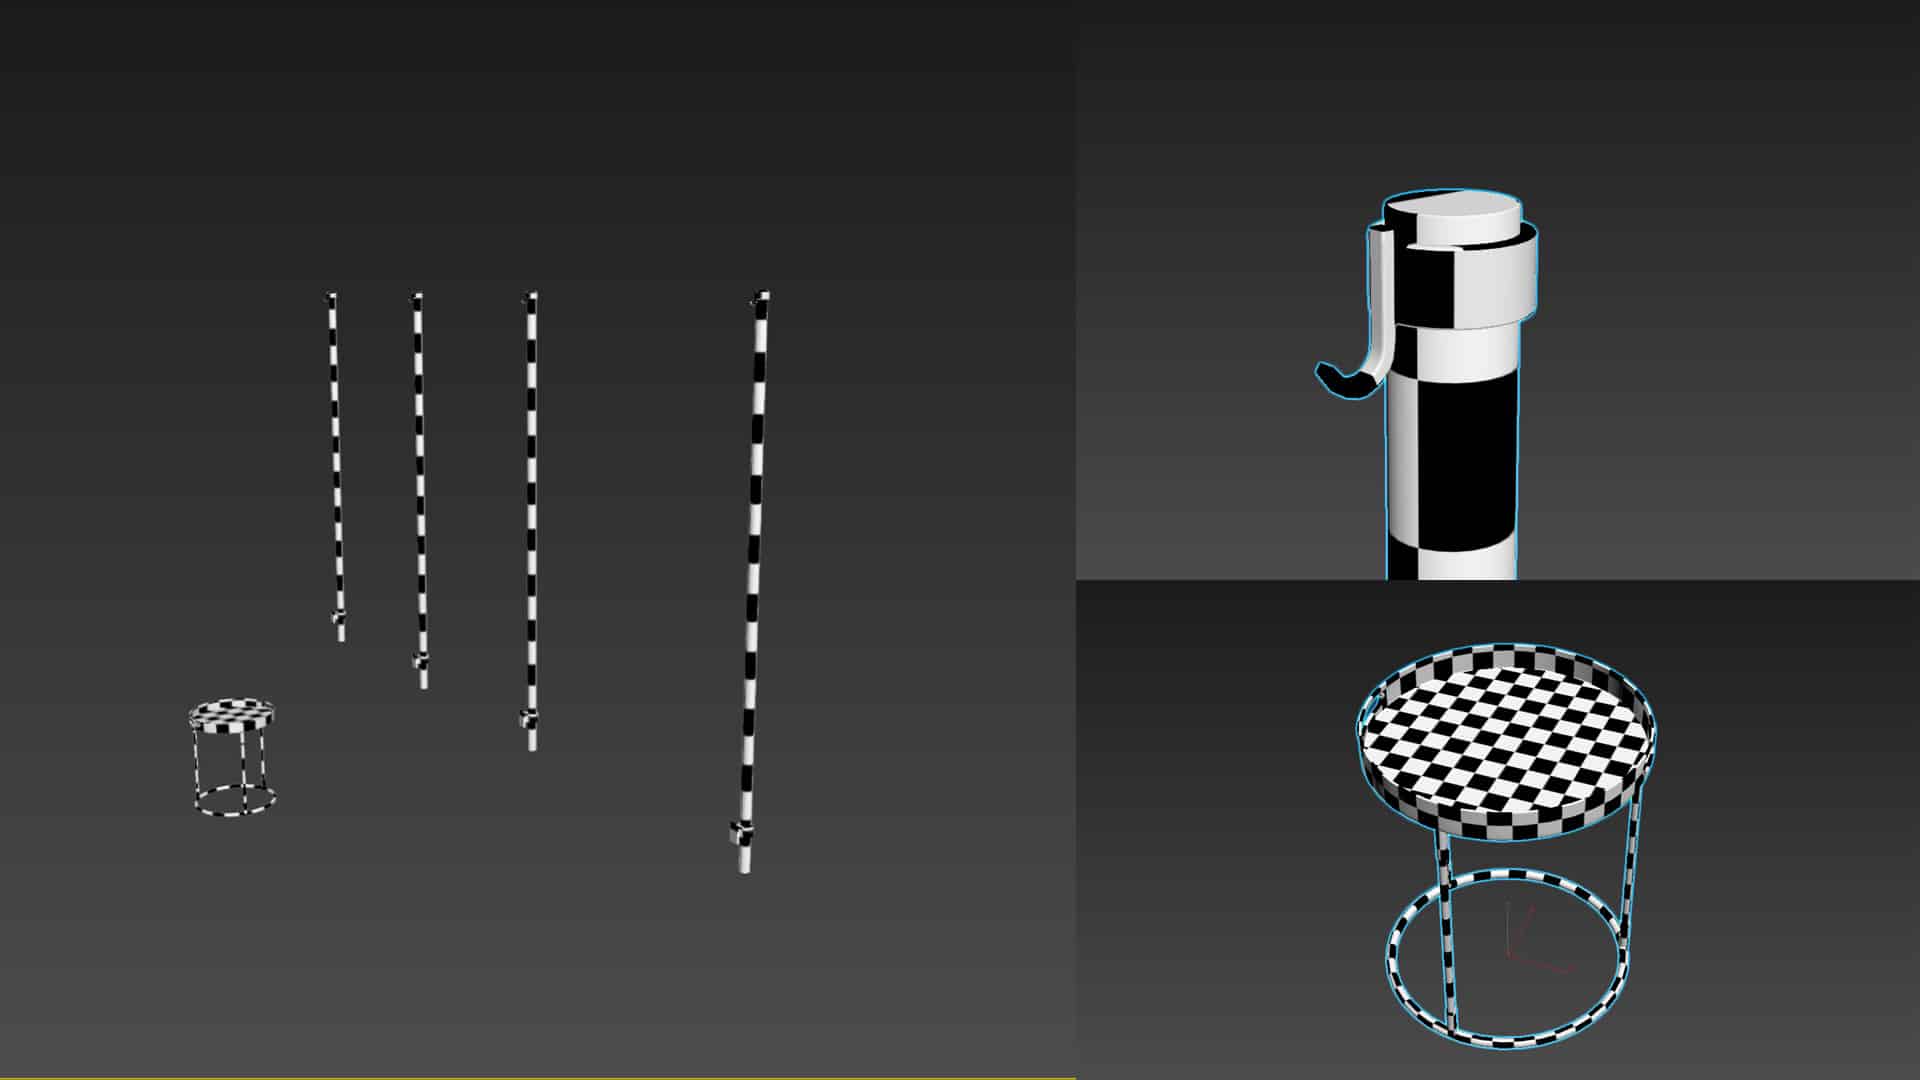
All of the remaining models such as table, chairs and decorative objects, we downloaded from 3Dsky.org with the tremendous available materials and textures.
Texture & Materials
In our opinion, the most critical thing for photorealistic ArchViz is realistic materials, so that we have tried our best to use PBR textures in every work.
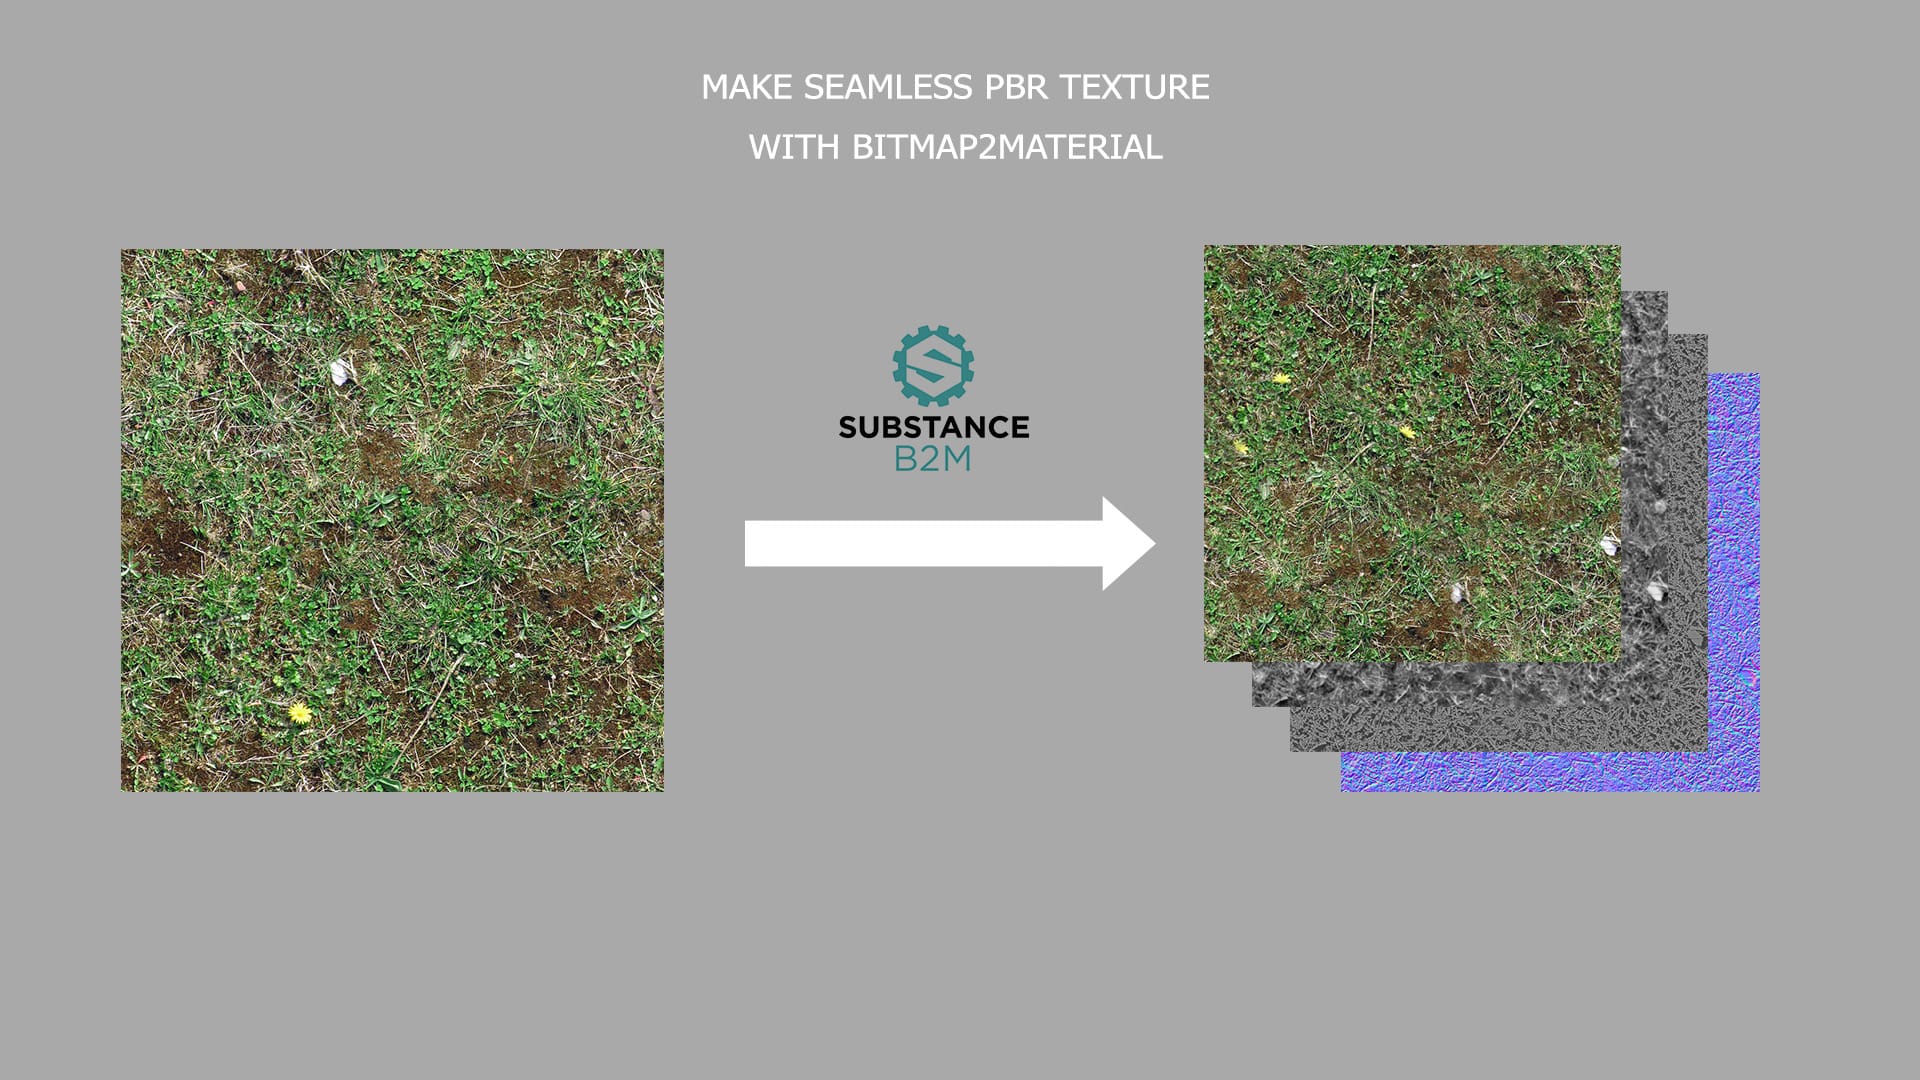
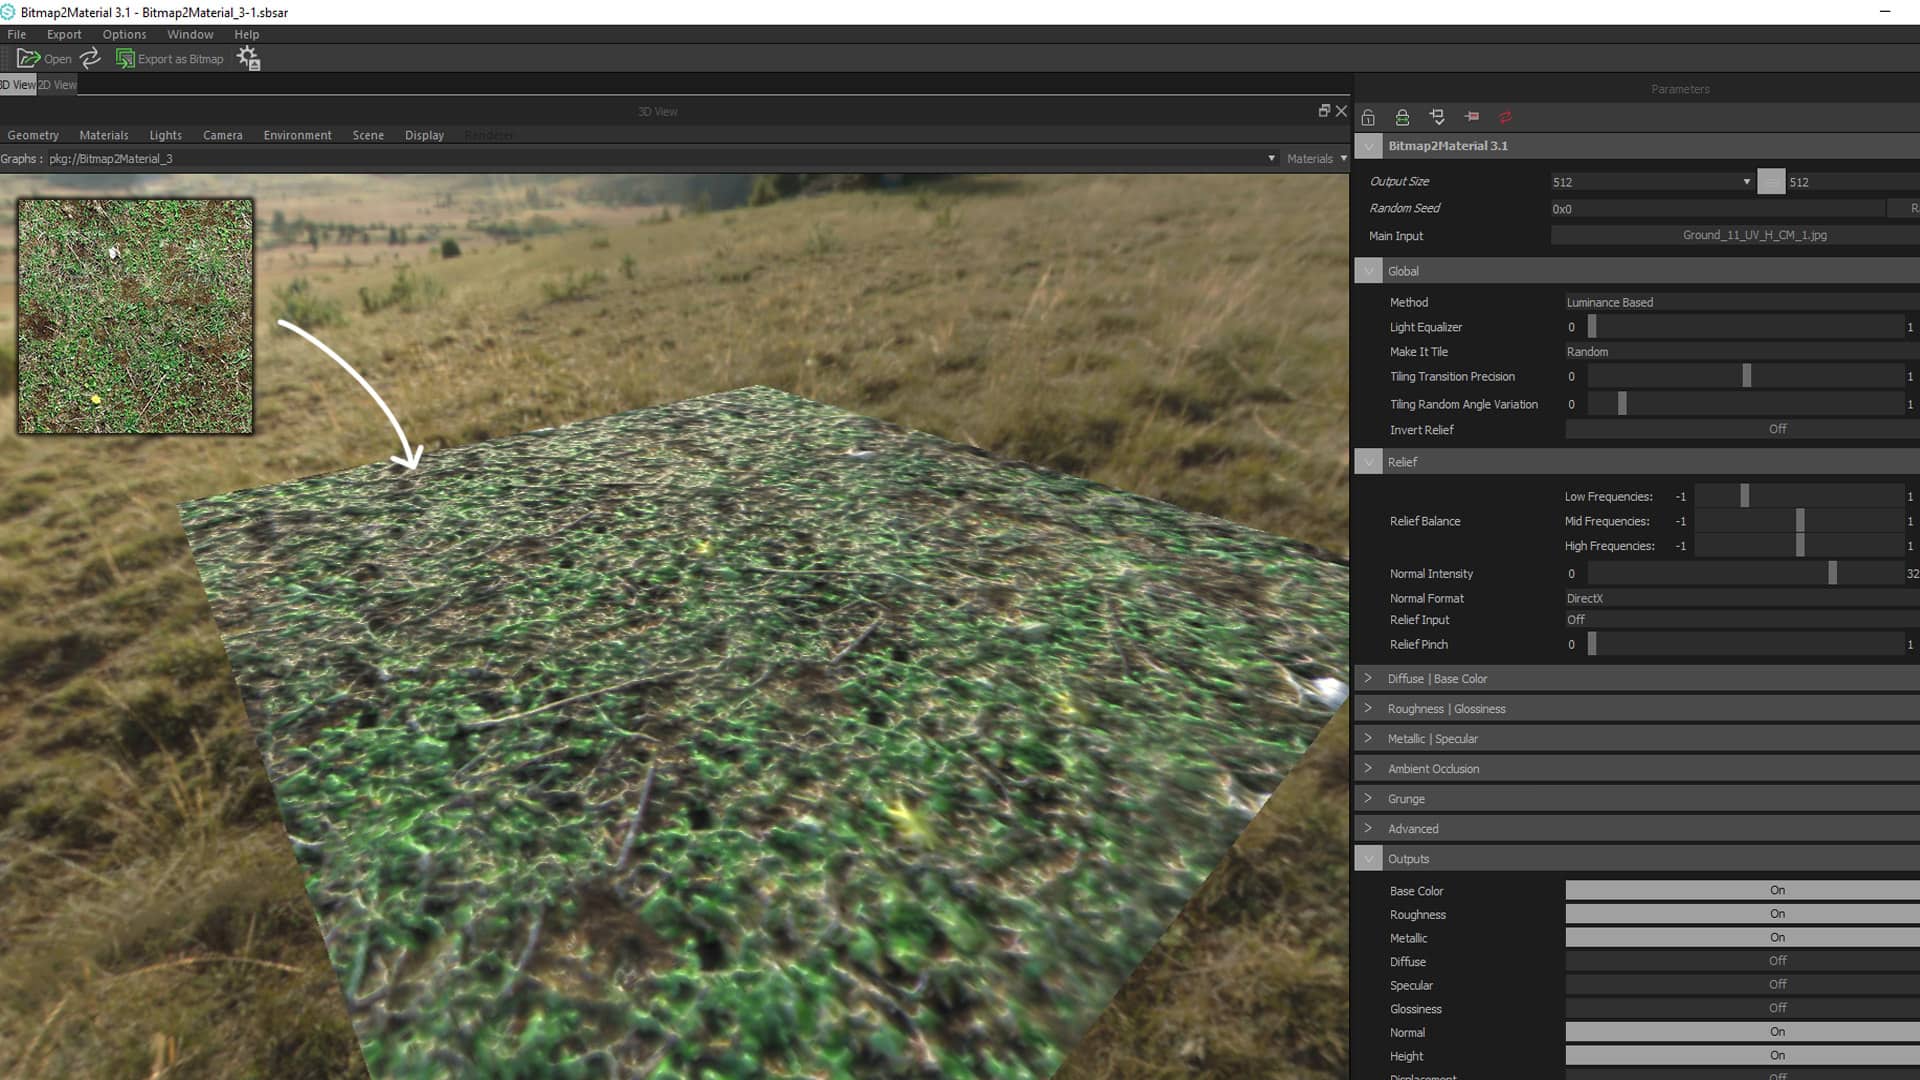
Some parts of the material we took from poliigon.com and the remaining ones we created with Bitmap2material and Substance Painter.

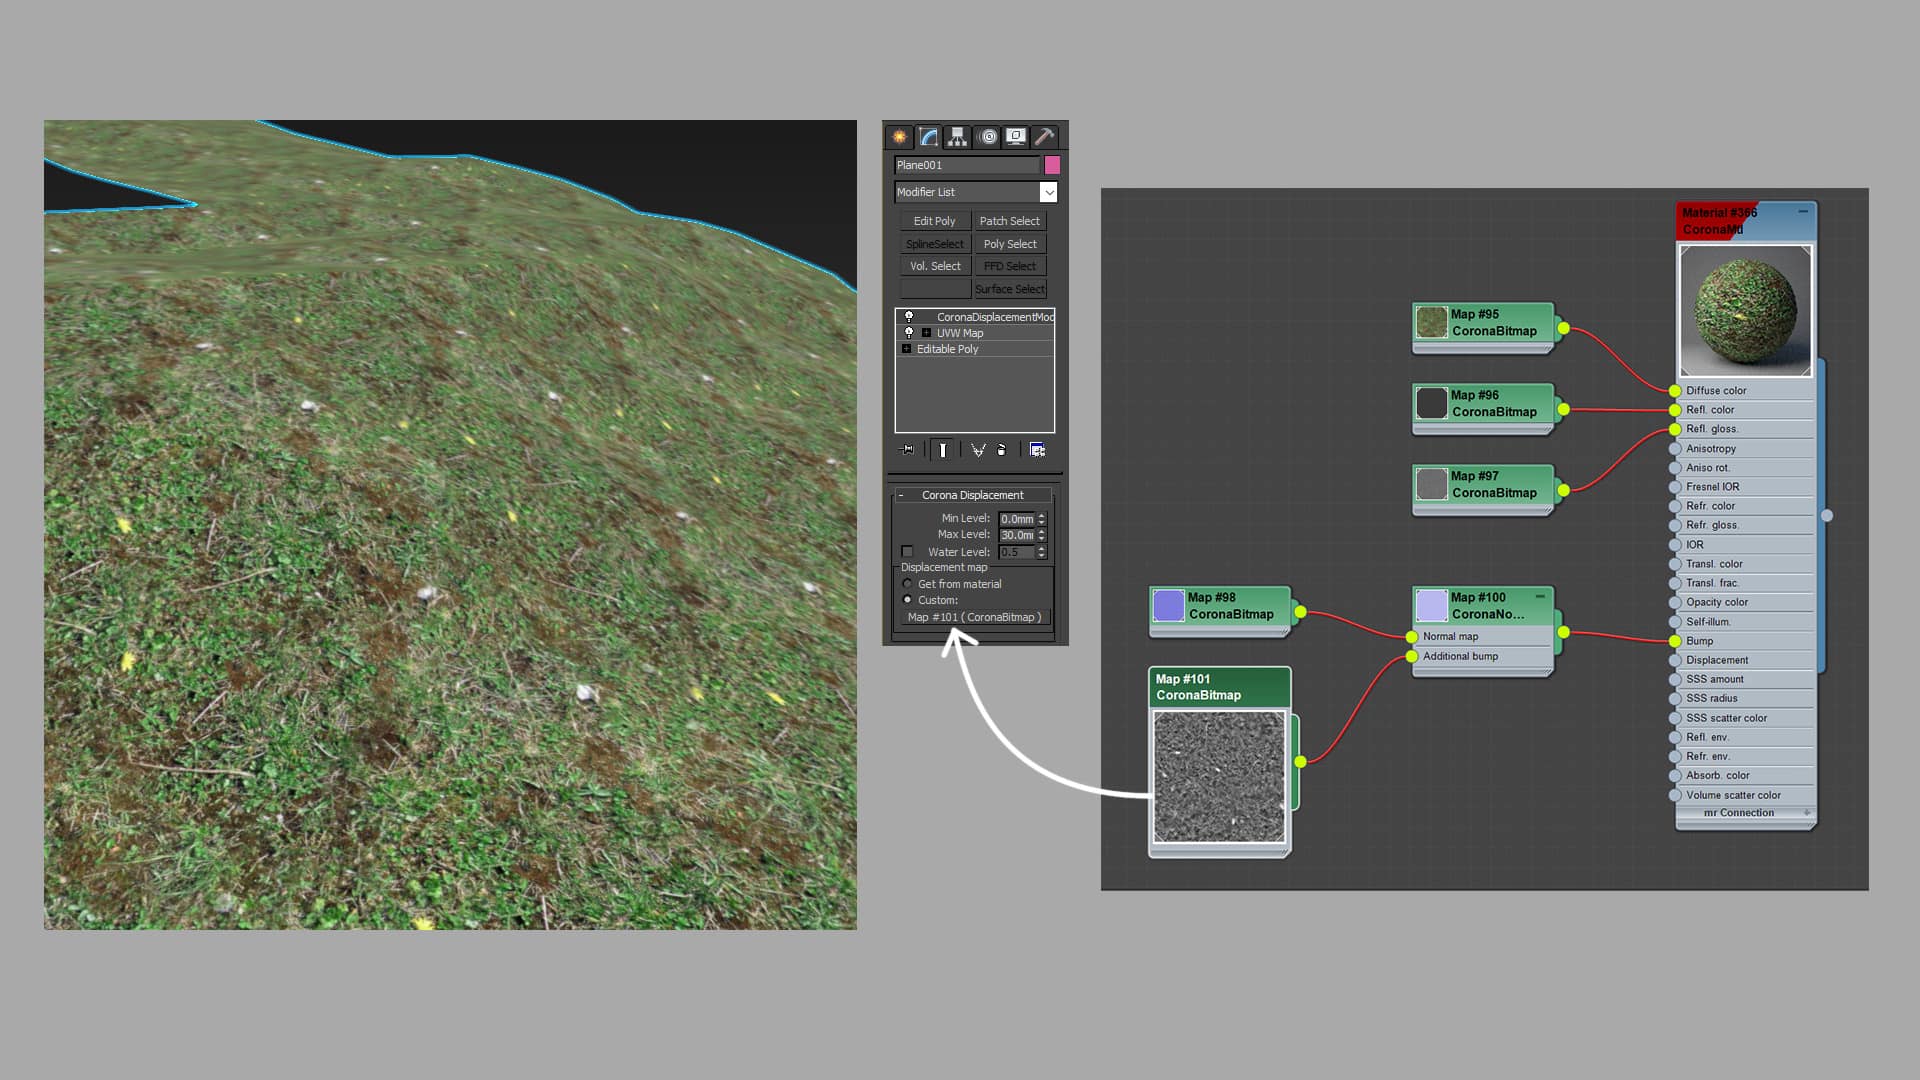
Besides, the physical properties of the exterior wood material were made from our most significant effort to make them as detailed as possible by using Ambient Occlusion map including Corona Renderer combined with a dirt map on the Internet and some smoking maps.
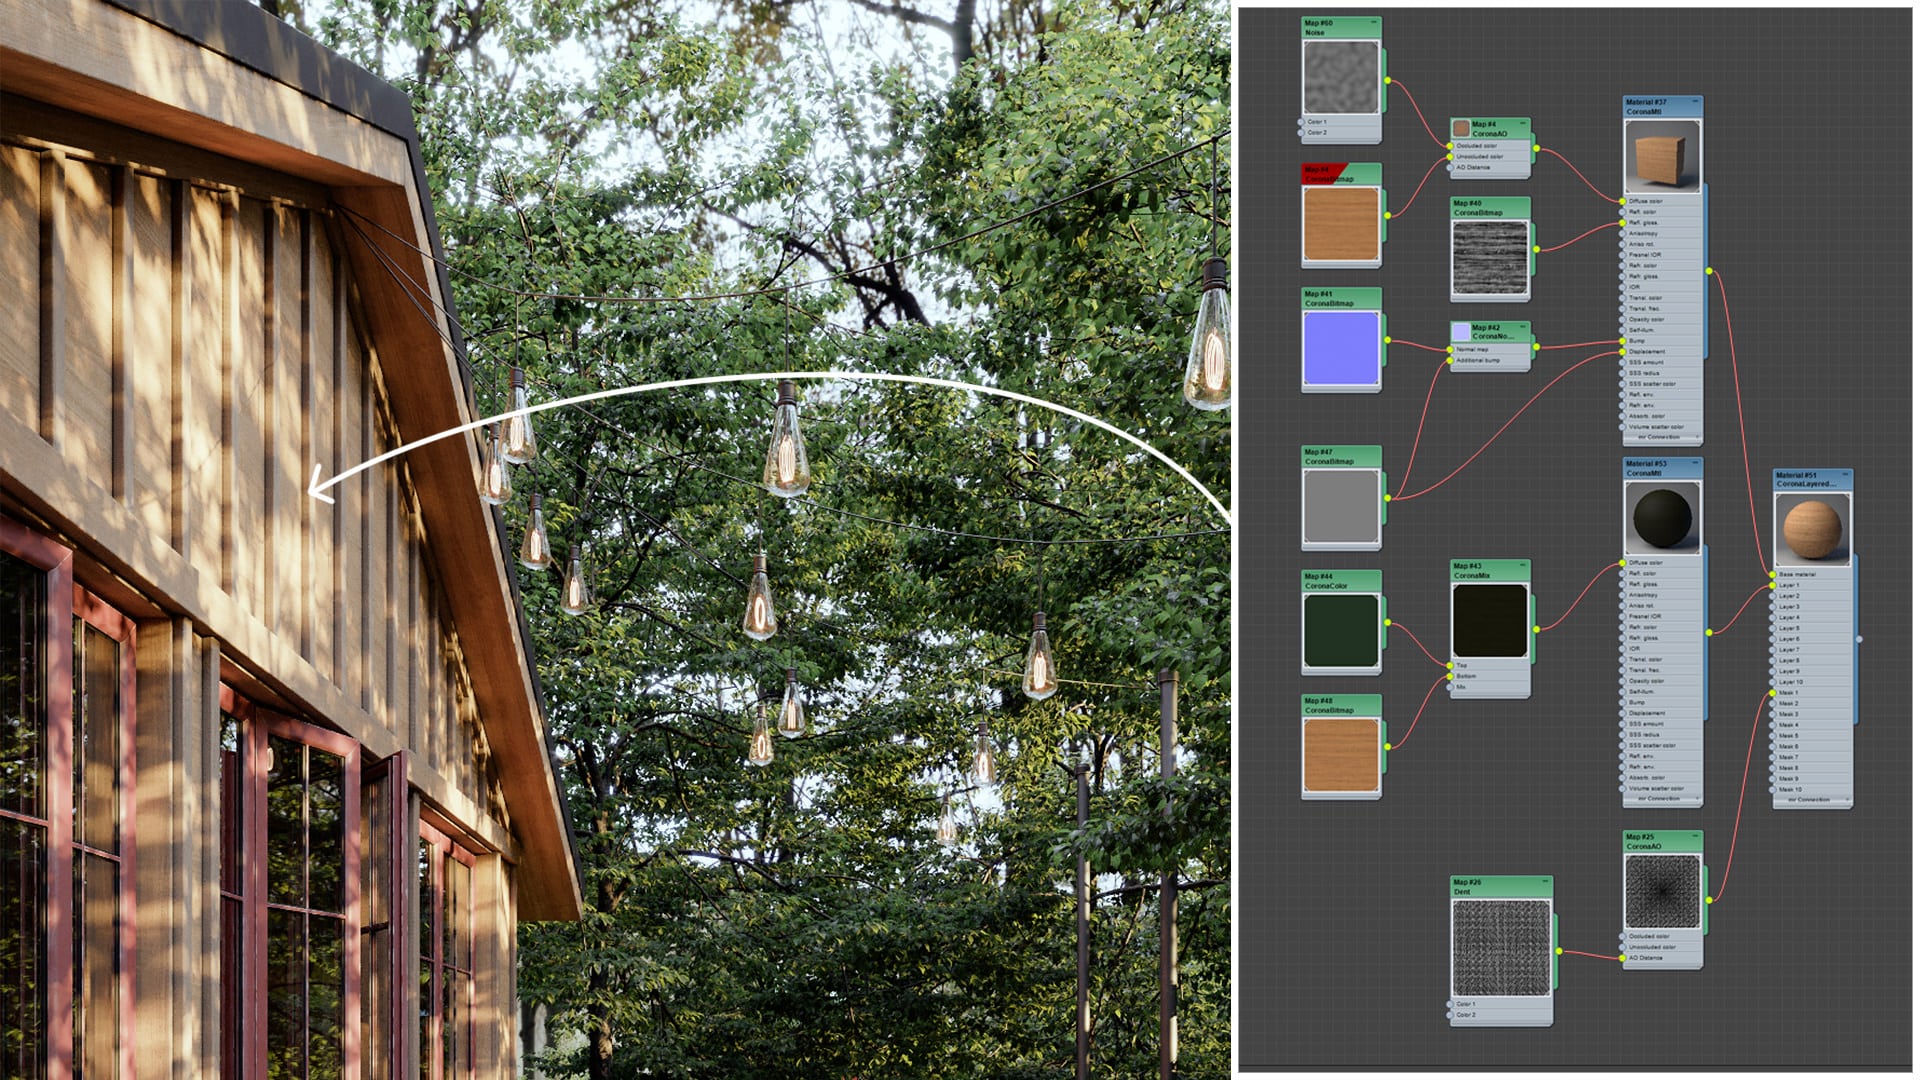
Moreover, we did the same process with the materials of windows and doors.

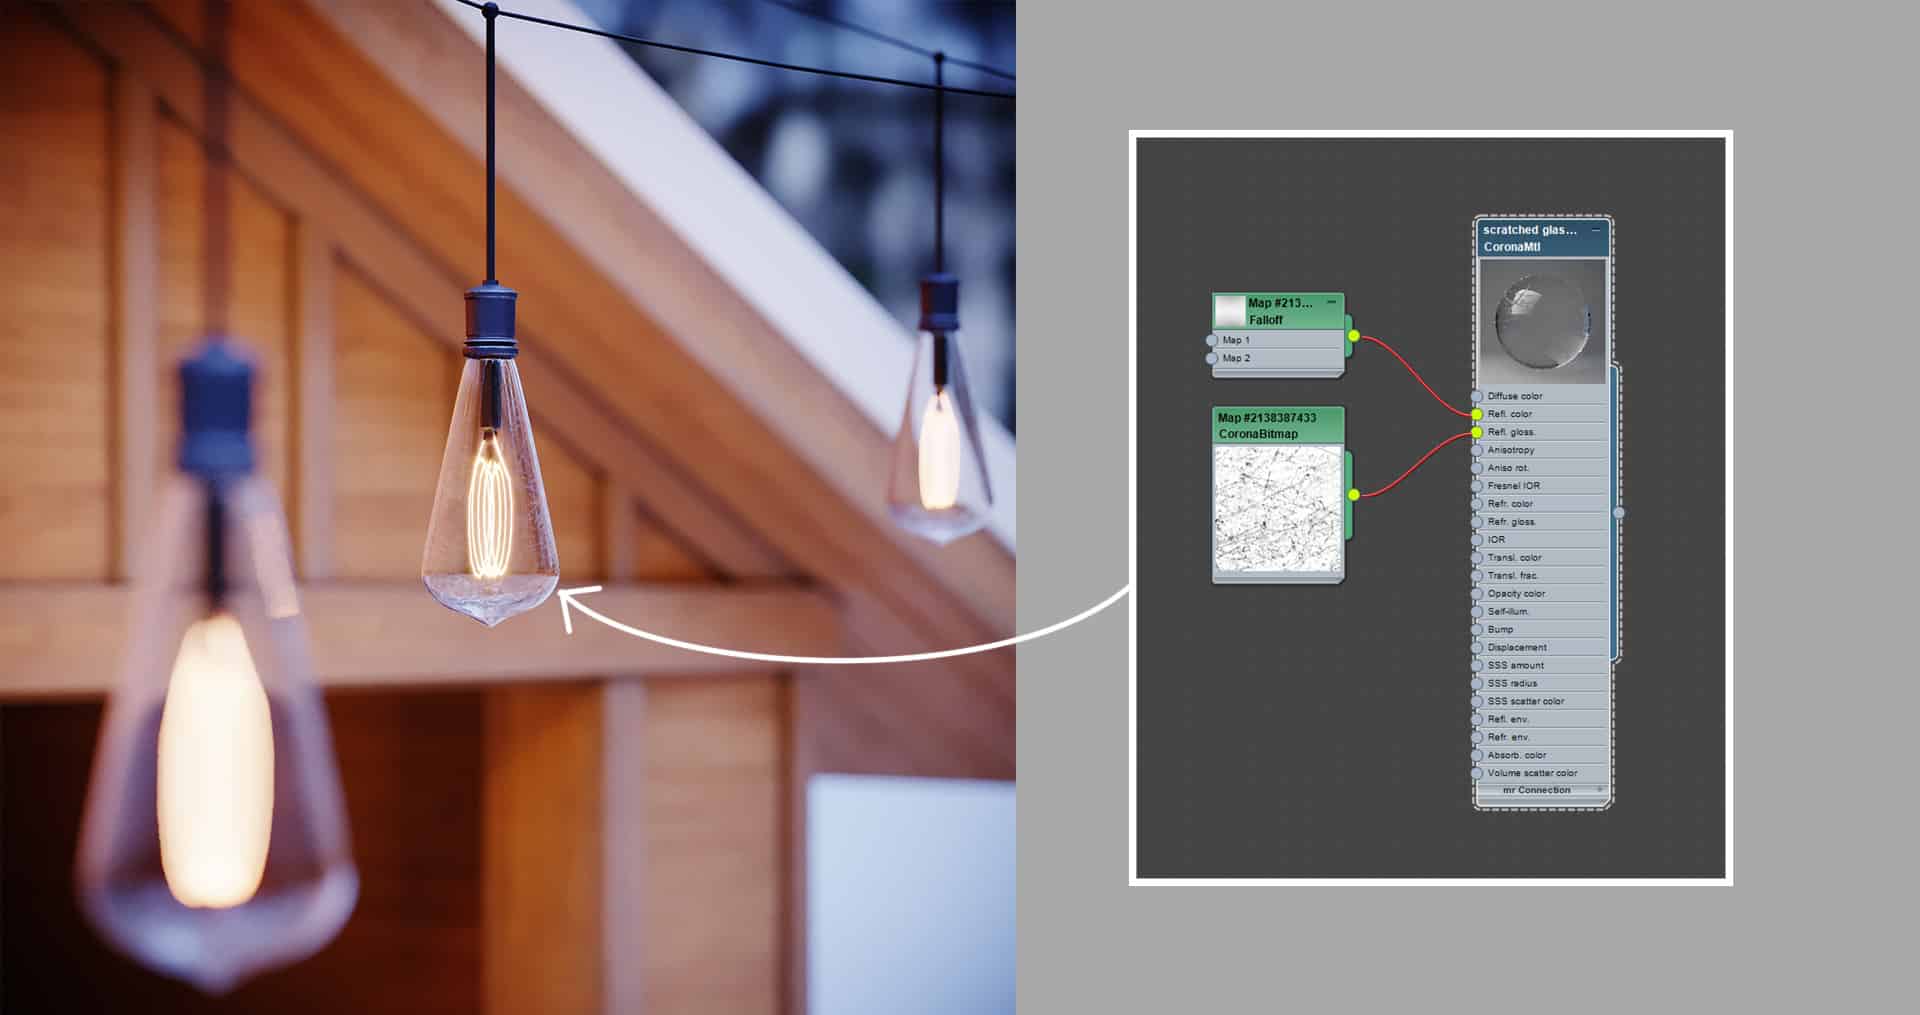
For adding more emotions and details, we did the UnwrapUVW on some models and brought them to Substance Painter to make their materials. Substance Painter and its generator tools are extraordinary in making the most natural materials.

Moreover, we tried to relax with some materials with their Glossiness channels.
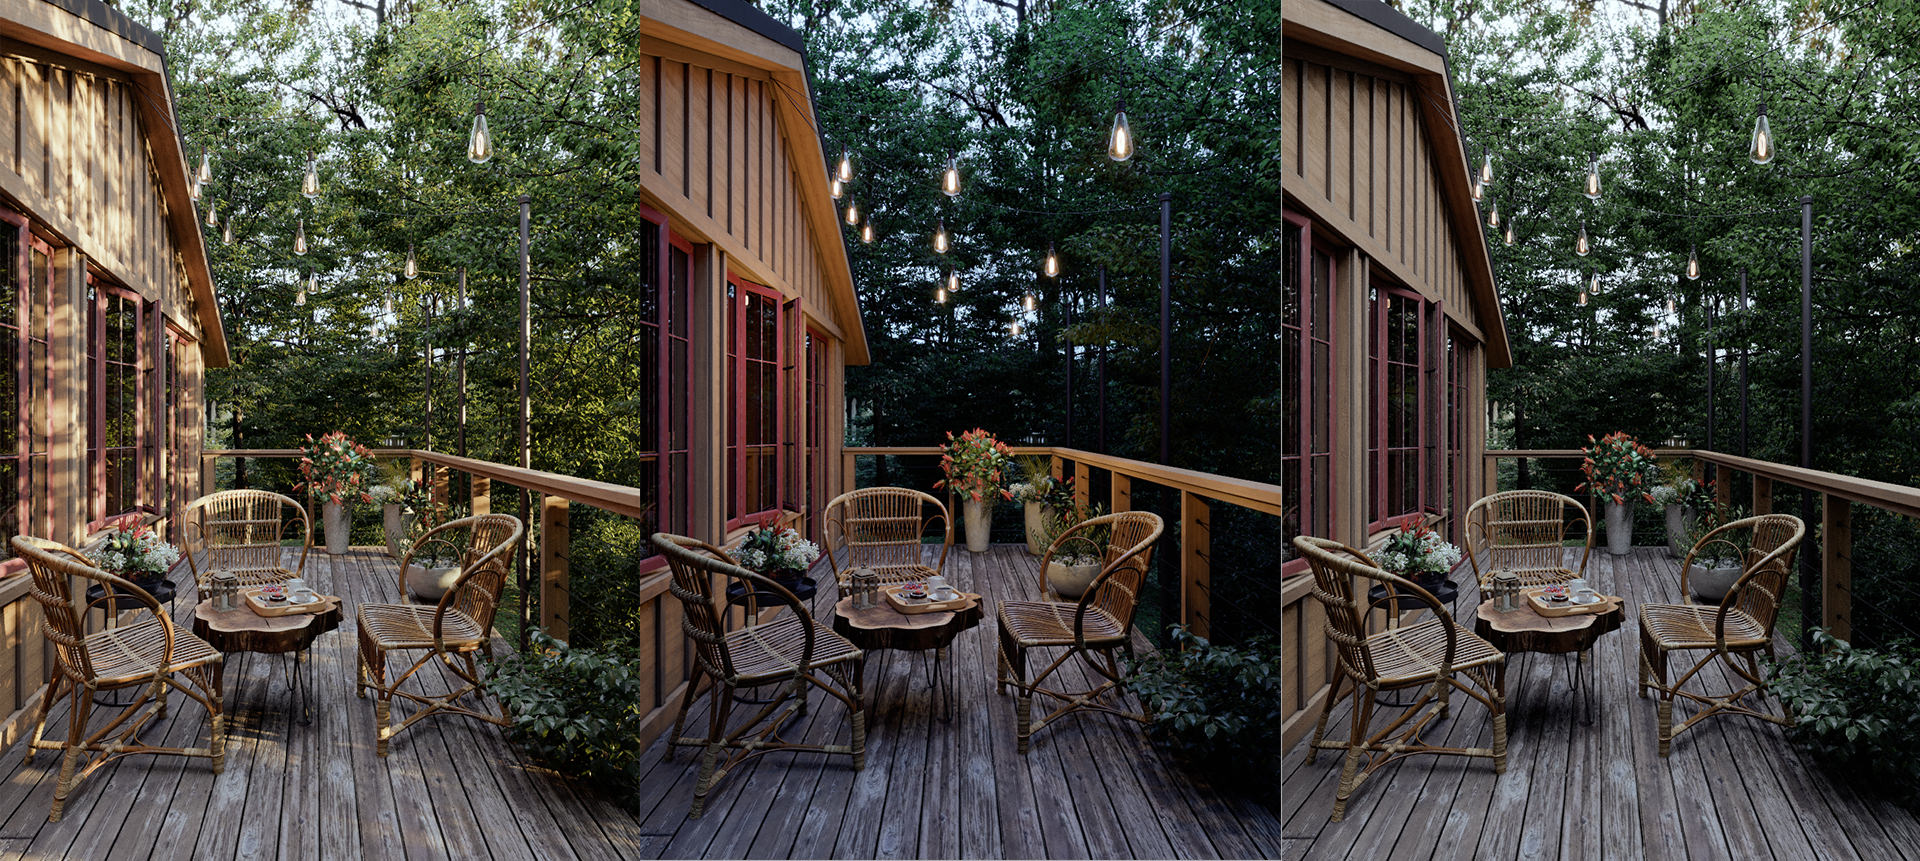
Lighting
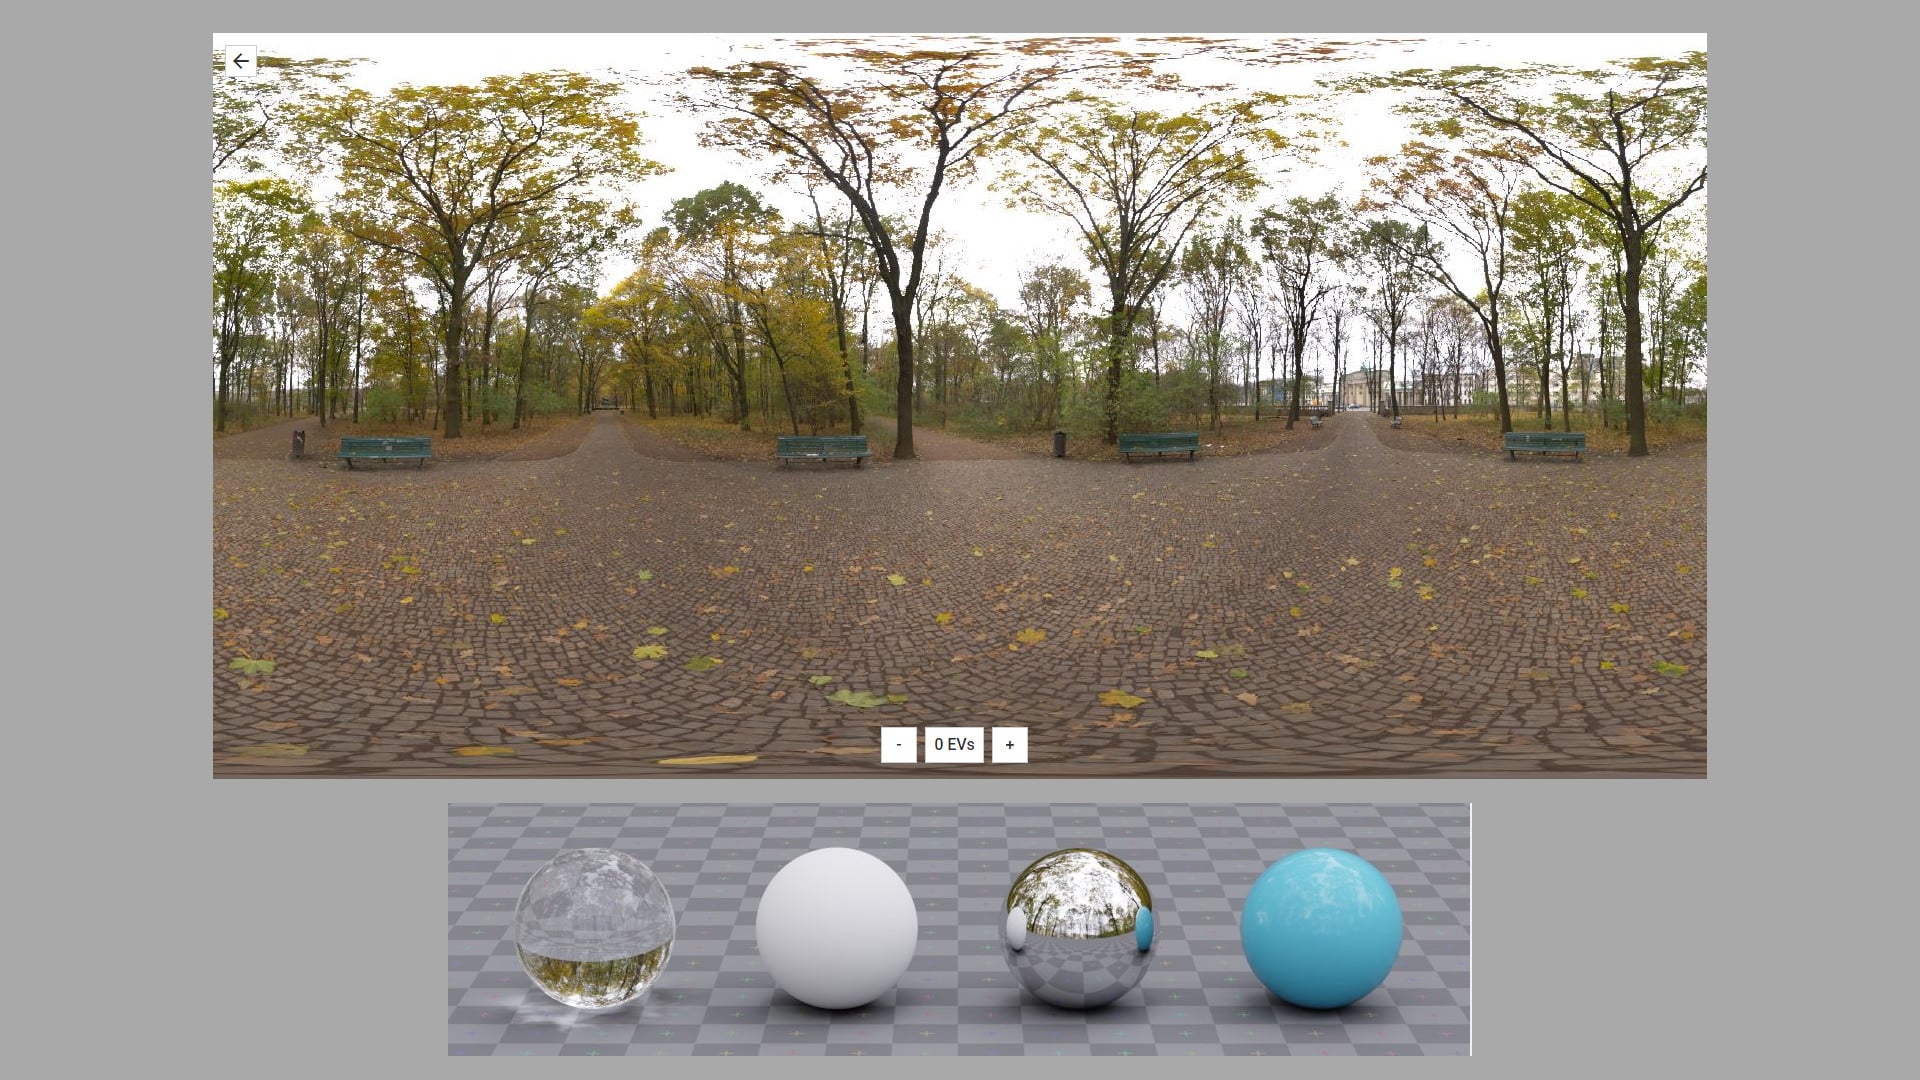
Lighting is the most exciting moment of the whole working process. In most of my work, I have tried my best to simplify the lighting and also in this scene. I just used HDRI and Corona Renderer Sun to complete this step.
By the way, I download HDRI from HDRIheaven.com (2k for speed test rendering and 8k for final rendering).
All the lighting figures were set at default, and we adjusted them with Corona Renderer Lightmix.
You can see that I can make plenty of lighting concepts by using this excellent tool.
Rendering & Postproduction
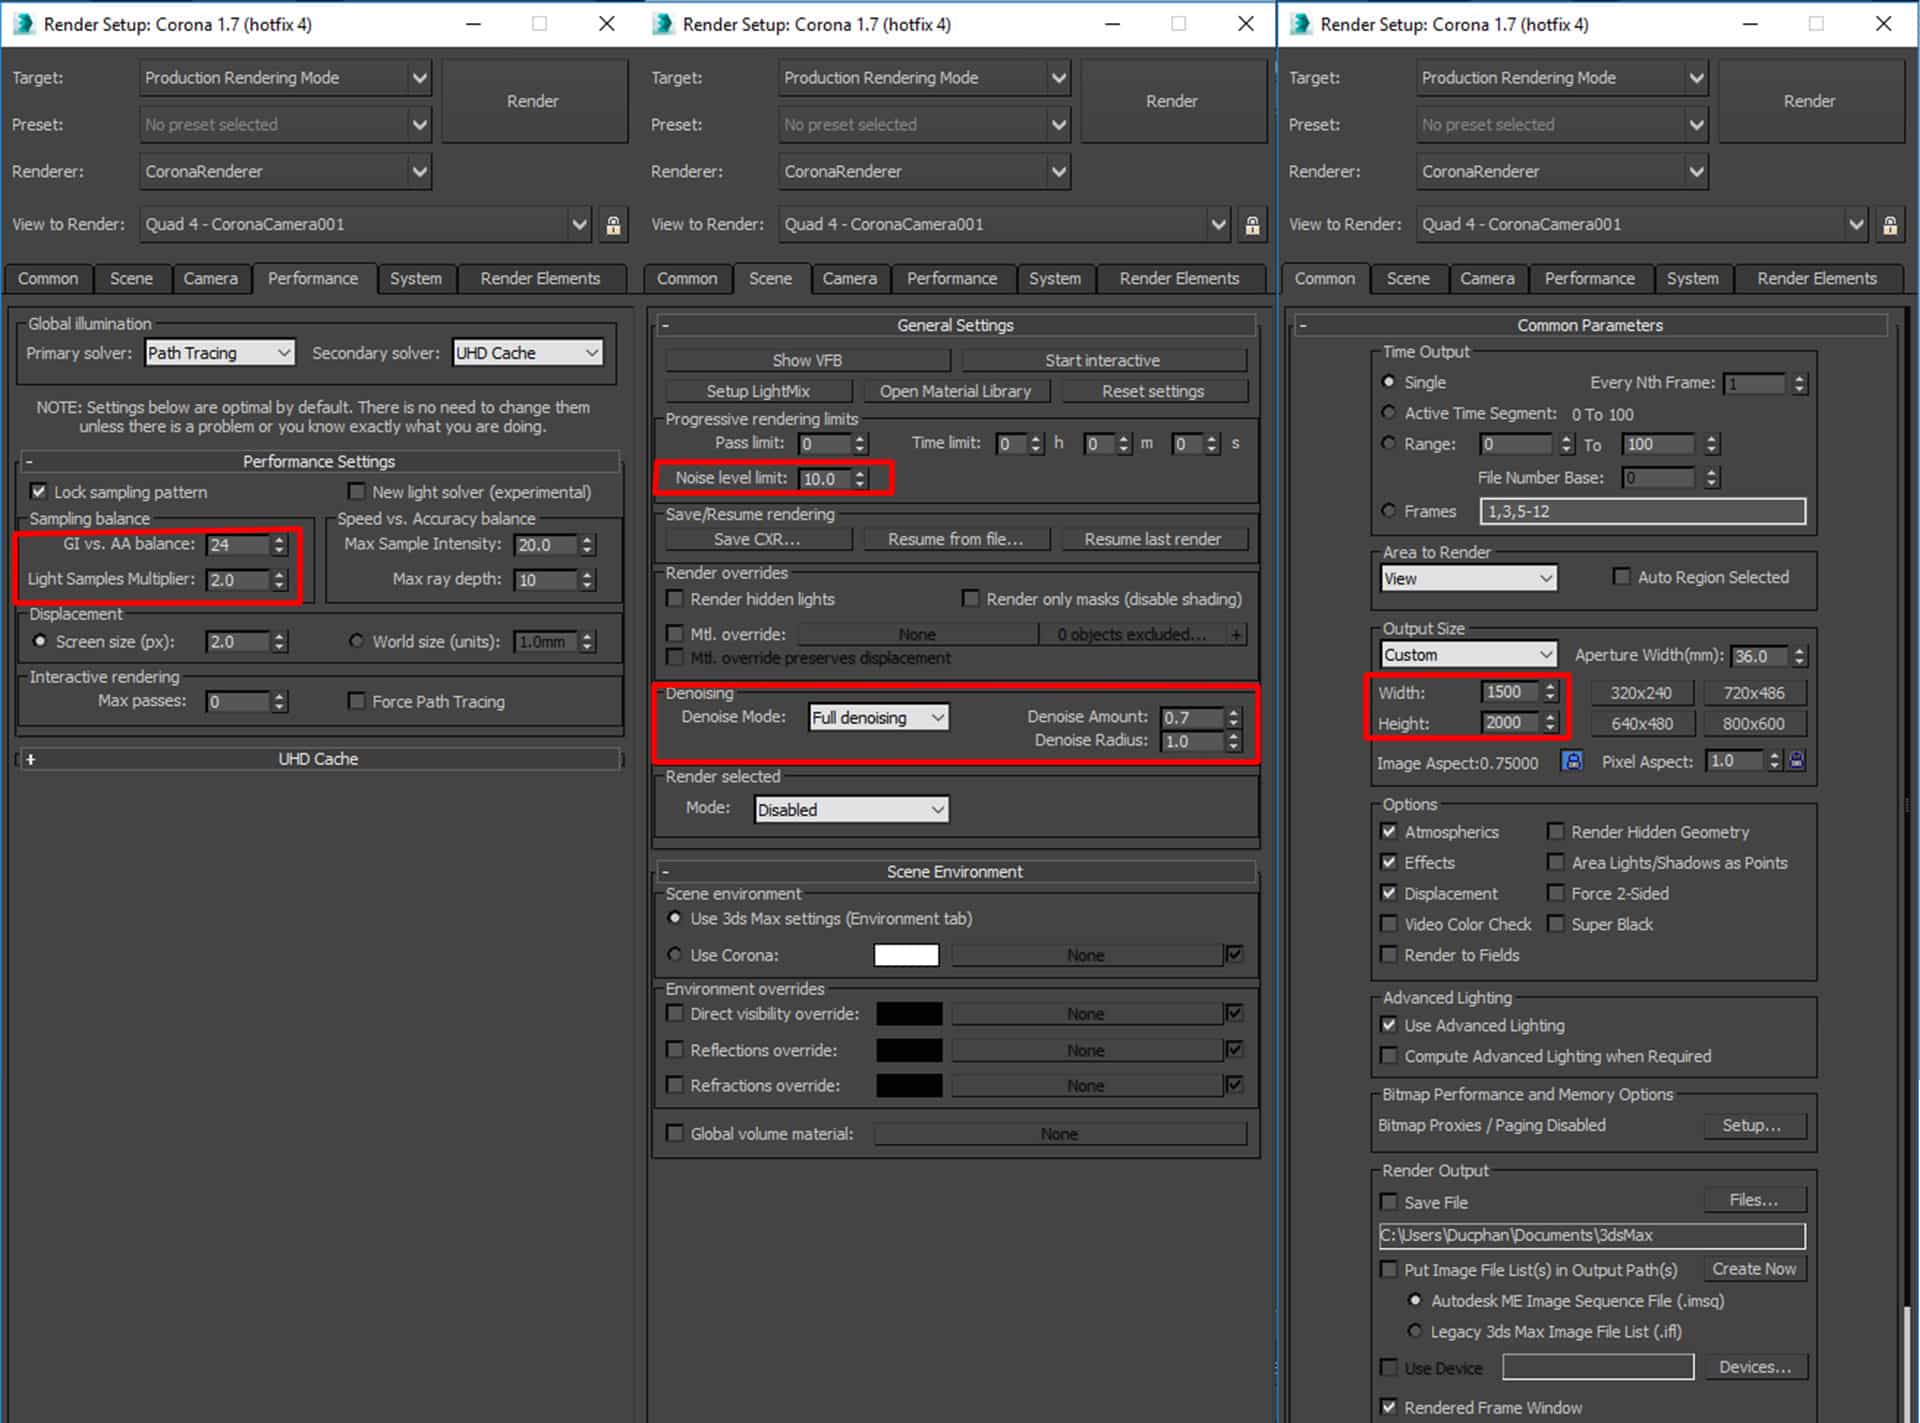
We kept most of the default setting of Corona Renderer. There were only some changes to the GI/AA balance. It helped us to save time by reducing the number of passes.
We also reduced the number of Max Ray Depth because we found out that this number doesn’t need to be very high for an exterior scene.
Our expected Noise Level was 10%, and we set up the Denoising at 70%.
After finishing the rendering, we made lots of lighting concepts, color grading with Lightmix, Corona Renderer Tone Mapping, and CoronaLUT.
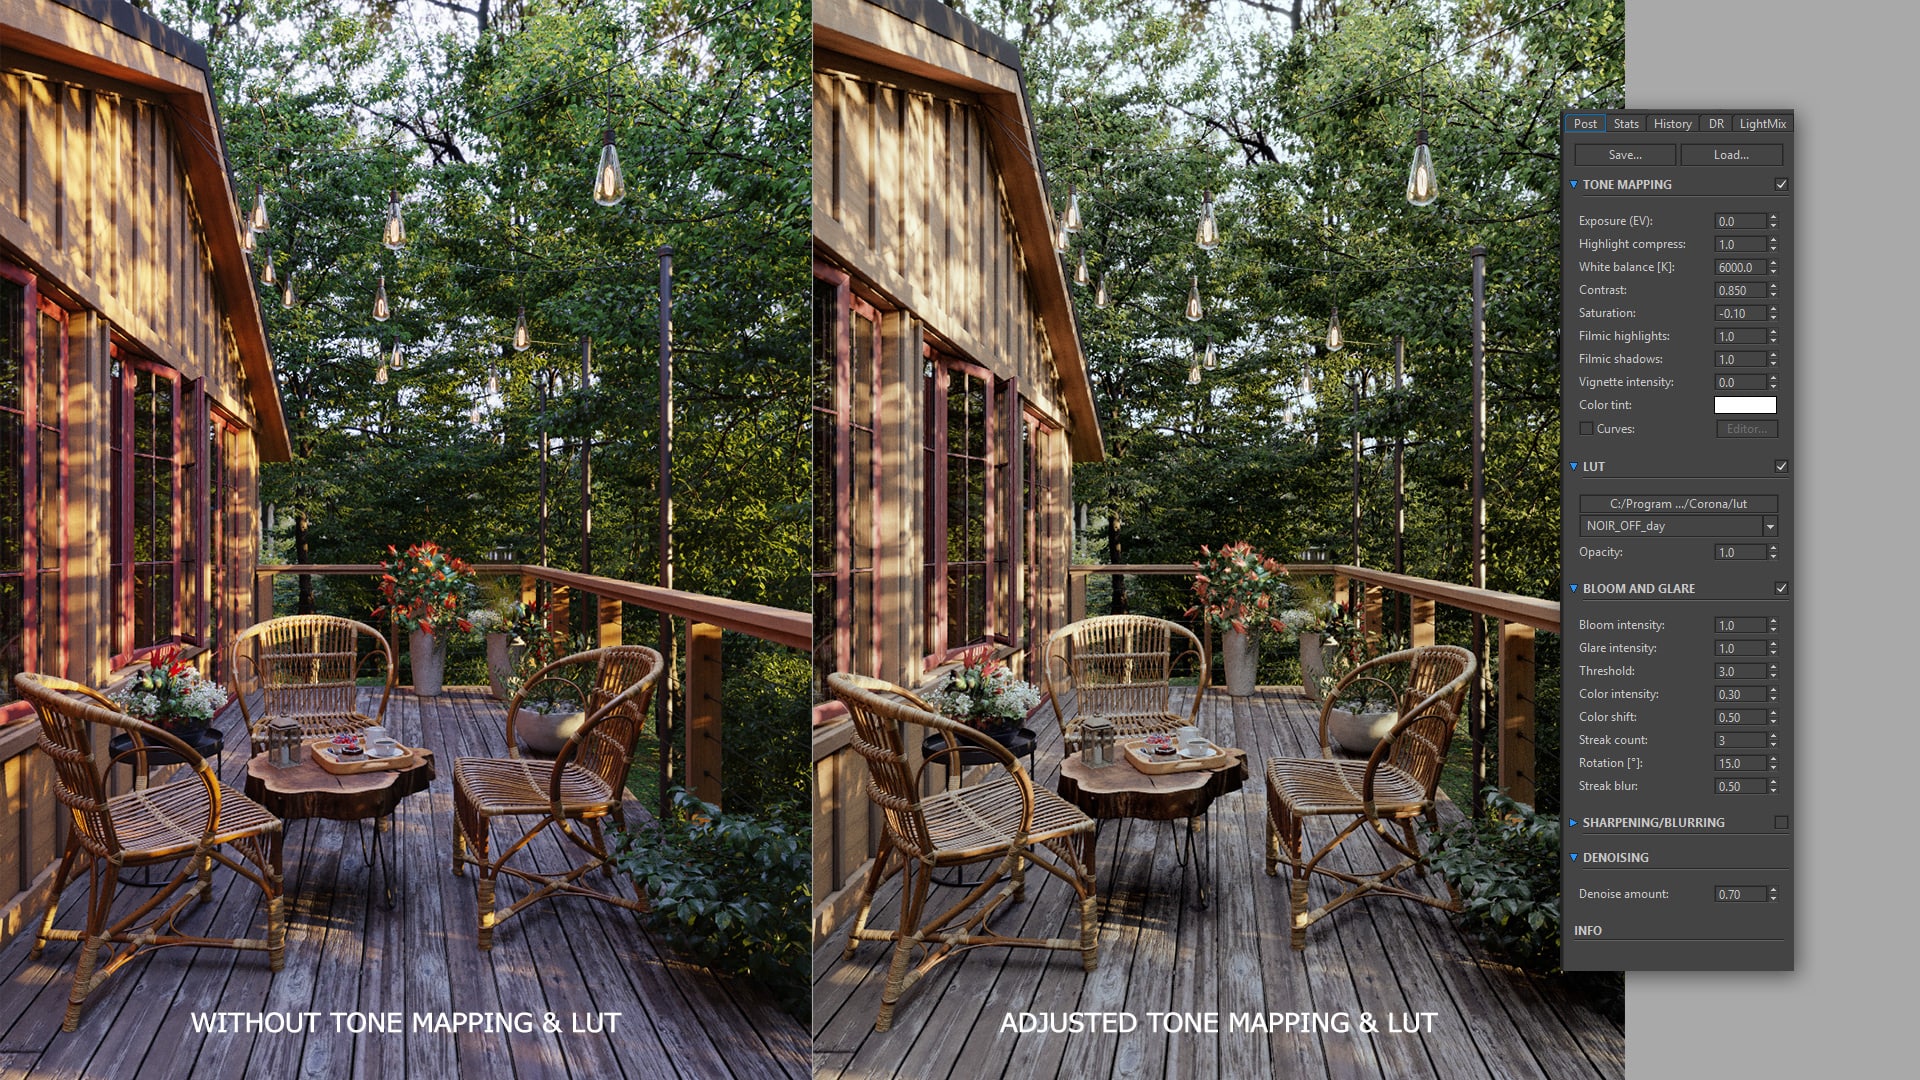
These tools we used helped us a lot in saving time in Post-production. We did not have to render so many elements to compose as we had done before (This is useful for people who have low spec computers like me).
We then have the final render photos as you can see. I just used Photoshop to convert them into JPEG images.
")
")
")
")
")
")
Thank you so much for spending time on my MAKING-OF! I hope that our experience can help you guys in your work.
Special thanks to Ronen Bekerman for giving us the precious opportunity to share our work with all of you.
Please do not hesitate to make comments and ask questions!


Love this work! Going over the article, I specifically like what you did for the window frames material using the ambient occlusion map. That, and the custom treatment with Substance Painter.
Ronen is right about the custom treatment using substance painter, I myself like how the cameras are framed in a way not to see everything in one camera.