


Making of Prairie House
I’m very happy to share a making of by SoA today! Prairie House is a commercial job for an American company that builds beautiful cabins in fantastic locations around the world. SoA takes us through their process as they give lots of attention to nature and how the house connects with it. 3ds Max, Corona Renderer, Substance Designer and Forest Pack were used during this making of this project.
First Steps
Like for previous projects, also for the “Timber House” the client sent us a 3d .dwg file modeled with a software different from 3d Studio Max, probably with Revit.
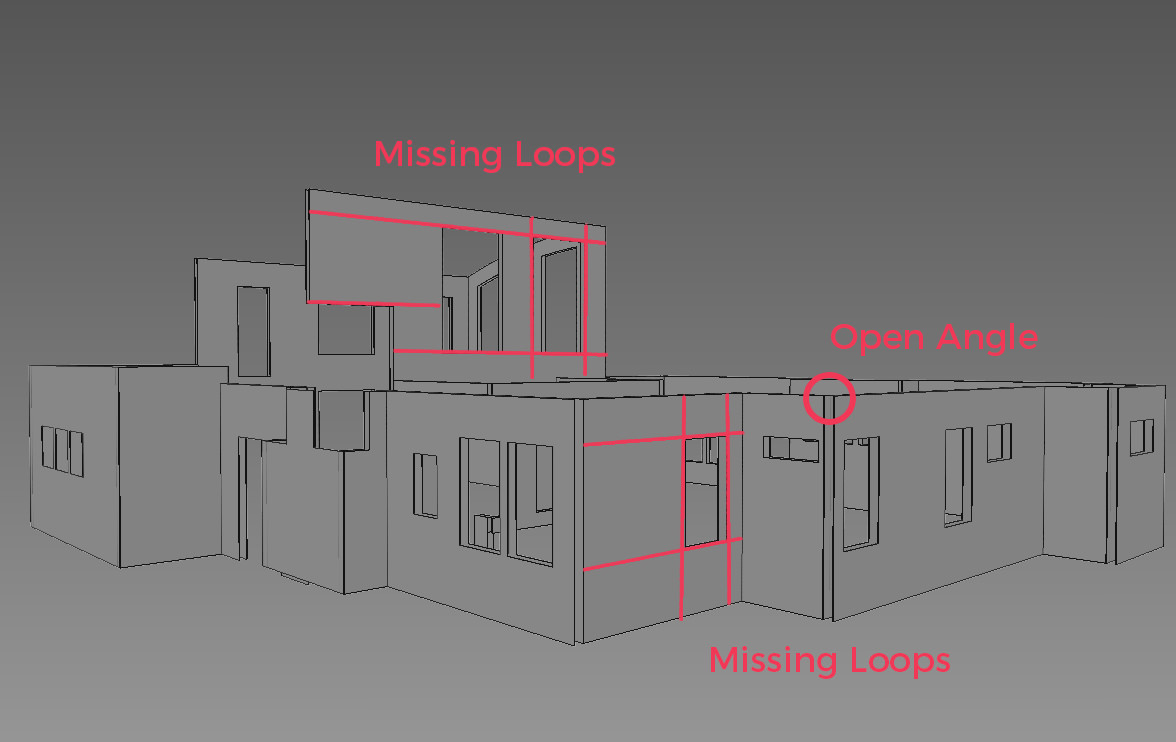
The Autocad file was imported in 3dsMax and converted in Editable Poly. Unfortunately, while converting the file, we lost some geometries so, in the first stage of the modeling process, we had to complete the model with the missing surfaces.
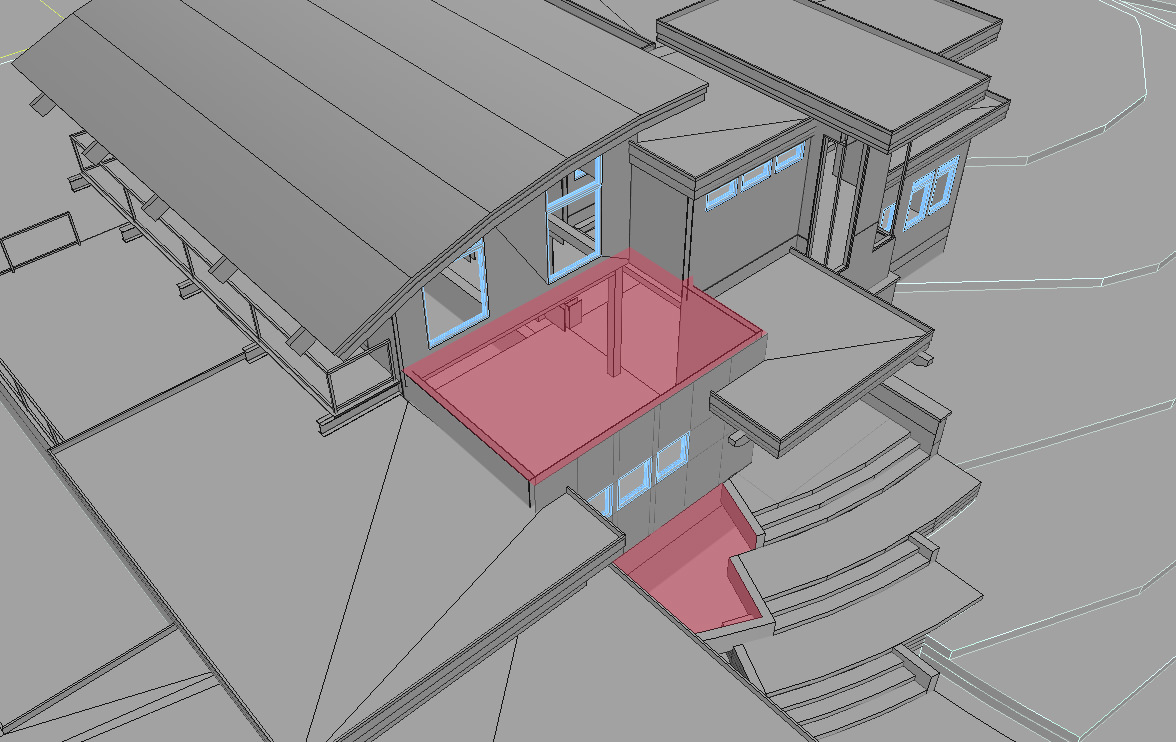
Image Planning – Clay Render
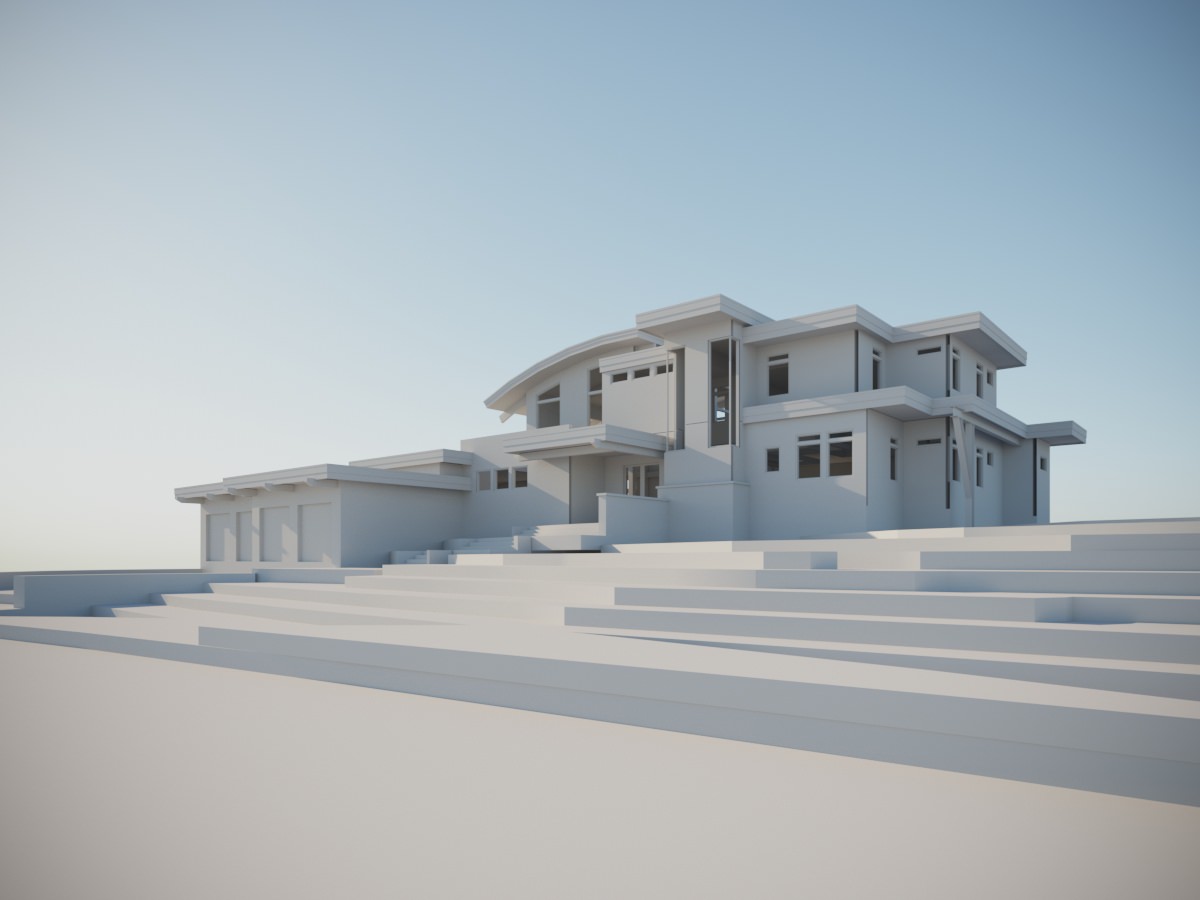
According to our client’s needs and our directions, we arranged some proposals for the point of view to use.
To the model, we applied a Corona Renderer default shader (medium grey), and for the lighting set up, we used the Corona Sun combined with the Corona Renderer Sky in the environment node.
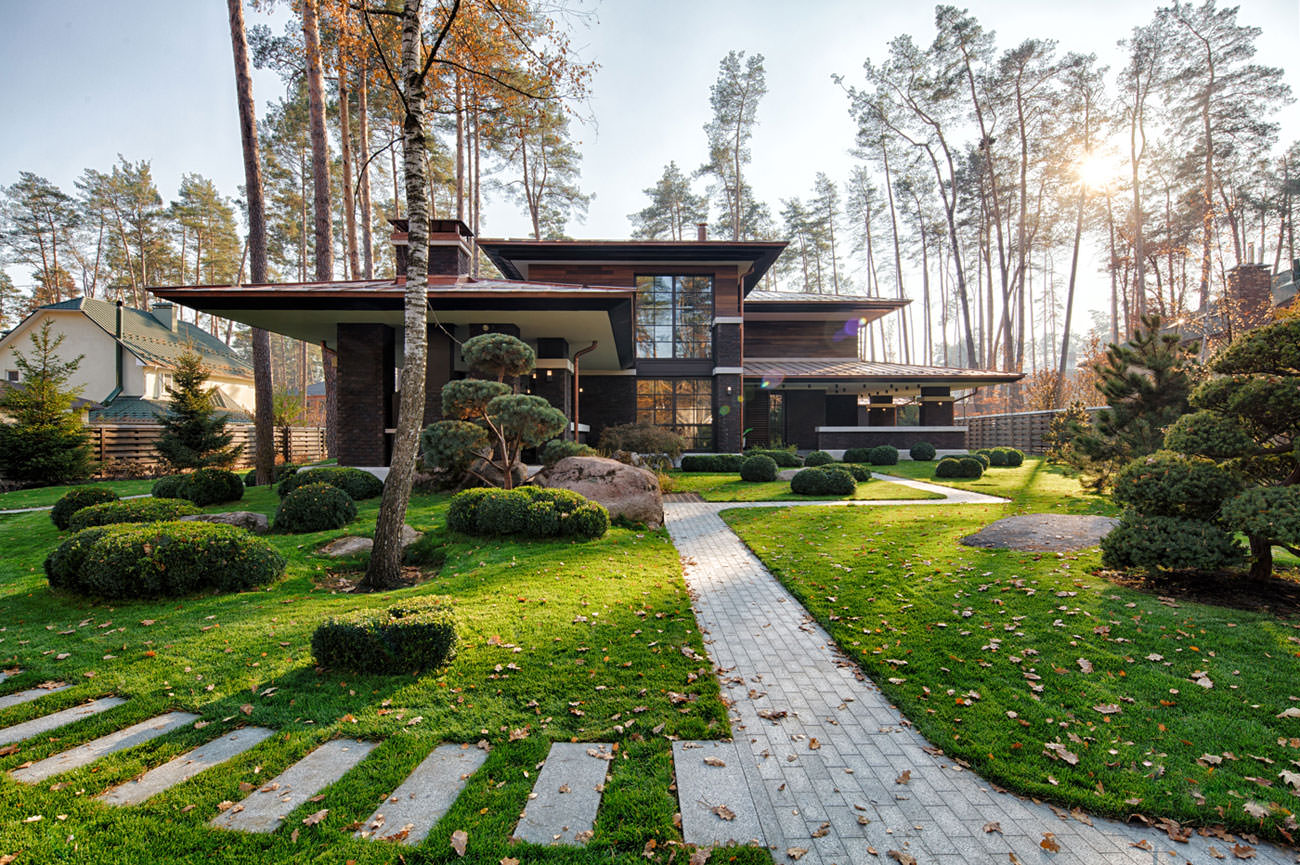
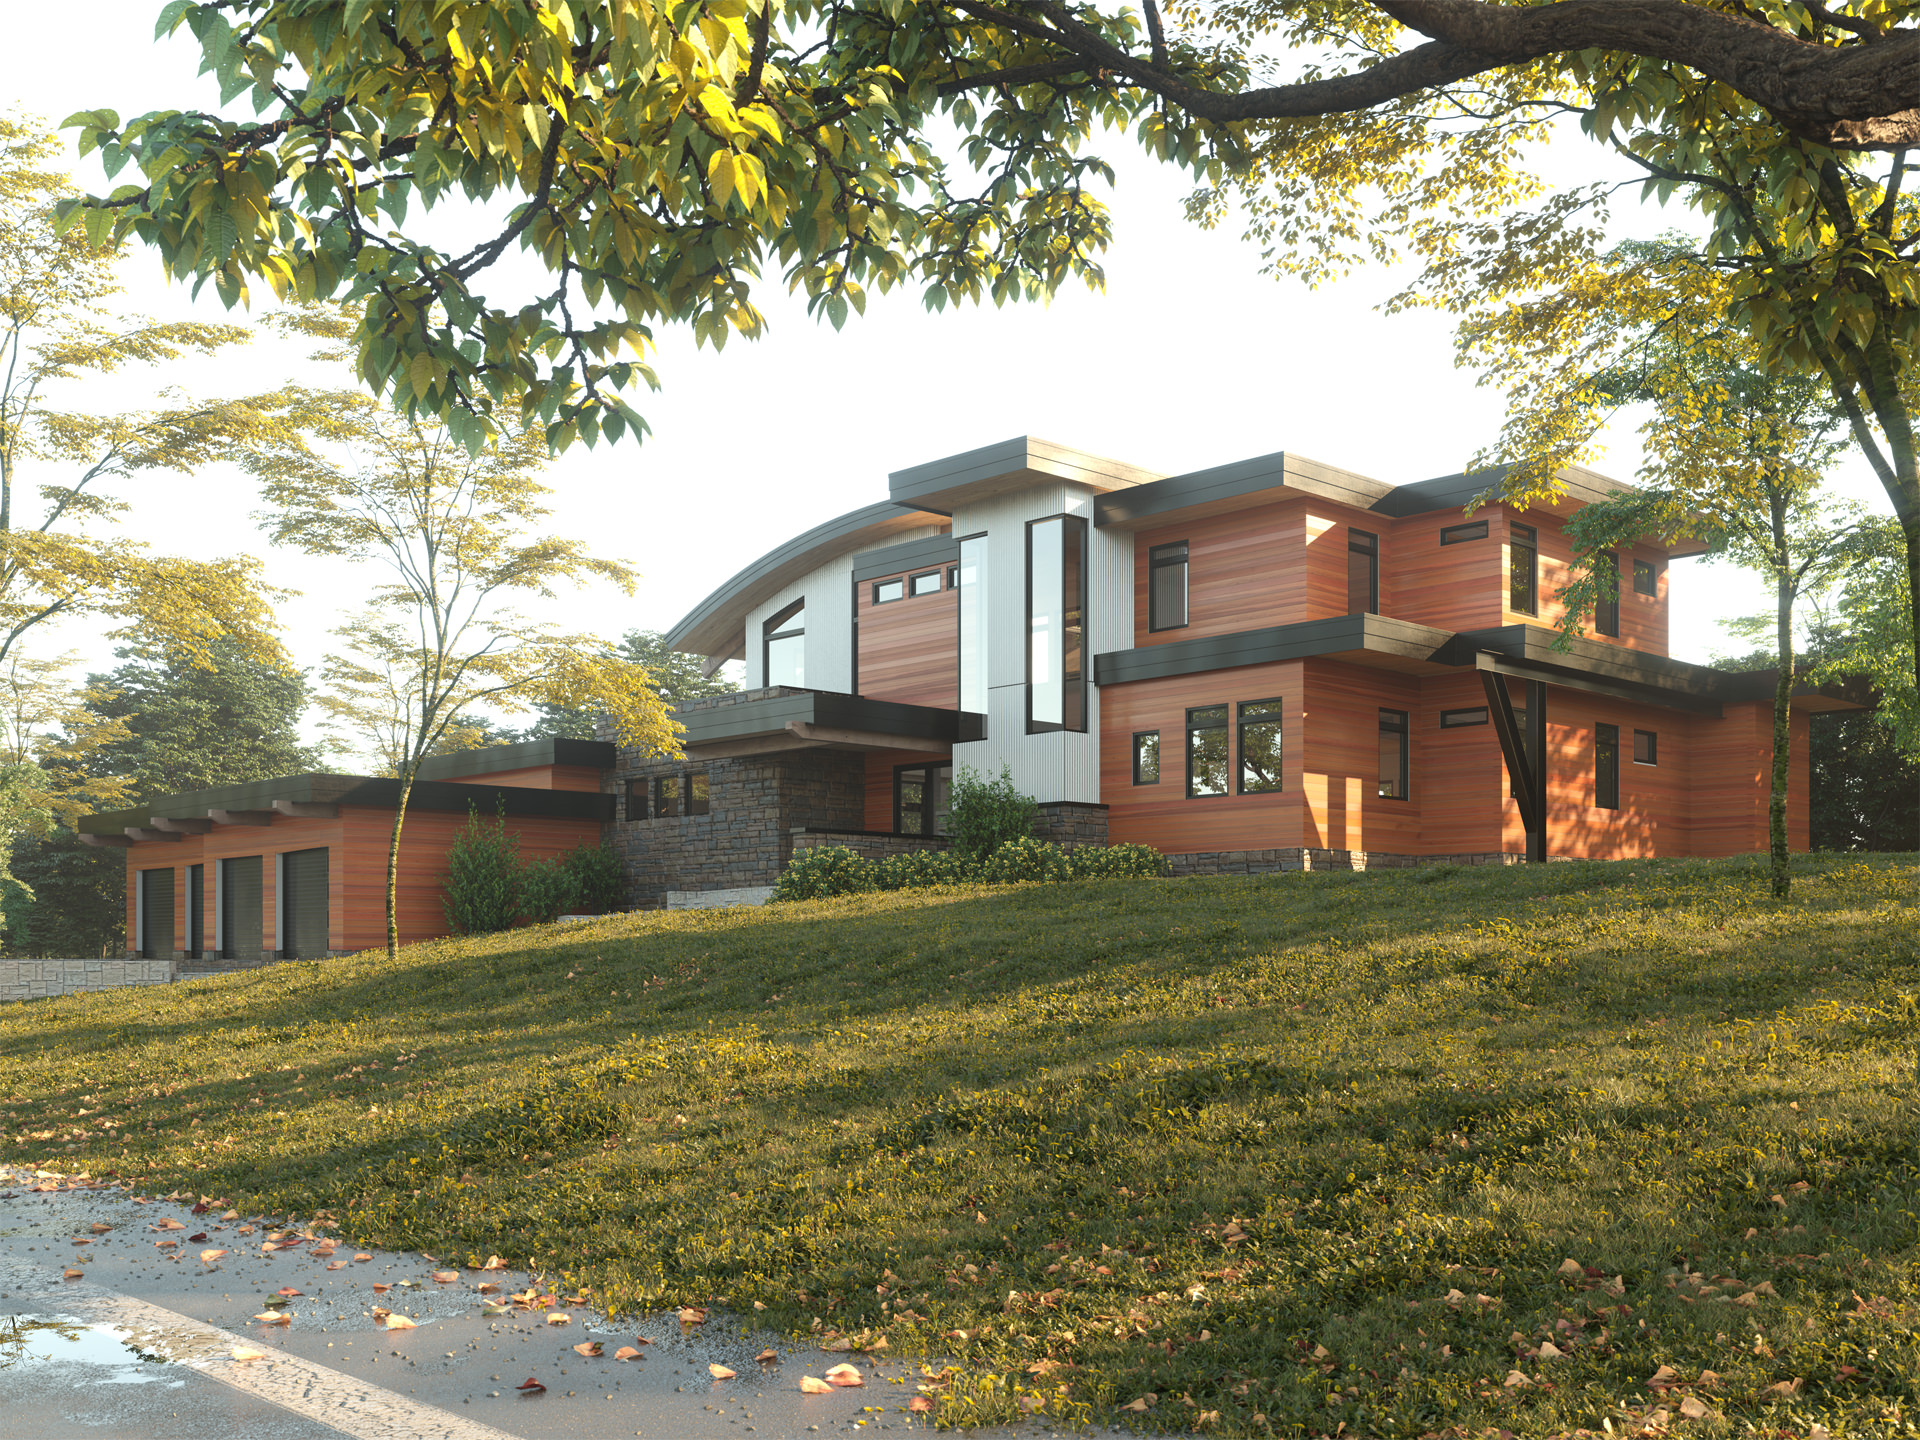
Composition
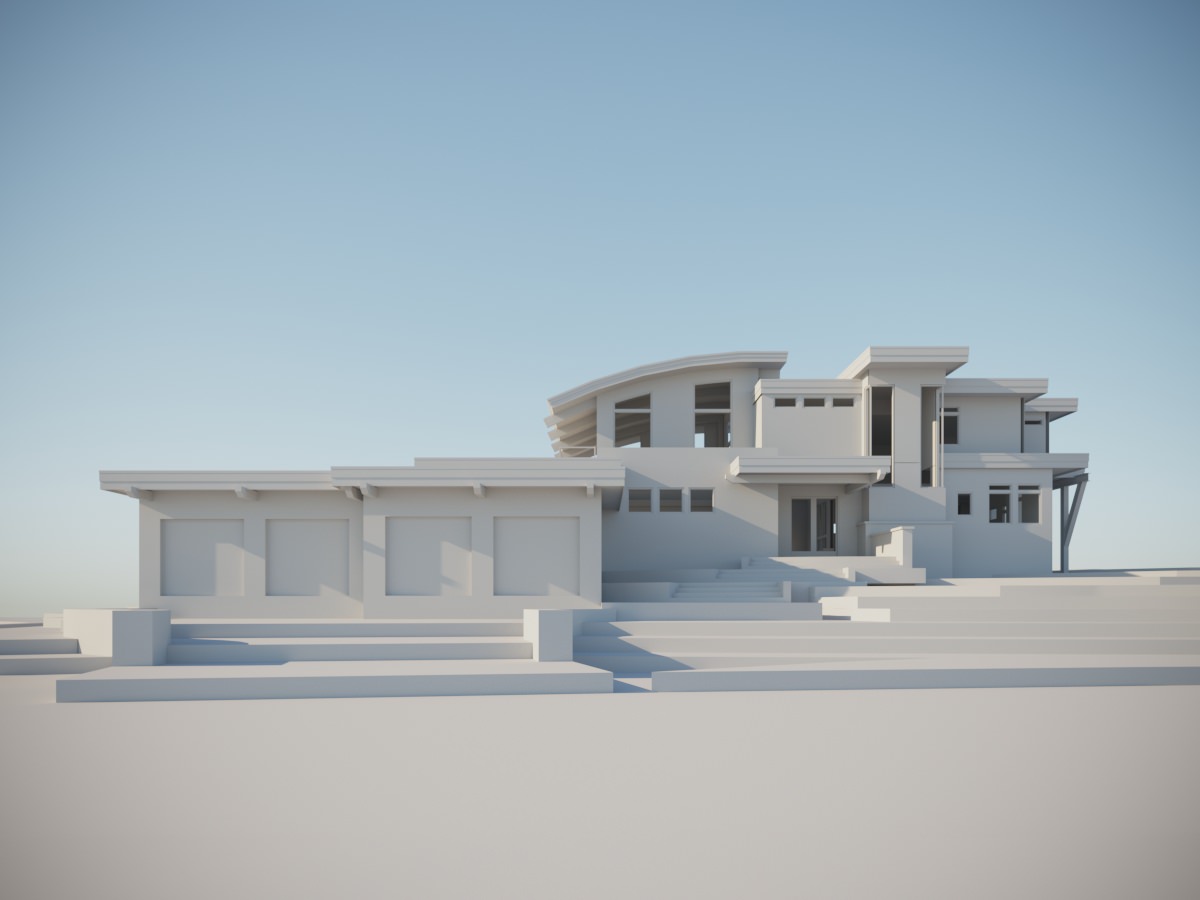
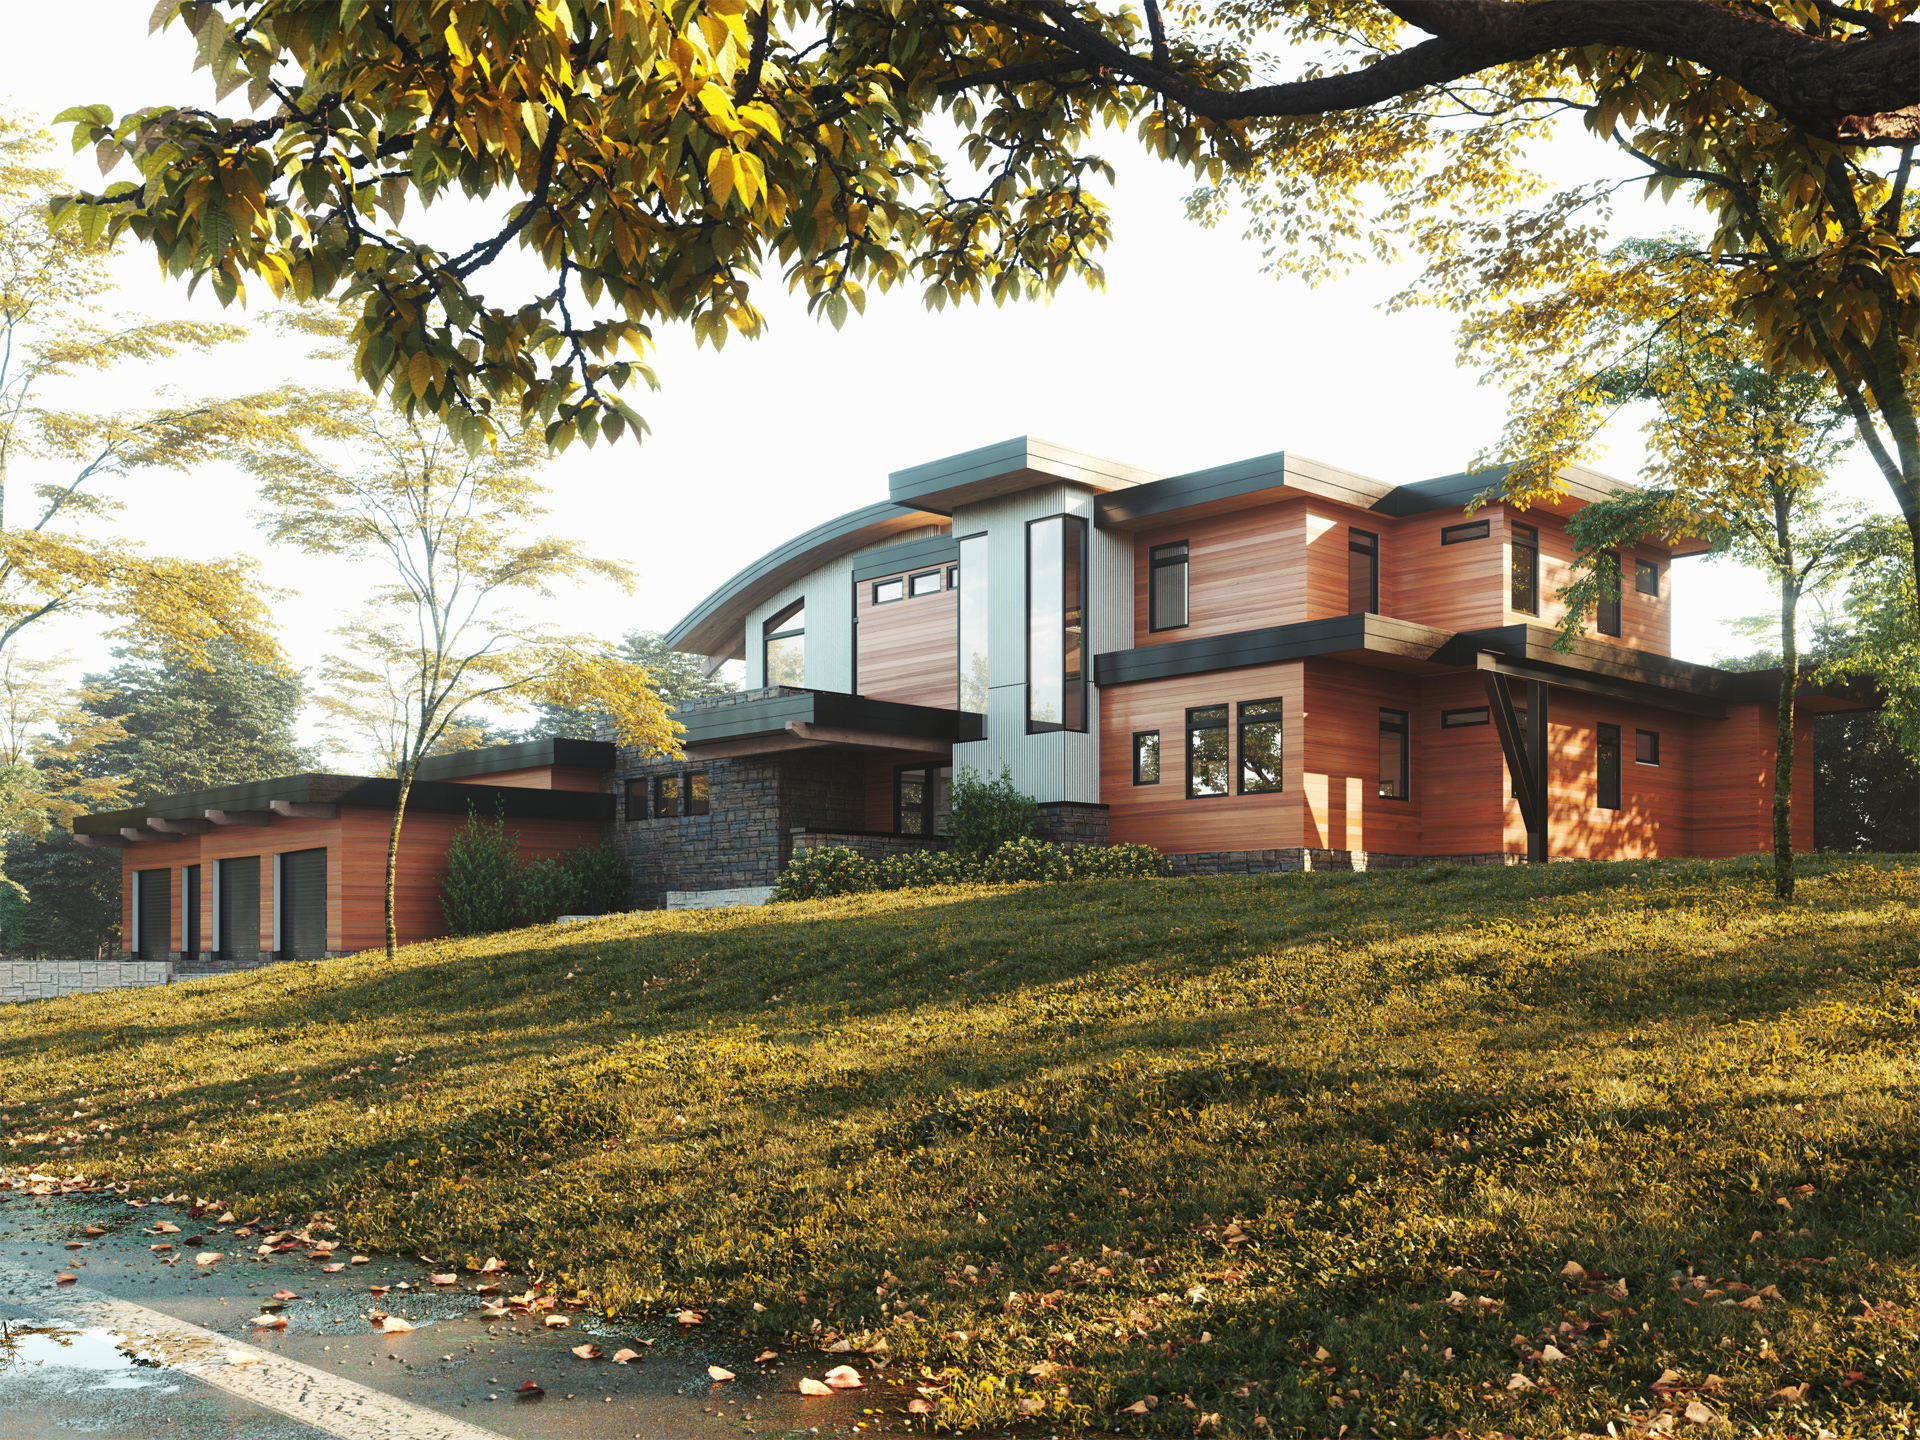
The composition was made to highlight the volumes and the particular shapes of the building. At the beginning, we thought of a frontal image with central perspective, and later the choice was changed into a three-quarter view to highlight the depth of the architecture and create a direct relationship between the house and the garden around it.
From the compositional point of view, in this way, we could take advantage from the front of a tree in the foreground, which was used to enhance the curvilinear shape of a part of the roof.
The front also created a natural vignetting on the image, which further highlights the building.
Modeling / Details
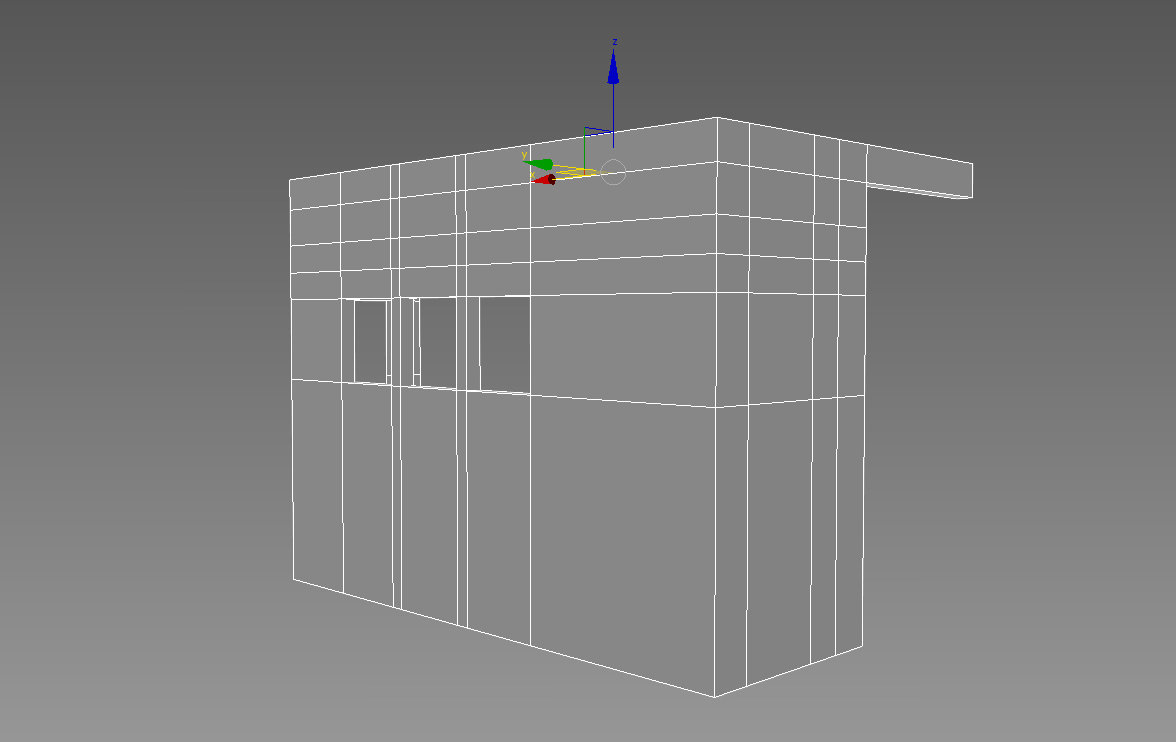
For the final model, all walls have been edited and remodeled. The topology wasn’t correct because the loops corresponding to the openings were missing, and the angles were completely open. We also adjusted the smoothing groups by the topology of the single pieces so that the smoothing groups were different at every change of direction.
Thanks to these adjustments, we could create the chamfers in the right places.
Windows and doors have been detailed with the insertion of :
- Chamfers on all metallic elements with an amount of 5 mm (Unsmoothed Edges mode also used for the walls)
- Rubber round seal
- Single glass with a thickness of 2.5mm
Original Windows frame…
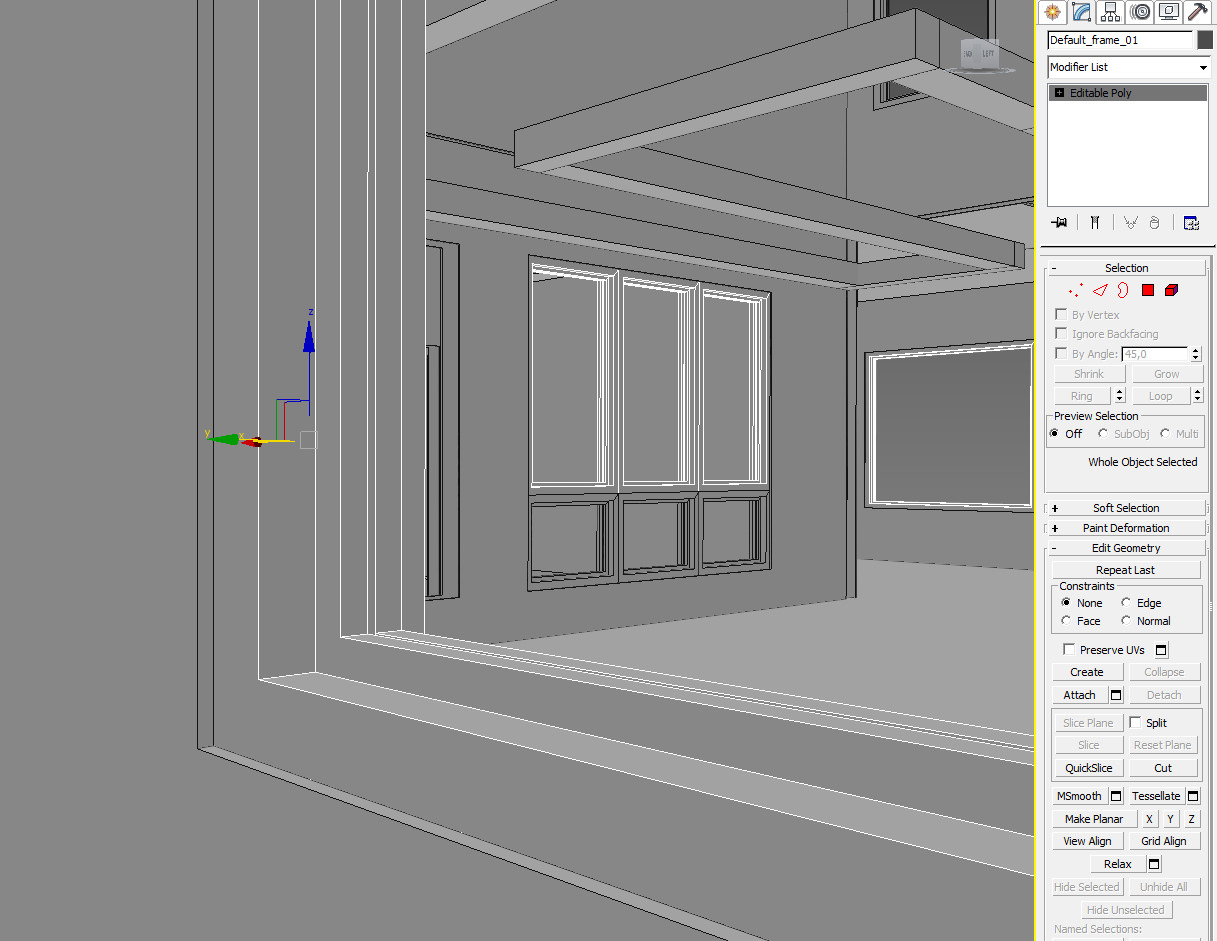
Fully detailed version…
Railclone
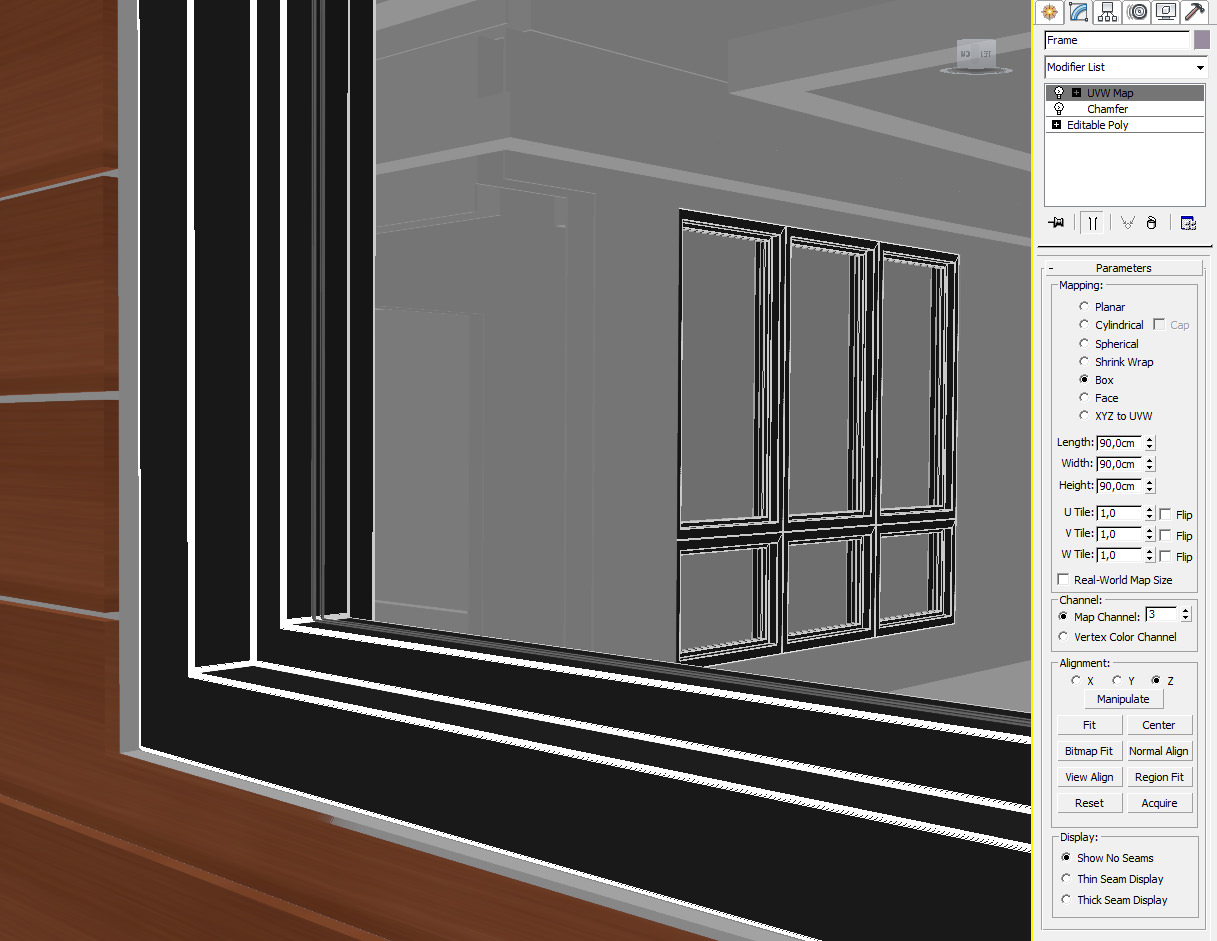
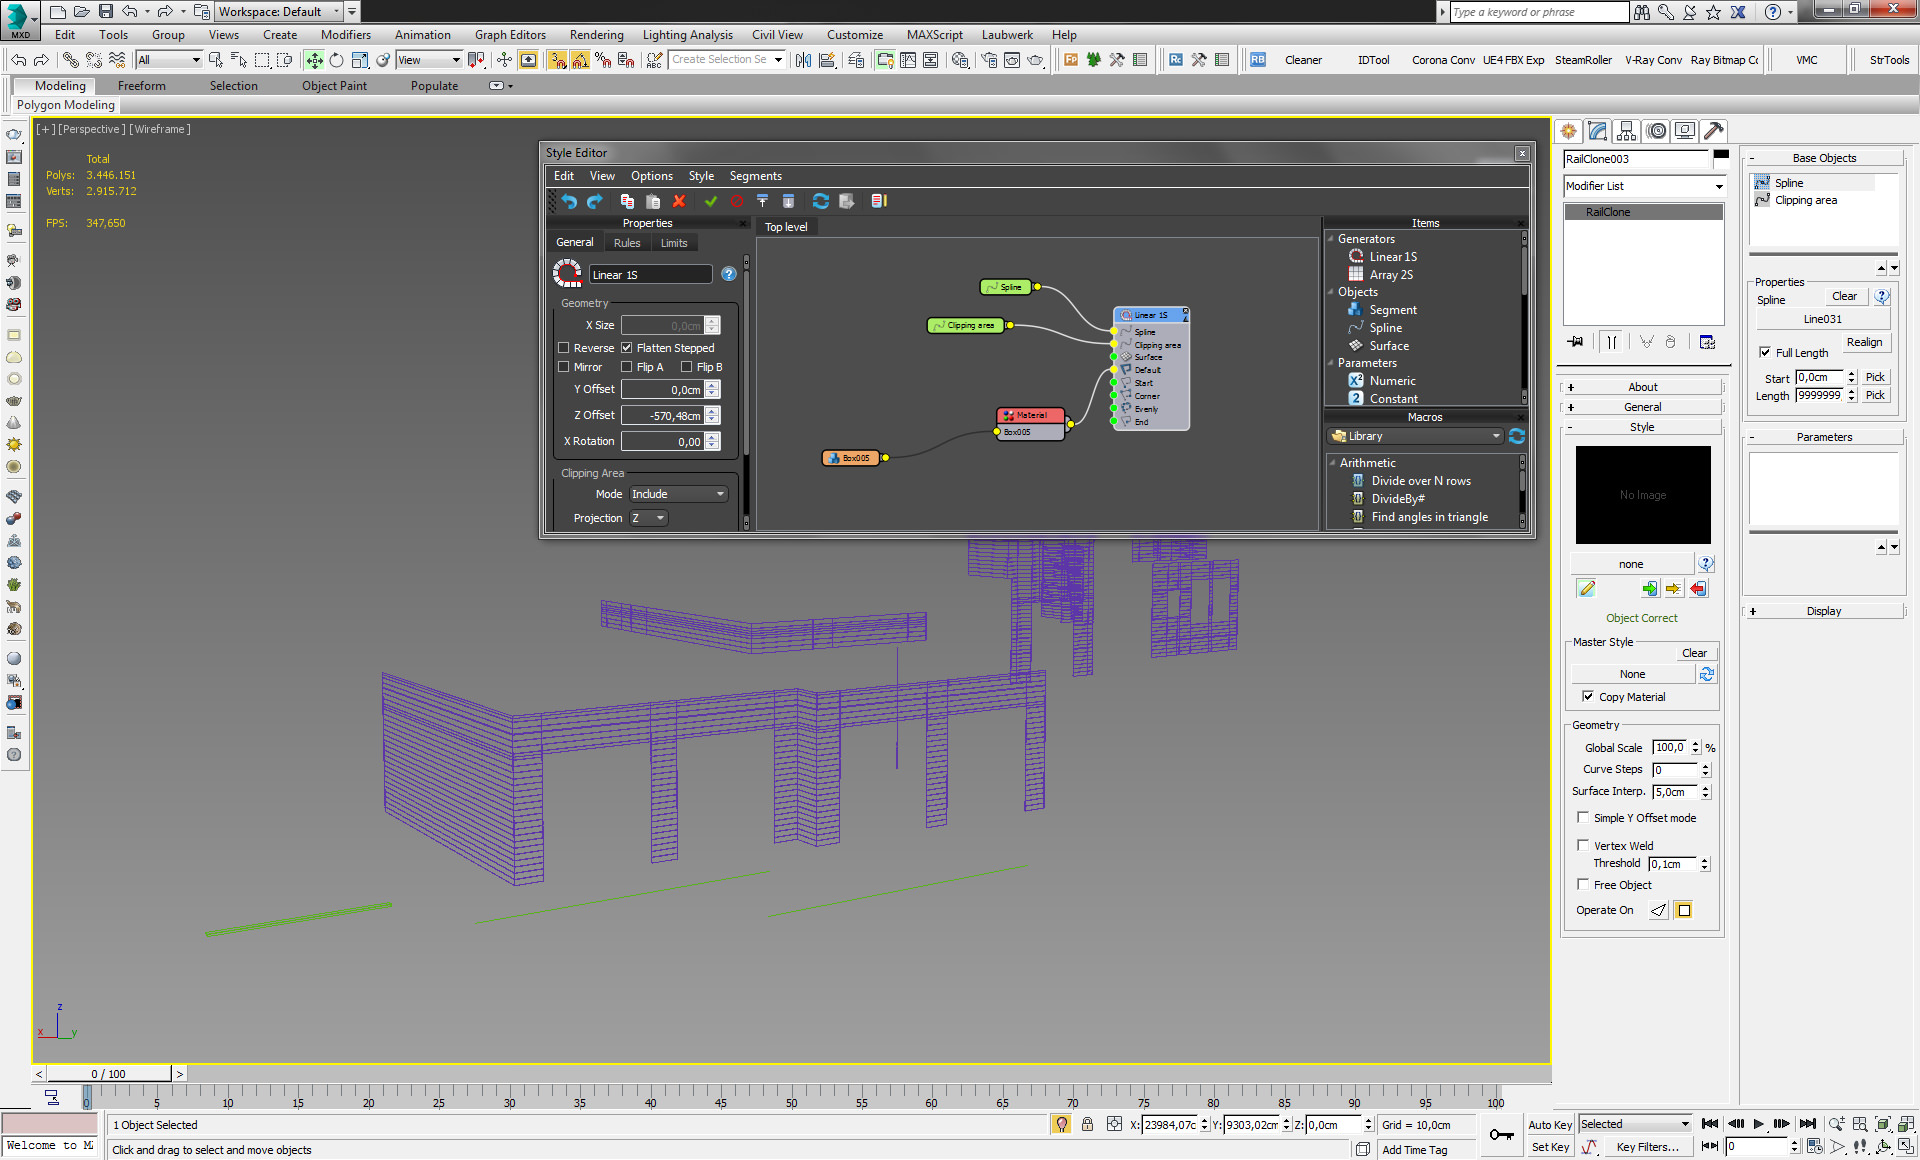
For the wooden facades, we used Railclone. Thanks to the 1S Linear generator with a clipping mask, we created continuous facades for every side of the house. The textures used for the shading were added in a multitexture node and thanks to the material operator, the randomization of the single elements has been made with the Object ID mode.
We applied the same material to the single plank, and with a UVW map, we checked the map and the direction of the wood grain.
Modeling of the Ground and the Street Surfaces.
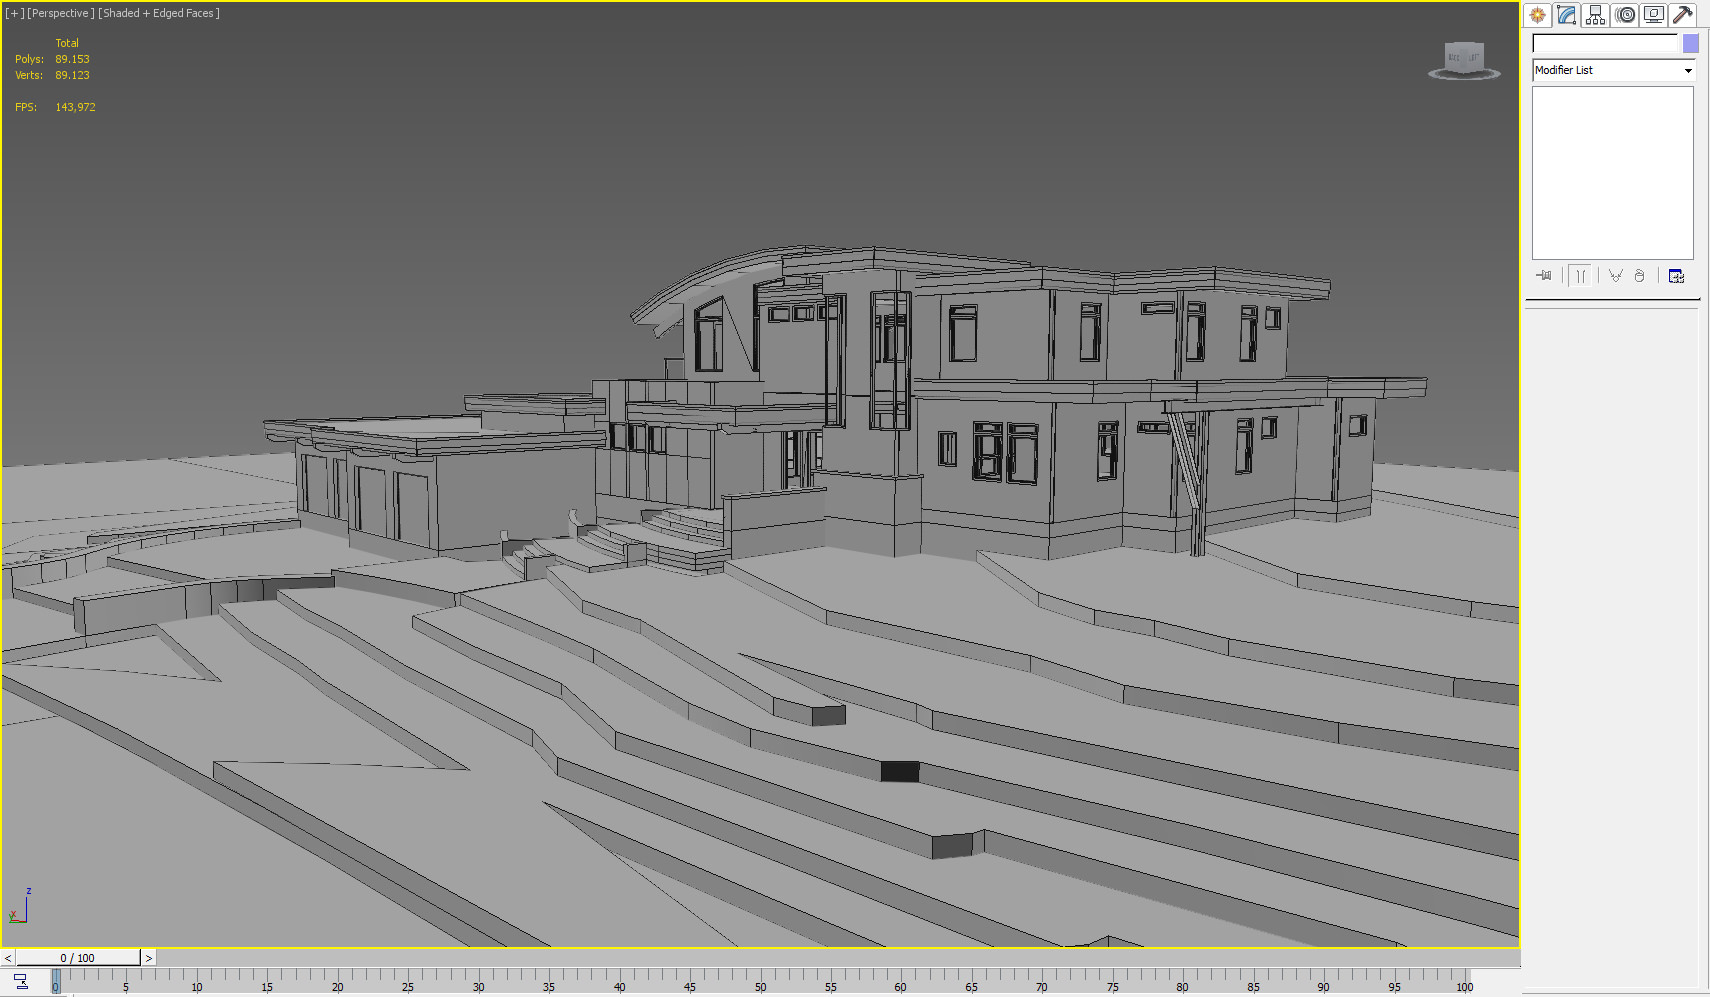
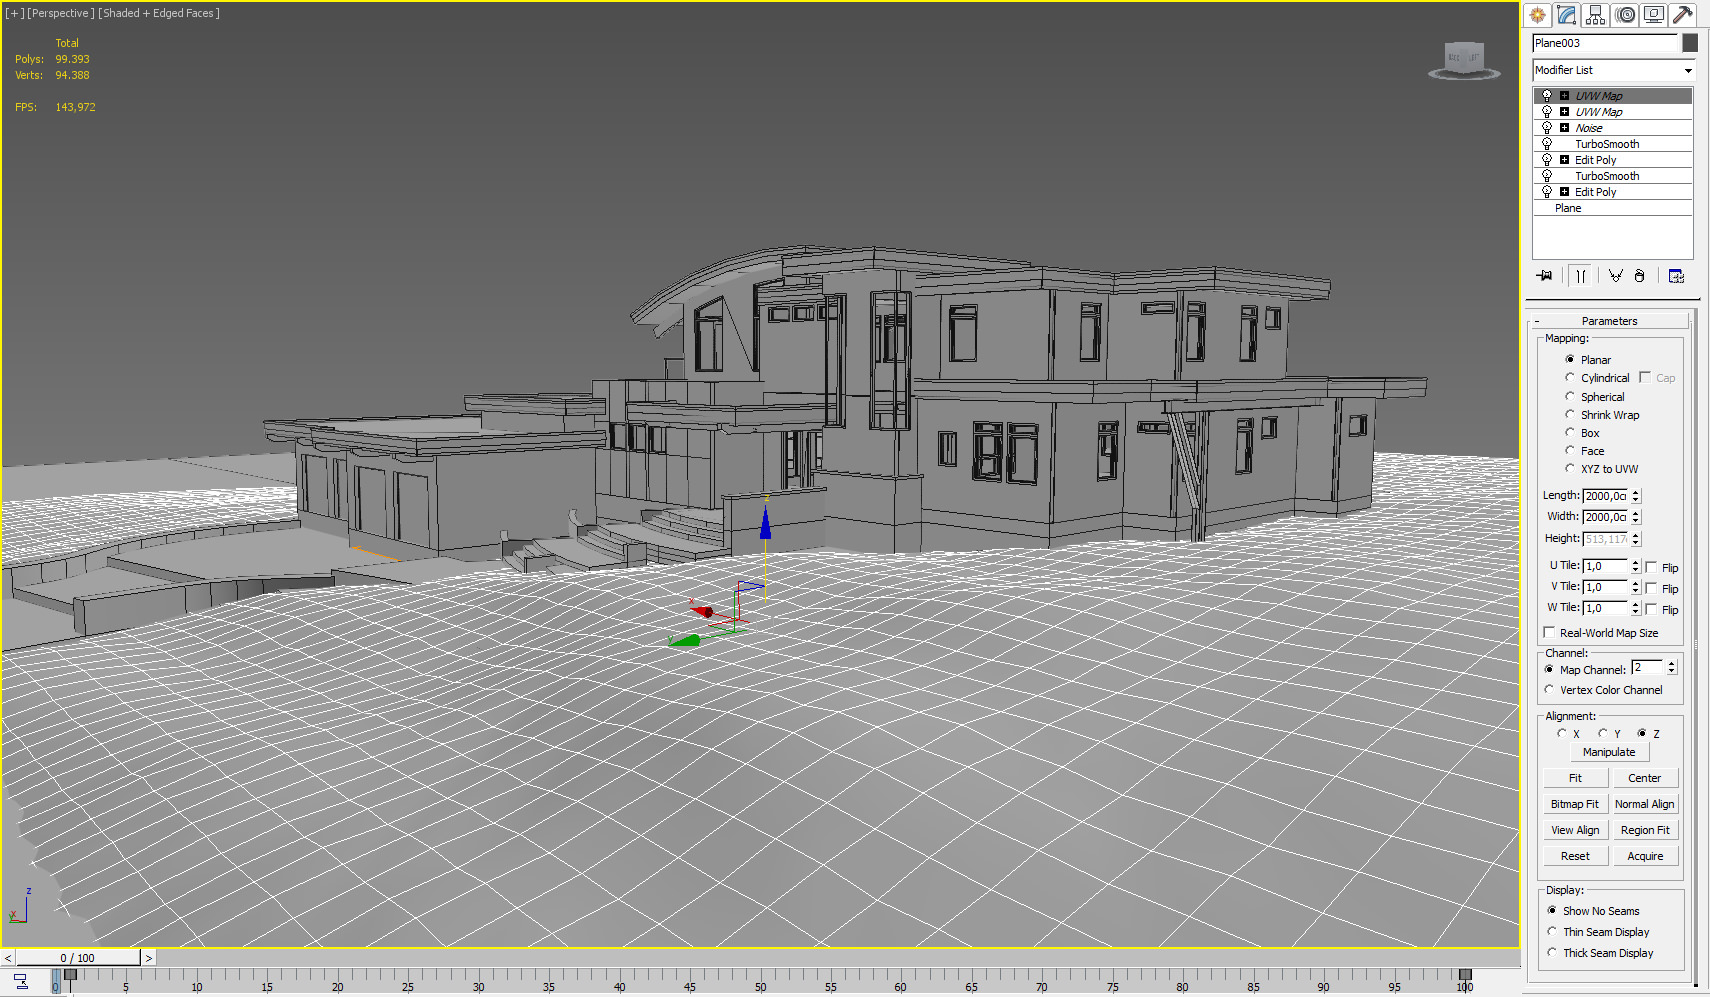
The ground modeling was very simple. The graded depth that the client sent was the starting point for the altitude. Starting from a plane, we expanded the surface and kept the faces as squared as possible in all the development.
For detailing and creating real variations on the grass, to the object :
- We added a Noise modifier (with a couple of inches variation in x, y, and z).
- We precisely changed some parts of the geometry with a soft-selection (inside the edit poly) to create dips and bumps.
- We added a couple of turbosmooth modifiers to smooth the surface and increase the number of polygons.
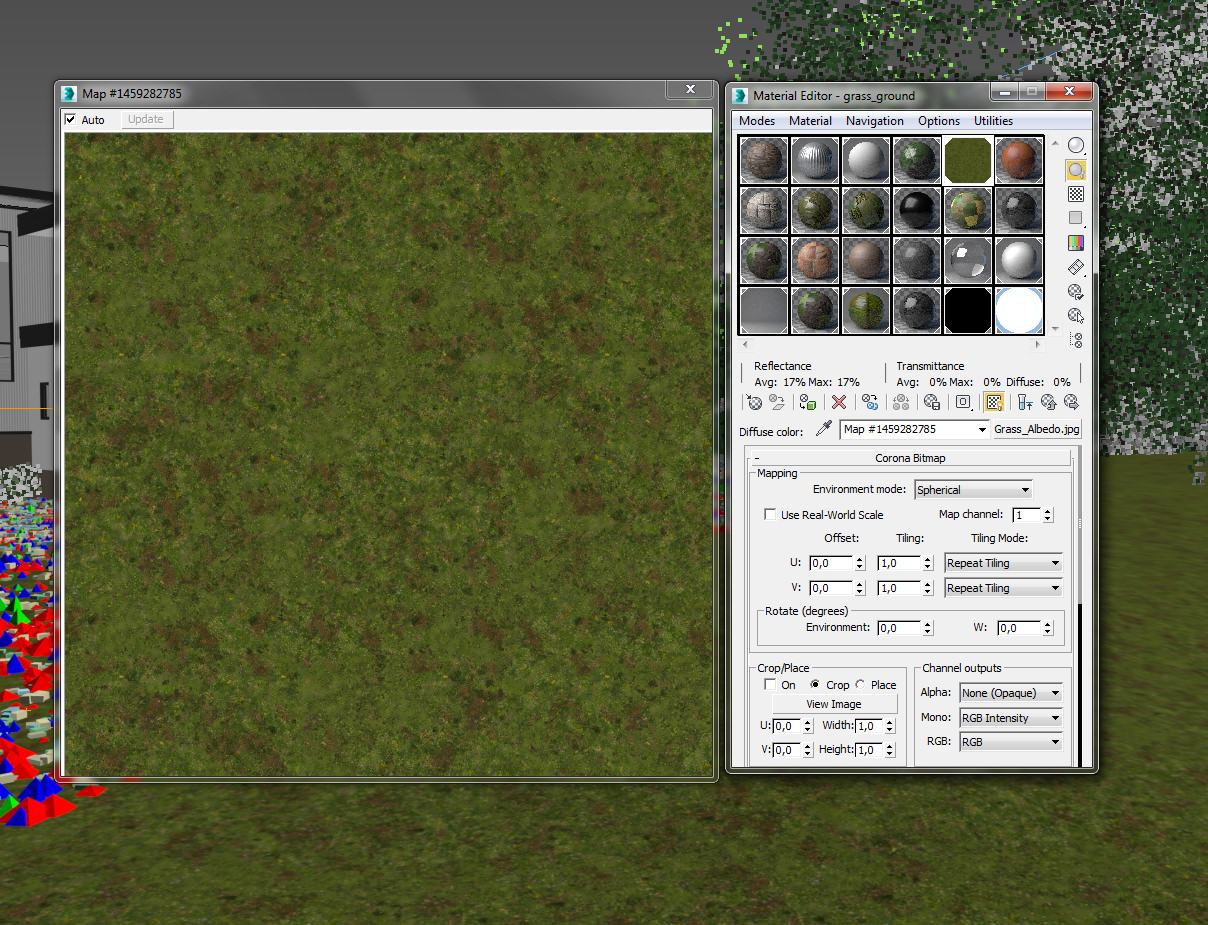
To finish the ground, we applied a shader with the grass texture mixed in composite with other ground textures.
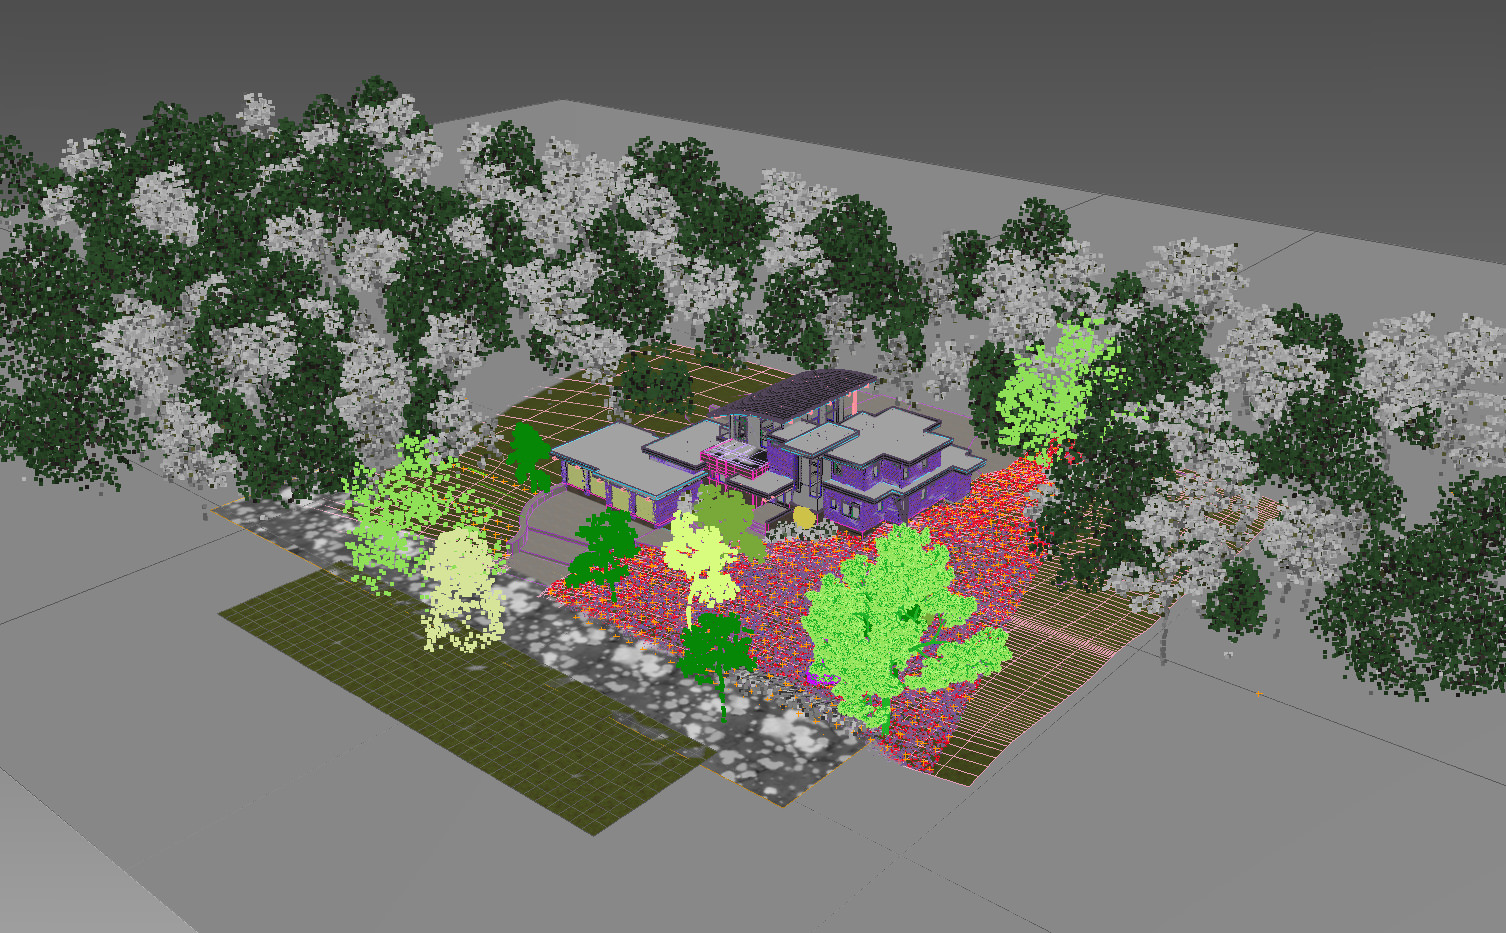
Vegetation
For the vegetation, we used Megascans. We gave importance to the translucence of leaves and grass with a parameter that can be easily
customized with Corona Renderer.
The result is very close to reality.
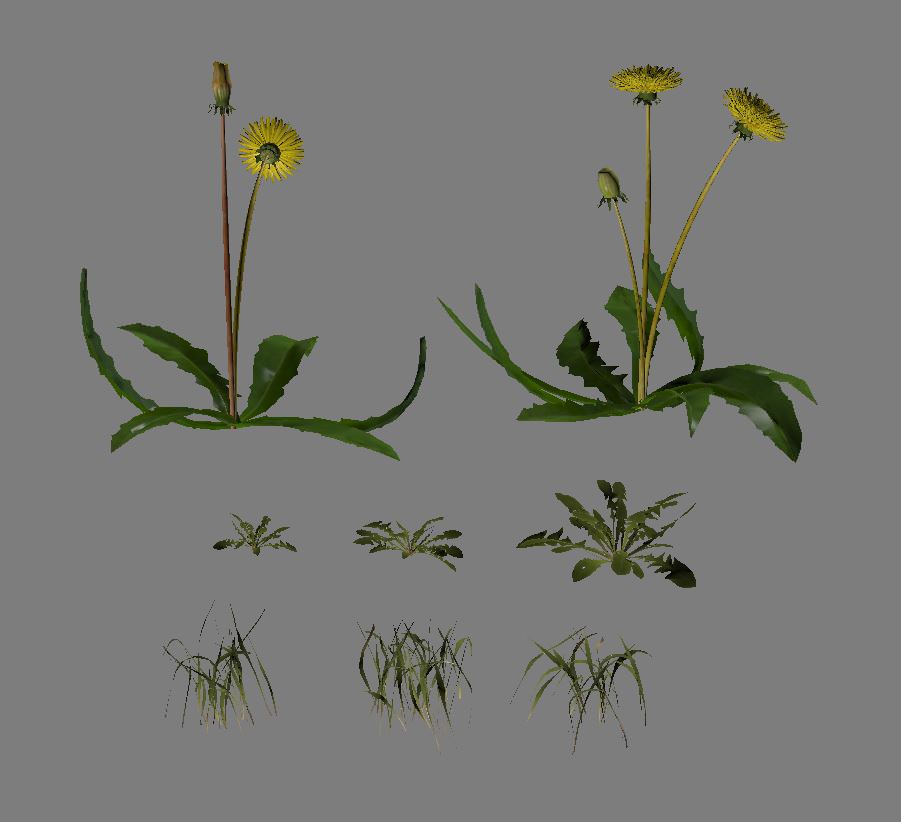
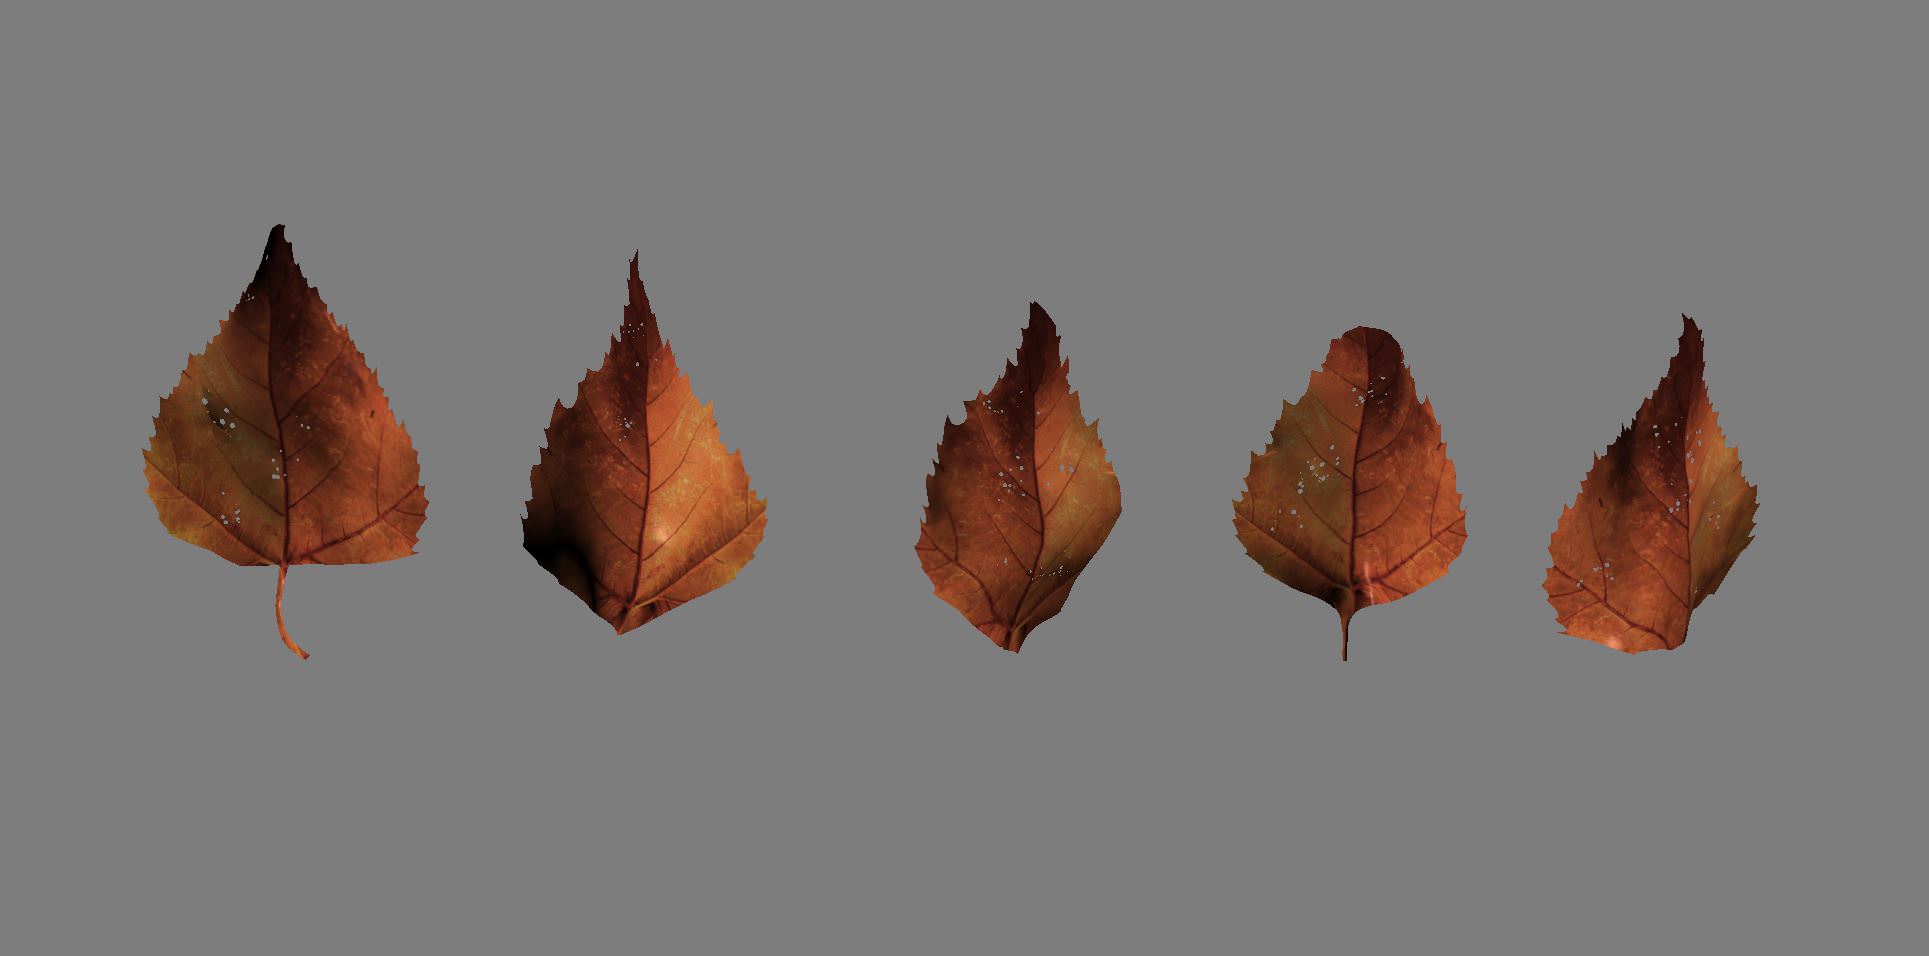
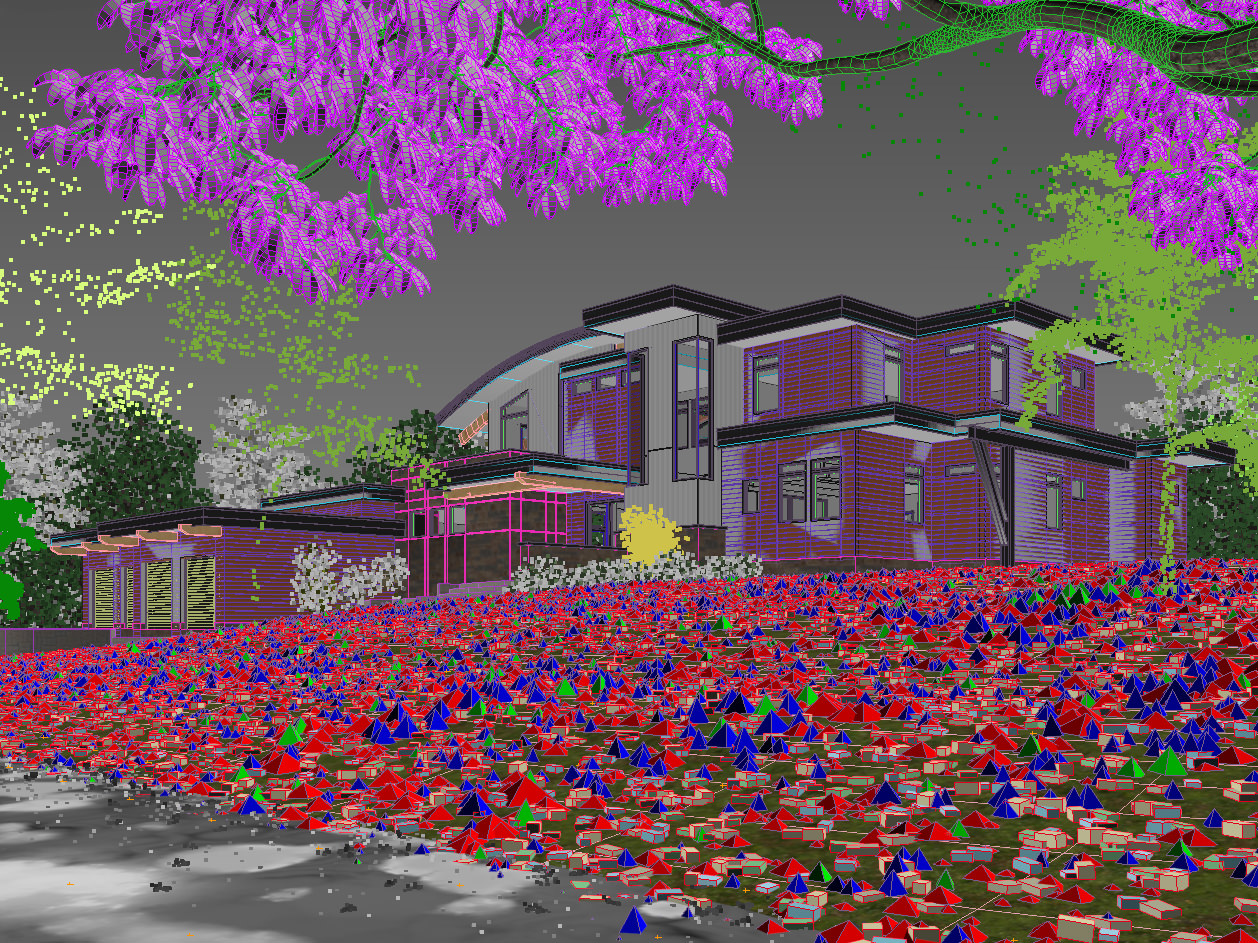
The grass was created from Megascans textures. We formed groups of simple grass and groups with denser grass with broad leaves to differentiate the scattering with Forest Pack. We also scattered dry leaves for the street and the garden. These leaves are customized models made with DebrisMaker script.
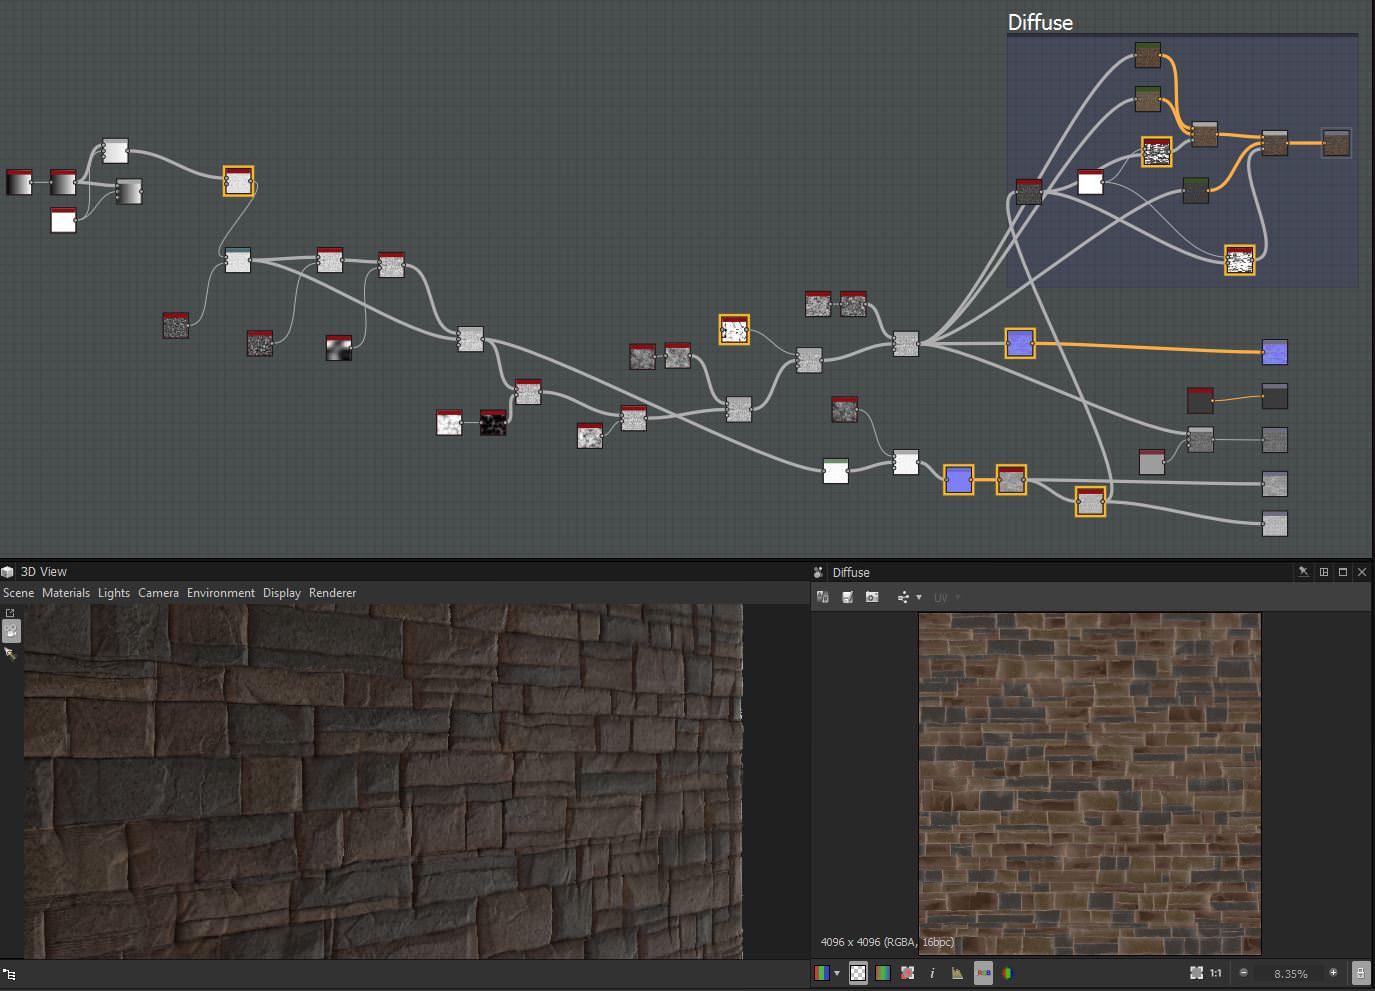
Materials
The client requested a particular material for covering some facades, which was made of stone blocks with variable dimensions and colors. Substance Designer is the tool that let us create such materials in an easy way. All materials and lights were placed directly on the final scene by using the interactive render in Corona Renderer.
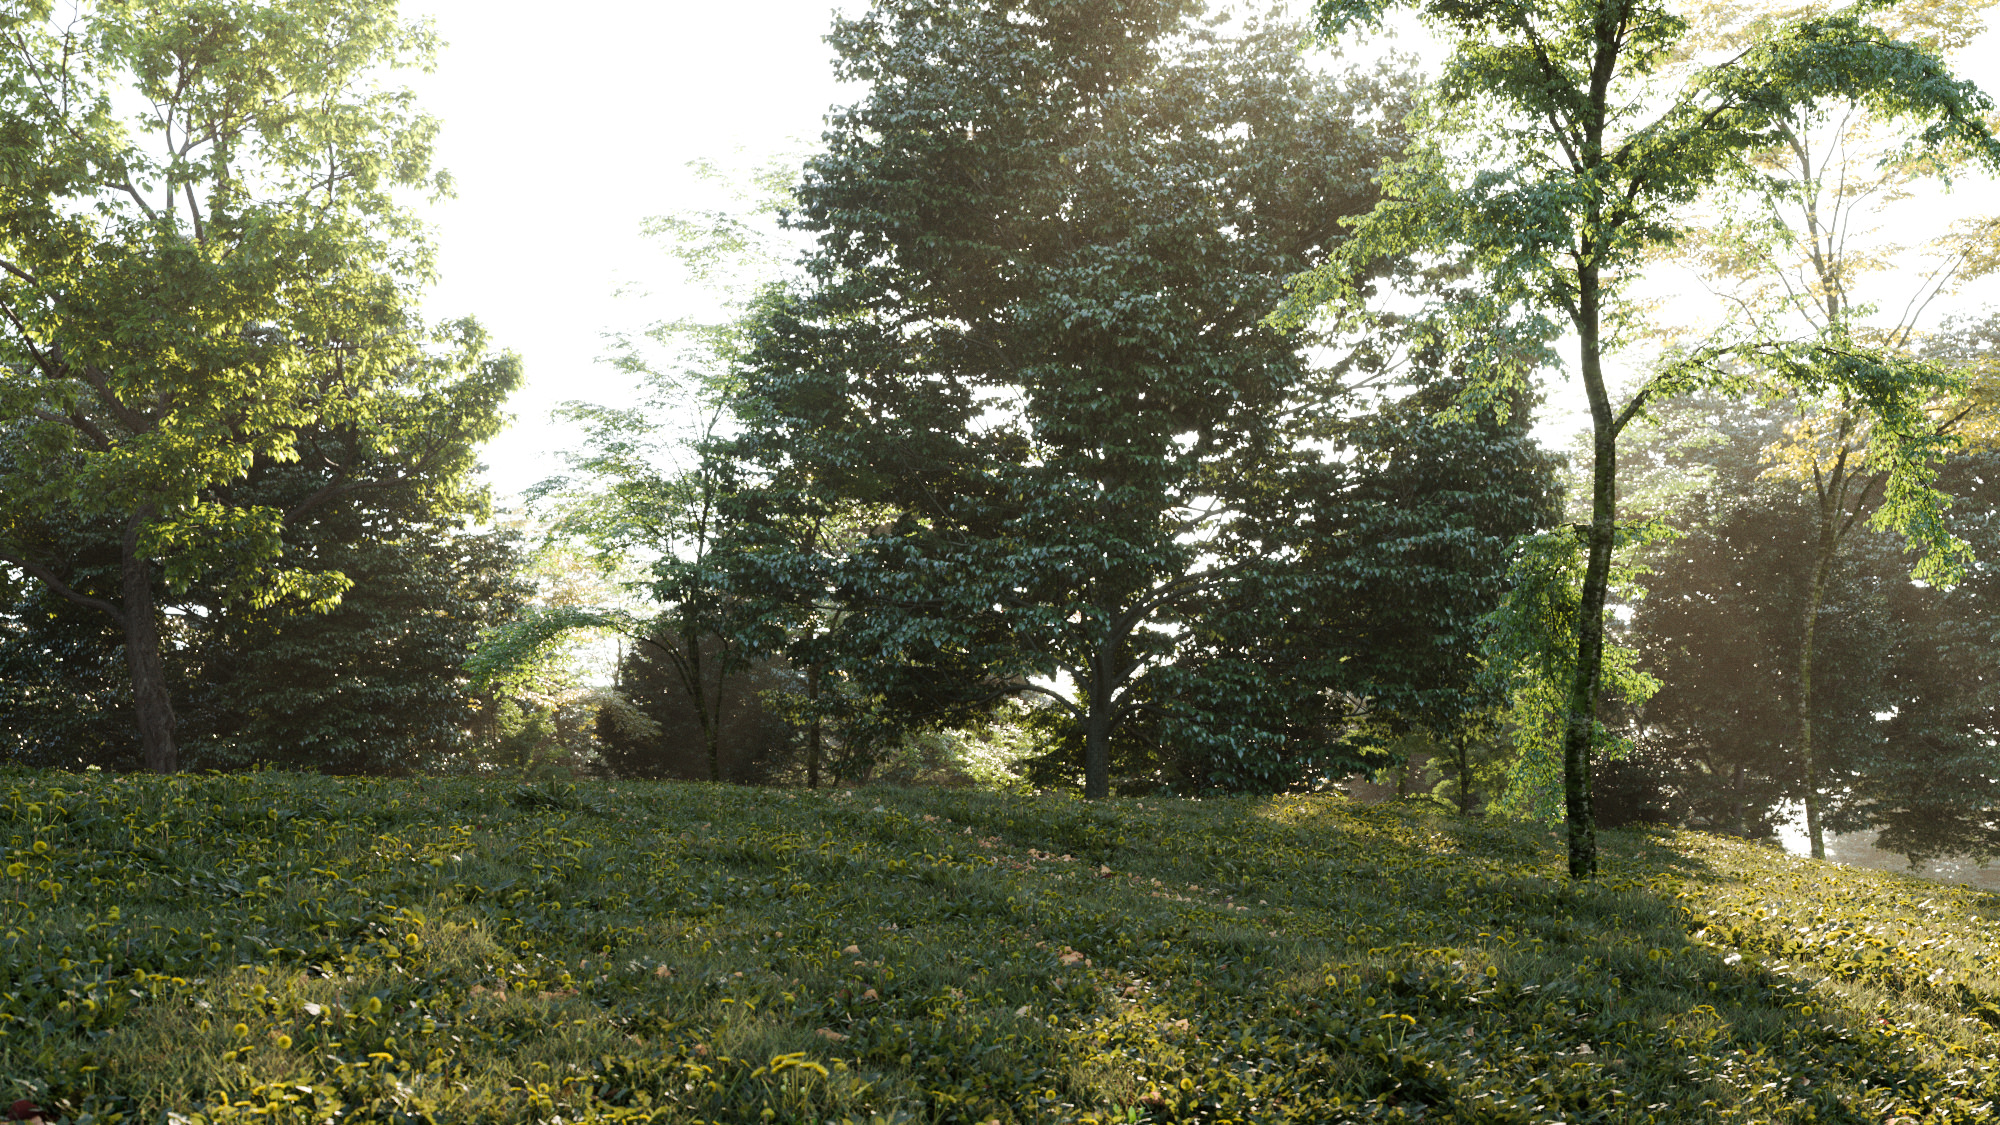
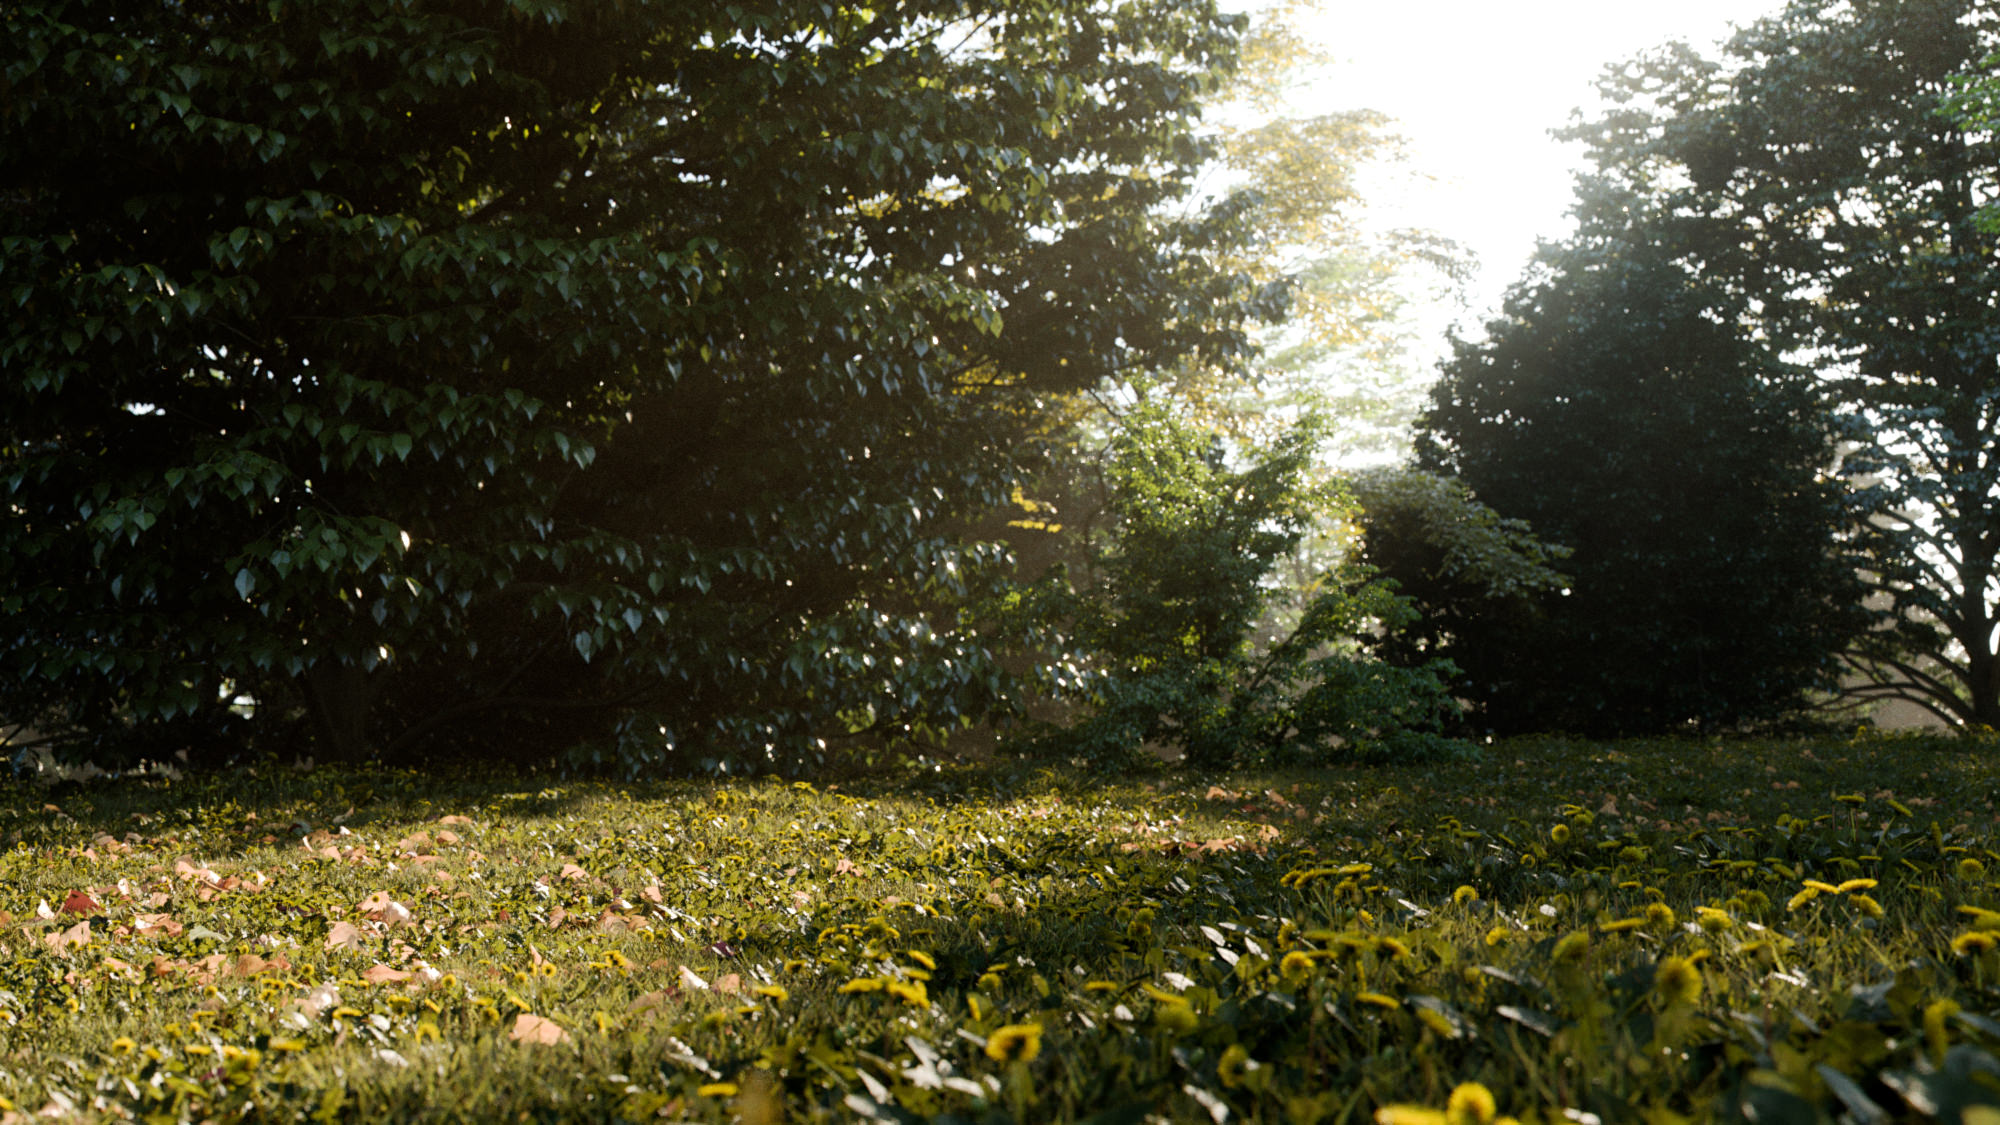
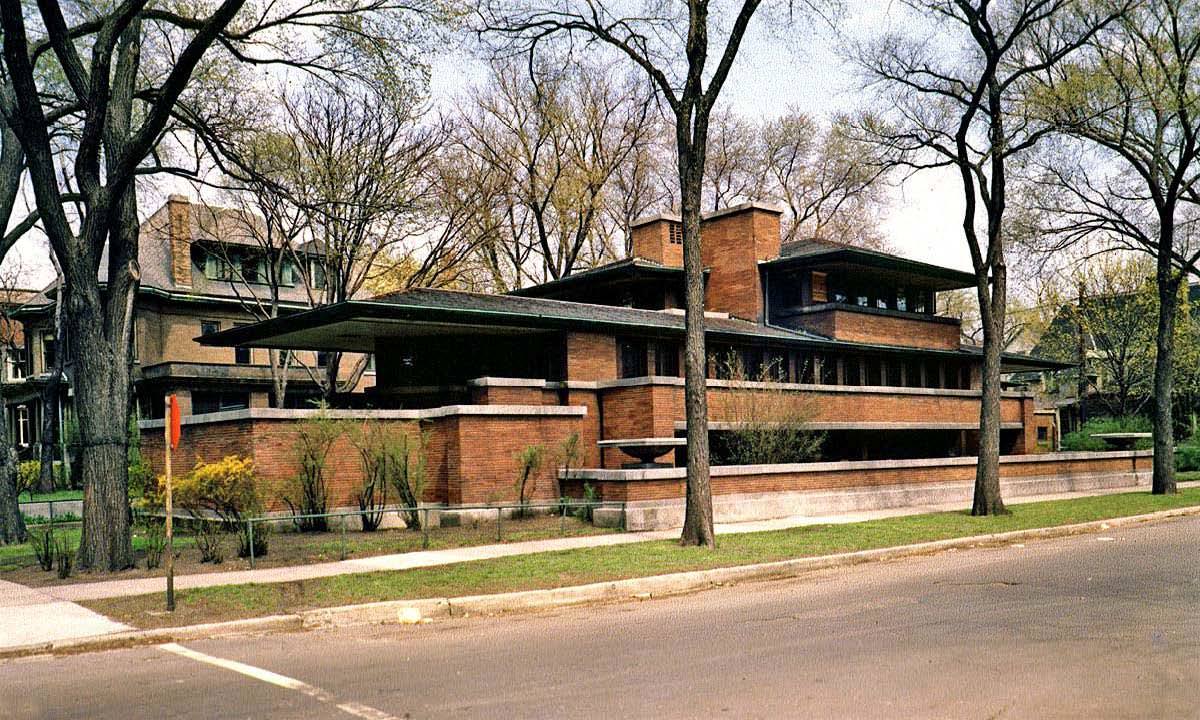
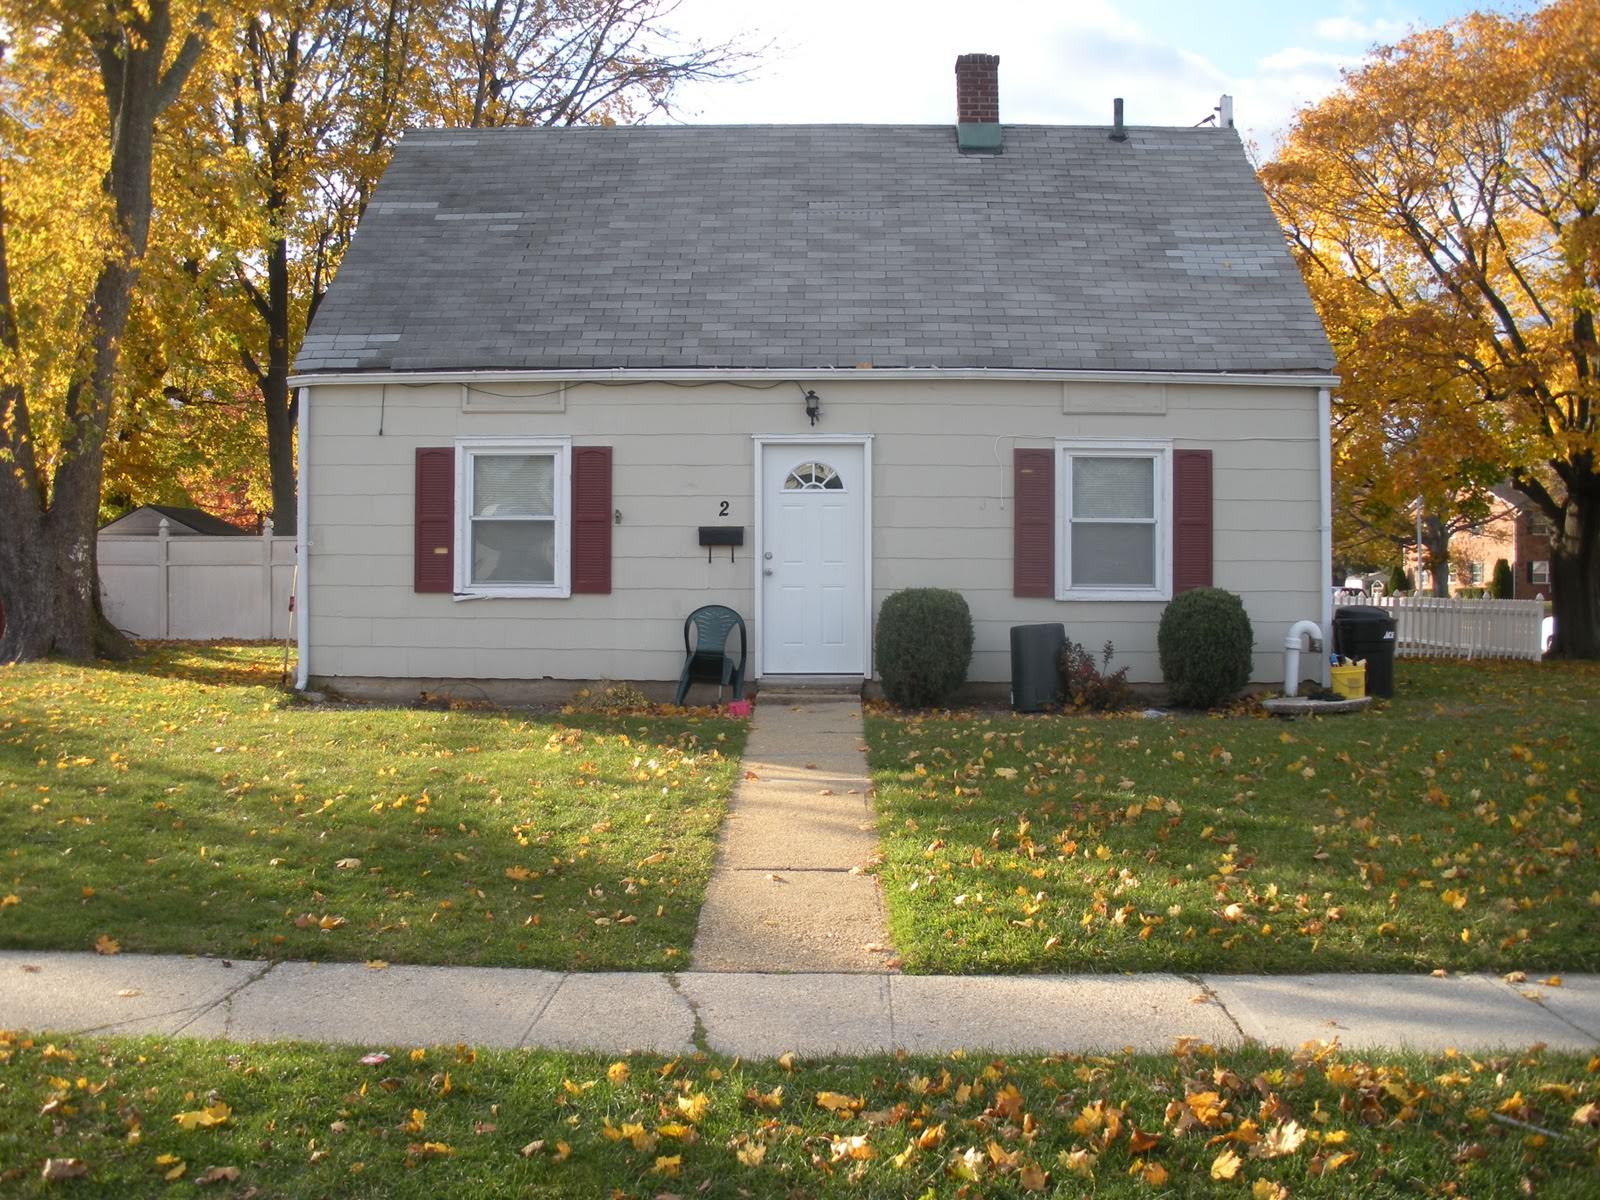
Reference & Mood
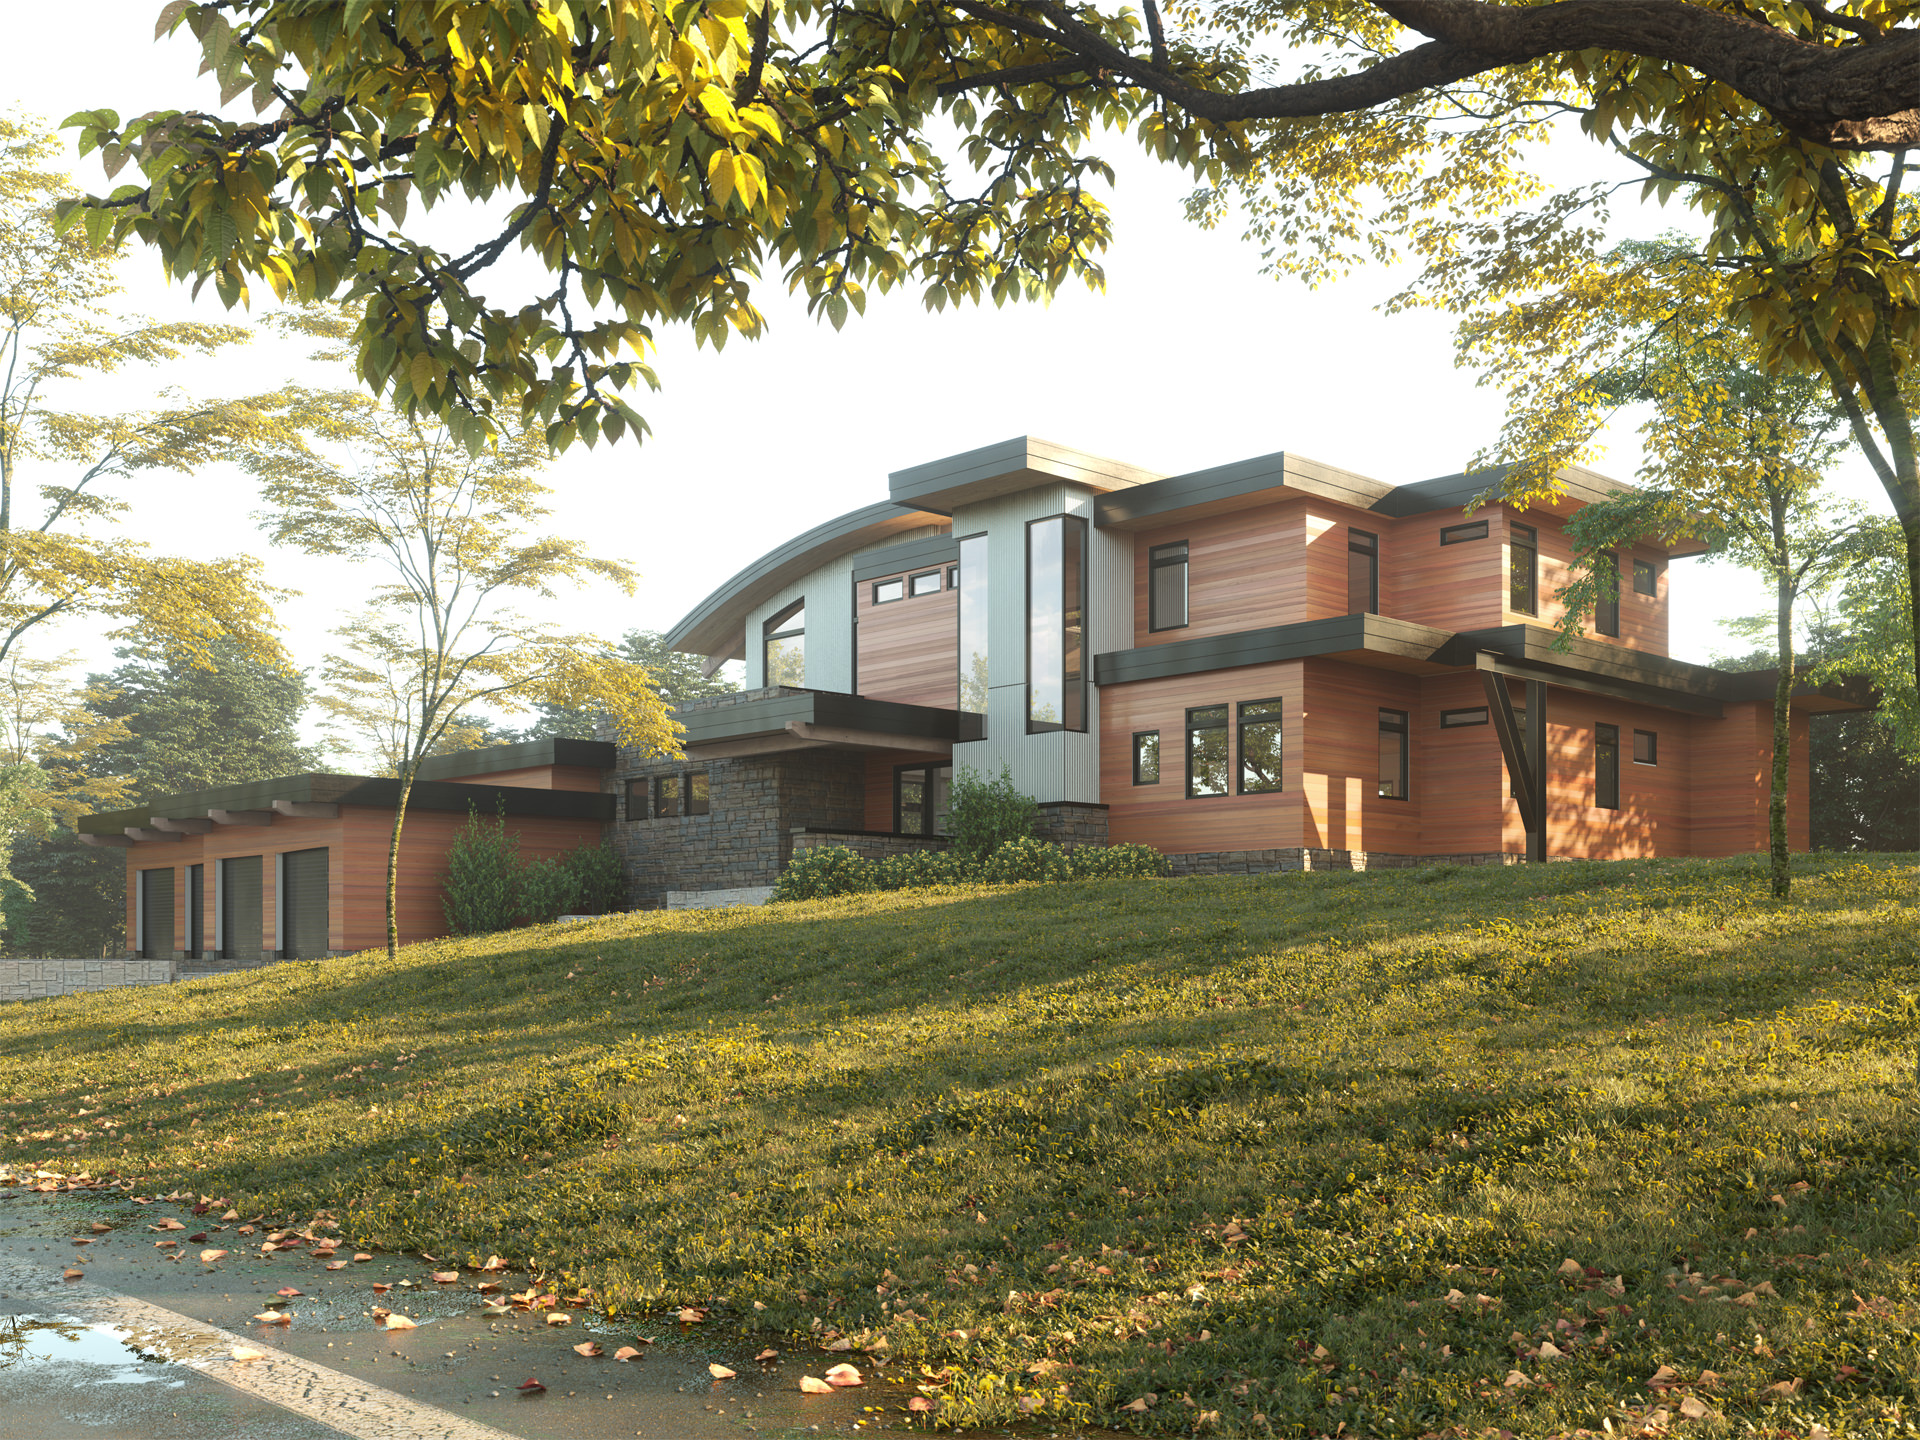
For the stylistic choices for the images, we considered some photo references. We mainly chose those based on the Prairie House and the American suburbs in the ’60s. Because of the photographic references, the mood is in autumn. The lighting is the same as a clear morning after a rainy day, with a low sun and warm tones, which create long shadows that help the final composition of the image.
We didn’t use HDRI but only Corona Renderer Sun + Sky with default parameters. Intensity 1.0 and Size 1.0 NB: We chose a palette with warm colors for the atmosphere to integrate the materials used with the surrounding contest.
Final Settings & Rendering
The settings used in Corona Renderer are the default ones. The parameters we changed are :
- Resolution 5000x 3750 pixels
- Noise limit 2,5%
- Full denoising mode at an amount of 0,3
- Enable DOF with f-number 8 in camera
- Exposure -2,0
- White balance 9000
- Highlight Compress 1,0
The render elements that we insert in the final image are :
- Reflect
- Translucency
- Volumetrics
- Z-depth
- Bloom & Glare
- Raw Diffuse
- Raw Reflection
- Raw Refraction
- Source diffuse
We enabled the Camera Depth of Field and used a custom aperture map. In images like this one taken with a wide-angle lens, the DOF effect is less visible but it slightly increases the photorealism by breaking the perfection of digital images.
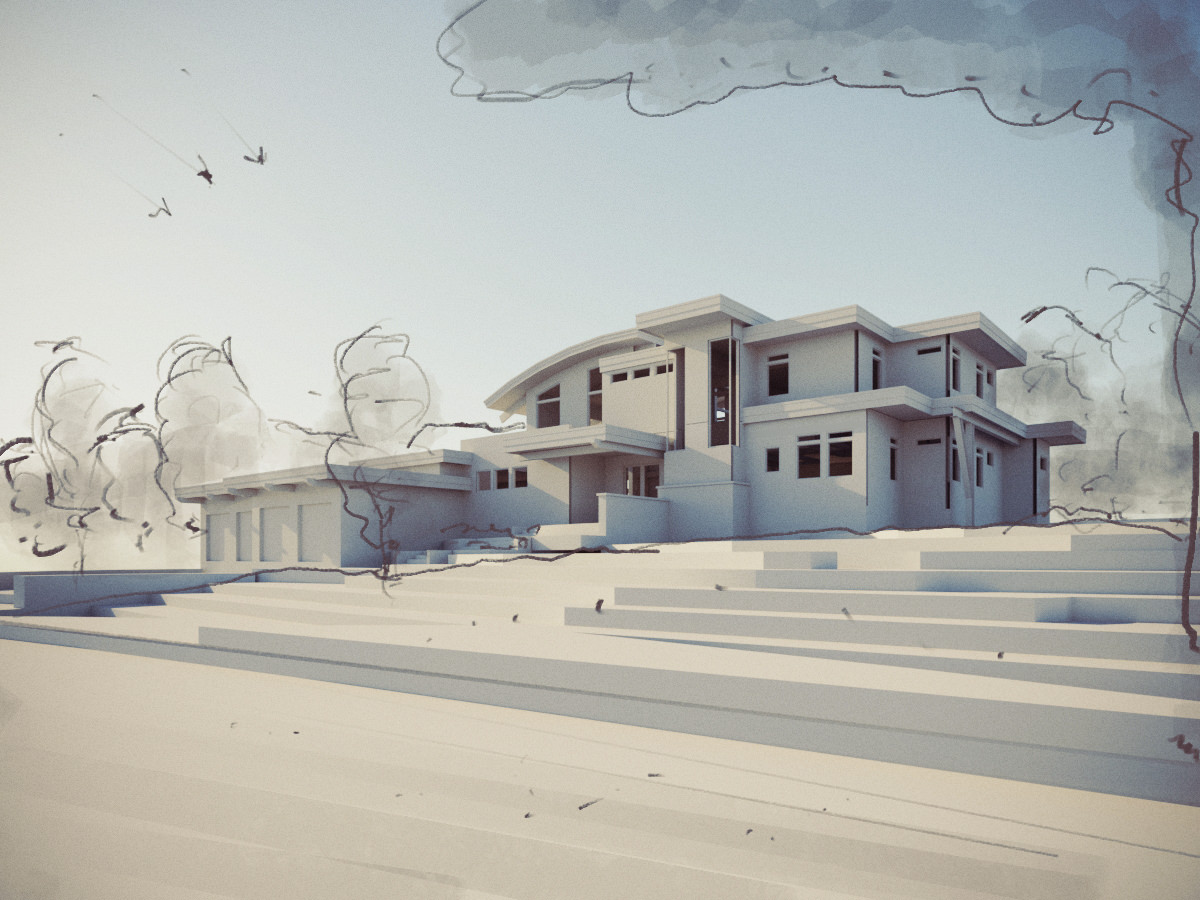
To emphasize the autumn mood but also to make the image lively and realistic, we introduced the Volumetric Fog.
Raw render
Post-Production
When we work with this kind of projects, we aim for less post-production in order not to alter the photorealistic nature of the image.
We did similar work to what a photographer would do when adjusting a Raw file :
Correction of contrasts and material reflections
Emphasis on the fog
Color grading to define the final look

Thanks for watching and we hope you enjoy our tutorial.
SoA Studio / SoA Academy
![]()


Perfecto!! )
How are you guys going from Substance Designer to Corona? Just exporting from SD as bitmaps? Beautiful renders.
Hi, we exported the various bitmaps from Substance.
Thanks!
Very informative. Very, very nice technique! Wonderful render.
Thanks for sharing! Very interesting!
Amazing work!
Great tutorial, insightful and a great outcome – thanks for sharing!
Pardon my language, but holy fuck.
Wow, you’re megascan rendering are sick! congratulation! Do you mind sharing your material setup for grass or leaves? My render seams a bit fake compare to yours! Maybe I’m missing some points with specular or reflexions? Any advice? Anyway … really god job! 🙂
Hi just to know, am quite a starter so loved so much you tut,.though i got a lot to learn. One qn, the color grading was done by a LUT or just Post Production software (Ps I guess!)
Its Nice Work … I like your work sir.!