


Making of 80 East 10th Film
Moso Studio shares with us a fantastic breakdown of their work on the 80 East 10th film for NAVA and Brown Harris Stevens. The goal was to portray NAVA’s vision in a way that would resonate with viewers, and so the unique and intricate facade pattern was recruited for this purpose, with a sphere guiding the viewer all through the film along with some smart Forest Pack tricks to accompany that. Enjoy!
Moso Studio would like to thank Ronen Bekerman for inviting us to share our work. We are longtime fans and often visit RB’s website to learn about what others are doing in the world of CGI as well as find inspiration for our work. We’re honored to be able to contribute to this talented and diverse community.
Our film 80e10th is a short film that contextualizes an architectural project by highlighting various intimate interior and exterior moments. This film was created for one of our longtime clients, the architectural and development office NAVA, in partnership with Brown Harris Stevens (BHS), a sales and marketing company.
Working with NAVA and BHS was a great experience. We were inspired by the design of the building, and their trust gave us freedom in our creative endeavors. A more conservative client might not have been as open to experimentation with visual storytelling when it came to architectural visualization, so we were enthusiastic about this project from the beginning.
Below we will share with you a bit about our process, from the creative and artistic to the technical angles.
The Film
The Project Scope
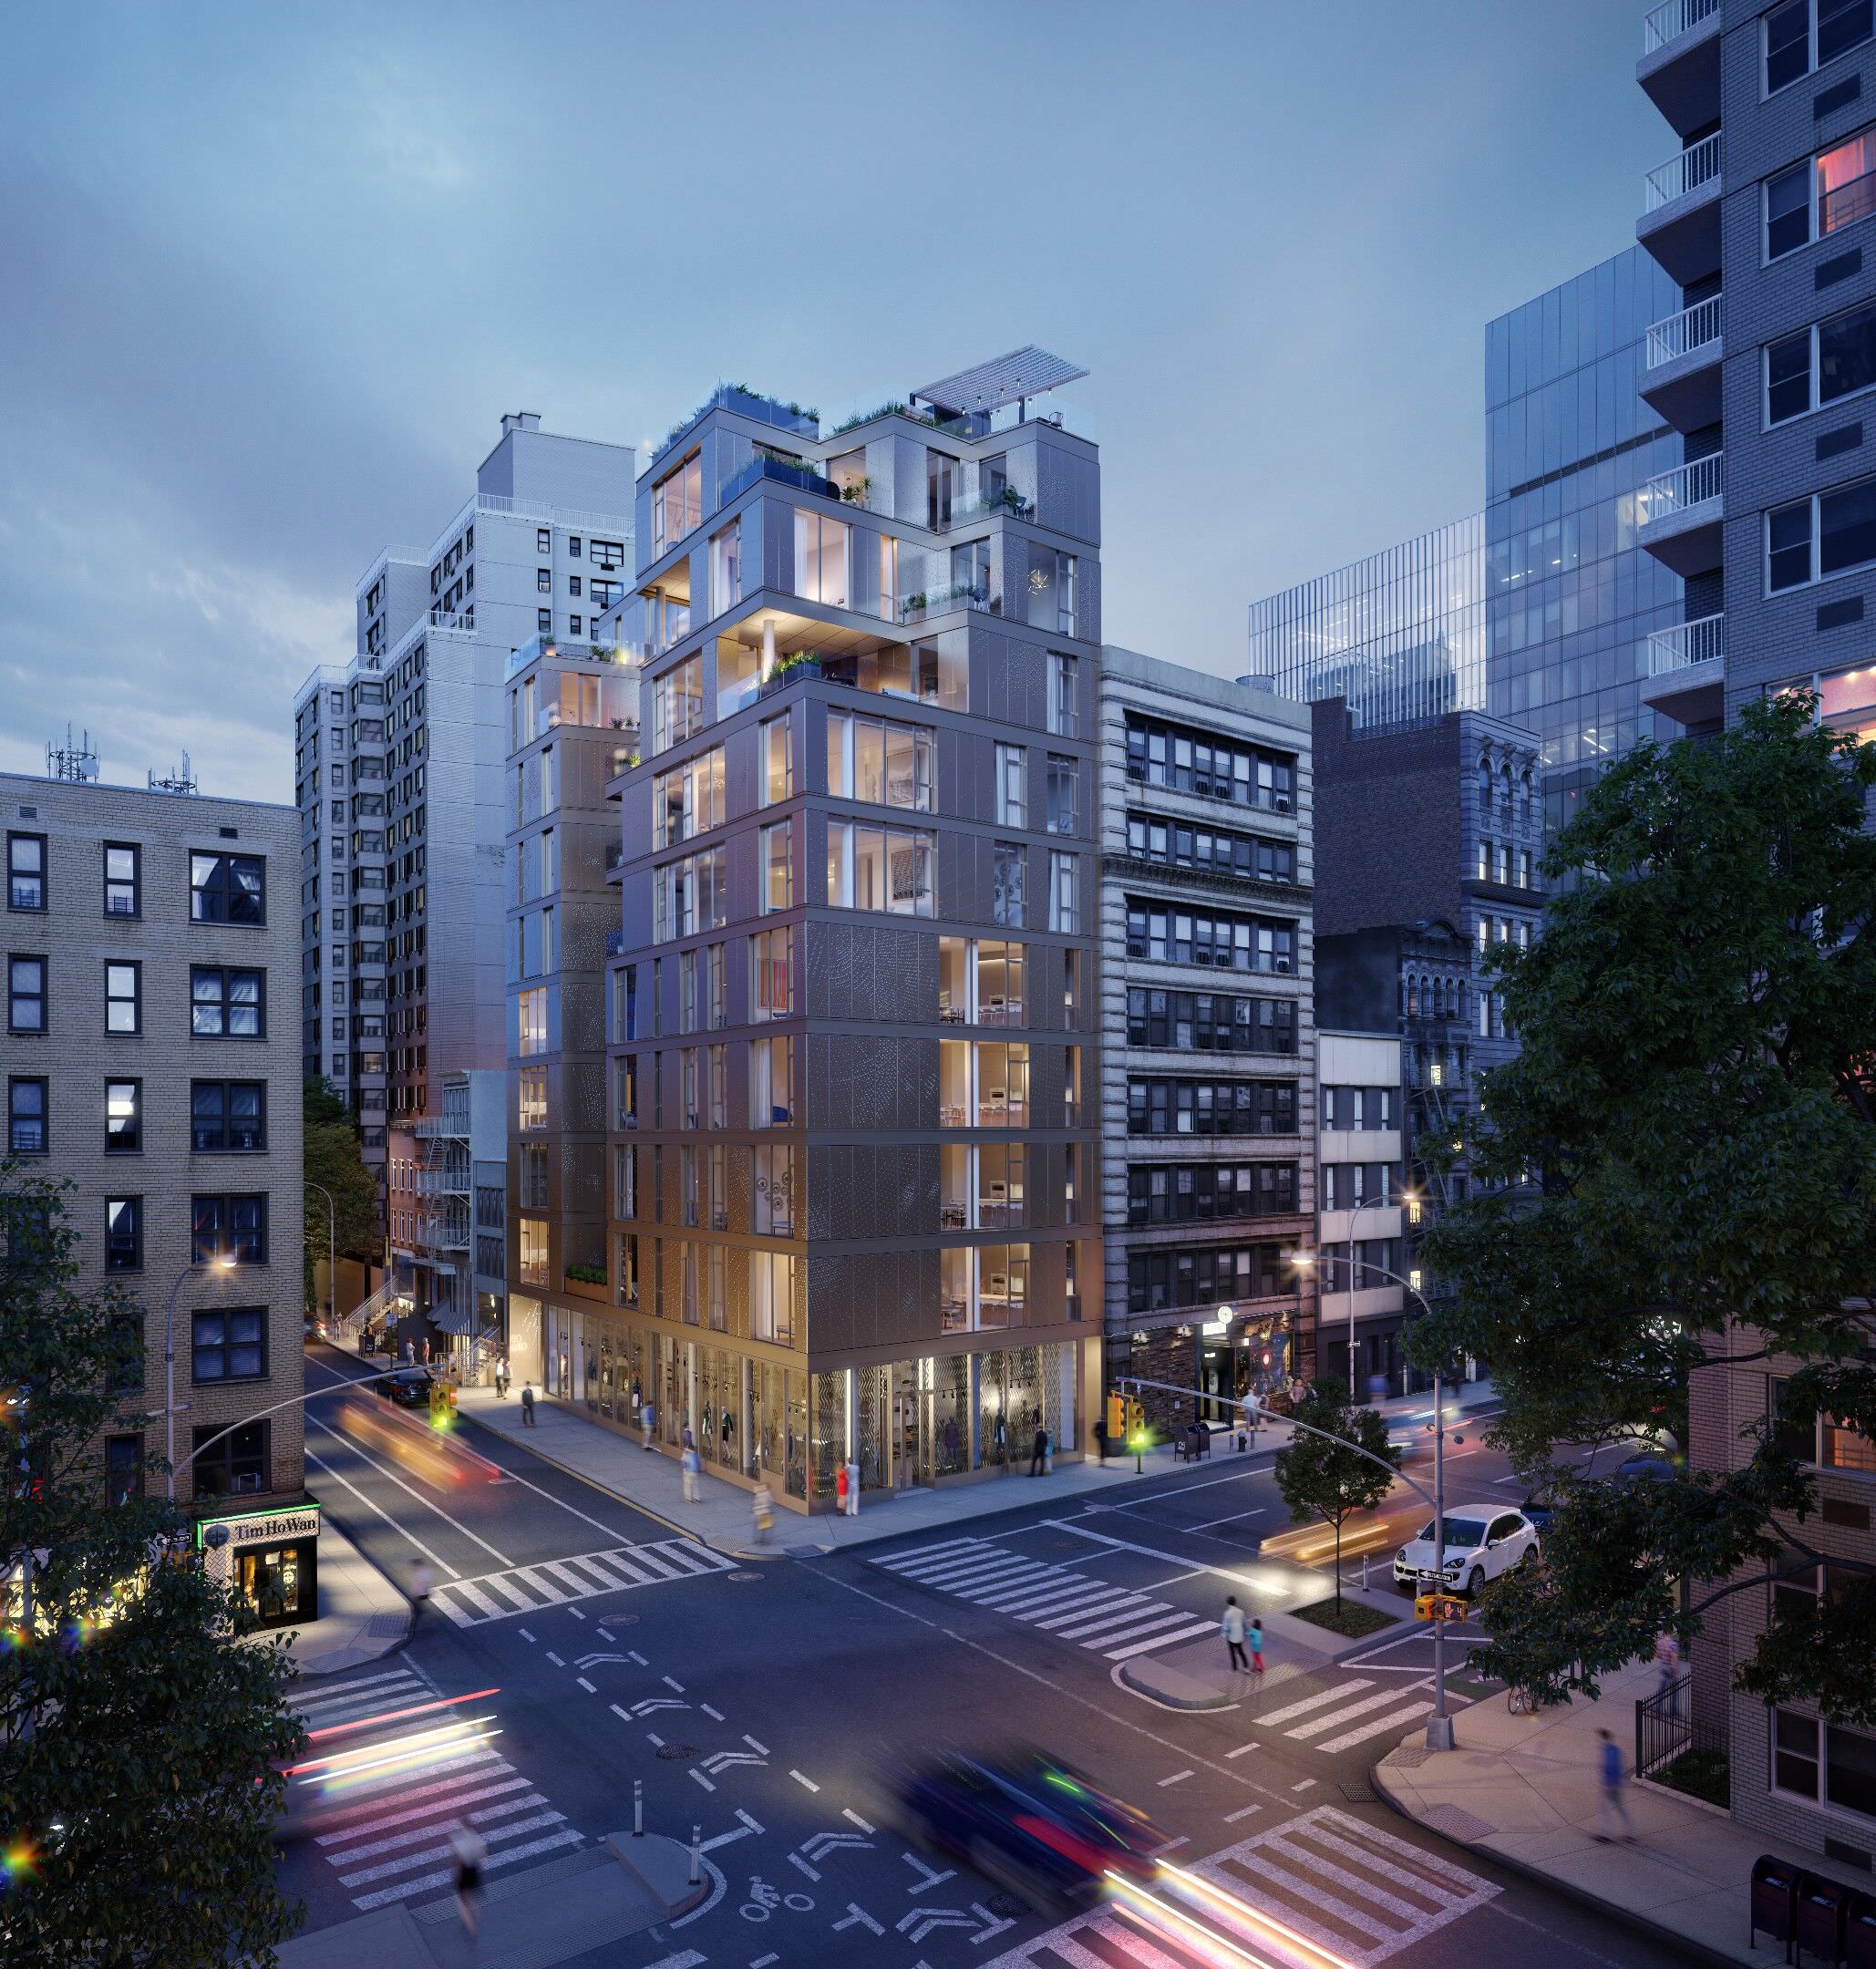
This film was commissioned after we completed a set of still images for the Eighty East Tenth marketing campaign, which showcases a twelve-unit boutique luxury condominium located at the intersection of East and West Village. Two of New York City’s most iconic neighborhoods.
The scope of the animation was to portray NAVA’s vision in a way that would resonate with viewers and to provide potential buyers with a deeper perspective of the building. We wanted to create something different and exciting so people would not see the film as just a marketing tool, but would also enjoy the simple narrative within.
Above are some of the illustrations made before the film was created.
The Location
The film takes place in and around Astor Place, a dynamic and ever-changing neighborhood in the lower part of Manhattan. As mentioned on NAVA’s website, “Eighty East Tenth Streets sits at the heart of a historically significant stretch of Fourth Avenue formerly known as Book Row, once the center of the rare and antique book trade in America.”
The Initial Concept
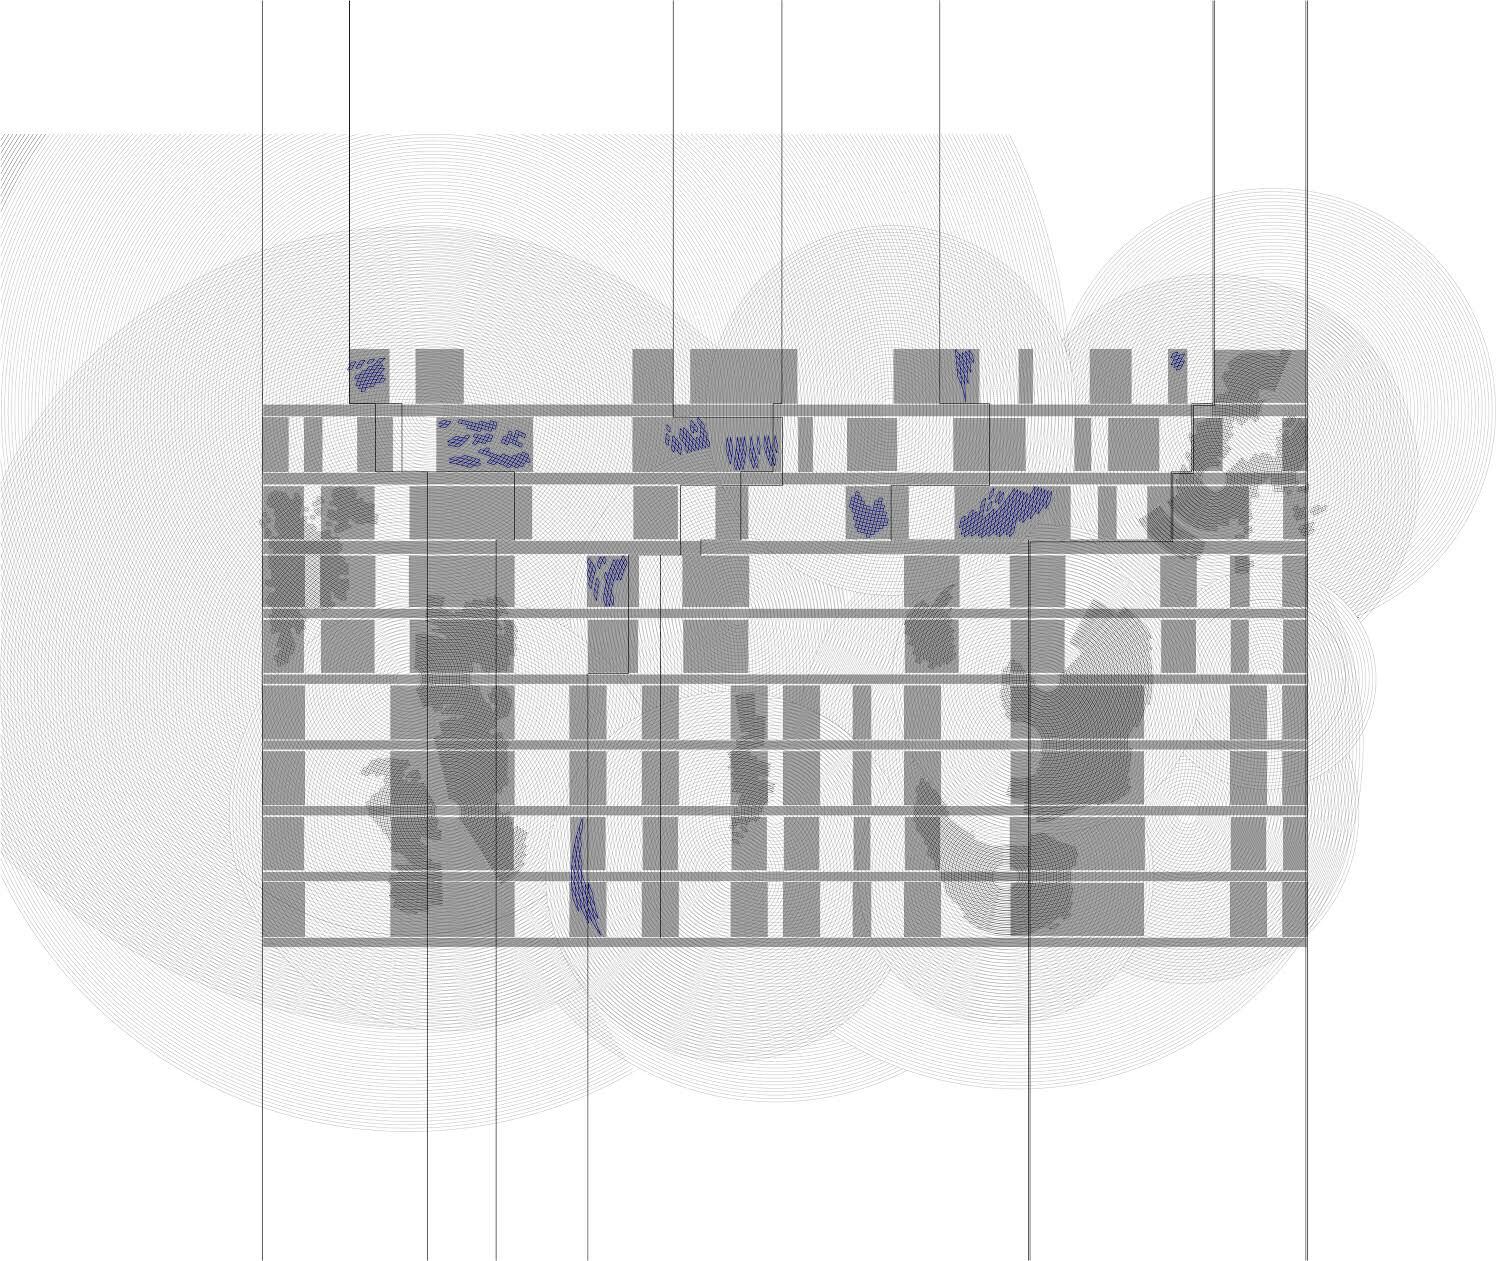
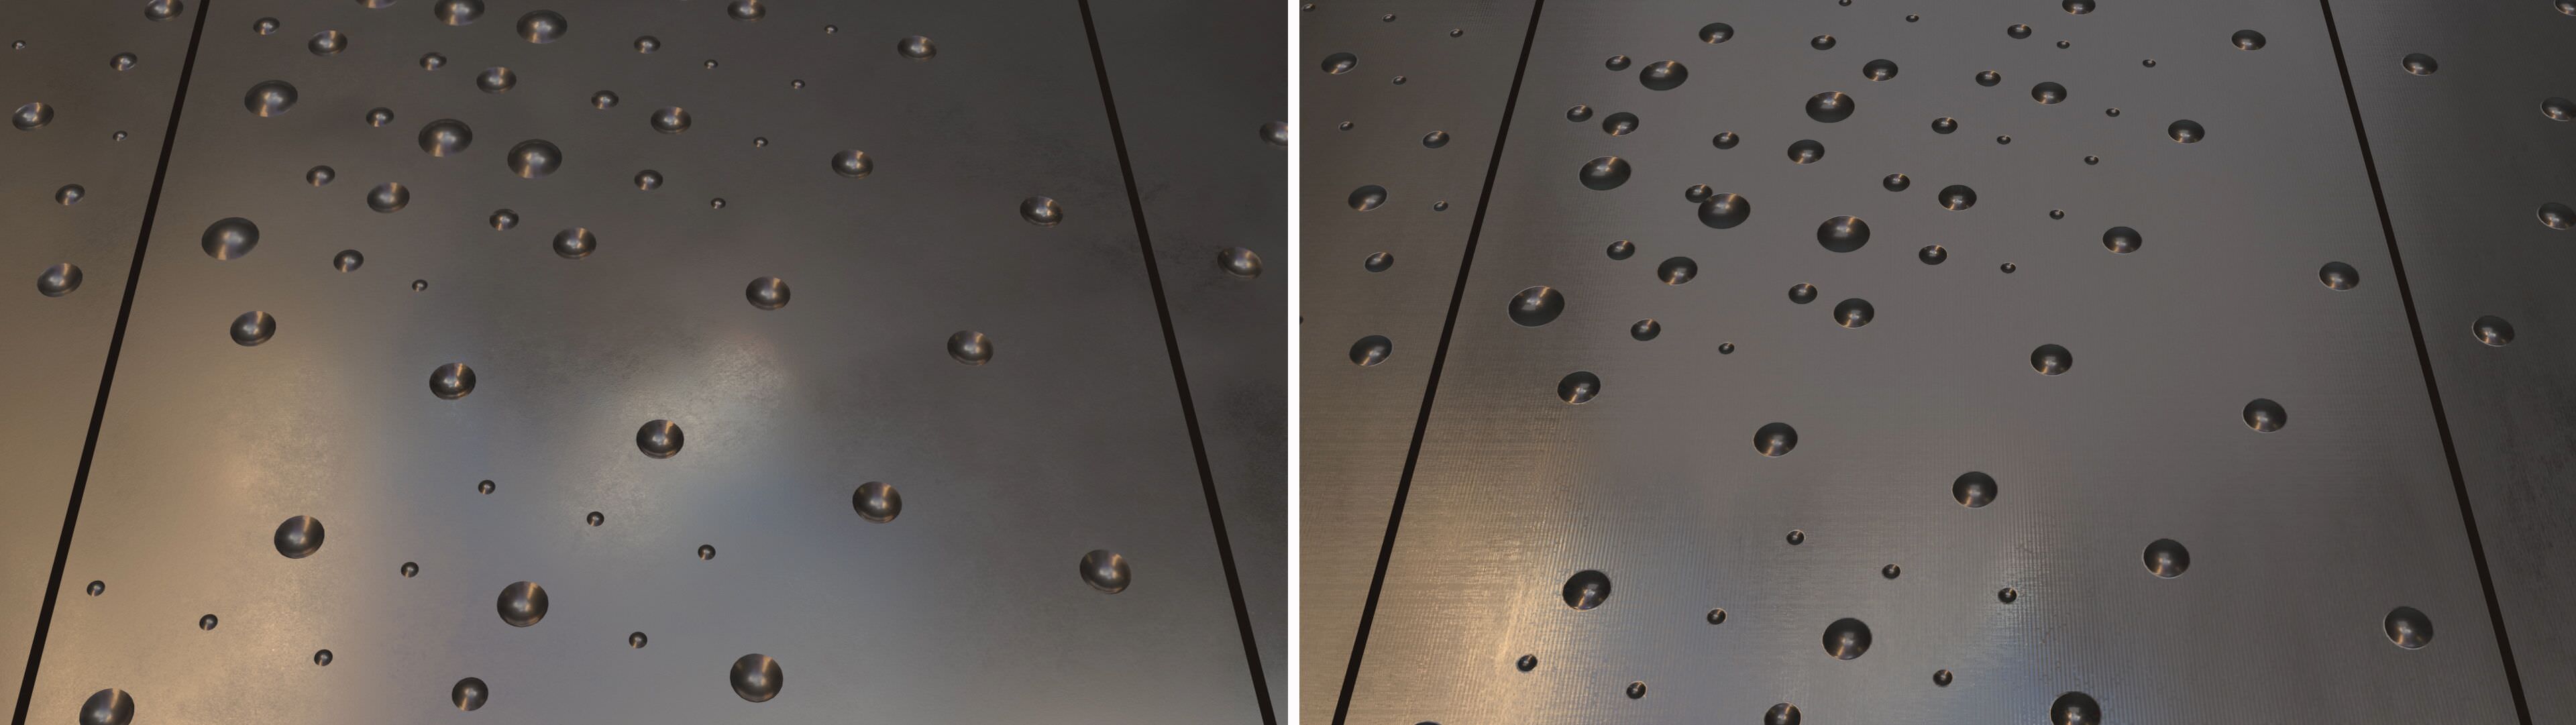
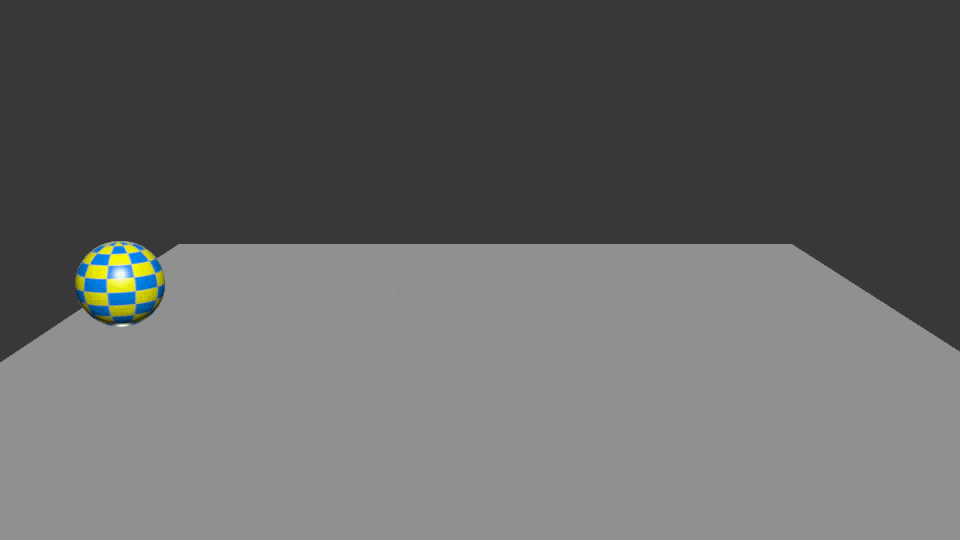
The unique element architecturally happens at the facade. NAVA designed a very intricate pattern layout that gives the exterior metal cladding a unique look. The pattern is expressed with a series of spherical cavities and reliefs that follow an elaborate radial system designed by NAVA. This pattern inspired the idea of a sphere as the central initial concept.
North façade elevation
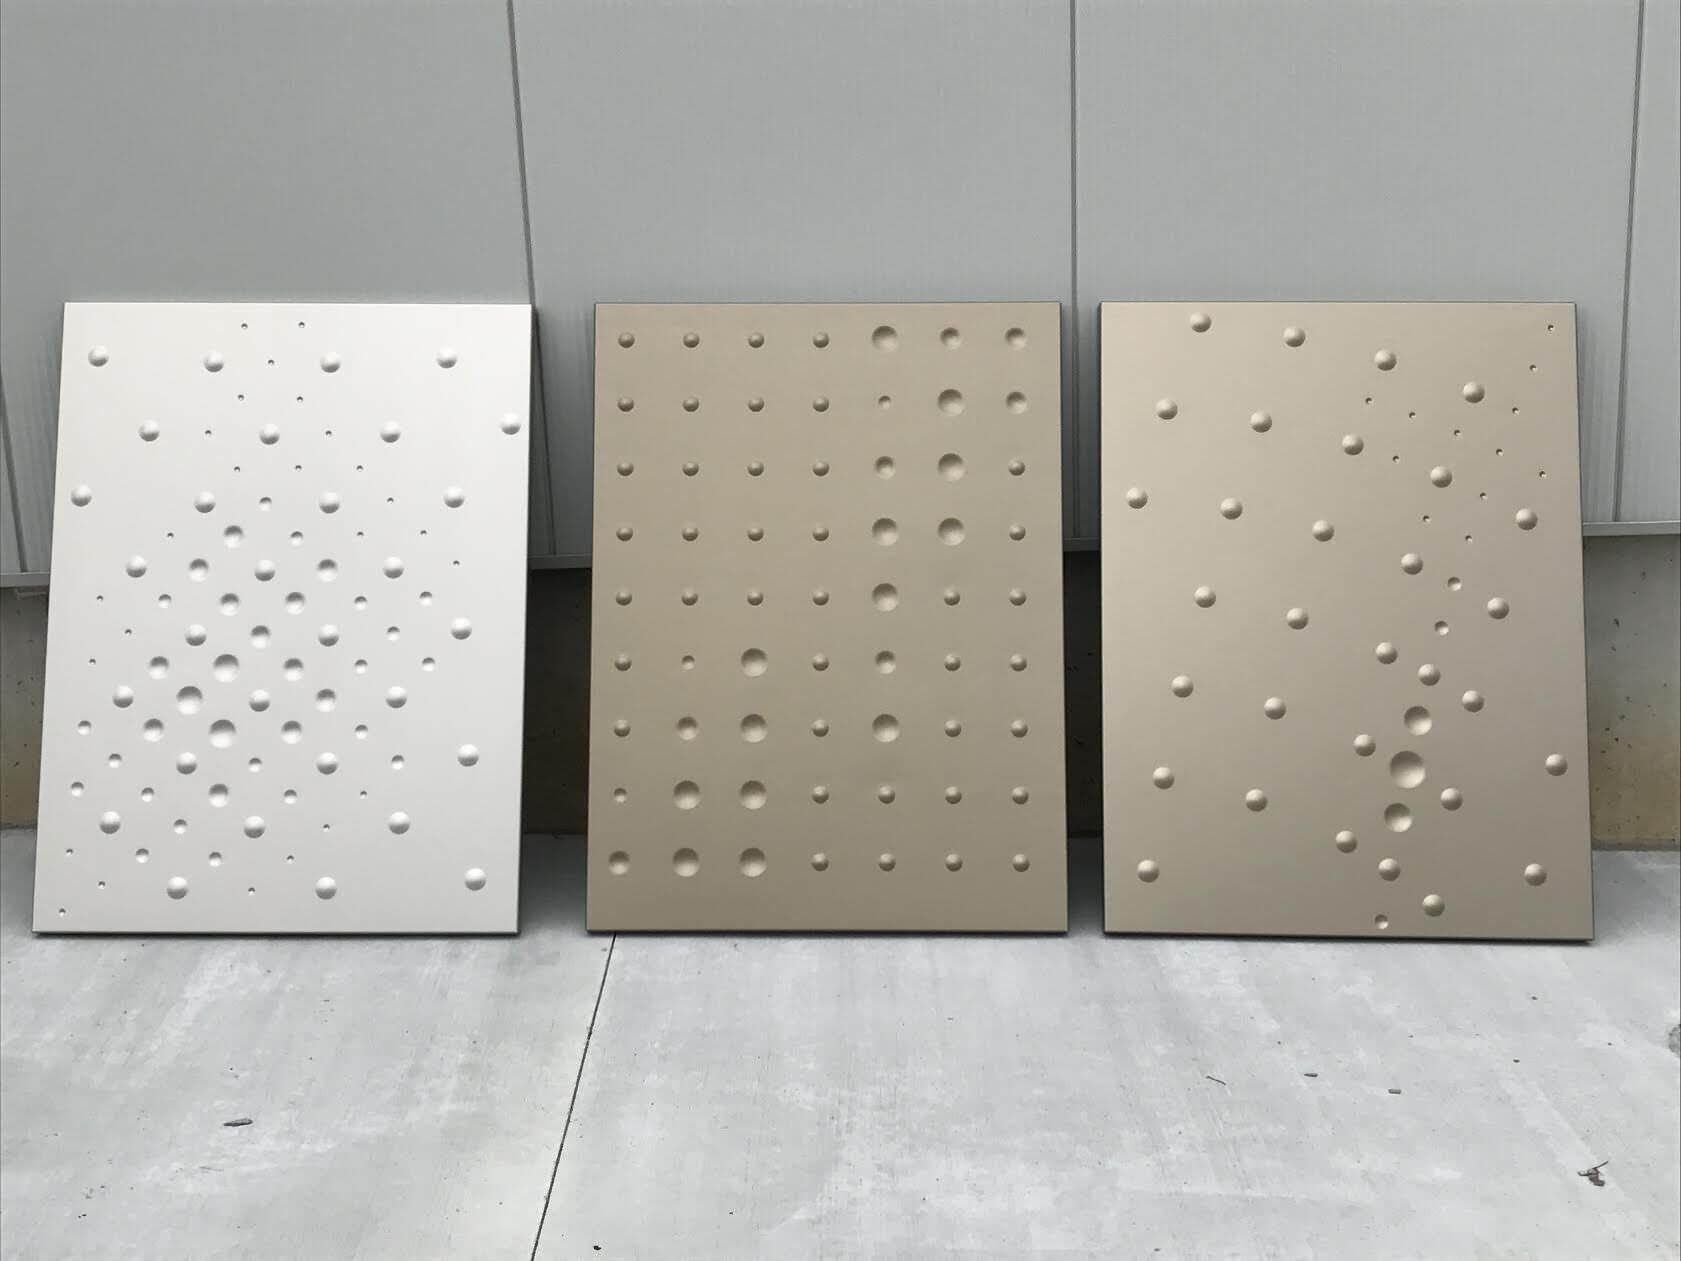
Metal panels composing the building facade: the pattern is made of concave and convex spheres, arranged differently for every single panel
The Storyboard
Below are some of the sketches we created to refine our ideas. The initial storyboard was quite different from the final film, but it helped to set the groundwork as we polished and selected the best ideas that emerged during this process.
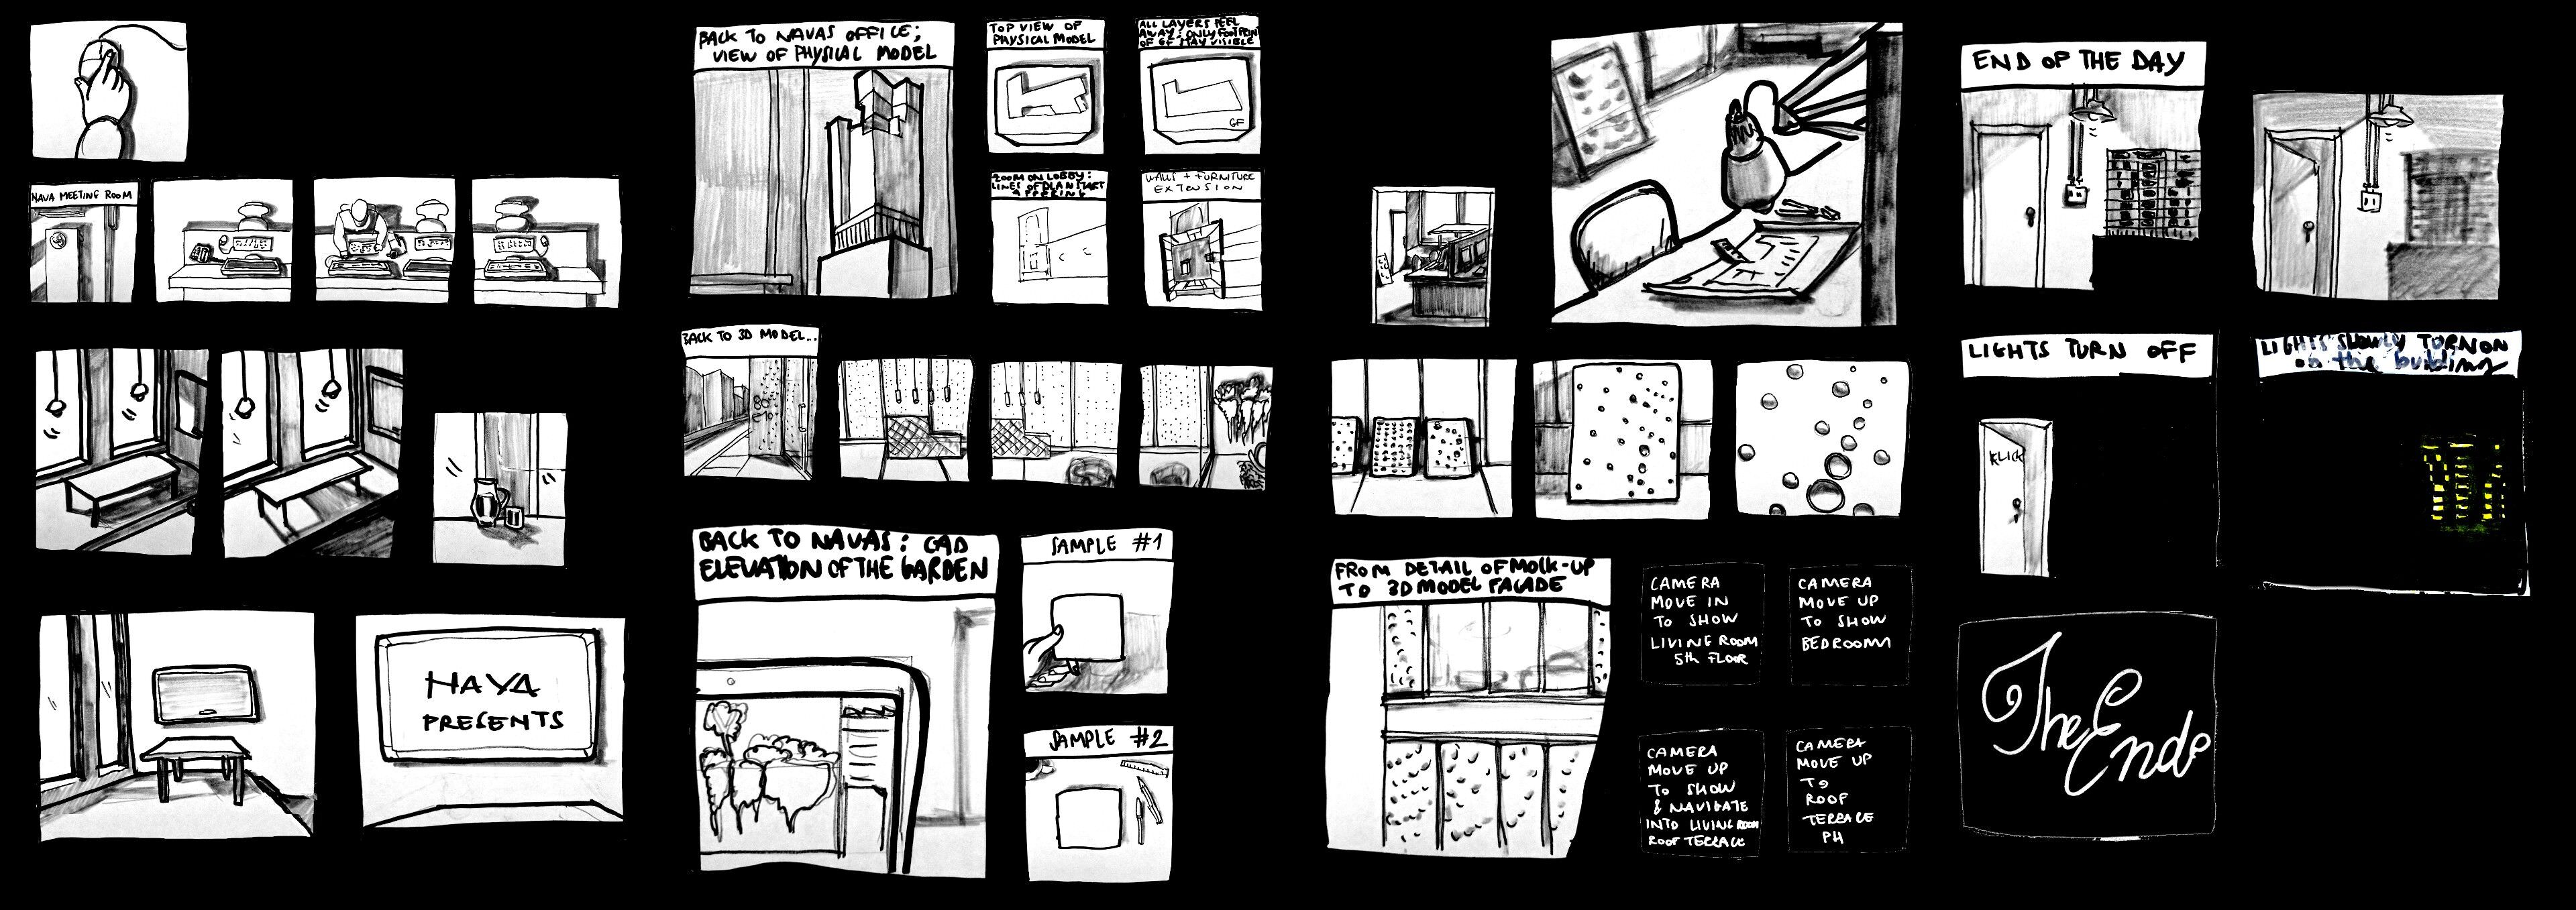
Our first Storyboard concept
Focus on a panel story

Final Storyboard
By the time we reached what would be our final storyboard, we had a distinct path of what we had to do; we had the leading actor (the sphere), and we were going to tell the story of its journey to the building. By doing this, we would get to show a bit of the surrounding, and also, once, within the building, we’d be able to provide a focal point to guide the viewer from one space to another.
This approach also lent itself to a slow reveal of the building. We could offer a few glimpses at first, and then, just towards the end, show the full view.
Breakdown of the Film
The storyboard was divided into three blocks representing the three different segments of the narrative and corresponding to the production of each.
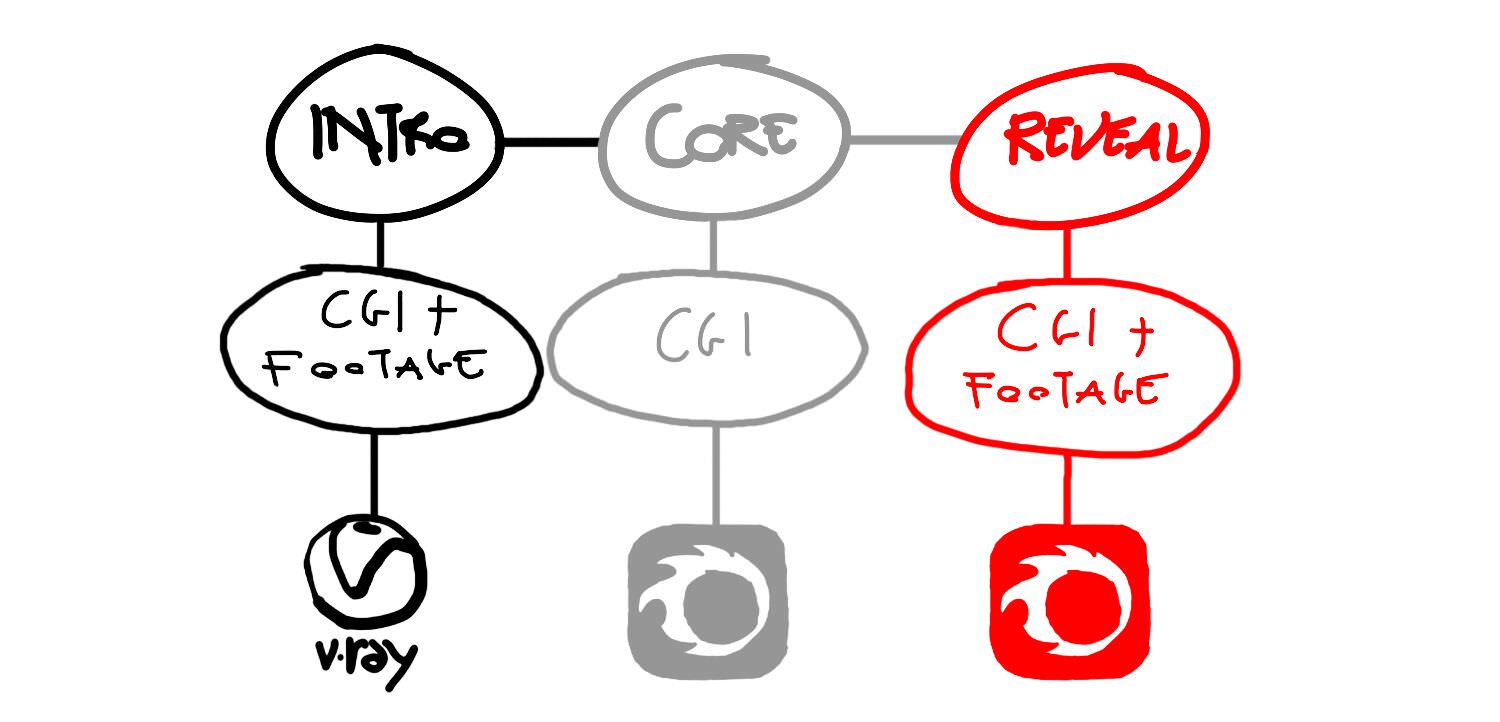
The Intro (scenes outside, before entering the lobby)
These scenes were heavily dependent on film. We used various techniques to acquire the footage and to combine it with the CGI elements.
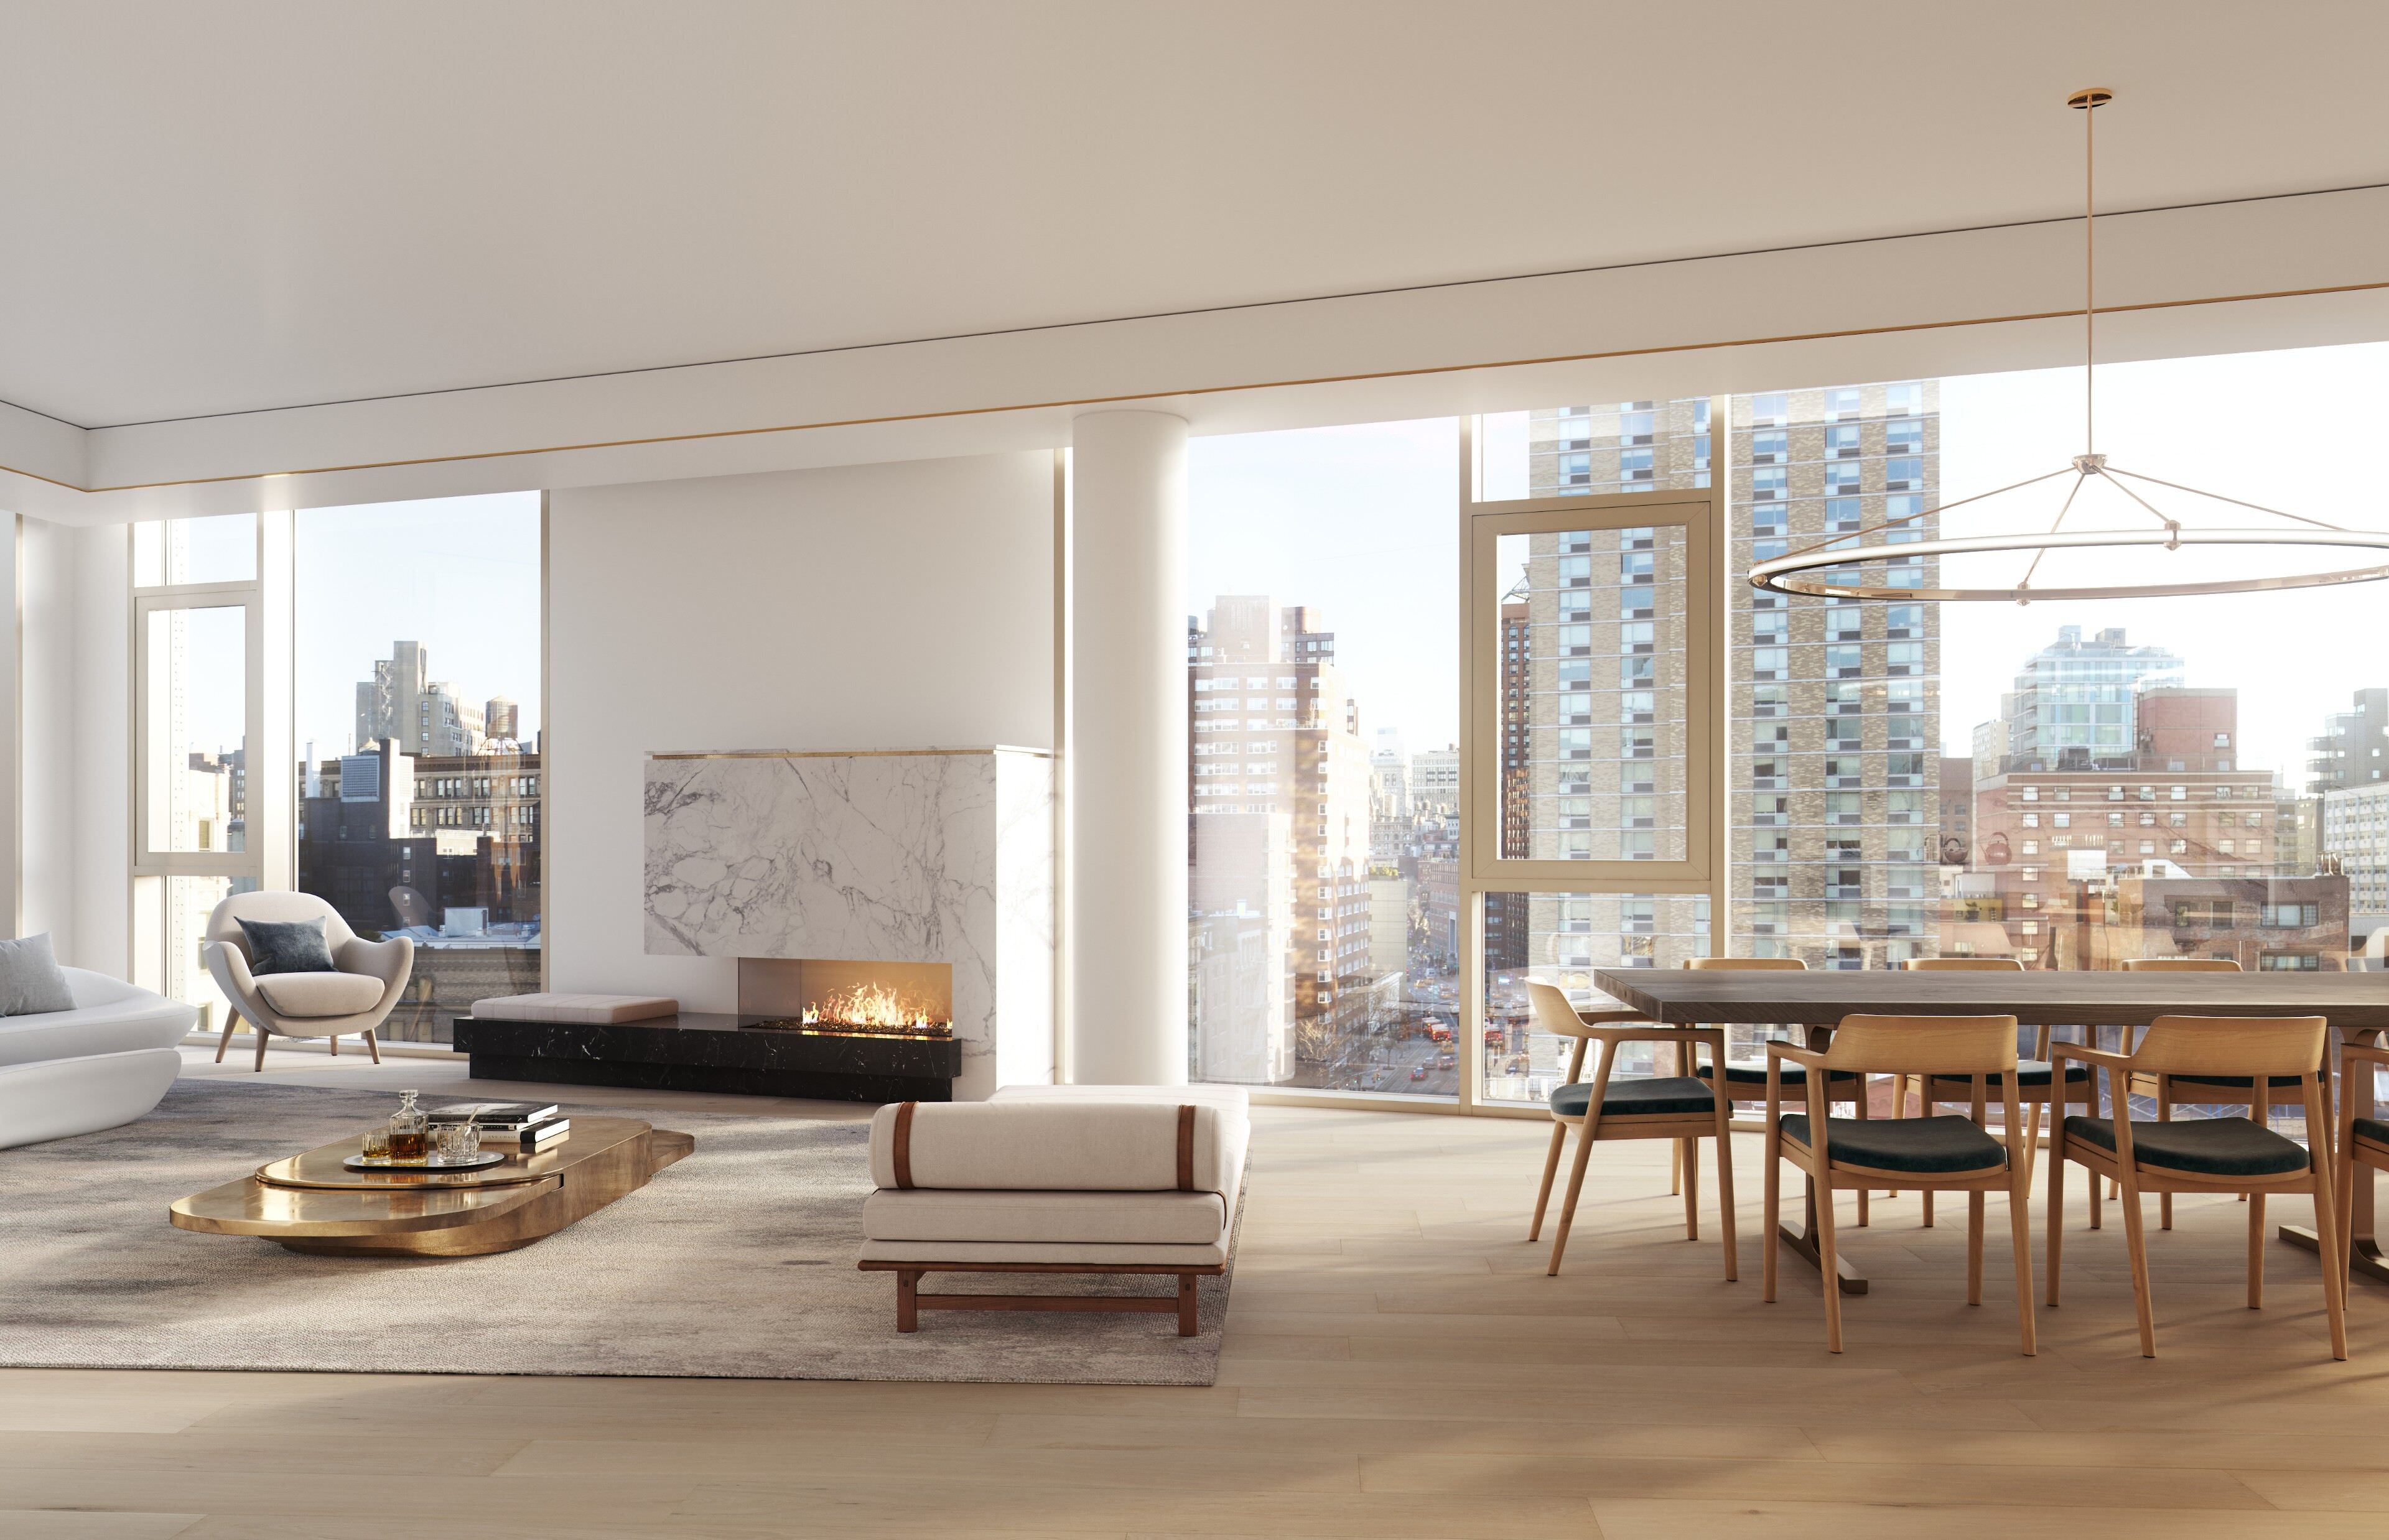
The Core (scenes inside the building)
These were mostly CGI. In some ways, they more straightforward to set up, but of course, they came with all the predictable complexities of making appealing interior visuals and having cameras that could maintain a good narrative flow.
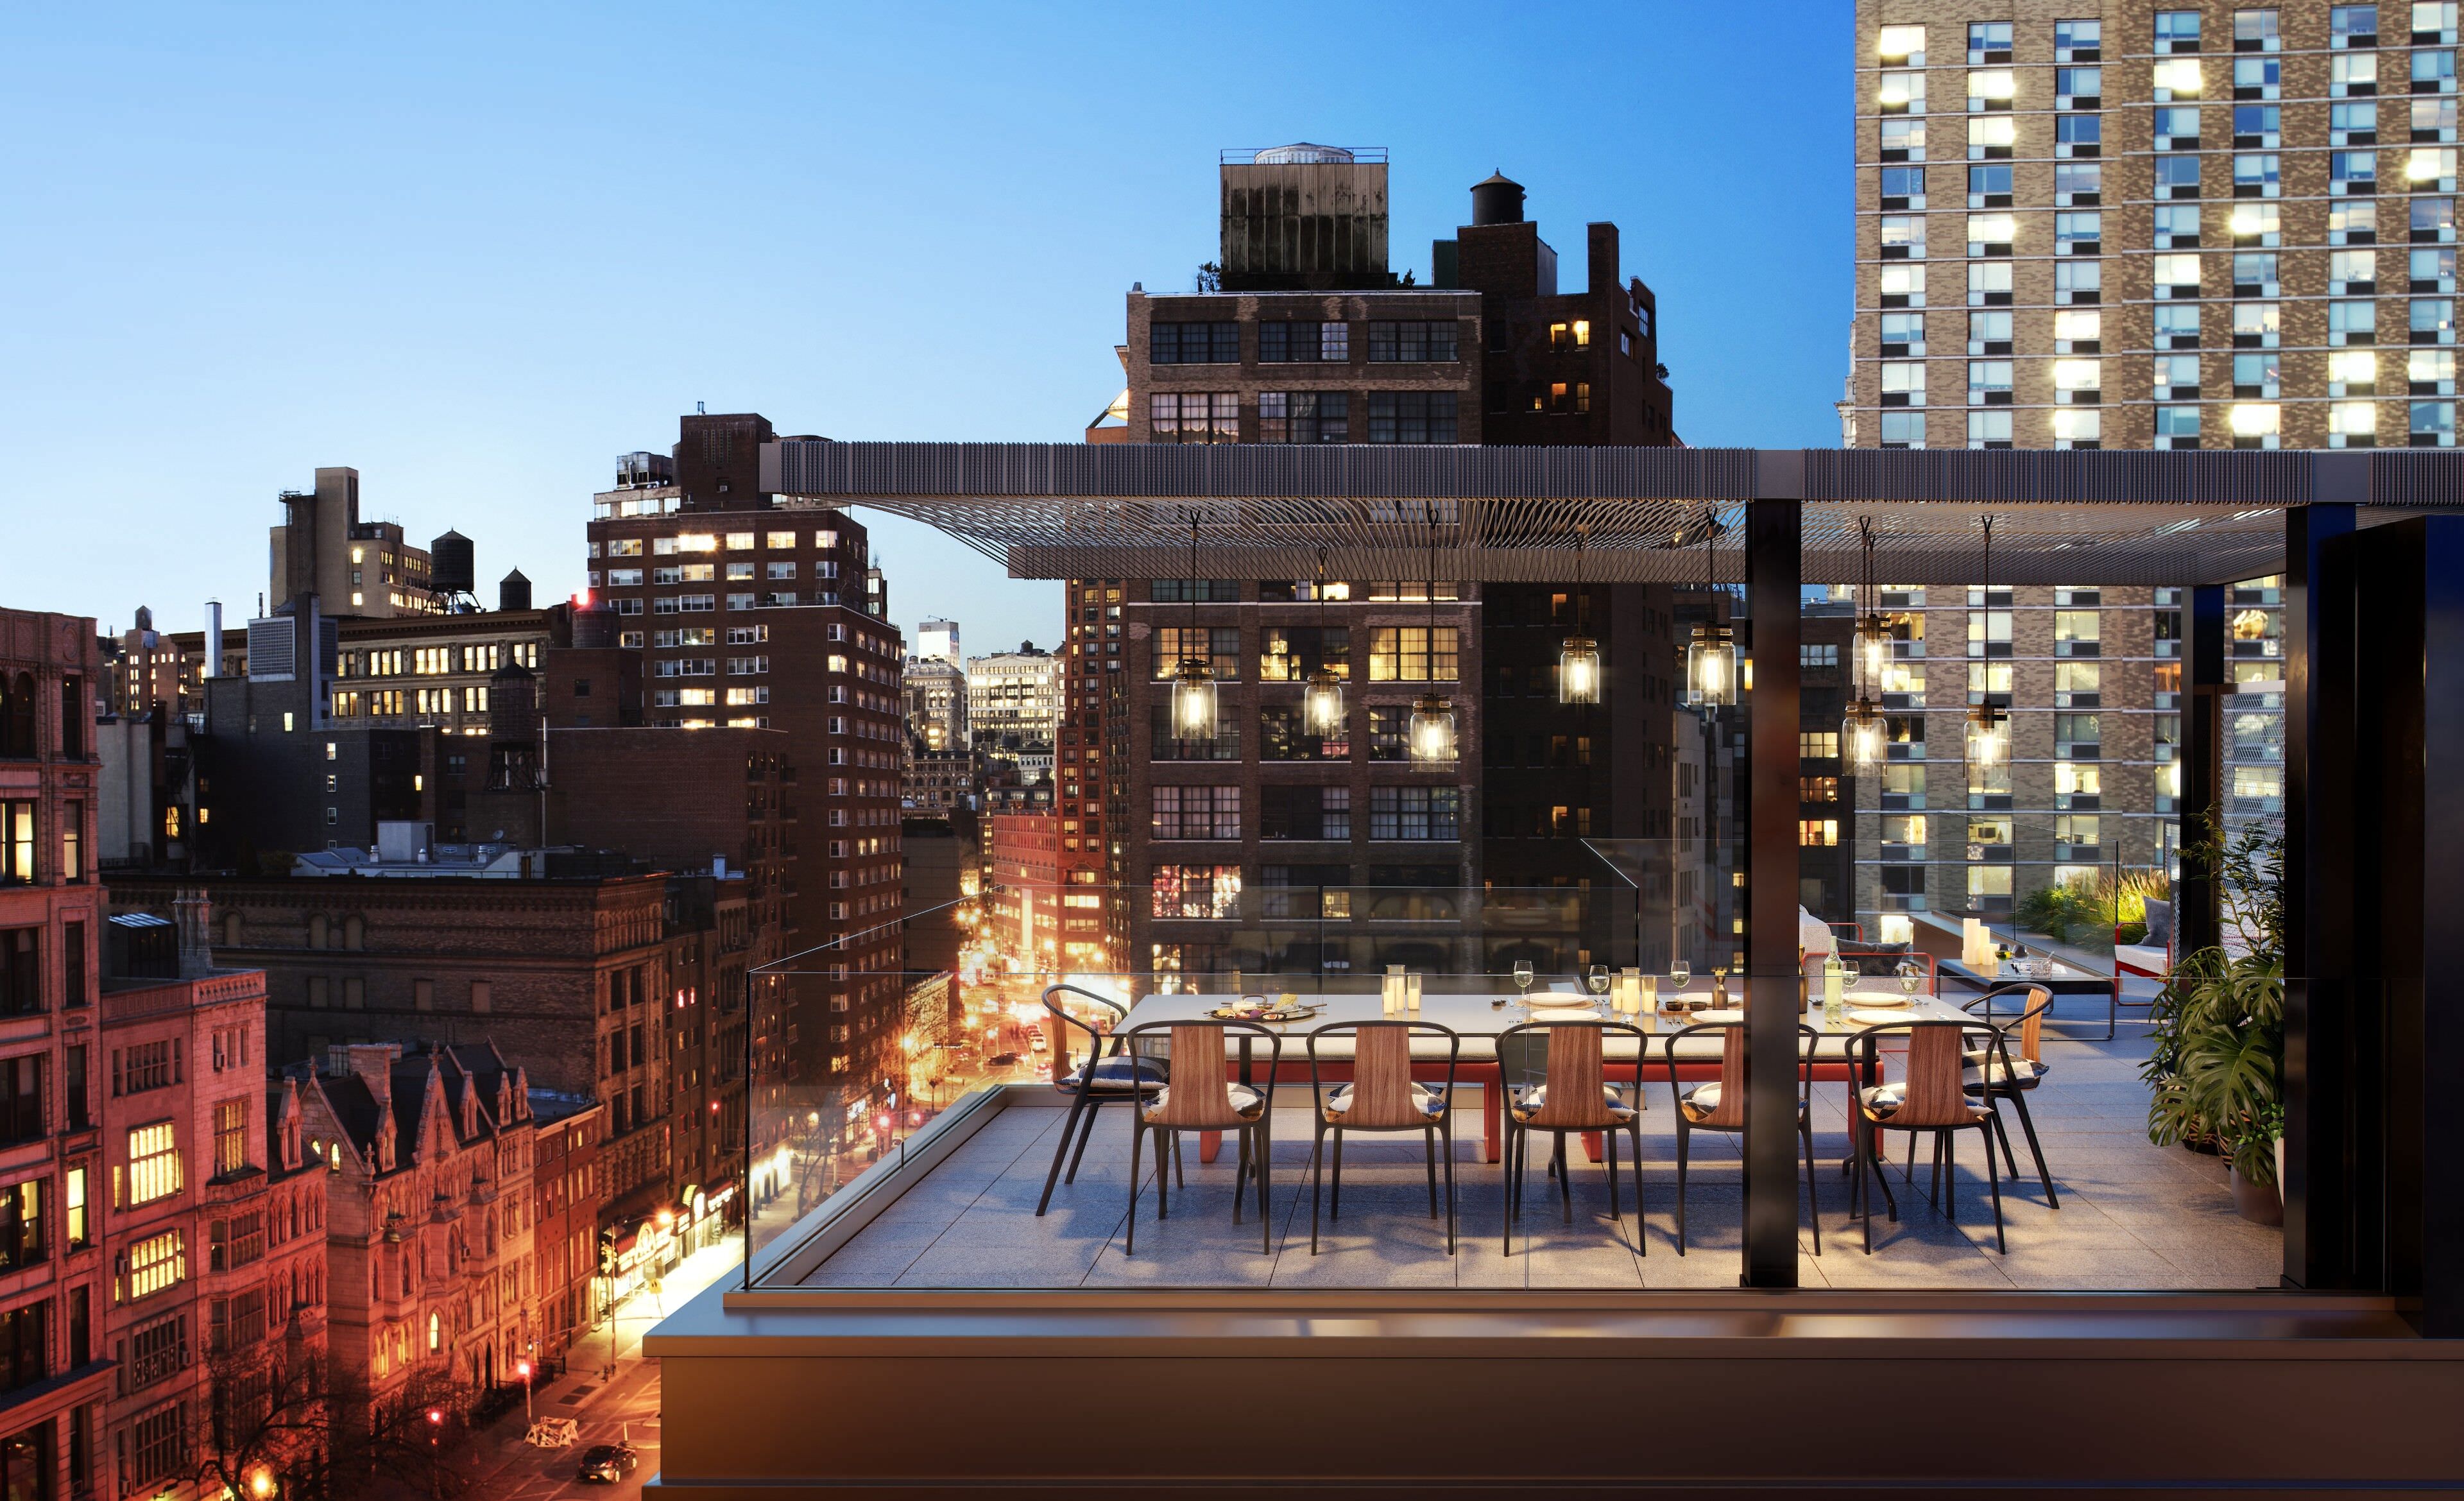
Reveal (aerial/exterior shots of the whole building)
These scenes relied again on part film and part CGI. We were able to acquire some film back-plates but also had to do a lot of entourage modeling to make these plates work.

Production
There were too many parts in the creation of the film for just one article; we selected some elements that we thought would be the most interesting to read about, as well as some parts of our workflow that were unique to the project.
Filming Process
After our storyboard was almost entirely defined, we started the filming process. We used four types of motion for the cameras; tripod shots, dolly shots, gimbal shots and drone shots.
We did a lot of RD and experimentation, and many of the initial ideas were not used on the final piece; below are some images behind the scenes and tests that were done through the process.


Lighting
To do the lighting of our scenes, we used two different workflows:
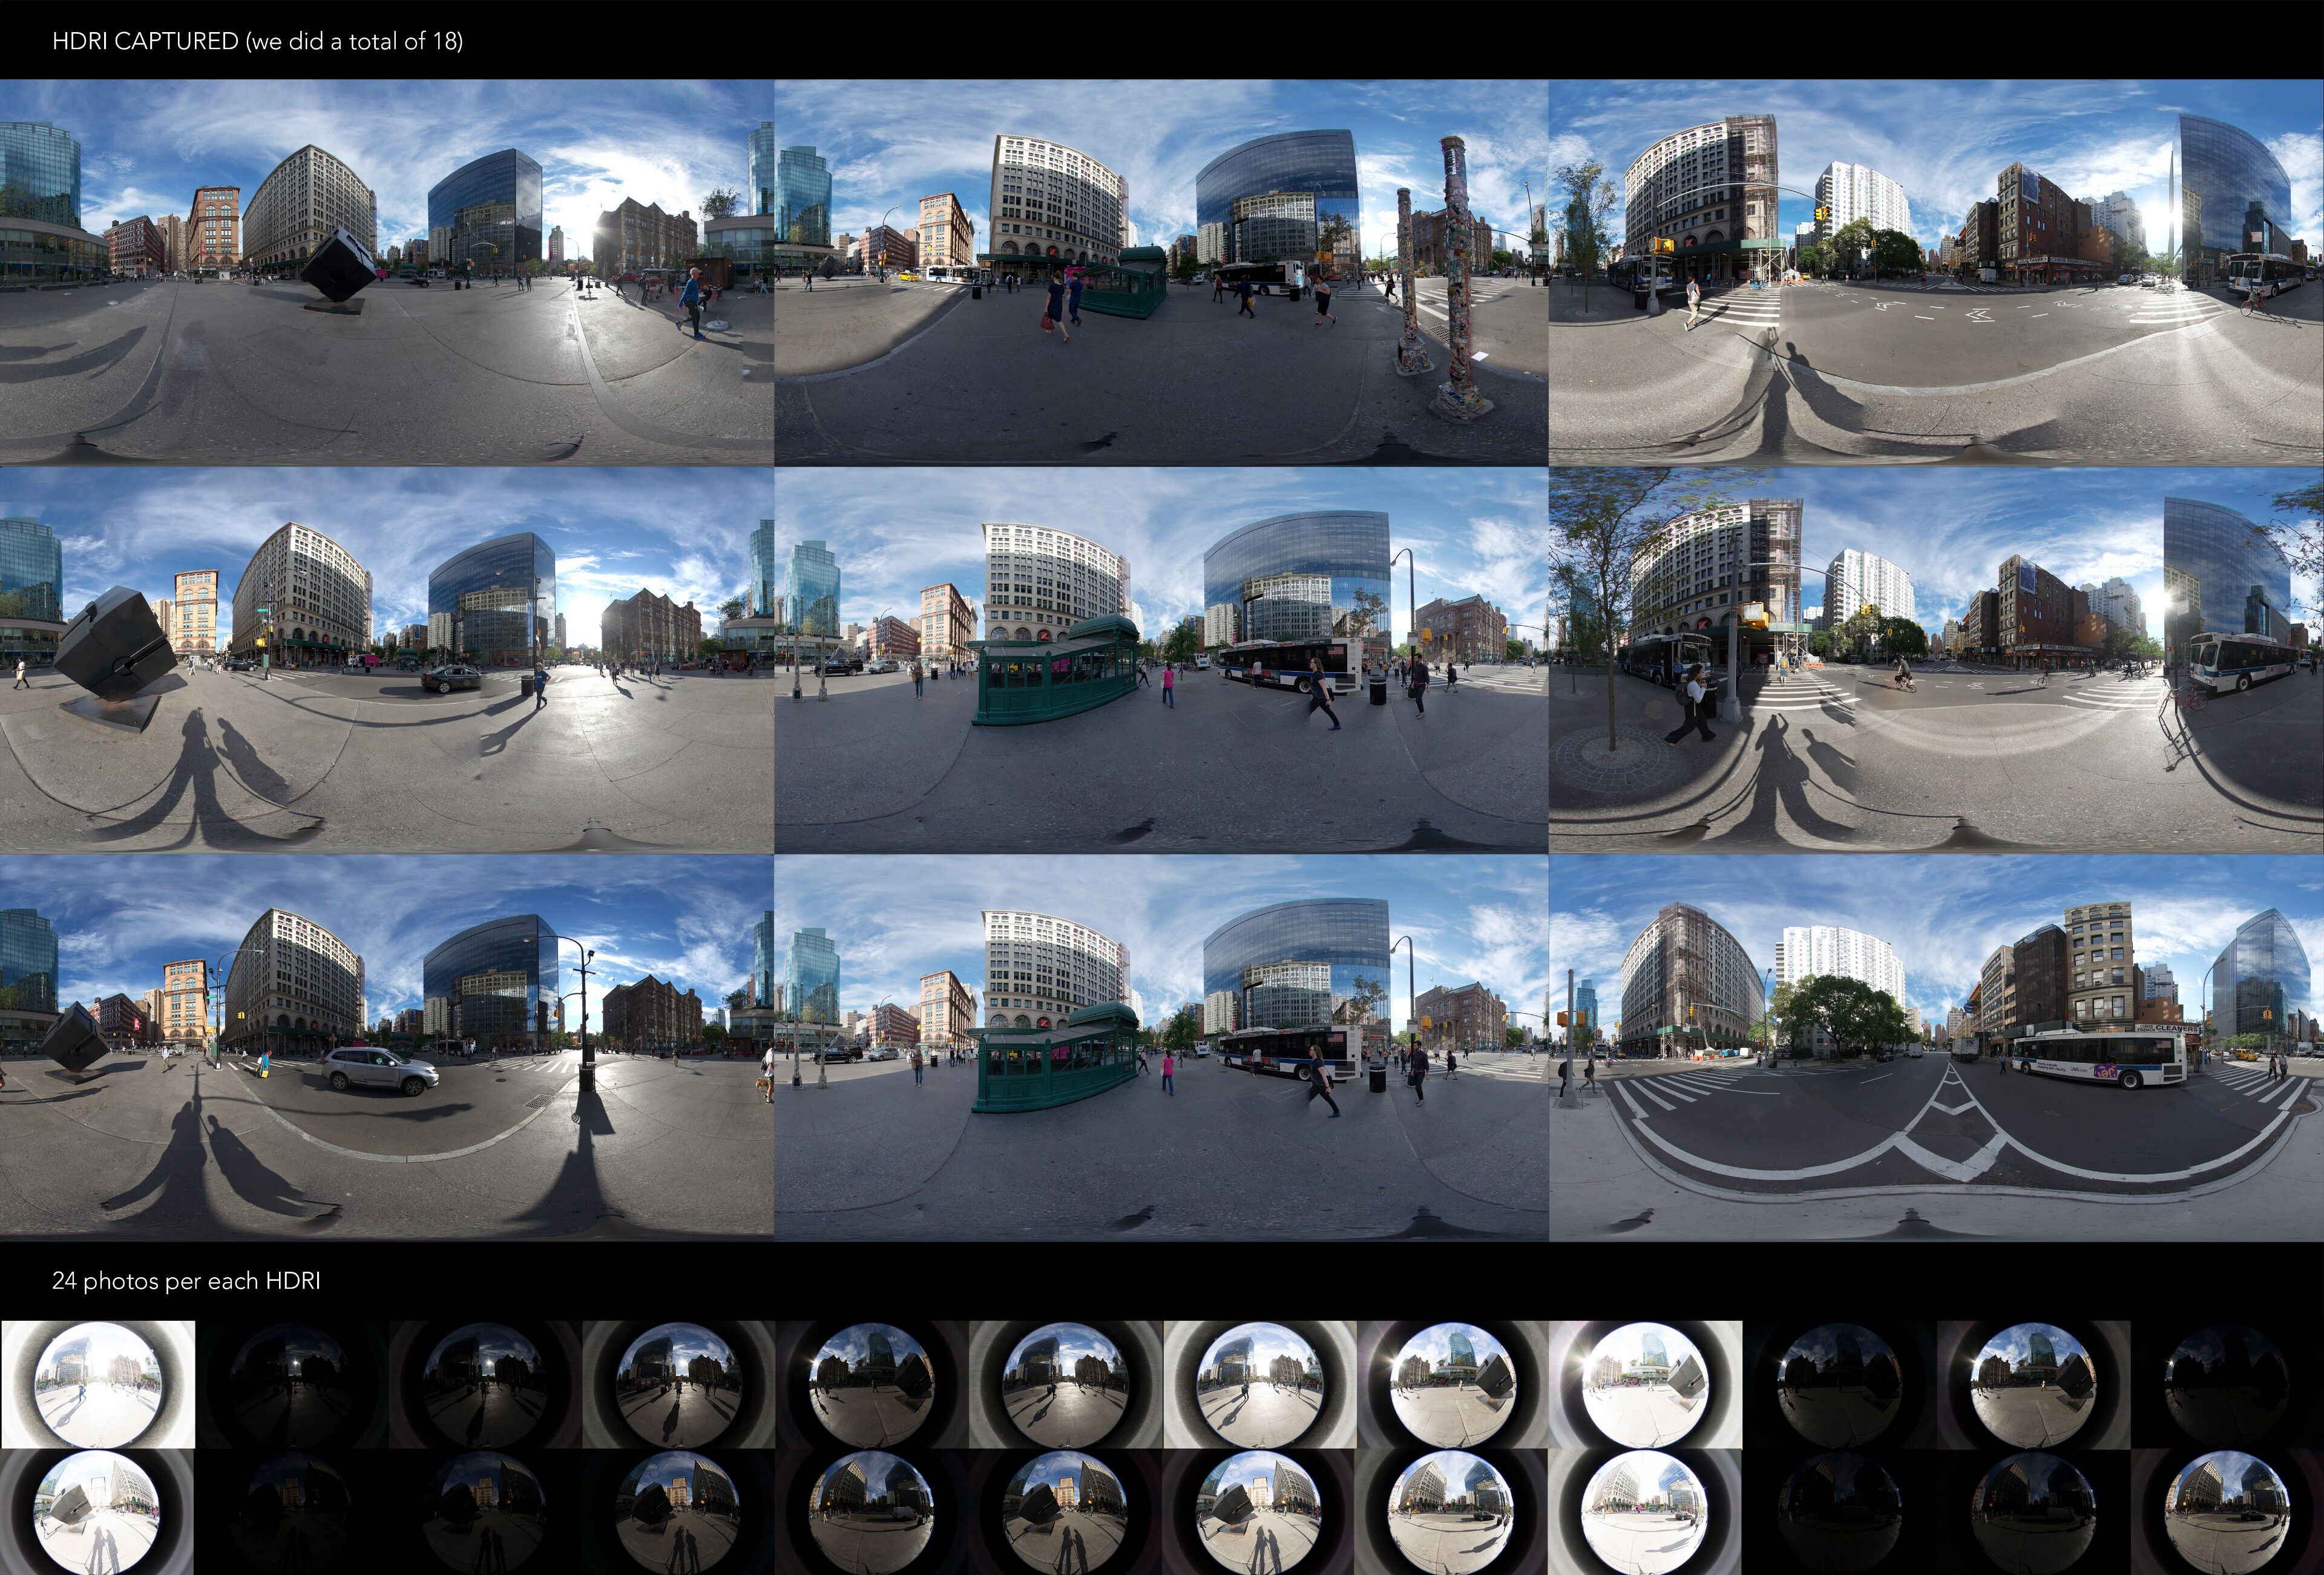
- For the exterior intro shots, we used HDRIs primarily from the actual location.
- For the interior shots, we used a mix of HDRI and Sun, depending on the scene.
Intro Shots Lighting
For the Intro shots, we captured several HDRI from all the locations where we anticipated our sphere would be rendered. These HDRI were the primary source for lighting and environment reflections on the scenes.
Full CGI Lighting
For the shots that were less dependent on a film plate, our workflow with the lighting was a bit different. Since we had to light so many scenes, we created a script to help with the positioning and quick testing of different environments and Suns, relying on how fast and responsive the IPR has become on both V-Ray and Corona Renderer.
Below is a small video showing the script functionality.
Materials
There are a lot of different materials used throughout the film; below are two examples.
The Cube Material
One not so common tool we use for some of our 3d model’s materials is 3DCoat. It allowed us to make textures in a more organic way that ultimately can feel less procedural. We used 3DCoat for the metal on the cube, as we wanted to make sure the 3d model matched as close as possible to the real one (especially since some of the shots showed the real cube and some showed the CGI version).
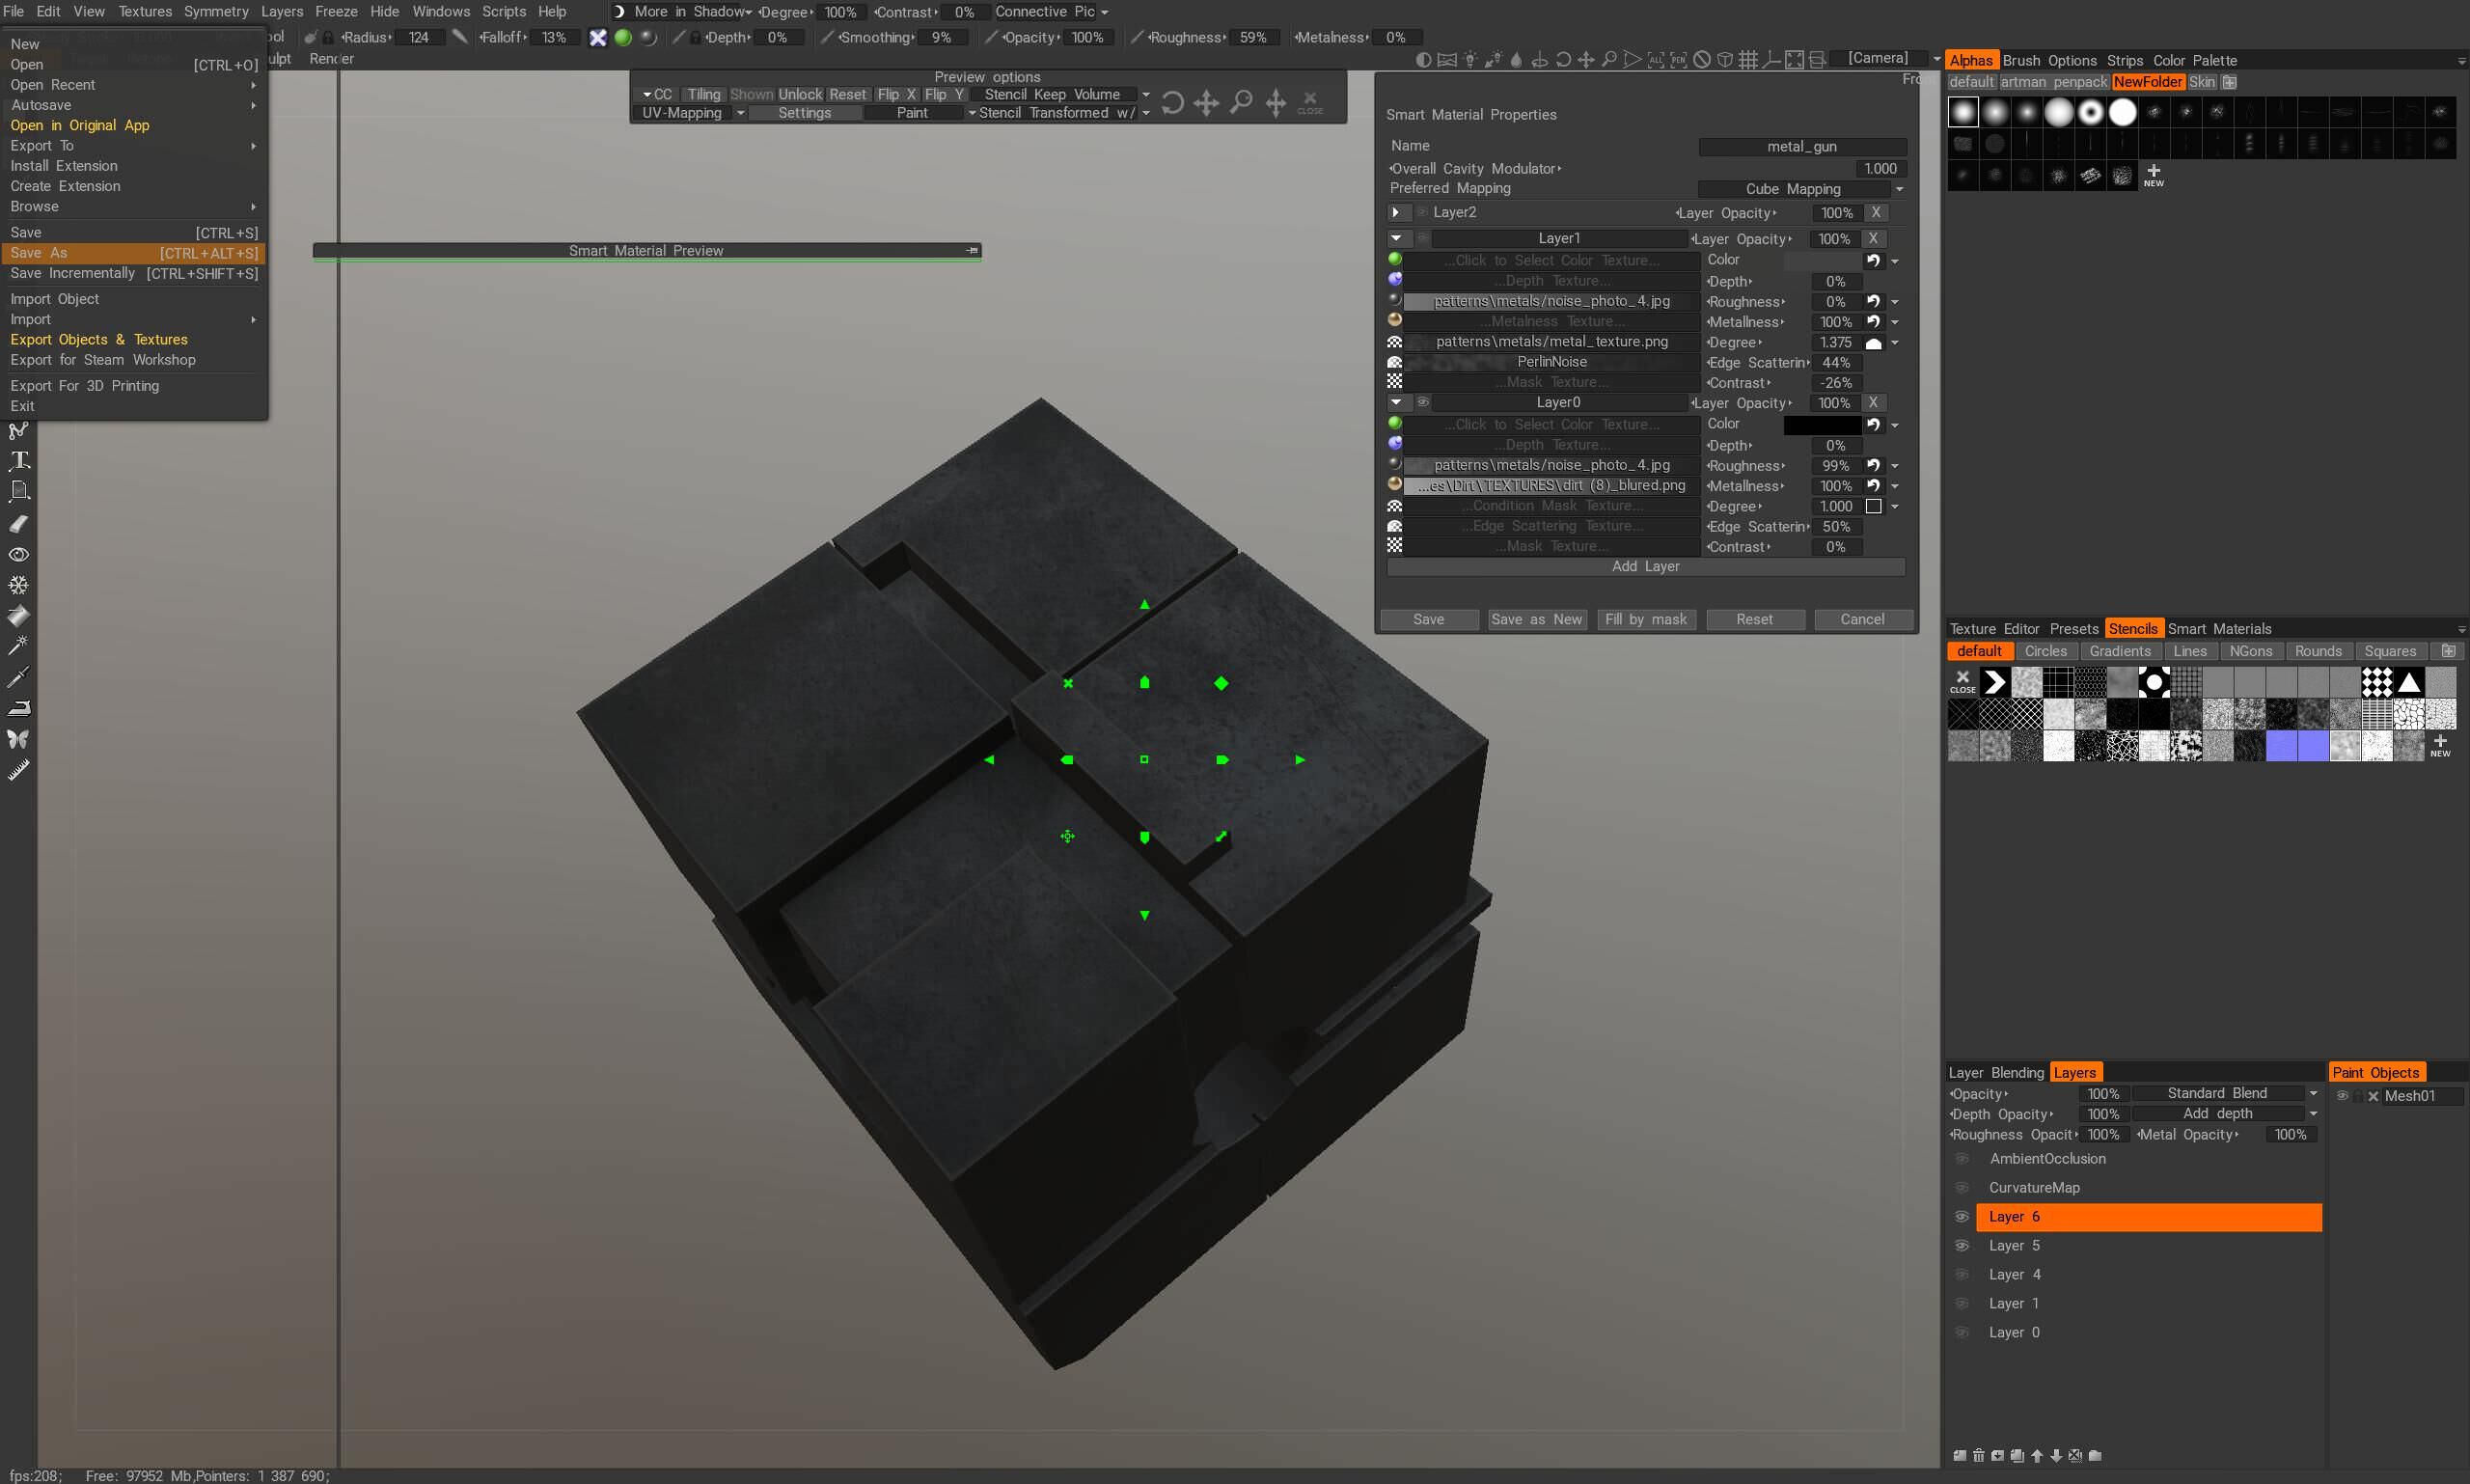
3D Coat screen shot

The Cube – Mtl Parameters
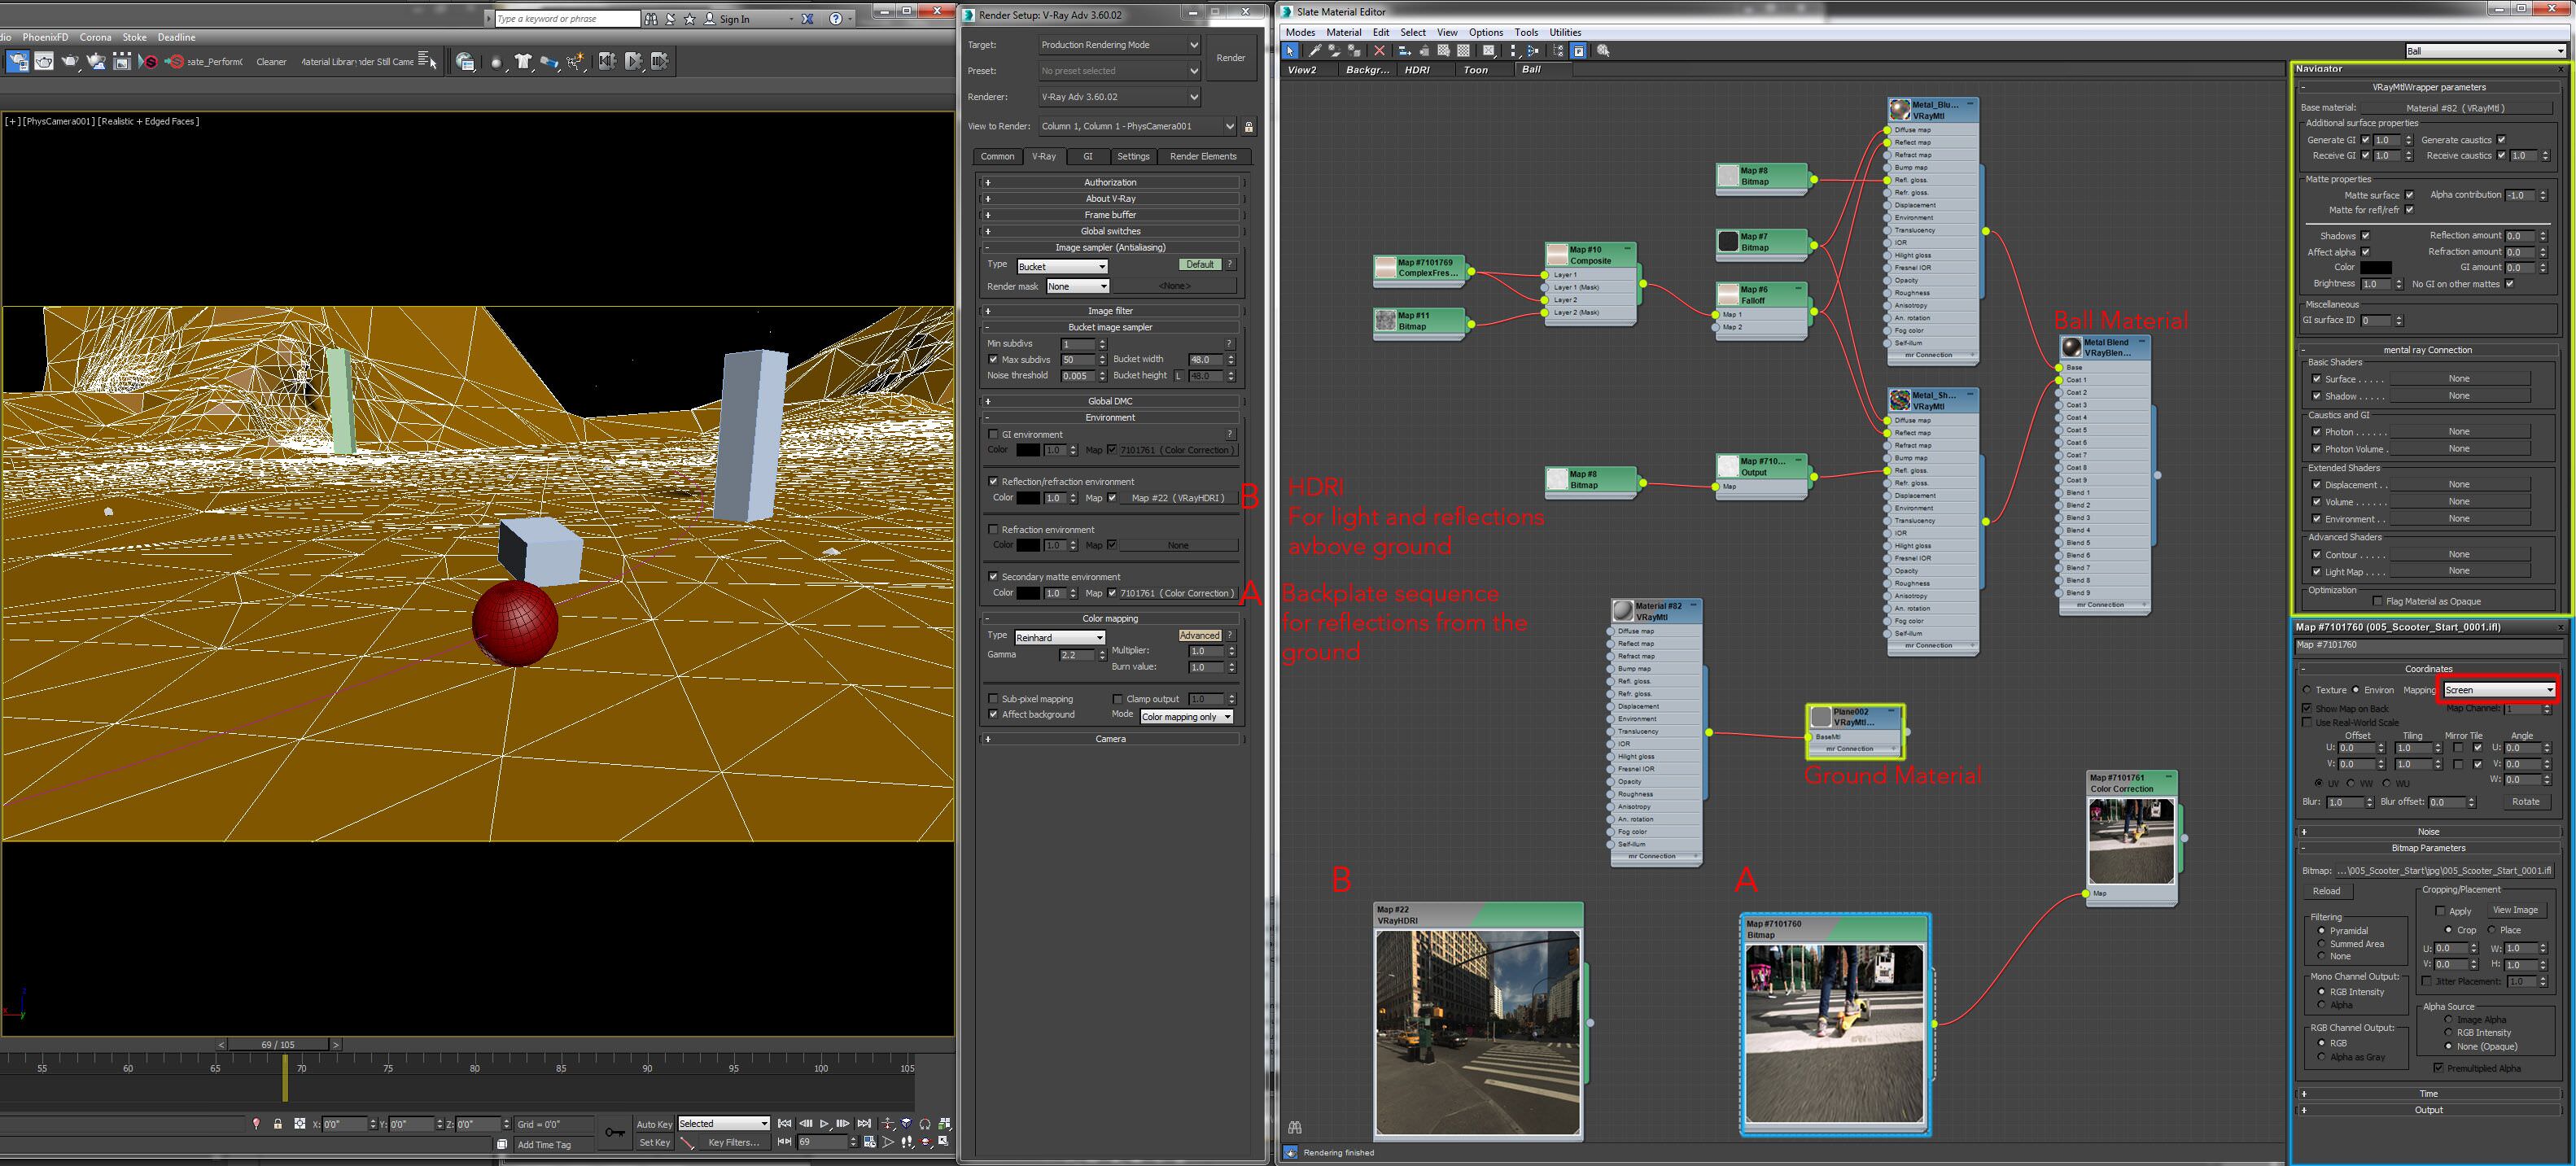
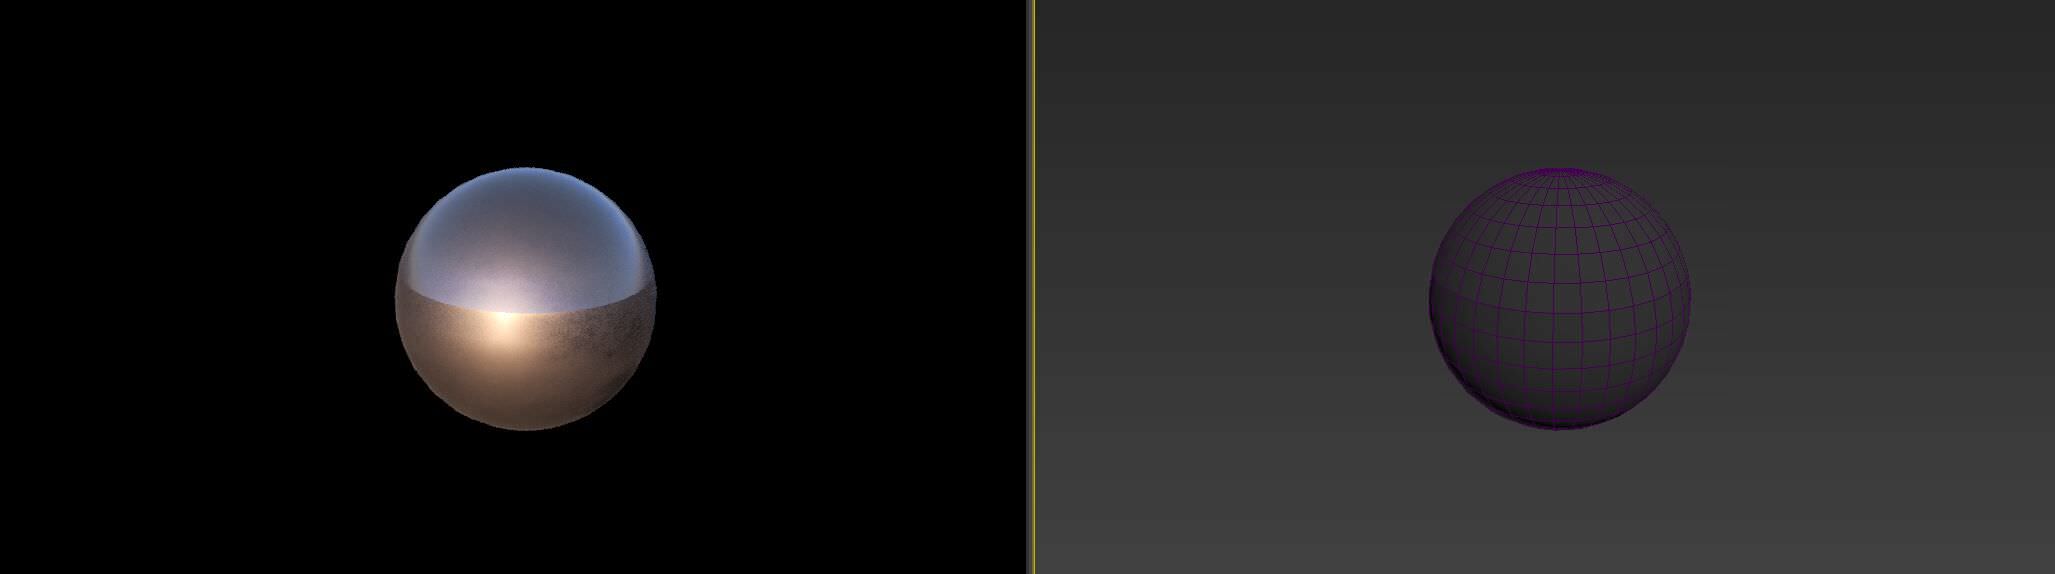
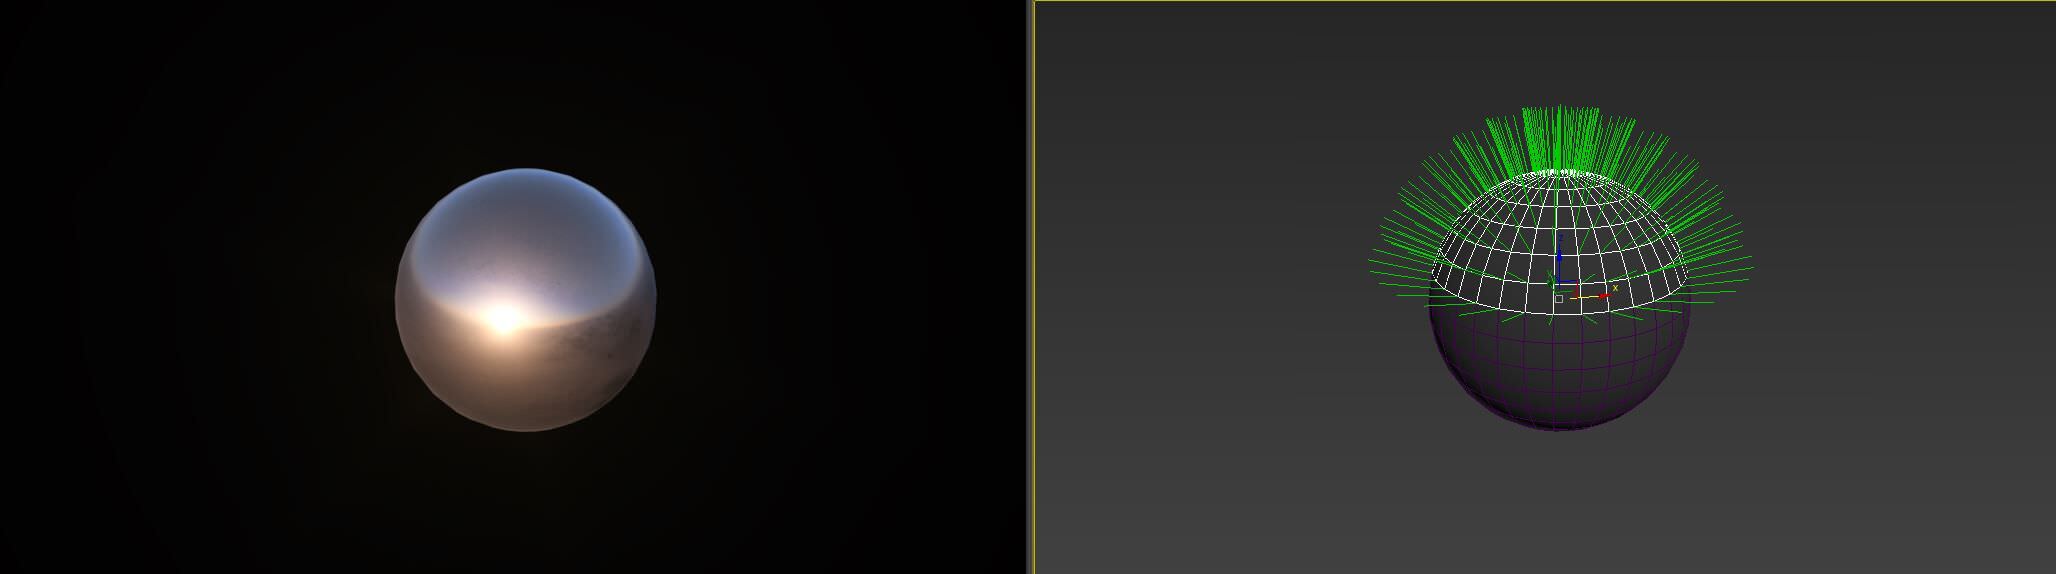
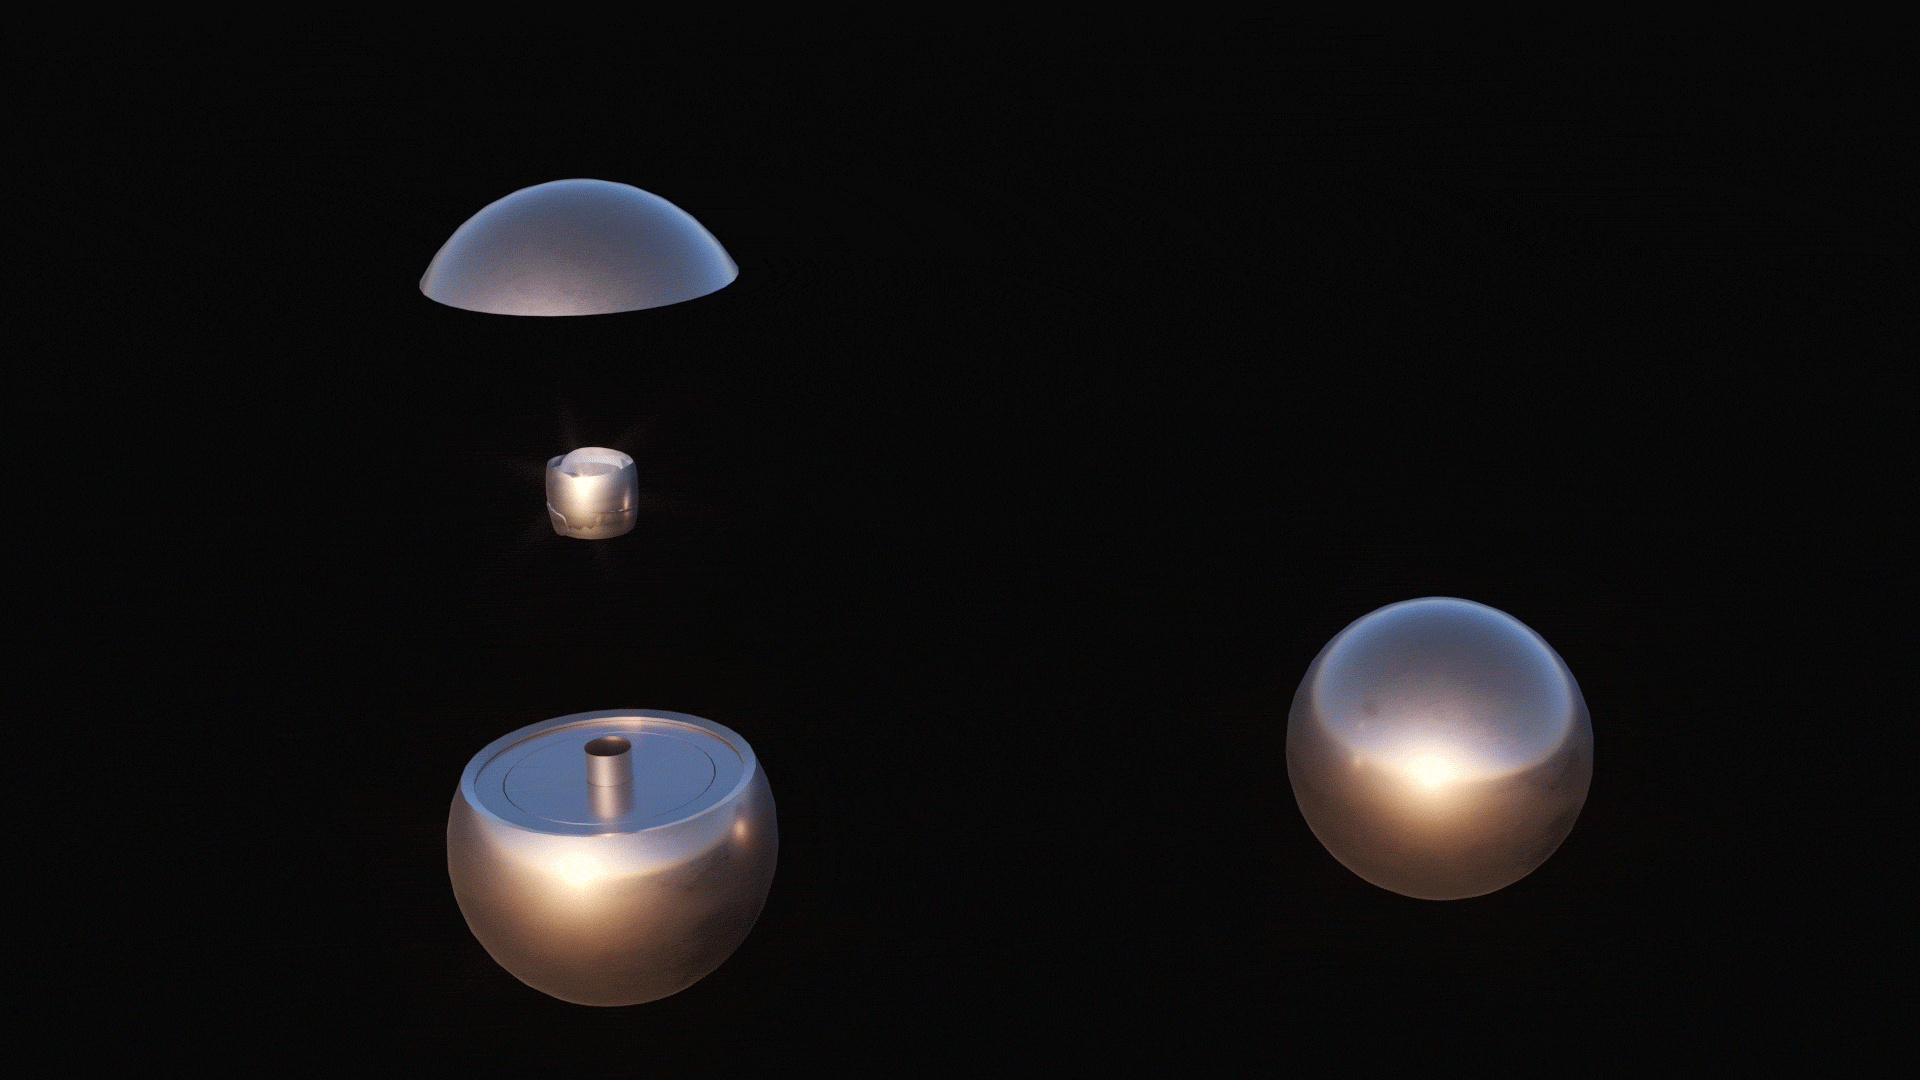
The Sphere Material
The material is fairly simple, but we did a lot of testing as we wanted to make sure the sphere worked well with the film plates, but also matched the aspect of the material of NAVA’s building facade. Below are some of the options with different levels of reflection and subtle changes in tonality.
Some material tests
To get more flexibility and to be able to play with reflections in the compositing phase, we applied a Vray Blend Material to the sphere and extracted a VRayMtlSelect Render Element for each of them :
- Vray Material_selected_Blurred
- Vray Material_Selected_Sharper
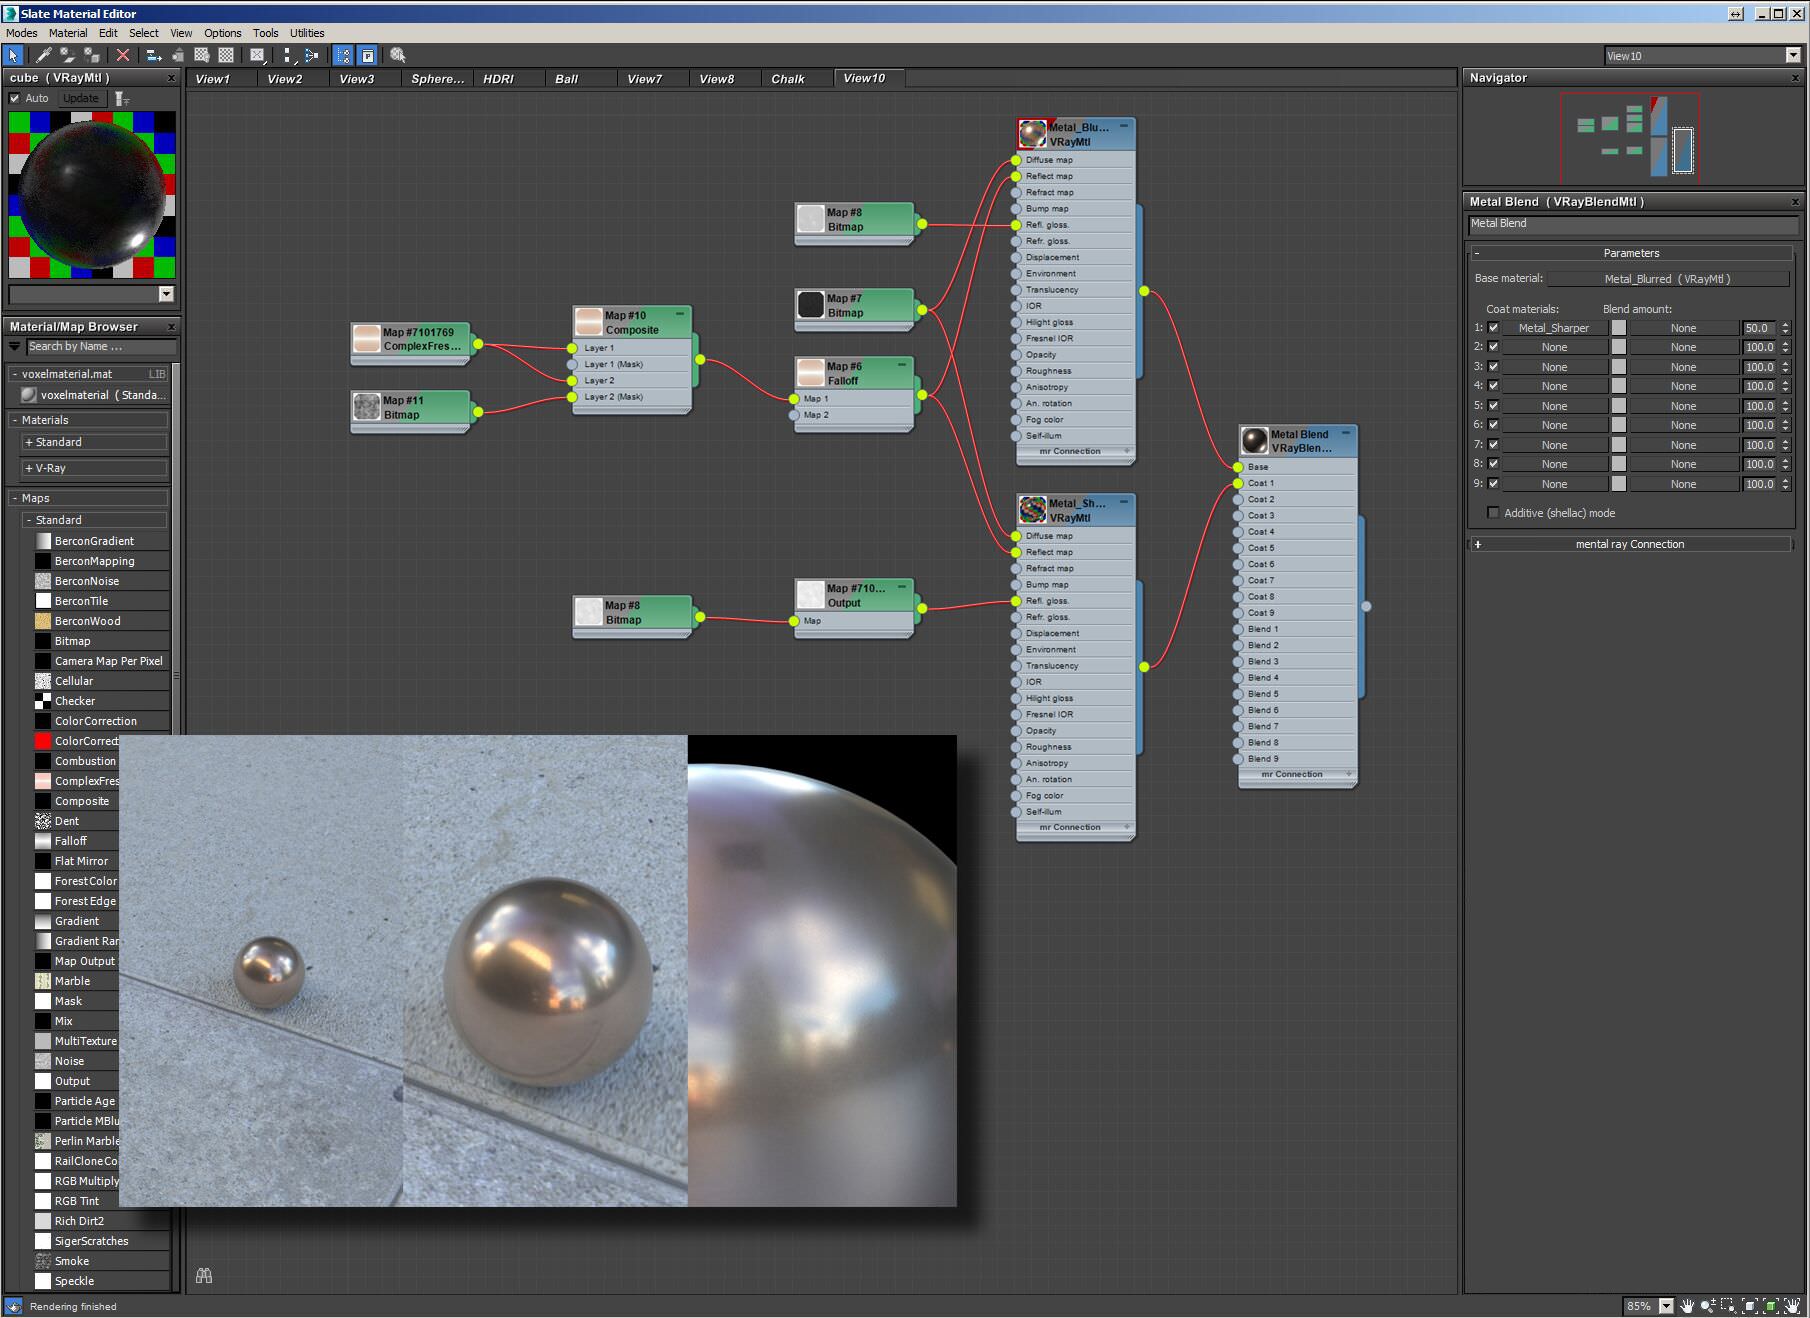
The Sphere – Blend Mtl Parameters
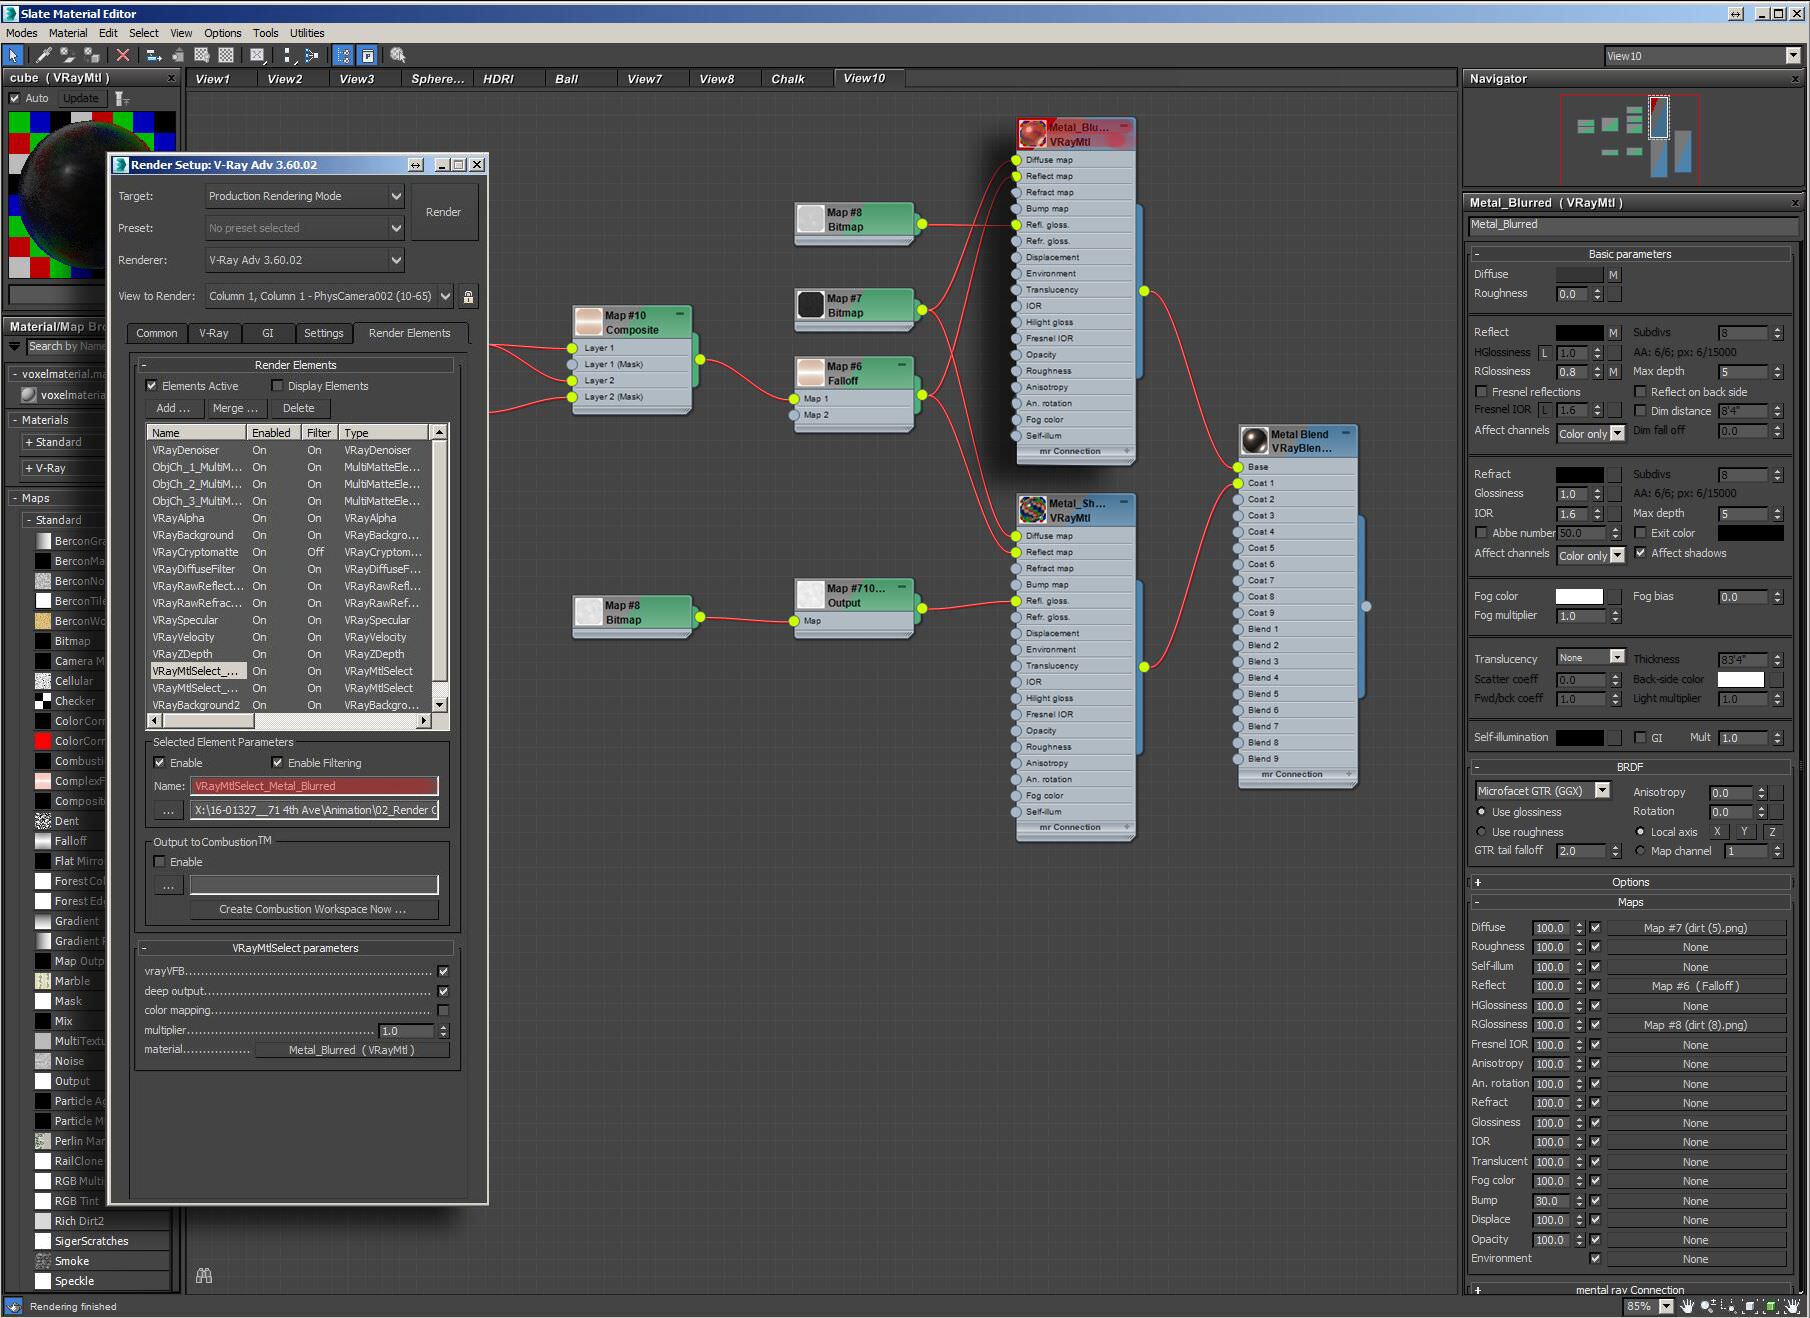
Vray Mtl Select_Blurred Reflections Mtl

Vray Mtl Select_Sharpen Reflections Mtl
Facade Pattern
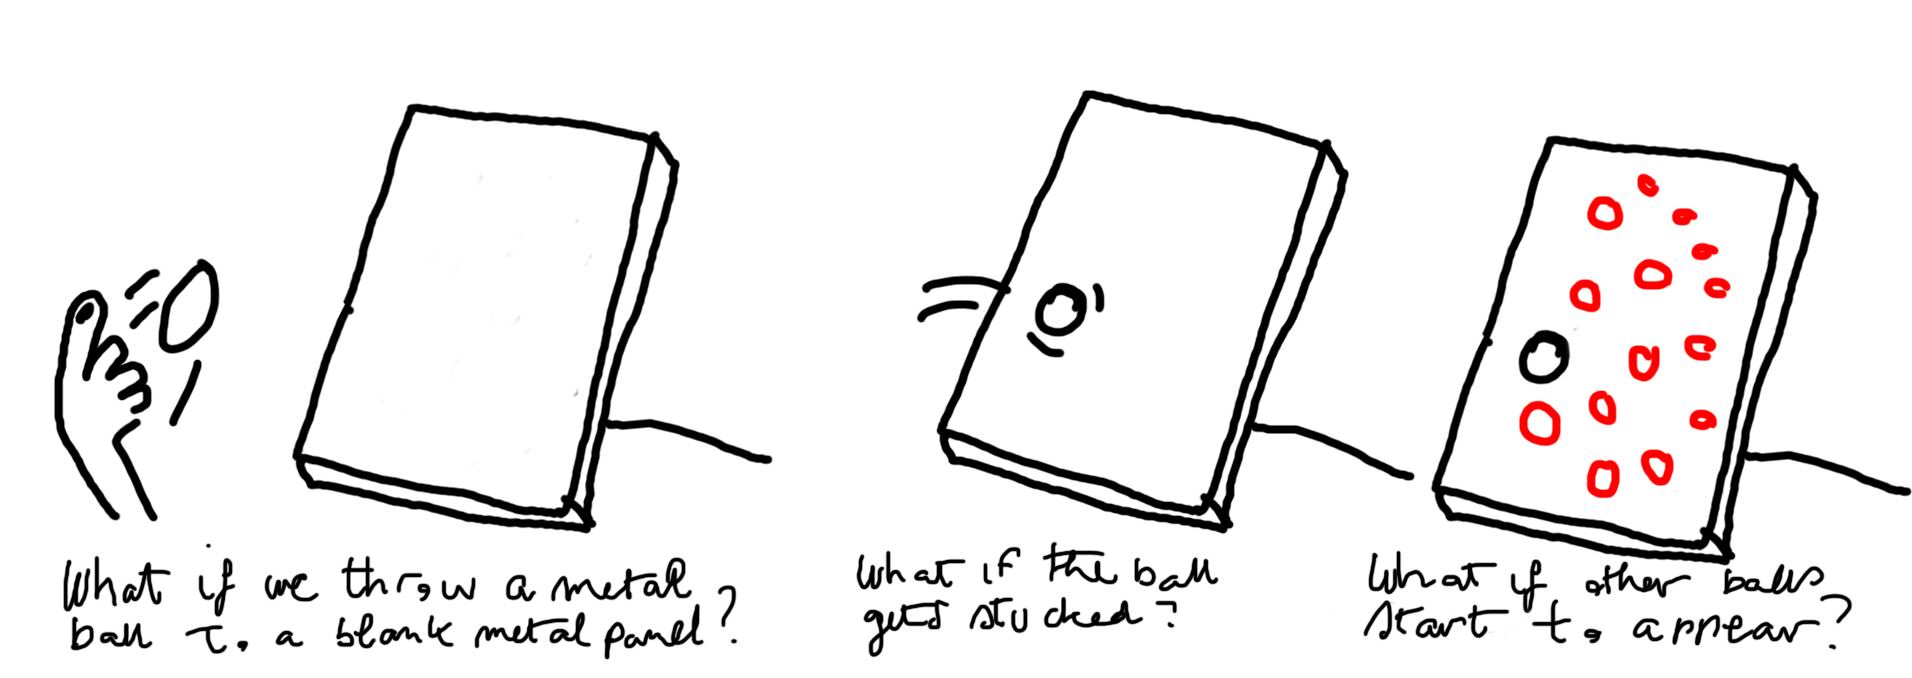
As part of the concept, the sphere served as both a guiding element and a way to bring some life to the building as well; this was expressed by triggering the appearance of the spherical impressions on the facade panels.
When doing the illustrations (before the film), we created/modeled actual geometry to express the pattern on the facade; however, we knew that for the movie we’d need a solution much lighter in geometry, and that would give us more flexibility.
Facade with perforations as geometry
In the end, we opted to use Normal maps instead of geometry.
First, we created animated pieces of each type of impression using the slice modifier.
Here is the final result
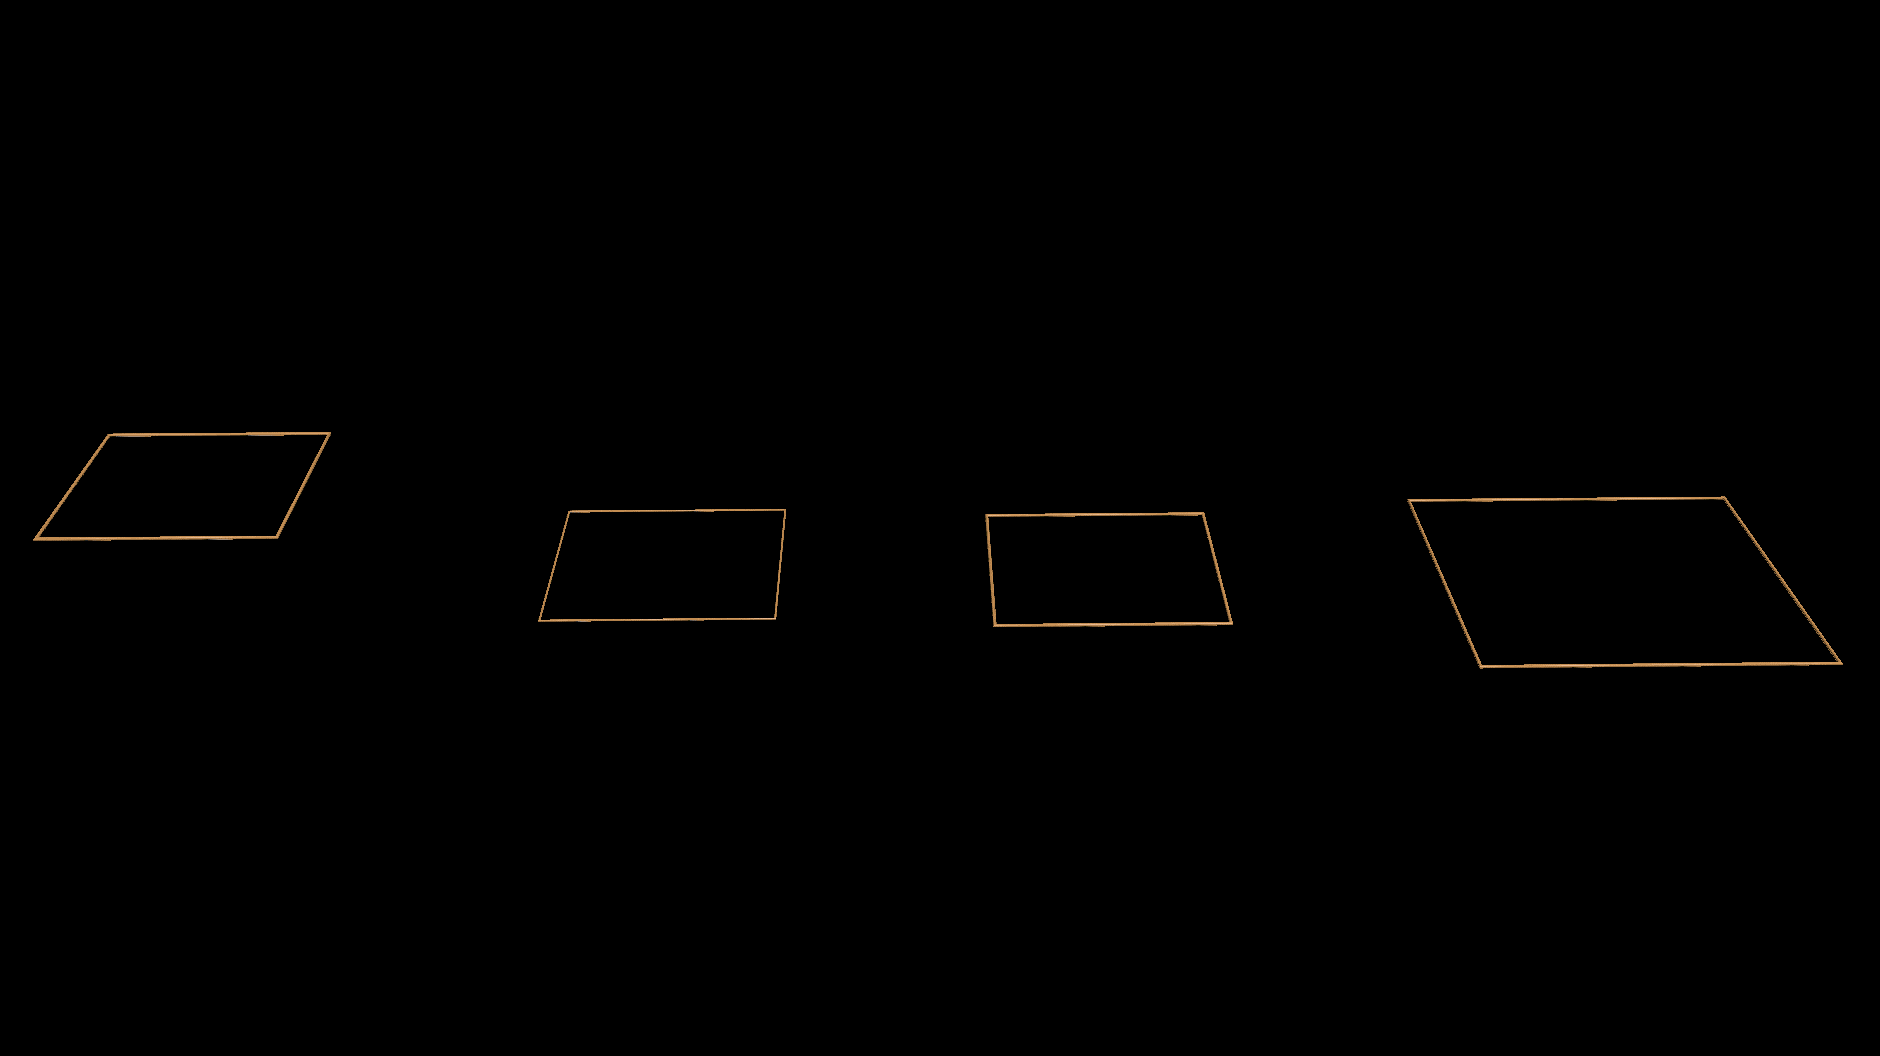
Then, we used Forest Pack to spread the different types of animated sliced spheres (concave and convex) across the panel surfaces.
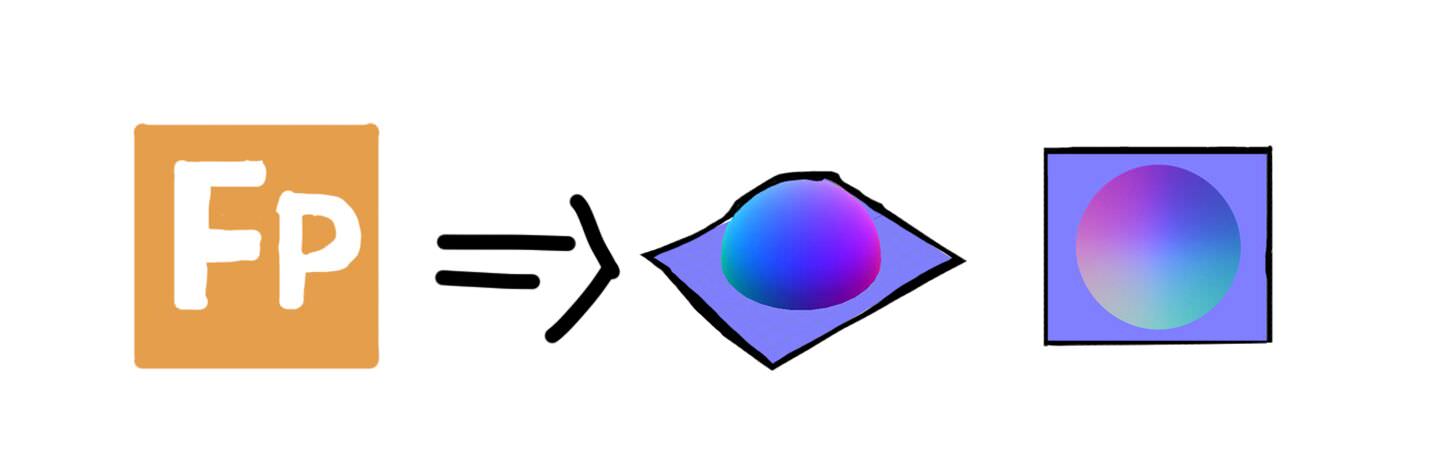
We used FP pro to extract concave and convex impressions Normals map
We decided to use the Normal Maps instead of actual geometry because to create the concave spheres with actual geometry we would have had to develop an animated hole for each one on the panels, and this would have been extremely time consuming and heavy in geometry. Normal Maps allowed us to project convex and concave shapes on the panels, which simulated the effect of protruding and carving.
Forest Pack was animated moving the UVM’s gizmo of a gradient map applied in the map slot of the animation menu.
Once we had animated Forest Pack, we used an orthogonal frontal camera to extract the Normal Maps. Then we applied these Normal Maps to the bump slot of the final metal panel material.
Original 3D Geometry vs Normal Maps


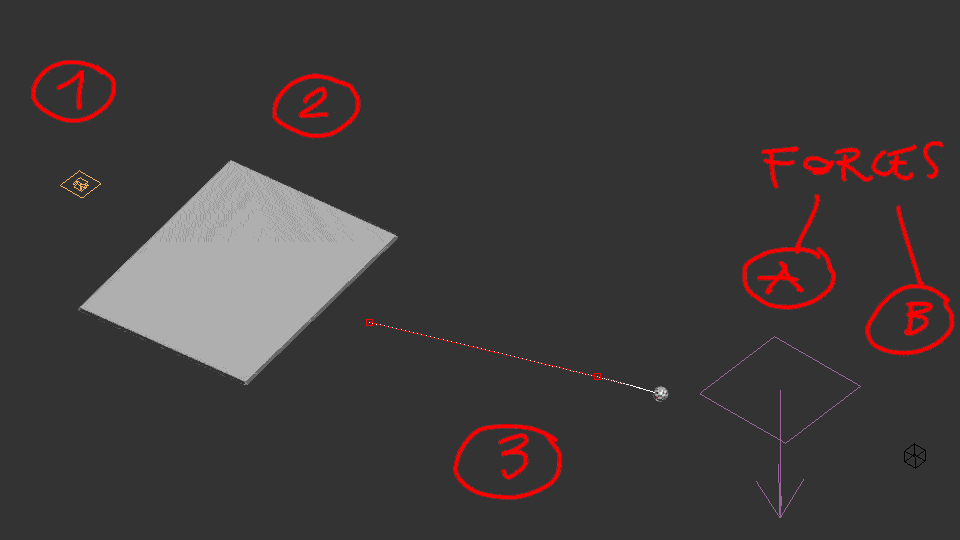
The Sphere Motion
For the seemingly simple task of animating a rolling sphere, there were some technical challenges. We wanted the sphere to roll naturally, but also to have precise control of direction and speed.
We had two different scenarios, for which we developed two different workflows.
Uneven Surfaces
In cases where the ground plane wasn’t flat, we used particle flow’s mparticles to help with the physics. By using the Data Operator, the object was to keep all X and Y transformation data from the original input object (our hand animated sphere/dummy), while the Z position and rotation would be coming from the simulated particle.
Particle System Components
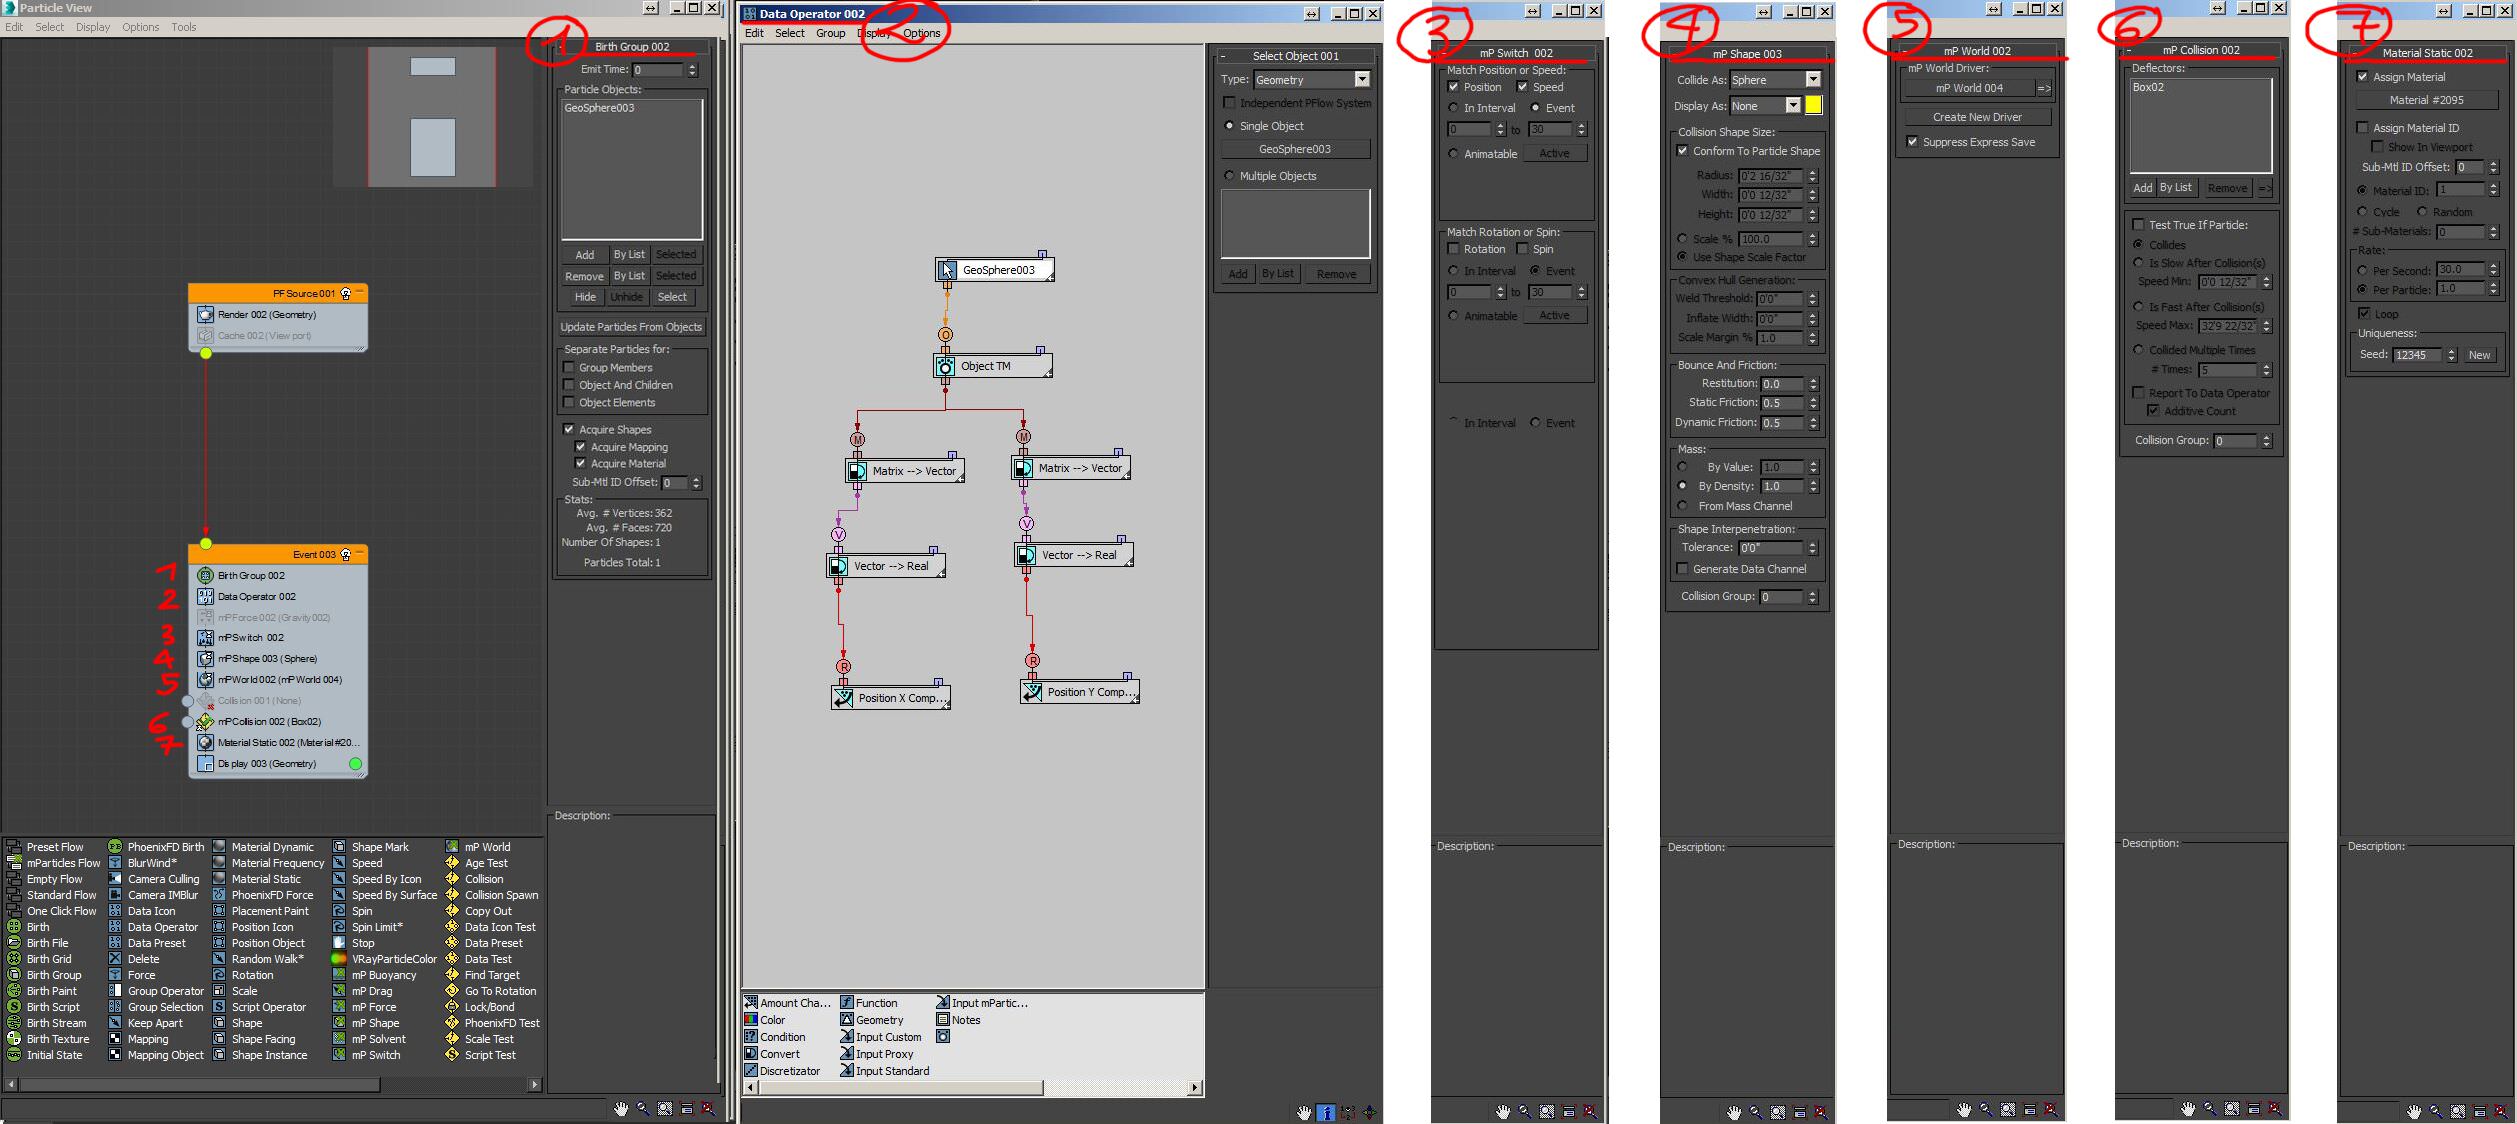
Particle System Workflow
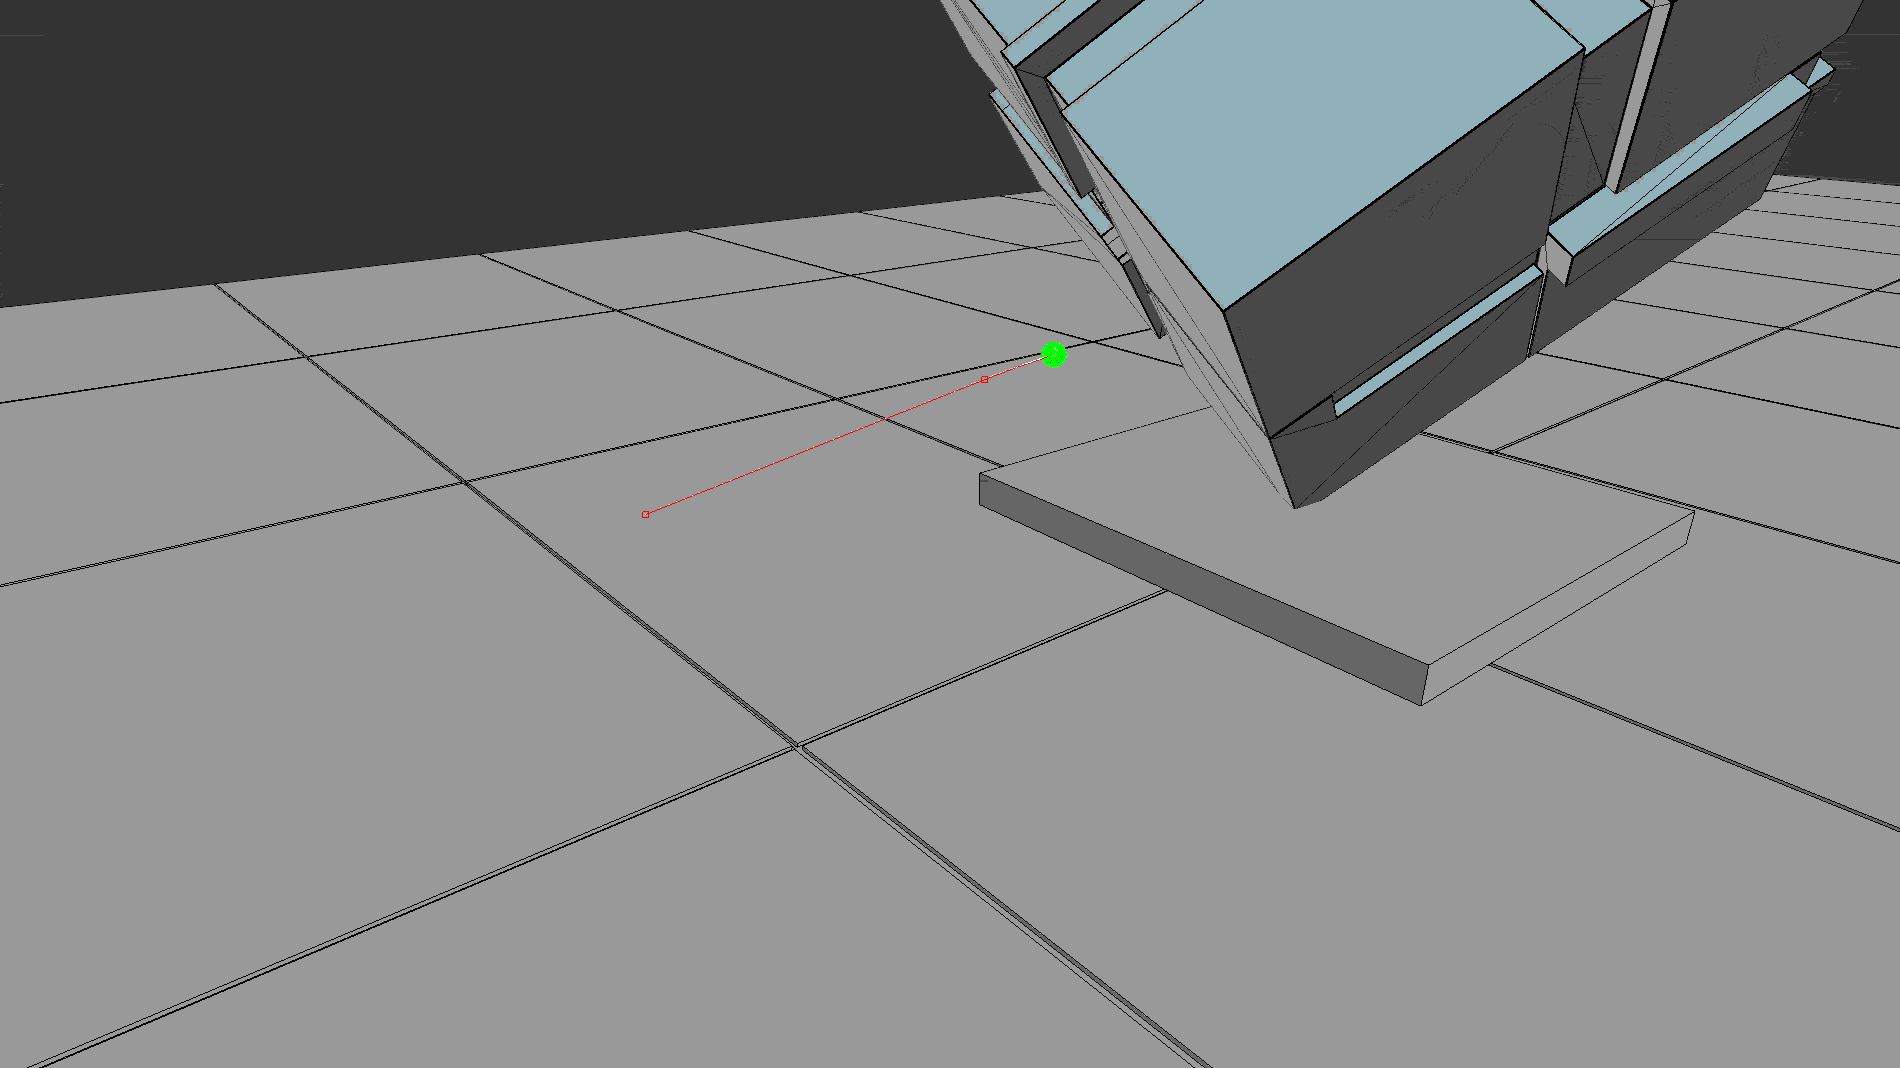
Camera Backstage
We applied this technique to several of the scenes on the Intro part of the film, as we were dealing with the real grounds of the city which apparently are never entirely flat.
The technique is explained in further detail in one of Particle Skull’s tutorials.
Flat Surfaces
In cases like most of the interiors where the ground was perfectly flat, we used another workflow that was a bit simpler and more flexible. The only requirement was that wherever we animated the ball, regardless of speed, it would rotate properly (even when changing directions).
Sphere – Script applied
We did some research and found a great expression script was already written, which we borrowed and adapted to our needs. You can find more about the controller script at Cuneyt Ozdas Website.
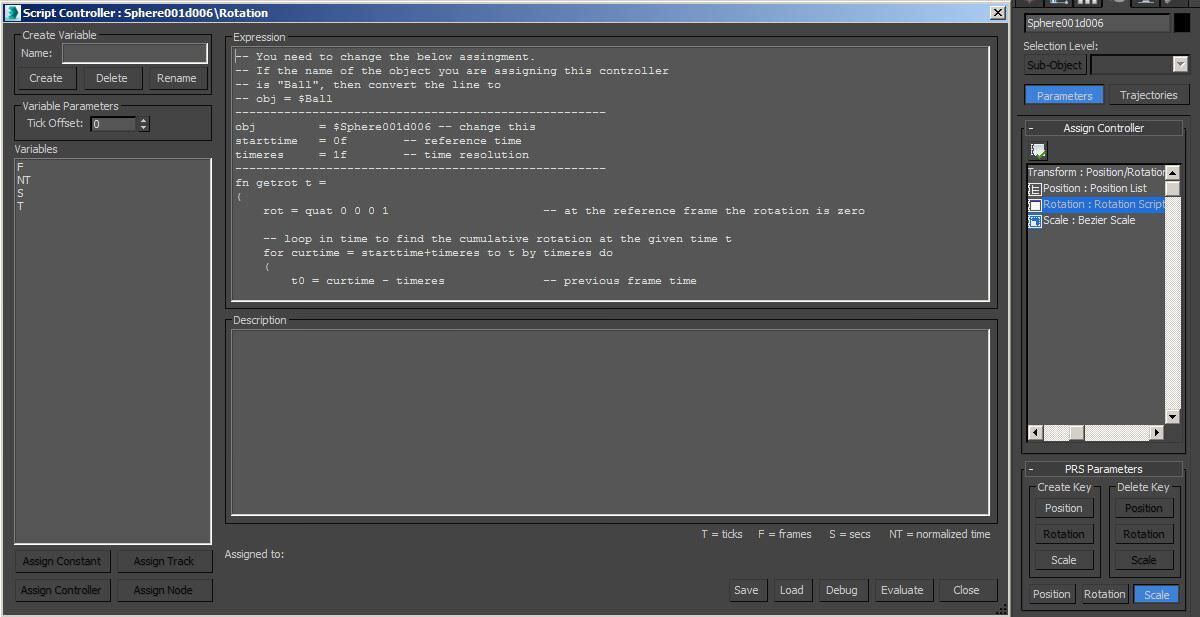
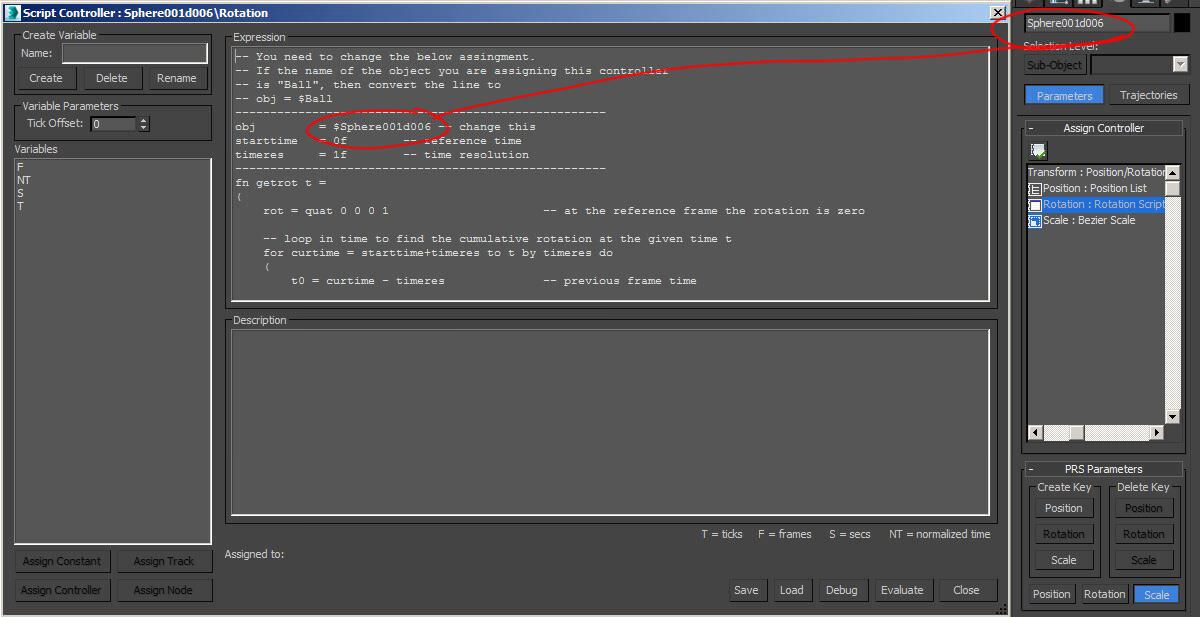
Obj name must be the same as the poly you are applying the script to, and not to edit it, but instead keep it as an object type (modifiers can be applied).
Film Plate & CGI Integration
We captured many spherical HDRIs from the actual site locations. These were used to make sure reflections and lighting of CGI elements would match the back plates.
The workflow consisted of :
- Selecting footage (based on the storyboard and video edits)
- Camera tracking
- Ground Mesh Generation (creating geometry for shadows and projections)
- Setting up the 3D Scene with the animated elements, matching the lighting to the plate, and setting some objects to interact as catchers for shadows, or to project shadows onto our CGI
Ground Mesh Generation
By using NukeX standard tools we were able to generate point clouds based on the camera tracking, and then convert this to geometry. This geometry was used to project the plates (for reflections) and to catch the shadows of the CGI elements.


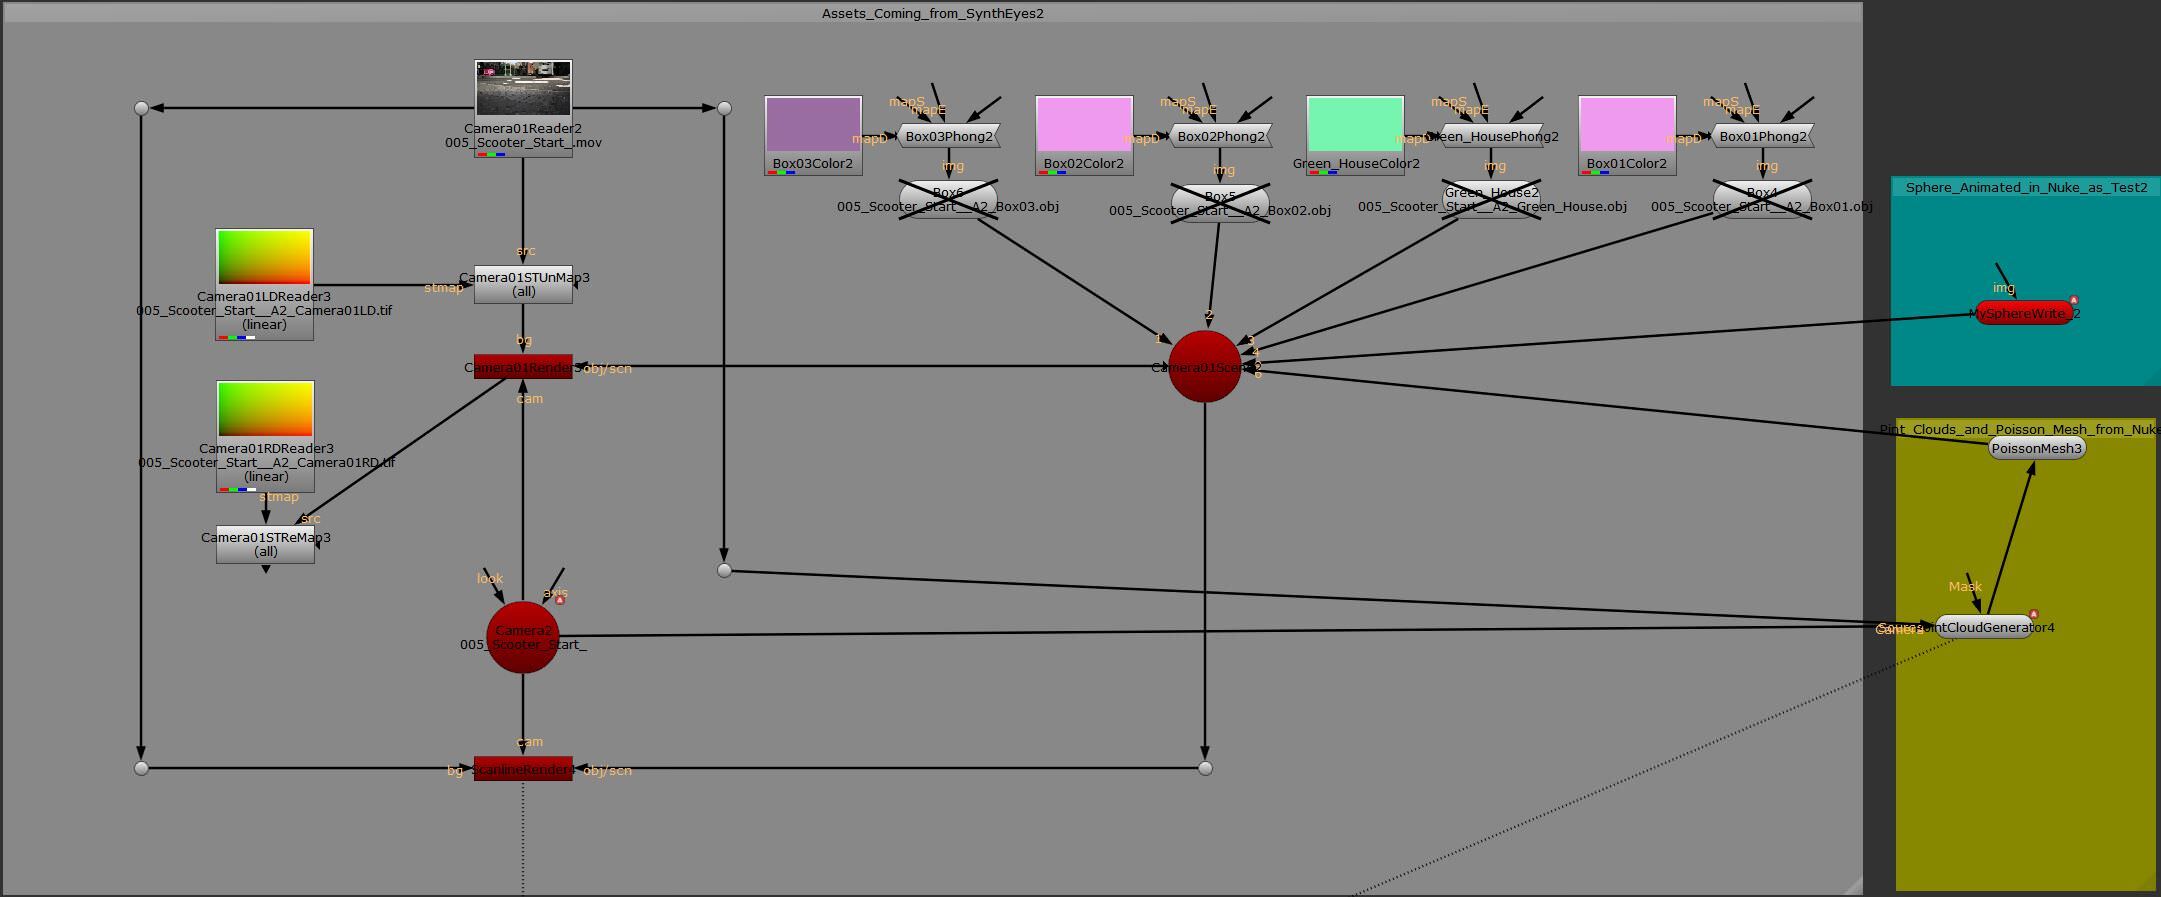
Nuke Tree for Tracking
Camera Tracking
For this process, we used NukeX and Syntheyes. We found the former to be quicker at getting good tracks on the intro shots that were very low to the ground and tracking features were relatively small (in many cases the tracking system was mostly using the ground imperfections to generate the camera solves). Syntheyes, however, is extremely fast, and when the solution comes easy, it is consistently quicker than NukeX. Also, NukeX doesn’t do object tracking, which we needed for putting the ball on the Bicycle.
3dmax Scene setup
Most scenes on the Intro part were rendered in Vray; we found Vray a bit more flexible to control the materials and passes needed to get the CGI integrated into the backplate.
There were just a few elements of these scenes :
- The animated sphere
- The ground
- Tracked camera
- And lighting (some had a few more elements, but that was all)
3D Max Scene Setup
Sculpture Transformation
The sphere was born from the cube sculpture. We used this abstraction in reverse order by using the same sphere to generate the sculpture in the garden. A source of inspiration for this effect came from one scene of the BBC show Sherlock Holmes
There were two technical steps.
- The particles simulation
- The bullet time effect
The Particles Simulation
We tried several different approaches. In the end, we went with the most straightforward way we knew: We animated the particles (Particle Flow from max) by shattering the solid sculpture and bringing the particles inside the sphere. Then baked the animation, and then again reverse order the whole thing (we found it was easier to destroy an object than to carefully put it together).
We used a really old but useful script from bobo (https://www.scriptspot.com/bobo/mxs5/pflow/pflow__Chunks_Basics.htm)


The Bullet Time Effect
We found a lot of tutorials and even a few scripts to do it, but they didn’t do quite what we had in mind… so we decided to write our script.
Below is a video explaining how it works (feel free to download and play with it ).
The Drone
The Drone’s Normals
Here a quick video of how we were able to solve one of the main issue of this scene: with an Edit_Normals modifier we could manipulate the vertex normals after an edit mesh, to avoid any smoothing problems and controlling how a polygon catches the light.
Edit Mesh applied to the Sphere: incorrect Normals
Edit Normals modifier applied to the edited Sphere: correct Normals
The Drone’s Animation
The animation of the drone was done using a path deform to make the blades roll into a spiral shape. These blades were parented to a central element which was the one rotating. The opening of the sphere was key-framed by hand, after fixing the normal (explained above). Depending on the scene the drone was then constrained to a path or hand animated to travel across the spaces.
Animated Axo of Drone Mechanism
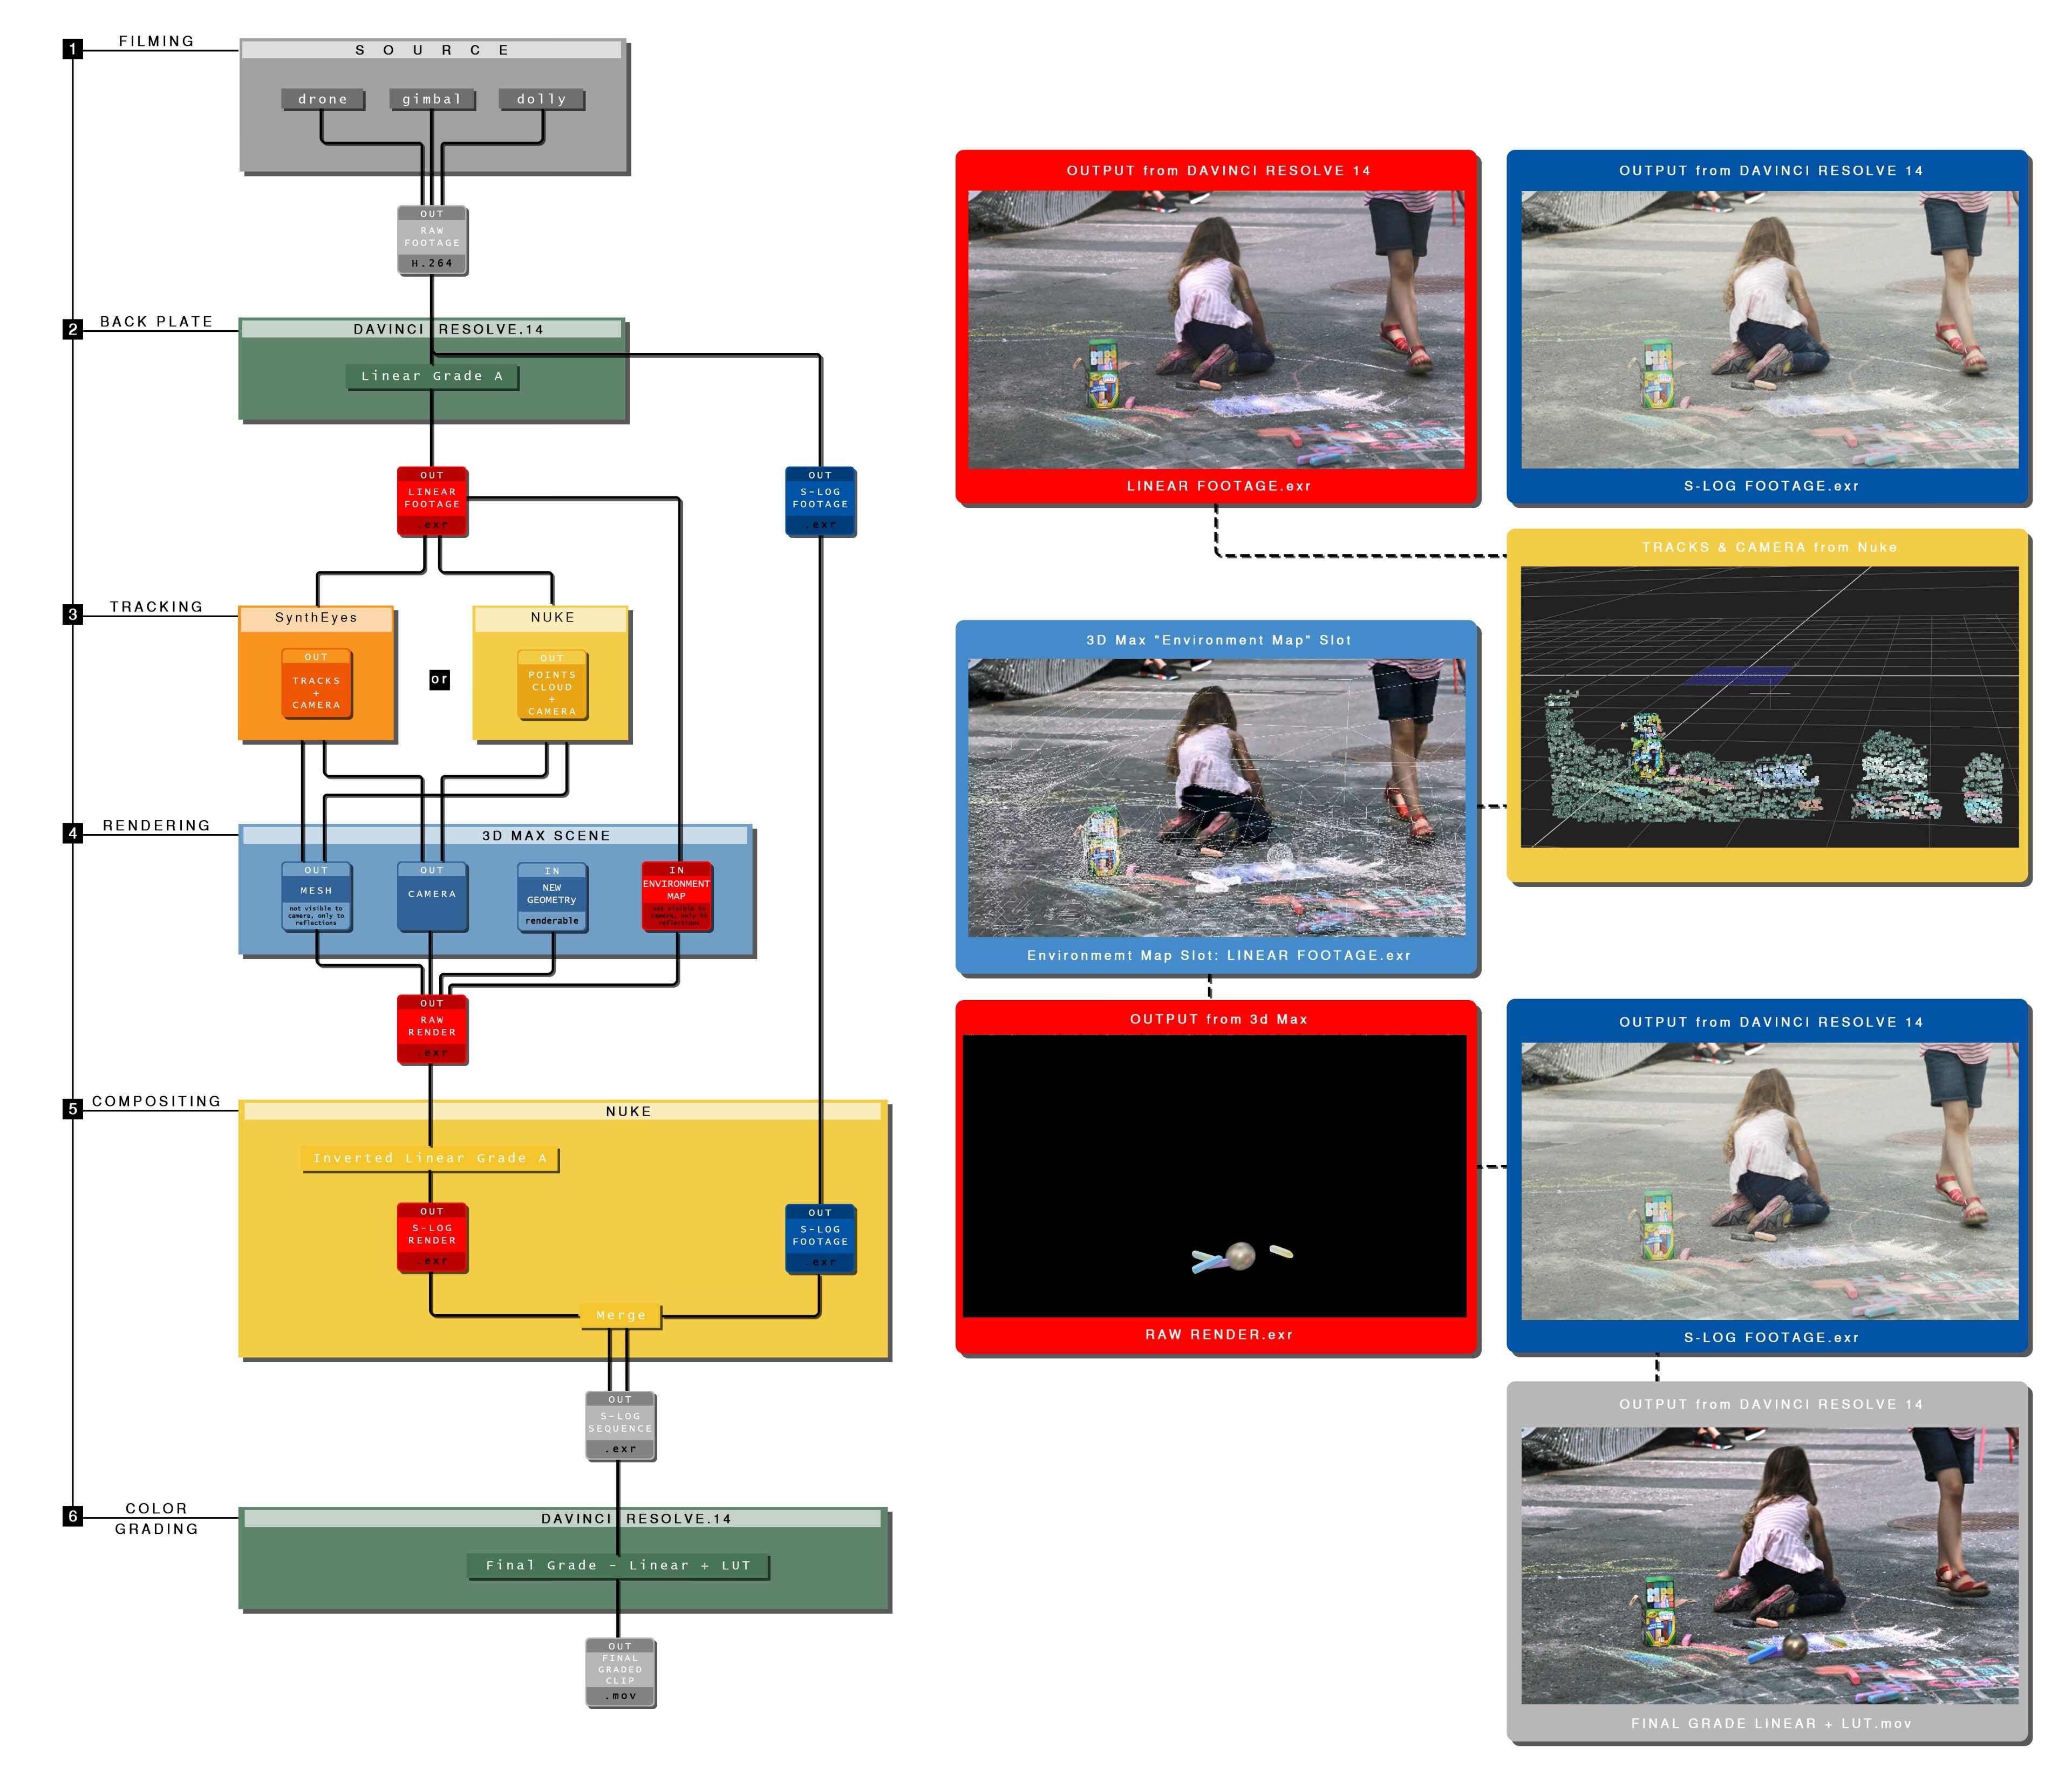
Compositing & Color Grading
We liked the idea of the film looking very natural; we wanted to play with color, but at the same time didn’t want the grading to define the scenes too much.
We filmed most of the back-plates with a Sony A7s 2 in s-log2 for a better dynamic range and a higher color grading flexibility; however, the output was only 8-bit, which led us to the workflow outline below.
The goal was to do only one final pass of color grading over film+CGI on the final edit in DaVinci Resolve 14, therefore to match the CGI to the original filmed plate, we did an inverse s-log on CGI before merging them.
Our workflow can be seen in the graphic below.
Conclusion
Besides making sure we met the clients needs, we enjoy pushing our limits technically and artistically. It is a big part of what keeps us motivated doing this every day.
We enjoyed the process of creating this film, the entire studio team helped one way or another at different steps, and we all learned a lot from this project.
We hope you appreciate reading our experience, and the insight may be helpful for some other smaller companies like ours when approaching their next challenges.
See you in the comments section!


The dedication is quite clear in the project. My eyes tear up when I look at the level of effort put into this art. My heart craves to achieve this level of artistry! Kudos and Bravo.
Incredible technical and artistic talent on display here. Job well done to the moso studio team!
nice detailing and overal quality – one minor point to the storyline: that ball is “demanding” to much attention and the whole project is being put in the background… Personaly I would love the animation more if I could focus better on the environment, the exterior and interior architecture without that ball “guiding” – Goal is to have a good edit that guides you through it.
The need to get something fresh in there is well thought out, cause we’re seeing alot of the same these days, but still… I might have prefered without it. I’d watch the anim again, and I’d have to actively ignore the ball in order to see the project better.
Tutorial is amazing, very detailed, it’s a great blog entry.
Projectwise, I had to watch it twice, I only paid attention to the sphere rolling around and flying the first time, thought something would come out of it, until it ended and … well I realized it was trying to sell me the building itself, I think script could have been thought differently.
Great team job!
Diego and Ethan,
Thanks for the feedback. You are right on feeling the ball was perhaps overtaking the spotlight. Initially, it was only going to be the guide to get to the building but the marketing team insisted on maintaining the ball until the end. This was in part due to the fact that the building marketing, design and details were already public, so the film could be a bit less explicit and showing the architecture more subtle… Nonetheless thanks again your input and compliments, I’m sure a lot of things could have been done differently and better in many ways.
Ben
Thanks for encouraging words.
Mustafa
Thanks for the kind words, it was a big effort for us, and we worked as a team to make it happen.
Good job moso team. it was a very developed project, it has a very interesting story telling. I think the fact that the little ball becomes a drone is not necessary because it ruins the whole thing. Maybe you wanted to put too many ideas in this and the ball, the normal tracking of the camera and the music were too much for a two minute video.
As for my personal opinion, the music is not fully accurate because it dulls the entire project. Also the timing is off. Take this into consideration next time.
best, Yana
Special work !!!
This script to test the lighting, you could market.
Looks like a really challenging project, very well executed!