

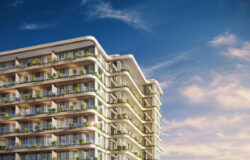


Making of IEEG Energy Center
Uros and Igor, from EDiT, previously wrote here about the Making of the BOKA Artist Residence project and today they visit us again showcasing the process of making one of their most recent projects – The IEEG Energy Center. Focusing on a single shot, they will describe how they took it from model to final relying mostly on post-production workflow. Enjoy!
![]()

Author: Uros and Igor, EDiT studio
EDiT is a young visualization studio based in Belgrade, Serbia founded by Uros Nesic and Igor Kozic in the fall of 2012. Both of them became interested in architecture visualization during their architecture studies at the University of Belgrade. Using 3D graphics and 2D composting as a main tool to narrate their projects they paved their way into the field of ArchVIZ, and since then they have focused their work mainly around storytelling.
Introduction
Couple of months ago we did a set of visuals for a young team of architects from Serbia Monika Jovanovic, Dijana Bardzic and Jovana Kazanegra. The project they were working on, the IEEG energy center, was a reconstruction of a (not so) old industrial hall which is supposed to be made into a center for promotion of sustainable energy and green design. It sounded interesting from the beginning, as it included working with raw materials such as concrete, metal and wood.
In this article we will try to walk you through our process behind this project, from modelling to post production.
Particularly for this visual we set the emphasis on the relation between the wall, the building and the passage itself. We wanted to create a scene that represents calmness and equilibrium between the built environment and elements of nature. The idea was to emulate low sunlight, as seen in the calm golden hours of the day.
The modeling
SketchUP
We usually start with SketchUP for the base model, and then move on to 3ds Max for the touch ups. In this phase we pay attention to keeping all the layers tidy, and the geometry clean – mostly made of grouped solids. This way, we would reduce the geometry problems that can occur when exporting form SketchUP to 3ds Max. We arrange the layers according to materials as another method of making our lives easier later on.
3ds Max
Upon finishing the model in SketchUP we moved on to 3ds Max and V-Ray. This is the phase in which we usually make smaller adjustments to the rough model geometry softening, adding some of the details, light fixtures and furniture. After the model was all set we moved on the next stage, which was the lighting the scene.
Lighting
When setting up the light we prefer to work with a clay model, it helps us to isolate the lighting so that we could focus on the relation between light and shadow in the scene.
We used a sunny HDRI map joined with a V-Ray Sun. This way, we combined the best of two worlds, the atmosphere generated by the HDRI and the overall control you can achieve when using sun object.

Texture
When the position of the sun was set we moved on to texturing of the model. As you can see there are just a handful of materials in the scene. We used basic materials, as we wanted to have a good base render for post-production. The materials are created in a way that would allow more flexibility later on.
Heres a preview for the materials used in the scene :

The gravel and grass were created with Forest Pack Pro using basic presets.
Composition
With the material and the lighting set we moved on to choosing the right angle for the visual. We tried to frame the shot so it leads into the distance guided by the lines of the buildings. At the same time we tried to avoid the central perspective and give the image a more casual, snapshot type of look by tilting the frame a bit to the side.
Post Production
Base Render
We started off with a simple, plain render. As we mentioned, the idea was to produce a lightly contrasted raw render, so that we can have more space for compositing and post-production later on.
Base Corrections
We usually work on base render corrections after the compositing phase of the scene after we set the environment. But considering the fact that most of the image was taken by the base render, it was a good idea to start from corrections this time. For the corrections we used a few V-ray passes. We tried to boost definition with the GI pass and reflection with raw reflection pass. We ended up with more contrast and a clearer looking render.

Texturing
In this phase we started to bring a bit more dynamics to the base materials. We usually look for textures that are similar in scale, but with distinct shadow contrast. We set them in perspective, usually desaturate them so that colors wouldn’t burn out, and then we use a specific blending mode to blend them in. In this particular scene, we worked on concrete, gravel and corten steel.

Background
For the background we combined one of the photos of the building from the original location with a suitable sky. We blend in the sky the same way as the other materials. It is important to look for the fine shadow play and dynamics, as the color can easily be corrected later.

Bushes and more Grass
At this point, we received feedback from the client, and we were asked to put in higher vegetation instead of the grass on the floor. Holes on the wall were also to be filled with grass, so the entire process involved playing with grass textures and masking them out with proper brushes in Photoshop. It is essential to keep in mind the shadow contrast of the scene, and match it on the painted geometry.

Markings on the Walls
Next, we continued to go deeper into the visual, thus we added customized details such as drawings on the corten and flashes on the solar panels, to make the image feel a bit more natural.

Fog and depth
At this stage the picture looked good but it was still a little flat so we started painting in the fog and emphasized lighting and shadows of the scene, to add a little more atmosphere and depth. It also helps to pop up the foreground elements of the scene.

People
The image was at a decent level so our next step was to add people in. After some consideration we decided to go with a peaceful yet a bit romantic layout. After proper scaling and setting them in perspective, we painted in shadows, did some dodging and burning and played around with colors to fit them into the composition.

Final Corrections
Everything was set for us to move on to the final phase :
The colors of the image looked a bit uneven so the first step was to paint in a touch of blue to even out the sky and the rest of the image.

We did some dodging and burning to bring out the overall shadow and light dynamics and make the image pop out a little more.

So far the image looked great, but we wanted to add a little more warmth and focus so we used a warming filter and a diffuse filter to give it a warm haze and diffuse the light, as well as a vignette to center the focus.

So there you have it!
And in a nice video too…
https://youtu.be/ue1rgZm90GQ
We hope you had a good time reading this article. If you have any questions, feel free to ask in the comment section below.


Thanks again Ronen! It has been a great pleasure writing this article for the blog!
Added a video of the breakdown process : https://youtu.be/ue1rgZm90GQ
I know those guys there 😀 lovely mood guys!
best
Lasse