


Making of BOKA Artist Residence by EDiT
EDiT‘s BOKA Artist Residence images were highlighted as part of weeks 43+44 on the forum finished work section. First, because of the architectural subject and the location. Second, because of the great look & feel these images had to them. I wanted to learn more about their process, which was obviously post-work centric, and Uros and Igor were very keen to share it with us. Follow them below as they describe the process step by step along with a video to recap the breakdown in the end. Enjoy!
![]()
Author: Uros and Igor, EDiT studio
EDiT is a young visualization studio based in Belgrade, Serbia founded by Uros Nesic and Igor Kozic in the fall of 2012. Both of them became interested in architecture visualization during their architecture studies at the University of Belgrade. Using 3D graphics and 2D composting as a main tool to narrate their projects they paved their way into the field of ArchVIZ, and since then they have focused their work mainly around storytelling.
Introduction
Couple of years back, one of the first things we came across in Architectural Visualization was Ronen Bekermans blog.
It offered, and still offers, a wide range of workflow articles, a fine connection between software technicalities and flat CG artwork, lots of resources and info, fantastic forum and most important of all… Great handpicked CG / ArchVIZ work.
It is really hard to imagine how big of an impact it has made on the entire CG / ArchVIZ community over the past few years… and all of that thanks to one guy!
So, it is really a great honor to get a chance to write an article for this blog, and we want to send out a big thanks to Ronen Bekerman for inviting us, and trusting us to do so.
Our interest in the world of ArchVIZ came almost simultaneously with our introduction to the world of architecture design. Even the early stuff from our student days were planned using 3D models. Somewhere along the way we spontaneously picked up on Photoshop compositing, and we started adding external elements to our renderings, later realizing that we can use those elements to aid the presentation of our projects.
It is understood that architectural form should be the main motif in architecture visuals, but in reality architecture goes beyond its physical representation. All of the circumstances that are widely considered to be part of its utilization come together, thus creating unique moments.
Therefore, we try to introduce a counterweight theme related to the architecture, to create what we believe is the most appropriate moment for a particular visual. We believe that CG should go beyond pure representation of the physical attributes of the project the image should inspire contemplation.
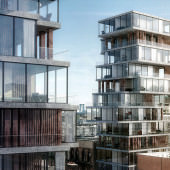
The Boka Artist Residence
This particular project entry was designed by architect Vladimir Joksic for the purpose of the international competition – Boka Artist Residence. The complex was intended as a dynamic and interactive space where art students could exchange knowledge and experience and it is situated near Herceg Novi.

Images for Boka Artist Residence arose from a different set of circumstances then we normally encounter. The typical workflow in our studio includes modeling, rendering and post process. In some cases we work on a provided model, but in this case the author insisted on providing the renderings himself. This is not an ideal situation because the amount of control we had on the final outcome was limited. On the other hand it represented a challenge for us, so we agreed on these terms.

Reference images are almost always a two-phase process for us.
First of, we do our research of the location, mainly by searching for reference images of the region, so that we can get a better feel of the surroundings.
In the second phase we choose images that could eventually be an actual part of the final visual, and so there is a lot of experimenting involved.

The initial render angle was a bit too tight, so we decided to give it more room to breathe. This way we balanced out the canvas by placing the main focus in the lower right corner. Leaving us with more space to plan the environment later on.

Deciding what comes first in geometry compositing depends on the surroundings and overall canvas layout thats usually the toughest part.
We started by mixing reference images in the background, keeping in mind overall proportions and perspective. We used layer masking and puppet warp to connect the geometry.

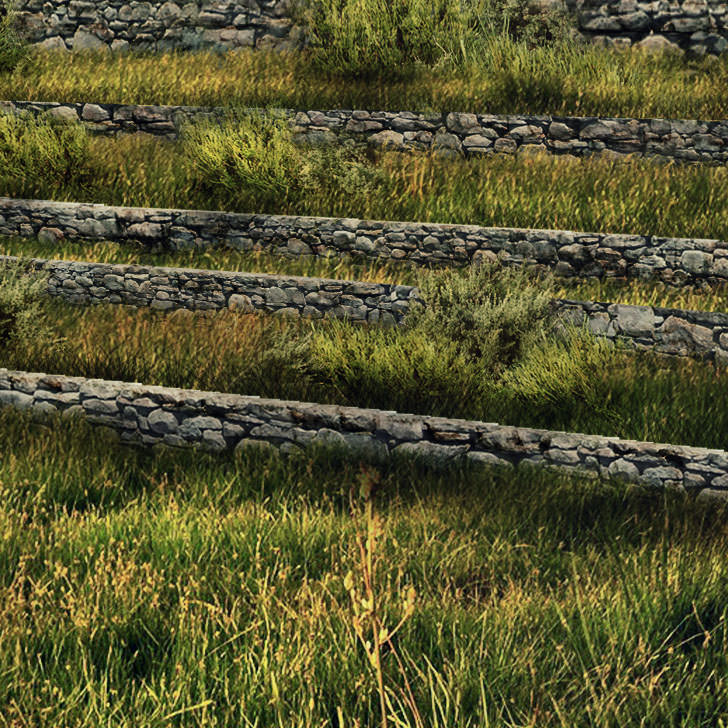
With a solid background composite, it was a lot easier to determine how to build up the first plan geometry. We needed to recreate the slope from the location, which would separate the first plan from the background geometry, and in the same time allow the 3D render to properly sit in the hill geometry.

Holes that were left in the geometry, were more or less flat surfaces, and were intended to be filled up with grass. We already prepared a grass image that we were satisfied with, we scaled it and multiplied it couple of times, with some layer masking, in order to match the render scale.
We also brushed in the grass around the edges, thus embedding the 3D render a bit more.

At this point, basic geometry layout was entirely set up. Usually we send a desaturated image to the client, so we wouldn’t have to worry about color corrections and layer adjustments before confirming the layout.

After the feedback, we added the mountain in the back, to spice up the dynamics of the composition. The next step was adding adjustment layers to color correct the landscape. Almost always there is referent layer according to which we color correct, and adjust all the other layers. In this case the grass was chosen as a reference layer because its color was most appealing.

Having the landscape all set up, we could focus on filling in the details of the surroundings. Vegetation was placed not only to fill up the visual but also to add more spatial depth in the image, and separate front, middle and back elements of the composition.

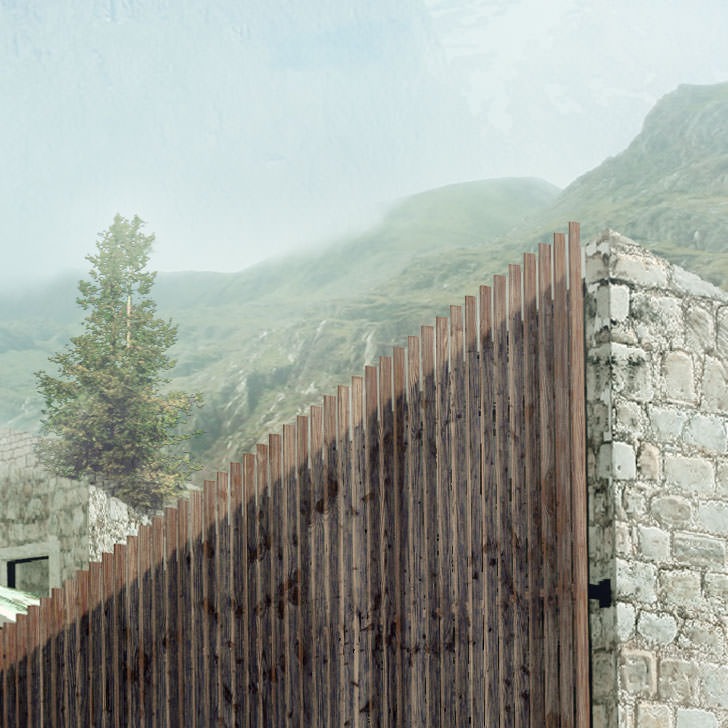
The render came of as pretty flat compared to the surrounding so we needed to balance it out. We added additional textures wood facade and stone cascades, painted in more shadows, dodged and burned it until we felt it leveled up with the landscape.

Going further, we started adding people in the visual. The people in the background are added to further define the scale and describe the atmosphere. Since the main building is opening up to the sky and the landscape, we added a counterweight theme by placing two girls in front. Their position and form brings the eye back to the main building thus creating triangular relation between those three directions.

Everything was in place at this point, so we started working on final corrections that apply to the entire visual. We added a filter via Magic Bullet Looks, to bring out the contrast and unify the colors, as well as a separate vignette that would accentuate the main building.

Second step of final adjustments included cropping and adding a lens flare on the right.

In the third step we painted in additional fog, sun rays, and some more shadows.

And as a fourth and final step of creating this visual, we added an adjustment layer – selective color, to bring out a bit of redness and tune down green colors, as we felt they were a bit too aggressive and dominant.
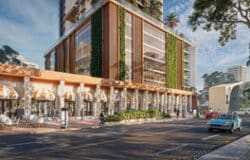
So, this is the final version of Boka Artist Residence :

And thats it!
Also, take a look at our image breakdown video recap :
We hope that you found this image breakdown enjoyable and informative.
Here are some original size crops too…

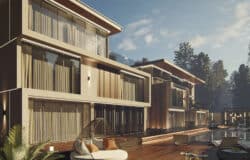
And a crop from a 2nd view we made :

Again, a big thanks to Ronen, and thank you for reading this article!
If you want to see more of our work please visit our website or FB page.
And, if you have any questions please post them in the comment section bellow…
All best,
Uros and Igor, EDiT studio

Awesome work!!