


Making of House on the Coast
3dnotos studio sheds some light about the making of their striking “House on the Coast” image posted not long ago on the forums (Done in viewport still screen capture style mostly). I love the look & feel they went for on this one, being an actual client work, and not the usual treatment one would expect… this image offers both warmth and cold feelings with a very smart placement of the women overlooking the sea from her exterior deck.
Author: 3dnotos3dnotos studio was created in 2008 by Leonardo Merlos and Hernan Landolfo, both childhood friends and fellow architecture students, with the aim to be among the best of our industry and hope to reach that level through the power of imagination and of course… 3ds max and the all mighty Photoshop.3dnotos use 3ds max 2012, photoshop CS5 and After Effects from time to time.
The House on the coast
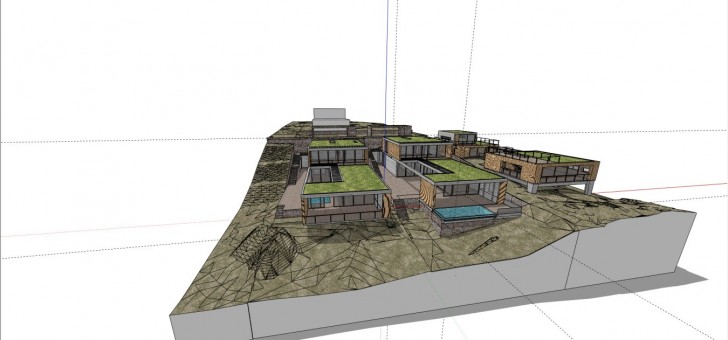
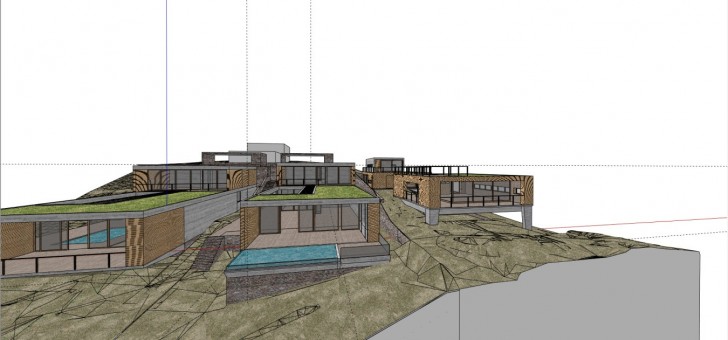
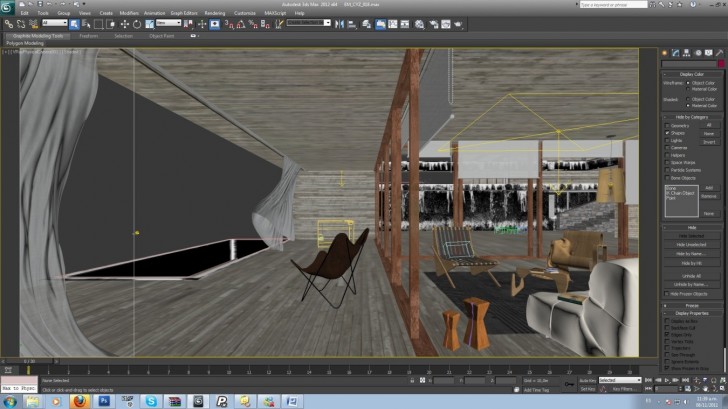
The project came to us from architect Edgardo Minond, it was due in 2 weeks and we were given a Google SketchUP 3d model, with which we worked most of the 3d.
Here are some views of the model…
Why raining?
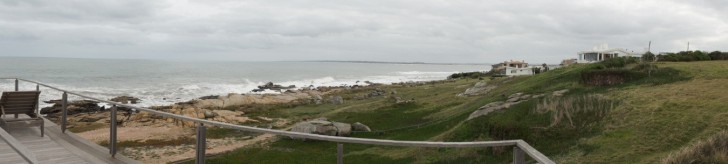
The scenery in which the building was set, was an incredible and sublime view of the sea, this vast and scary place, a place where a change of tides can become a disaster.
The first usage of architecture is said to have been (in the early ages of civilization) as a refuge from the elements, a place where these fragile human beings waited until the mother earth would stop pouring water, rocks or wind at them.
This idea of a “refuge” and a “beacon” where both the intentions we wanted to give to the image.
The architecture was also of big help, having some details specially created to stop the rain from coming to the living area and a small pool that had a relation to the sea and to the drop of water from the roof, in free fall.
Why the furniture?
All of us here are architects and have a weakness for modern furniture created by the masters of architecture, most of the furniture we model in-house and keep it as model library for our own usage, we decided to model a BKF chair (also known as butterfly chair) and Aalto´s furniture for this image as we thought it would add that “distinction” of “fine taste” modern furniture has.
Why a woman in a chair, why is she outside?
Well… the rain stopped, she was reading a book in the living room and thought to have a cup of tea outside, contemplate the beauty of her own sea view after the rain, she felt safe from the drops.
The Modeling
As I mentioned before, we used a Google SketchUP base 3d model to do the image, we modeled most of the furniture, the curtains and the water on the pool. I´ll show you each model and the modifiers on it…
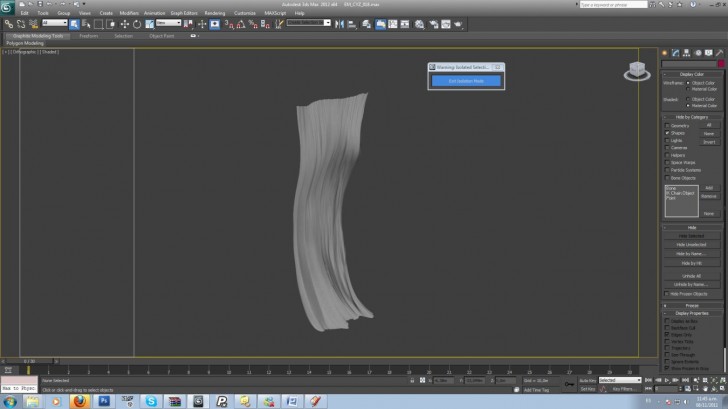
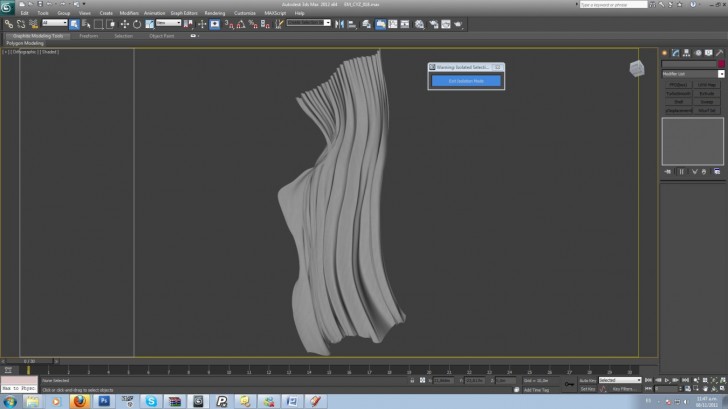
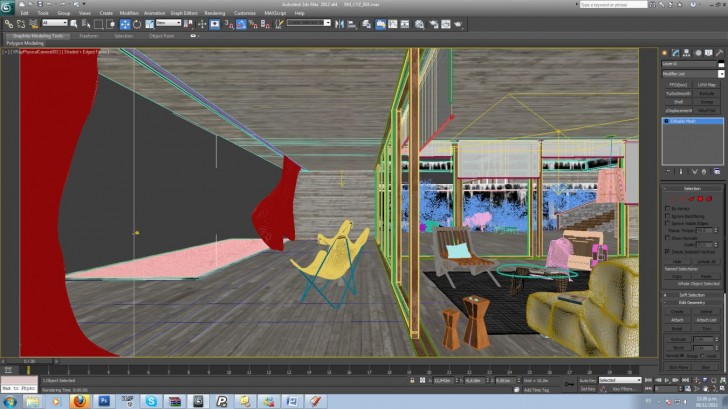
1. The Curtains
The curtain were modeled in 3ds max and further detailed in ZBrush, we didn´t use any physics emulator to have the shape of the curtain we just modeled it by hand, than a FFD box to fix the position without having to retouch the mesh.
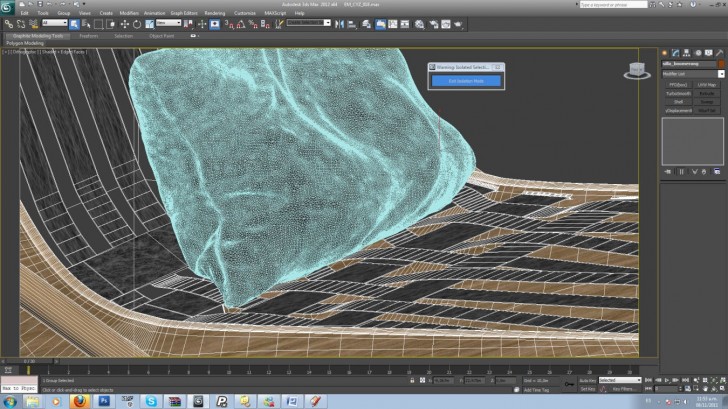
2. The BKF Chair
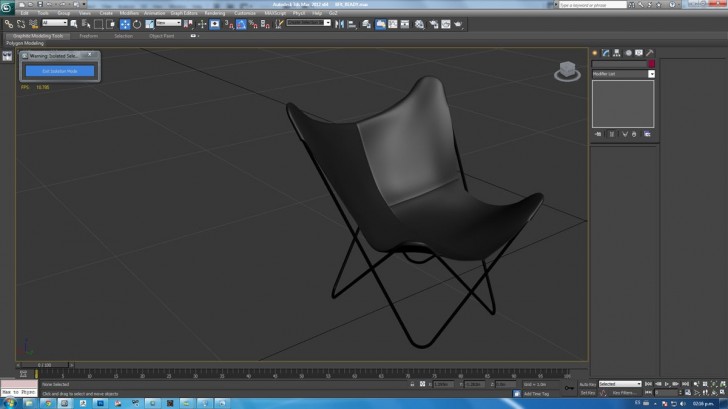
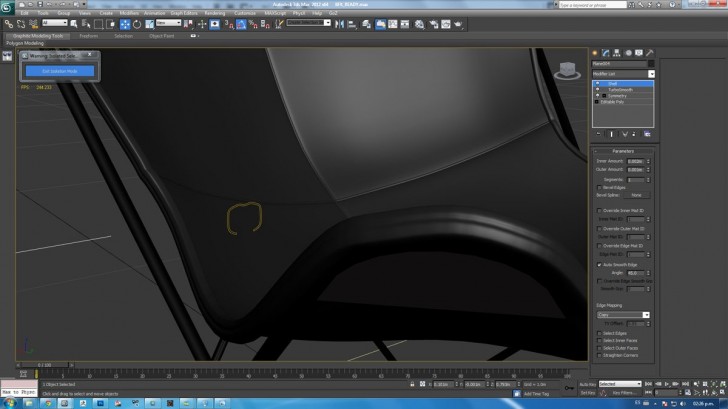
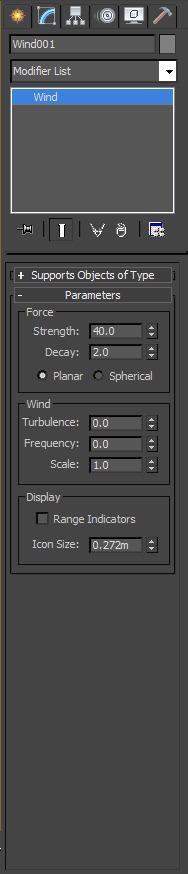
This chair was modeled entirely in 3ds max and we used a wind effect on top of the chair facing down to emulate the weight of the woman sitting on it, we only led the emulation go for a few seconds so it wouldn’t wind up all the way to the floor.
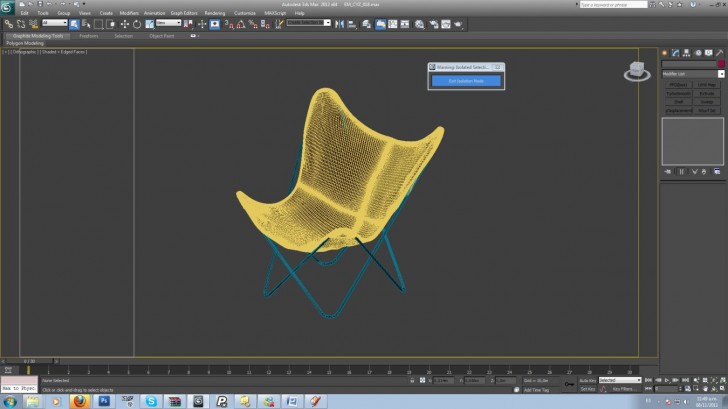
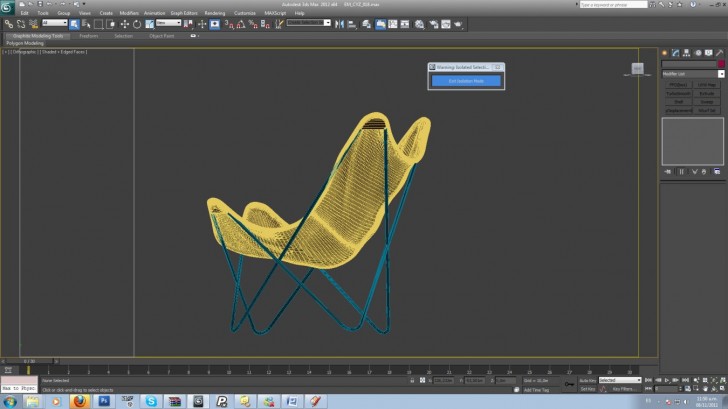
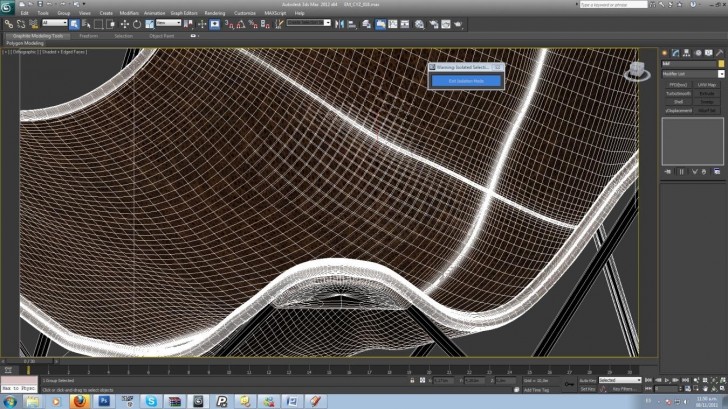
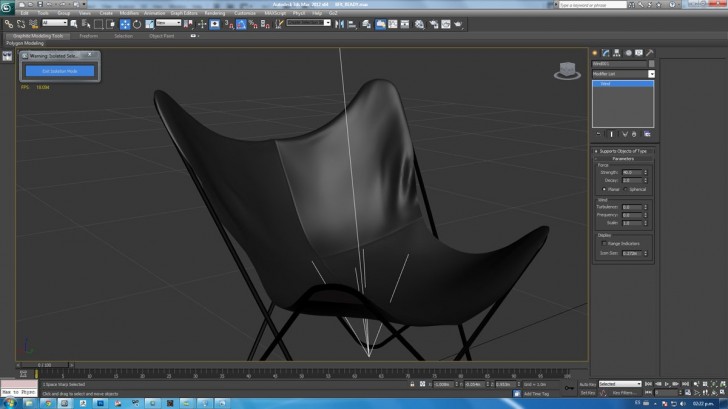
Here are the viewports with the wind work on the chair hope it is clear enough
Original geometry
Cloth modify
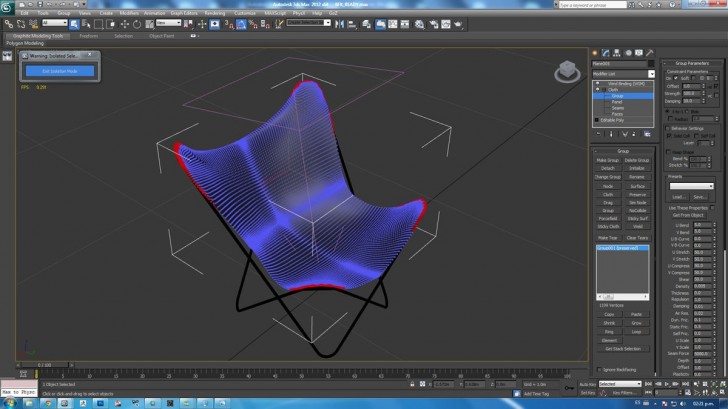
Edge sweep
Wind parameters
Alvar Aalto´s boomerang chair was also made entirely in 3ds max, the cushion though, was based on a model by 3ddd.ru and ZBrushed on top of it.
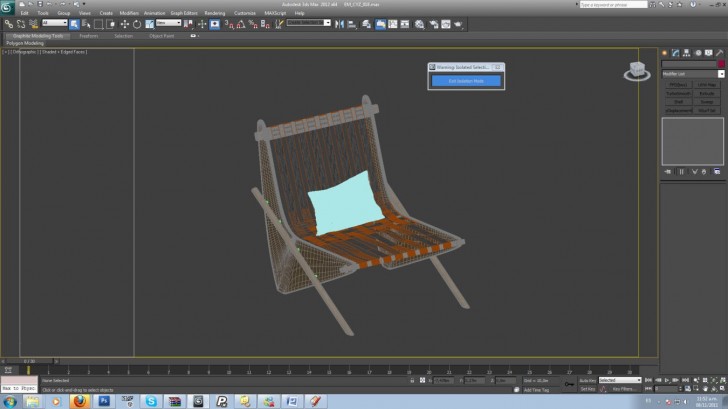
we decided to fix the strings on the chair so it would show the weight of the cushion on it.
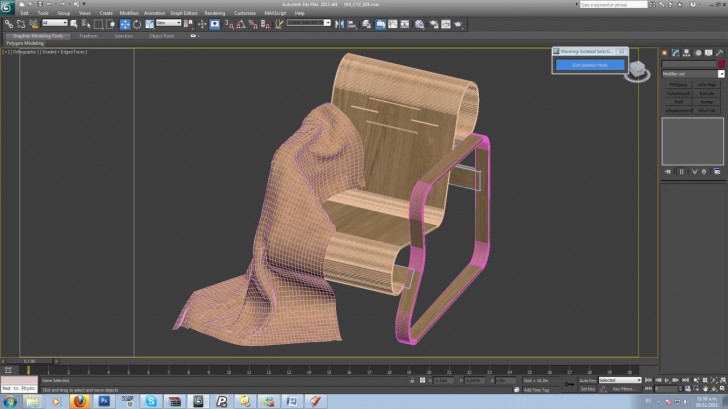
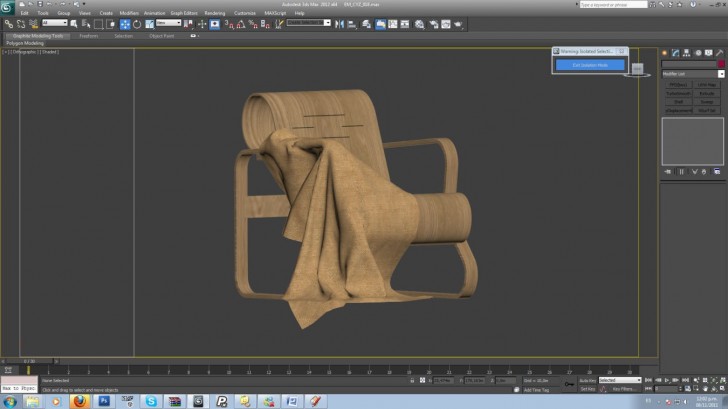
Aalto´s Paimio Armchair and plaid on it was made in 3ds max, we used a silk emulator for the plaid on top of the chair.

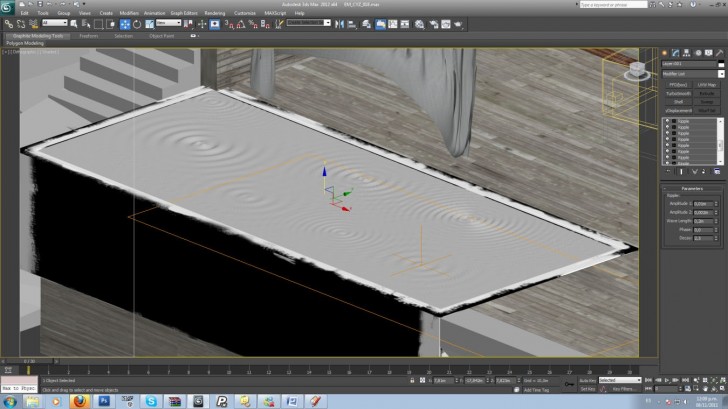
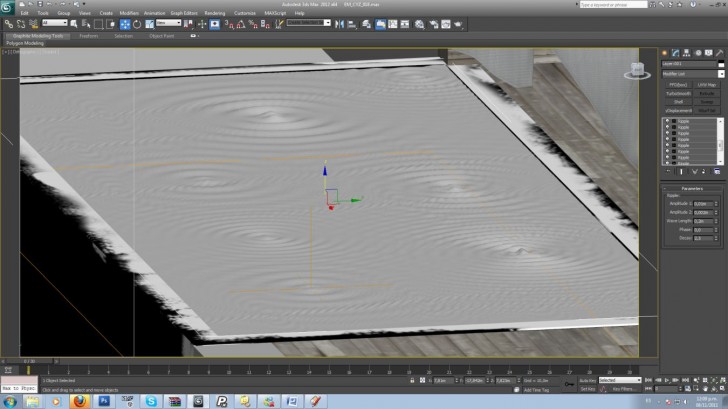
3. The Water
We used a plane with a number of ripple modifiers in different sizes to emulate the drops of water that kept falling after the rain is over.

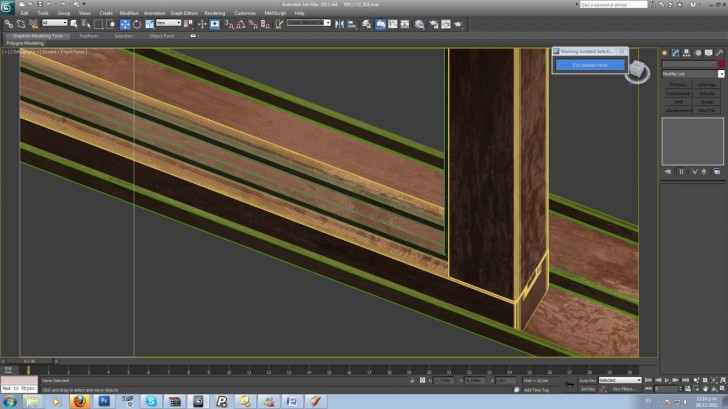
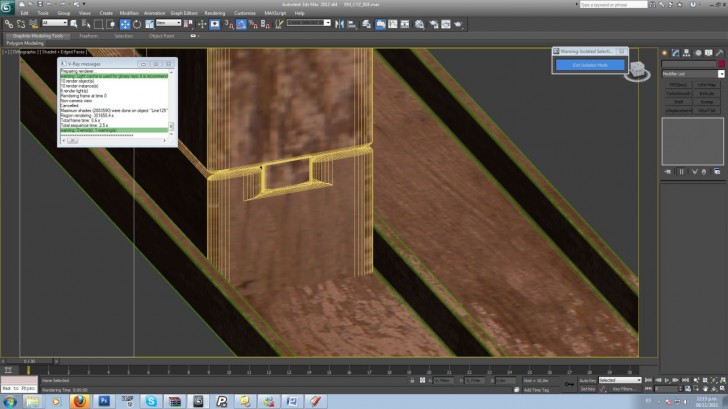
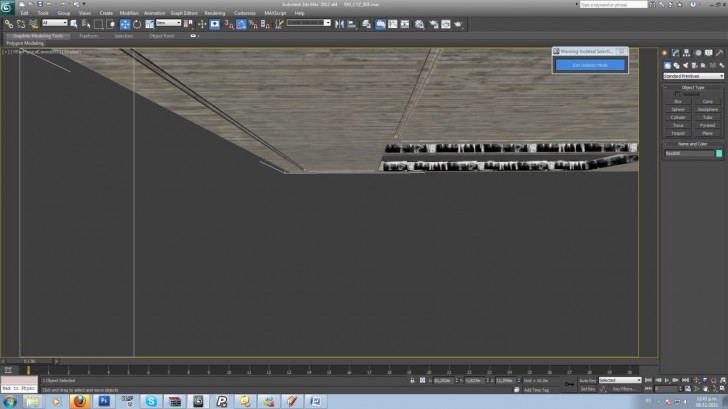
4. The Windows
We detailed it as much as possible mostly chamfering most edges and fixing the railing as much as we could.

The rest of the modeling we think is not worth an explanation since we believe most of you understand how to make it.
The lighting
The lighting is very basic actually
A default VRaySky and two VRayLights and an Omni light. The one on the right is throwing warm light into the interior and the one at the back is bathing the wood wall.
yup… that is it. Just 2 lights and a default VRaySky Honest!
The Textures
All textures were downloaded as .JPGs www.cgtextures.com.
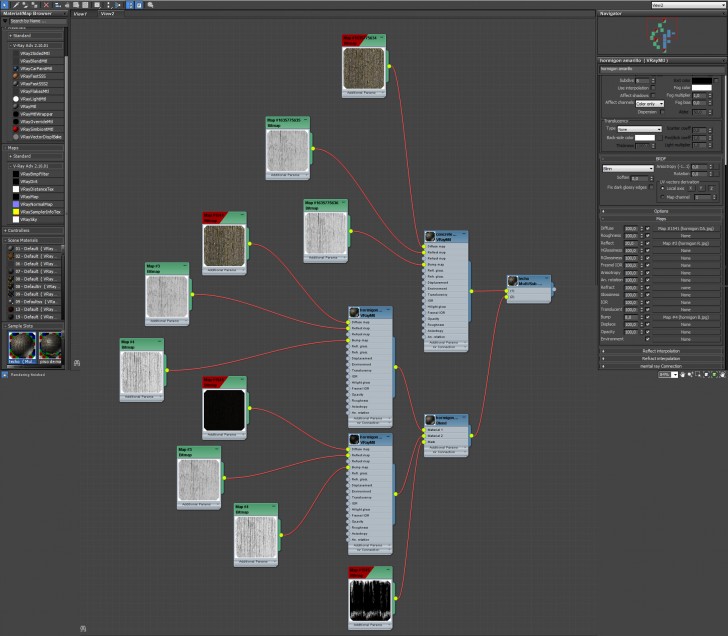
1. The Floor
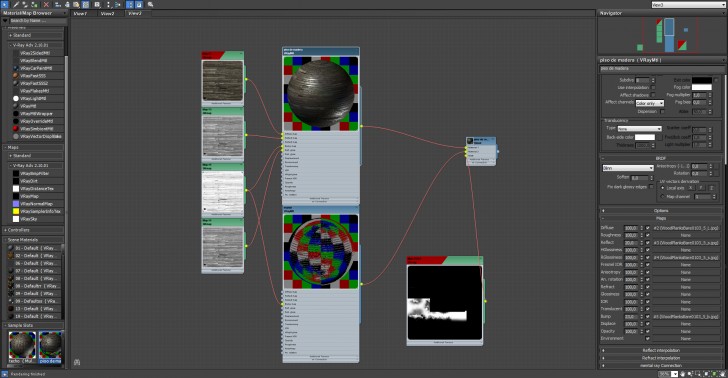
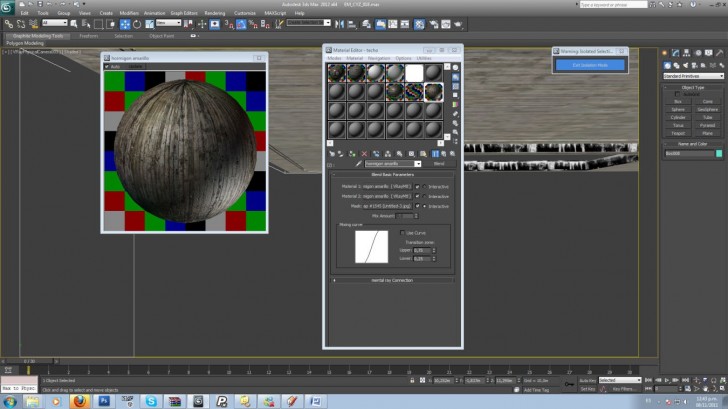
It´s a max blend material between a mirror material and a wood one, let me split it up for you
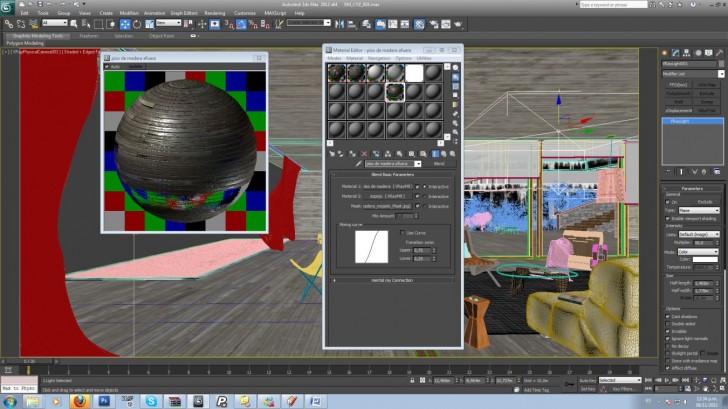
Wood Material Diffuse
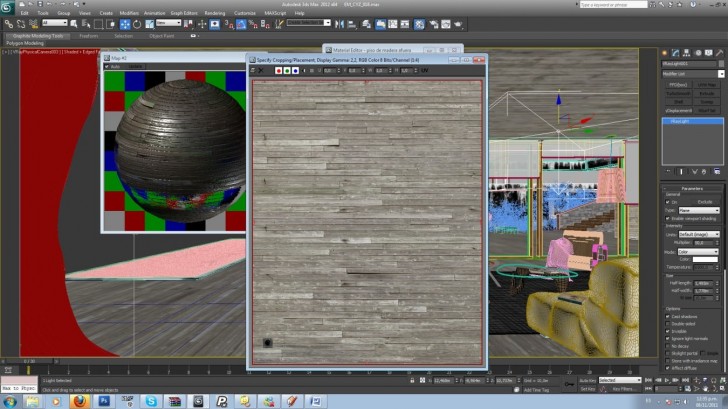
Wood Material Specular

Wood Material Bump
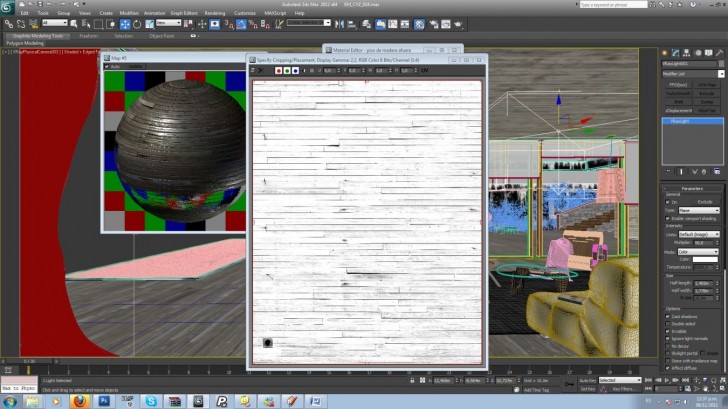
Mirror Material
Just a regular VRay material with reflection and the wood bump in the bump channel to emulate the different planks.
The Blend Mask
A lot of patience and a Wacom Intuos was the solution to our masking problem.
2. The Concrete
Multi sub/object material with 2 different ids, one for concrete and one for the leaking water on some concrete faces.
ID1
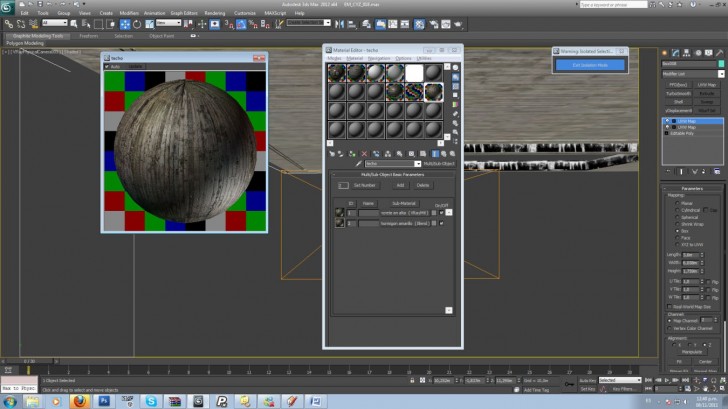
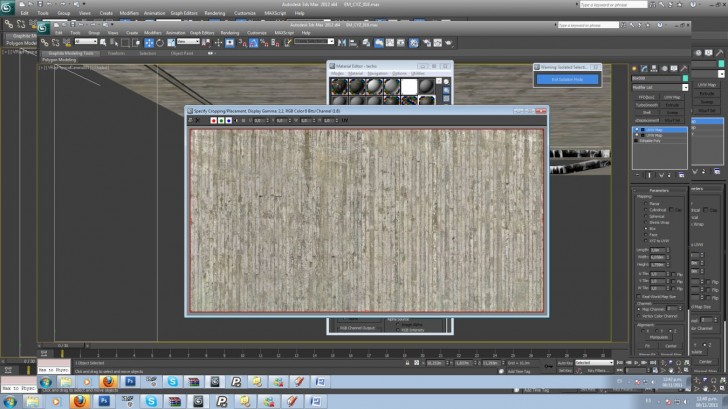
Concrete Material Diffuse
Concrete Material Specular
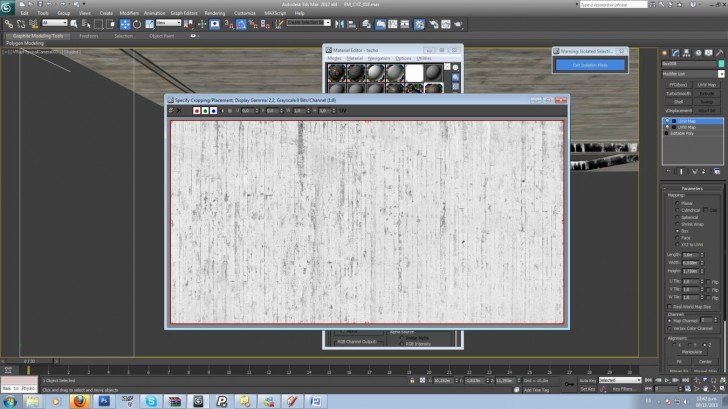
Concrete Material Bump
ID2
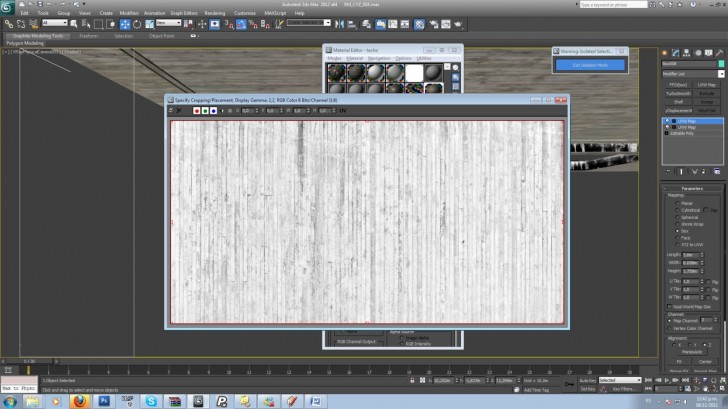
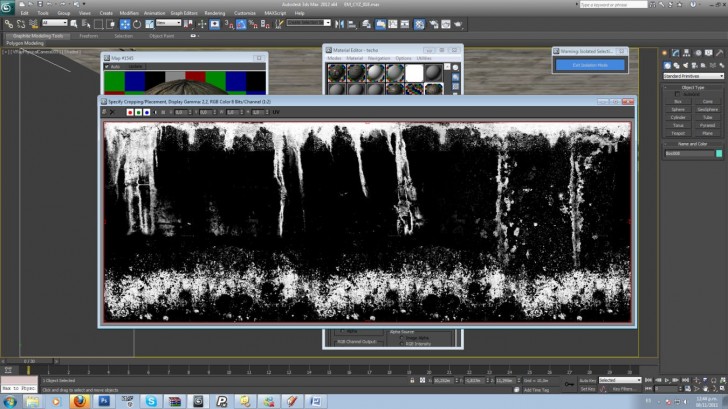
Leaking Concrete
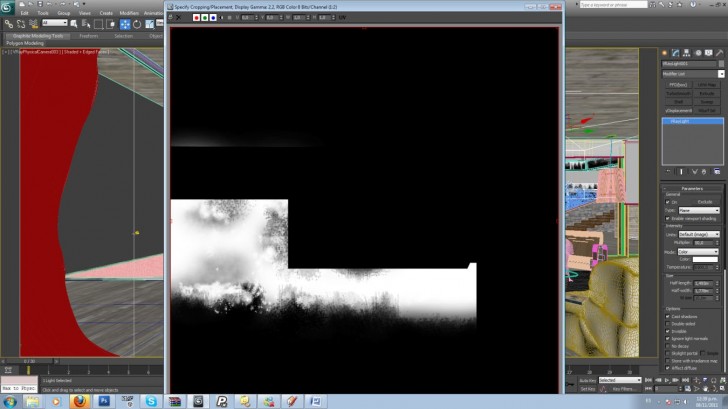
blend material formed by the concrete material and a copy of it with the bitmap output a bit darker, blended with a mask
Blend Mask
And the slate view…
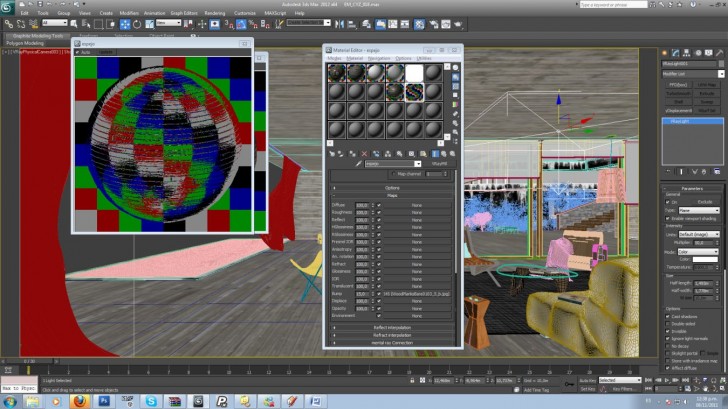
3. Wood Wall Material
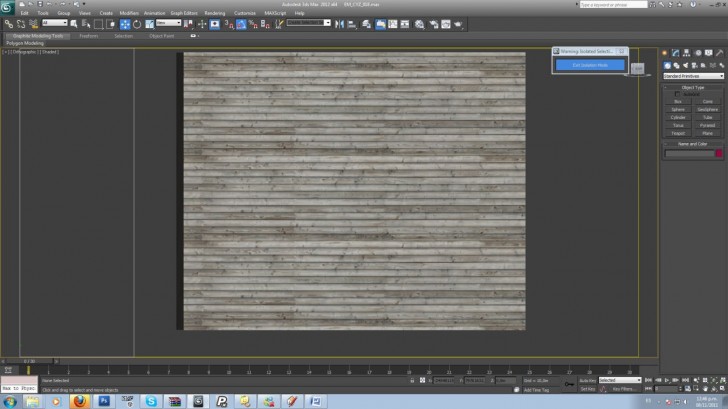
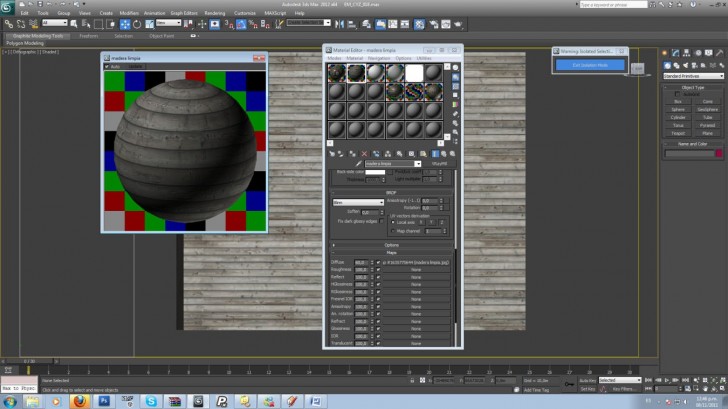
Wood Wall Material Diffuse

4. The Carpet
The carpet was inspired by an artwork by the Argentinian artist Pablo Siquier.
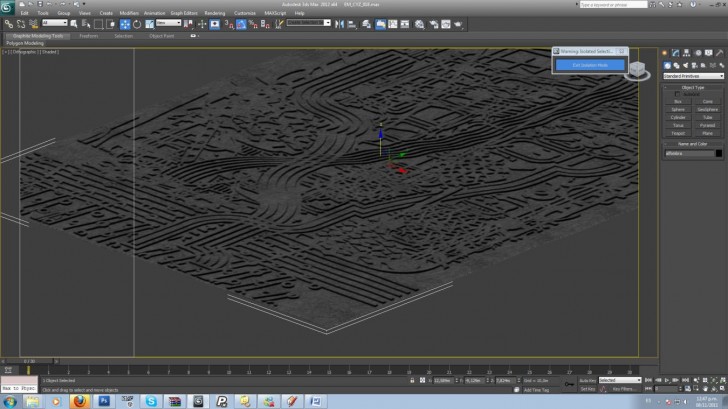
Carpet Material Diffuse
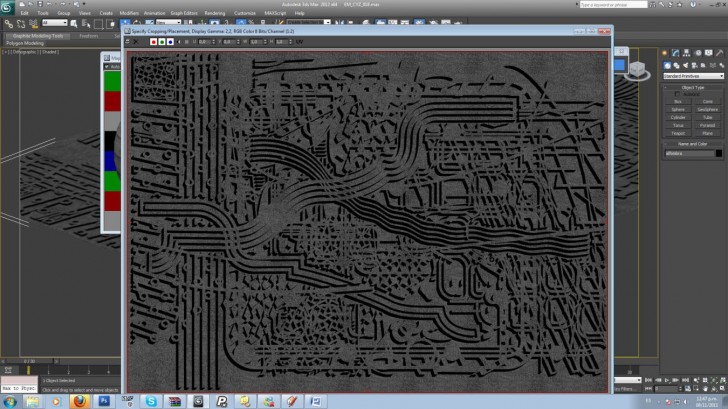
We used a a VRay Displacement Modifier with the same texture.
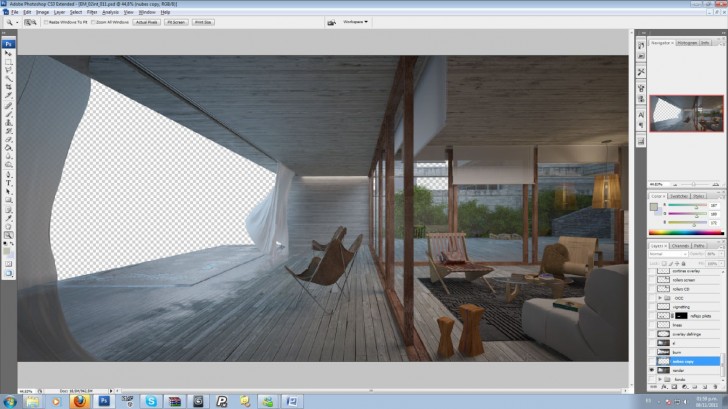
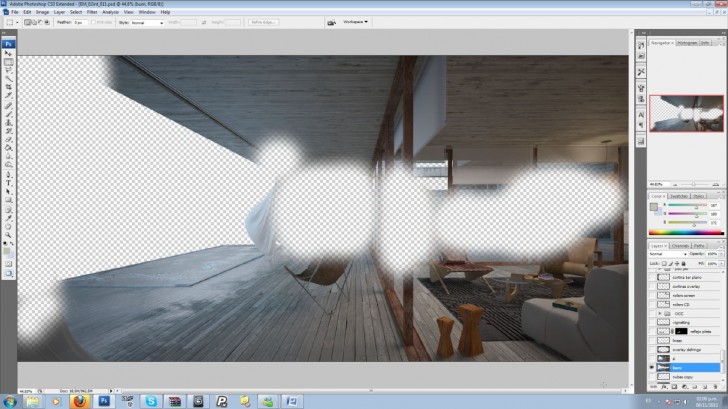
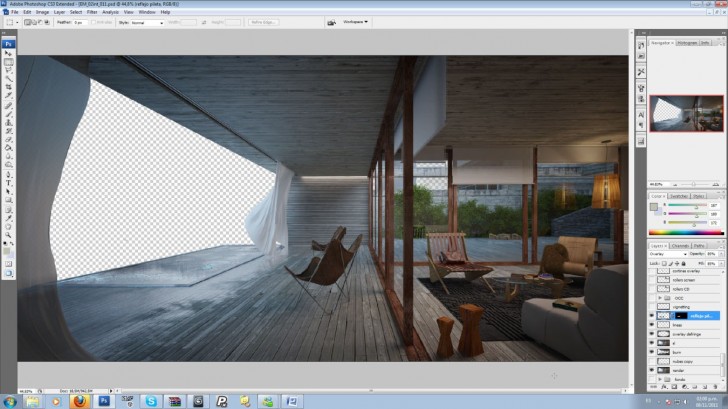
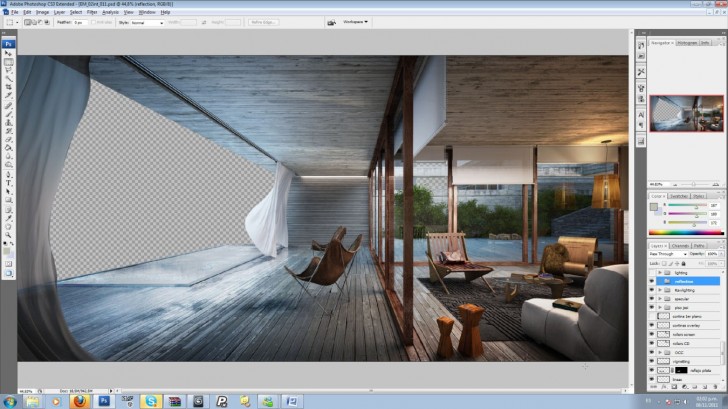
The Post Production
A bit long with lots of layer viewport captures I hope it will be clear how we went about doing this (once you open the first image you can advance as like a slideshow and see the change from frame to frame better).
Raw Render
Blending Mode Burn Layer
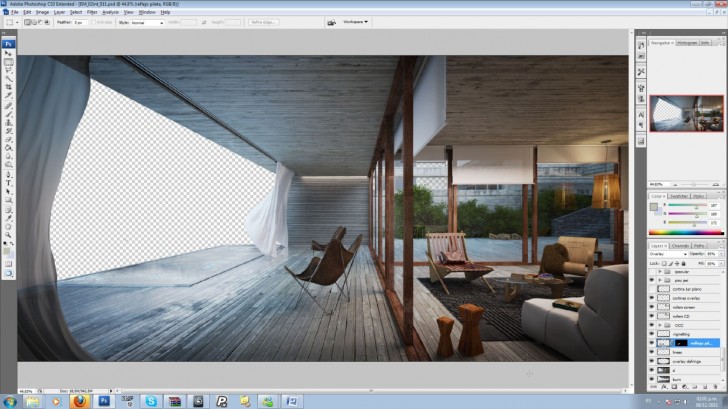
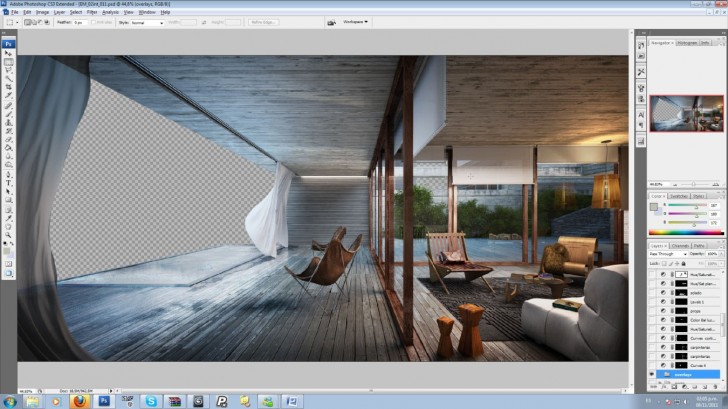
Water Reflection & Overall Defringe
Vignetting, Occlusion & Curtains Retouch
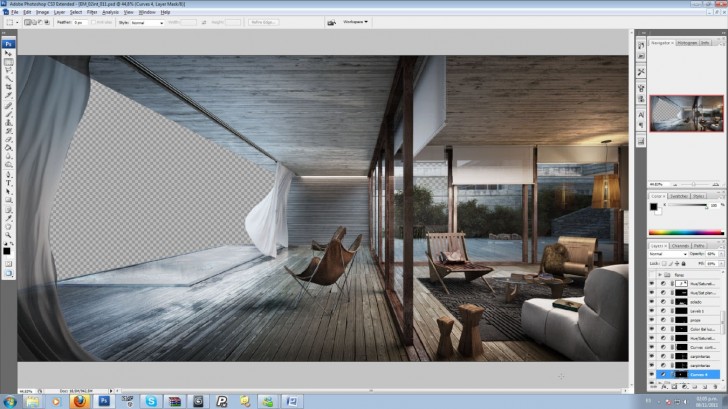
VRay Specular Pass
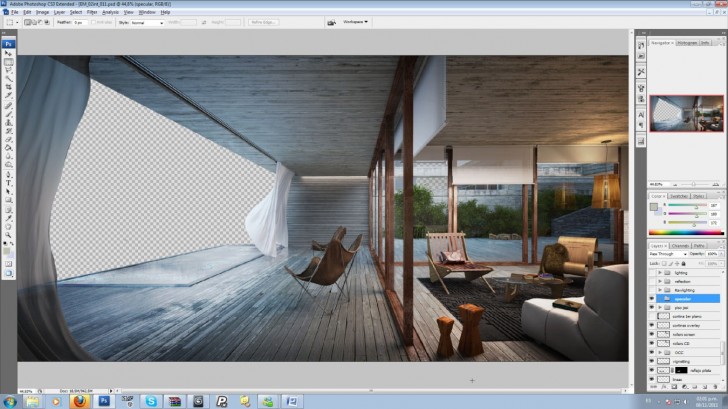
VRay Raw Lighting Pass
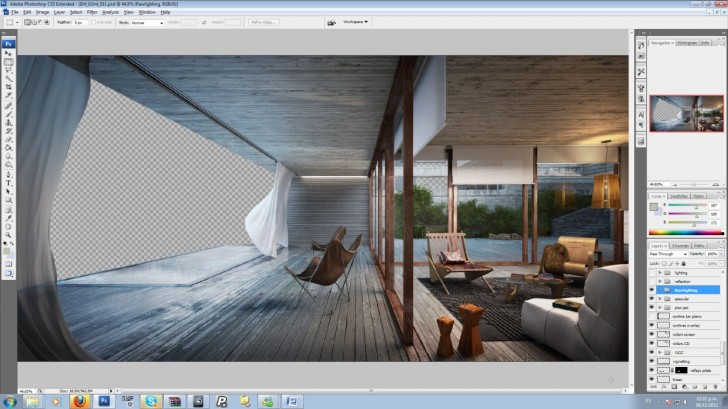
VRay Reflection Pass
VRay Lighting Pass

Overlay Brushes
Adjustment Layers
Flares & Color Correction

Background Added
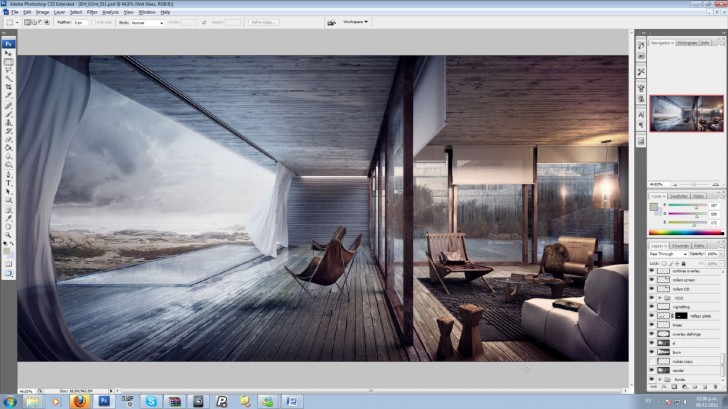
Adding the Women

The women integration was made with a photograph adding some burn with a brush and some color to on top of it. There was no need for an adjustment layer we did it directly on the photo for better result.
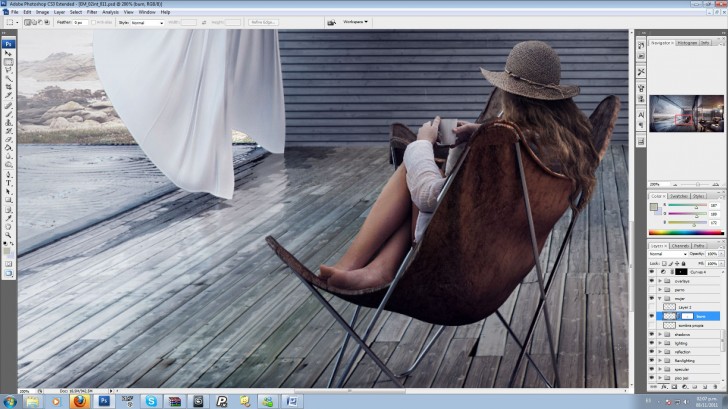
Adding shadows for the women

Overall sharpening
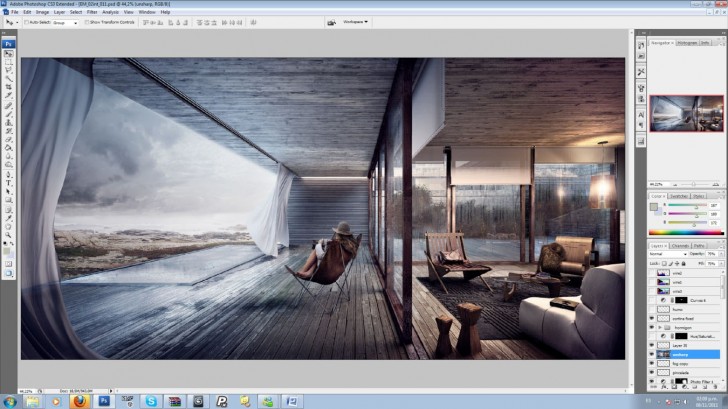
As you can see, we work on post production quite a bit, but is also necessary to think creatively when composing the image.
I hope you found this informative!


Any one else using some reactor physics to assist in modeling… or zbrush for cloth like objects? Would be interesting to know how common it is?
@ronenbekerman I use reactor quite a lot for cloth and fruitbowls. I only use zbrush for personal (non commercial) projects, Mostly i find that it takes to long to us it with deadlines
@WVanspranghe@ronenbekerman I use zbrush a lot for detailing and specially with cloth or ornamental details. Then you can use a low poly version of your mesh I grab normal maps or displacement as you need them. Zbrush is a lot of fun and it helps me not to get bored doing everything inside max.
@ronenbekerman
thank you ronen for all your kind words, we are proud to be in the blog!
http://www.facebook.com/3DNotos
Great project and great “making of” for me one of the best i’ve seen so far
I have just used Cloth to put fabrics over elements, Wind is interesting new thing… Cool Making of 😉
I watch most of these. “making of”, posts. I like most, but I loved this one, which is initiating my first reply. This is the reason illustrators are needed. Your beauty pass is where most people stop, but it should be the entry into a great illustration. I was hooked on this article at the, “Why rain?” part. To many times I get request for that SE ISO with a blue sky, and no shadows. I love your work, keep it up!
@whitebirchstud So true… who ever said clear blue sky is the way to go? sometimes people look for other moods in relation to the subject matter you show them.
I keep revisiting the MIR and LUXIGON interviews & portfolios, seeing so many gray rainy images that spark many emotion while viewing them, that no clear blue sky image could.
Clear blue sky needs a reason… for example the great images made by dboxcreative for the dellis cay project – http://www.delliscay.com/content/final.html
If ever clear blue sky was in order – this is it!!!
@ronenbekerman@whitebirchstuddboxcreative I agree with you Ronen and do almost the same. I keep revisiting the LUXIGON and MIR portfolios and interviews and also keep visiting the VYONIX website…Everytime I look at one of their illustrations with one of those rainy atmospheres or striking sunsets (more Vyonix), they spark many emotions.
I would like to add one point to be discussed, if possible. We all produce realistic images…honestly, I don´t mean to sound arrogant, I was producing realistic renderings for Screampoint back in 2003 and later to other companies. During this year, I started to study the work of many talented conceptual artists like Syd Mead, Fheng Zhu, Jesse Van Dijk, Stephan Martiniere and others. They create atmospheres and/or moods…their work spark emotions…their name and their work will be reminded because of those emotions…The same kind of emotions sparked by the work of MIR, LUXIGON, VYONIX…
Let me know what you guys think…
@ChristianMiranda@ronenbekerman@whitebirchstuddboxcreative
Well i believe those 3 companies are a great inspiration for all of us, and we also have been looking some concept art ourselves, as well as comic books and cinema. I just wanted to point out that even though those companies are as great as you say, we are not just a MIR or a LUXIGON wannabe, if you take a look at our portfolio, you will see we are trying to make our own way in the creative development of images. The idea of having a heavy sky in an image came from many places for us. To be able to aproach concept art, well….that would be great.
MIR, LUXIGON, PURE and DBOX are some of the companies that have leaded and lead the way for many of us, but we hope to be in our own path
@HernanLandolfo@ChristianMiranda@ronenbekerman@whitebirchstud
Hi Herman. Sure thing. Never wannabes…I was specifically talking about the style of MIR and LUXIGON and then I added Vyonyx. In my opinion, those companies are great sources of inspiration as those great concept artists are and several traditional artists… Each one has a particular trajectory and style. Right now, I´m working to take my work to a higher level. I want more atmosphere and I hope one day my work will spark emotions too…but with my style.
sugoi!
just fucking wow!
I love it! Breath taking atmosphere, calm before/after rain..
Remember, when I got the newsletter from CGarchitect with this featured as a pro of the week ..stared for a while at it =) then a bit more.. saved it to my inspiration folder and tweeted =)
it’s one of these works that you put in your mind among other master pieces seen around from Visualiser (in capital V =) bb3, peter, kizo, pixela..to start..
It was interesting to see this story-board/tuturial =)
..with time You understand that there’s no magic in that, but skillfull work of those that do understand what they are actualy doing or sometimes just dare to explore the posibilities =)
Great! NOTOS! i have only one cuestion, the foggy glass? can you tell us how you did it? .. Gracias amigo y te felicito, soy de Córdoba de la UCC, Argentina. Saludos..
Keep it up!
What a brilliant workflow, love the atmoshpere added to this image! Congratulations for the work shown, very impressive! 😀
Insprational tutorial.Great work
Notos is one of the best visualization study of Argentina, no doubt.
Great work 3dnotos this is one of my favorite images of all time, I love all your work, it really inspires me, thank you for the making of, and thank you ronenbekerman for such a fantastic website 🙂
this is awesome. Thank you ronen.
Zbrush is a lot of fun and it helps me not to get bored doing everything inside max.
That image is stunning. That would just about be my dream house – all glass and sea views.
very nice work. The visualization reminds me of the house in Roman Polansky’s “Ghostwriter”, which they composited a lot of seaside footage for… great movie btw.
Excellent! You are really a great artists for having great ideas such like this…
Hey. Great work! How did you achieve the rain on the glazing at the back right of the image?
I’ve been experimenting recently with particle paint and for the drops and a vray blend mtl for the condensation.
Interested to know how you done it, looks great!
J
Wow, a lot of work has gone in to that image. The texturing of the floor to make it appear wet and the raindrops on the glazing are very interesting. Great post.
Soul, this image has a soul!
Totally make me think of the movie Ghostwriter. Awesome cinematography.
This is amazing! What level of details and amount of work. What price for this premium service? And how many days did You spend working on it?