


Making of Blue Bar
The Making of Blue Bar is a dive into the details by, French Interior Designer, Martin Darzacq. Going back to his showcase made here 2 months ago. Follow his process as he experiments with RailClone and Light!
Introduction to Making of Blue Bar
Thanks to all of you who found interest in my work and pushed me to share about the process. I am grateful to Ronen for offering the opportunity to contribute to the community through his blog.
My name is Martin Darzacq, I’m a french Interior Designer & 3D lover, and I’m happy to share this making-of with you.
The Making of Blue Bar os a personal project that had different purposes. To have a set of visuals I can communicate about, without worrying about the confidentiality or credits aspects. Also, to challenge myself with a dark environment lighting and assets modeling. Finally, to experiment with RailClone, a tool I have wanted to learn for a while. And of course, have some fun with it too!
Please note that what I did may not be the best or the most efficient workflow, as I said, the idea was to learn and experiment. I used 3ds Max, V-Ray Next, Railclone, and Forest Pack.
Blue Bar Inspiration & Concept
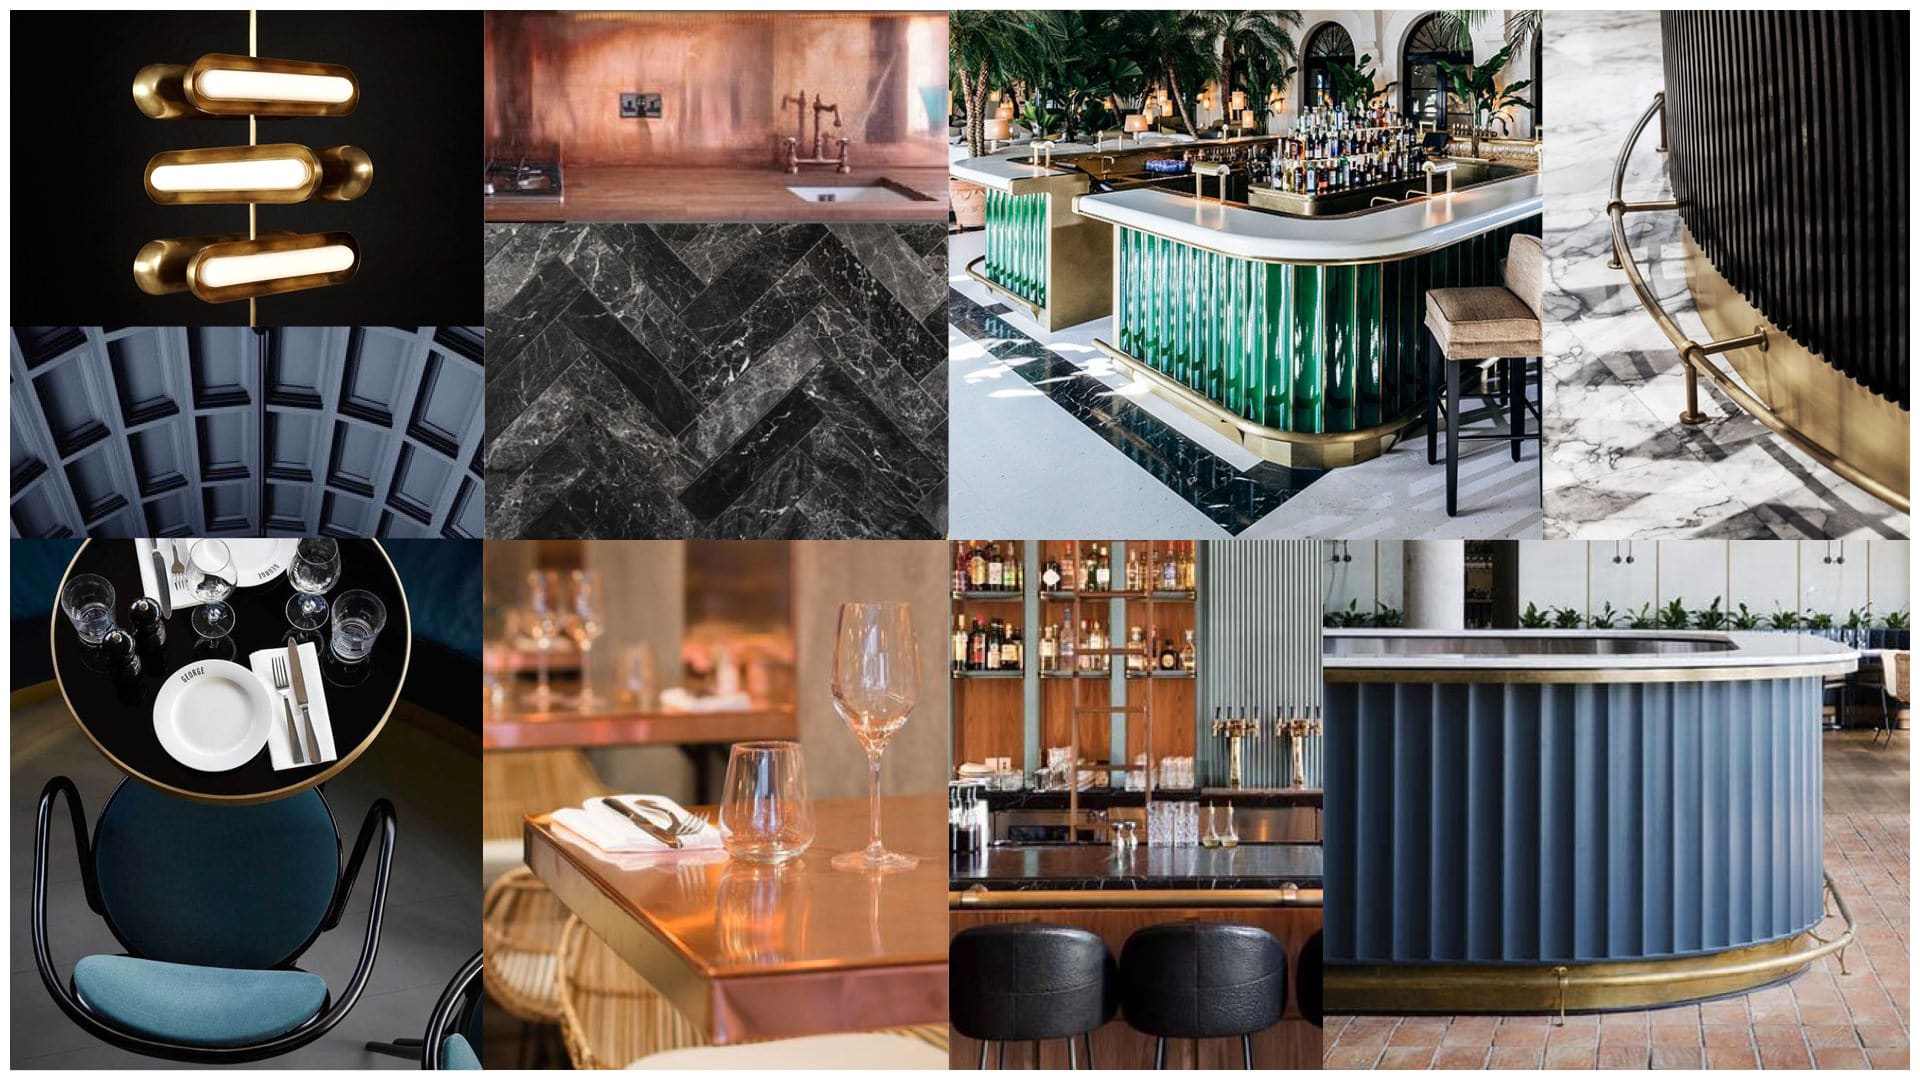
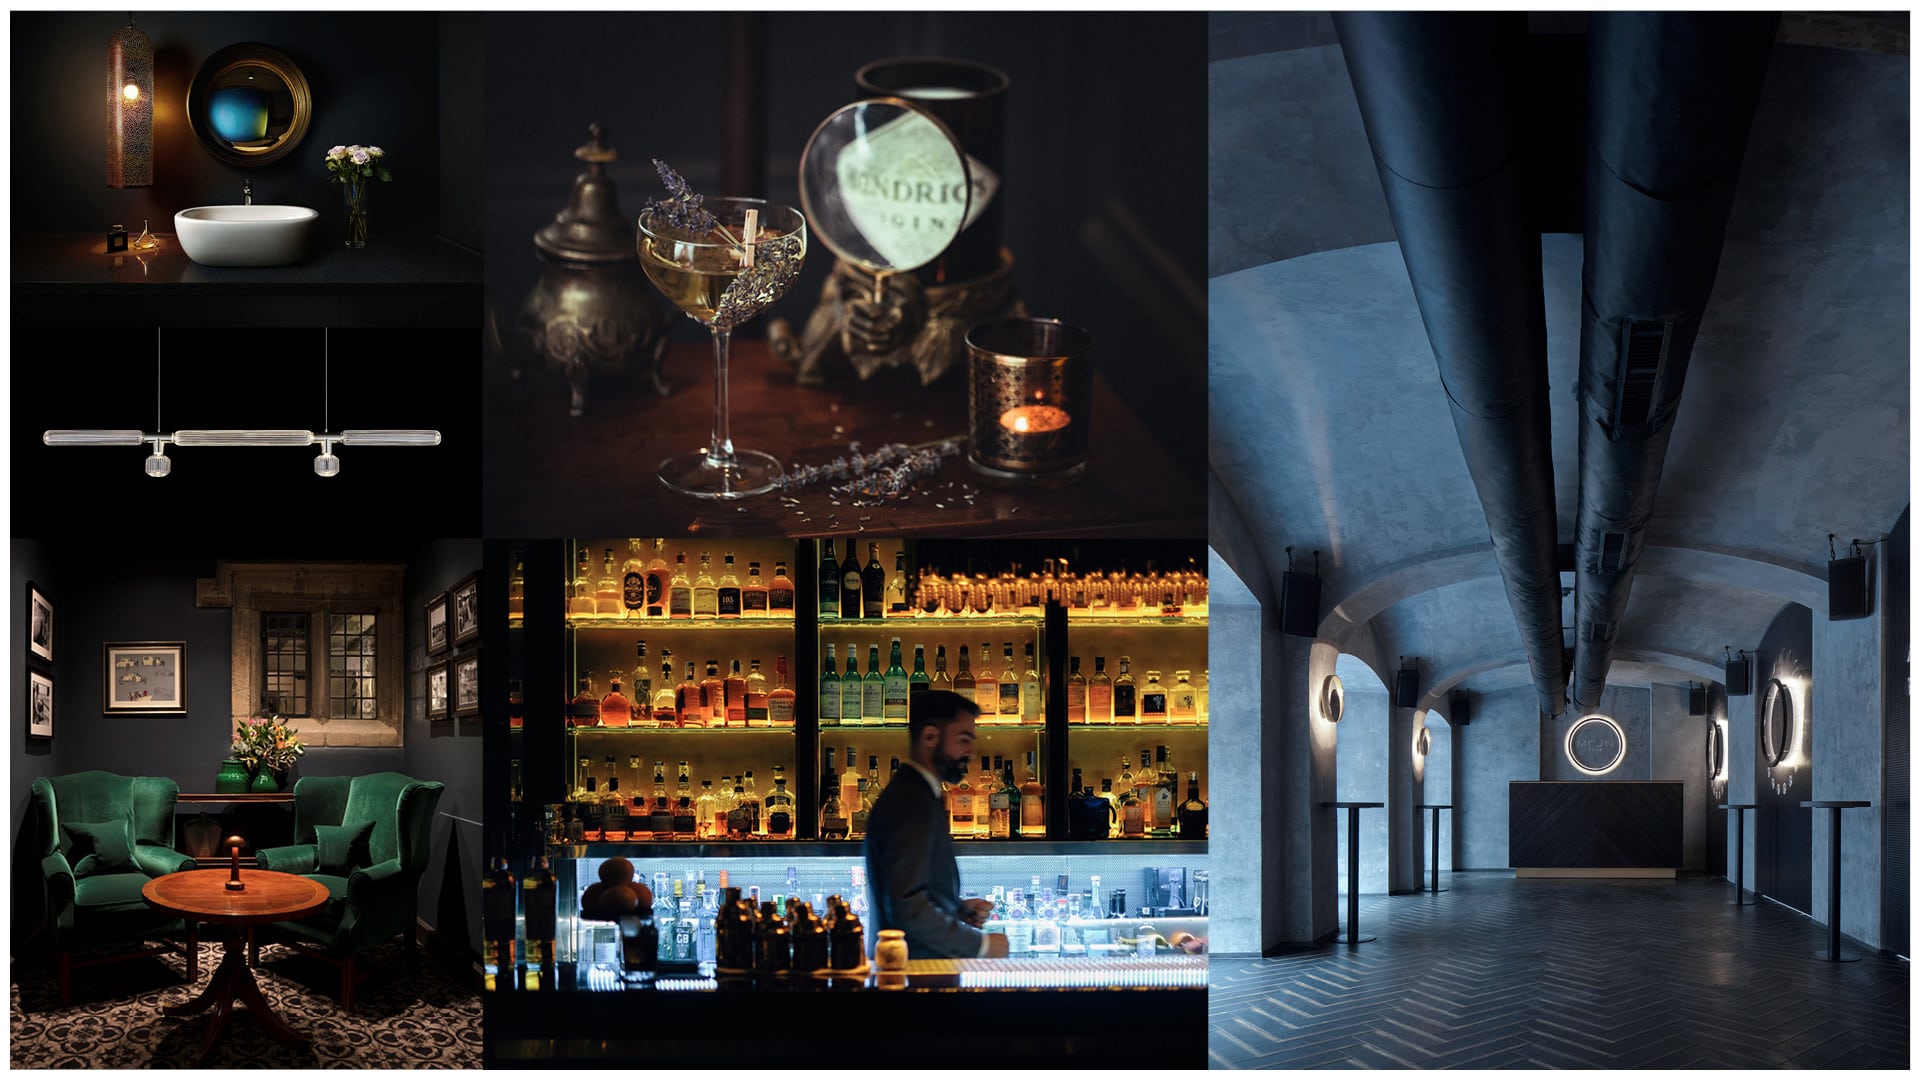
BLUE BAR PROJECT Design references mood-board
Here are some references I used to approach the design of the bar. The idea was to create a mysterious, elegant atmosphere by using dark materials and contrast it with some shiny details that could create profound reflections. In this way, I went for a neo-art deco style with a design inspired by Joseph Dirand’s bar for The surf club at the Four Seasons hotel in Miami (green reference above).
The Blue Bar Basic setup
A few important things I do before starting a new project :
- Verifying that units are set to centimeters in both file/system units to avoid scaling issues when importing/exporting geometry.
- Creating a layer structure to be able to mask all unnecessary geometry in a few clicks when required. It helps to allow smooth viewport navigation and doing light tests quicker.
- I was setting the frame buffer by compressing highlights to 0,10 and adding a LUT to bring back the contrast. This way, I will be sure to have correct renders without burst areas. I like this workflow because I can have the same settings every time and focus on the light and materials instead of wondering if my settings are correct. I used a LUT from 3D Collective. You can do something similar with a contrast curve instead.

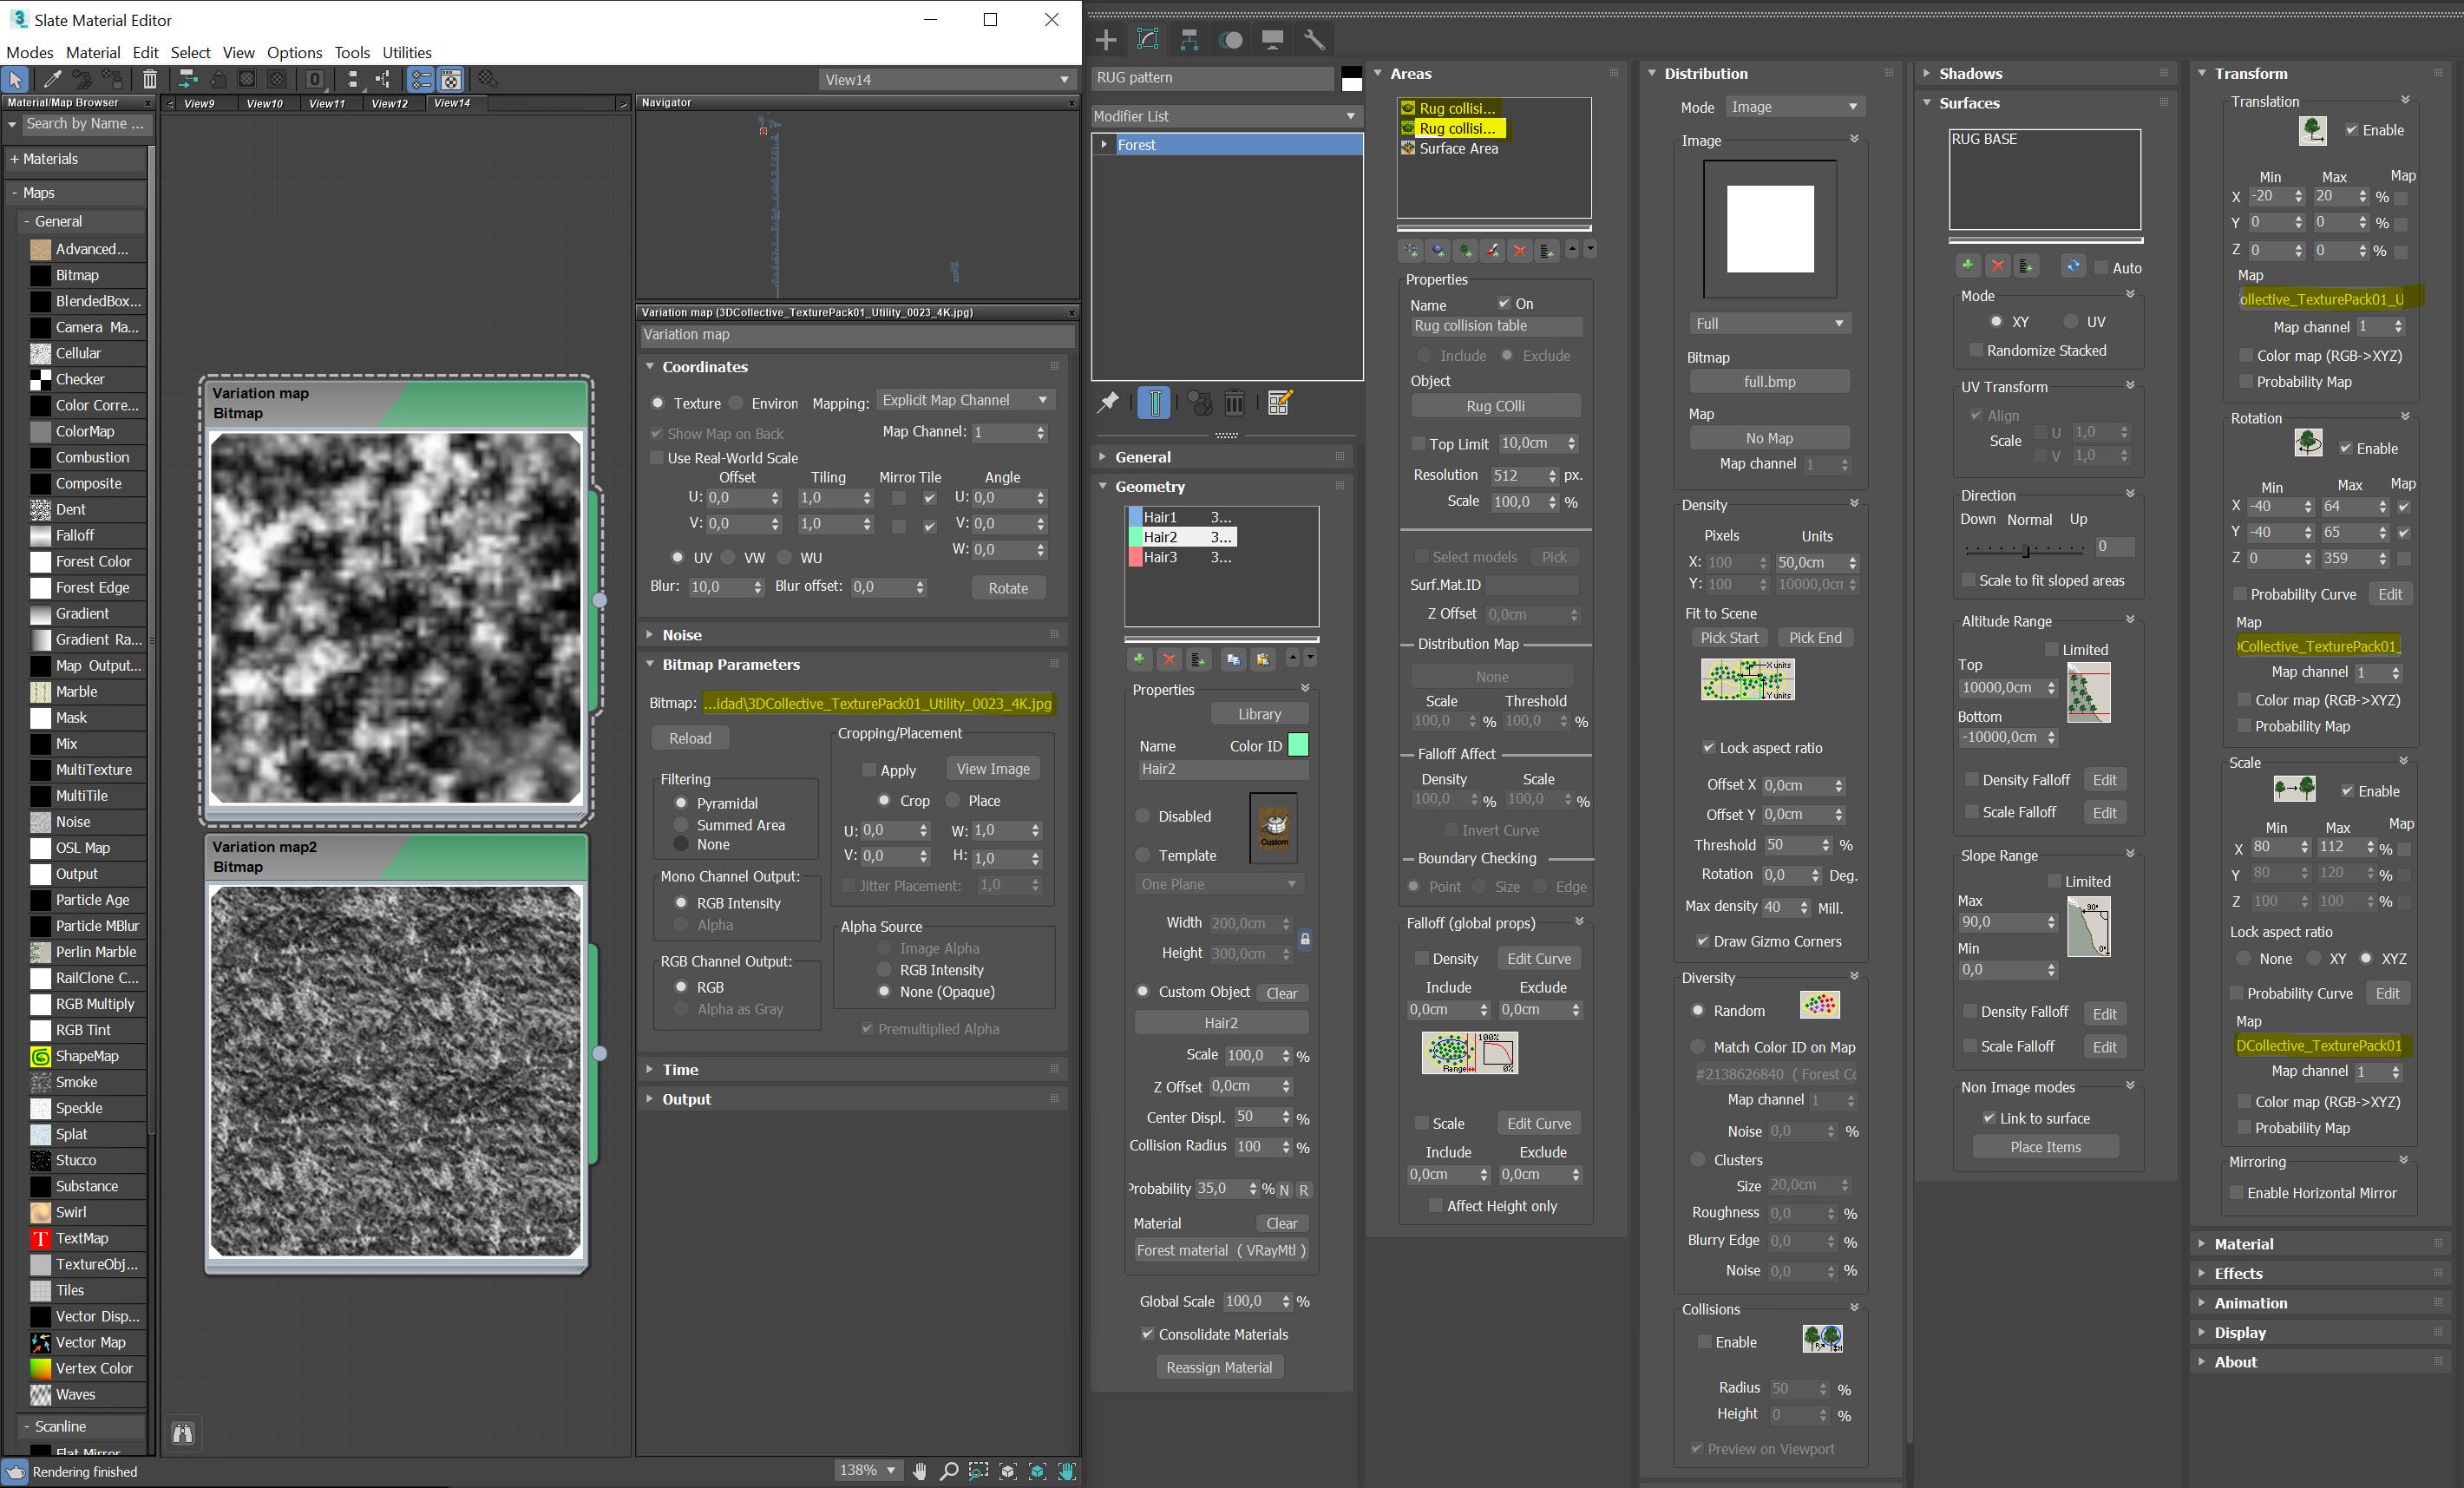
The Blue Bar Modeling
The base is a basic box, a bit bigger than needed to get some room for further experimentations. The floor, the ceiling, and the bar counter were made from simple splines with Railclone.

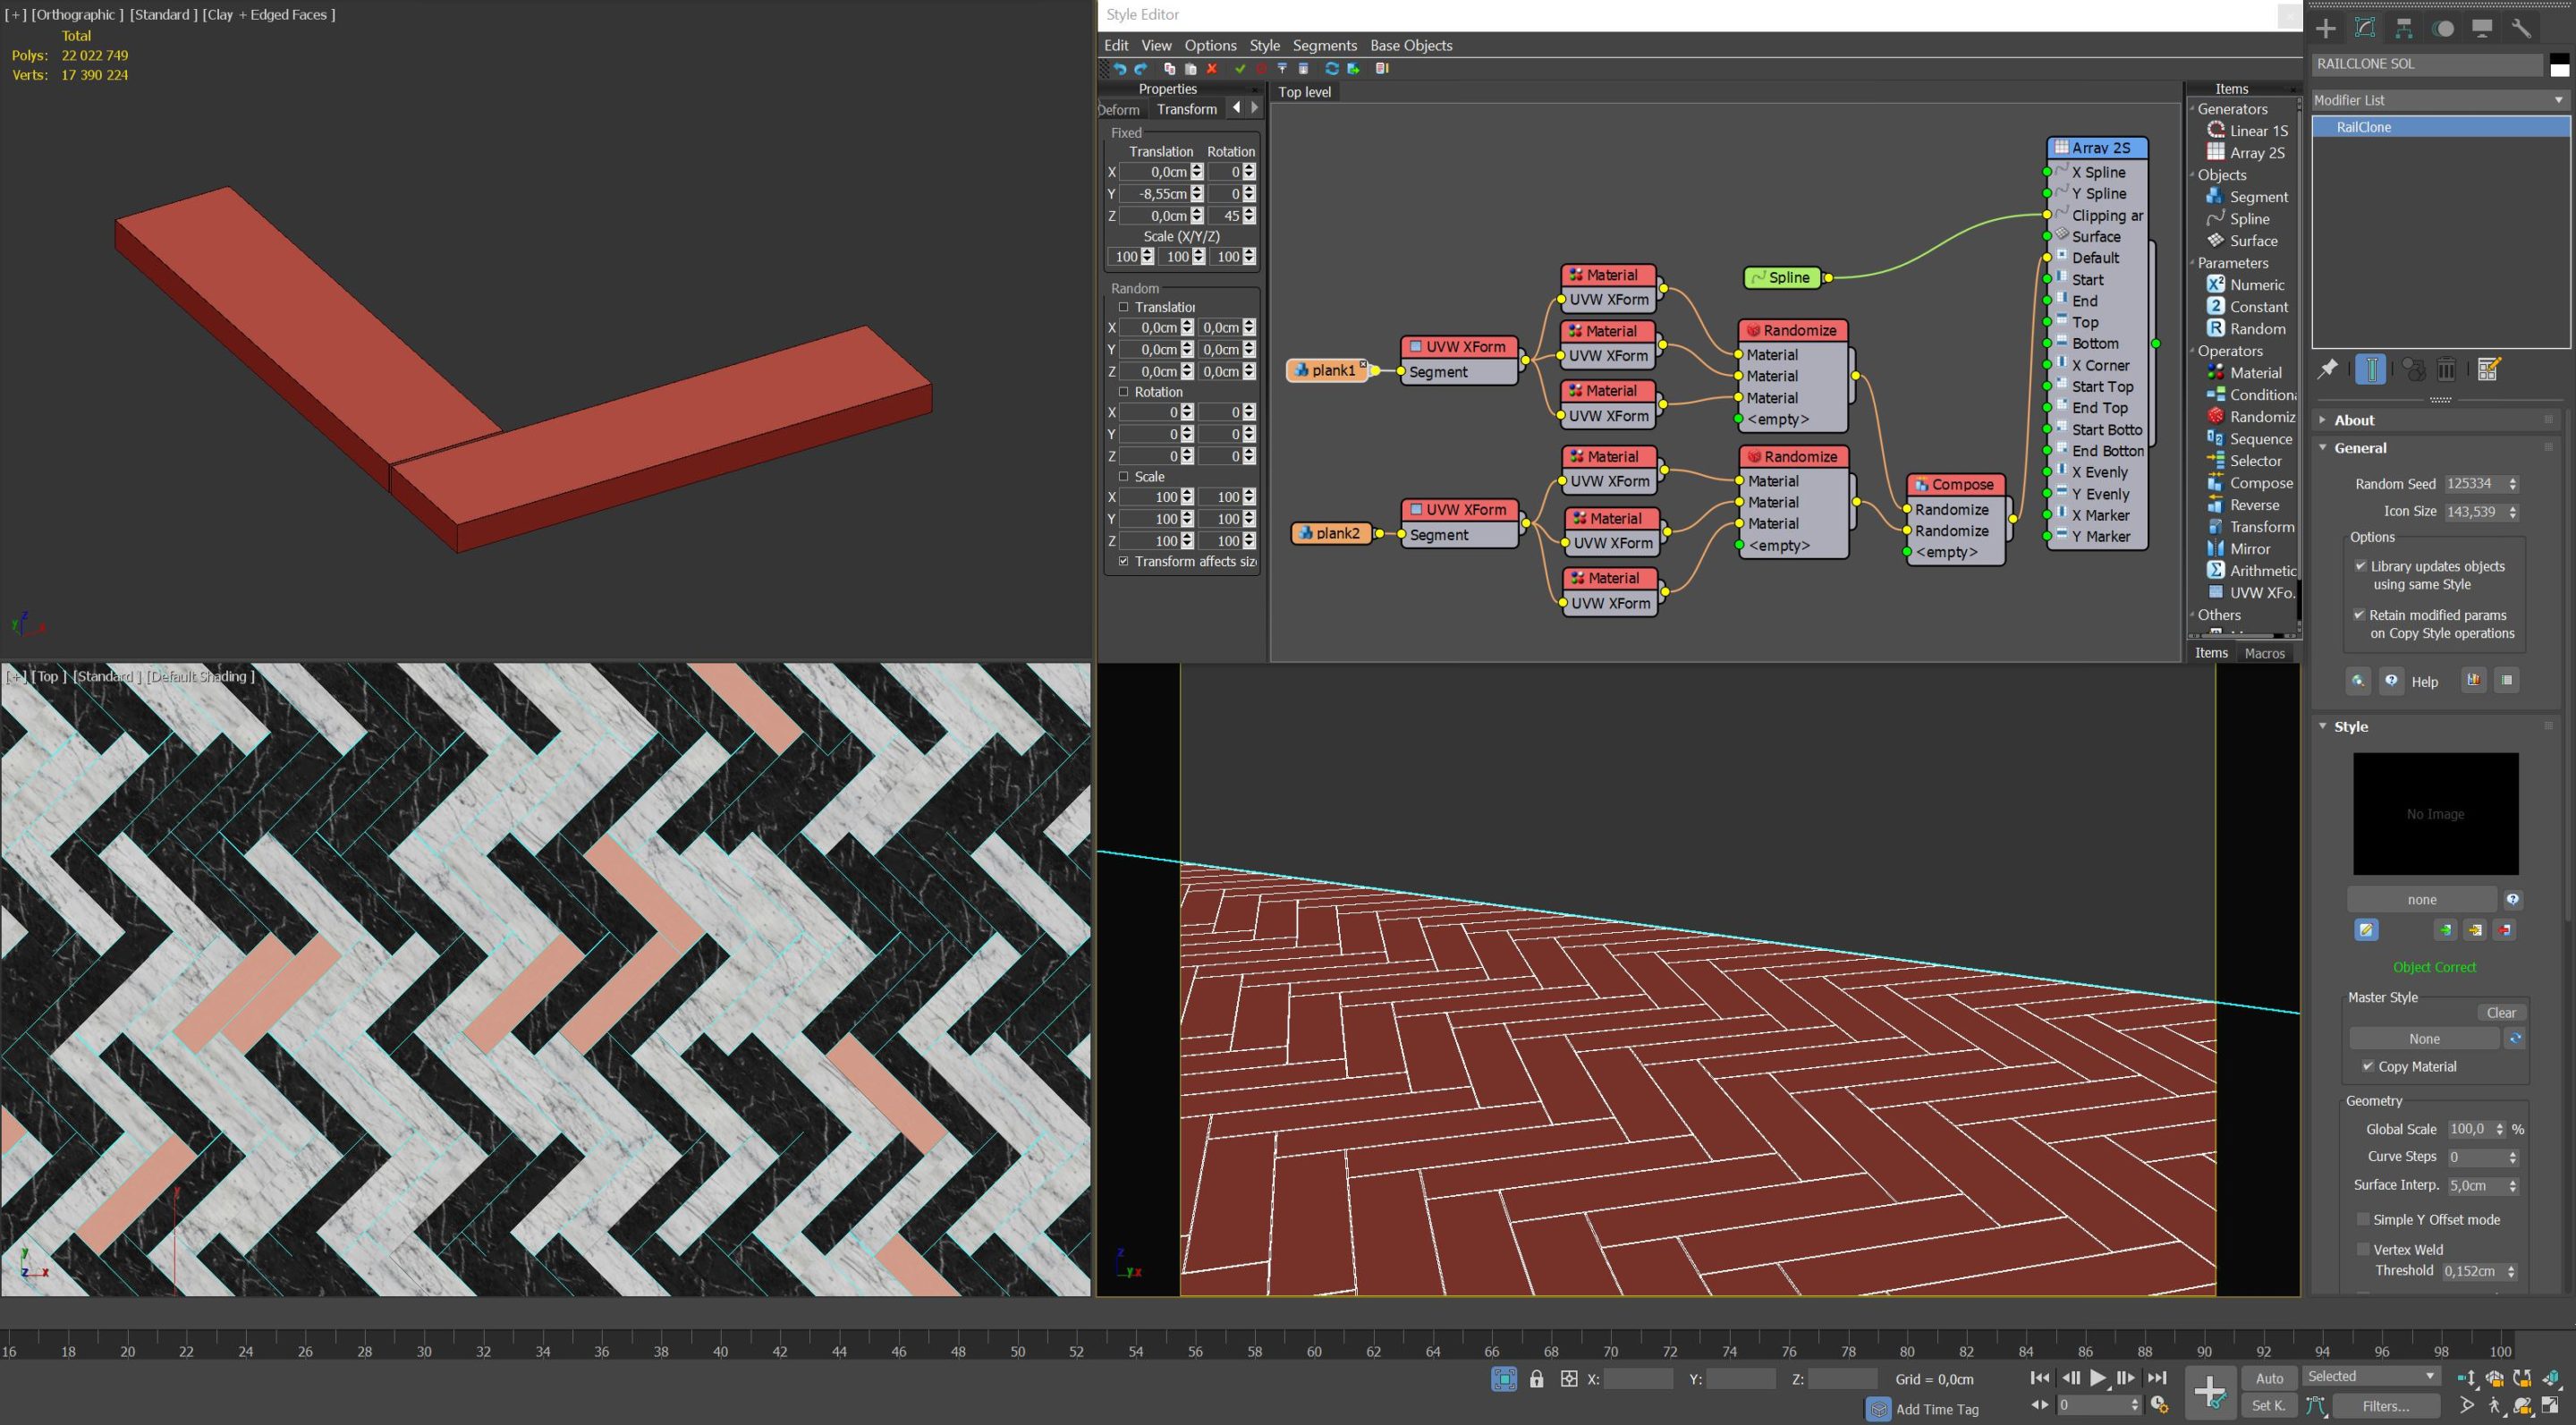
A RailClone Floor
I used two simple boxes with a chamfer modifier. Railclone helped me orientate the tiles, create material variations, and randomize the mapping. I used the segment’s translation and rotation settings to achieve the herringbone style floor pattern.
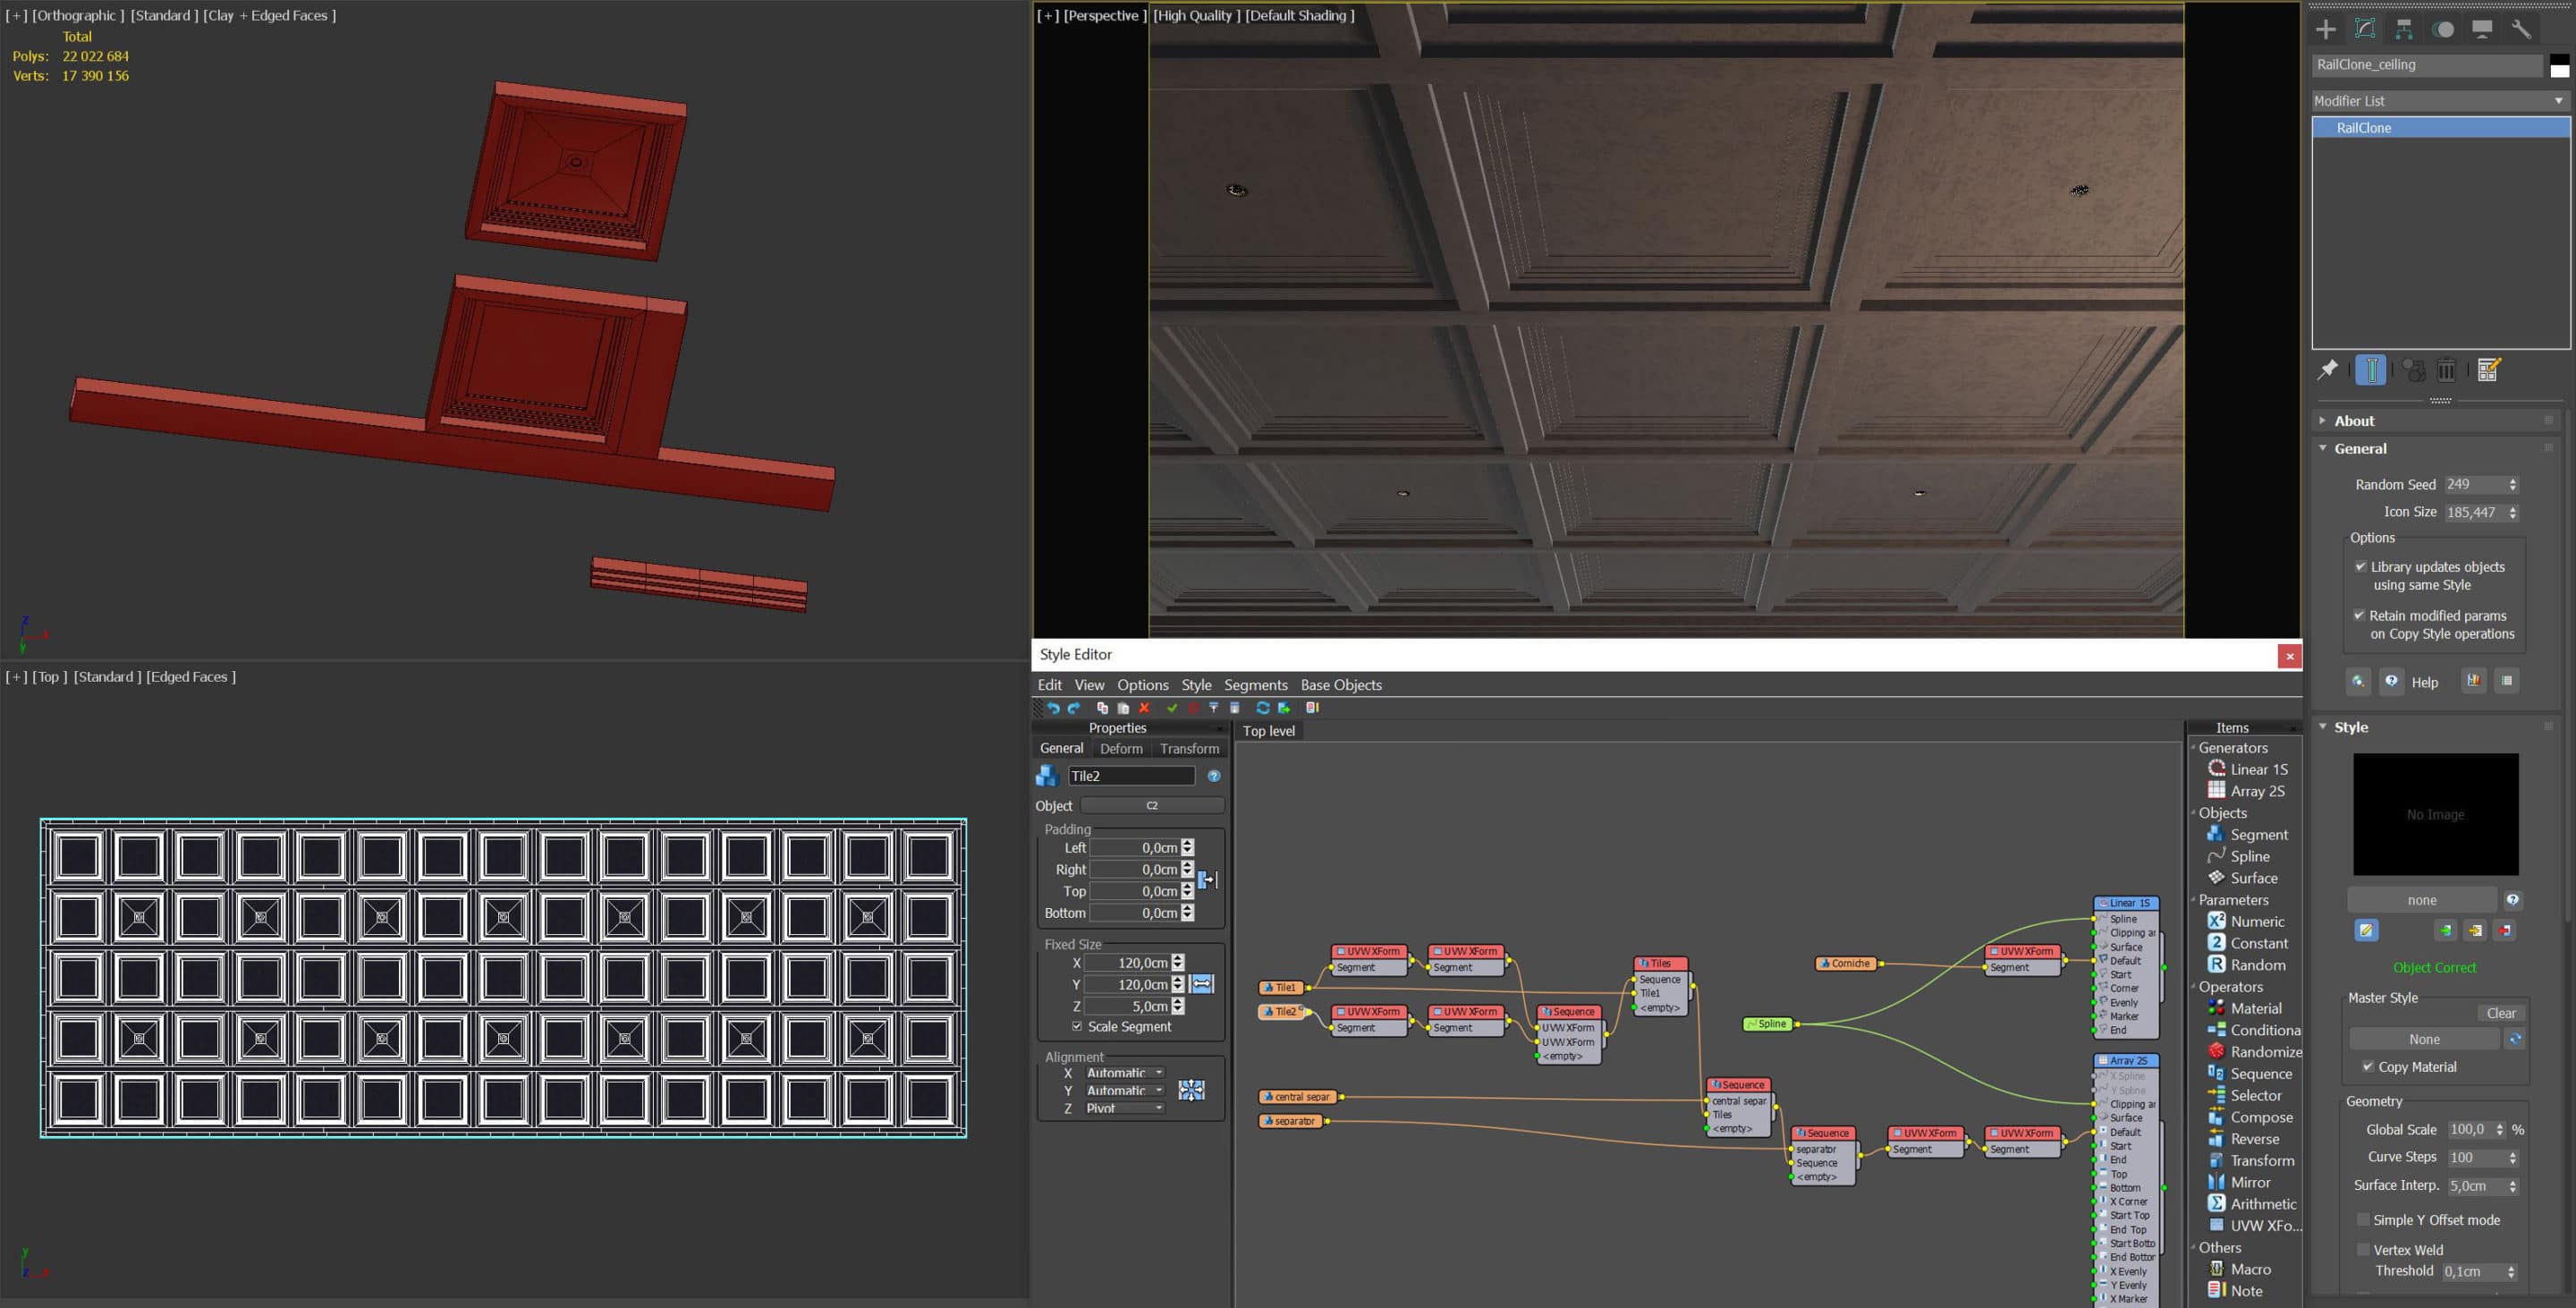
A RailClone Ceiling
I scattered the elements below inside a rectangular spline. Railclone helped me create a regular pattern with the ceiling tiles, which were equipped with lighting (V-Ray lights were added separately). I used the segments’ “Fixed size” rollout to try various dimensions without having to edit the original geometry.
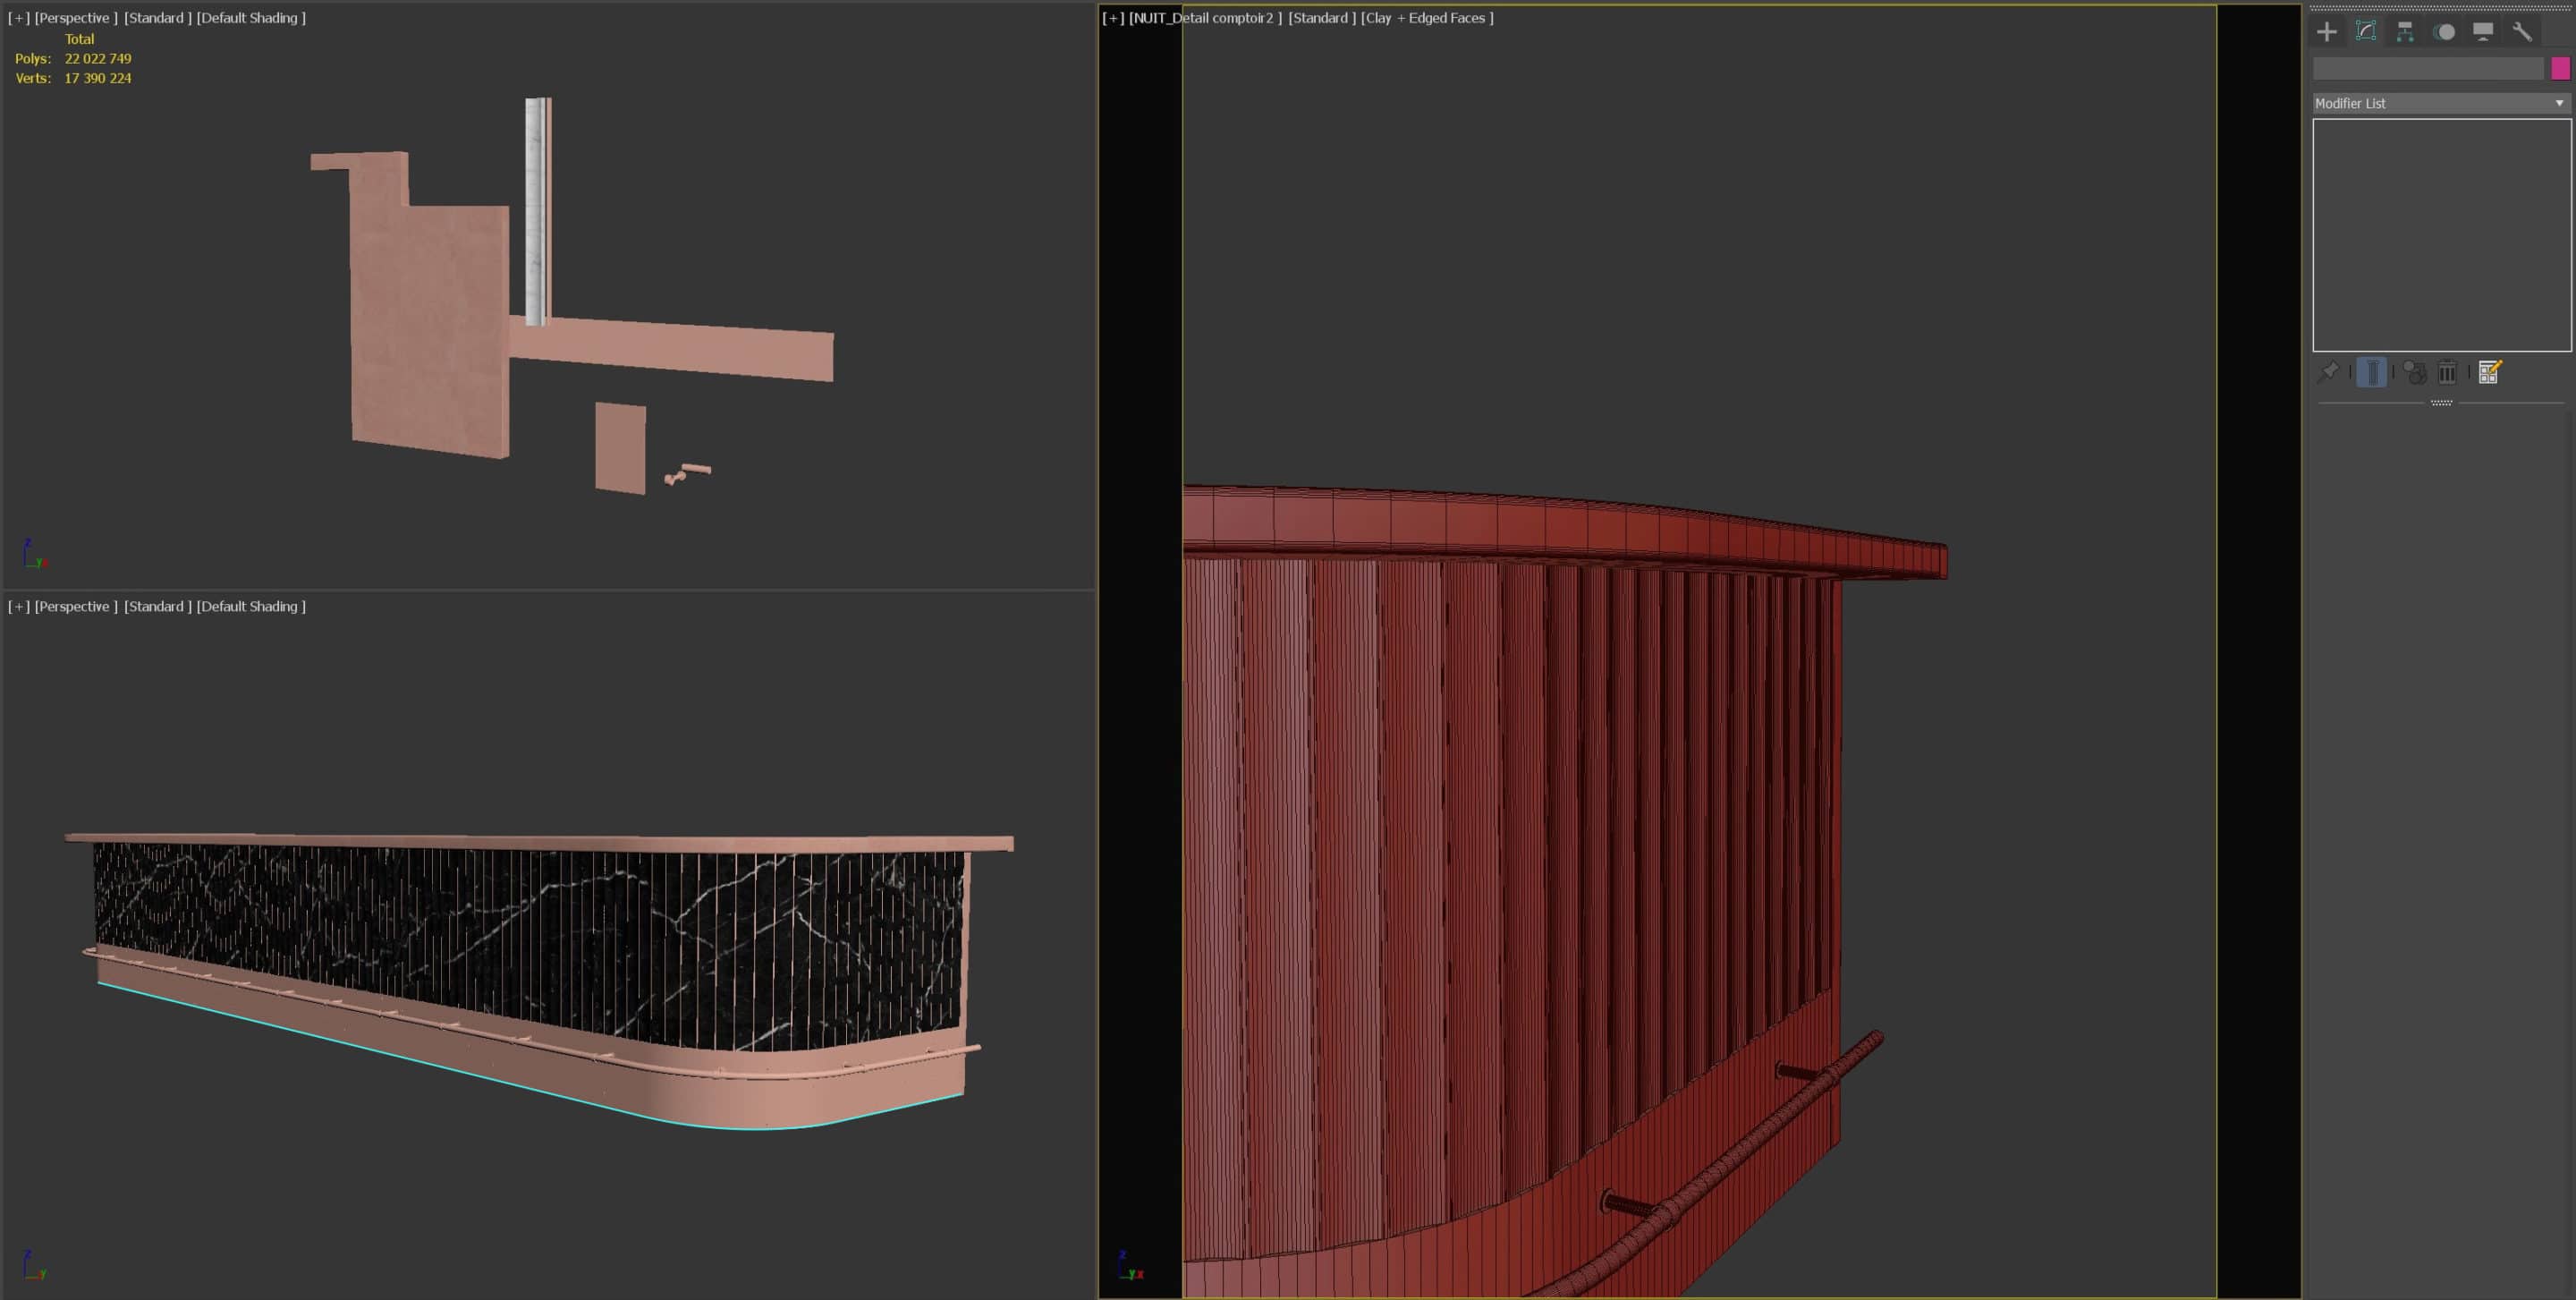
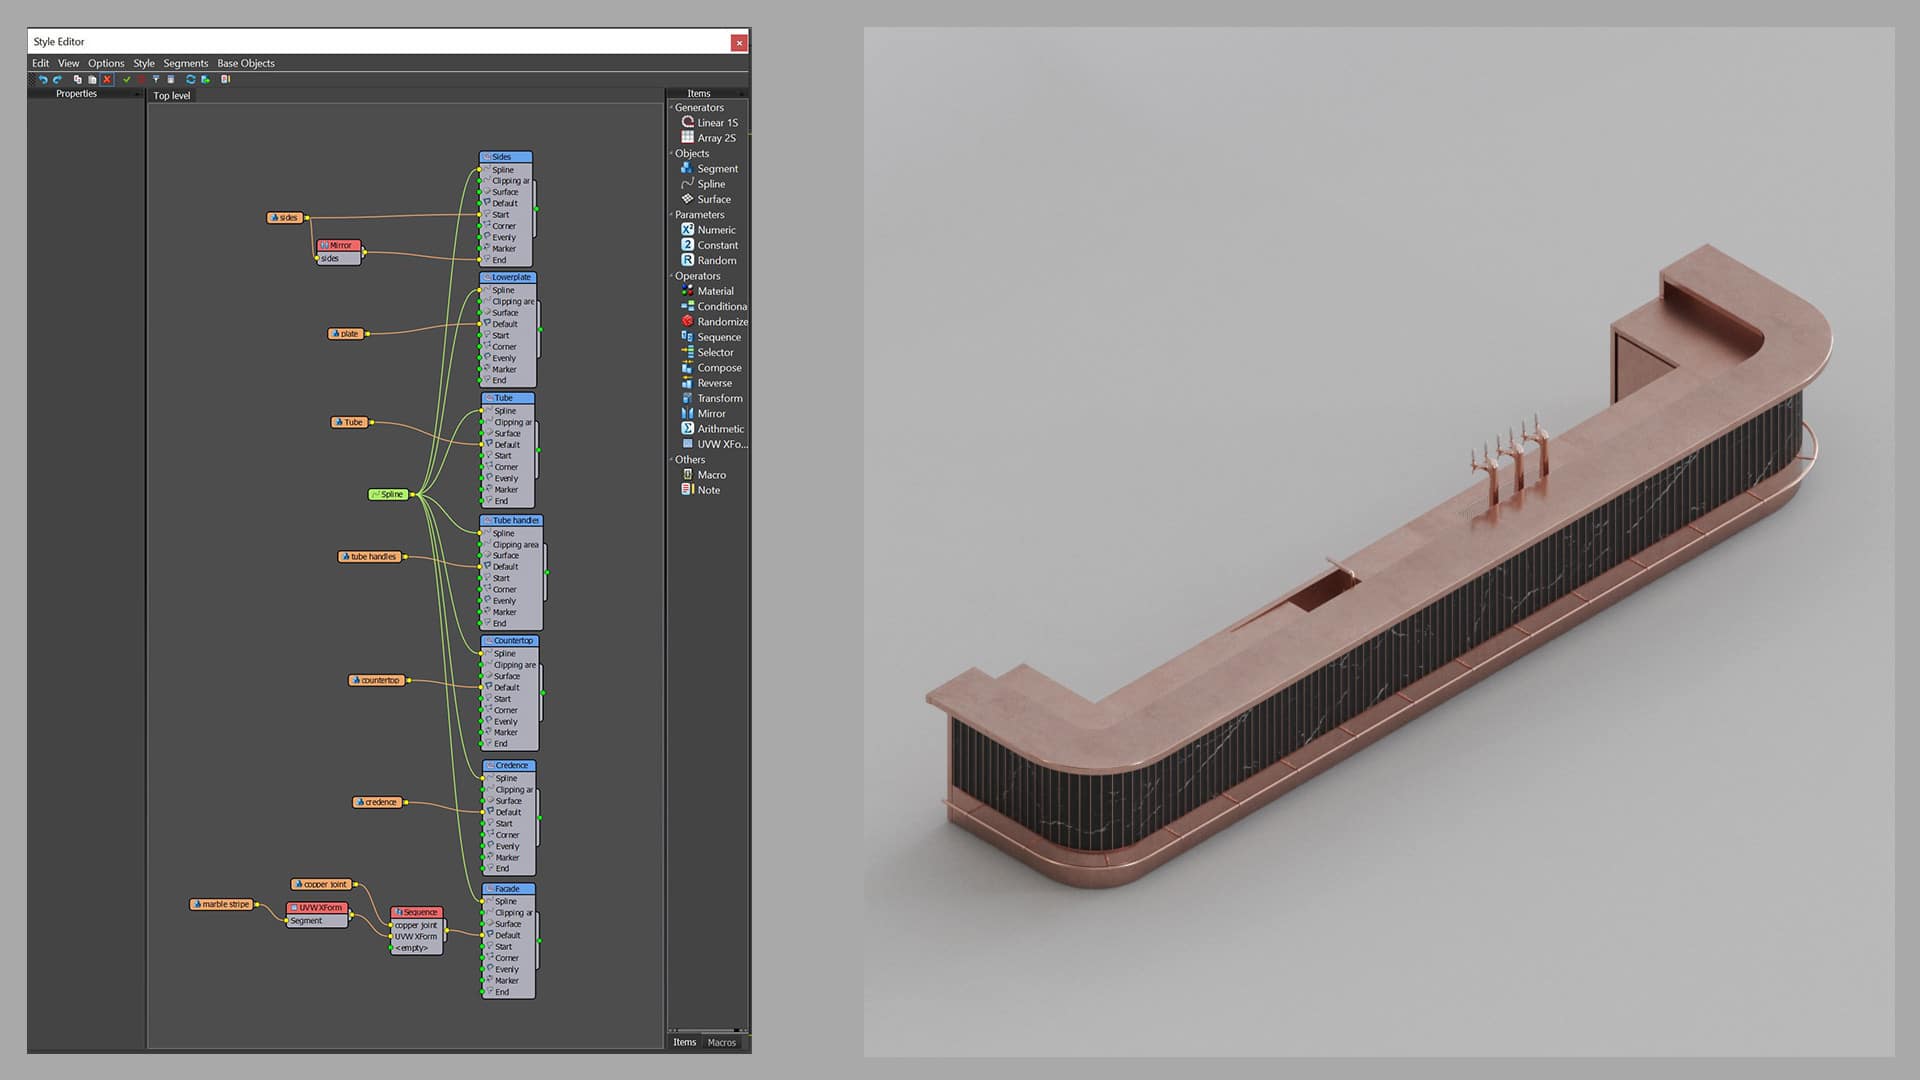
RailClone Bar
It was interesting to be able to adjust the size of the bar, try various shapes and materials in a few clicks, and refine its elements. It would be time-consuming without parametric settings. However, once satisfied with the bar facade, I added the internal counter and taps separately. I did not find a way to fit my kitchen cabinets into the curve’s internal angle without geometry issues.
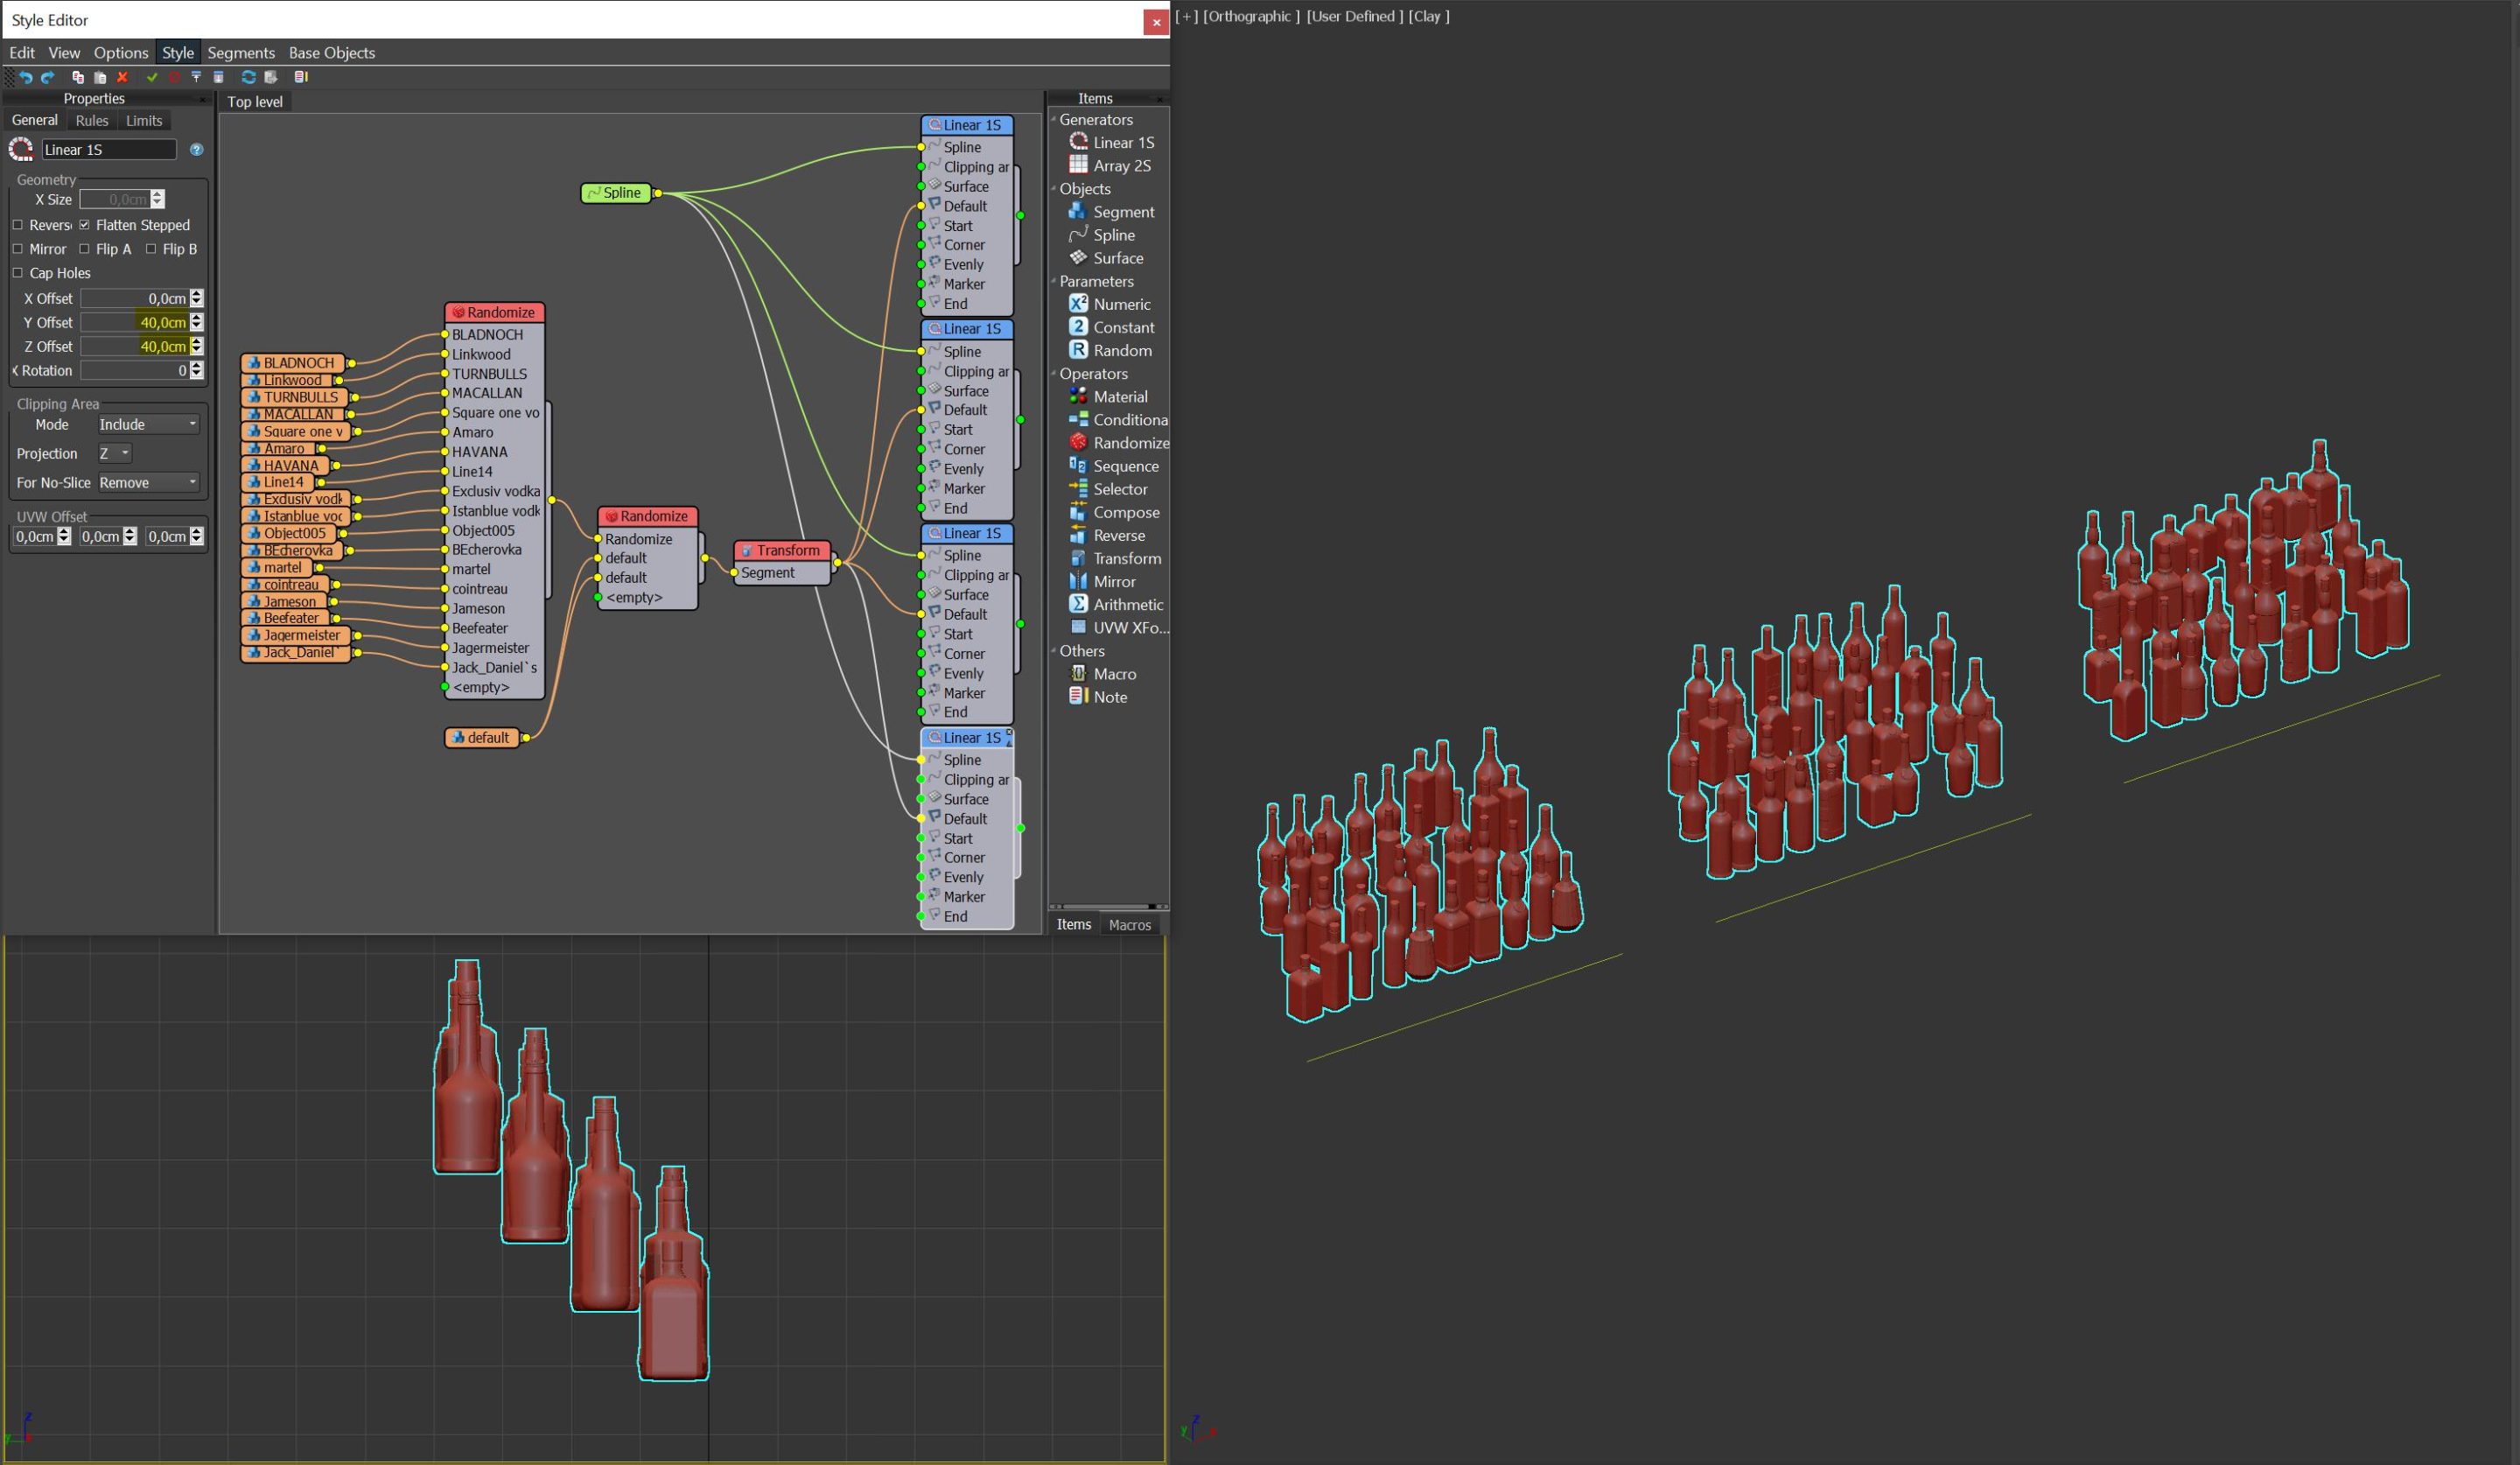
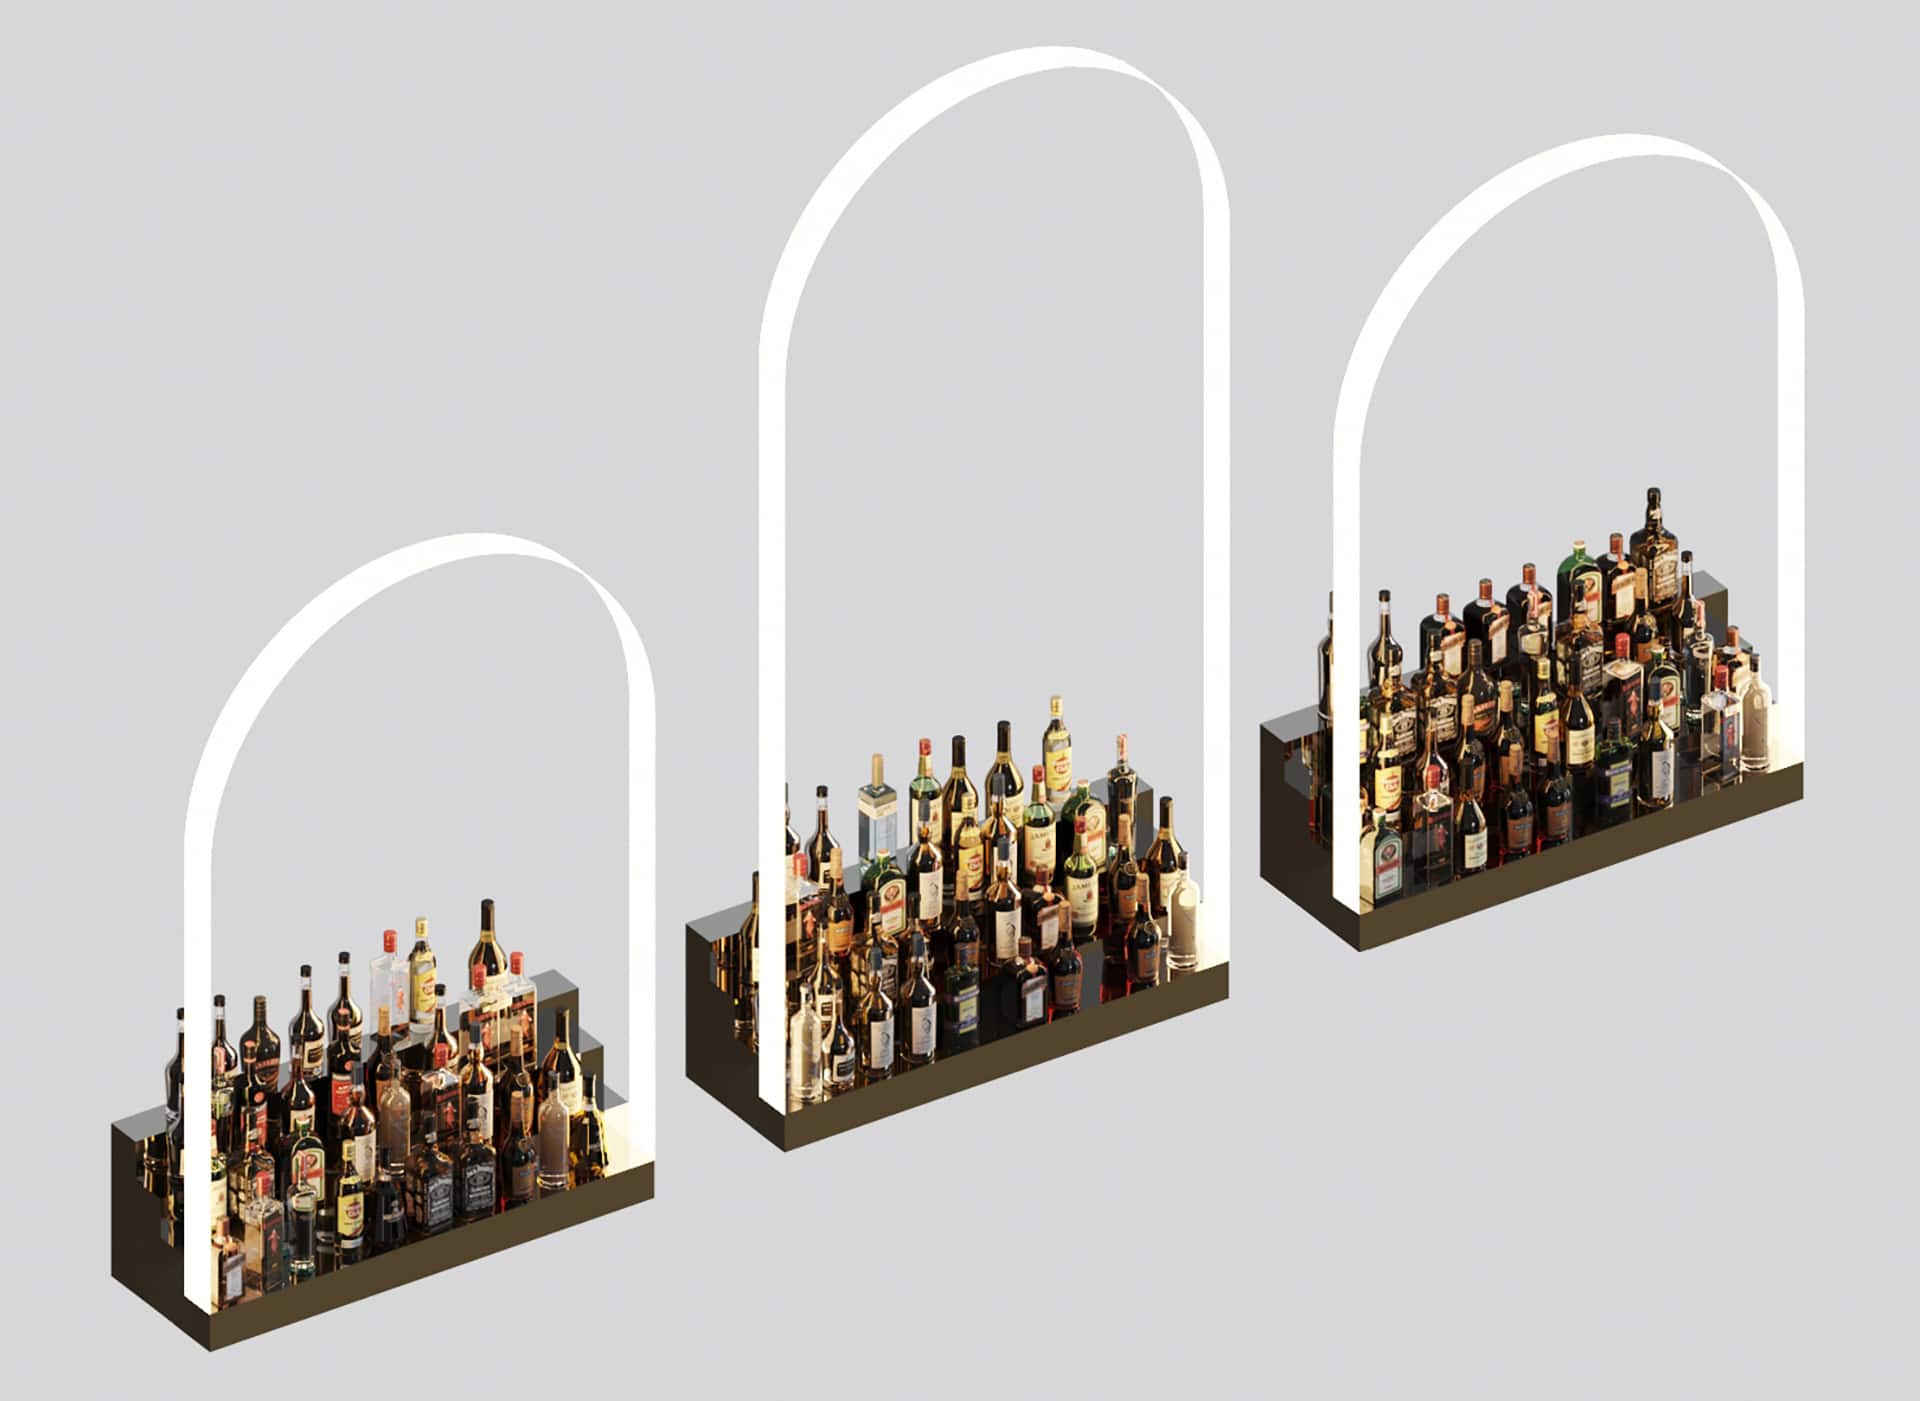
RailClone Bottles
I also used Railclone to scatter the bottles and to create random empty spaces (using empty segments) and variations (using randomize operator). The bottles were scattered along a basic spline, using the generator’s general offset settings to place them on the shelves. I modified bottles from 3Dsky.org by adding depth to the glass, liquids inside, and then changed materials to add a bit of realism.
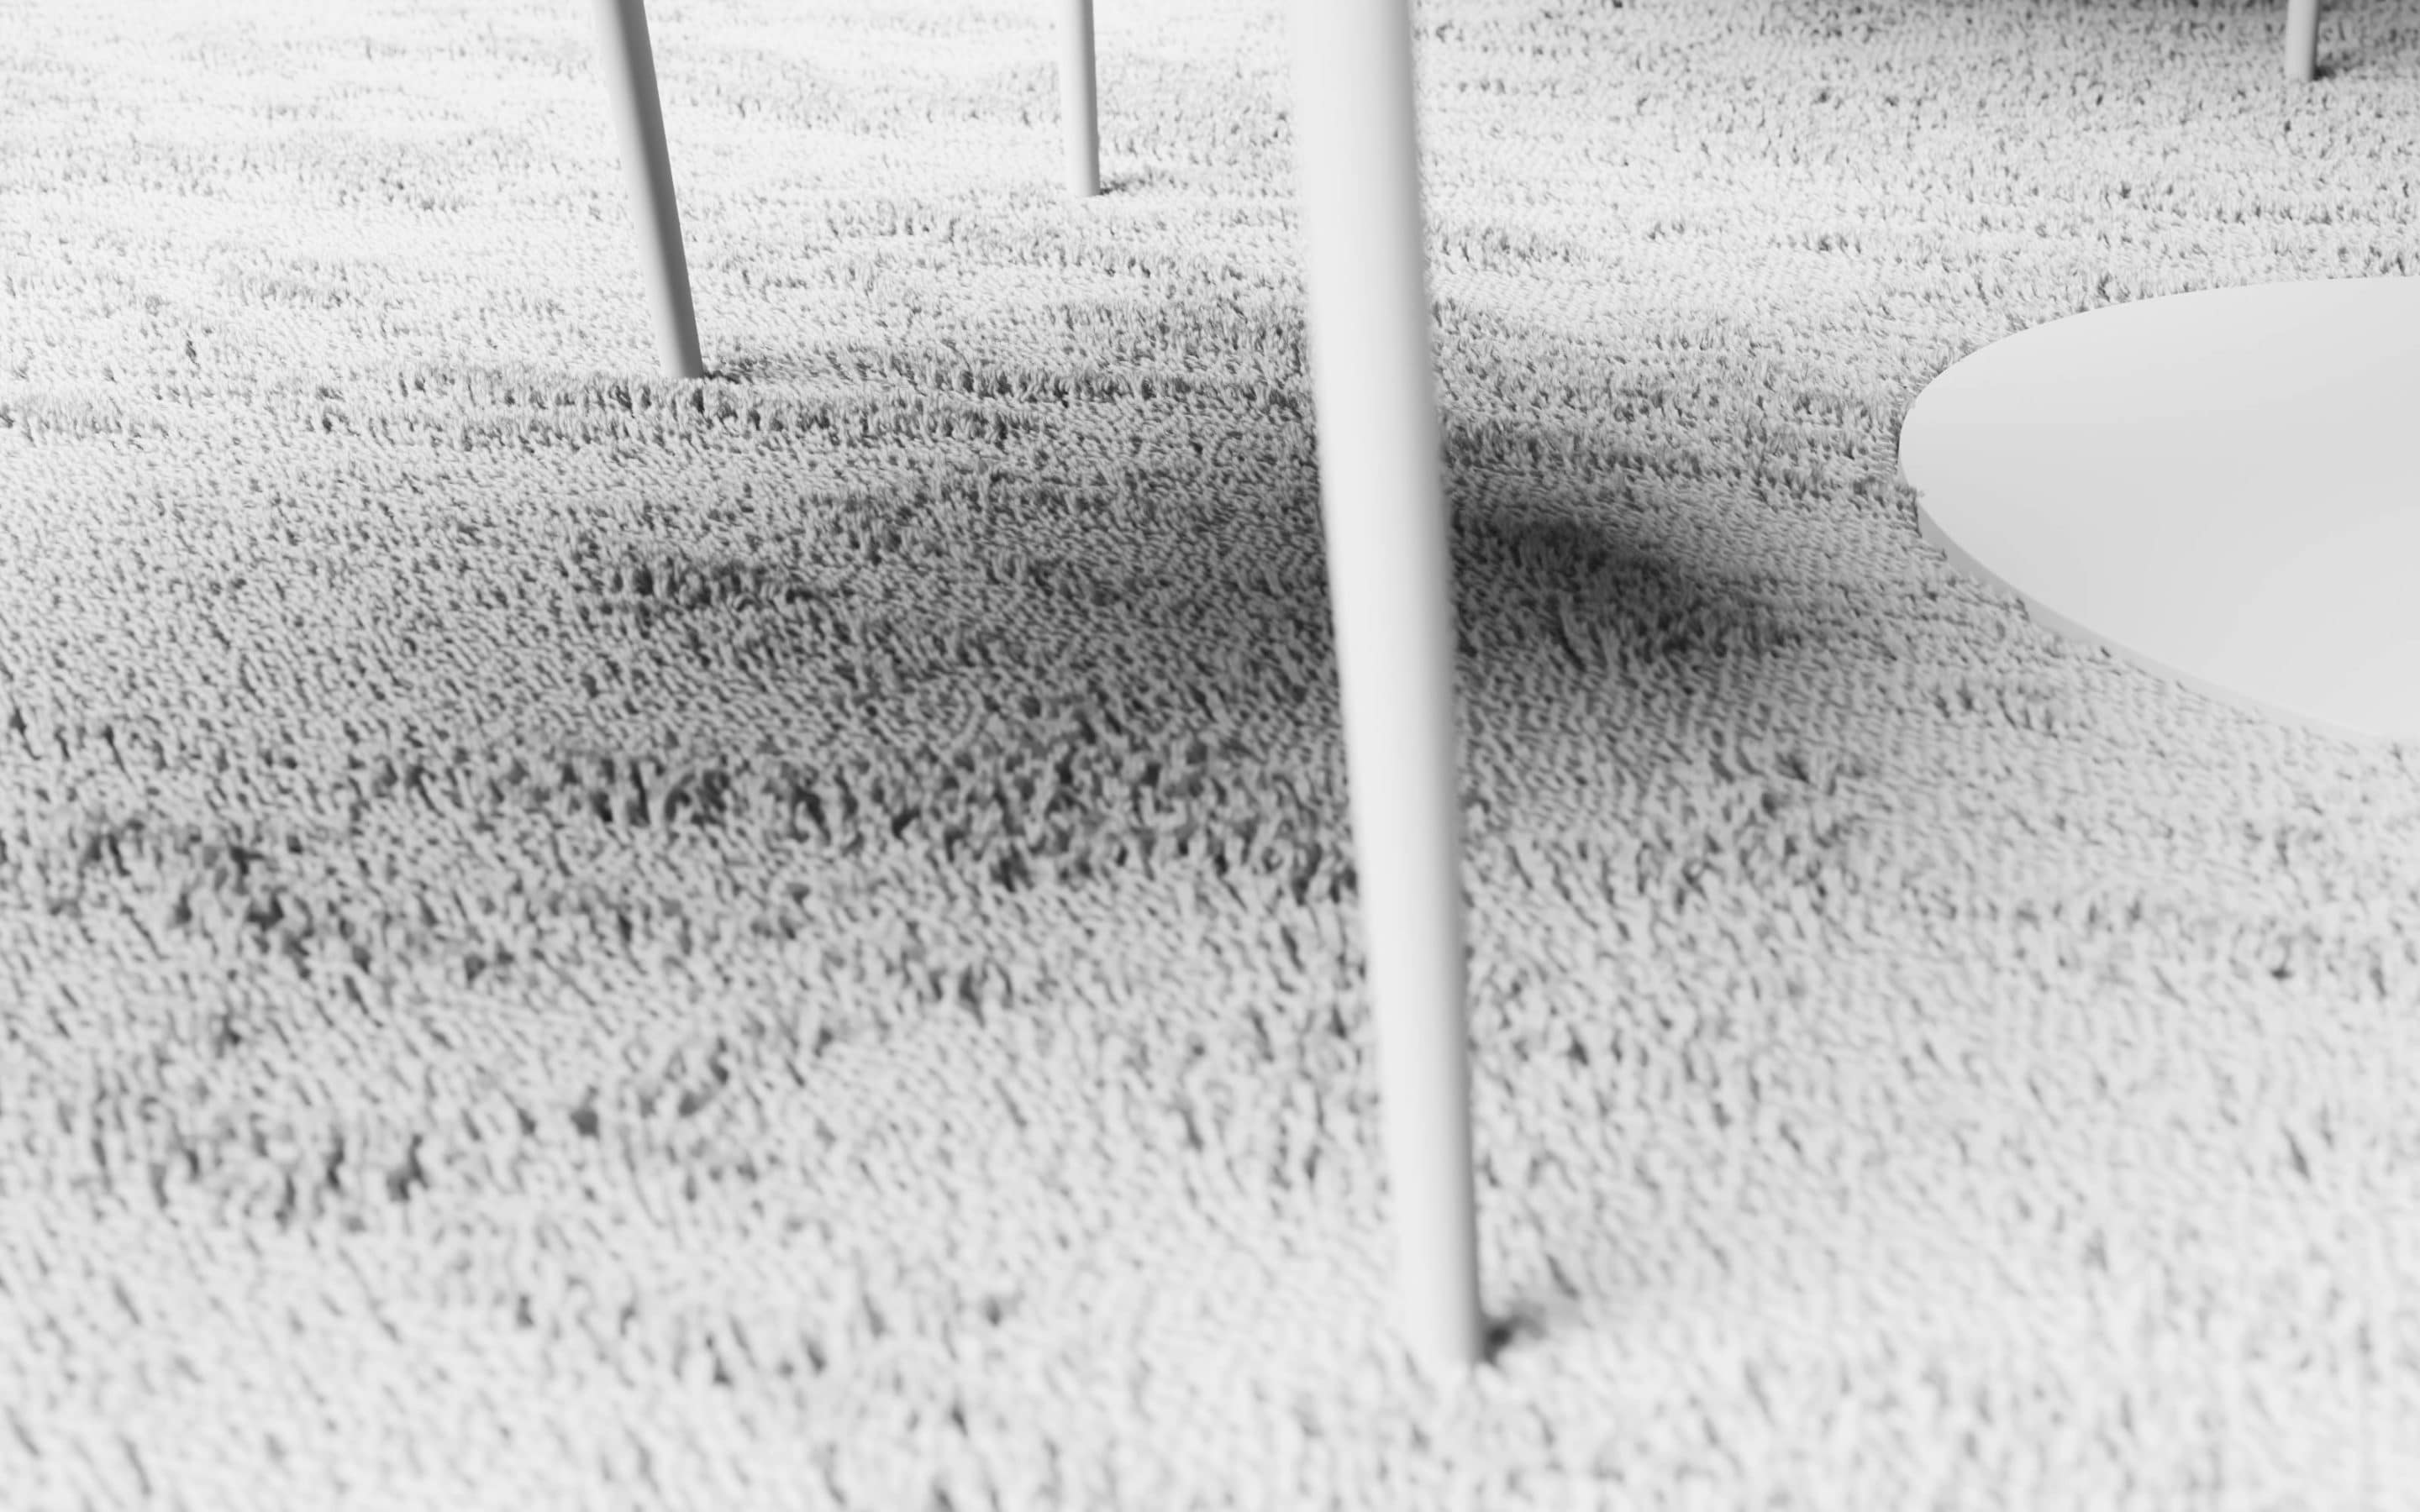
Forest Pack Rug
After modeling the carpet pile, I used FP to scatter some triangles to make it more realistic. After collapsing the geometry, I scattered these three piles on a simple rug surface. This may not be the most efficient way to do it, but I wanted to experiment with this method and see if I could create more controlled patterns, sizes, and color variations for further projects. After testing a bit, I finally went for something simple in this one. I added a simple non-visible cylinder to exclude the areas of the table from the scattering, avoiding having hairs popping through the feet of the table.
I used black and white maps from 3D collective to create movement in the carpet piles.
Assets
Other assets have been created for this project. The glassware is a beautiful set from Casa de Perrin, a Los Angeles based luxury brand, which I tried to reproduce by eye.
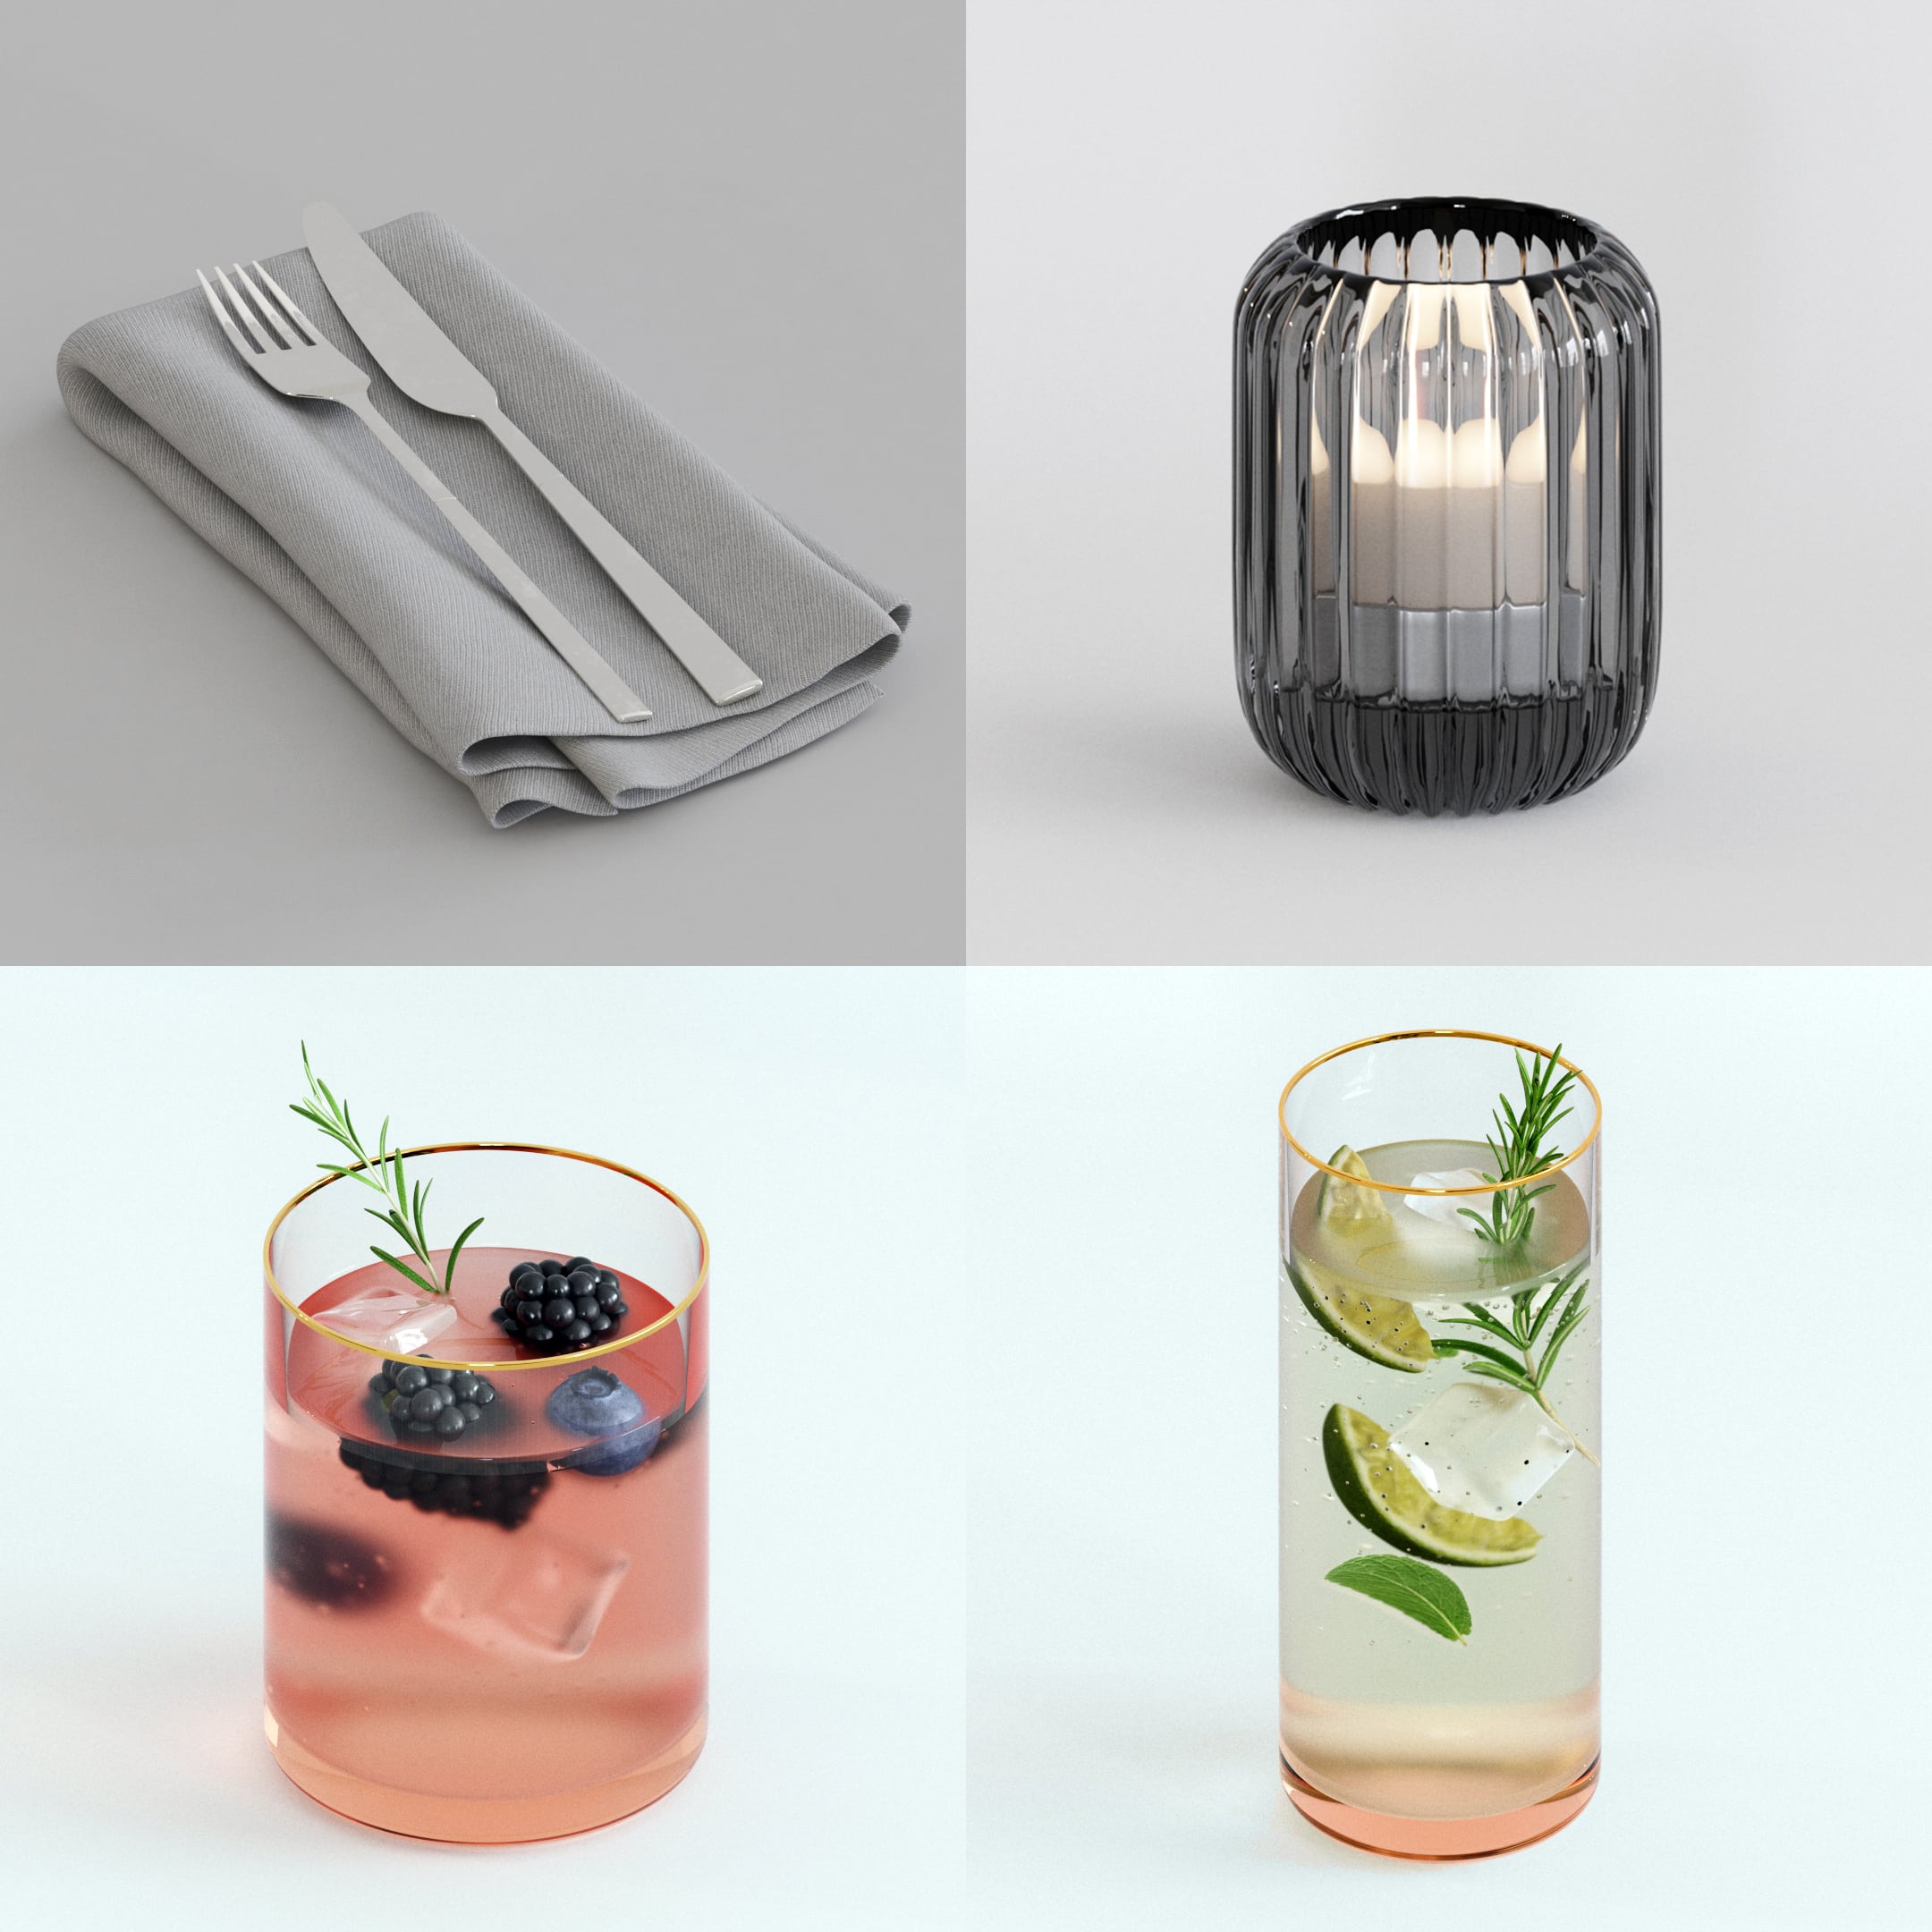
Napkins were created from a plane which I managed to fold a few times with a cloth modifier. I used a second cloth modifier to place the cutlery on the fabric. I made some candle lights to emphasize the lounge atmosphere. I had some fun creating cocktails compositions, using the glassware I’ve just made, and a few fruits from Poliigon.
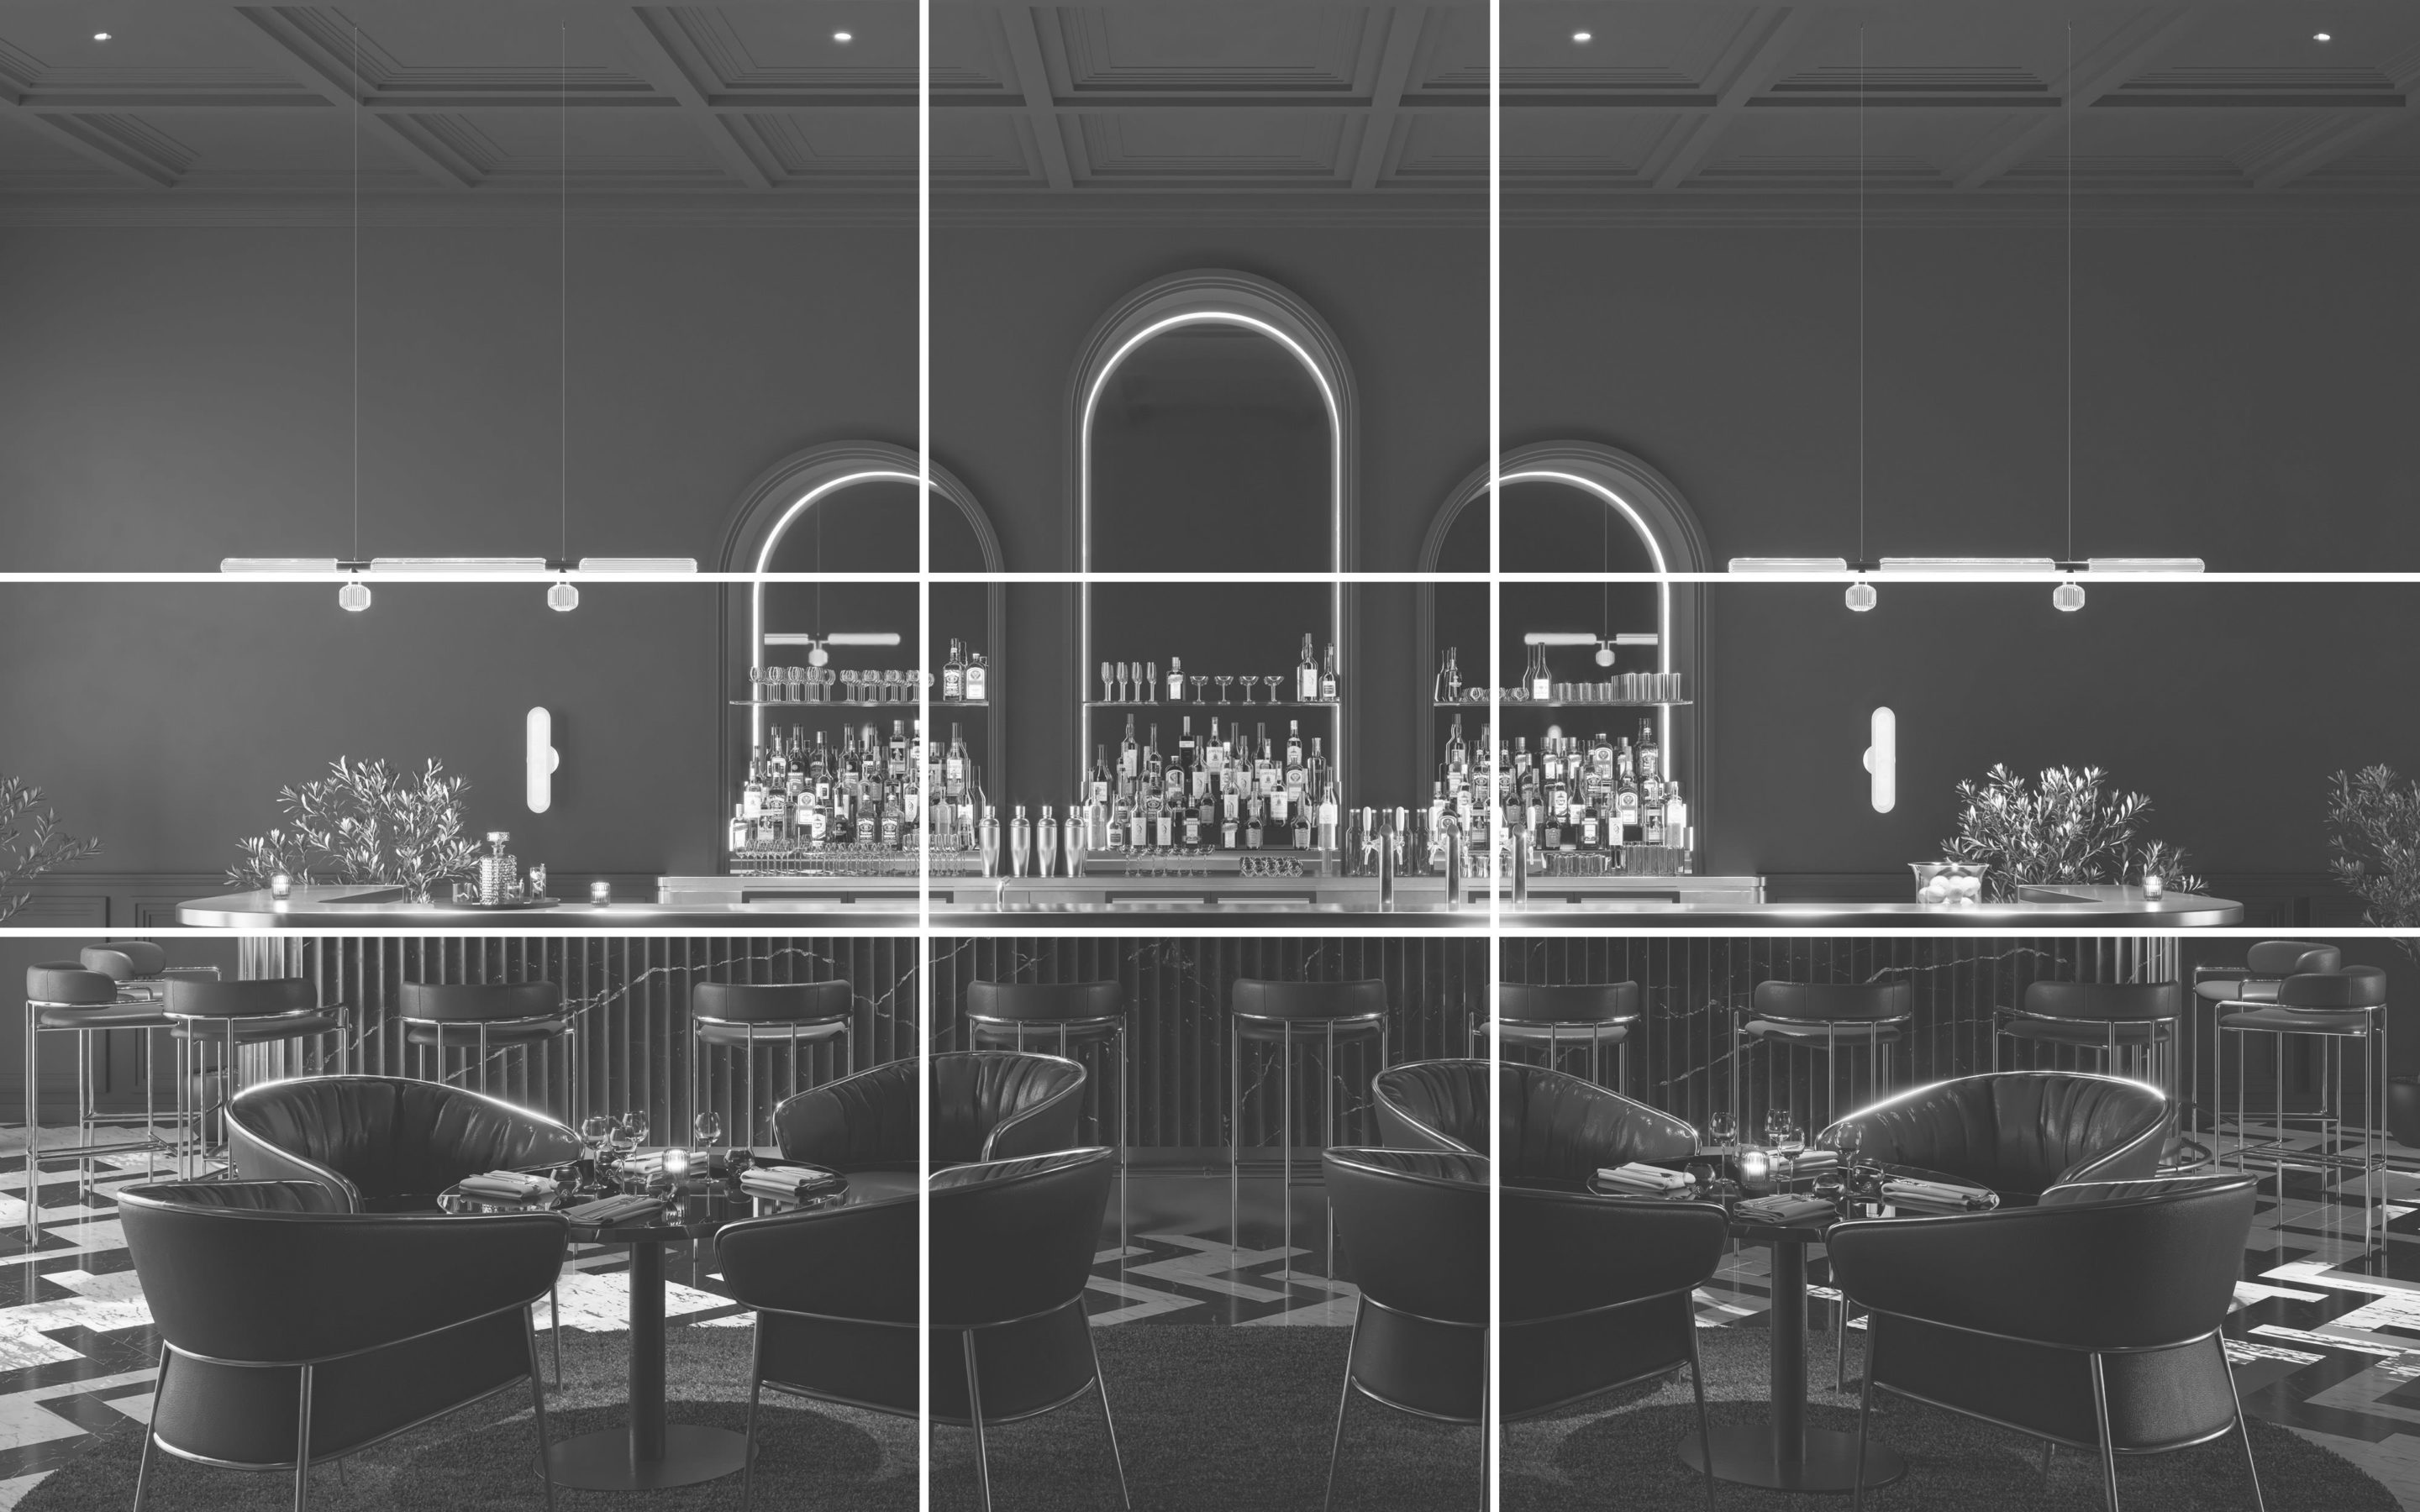
Framing
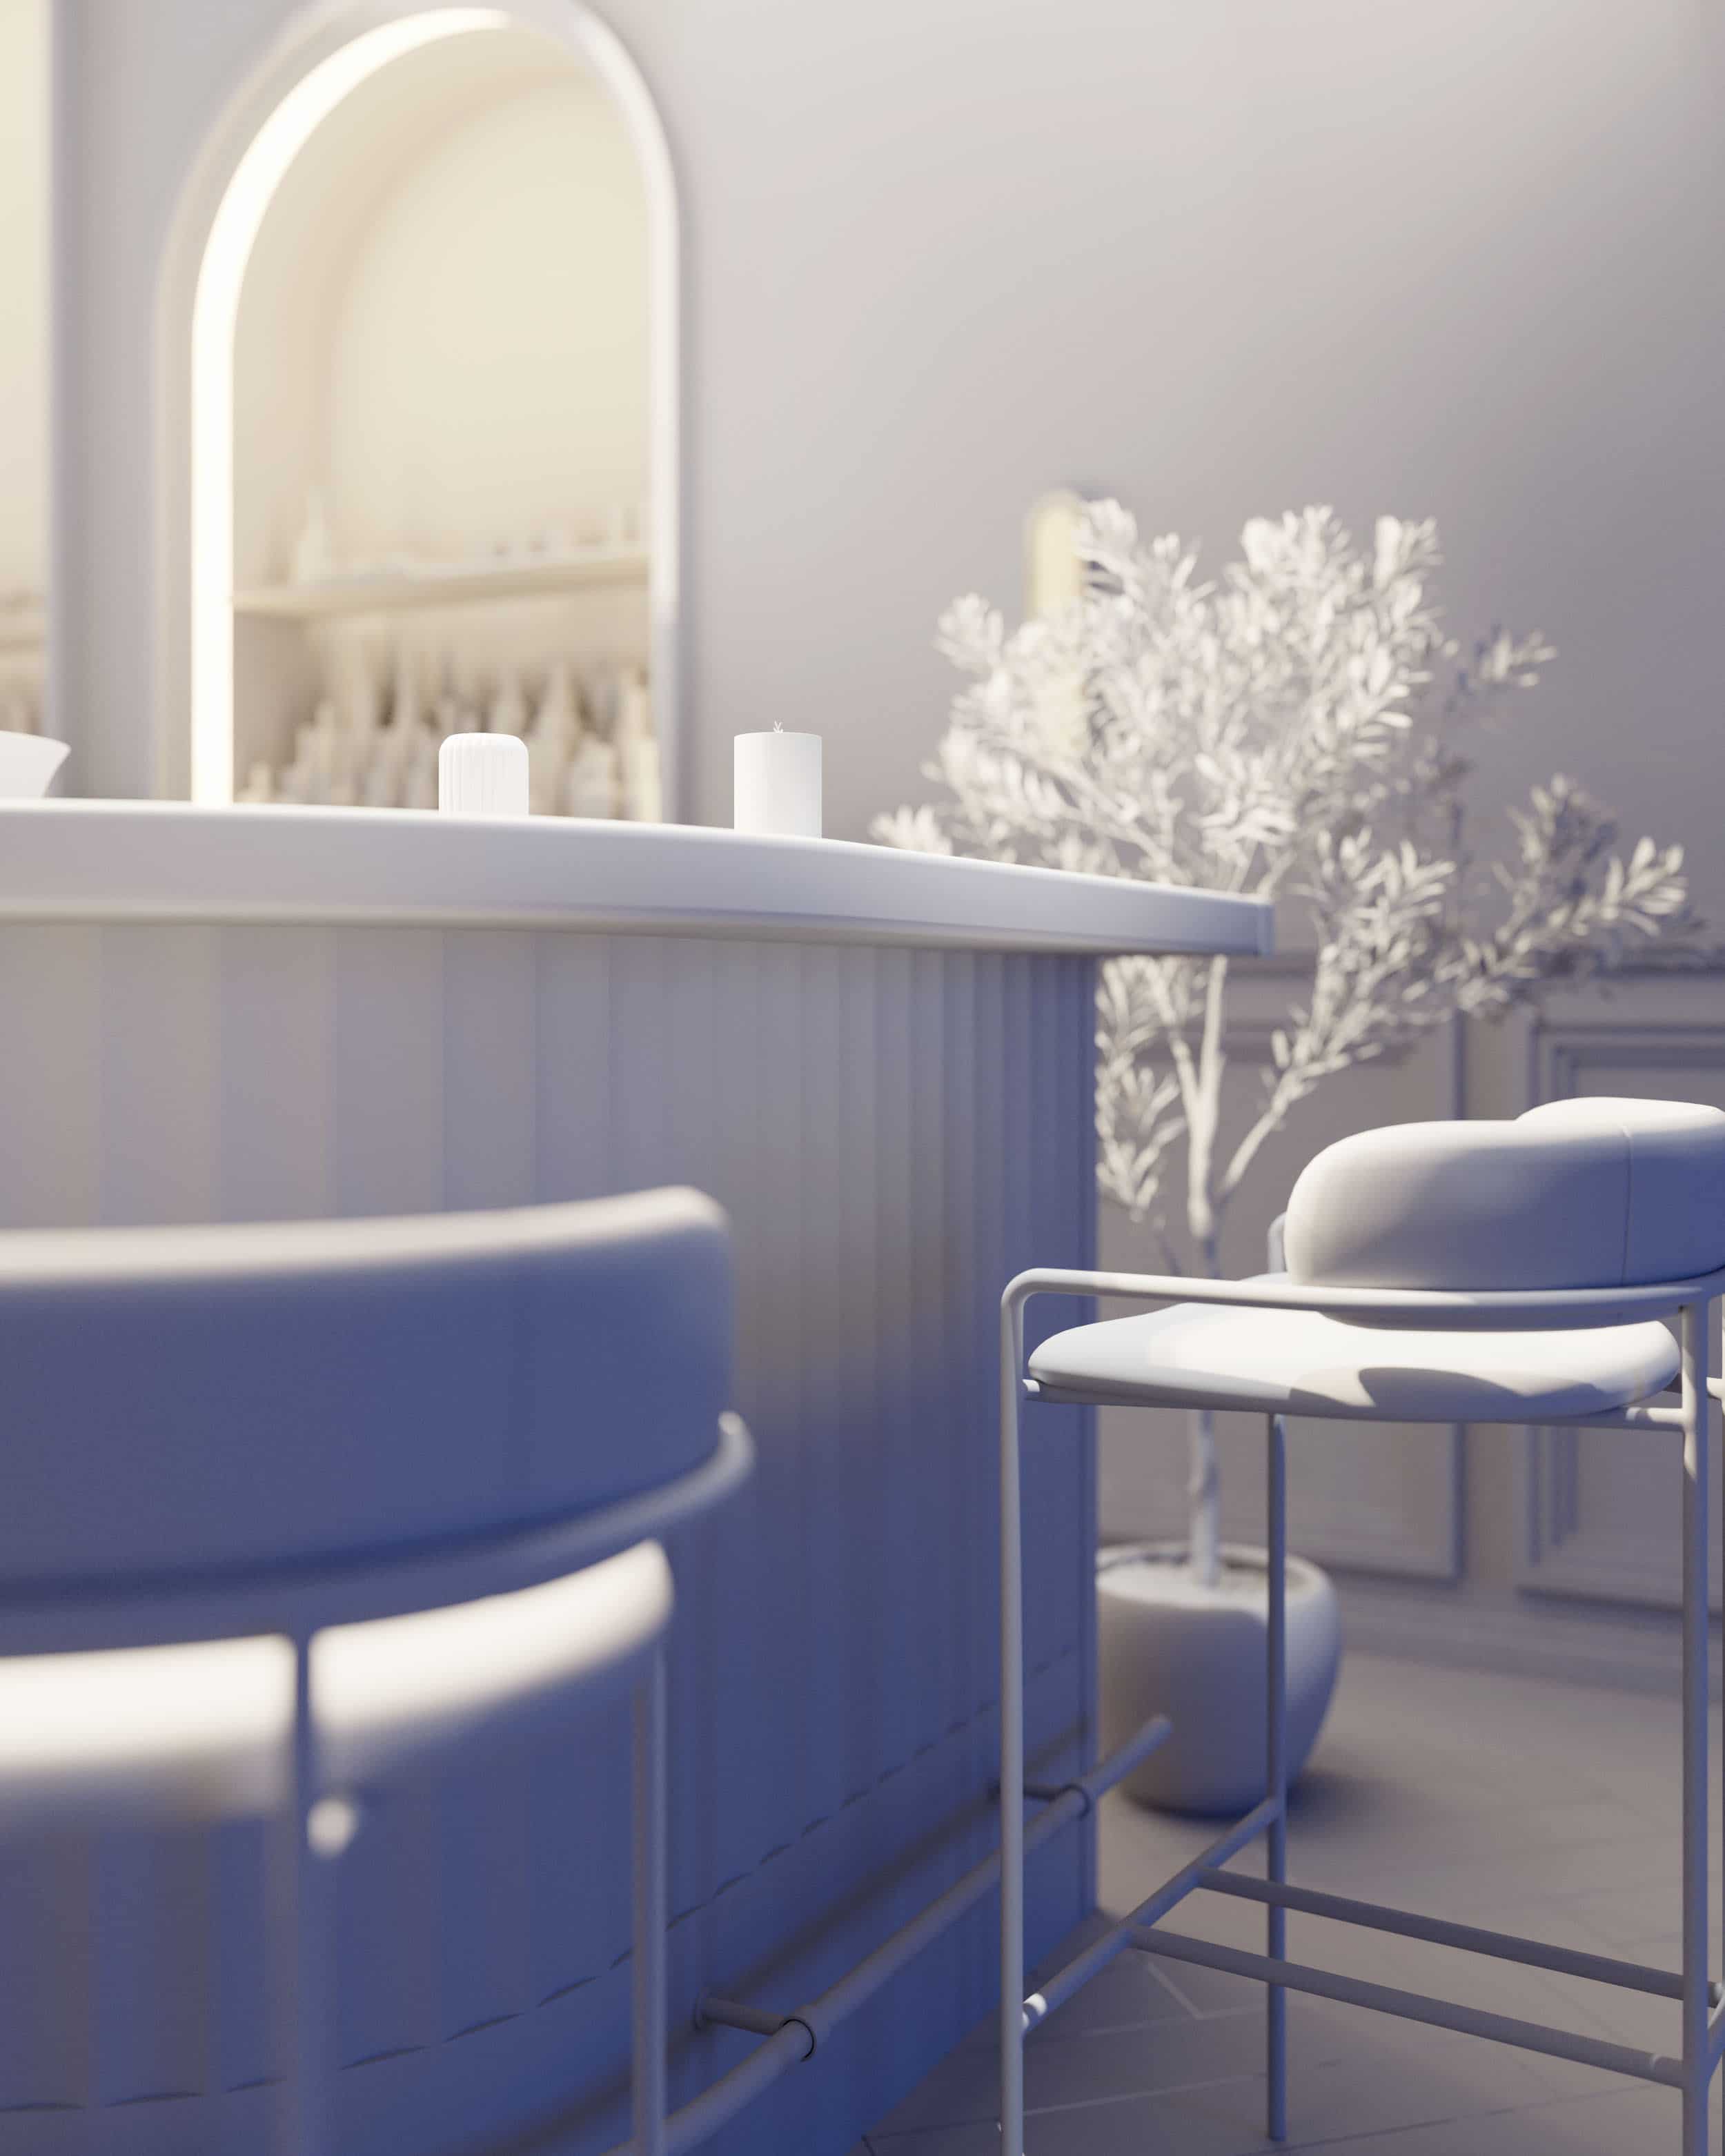
The goal was to get a broad view of the whole counter as a designer would probably ask for, without revealing the entire area to leave space for further developments. Then I added a close-up view to experiment with depth of field and get a more creative and immersive result. I used a golden ratio grid to balance the composition.

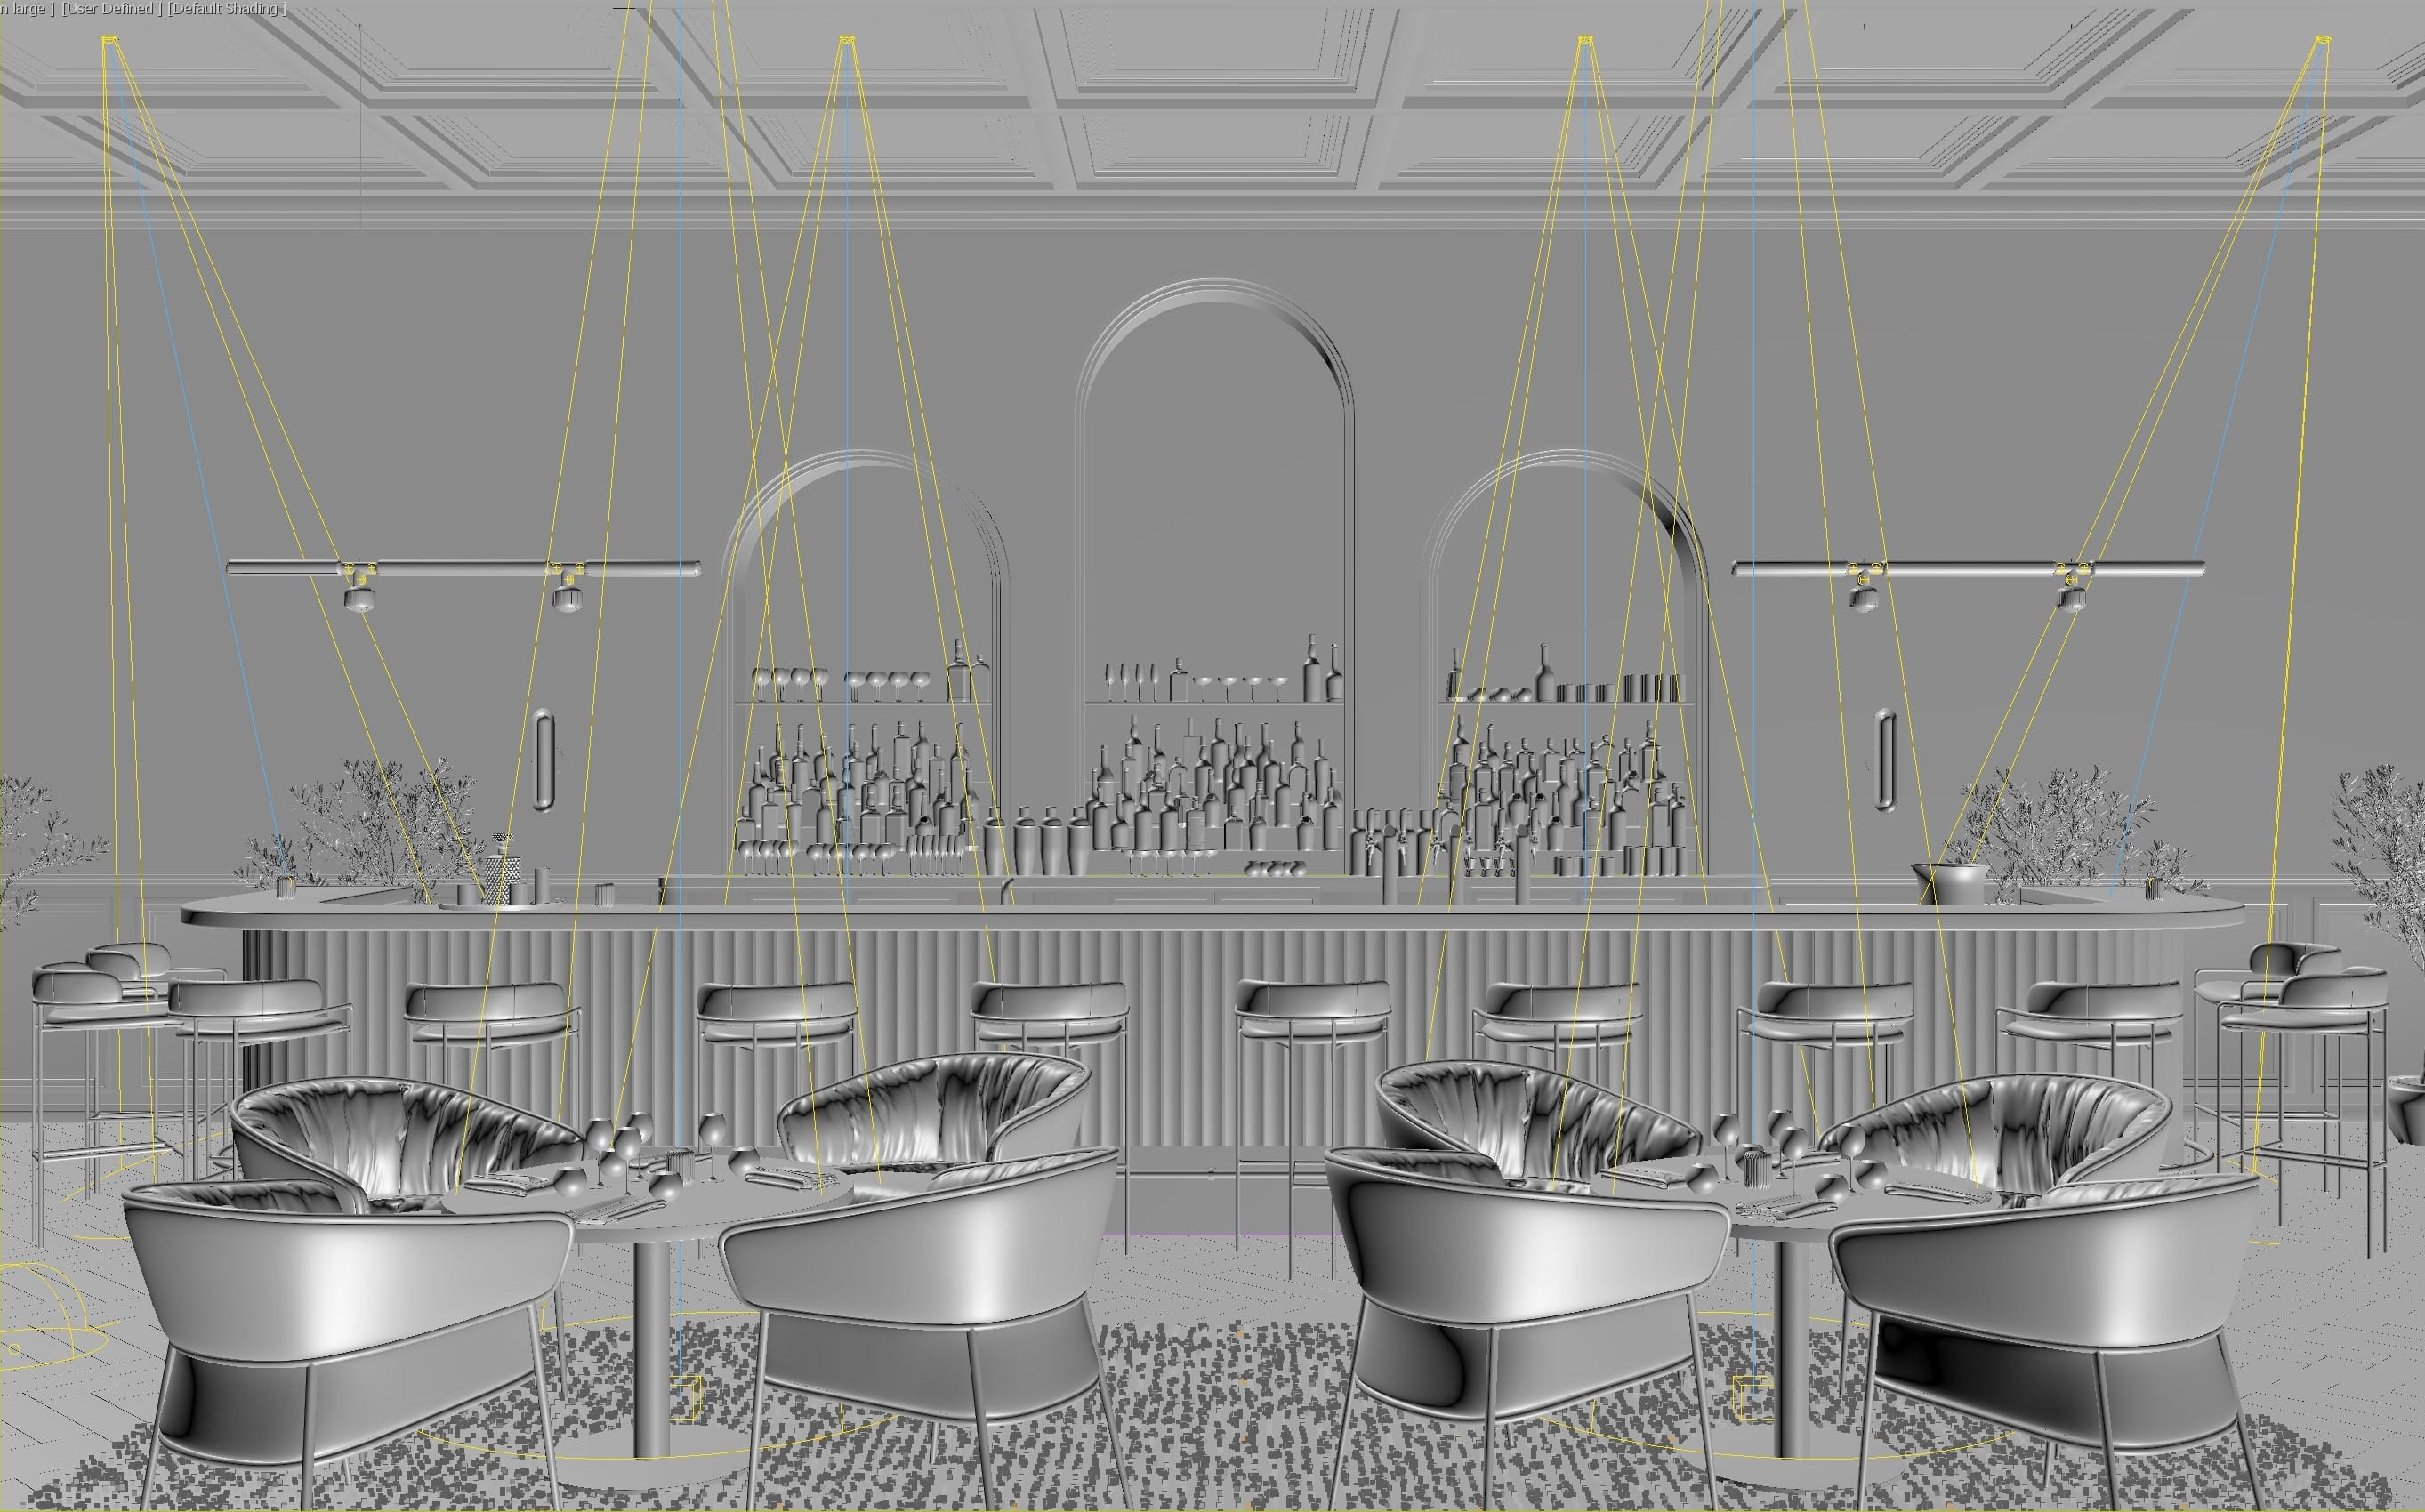
Lighting
The idea behind the lighting was to get an overall dark blue atmosphere via moon-like lighting. And then to “paint” the details with warmer lights, trying not to illuminate the space too much.
In this way, I could obtain an attractive lounge look.
The primary light comes from the two suspensions that I split into two parts: The V-Ray spheres to illuminate the scene and the light stripes with an emissive material for the aesthetic effect (with direct illumination Off). To prevent the primary light from bouncing too far, I used a cutoff value of 0.5. As we are lighting very dark surfaces, the sharp lighting borders you can see for example on the arches below will not be visible in the final render.
The secondary light is a V-Ray Dome Light with a blue color to simulate the moonlight.
The accent lights are a combination of V-Ray Disc Lights to simulate the ceiling spots and a V-Ray emissive material for the wall lights, candles, and arches strips. I also used a V-Ray Plane Light inside the fridges of the back bar.
Materials
Here are some PBR materials from the scene. I have not set up a library yet so I’m used to creating shaders from scratch.
The maps I use the most are textures from Poliigon and dirt maps from 3D Collective.
I tend to use metalness instead of specular workflow more and more, as it allows me to display metal textures in the viewport instead of black color (specular workflow using black color in the diffuse slot).
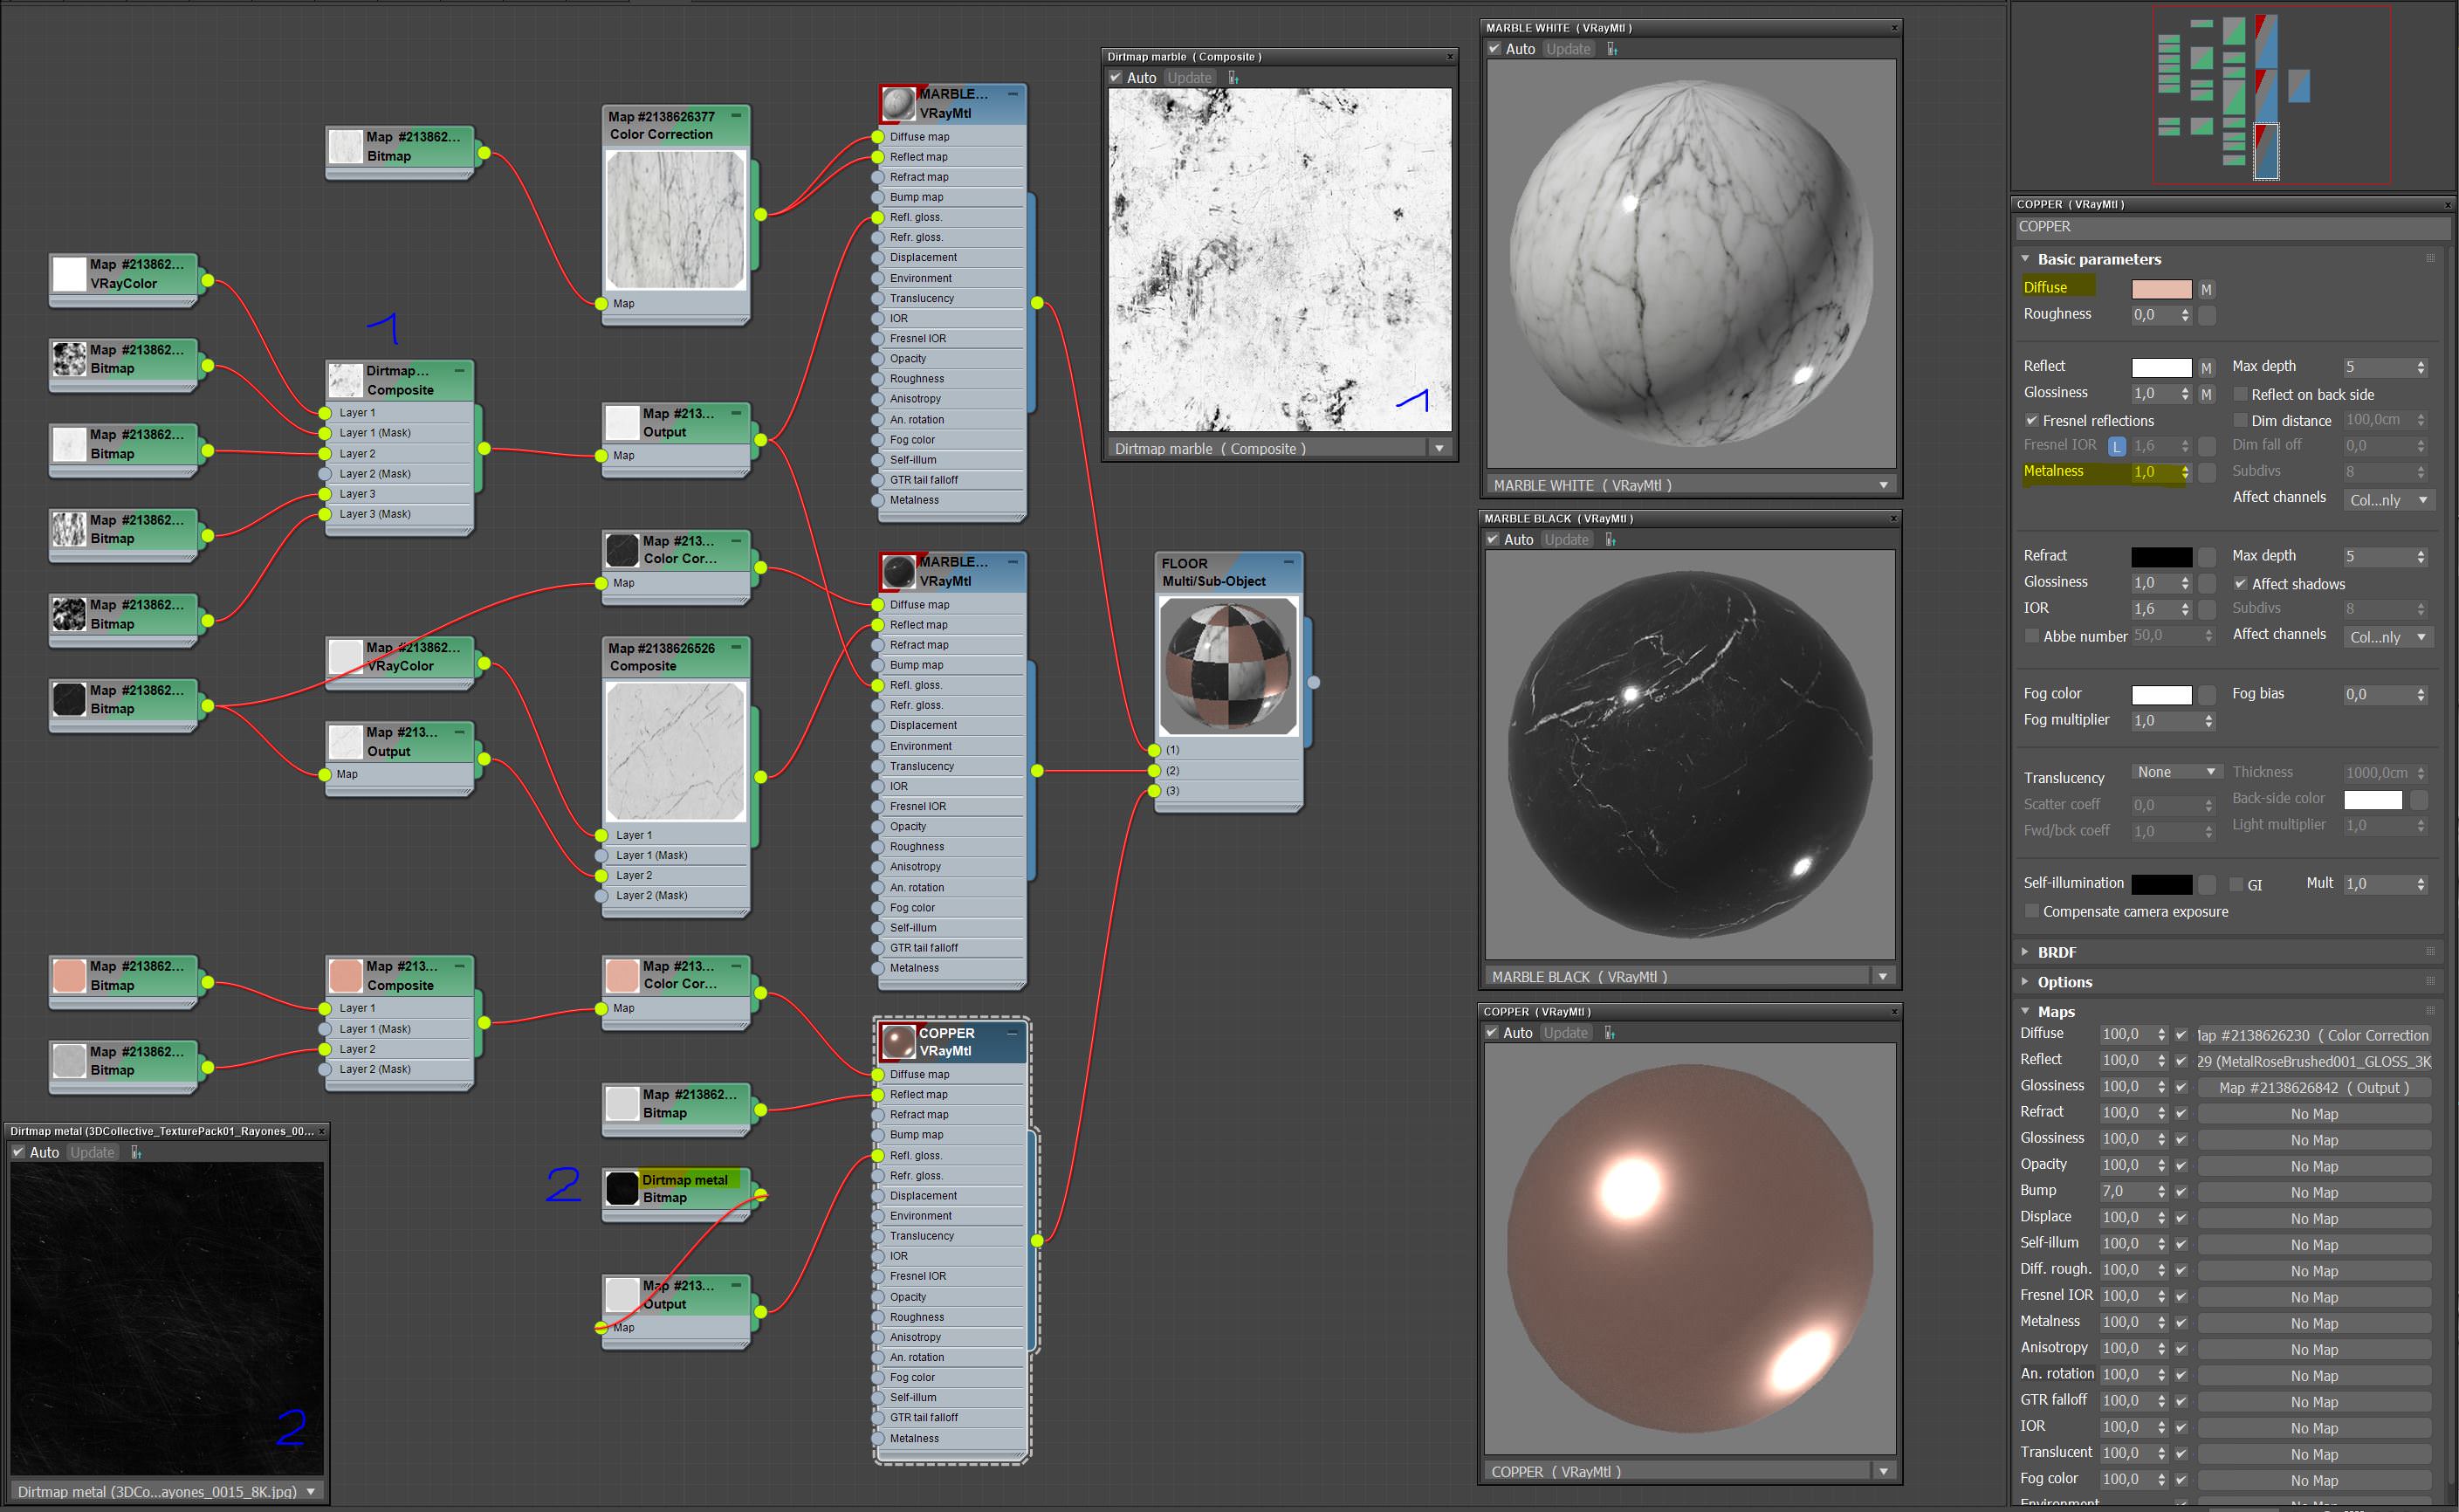
Floor Shaders
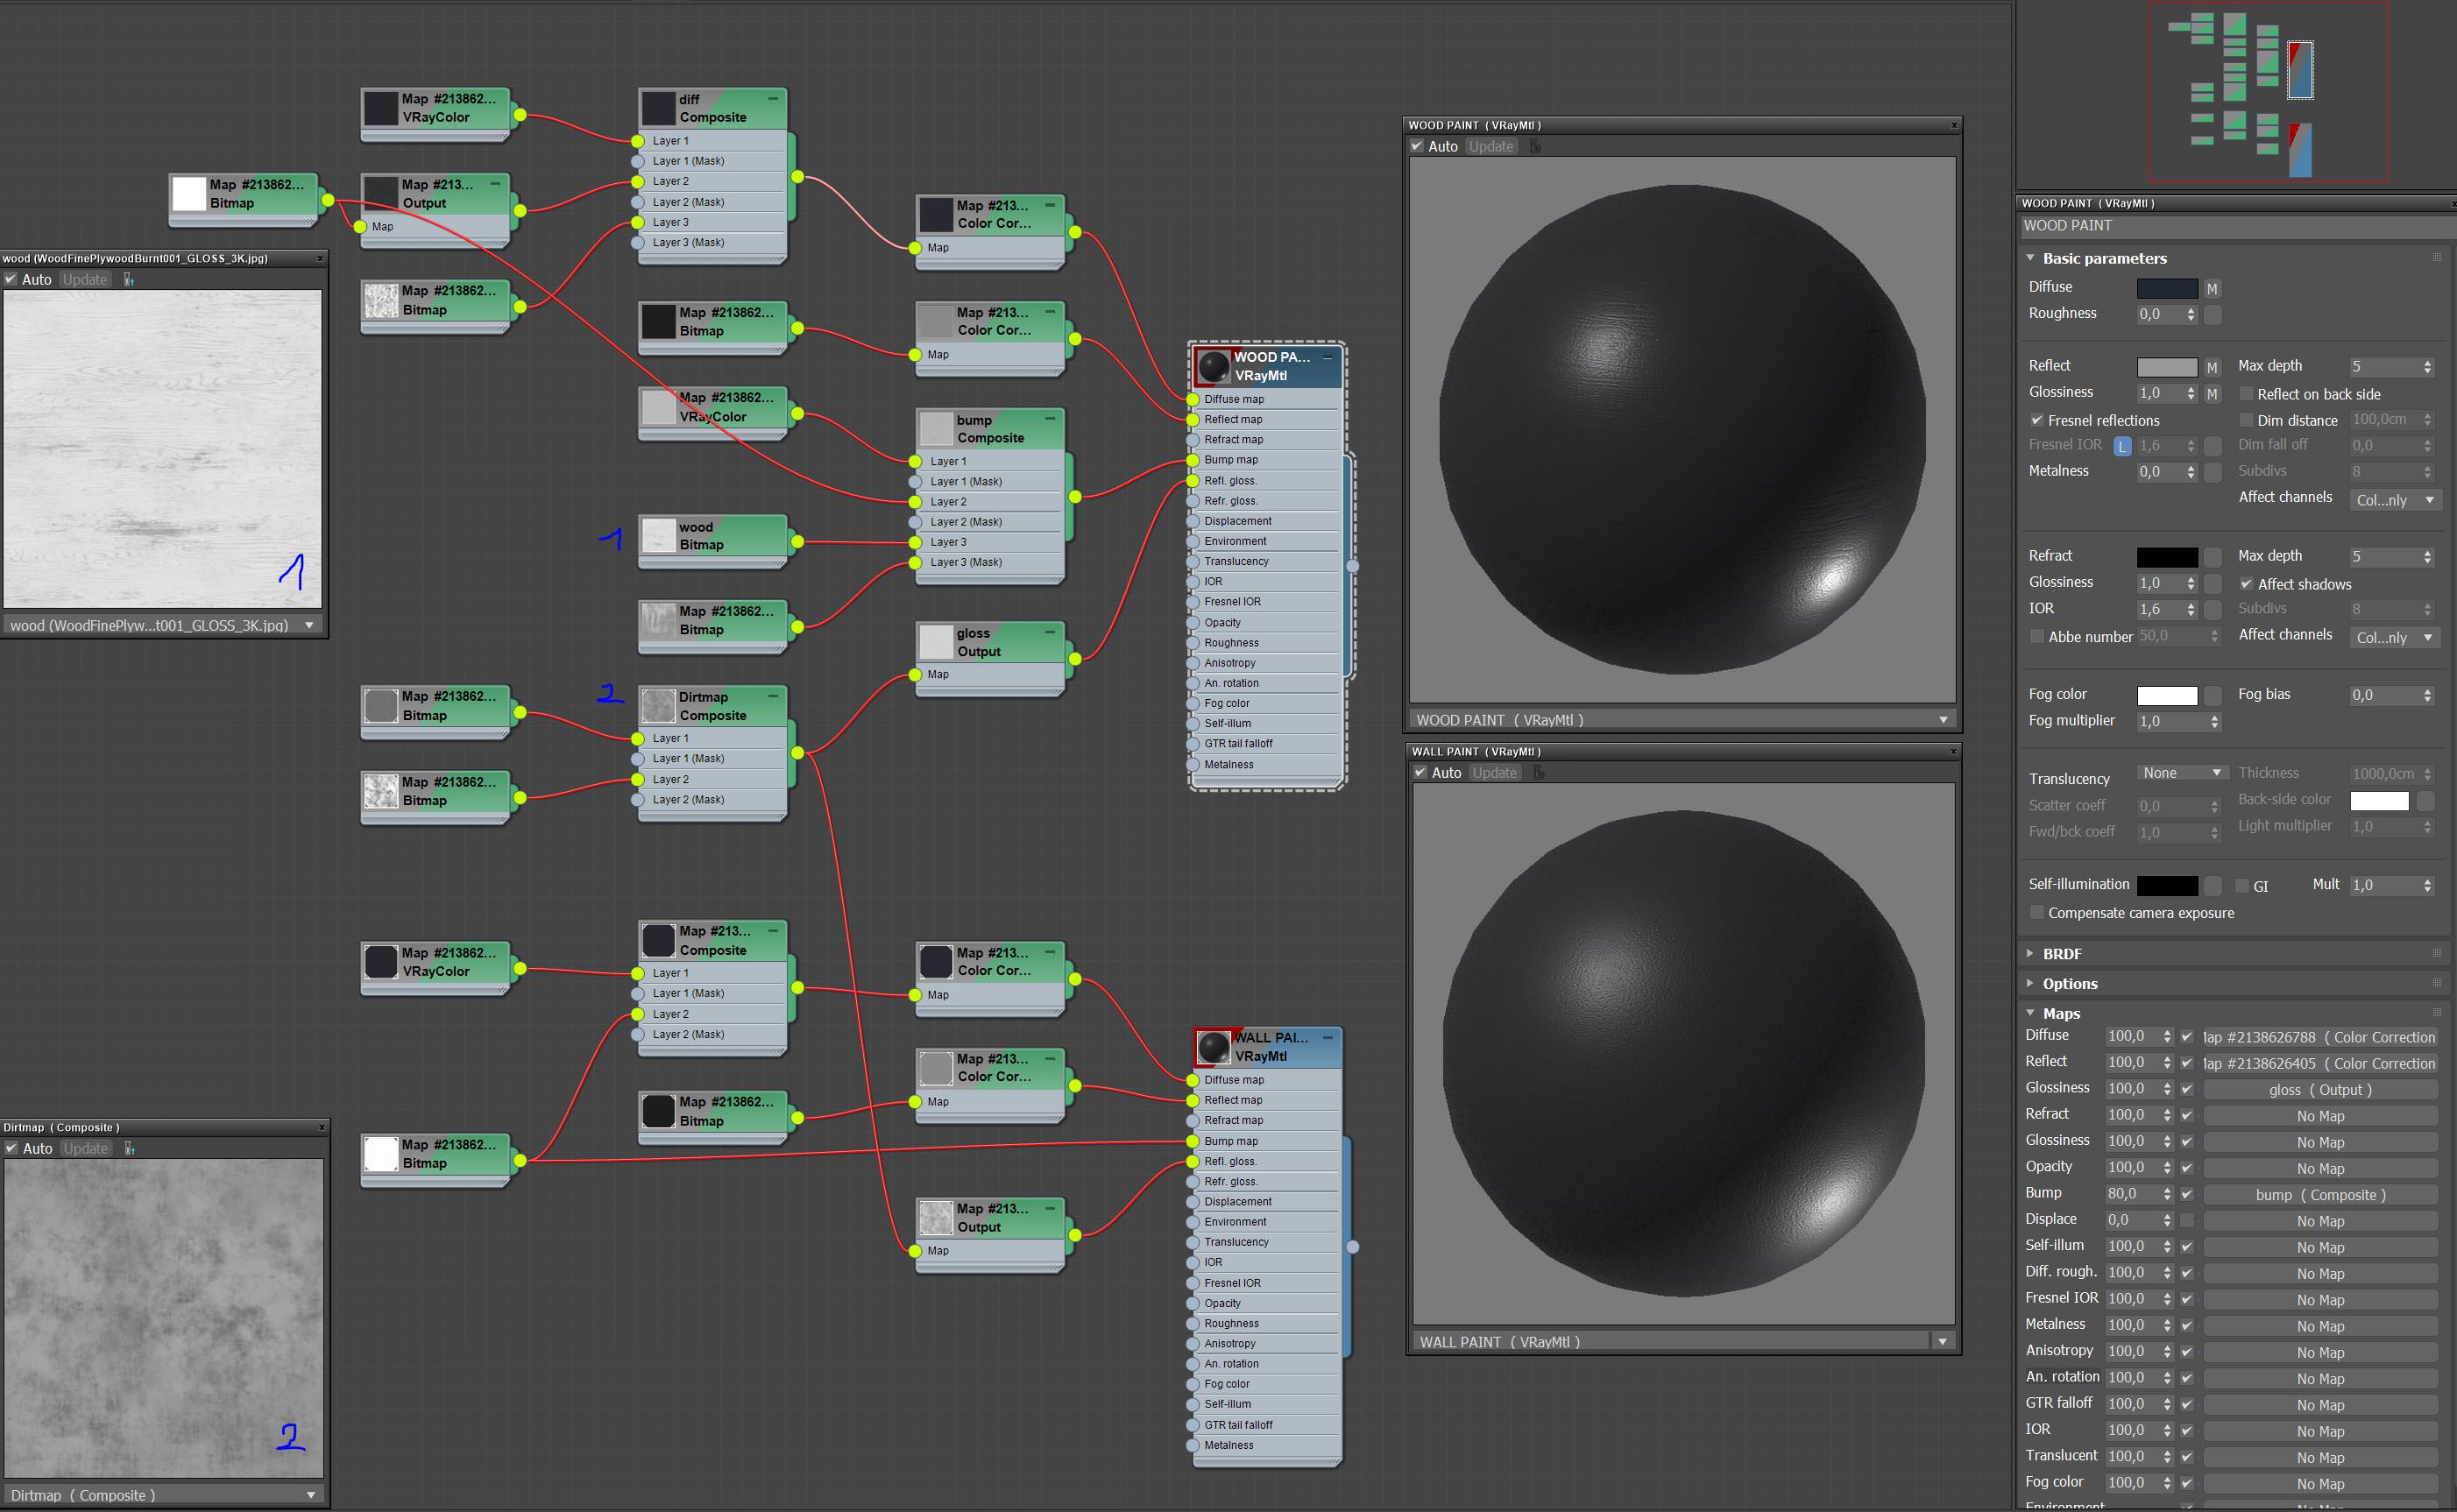
Paint Shaders
Post-production
The photoshop treatment was light. After exporting an .EXR file, I added the LUT. Note that you can export the image with the a LUT applied directly from the frame buffer now. I didn’t do that so I can describe the process.
To do this, make sure to tick “Save in Image” in the vfb LUT settings.
Then I slightly increased the sharpness in Camera Raw.
Finally I mostly used photoshop to add the Glare layer (that you can export directly from vfb too), because I blended two different glare layers and played with masks to have more control of the result.
Final Result
I enjoyed experimenting with this project. I think RailClone is a great tool, and I barely touched the surface of its incredible possibilities.
I hope you enjoyed this making of and found some valuable content. Thank you for watching!


Been craving about this work for a while since you uploaded it on the Showcase!

Very well done job @martindarzacq
Thank you for your hyper-detailed making-of,
I am blown away with that Forest Pack application for the carpet/rug, to be honest!
All the best,
Duy Phan
Duy Phan I am happy that you like it and touched by your comment . You’re filling me with joy and motivation!
Best wishes,
Martin.
The beauty of endless zoom into details in CG… this could have easily be a forest of parametric office towers!
That’s what she said!
My pleasure @martindarzacq

I explored a bit of that in here : https://www.behance.net/gallery/96419833/THE-THING-Challenge.
Not confident enough though to handle the tomorrow challenge, yet!