


Making of A45 Cabin
Radosław Kielak, from PICTURA studio, shared the A45 Cabin project on the blog’s Facebook Group and I’m very happy to introduce his Making of A45 Cabin here! Lots of good stuff going on here with Cinema 4d and Corona Renderer as the main tools of the trade. Enjoy.
First of all, I would like to thank Ronen for sharing on his blog the results of my work in this making-off. I will not keep it as a secret that my skills and sensitivity to architecture were made from observing the results and tutorials published here.
Making of A45 Cabin Introduction
A45 is my interpretation of the mass-produced A-shaped summer cabin by Soren Rose Studio / BIG. In Pictura Studio, we see ourselves as translators of the non-existent architecture. As a ready-made house, the A45 could be visualized in any environment; however, recreating the building’s image in the European autumn forest was such an exciting challenge that I decided to follow this variant.
Here are 5 images by which I tried to extract the emotional potential of this cabin.


WORKFLOW
The project was mainly done in Cinema 4D, but most of the tools I use have their equivalents in other programs, including 3ds Max. The full list of programs and plug-ins is as follows :
PRIMARY SOFTWARE
- Foundry Modo.
- Marvelous Designer.
- Cinema 4D.
- Corona Renderer.
- Adobe Photoshop.
PLUG-INS
- Paint on Surface
- Magic Select
- Riptide Pro
- Arion FX (Photoshop)
- Py Spider Generator
SCANS
- Agisoft Metashape
- Zbrush
References for Making of A45 Cabin
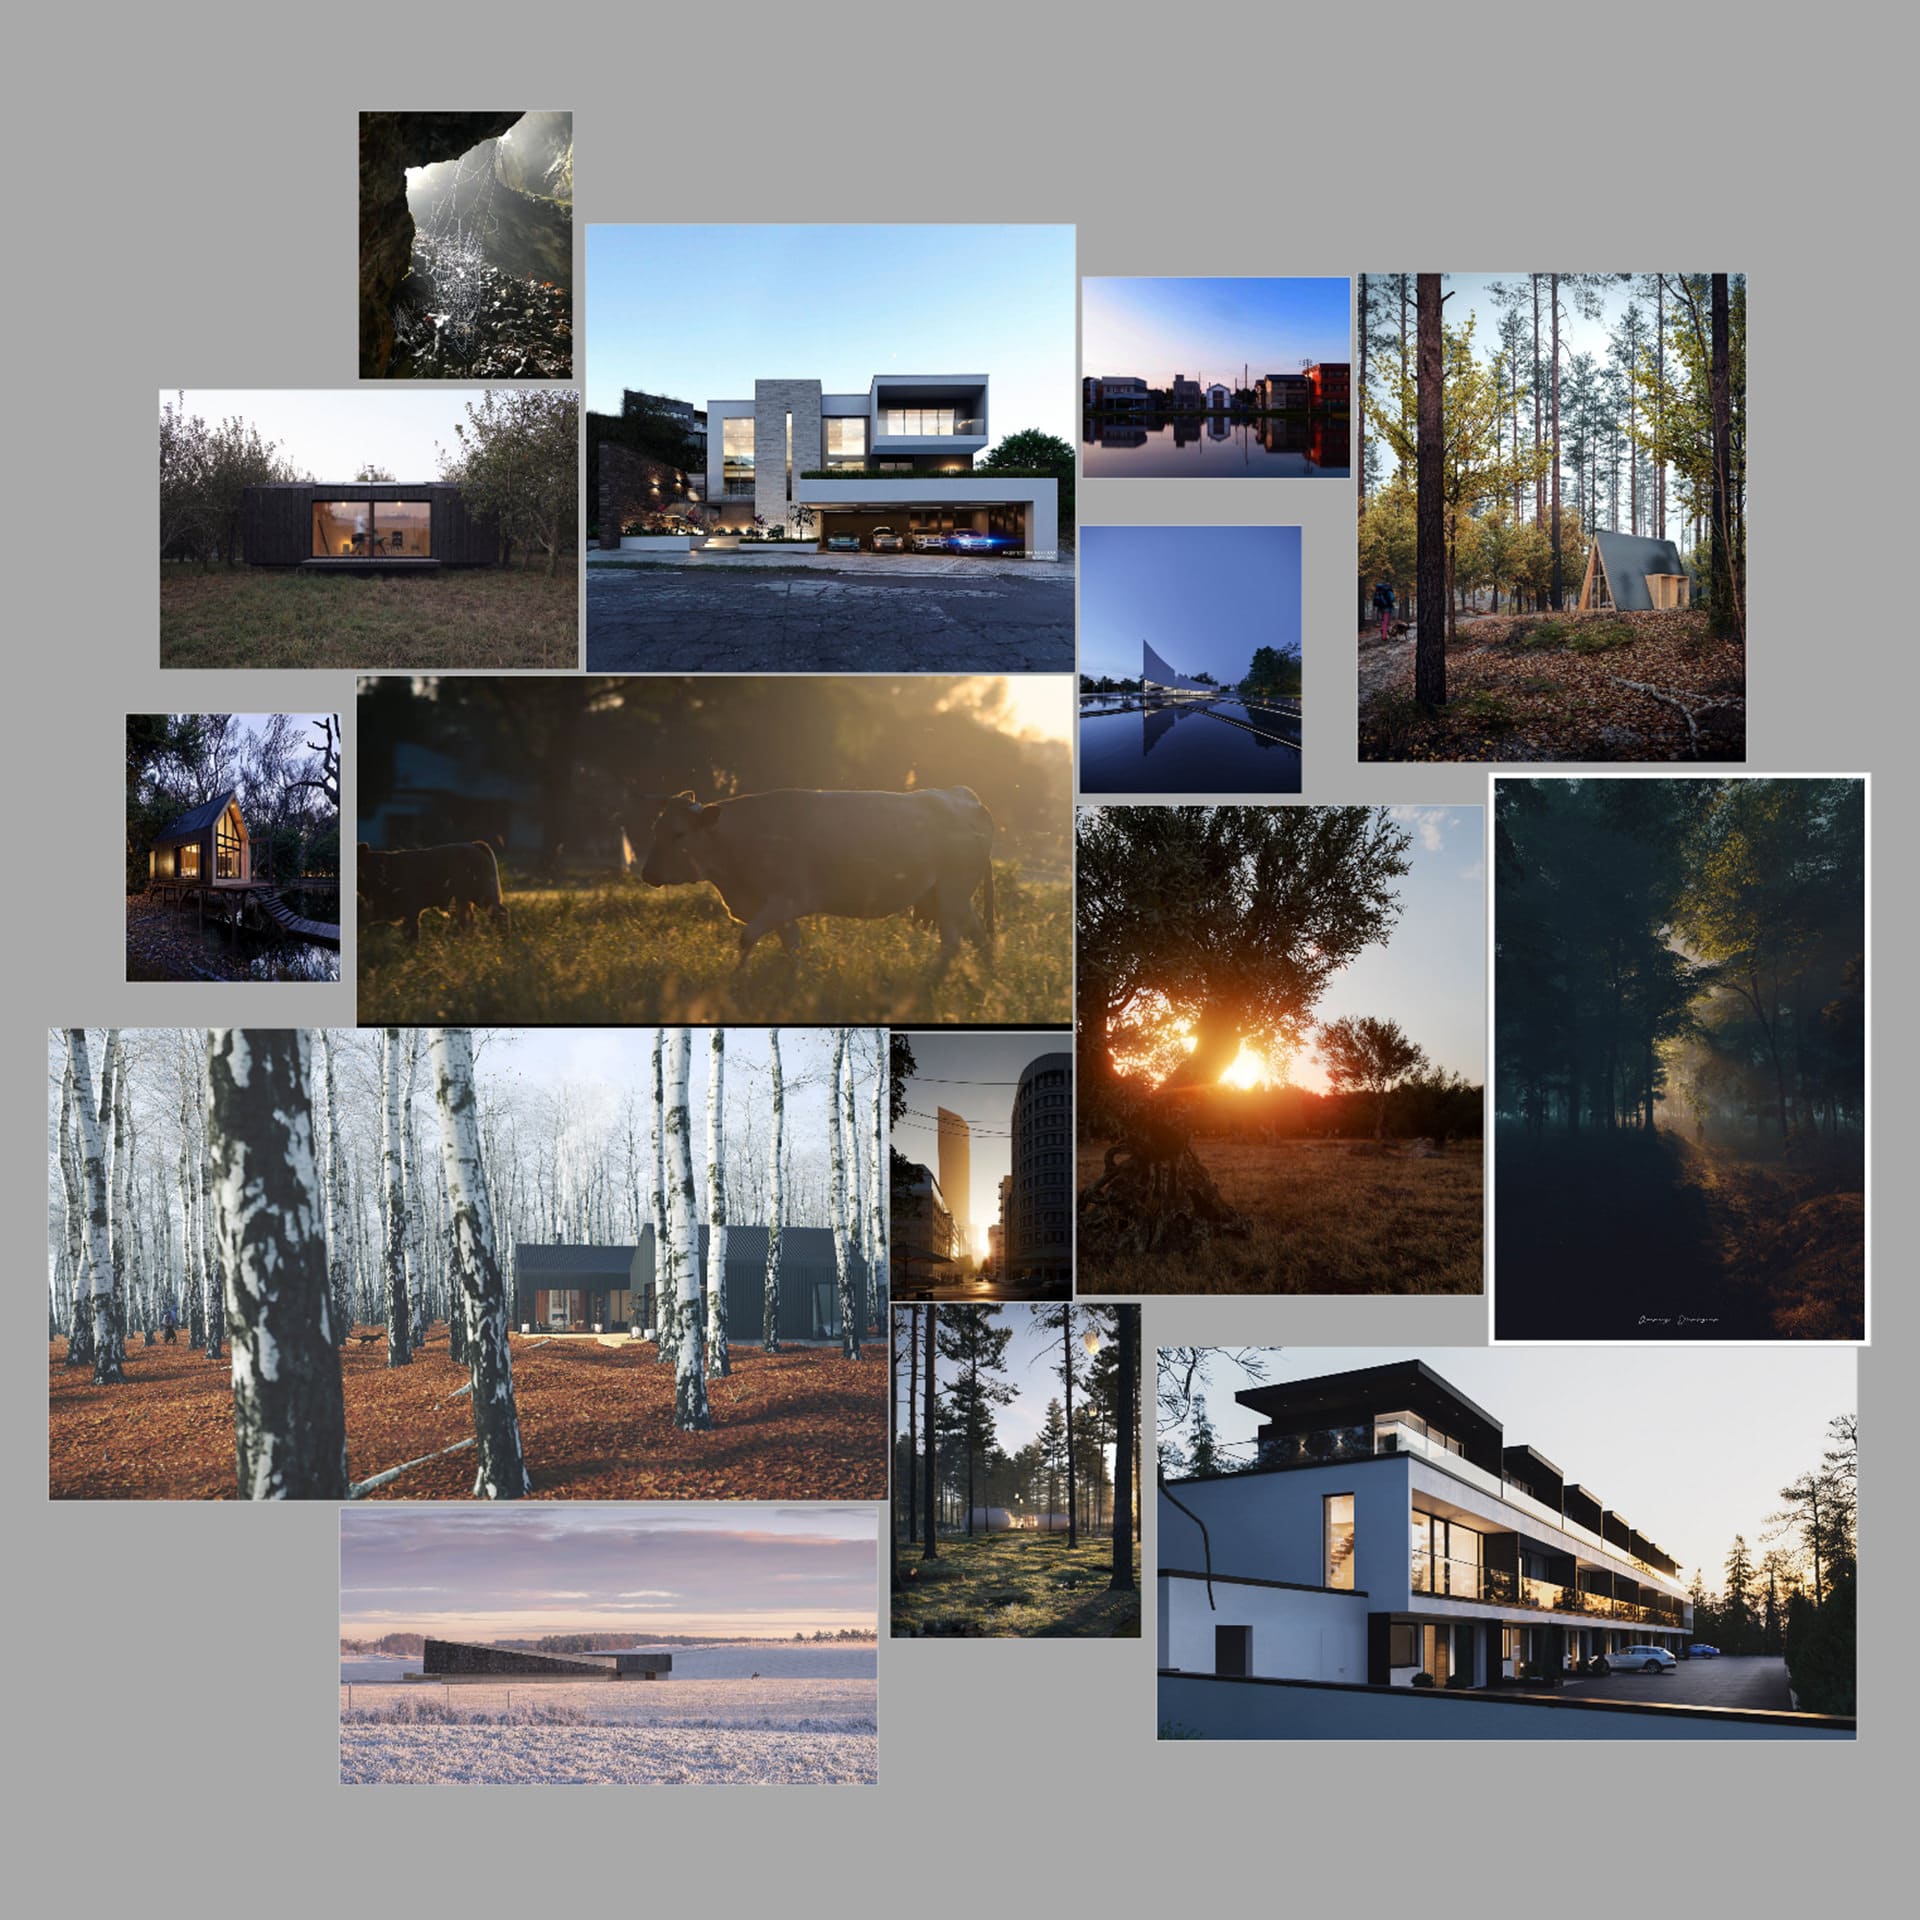
As reference images of the building, I primarily used photos of the existing A45 cabin prototype. My goal, apart from showing the building itself, is to create a specific atmosphere.


I collect images from various sources around me in a special drawer. These are visualizations, photos, and movie frames.
I attach the mood board on which I worked on the Making of A45 cabin project.
MODELING
Primary object modeling proceeded in Foundry Modo.
Since what is unusual for this type of object – the cabin is covered with fabric – we decided to build the main skeleton of the building first and then use the Marvelous Designer to apply the canvas.
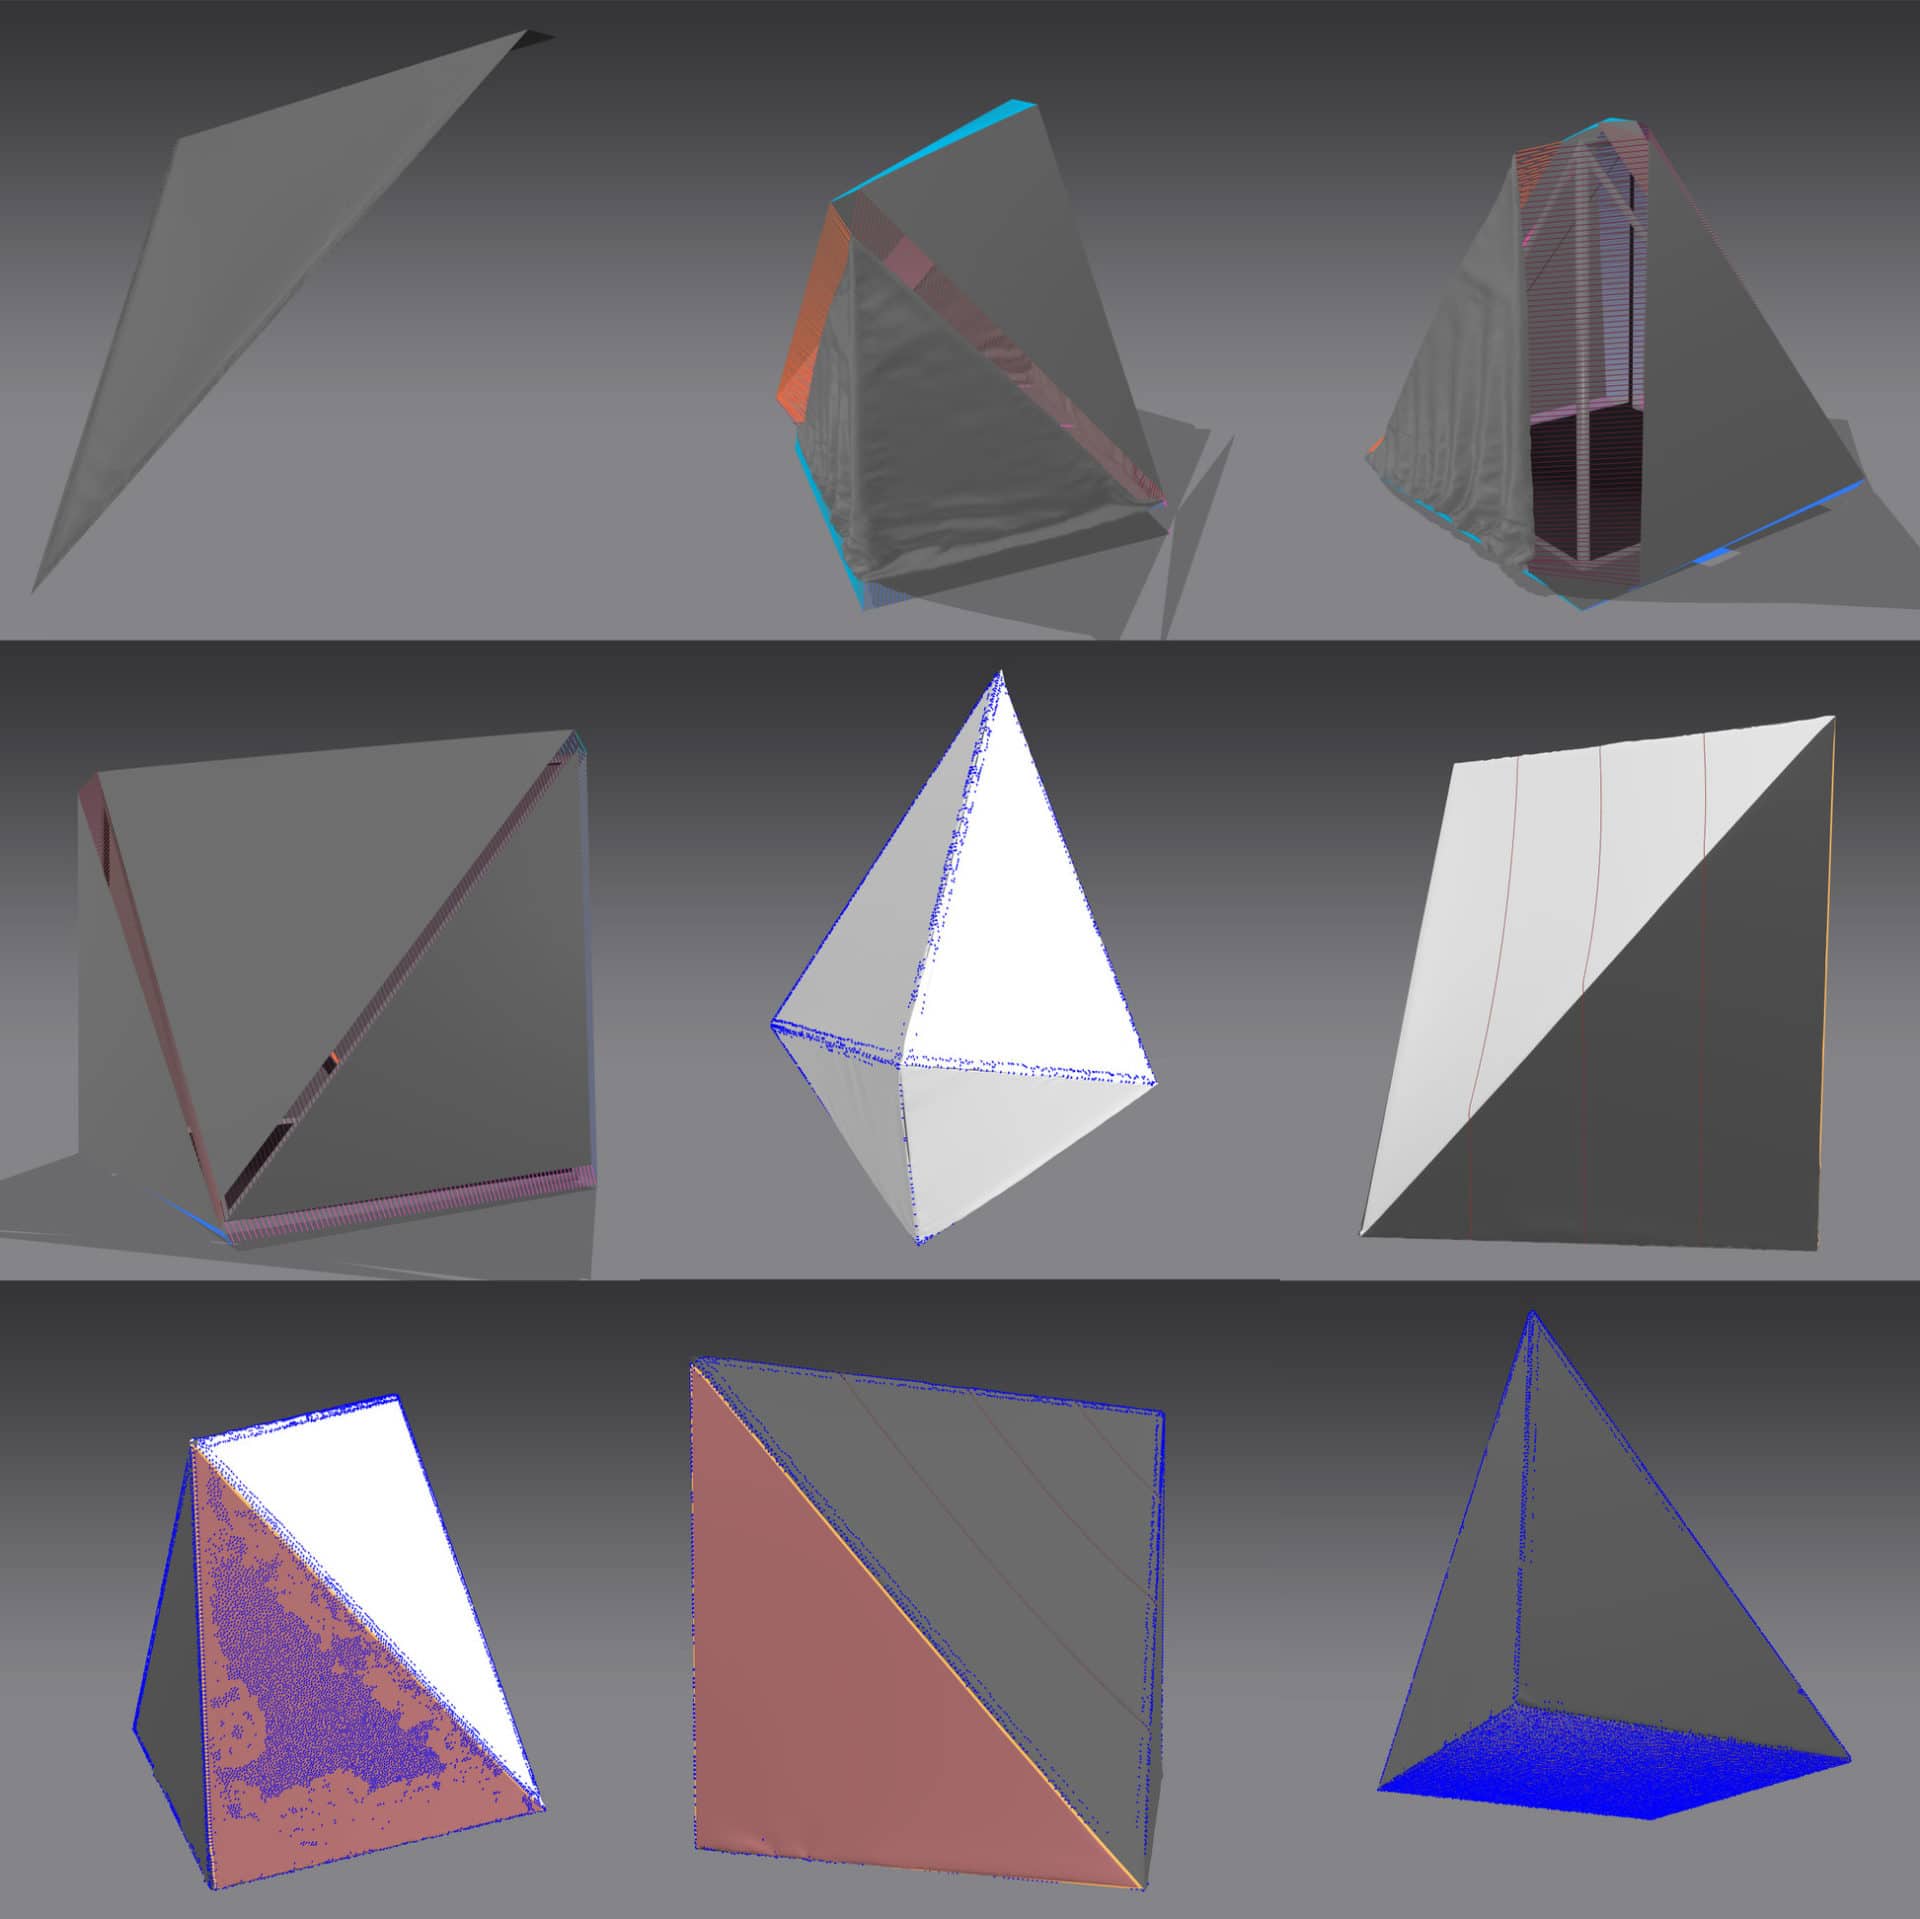
The fabric model was loaded back into Modo, where we sewed the seams and corrected the simulated fabric errors. At this stage, my teammate, Rafał Strąkowski, participated in the project.
The terrain model has been sculpted and tessellated for a specific camera.
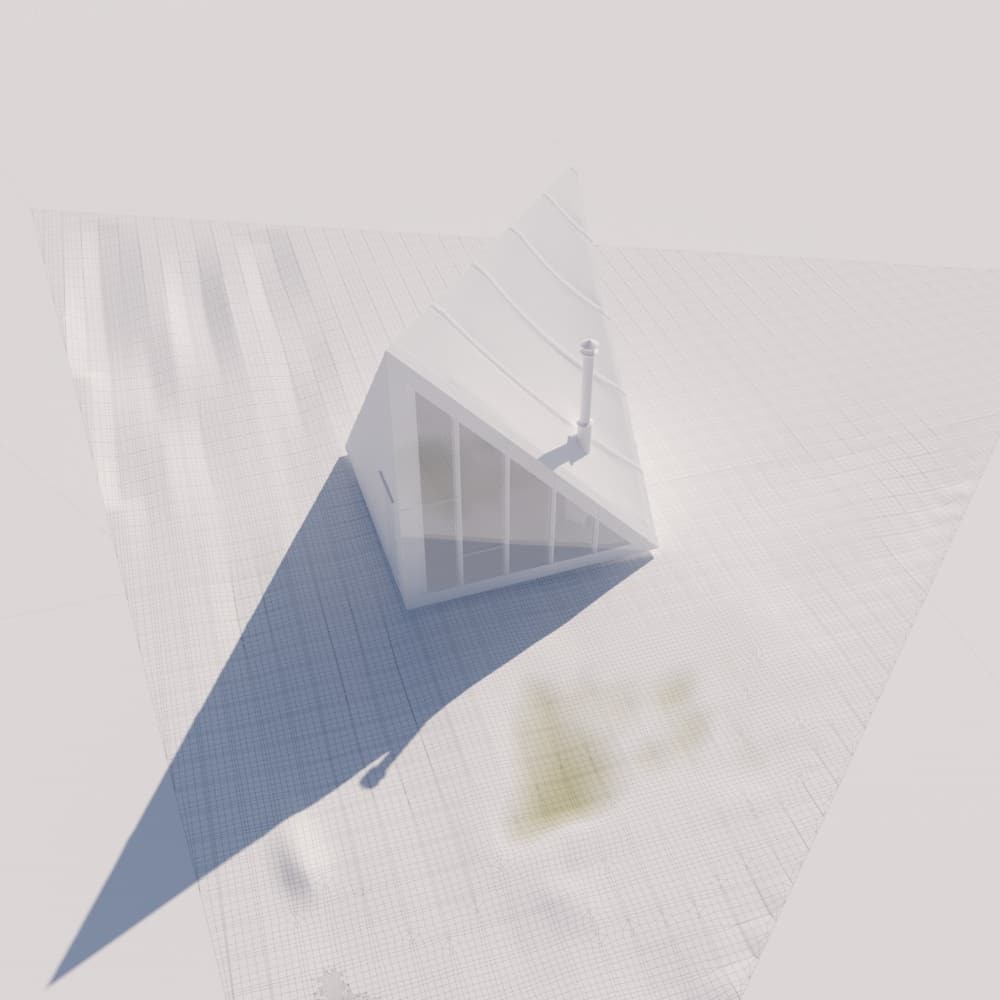
ENVIRONMENT
Apart from modeling the building itself, I did the rest of the scene building in the C4D R21.
The models used to create the impression of late fall come from many sources.
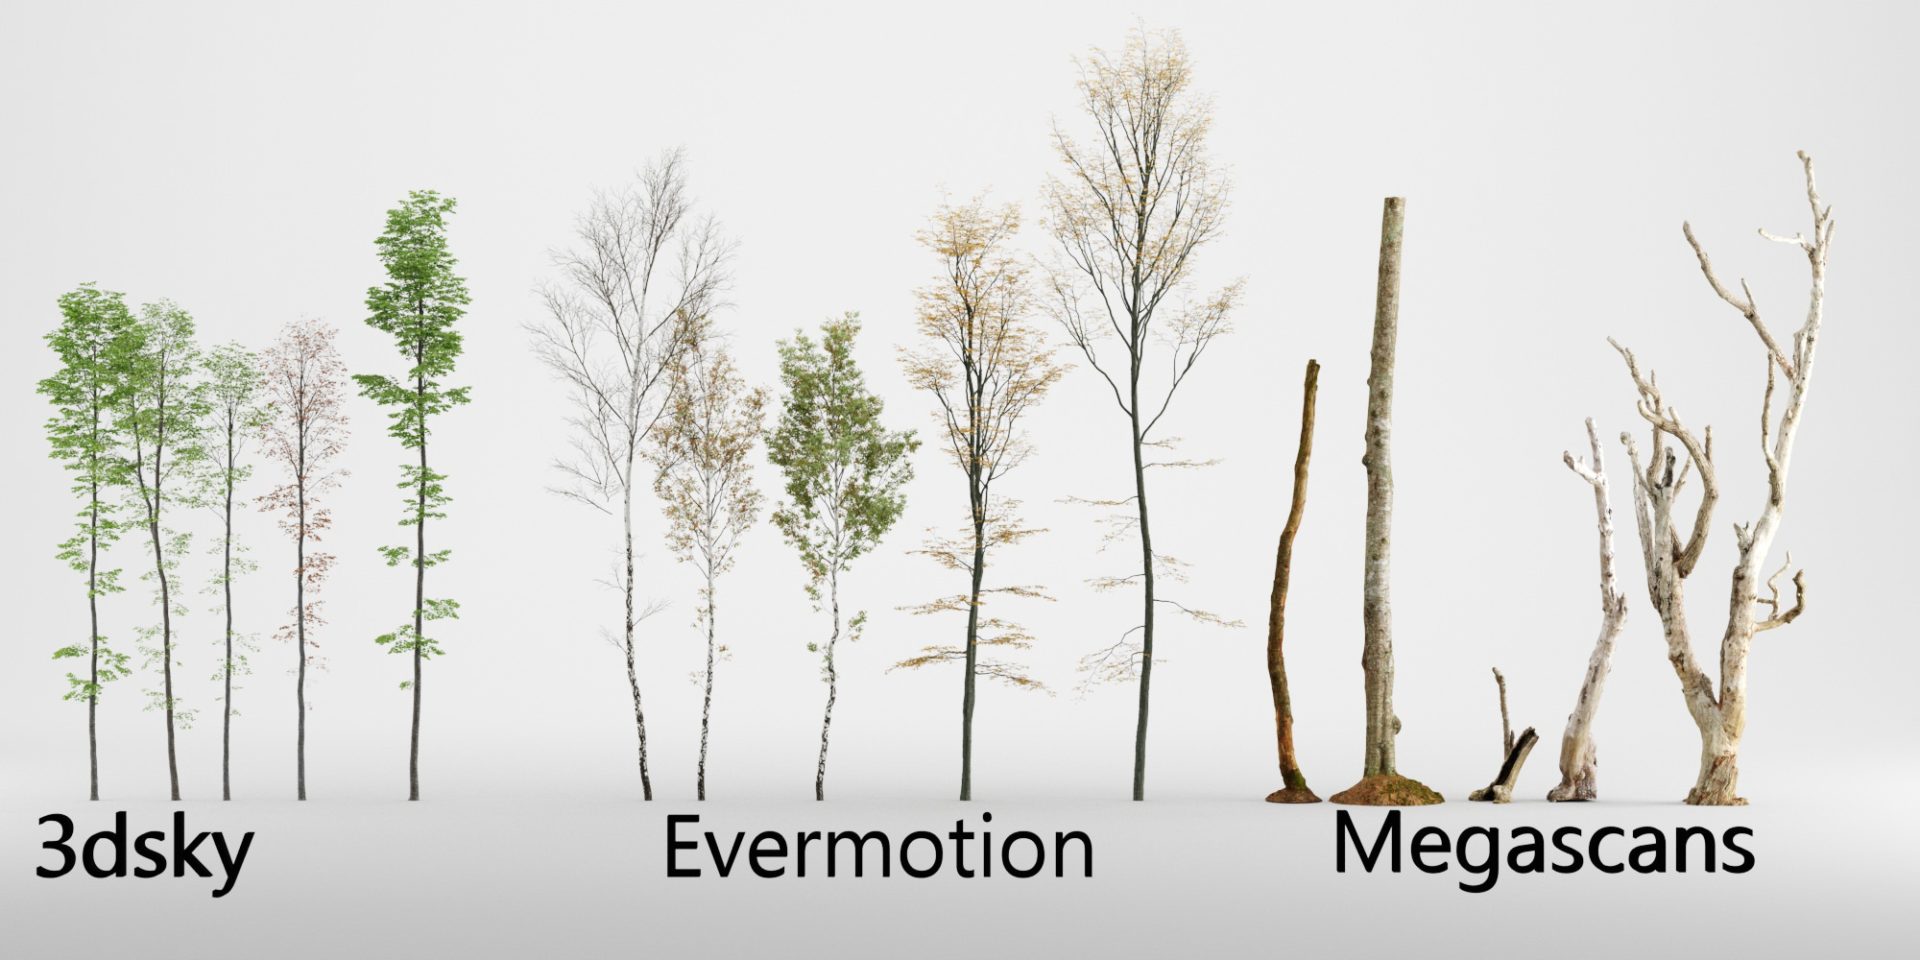
Most of the trees have been modified (I have removed some leaves).
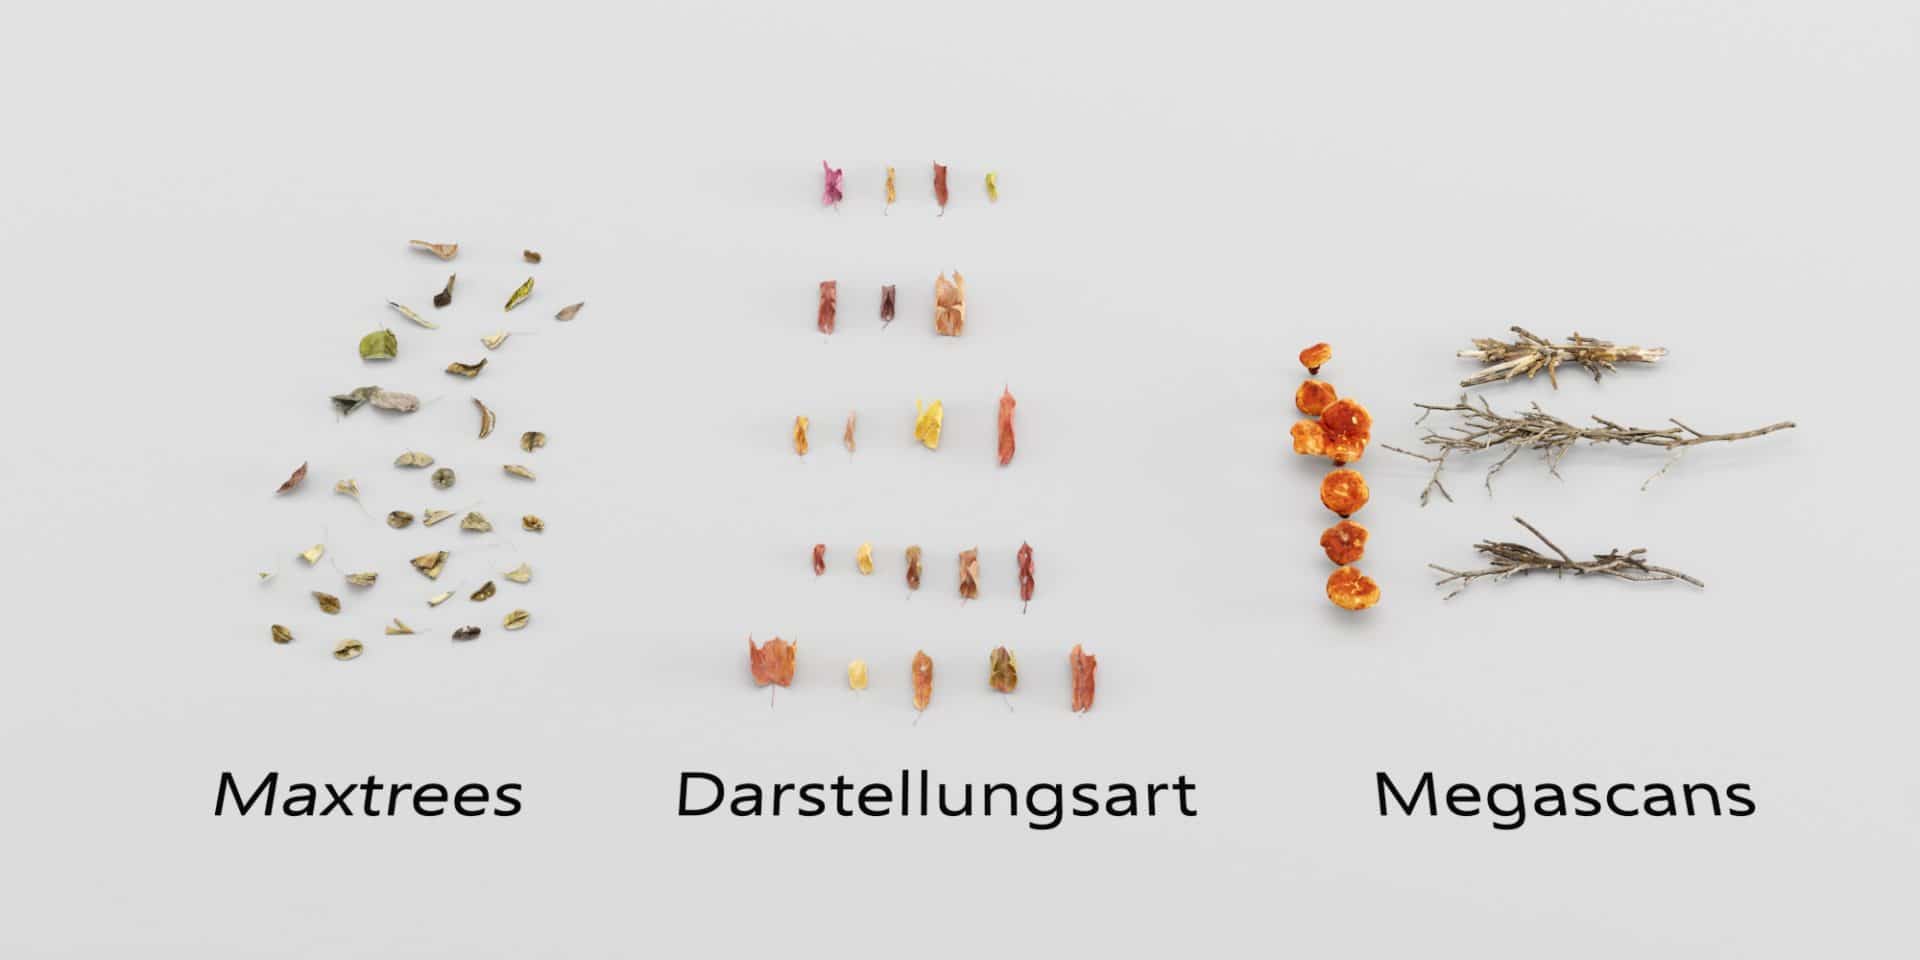
All low greenery models come from MAXTREE.
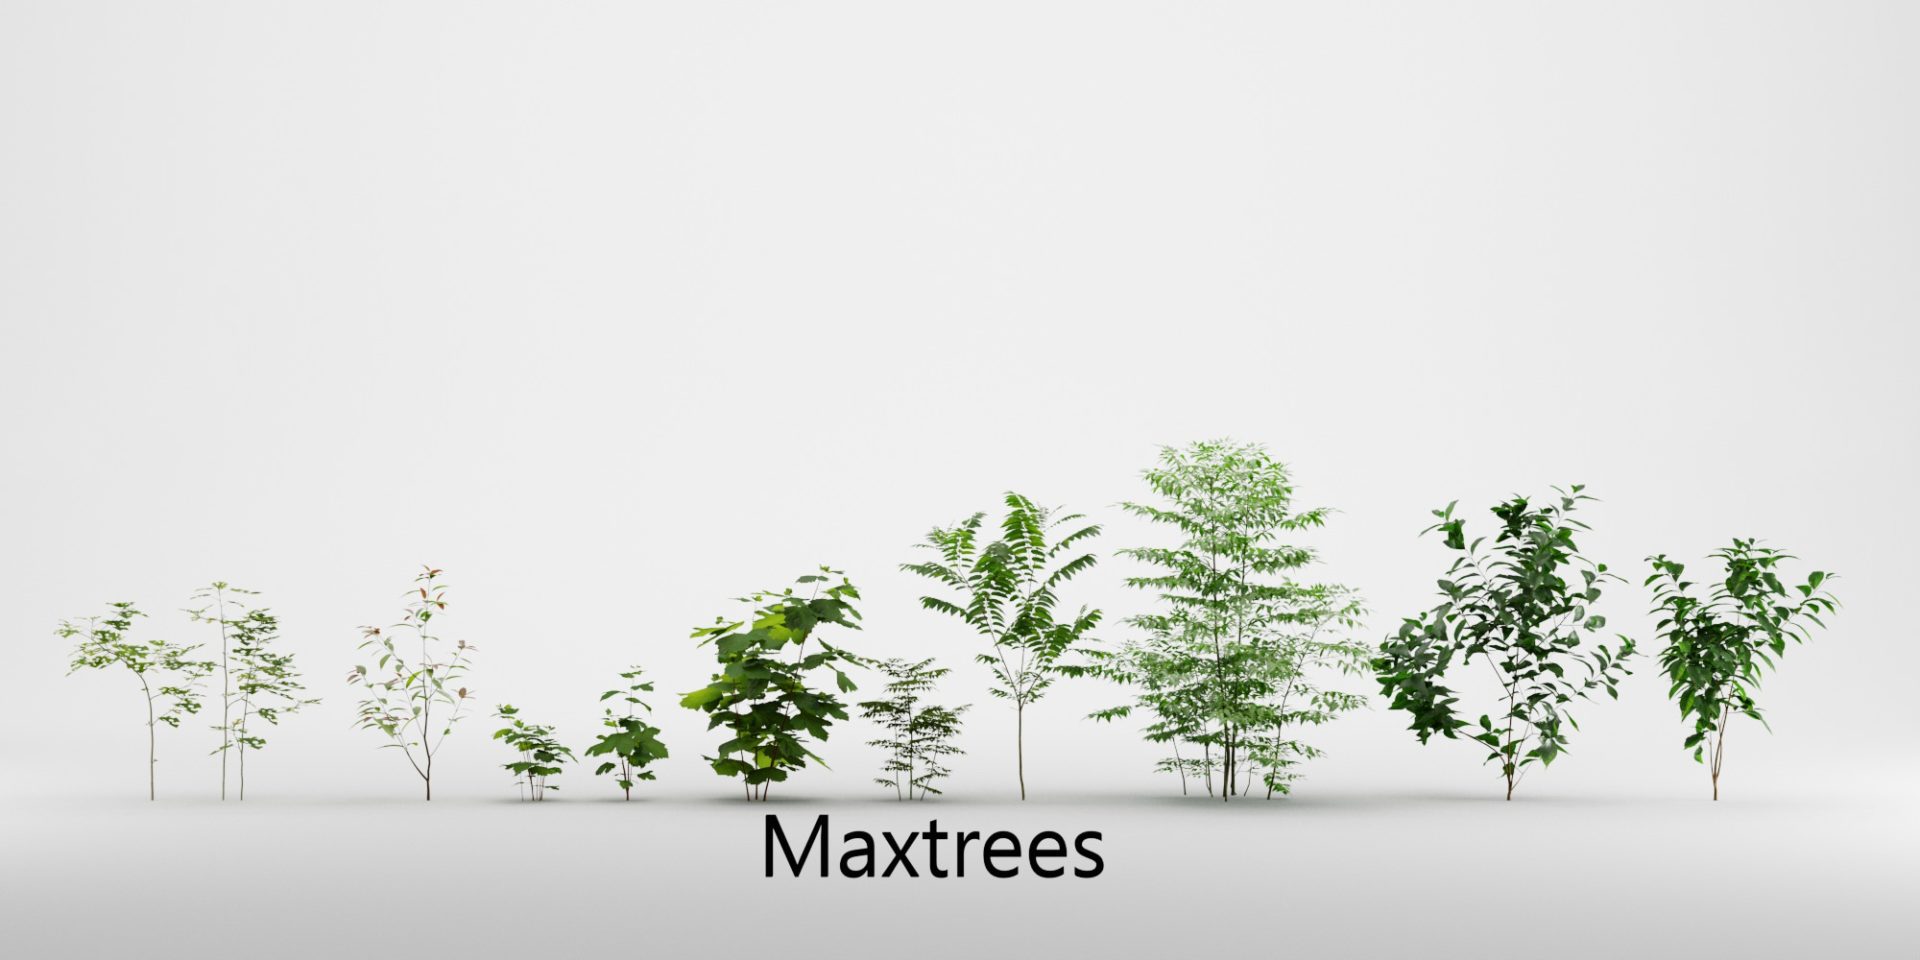
The leaves come from the MAXTREE and Darstellungsart Meadow Asset library. Sticks and mushrooms are elements from Quixel Megascans.
The models of pine cones were made by me using photogrammetry.
You can download pine cones for free from my gumroad.
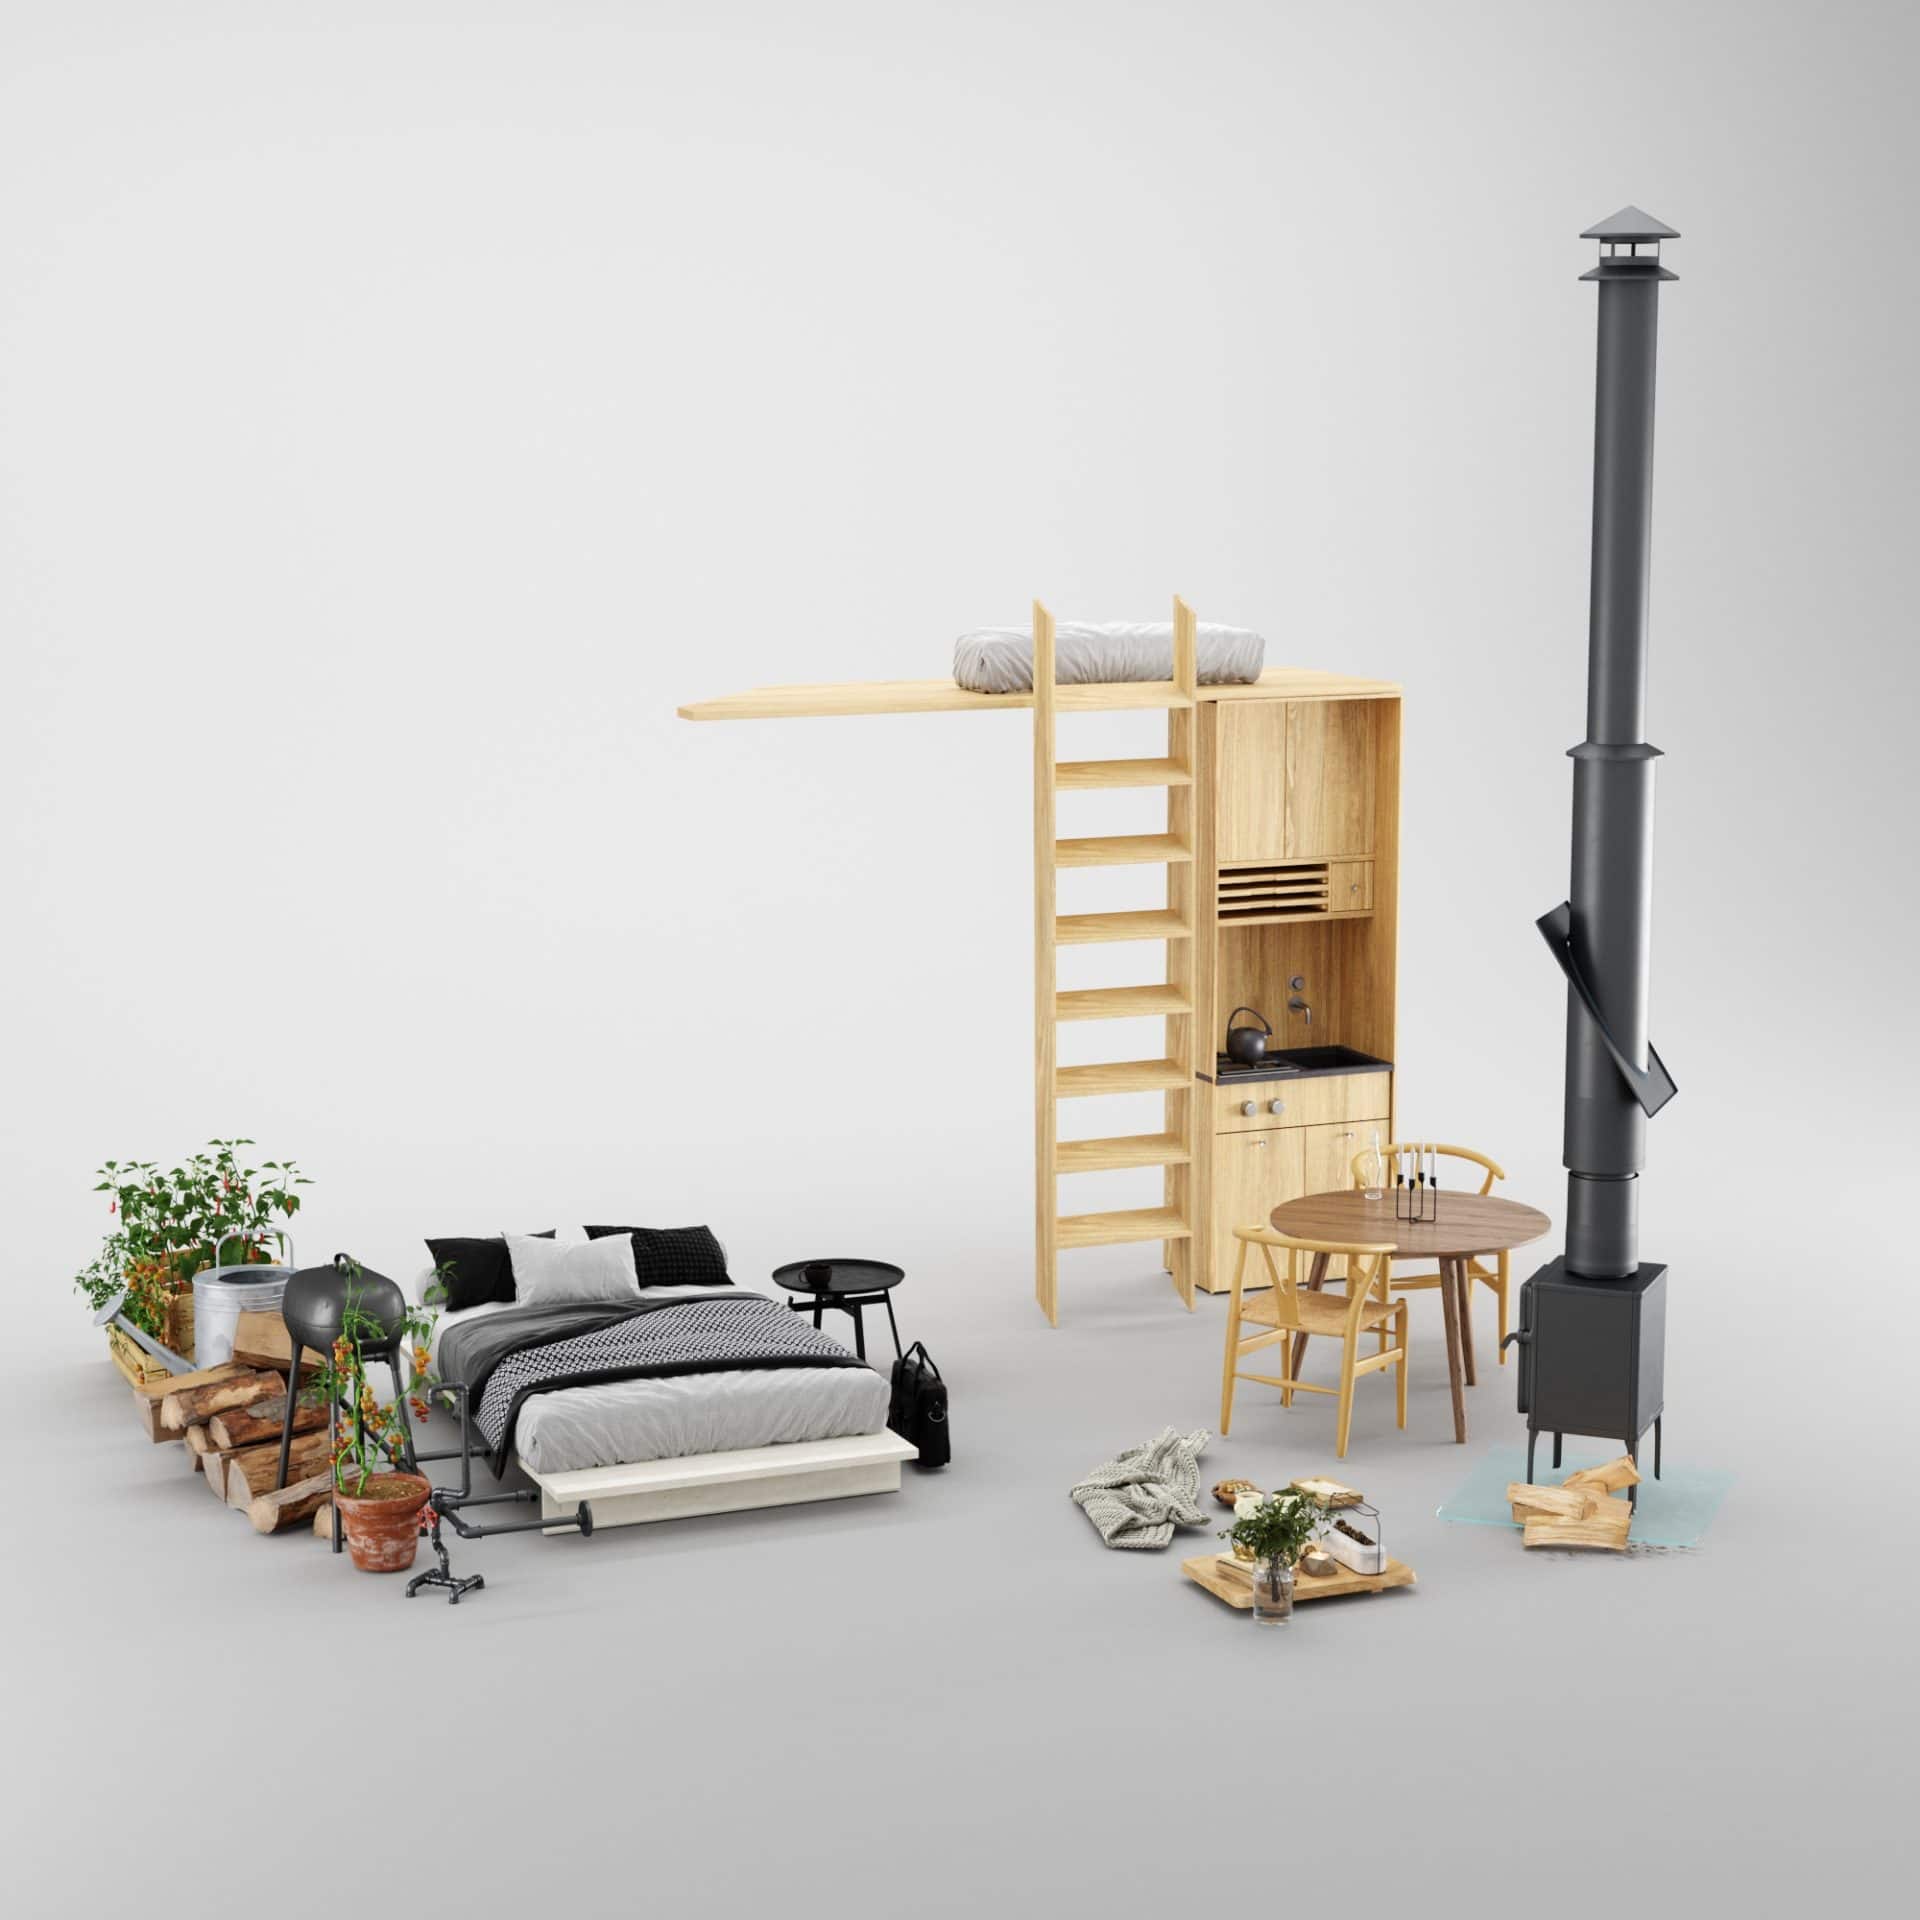
Here are other models used in the scene.
SCATTERING
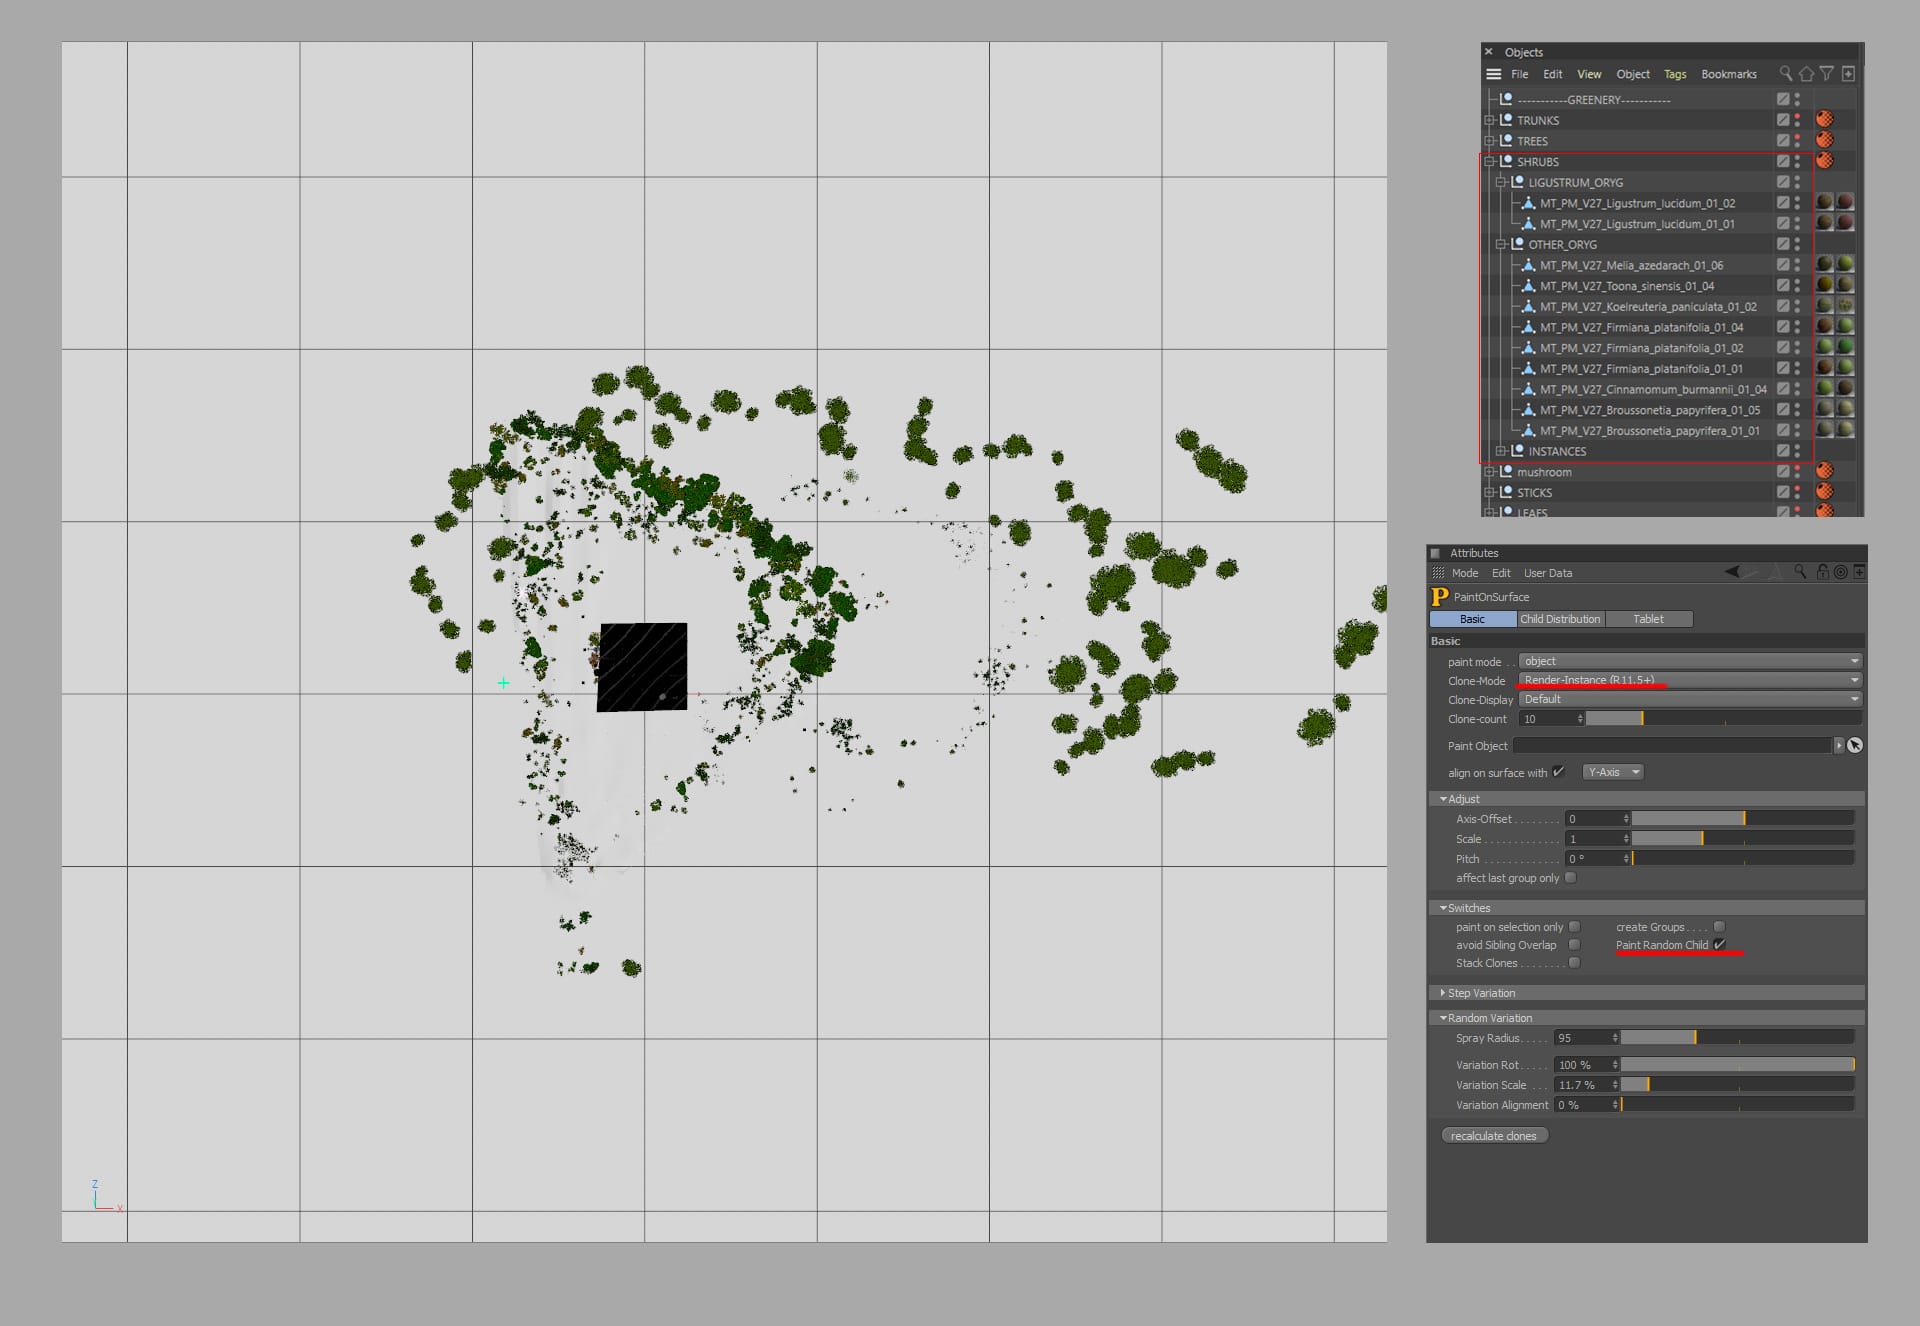
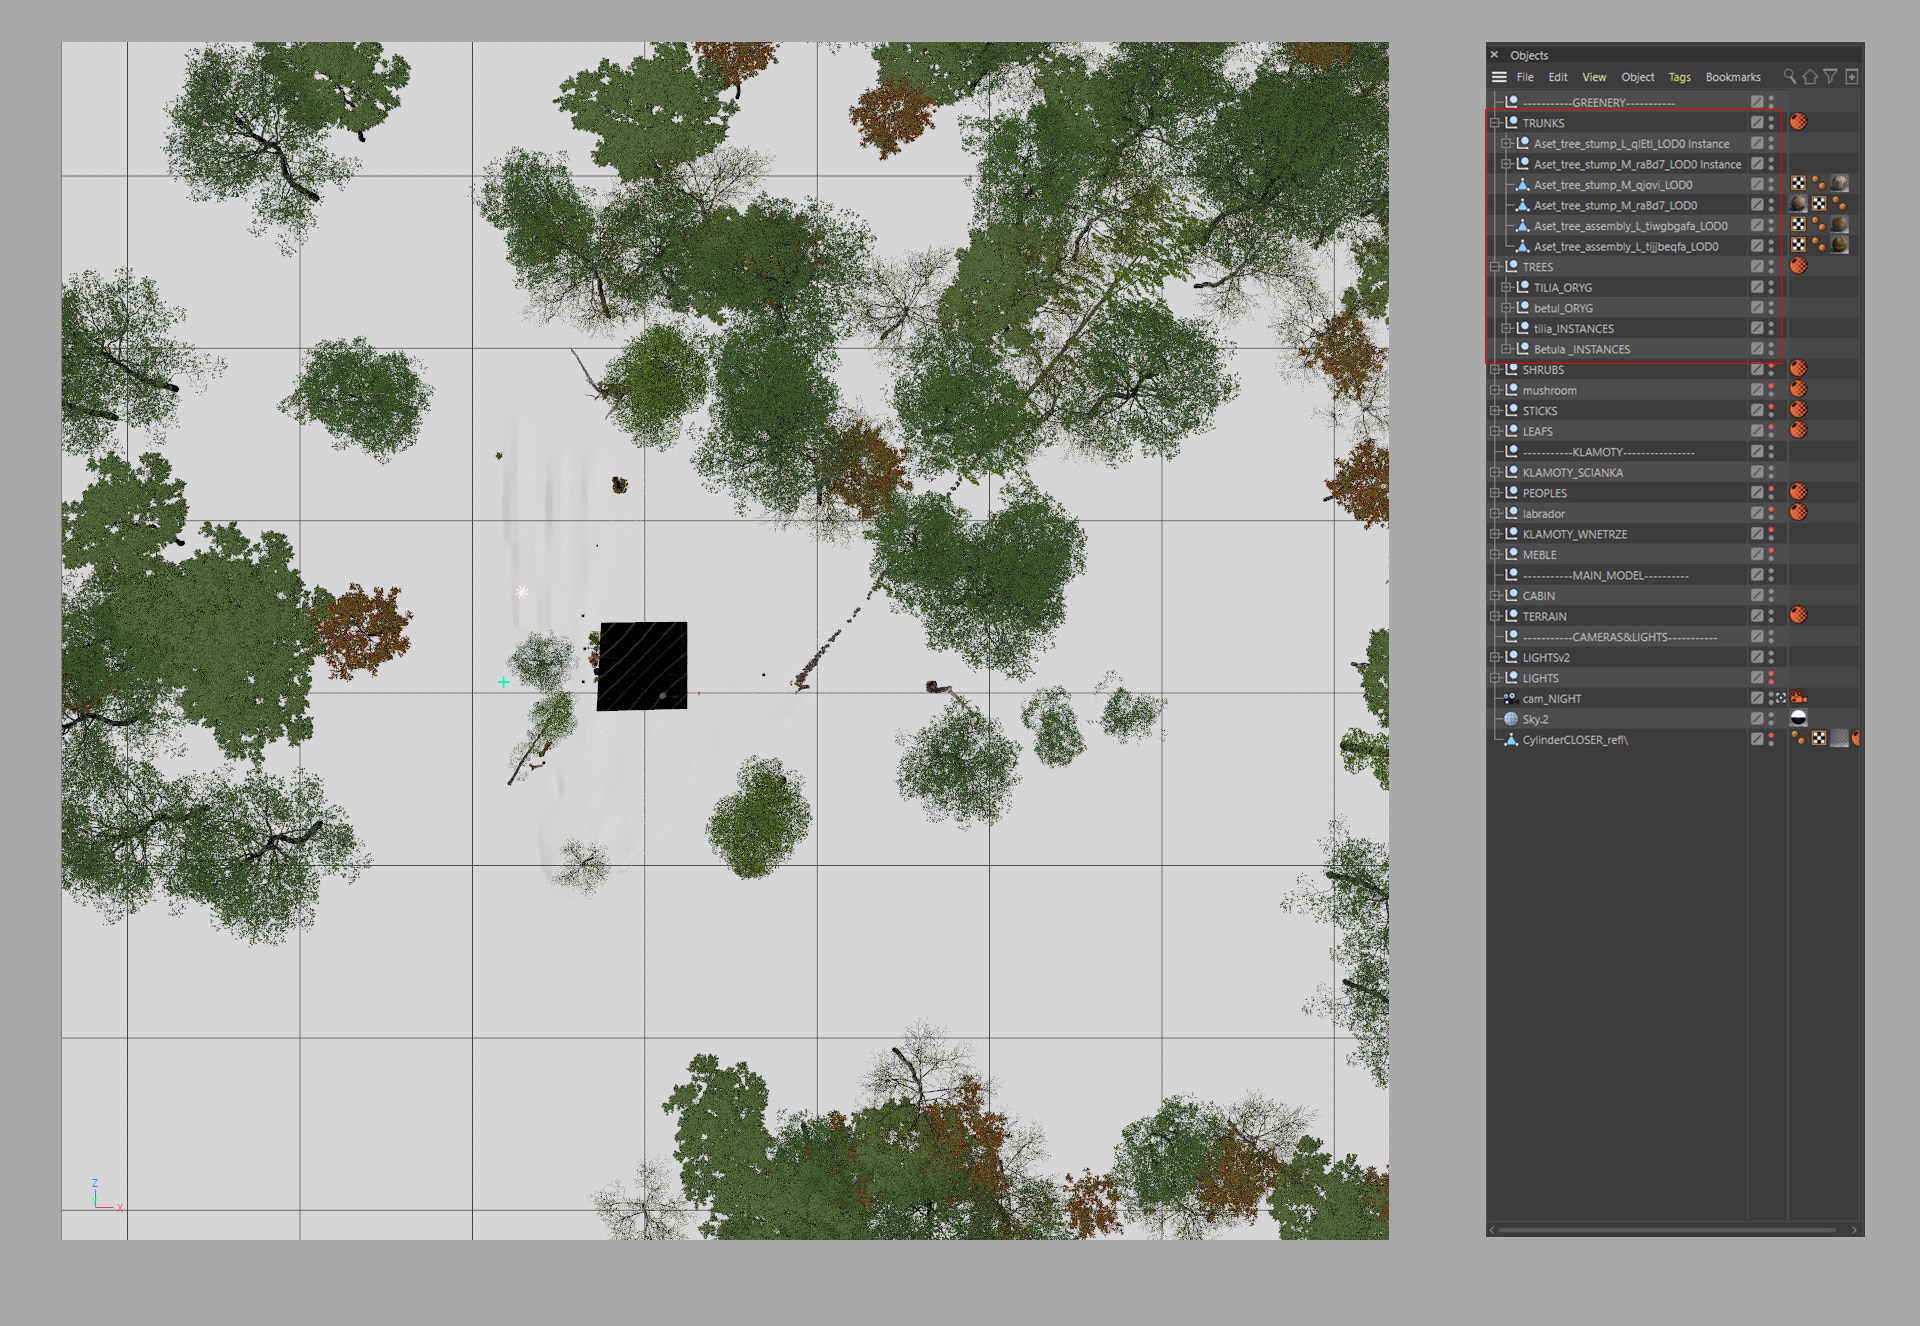
The distribution of the objects changes from image to image. Some items, such as trees, shrubs, and branches, have been painted with the Paint on Surface plug-in.
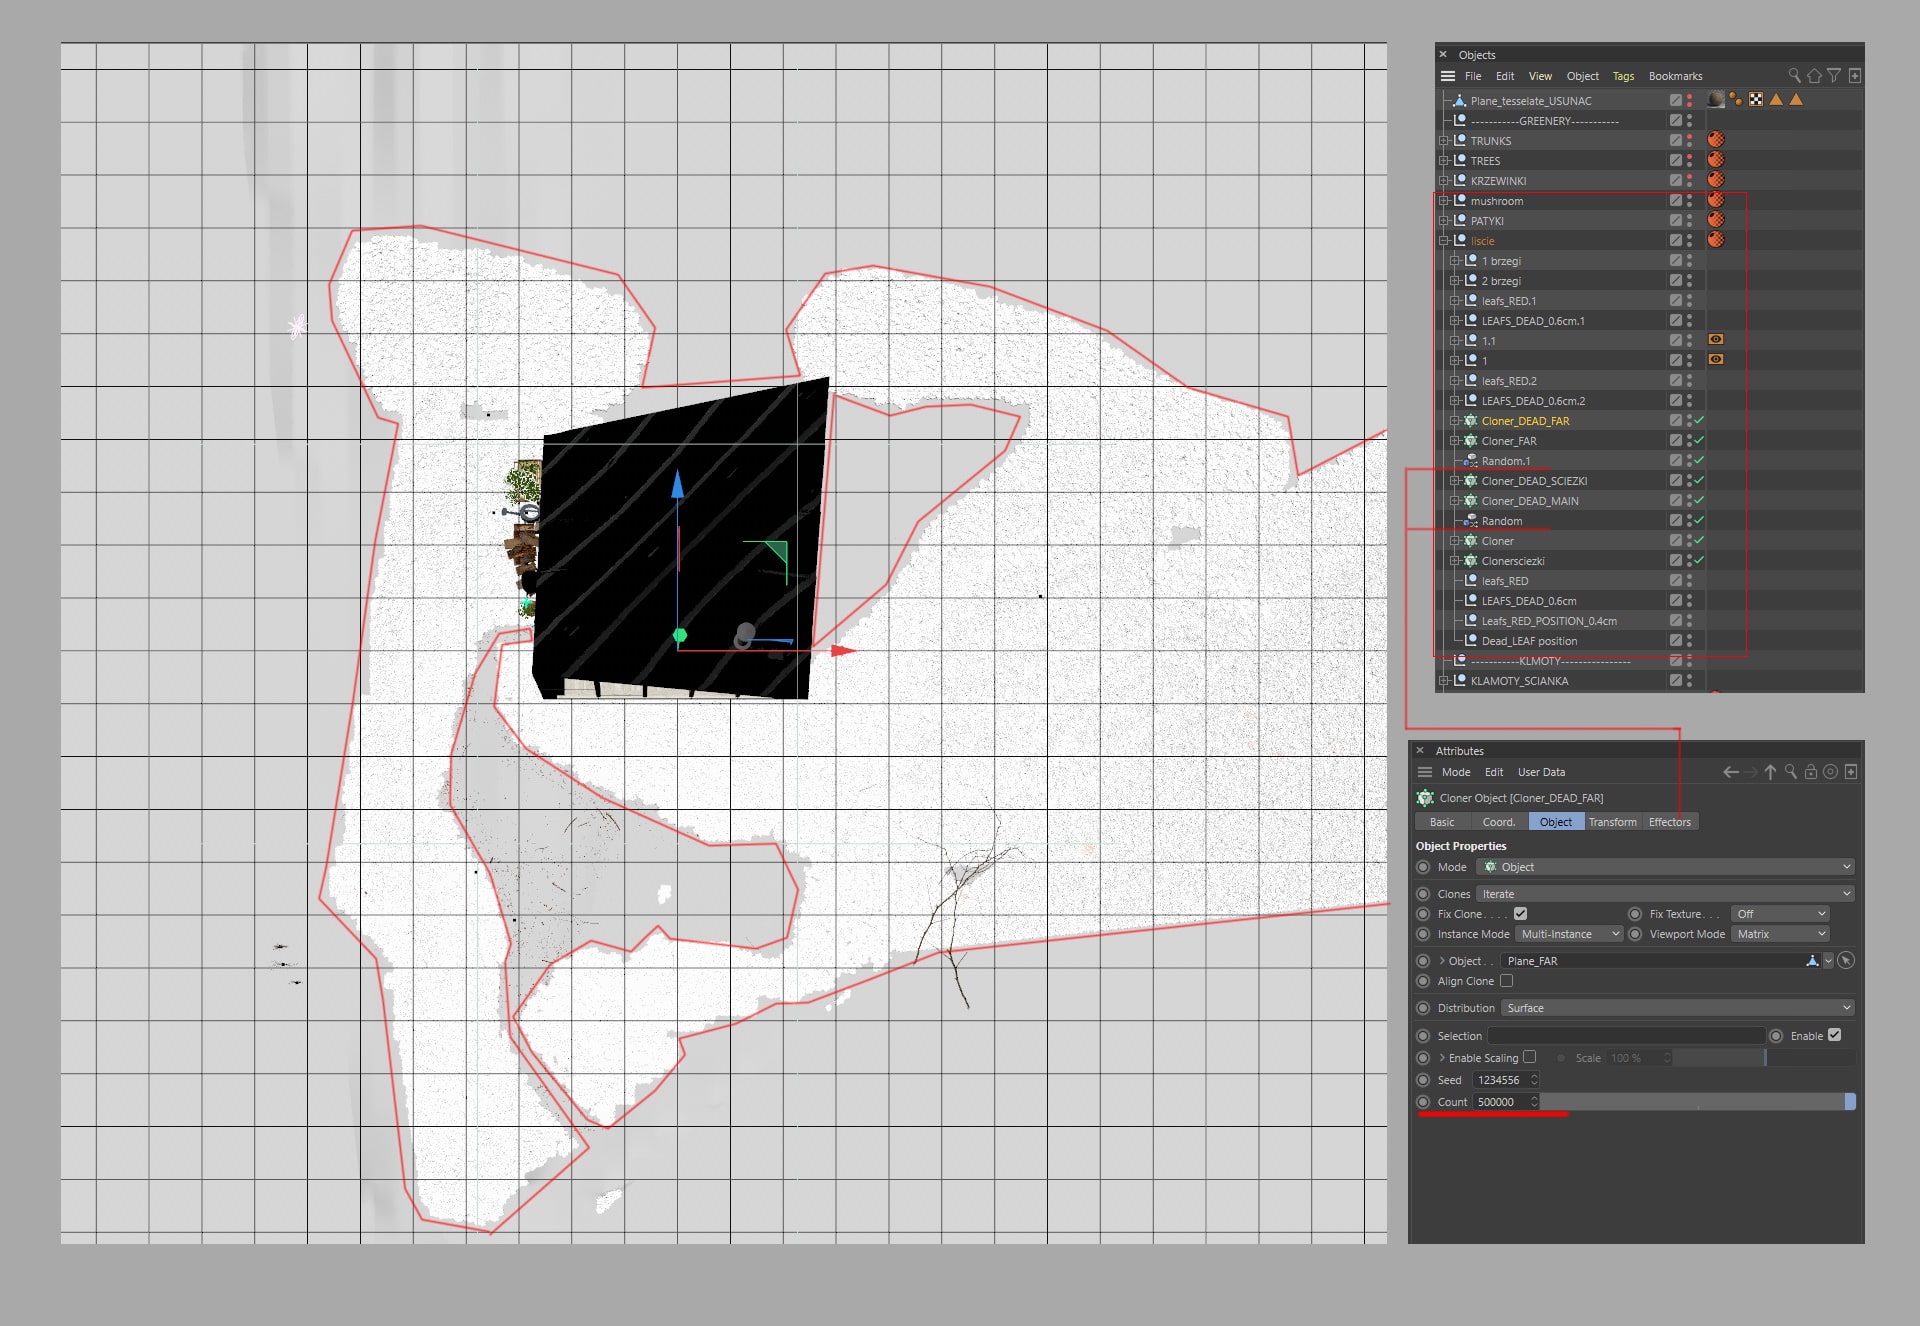
For the leaves’ distribution, I used a tool built into Cinema – “cloner” with the “random” modifier.
For arranging the wood, I used simulation with C4D dynamics.
MATERIALS
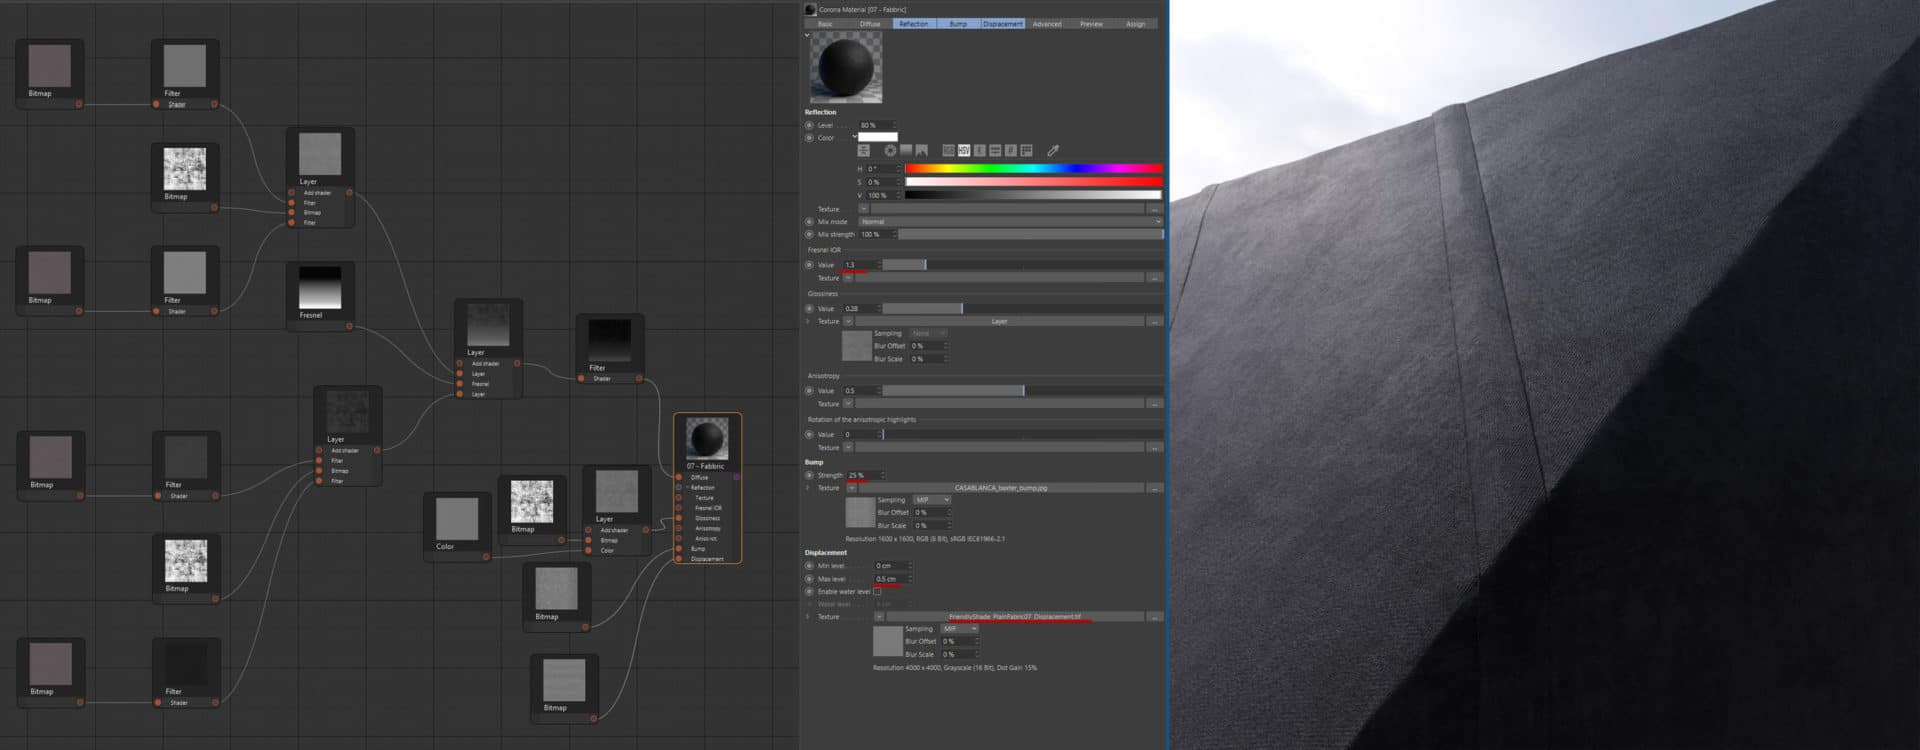
The most advanced material in the scene is the shader of the canvas covering the cabin walls. The most essential components of the material are the glossiness channel giving the impression of erosion from the surrounding, and the displacement channel.
I used the Friendly shade texture here.
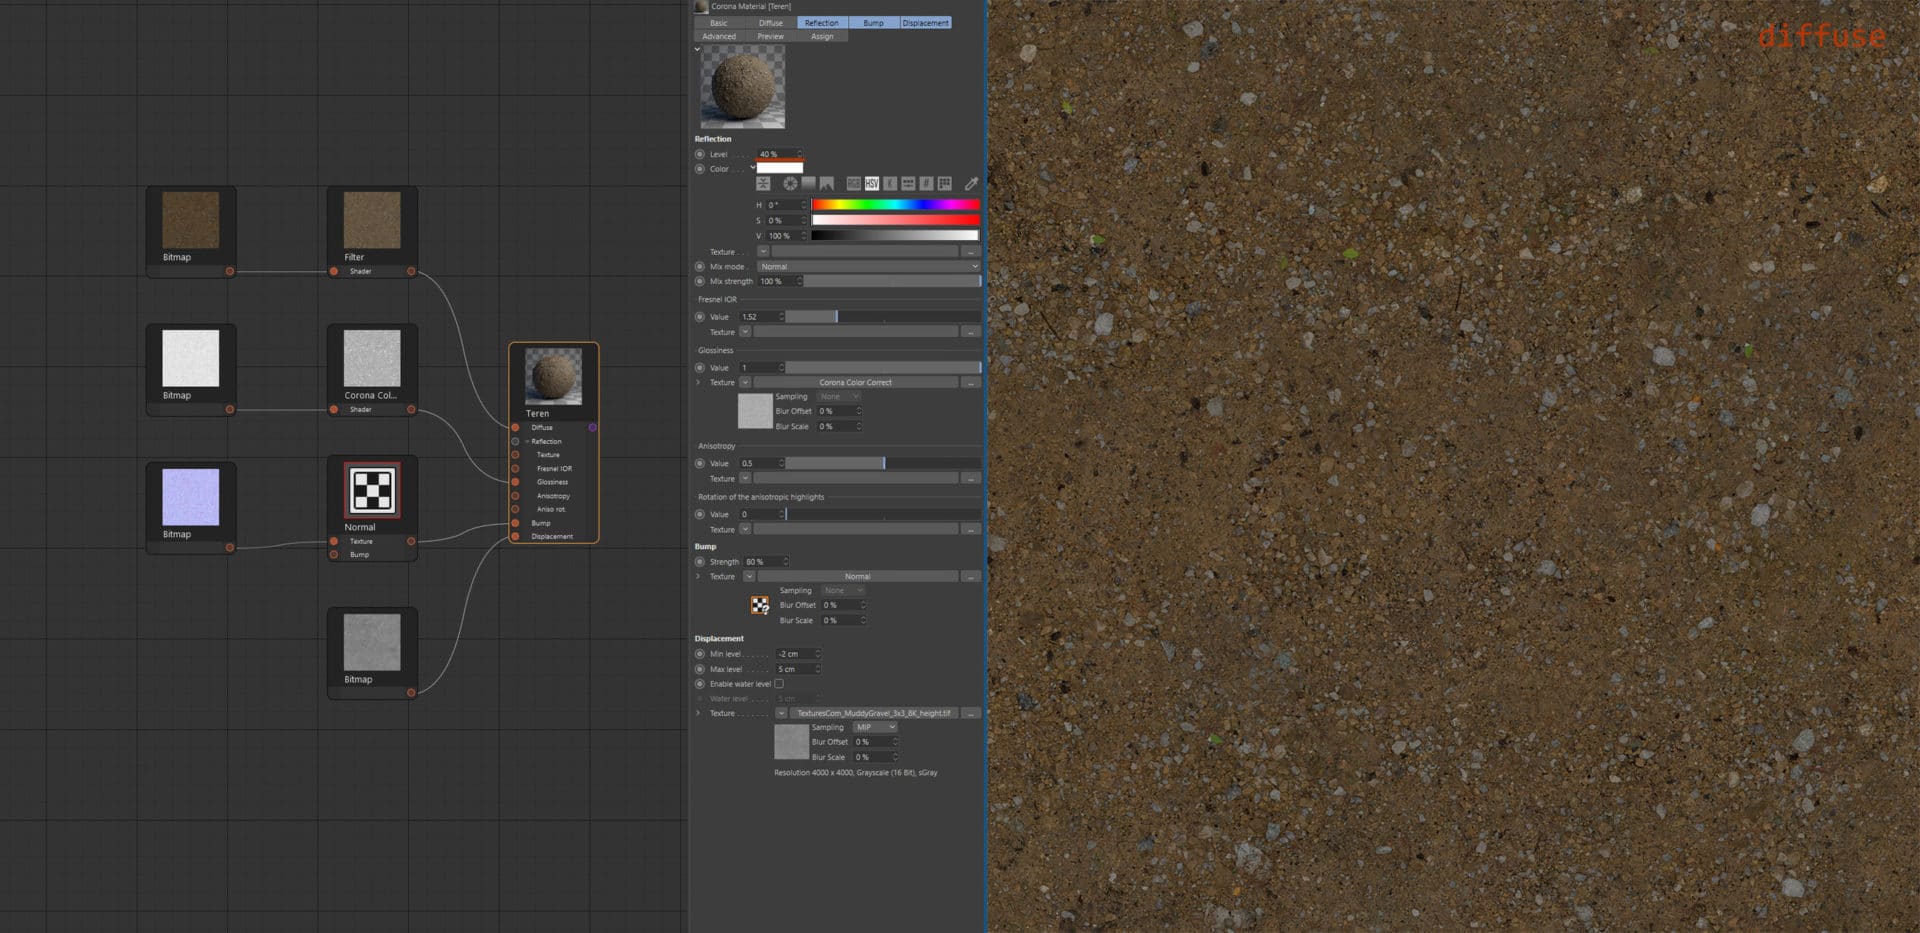
The material of terrain is made from a set of scanned textures from textures.com. Which, in my opinion, are the best scans on the market at the moment.
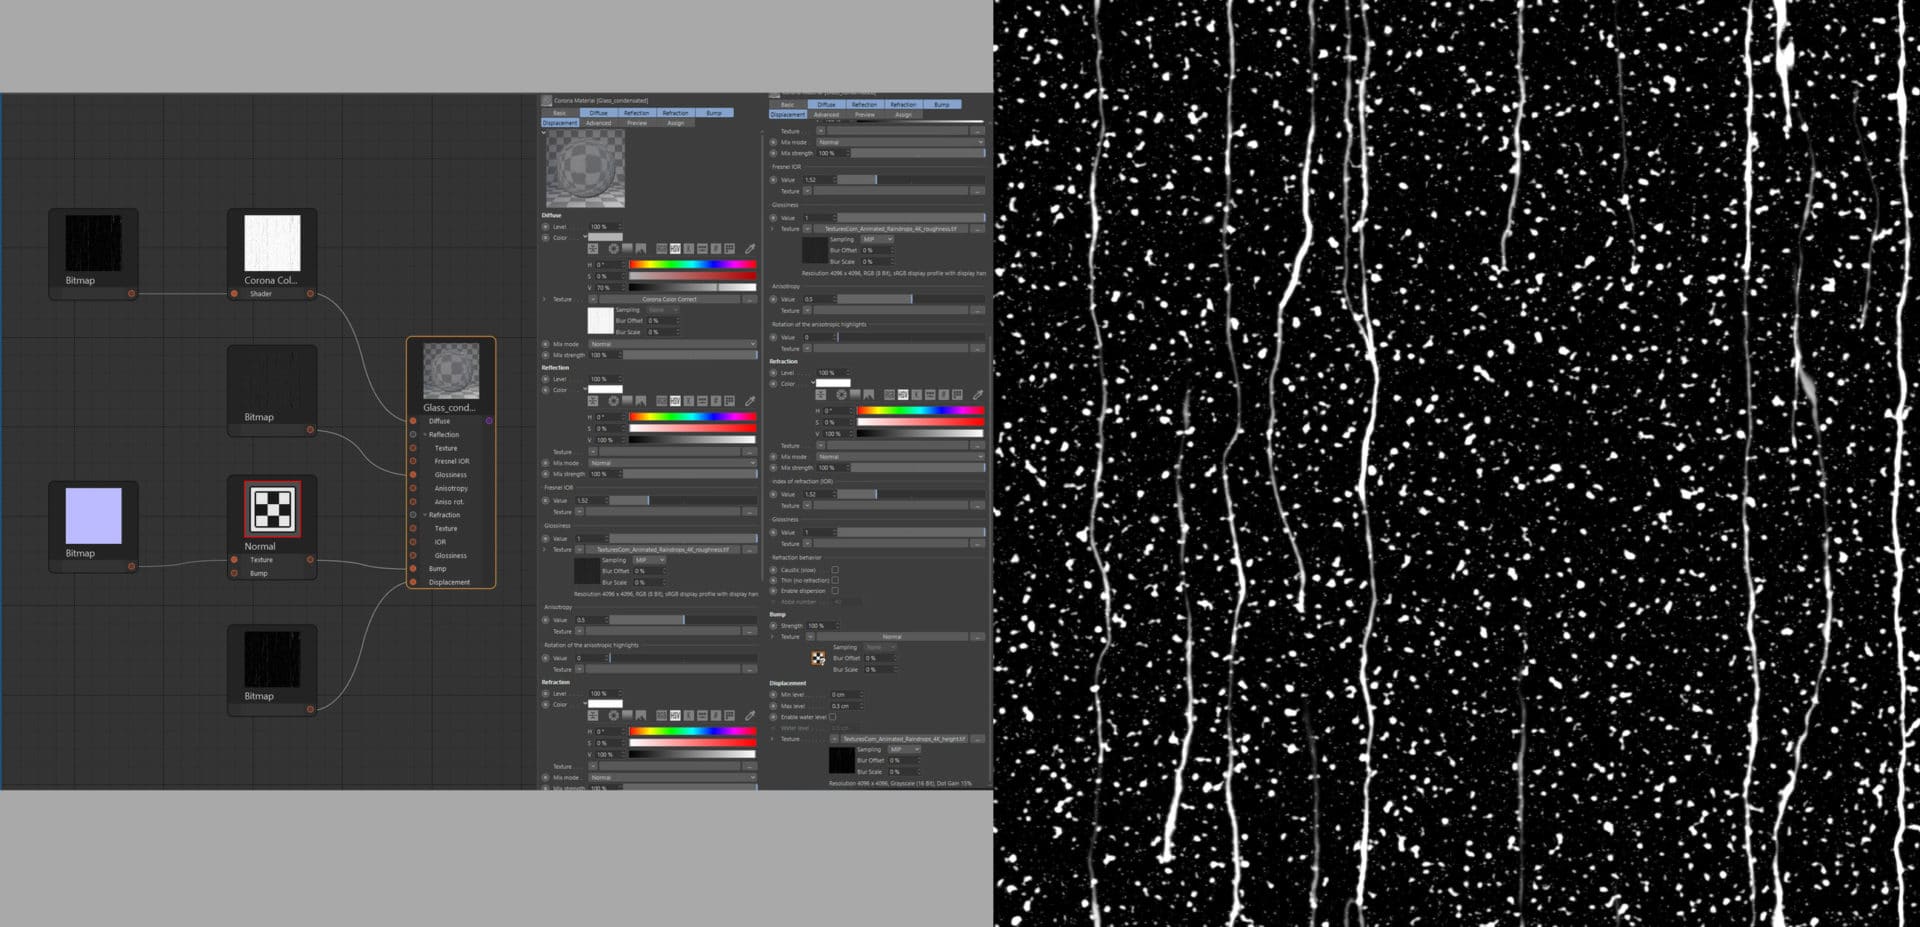
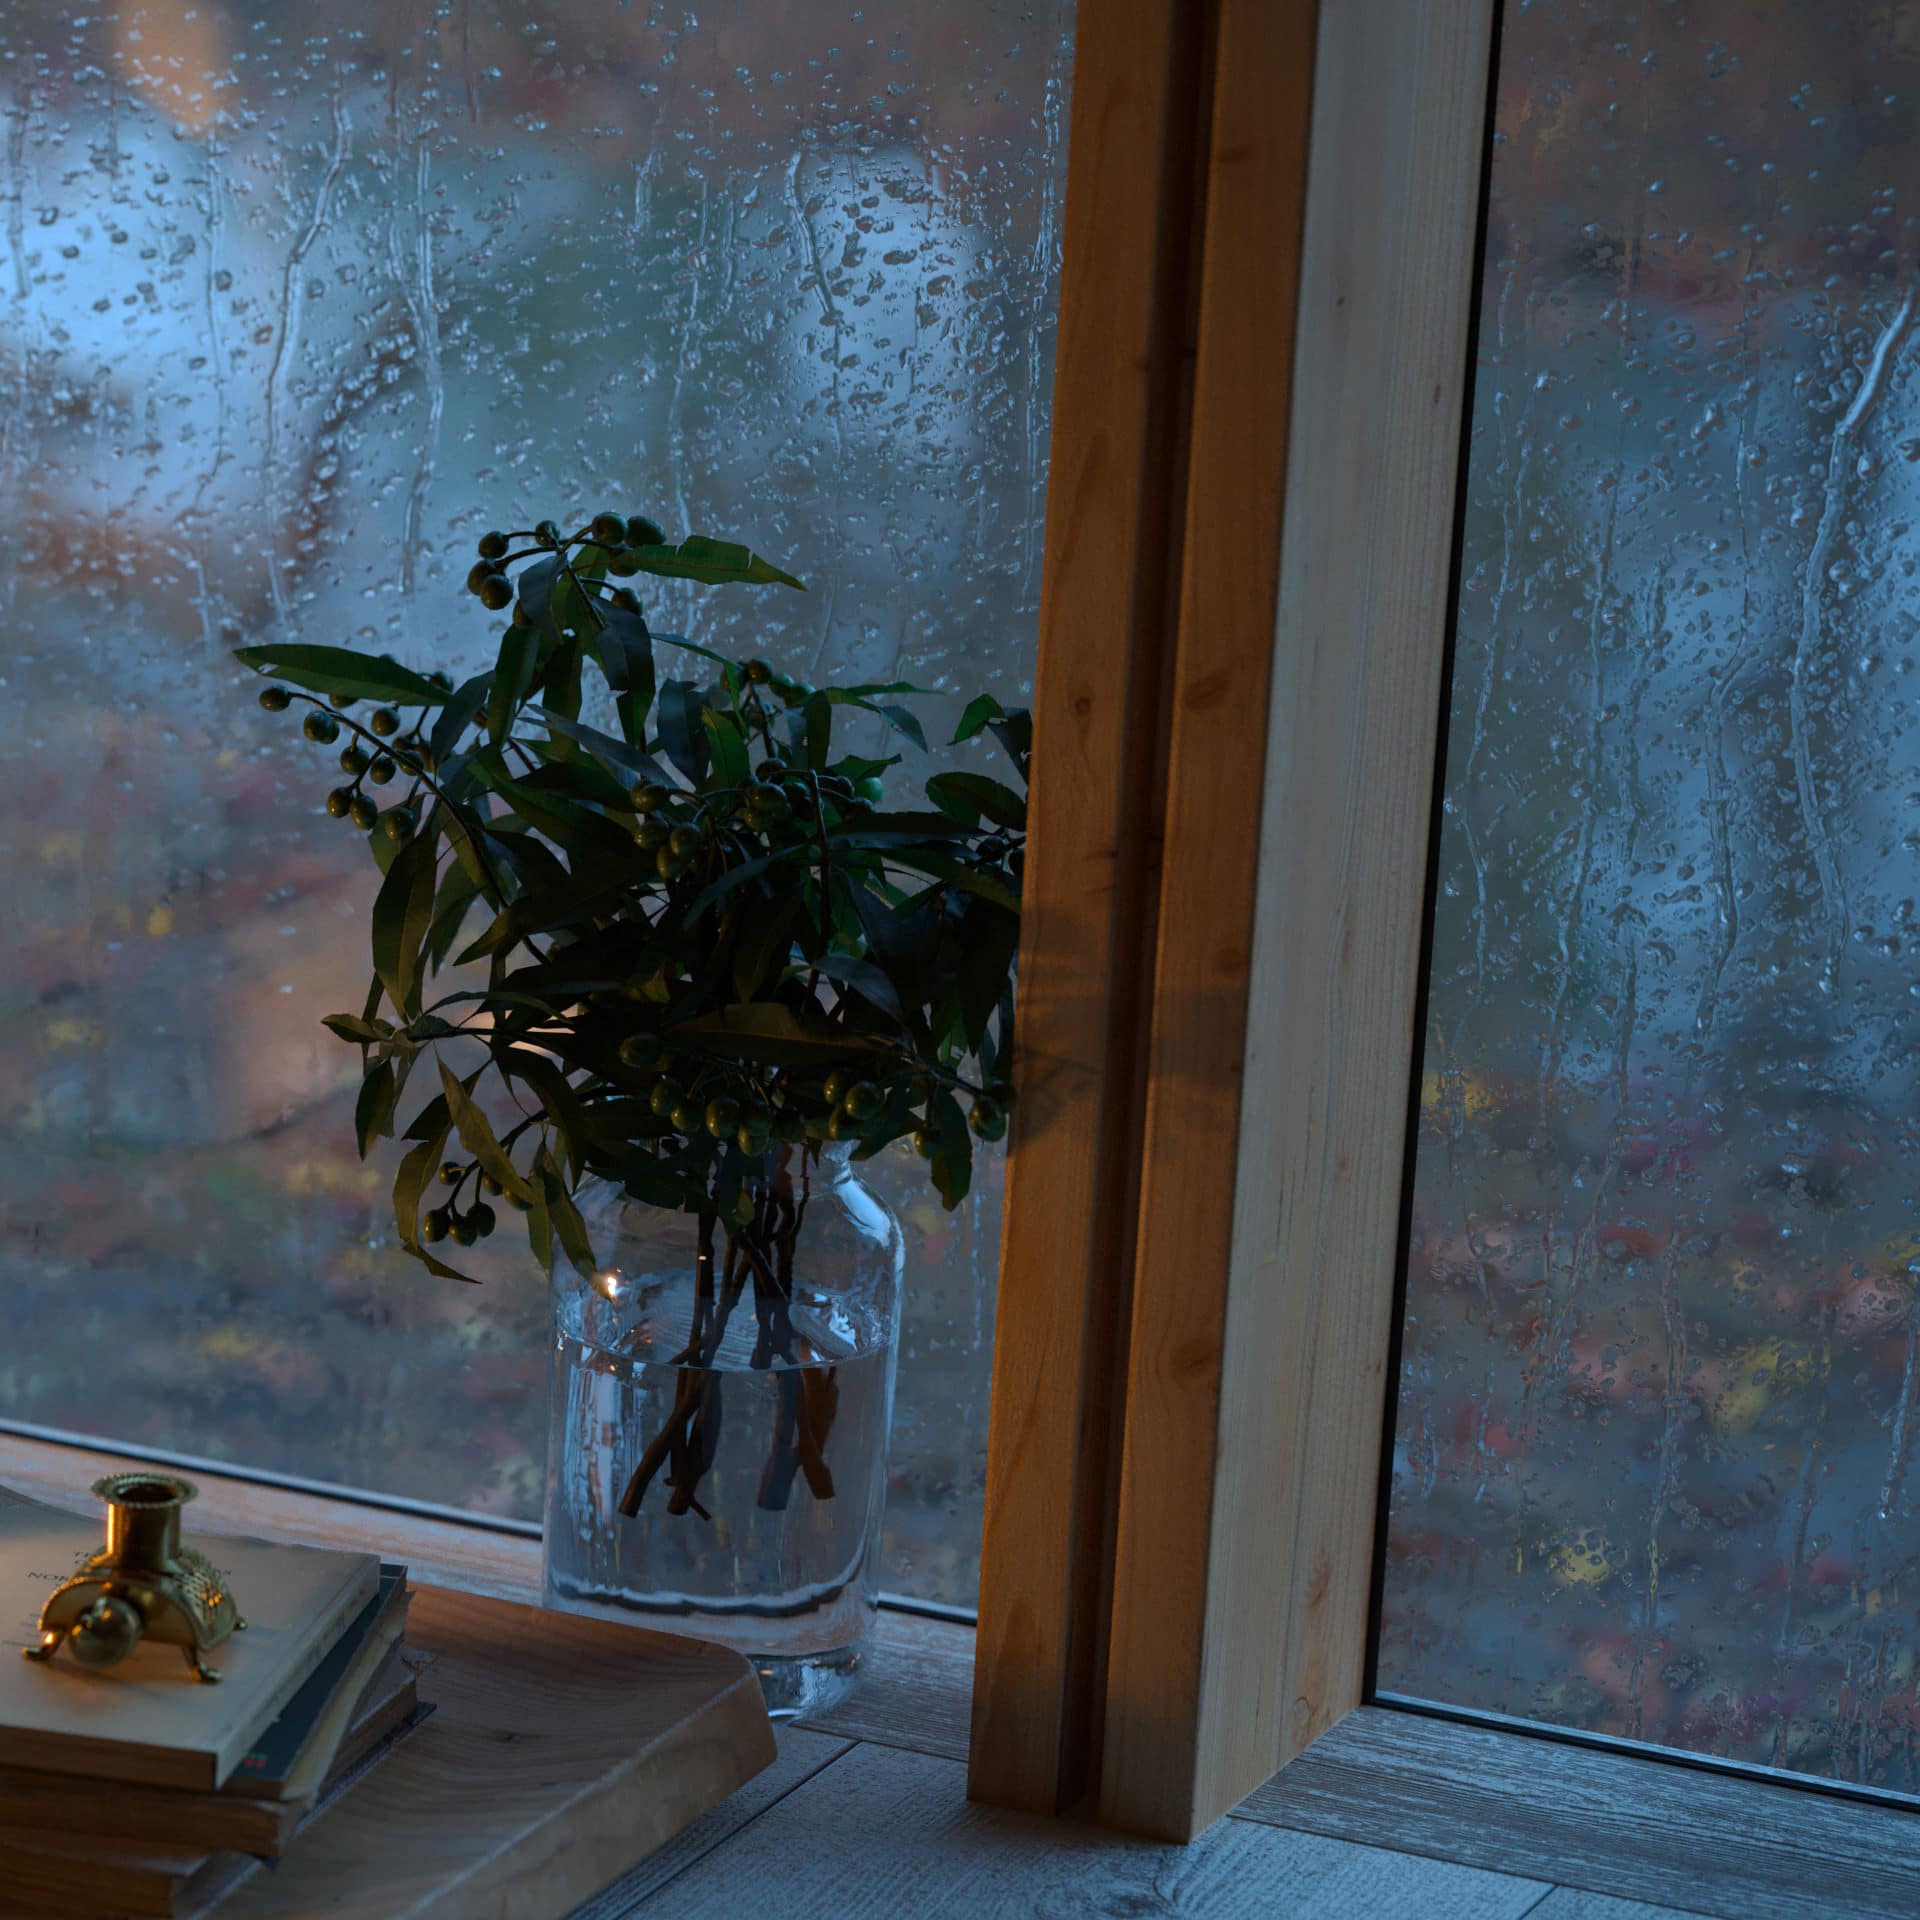
Raindrops on the window material also come from textures.com.
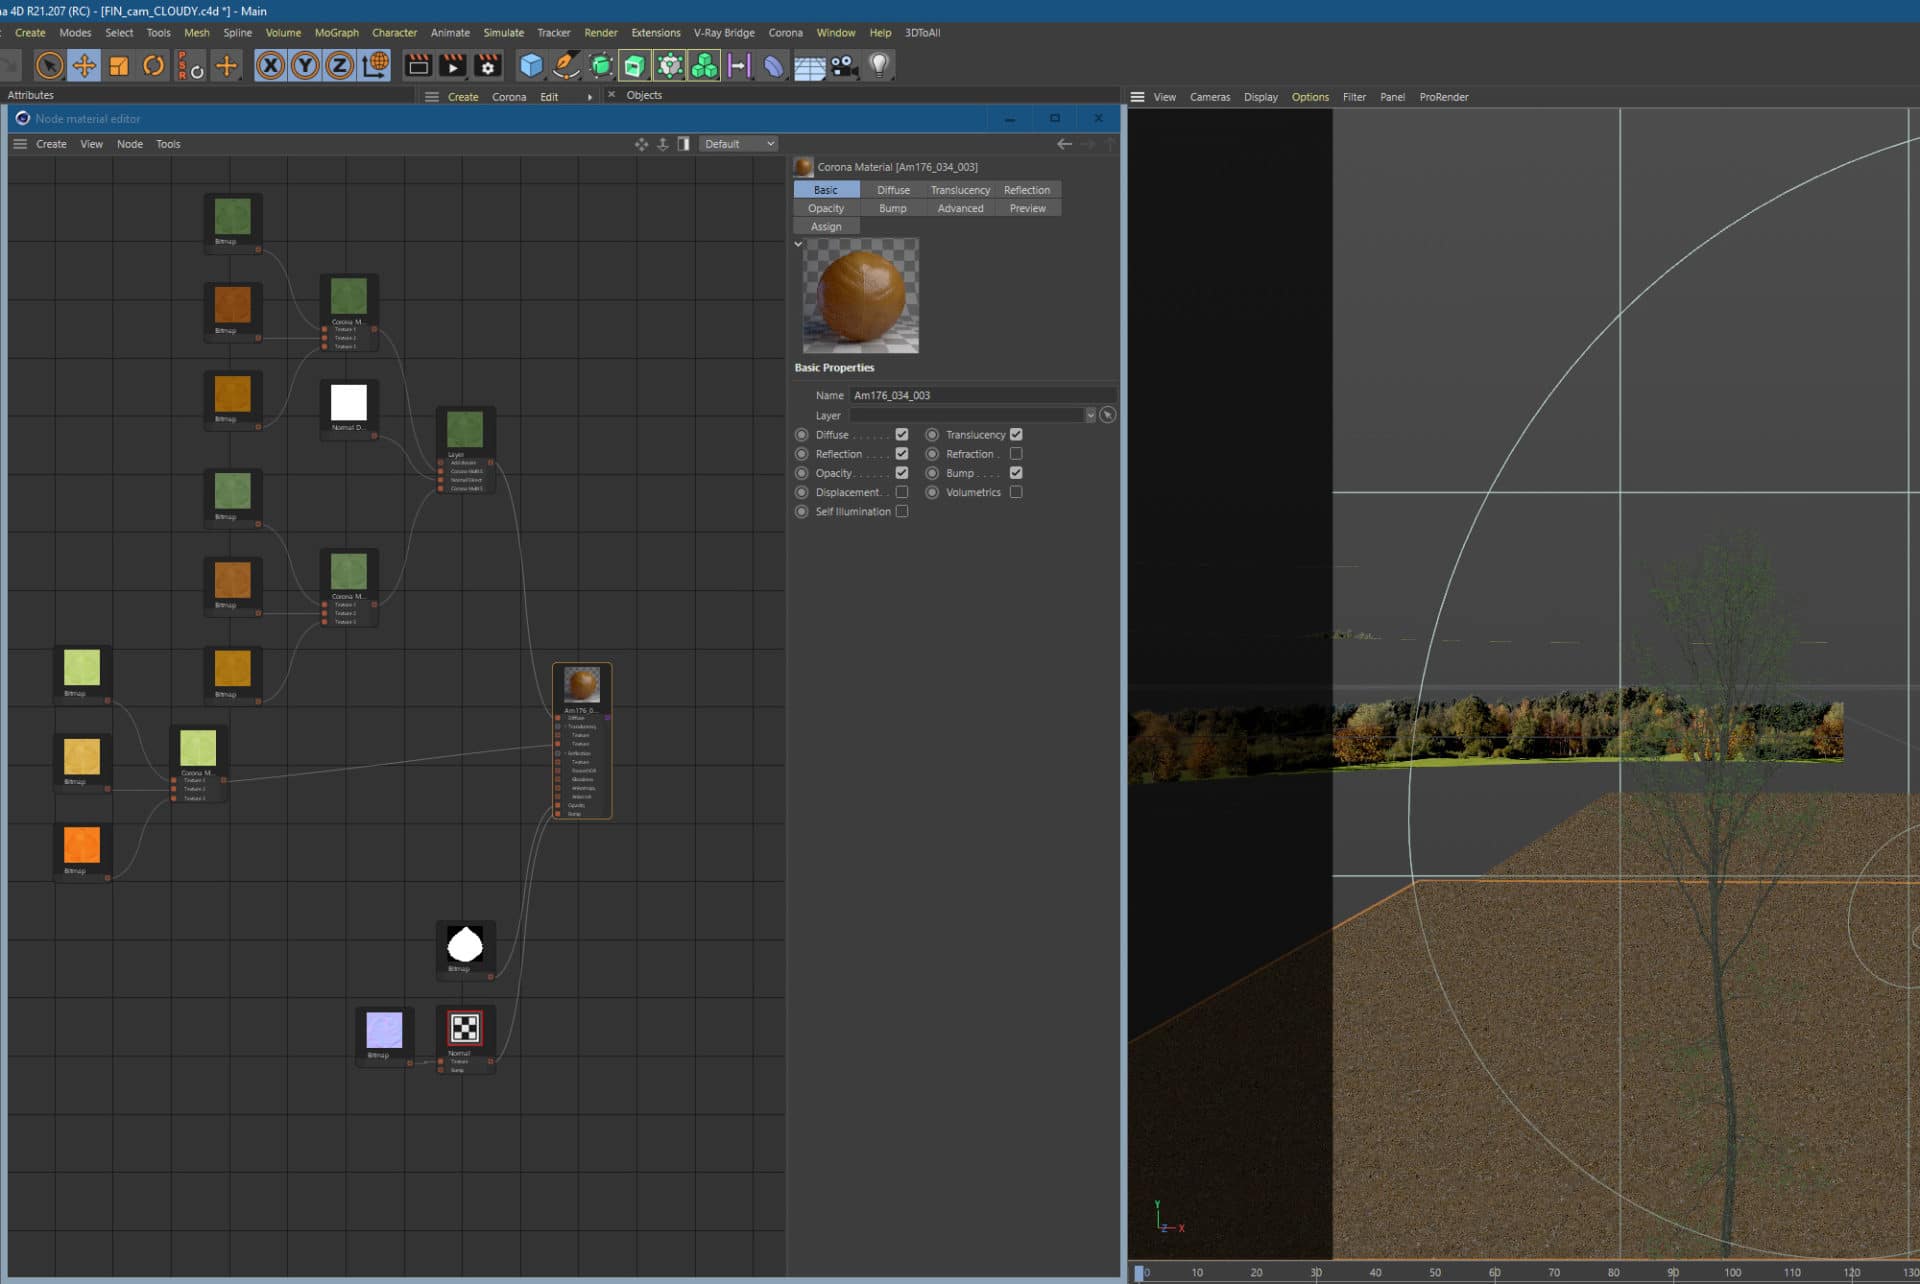
I’ve adopted some of the tree shaders to fit the fall season. The variety of the leaves’ color was achieved by using modified bitmaps plugged into the Corona Multi Shader.
LIGHTING
Meeting the correct lighting with the well-constructed shaders is, in my opinion, the key to achieving a realistic effect. In the A45 project, the skylight was created by HDR maps and the rendering engine’s rendering engine native lighting system. I used regular Corona Lights to illuminate the interior.
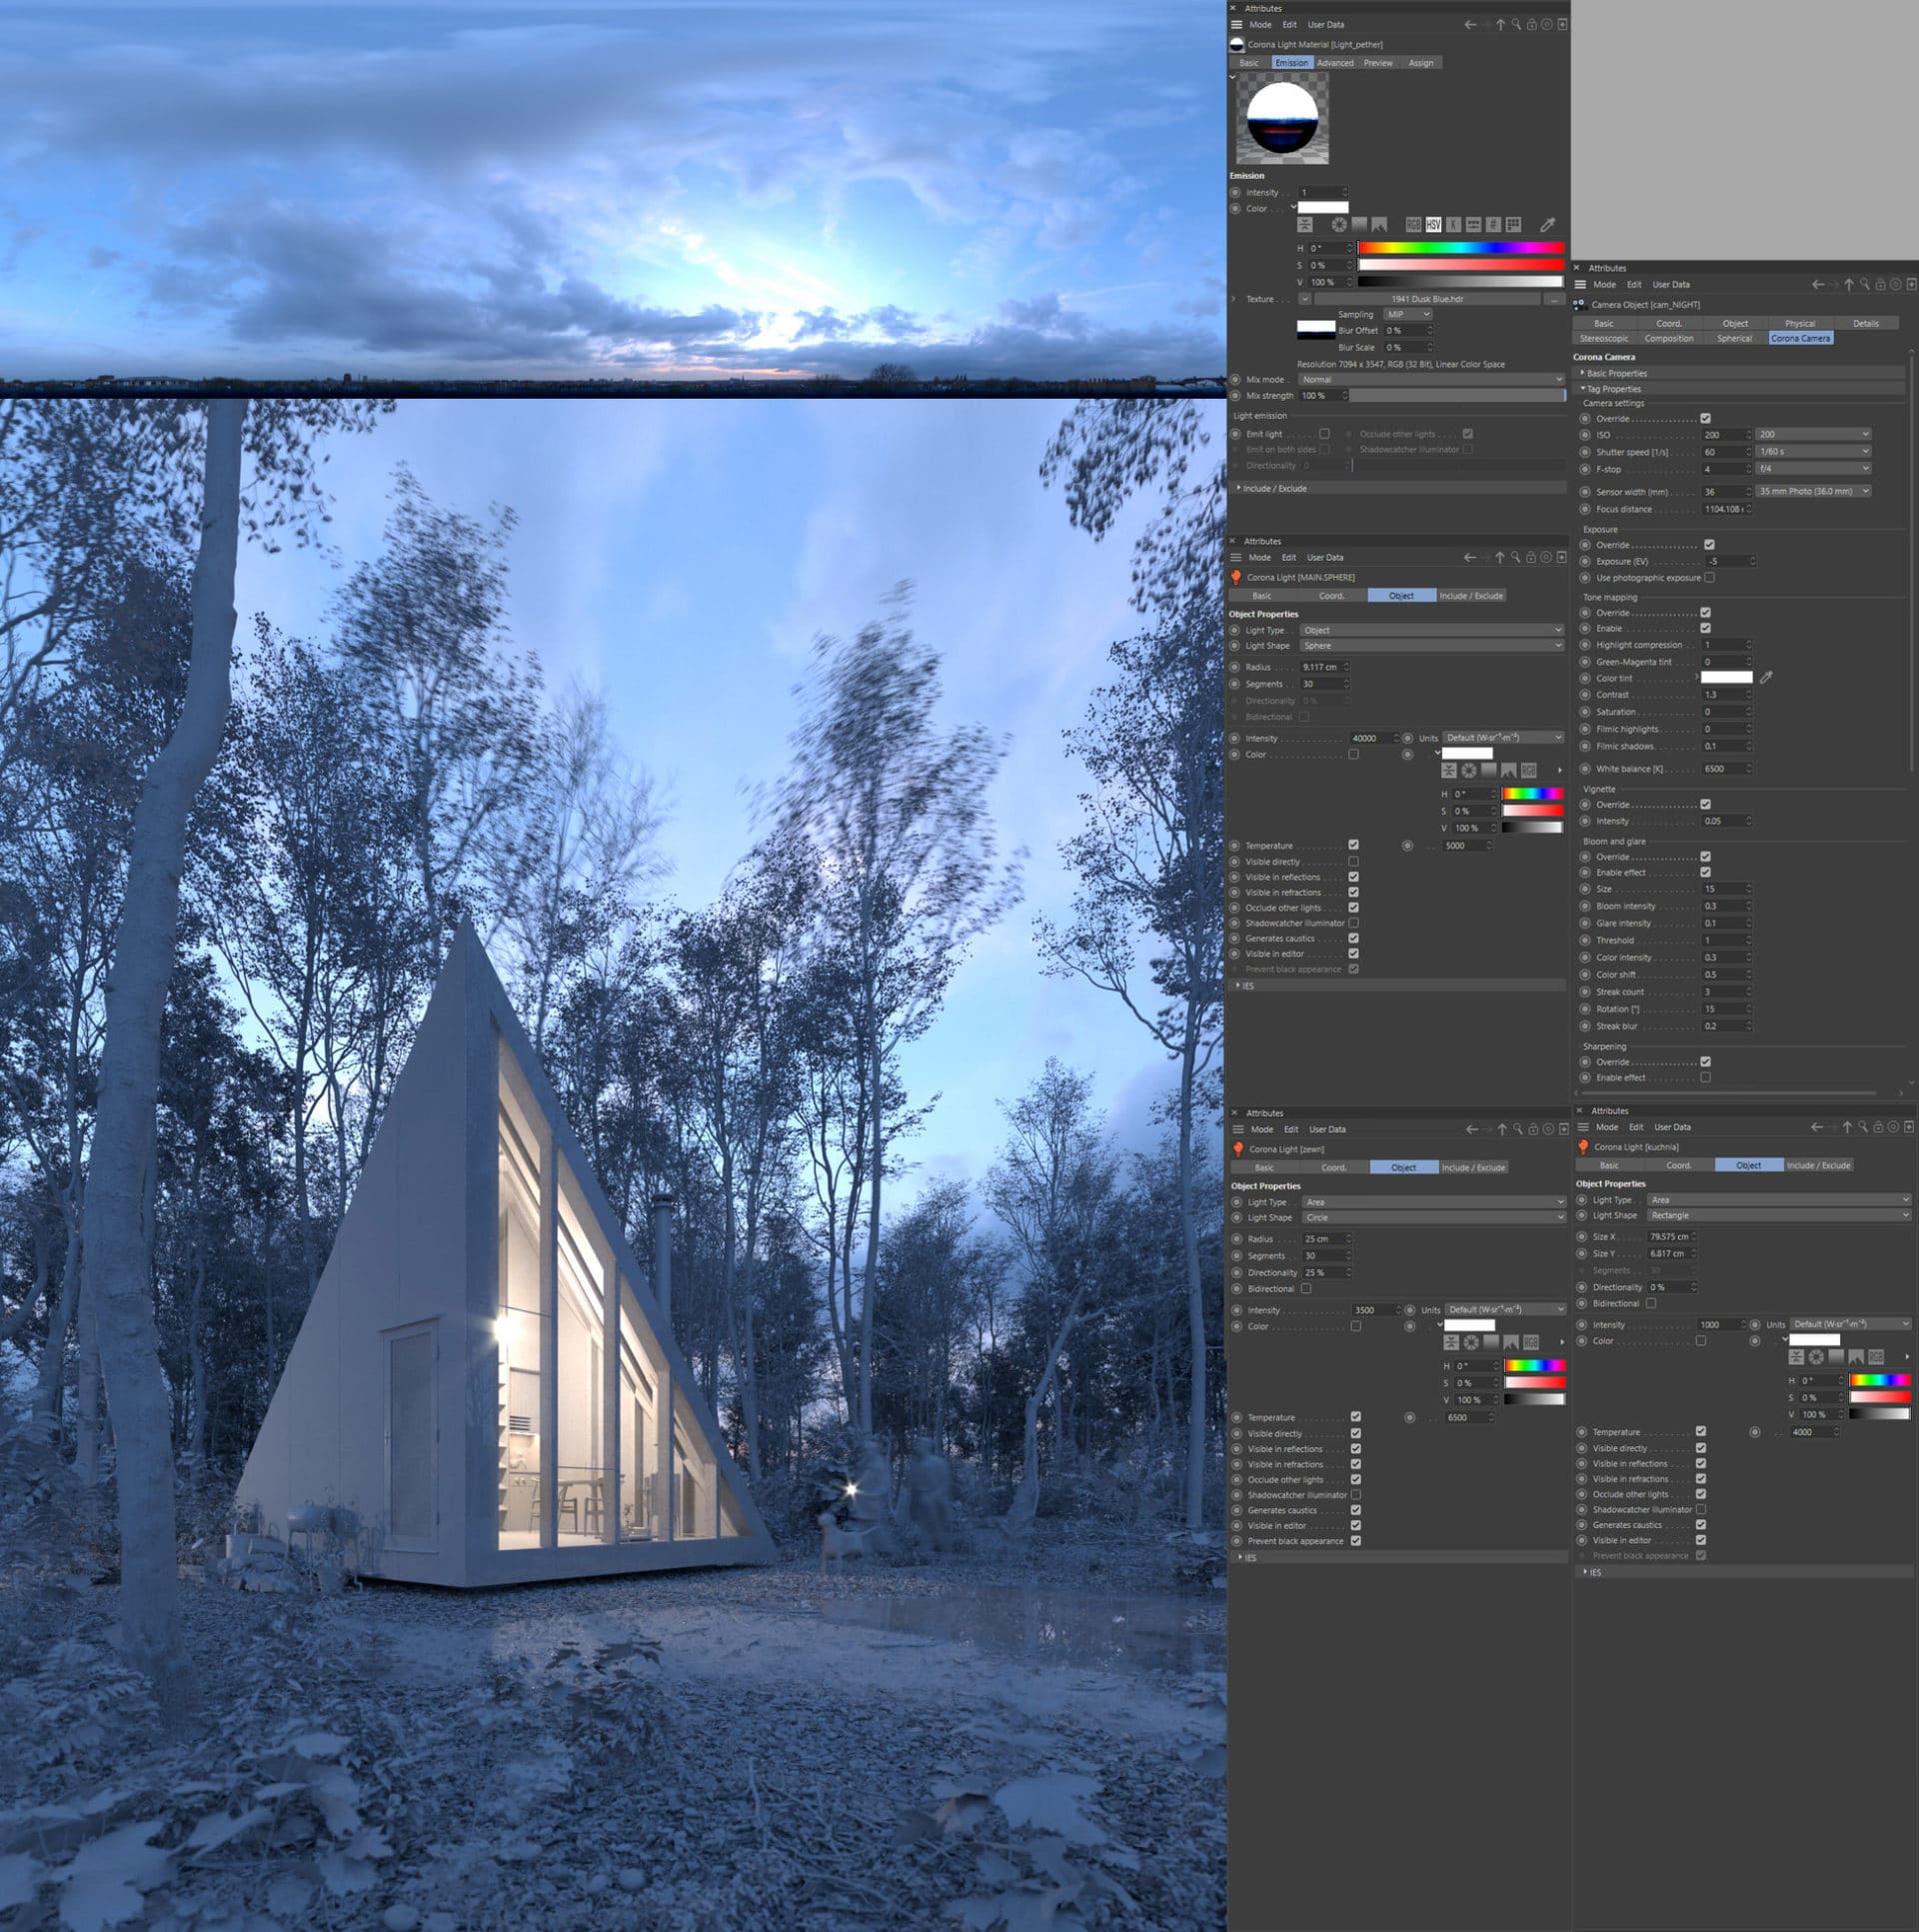
The night shot was taken using a 1941 Dusk Blue HDR map from Peter Guthrie from PG Skies. Additionally, I placed one of the Corona Light lights outside the building to illuminate the shot from the left with artificial light.
For the daytime shot, I used the map 1325 Sun Clouds. The interior lighting is the same as in the night shot.

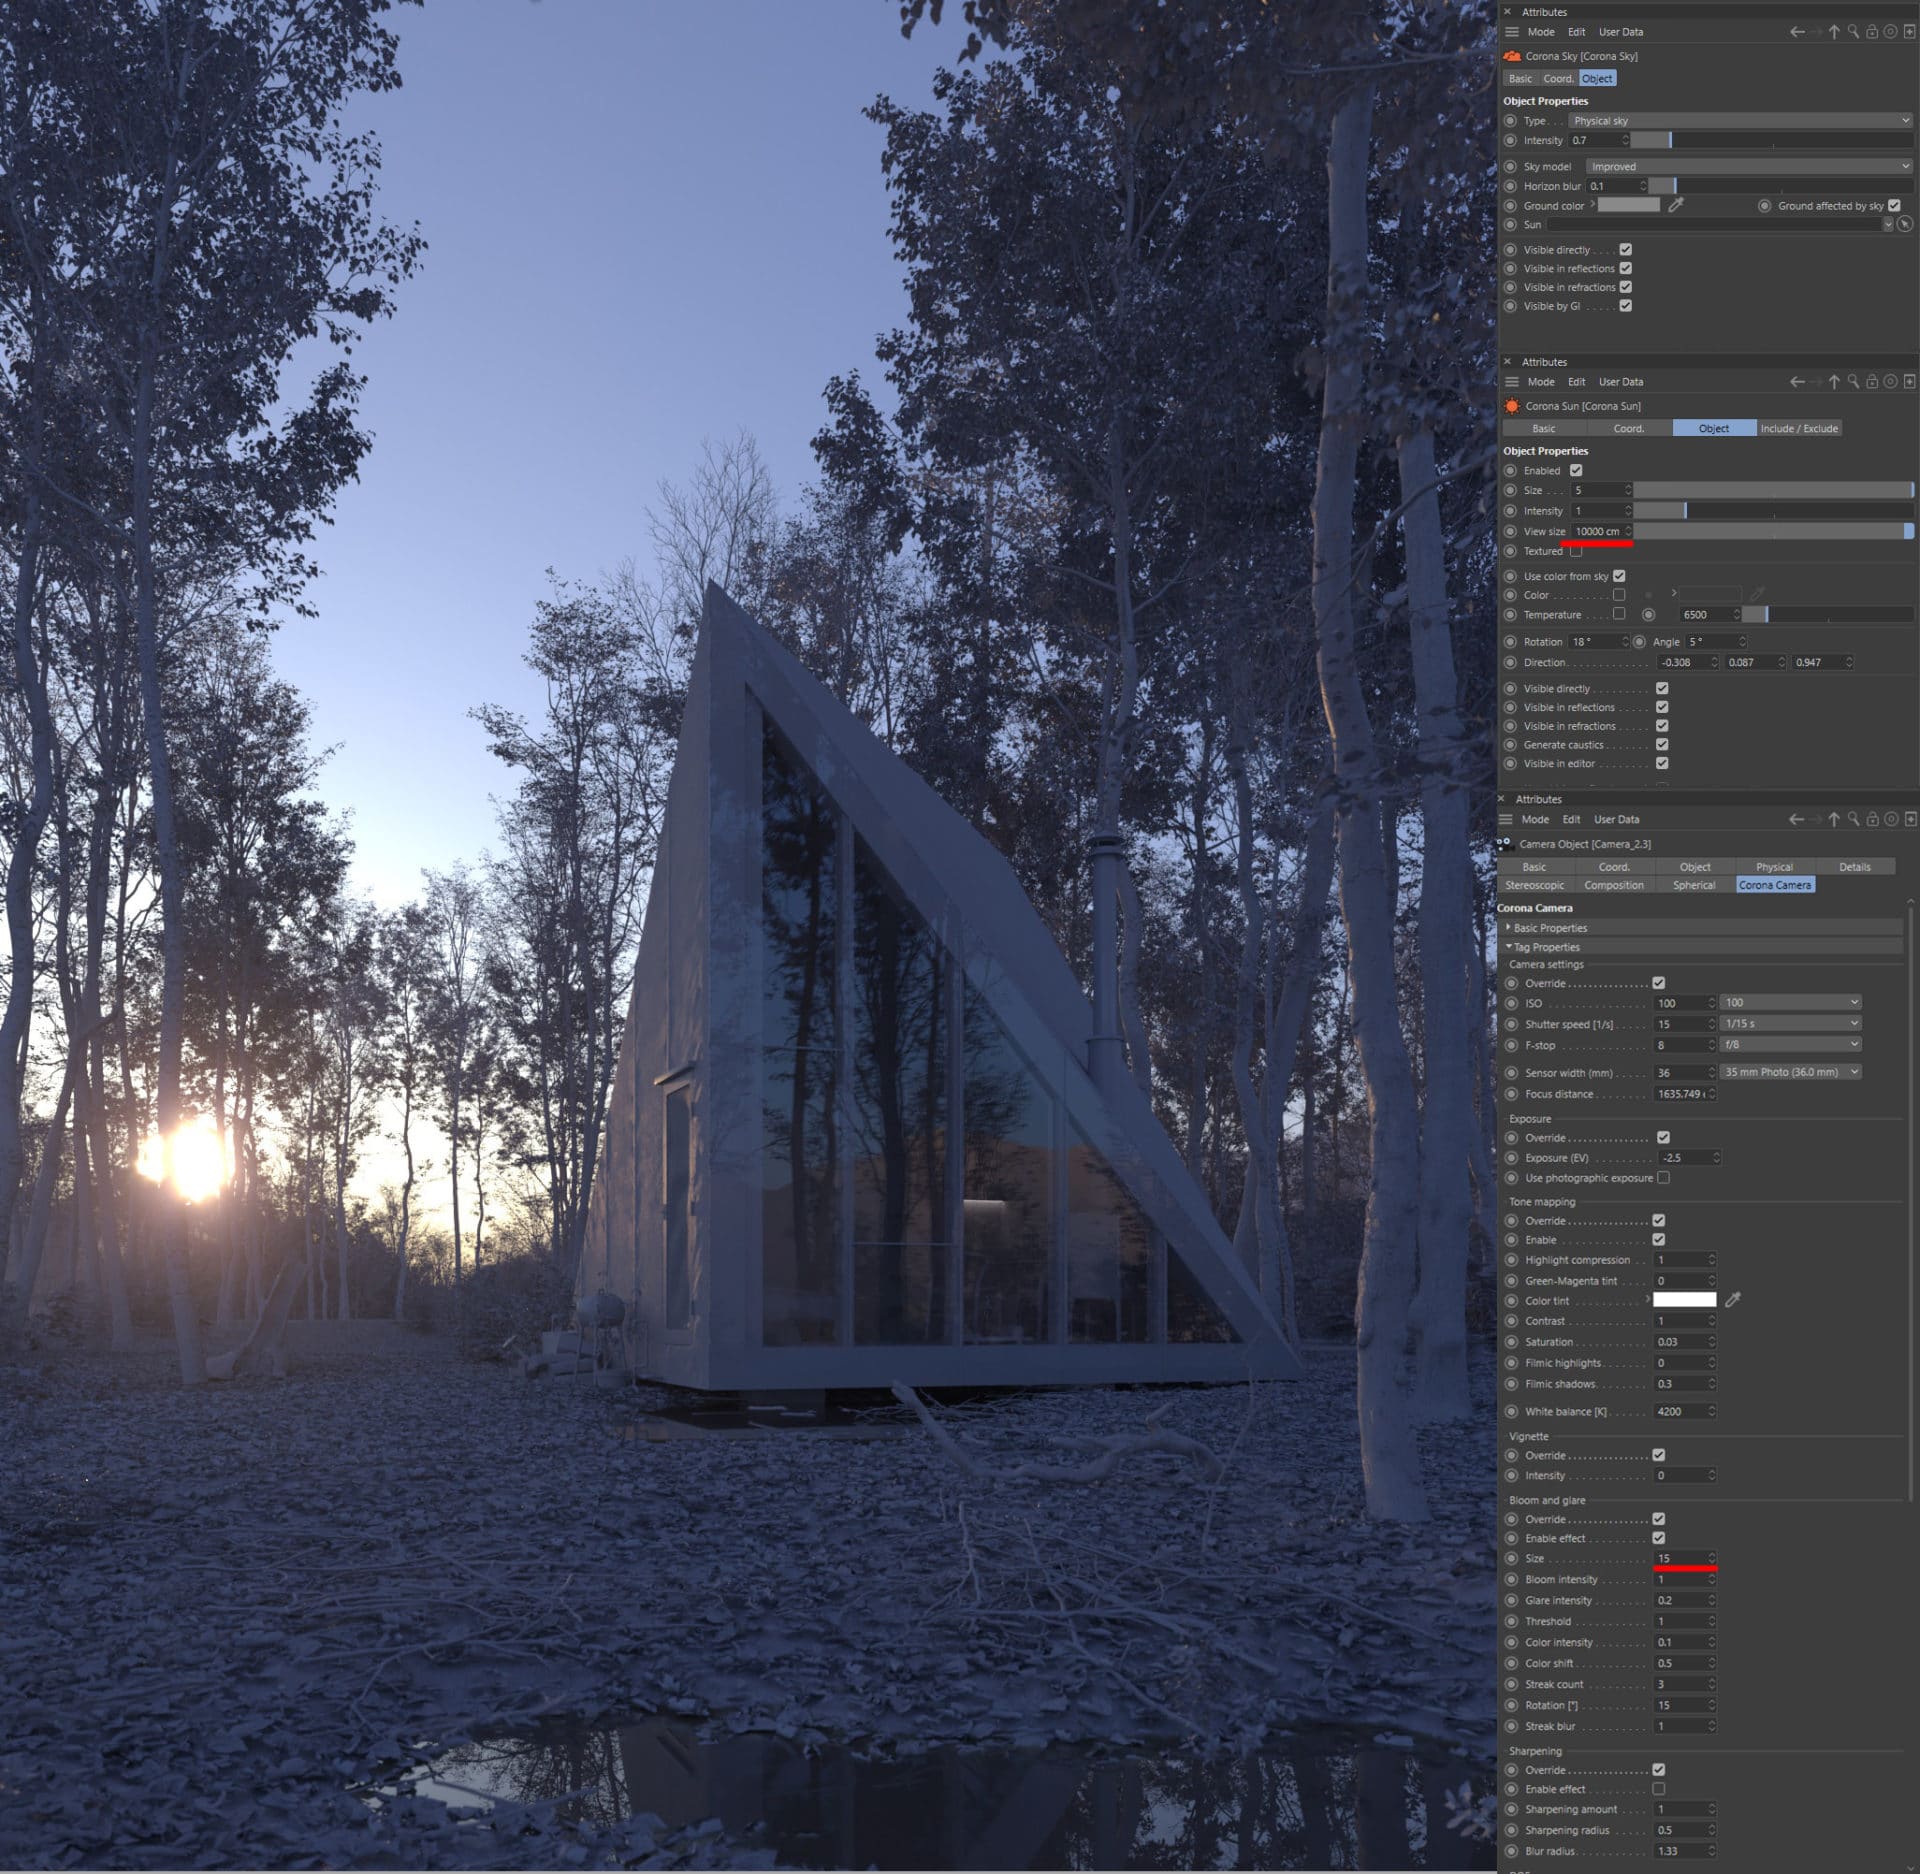
The sunset was achieved using the sun + sky system with the new version of the Corona Renderer 6 engine. To achieve the desired effect, I used the maximum Sun View Size value available.
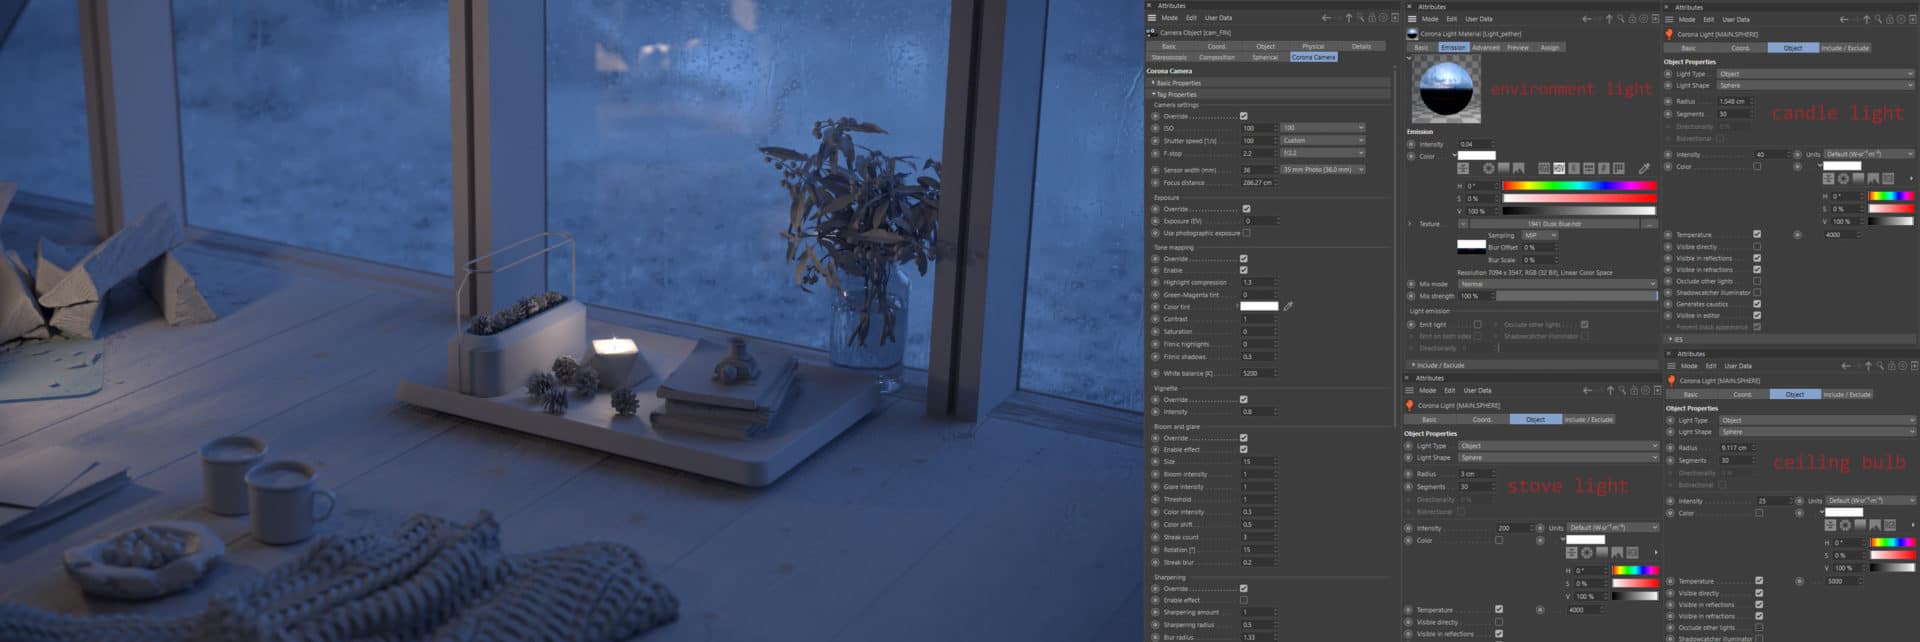
Both interior images were lit by the same set of lights. For exterior lighting (environment light), I used the same HDR map, which served me in terms of night view. The rest of the lights are a composition of spherical Corona lights.
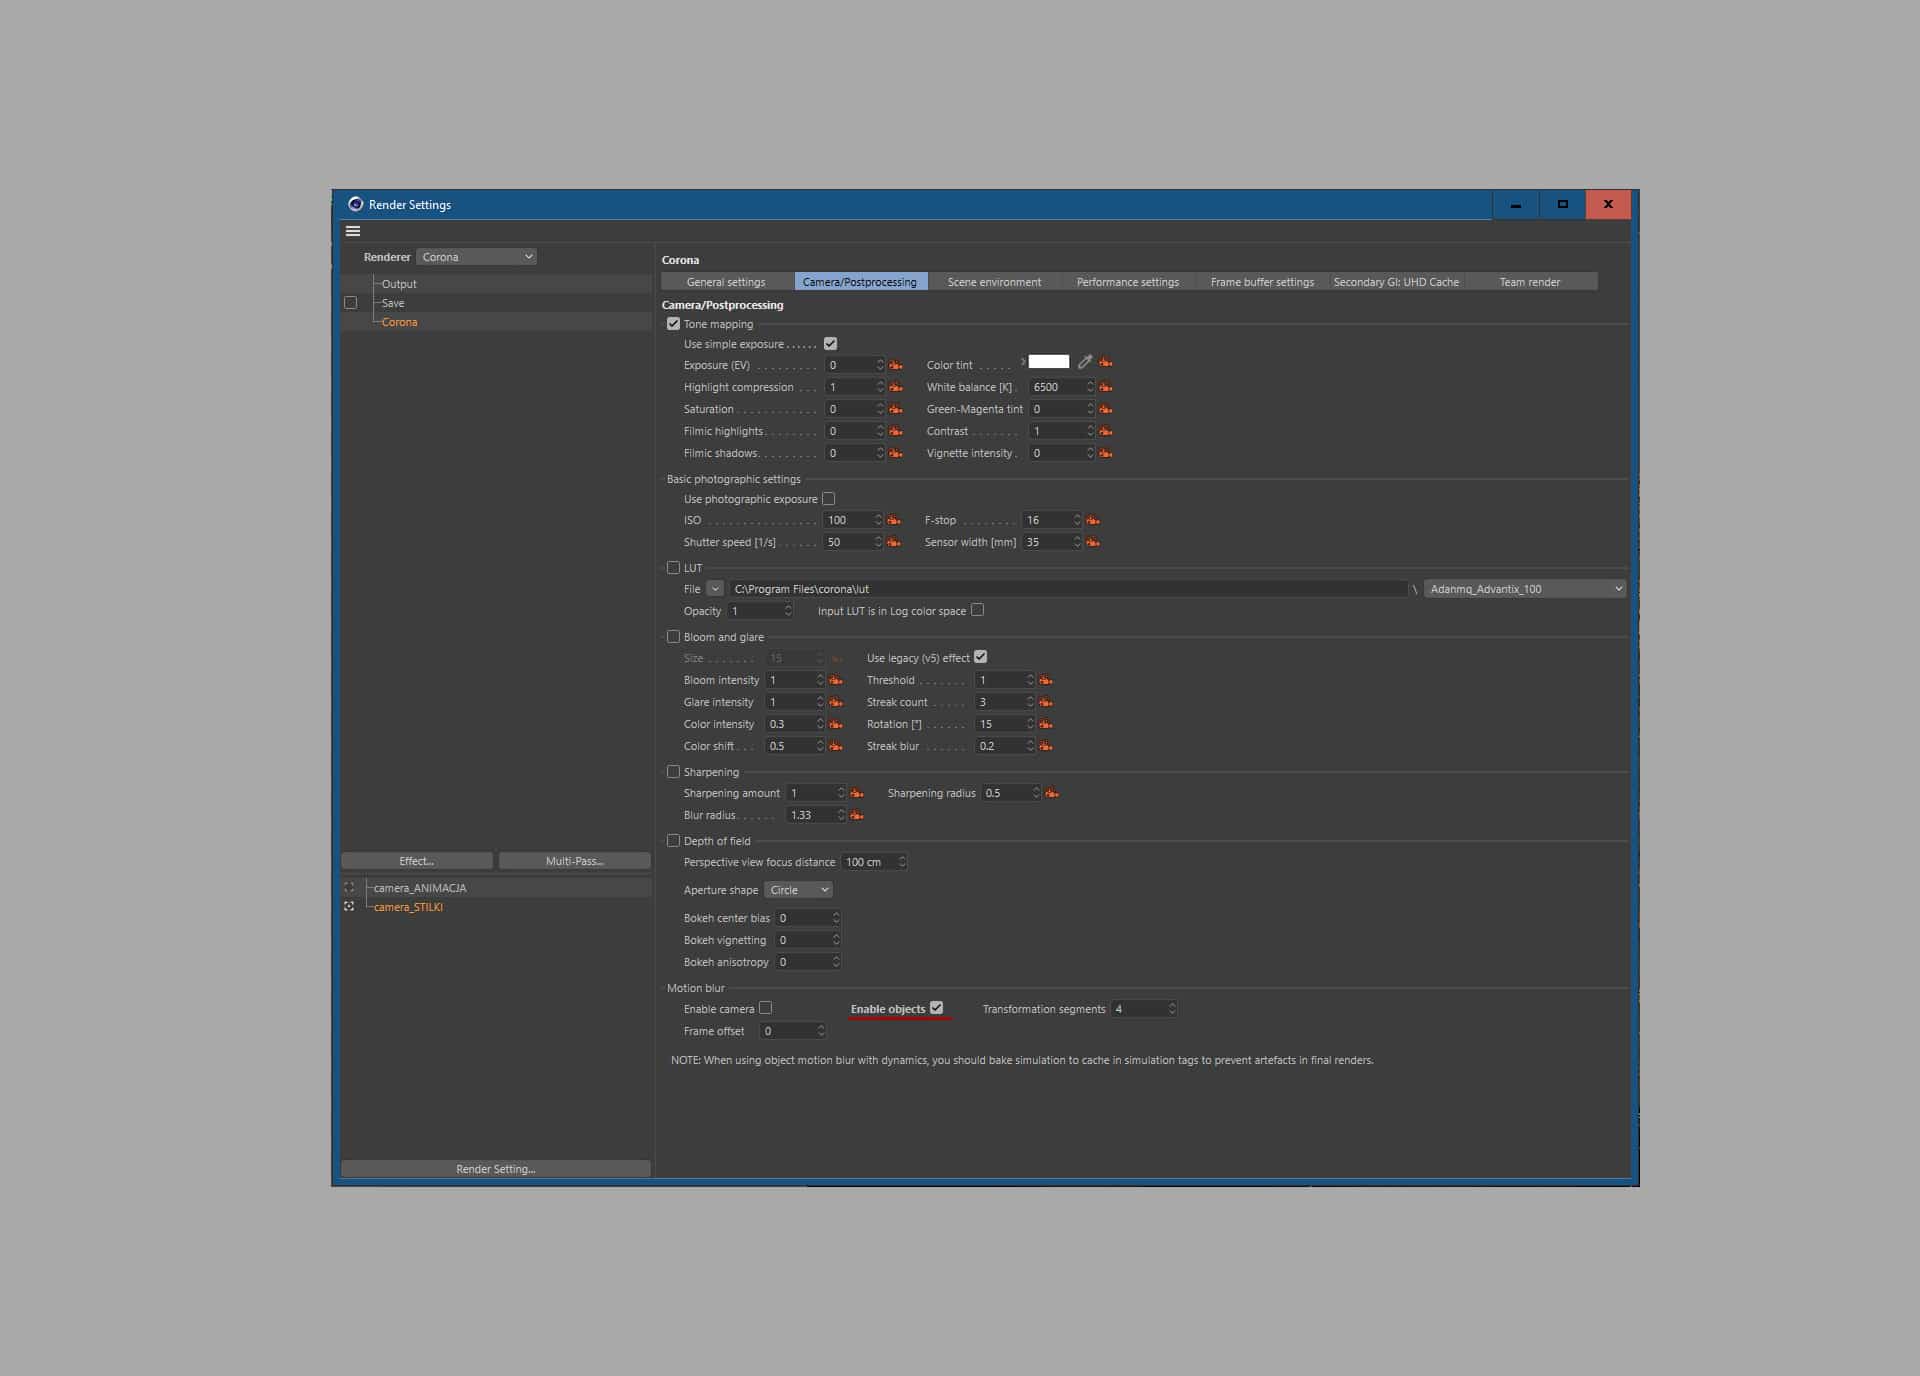
RENDERING
In the rendering part, nothing is interesting at all, just standard corona renderer setup.
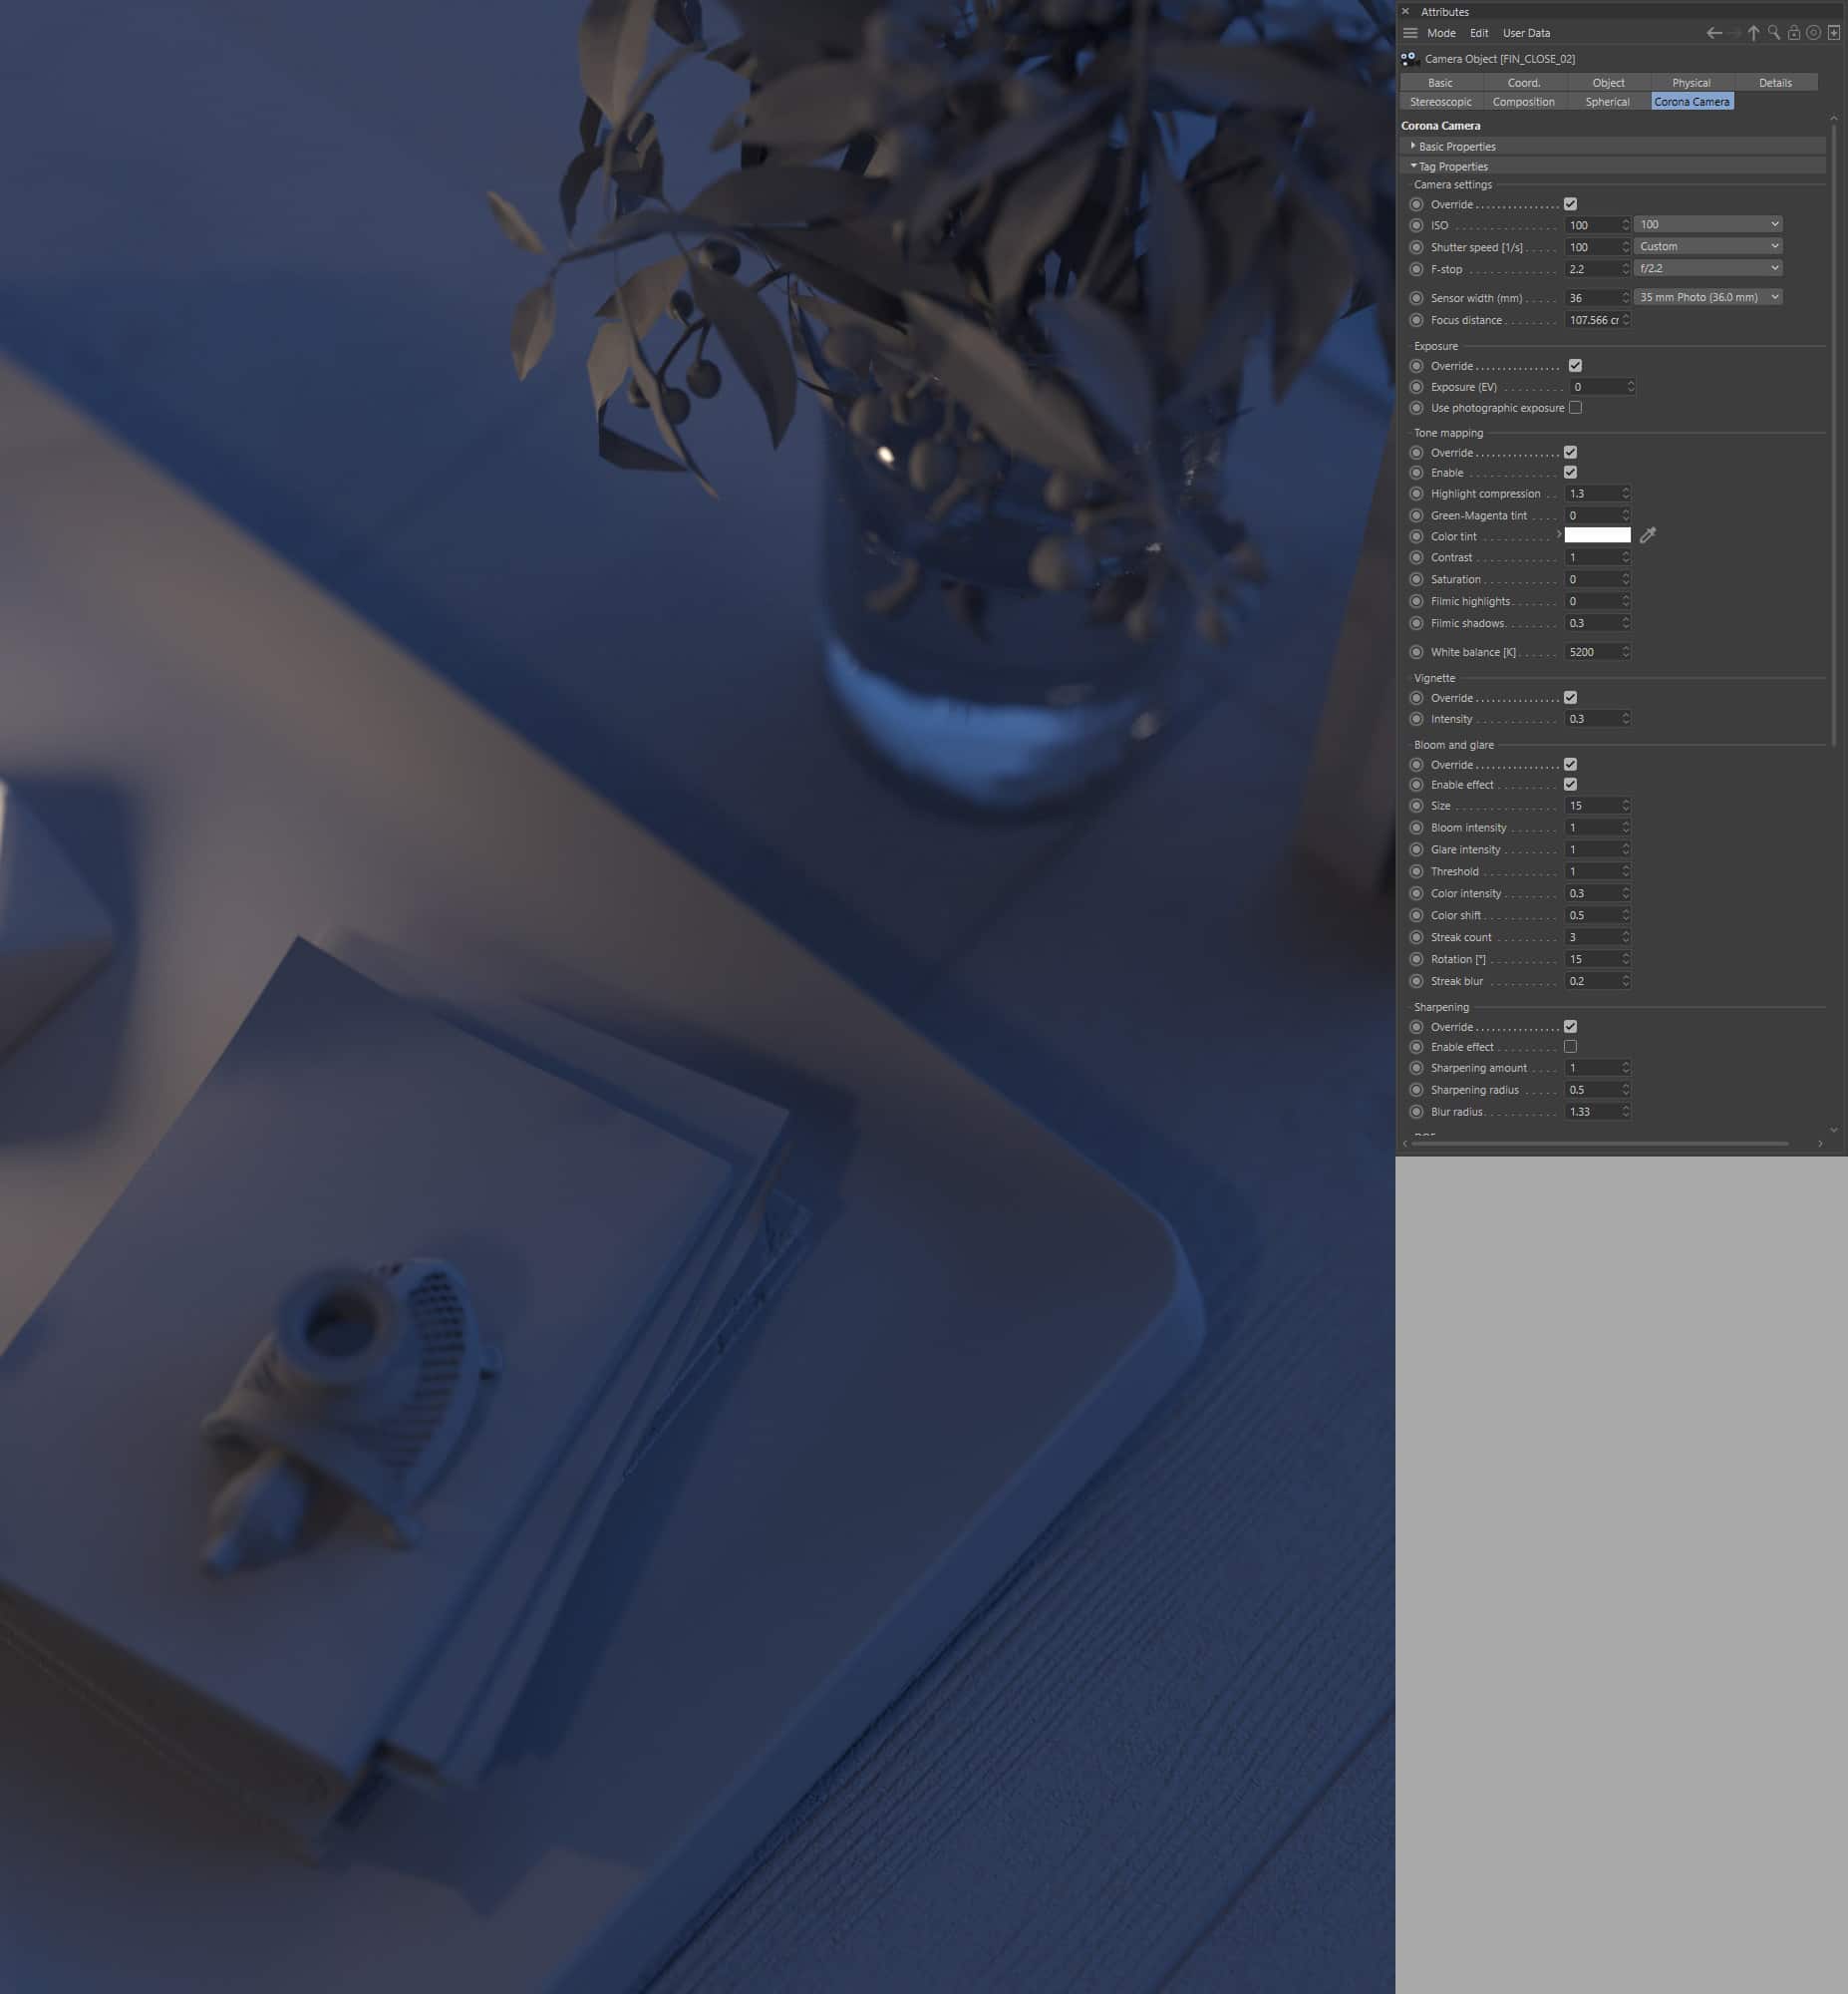
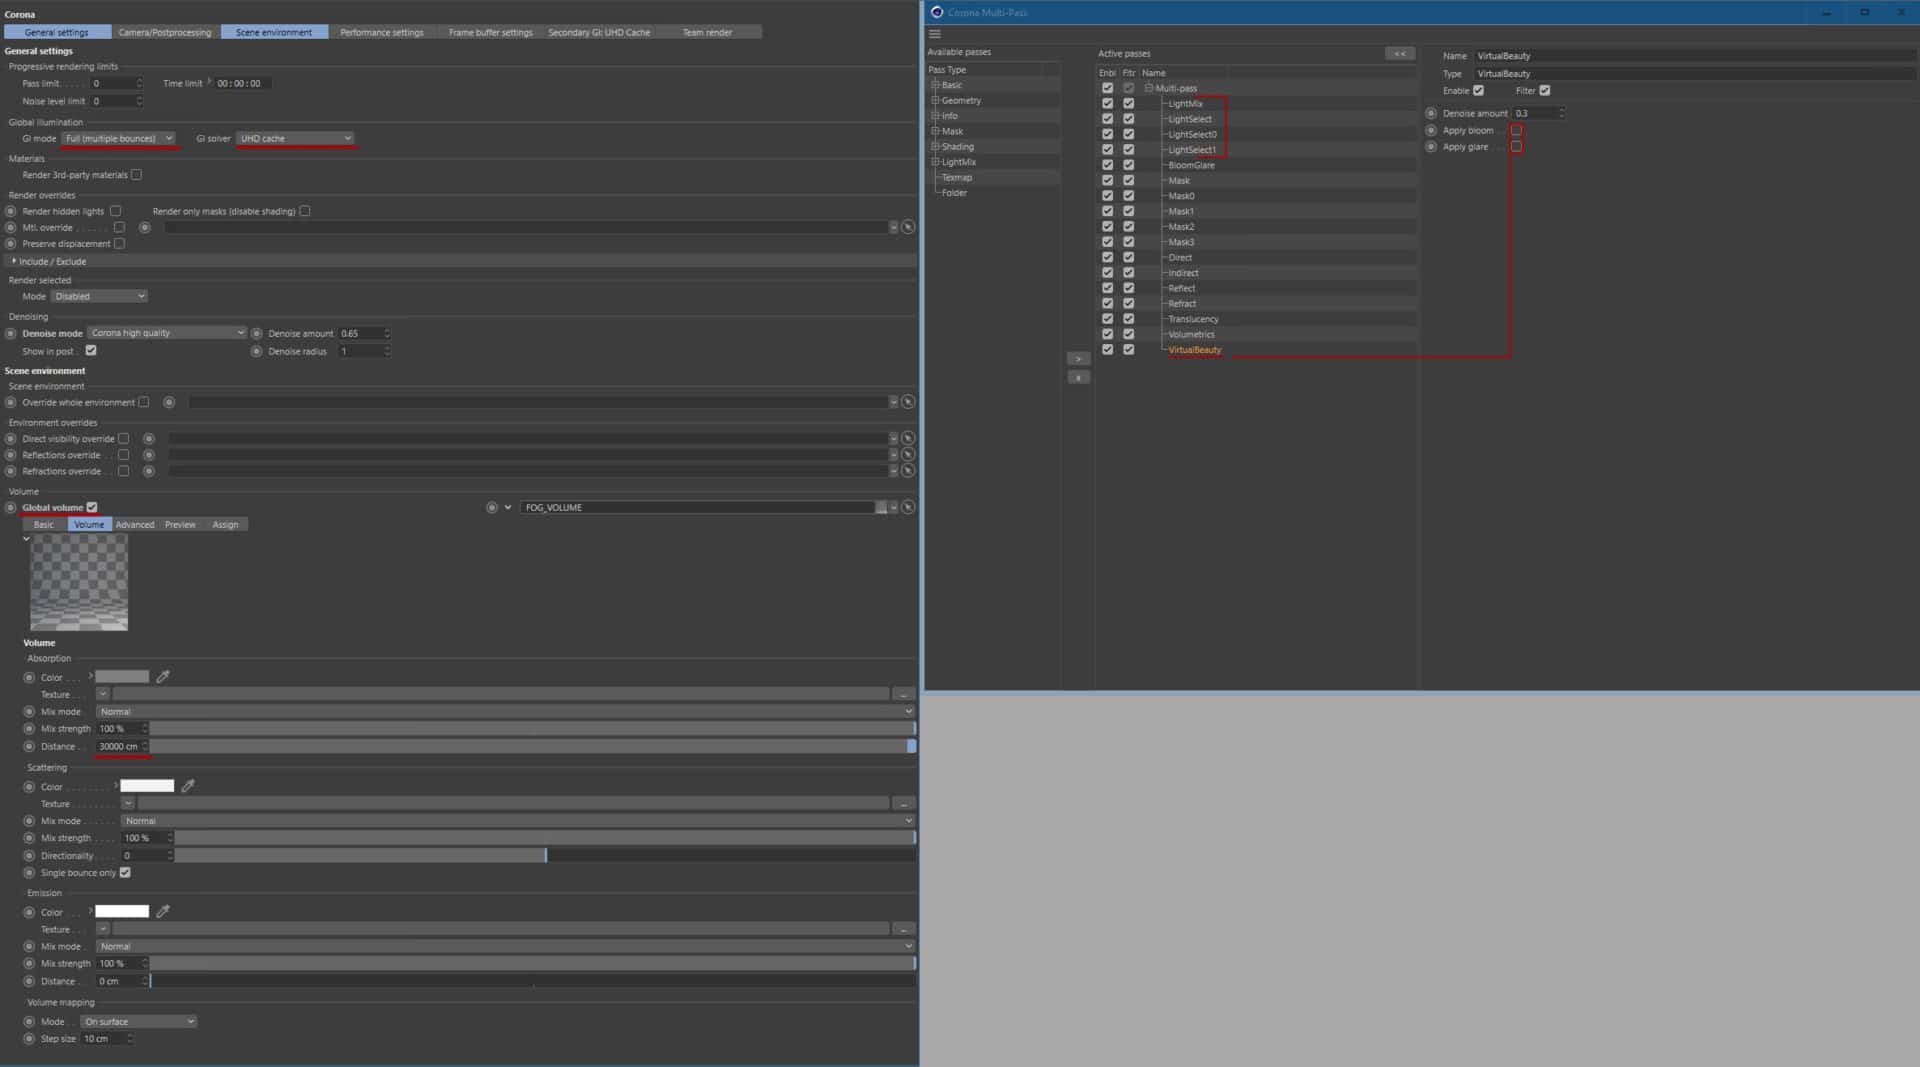
I used Corona Volume Material in the Global Volume slot in the sunset shot to achieve a more hazy atmosphere.
Considering passes, I’m preparing material/object masks for more critical objects or groups of items that could be proceeded together, essential render element passes, and additionally, Bloom & Glare and volumetric pass (if used). Because I like to have bloom and glare already in the beauty render applied, I add another Virtual Beauty pass with a low denoise amount, and Bloom & Glare turned off as a backup.
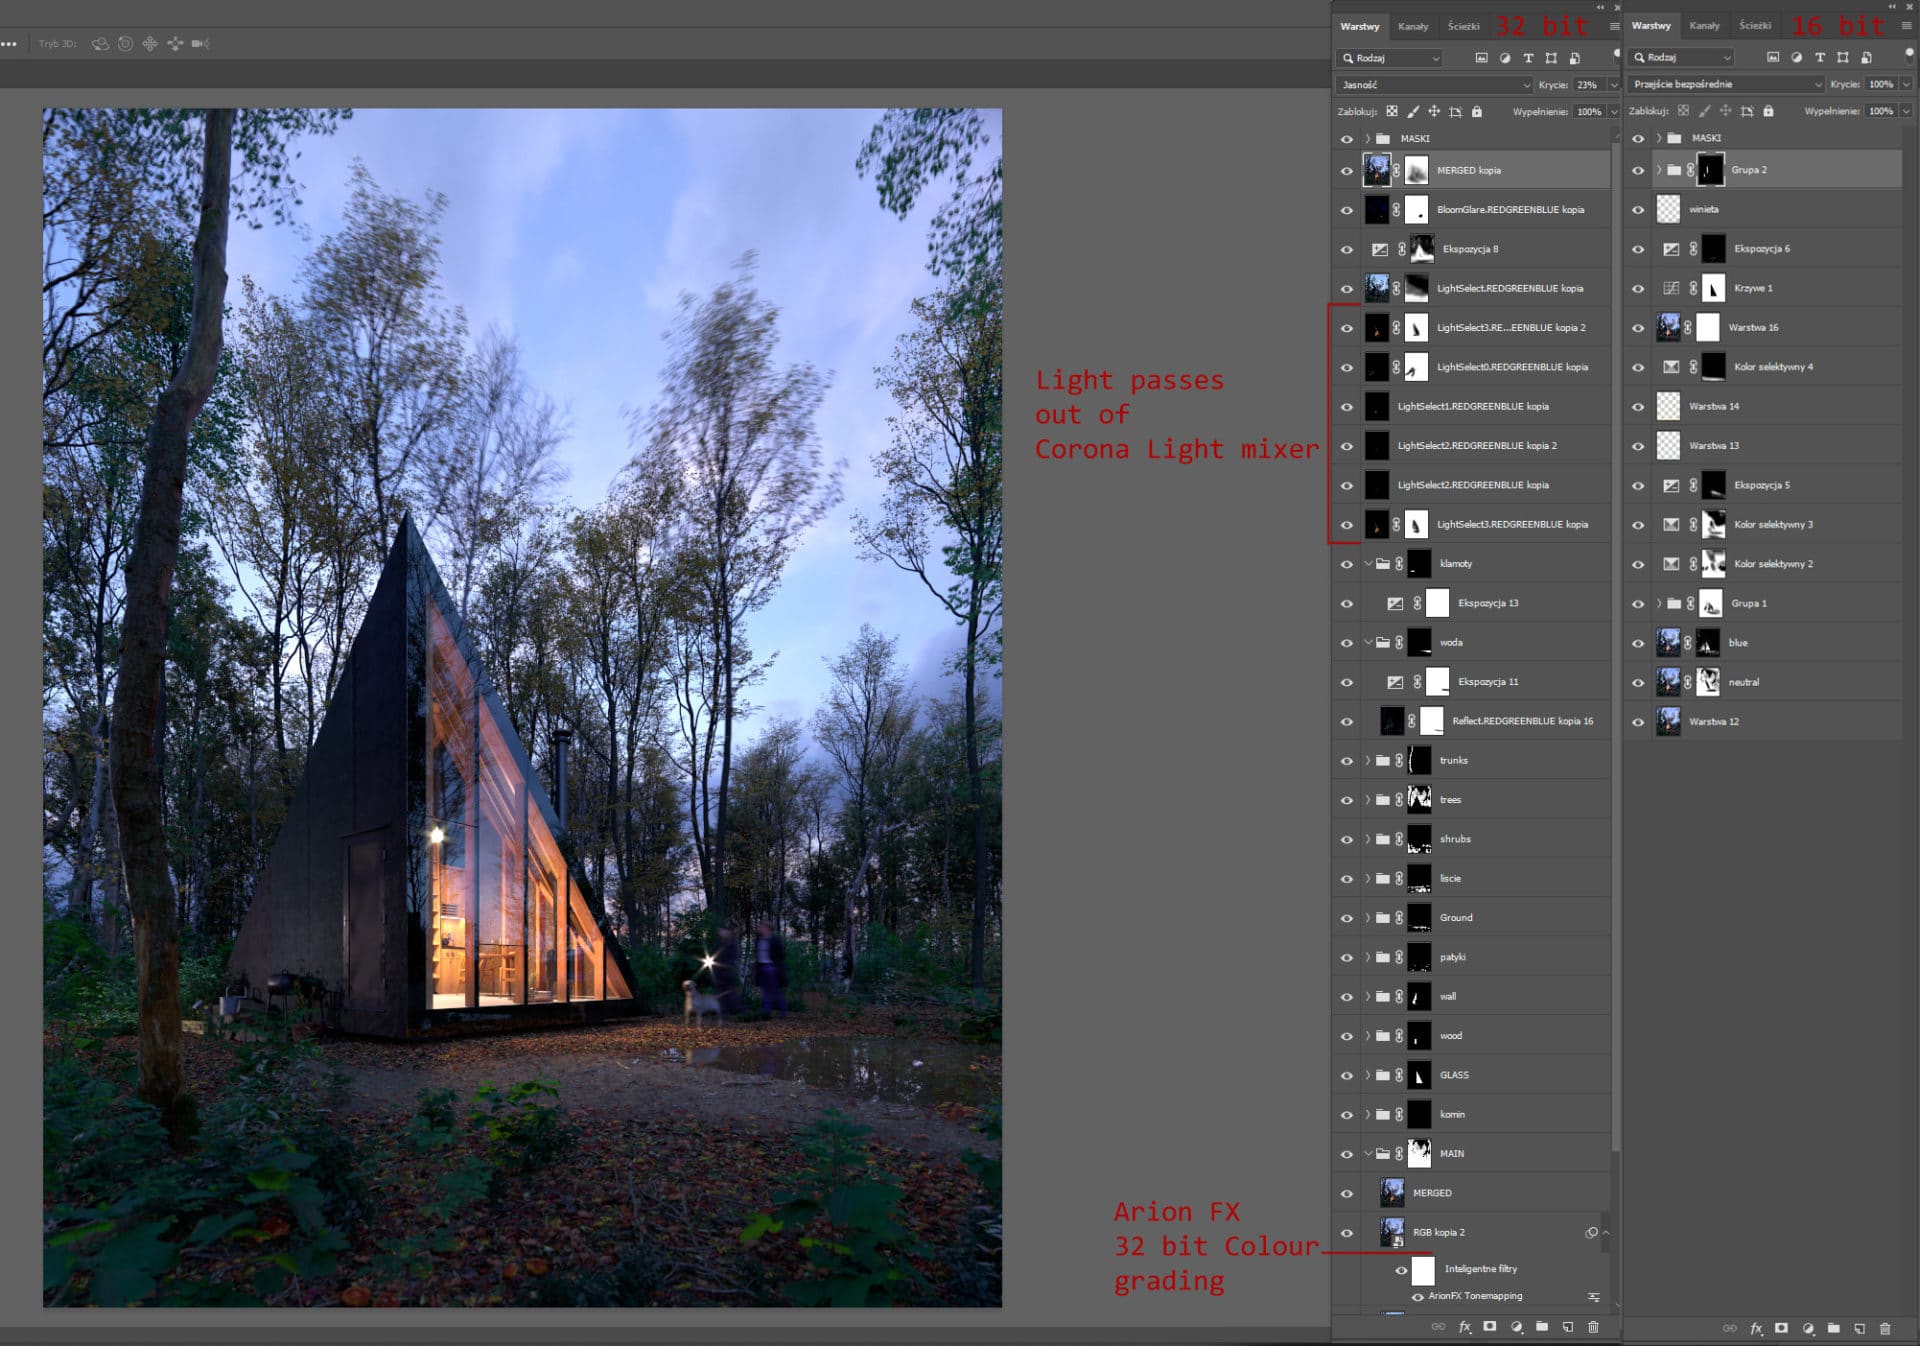
The critical element was Corona Light Mixer passes, which I prepared for every light in the scene. This is my starting point for post-production.
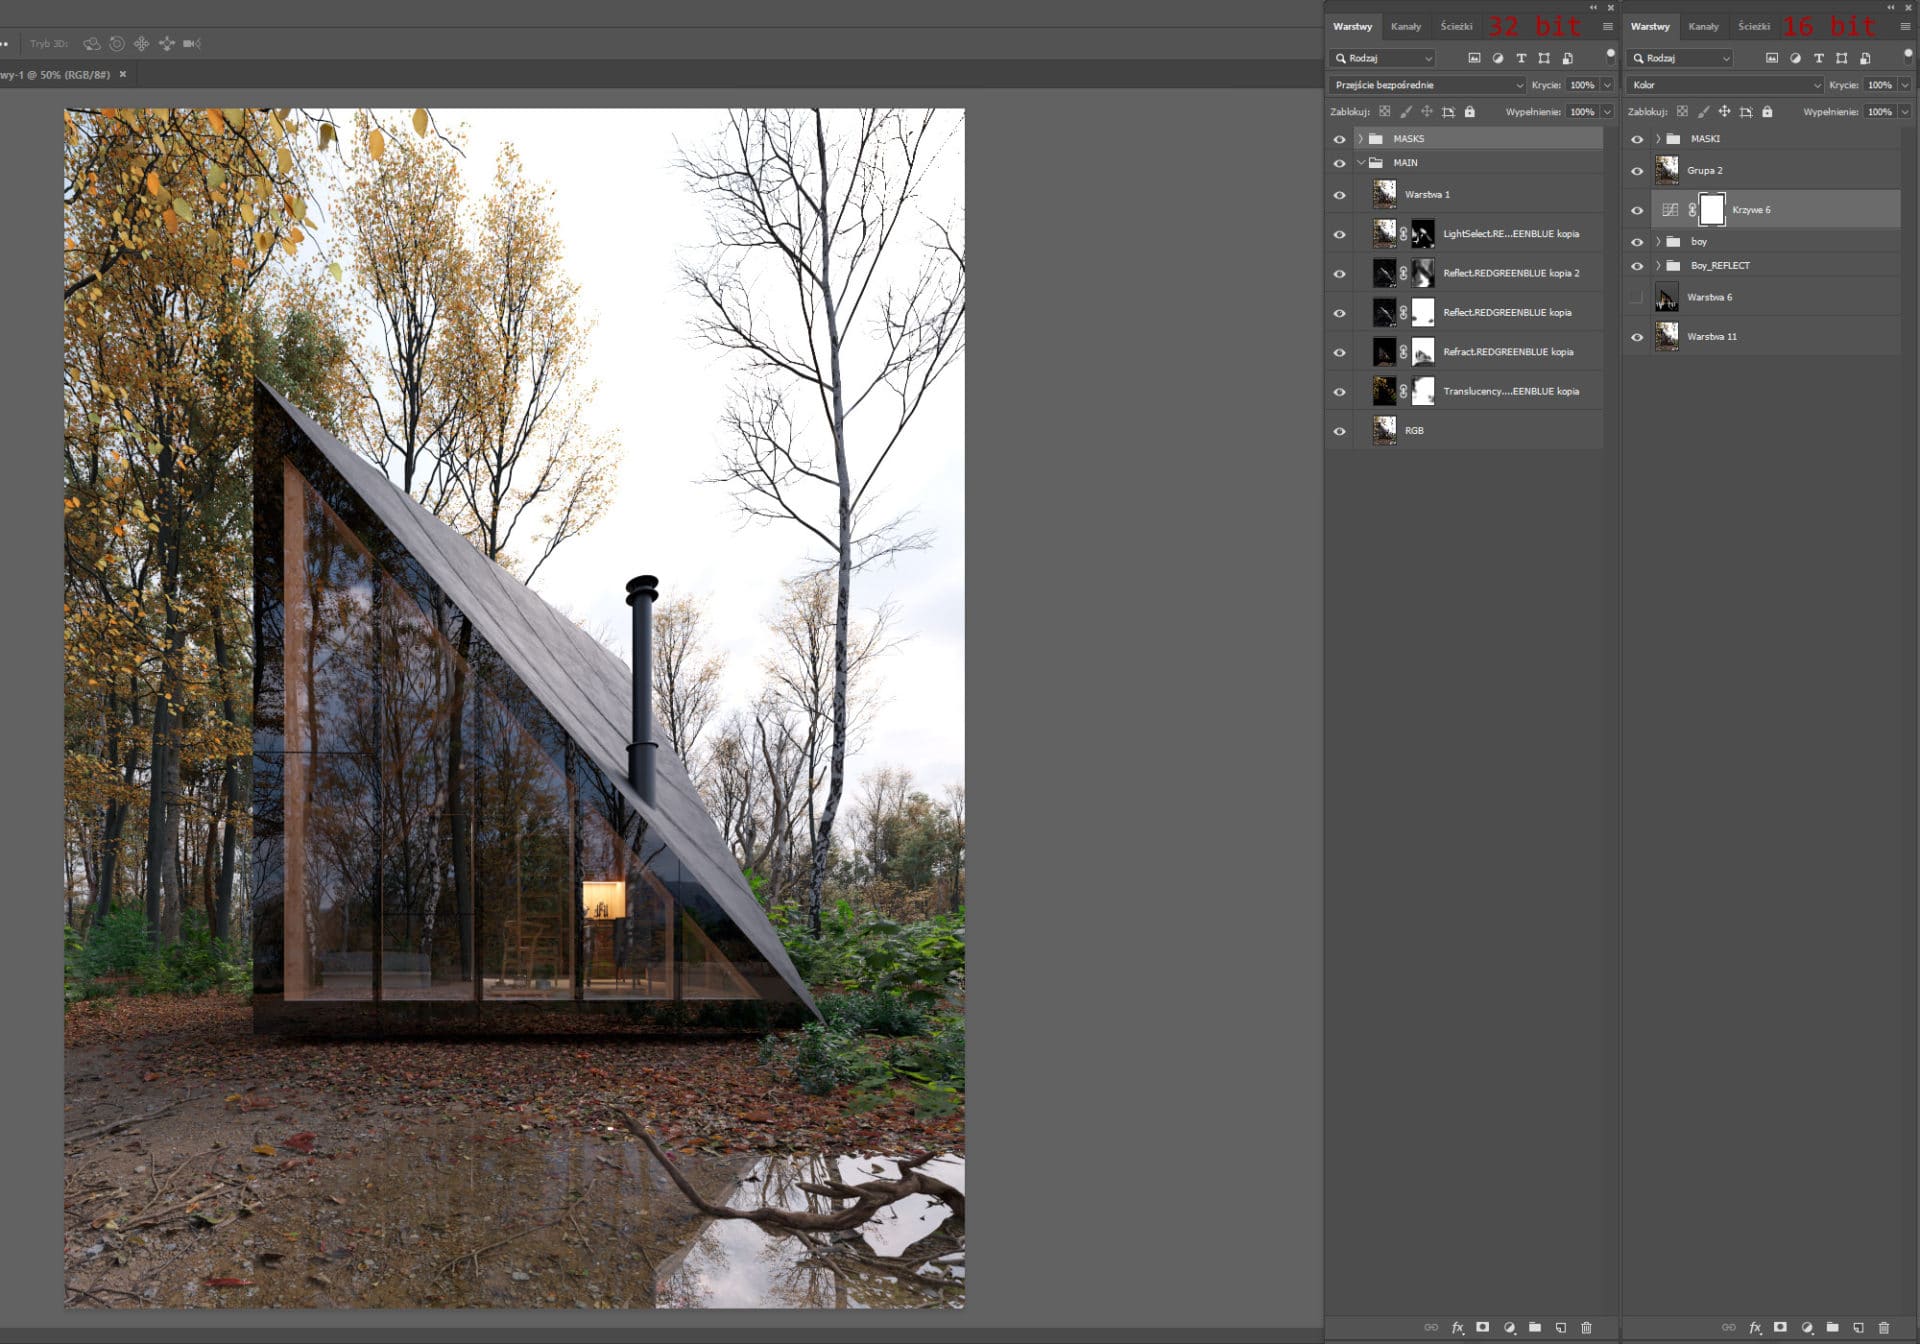
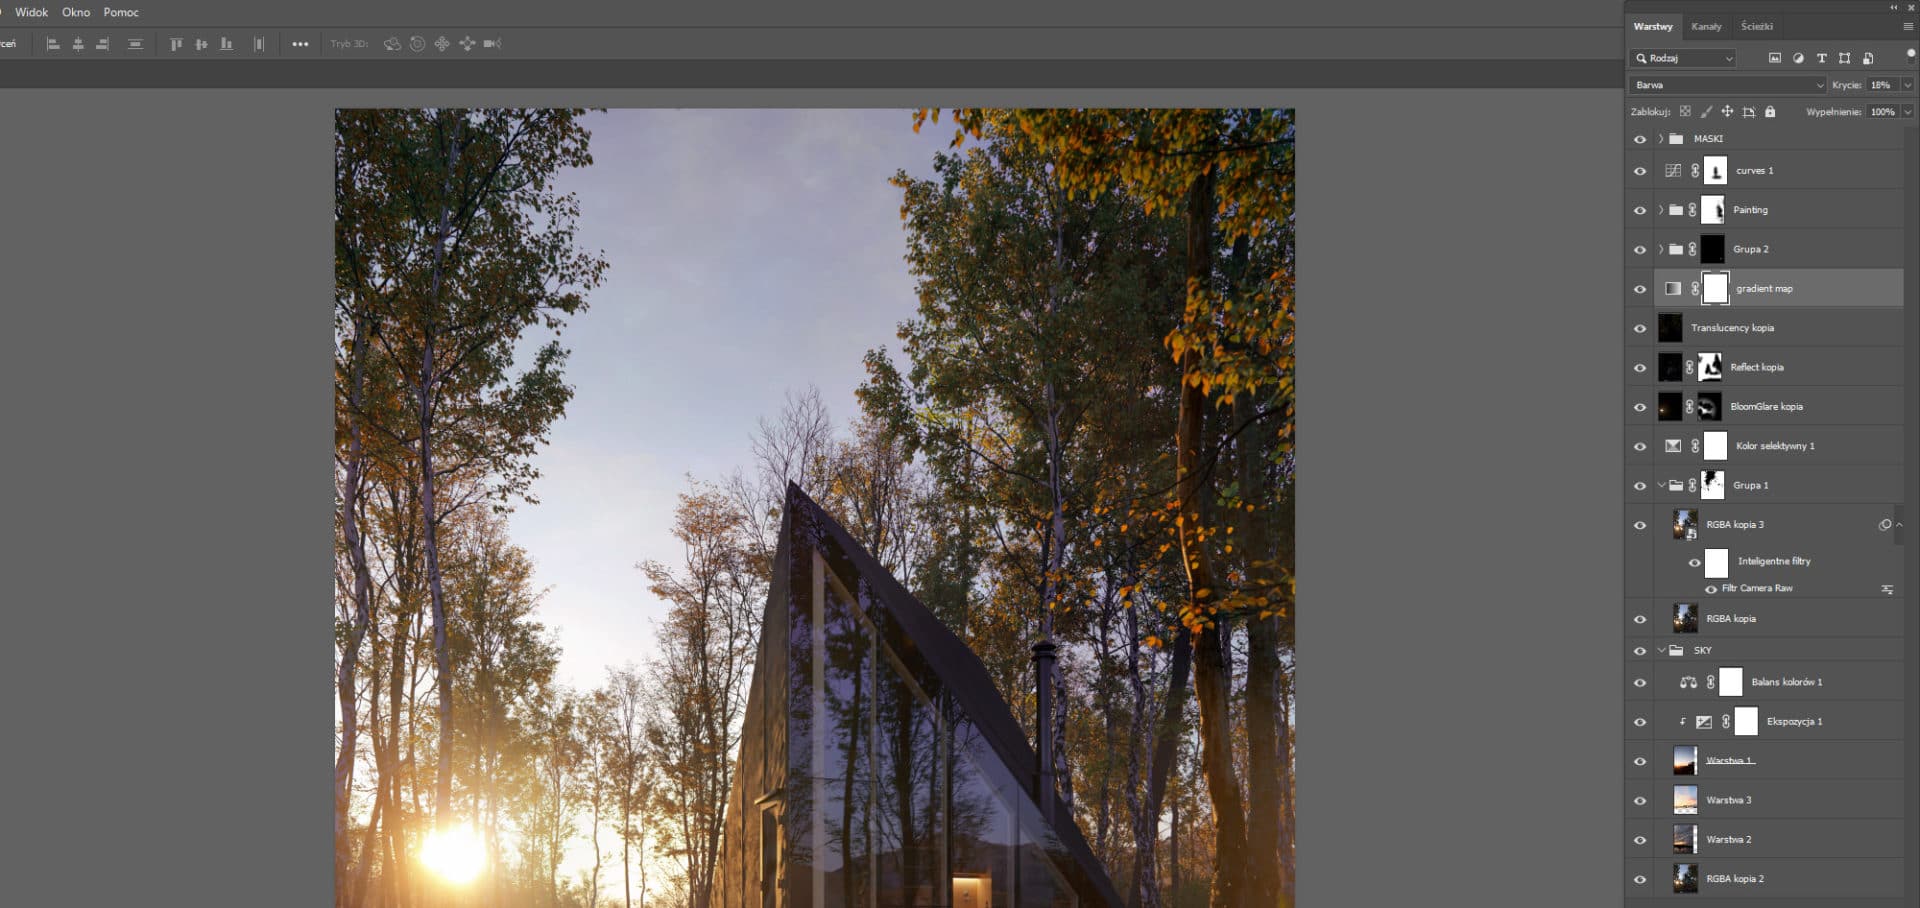
POST-PRODUCTION
Although I try to get possibly close to the final effect already at the rendering stage, it is often only post-production that allows us to achieve an effect similar to the one our eyes are used to by looking at the photos. Since I use non-destructive workflow, all modifications made with Camera Raw or Arion FX have been applied to the smart objects. I begin my work on 32-bit images. When the overall effect is satisfactory, I move the work to 16 bits since more tools are available. I save the final files in 8 bits.
Until the final save to the Internet, I try to work in the RGB palette.
In the second image, post-production was way more straightforward.
In the sunset image, post-production was a bit more complicated. Because it wasn’t lit by an HDR, I added the sky in the post.
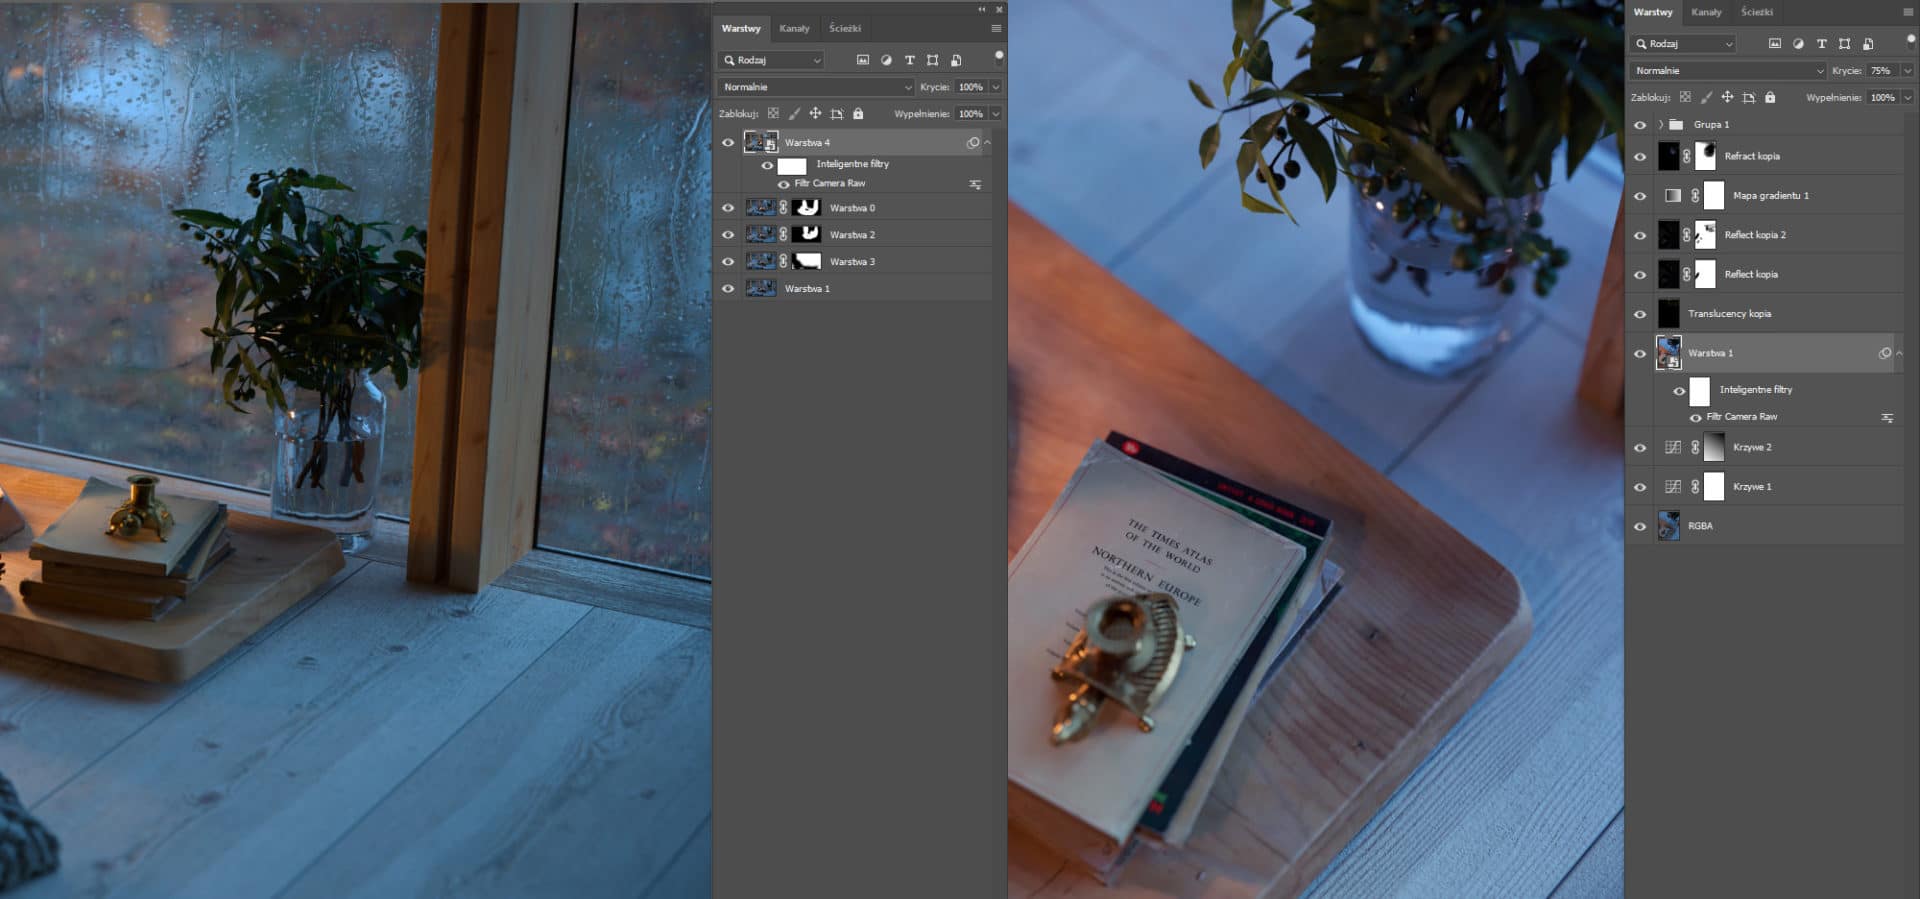
At the post-production stage of interiors, I assumed to treat images like photographs and limit myself to color grading.
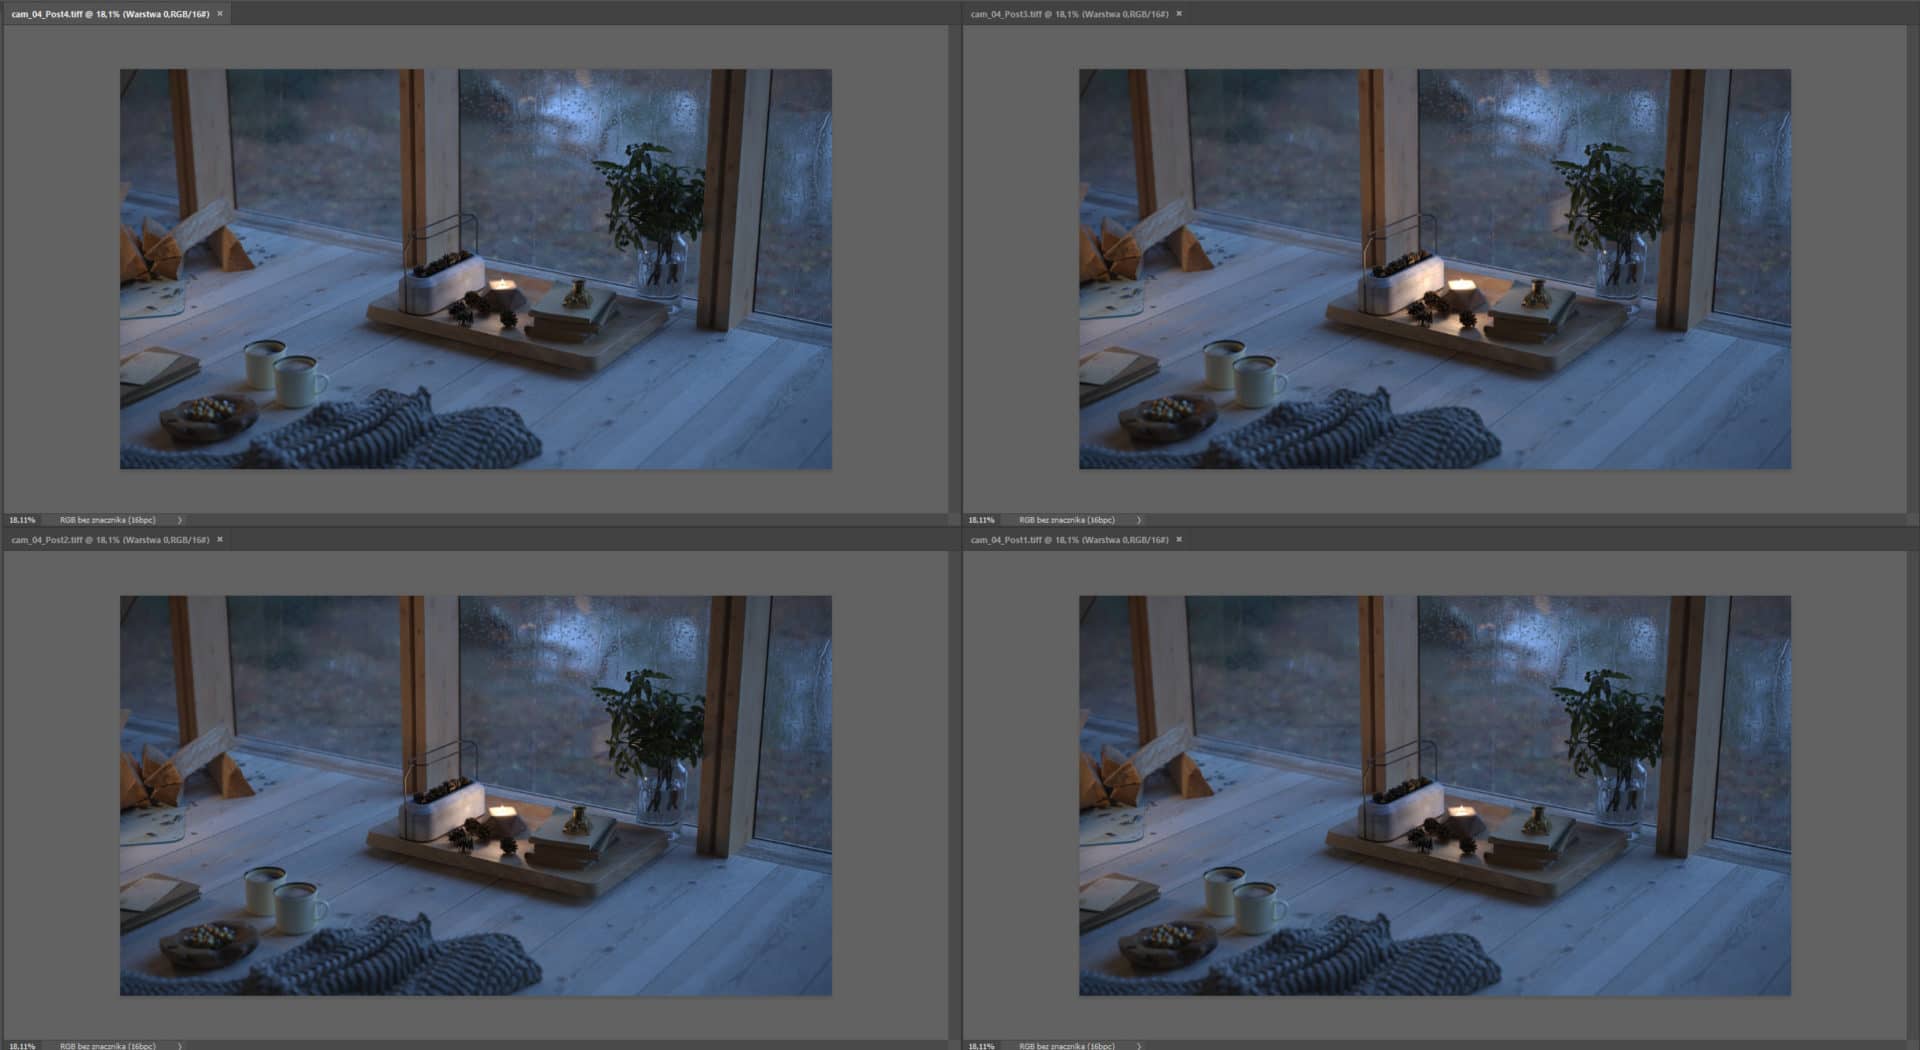
From the Corona Light Mixer level, I exported four images with different intensities of individual lights to paint the interpenetration of particular elements of the image with a brush.
SPECIAL EFFECTS (ADDING EMOTIONS)
In Pictura studio, we aim to evoke emotions by the pictures. Here are some manipulations I made to try to achieve this goal.
It is almost impossible in the real-life night forest to achieve perfectly sharp upper parts of a tree due to the standard camera’s long exposure. I tried to recreate this effect by animating this movement and turning on motion blur for objects.
Manipulation, which works on senses out of the image, adds raindrops on the exterior glass material. By contrast, it gives more warmth to the interior than the stove.
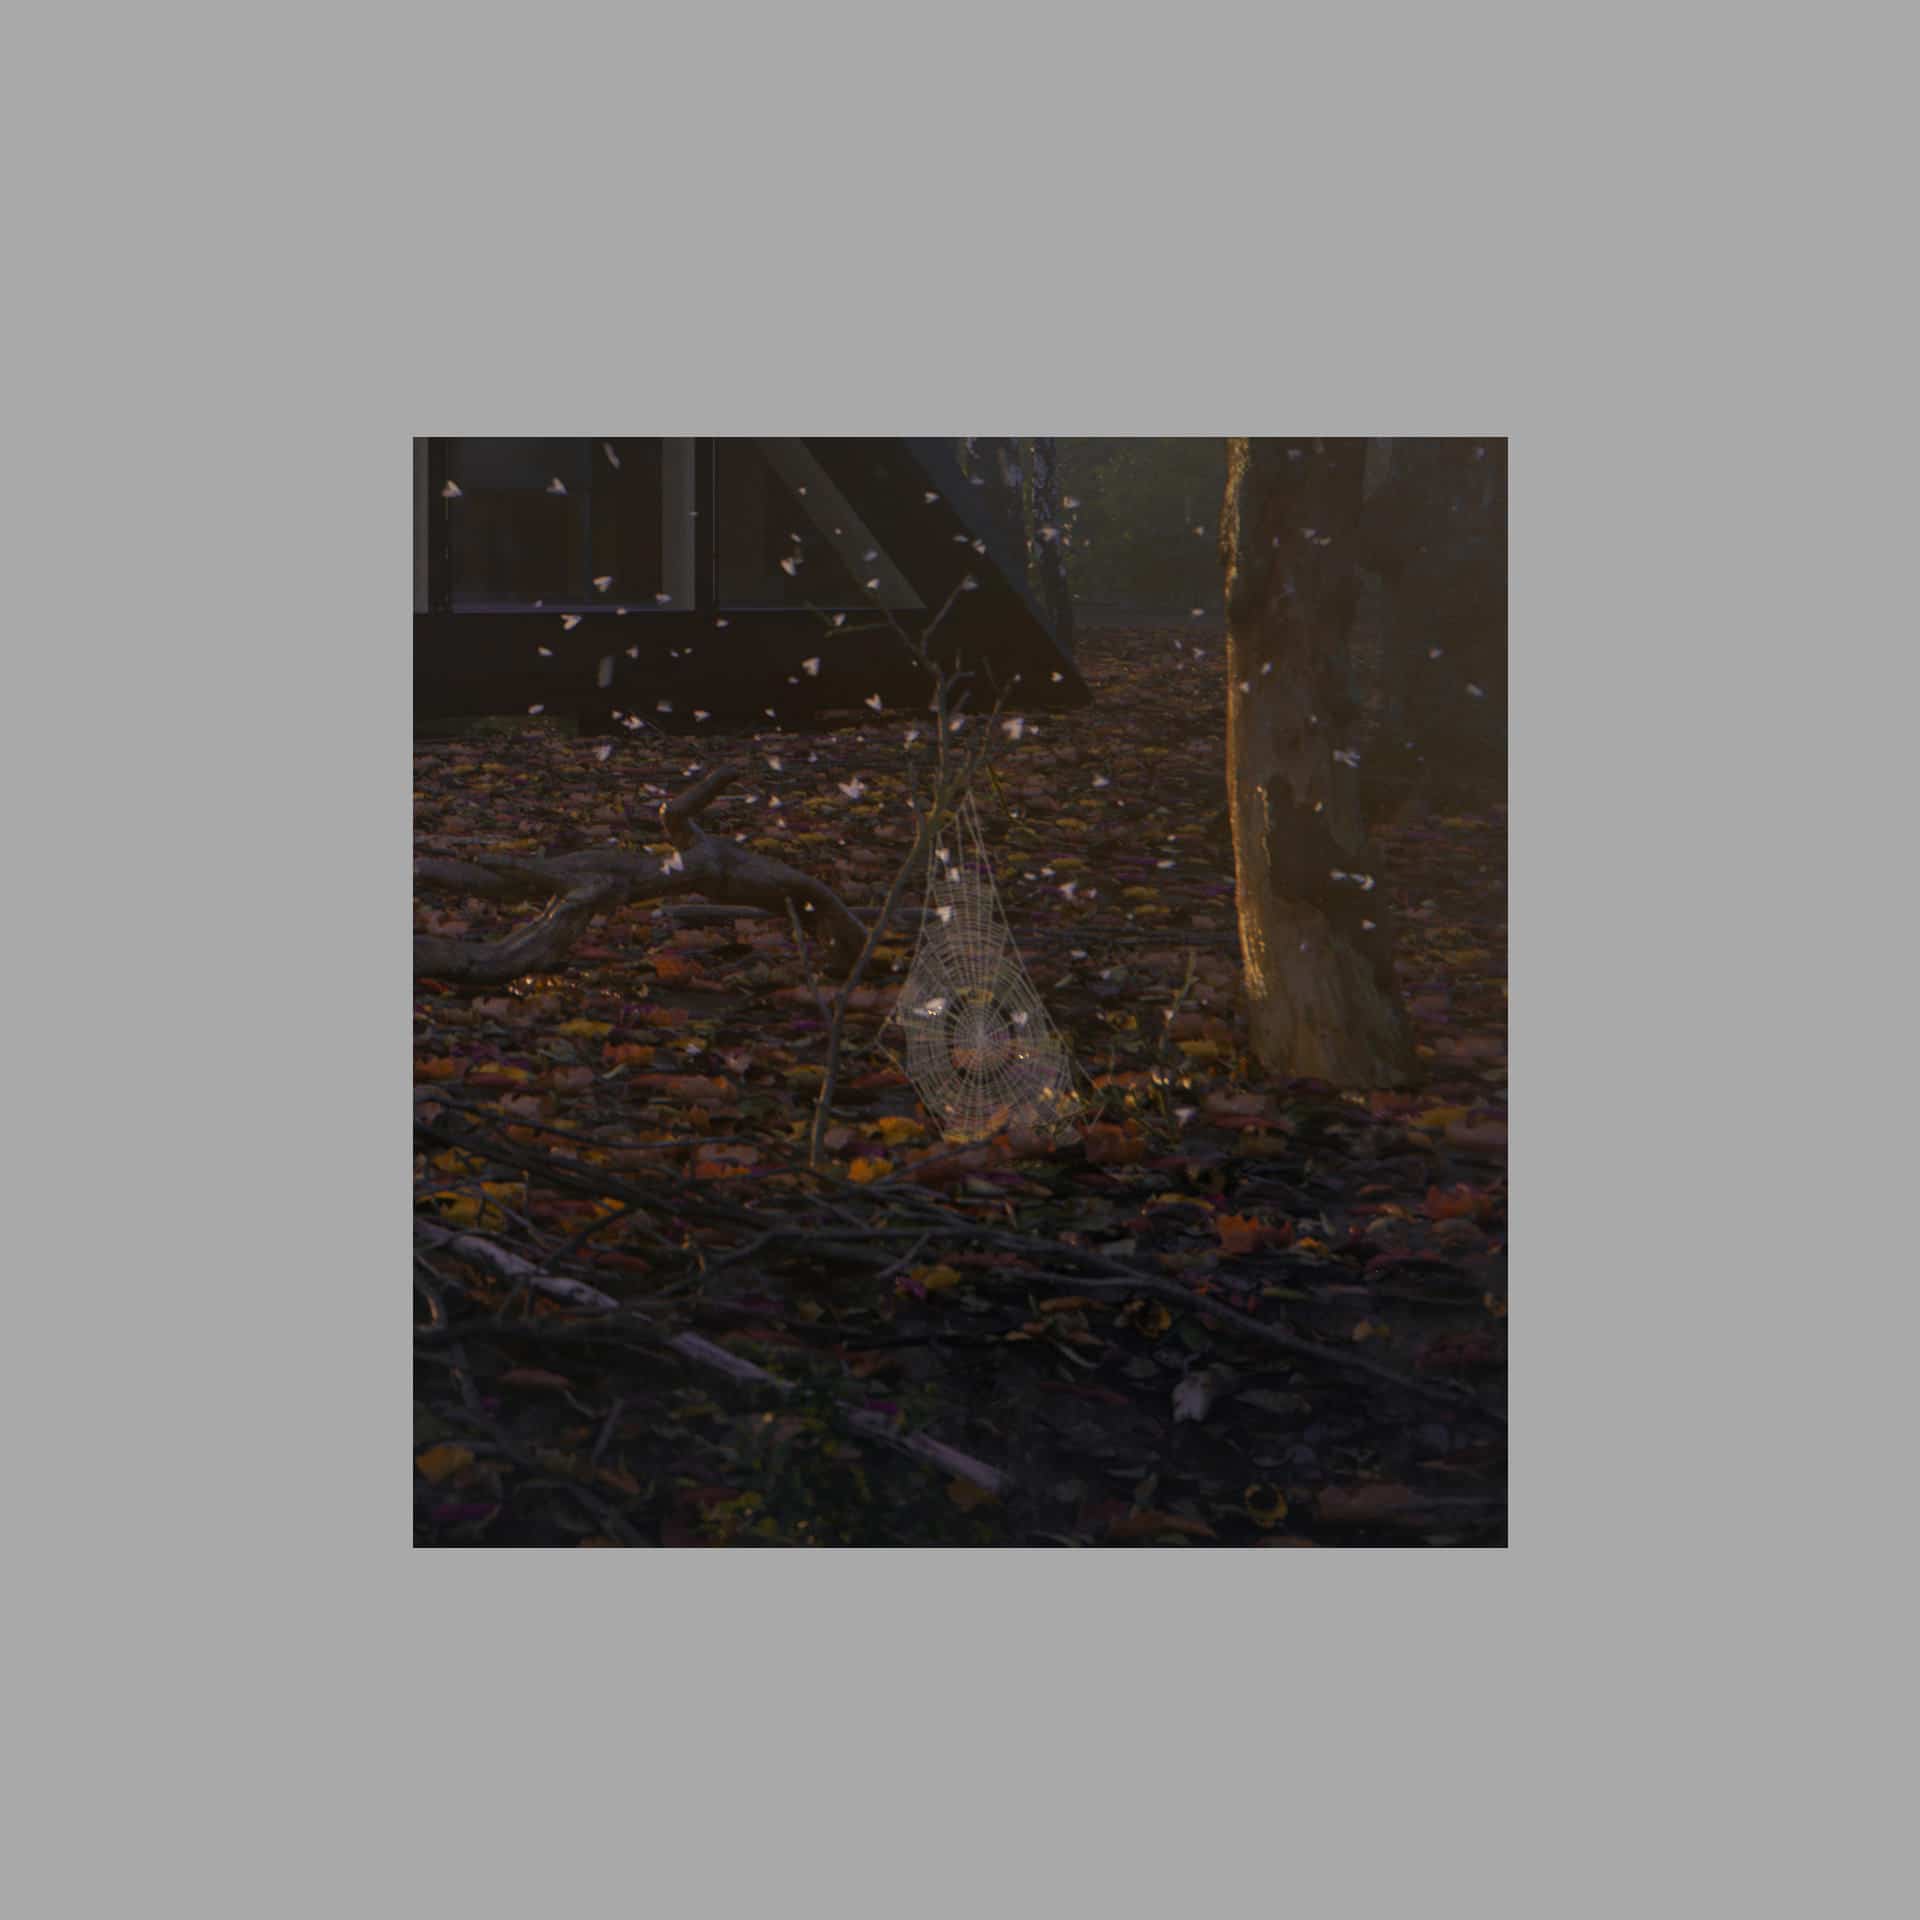
In the sunset image, I tried to emphasize low warm sun rays by giving them the opportunity to translucent. Making spider web was much more straightforward than I expected thanks to Py spider generator
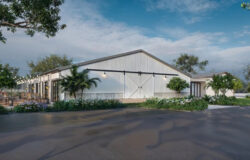
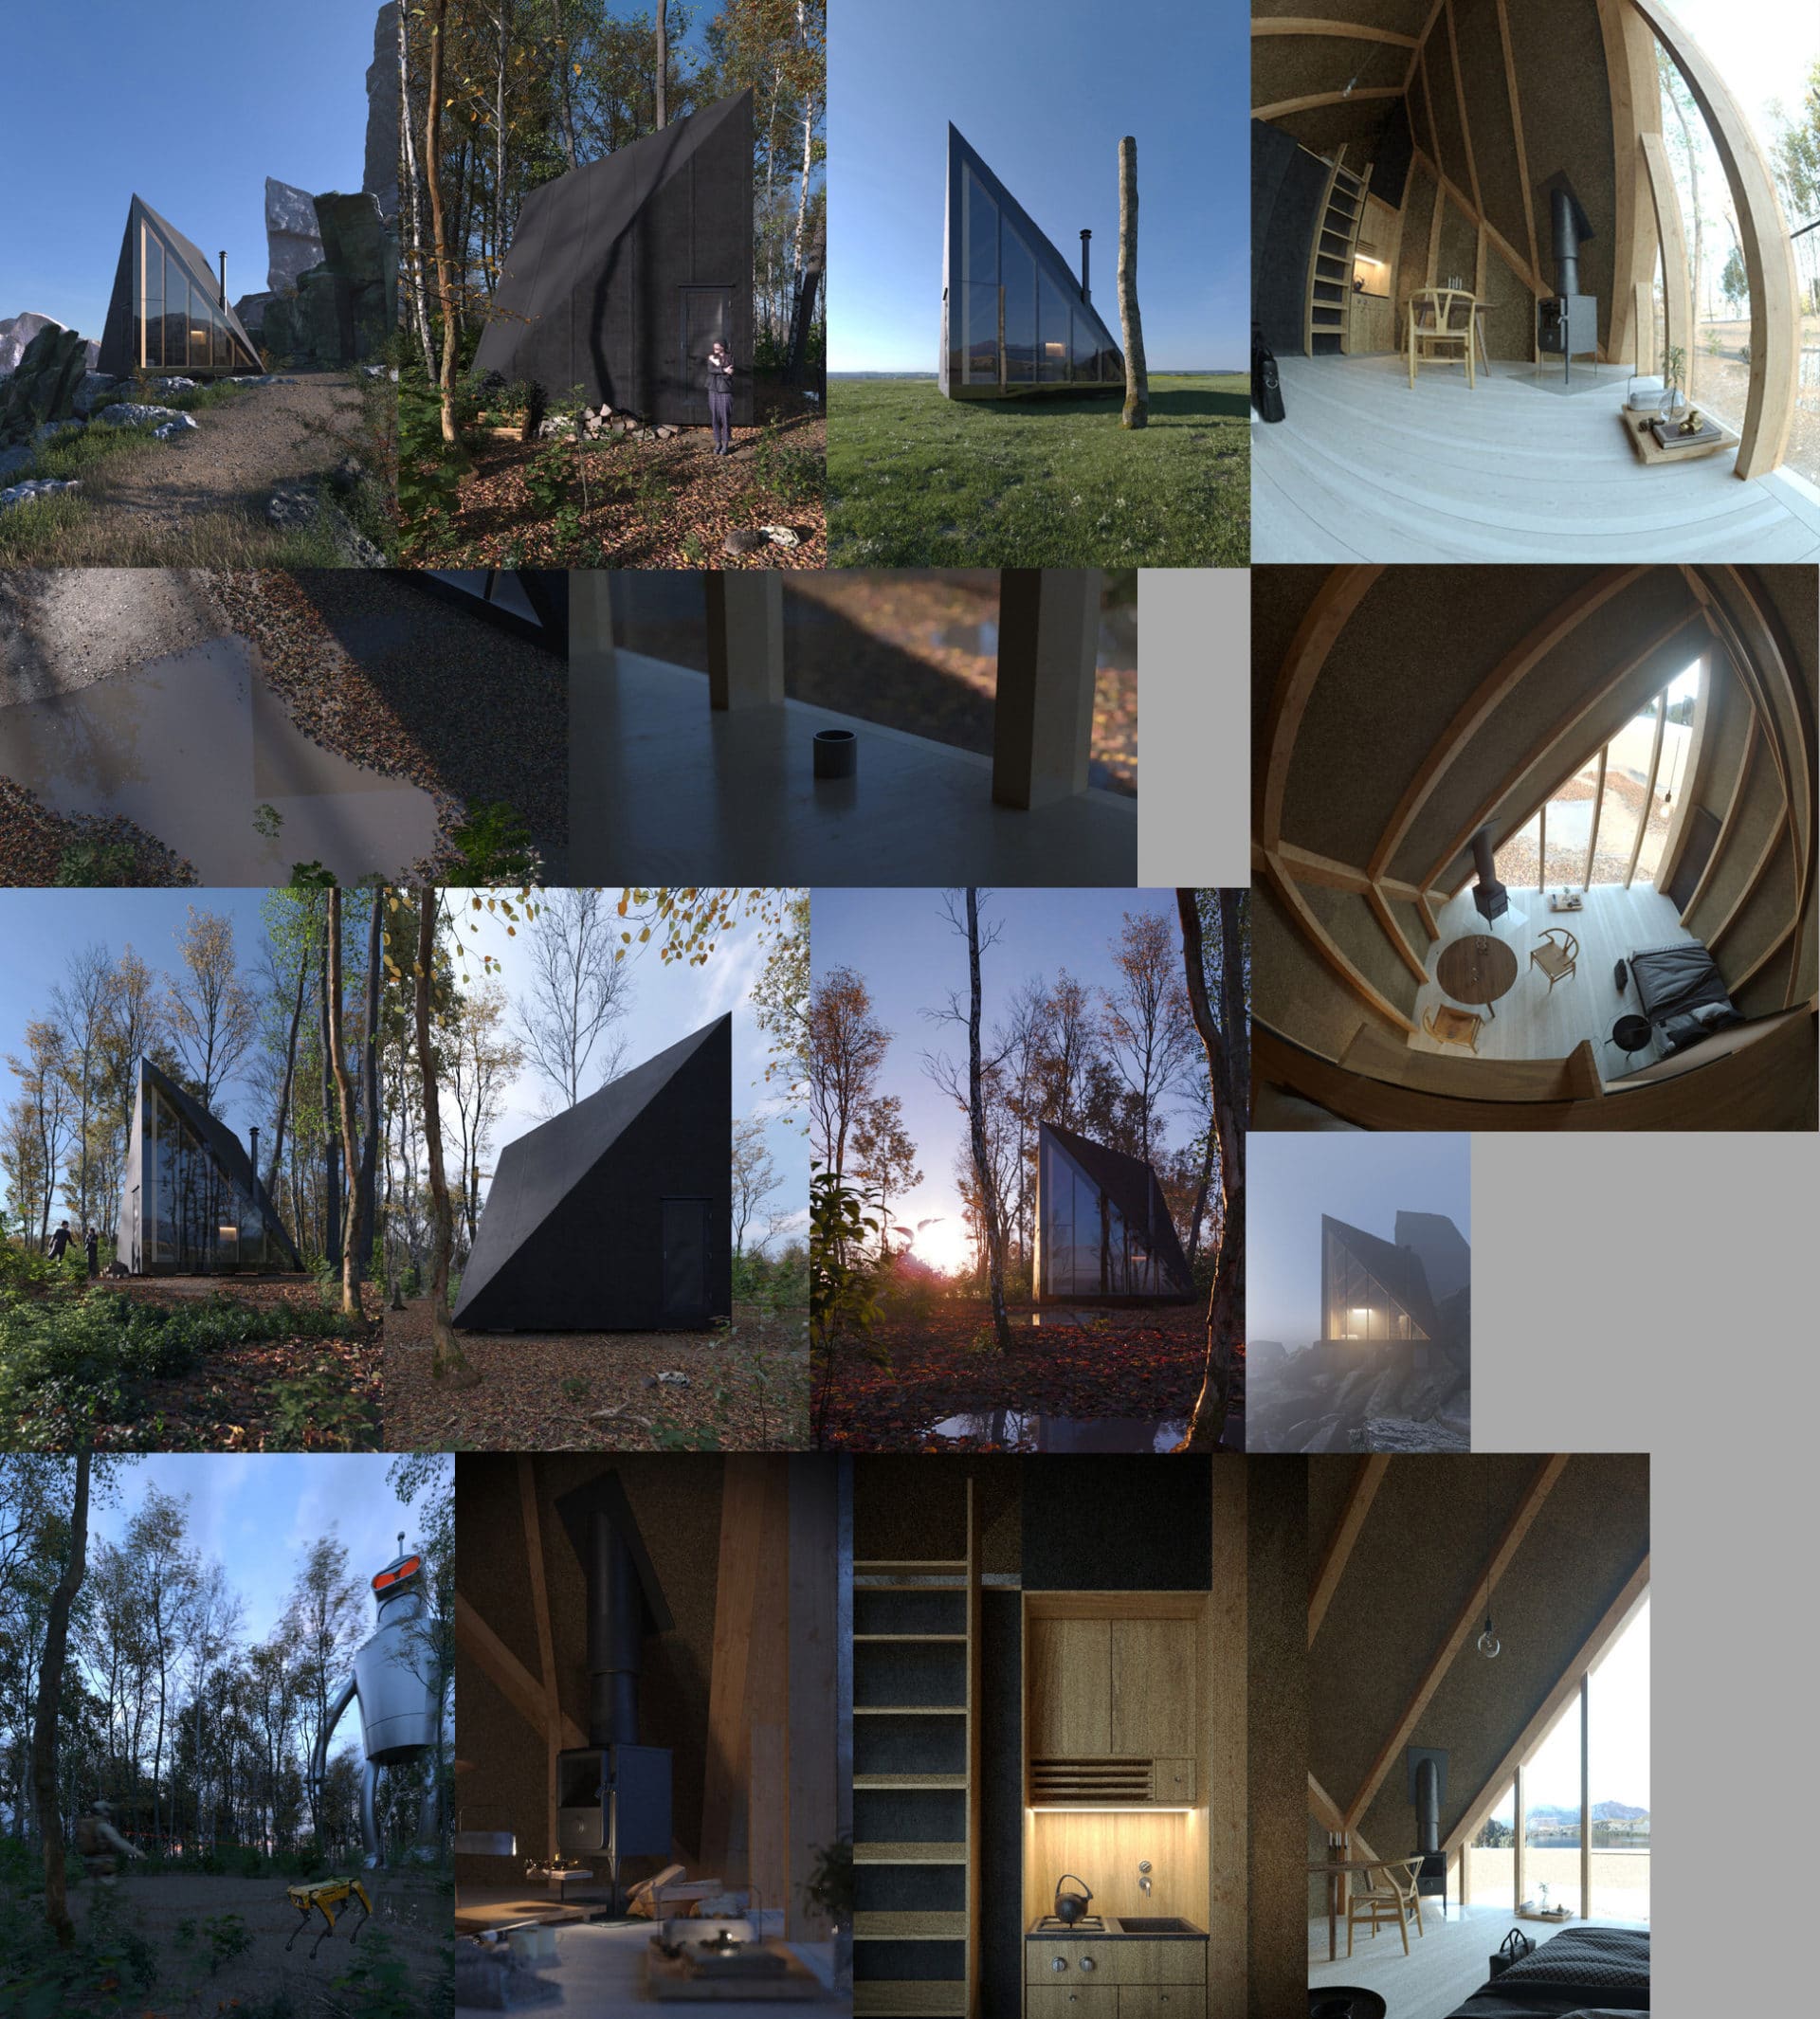
Finally, I would like to share a board of test renderings created while working on the A45 project. Not all of them are completely serious, but they all show how many ideas I failed to implement and how many paths the creativity triggered in the process takes.
I hope you enjoyed this one! see you on TALK to discuss this 😉
Radosław Kielak.


Nothing to say bro … You are very incredible 3d Architectural visualizer … I think I can’t go to your level …Are you using sketchup-vray next? Can you give a tutorial on how to make a very realistic detailed ground, like in this A45 Cabin artwork, using sketchup-vray-next?