

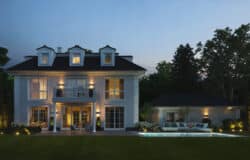


Reality Check with a Modern Barn in UE4
I’ve been following this work by Guilherme Rabello since he first shared progress images and I must say this looks good. Very Good! It is super inspiring and now he shared a very informative post on TALK which I recommend all of you to follow.
Reality Check number one in relation to game engines being able to pull an ArchViz project was the Unreal Engine 4 + ArchViz tests by Koola. This sparked the process that ended up with The Vineyard challenge on the blog in partnership with Epic Games!
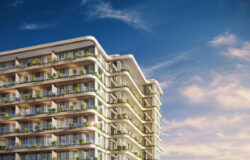
Factory Fifteen took the Grand Prize in that one and we all know what is possible in ArchViz with UE4 and other real-time tools since then which makes what Guilherme Rabello is doing even more impressive. It is the first time I’m seeing what is an ArchViz related world building on a large scale, taking care of the small details that look so photoreal by leveraging photogrammetry based scanned assets.
This represents work done in the recent couple of months being shared on Twitter and now also on TALK under the PROCESS category.


It is clear that it takes time and effort to get things to look like that with UE4. That is probably why such achivments are few and fer between.


Thanks! Yes, I’m using DF Shadows and cascaded shadows.
Cascaded will give you the definition you need for medium-small details nearby. You must tweak
Dynamic Shadow Distance Stationary LightandDistribution Exponentto achieve what bests suits you. I also like to decreaseShadow Bias(default is 0.5 and I usually set it to 0.3 or 0.2) to increase definition. The trade-off is that you’ll start getting visible shadow banding so it must be tweaked with caution.Outside the Cascaded Shadows radius the DF Shadows take place (if they’re enabled, of course). They aren’t near as detailed as cascaded but they do a good job for medium-far distance foliage (and even buildings sometimes). I like to reduce
Ray Start Offset Depth Scaleto get some extra detail on them.Sometimes I also use Contact Shadows to add some extra detail to small objects. It’s good for grass, but be you need to be careful because real lawns are denser than what you’re probably recreating in real-time and the individual blades shadows in real life won’t be so noticeable as it will in your sparser UE4 lawn (thus revealing a lot of contact shadows in a unrealistic way). Contact Shadows also adds artifacts that are very apparent in flat surfaces.
About AO baked to vertex color, that’s a very handful SpeedTree feature. You can obviously use it for controlled AO in the materials but also as a mask to reduce specular, reduce subsurface and decrease color intensity in the interior of the tree. It gives you artistic power to compensate the absence of baked lighting in your foliage.
For the grass material I use Masked - Two Sided Foliage (with the same vertex AO tricks I use on the trees).
Thank you! It has some blueprint coding involved but the overall process is a lot more lazy than that.
I’ve used a Vive and a default First Person Char actor:
In the end you’ll have a sequence with a motion captured camera. Then you can play it or compose it with other sequences, etc…
Hey, guys.
A couple of pictures of some lighting tests that I’ve been doing:
I’m trying to use Lighting Scenarios so I can keep 2 or 3 different lighting situations in that same main level. The drawback is that the amount of RAM used will increase a lot since the lightmaps of all the Lighting Scenarios are loaded at once with the main level.
The other way around would be keeping 2 or 3 copies of the same level with different lighting setups but that workflow is a nightmare when you’re constantly updating the project.
For each Lighting Scenario level I have different:
I’ll be posting the final footage of that project soon.
Hello guys.
As I said in the main post, I did a week sprint last month to create a real-time footage of that project for my CGarchitect Award 2018 submission (I got it confirmed in the end).
I was holding it until they published the results. As I didn’t get between the final nominees, I’m sharing it here with you guys with some details about how it was done:
https://www.youtube.com/watch?v=QBfV-hDsV-QThe award rules required a real-time footage (at least 30fps - 1080p) and some player interaction. So I divided the video in two parts. The first one is a Sequencer based footage with simple camera cuts and a song. The second one is a first person walk-through that I controlled with mouse and keyboard.
For the interactive part I set up some sound effects to contribute with the immersion:
Not the best solution for the sound triggering… But I didn’t have enough time and that one got the job done.
I’ve also added an Audio Volume inside the house that slightly reduces overall sound volume and cut off the higher frequencies (all those settings are easily changeable in the Ambient Zone session of Audio Volume settings).
The resolution was set to 1440p and the framerate locked at 30fps (it was oscillating between 33 and 45 without the locking). I’ve captured the screen with Nvidia Shadowplay at 60fps (it produced a smoother video - less stuttering).
PS: The project wasn’t finished when I made that video. So I’m not considering it “official”. I’m still working on my final portfolio footage for that project (my agenda got so crazy during the last couple of weeks and I had to put it on hold for a while). I’ll definitely finish it this weekend
Cheers
That project became big enough that I gave up trying to show it in a single video. It would be too long and boring… So I decided to create three . Each one with different focus and mood. I’ll be releasing them in the next couple of days and here is the first one. I hope you guys enjoy it
https://www.youtube.com/watch?v=tQ3RnX3iIswCheers
Second part:
https://www.youtube.com/watch?v=VXdJk87v4Fs