


Making of WINTERHILL
Best of Week 24/2016 by Andrei Mikhalenko was about recreating a strong image he carried in his mind for some time. It was a personal project in which he bonded the winter harvested field concept with a house he designed later on to fit. This work focused heavily on creating the environment using GrowFx and Forest Pack. Besides these, Andrei also used 3dsmax and V-Ray to create the final images. Dive into this detailed making of the “Winterhill”. Enjoy!
The Concept
The way to this work began back in 2014. During a break from work, I was scrolling my Facebook feed and came across one image depicting a winter landscape and a harvested field. I remember I thought it would be nice to make a work with a similar ambiance one day. I’ve put the image into my “inspiration” folder where I collect references for later use.
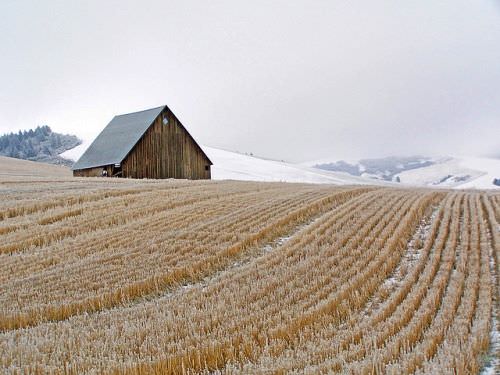
The image has spent more than a year waiting for the right time as I constantly kept it in mind. The only thing missing was the architecture piece that would match the scenario. Once, while drawing some sketches and looking for an interesting concept, I came up with the house of three volumes.
It was a perfect match!
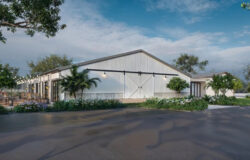
The idea behind the design was to make a building transparent the sunlight piercing throughout its length.
Reference
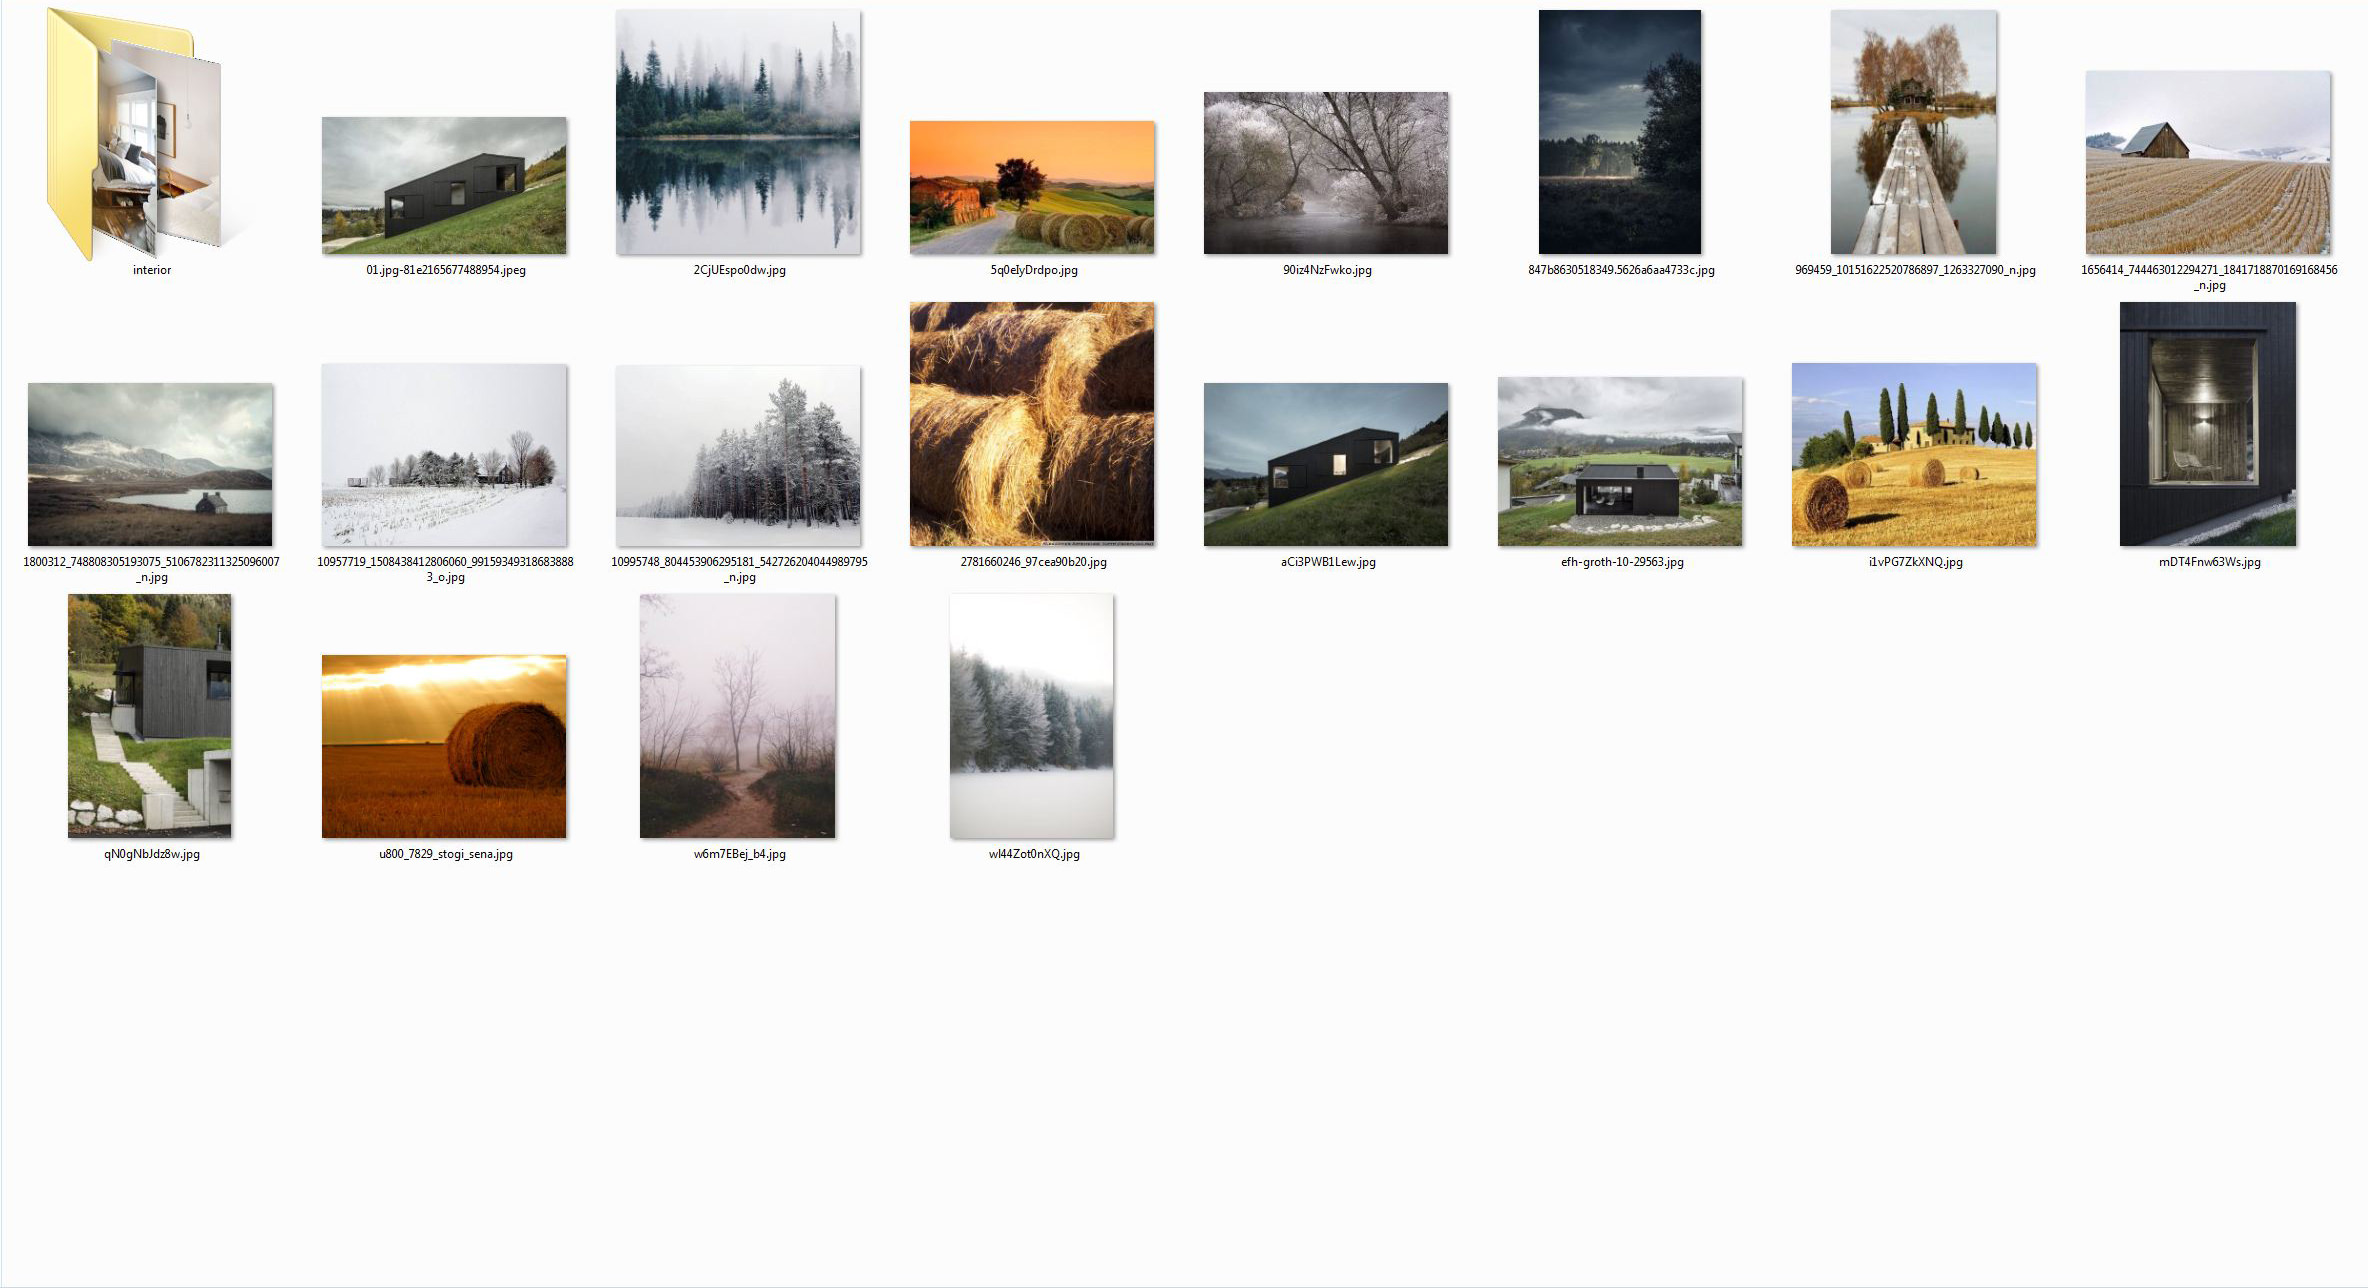
After clarifying the architecture and keeping in mind a vague image of what I aim to achieve I began to collect additional references. It helped me to get deeper into the environment and architectural details.
For this particular project, I didn’t need too many since I’ve spent my childhood in a suburb and my house was located right next to a field merged with a forest. That’s why early frost hour and the late autumn theme is well known to me.
3D Modeling
Any time I start working on a model, I create Biped to orient myself in a scale. Later on, when the number of elements grows, the Biped becomes useless since I start to feel a scale in the differences between elements.
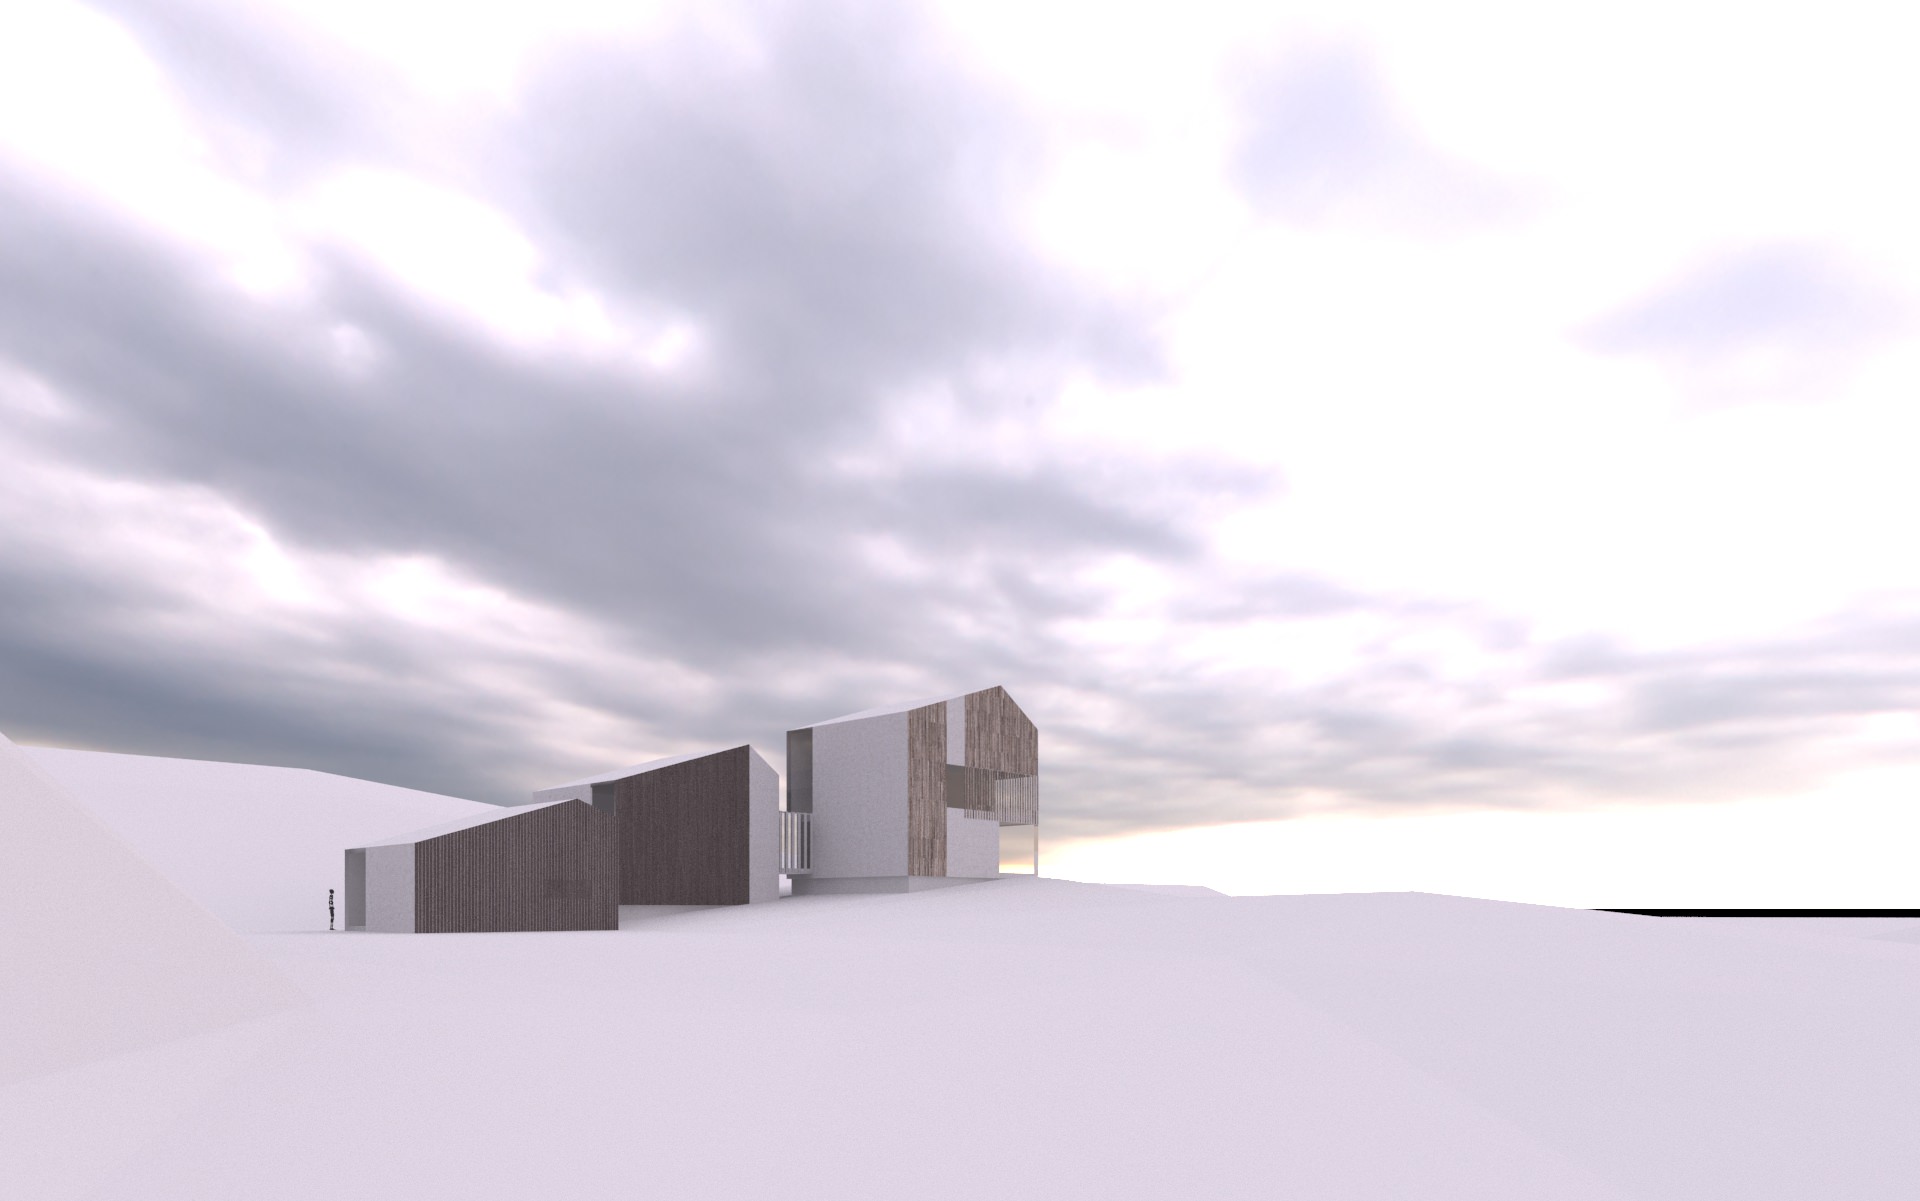
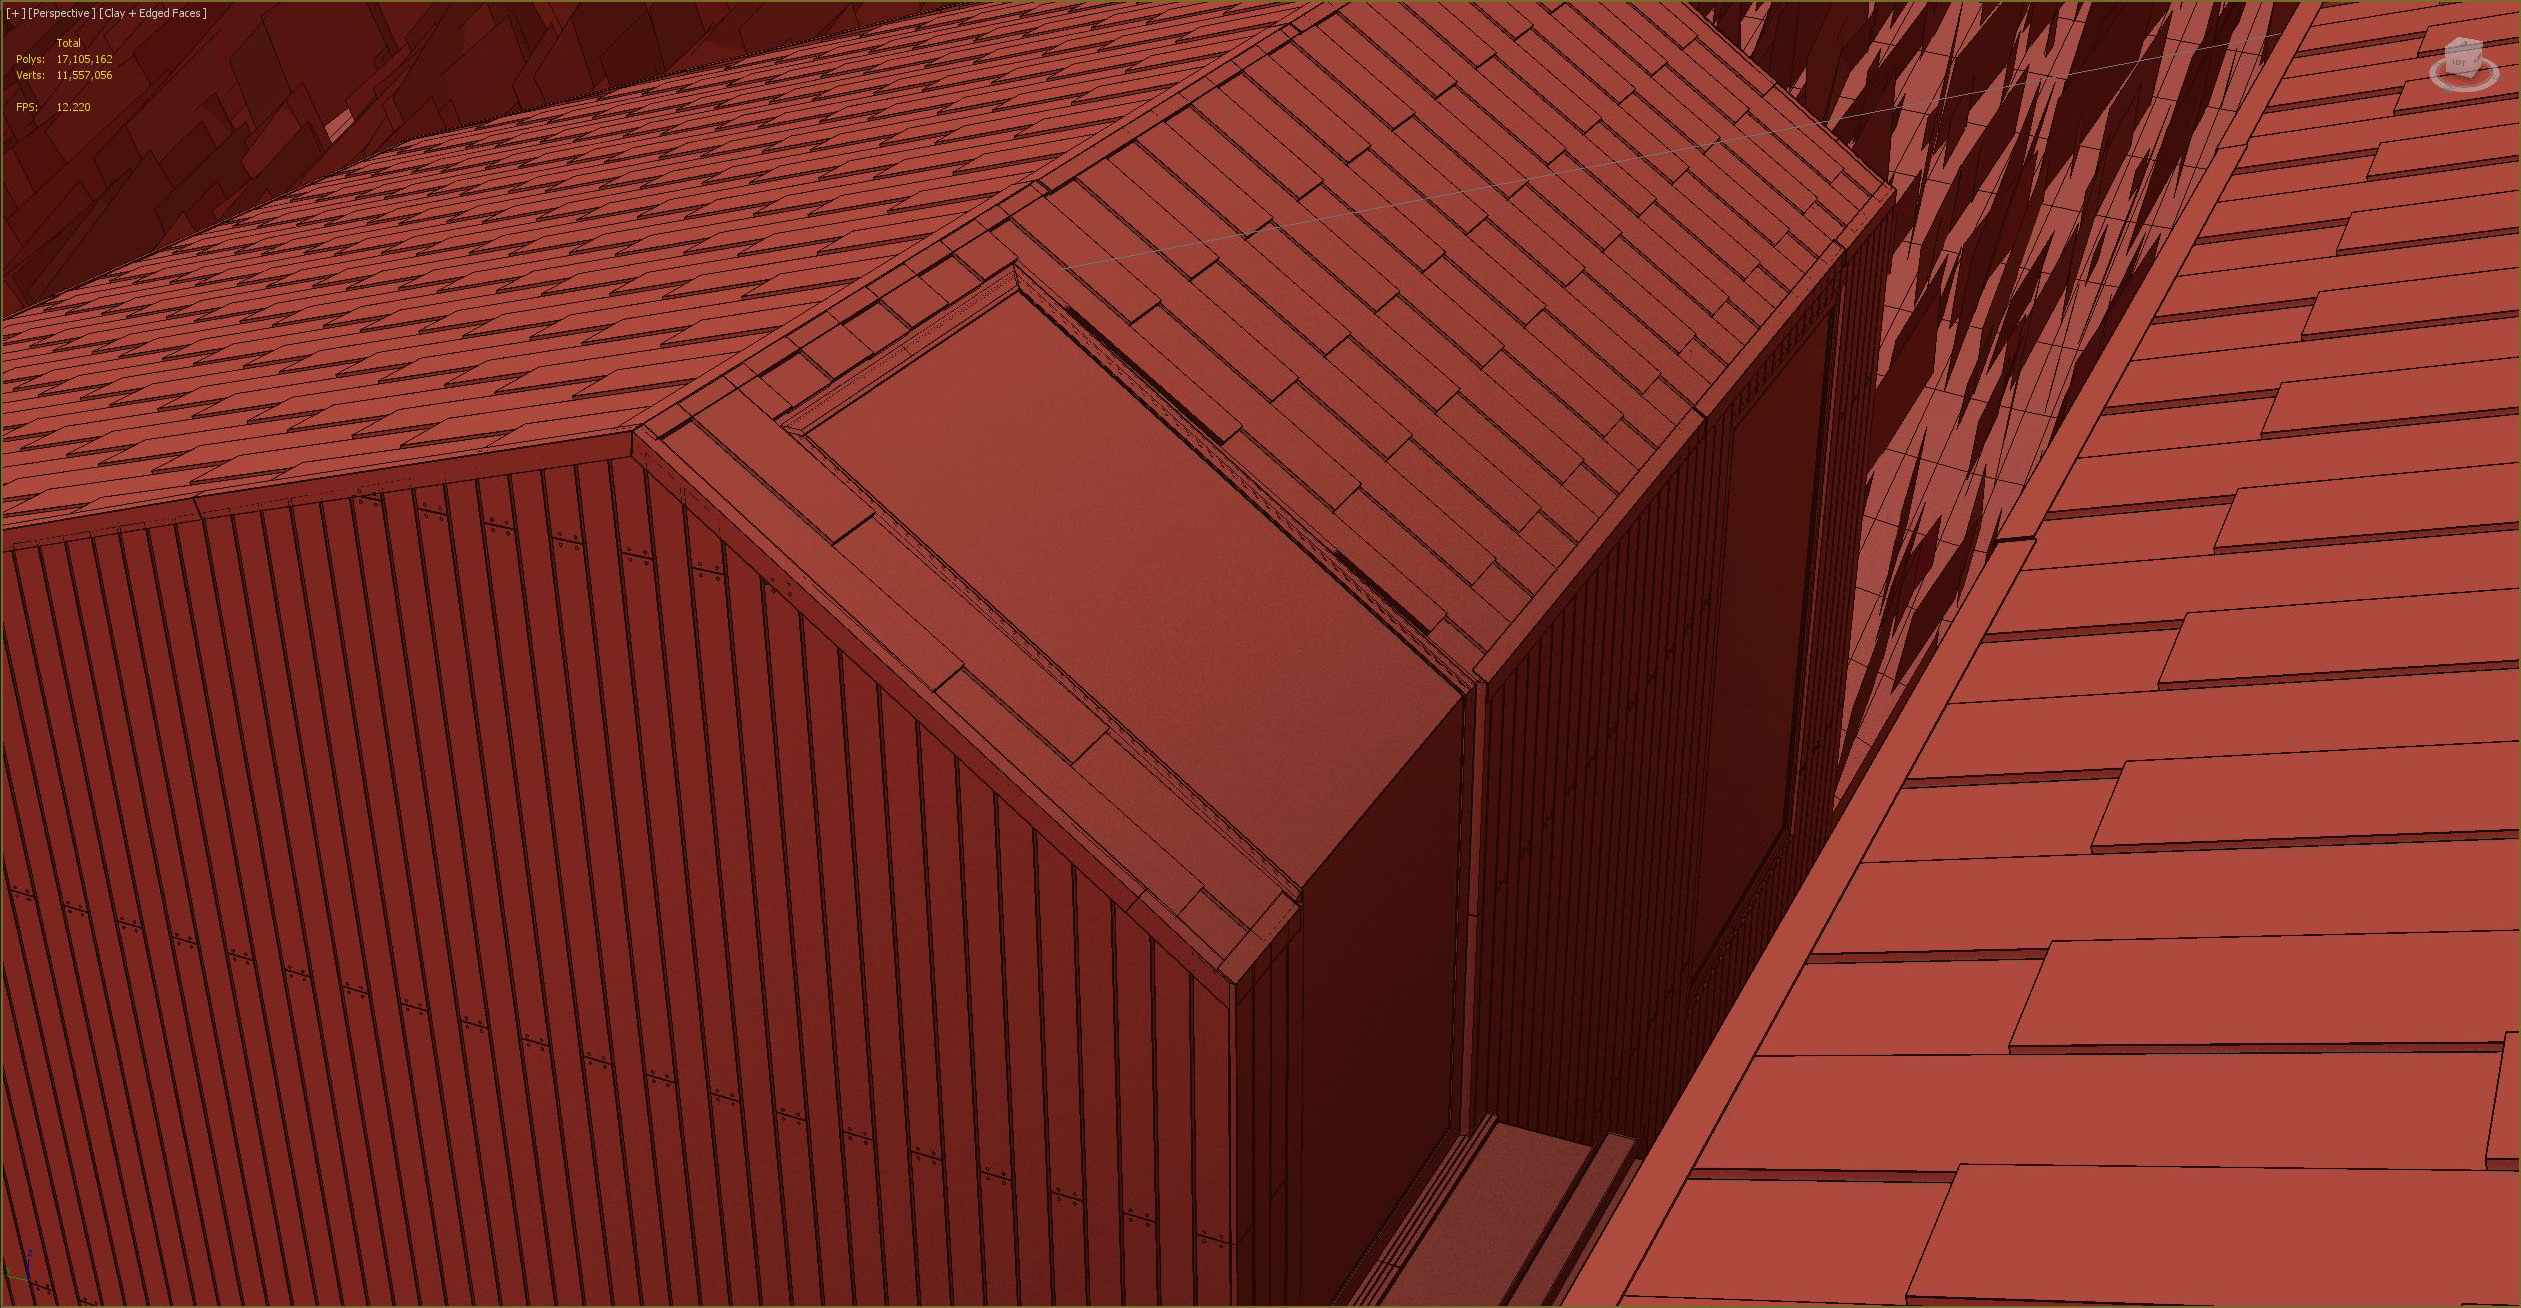
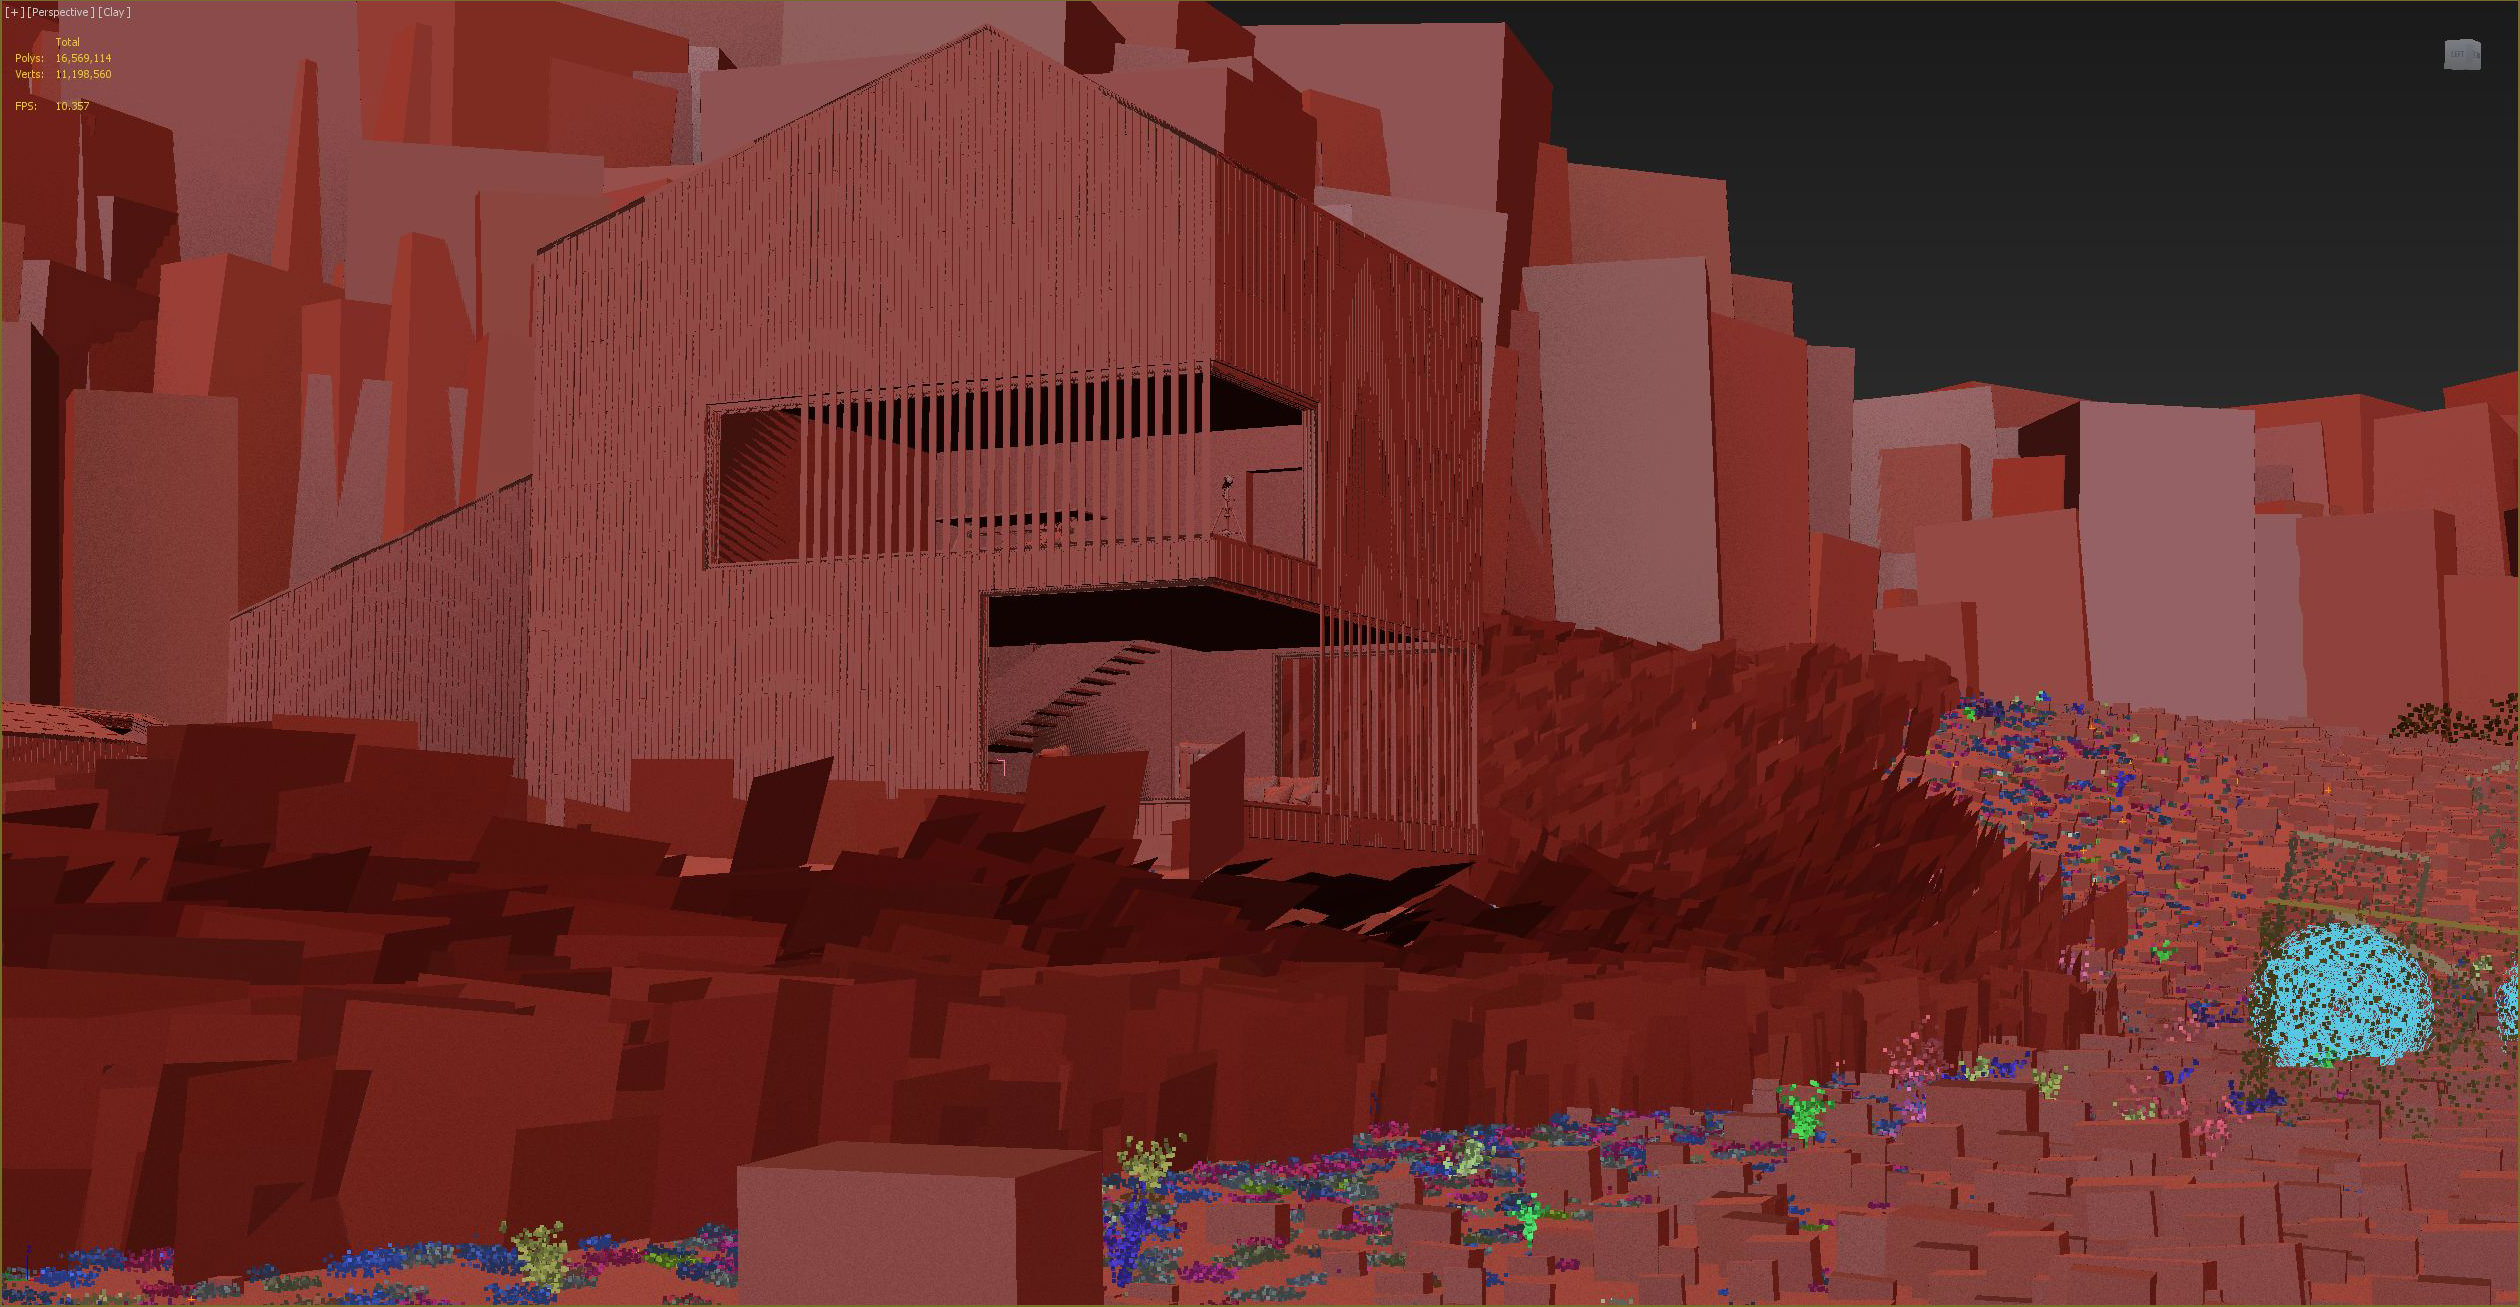
There is nothing special in the model of the building. The sheathing is created using FloorGenerator plugin. Small details like nails were modeled using simple spheres and Clone modifier (It is a freeware you can download from iToo Software website).
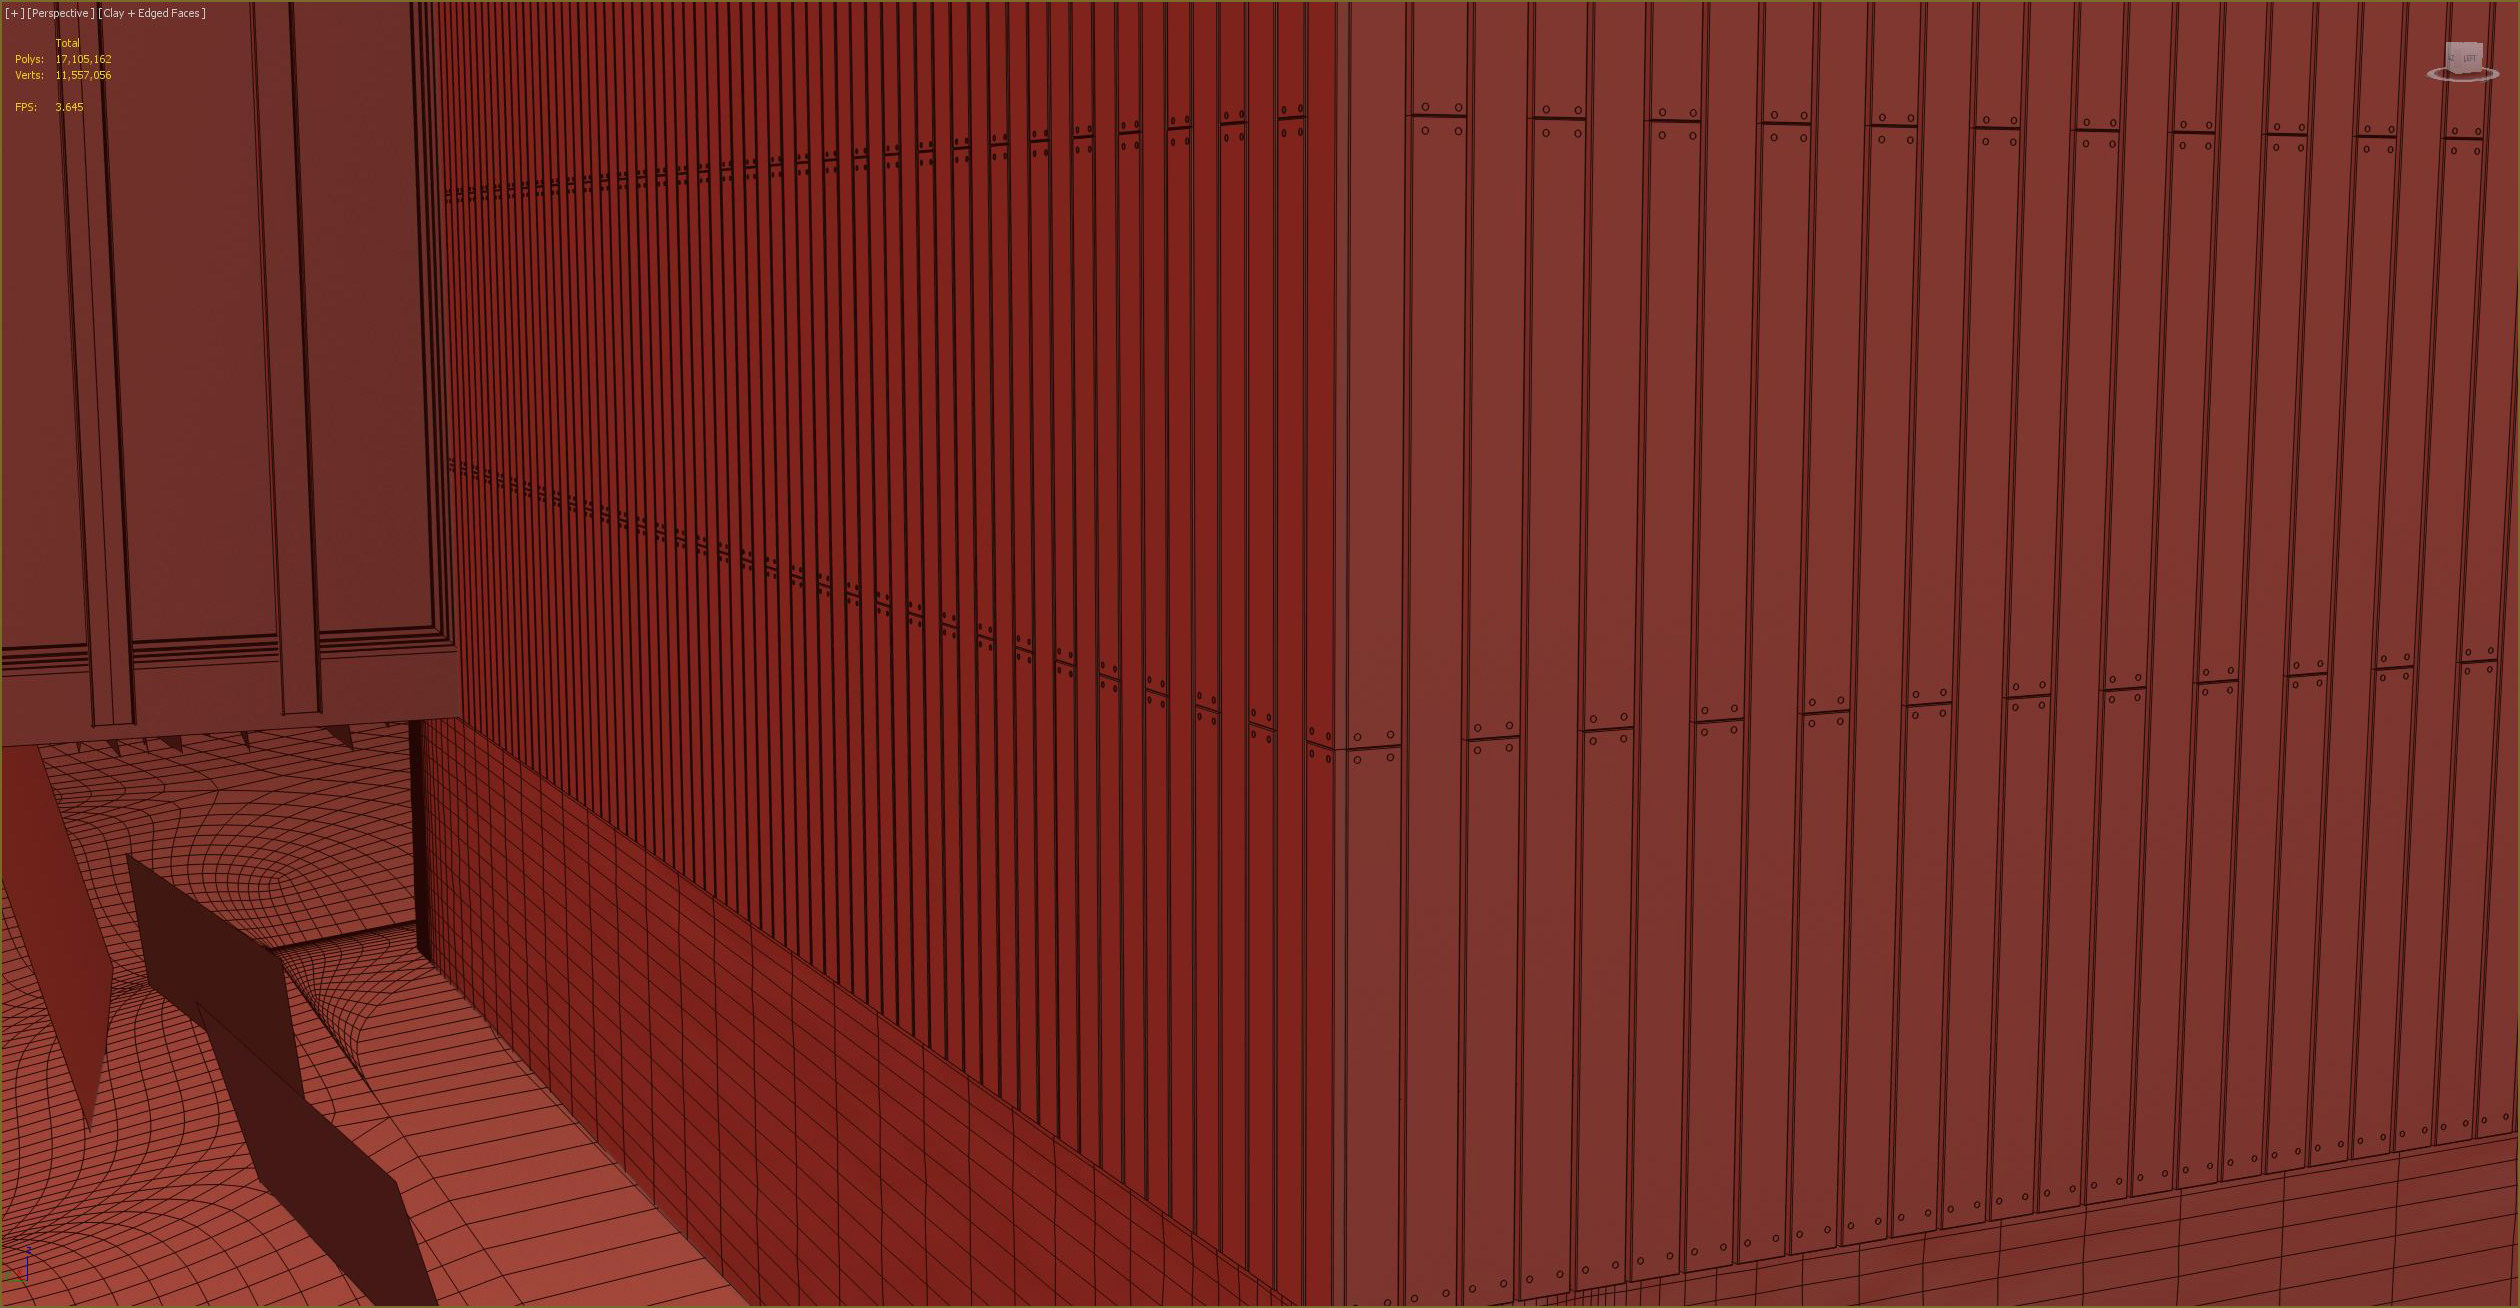
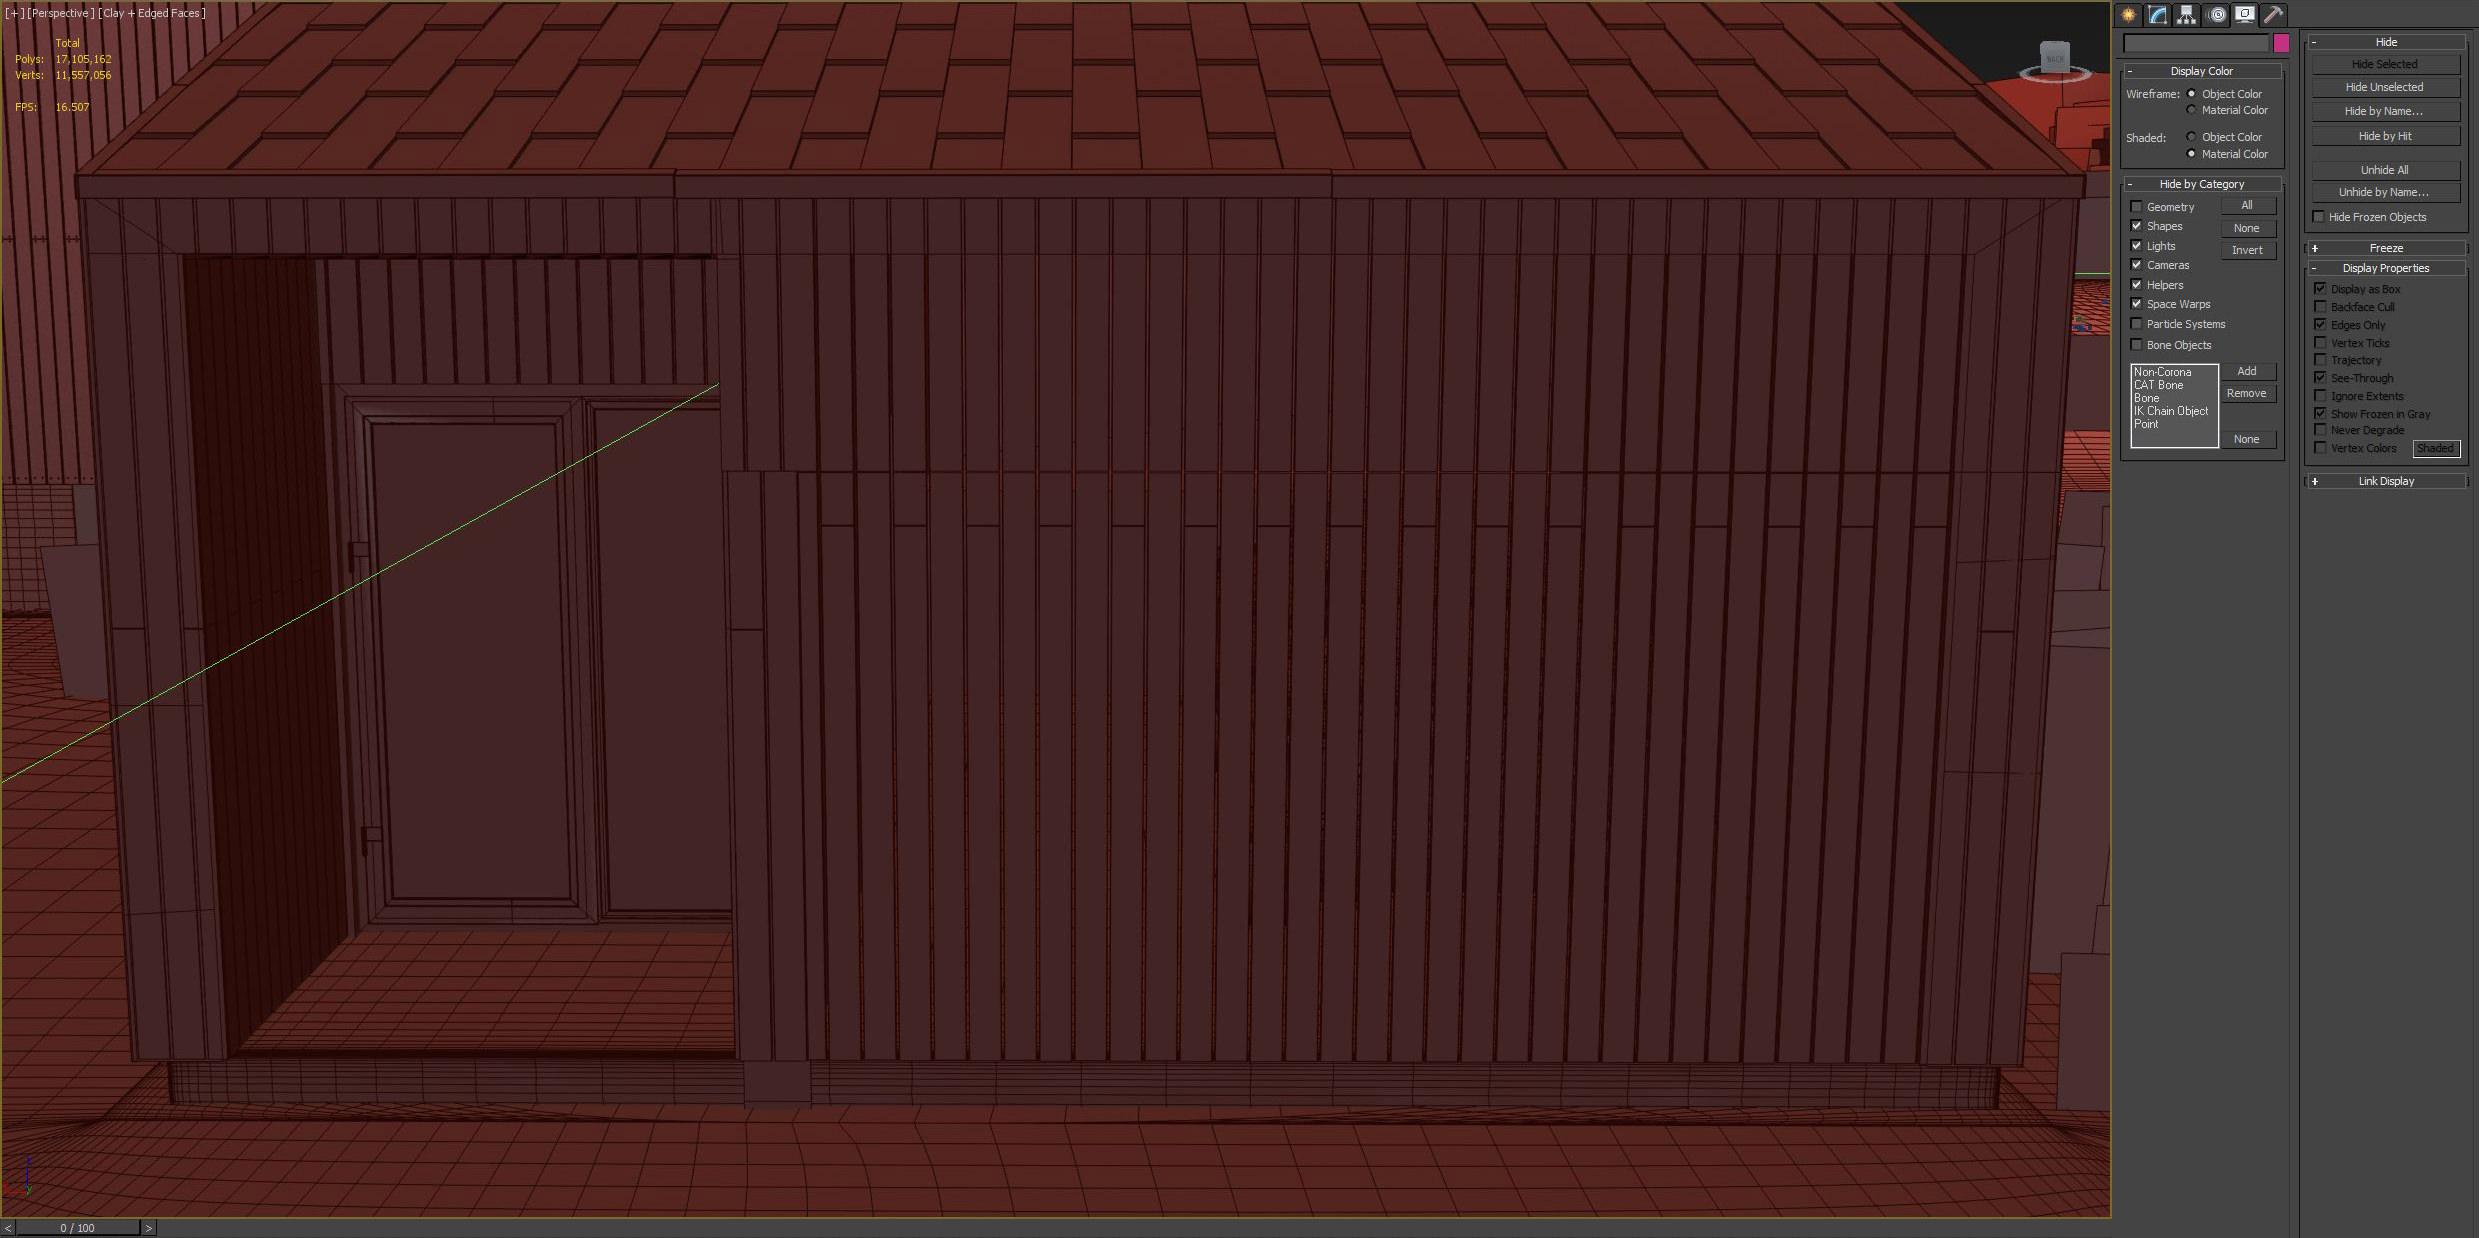
The kitchen and living room interiors are modeled as well. You can see them through the large panoramic window in some angles. You should never forget about the interior even if you render the exterior shot. It adds some details to your image that are not obvious but can bring another piece of the story you aim to tell.


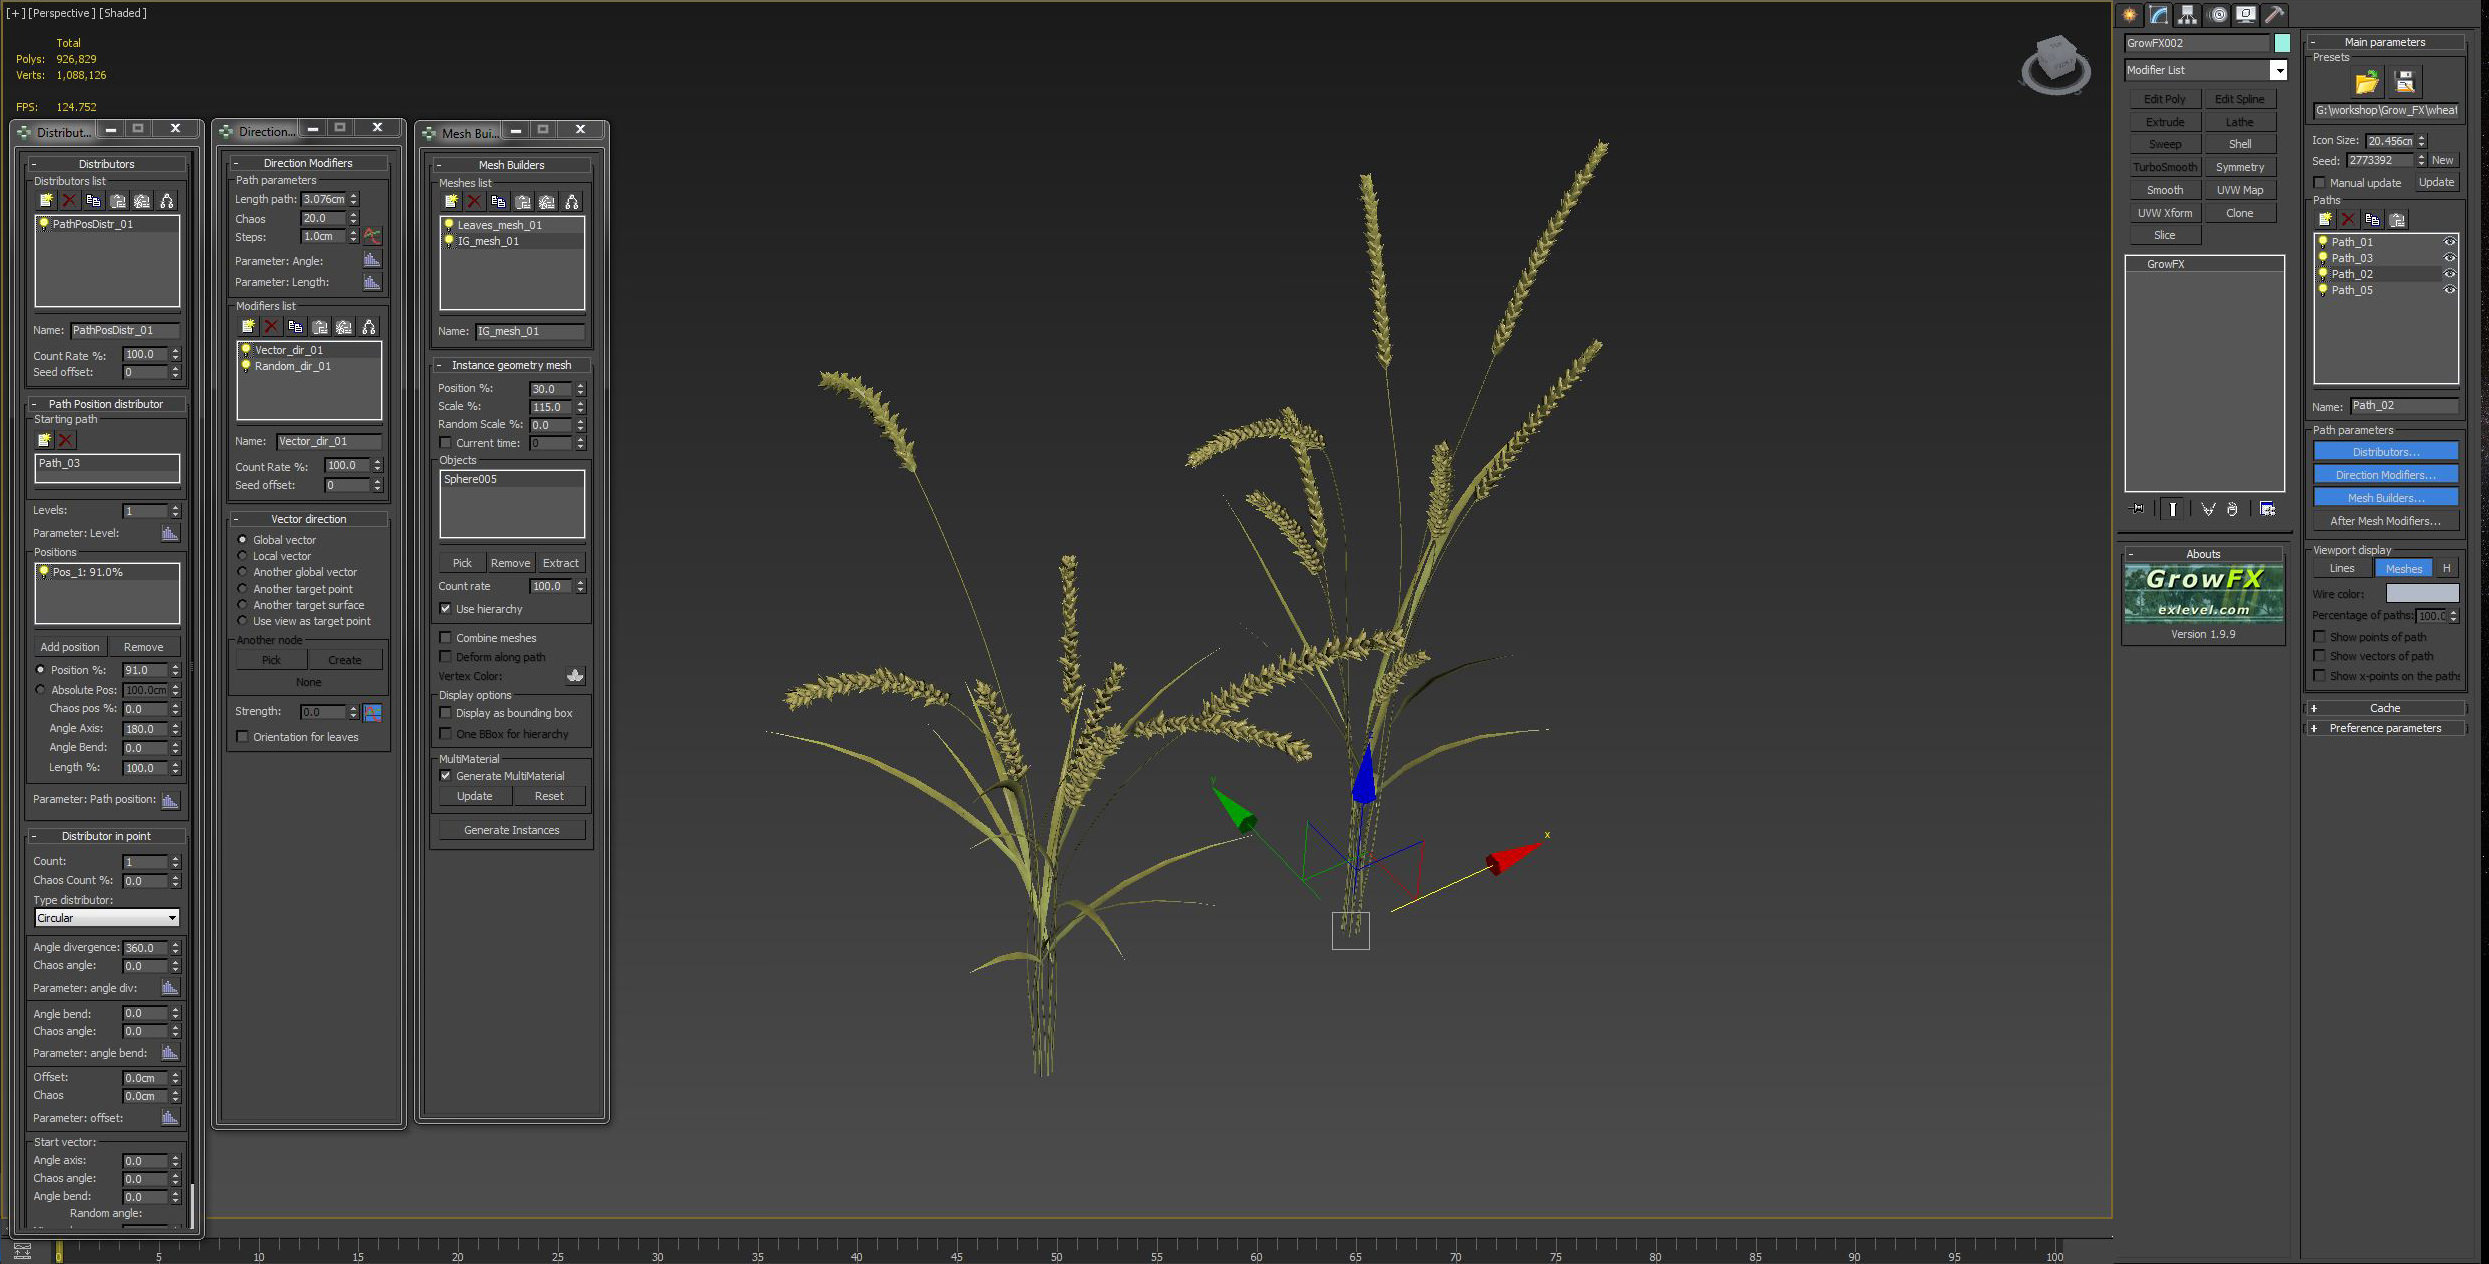
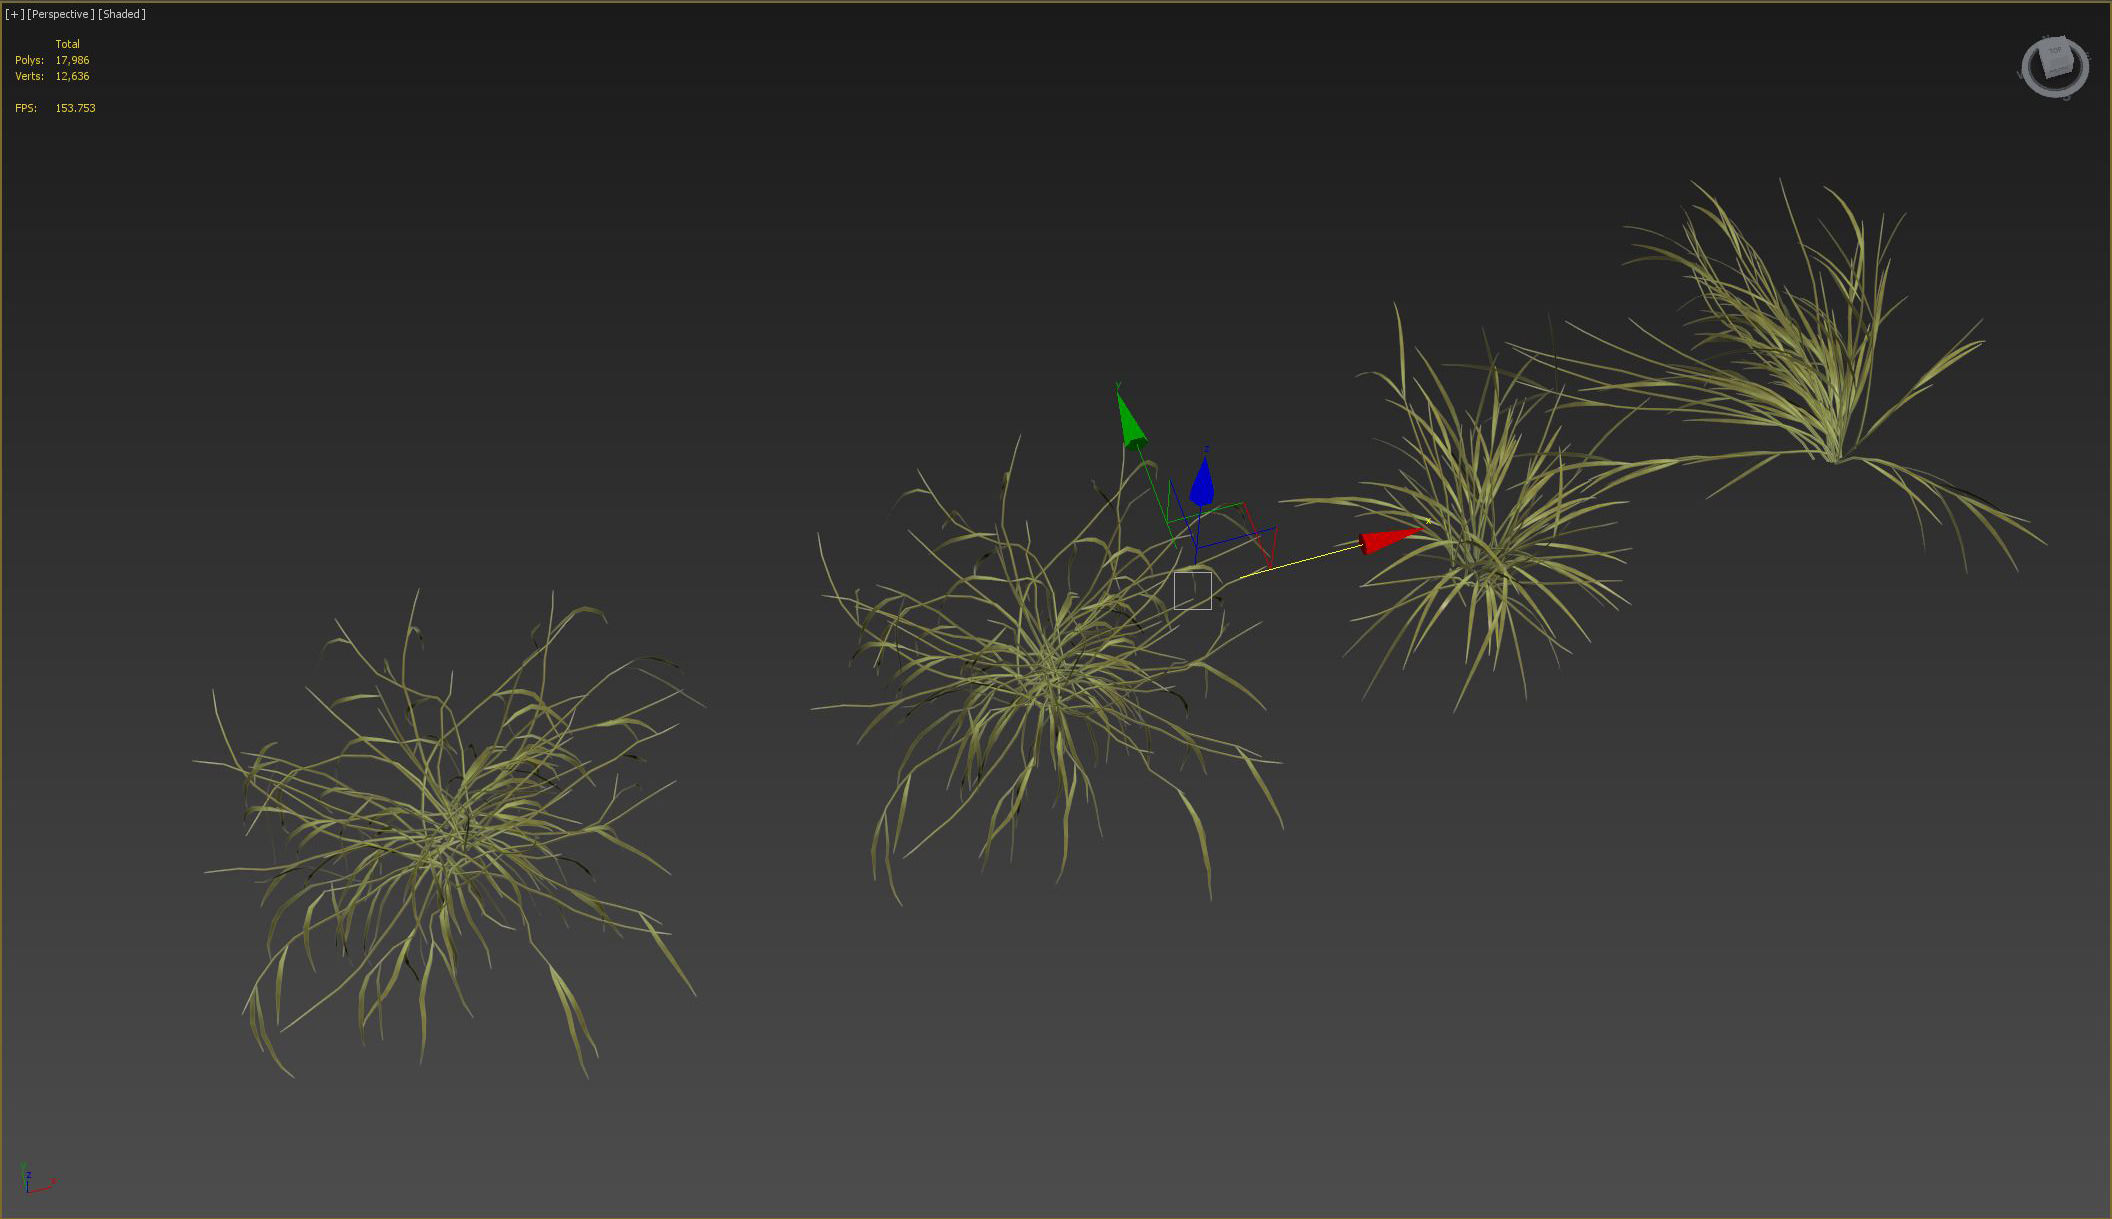
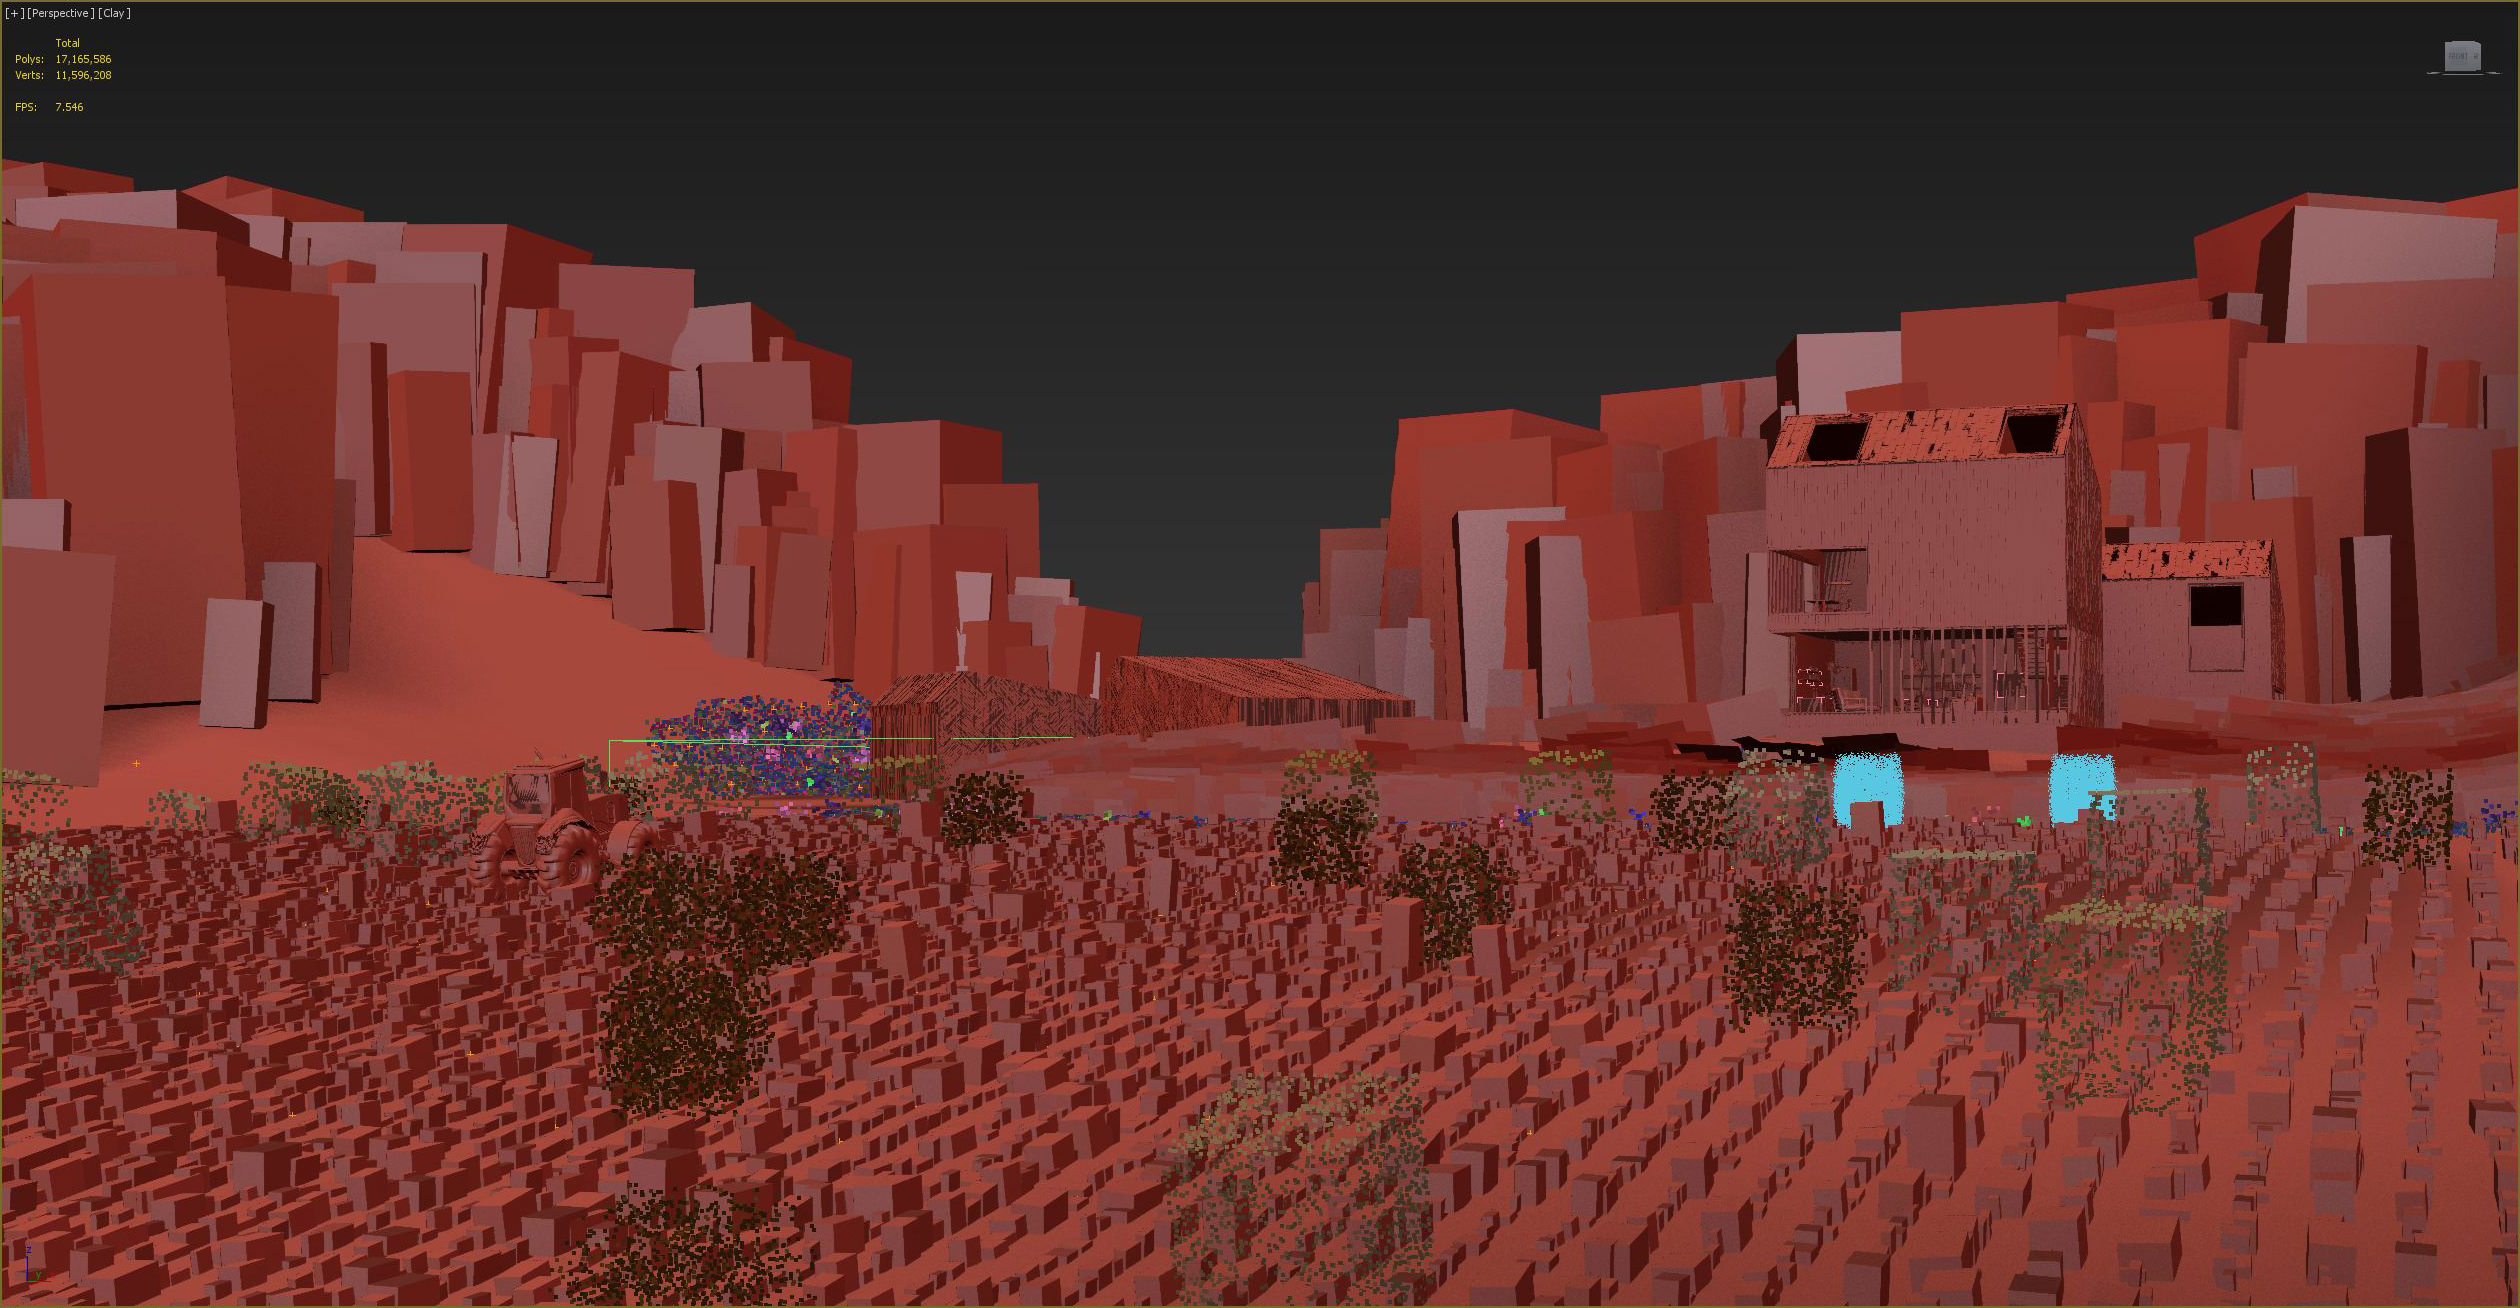
In this work, the main emphasis is on the building surrounding. The most powerful elements are harvested field and the haystacks. Since I always aim to create unique models for my works, this time I had to patiently model all the vegetation. I used the GrowFX plugin for those purposes.
The Haystacks
The first thing was to open the Google and look for references. Even seeing objects for so many times before you can miss a small detail affecting the realism of the image. As we all know, the realism is all about details.
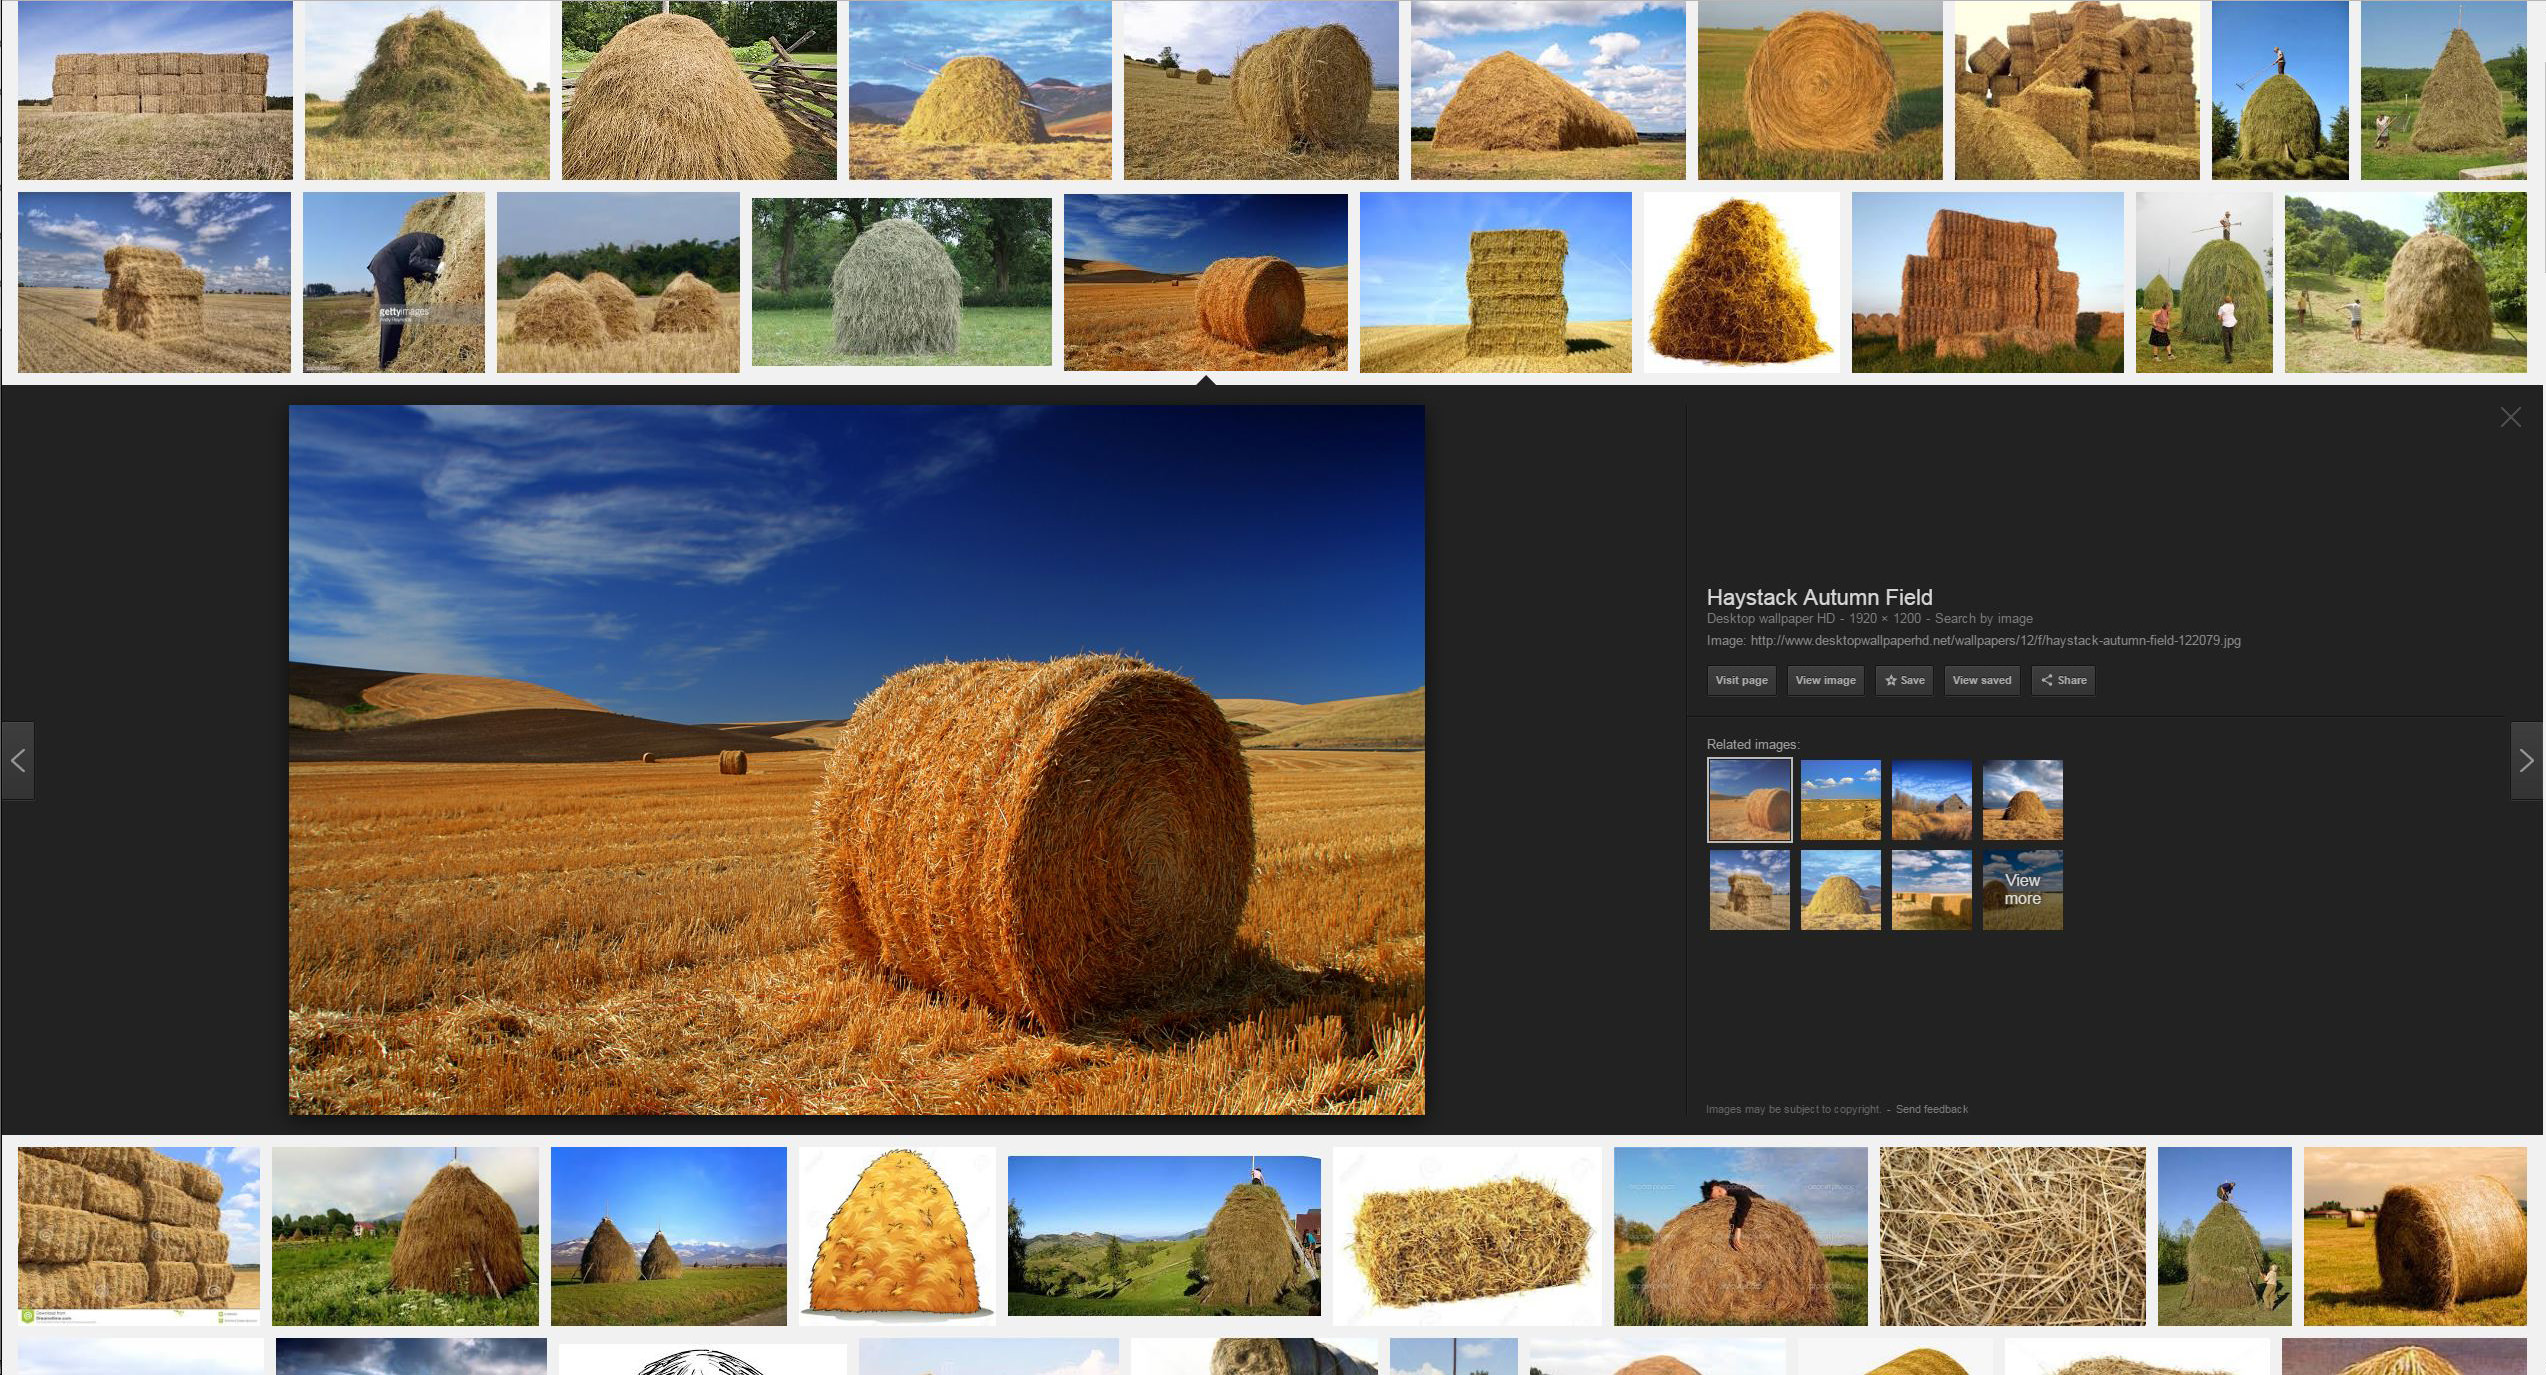
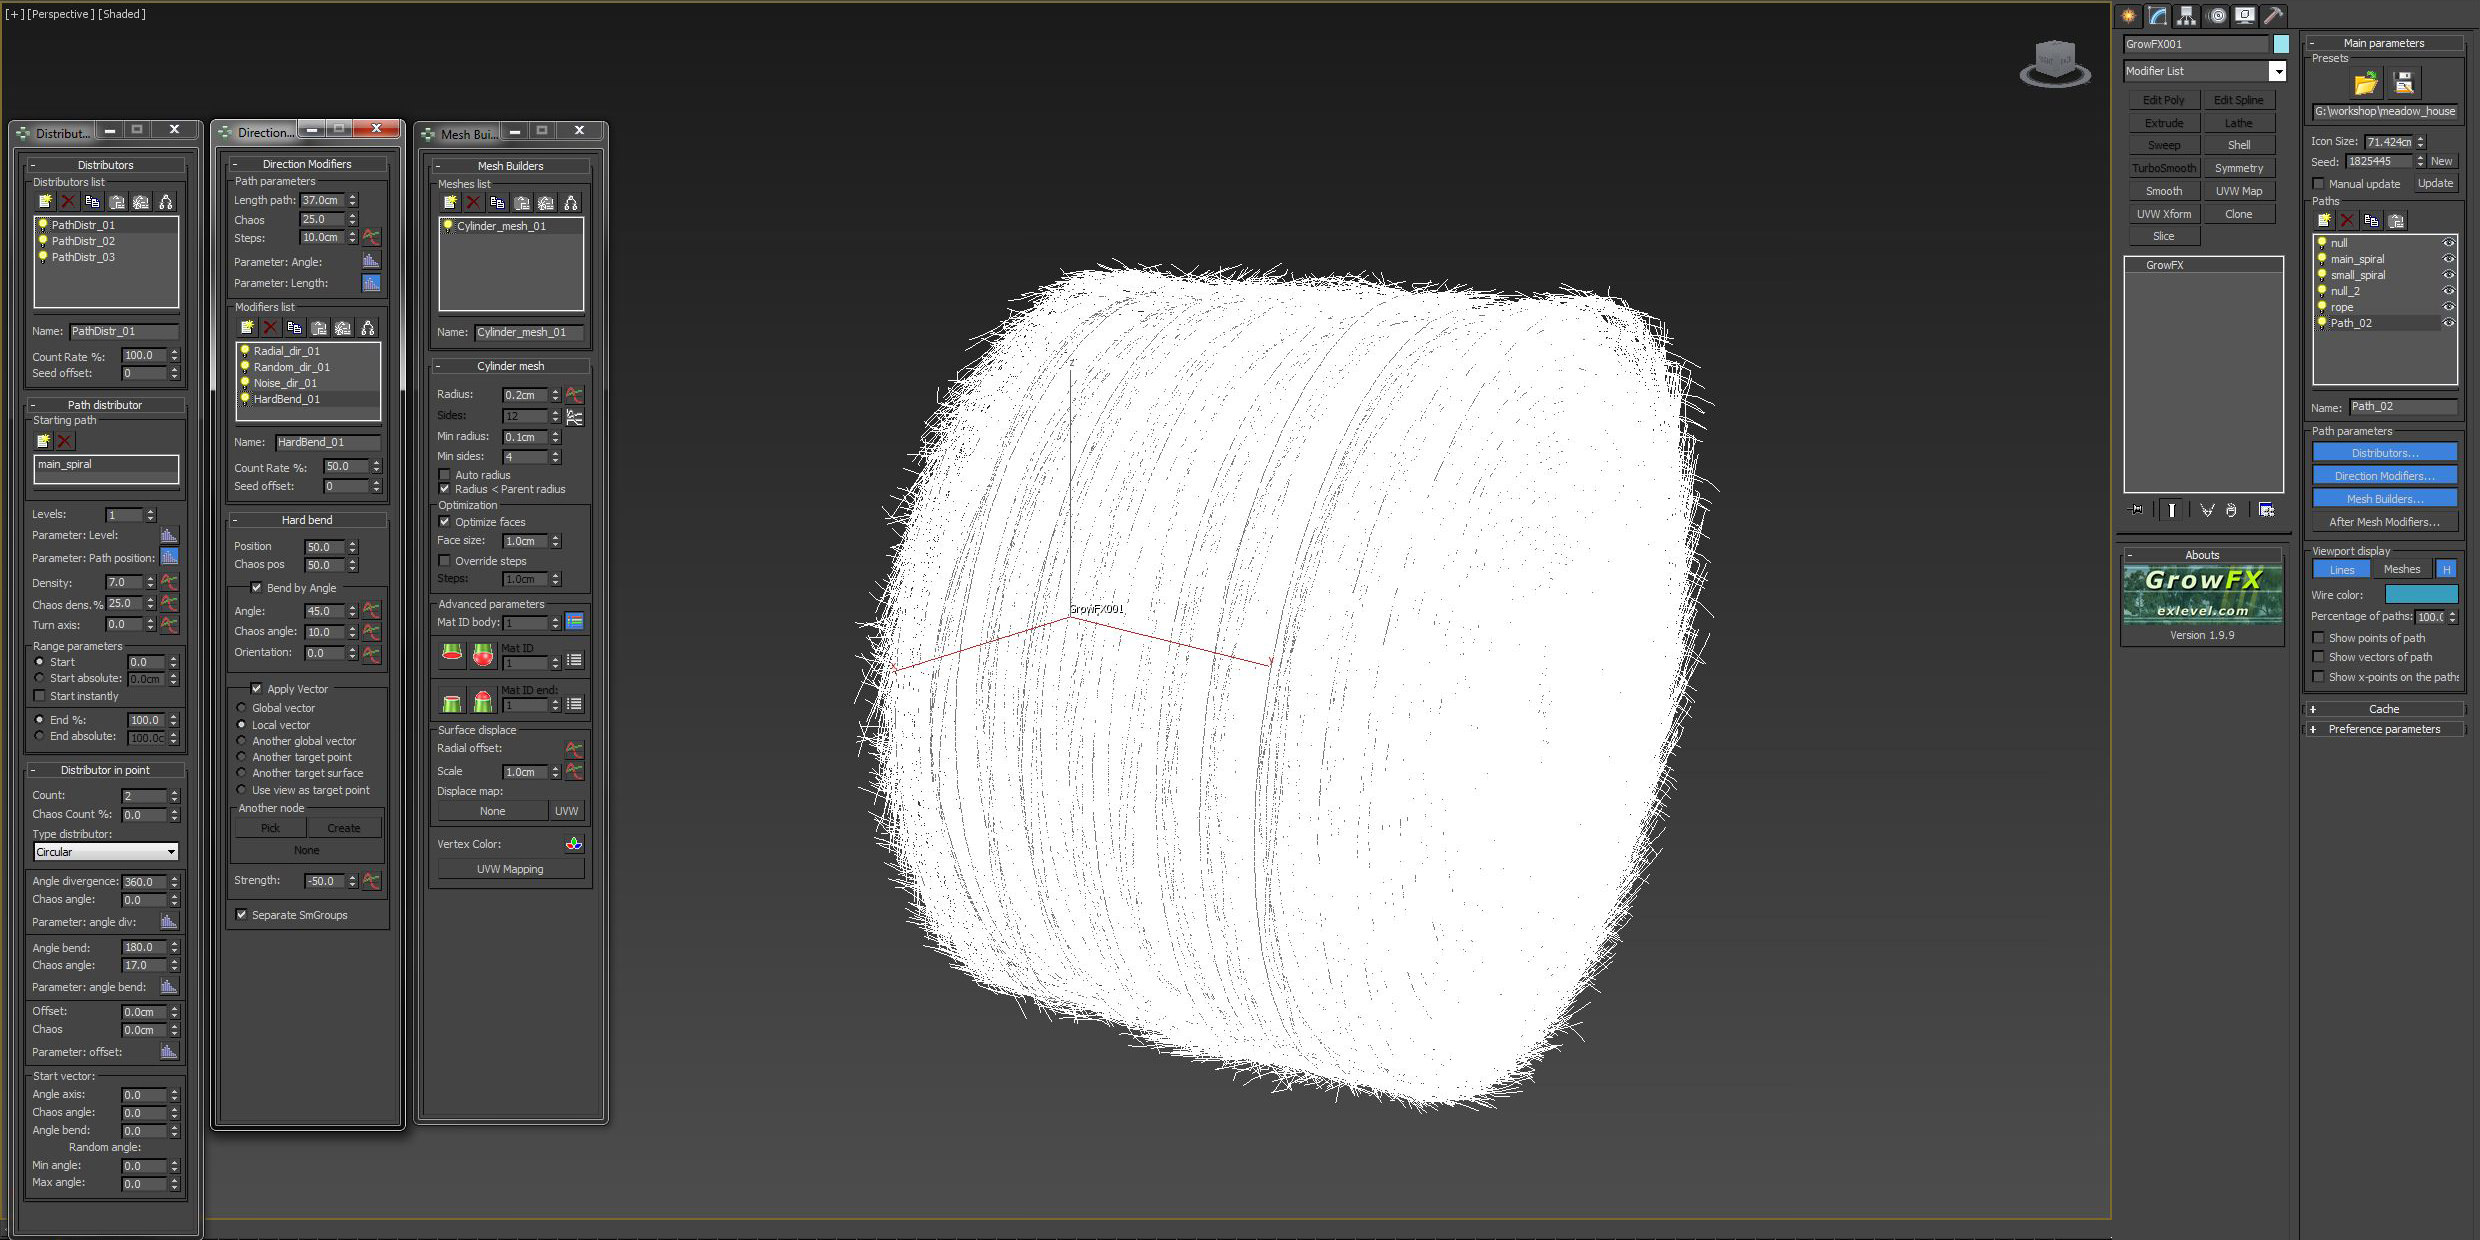
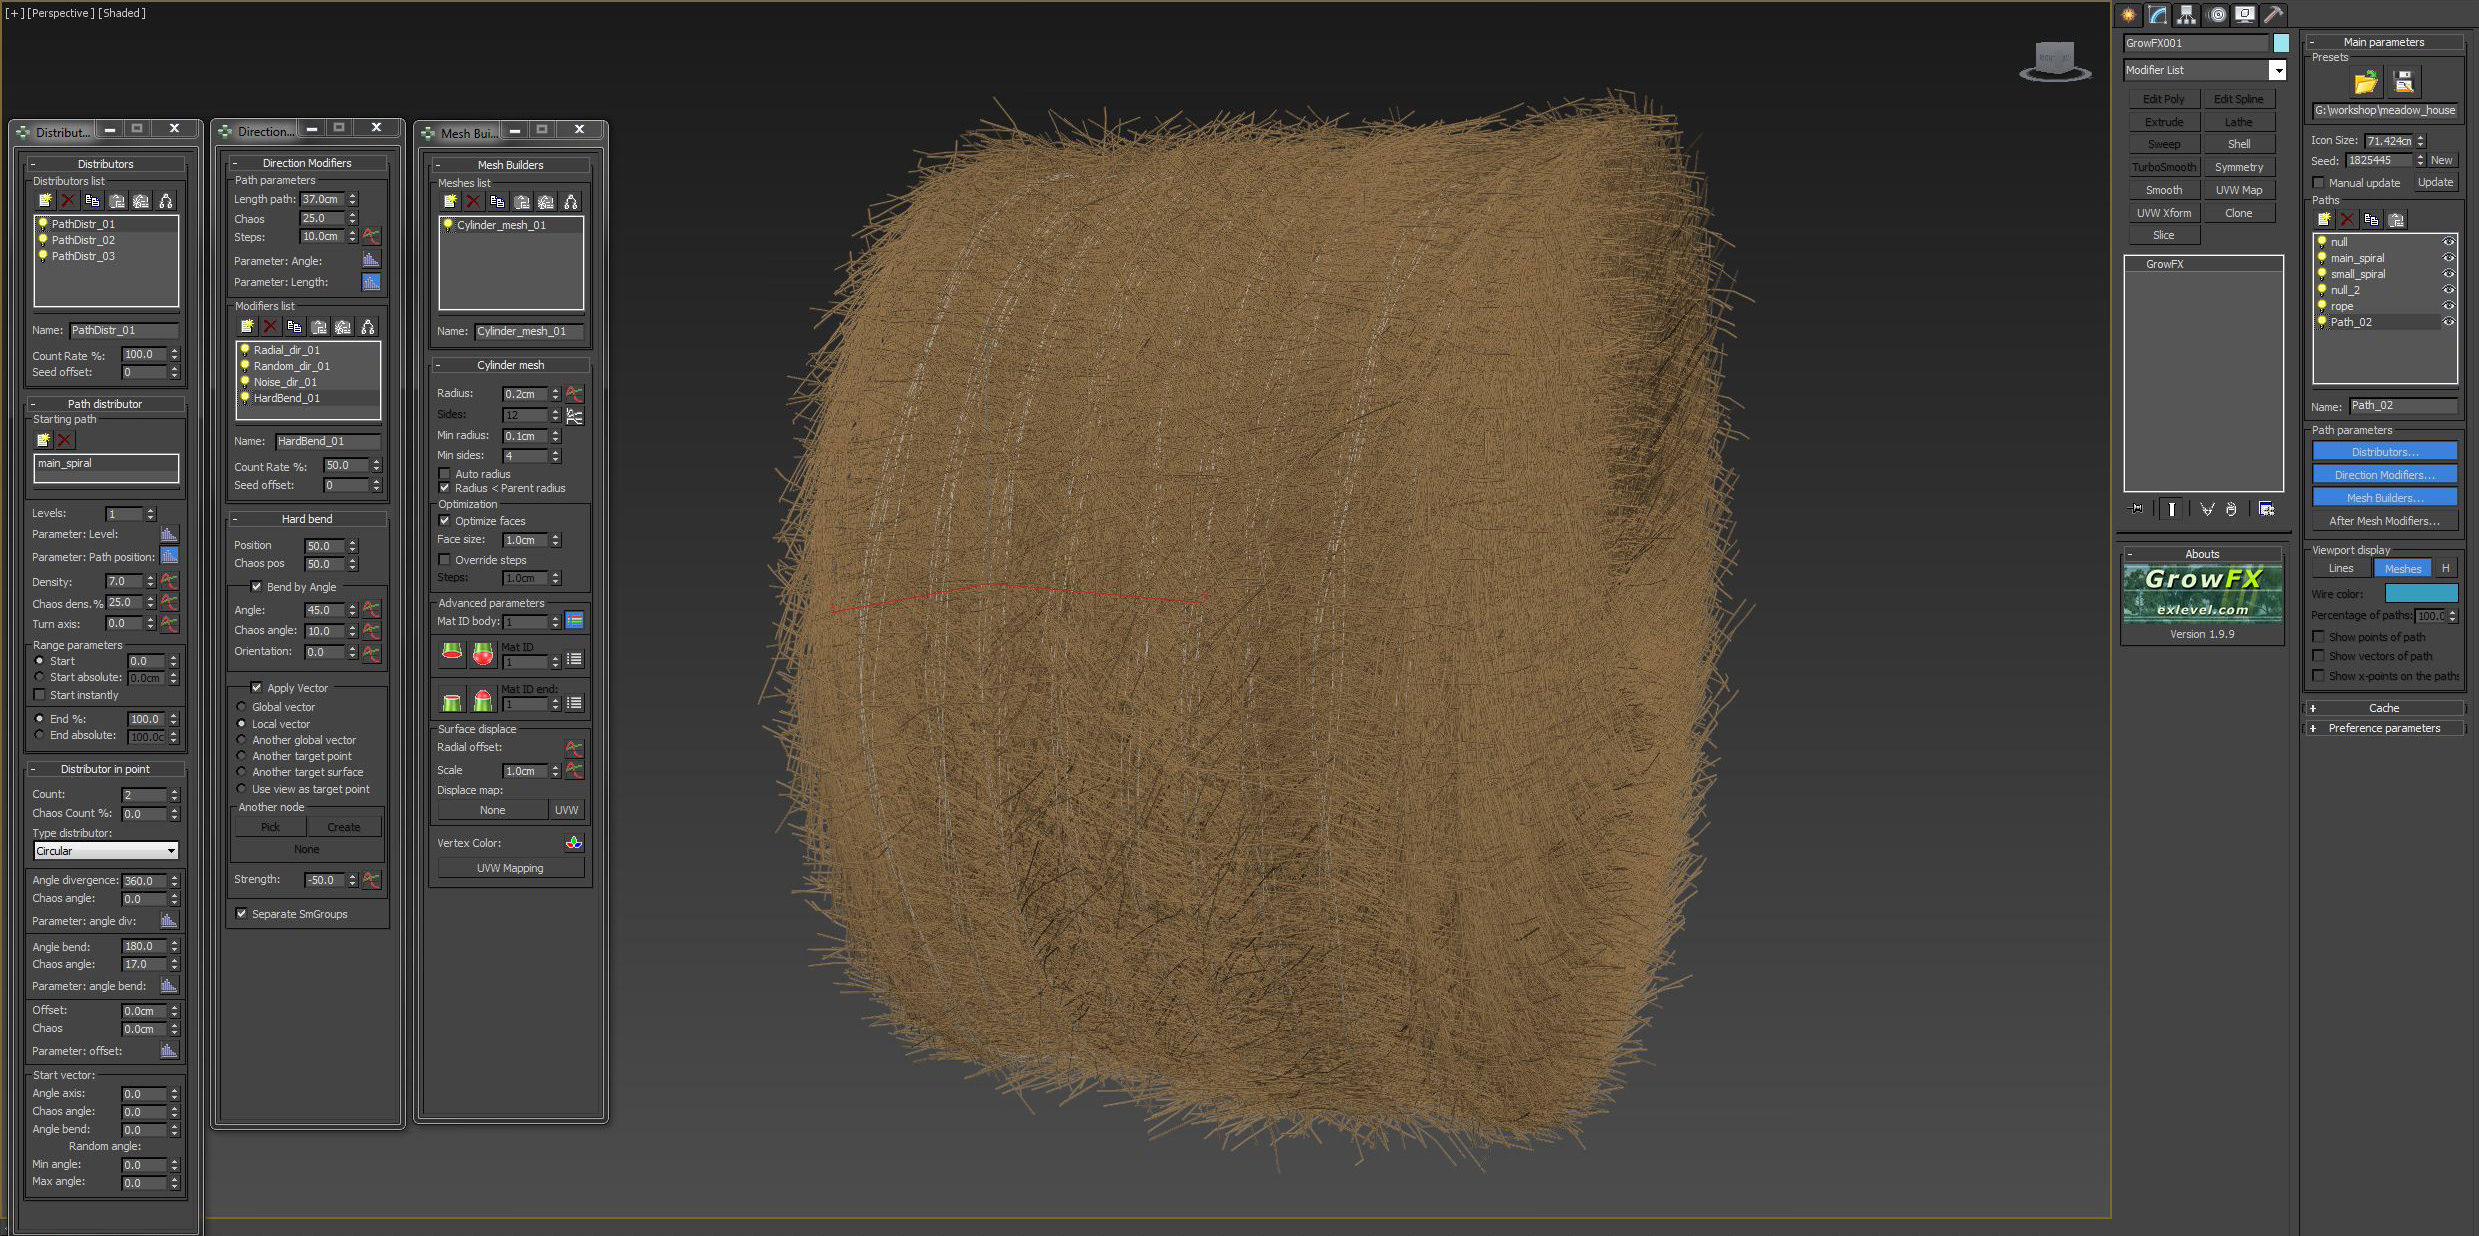
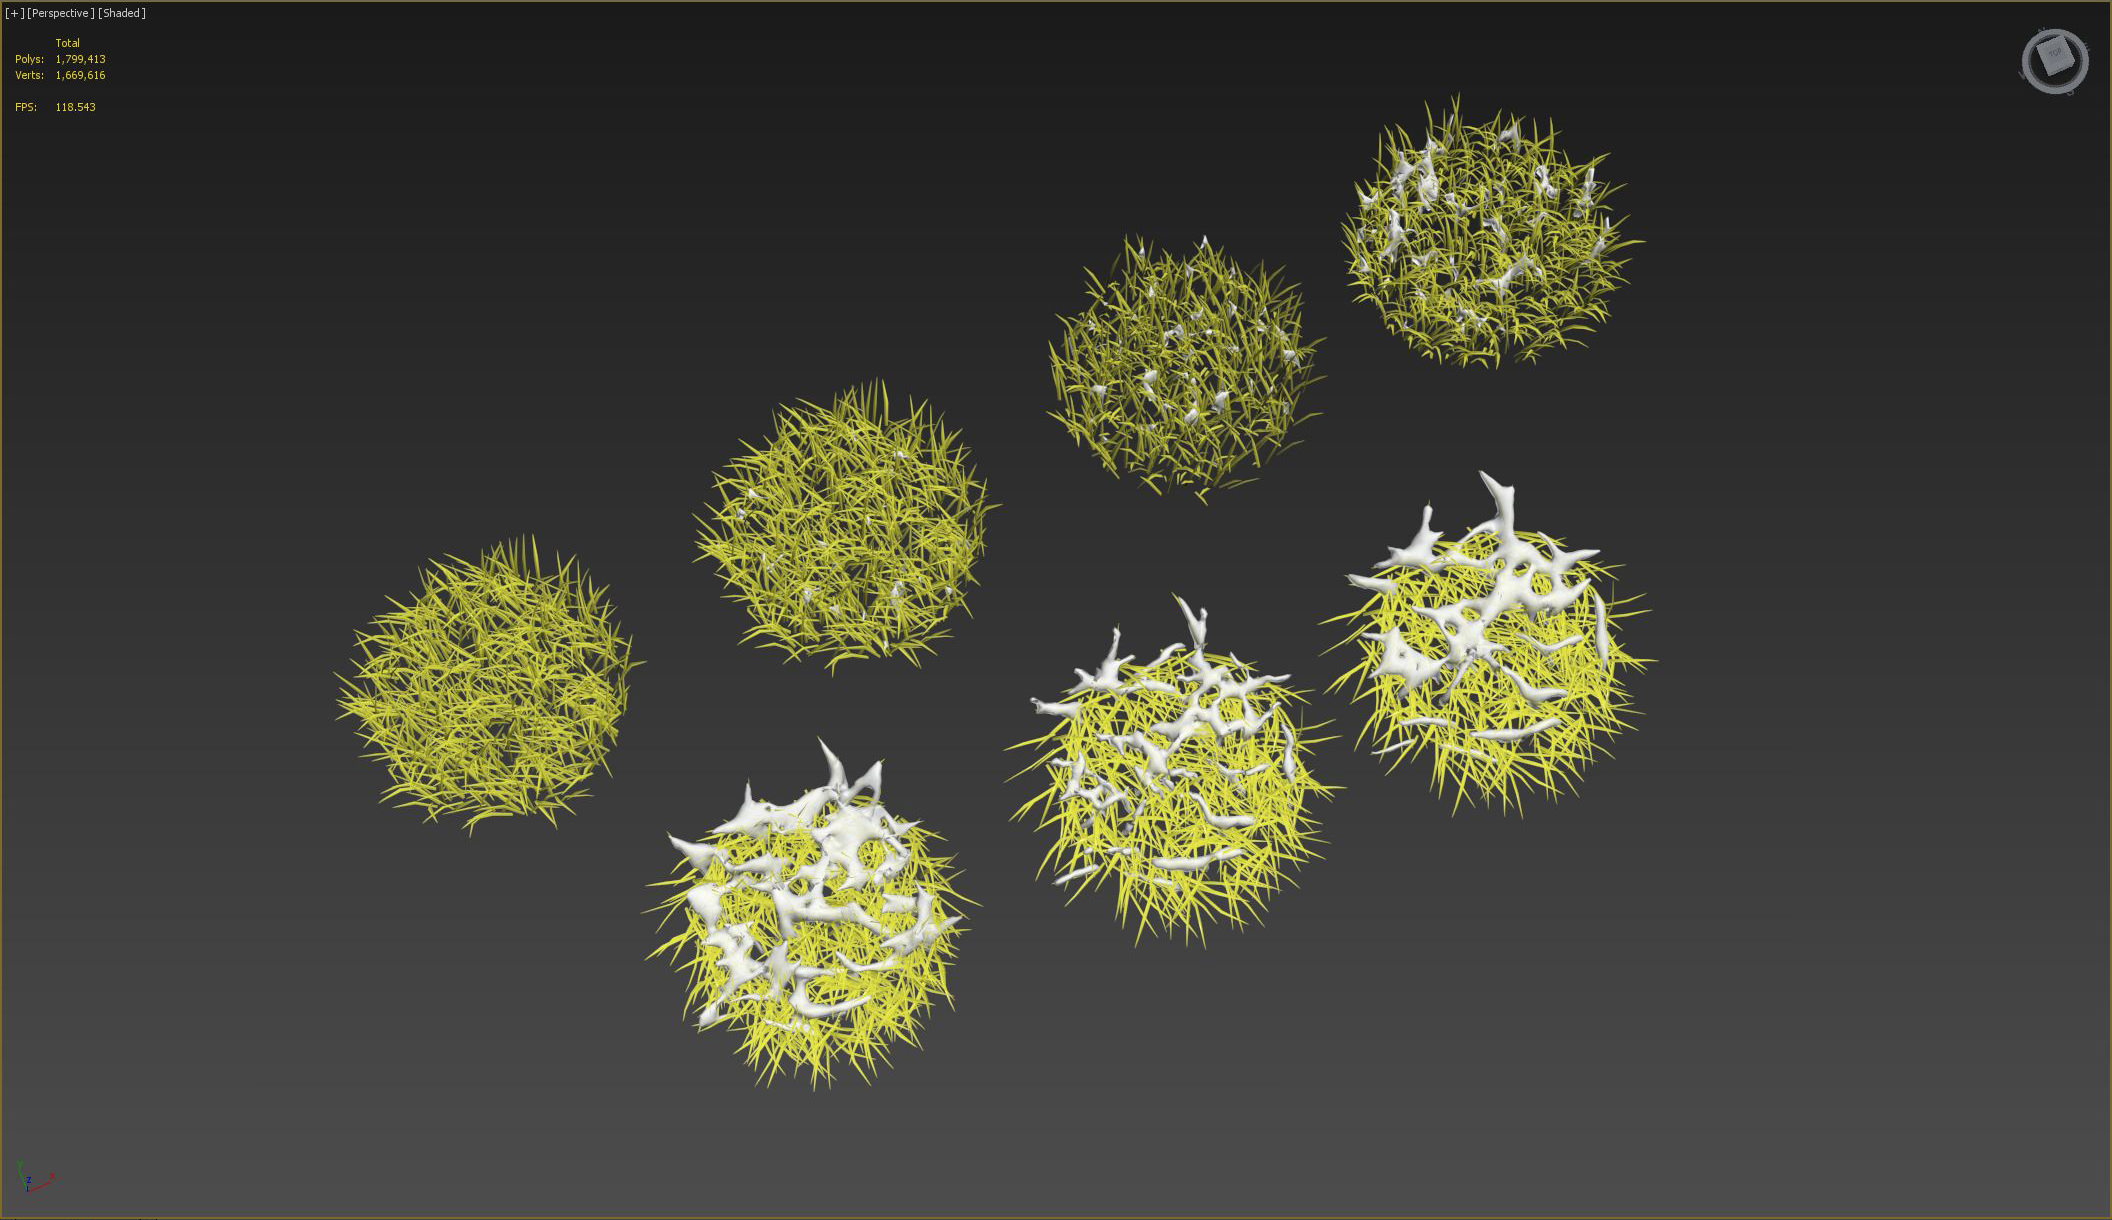
To make things simple, the haystack can be represented as a surface with a certain thickness that is rolled by a spiral. That is why the main task was to create a spiral first and then add straws.

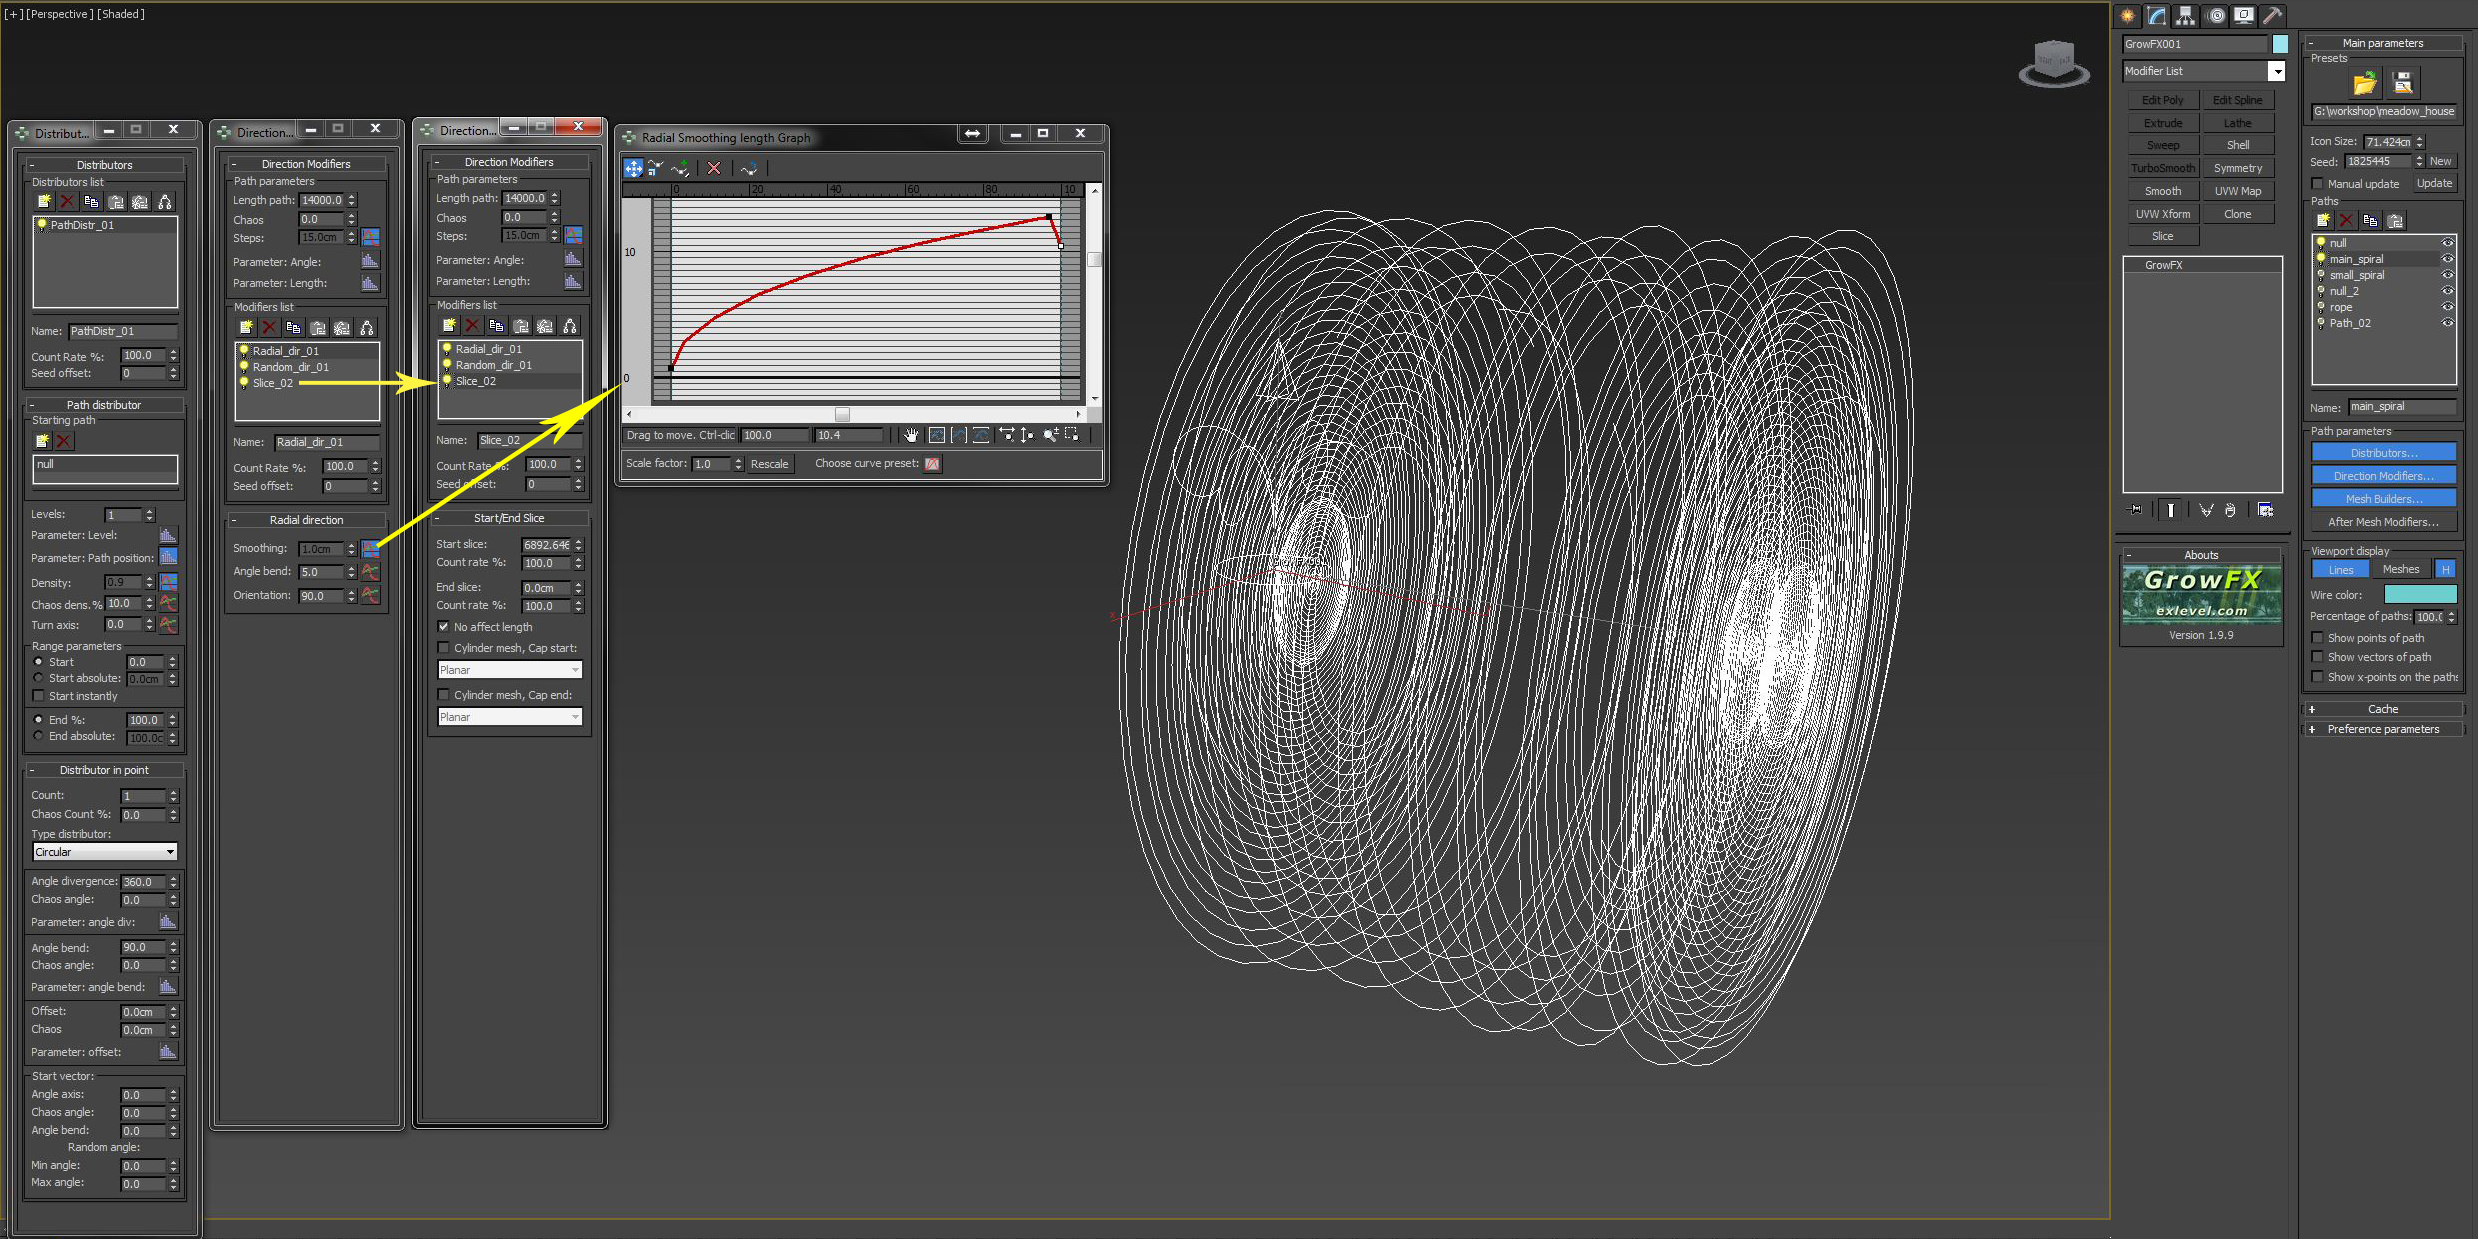
To reduce the polygon count I made the haystack hollow. To achieve that I used the “slice” parameter to shrink the length of the spirals based on the distances between each spiral and the central point of the haystack. The closer spiral to the center – the more slice value is. That’s how I created the full spirals at the haystack both ends and the shortened ones in-between.
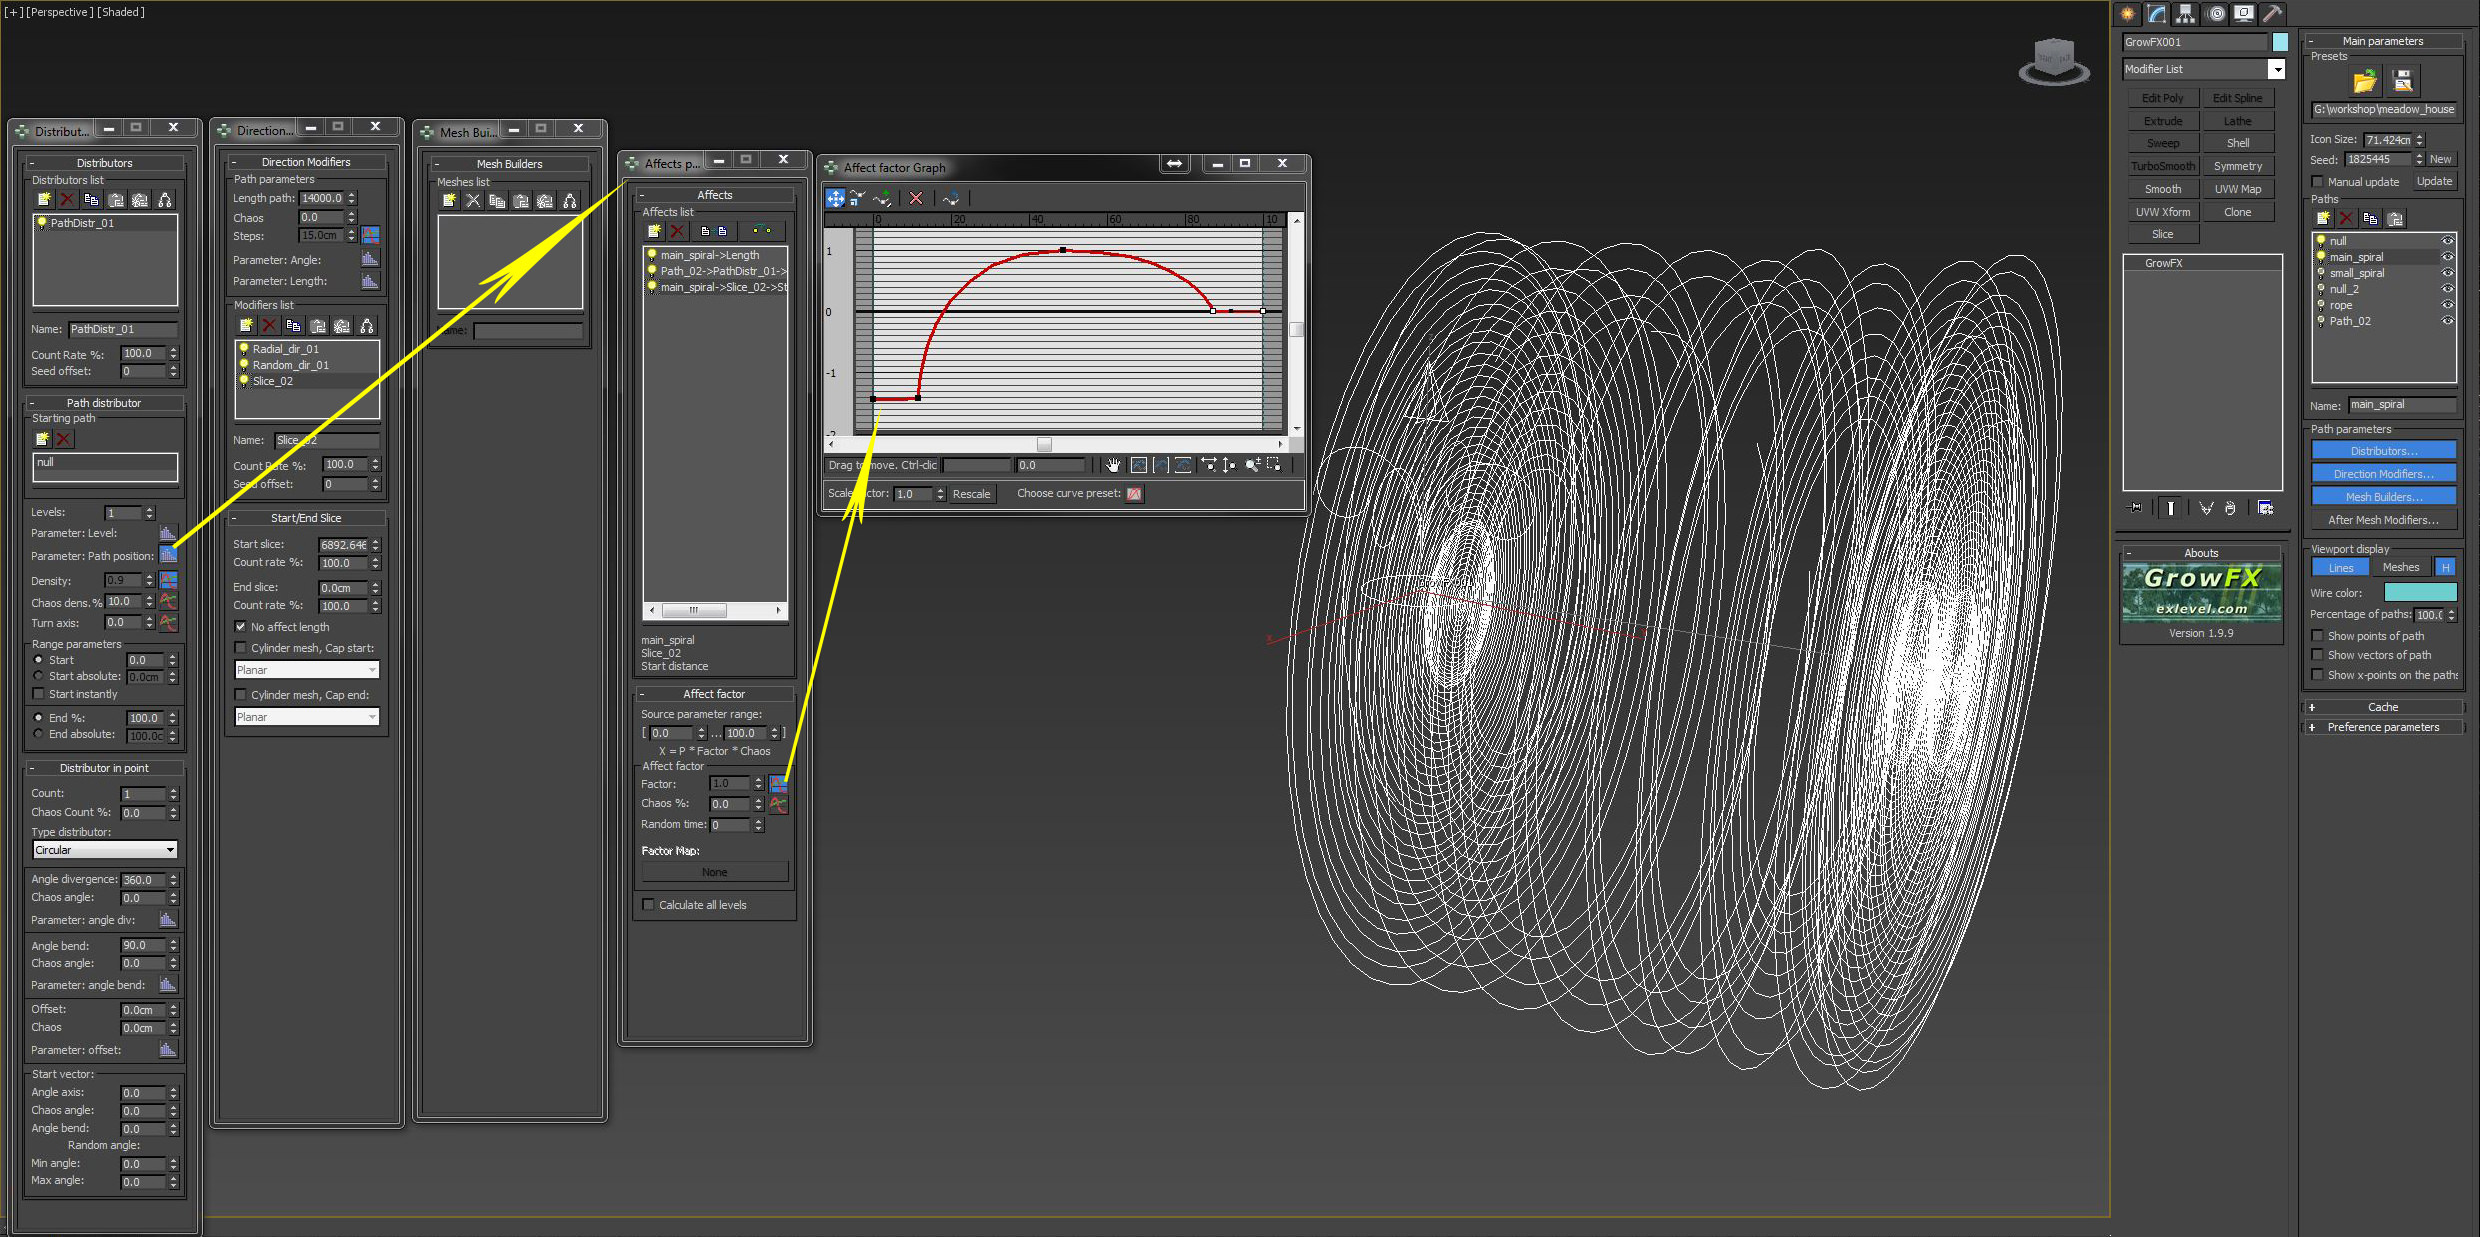
Next, I made exactly the same spirals but of the smaller diameter with an offset from the start and the end points to imitate constriction effect of the rope.
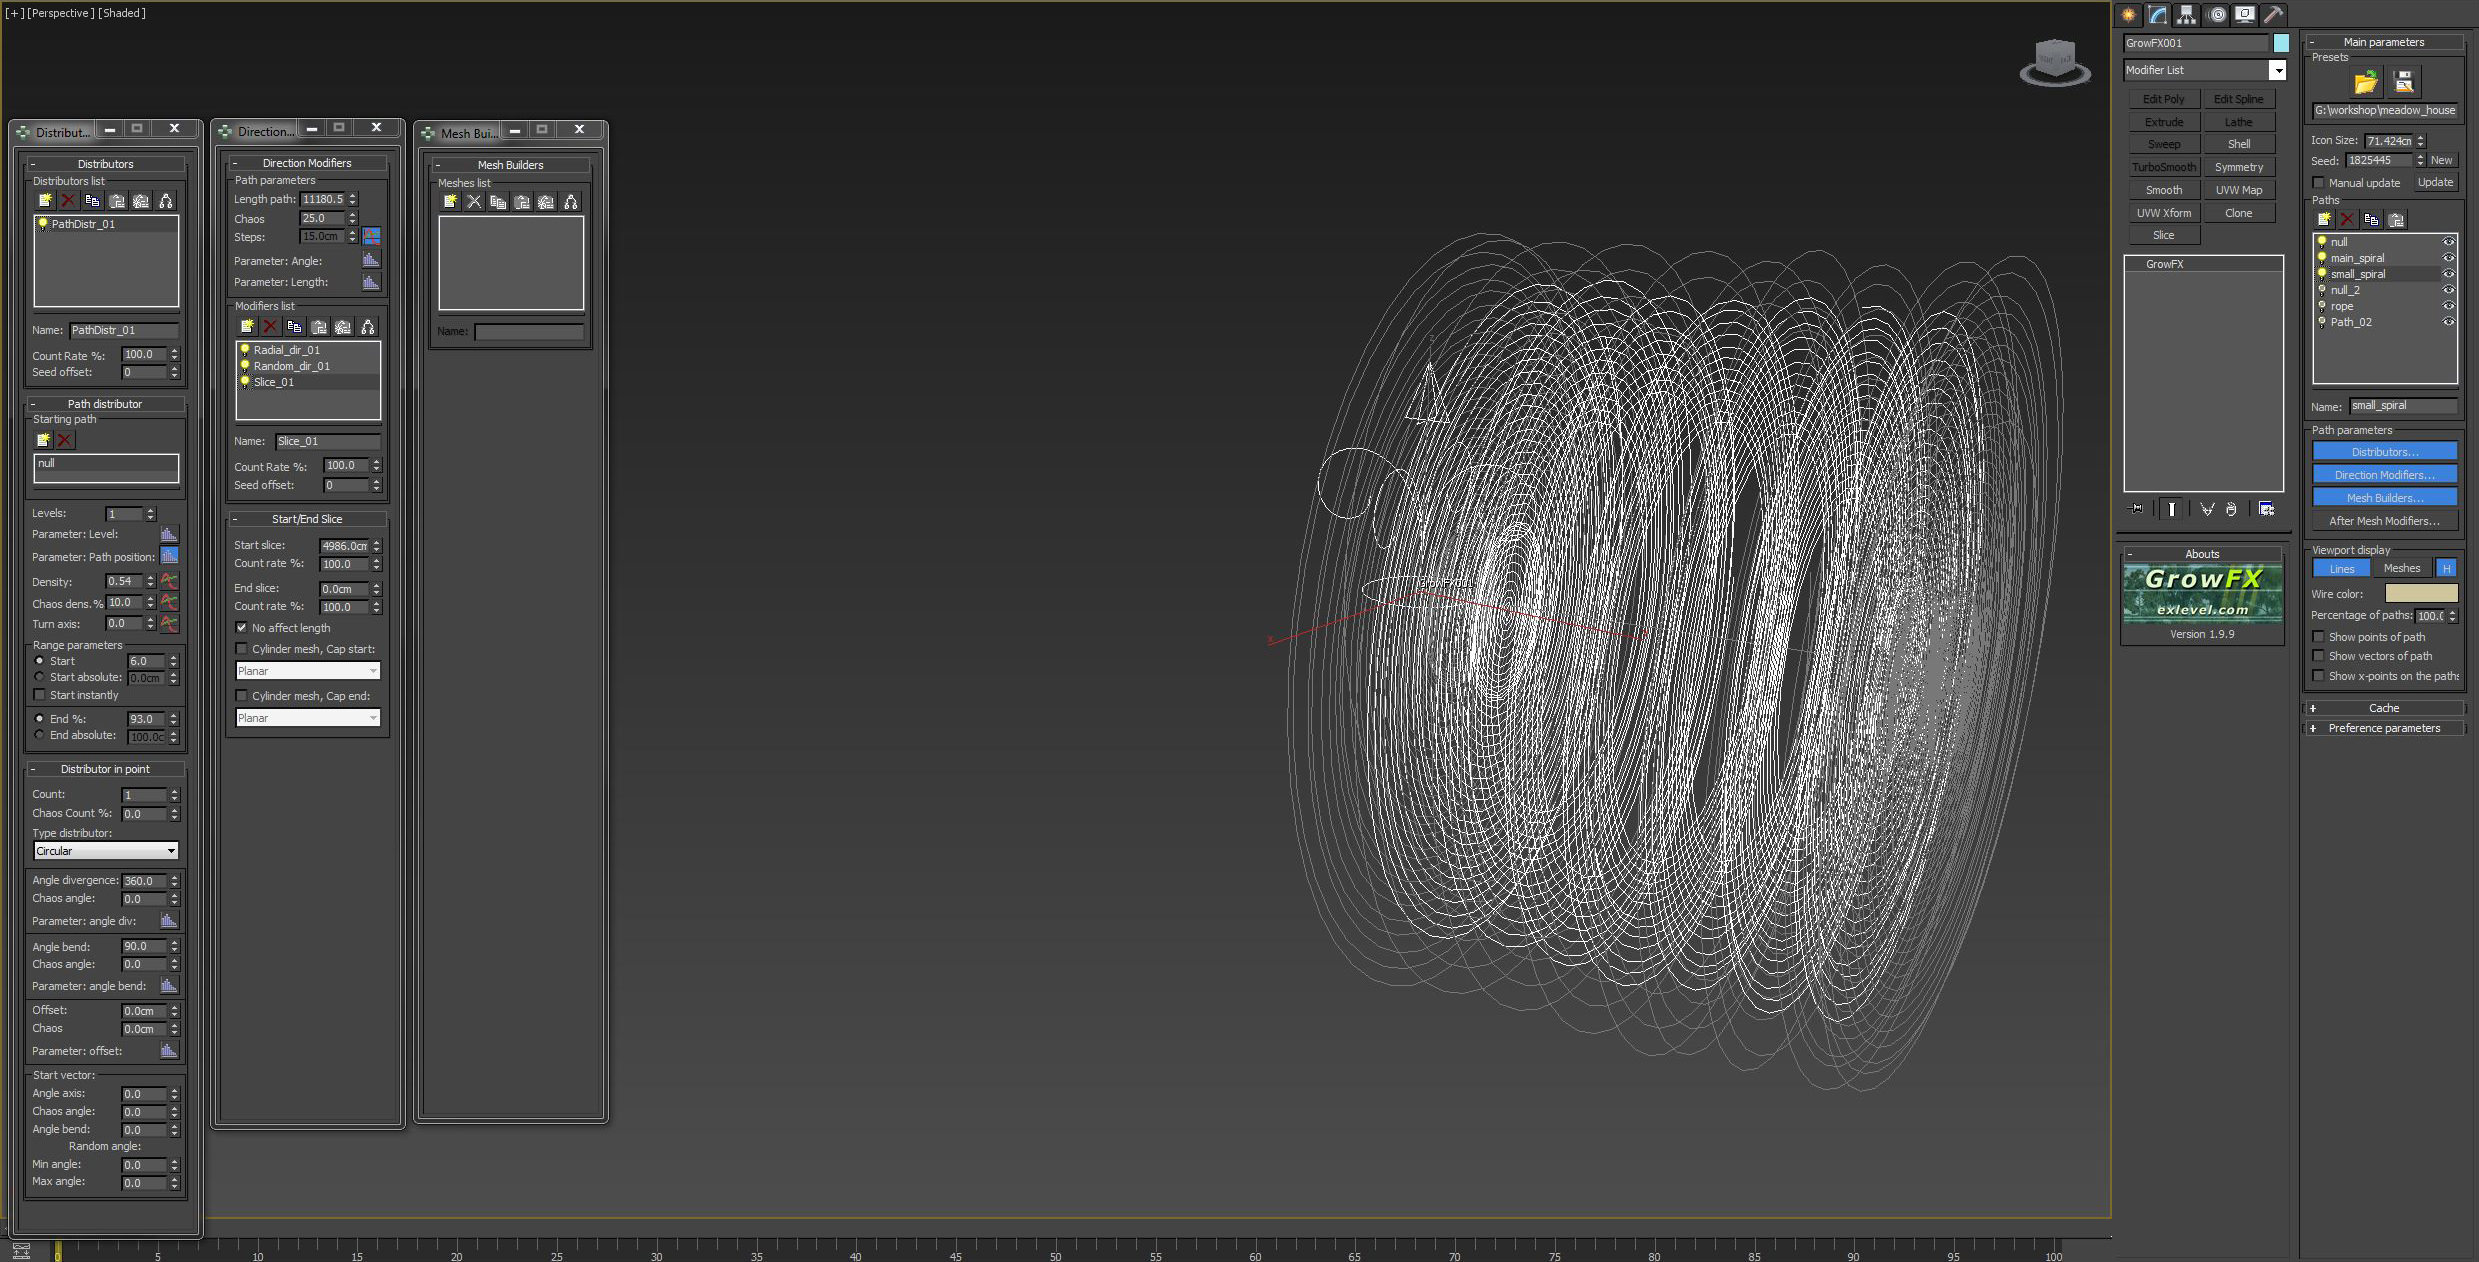
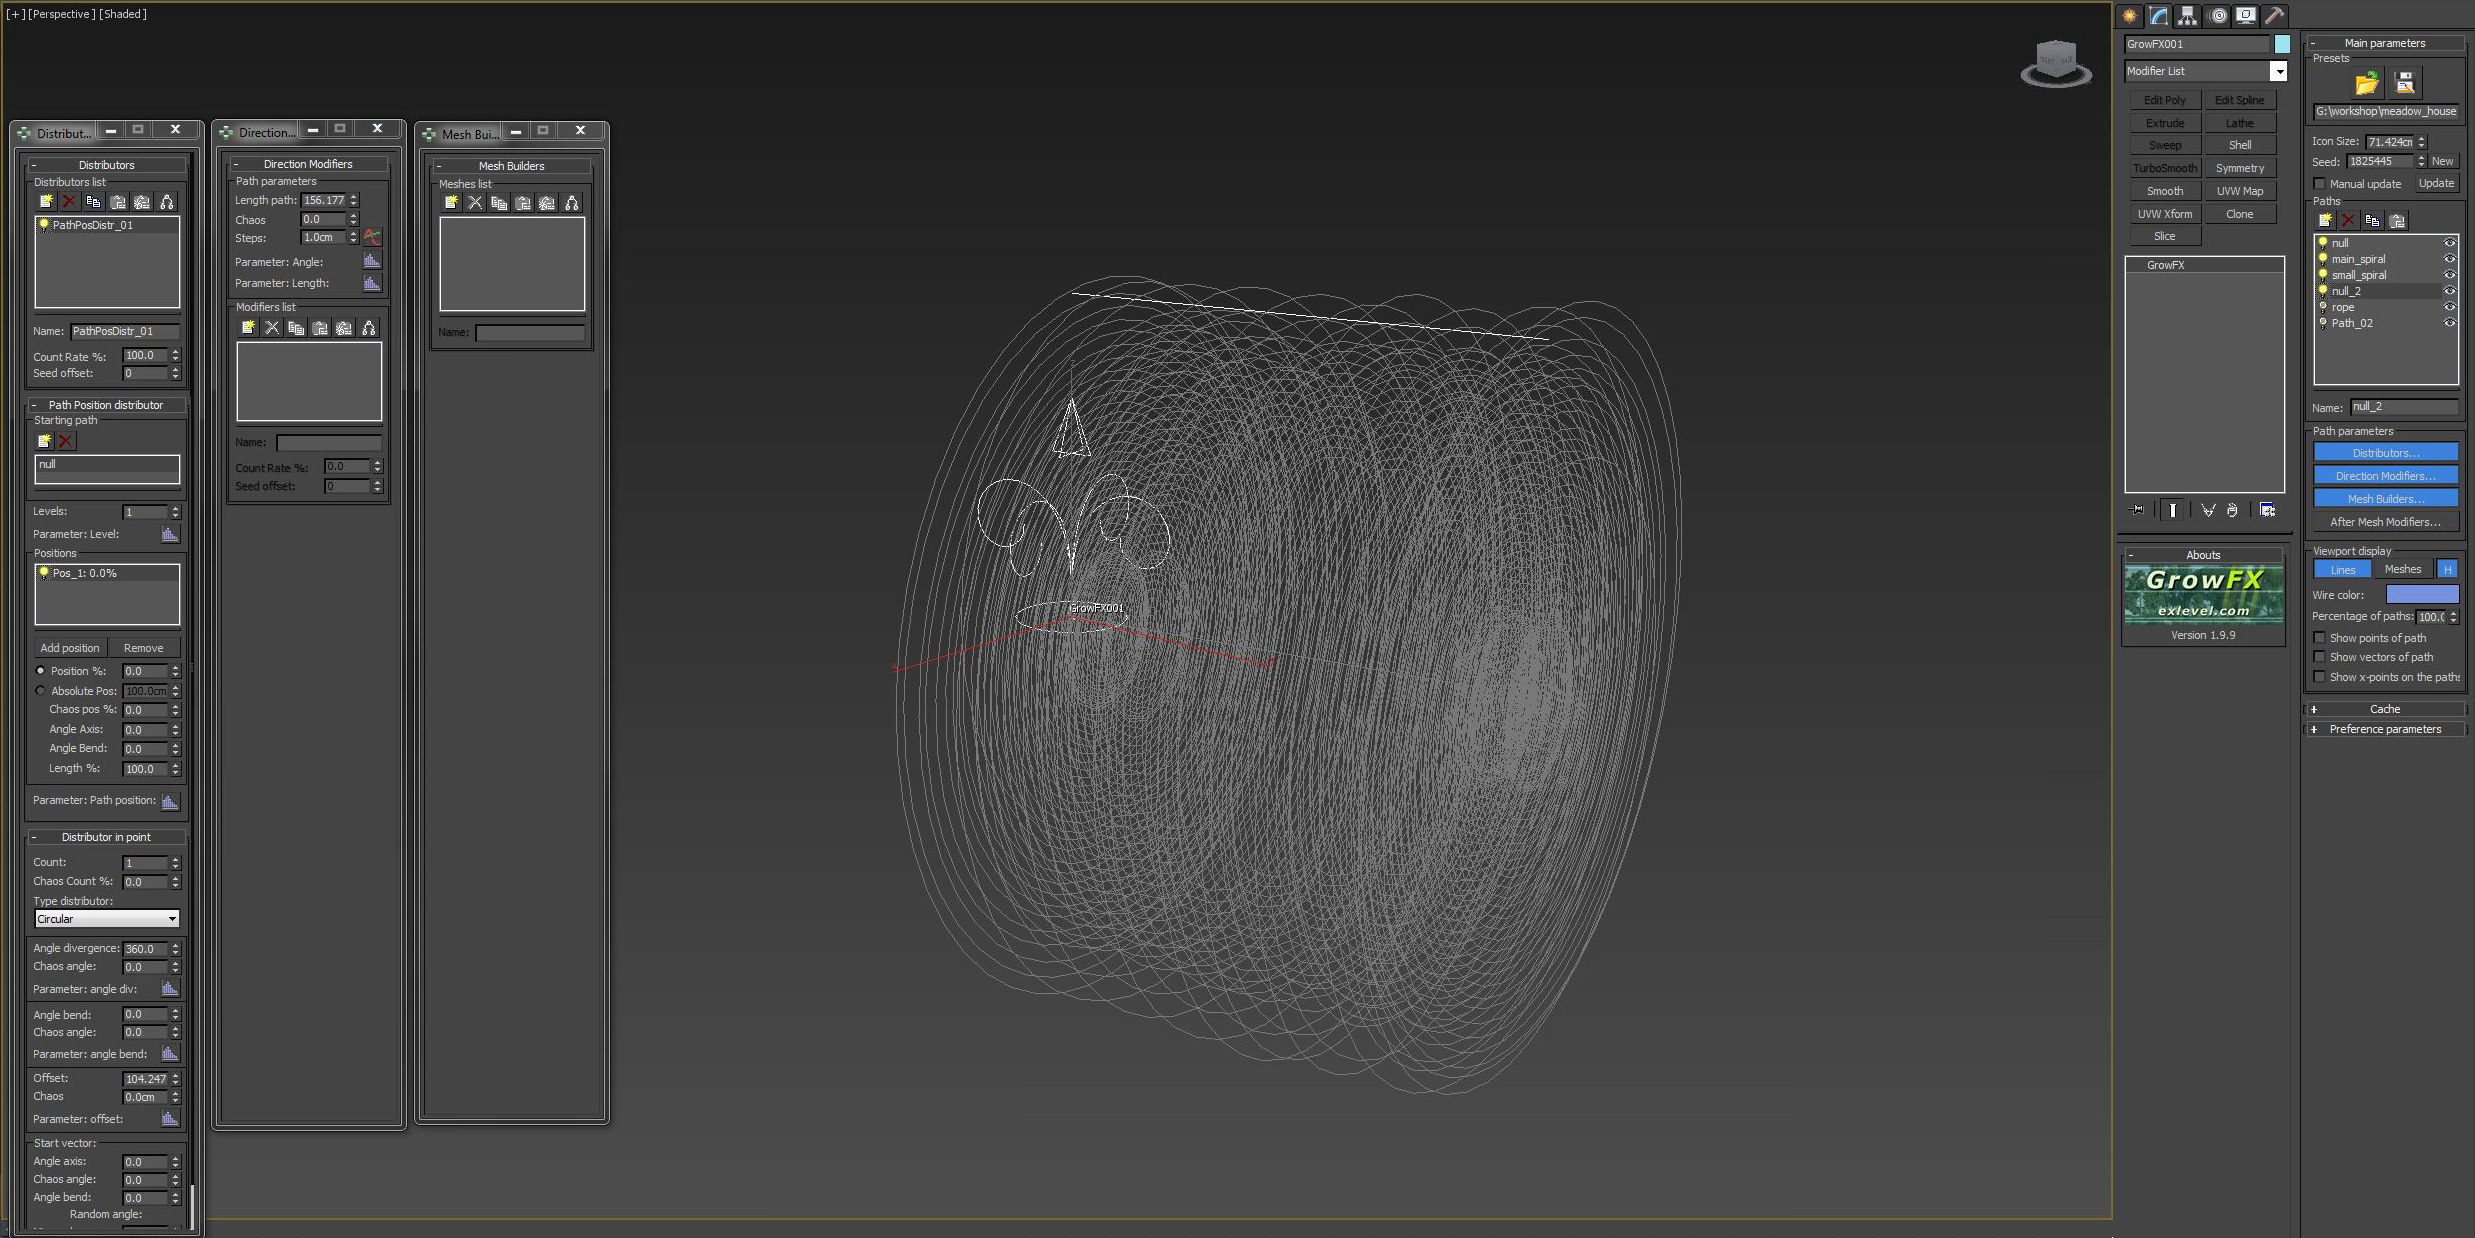
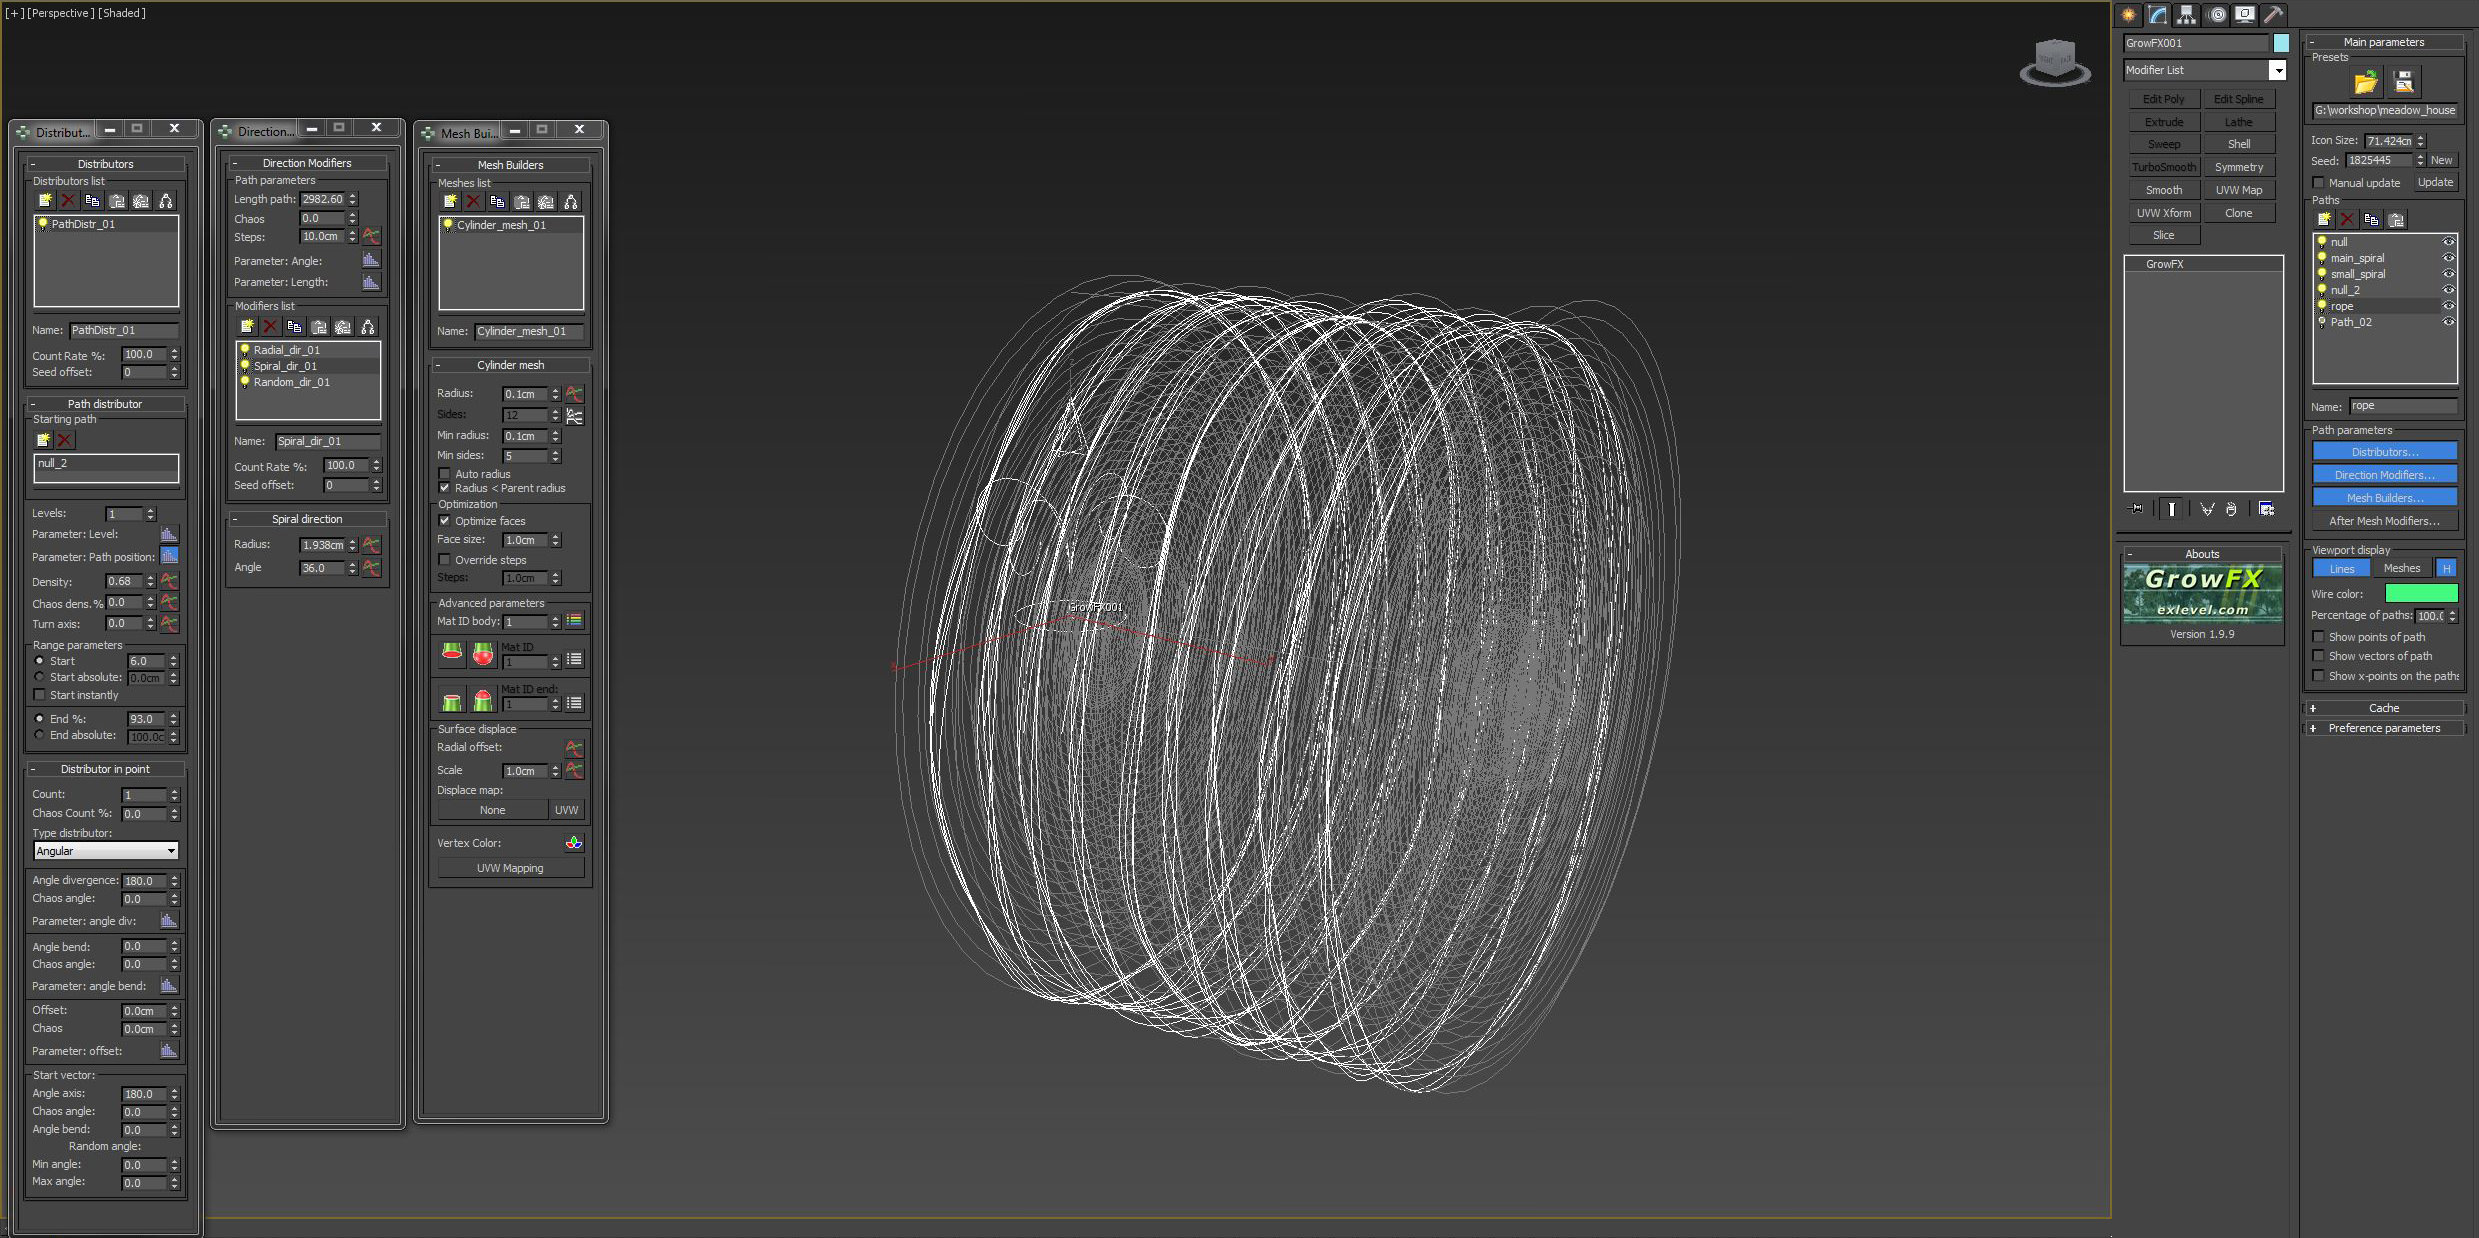
Finally, I came up with 3 splines. 2 spirals for straws and one for the rope. The straws geometry was created using standard PathDistribution by adding the rotation randomness, bending and a bit of noise.
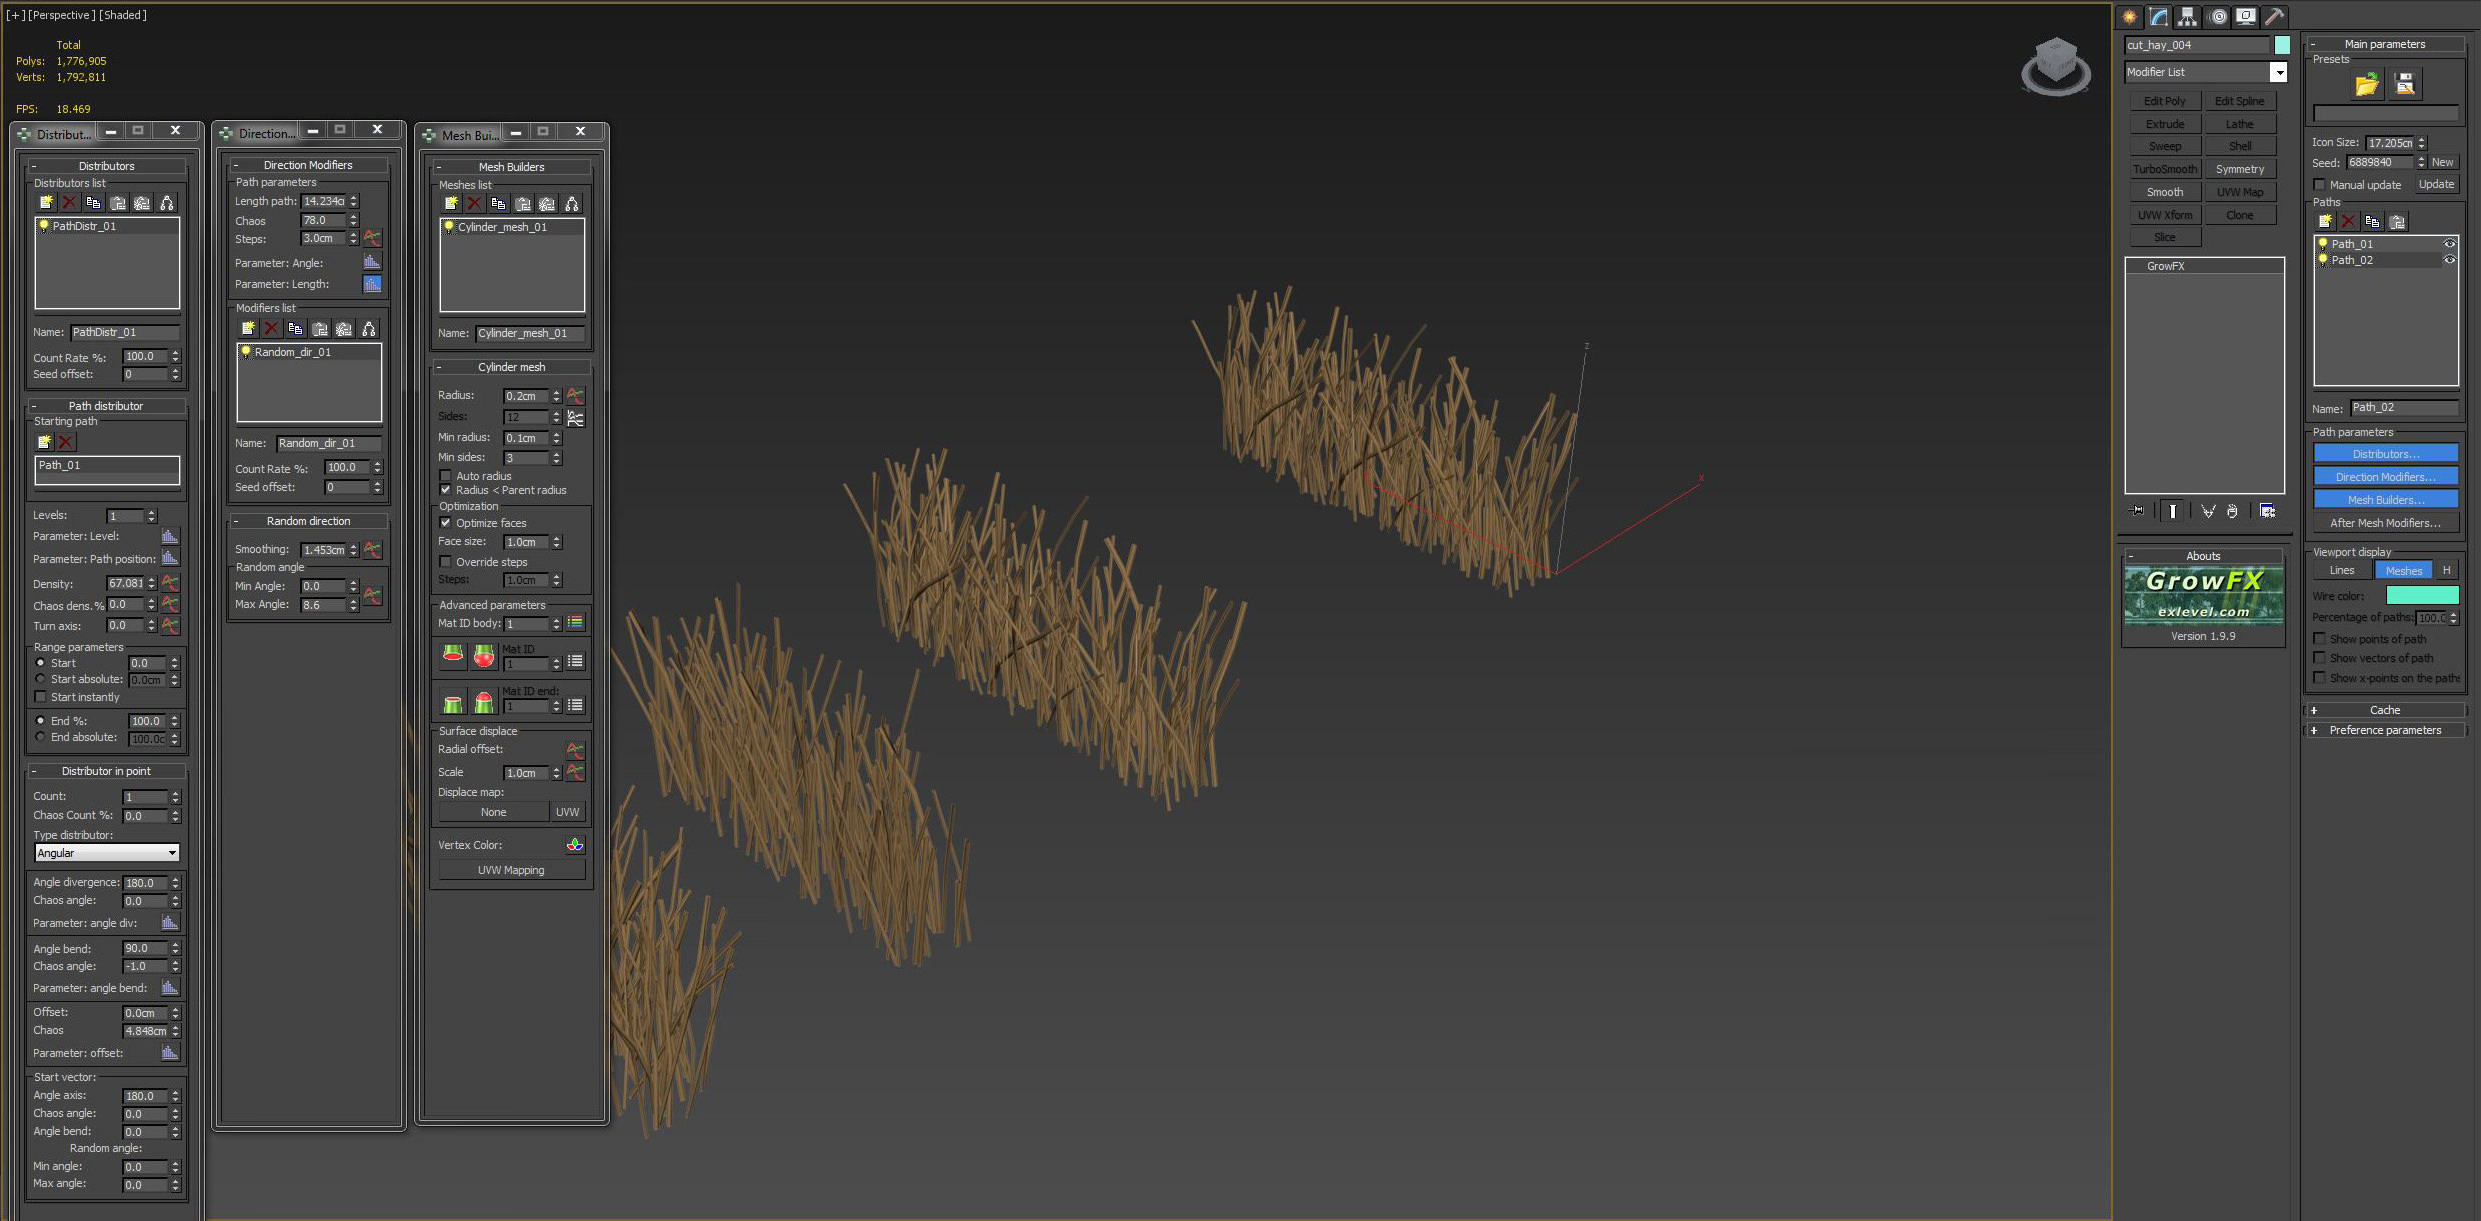
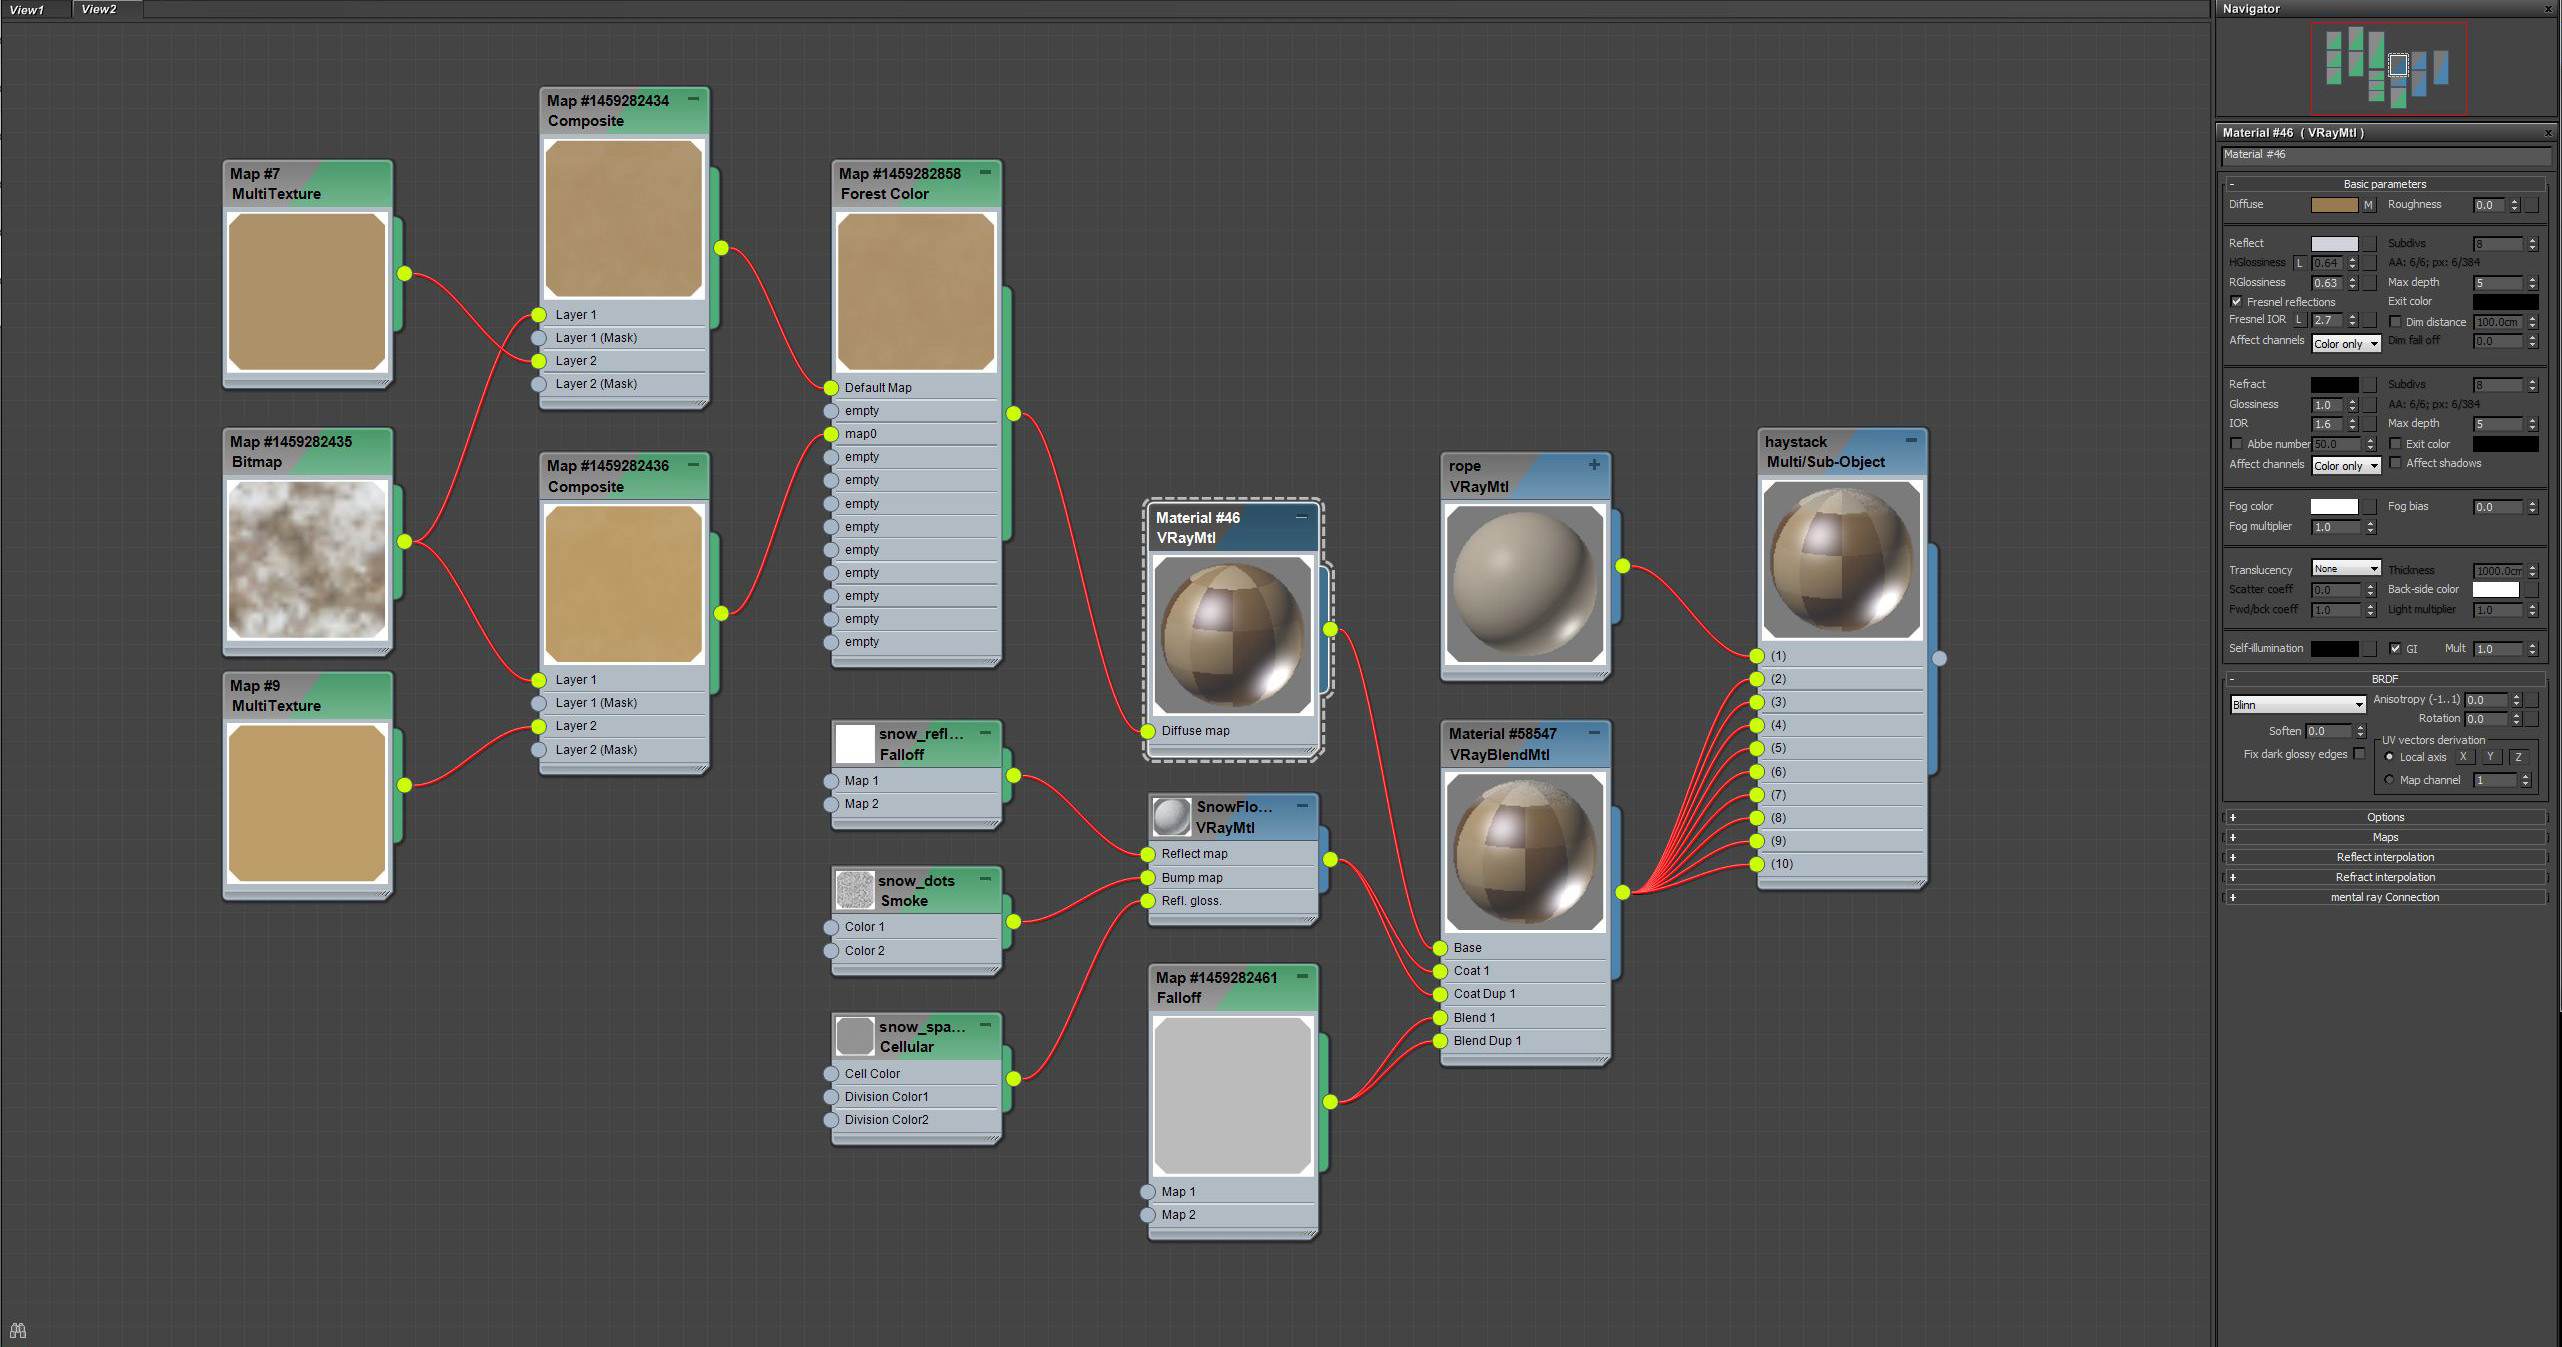
The snowy grass was made using two plugins. GrowFX for the grass and SnowFlow for the snow.
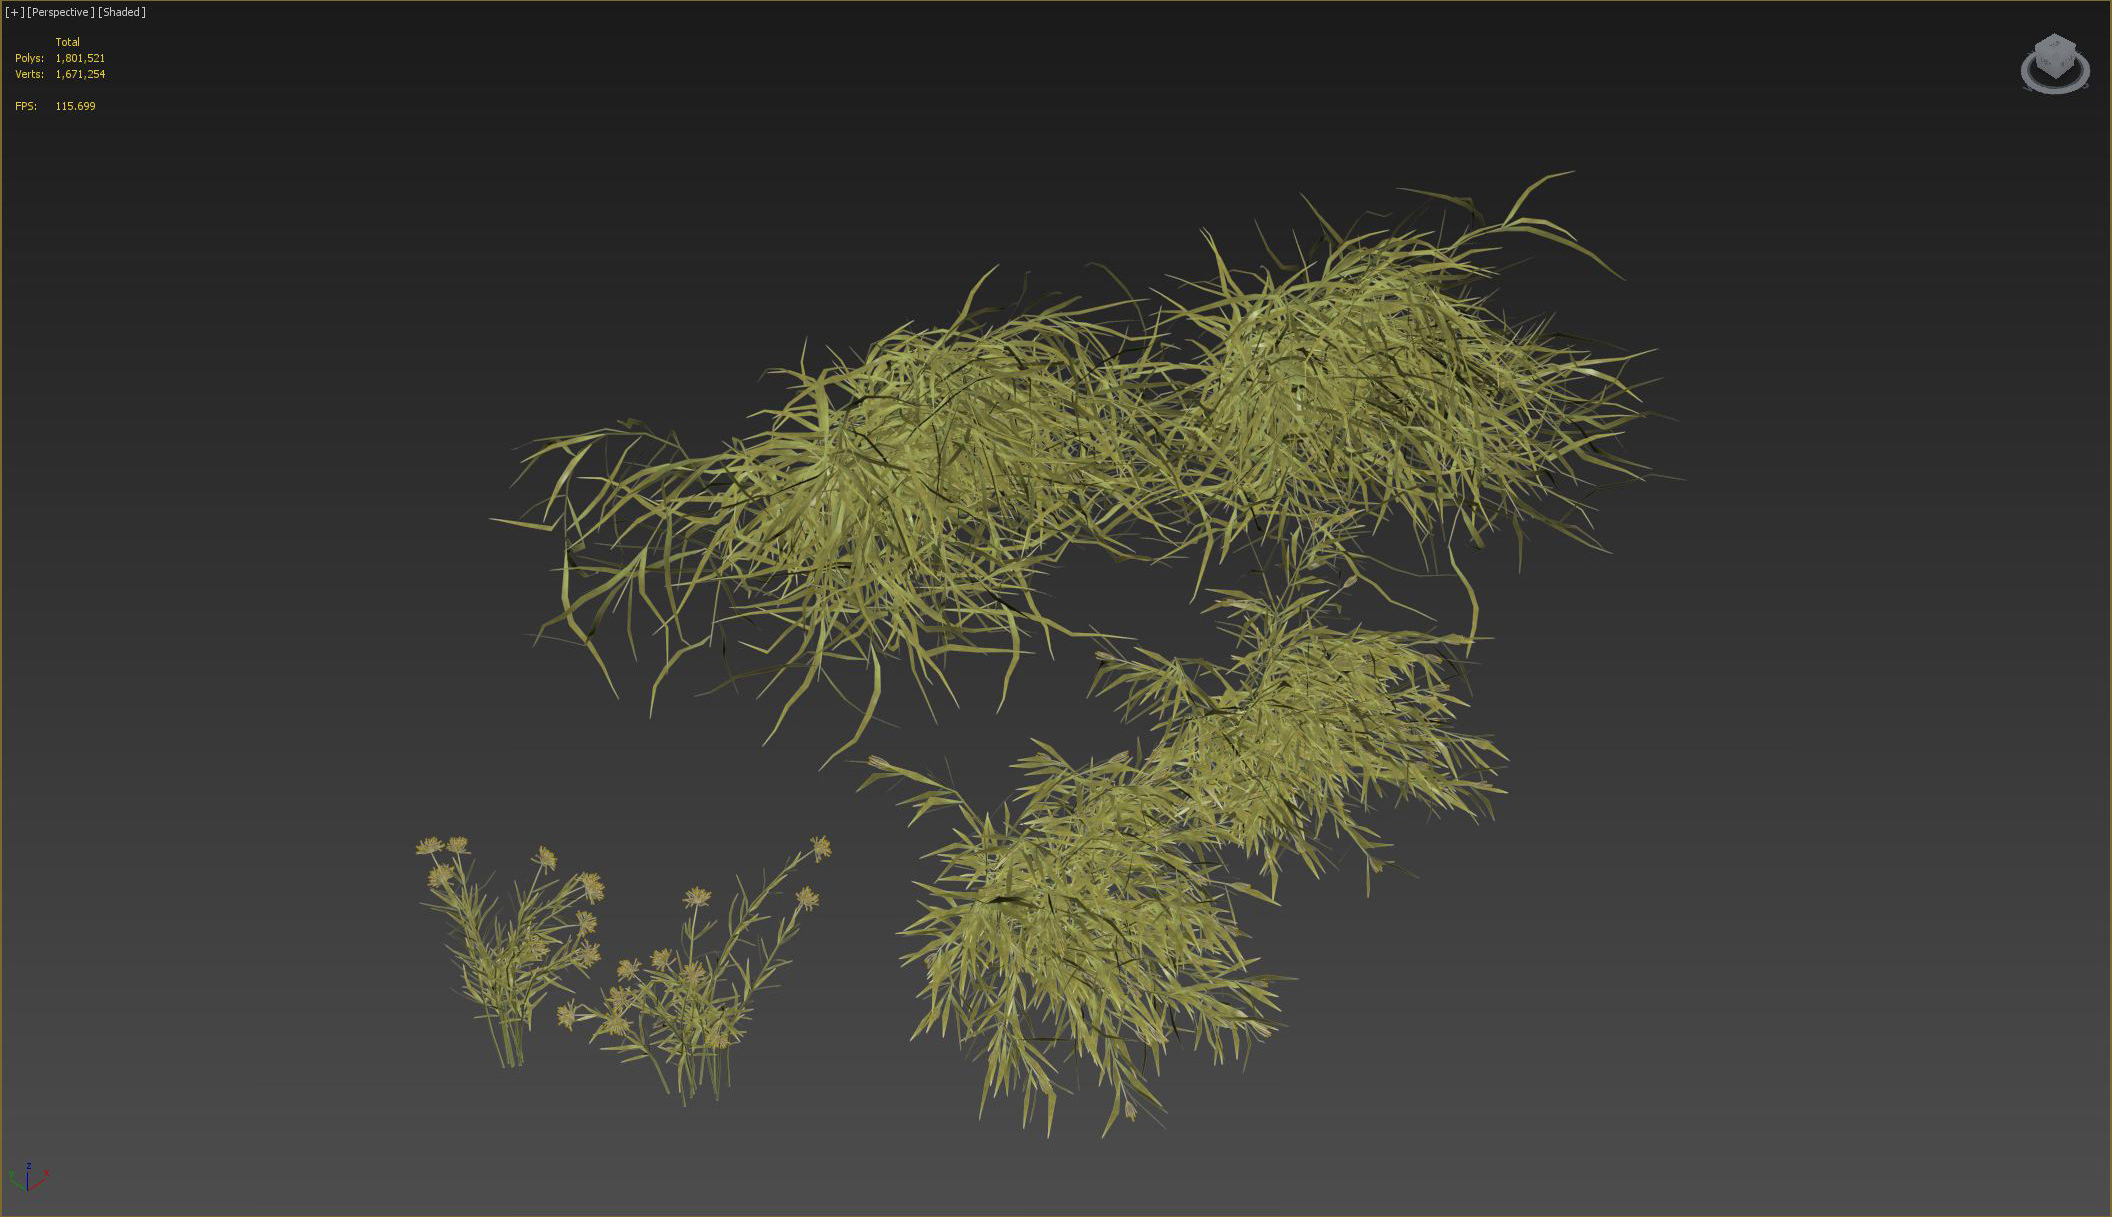
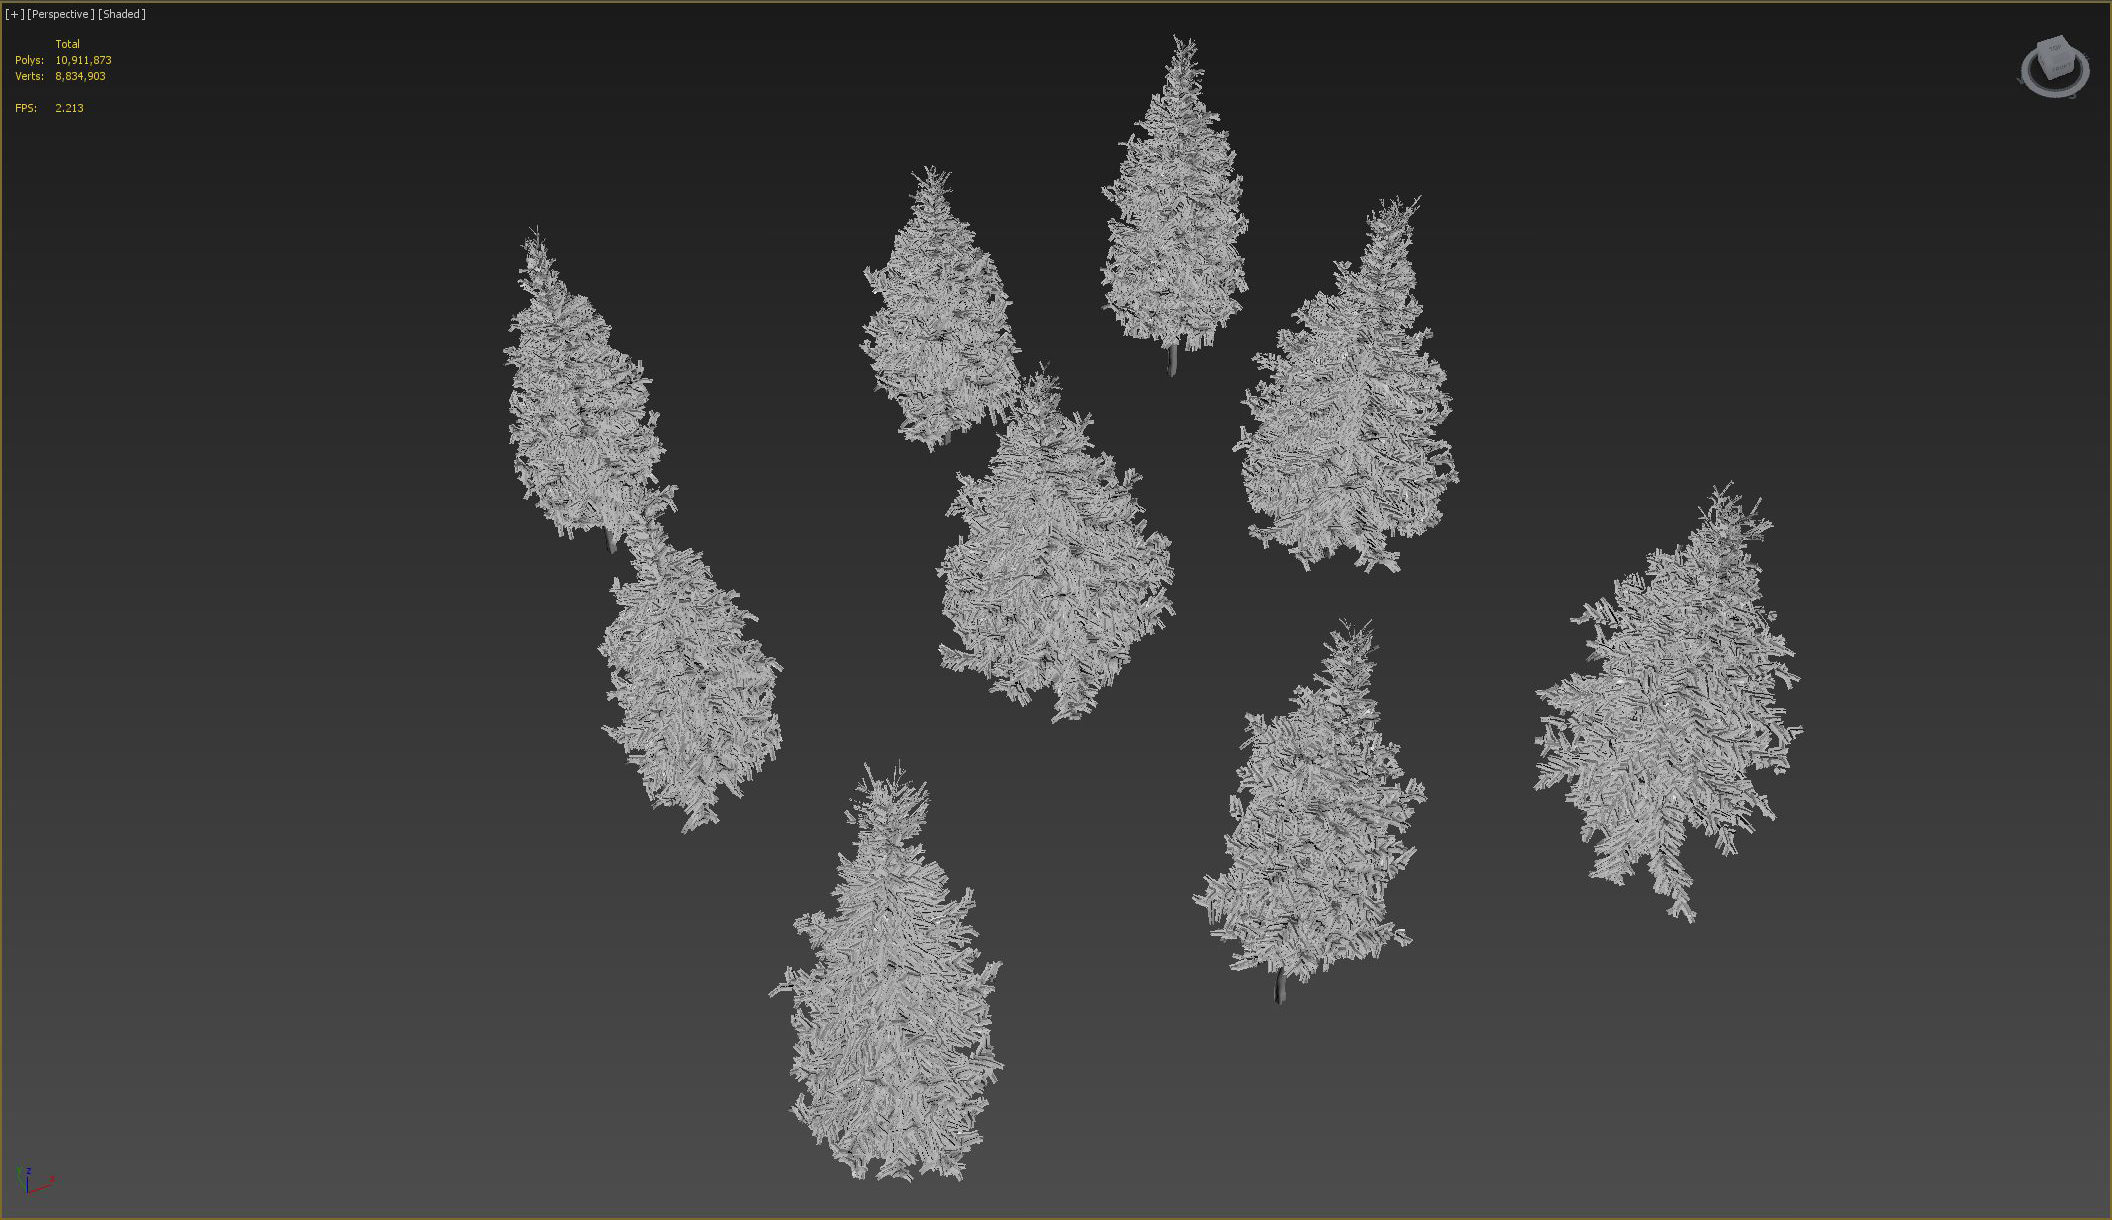
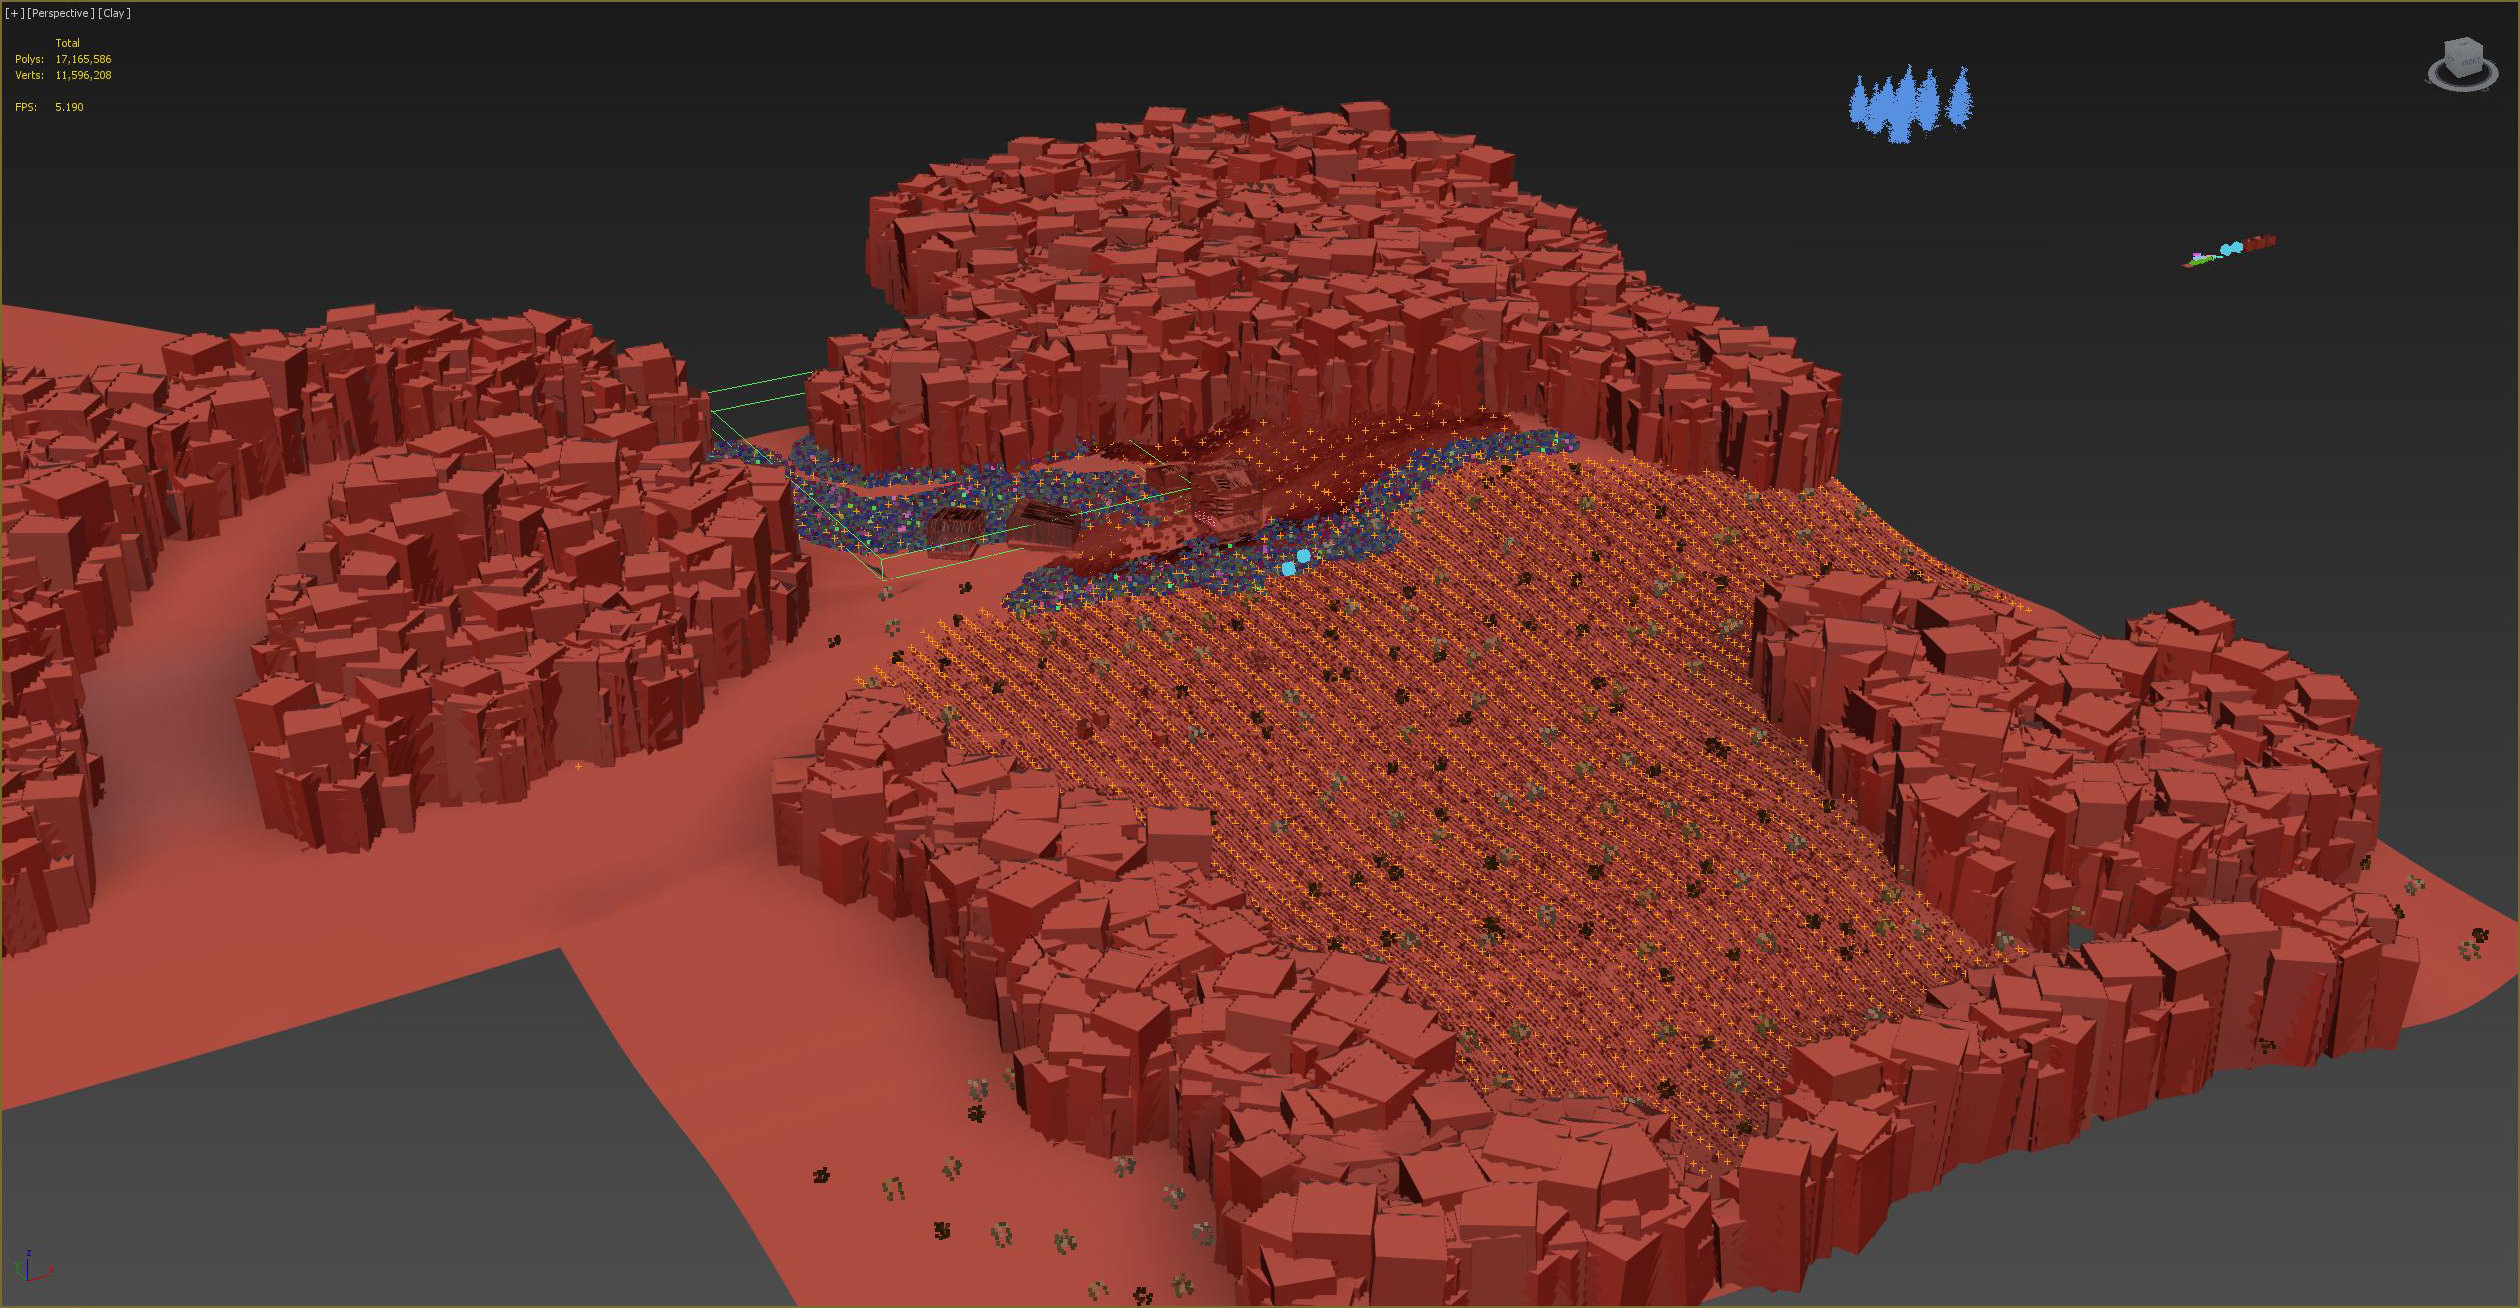
I used ForestPack plugin to spread all the vegetation across the site.
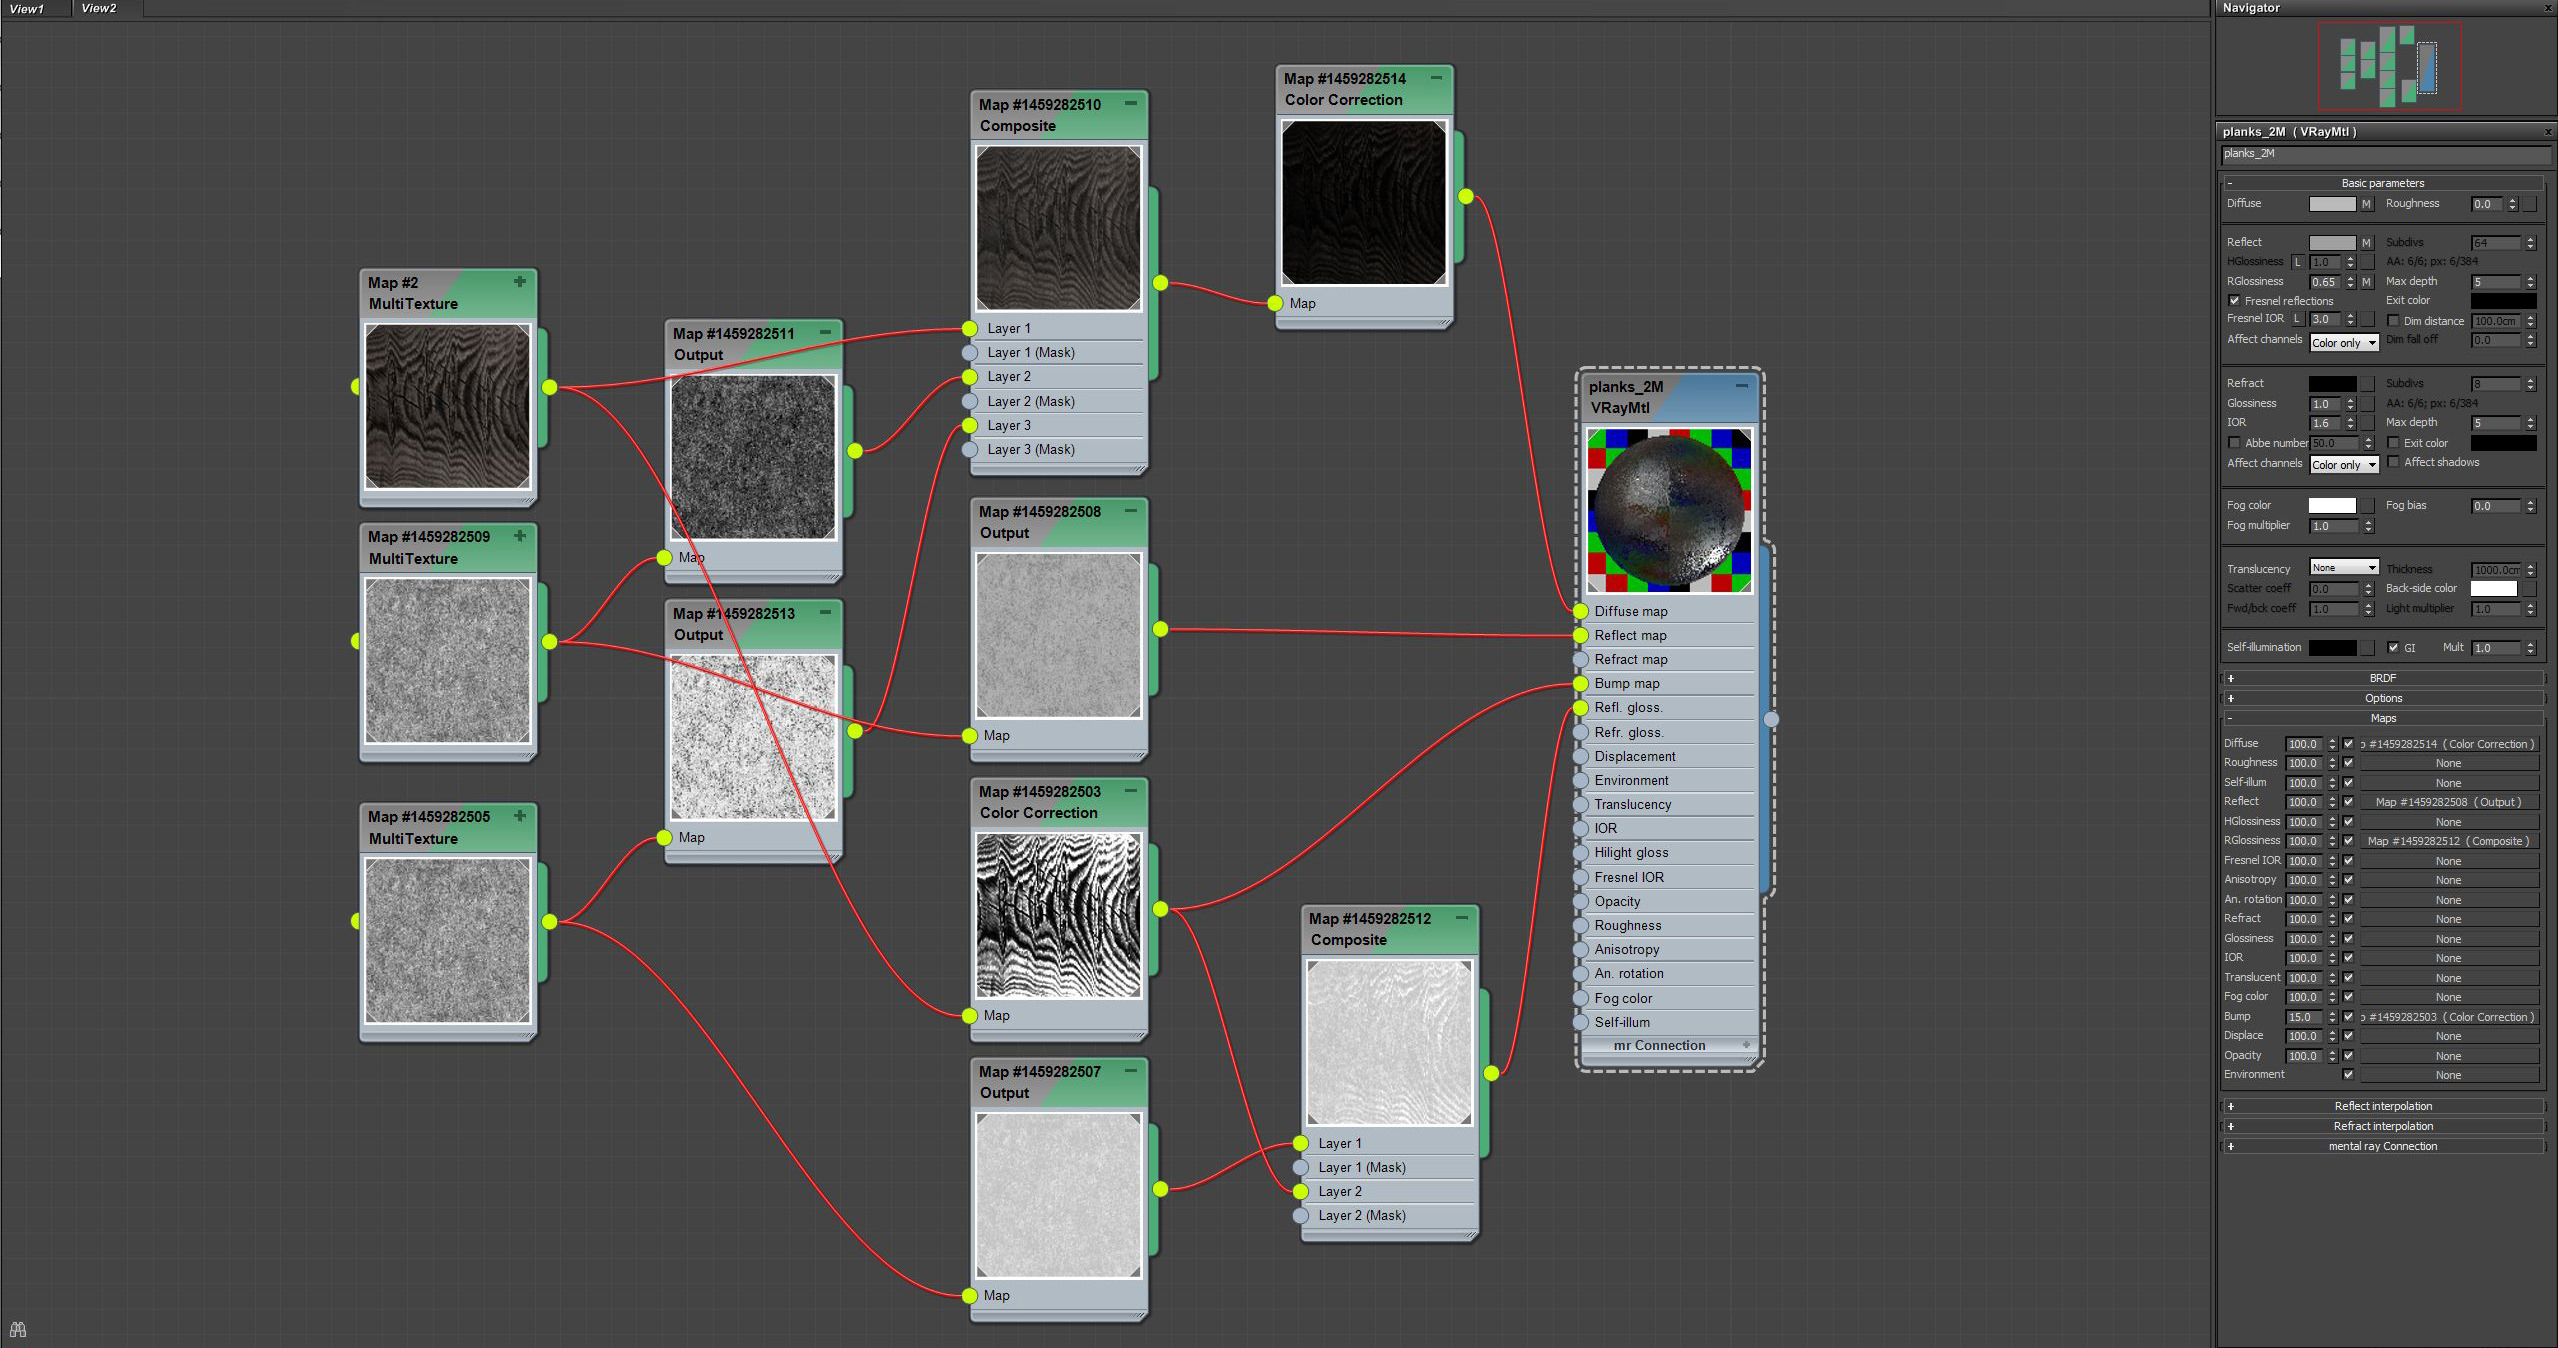
Materials
All the materials used in this work are quite simple. The main thing you need while creating a material is reference analysis. You may study the exact materials that were used for vegetation in this project by downloading the Mikhalenko vol.03 pack.
You will find models for vegetation and different types of haystacks there as well.
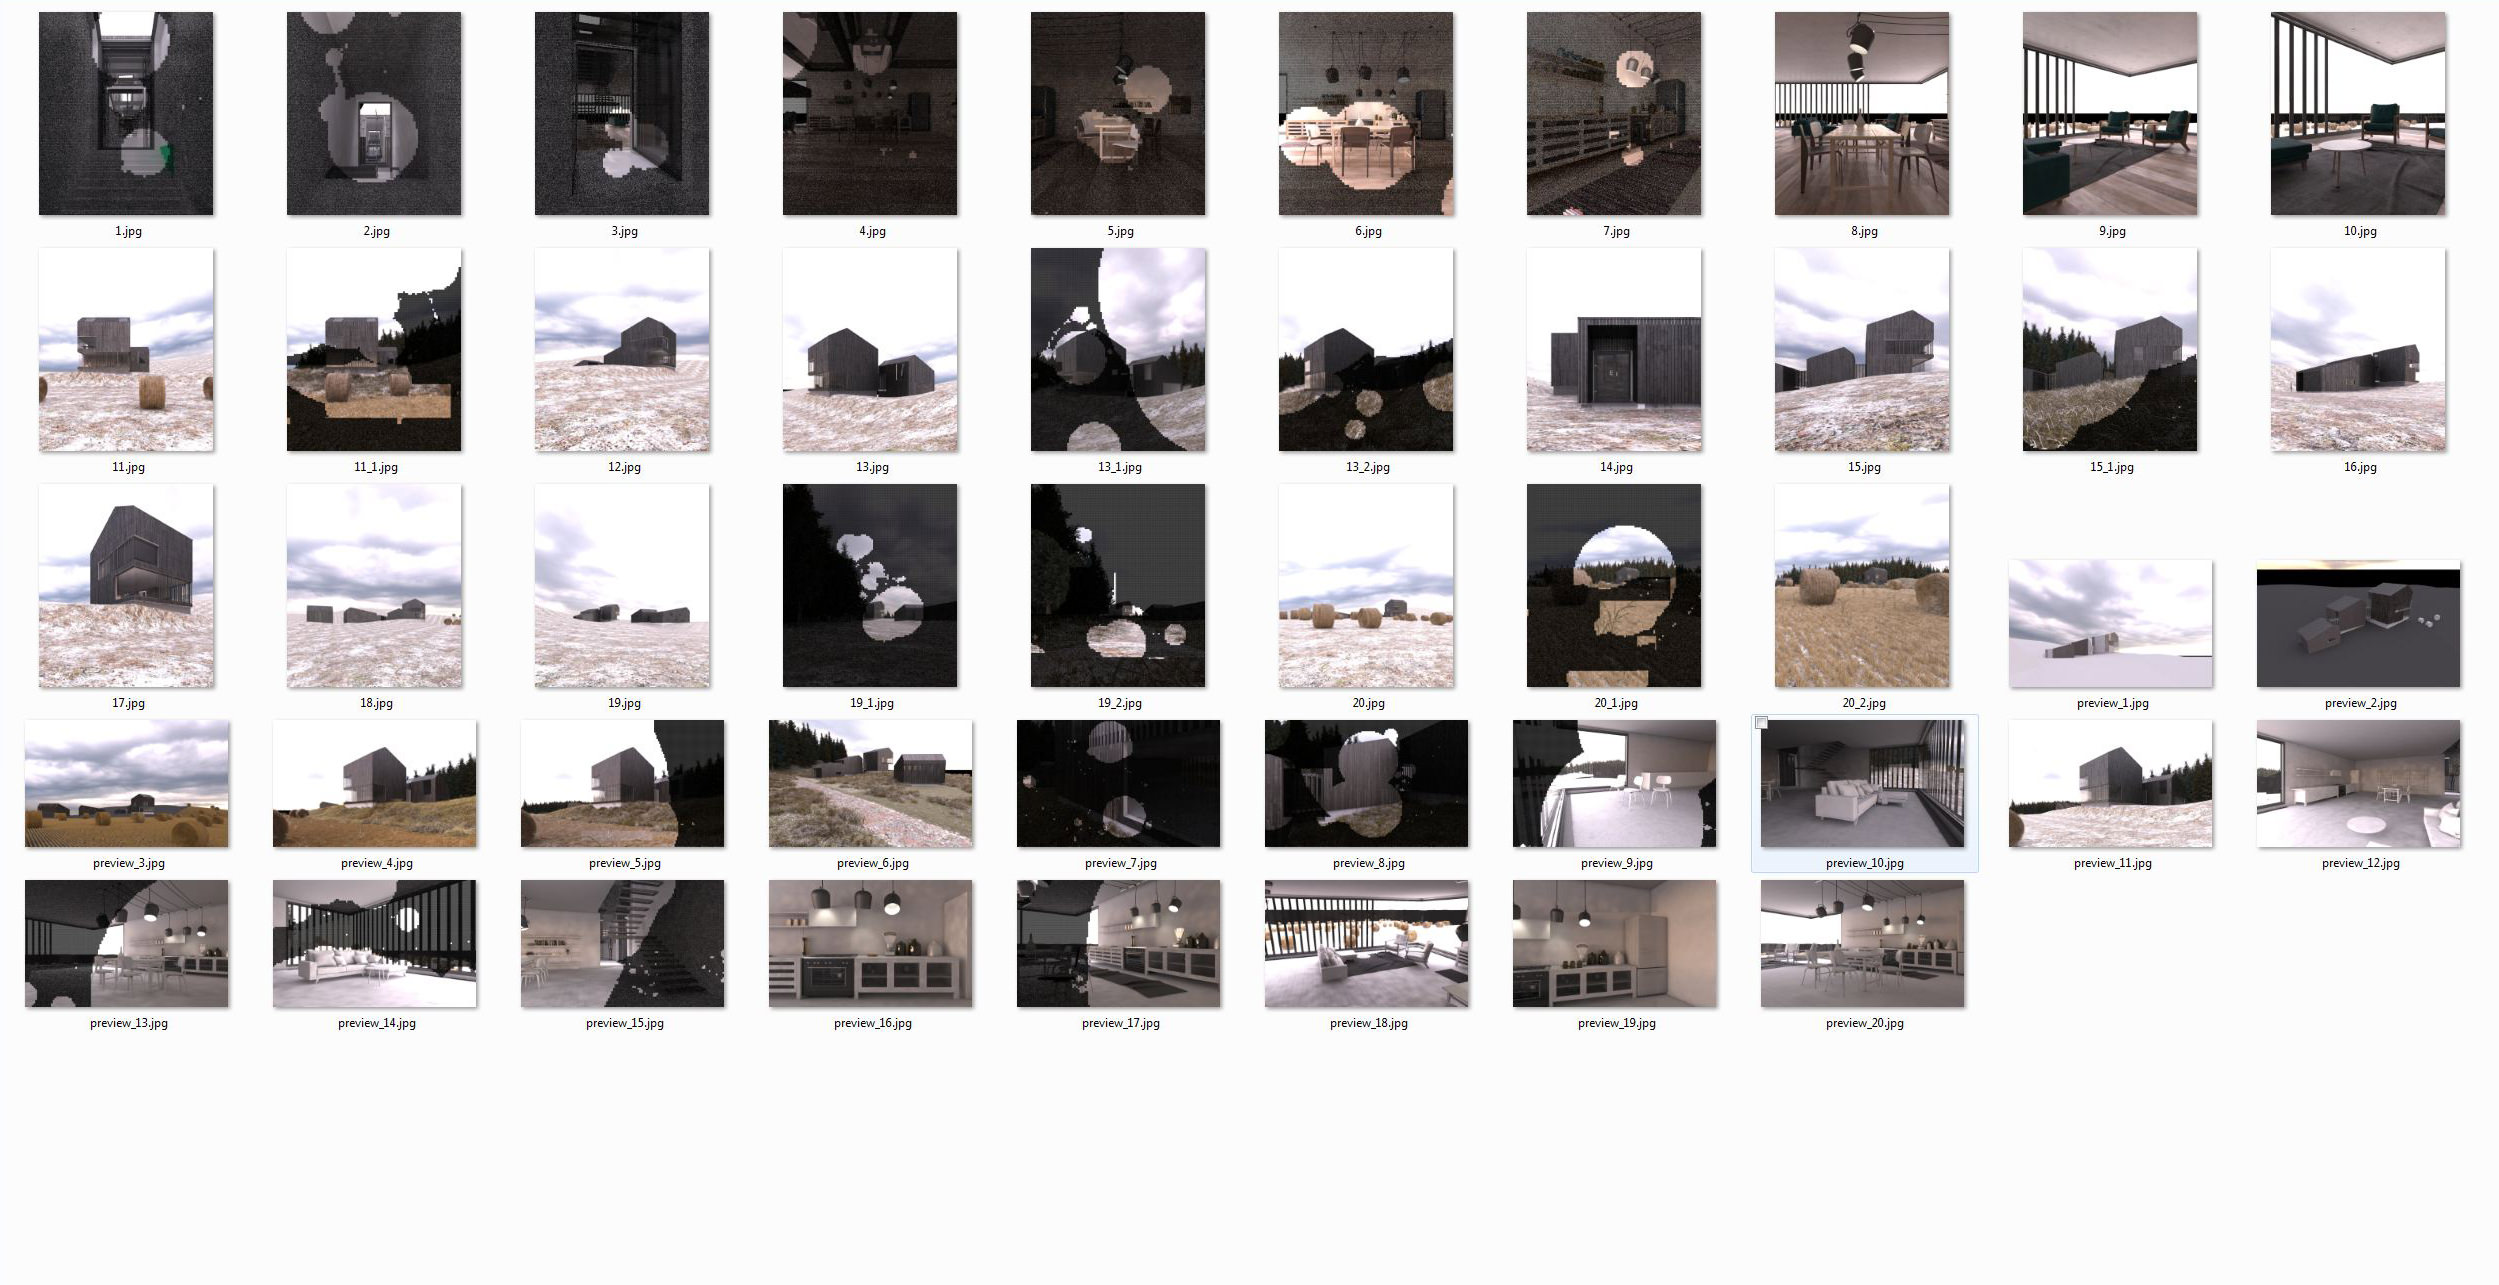
Camera Setup
Since the geometry was modeled and the materials were set, I started to look for interesting angles. Because I modeled the whole scene now I could act like a photographer walking around the building with a camera in my hands hunting for a beautiful shot. I put 20 cameras and made 20 test renderings to evaluate the composition. Eventually, I came up with 7 cameras and checked them in a high resolution for defects and missing details that are not visible in a low-res. I added some details for specific angles only since they are not visible on the other cameras and might make the whole scene much heavier.
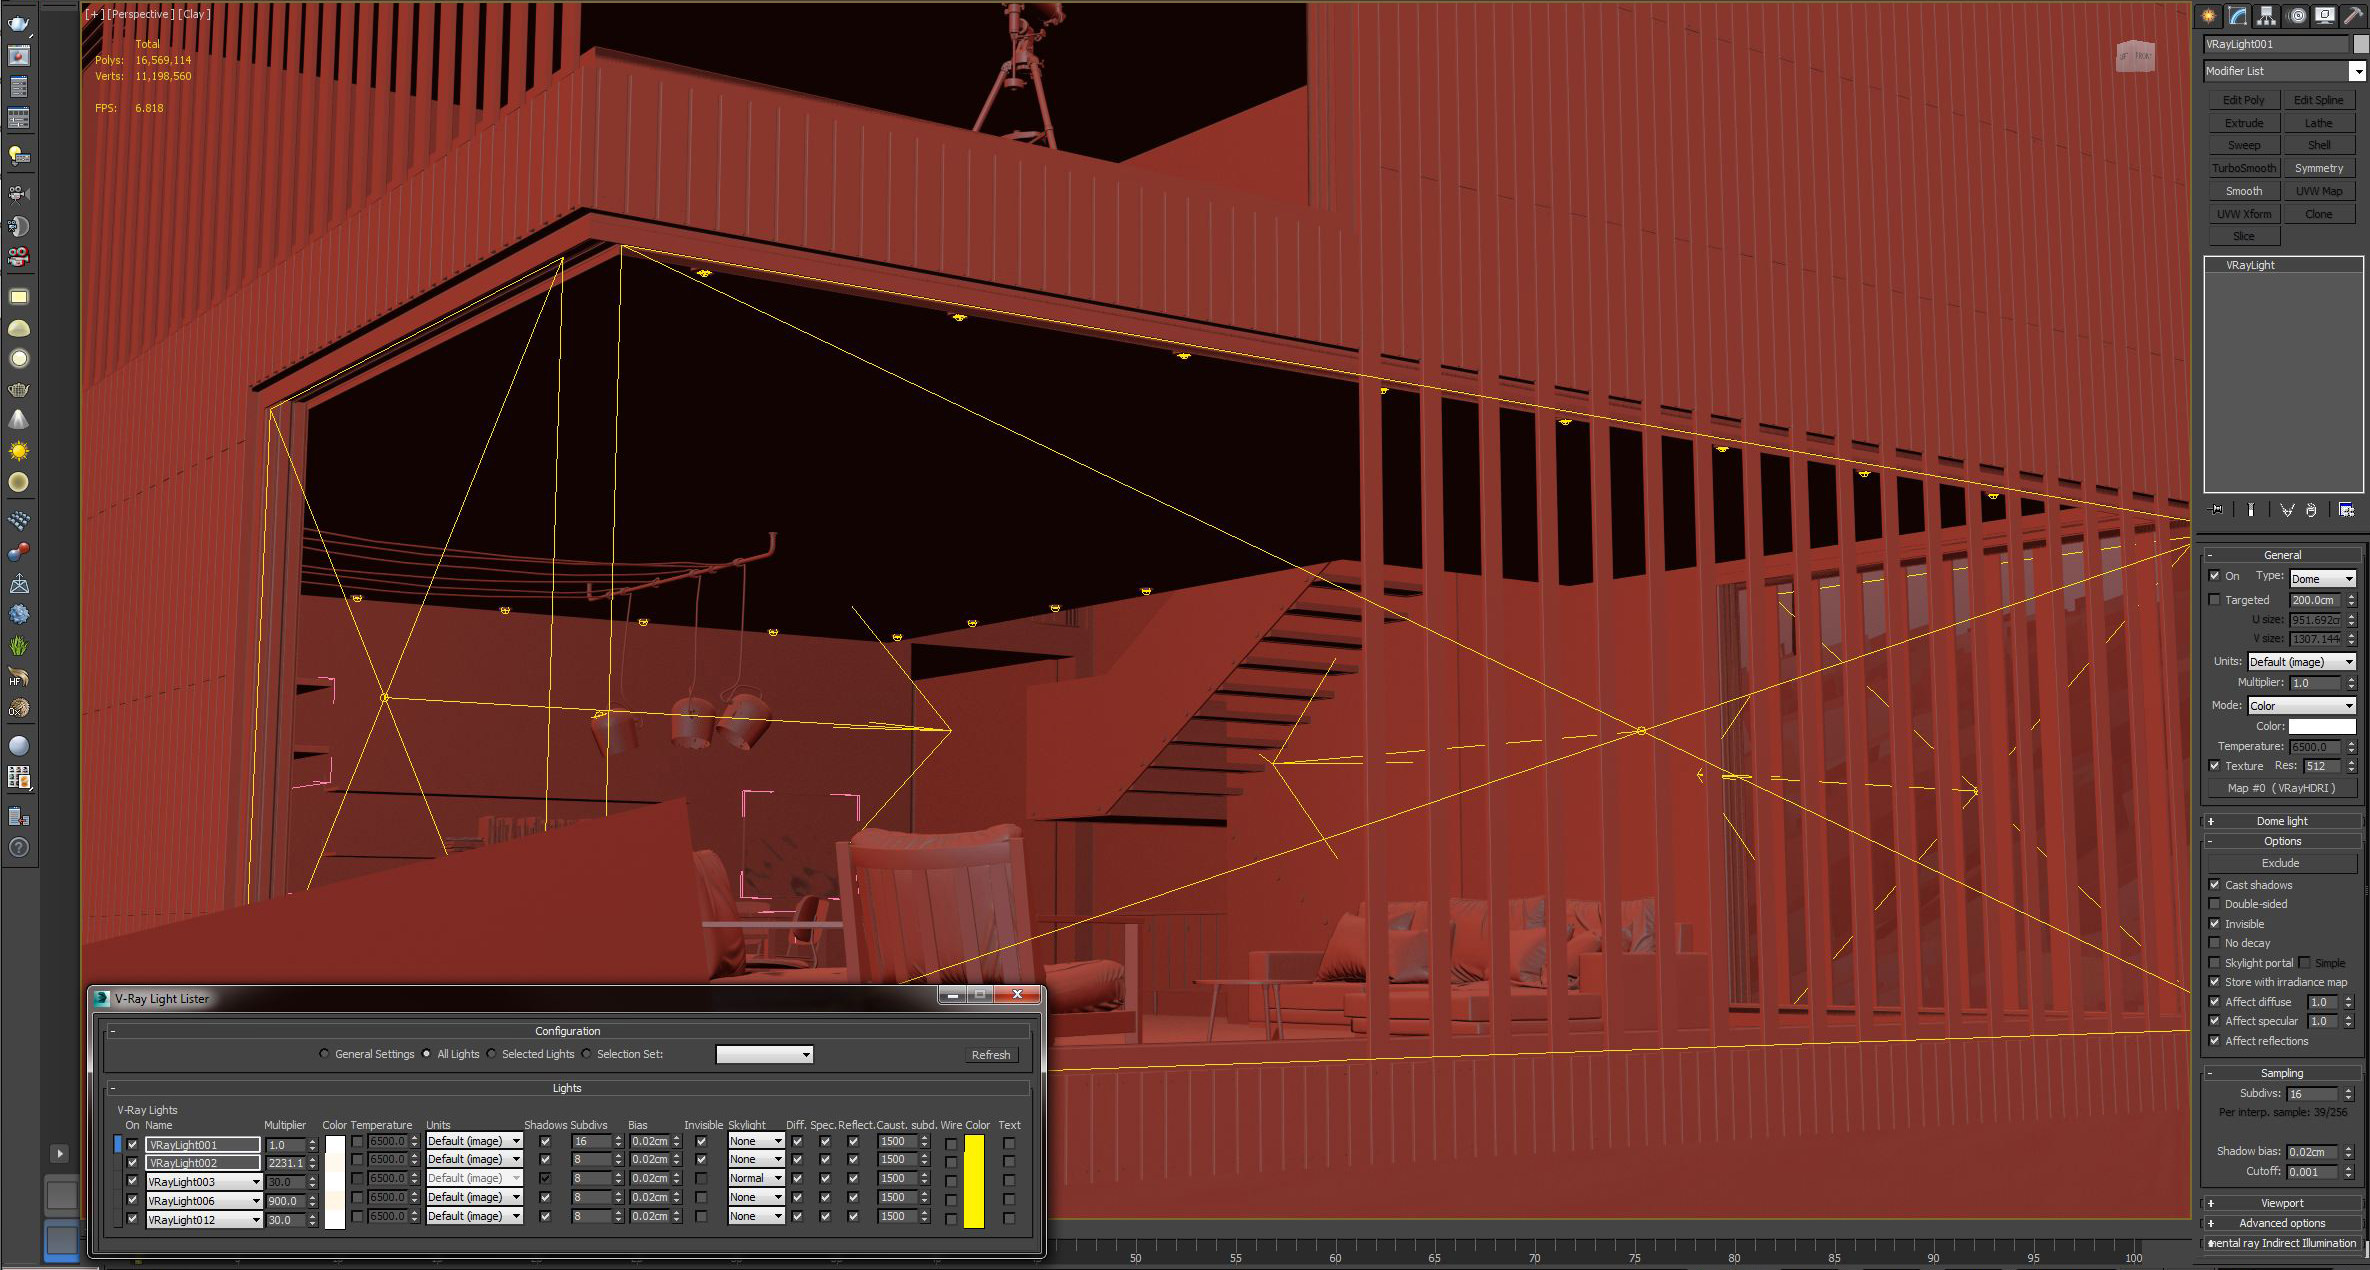
Lighting
In this particular project, it was the only one source of light for all cameras. I used HDRI map for that purpose. To add more life to the image I also used additional interior lights.
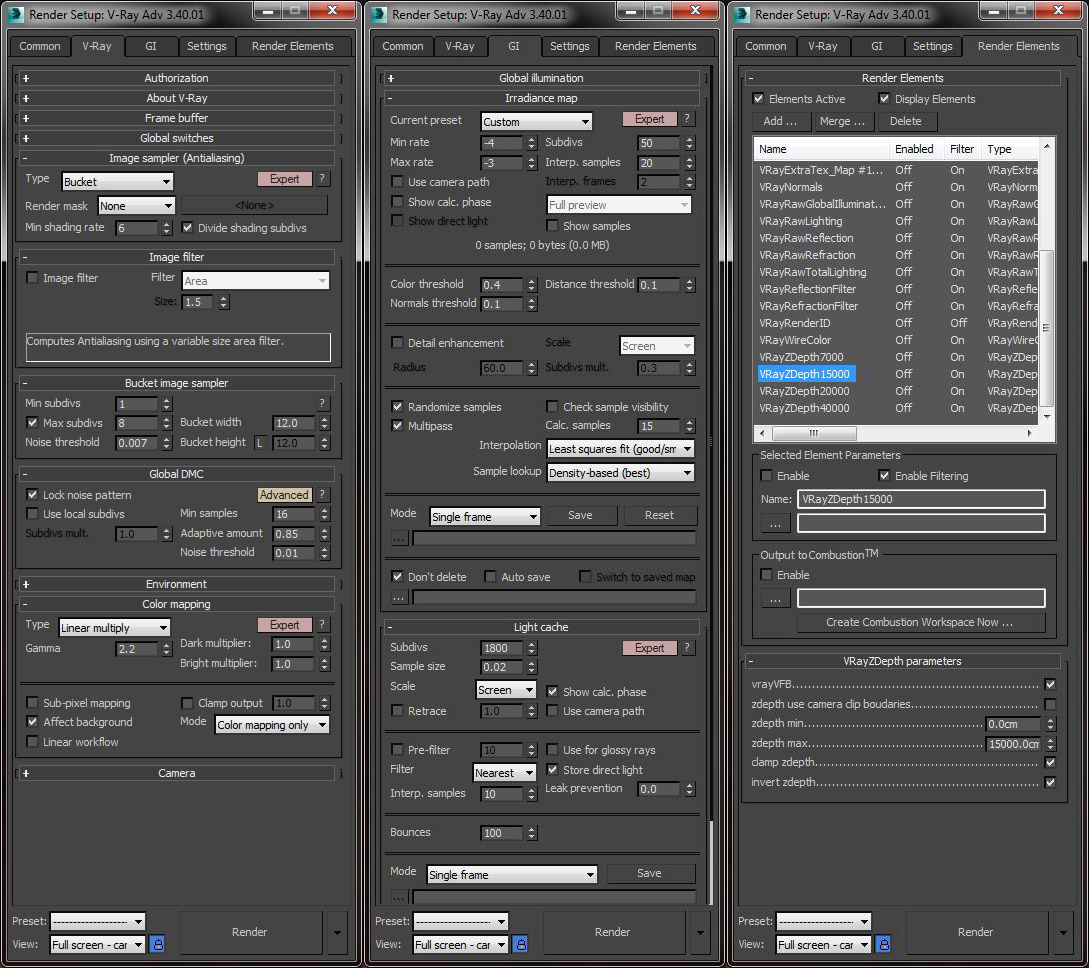
Render setup
Nothing special here. I didn’t use the filter for the final image in order to get a sharp one.
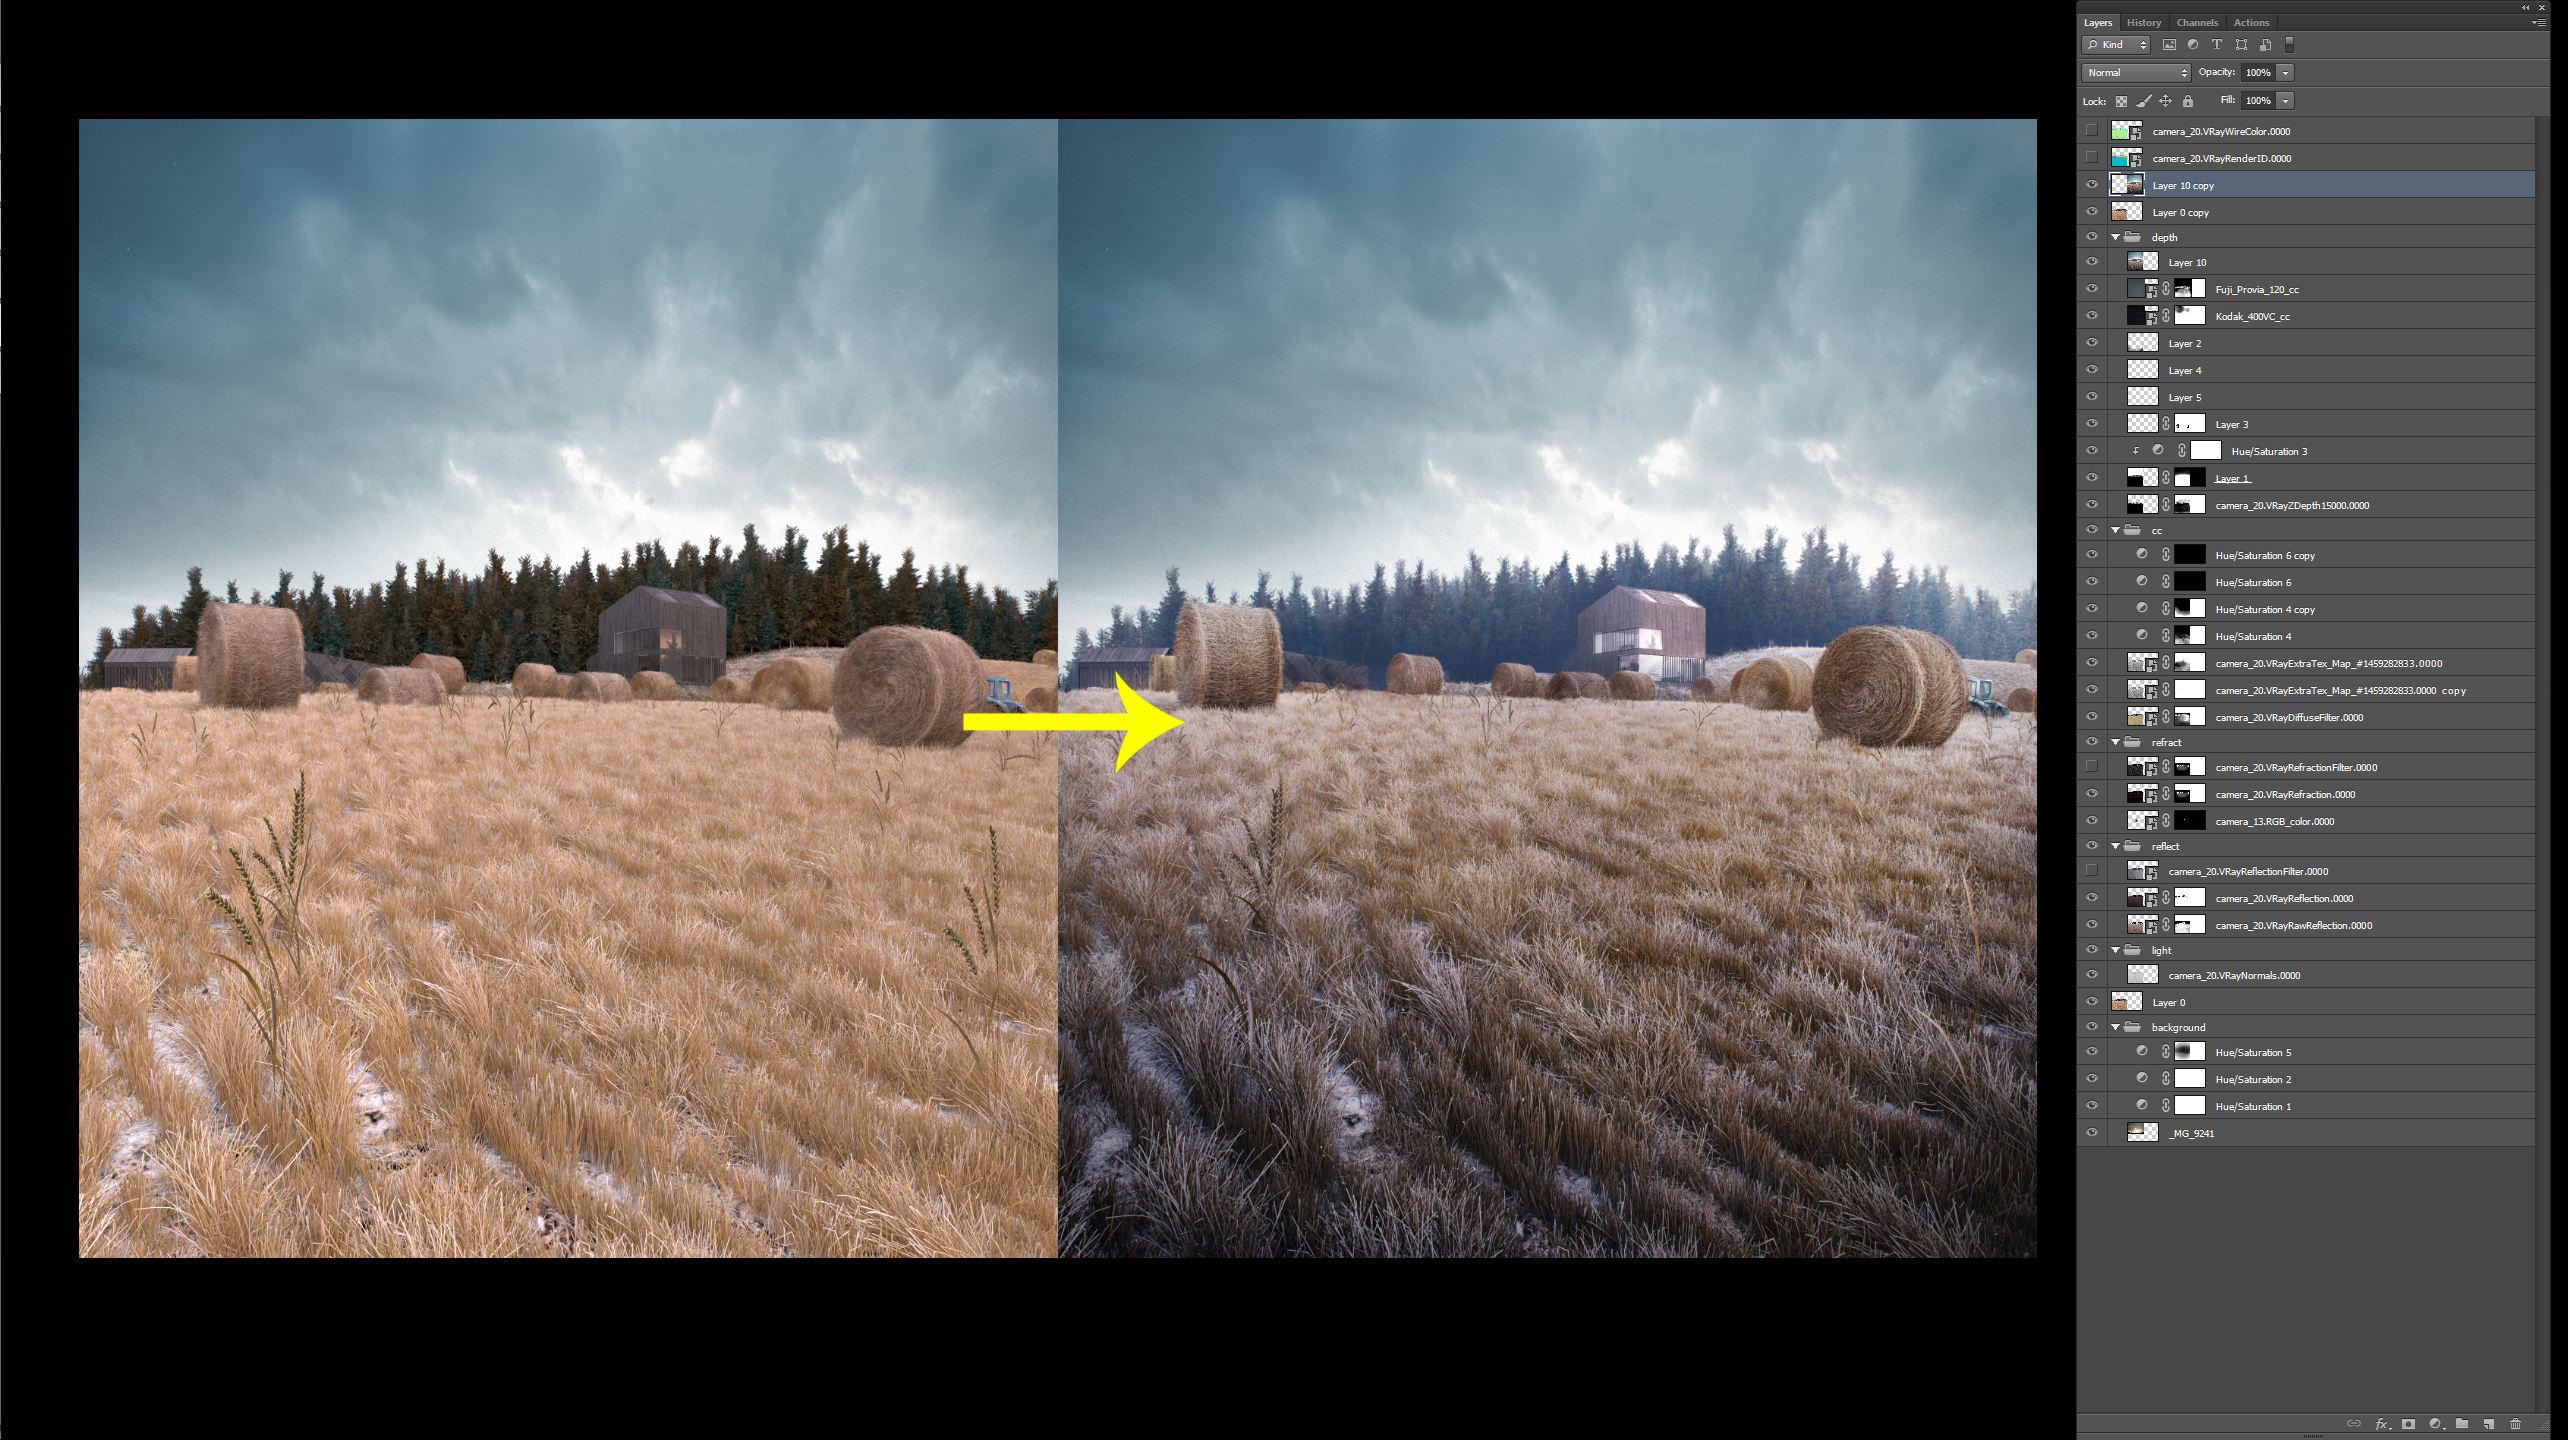
Post-production
All the work that brings ambiance and color mood to the image I always make at the post-production stage. But it doesn’t mean you must rely on post-production entirely.You need to actually like the rendering before you start post-production.
Using the post-production techniques I bring the image to a condition that was already in my mind. Even while making test renderings I already plan how to improve and what to add during the post-production.
Of course, you can always spend a lot of time adjusting the render until you need Photoshop for watermark only, but in the most of the cases, there is no need in doing so, since you save much time both for your work and for rendering process using the post-production.
In other words, you always need optimization and rational approach in your work. It comes with the experience of course. From work to work.
To make navigation between Ps layers easier, I usually divide render elements by different groups : background, reflection / refraction / light / depth / color correction. There is no common recipe for post-production. It all depends on your raw rendering and the goal you aim to achieve.
Thank you for reading thus far! I hope I helped you with this article about my work, and I look forward to your comments 🙂
Thank you,
Andrei.


harvesting in winter, really?
Nice tutorial, there a many nice things (props, forests items) but also a lot of strange things !
Why 4 Zdepth ? If you render in 32 float, or even in 16 bit PNG you’ll have all the depth you need to generate the Z you need.
BTW, try Vray aerial perspective, it will save you a lot of post work for the same result (at the moment it’s baked into the RGB but Chaos will make it renderable as a separate pass)
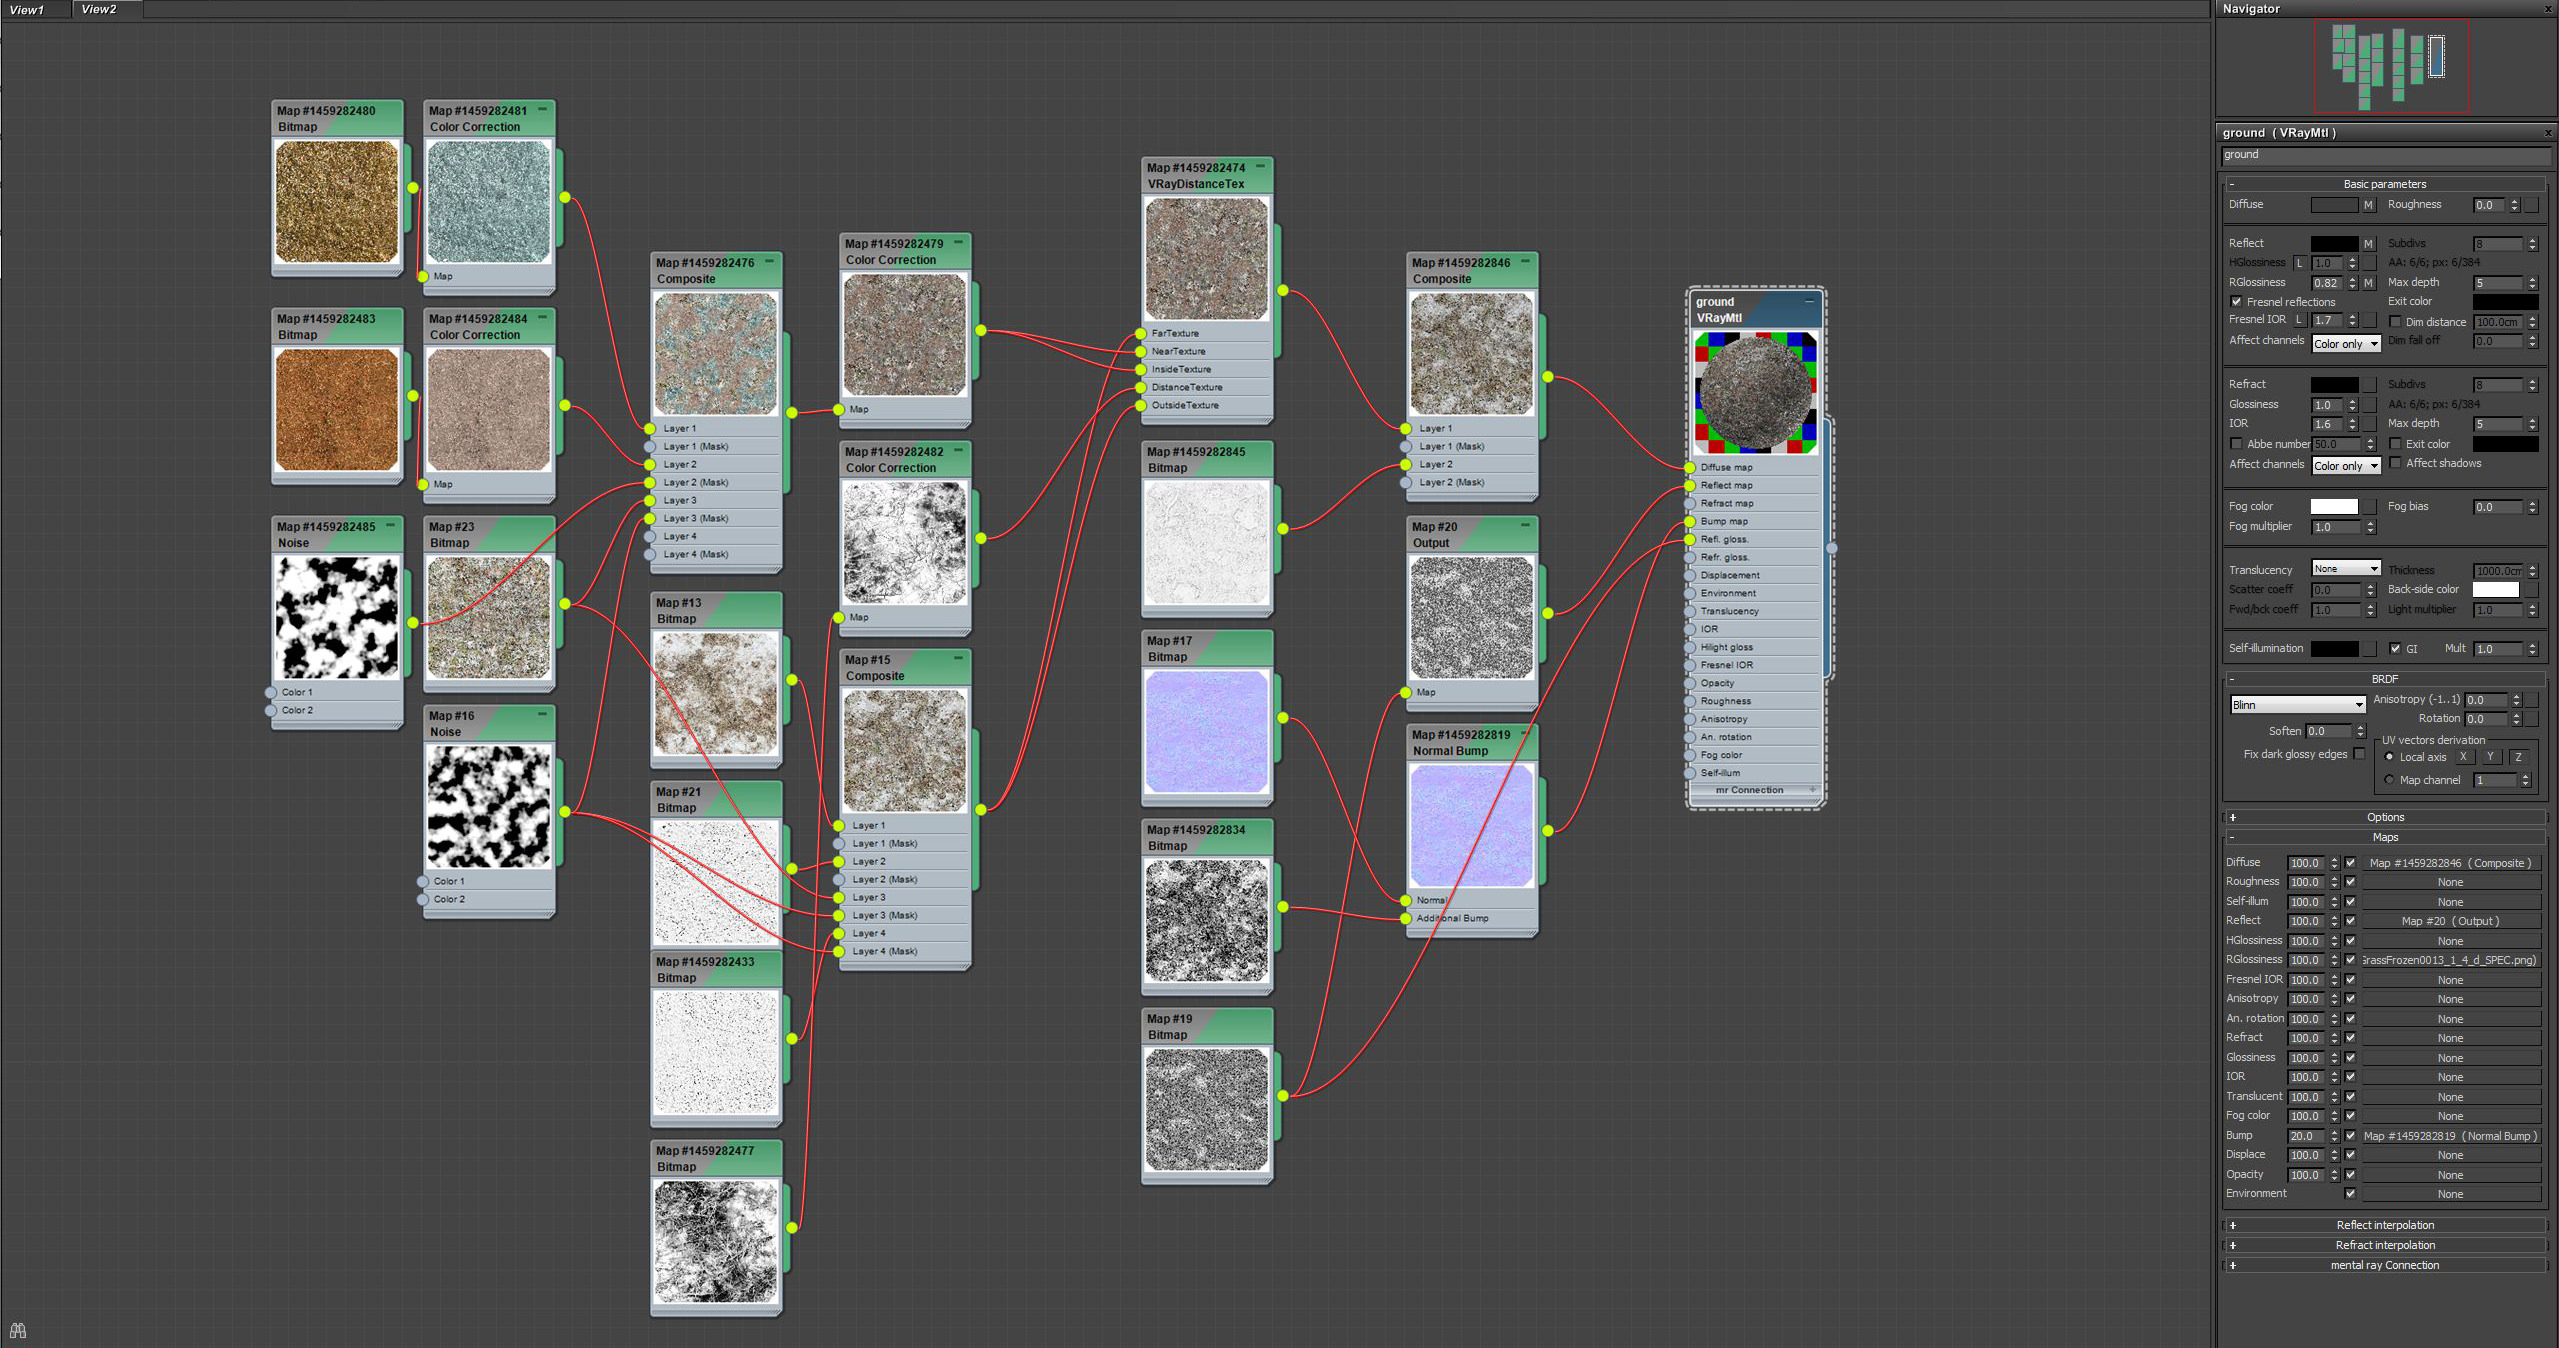
The ground texture gave me an headache trying to understand it. It’s overkillllllllllll 🙂
I think you should try to do more with less effort, because ased on the screen you put a lot of effort in things taht you don’t see in the final images.
Also the final image has a bizarre feel, the building should appear darker IMO, and the light seem to come from behind the trees but your windows are glowing. If it’s artifical light it’s too bright & wrong temperature.
Amazing work!! Thanks for sharing
Beautiful work! Great atmosphere! And thanks a lot for your assets 🙂
I like your workflow and the “care” for Details. You build up the whole scene and walk through the whole area as a “photographer.” Amazing 🙂 I love it 🙂
psteels Thanks for comment. I use 4 Zdepth for various cameras with different values. It’s help receive few variation of depth for image, what help in better control.
About glowing windows and light behind trees, actually light goes in front of building, glowing sky it’s just artistic touch.
For this work I used V-ray 2.40 which don’t have Aerial Perpective ) And As for me, better control fog in PS than when it baked
Why not? And this autumn frosts, no winter
May I know which HDRi did you use?
psteels btw i think aerial perspective only works with vray sun and sky…
was the roof modeling done with floor generator or clone modifier?
because in floor generator you cant rotate the plags as you did.
very intrested to find out