


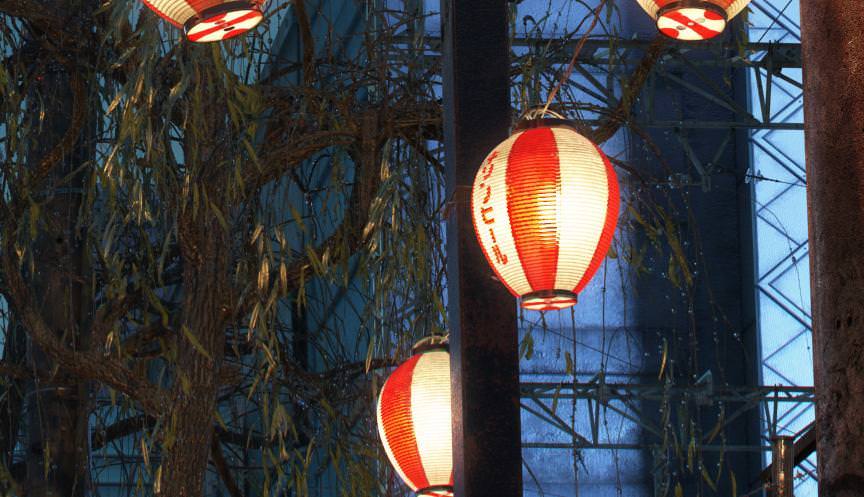
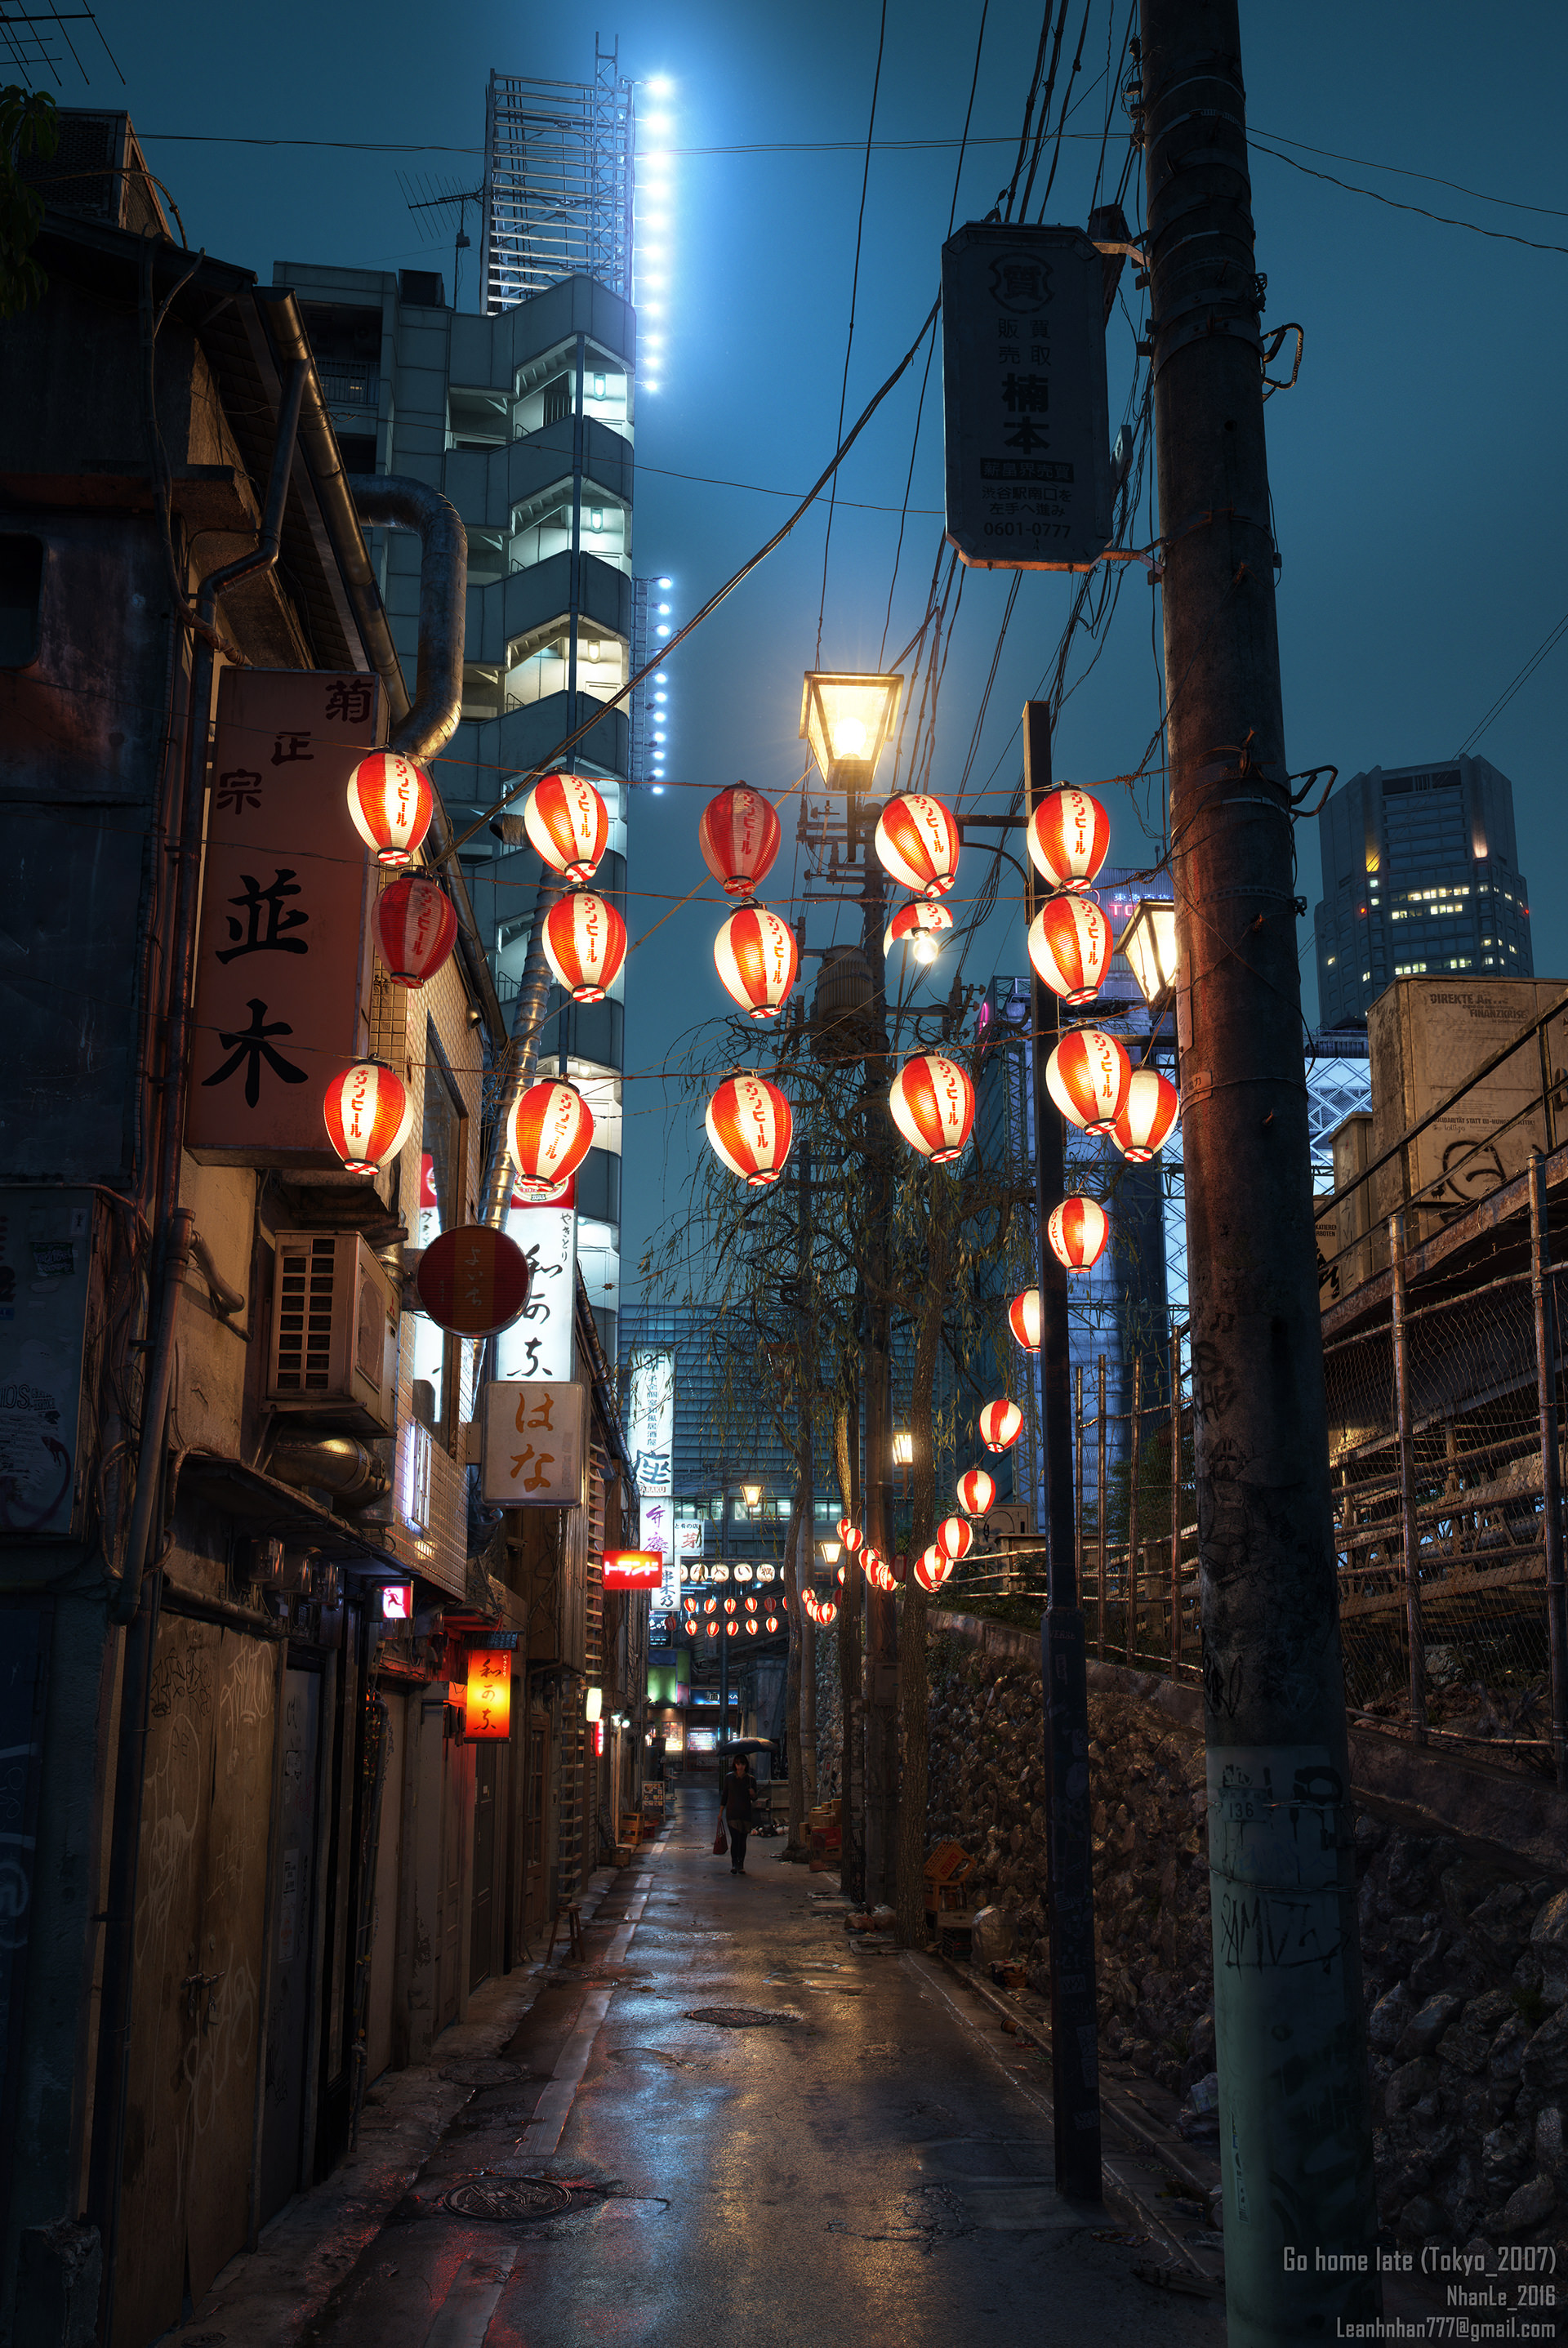
MAKING OF “Go Home Late (Tokyo 2007)”
Lê Anh Nhân is a 3d Artist from Vietnam. He studied 5 years in the university of architectural design, and got interested and use 3dsmax & V-Ray during his 4th year there. His passion for CGI got him to follow ArchVIZ after the university. Today I’m very happy to share with you all the process behind his AMAZING work – Tokyo 2007, done as a tribute for his wife. Enjoy!
Introduction
Hi, everybody!
I’ll start with thanking Ronen for giving me this opportunity to share with you the method used for “Go Home Late (Tokyo 2007)”. It is a great honor for me.
I only have 2 years experience in the profession. All the things I am sharing with you here I have learned by myself, without training courses, just study on the internet. It may contain flaws, so pat attention to this fact. I hope everyone can sympathize with me.
Let’s start with the inspiration behind the project.
Inspiration
Why did I create this image?
I just got married and each evening I waited for my wife coming back home late after work. Since I love her very much, I wanted to do something for her. I look for inspiration in the works of others artists which, thankfully, there are many of around us to learn from.
It was a coincidence when I saw the work “Big City Sensory Overstimulation” which was performed by Gleb Alexandrov, a very talented artist.
And I was even more inspired when Cornelius Dammrich published the work “52HZ“.
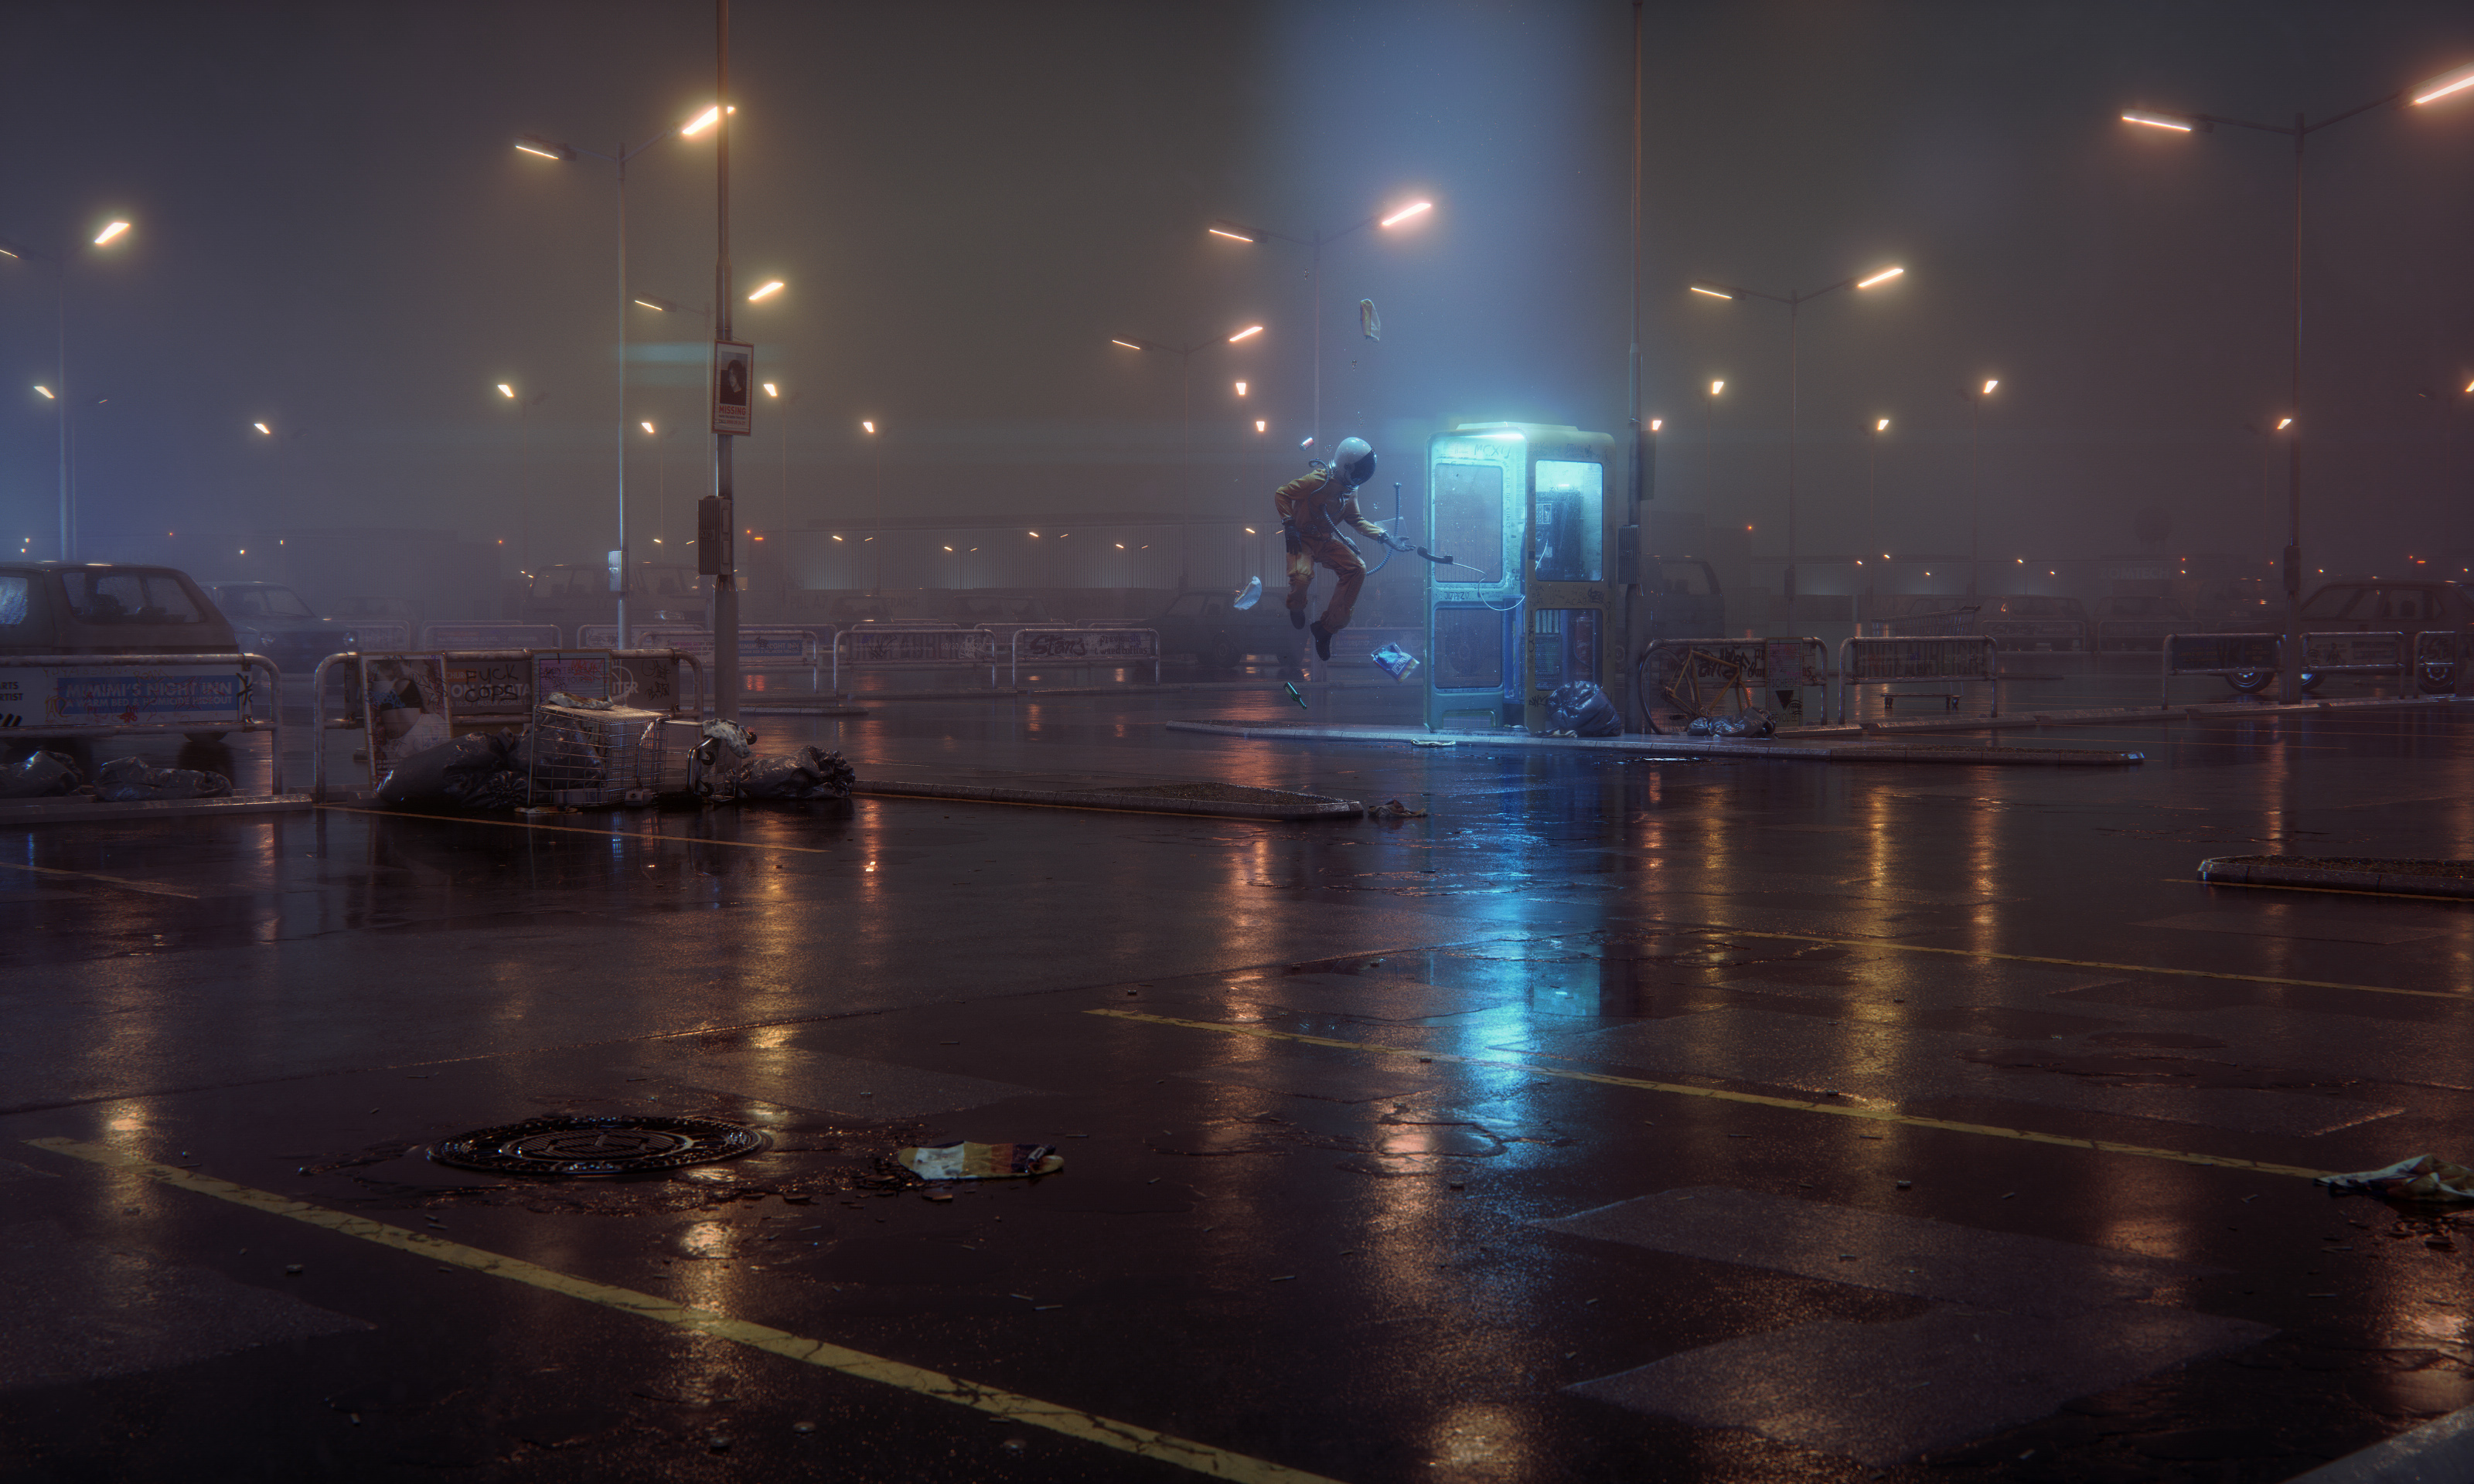
I confess, I was addicted to these two images.
I’ve decided to do something similar, also “crazy” like them but in my way. Due to commercial work deadlines, I had very little time to do it. I had only 8 hours a week to do it, and modeling and texturing are not my strengths. I am the best at observing everything around us. So let’s start with my references in this project.
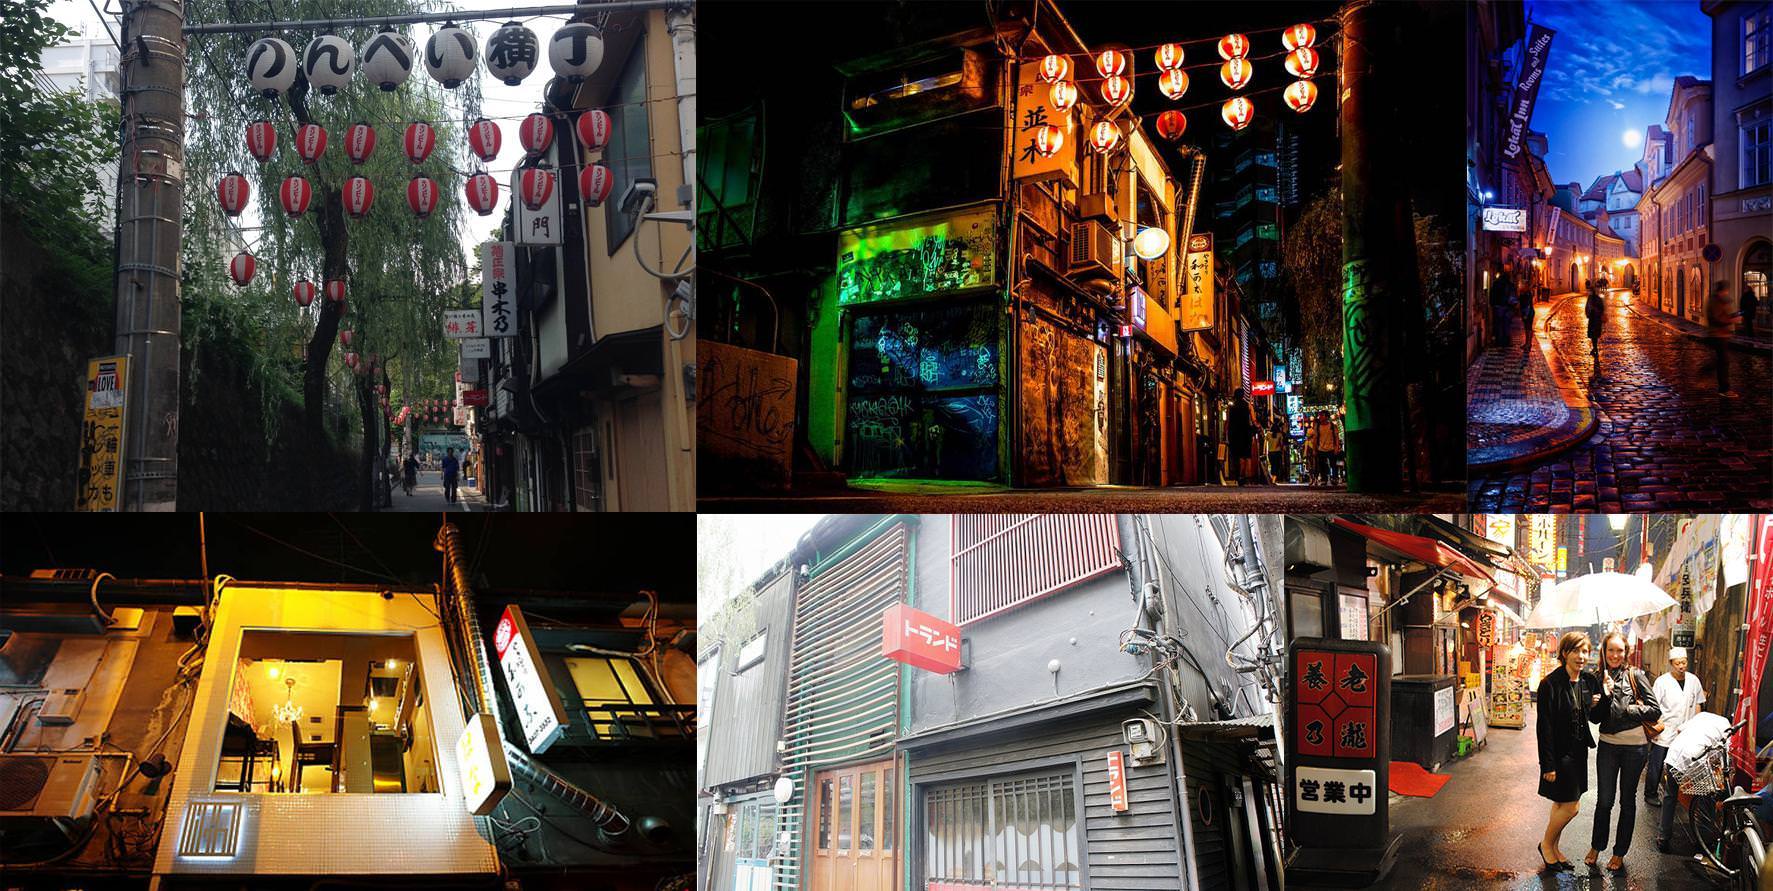
References
I think this is the most important part. Human imagination is wonderful, but we must connect what we do with the reality around us, which takes the time to understand in a way we can translate to our images. Before doing something, I often observe carefully, understand the nature of it, then I start drawing.
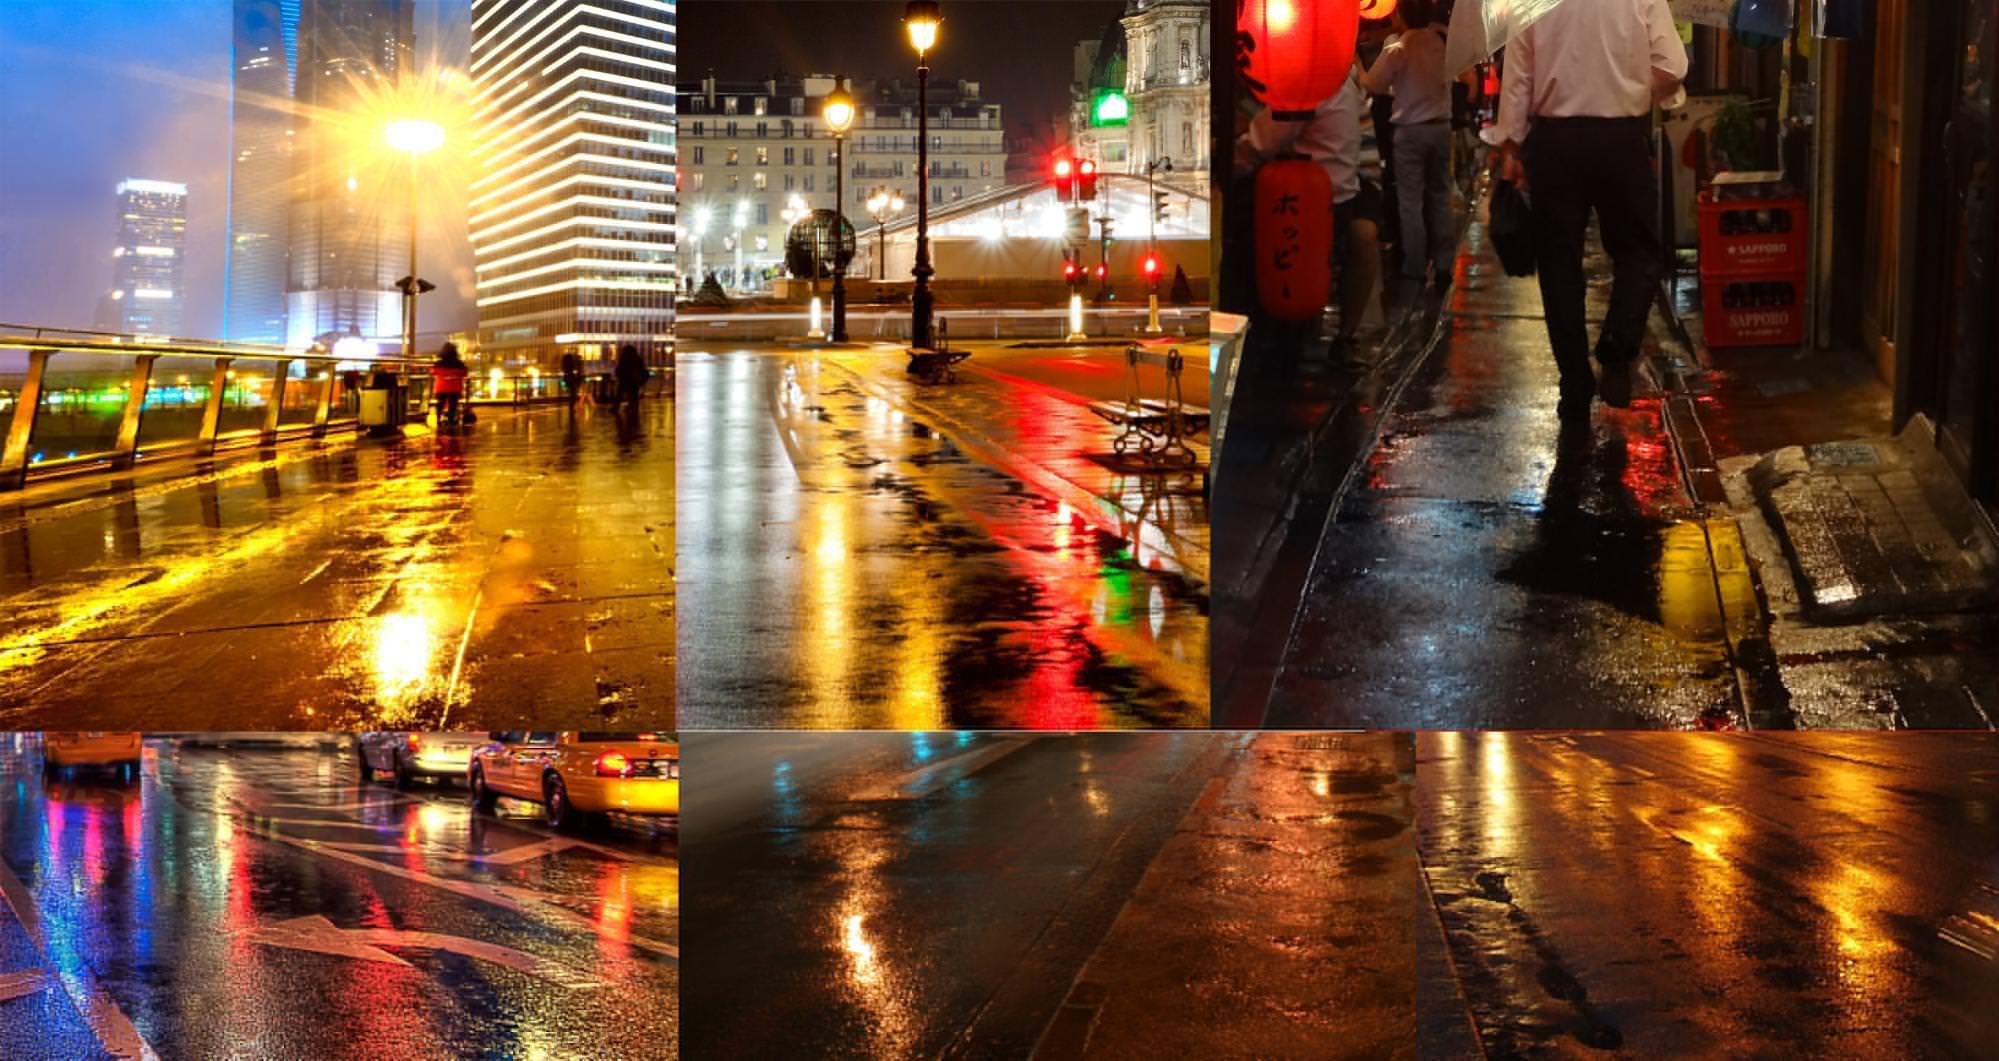
Here are some references that I love…
3d Modeling
This is the most time-consuming part for me.
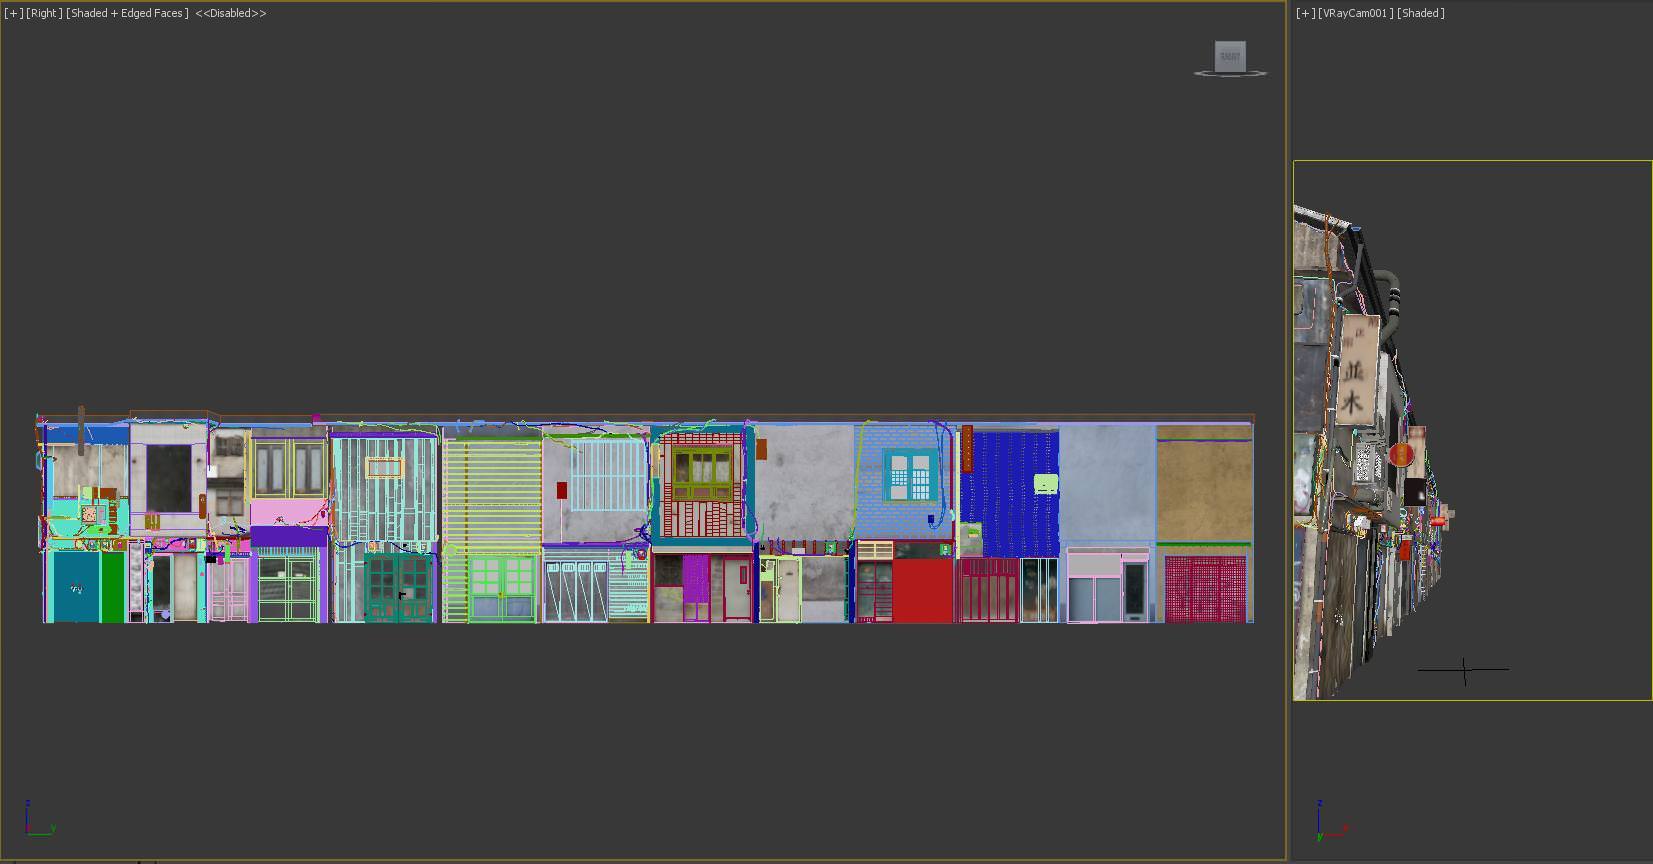
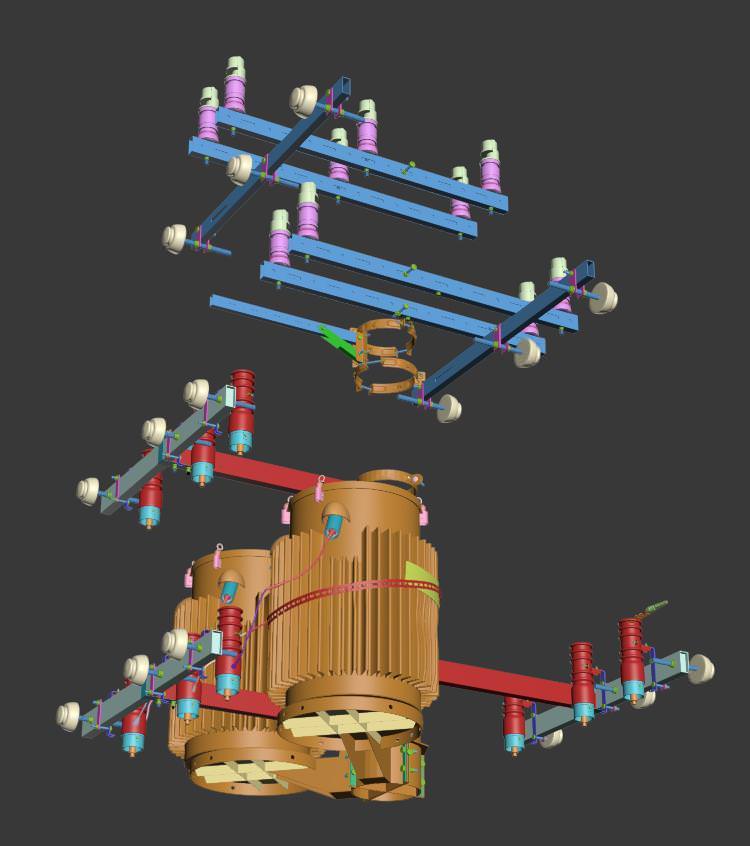
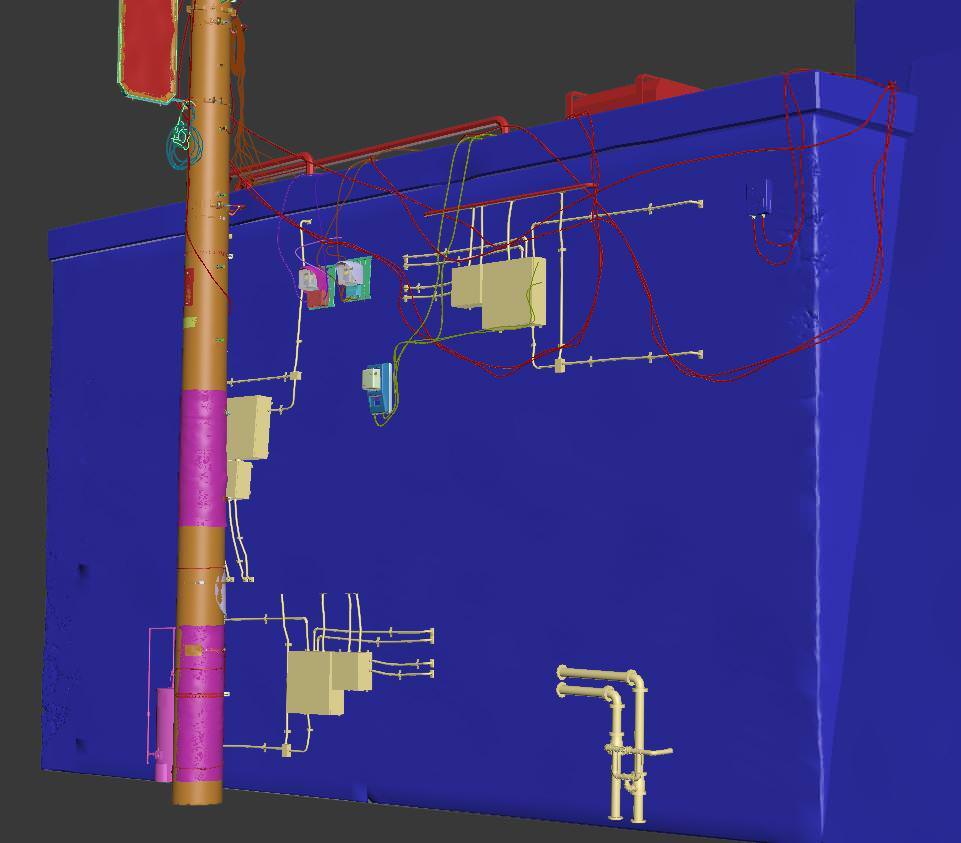
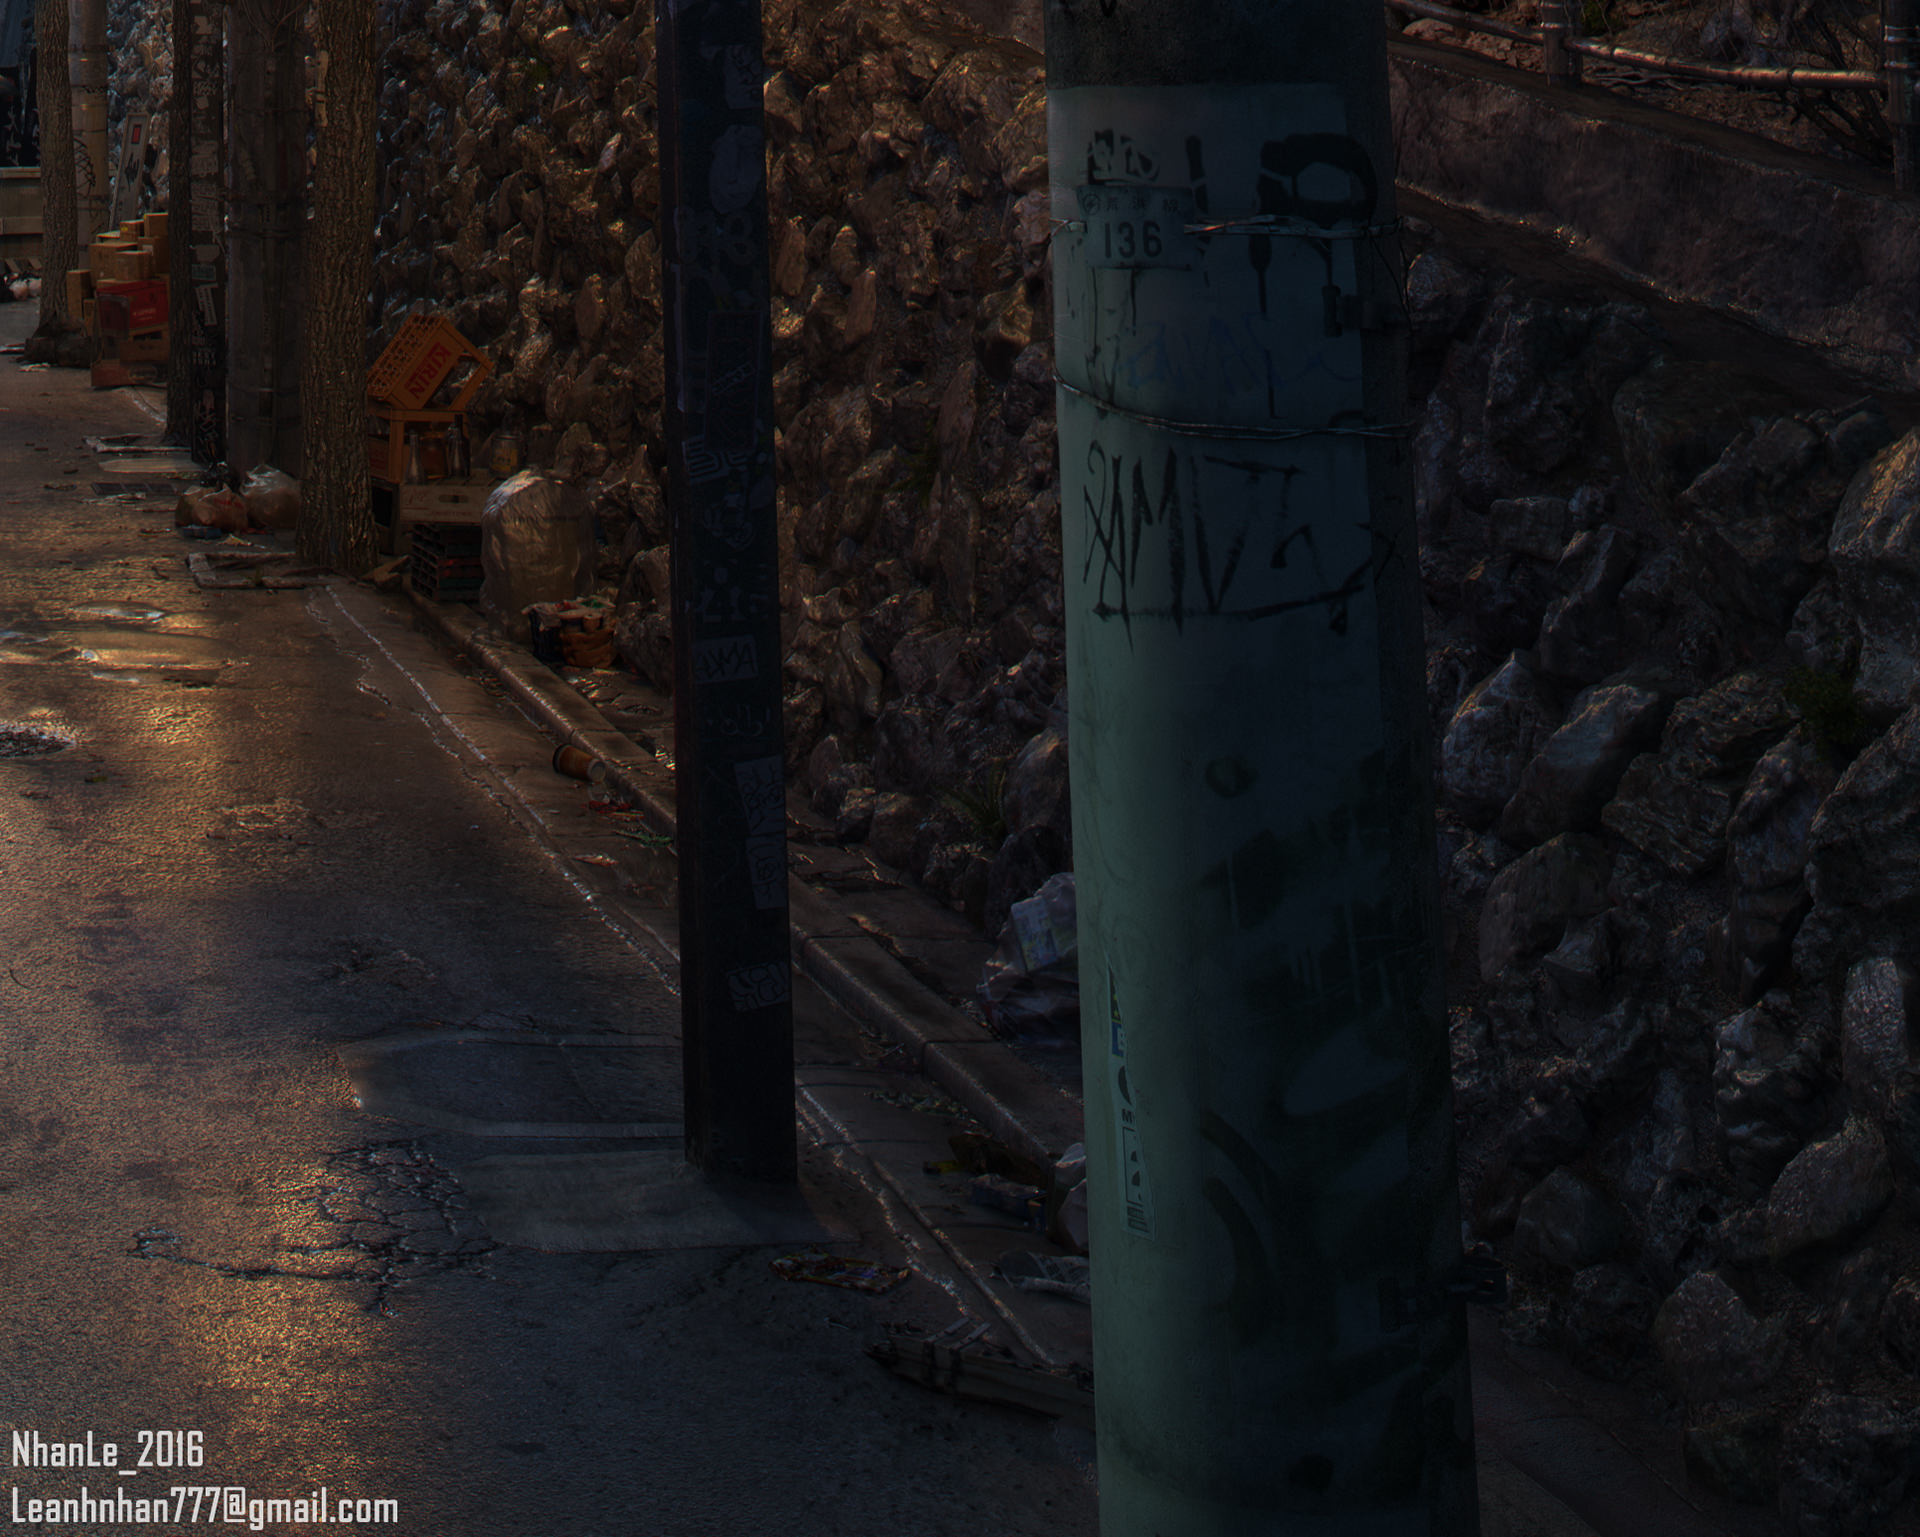
On this image, I want to do exactly with the current state of the buildings in this small alley. From architecture and location of electrical equipment, even the way matching electrical wiring must be the reality. To start with a camera and the cubes. I always do that because it helps my job easier.
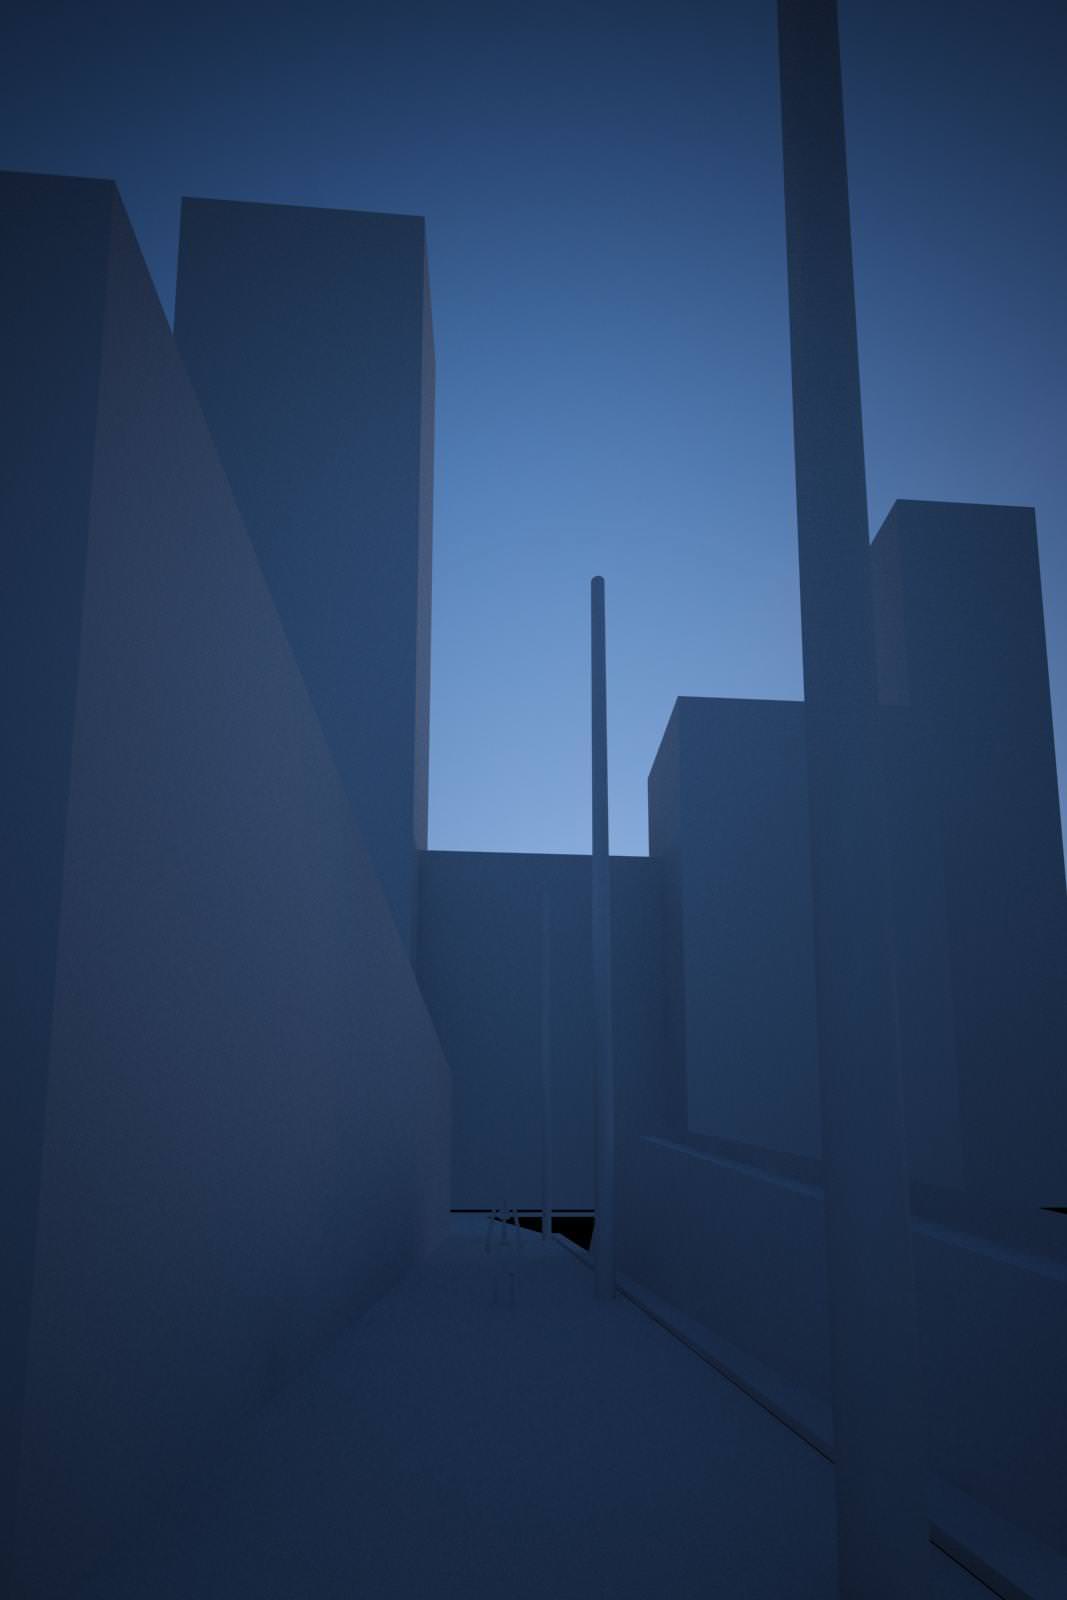
Prior to the model in detail, I would like to share with you an experience which seems everyone knows. All the sharp edges in this 3d model have a “chamfer” on them. It helps with picking up the important highlights on edges we do see in real life. Making everything to be more believable.
I always keep in mind that, to be truthful, even the furthest part of the 3d model, needs this level of detail. You can decide to cover it with fog later if need be. Just have the detail built in for when you need it. That’s just how I trained myself (and today with 360’s becoming more popular as well as VR it will make your scenes more ready for it).
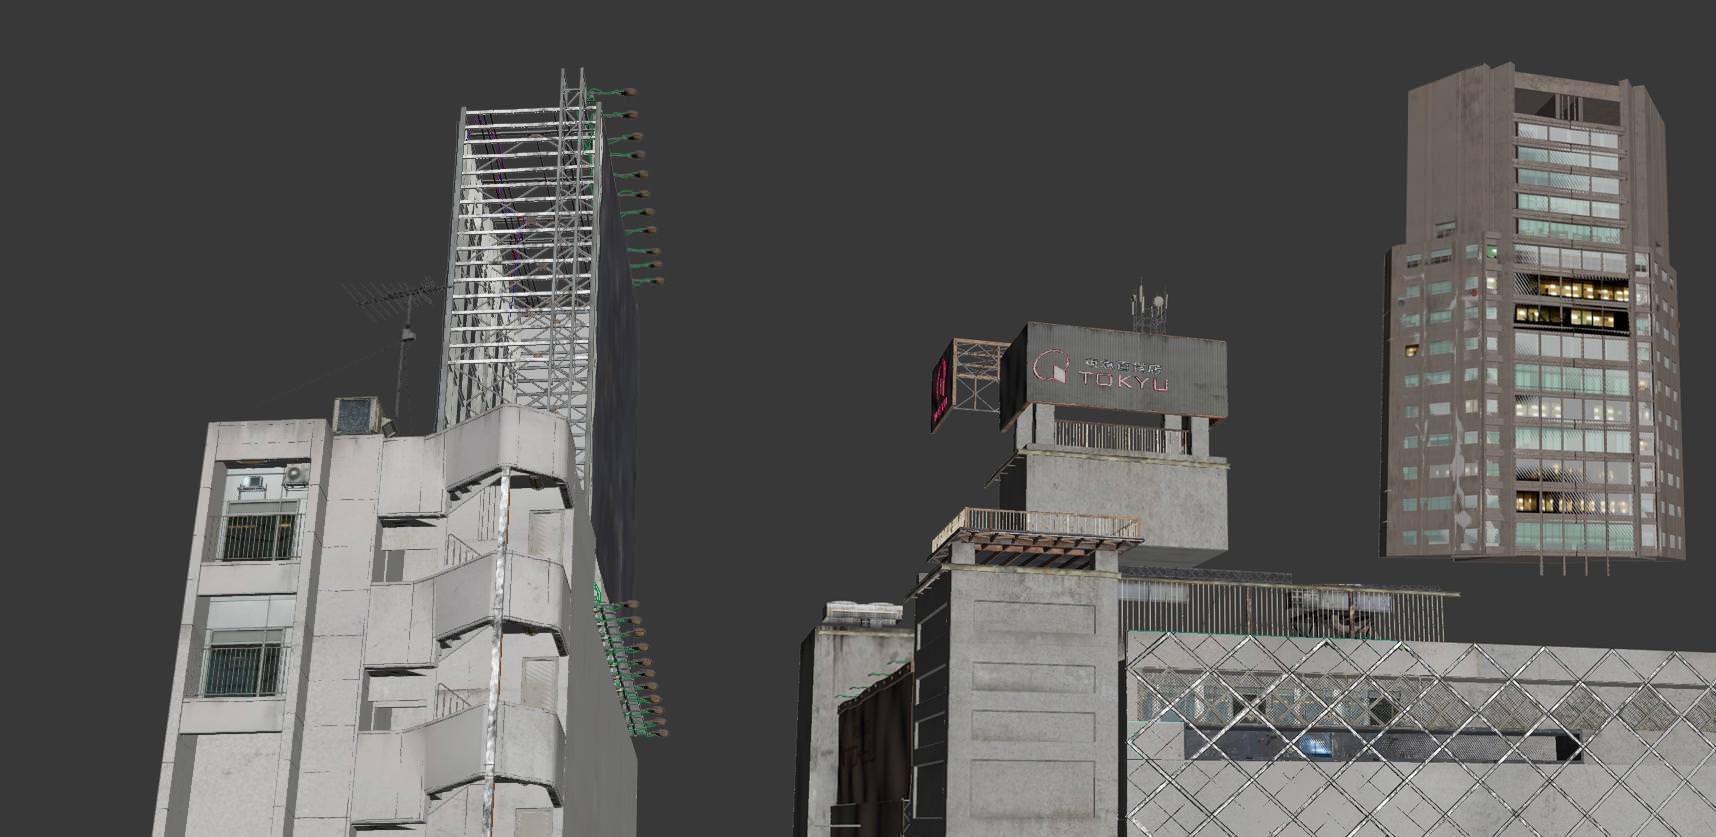
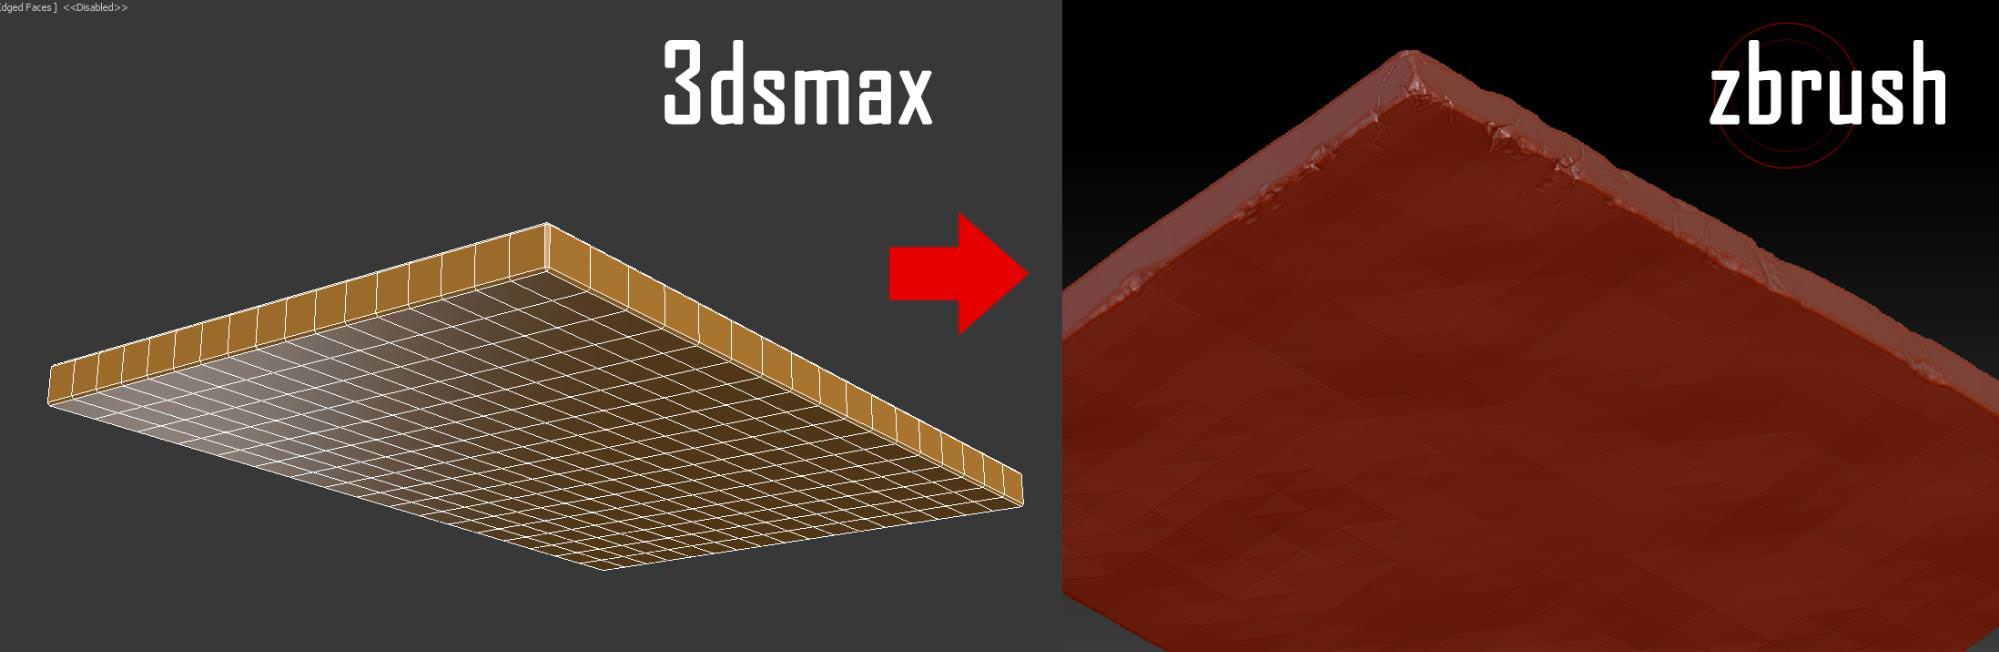
There are 17 buildings in the scene. I modeled them in 3dsmax. There are erosion details demanding the use of ZBrush. You can see this in the image below.
And this is an example of how I make the concrete details eroded.
I used the 3 brushes below to sculpt in Zbrush.
The Willow, in fact, is very bare. It has truncated branches because the alley is too narrow for growing. I modeled the willows in SpeedTree with 3 different models.
You can see instructions on how to use SpeedTree on Youtube, there are many tutorials about it.
I created the leaves with GrowFX.
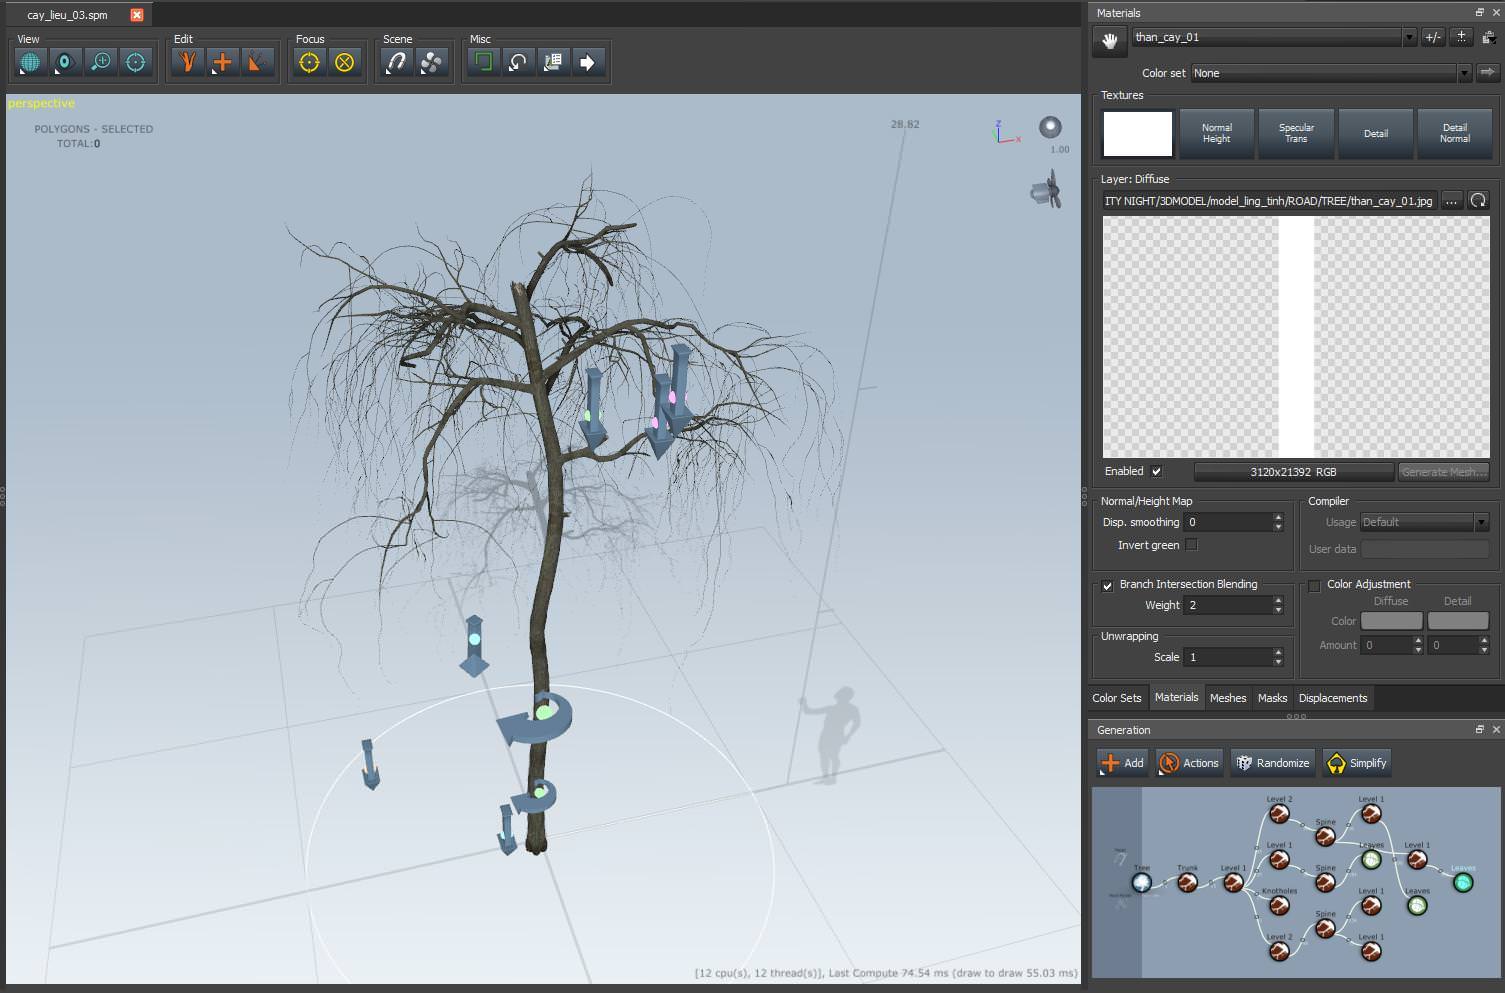
Incurvation of the leaf is very important, it helps with having specular highlights, which is necessary when it have just stopped raining.
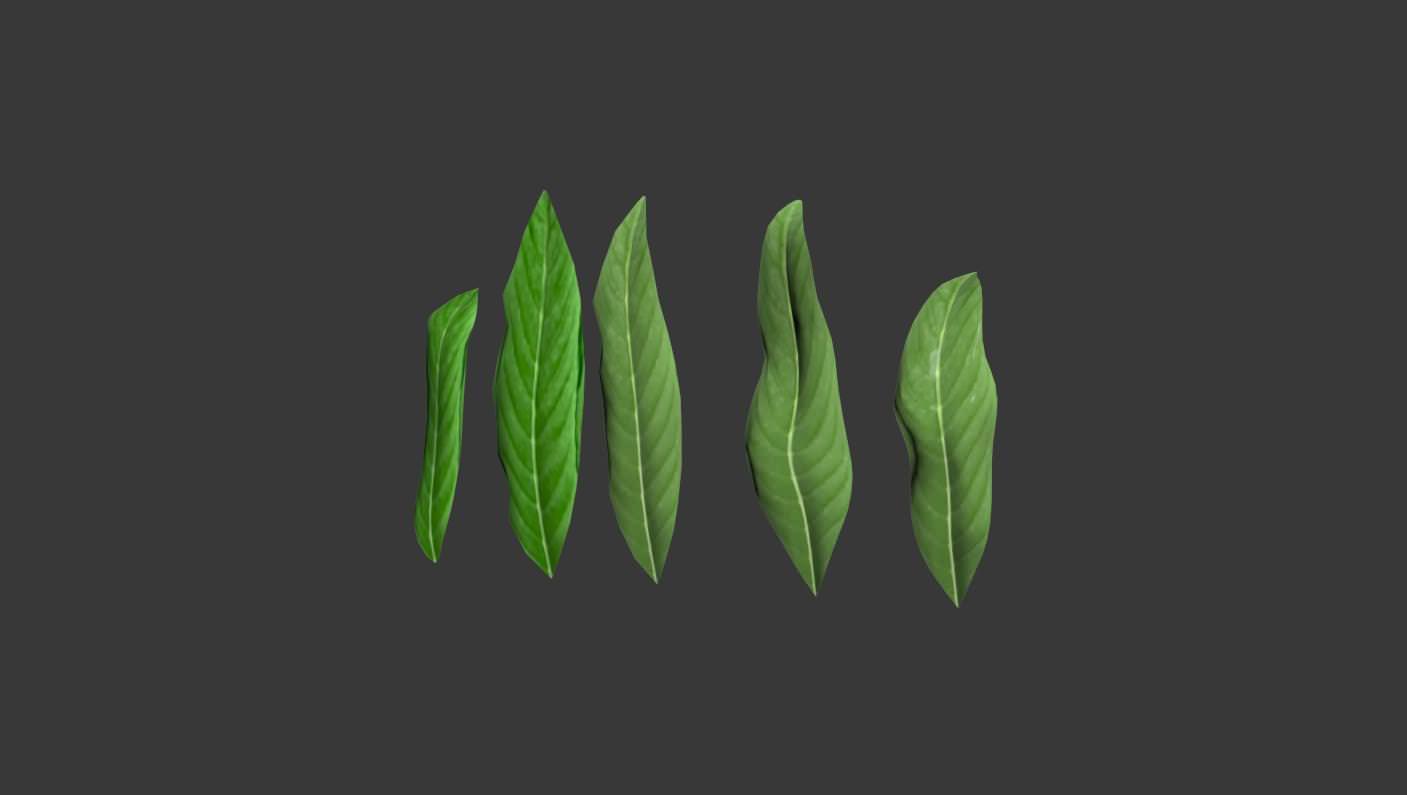
Results in 3dsmax…
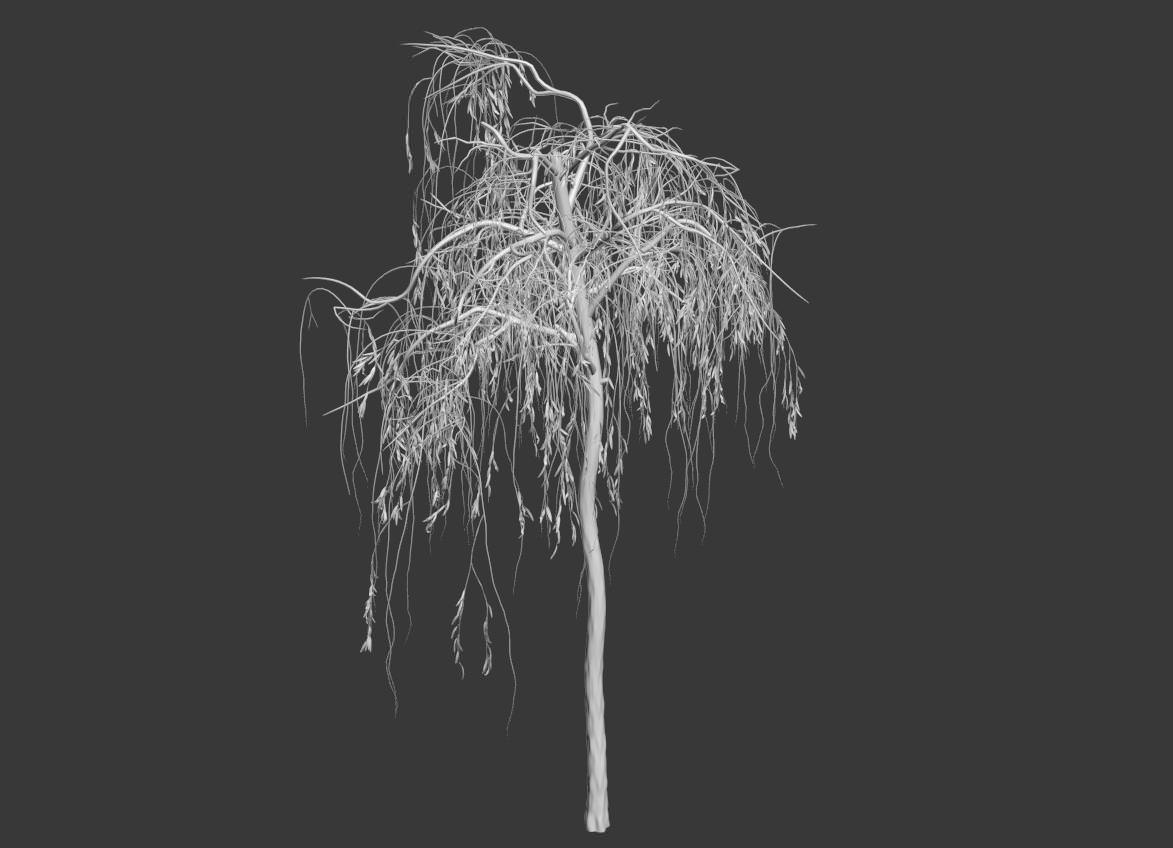
Raindrops on my leaf are distributed with MultiScatter.
I had to manually distribute raindrops deposited on the wire. It is difficult to recognize. But it is necessary to create the mood after the rain.
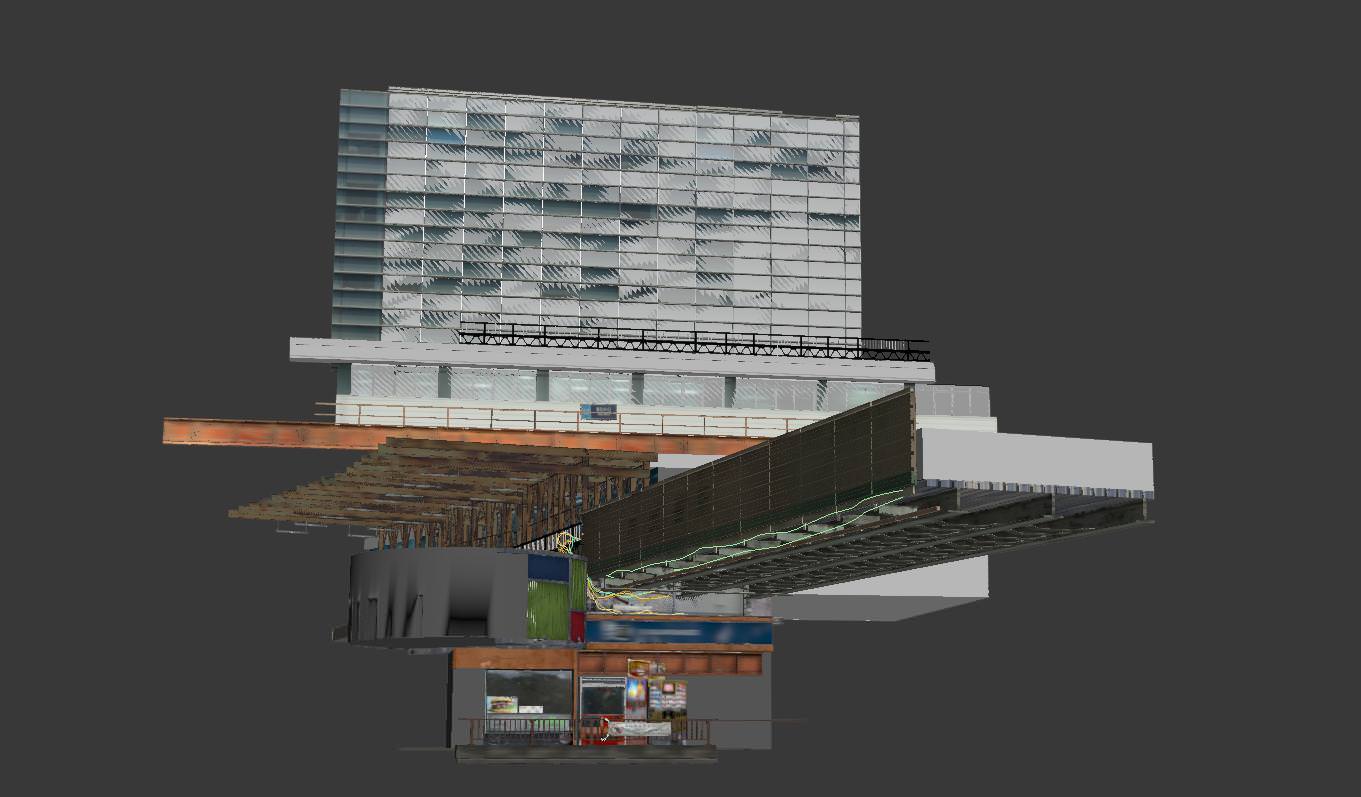
This is the model created in 3dsmax…

I will just mention some specific models further.
I want to share with you how I modeled the plastic packaging.
I used MassFx of 3dsmax and made it hang down like cloth in accordance with the rules of physics.
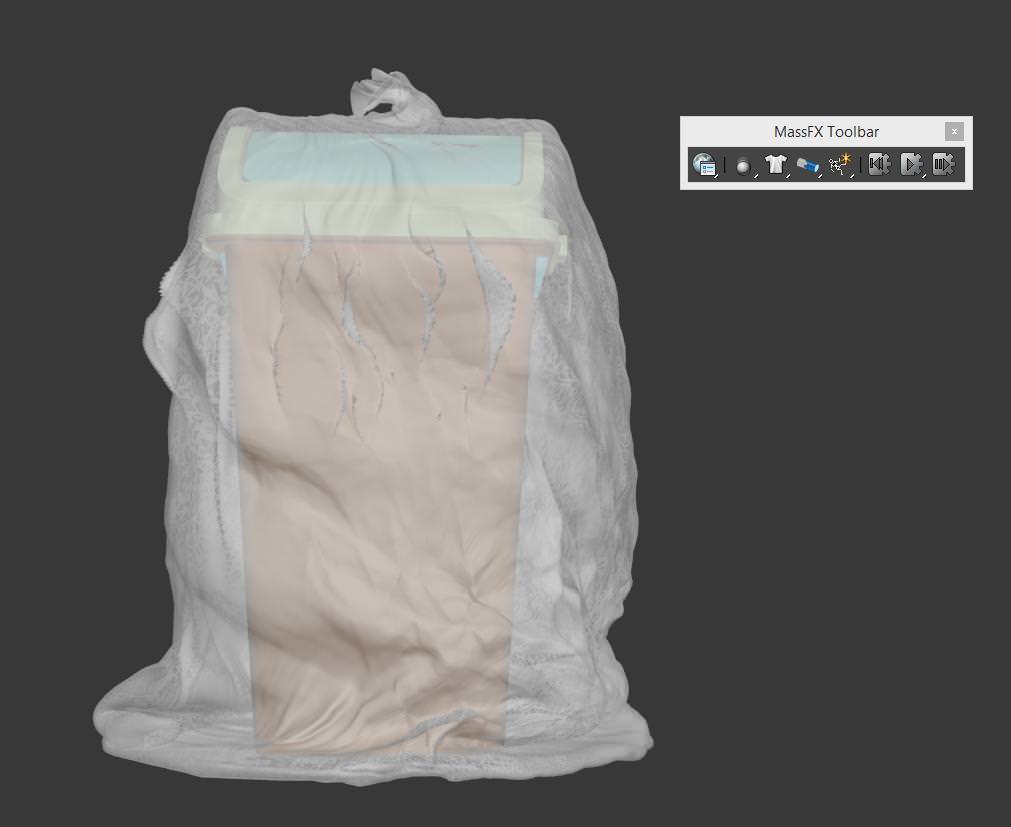
And added sculptural details in ZBrush.
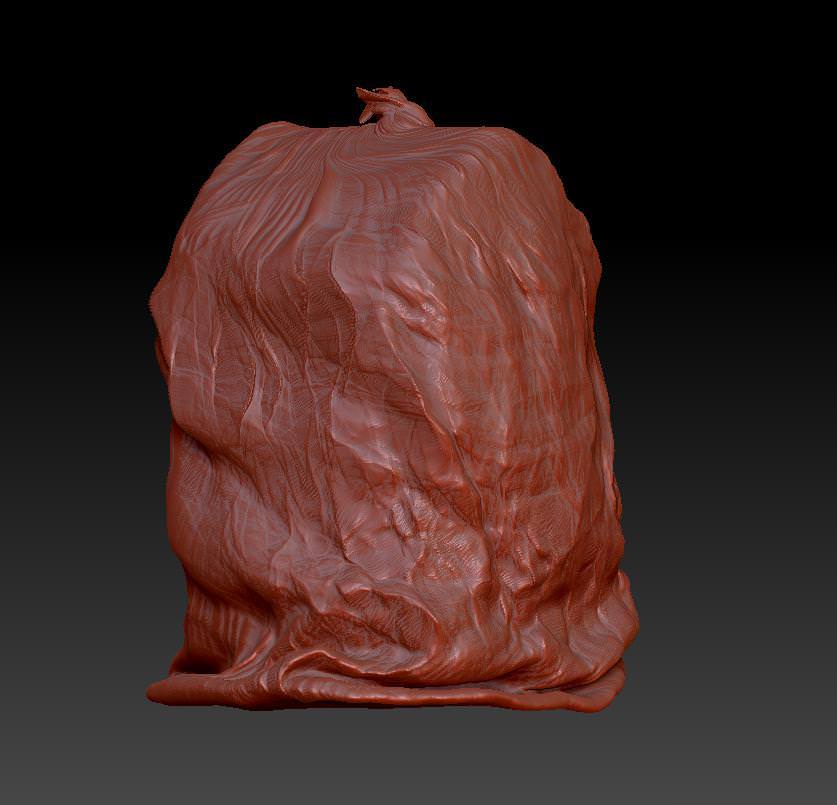
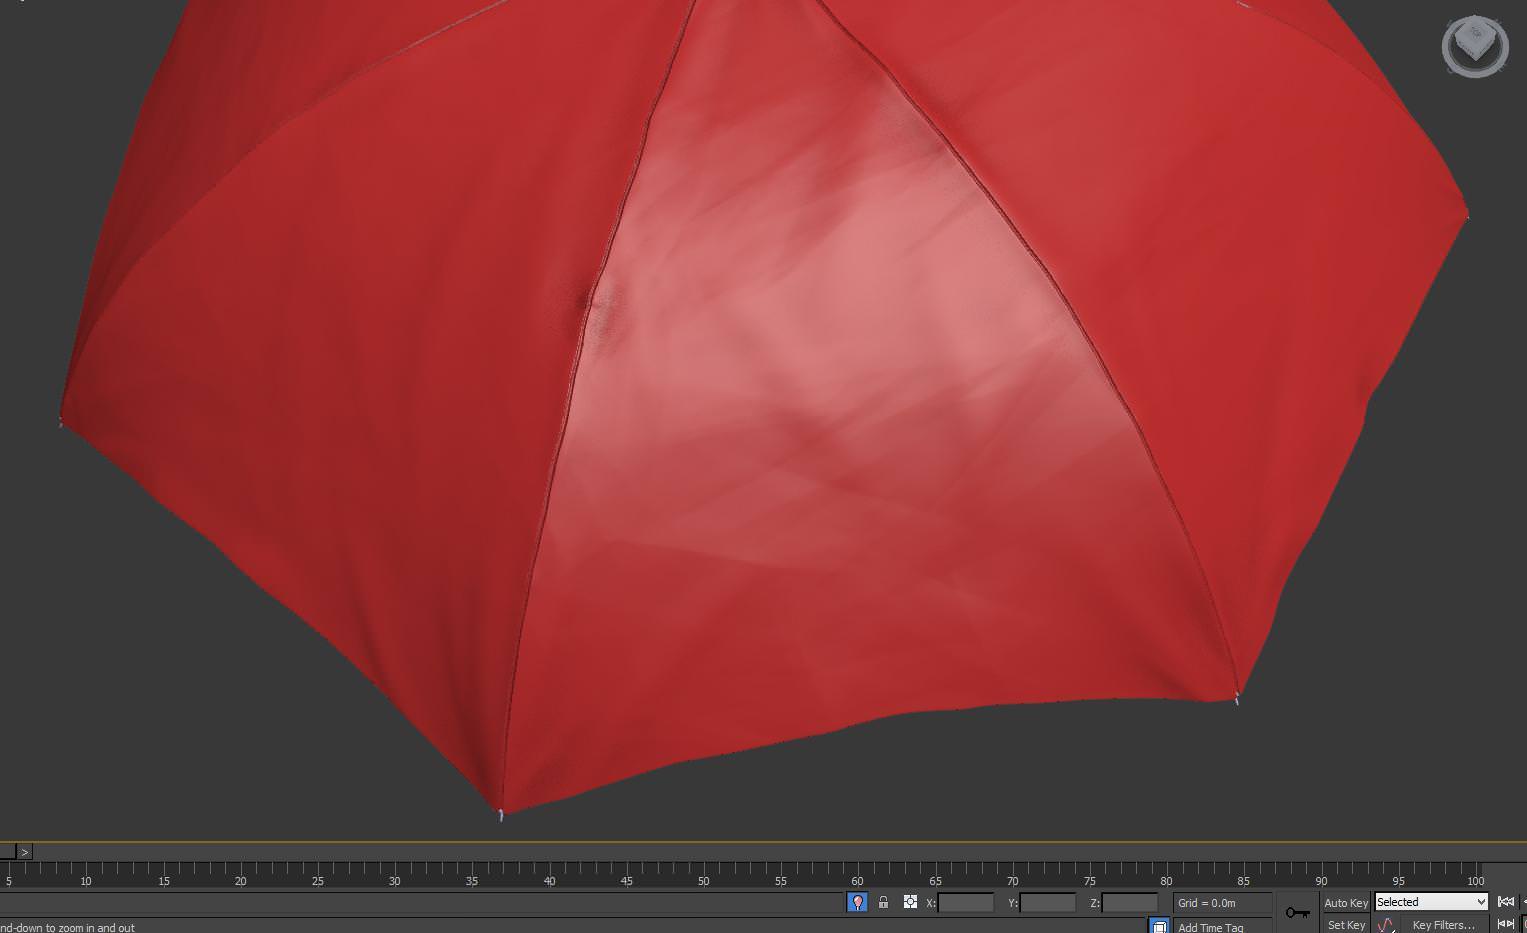
Similar to landfills and umbrellas.
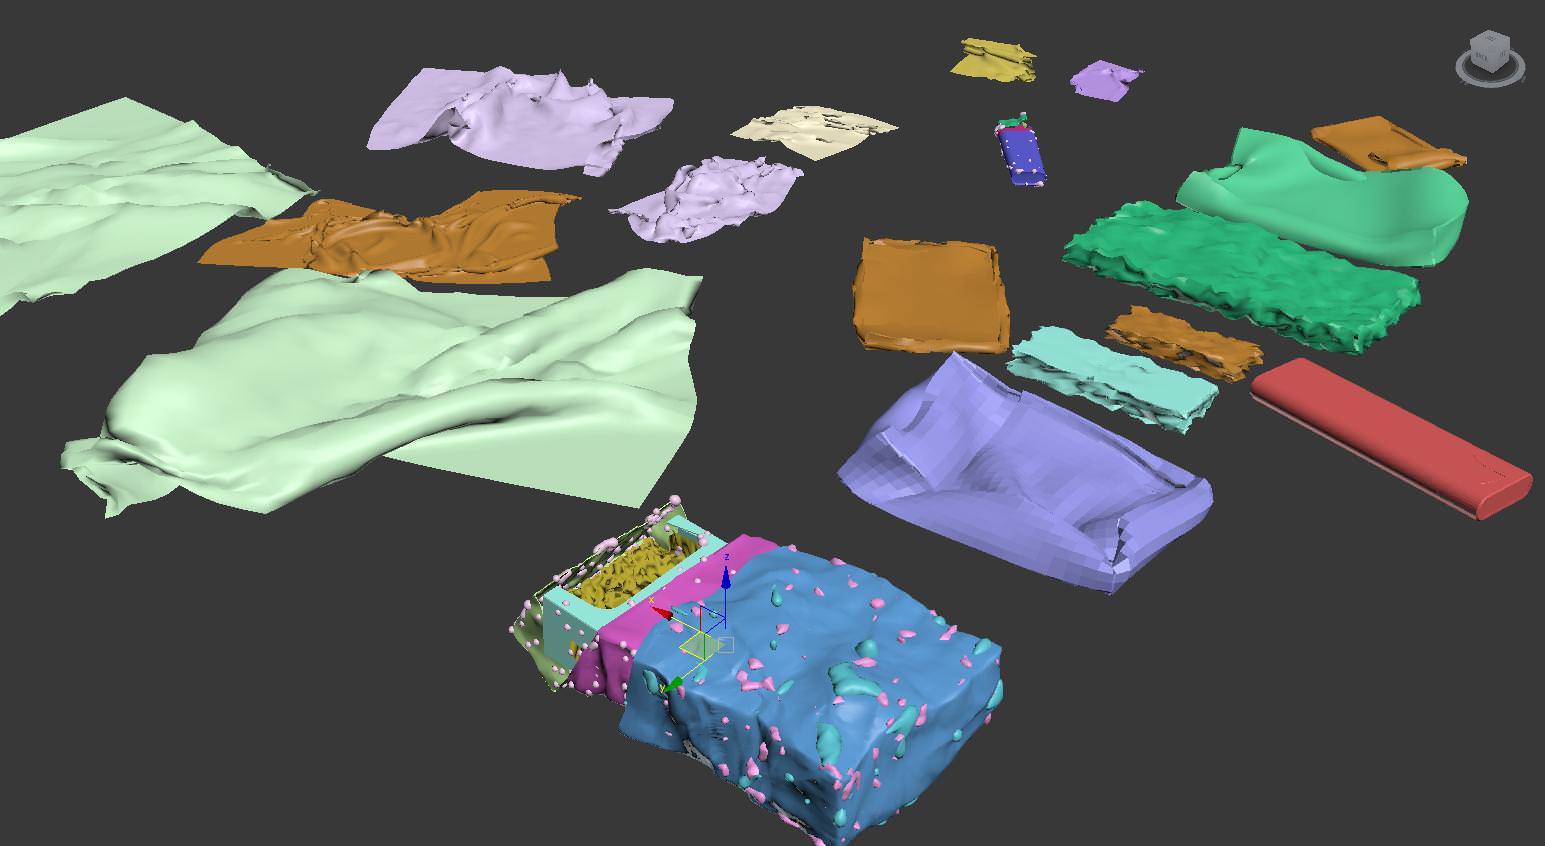

And here are some concepts of pubs.
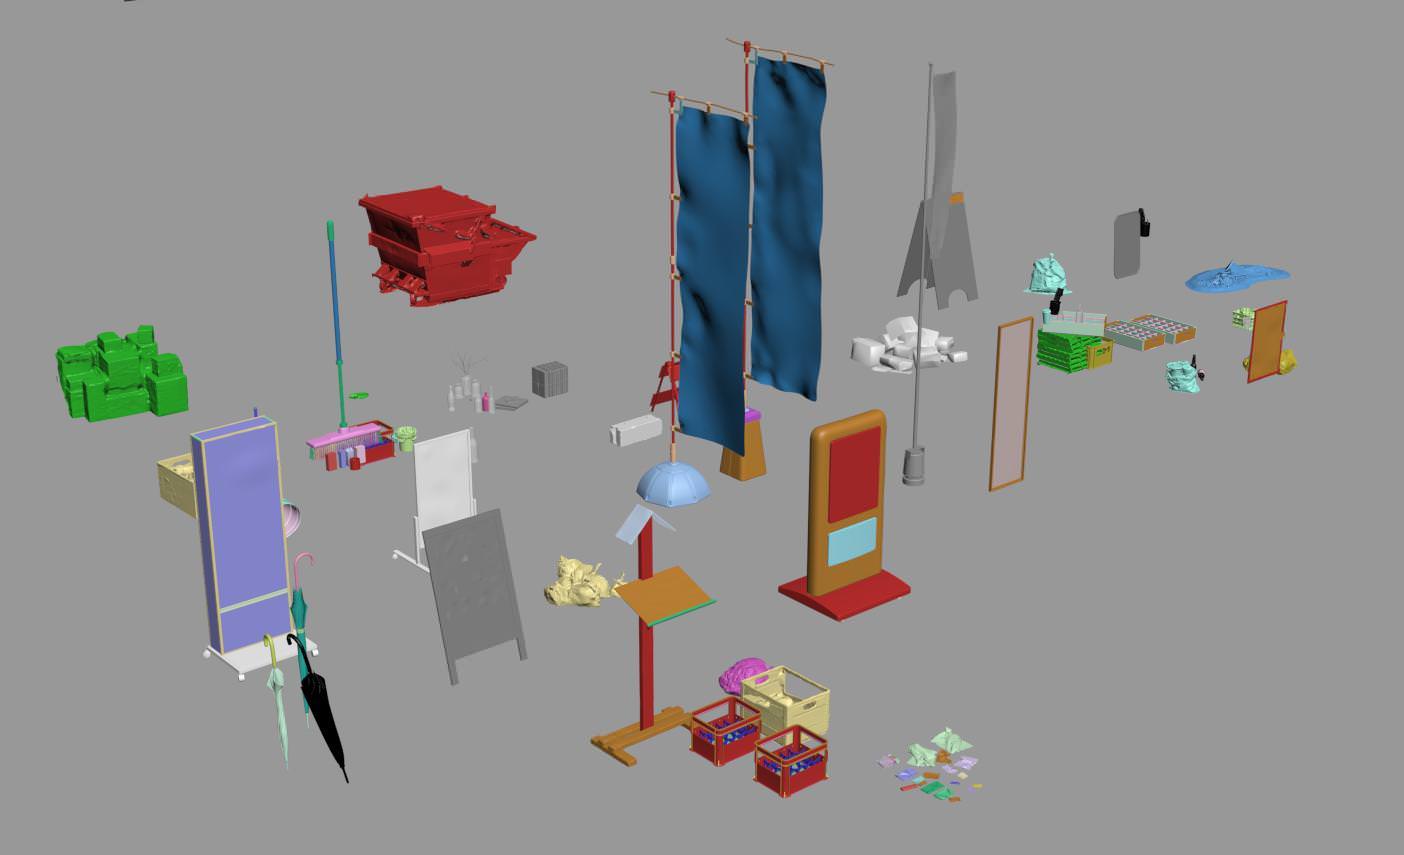
Some models of electronics.
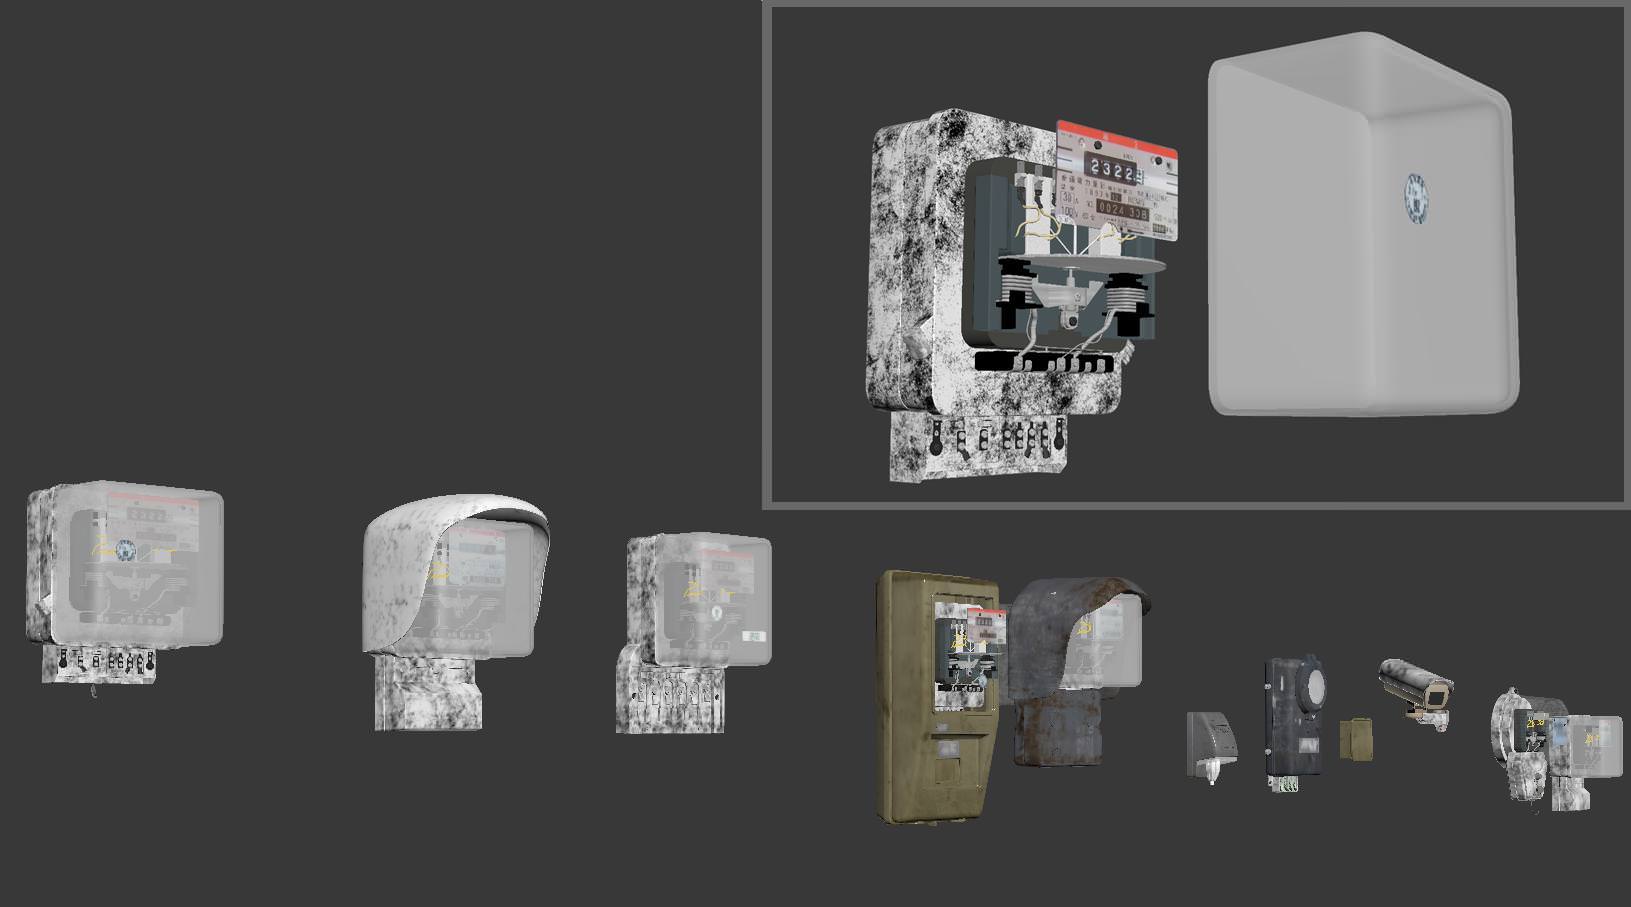

I wanted all to be really detailed. I want it to be true to reality. There is no deception, otherwise, I will feel very uncomfortable!
Texture & Materials
In this part, I just mention some main components.
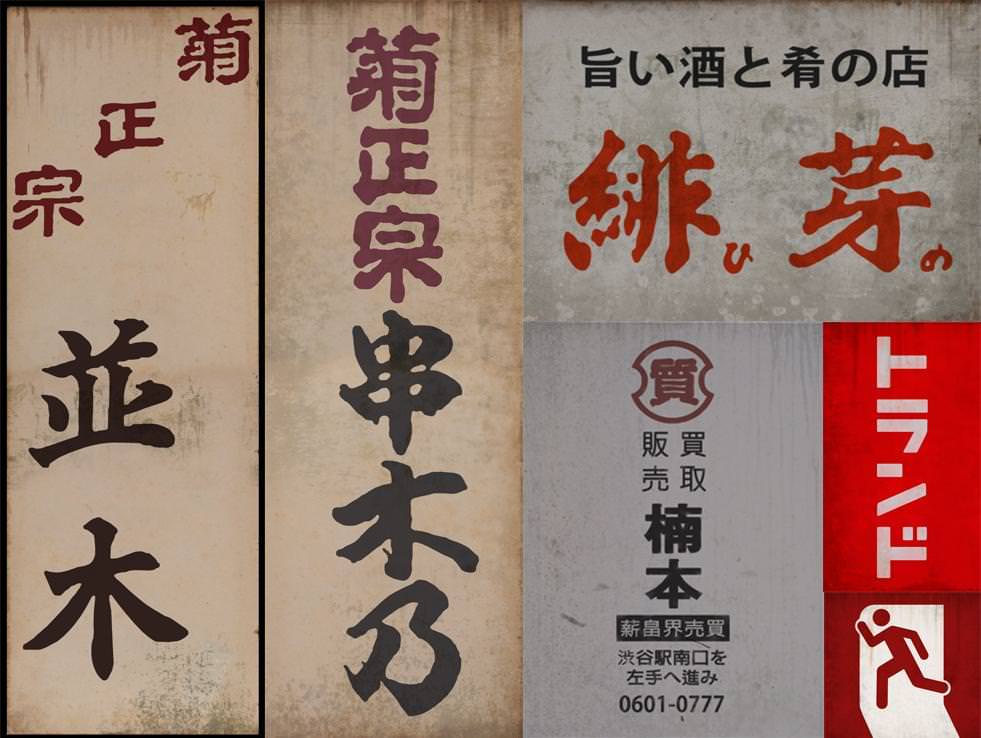
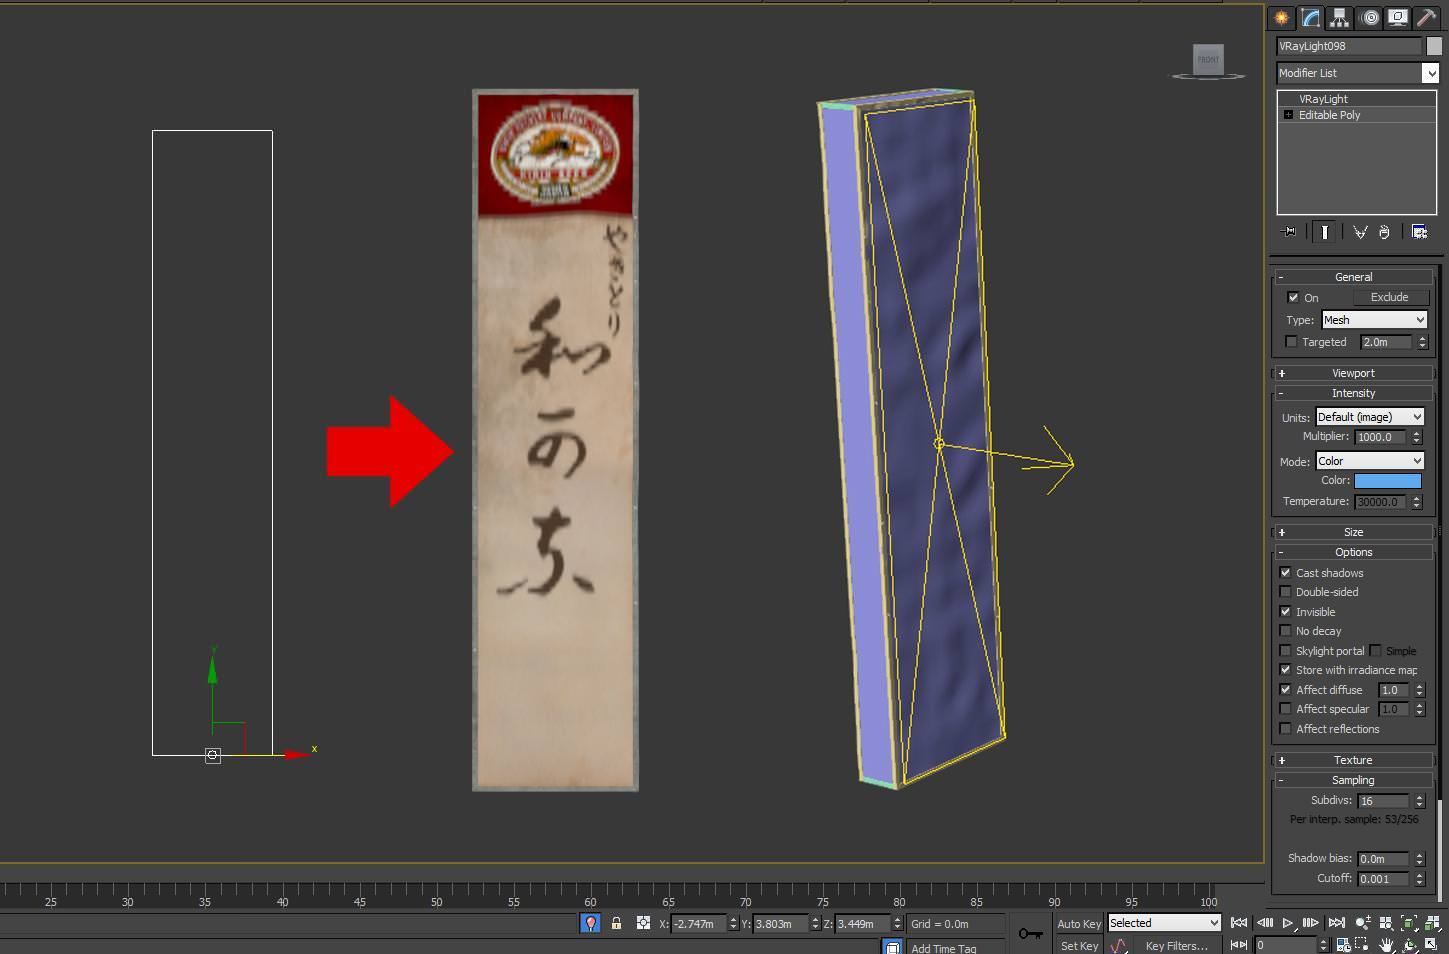
This is the part required your actual observations a lot. I do my texturing in photoshop with different blending modes. The biggest obstacle, which took most of my time is billboards. Because I am in Vietnam, I don’t know anything about Japan. Meanwhile, my intention was that the texts on the billboard will be accurate and textures resolution must be greater than 4000 pixels. So I’ve decided to do it manually in Photoshop and render them all.
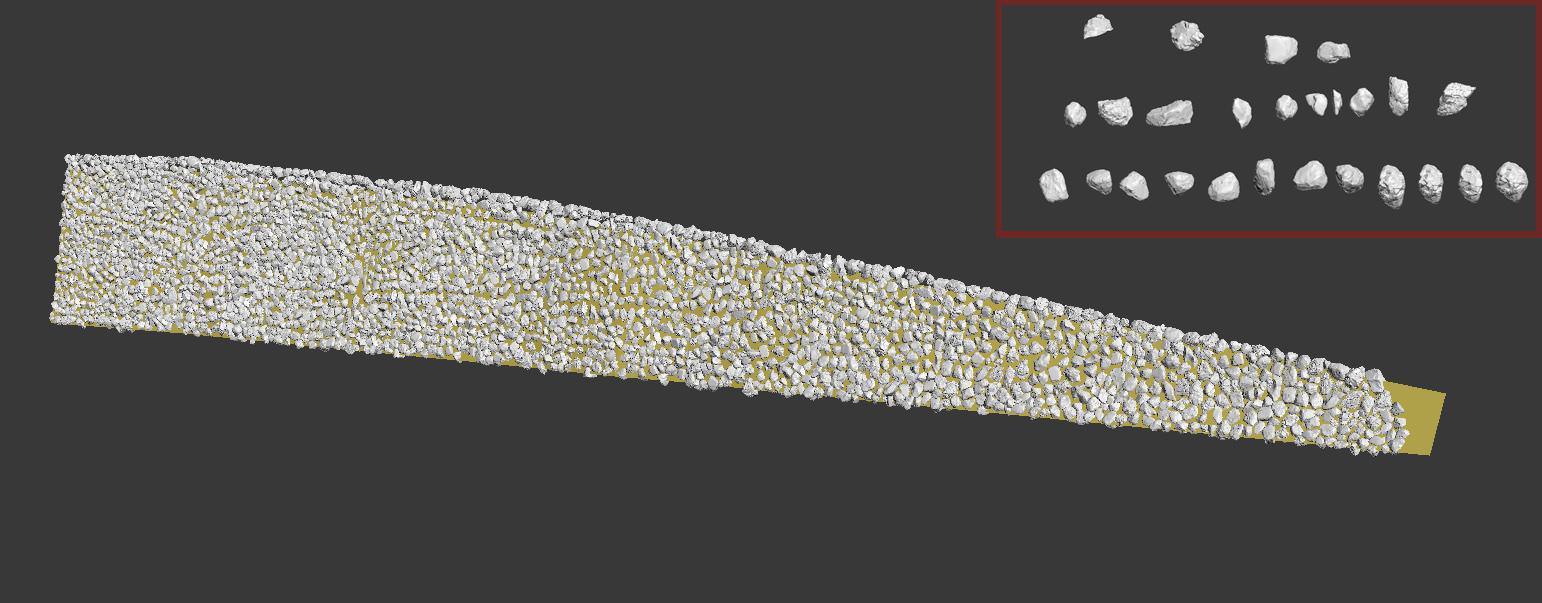
Modeling the stone wall was very time-consuming. With the camera angle of the picture, it required having a very long stone wall in view. To avoid repetition of stones I had to create 26 unique stone models.
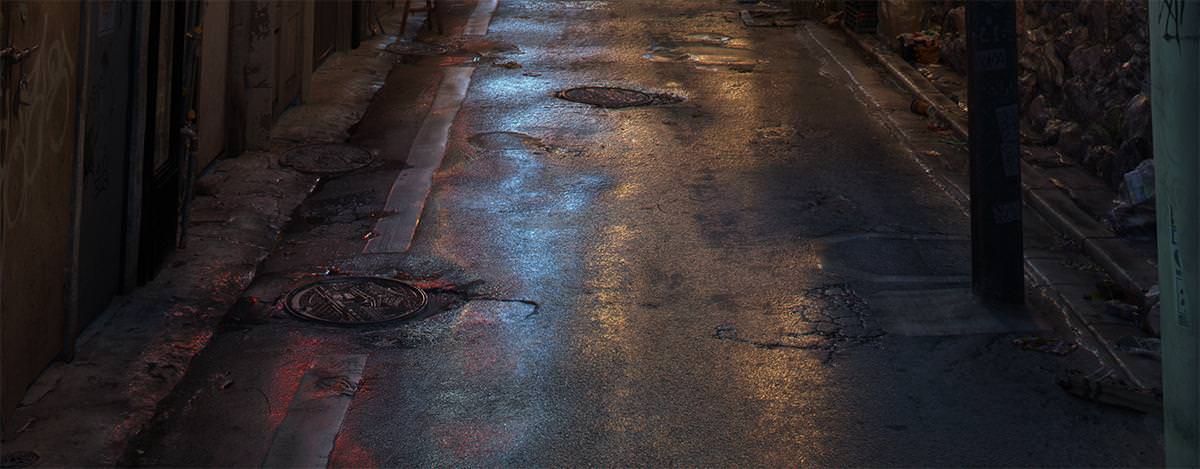
The road after the rain was my obsession.
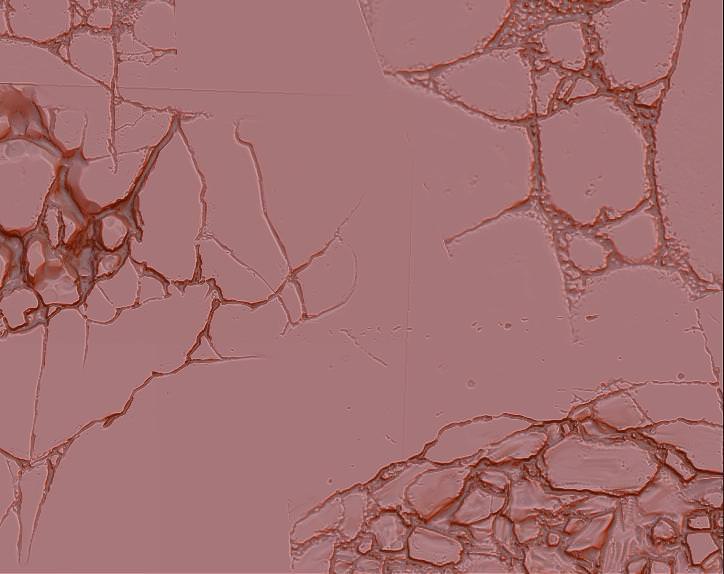
It took me 2 days to observe it. Luckily, where I live there is much rain. It is quite complicated to explain. I started with a simple path model in 3dsmax, then the model is detailed in ZBrush. Displacement map was created in ZBrush and photoshop. Reflection map is similar.
Here is an example.

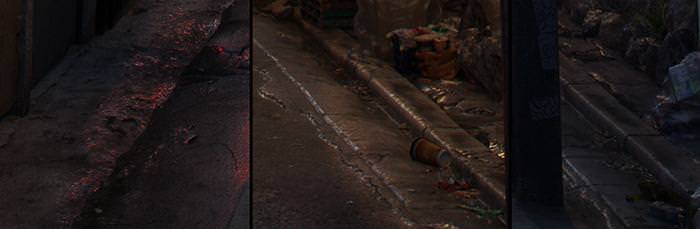
I did the road as if it was an hour after the rain… so the puddle is very limited, mainly appear in the grooves and cracks on the road.
What makes me most confused is the material.
Darkness + Wet Asphalt + Light Colors = ???
Is it not like metal under the lights? It is very dangerous, very difficult to let others believe that it is an actual path. The boundary between the wet asphalt and metal material is very fragile. I was very careful when setting up the road material.
These are pictures taken in my references…
Is it pretty similar to metal?
Wet concrete, wet lines and wet asphalt are completely different materials. I created an alpha map to differentiate the three materials. I mainly use V-Ray blend in most cases, the path is no exception.
This is my recipe of road materials : (wet asphalt level 1 + wet asphalt level 2 + puddles in the cracks + puddles exposed the line and the concrete) + (wet line + puddles on the line) + (wet concrete + puddles on the concrete)
Here is a diagram of the material of the path.
This is the first branch of the diagram.
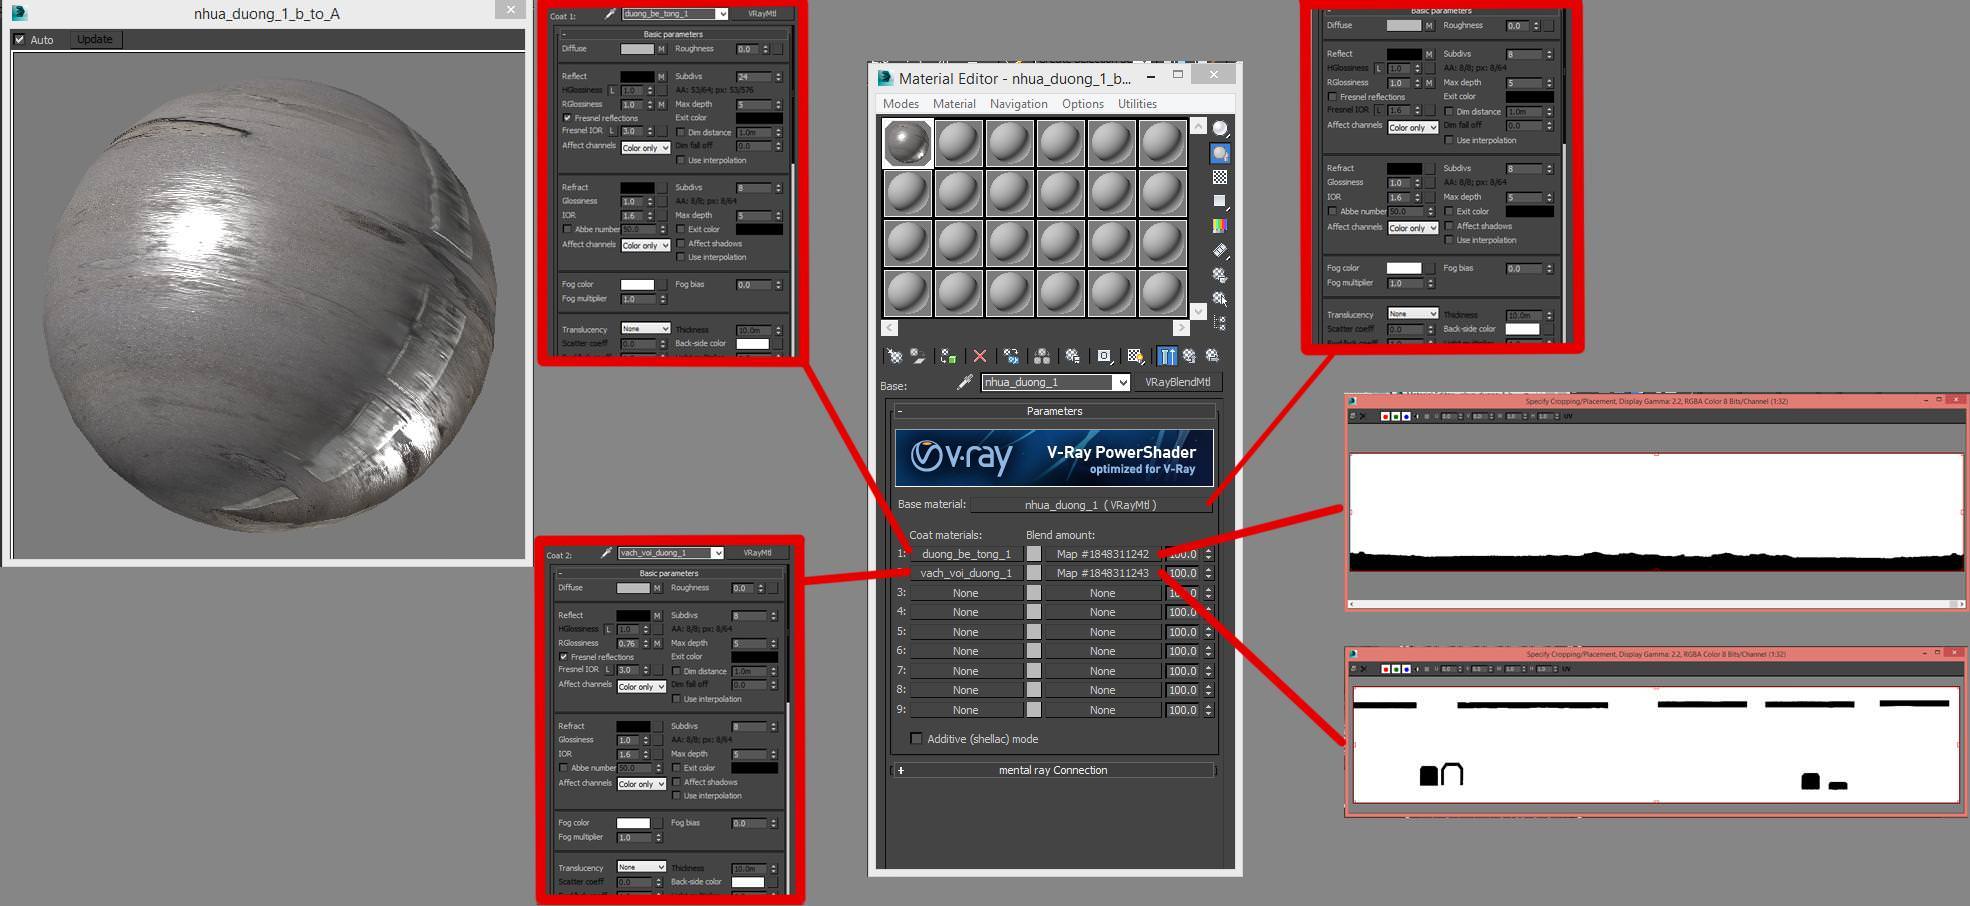
I created three versions of the road to avoid duplication. Add a bit of oil spilled on the road so as to the road look more attractive under the lights.
And the result is…
An example of the wet stone material.
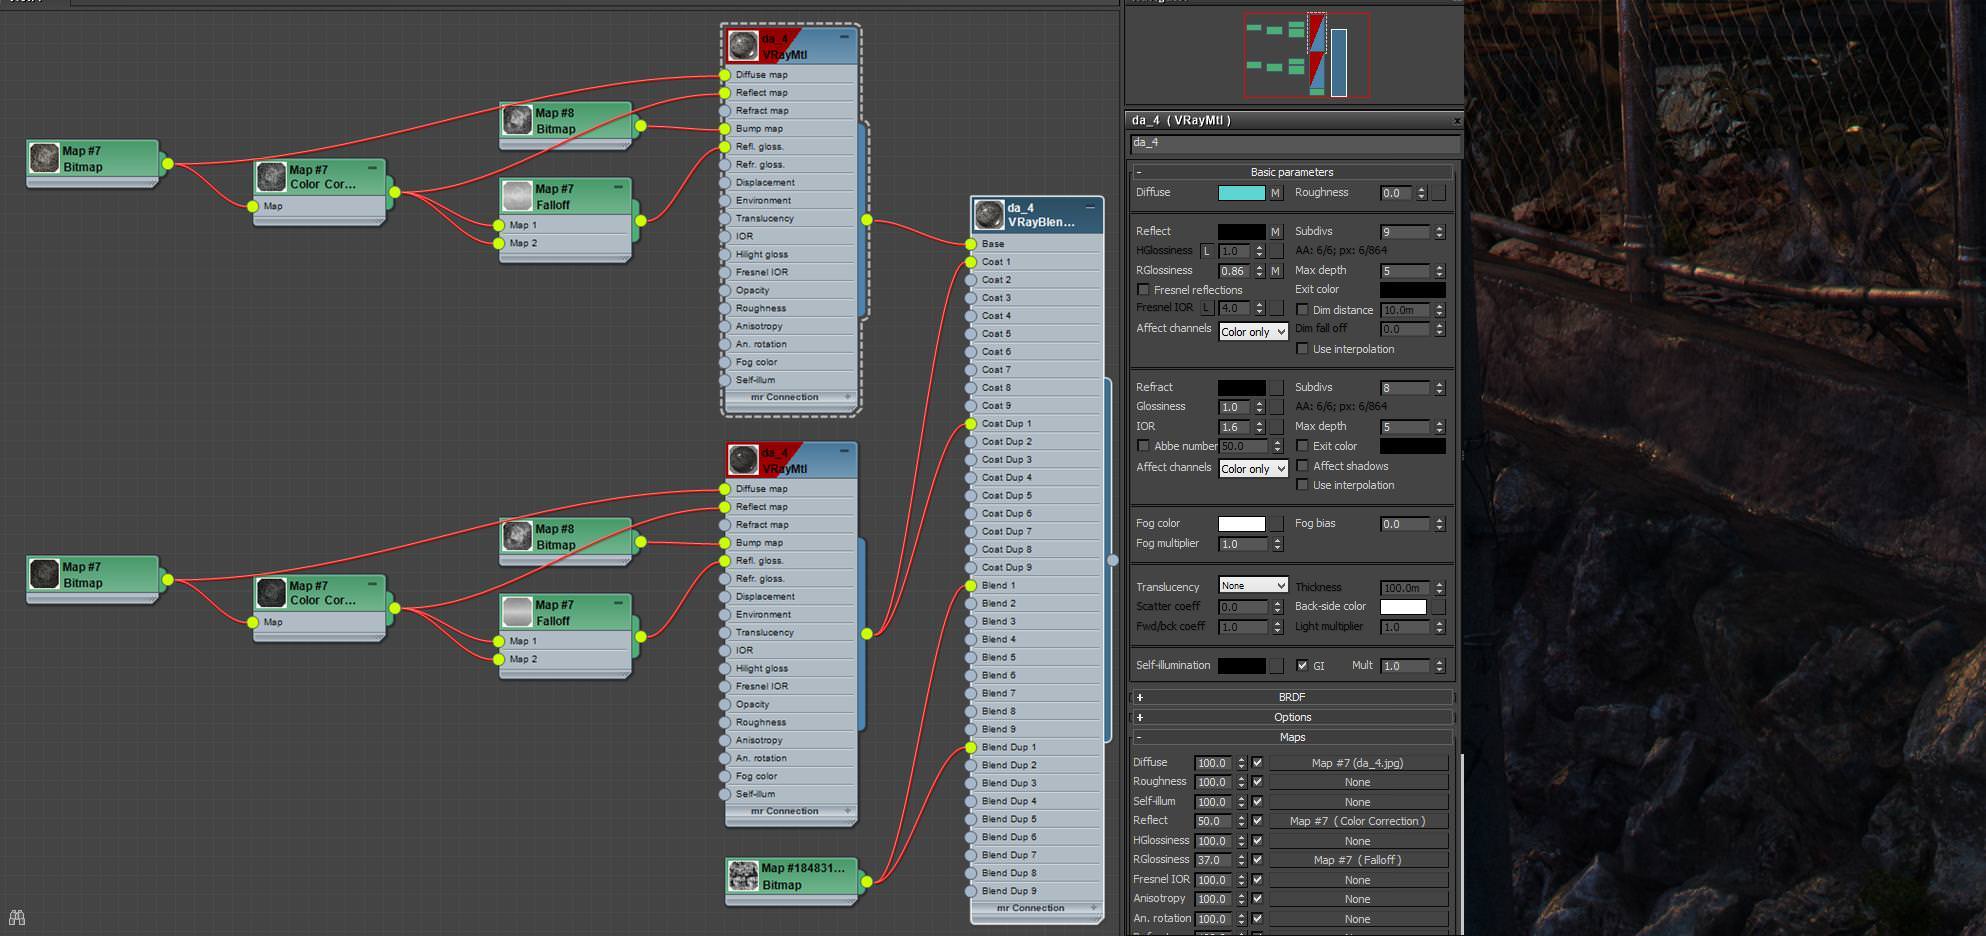
I often use V-Ray blend for rust metal materials too.
Lighting
This is my favorite part!
It is critical in the creation of the mood of the image. This is my lighting setup.
Use 1 Dome light + 1 HDRI from Peter Guthrie.
These are my light settings…
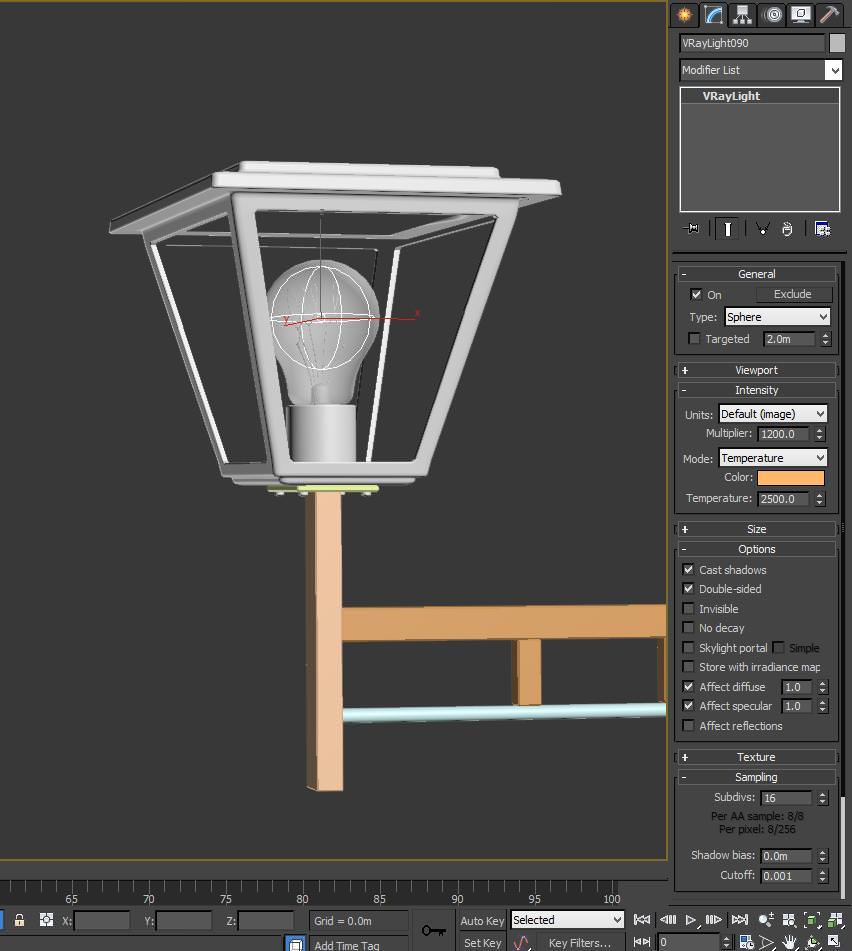
3 streetlights and 5 bulbs (1 bulb has burnt). Nothing is a secret here, I only use 1 V-Ray Light sphere for a bulb. And here are the setting…
I will mention how to set up my lantern light. Operating range of lantern light is quite narrow, it only affects the objects near it.
The interior structure of the lamp.
These are the sign lights settings…
You can see the video below for sequences setting my light.
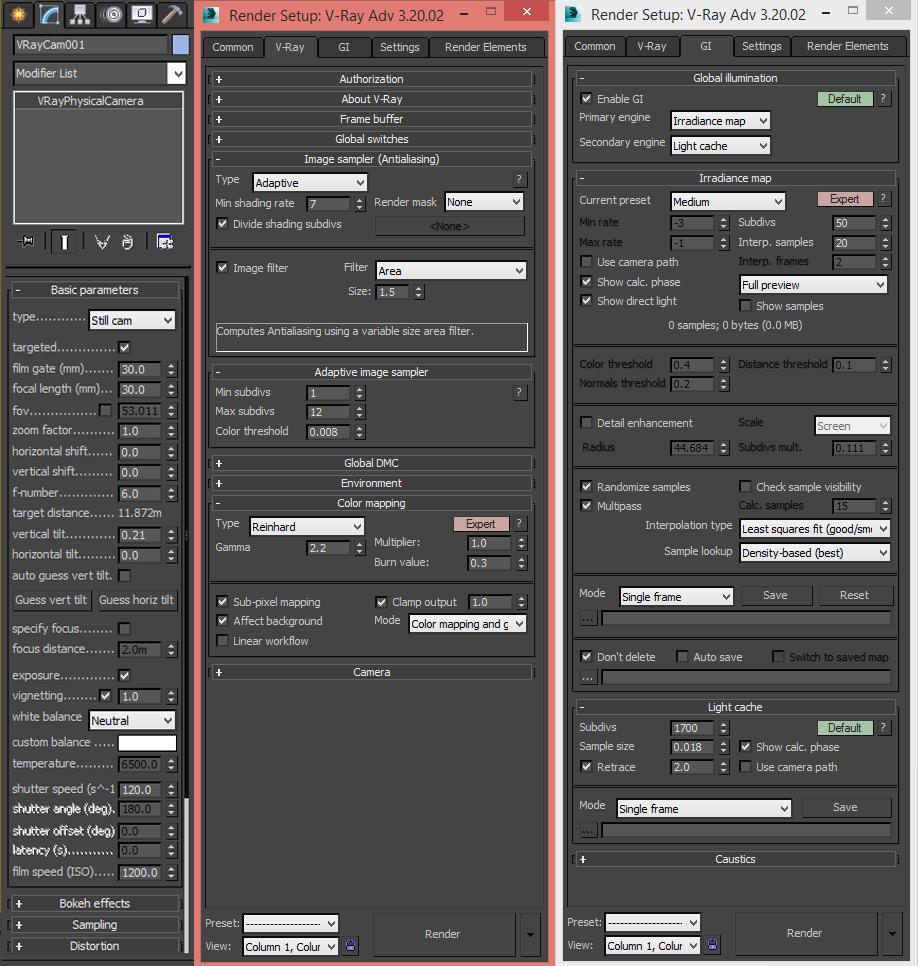
Render Setup
I used the V-Ray render engine to create this image (which is the most common tool I guess). It is fast and easy to handle! And I think in the future I will still use it. This is the camera settings and render that I usually use.
Pretty basic, I think so.
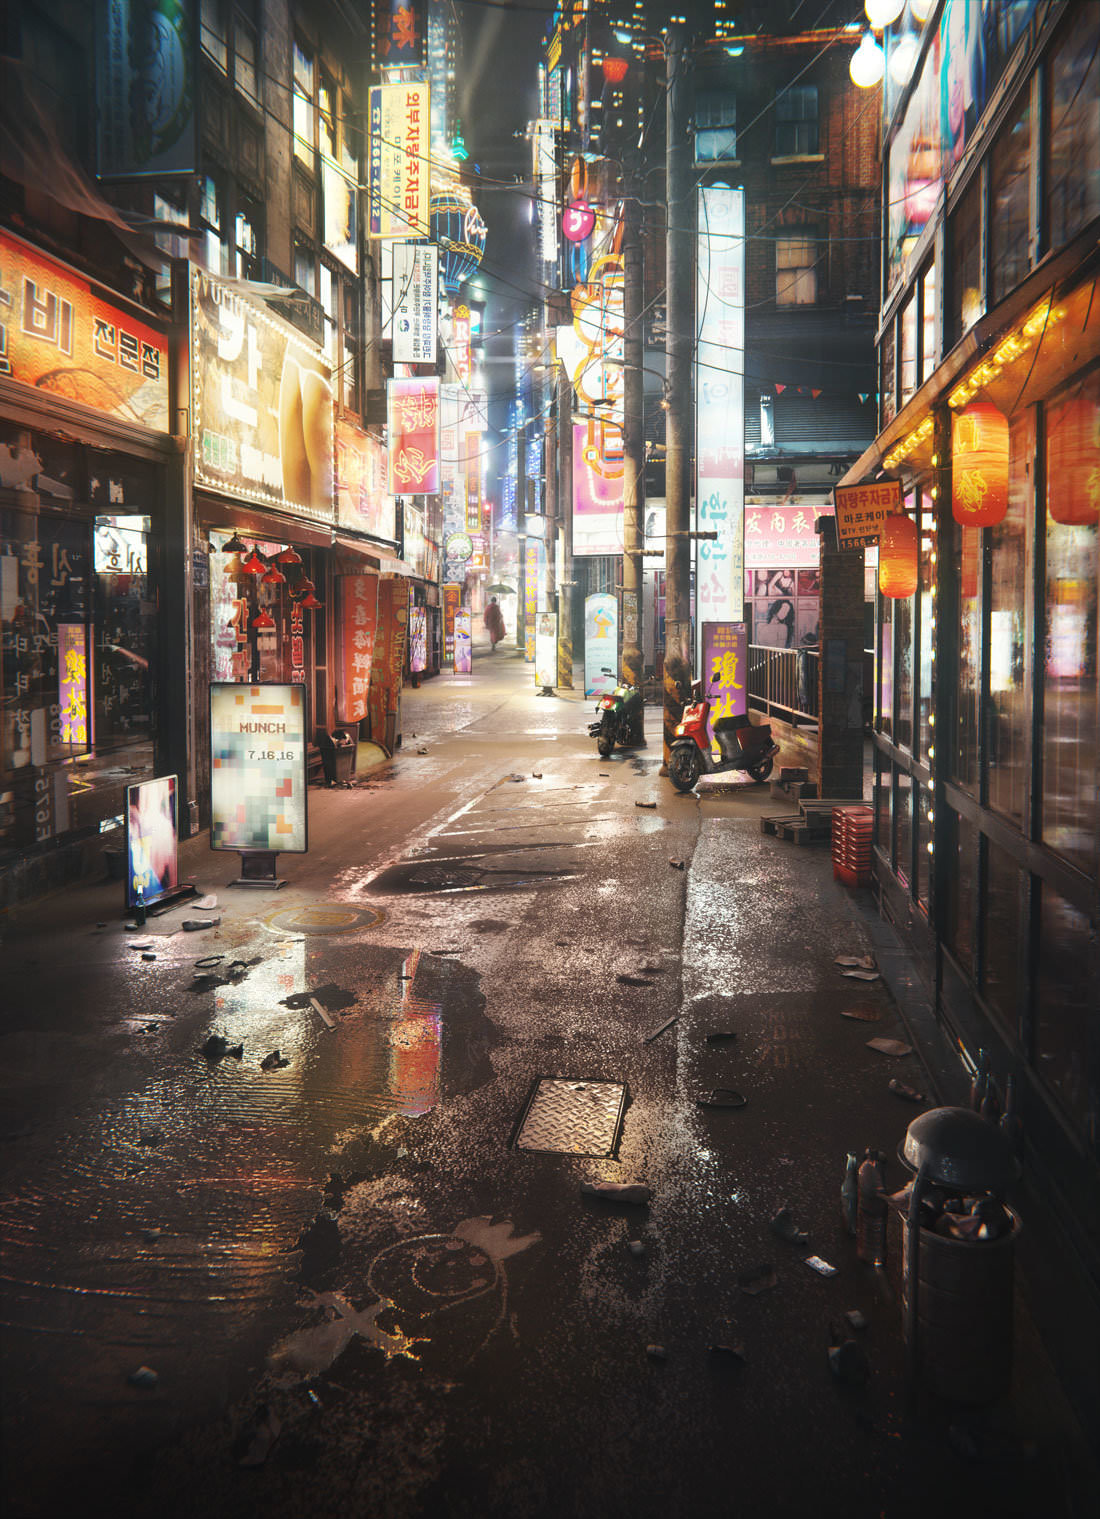
Below is the final render…
Post Production
Please feel free to check out the making-of video…
Thank you for reading this “making-of” article and I hope you found some interesting and useful advice in it!


Impressive
C0rbac Indeed!
The detail, mood and the feeling in the image is insane. My office is located close to that street and I often go to this tight bar with the big window to grab some beer after work. Impressive…
Thanks https://www.behance.net/leanhnhan! this image is awesome and a lot of people will learn with your making of !
Cheers!
amazing work <3
Stunning result.
the most astonishing aspect of this stellar visualization is Lê Anh Nhân patience to produce such exemplary details.
Impresionante
Wow 2 years of experience what kind of robot are you! Well done sir… This is incredible after such a short amount of 3d experience. How long did i took you to create this complete scene?
PS perhaps its the wrong image, but i hardly see those waterdrops. Just on a small part of the tree but not on the electricity lines like the modeling showed
any video tutorial?
Great job Lê Anh!
Monumental achievement. Very impressive and inspiring!
this one is insane man imoressive work
He forgot to credit the guy who took the real picture
from where he got “inspired”
https://www.flickr.com/photos/119168045@N07/12882130004/in/photostream/
Indeed, not very kind with the photographer, nor the readers…
Still props for the modeling and texturing if accurate to what is presented here