


Making of the weeHouse
I’ve seen this work by Mark as it was building up and taking shape. What a great finale! awarding him Best of Week 48/2015 and today I’m happy to share the making-of these beautiful visuals by Mark Staddon. Being a Prefab project makes it all the more interesting. Designed by Alchemy Architects and located in Mafra Texas. Mark took some creative license on this one and used 3ds Max, Corona Renderer, and Photoshop to get it done. Enjoy!
Introduction
Like many of us, Ronen’s Making Of articles and forum have been a huge source of inspiration and knowledge over the years. Being asked to contribute to it is a humbling experience and I thank Ronen for the opportunity to share my workflow and discuss this project with you.
The Prefab Syndrome

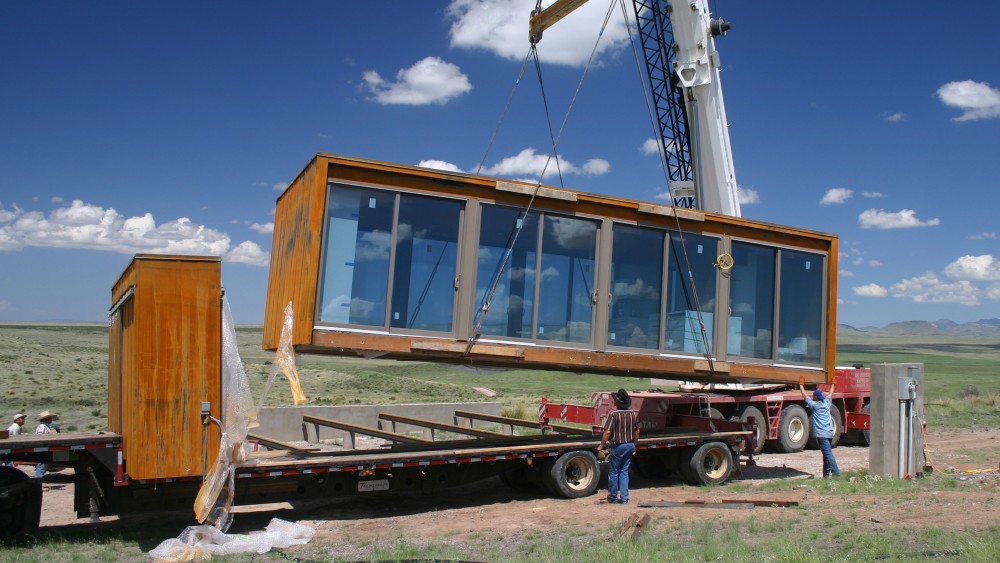
I’m often drawn to prefab architecture and the flexibility it can offer in creating low impact housing in amazing locations. The weeHouse by Alchemy Architects is a great example and compliments its surrounds in Mafra West Texas perfectly.
The weeHouse was the core source of inspiration for my project and you can view it at Alchemy Architects Website – Marfa weeHouse.

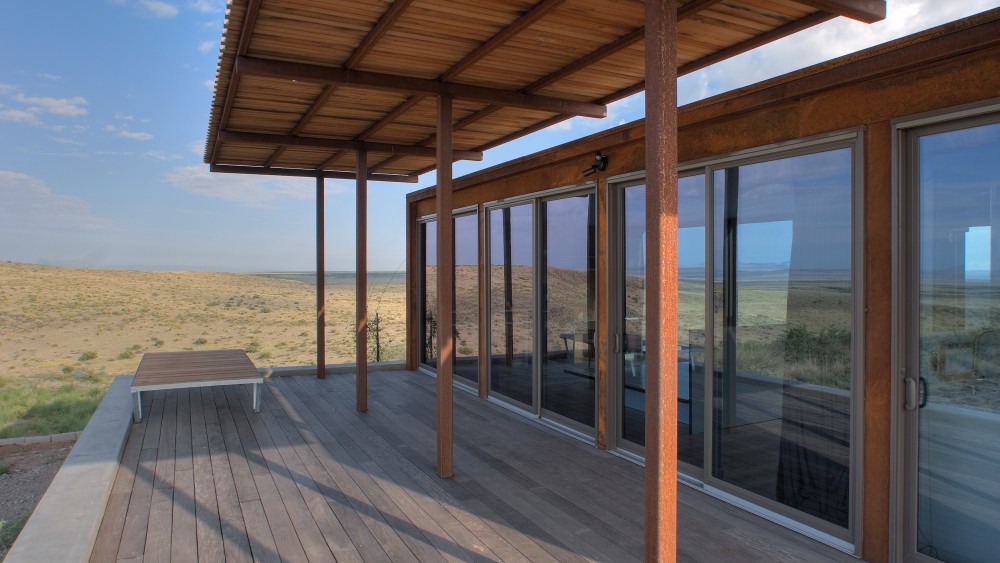
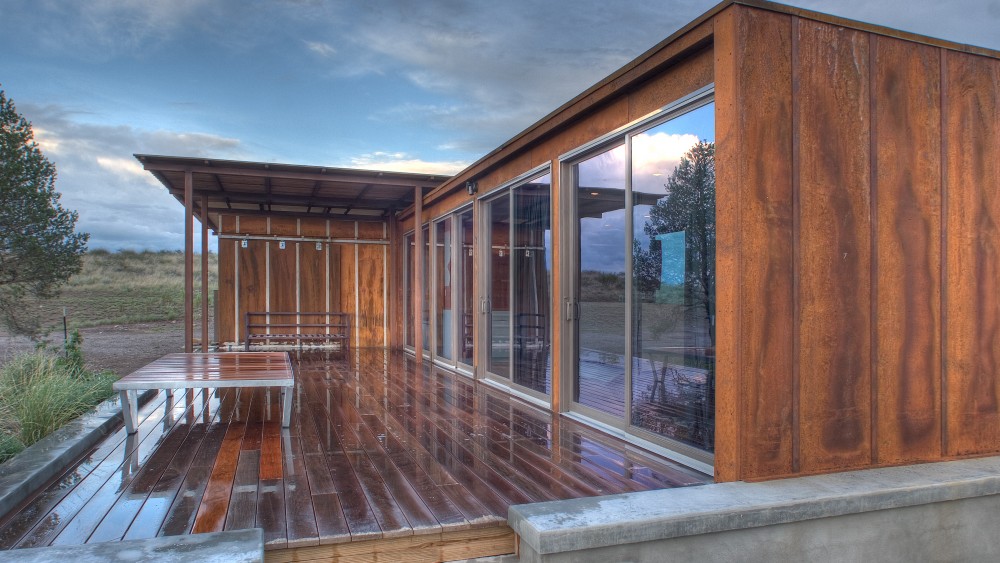
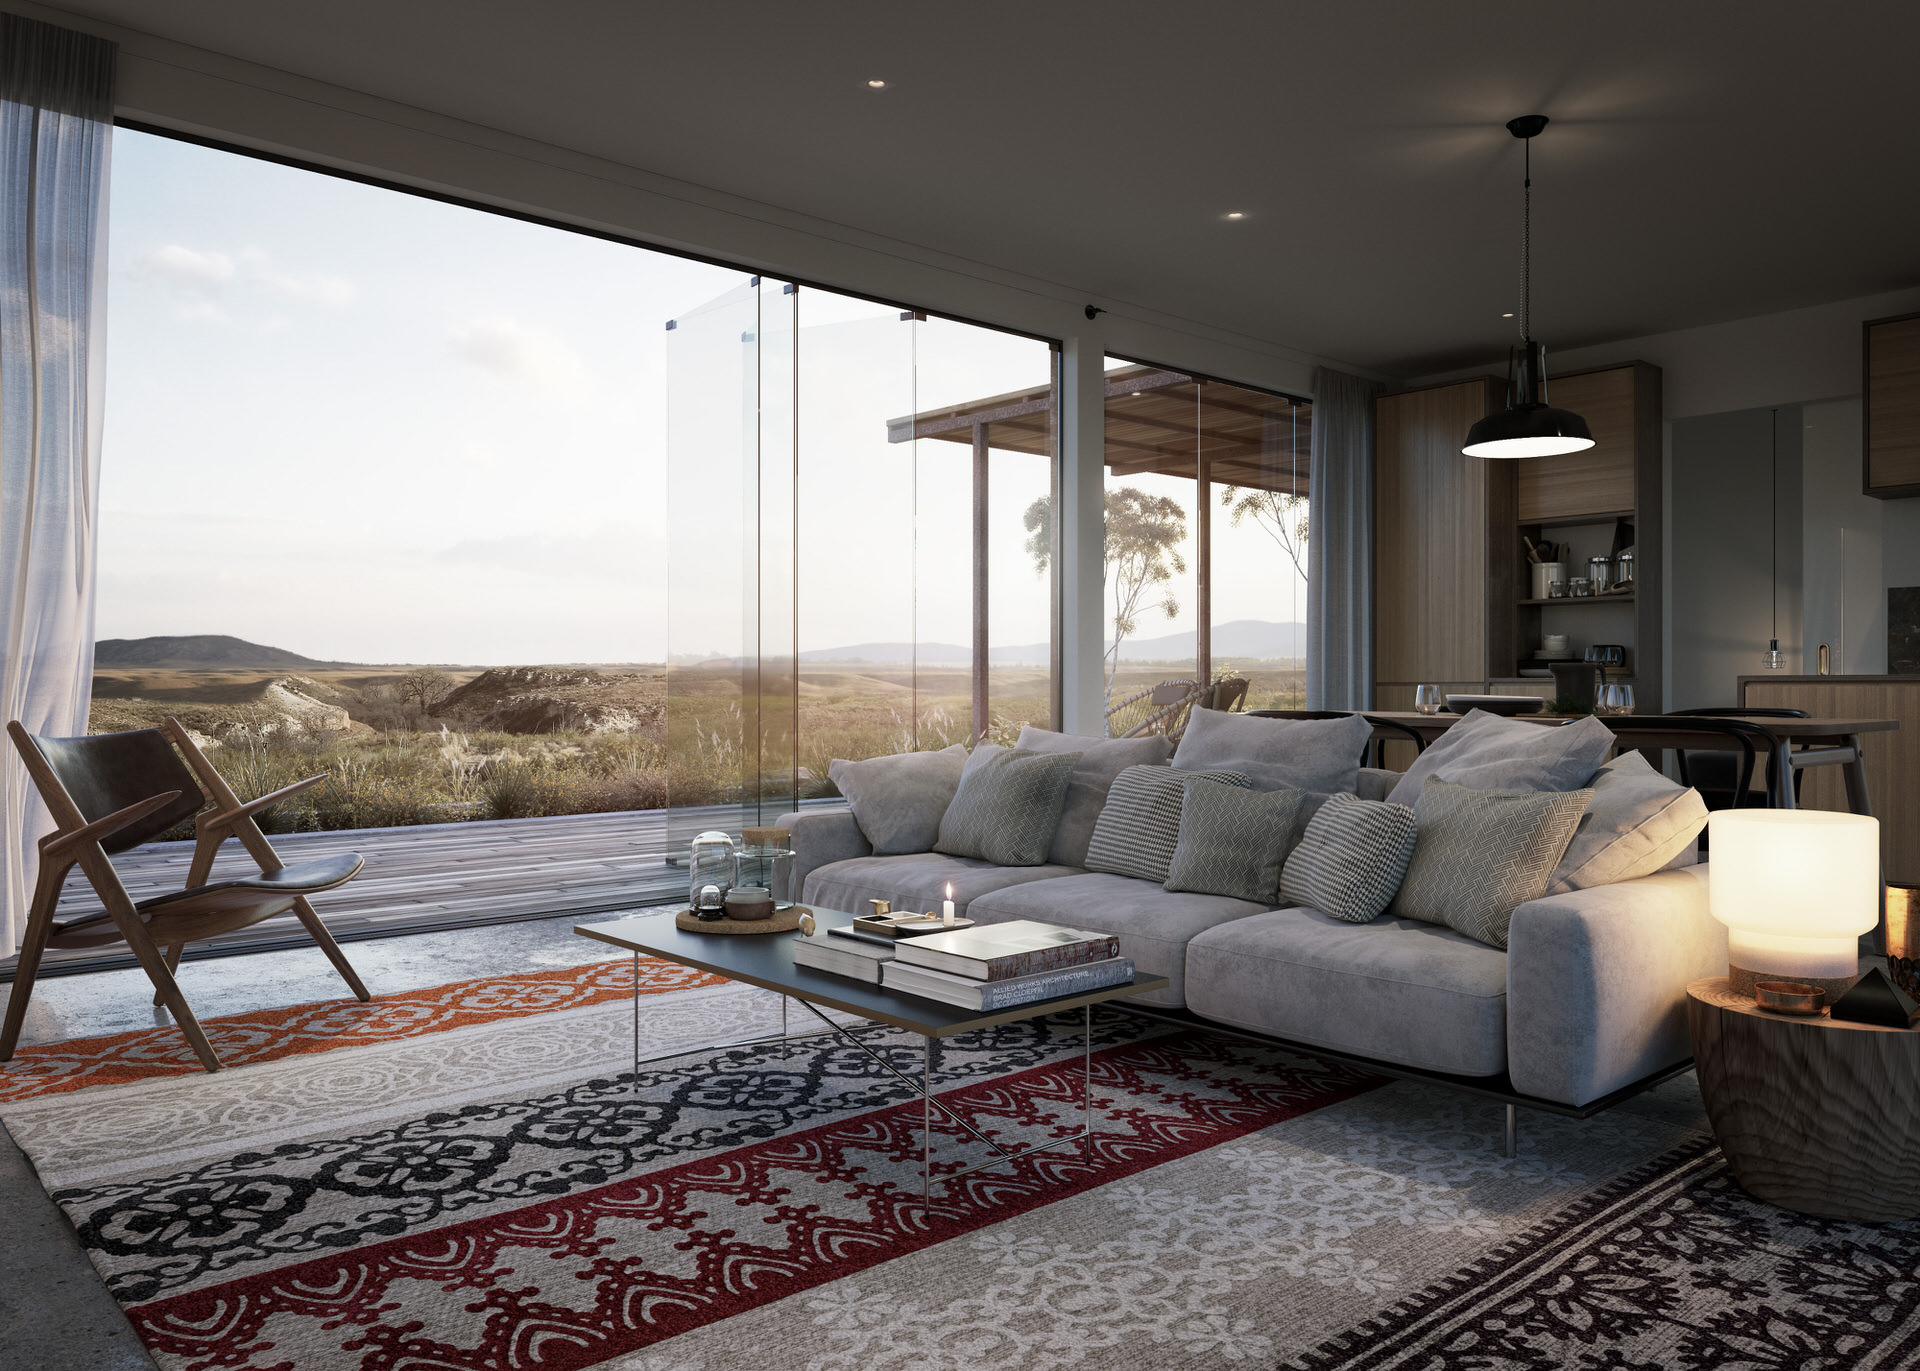
Here are the final images I created for this set. My focus was more towards the external image set and the landscape integration in post which I will now discuss.


3D Scene Setup
As a good practice, always make sure your Gamma and Units (I only work with millimeters) are correct before you start a new scene. Doing this at the beginning ensures you don’t have any issues later on in the project.

3D Modeling
Another reason I enjoy looking into prefab architecture for personal projects is often the simplicity of the architecture to remodel. The structure was created using floorplans available online as well as reference imagery. Importing the plan (and scaling it correctly) will give you a footprint to build from when DWG’s are unavailable. In addition, tools like floor generator and quad chamfer are really helpful and further speed up the modeling process.


3D Environment
I really liked the wild, dry vegetation in the reference images so I used similar examples from my library to recreate it. Various models from Evermotion, R&D Group and iToo Software were selected and scattered using iToo’s Forest Pack.
Forest Pack is a great tool which you can find more information on by going over the many articles related to it on this blog.
One point I would suggest however, is to always make proxies of your vegetation to use within forest.


Lighting
I have used Corona Renderer exclusively for a few years due to the exceptional lighting results I found I could produce with relatively default settings (version 1.4 was released this week and you can get the Corona Renderer demo from Ronen’s ArchVIZ Shop).
Most of my scenes don’t vary much in settings outside the necessary adjustments needed for each individual HDRI. The HDRI for the afternoon shot in this set was taken from a great free website called NoEmotion.
Using the selected HDRI in the environment slot and also enabling it in my viewport makes height and directional adjustments much easier. I use the V-Ray HDRI loader at this stage as I still find its the easiest method of rotating and balancing an HDRI within the scene. In addition to this, I find a color correction modifier is helpful to deal with over saturated lighting results.
The final step is to balance the exposure settings within Corona Renderer.

The dusk scene settings.

Textures
Most of the texturing in this scene use pretty basic setups but there were a few surfaces that I tried to make with some added detailing.
The ground material itself is pretty straight forward, a tileable texture and suitable greyscale used within the reflect/glossiness slots and also for displacement of the finer detail. A further displacement map on the surface itself is added for additional natural undulation to the landscape.

The block-work was a little more complex. I used a composite material consisting of the underlying block-work and a rendered cement finish controlled with a mask and finally a dirt map for added wear along the objects edges.

I used another composite material to make the corten cladding look appropriately worn and weathered as I felt it would help the overall narrative of the image.

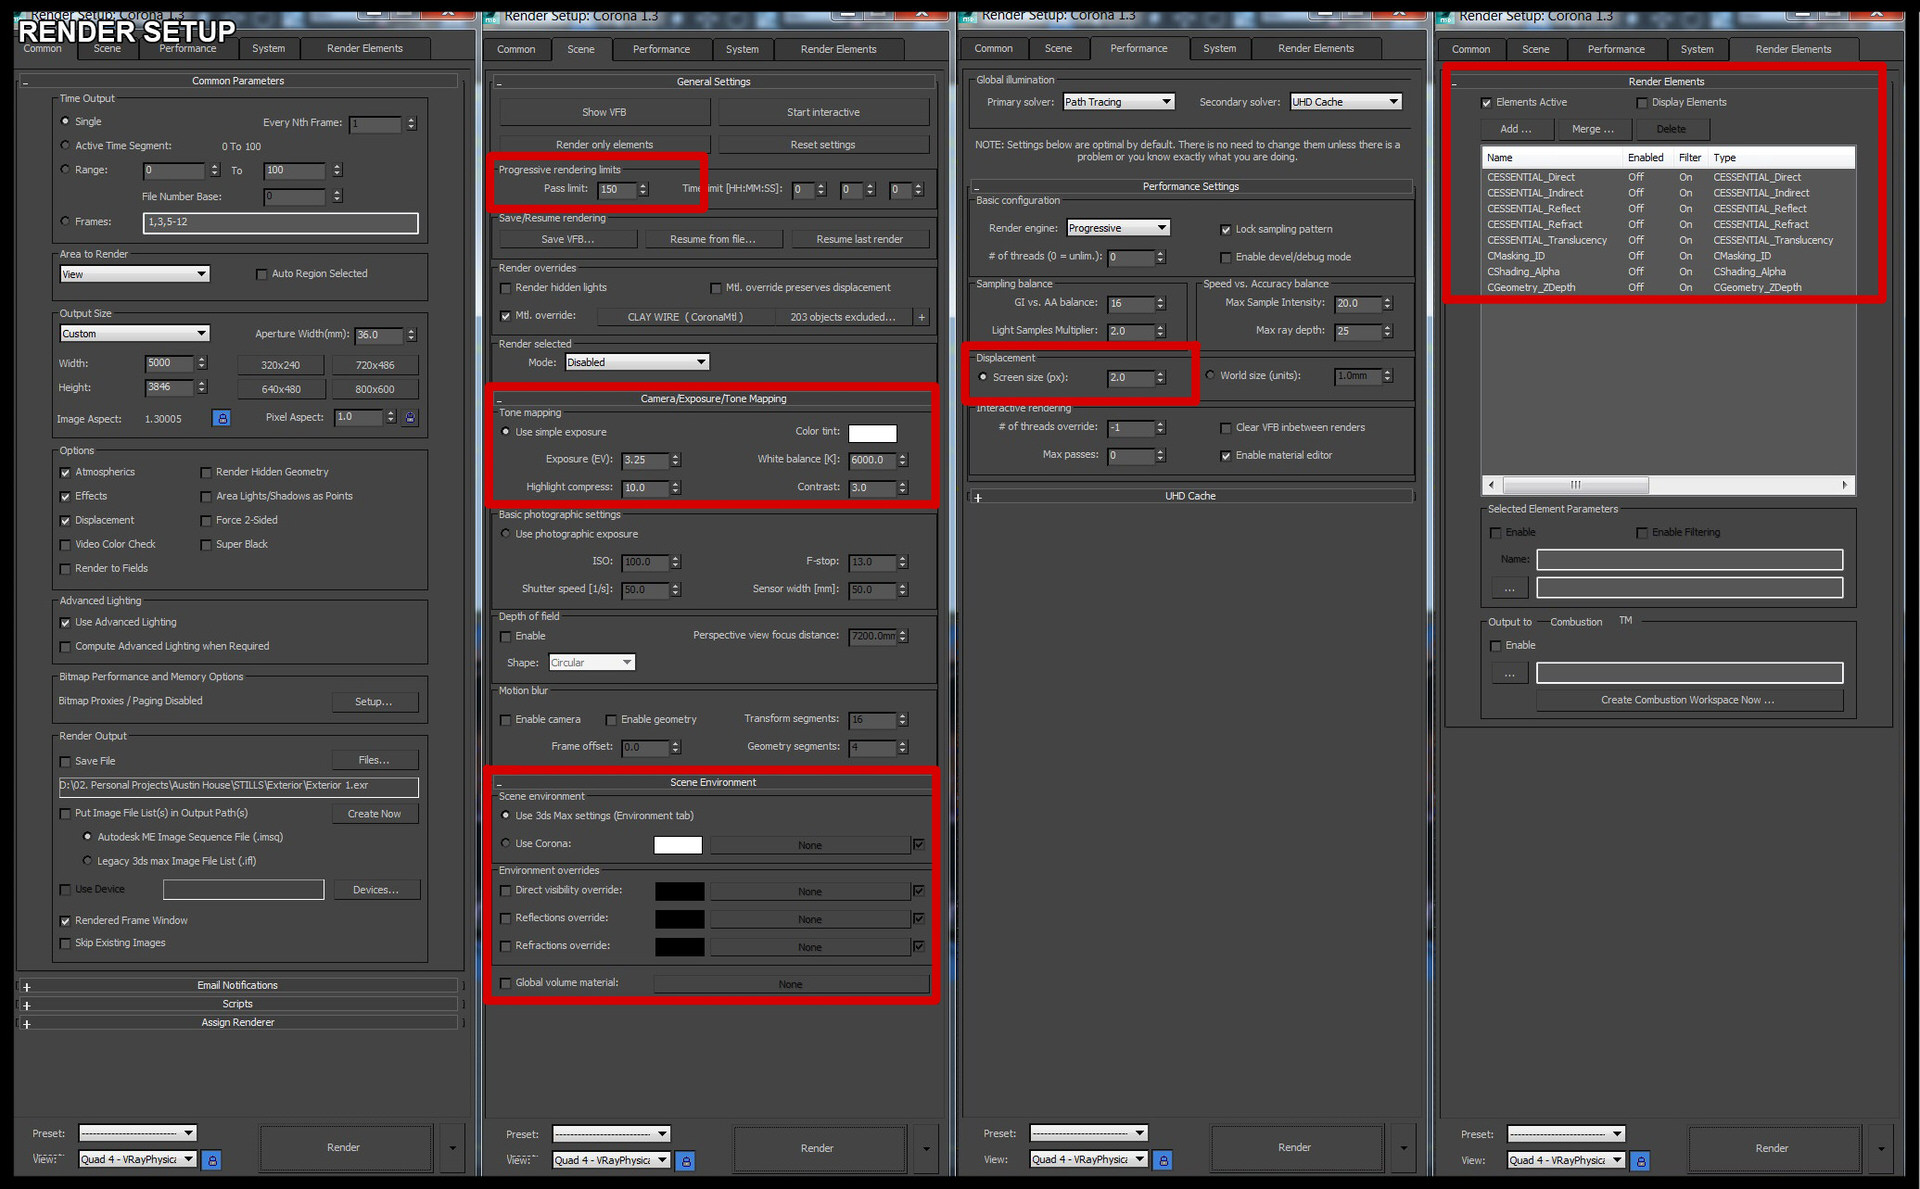
The Render Setup
My render set-up is pretty standard outside of the necessary exposure and environment settings discussed earlier.
I find 150 passes is more than enough for an image to be clean, often times it can be considerably less. One thing I did change for this project was the displacement screen size. Changing this setting slightly can greatly increase the displacement quality deeper into the image but it will increase your render times.
Matte Painting / Post Production
Having a fair idea of the environment I wanted to portray this project in, I set about finding the necessary imagery to create the back-plate. For the afternoon shot, all I required was a suitable horizon line and sky. Often I will render out a .TIF of just the environment background as I find it a very useful color reference to build further detail upon in post.
After merging the background and raw render I use a series of Photoshop adjustment layers as well as some plugins, particularly Nik Collection Colour Efex Pro and Alien Skin’s Exposure for contrast and color adjustment.


The dusk scene required a little more matte painting to complete the background.
Starting with the rendered image of the environment background I include appropriate vegetation imagery to create the desired landscape and add a series of Photoshop adjustments (levels/hue & saturation/curves) to match them with the intensity and temperature of the rendered environment.


That brings it to an end.
Thanks again to Ronen and everyone who took an interest in this project. I’m grateful for the opportunity to share some of my workflow with you.

SO-ON is a boutique arch viz studio based in Brisbane, Australia.


thanks friend,this is great!!!
Awesome work Mark!
Great images Mark! thanks for sharing!
This is very nice! Thank you
good man. Came together really well mate!!
Thanks for the opportunity Ronen. I’m glad to be a part of your great blog!
Well done Mark! U0001f44fU0001f44fU0001f44f
Thanks mate…more news to come tomorrow! 🙂
most welcome 🙂
Thanks you! It is great having you here 😉
Really nice work Mark!
cool! thanks! 🙂
Very interesting this “making of”. Thank you!
Agreed… Cool info ?
Agreed… Nice reply thanks so much
who else really loves #blog ?
VicNguyen Thanks Vic, I appreciate it
Thanks D.
Brilliant! Thanks for sharing.
One of the very few who really explains all steps, with modeling etc etc. very nice!
rombout Thanks very much. Im glad you enjoyed it.
MarkStaddon rombout I tend to dislike most of these howto. They show the process almsot always without any modelling process. Also like how you show all the detail shots, very well documentated!
Thanks for sharing. Very nice work!
How did you preview the materials in real time like that? when i open my material editor i still get the old Vray material preview setup.
RupertRamiro you are using corona but still have the vray materials in the material editor? If this is the case, just make sure you have run the material convertor script (it should be in you scripts/CoronaRender folder inside your max folder on the C: Drive). Corona does a great job of previewing materials in the editor, and you can further refine this inside the system tab of your render setup. I leave mine at 1 as I find its more than enough to see whats going on. Hope that helps. M
colotune wow, nice job !
wao so beautiful
excellent tutorial! thank you for sharing.
excelent work, excúseme where can i get the same textures? please
great , where can i get the same textures? thanks 😉