


Making of Residence VDB
I’m very happy to share with you today, the making of “Residence VDB” by Vasyl Korol. Done as part of an Evermotion competition, and based on a house by Govaert & Vanhoutte Architects. Vasyl used 3dsmax 2017, Corona Renderer and Photoshop to create the images in this beautiful set. Enjoy!
My name is Vasyl Korol, Eugenia and I founded NIKO visual in Lutsk, Ukraine.
First of all, I’d like to thank Ronen for inviting me to the blog authors club, is an honor for me make this little contribution to the CG community.
When I created the Residence VDB project, I’ve set a goal to improve my workflow to achieve maximum photorealism in a short time. In the process, I found some interesting tricks that helped me to achieve this result, and now I want to show you this.
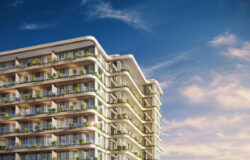
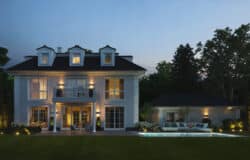
This project was done for the Evermotion Challenge. I set myself the task of conveying the atmosphere of home comfort and achieving maximum photorealism. I used photo reference of the Govaert & Vanhoutte Architects. I love the mood and beautiful location which is perfect for me.
This short tutorial is going to show you the main steps in creating the “Residence VDB.”
For this project, I used ArchiCAD, 3Ds Max 2017, Corona Renderer 1.7, and Adobe Photoshop CC.
Let’s Start.
References
For me, part of the search for a photo reference is the most important for creating a photorealistic architectural visualization, and I think it’s 80% successful renderer.
We have significant collections of photo references with different lighting that help us to create architectural images. We never start our project without photo references.
In this project, I used the photo reference of a great photographer Tim Van de Velde.


Modeling
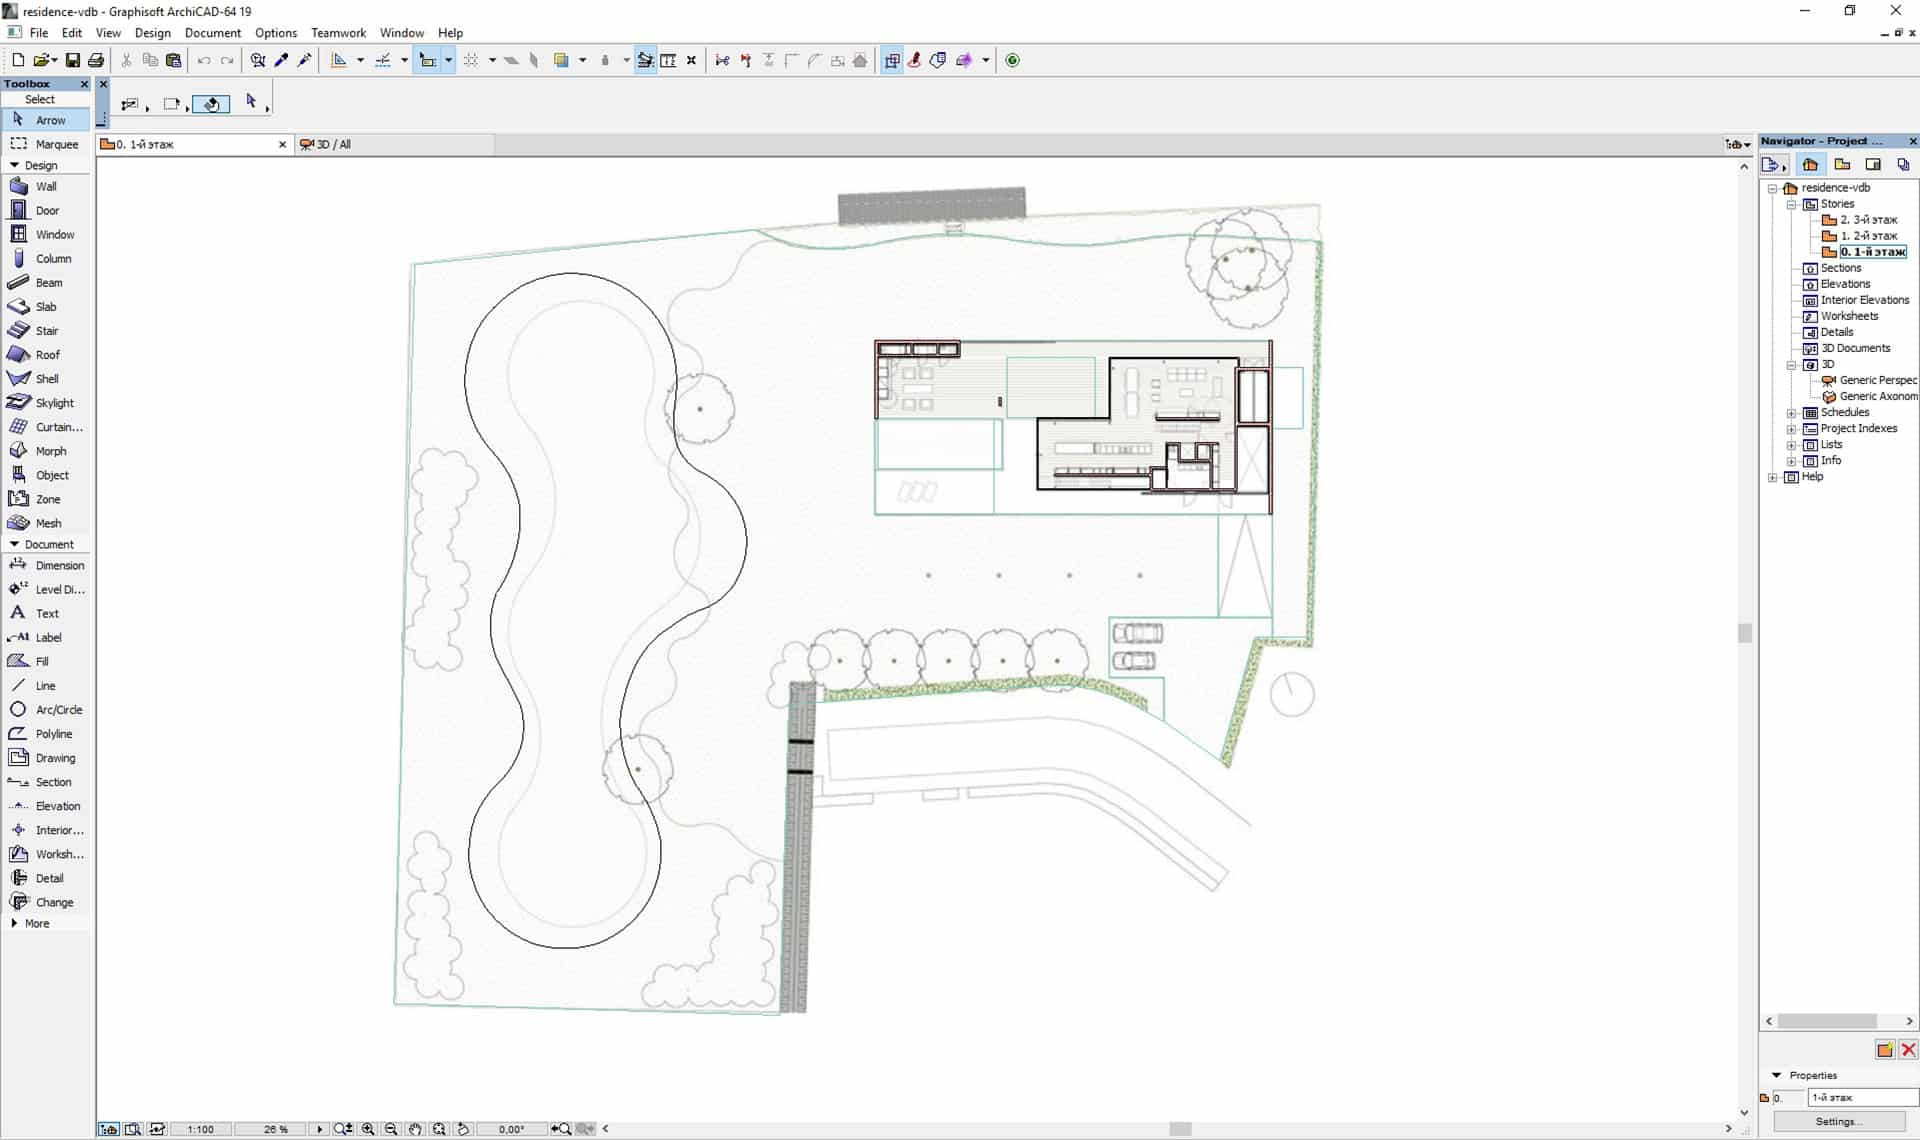
I started by modeling the main house based on drawings. There is nothing special to say about it so that I won’t linger on it. I was modeling the basis of this house in ArchiCAD because it’s the most comfortable and fastest way for me.
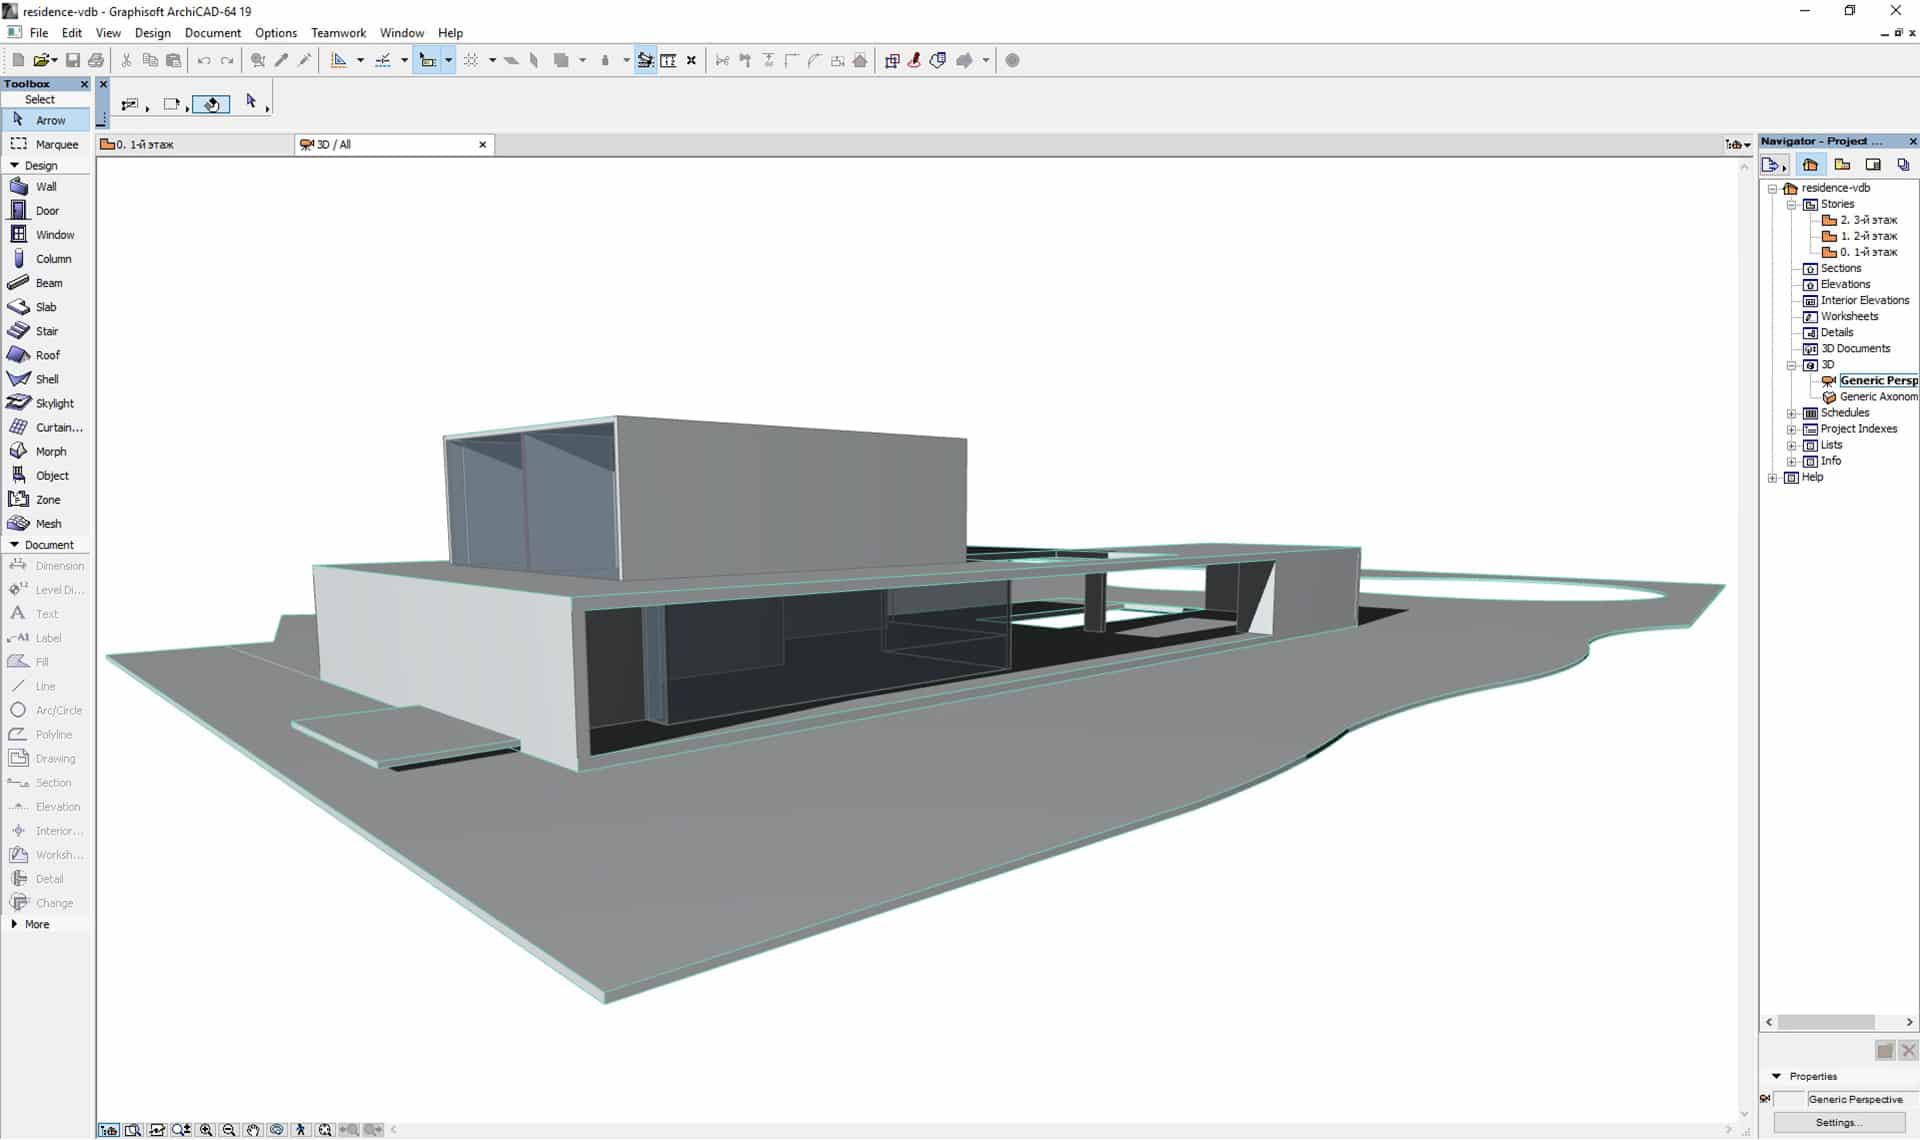
After that, I import the 3d model to 3dsmax and continue to detail it. For all the objects in the scene, I add a “Chamfer.” Also, I used a Floor Generator, for vertical wooden elements on the facade.
I have never met a perfectly flat surface, so I added a “Chamfer” for all the objects in the scene, as well as for some “Noise” (not quite a lot), this is necessary for photorealism.

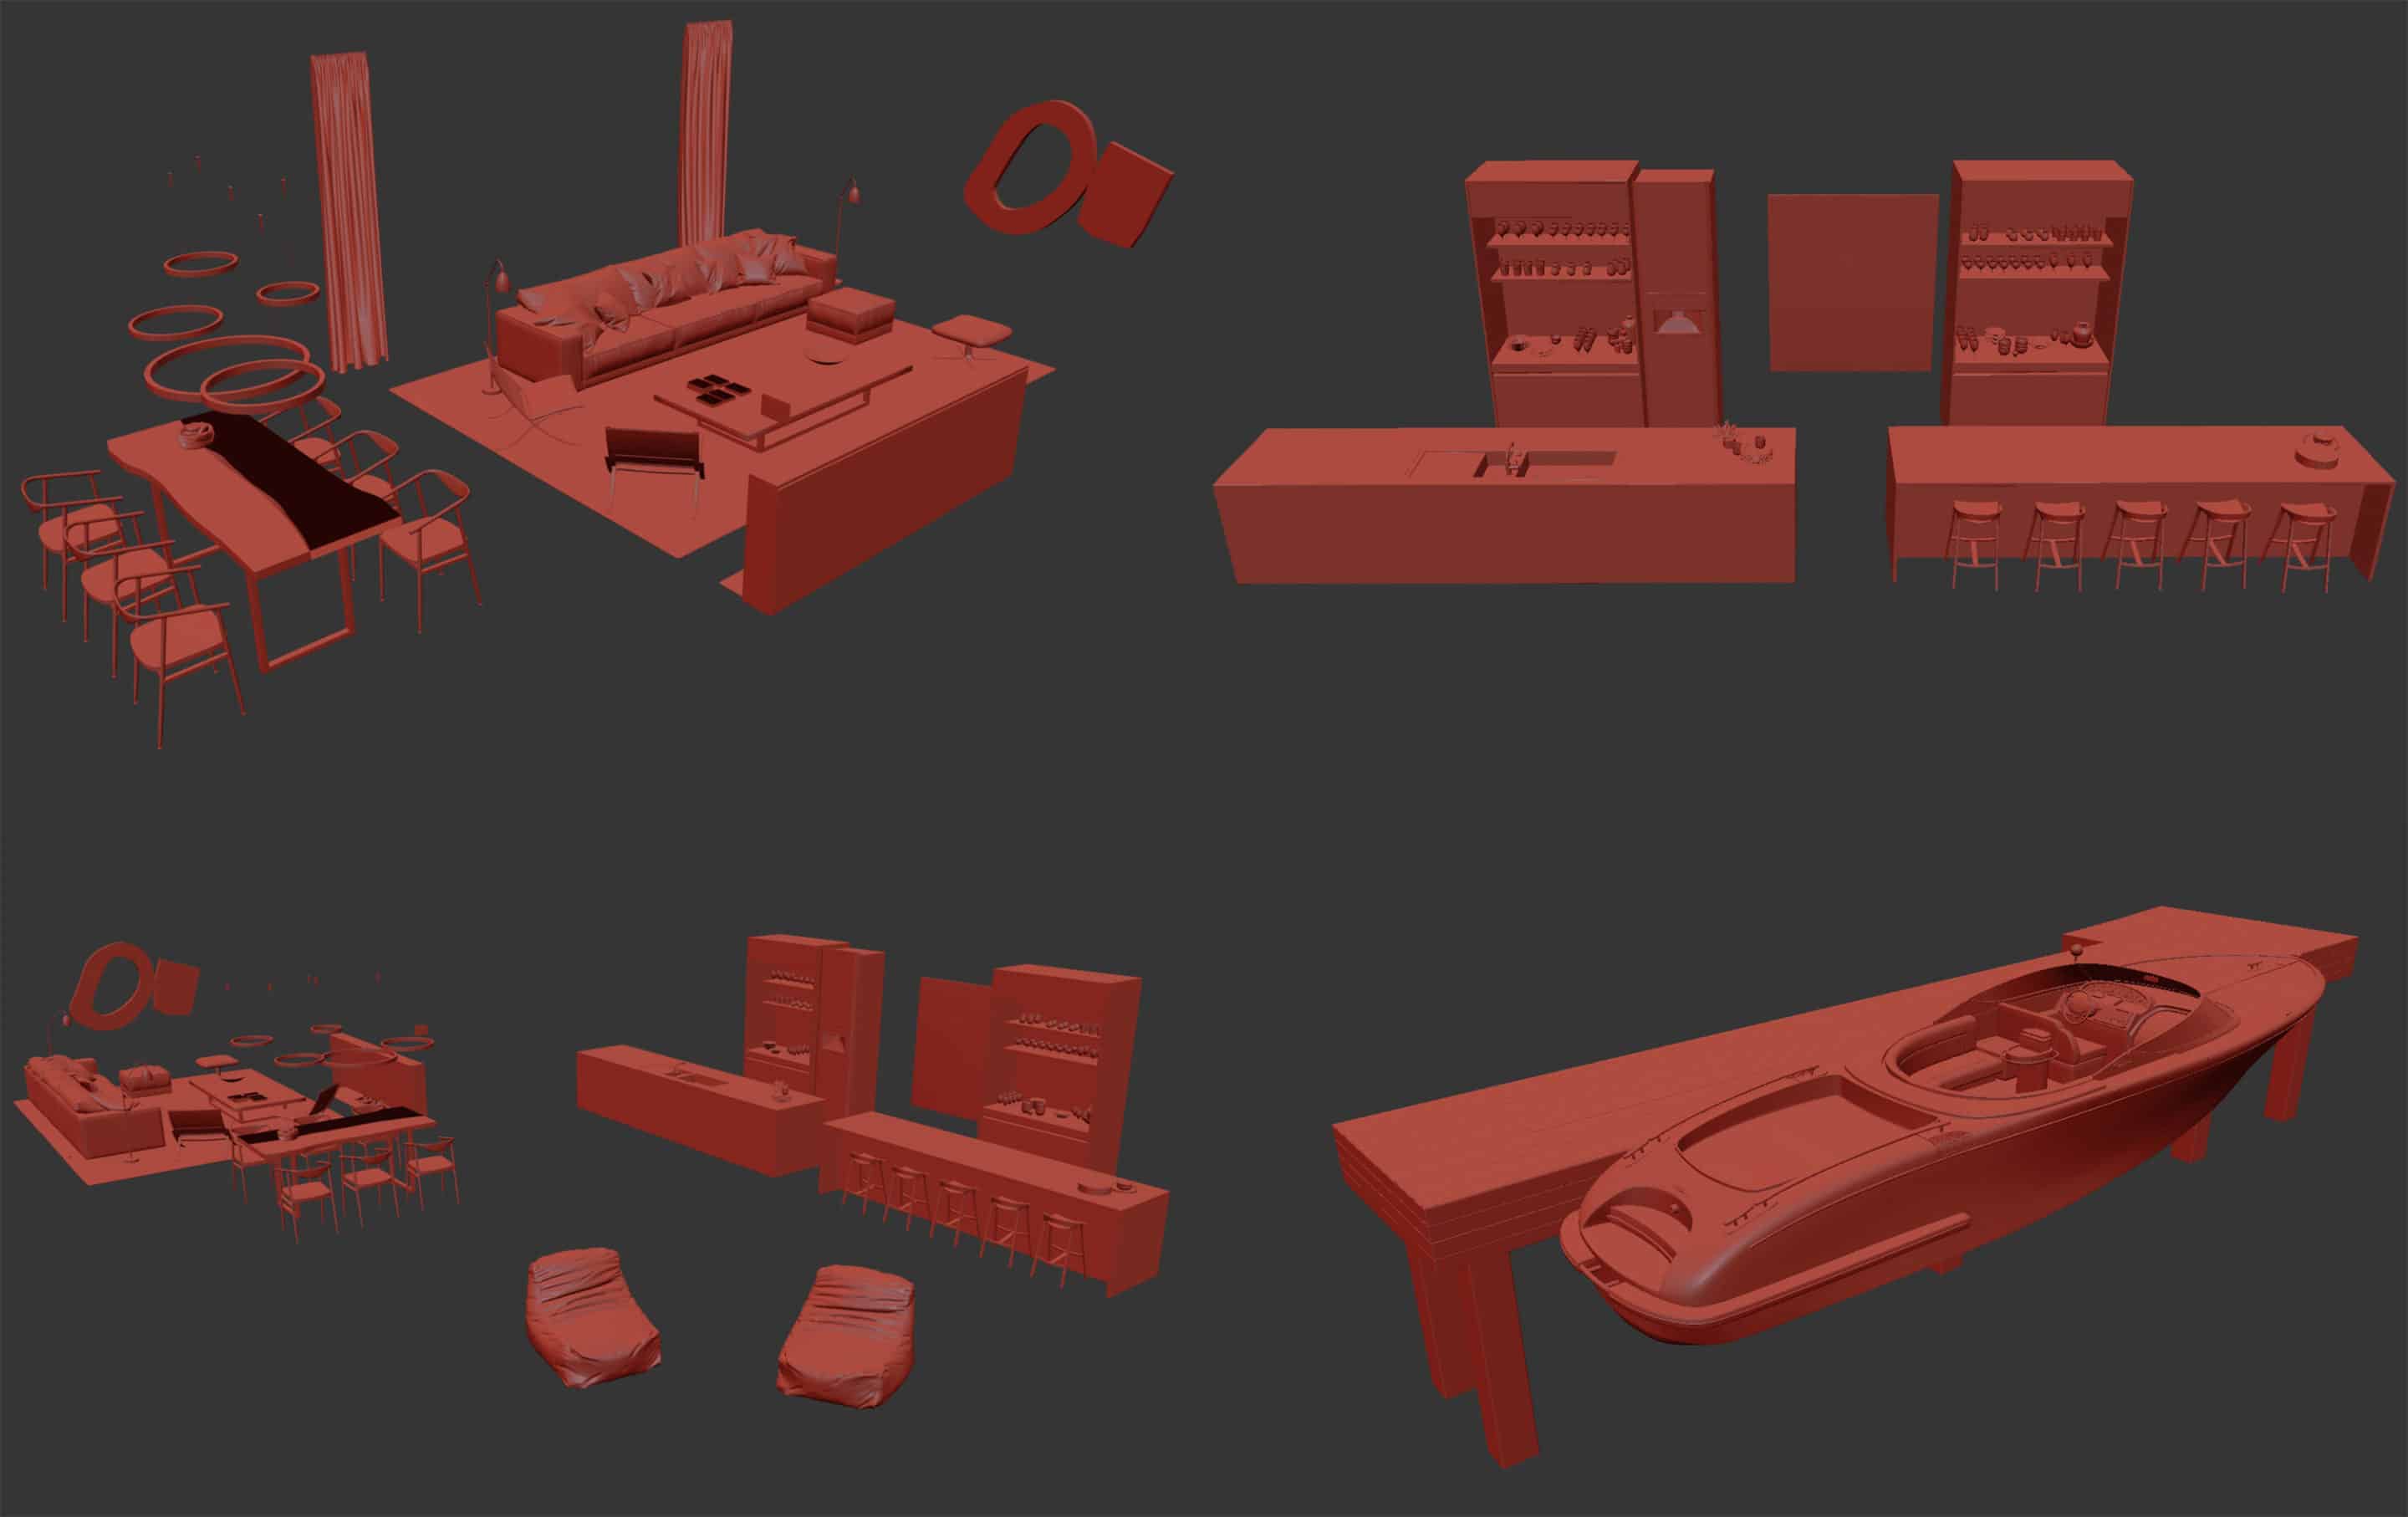
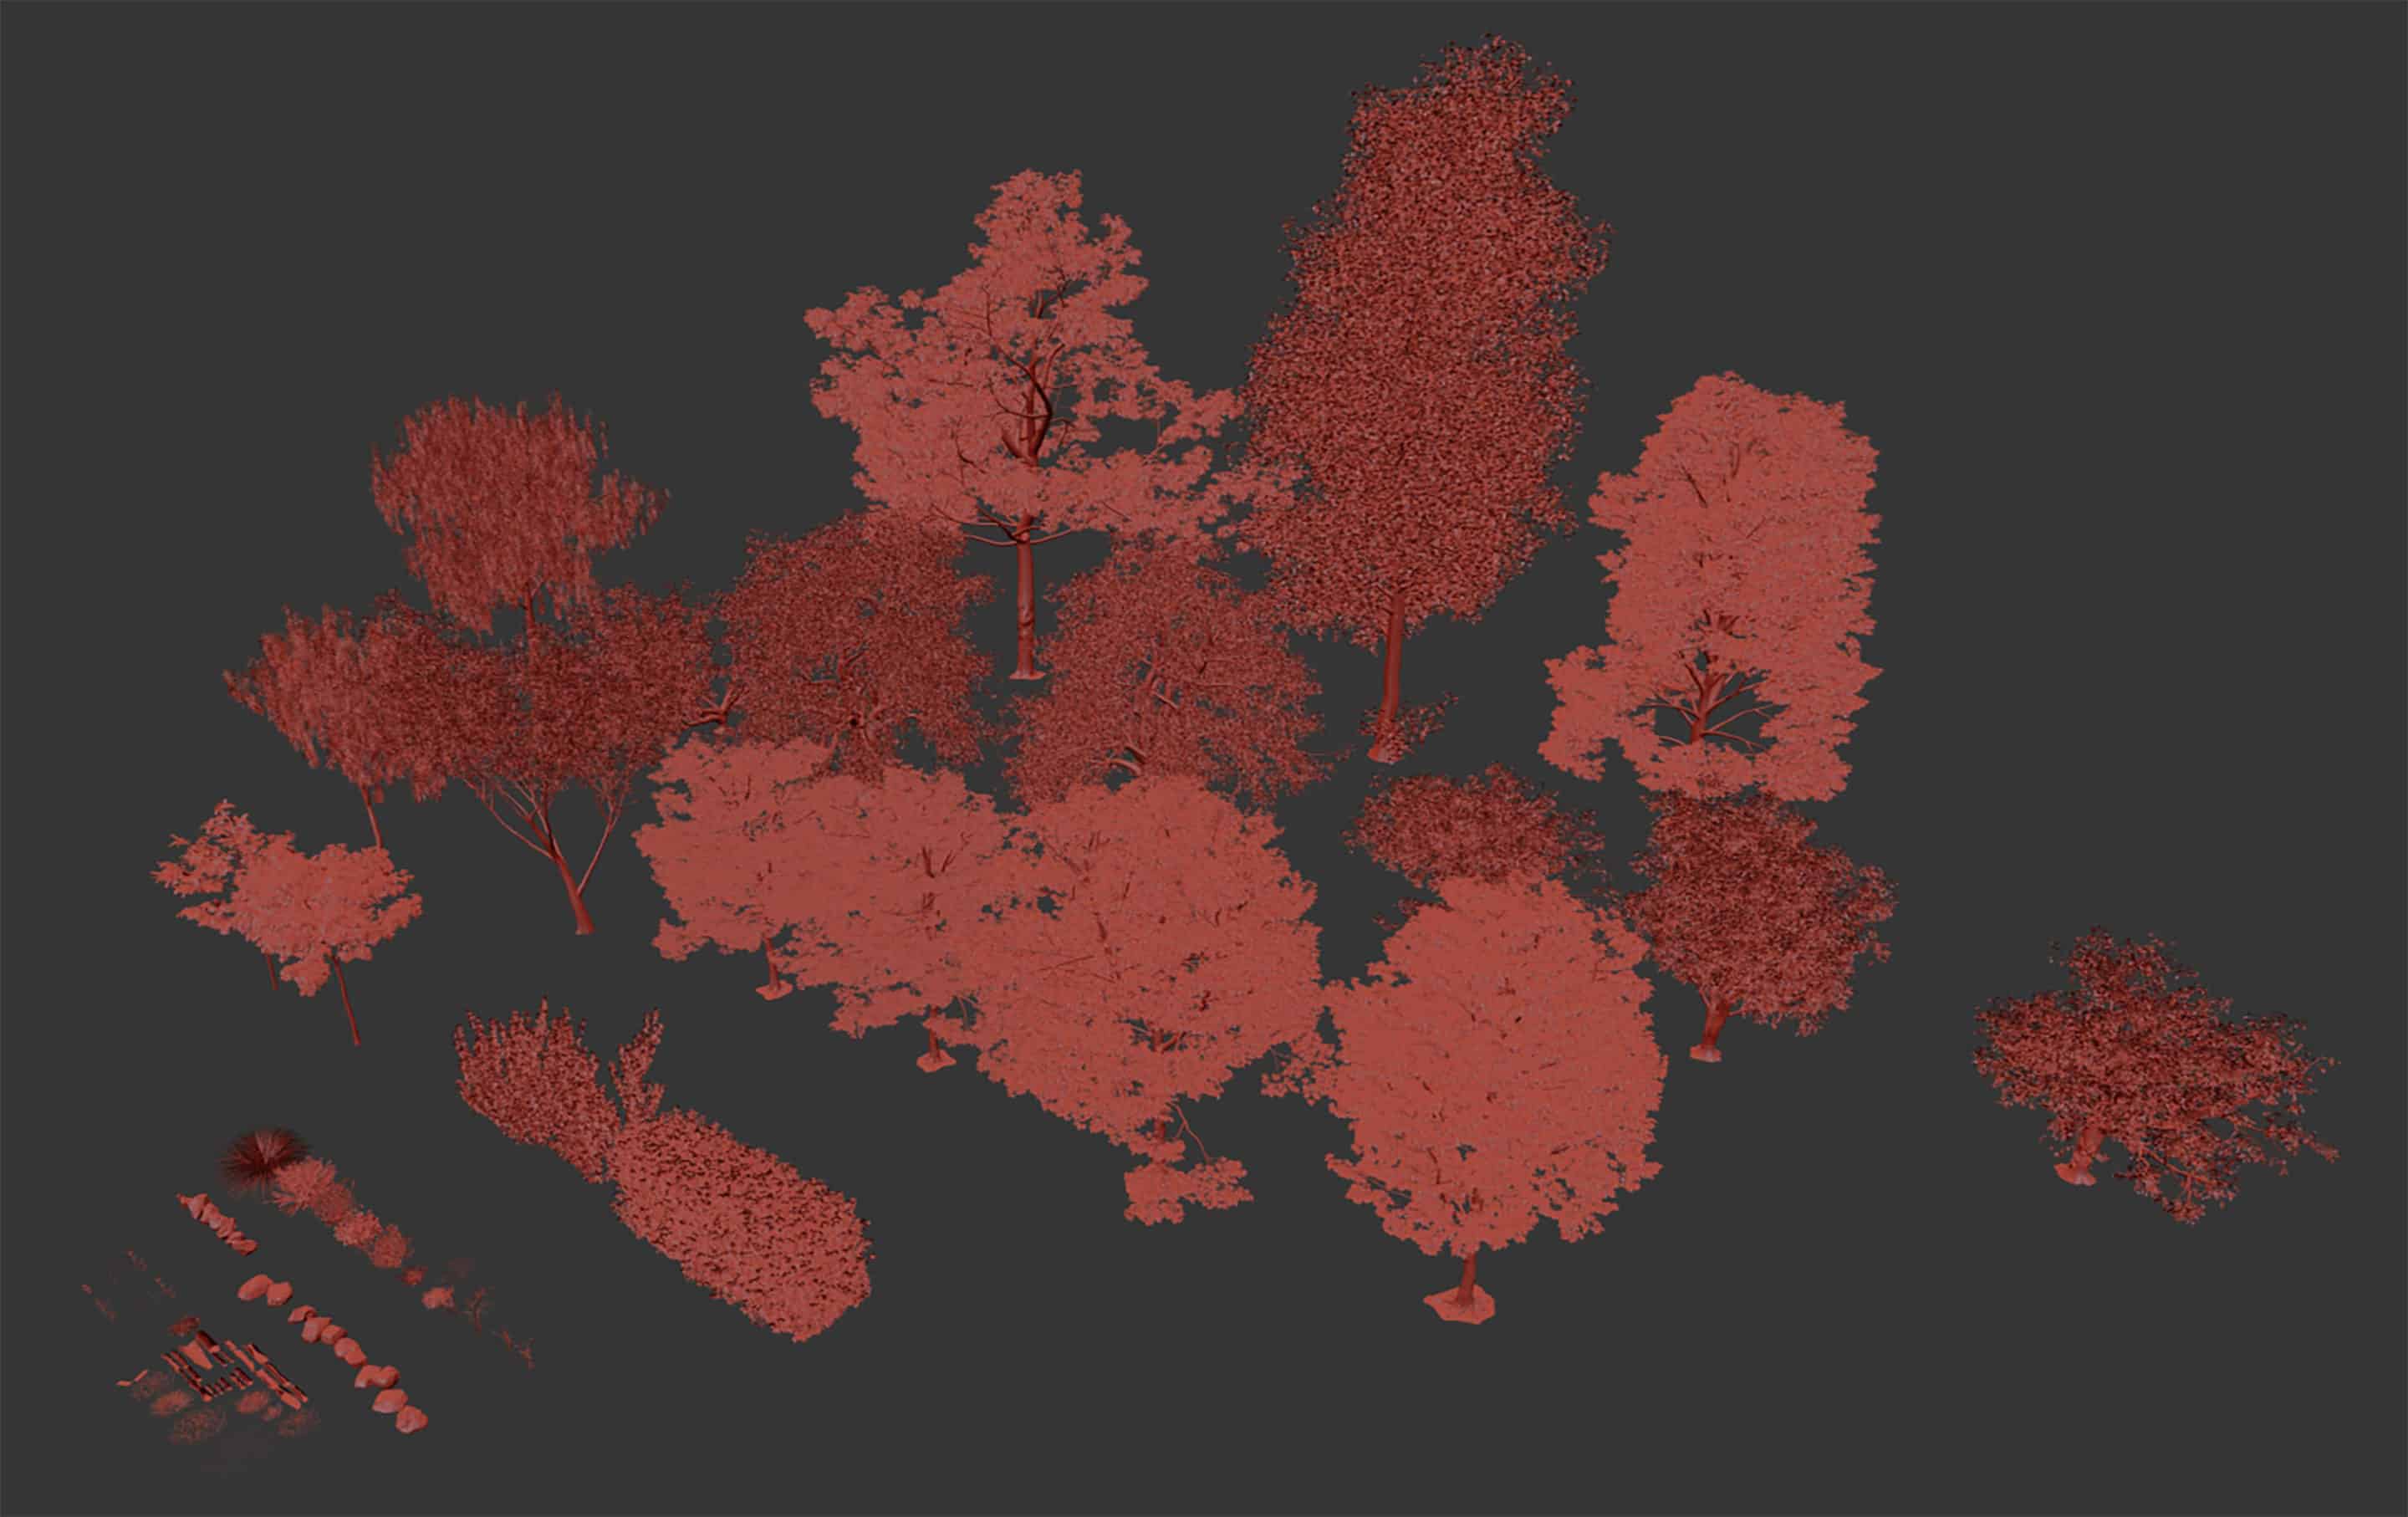
To fill the scene, I use a collection of furniture and plants:
- Evermotion (trees and bushes)
- iCubeR&D (trees and bushes)
- 3dsky (furniture)
In my scene, there are no objects that stand between themselves at an angle of 90°, for this, I have used Transform Random, it allowed me to return all objects in different directions. I think this is a straightforward and useful script for random movement, rotation and scaling for several objects in the scene.
For making landscaping, I used simple Plane, converted to Editable Poly, added Subdivide, Noise, Smooth and UVW Mapping. I also added some “Push/Pull” effect of making this terrain more irregular like in real world.
With the landscape everything is straightforward, all the trees, bushes, grass, stones I planted with the help of the Corona Renderer Scatter, as a map I used Vertex Paint. For the specific vegetation near the house, I placed them by hand.
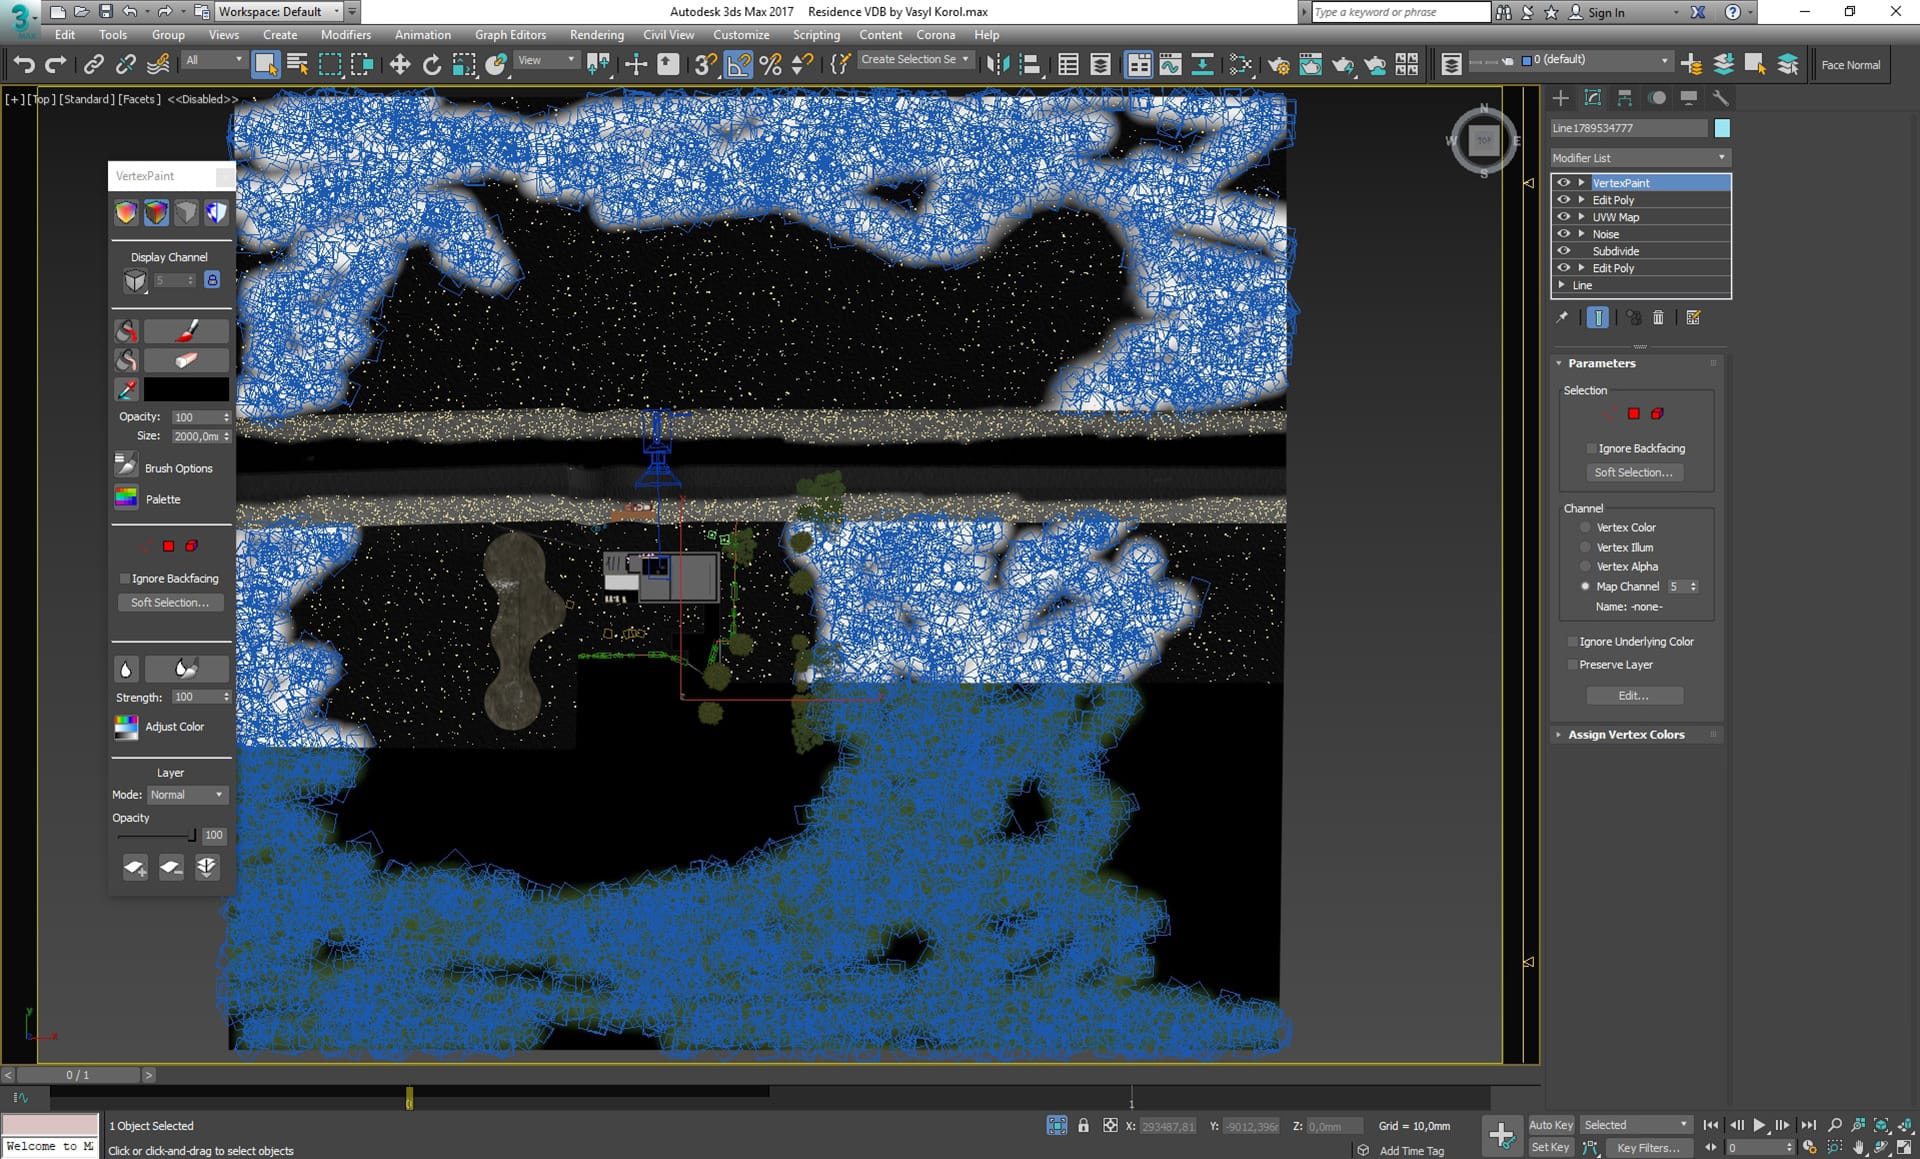
I know that it looks unattractive, but it is very convenient and fast.
Texture & Materials
Materials in this project are simple, but of course, I tried to make it the most realistic as I can, most of them have a basic structure (diffuse map, reflect map, glossiness map, bump map). I’ve used Corona Materials Library as a base, and I customized them according to the project needs. My primary source of textures was from Poliigon Textures. They have great textures and all the necessary maps: Diffuse, Reflection, Gloss, Normals, Displacement.
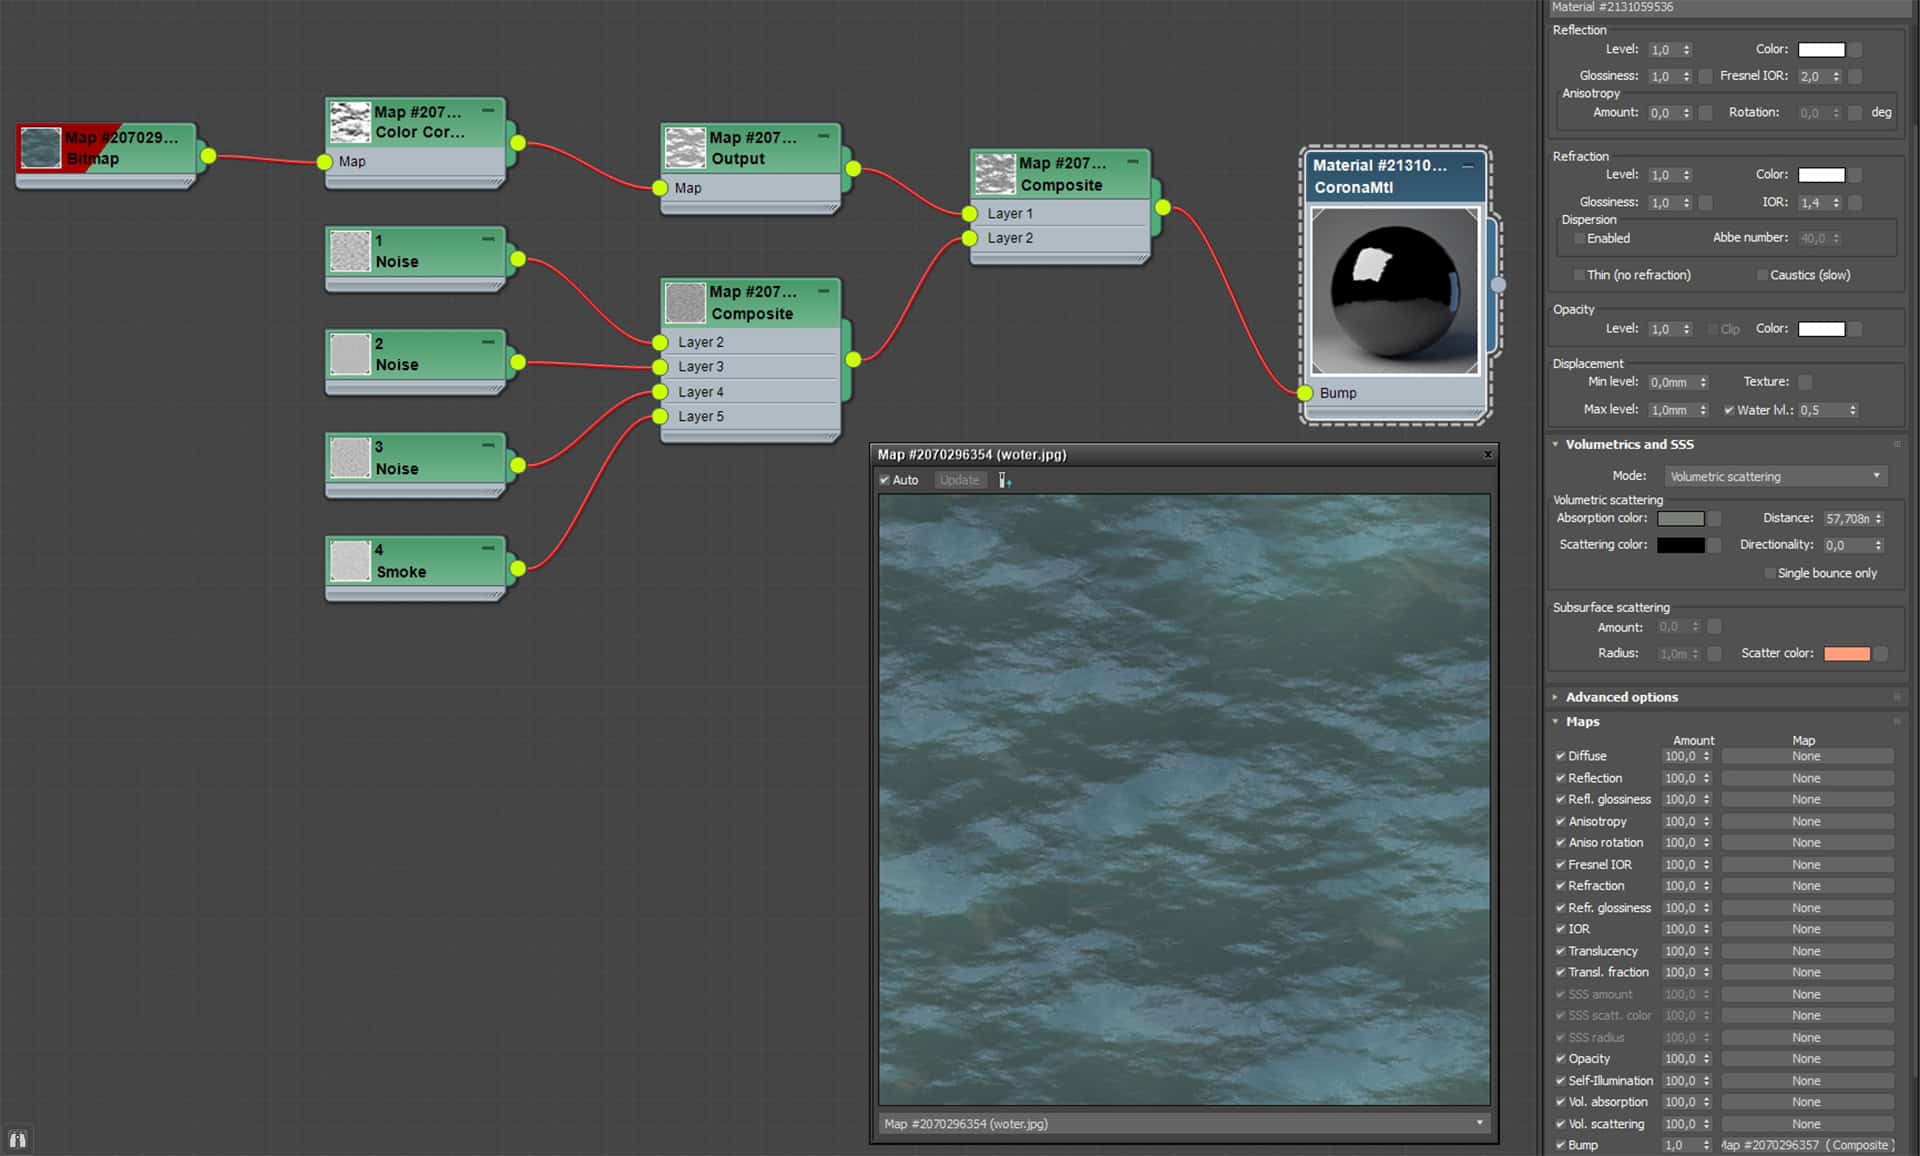
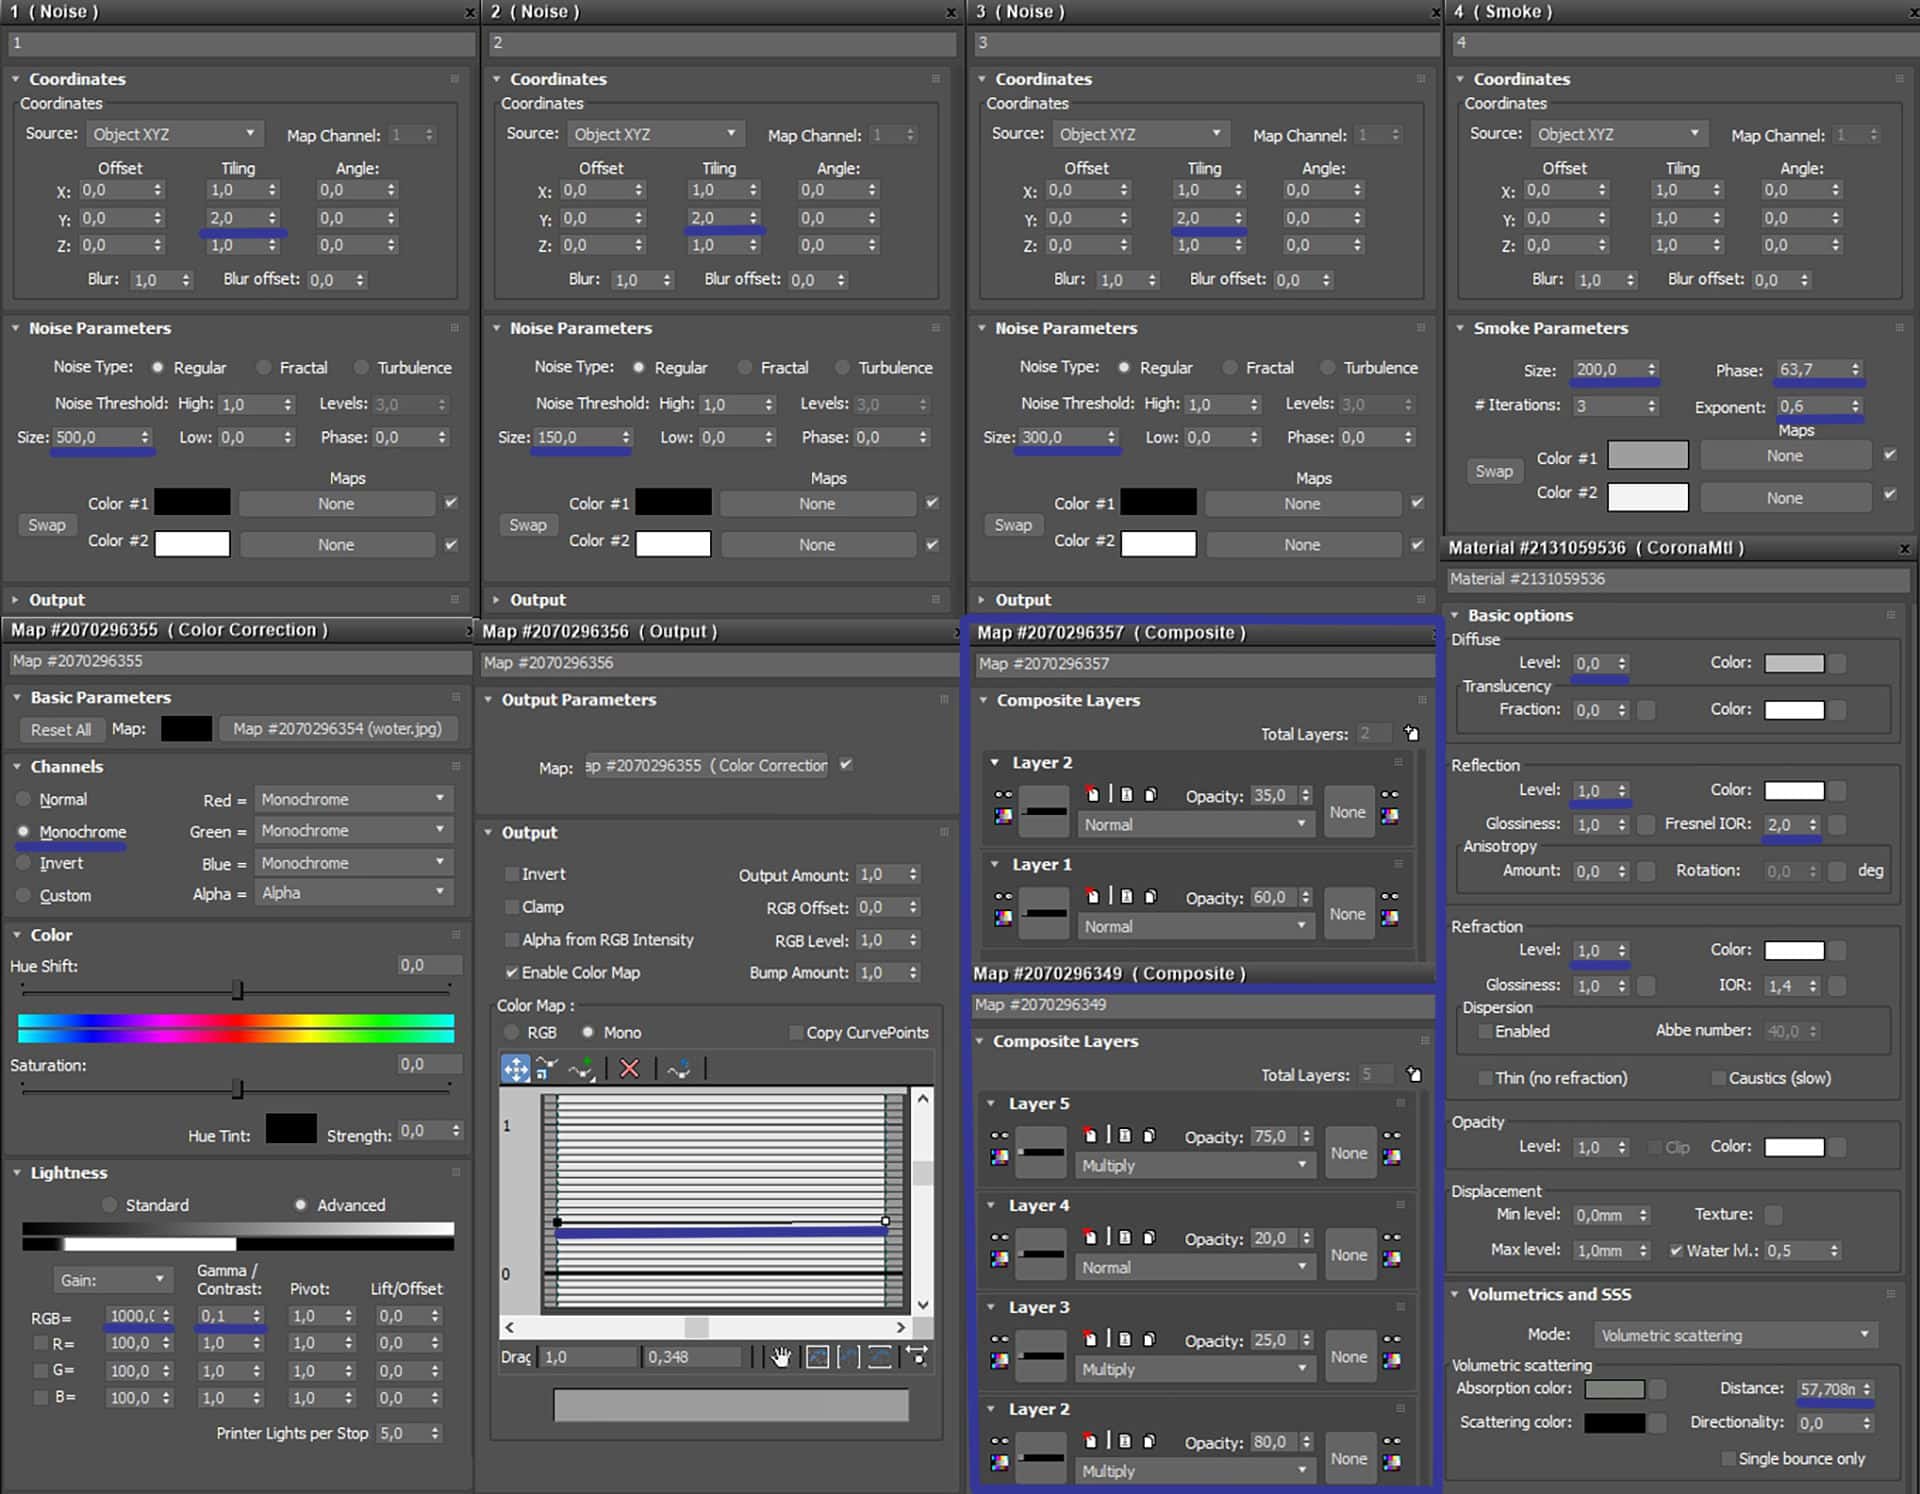
I want to show a shader of river water, here I used some tricks).
This is plain with a Shell of 10 mm.
Also a small trick for the material of plants. You can see all the plants in my scene with different shades, for this effect I used CoronaMultiMap.
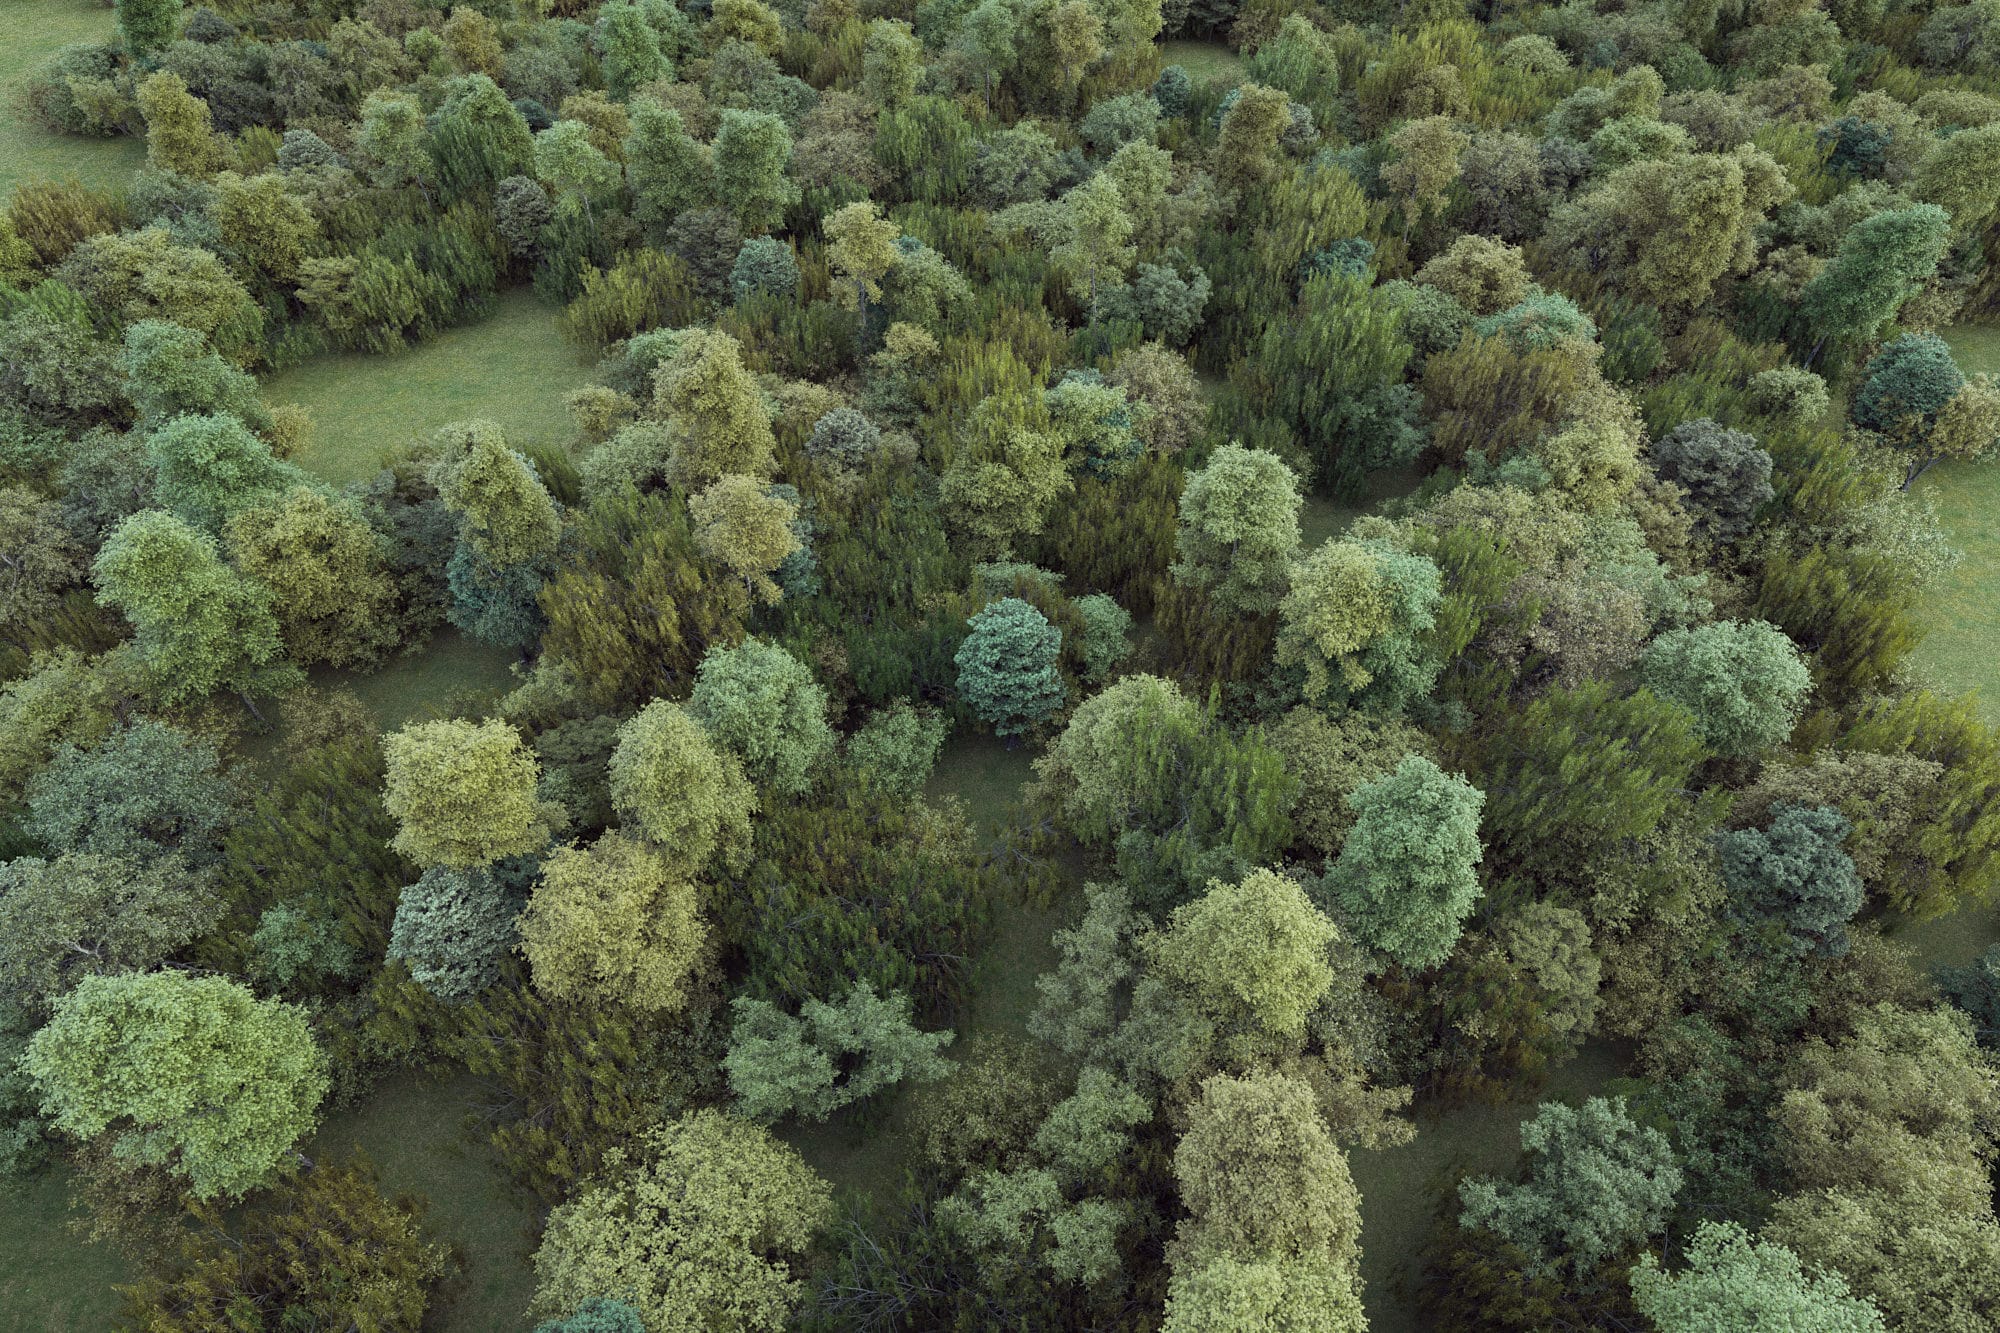
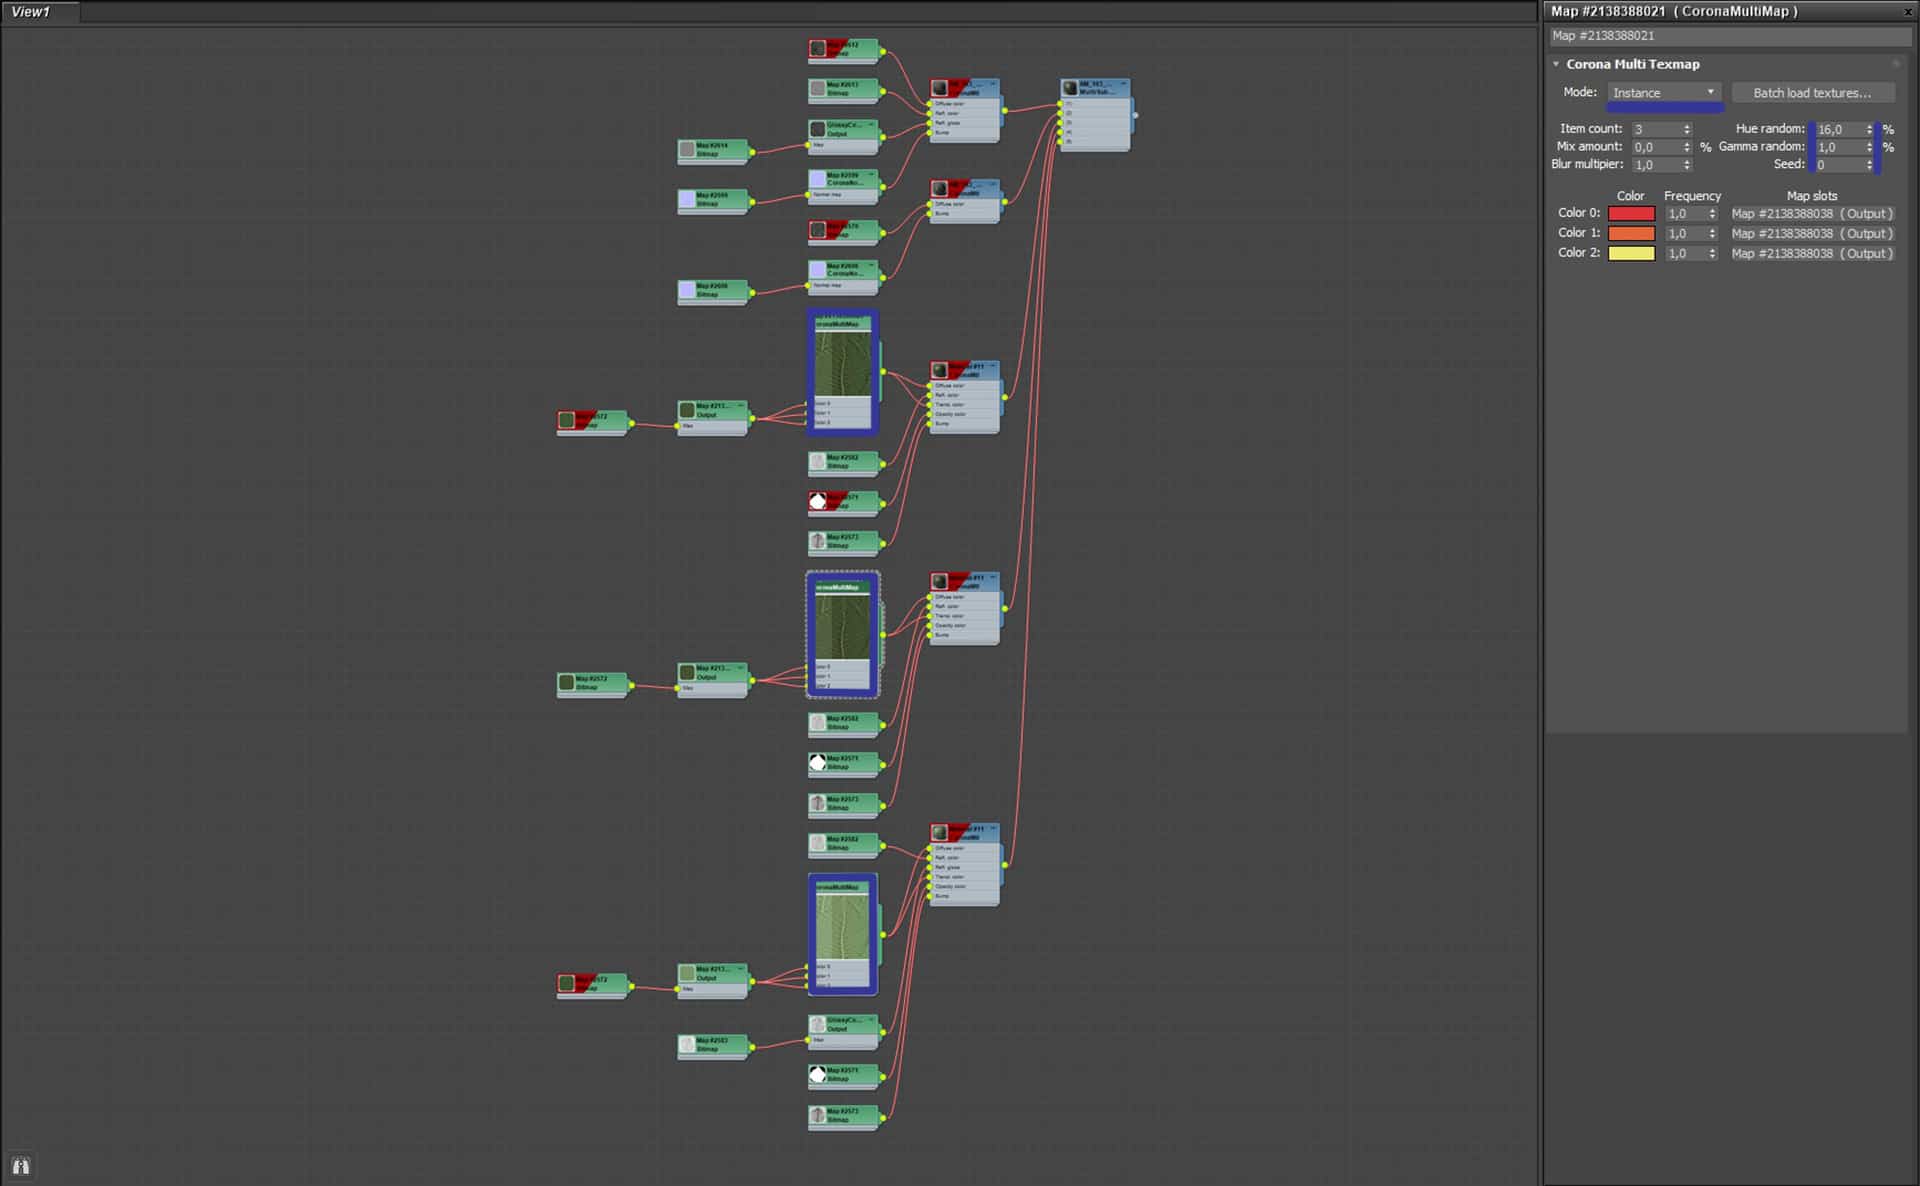
To do this, I used the “Instance” mode. This mode works very well with a Corona Scatter, and there are two other important parameters – “Hue random” and “Gamma random.” I also added this map to the grass material.
Lighting
For me, lighting is the most critical and exciting moment in the render. The lighting makes the overall atmosphere and mood of the image.
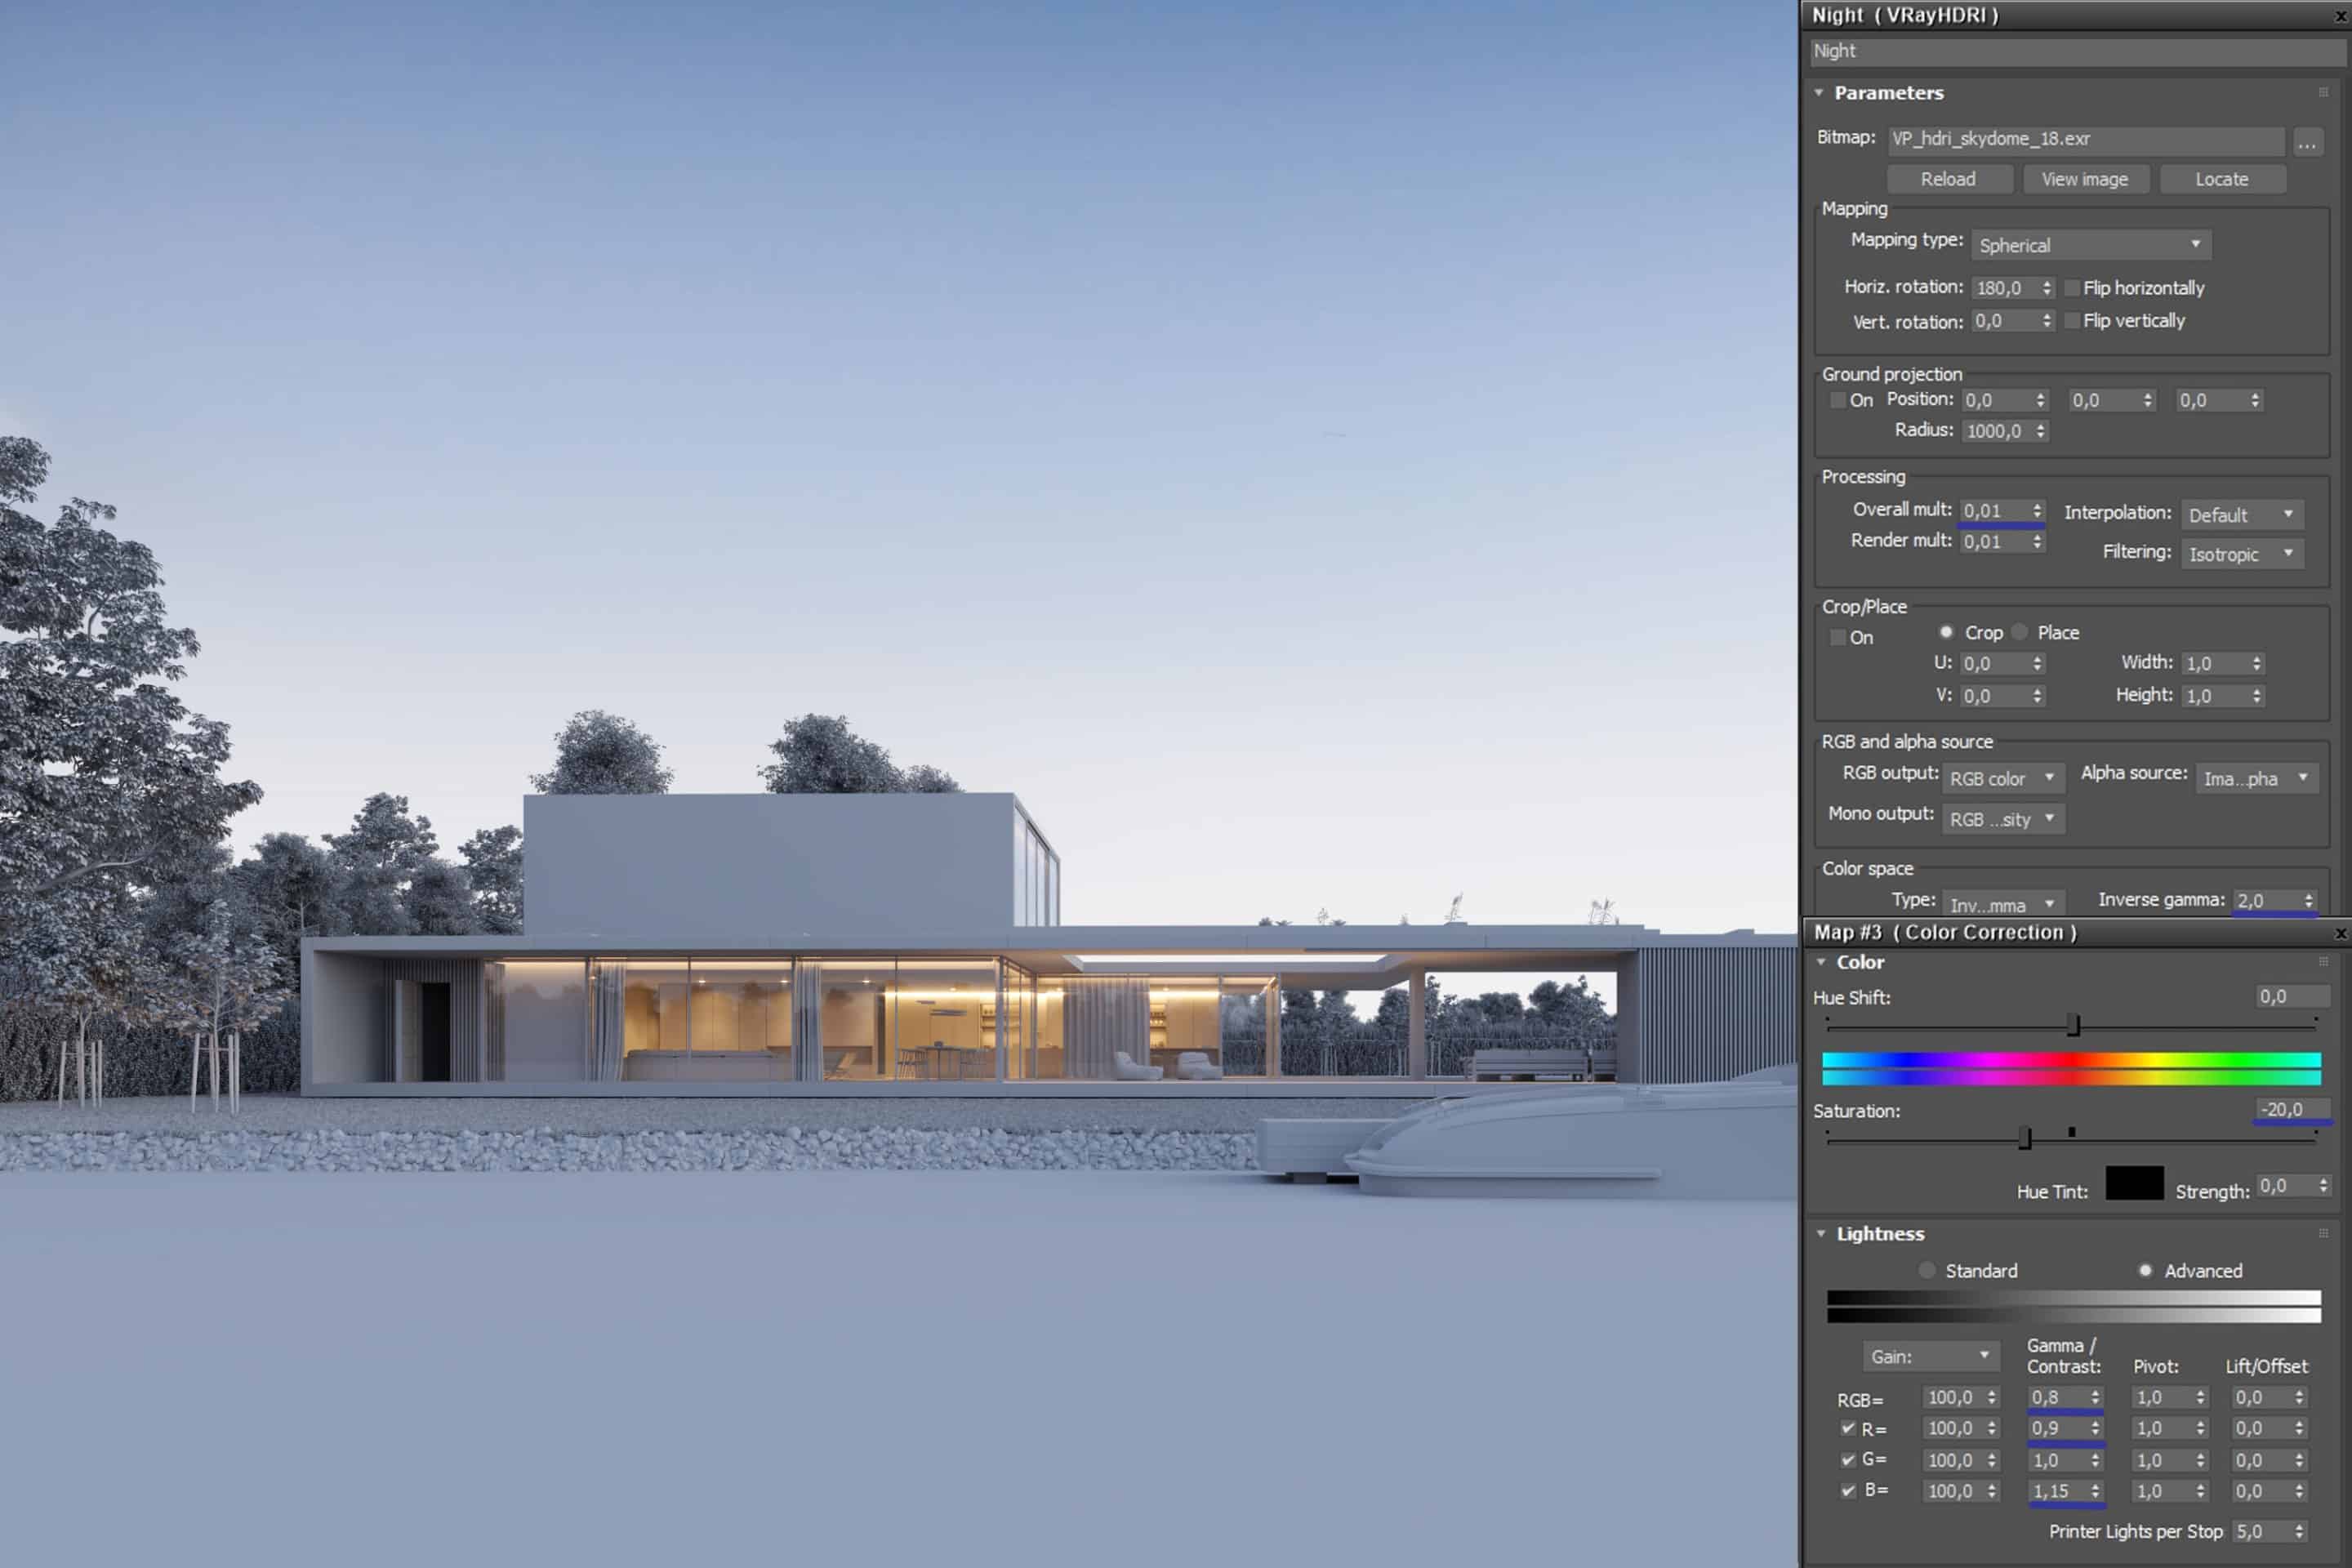
In this project, I used VIZPARK HDRI skydome 18 + Color Correction Map. This HDRI is more suitable for my project. With the Corona LightMix, I adjusted the lighting in the interior.
HDRI:
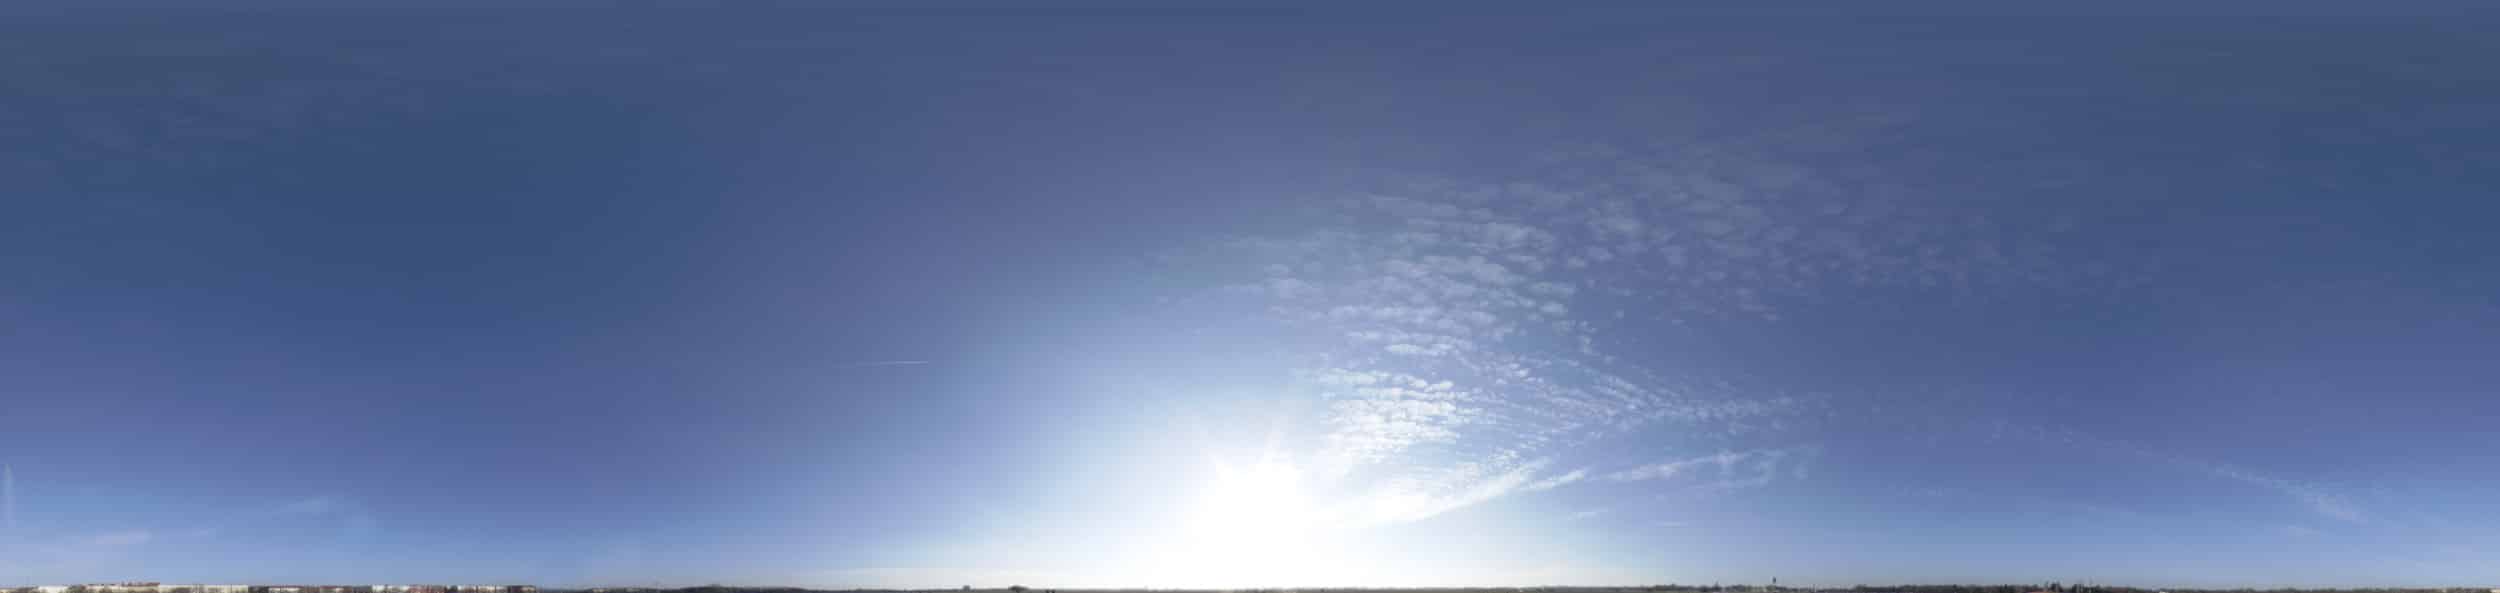
Color Correction Map helped me to set the sky color as in my reference accurately. Here are the results in the clay model:
Rendering
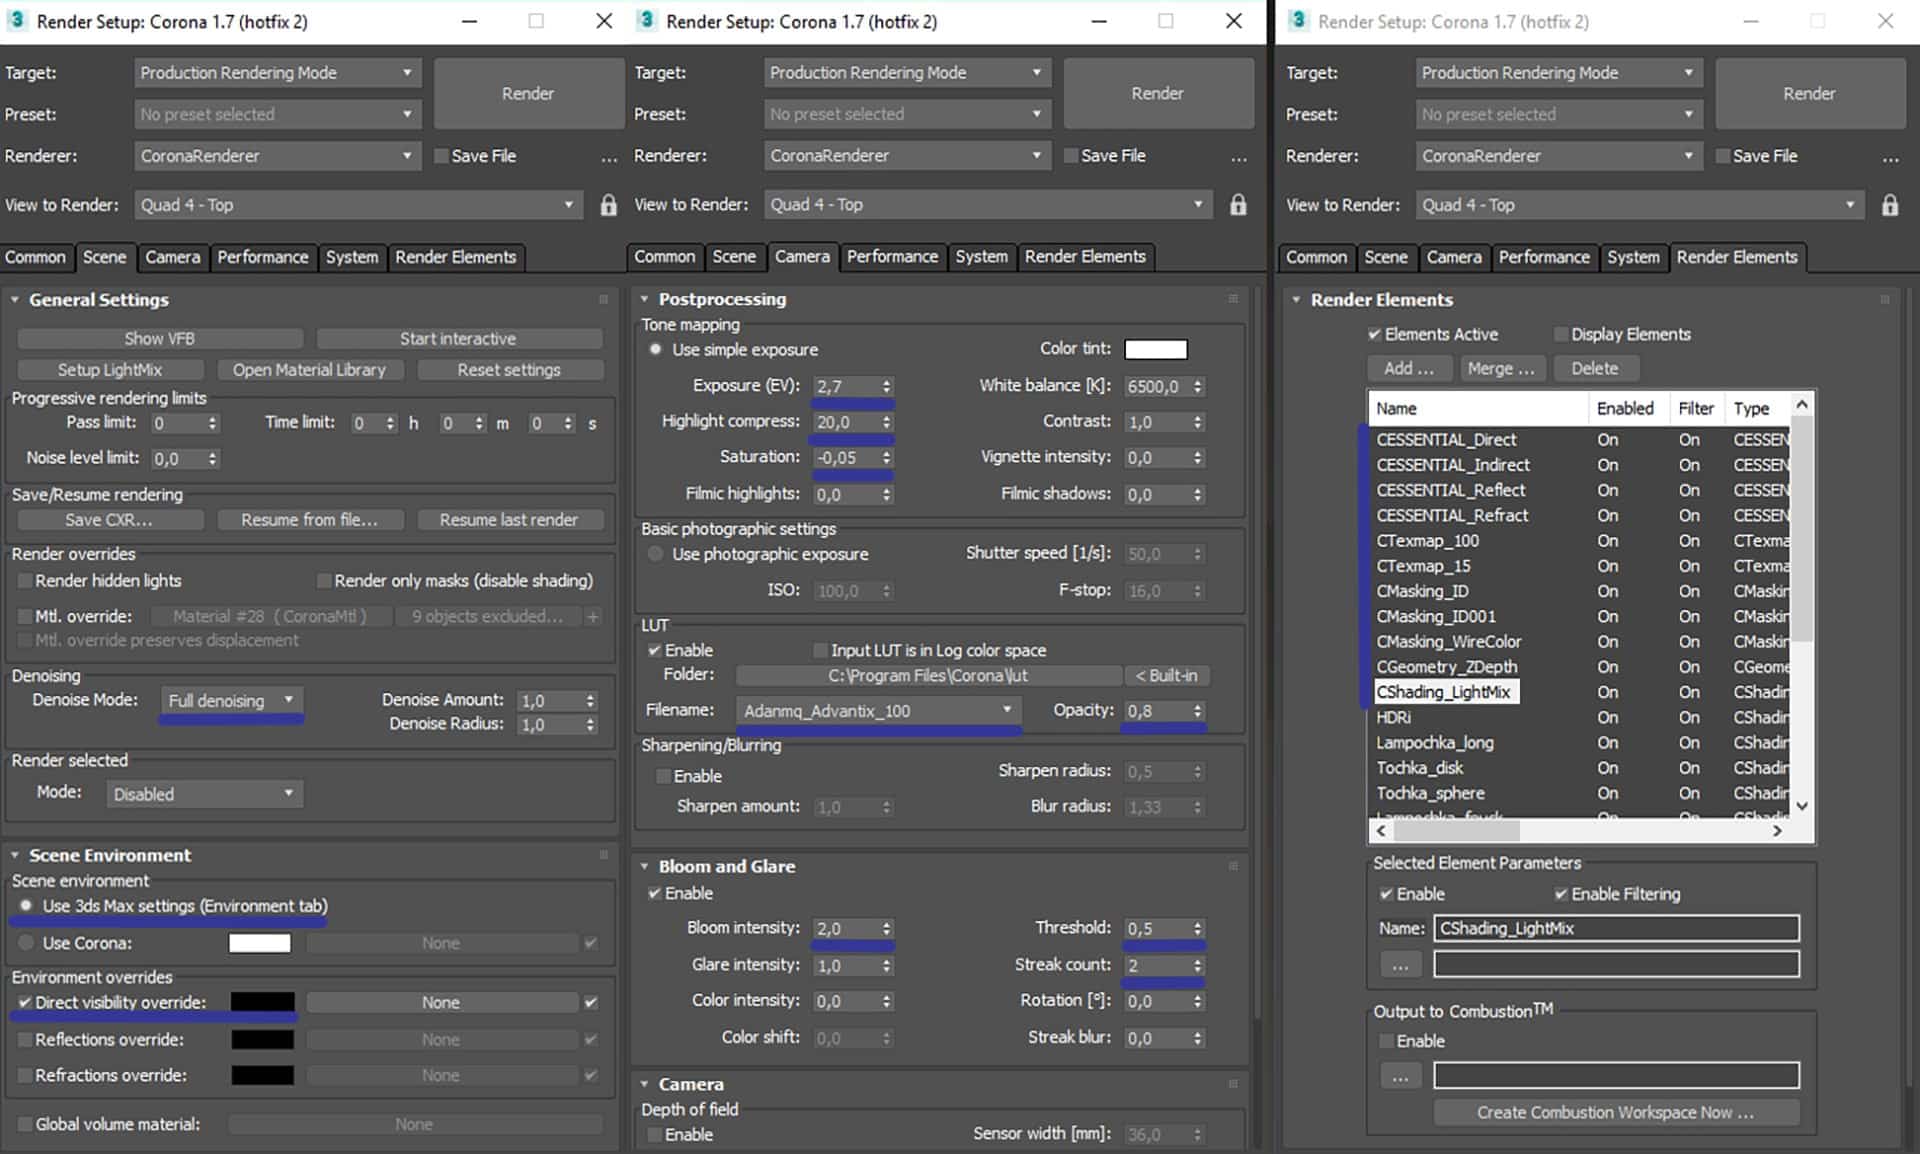
I used Corona Renderer. I think this render engine is the best that can be for rendering architecture, it is straightforward to use, and you can quickly achieve a steep result. For the Direct visibility override, I used black color to get rid of the white border around objects and trees.
I have used these render elements, below you can find some of the ones I use, these are probably the standard ones in our process:
- Direct
- Indirect
- Reflect
- Refract
- CTexmap (CoronaAO 100 and 15mm)
- CMasking (ID and WireColor)
- ZDepth
- Corona LightMix
Here are the render settings.
Post Production
After rendering the scene I moving to the post-production in Photoshop CC. The first step, I added to Photoshop all the render elements (File→Scripts→Load Files into Stack).
On the right side I placed a photo reference, I added render elements on the left side, this helped me achieve the desired result.
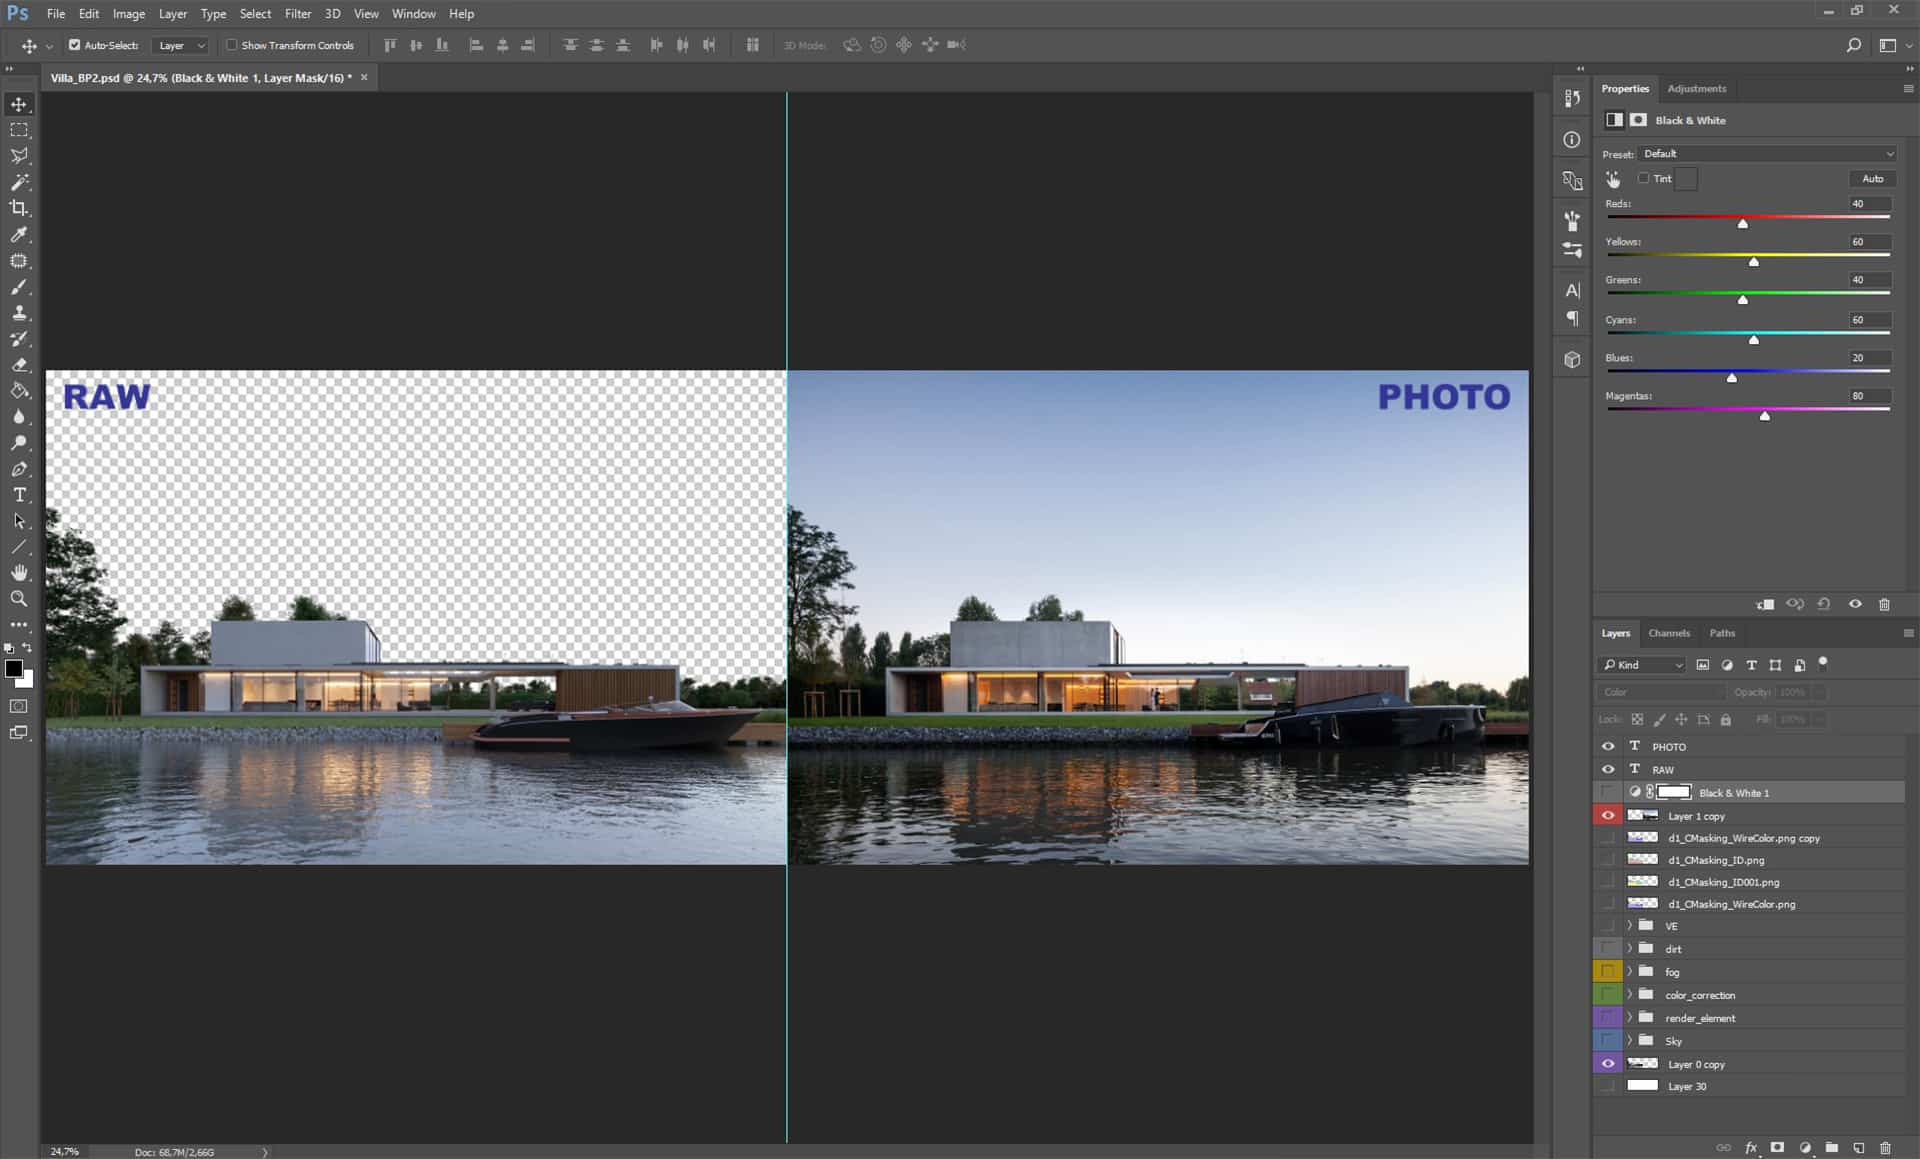
Using a combination of layers set to overlay mode, I start painting in focal areas and highlighting the most critical aspects.
I always use standard render elements for fine-tuning the materials, also in the Photoshop I use standard tools (Brightness/Contrast, Levels, Curves, Hue/Saturation, Color Balance, Selective Color, Camera Raw) + ArionFX
Post Production
The Final Images


Greetings to all CG artists from Ukraine 🙂
Once again, I would like to thank Ronan Bekerman and please do not hesitate to comment or ask questions!
Thank You for Watching, and I hope you found some useful tips in it.


Welcome, on-board @vasyllkorol
Big thanks for getting this one up to speed