


Making of ZHA’s Leeza SOHO
The making of Leeza SOHO Visualization is among the best articles in the past year and as part of a blog content review I’m pushing it up, so those of you who did not see it yet do not miss it! COSMOSCUBE did a fantastic job breaking down the architectural rendering process as they visualized Zaha Hadid Architects Leeza SOHO 46-story tower in Beijing, China. For comments, jump into TALK using the link at the end of the article.
Hey guys, here at COSMOSCUBE studio we decided to share with you the process of creating the image for Leeza SOHO. It was our pleasure to work with Zaha Hadid Architects, the prestigious architectural practice. We visualized the 46-story tower in Beijing, home of the world’s tallest atrium.
Leeza SOHO – Scope of Work
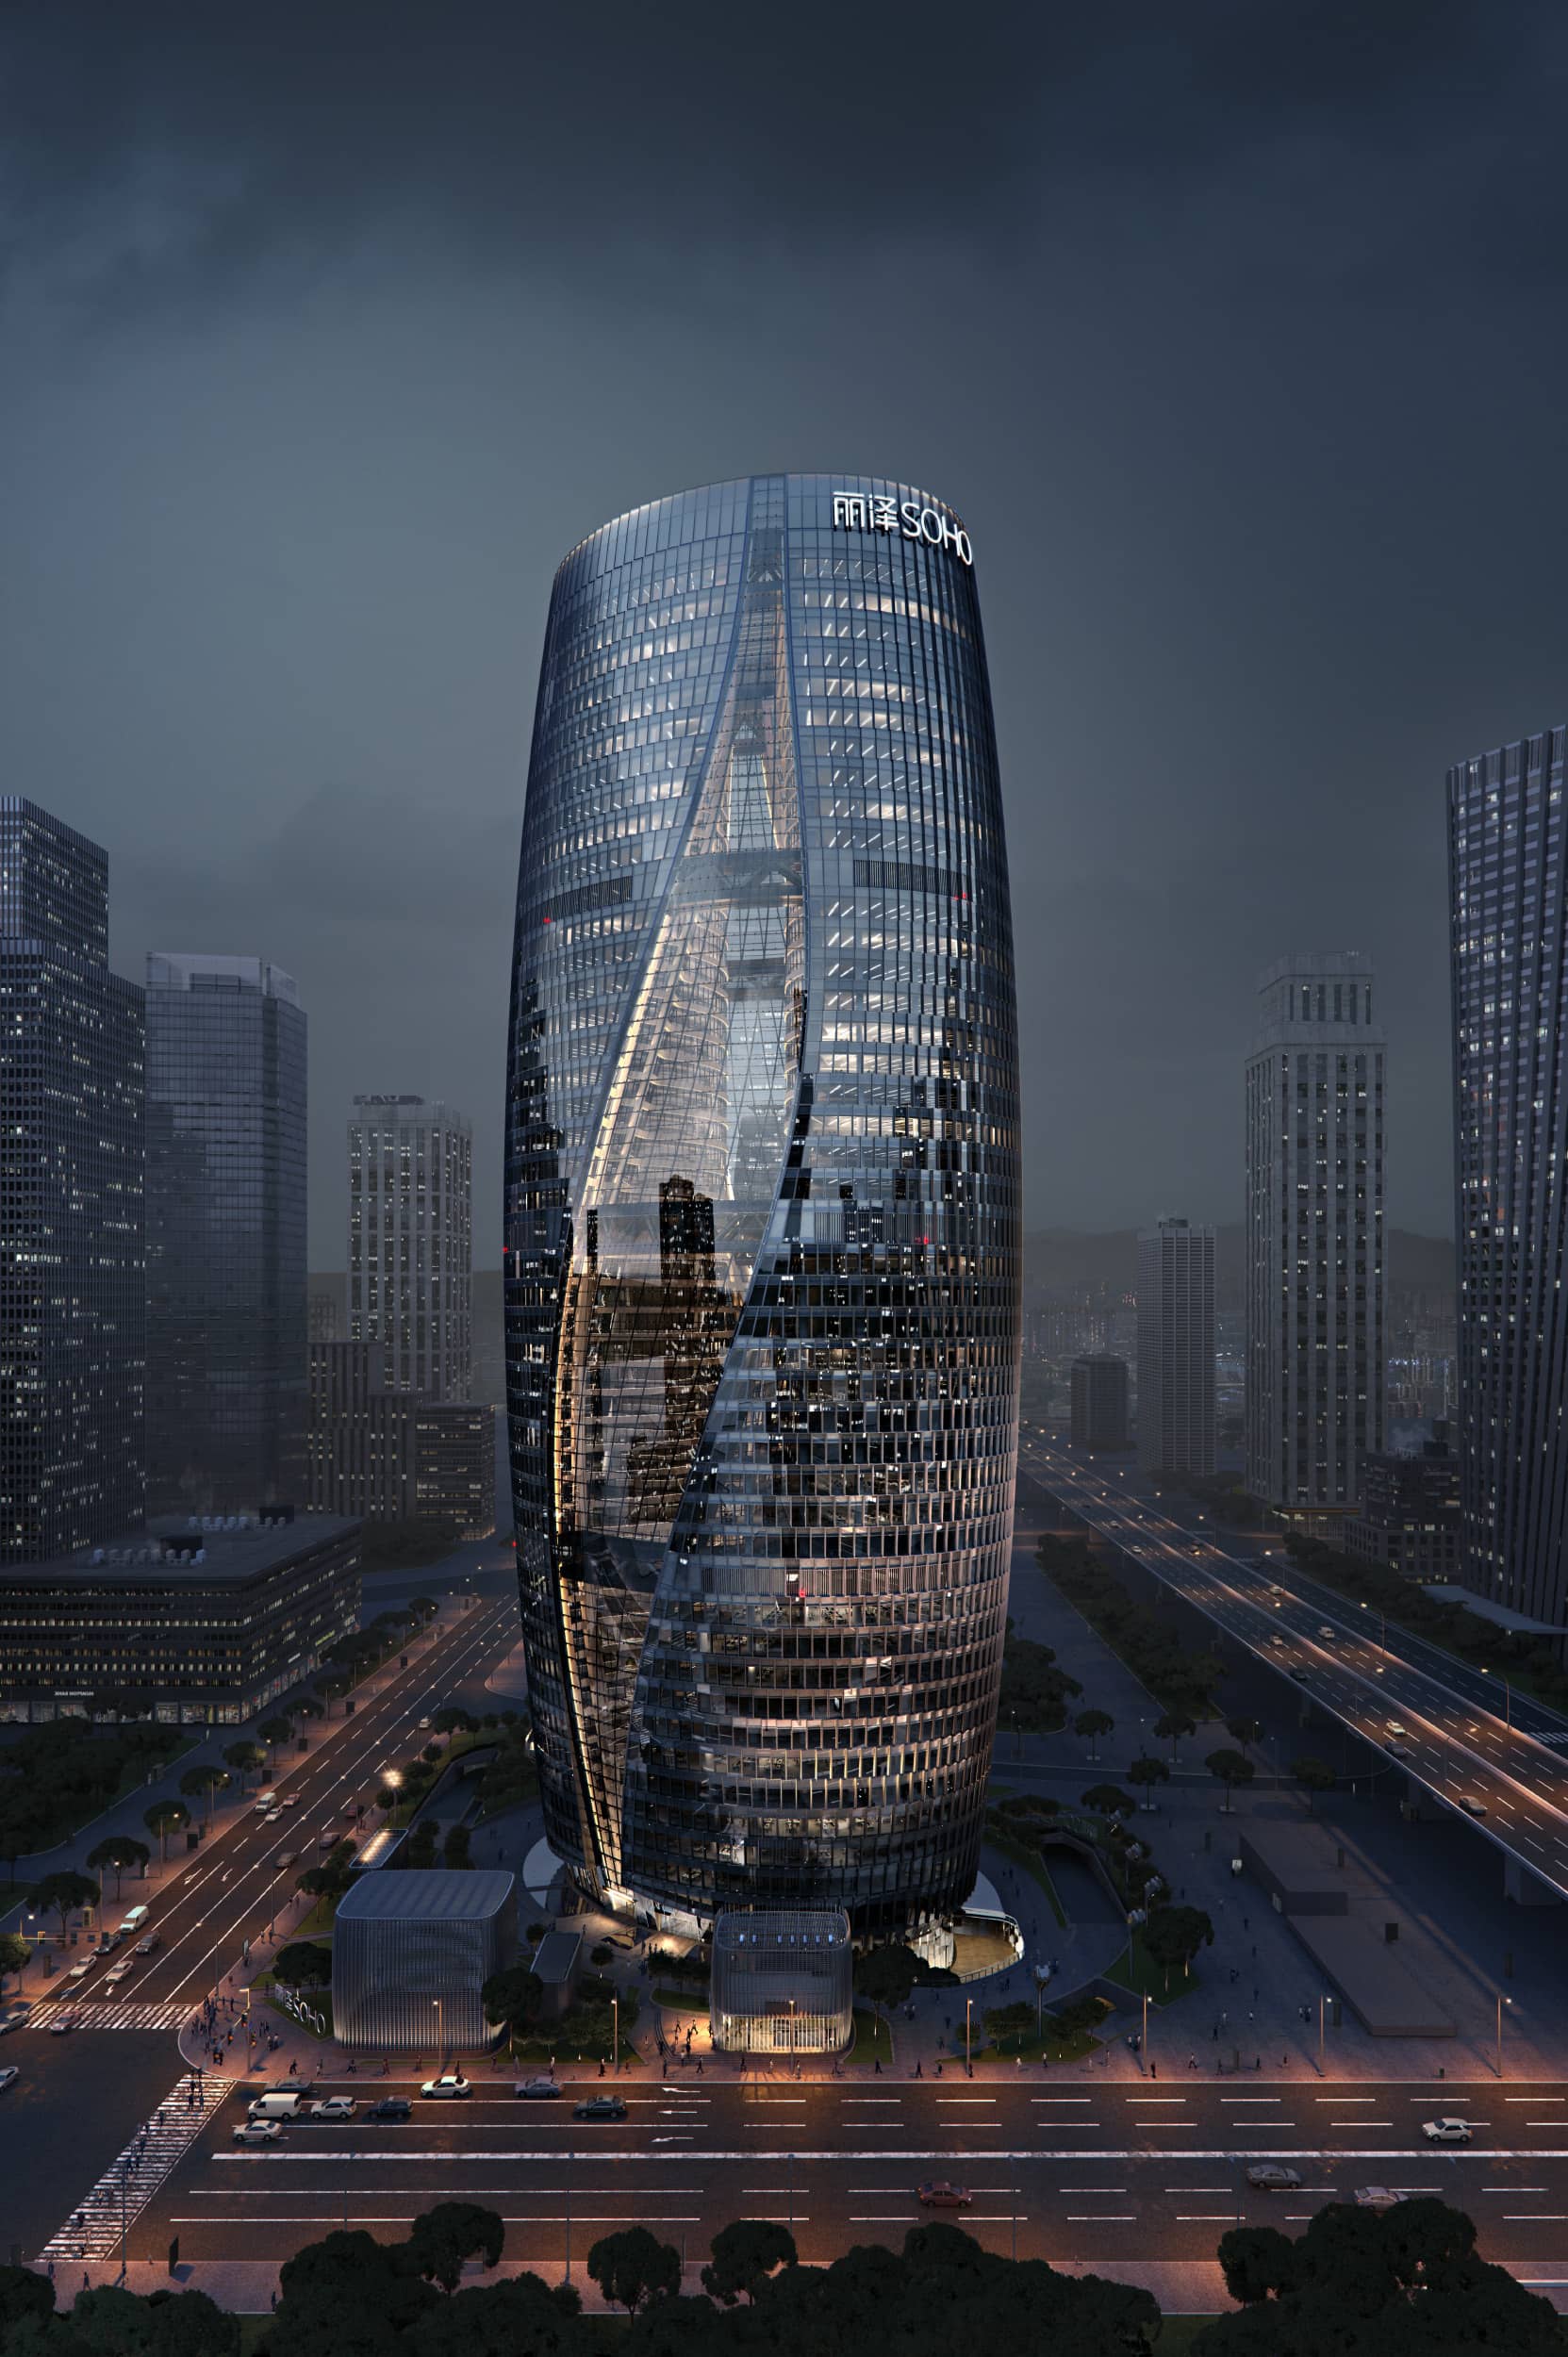
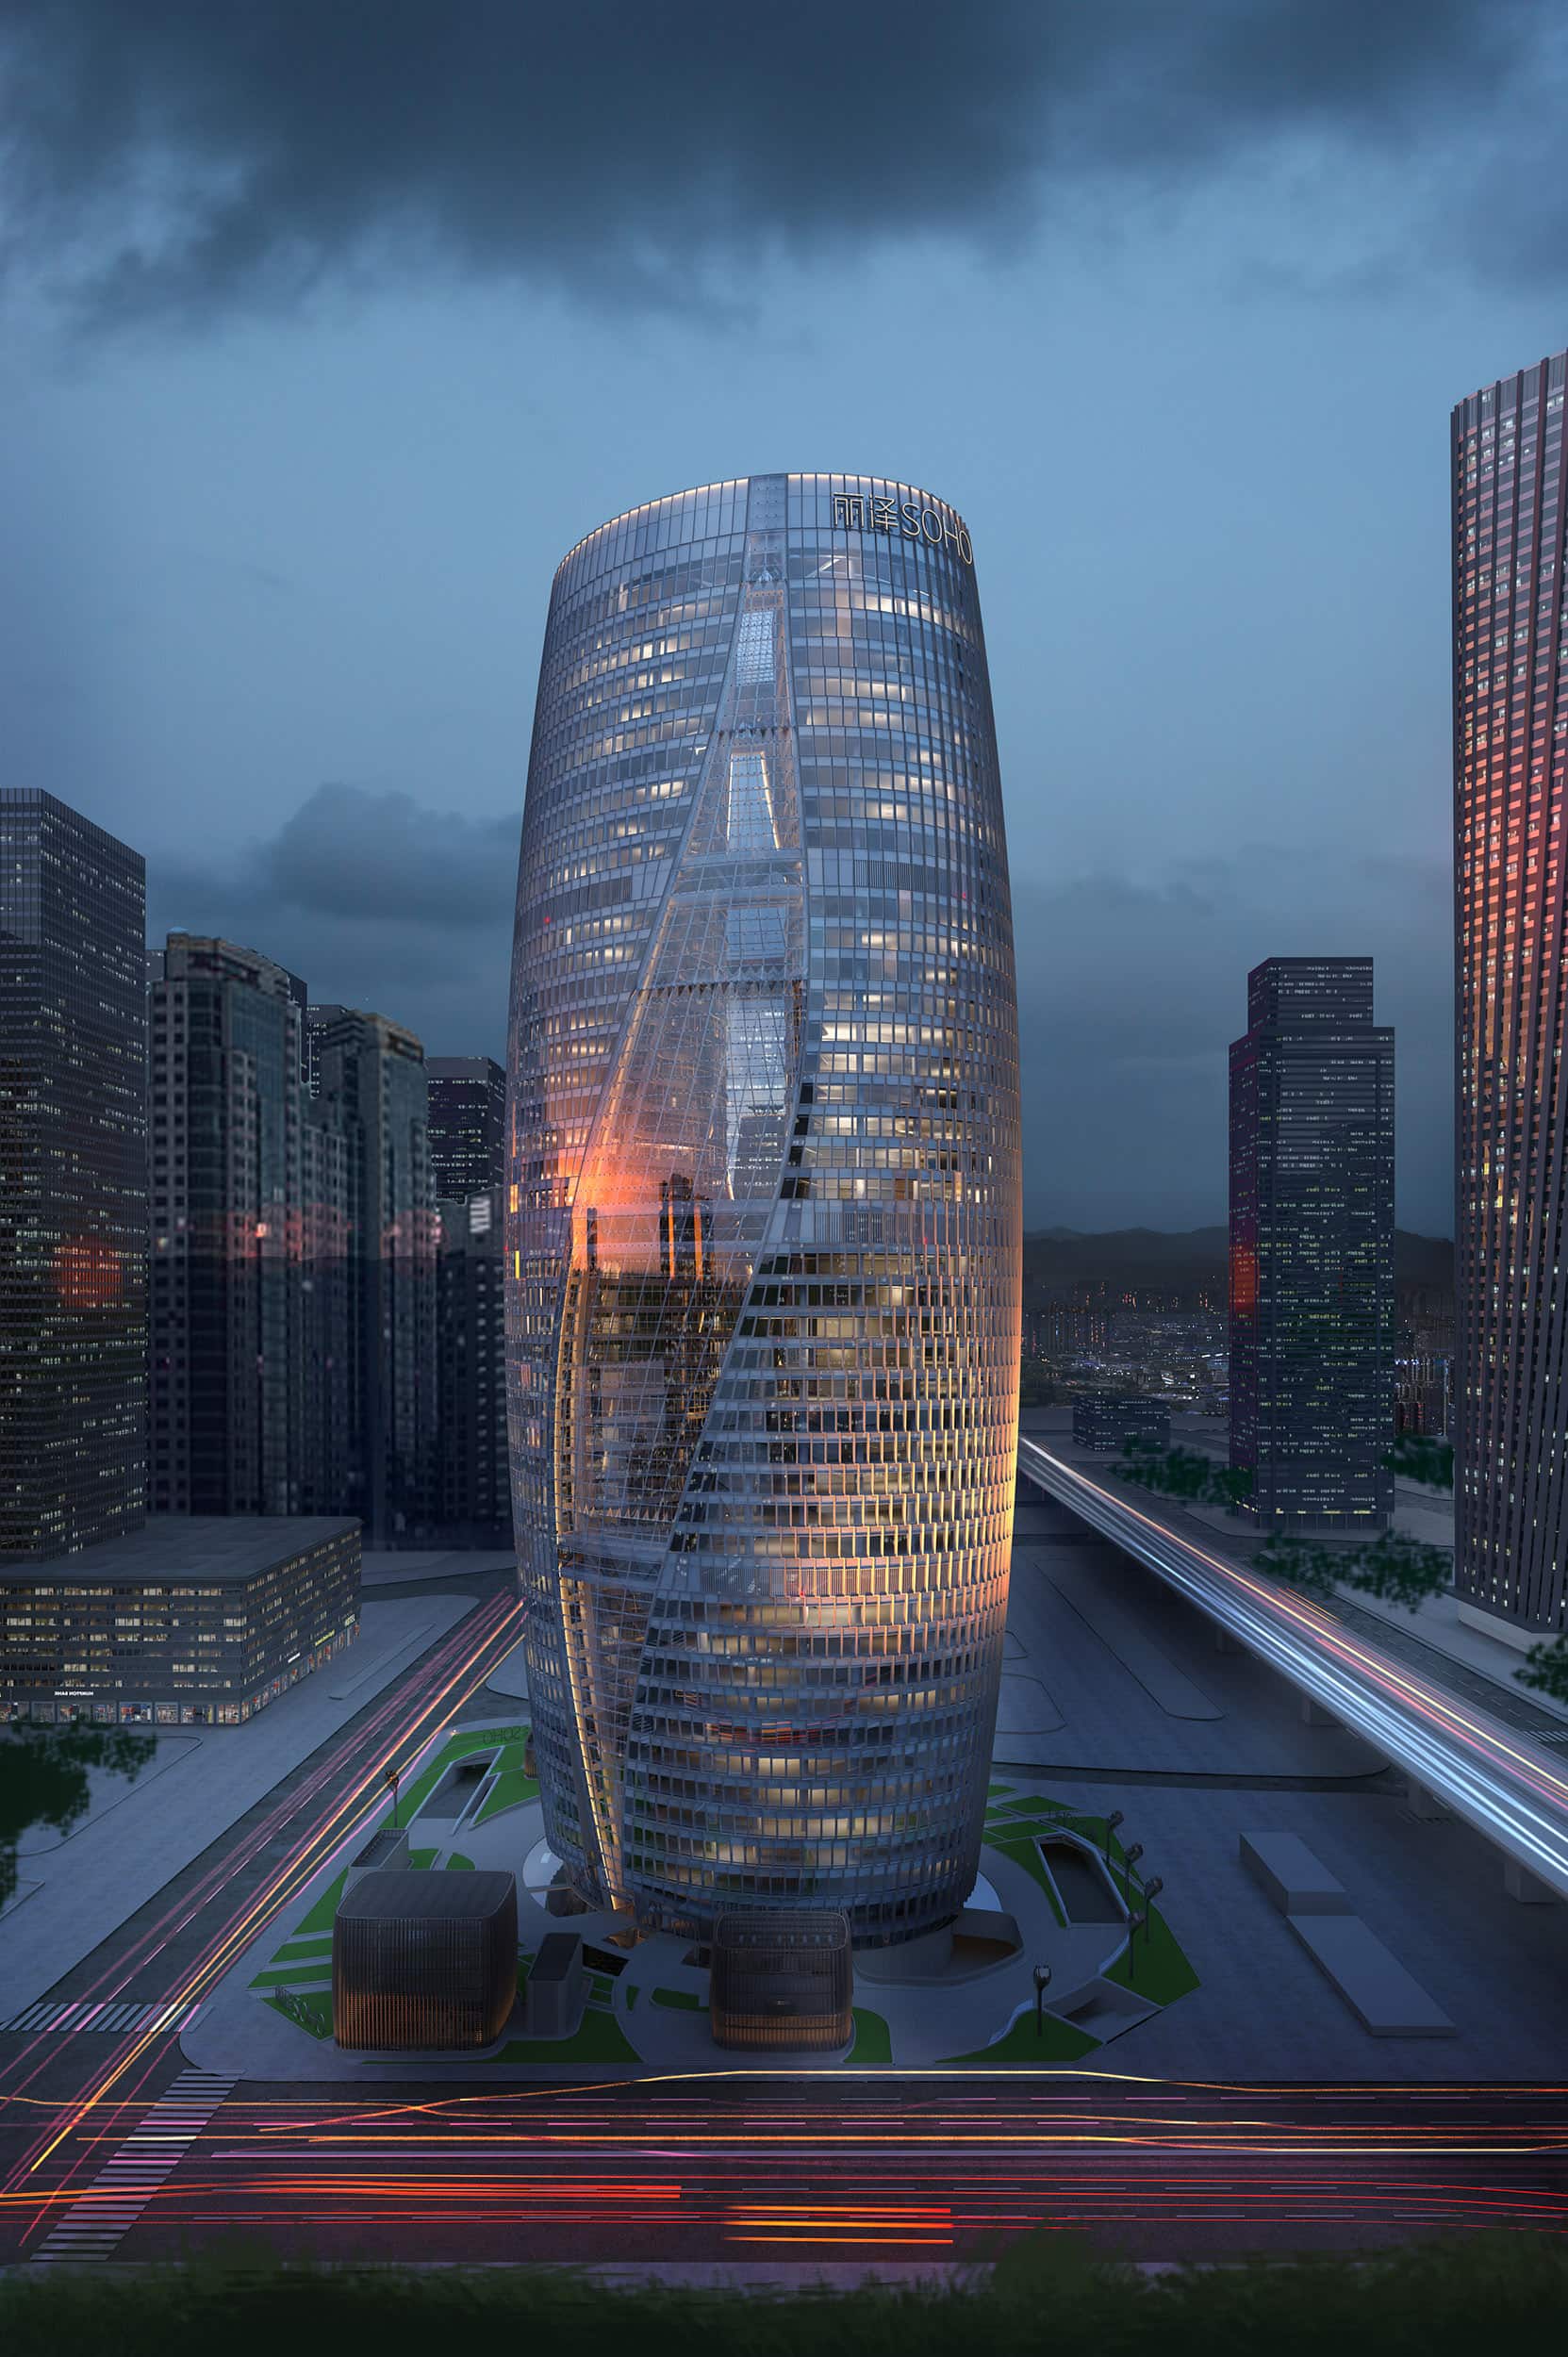
As an entry point to a bustling financial district, elegantly twisting on top of a subway tunnel, Leeza Soho is a representation of the connected, innovative, and fast-paced society. In addition to our photorealistic night interpretation of the future building, our mission was to emphasize the nocturnal effects of the actual facade, interior, and landscape lighting in sync with the tower’s dynamic context. We visualized the tower’s transparent facade, reflecting its surroundings, and at the same time accentuated its silhouette through eye-catching uplights (spiral floodlight), emphasized by the interior, top and other lighting elements. Undoubtedly, Leeza Soho’s abstract twisting atrium was its most prominent feature, so the significance of its lighting representation was key to the final holistic 3d visualization of the tower.
3D Modeling Leeza SOHO
First of all, let’s say something about the software. Rendered in V-Ray, ANIMA for scattering people, post in Photoshop.
We’re keen on using 3ds Max. And what we received was a Rhino model, which came to Max with around 250 layers. Some of them even had only a single object included inside. As you may imagine, this thing was utterly unable to move around and rotate. And so began our quest for optimizing, and optimizing more!
Here we go with some screenshots from 3Ds Max working interface.
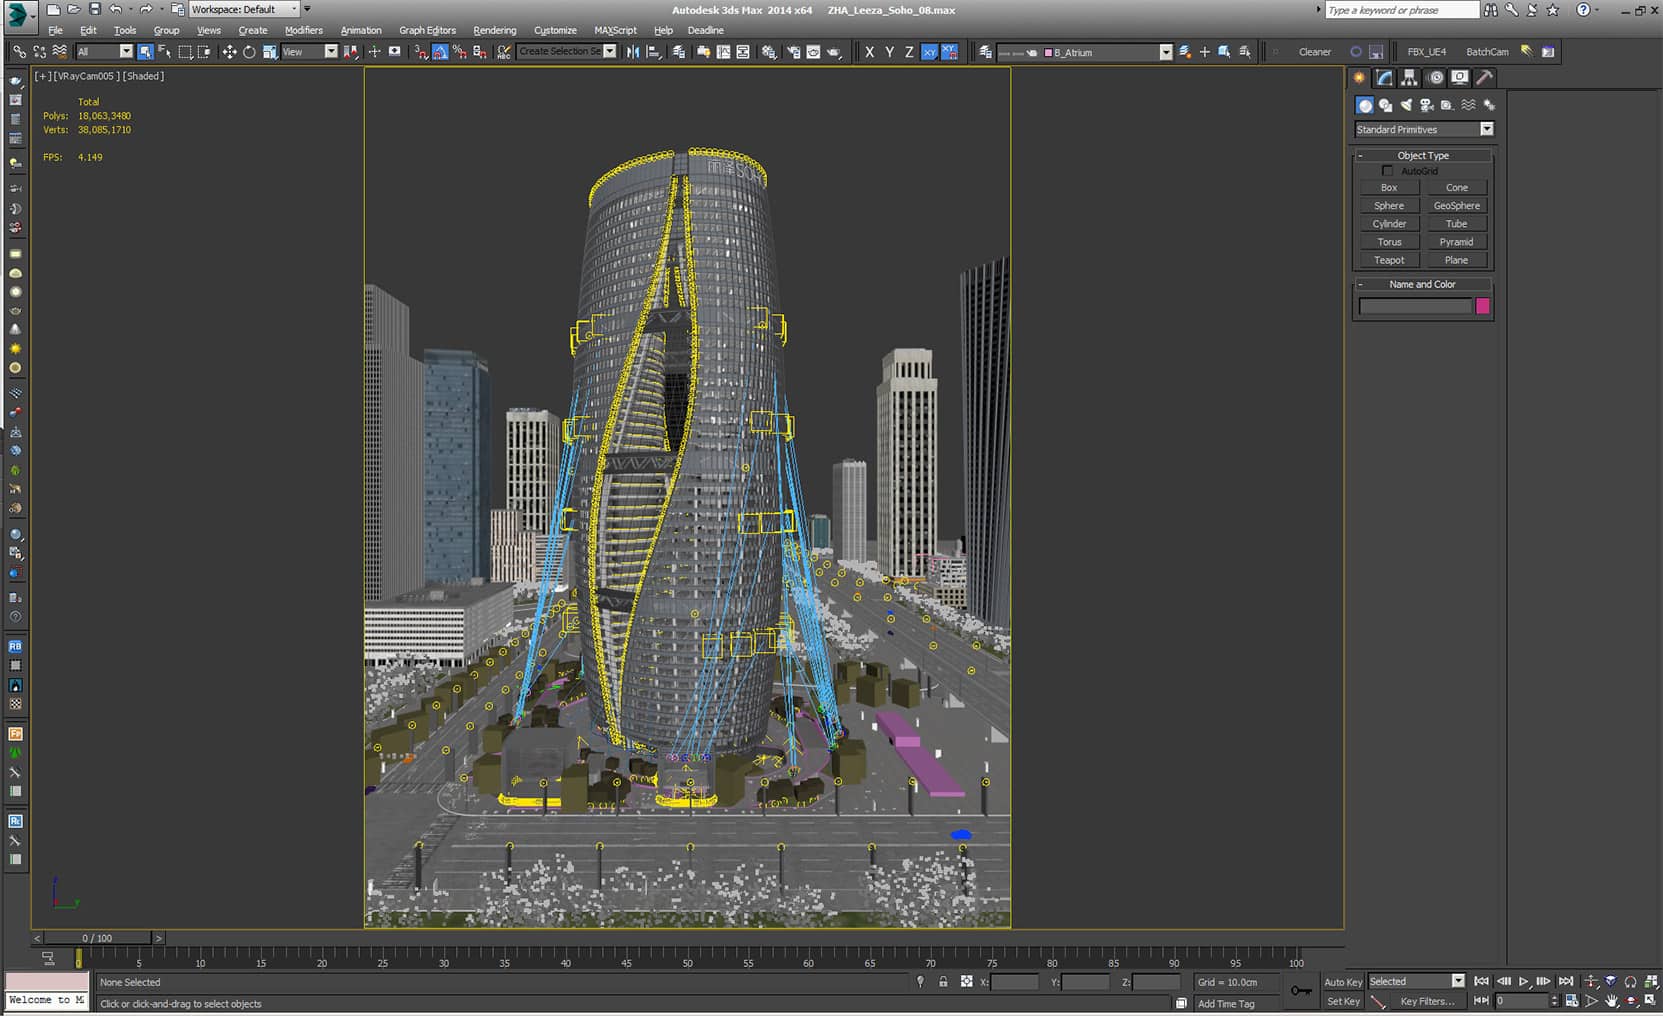
What is specific about the twisting geometry of the tower is that it is quite tricky to array objects along the way. And we didn’t use any parametric arraying software to put the stuff into place. The tower has several different curvatures raising from bottom to the top, and we did align the objects by hand.
Famous shortcut ‘shift+i’ for spacing tool helped us with all the lights going on in the atrium. They were aligned on previously created splines, hand-drawn, aiming to repeat the curves. Here is the place to mention that there is not a single floorplan same as another one along the height of the building.
Using Anima
After we’ve done most of the work with optimization, aligning the lights along the splines and optimizing again, we needed to breathe a bit of life into the image.
When it comes down to scattering people one no longer needs to think what to use. Anima was the tool here.
It has some minor issues with installations and scene reset, but as far as we know, the guys at Anima team are working hard and continuously developing it further.
My personal opinion – if they come up with floating licenses and silent installation it will be even better!
Leeza SOHO Visualization Process
Let’s go with some images here. The first set is showing what we received as an input 3D model of the tower along with a massing, imported in 3ds max and rendered as a clay / white model.
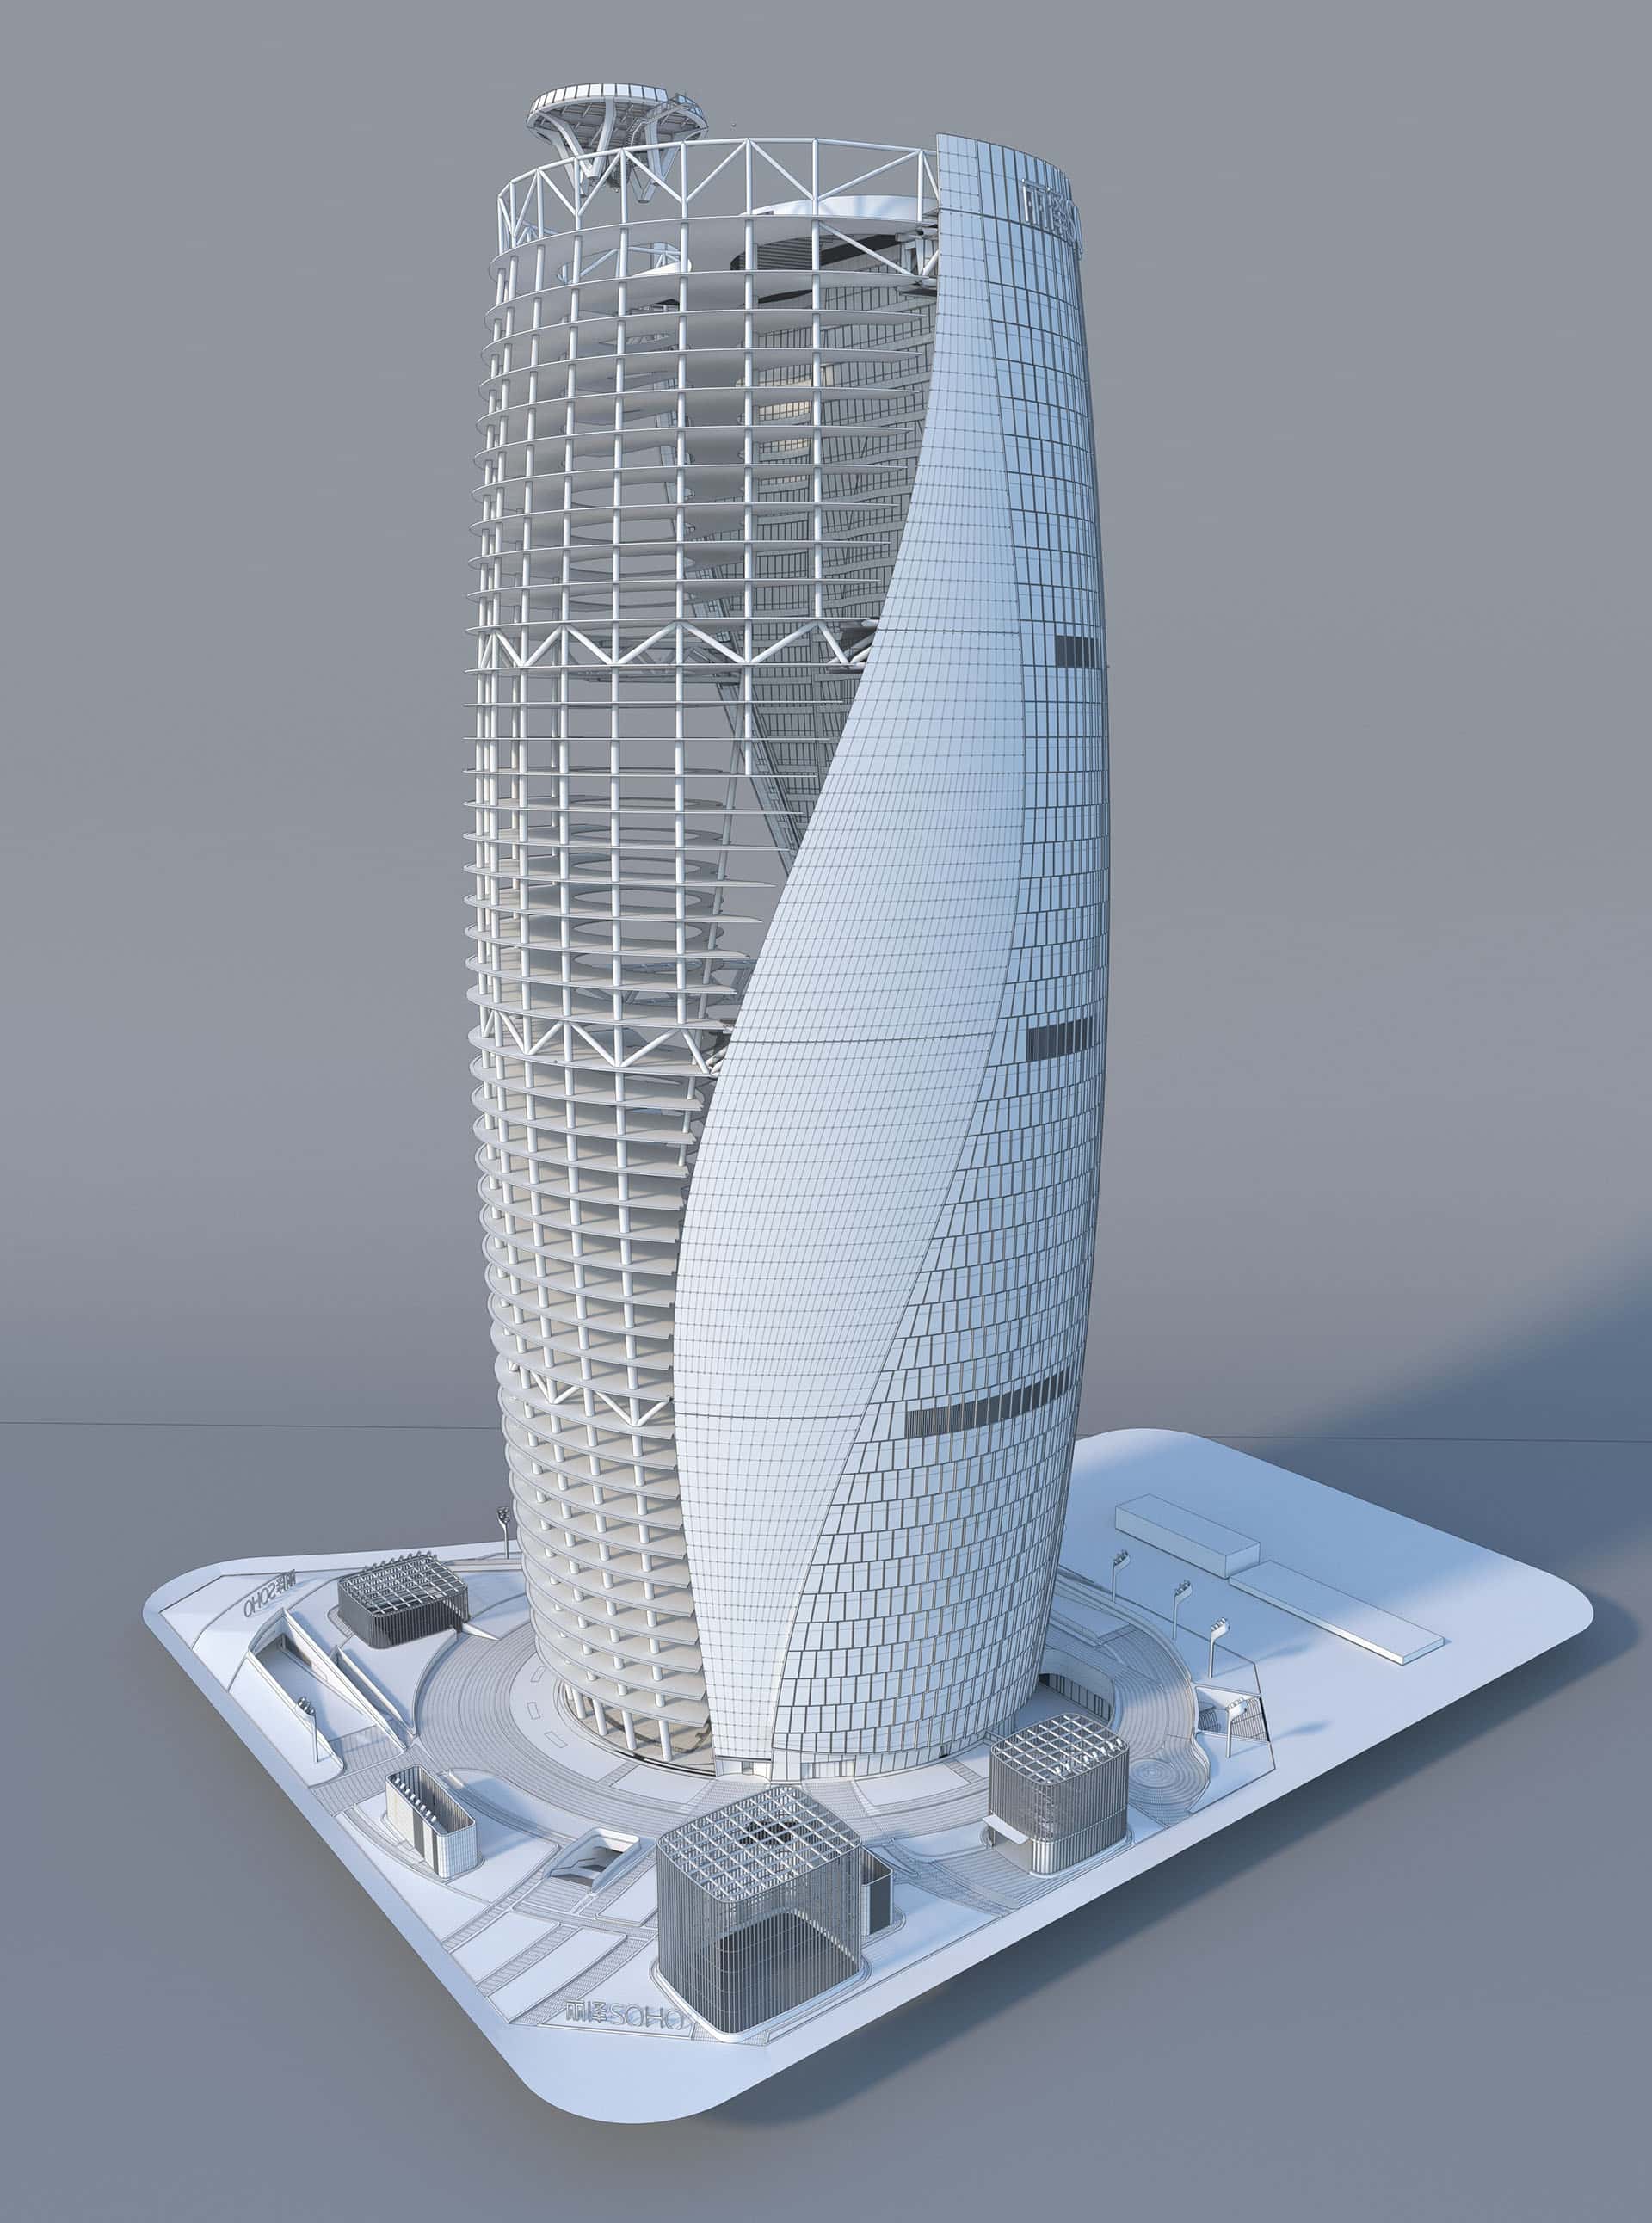
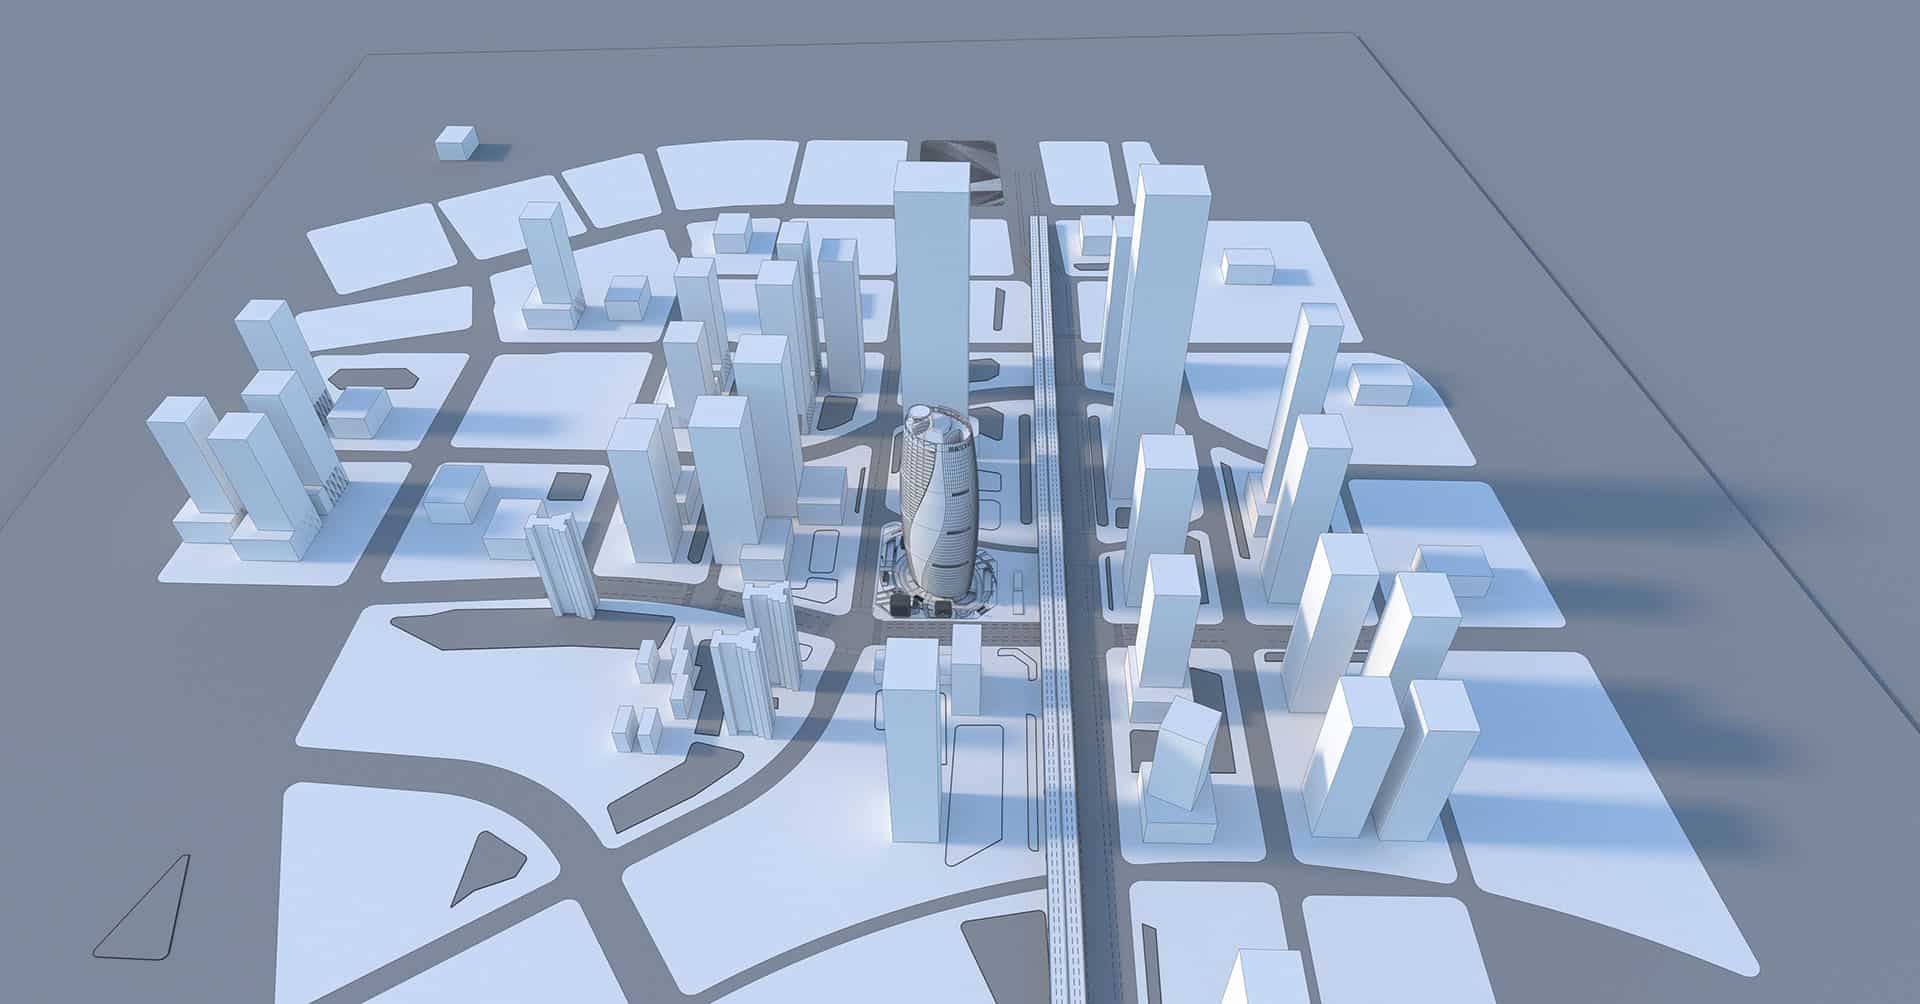
The building is symmetrical, that is why ZHA team provided only half of it, visible on the white image. From here it was our turn.
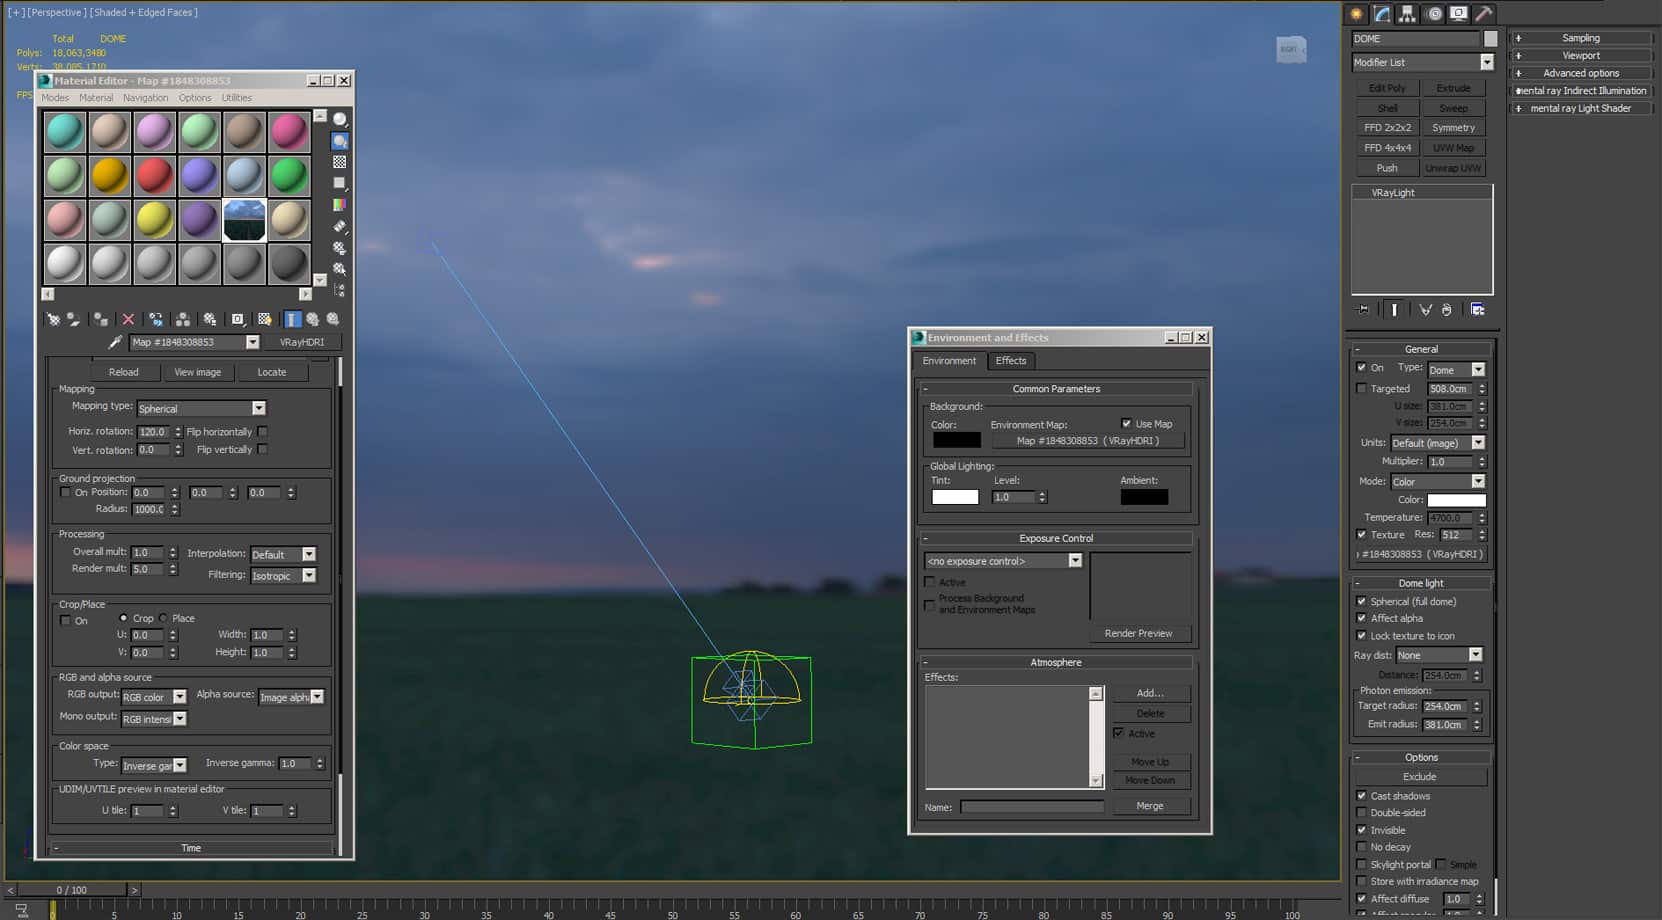
This is the lighting setup. We used primary dome light with HDRI. The prebuilt rig consists of the linked dome light, camera, and a dummy. The whole thing is rotating based on the HDRI horizontal rotation typed in the VRayHDRI map setting.
The camera is useful in this case because it is always aiming towards the sun position in the HDRI so that you can link another sun to it. This way we have control over the shadows, based on the V-Ray Sun settings, rather than the HDRI settings. However, for this project, there was no need for that.
It is a simple night setup 🙂
These are some of the clay renderings produced. Based on client’s idea – we’ve got the camera position to something like a semi-aerial height. And they needed to choose one.


Using Moodboards
This is by far our best way to show the client what’s our intention with the images. What is at the core of all the settings, buttons, adjustments and other stuff to follow. All are working together. They just need to see an image, revealing the idea, with a minimum text description.
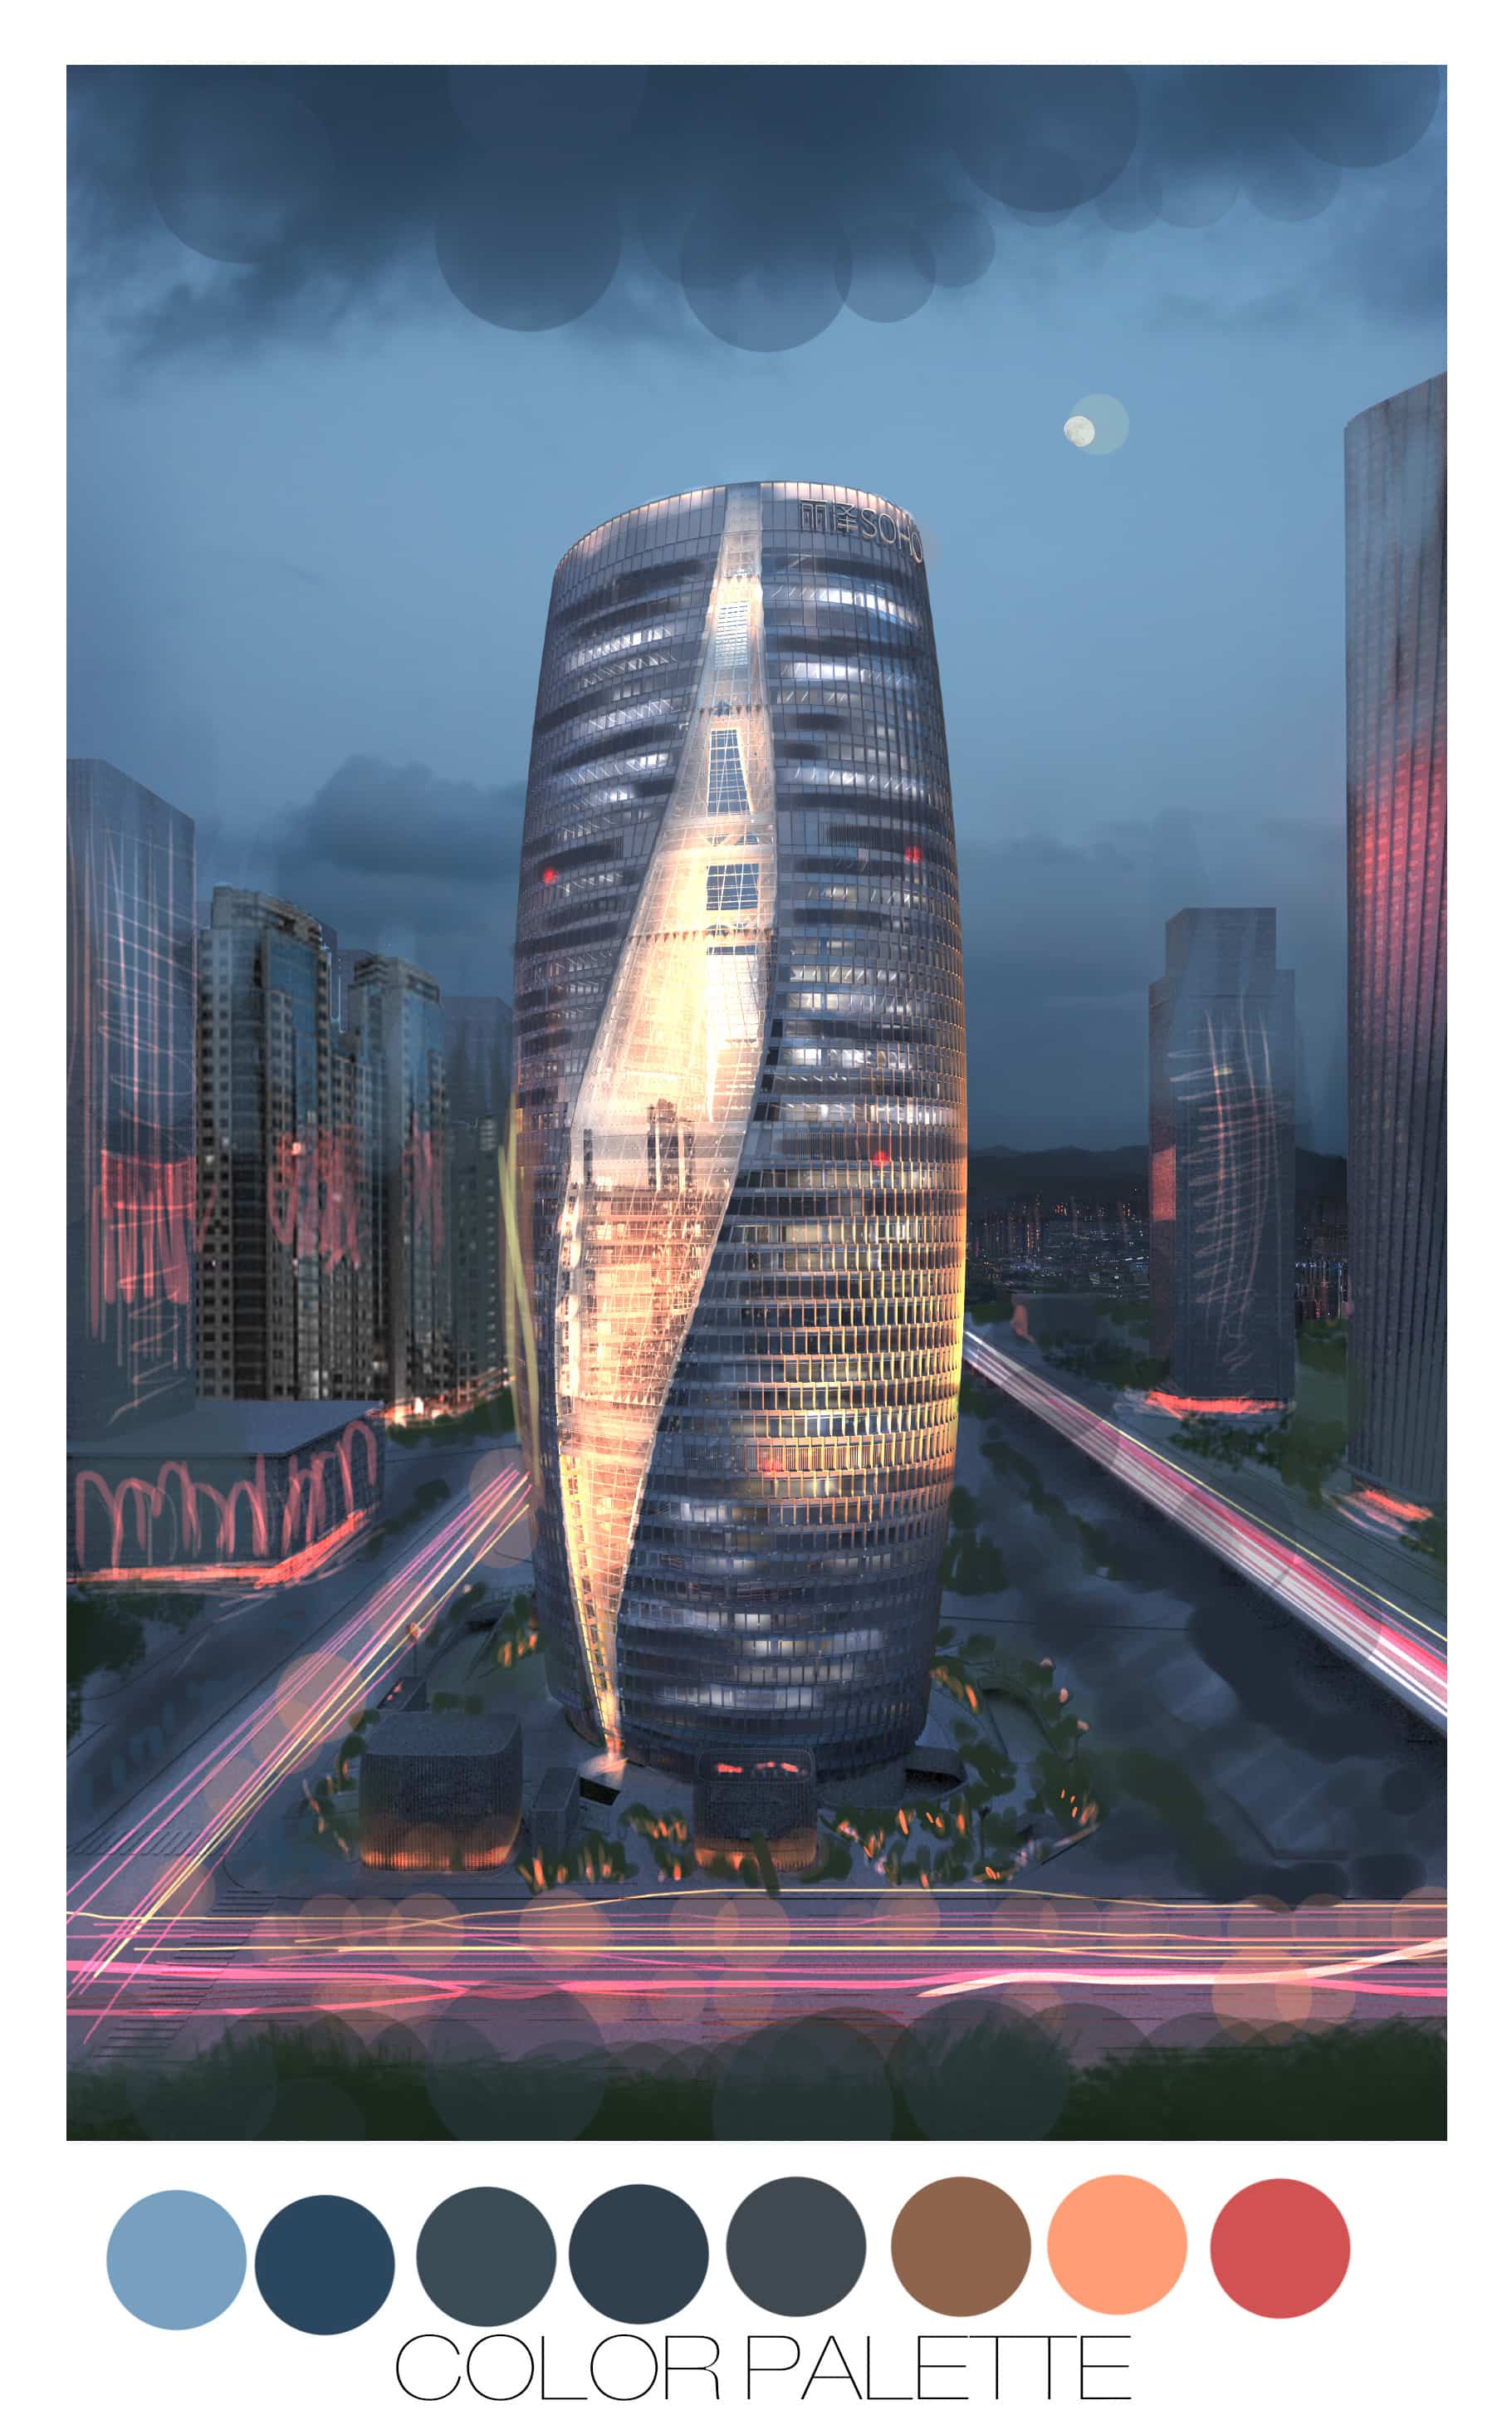
Color Scheme Reference
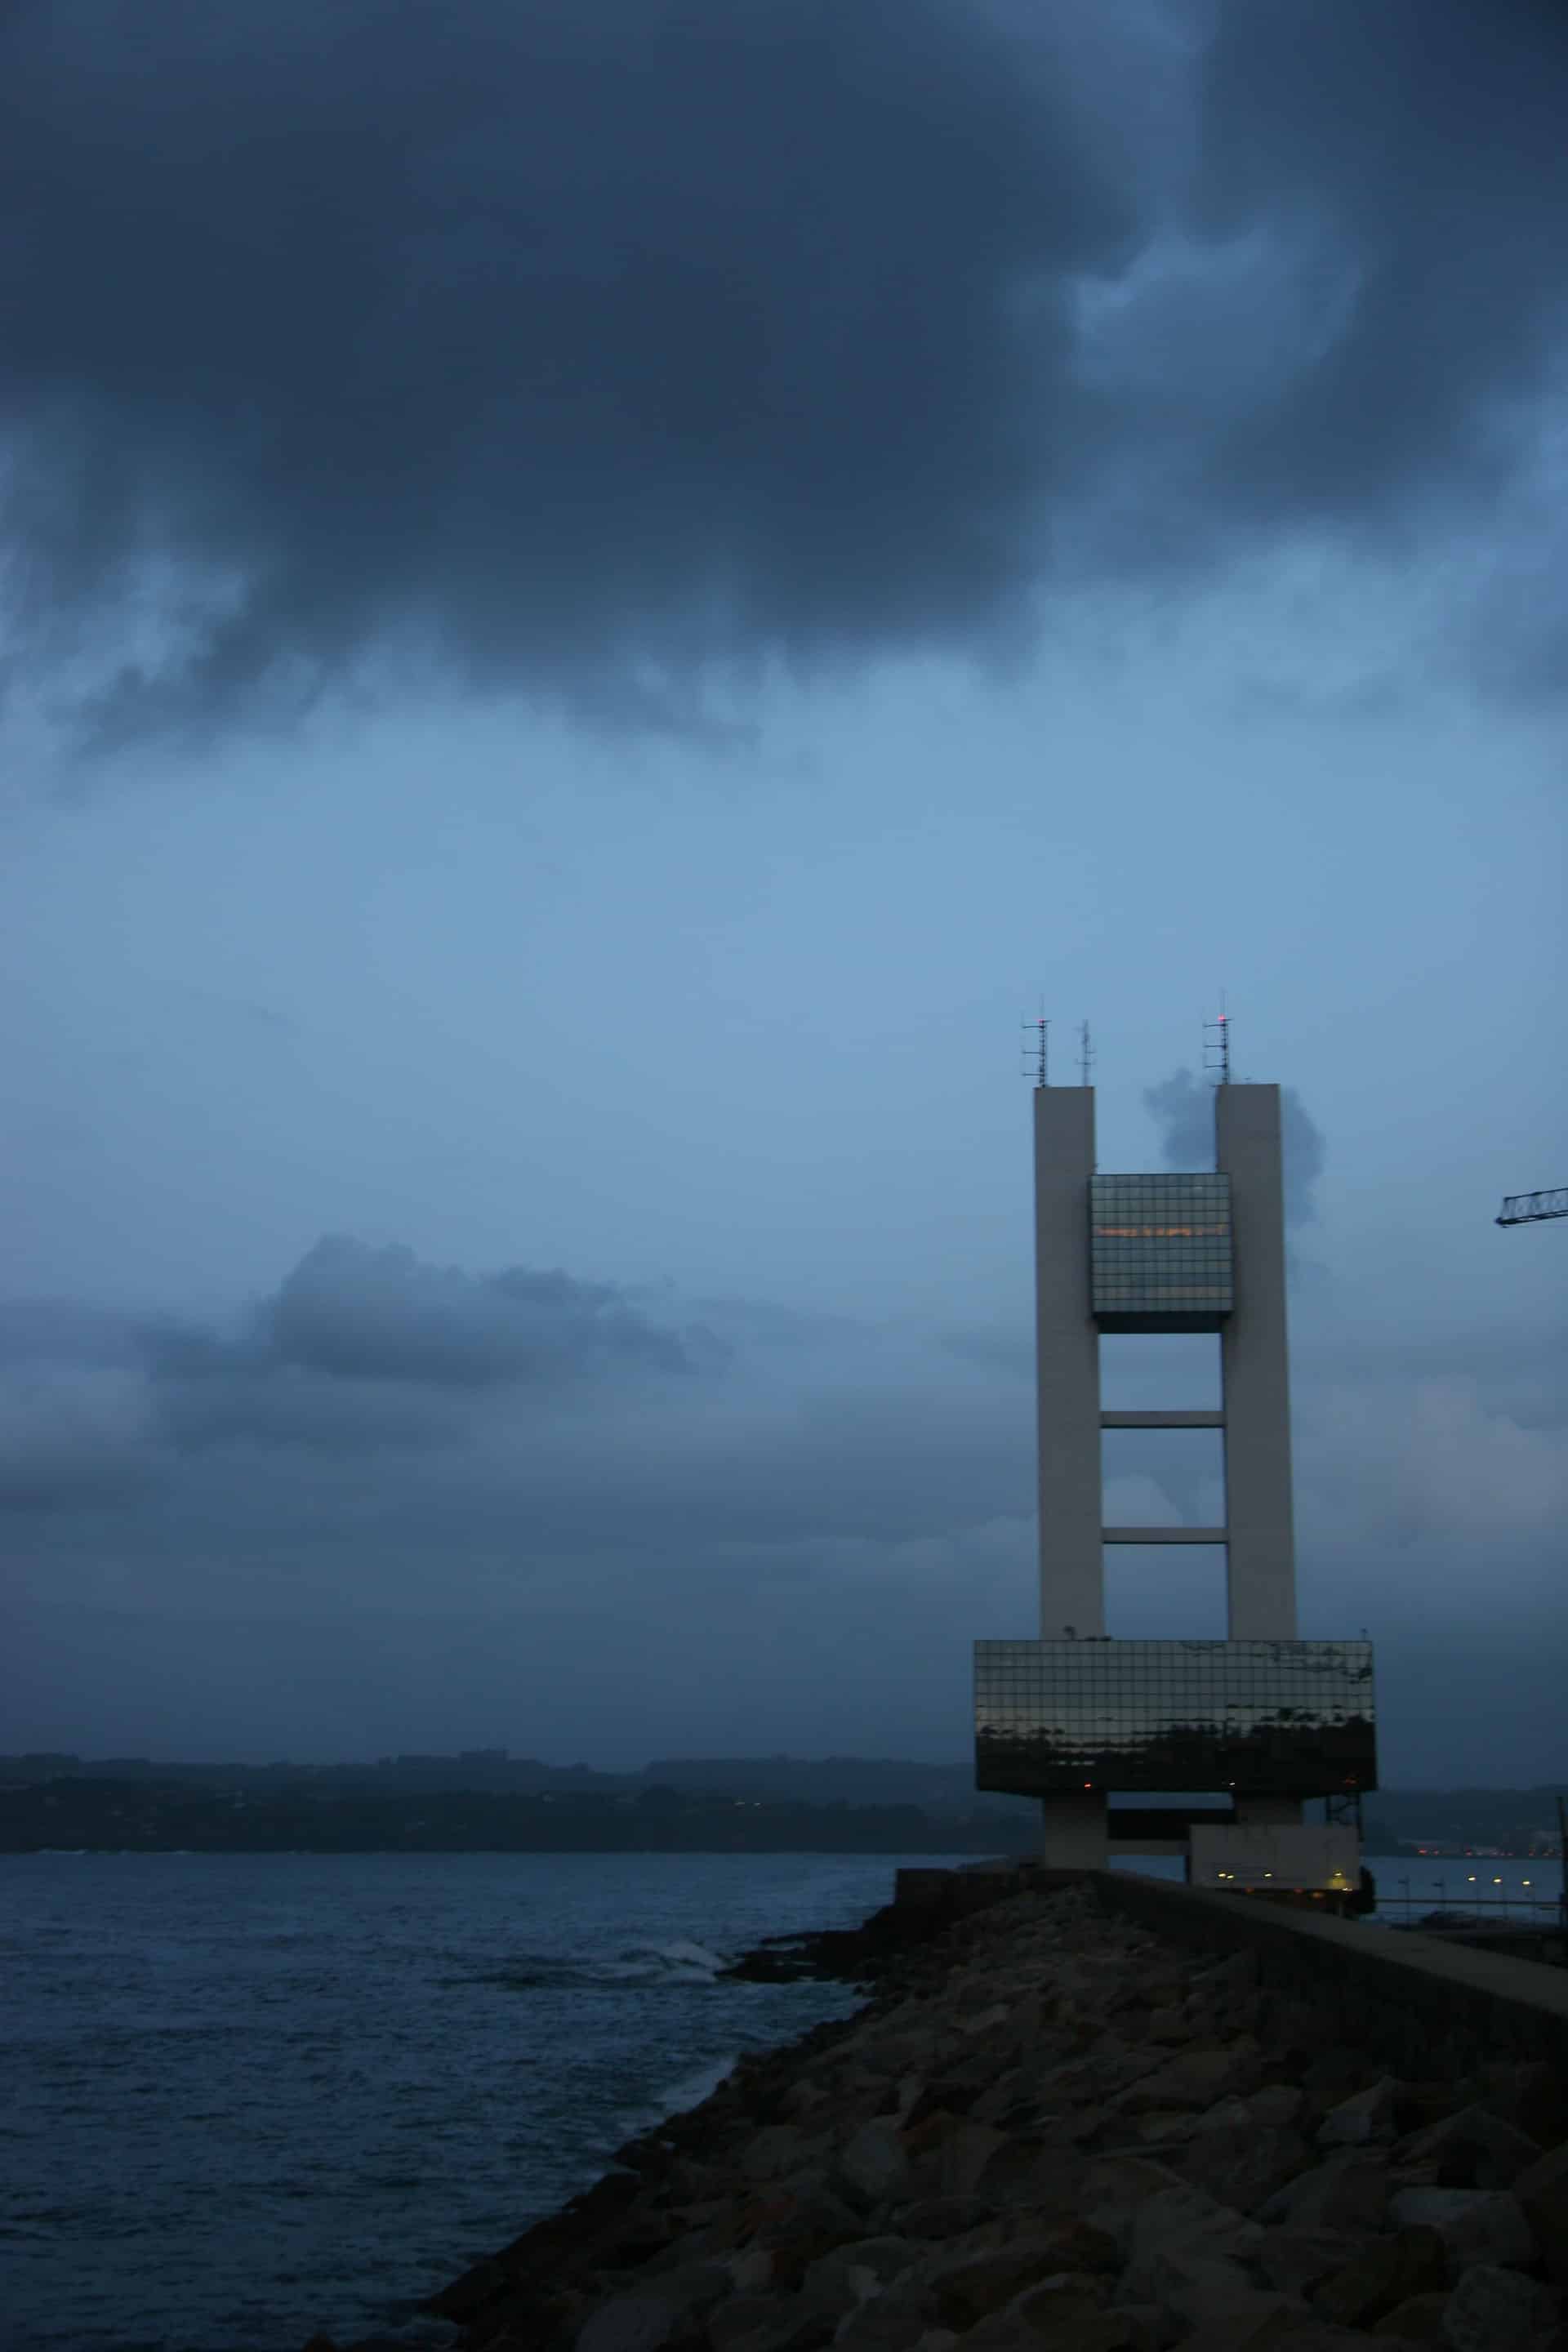
Sky Reference
First Preview Image
HOWEVER
We needed to implement the overall look and feel of Beijing and some of the previously built structures by ZHA, to be consistent with the style.
Here’s an image to set the direction.

And the whole set of previews.


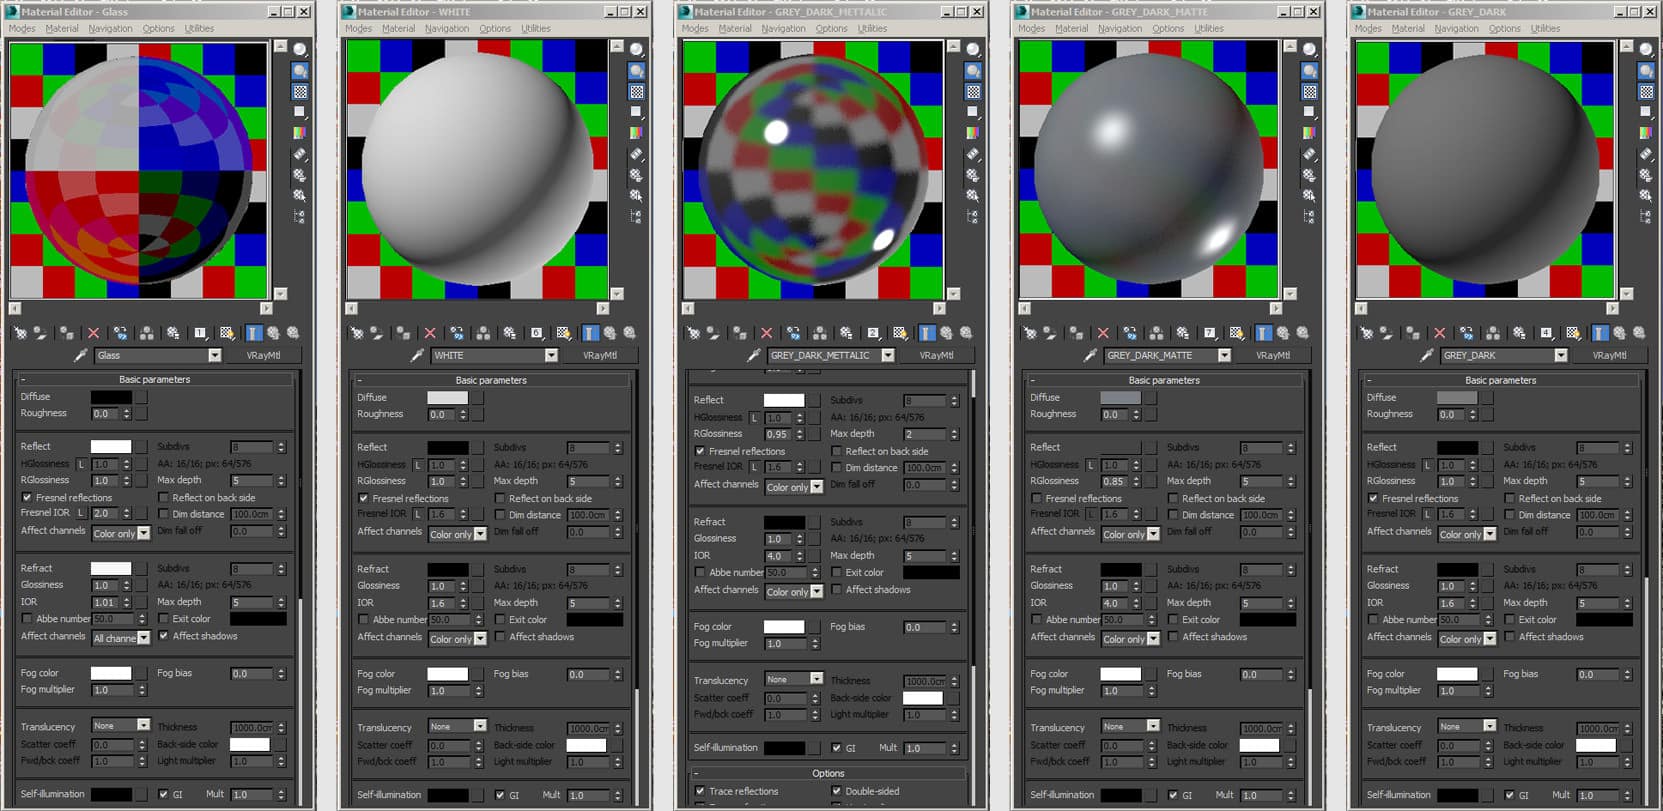
Textures & Materials
The following materials settings screenshots are not a detailed guide on how to build complicated materials in V-Ray, but these are a how-to guide for simplifying and optimizing without losing quality.
No extra textures or composite materials used, based on the viewpoint and scale, you’re not able to notice at full res which was 8k. Don’t get me wrong, for the use of textures and composite maps; this is an approach which is different for each project.
Just prioritize what’s important.
Rendering Stage
The render setup is shown here. Using IR + LC for the GI and moderate AA settings.
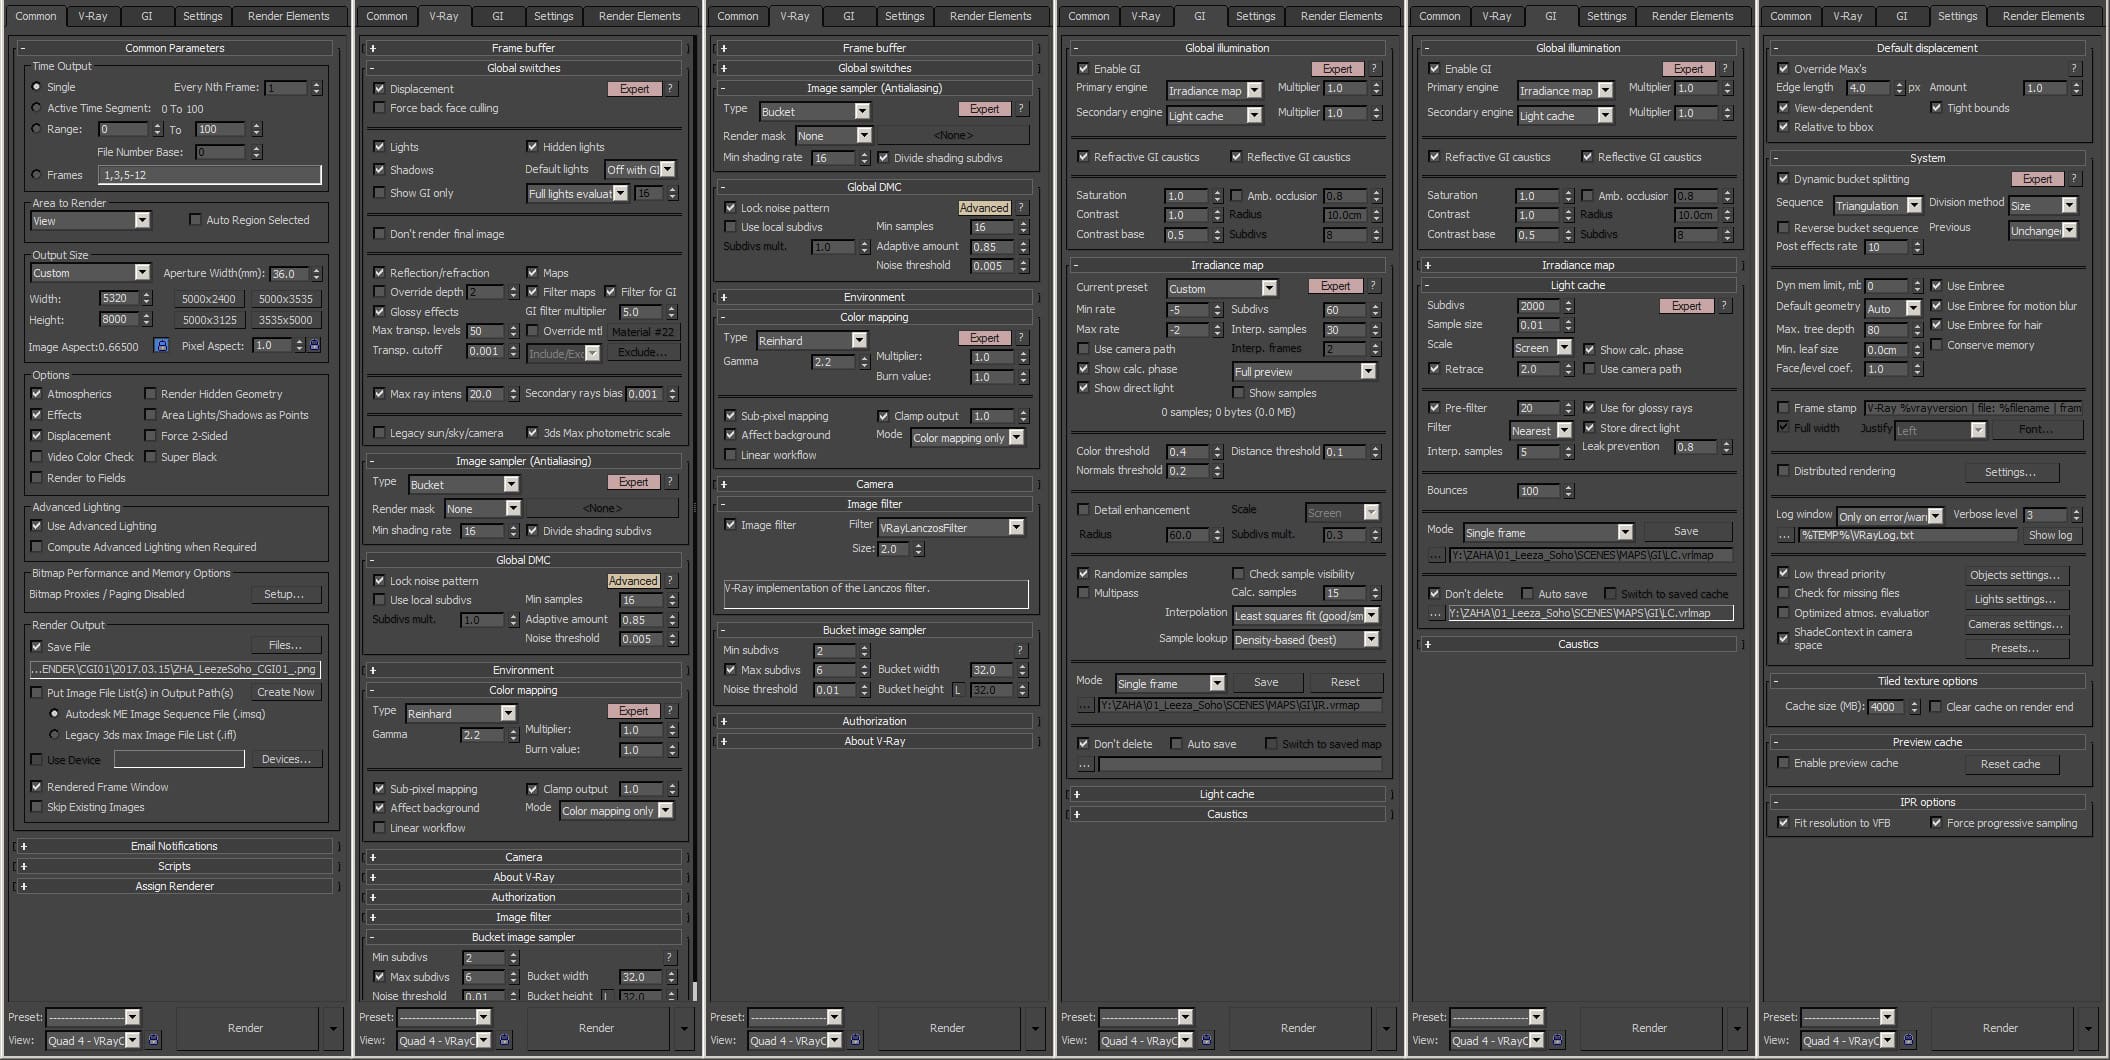
It turns out that there were several points where optimization was crucial. The 32 GB RAM was full during rendering, even with VFB turned off in order not to put the rendered color data into the RAM. Yep, then we had 32GB on all of our machines including the farm.
Post Production Stage
As most of the materials along the curtain wall are dark or reflective, or both, was necessary to use additional V-Ray Light Selected Passes in post-production. This is to touch up the lighting effects, which was our primary goal from the beginning. Other things taken into consideration were reflective facade, street life and the not-so-clear air in Beijing.
The following images show the RAW render before and after post-production.


Stats
A bit of interesting graphics revealing how much of the image is project, sky or context. Also a Z-Depth pass as a study, to give the idea of the depth.


Conclusion
There are several things, to be taken care of when working on a project. First of all, you need to recognize and prioritize those of them which are essential for the case. And if you need to have a fast rendered image, with daily amendments and client feedback implementation, like a current project – don’t hesitate to go way further.


loved it!
Very impressive – and nice atmosphere in the final image. Great job.
very nicely described, the moodboard & color scheme was the best part i enjoyed most.
thanks a lot for the details of this awesome skyscraper .
How long was rendered? and can tell the computer spec?
Great work! I would’ve pumped the colores a little more.
Great work!
awesome…i need power to copy your skill hahaha