


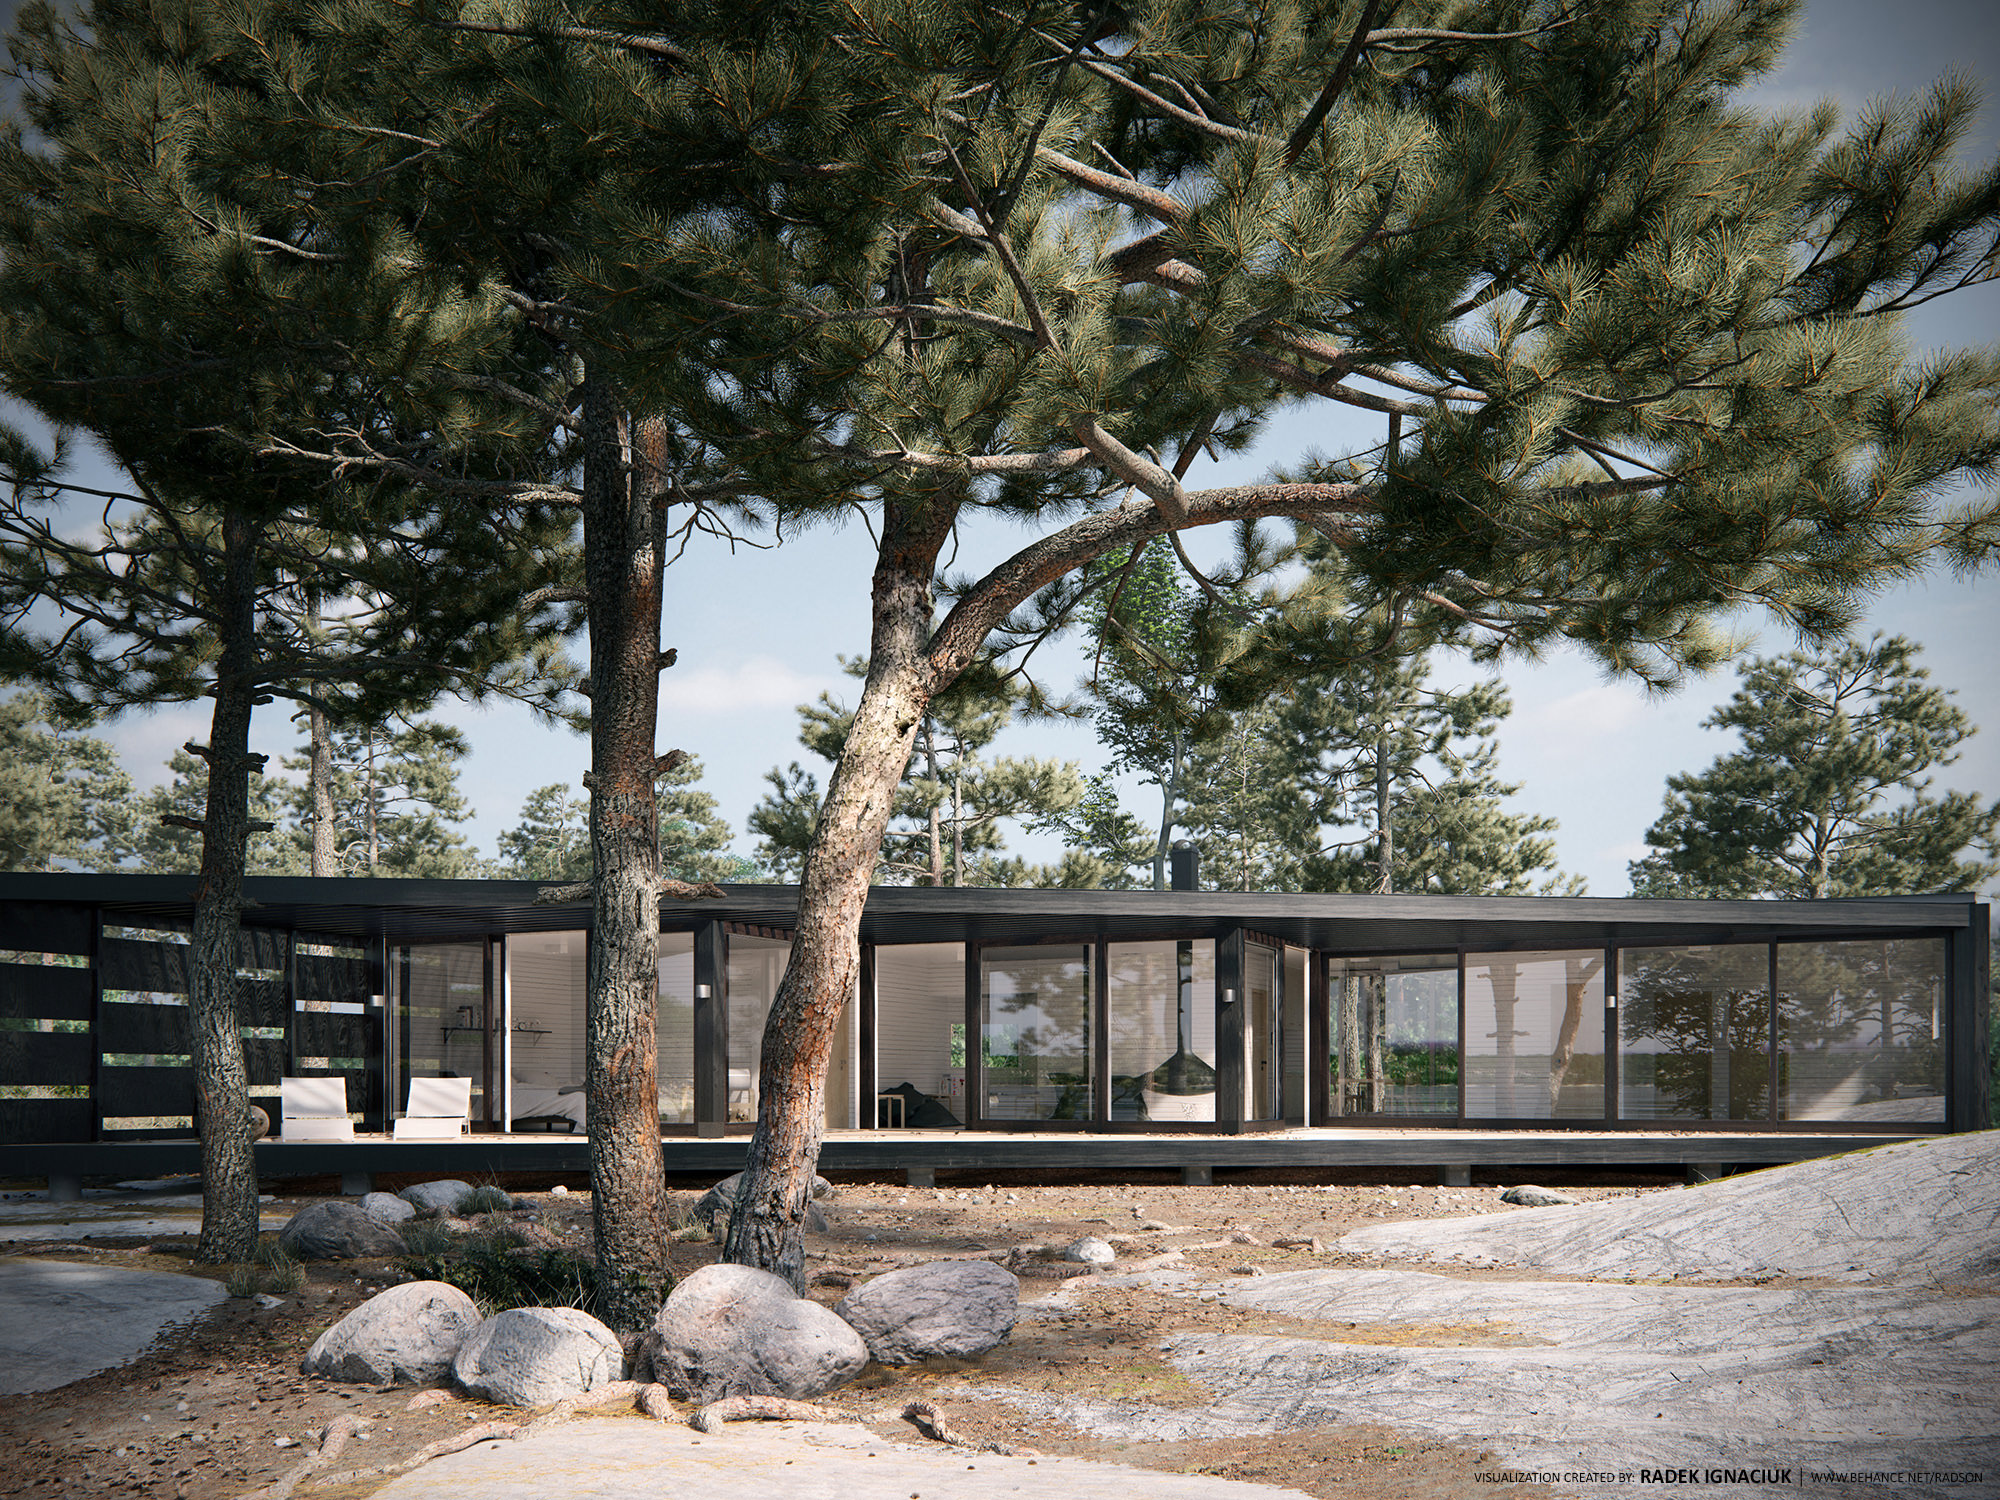
The GrowFX Tree at the Archipelago House
Radek Ignaciuk opened 2016 with the first Best of Week visuals recreating Tham & Videgård Arkitekter’s “Archipelago House”. This remarkable full CG attempt included great looking 3d trees done with Exlevel’s GrowFX plugin for 3ds max. Today, Radek will explain how he went about creating the hero tree in the image above. He will cover the modeling process with GrowFX as well as the scanning of the textures used to get it look photoreal. Enjoy!
Introduction
Hi all,
I’m very thankful for the opportunity to share my workflow with you, here on Ronen’s blog.
Today I’ll show you a bit about how to model the tree you can see in my visualization “Archipelago House”. I used a great plugin for 3ds Max, purposefully design for this task. You know it!
It is GrowFX.
The Basic Tree Structure in GrowFX
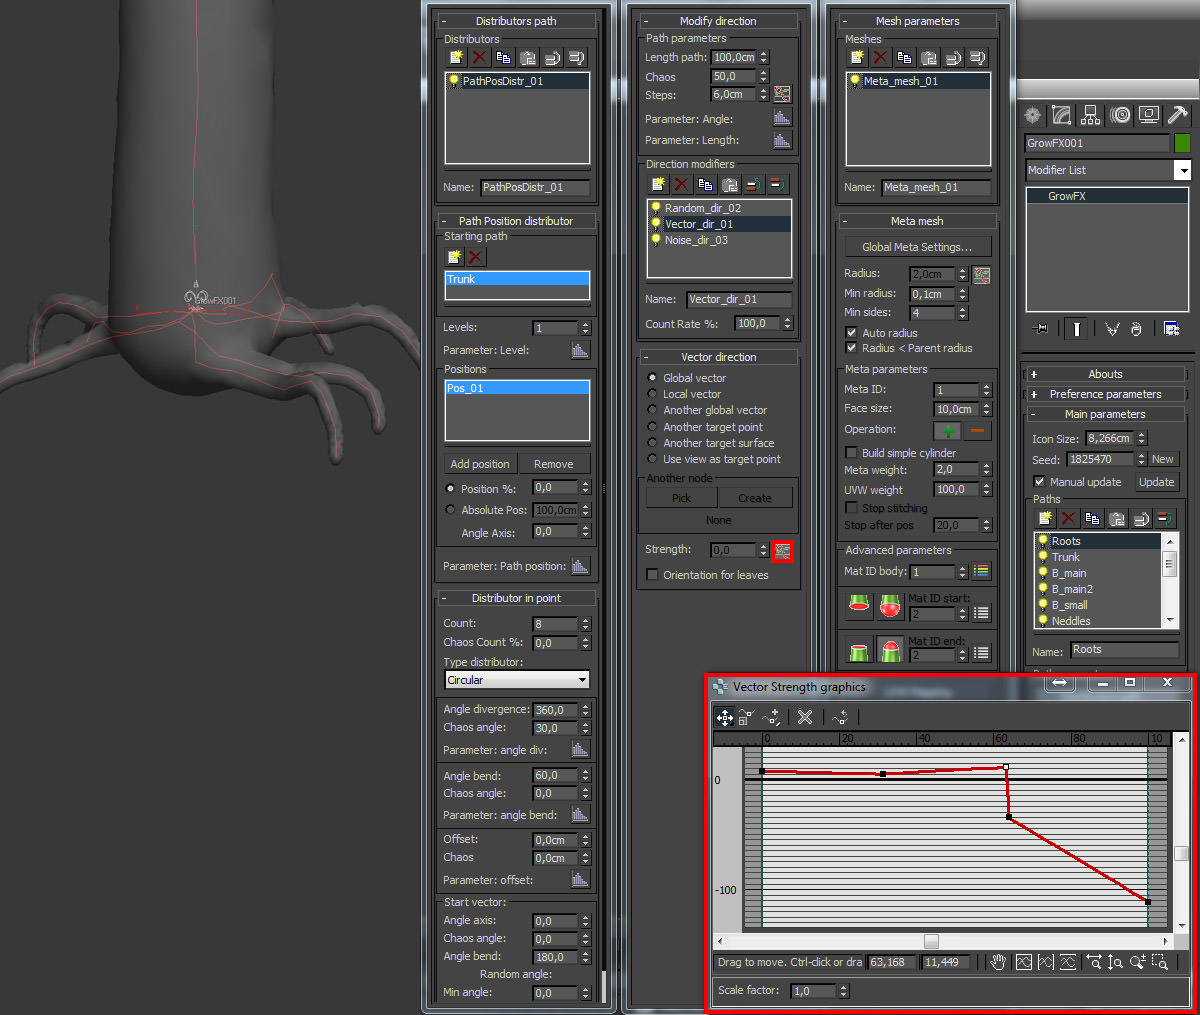
The first step is to decide on the tree shape and GrowFX structure layout. I use several paths.
The roots are directed downwards, just to mark them… not even sure they will show in the final images, but it’s good to have them locked in just in case.
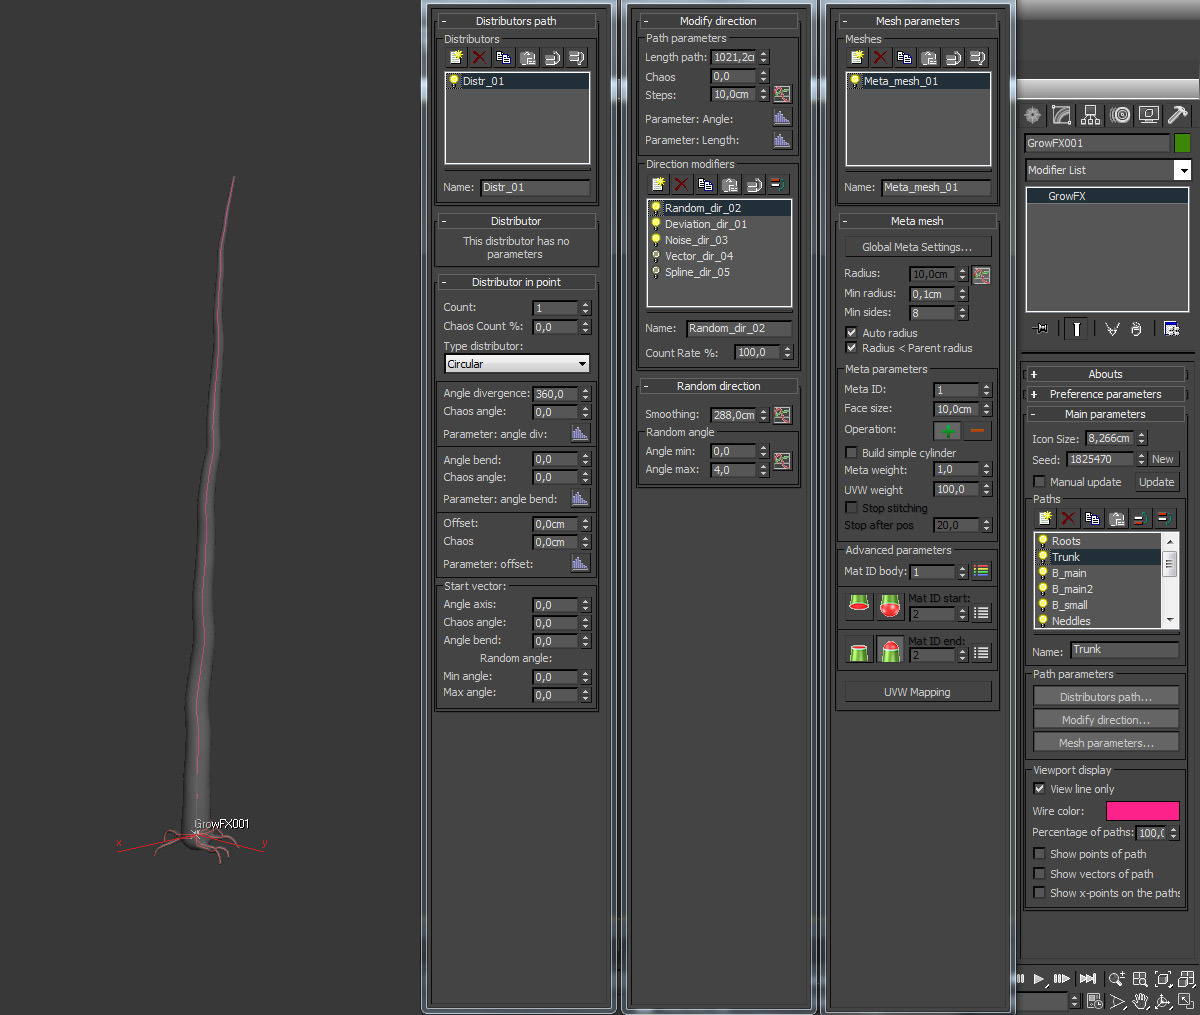
The main trunk is a single path with a slight noise modifier.
The structure of the 3d tree inside GrowFX is quite complicated, but it is always based on the same rules.
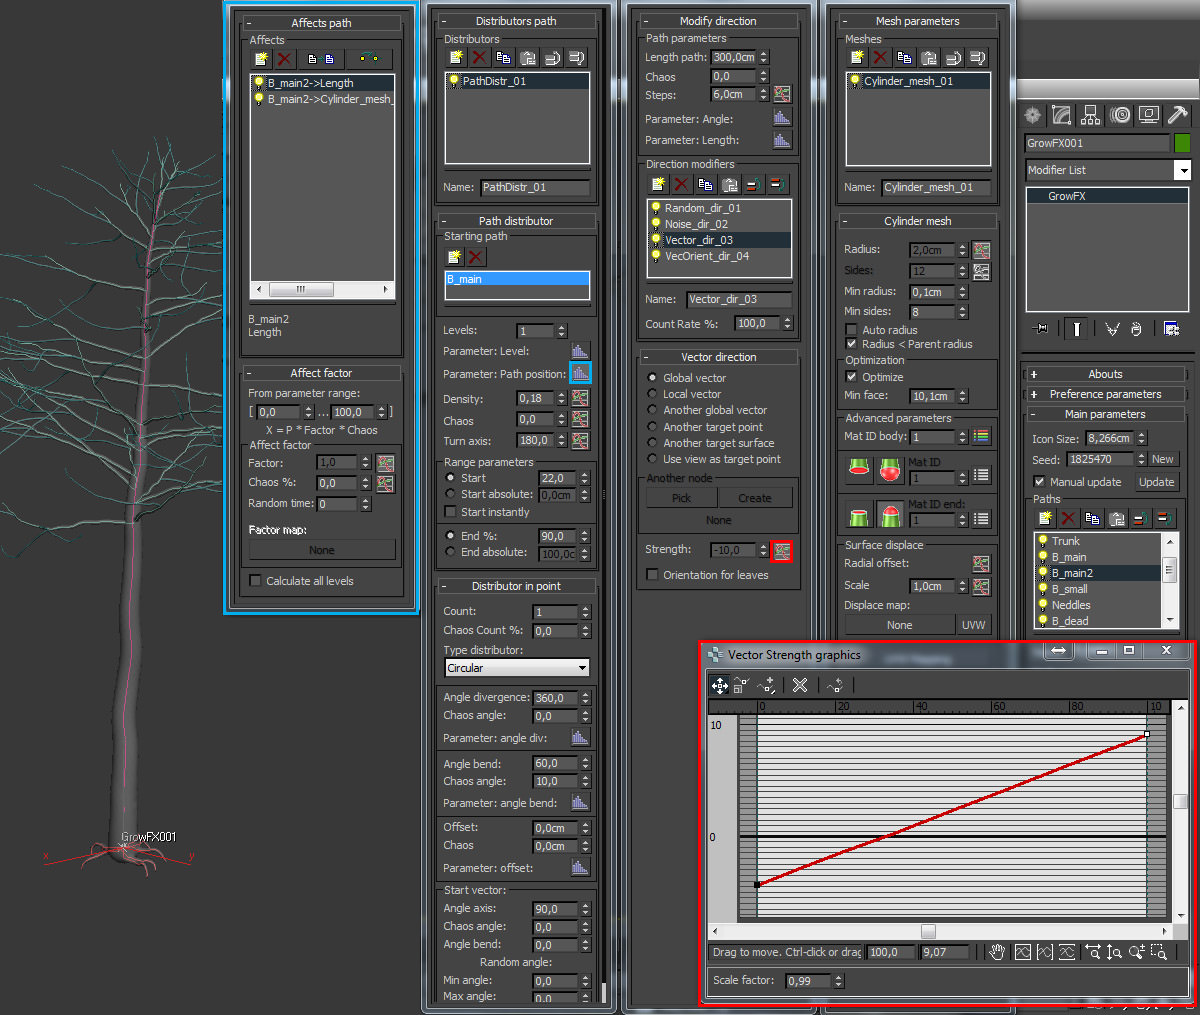
The position of the main branches (B_main path) affects other parameters like branch length (higher branches are shorter), angle bend, random direction (lower part are more bent and twisted) and density.
Small branches are rambling upwards.
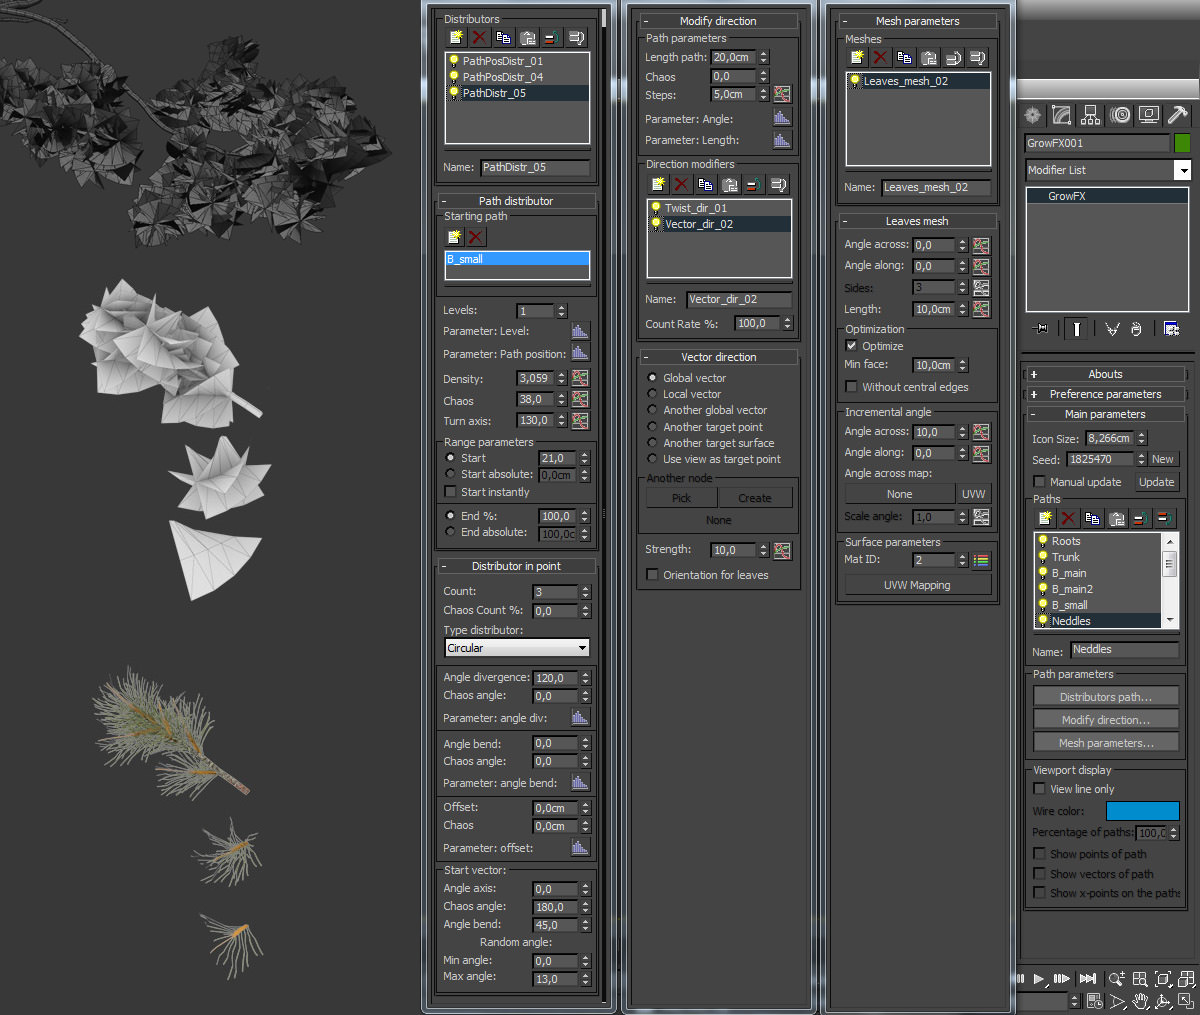
Needles are made of standard leaf mesh in GrowFX. It’s a rectangle with divisions and opacity map of the needle twigs. I also apply a twist direction modifier.
In the lower parts I create broken branches without needles. I use the “slice_dir” modifier to cut some of them off.
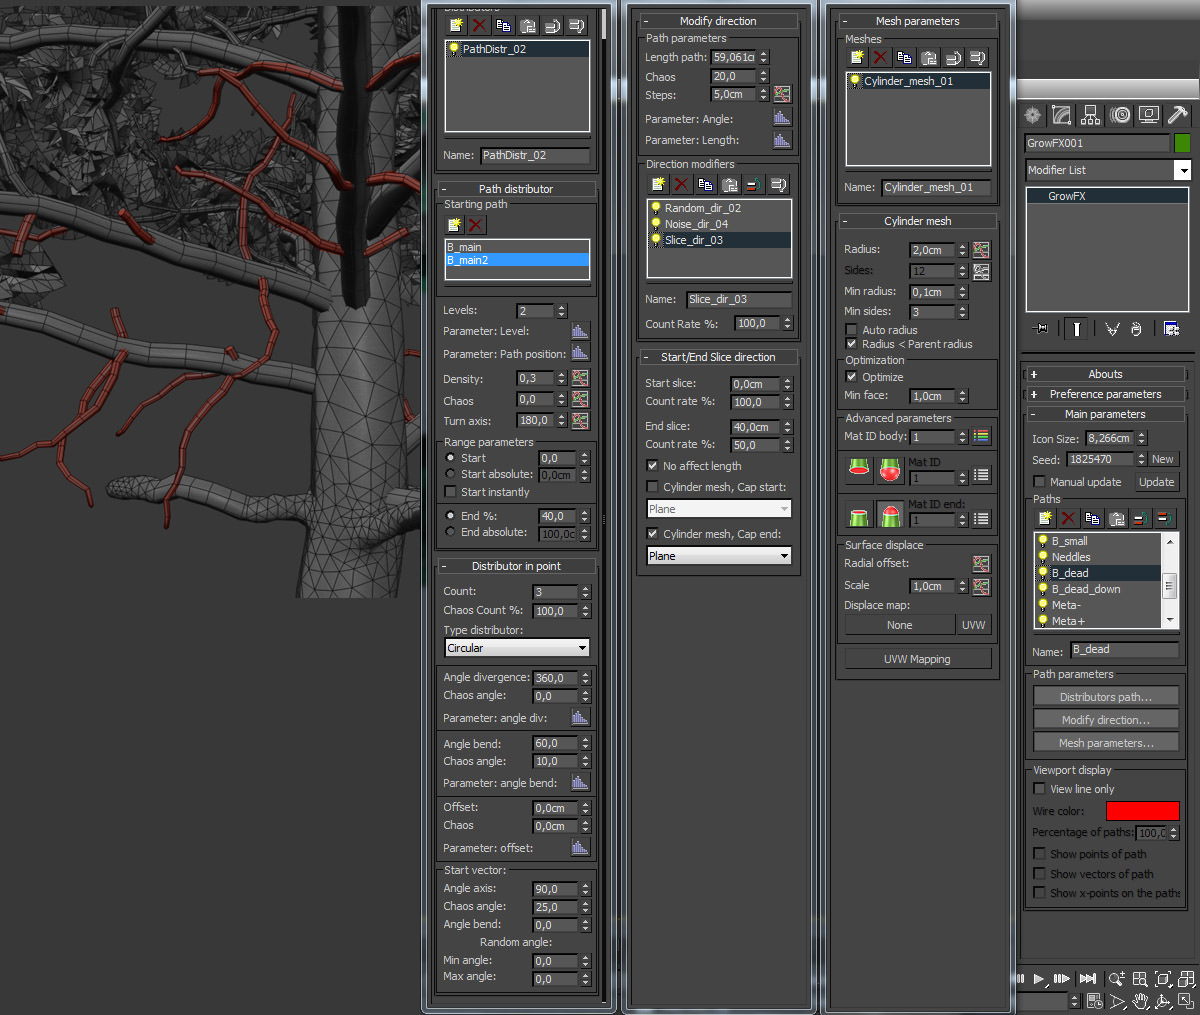
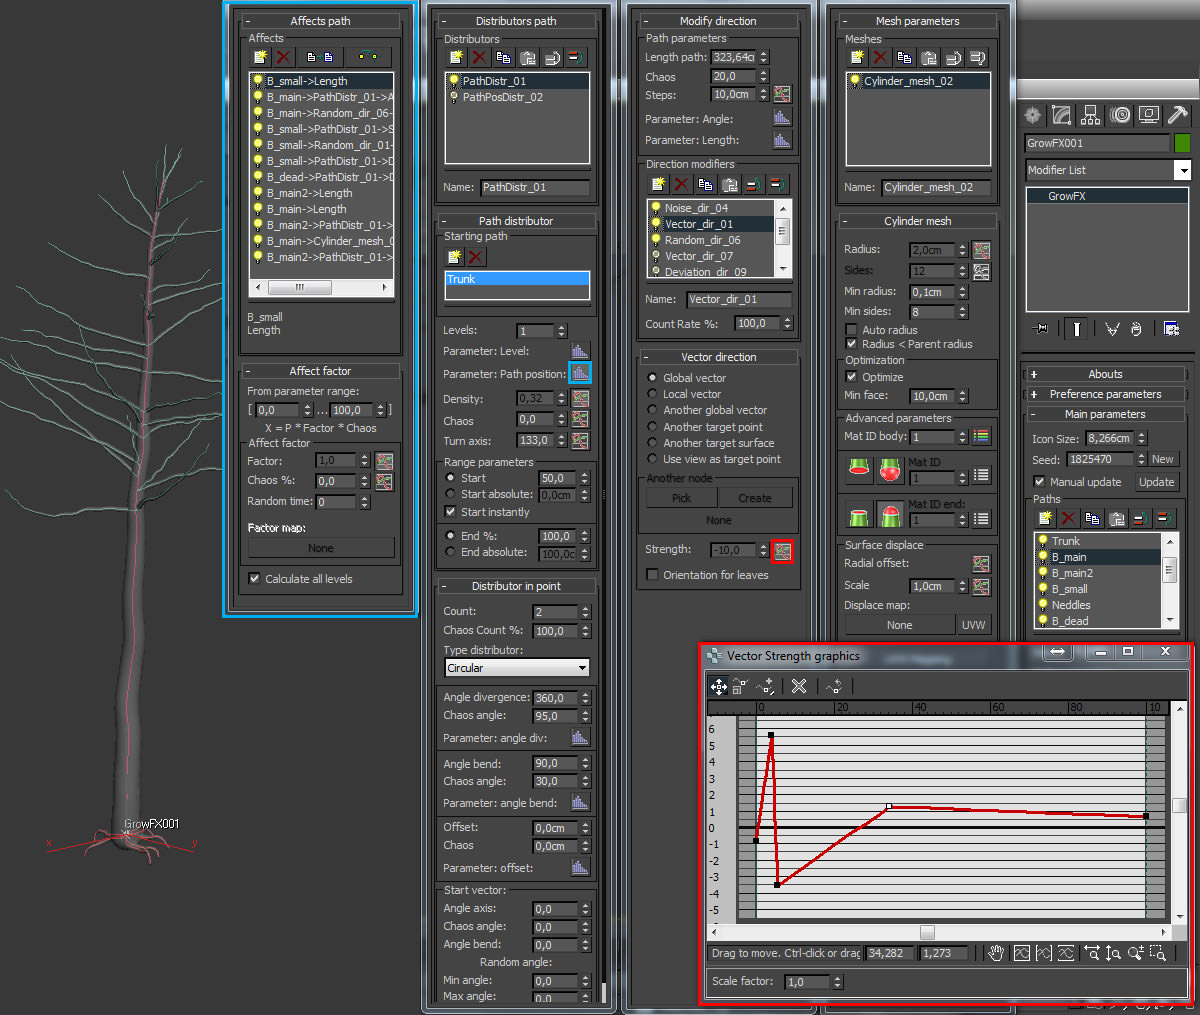
I do the same with branches that grow out of the trunk. I use the parameter Path Position to affect length, angle bend and random direction. They are shorter and more curved in lower parts of the trunk.
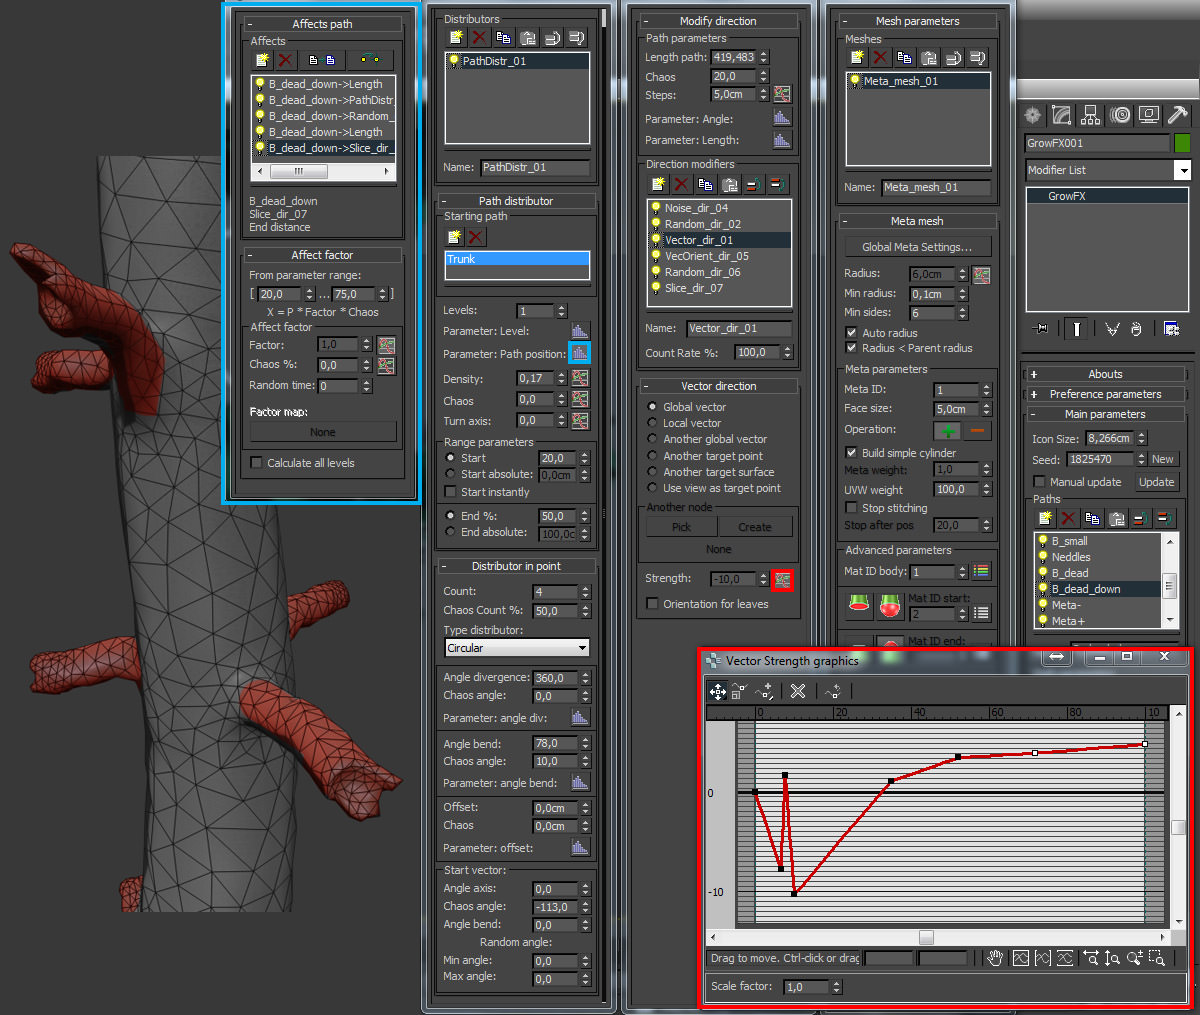
To make the broken branches effect in lower parts of the tree I use 3 paths :
- “Dead_down”
- “Meta-“
- “Meta+”
First path is just short small branches. Second and third paths cause small holes and splinters. I used meta mesh with “+” and “-” operation.
More GrowFX Tips
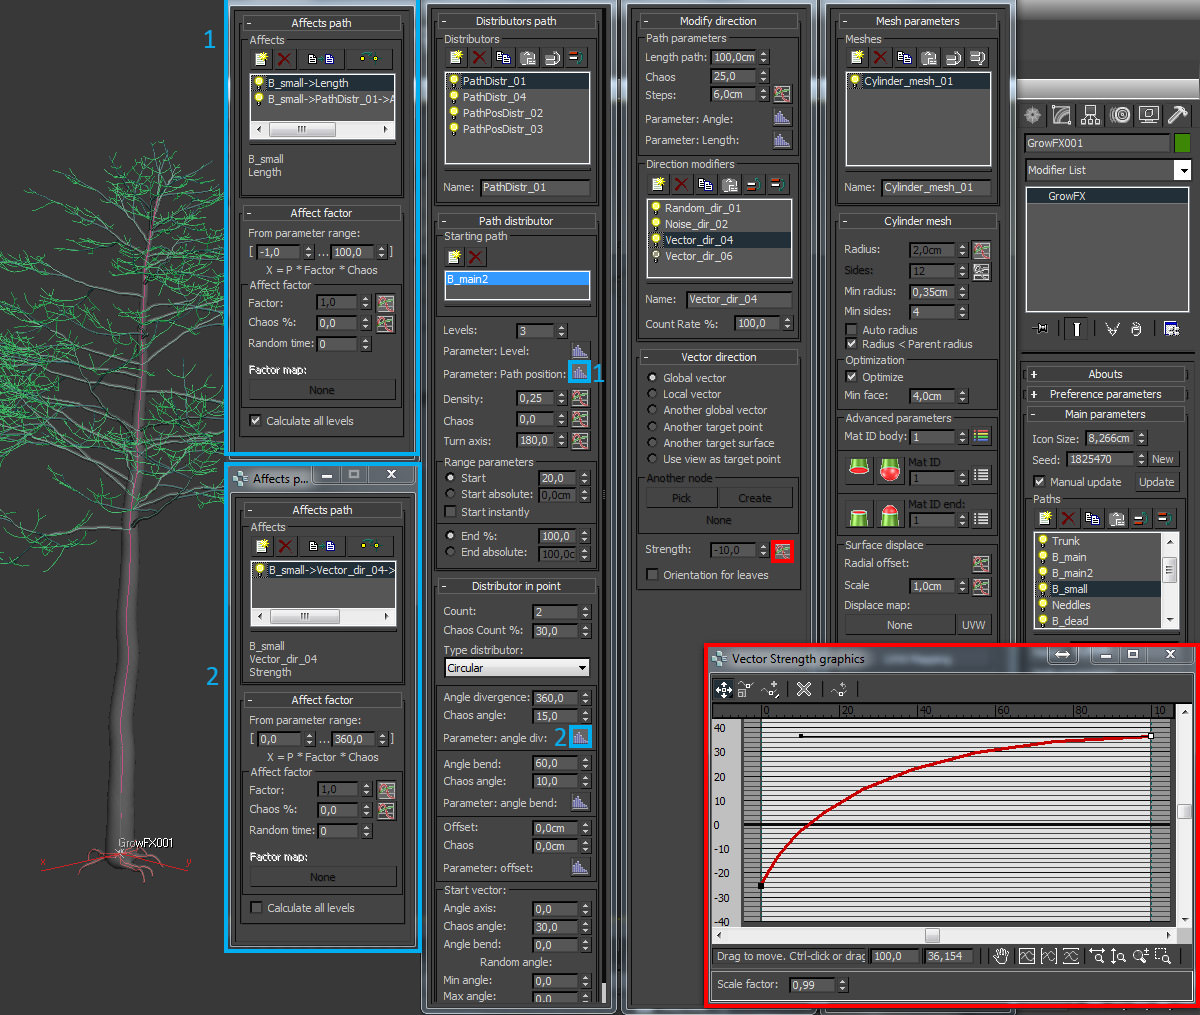
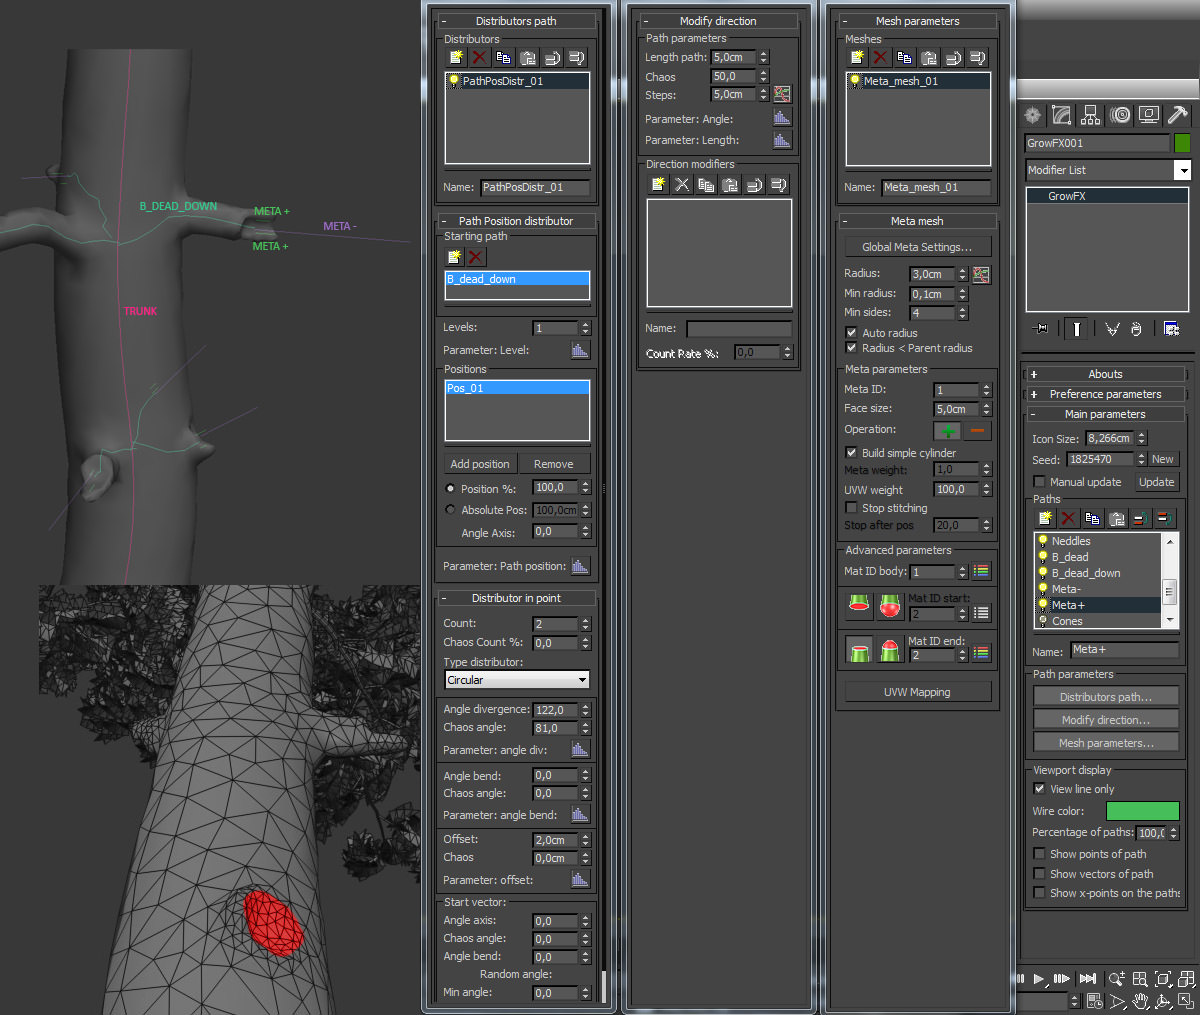
A large count of shapes causes longer times of update. An easier way is to take one branch and turn off the distributor that generates the main branches and add another with only one branch (Path Position Distributor). In this method we can have more control and in ease of the shape and branch splitting.
The interesting method of giving shape to trees is using vector direction modifier with selected option “another target point”. I use Exlevel Point helper (create panel / helpers / exlevel / point ) In this way we can change overall shape of a tree with just one mouse drag.
When I finish my tree modelling I copy the GrowFX object and use the seed option. I change the length of paths, density and branches count to achieve different trees.
Scanning Textures
I use textures of pine bark made by myself. The main idea of this concept is to get maps : diffuse; displacement; normal. The process of creating the textures is :
1. Take a good photos
I think it’s the most important and time-consuming step. I went to nearby park and shoot a LOT of photos. To scan one tree trunk I did about 140 photos! Maybe it’s too much but better more than less in this case 😉
2. Build a dense mesh using photogrammetry
There are a lot of software options to choose like 123D Catch from Autodesk which is free. There are tutorials on this process available online, but if you are interested, I might describe all the workflow in a followup article… just let me know in the comment section below.
3. Make it low-poly
If you want to create textures you have to make low-poly version of your scanned object. The easiest way is to use Z-brush to re-topology. In a one click you get low poly quad mesh. Next step is unwrapping. In the case of a tree trunk it’s quite simple because of its shape – it’s cylindrical. That means, if you cut mesh and flatten, it should be a rectangle. This is very helpful in making seamless textures later in Photoshop.
4. Bake the textures.
When you have high poly scanned mesh and low poly unwrapped version, you can go further. The most important textures are diffuse, normals and height map (displacement). Before you bake textures, I will show my workflow to properly set height map. Put your high and low poly object in the same place. Add shell modifier and gradually increase outer amount. When it covers almost all your high poly object, copy that outer amount value and paste it into the “max height” box in Projection Options. Do the same with inner amount. In this way you can get the most efficient height map texture. When it’s baked, it’s good to save in 16 or 32 bits (tiff or exr).
In one of trees that appears in front of camera I use a scanned mesh to achieve natural shape and preserved details. To do this I use “spline direction” modifier to path “Trunk” in my GrowFX object. Simply, I create line shape, important thing is to set properly the pivot point for this spline.
Next I convert my GrowFX object to editable poly and erase some lower polys of the trunk. I put my scanned mesh in correct place.
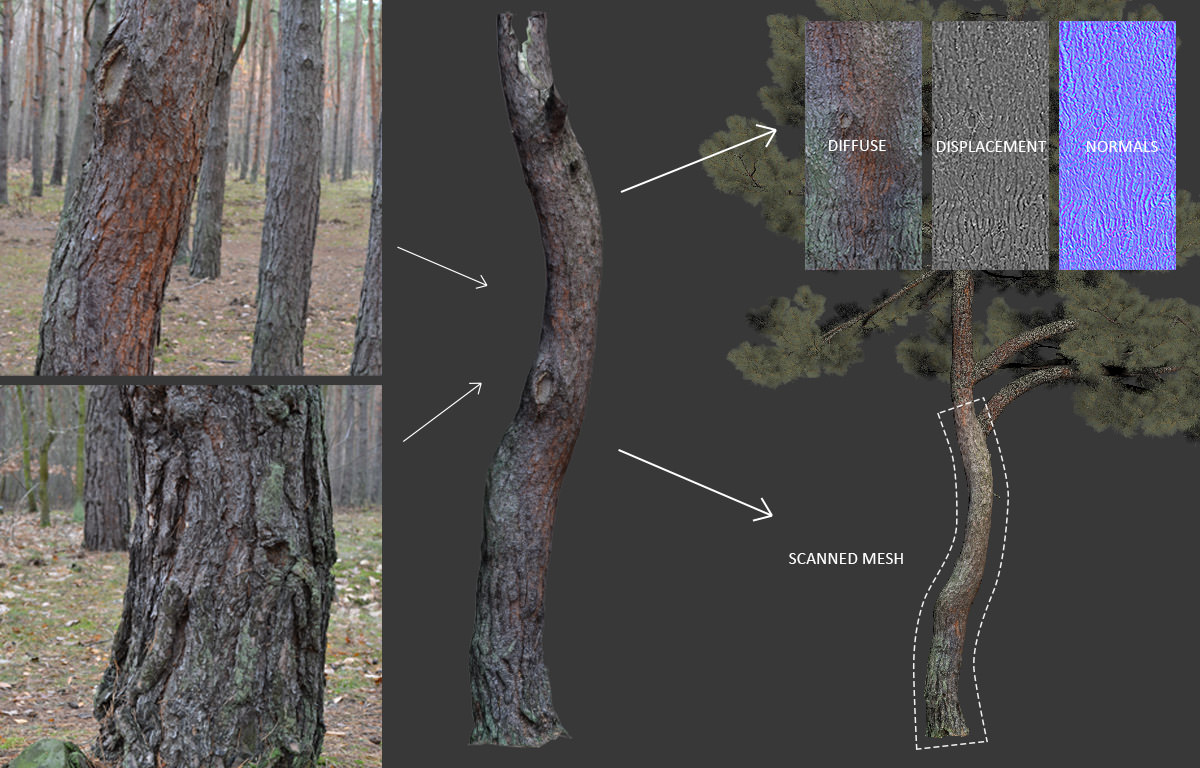
Here is other scanned elements used in Archipelago House scene.
That’s all for today. I hope you enjoyed it and ask me anything you like in the comment section below!
Thanks,
Radek / www.behance.net/Radson


I would like to know your photogammetry workflow
What a science to replicate real life 3d models, hats off!
visita nossa pagina
Indeed! super cool result in this one 😉
Green magic!
Nice tutorial.
Check out our 3D Renderings – https://luminiestudio.com/.
JohnTa1 yeah this would be great!!!