


Using Floor Generator Script by Bertrand Benoit
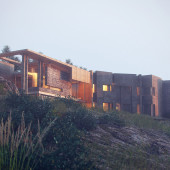
In this how-to article Bertrand describes in detail the way he uses the Floor Generator Script using the GH House model as an example. Check Bertrand’s full GH House making of article for more information about his work.
Back in the old days, I always struggled to create hardwood parquet floors that would work in any situation. Either my texture maps were big enough to cover large expanses of floor without showing visible tiling but they would show some pixelization when zooming on individual floor planks. Or they were detailed enough to be seen up close but did not cover large enough areas, showing repetitive patterns over a certain distance.
Initially, I solved the dilemma by actually modeling my parquets and texturing individual planks, placed at random, instead of an entire floor. But this was a protracted process and it was only really workable when the floors had reasonably simple shapes (basically rectangles).
Then CG-Source came along with the 3ds Max script Floor Generator, and a plugin Multi Texture Map. both written by Bercon, aka Jerry Ylilammi of BerconMaps fame that do the work for you, not just faster but better and with a flurry of extra options.

Since these free tools came out, I’ve hardly used anything else, not only for my parquets but also for all sorts of stone or tiled floor materials. I couldn’t live without them.
A side note – Good plank textures are notoriously hard to come by, so once you’ve dowloaded the free tools, do yourself a favour and buy some of CG-Source’s multi-texture maps. They are made to be used with the plugin, they are very high quality, and you’re certain to be using them over and over again.
A great thing about the Floor Generator is that it uses splines to define the area to be covered with parquet. The only restriction is that the splines must be closed (which is logical if you think of it). This means there are no restrictions on how complex the shape of your floor can be. This was a great advantage for the GH House, with its complex floor plan with few right angles. Floor Generator is also pretty intelligent. If you enclose a closed loop within your floor spline, as long as they are both part of the same spline, the script will understand that you want to blow a hole in your parquet, which is great if you have elements, such as concrete pillars (or tree trunks in the case of exterior wood decks), that must go through the floor.
Because I didn’t want to settle on a POV until I had finished texturing the house, I decided to cover the entire floor area of the GH House with parquet. The first step was to select and isolate all the floor elements, convert them to editable polys, and break them into workable bits (Floor Generator can be a bit slow when building very large areas of parquet, so better to split your floor in separate splines one for each room for instance).
Then, I selected all the outside edges of each of these elements and converted them into splines (Edit Edges ? Create Shape From Selection ? tick linear).
Make sure all splines are closed, otherwise Floor Generator will not be able to use the spline as guide. At this stage, I deleted the poly objects, which were no longer needed.
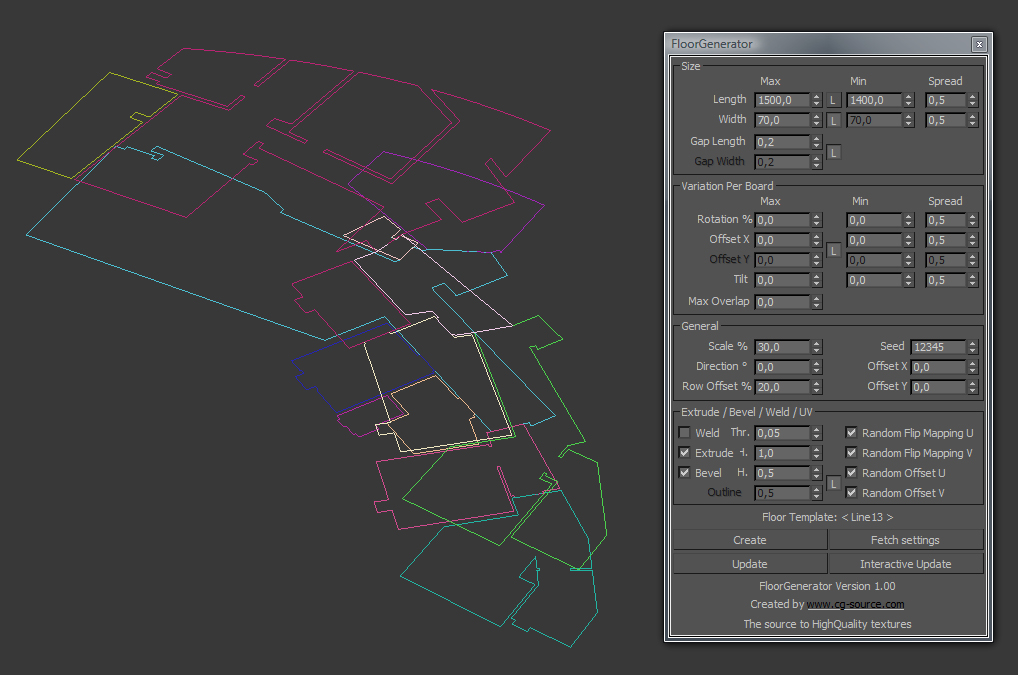
Having selected one of the splines, I ran the Floor Generator script and pressed the Create button. A generic floor appeared. I also pressed Interactive Update to see my setting changes applied in real time.
The first setting regards the size of the planks. For the length and width, I simply used the number of pixels of one of my plank maps (here 1,500×70 pixels), to make sure they would not be distorted in the image. It’s better if all your planks have the same size, as the maps will be distributed randomly, but the script lets you specify the minimum and maximum length and width of the planks if you want more variation.
The initial floor showed planks that were way out of scale. You can adjust the scale of your parquet by tweaking the Scale % value in the Variation Per Board section of the script. Here, I found a value of 30 per cent of the map’s scale worked fine. I left all other values at default because I wanted a very neat, new and flat floor. If you’re working on an older floor or some slightly disjointed tiles, the Tilt value works miracles by applying micro-level random rotations to the planks that give some relief to the floor and make it look more realistic as it catches the light.
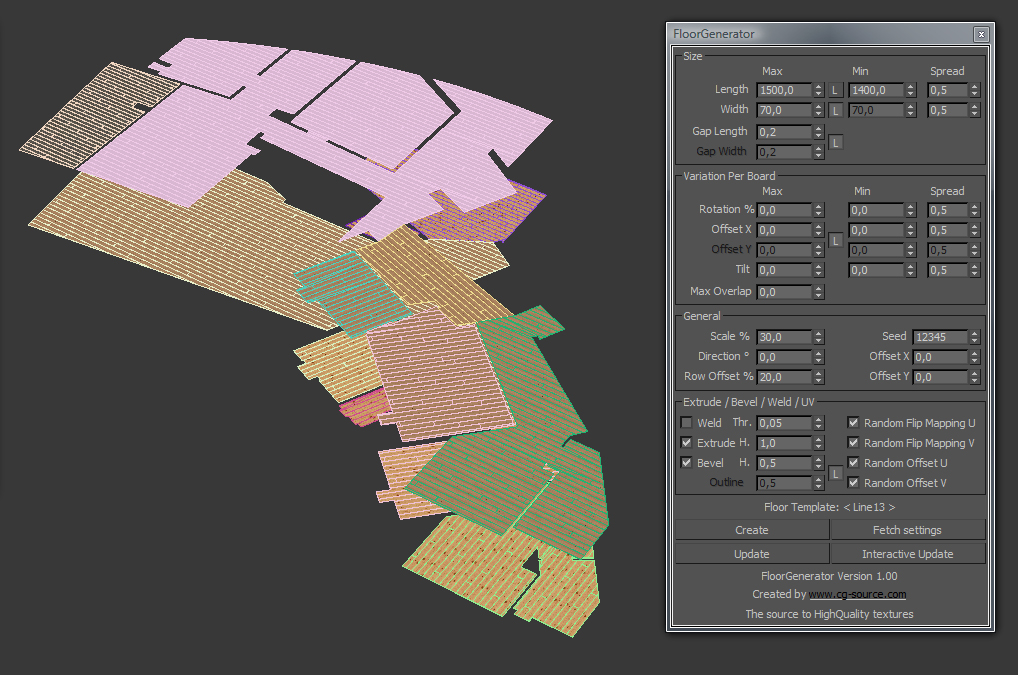
The following image shows my settings applied to all the spline objects. The only variation I made was to change the Direction value, which rotates the floor, to make sure the boards were all aligned with the general orientation of each room.
Now that you have your floor, the next step is material creation. (MultiText.jpg) shows the texture maps I used for my floor (well, just four of perhaps 20 different plank textures), each saved as a separate .jpg image. IMPORTANT: If you are using my settings, make sure your plank or board images are HORIZONTAL.

In the next image you can see an example of Floor Generator material (to be applied to the FloorObject created by the script, not to the spline object).
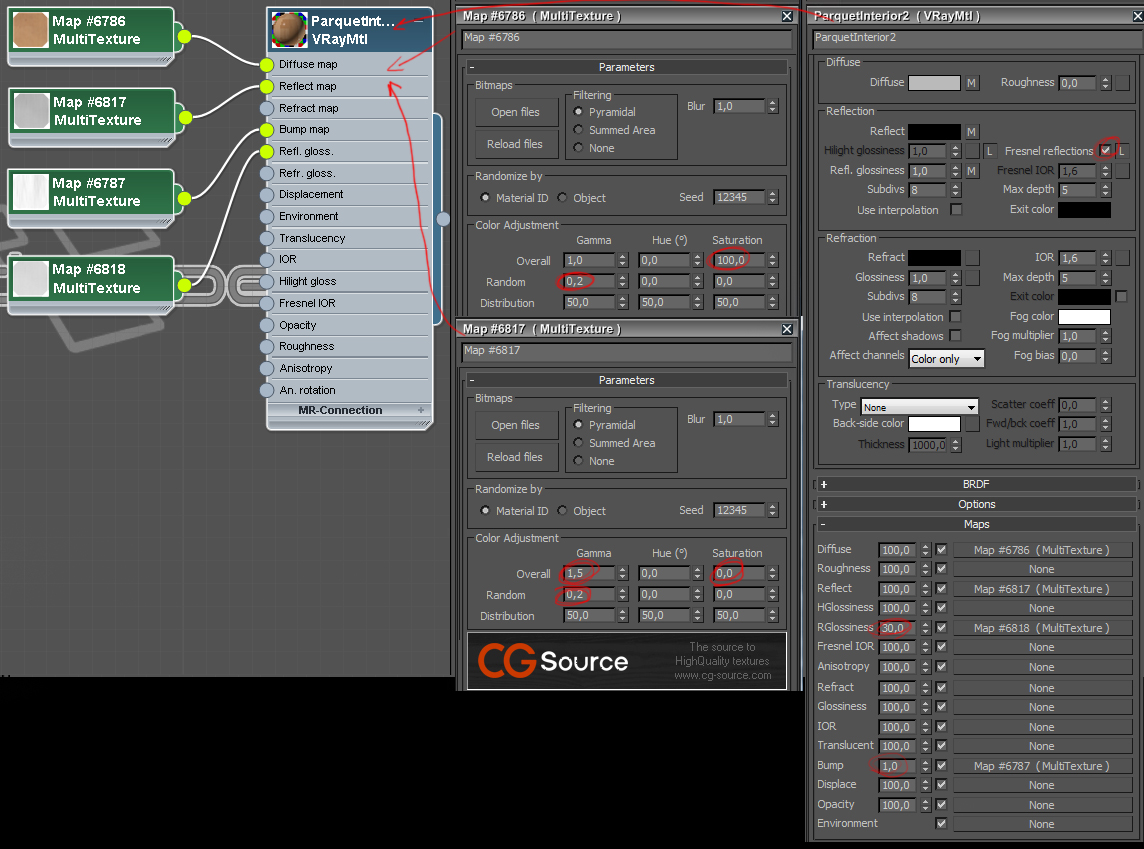
For the diffuse colour, I loaded all my maps into a Multi Texture. By the way, I retained the filtering in this example but it’s never a good idea as it will make your floor look blurry when seen at a grazing angle. Better to tick None in the filtering section.
The Multi Texture map lets you apply random variations to your texture. In this case, I just introduced a very slight Gamma variation (of 0.2), so that some boards would appear slightly darker than others. But you can also modulate the hue and the saturation.
The reflection, reflection glossiness and bump maps are all copies of the diffuse map but with Saturation brought down to zero (grayscale) and some variations in the gamma. Here, there is no recipe but only trial and error until your reflections look good. The image also shows my settings for the main floor material.
Do not worry if only one of your selected textures appears in the Max viewport. At render time, the script will load all the images in the Multi Texture map and distribute them randomly.
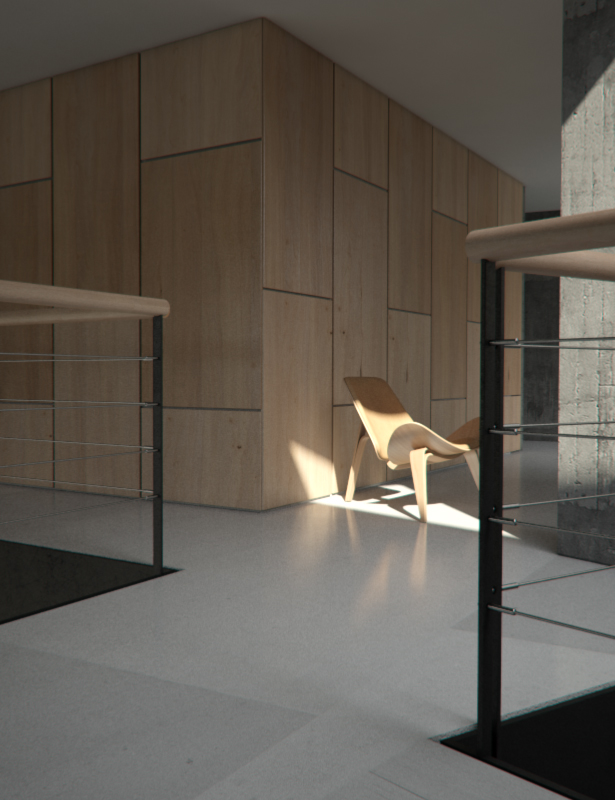
That’s it. If you’ve followed this to the letter and press render, you should see a beautiful floor appear. You should play with the other values in the script to obtain different looks. In addition to Tilt, you can also slightly rotate the floor boards, change the offset value for the rows, draw a bigger bevel around each plank, or add some space between the planks, etc. You could also make the planks have zero thickness (mainly if your viewport gets too slow or you’re running out of RAM to render).
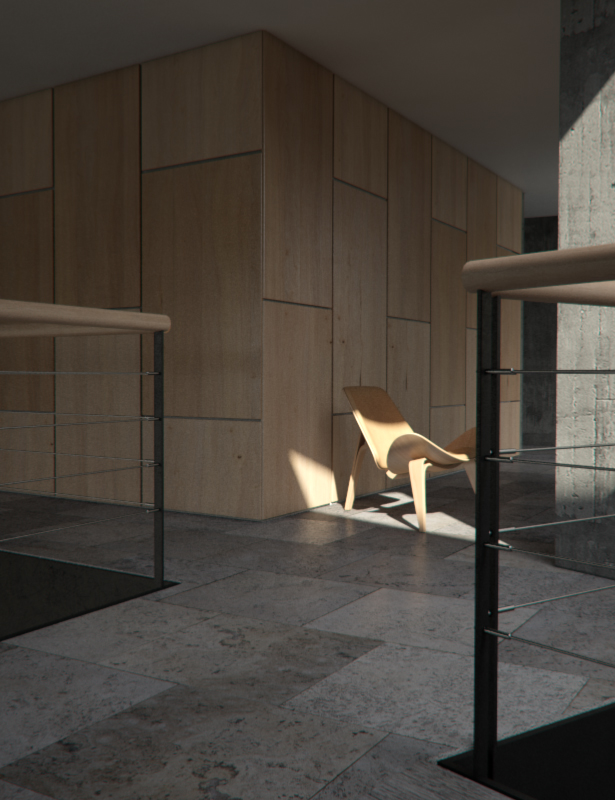
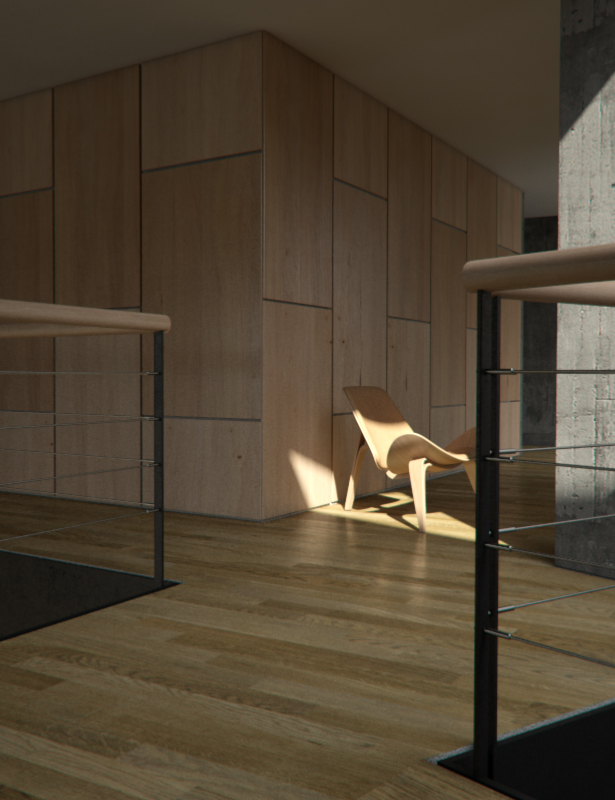
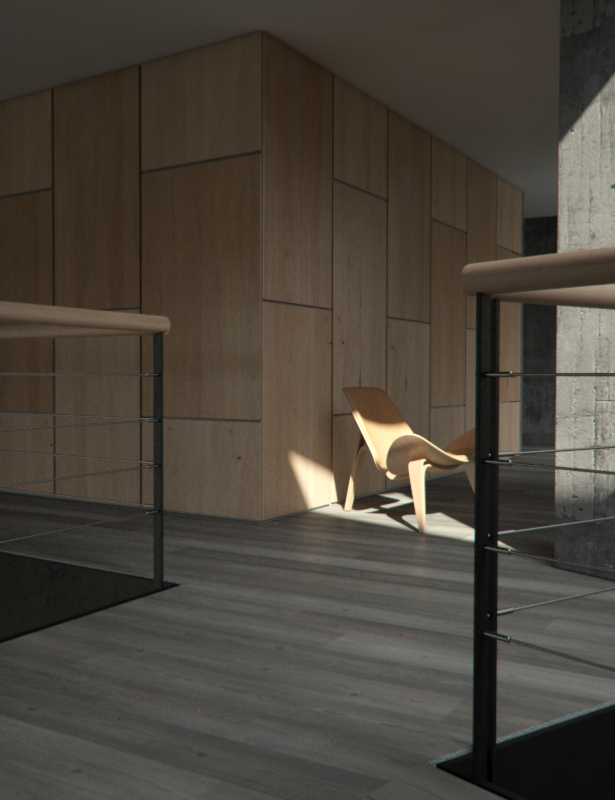
The following images show what you can achieve with home made floor textures, CG-Source textures, or stone and tile textures.


WOW! This was a busy week, eh?
Nice tutorial for a great plugin.
This plugin is really hot..Thank you 😉
Hello, thanks for this great tutorial, it spared me of lots of useless work so i guess i owe you a keg’o’beer or something 🙂
I have one question though… what is that material plugin you use, it seems a lot easier to use than vray standard (not that it’s any pain using it, it’s just annoying).
Thanks.
PS: Awesome portfolio 😉
I love to learn this stuff. Coz on my college days they only teach us a basic type of rendering. And this site was inspired me a lot. Thanks
@s-valentin – that material editor is node-joe
Where to put MultiTexture_max2010_64.dlt in 3ds max? It is not showing in my materials 🙁 Thanks..
Hi, just put it into your max plugin folder. The multitexture map will then turn up in your material textures.
Can anyone tell me how to load the multi texture plugin, says its there but not showing up in the material editor, Im running Max 2011, is that the reason? thanks Peter
Hi Bertrand,
I have the same question how do you load .dlt (Multitexture Map) in material slot? Or is there other way of applying this map. Your help would be much appreciated.
cheers
Hi Ronen,
Thanks for the tutorial, it’s fantastic.
But how can I make my multitexture jpg, into Maxwell render material? Maxwell can’t load a multitexture script.
Hope you can help me!
Cheers!
Mike
Hi Tanveer,
copy that MultiTexture_max2010_64.dlt file in plugin folder in max root directory.
hi, ronen your website is very great
and thanks for the tutorial.
i have a problem too
i couldn’t generate a rectangular floor which has a circular gap in it.
any help?
cheers
Do you know if “Floor Generator” work with Max 2012?
it doesn’t work with max 2012.
i/ve just sent an e-mail to the author asking for support…
Floor generator works just fine with max 2012, but multi texture map doesn’t have version for 2012.
Any news ?
I wrote to jerry.ylilammi@gmail.com and some days ago Thomas Suurlan from cg-source.com sent me multitexture_2012 and it seems to work fine!
Great plugin, but doesn’t seem to work in 3ds max 2011 x64 (it drap te boards outside the closed spline). In x32 version no problem at all, really easy to use and natural results.
For the three multitexture maps other than diffuse, do you have to create copies of each texture in Photoshop? If you’re using 20 diffuse textures, that makes 80 total. Is there a way to place the diffuse multitexture map into the other three slots and use the saturation to create some of them? I guess you would need an “invert” option and “contrast” to do it right. If you do create 80 maps, how does the plugin associate the correct diffuse map with the correct bump or reflect textures? Thanks for the great tutorial.
Hi,
How diffuse maps distributed randomly finds its own bump, reflection ect versions distributed randolny too? Imean how do they find their clones?
As usual, great Tutorial Ronen.You mentioned the tiled walls were also created with FloorGenerator. Correct me if I’m wrong, but is this the process you take? create horizontal plane – create desired tiled panels with FG – then rotate plane 90″ vertically (representing a tiled wall). This works fine for me, however once rotated, its impossible to re-edit wall with Floorgenerator. Am I going about it the wrong way?
Regards
Rendell
@Rendell I’ve not had time to test this but have you considered creating an instance of your ‘floor panels’ and rotating that, then referring to you original if you need to edit.
@BishBashRoss Thanks for the reply – Tried this earlier, unfortunately this doesn’t work with FG. Also tried instancing a variety of selections seeing FG produces (another) tiled object i.e plane_obj + the FG tiled_obj.I would assume, seeing Ronen ‘liked’ my query (but no reply), that my original procedure is perhaps how he produced his walls. So unless someone has a better and simpler idea, preparing/multi-texturing your wall first is vital before rotating it.
It’s a nice script, but acctually Max is always chrashing when I’m using the high rise mappings. I hardly can handle a scene lagerer than 10m x 10m (floor area). and my pc is not too bad equipped…any ideas what i’m doing wrong?
Hello, can you tell me is it possible to make tiles checkers by floor-generator? Thank you!!!!!
how can i get the mcr file for floor generator
harya did you try here? – https://www.cg-source.com/floorgenerator.php
ronenbekerman harya ya bro i downloaded ms file i can also use it
but if we hav mcr file then it wil be easy to add in toolbar am i right?
ronenbekerman try to
refer this video https://www.youtube.com/watch?v=ixcAsS9Y9ME
Impressive post!! Thanks for the precious information!! 3D
Royal Floors is the only company in the UK which provides 3D Resin Flooring
Solution. 3D royal floor has change the tradition of flooring. To make your
home and office more attractive use our 3D flooring.For further information use our website
https://www.3droyalfloors.co.uk/