

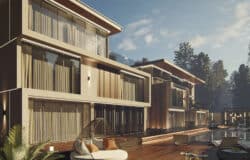


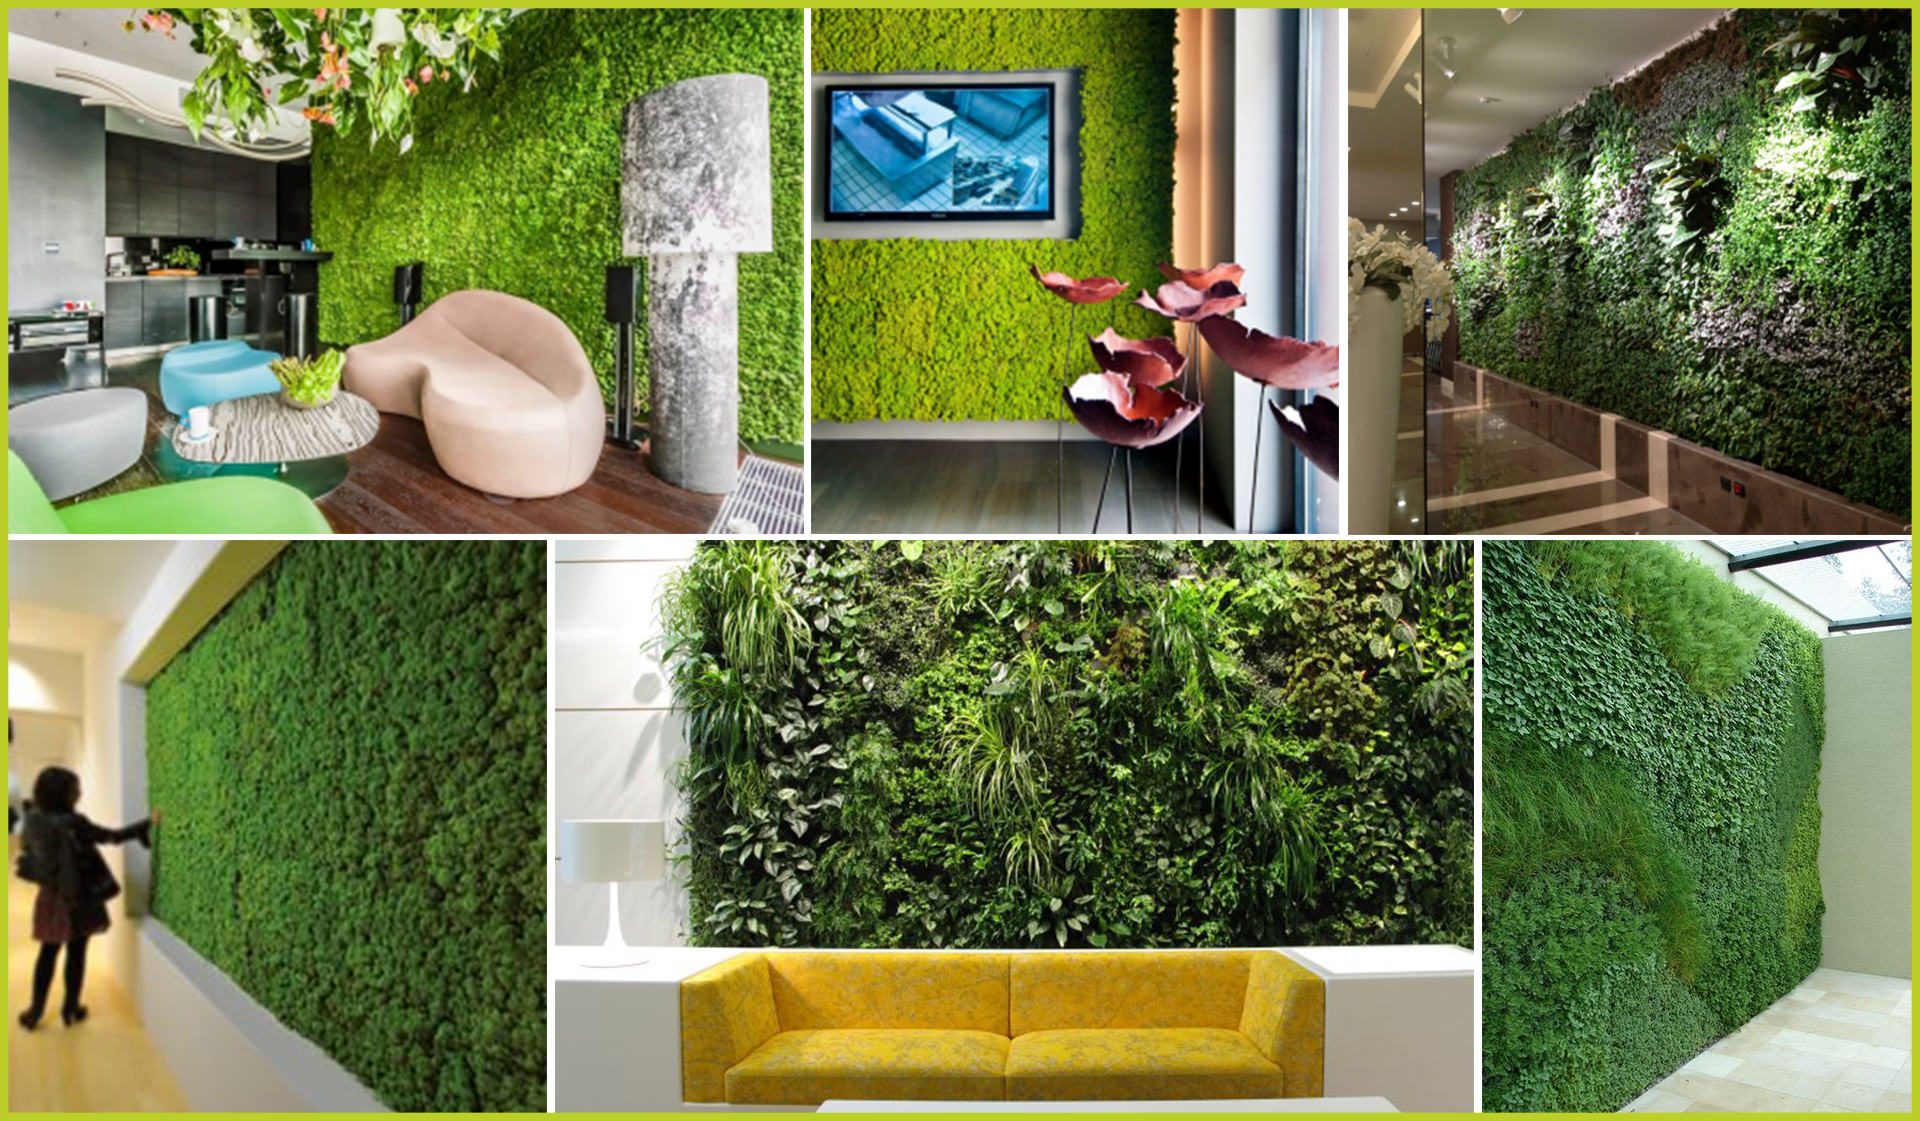
Making of Vertical Garden
It’s time for some blender render to be featured here on the blog! I stumbled upon this beautiful work by Paulina Kochanowicz not long ago and thought this would be a perfect one to start with. First, because it looks great… I love vertical green walls and this one is beautifully executed. Second, it is all done inside Blender and rendered with the built-in Cycles render engine. Keep in mind all you see here is done with a freely available open-source platform. Enjoy!
Introduction
First of all, a big thanks to Ronen Bekerman for inviting me to write and share with you this article about the making-of my Vertical Garden project. After many commissioned projects for clients, I decided it was time to make a personal project. A project in which I can explore and learn new tricks. So I was happy to find some time to make something without all that rush associated with commercial projects.
It was meant to be simple, quick and fun. So this project was made to test an idea of vertical gardens in interior and to give The Grass Essentials a try in an unusual way. These pictures are a part of a larger project but for now it’s a set of these four renders. with additional renders made for this making-of.
Software Used
Blender 2.74 – An open source 3d program.
Cycles – Blender rendering engine (built-in Blender).
Photoshop CS6 – For minor post-production.
Introduction to Blender
Blender is, in my opinion, the best open-source 3D program suitable for professional use by studios like mine. I have been using Blender for about two years now and I cannot imagine at this time functioning without this program.
I use it not only for creating visualizations of interiors and architecture, but also for presenting visual identifications, product mockups and advertisements created by our studio. This is an invaluable tool for us and unfortunately still not appreciated enough by the wider public, which I hope to be changed soon.
The great advantage of Blender is its community that really serves the development of this software, they share their knowledge, experience and create a variety of add-ons for it which make life and work much easier.
Getting Started with Blender
Step 1 – Download Blender.
Get Blender from here. You can download it as a .zip or as Installer pack if you don’t want to mess with your program files.
Step 2 – Installation Process.
Install Blender from the pack downloaded from Blender Foundation’s site. When the installation process is done you should be able to see the Blender icon on your desktop. If not, find Blender in the Program Files folder on your computer.
Step 3 – Opening Blender for the First Time.
Open a Blender file by clicking on its icon. An opening window contains a splash screen which shows which version of Blender you’ve just installed.
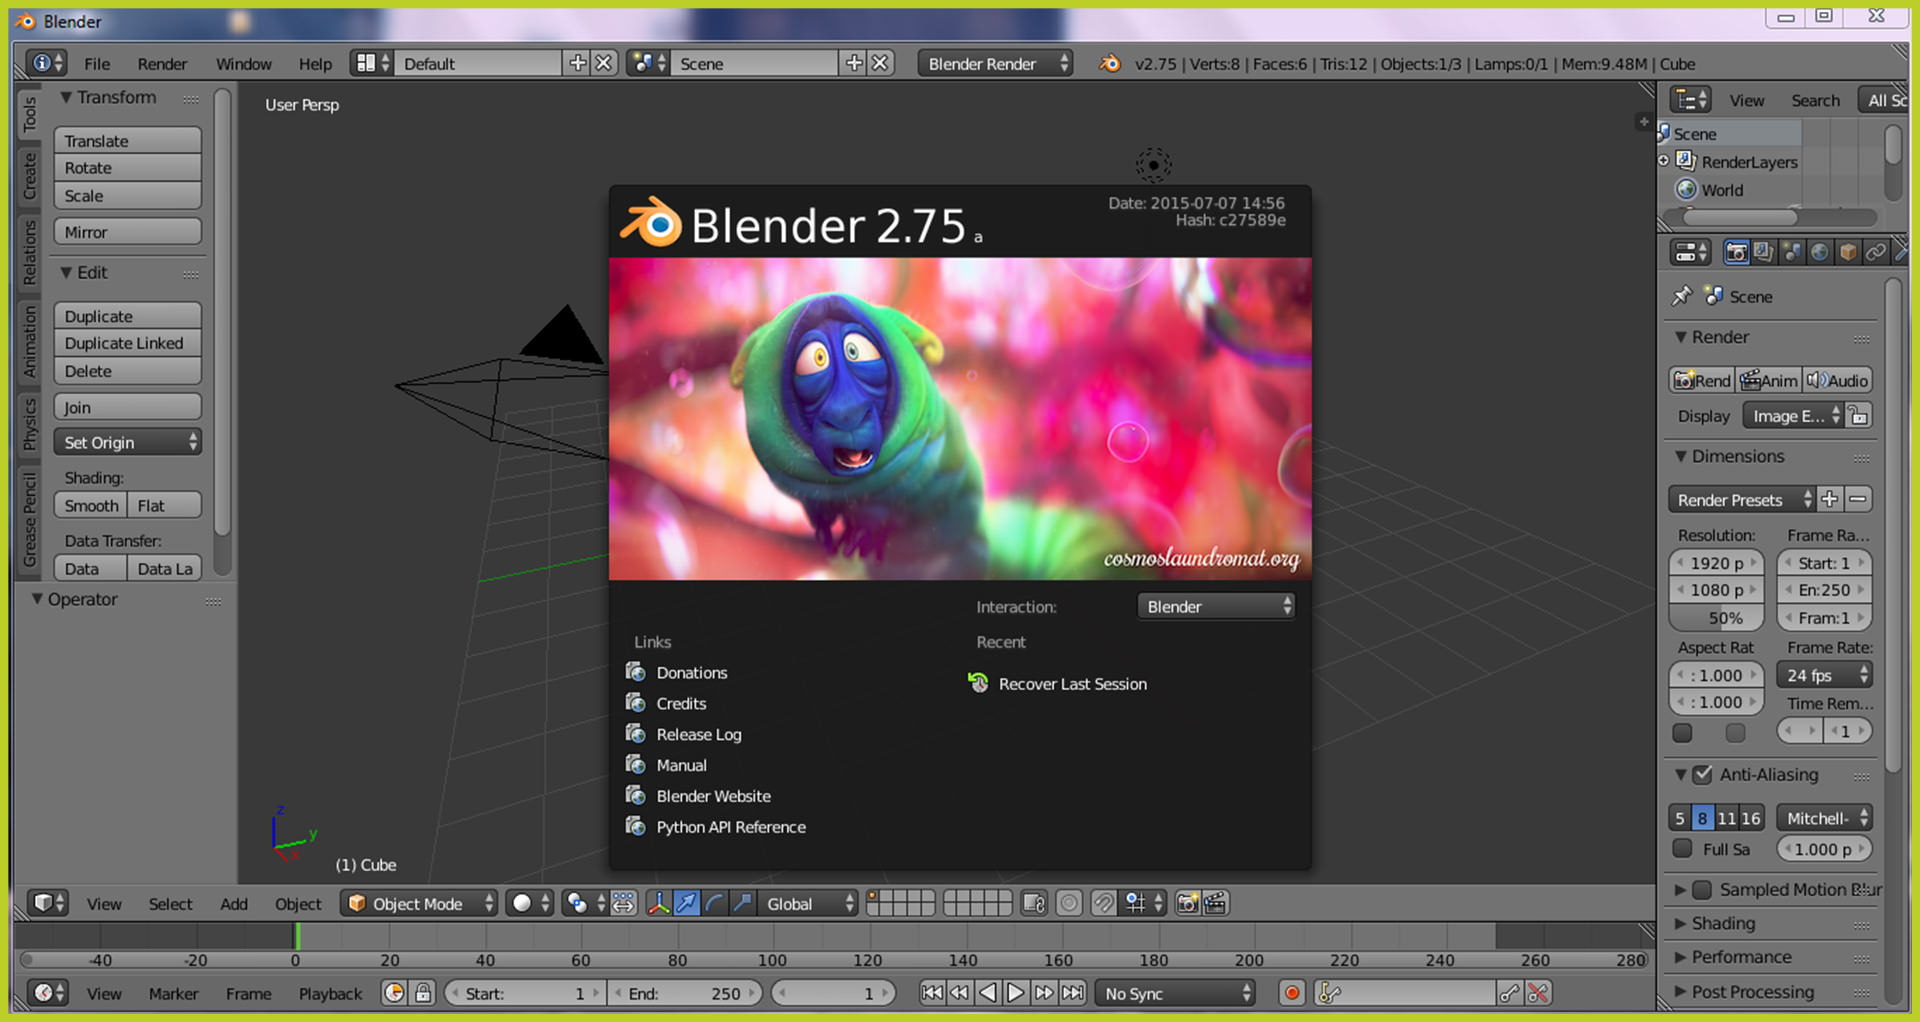
To hide this splash and go to the main 3d window simply click on it. Now you can set your startup file (every new opened file will have those settings. You can change whatever you like or need but I will show you below what are my settings.)
Step 4 – Setting up your 3d windows.
Each new file has default setting and main window that looks basically like this.
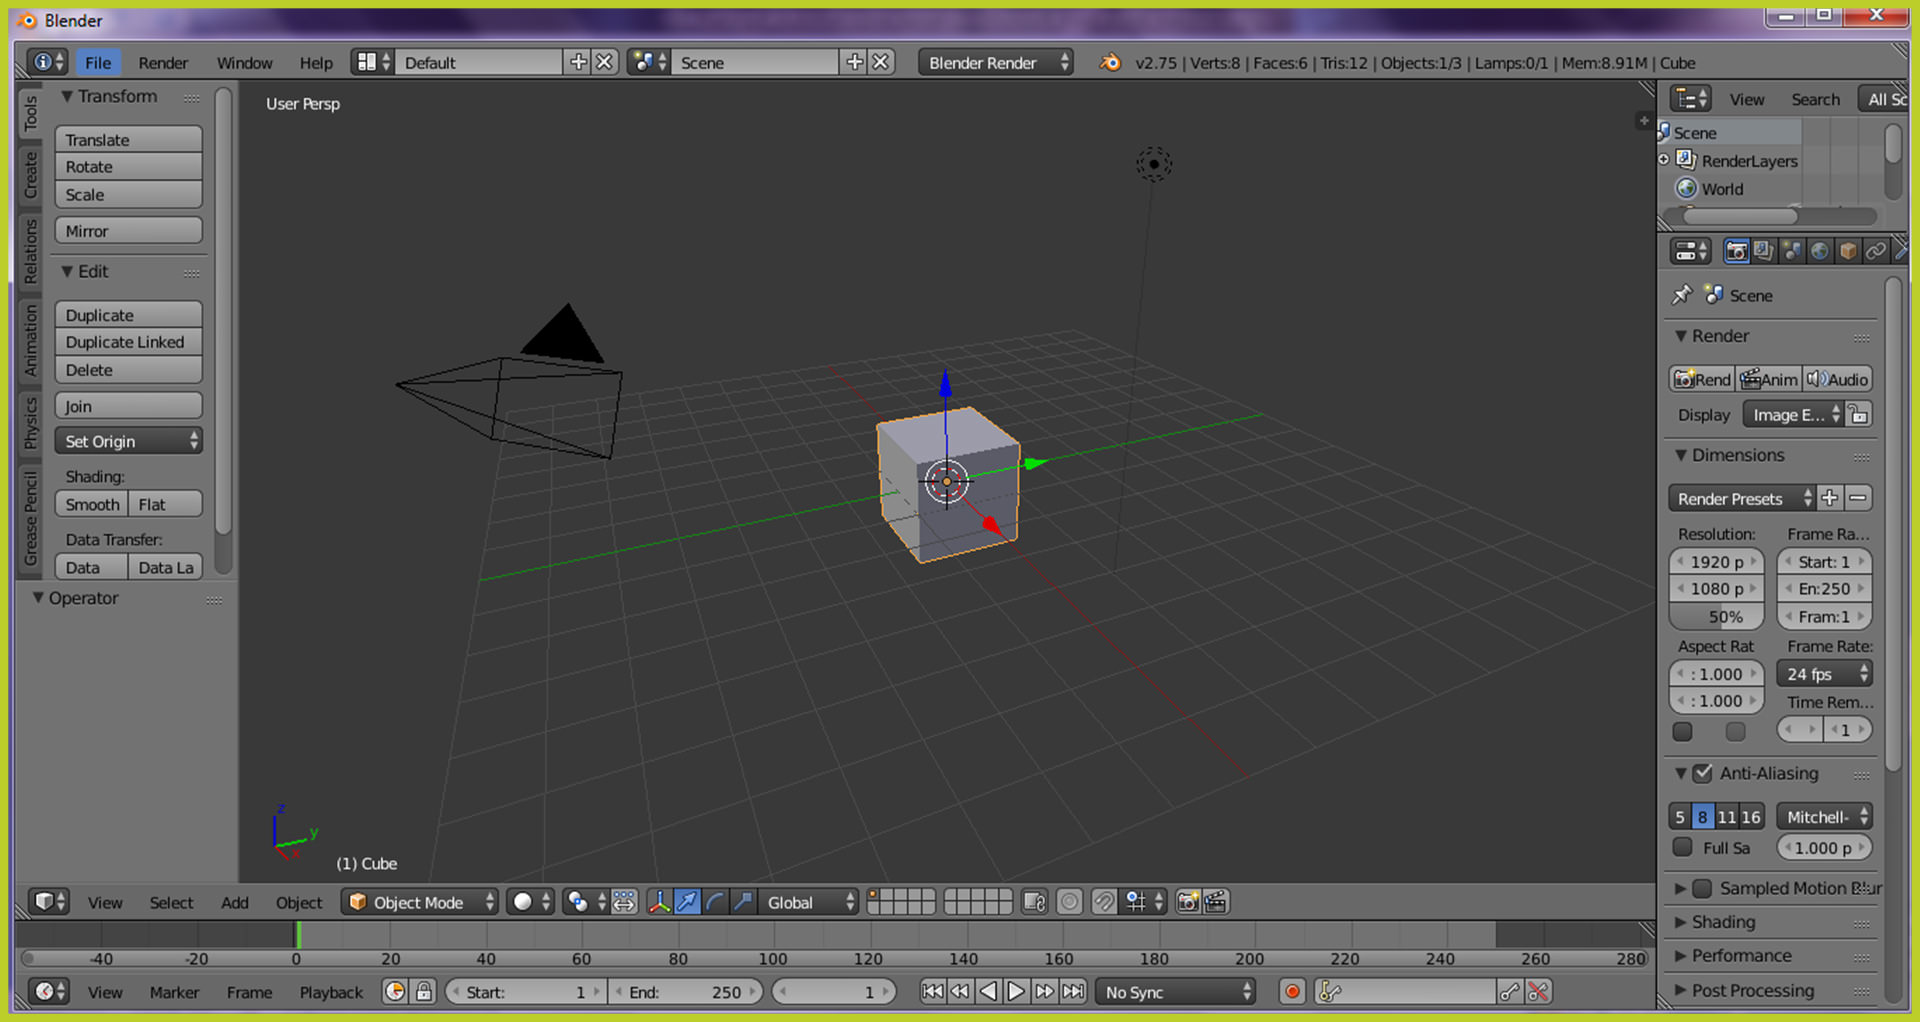
You can see here a basic mesh – cube, basic camera and basic lamp. I always delete all of those assets and change perspective to an orthographic mode by combination of keys from numeric Keypad :
1 – Front View
3 – Right View
5 – Ortho View (next click will take you back to the Perspective view)
7 – Top View
9 – Bottom View
0 – Camera View
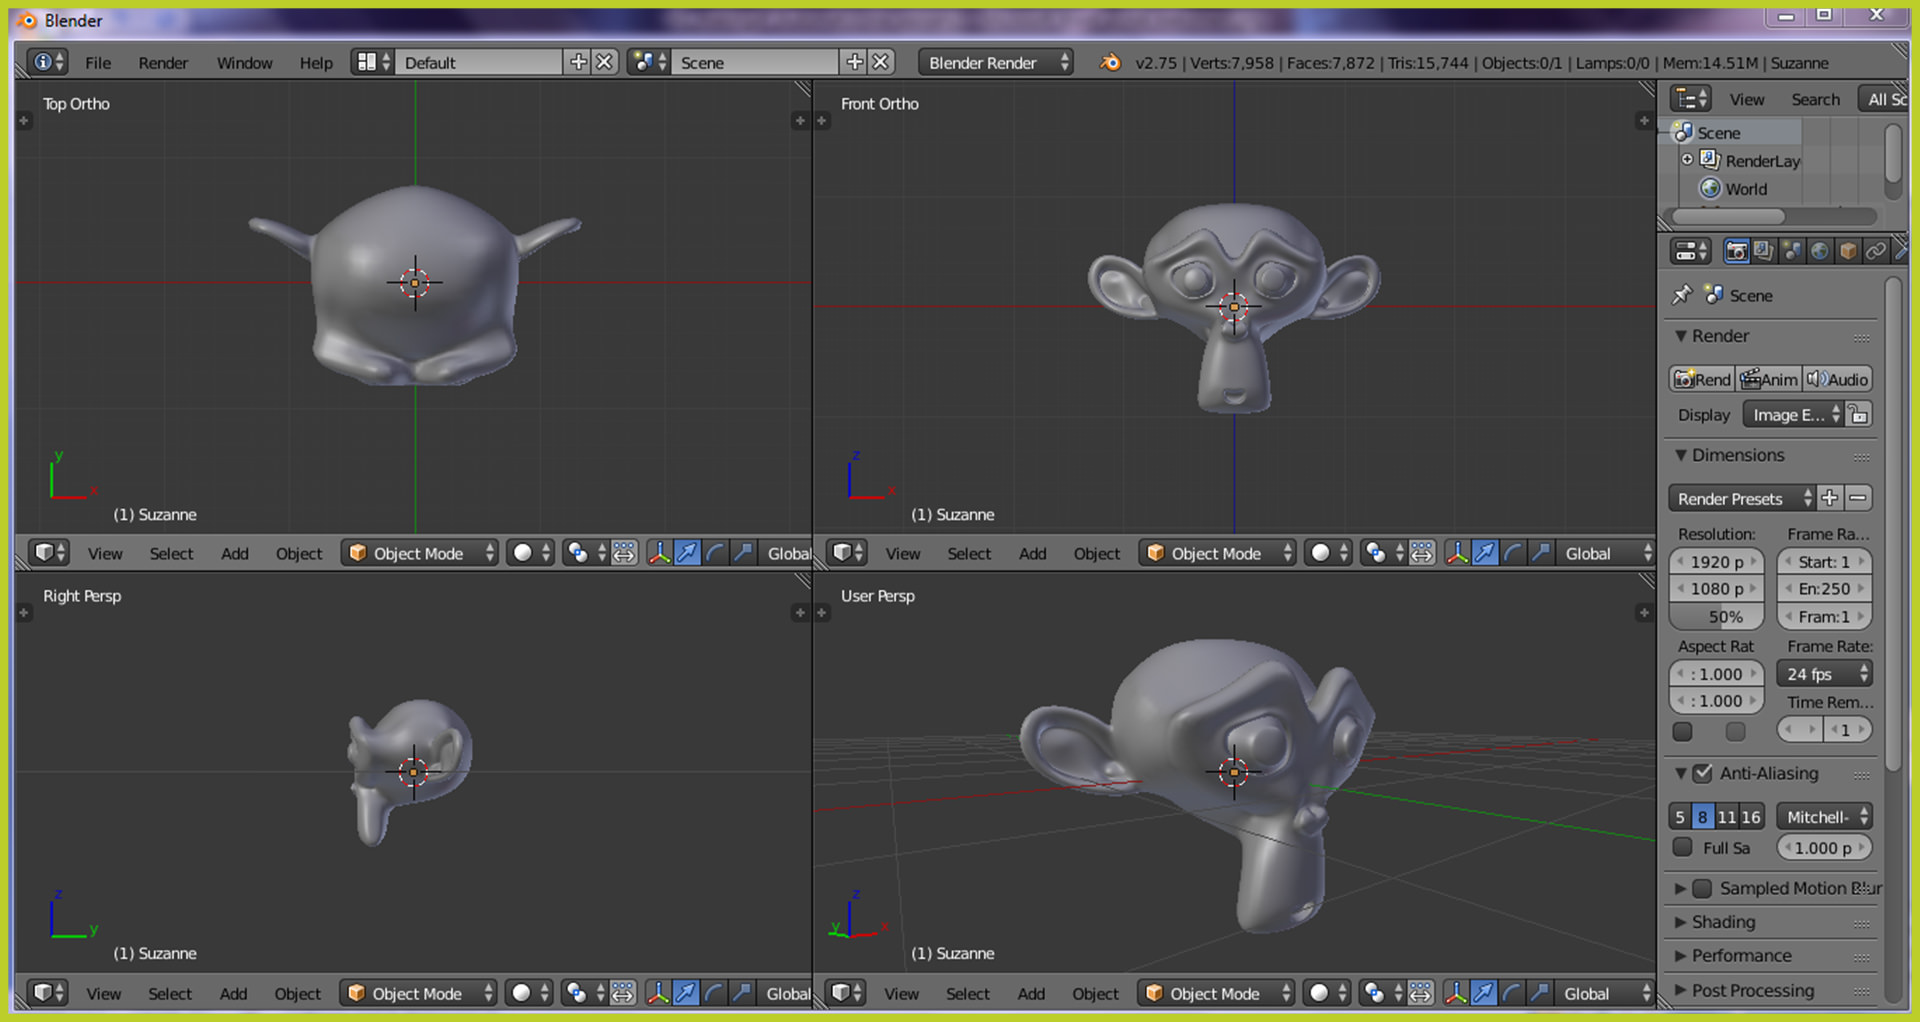
I set my startup file to top, ortho view (5,7) and delete all the basic meshes in the scene.
Now I set up all windows I need for modelling and texturing my scene.
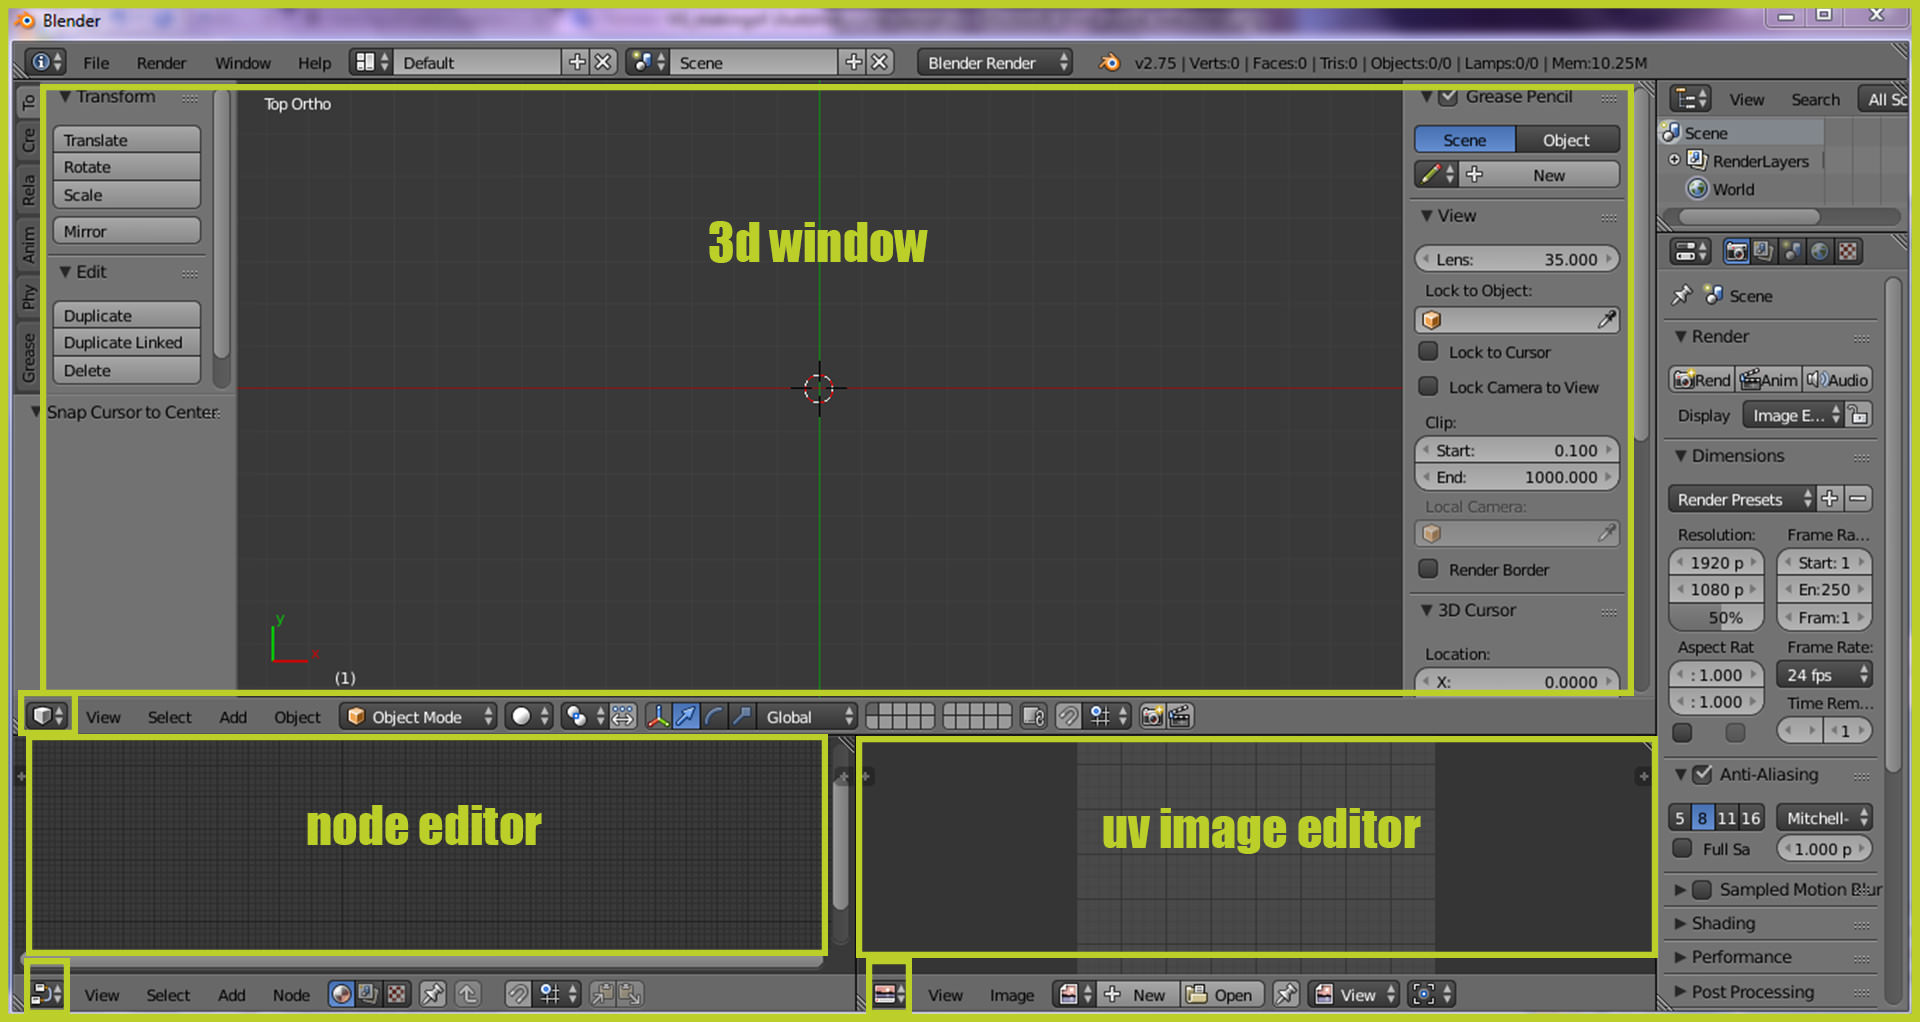
Main window is the 3d window in which you can model your stuff.
Left bottom window is the Node editor – a place where you can make all your materials.
Right bottom window is the Image Editor where you can preview all the textures loaded into .blend file and uv unwrap your models.
So basically those are my windows to work in. You can easily change yours by dragging right corner of each window up, down or sideways. You can even set your view to one known from 3ds max if you prefer to work with that scheme. It all depends on your own preferences.
You can split your window by placing the cursor over the line connecting the various windows. It will show you both sided arrow and ask you if you want to split or join areas.
Step 5 – Rendering Engine and Scale. On the upper main menu you can see drop down menu with available render engines.

Select Cycles from that list. Cycles is the best built-in render engine for Blender which allows you to make everything in the same window. You don’t have to export your scene to another program.
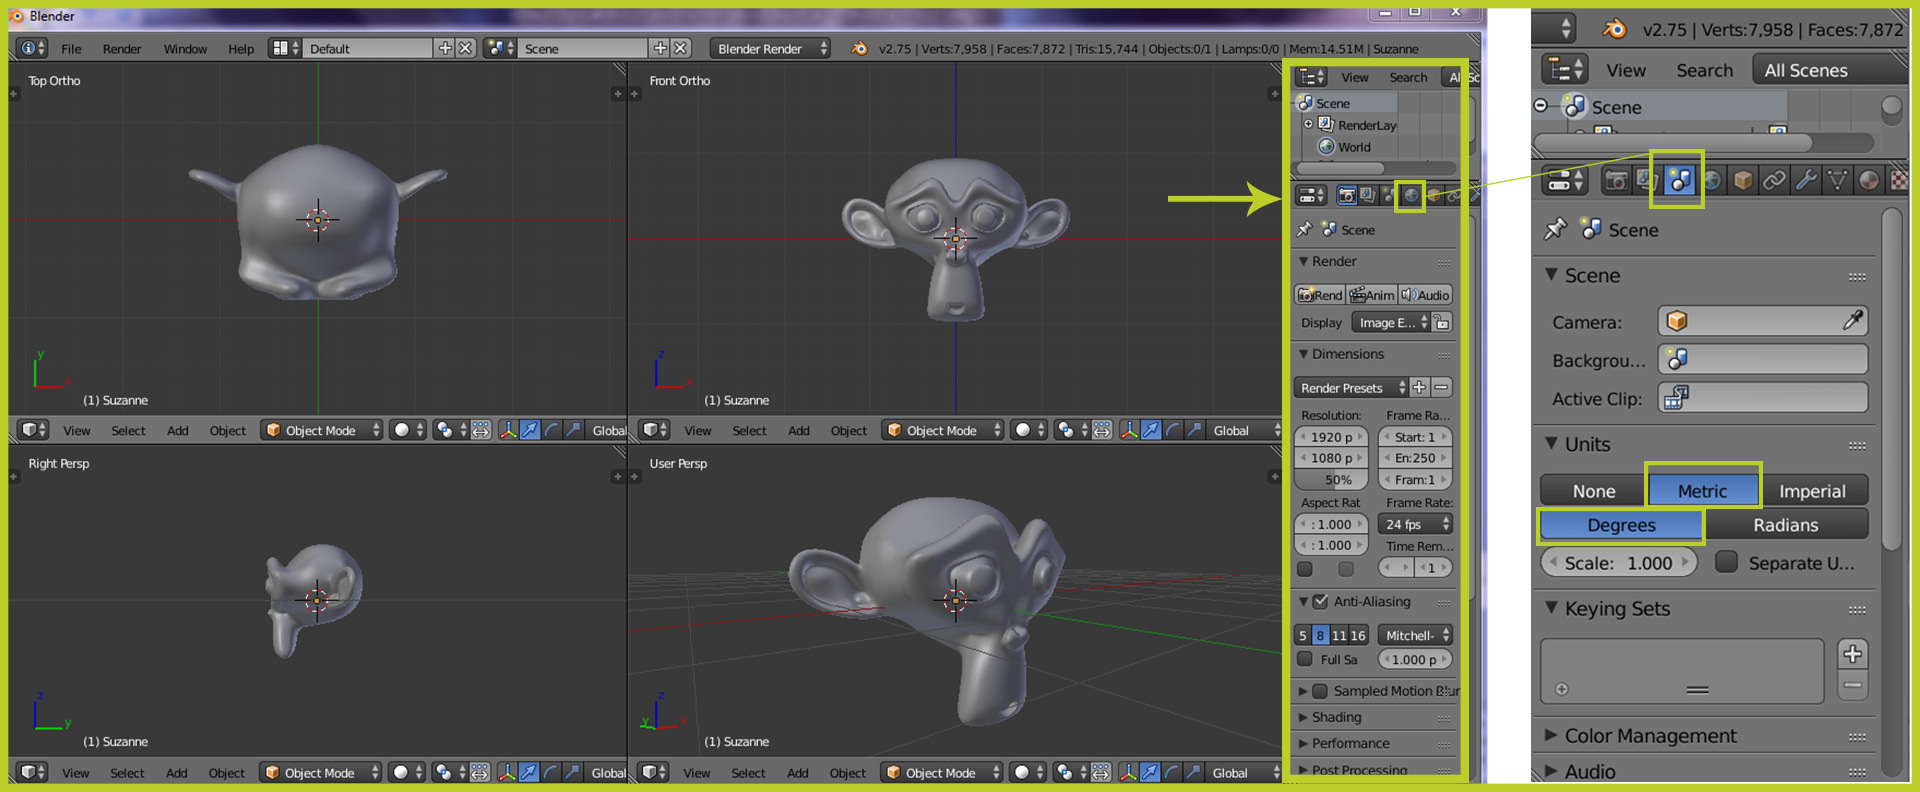
The one thing left is setting up the scale.
Maybe this is because of my profession, but I like to work with real scale. In my country it’s metric so I always make sure that this are my settings.
So to make this, go to Properties Panel on your right side and set up your scene units to metric.
Step 6 – Save your startup file. Simply choose from File drop down menu on your upper menu panel – Save Startup file.
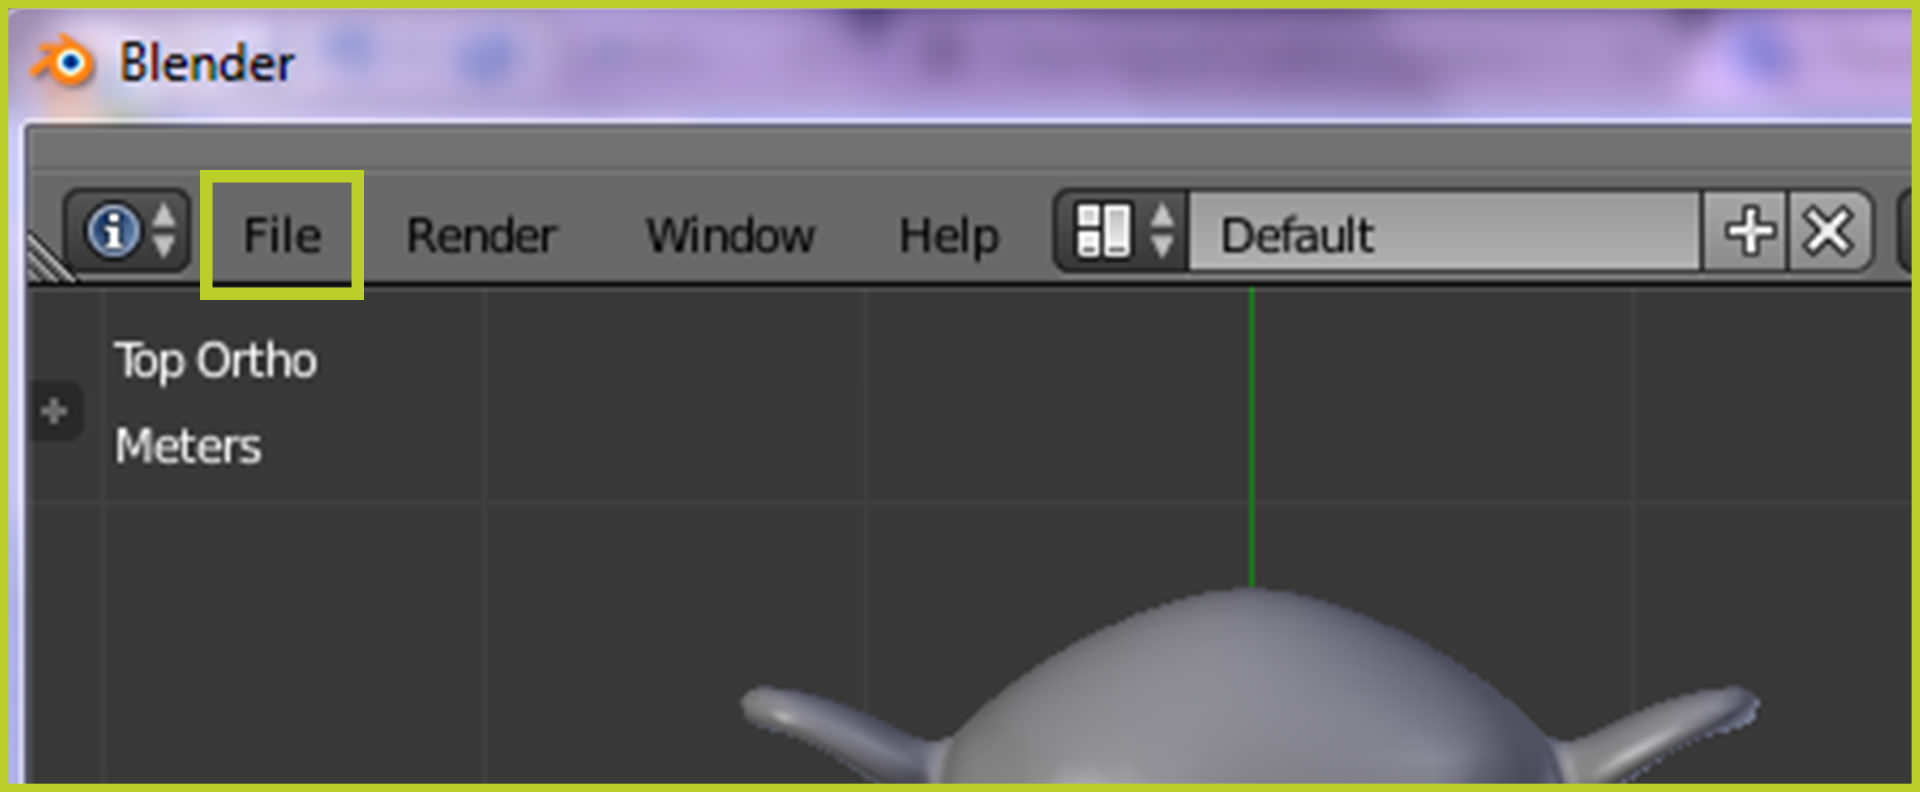
And that’s it. You’ve just made your first step into creating your own architecture scene and to know Blender better.
Happy Blending!
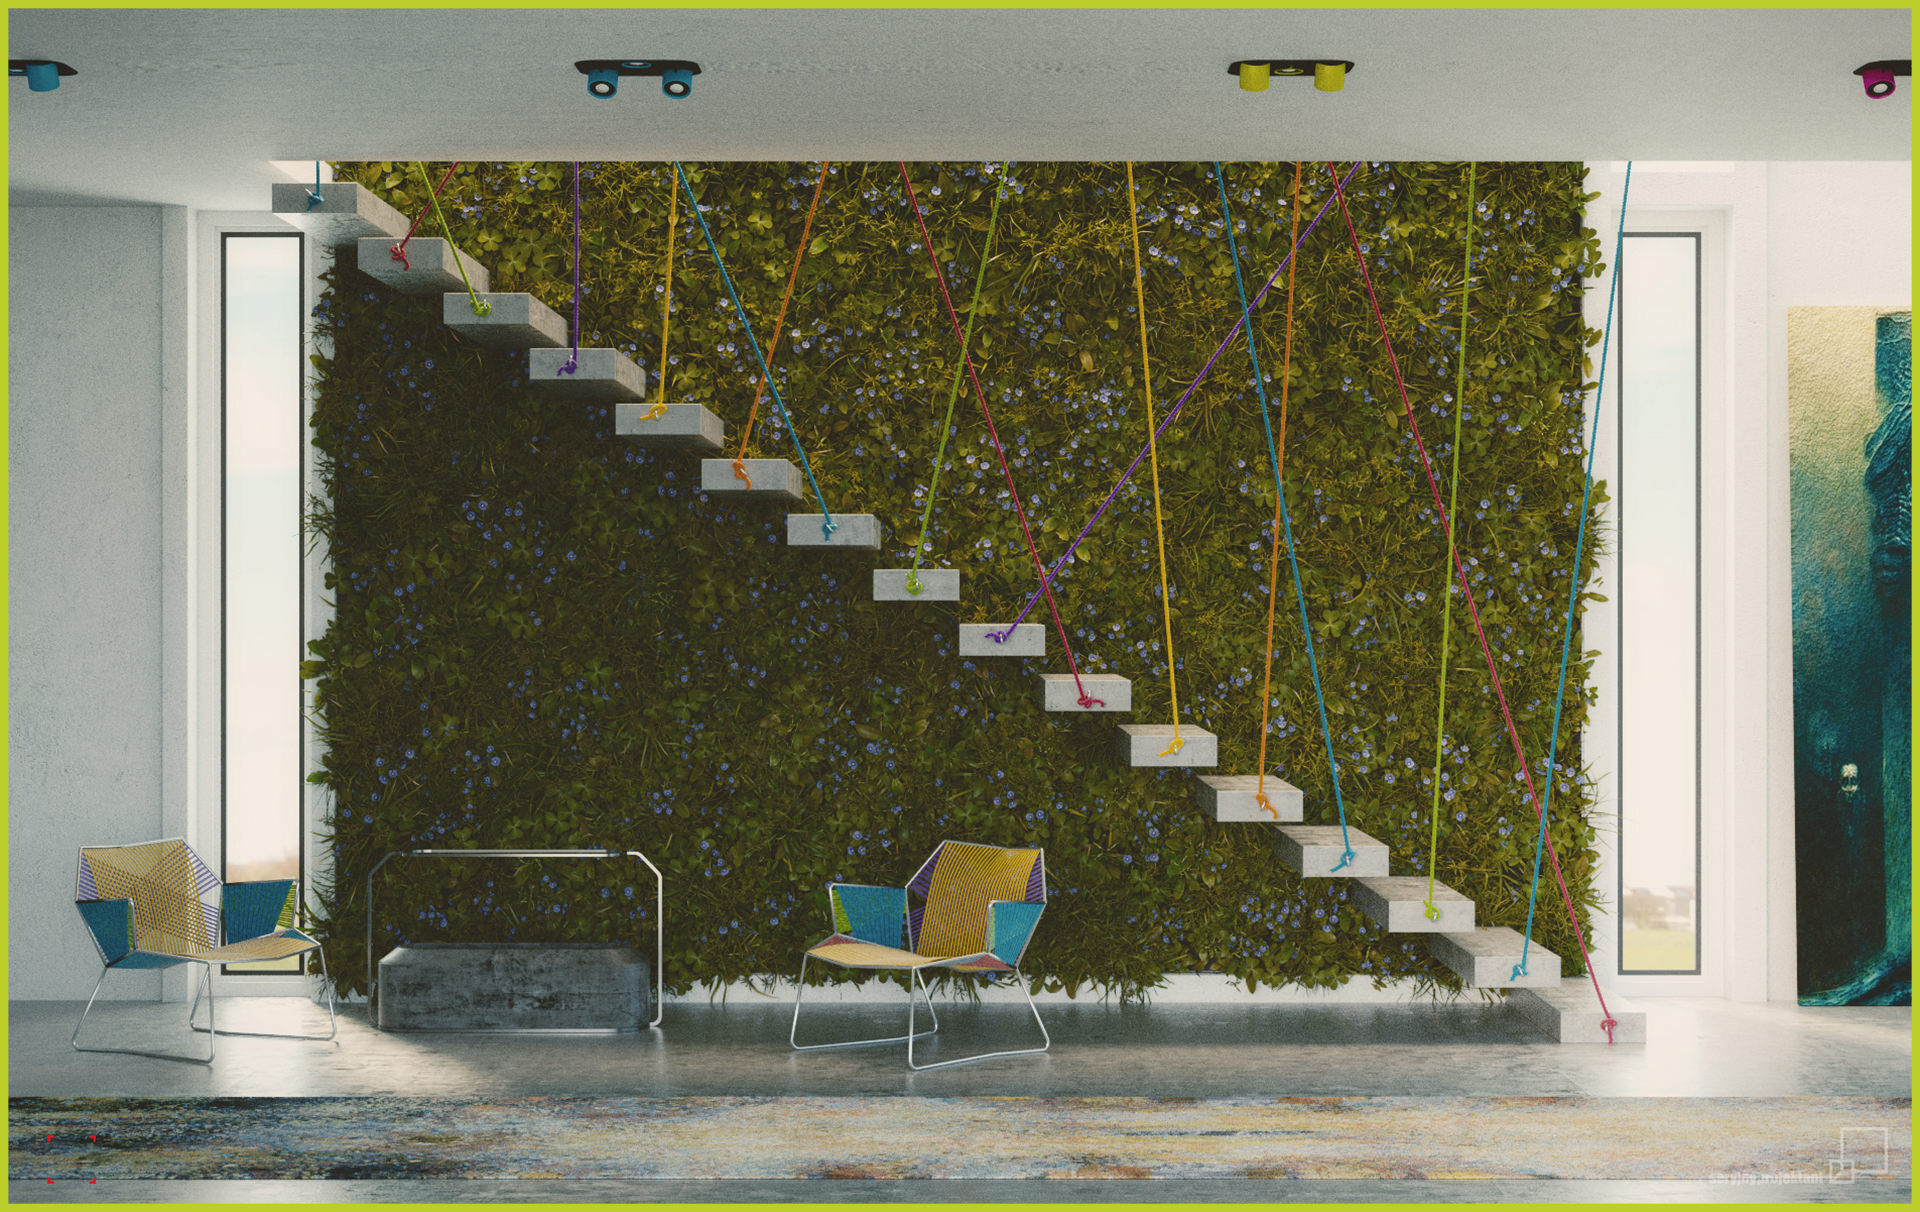
The Initial Idea of the Vertical Garden
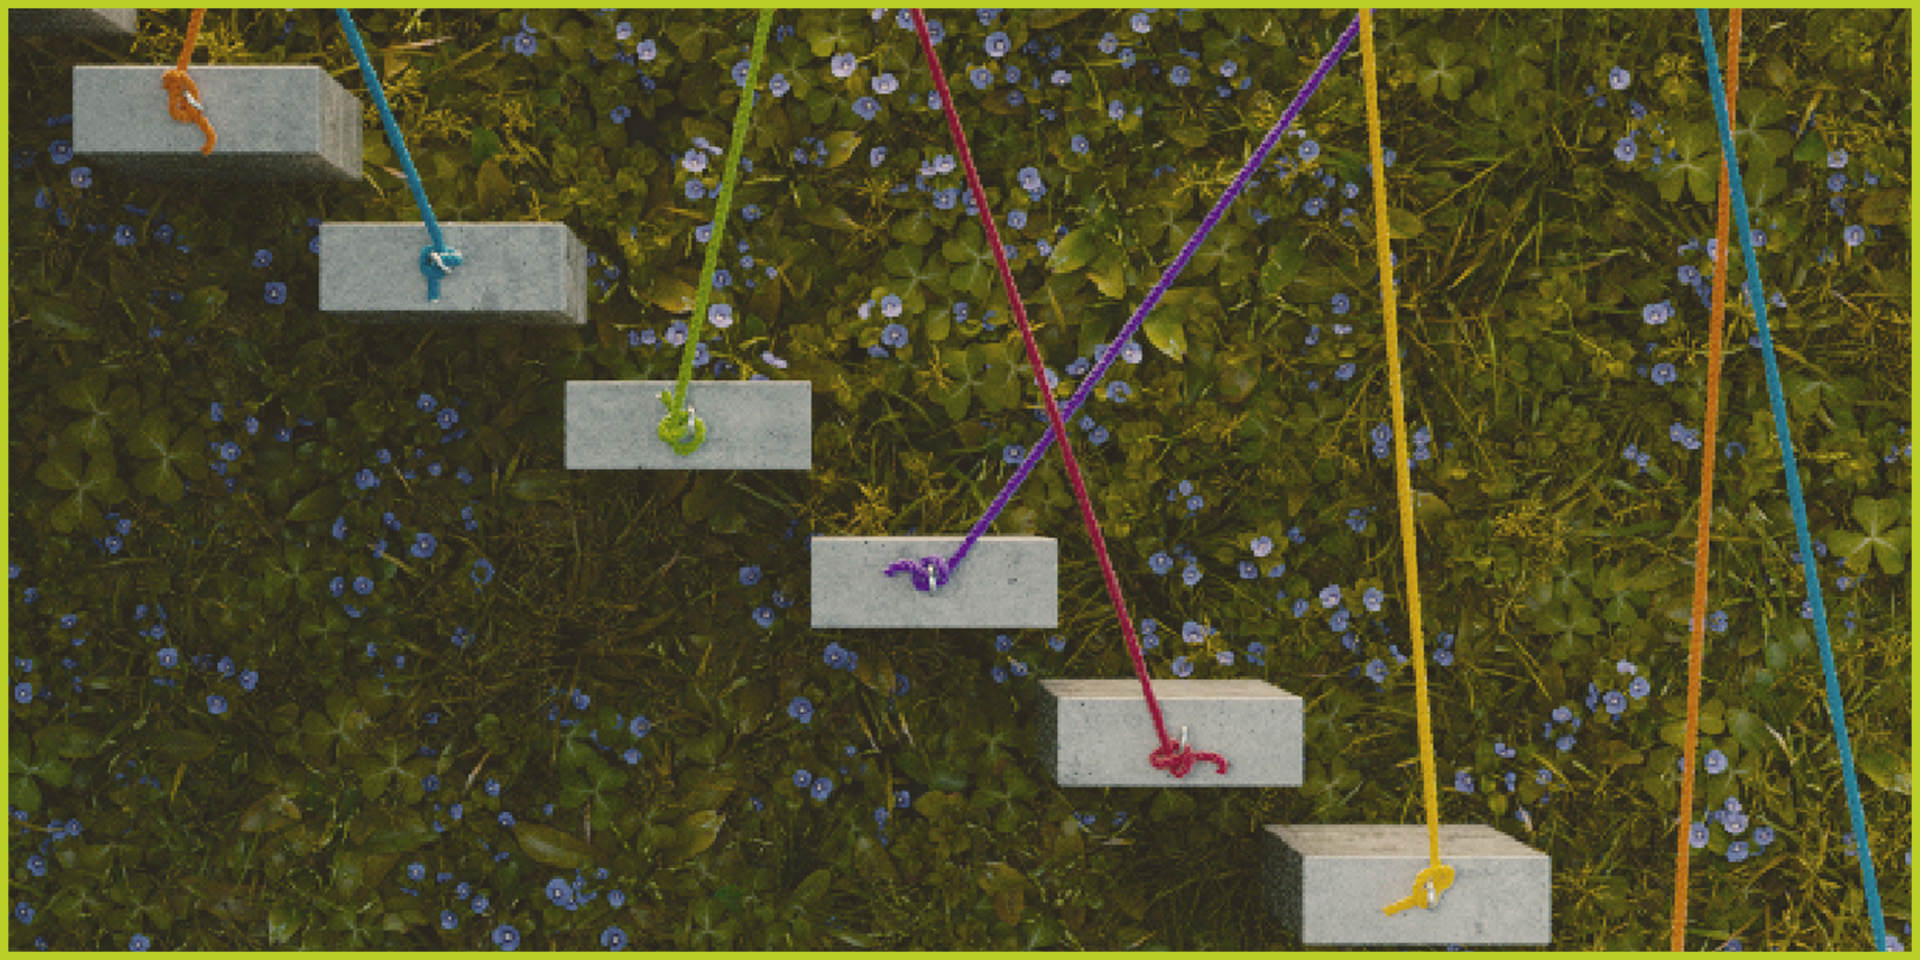
The very first idea of making the Vertical Garden striked me a few months ago and wasn’t connected to vertical gardens at all. I had in my mind this idea of colourful handrail made of tensioned rope along with the ascetic, concrete stairs. This was my basic object to focus on.
And then I started to look for something that would be a nice entourage for this handrail. At that time I received an email from my colleague about those vertical gardens idea and then I knew that this was it.
So I started to sketch as I am a bit old-fashioned in my workflow. And basically decided that for a test I will render only a house foyer to showcase the vertical garden.
Modeling
Walls
First of all, I modelled basic mesh of the walls. I started from a simple cube and than stretched it out to the proper scale and made a few loop cuts to make holes for windows and to allow light source to enter the room.
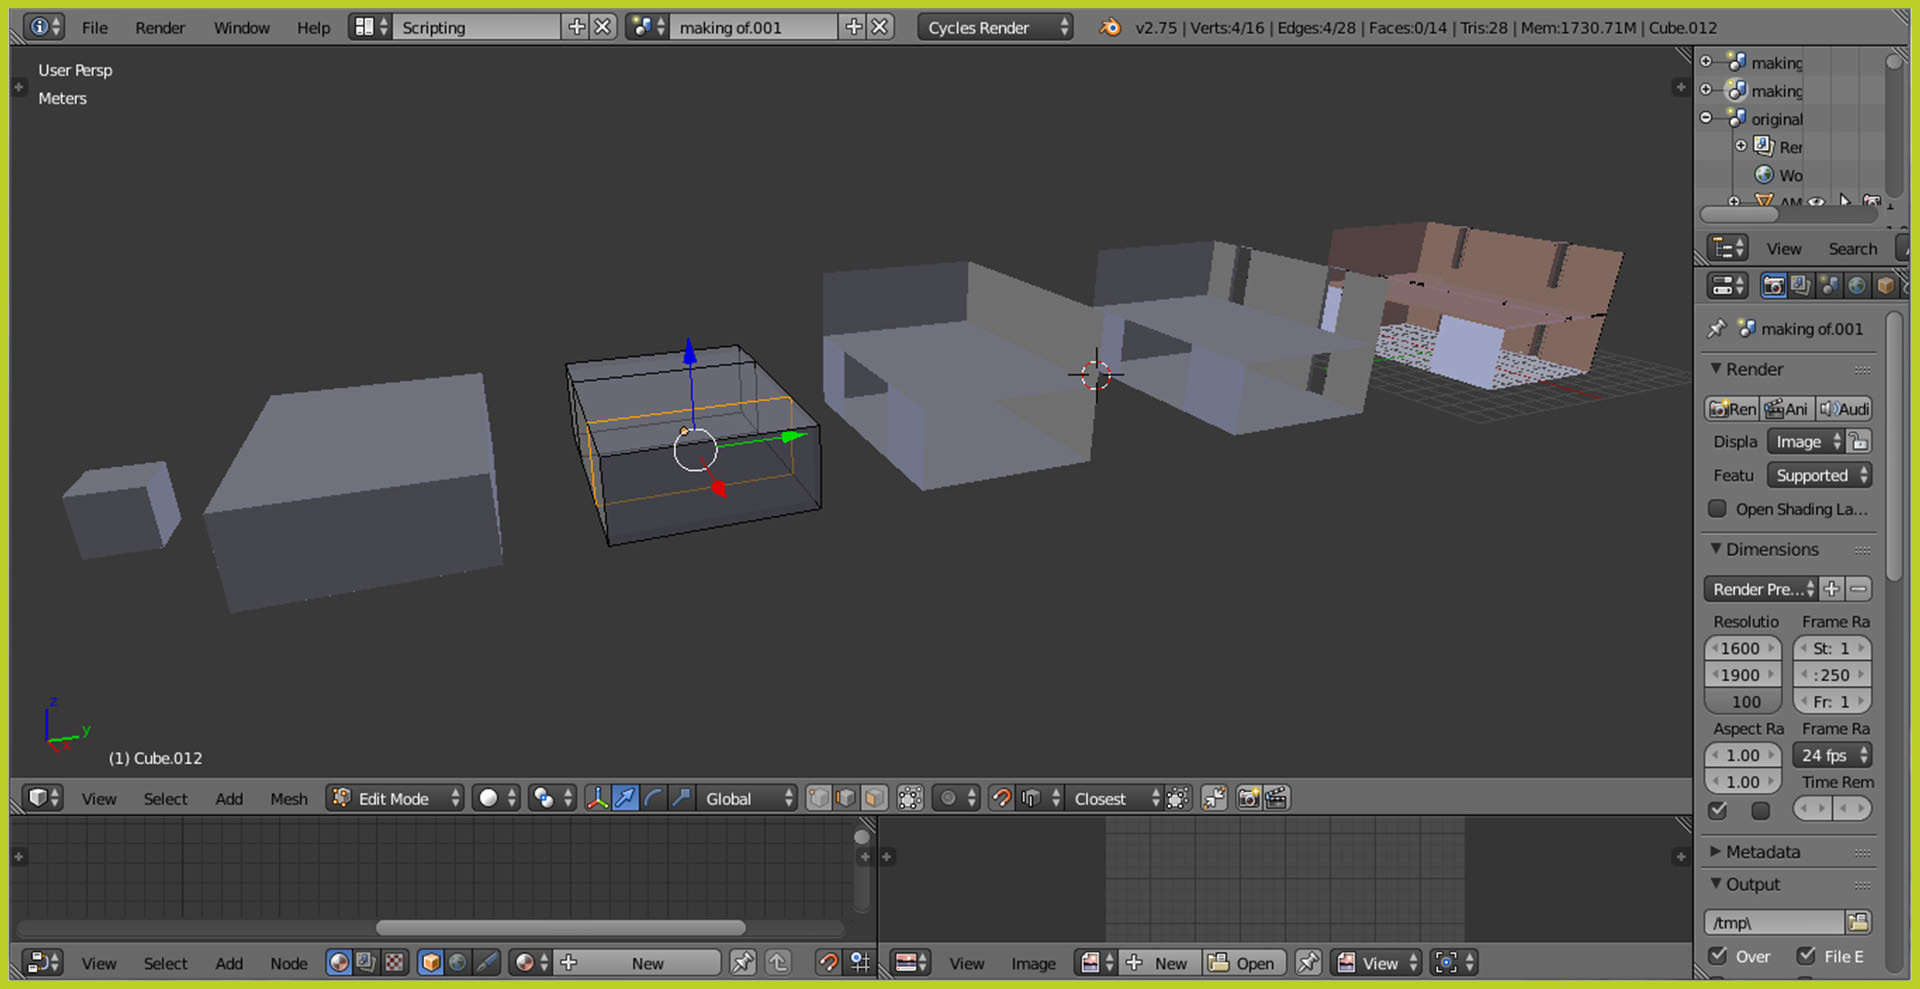
I separated floors from walls to make a proper UV unwrapping.
Then I made a few more details in order to have more realistic close-ups – I added a Bevel modifier to wall’s edges.
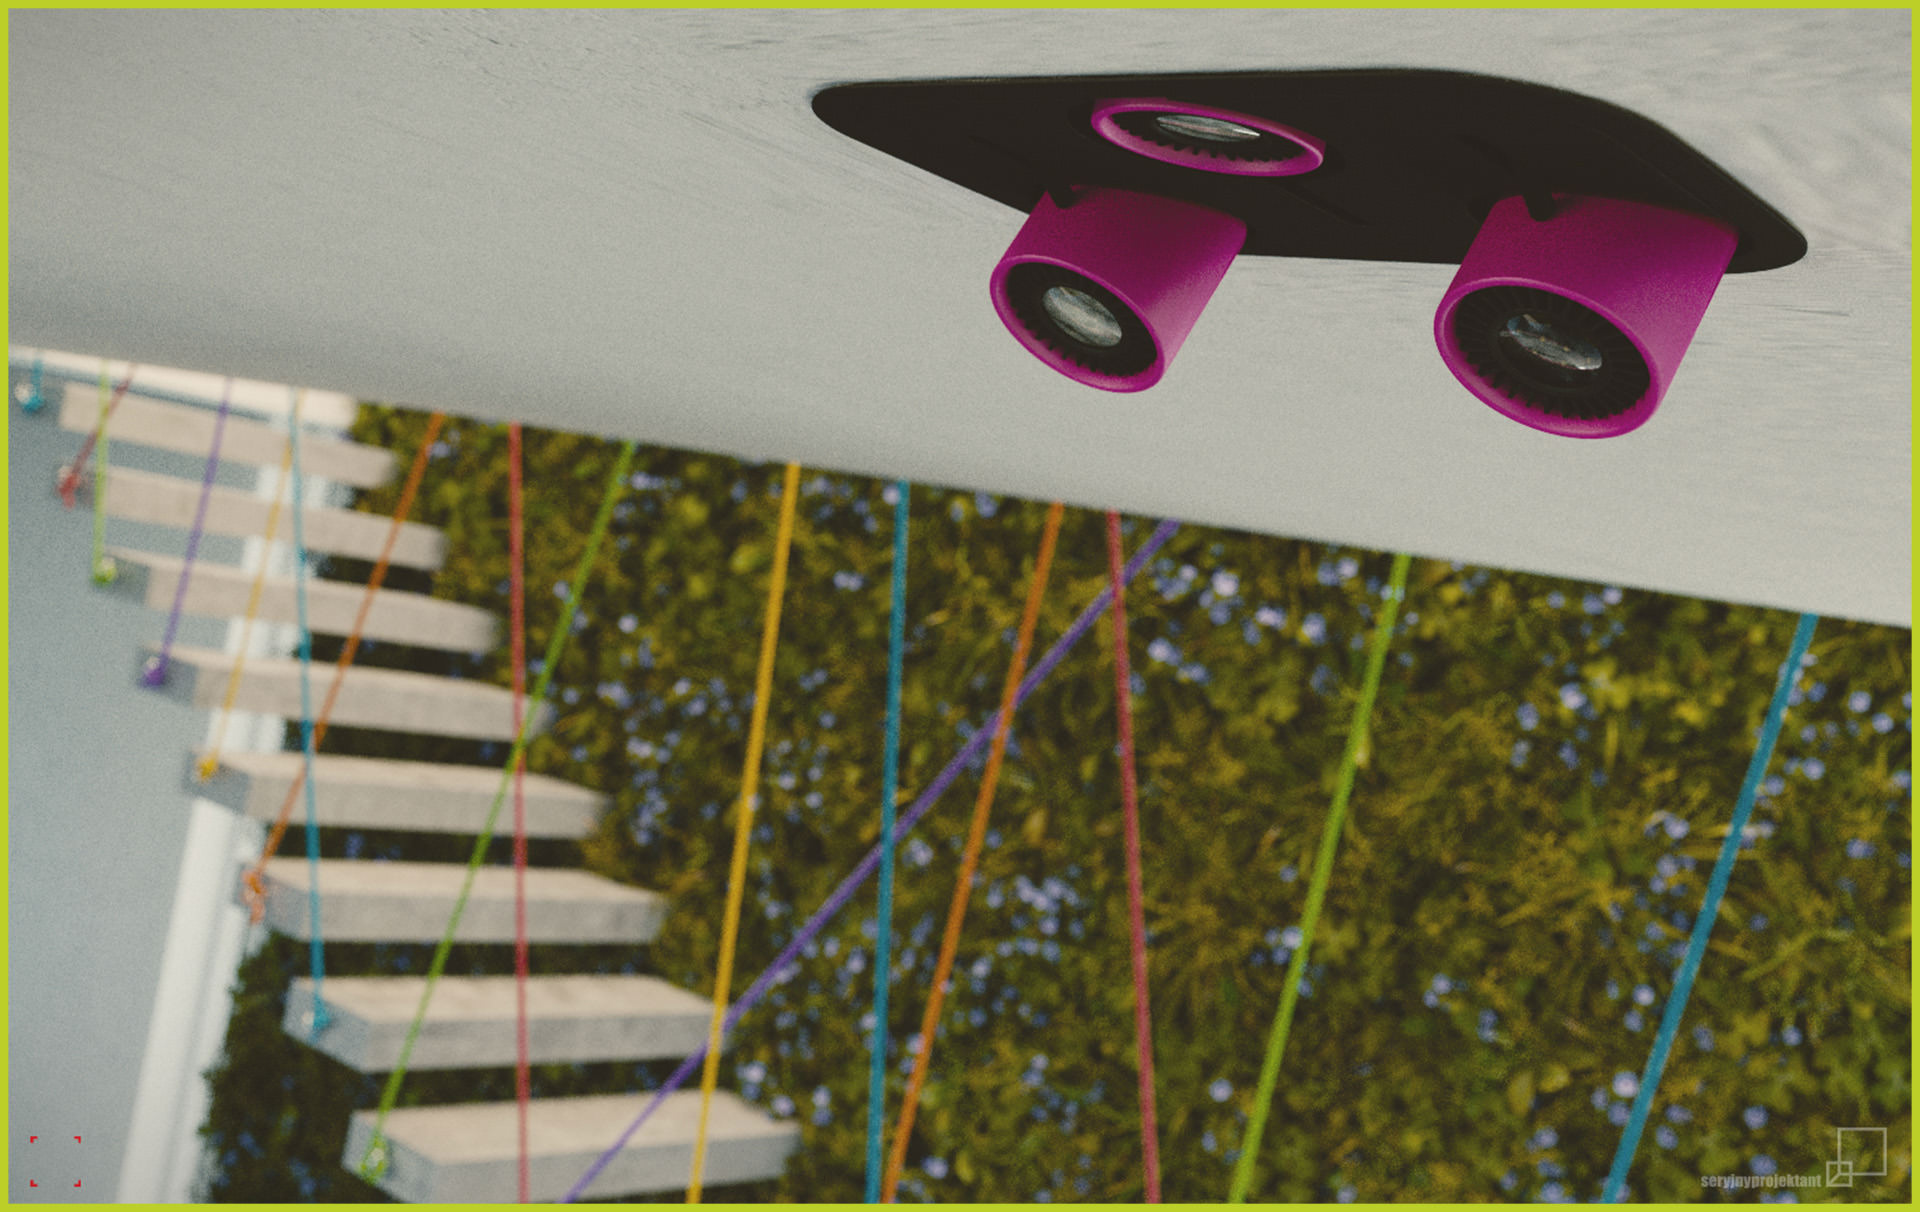
And made holes in ceiling for lamps.
Windows
After modelling all the walls, I made windows using the Window Generator v3 add-on.
It’s a very useful tool I use a lot. You can easily make windows with good amount of details needed to visualise both interior and exterior scenes. As You can see below there are many ways to adjust the window to your needs.
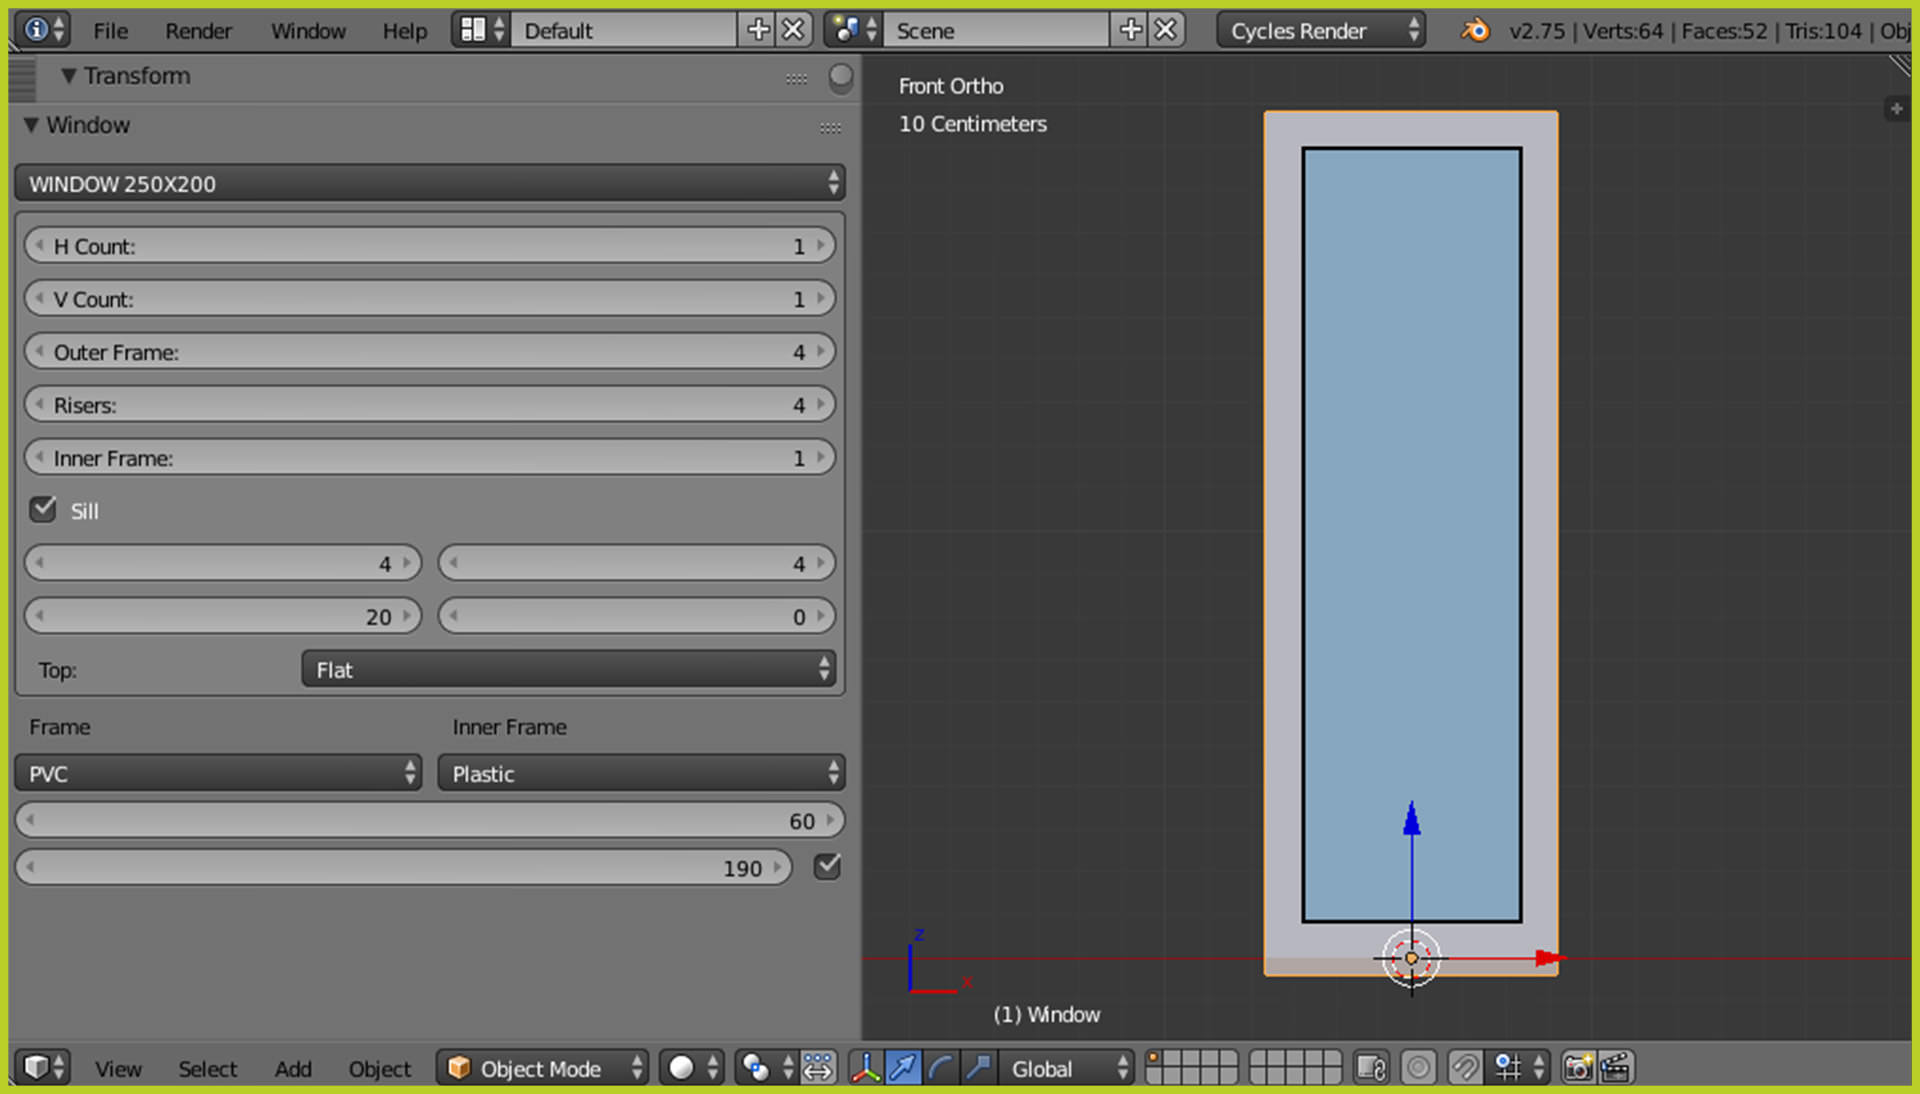
I made my windows very narrow and high:
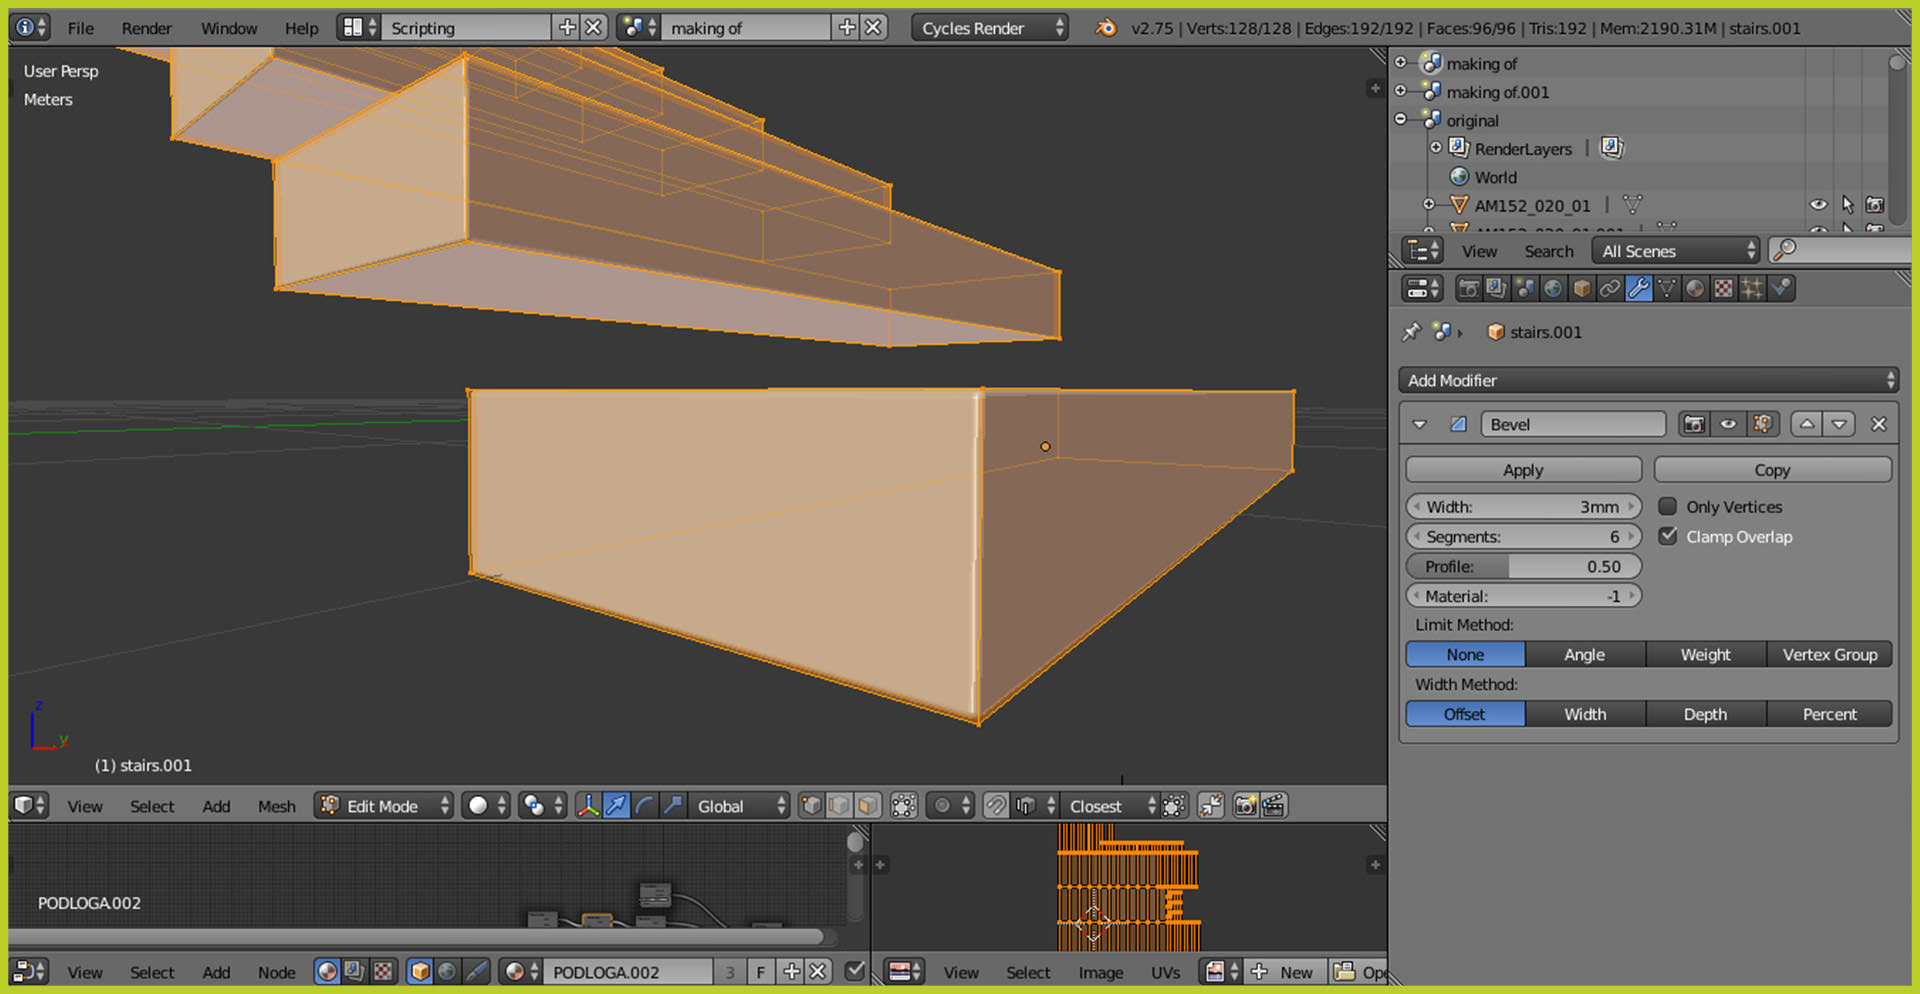
Stairs

I started from a basic cube, which I stretched out in order to match the real scale.
And than I used some modifiers. To make stairs look natural I added Bevel Modifier. This allowed me to achieve more realistic look – Bevel modifier softens the edges and gives them some additional loop cuts.
To duplicate the first stair I used the Array Modifier.
Handrail
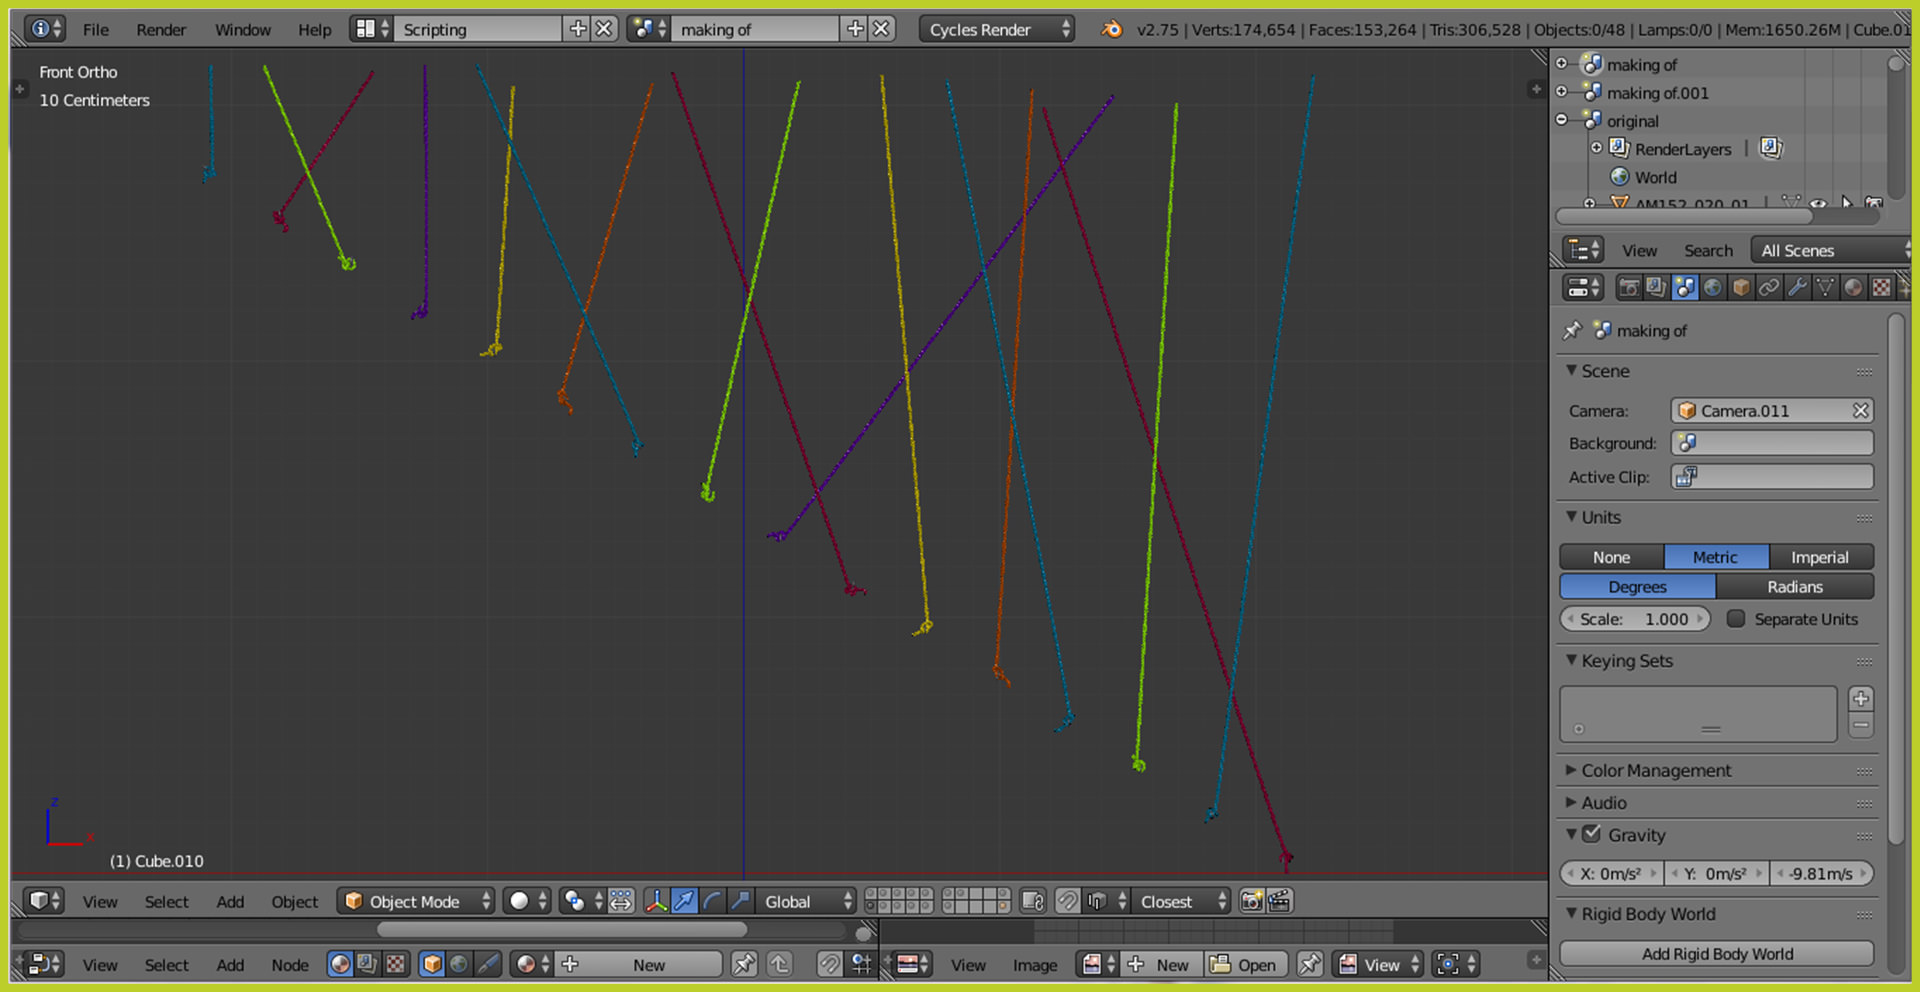
It was a bit tricky when I made it for the first time but now I think that this is rather simple.
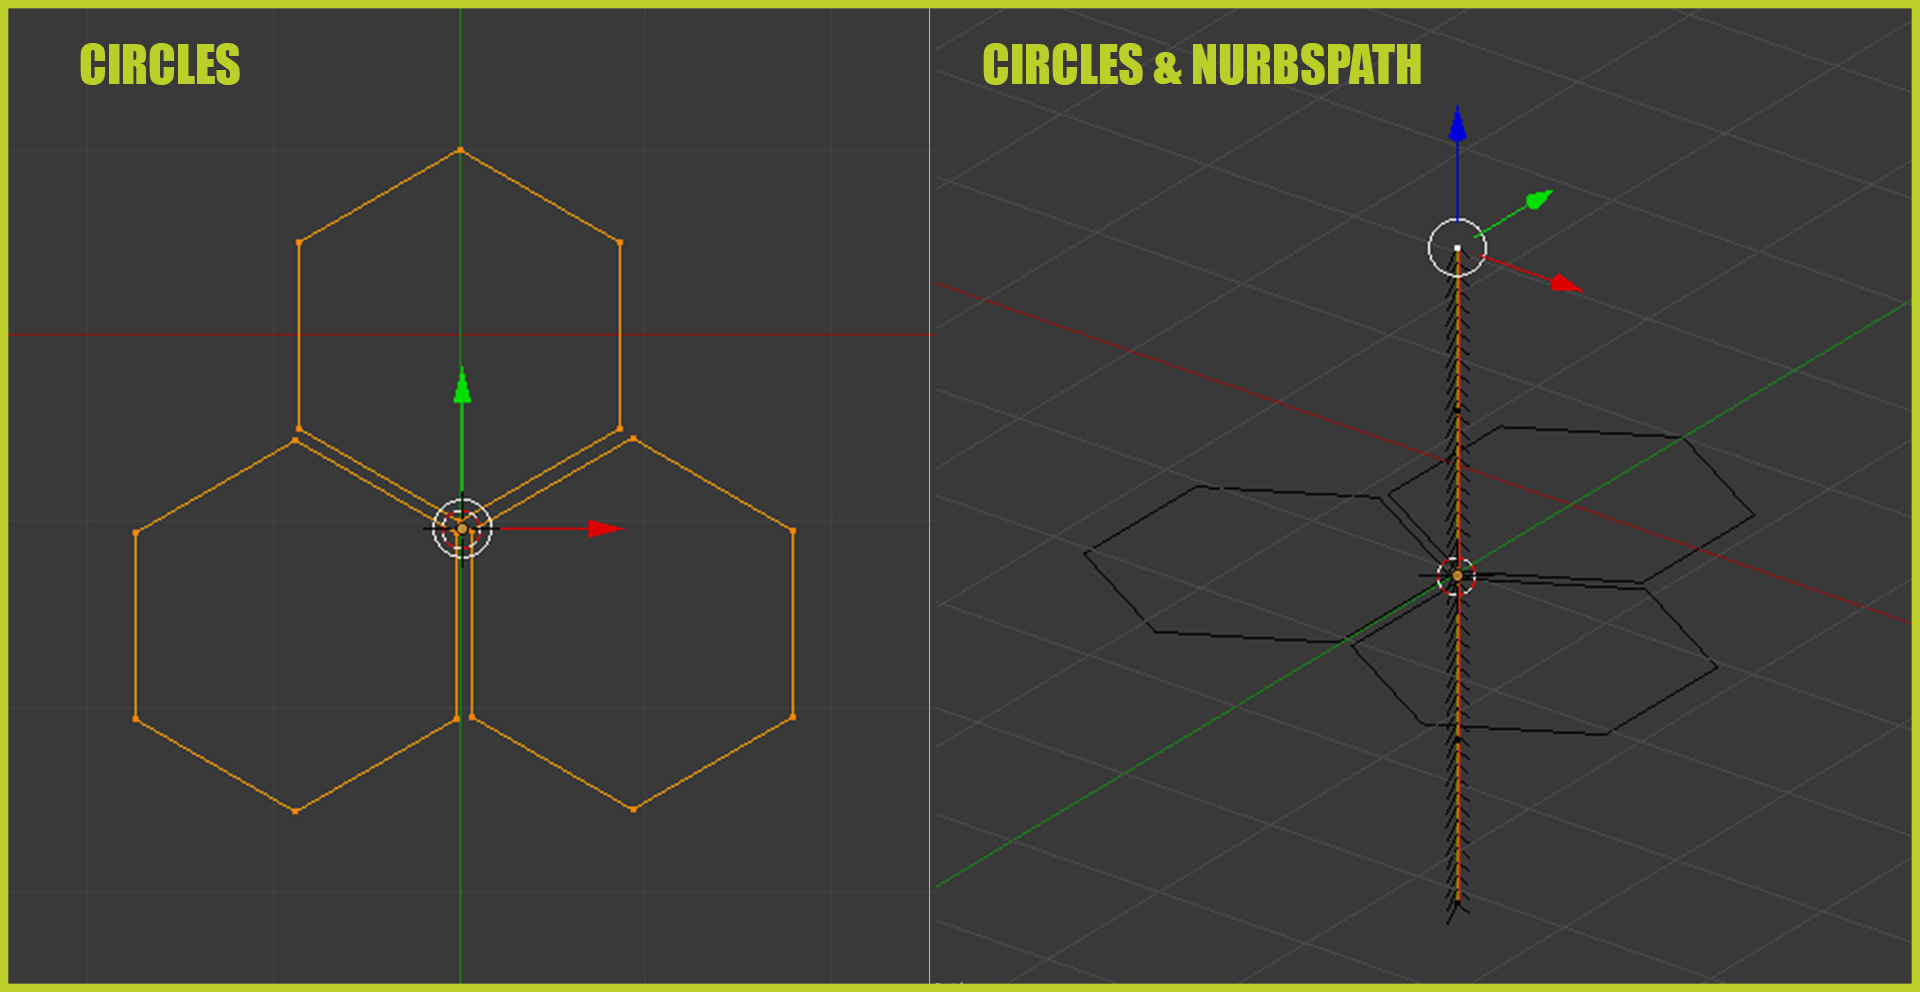
I started here with 3 circles. Each of them had 6 vertices (to make a small vertex count). And merged them down to one object. (TIP : make sure that the origin point is in the middle of the object).
I made NurbsPath and straightened and stretched it out.
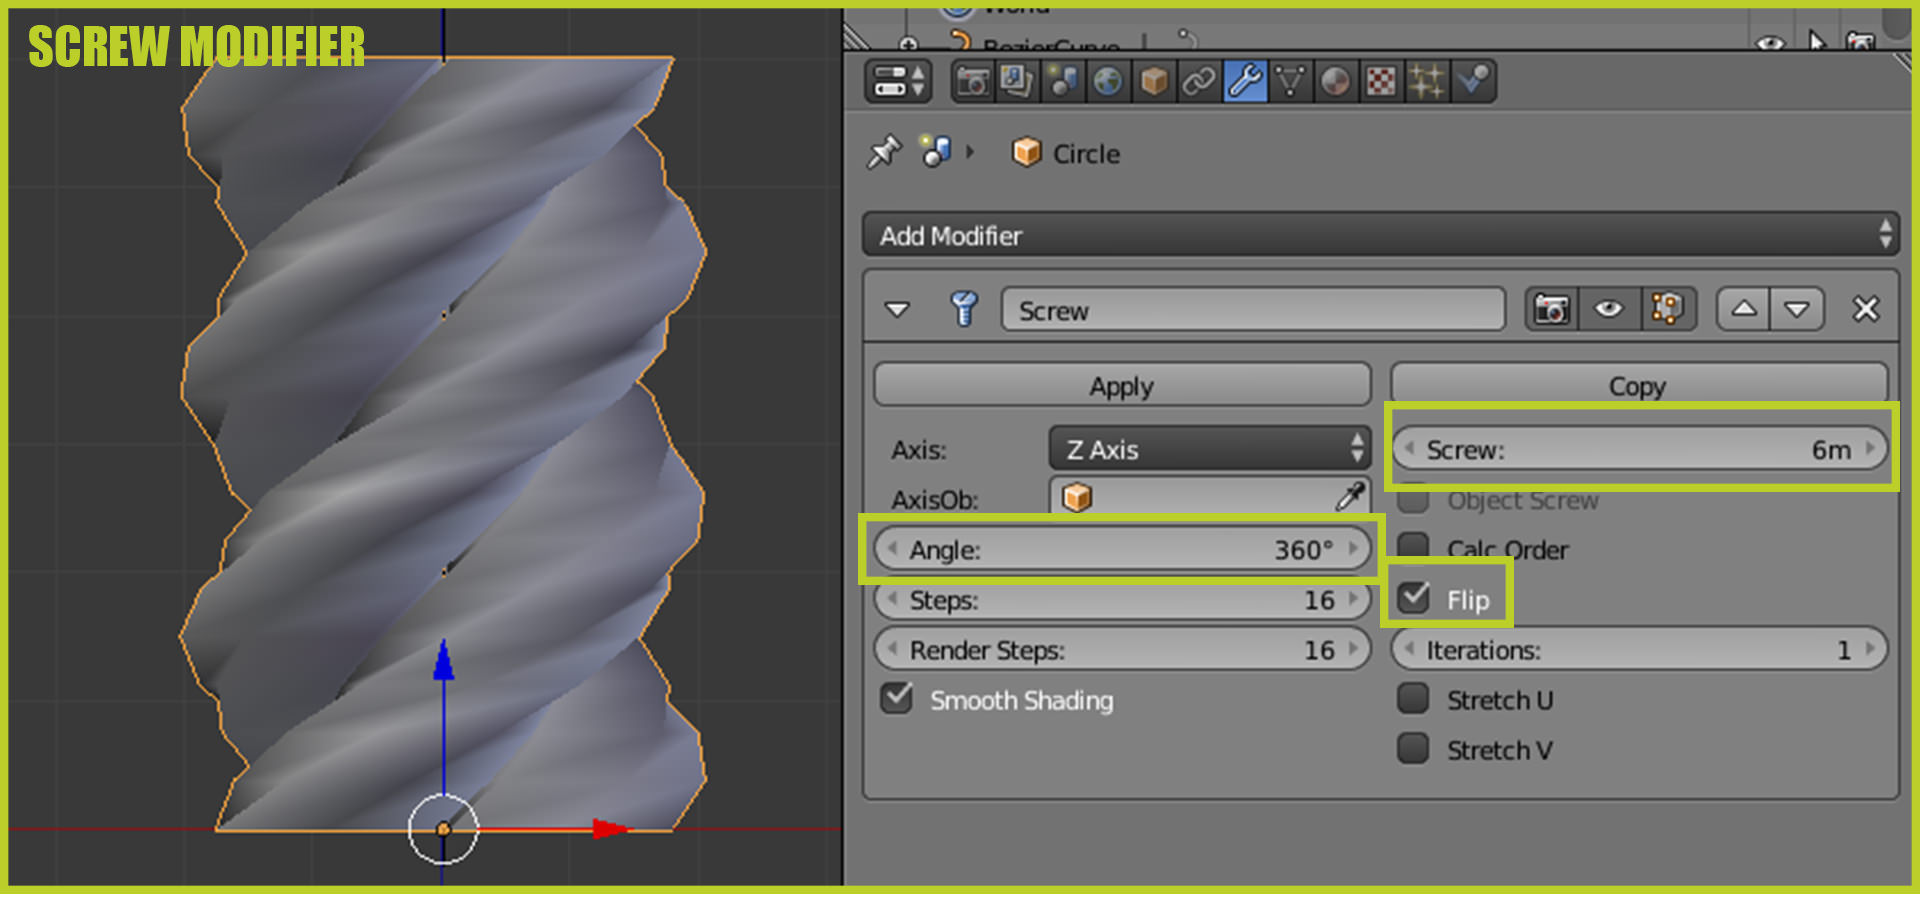
I added Modifiers to my rope object.
Screw Modifier which allowed me to rotate my rope mesh.
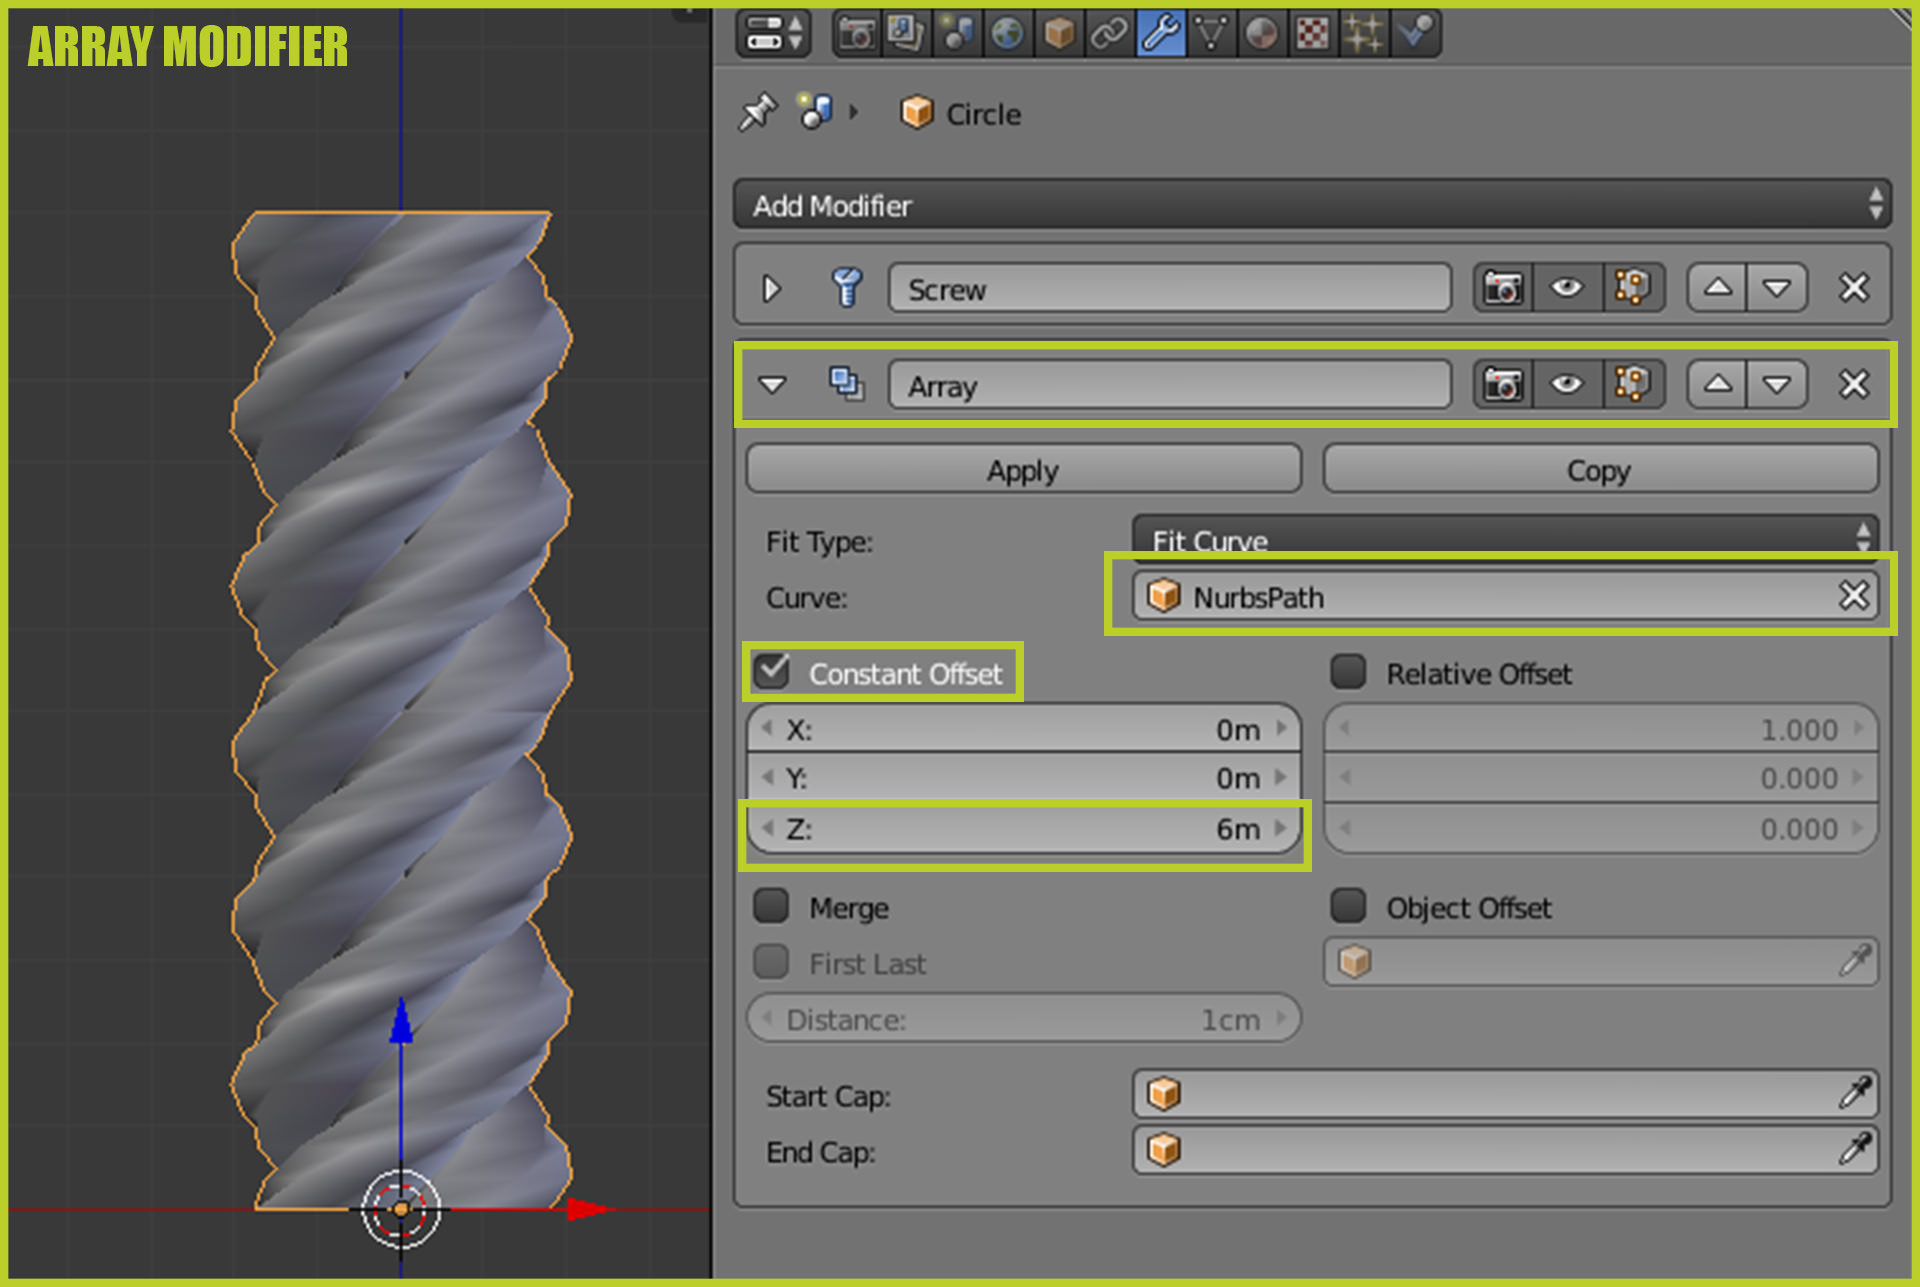
Array Modifier – as a “Fit Curve” type – allowed me to stretch my rope along the path.
Curve Modifier – to set the NurbsPath as a path along which rope will follow.

Optional Subdivision Surface Modifier – if you want to make rope smoother.
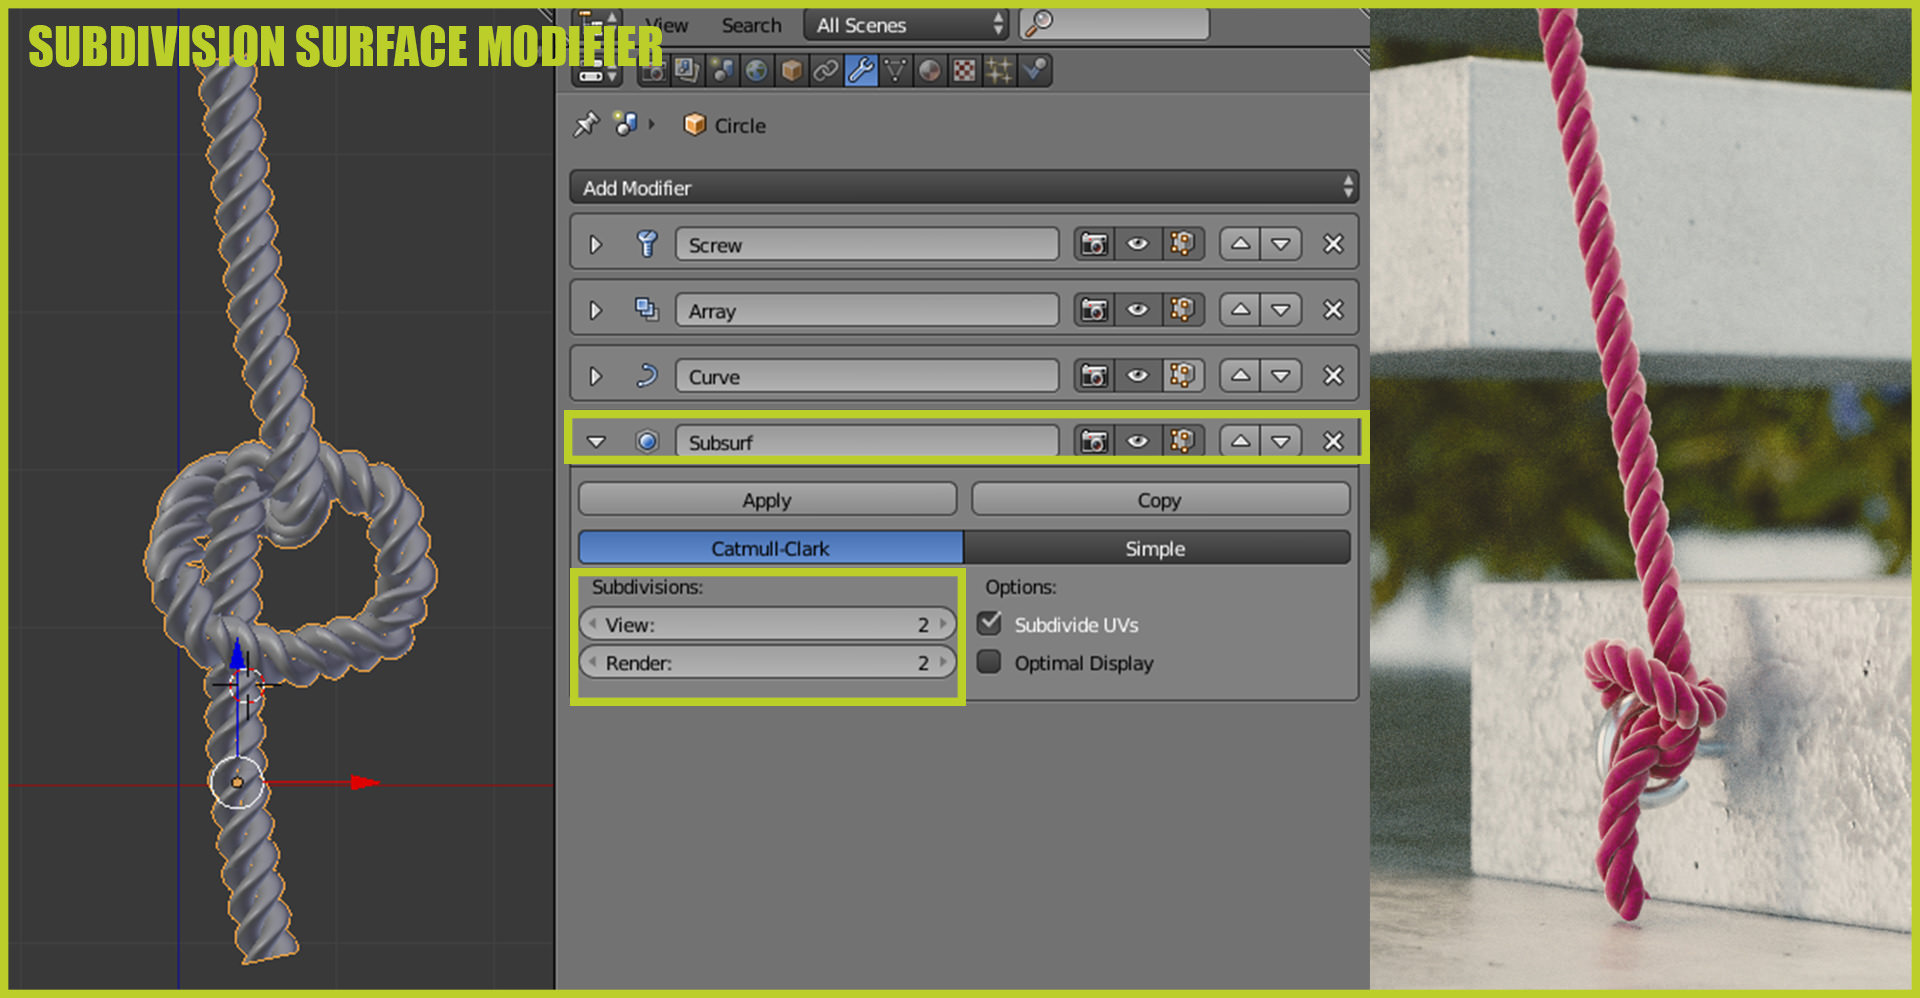
After making basic mesh I played with every rope separately so that each node was connected differently to avoid repetition.
Furnishing
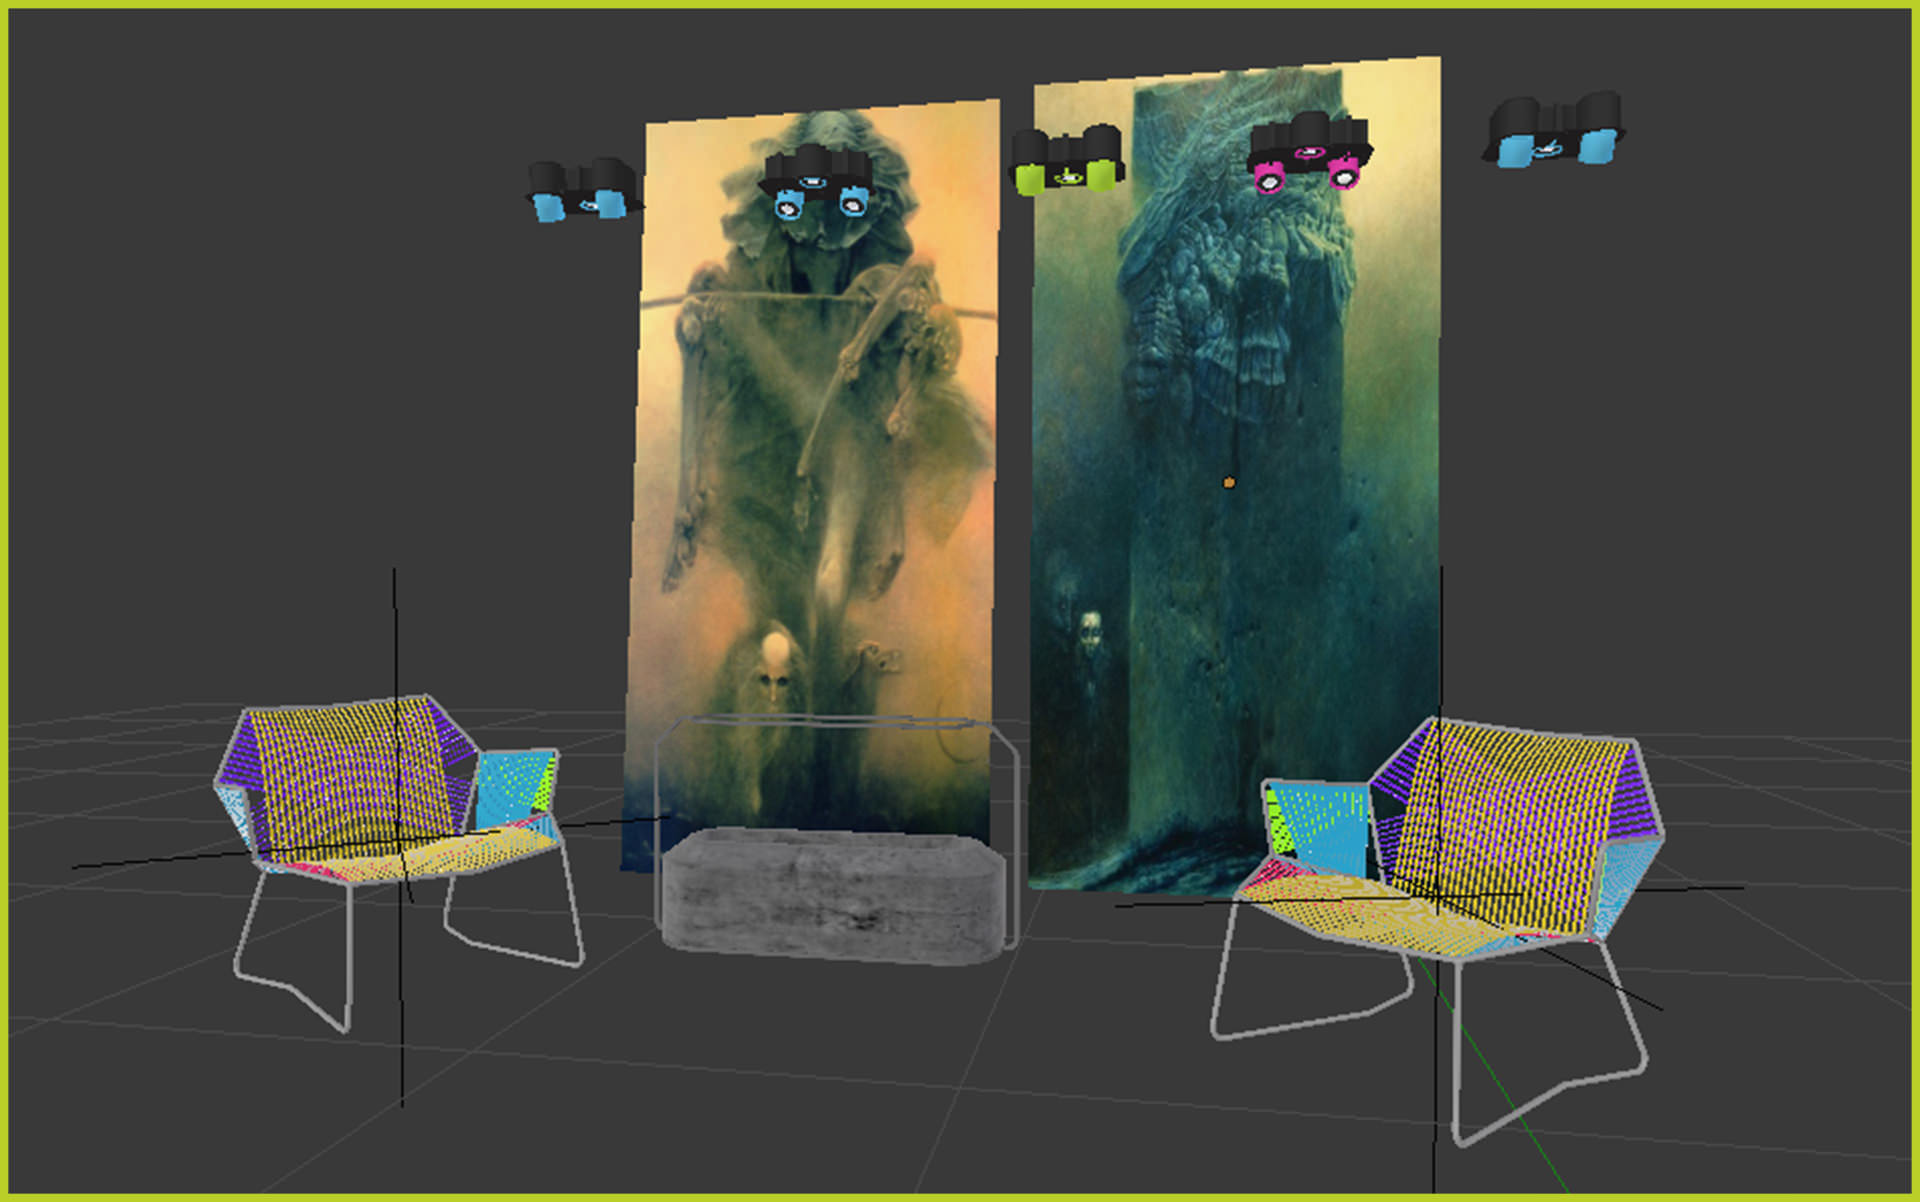
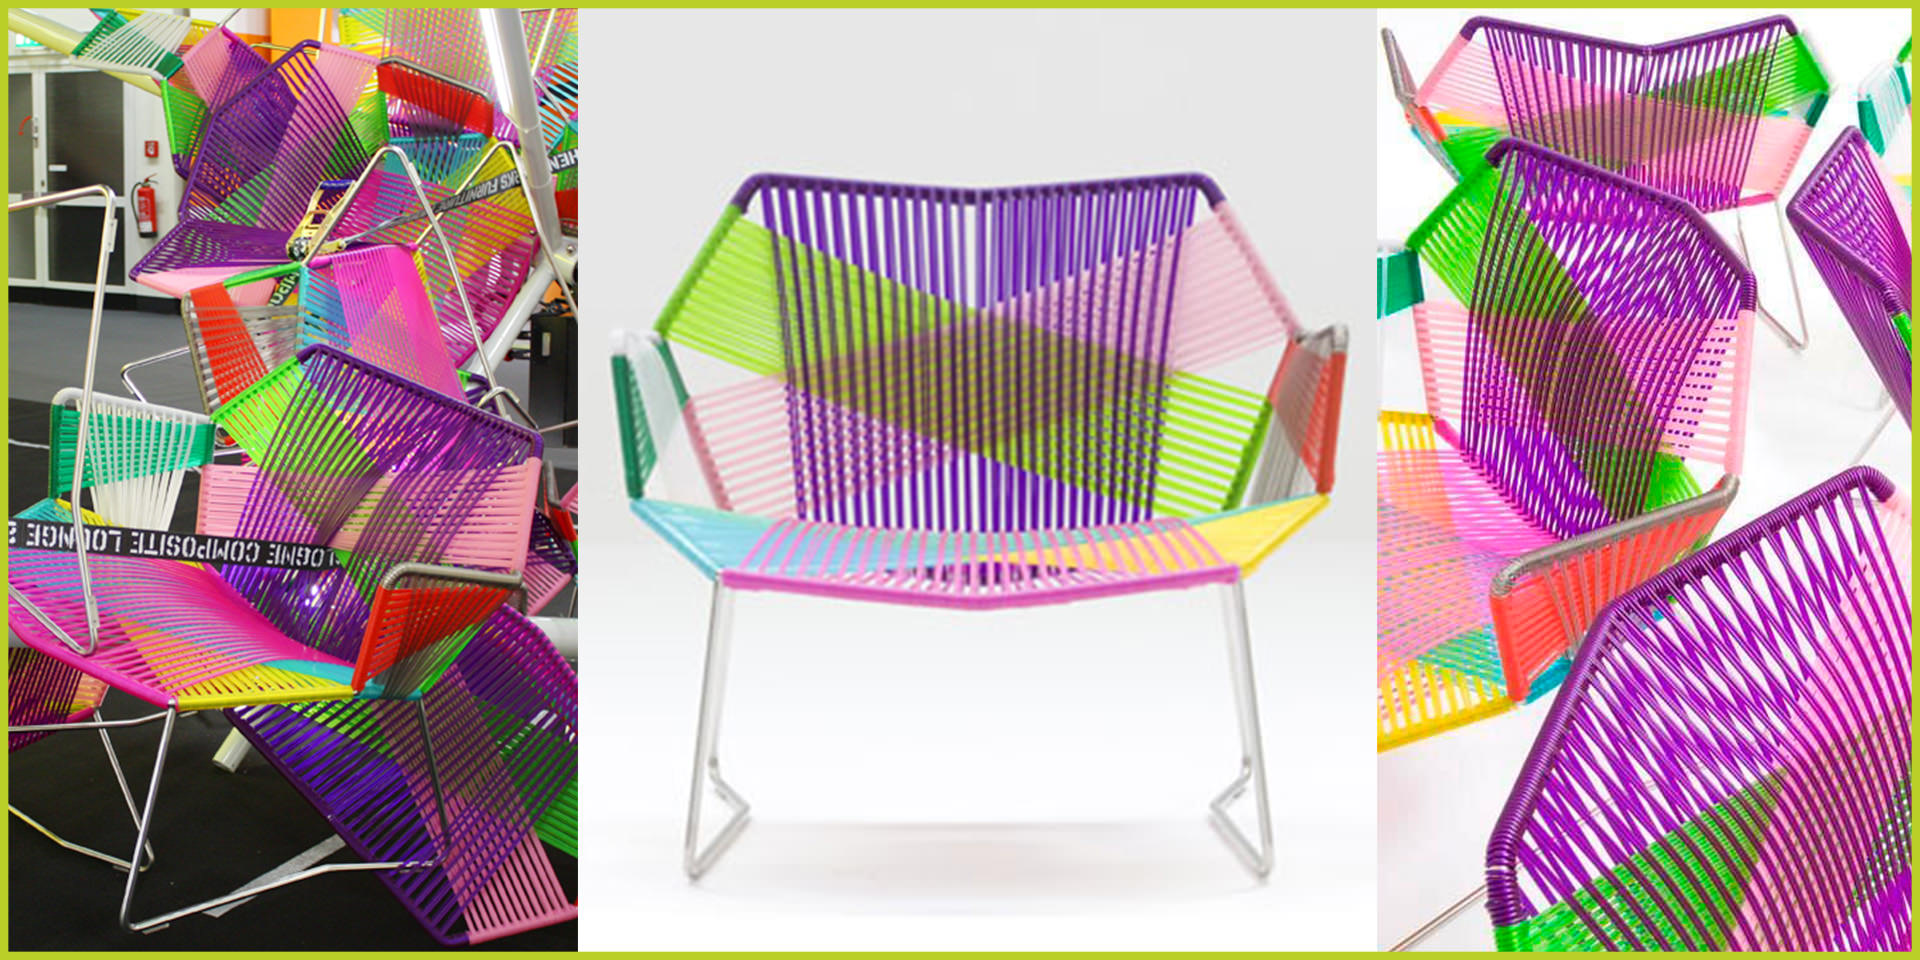
In terms of furnishing it was a rather simple project. As soon as I decided to make colourful handrail I knew that I would like to put into the scene Patricia Urquiola’s Tropicalia armchairs. I really like her designs and here was a good opportunity to use it.
At first I modelled a metal frame: started with a Nurbs Curve to create a half of armchair’s frame. I filled it with a full radius form and gave a depth to it to obtain the shape of a hollow tube.
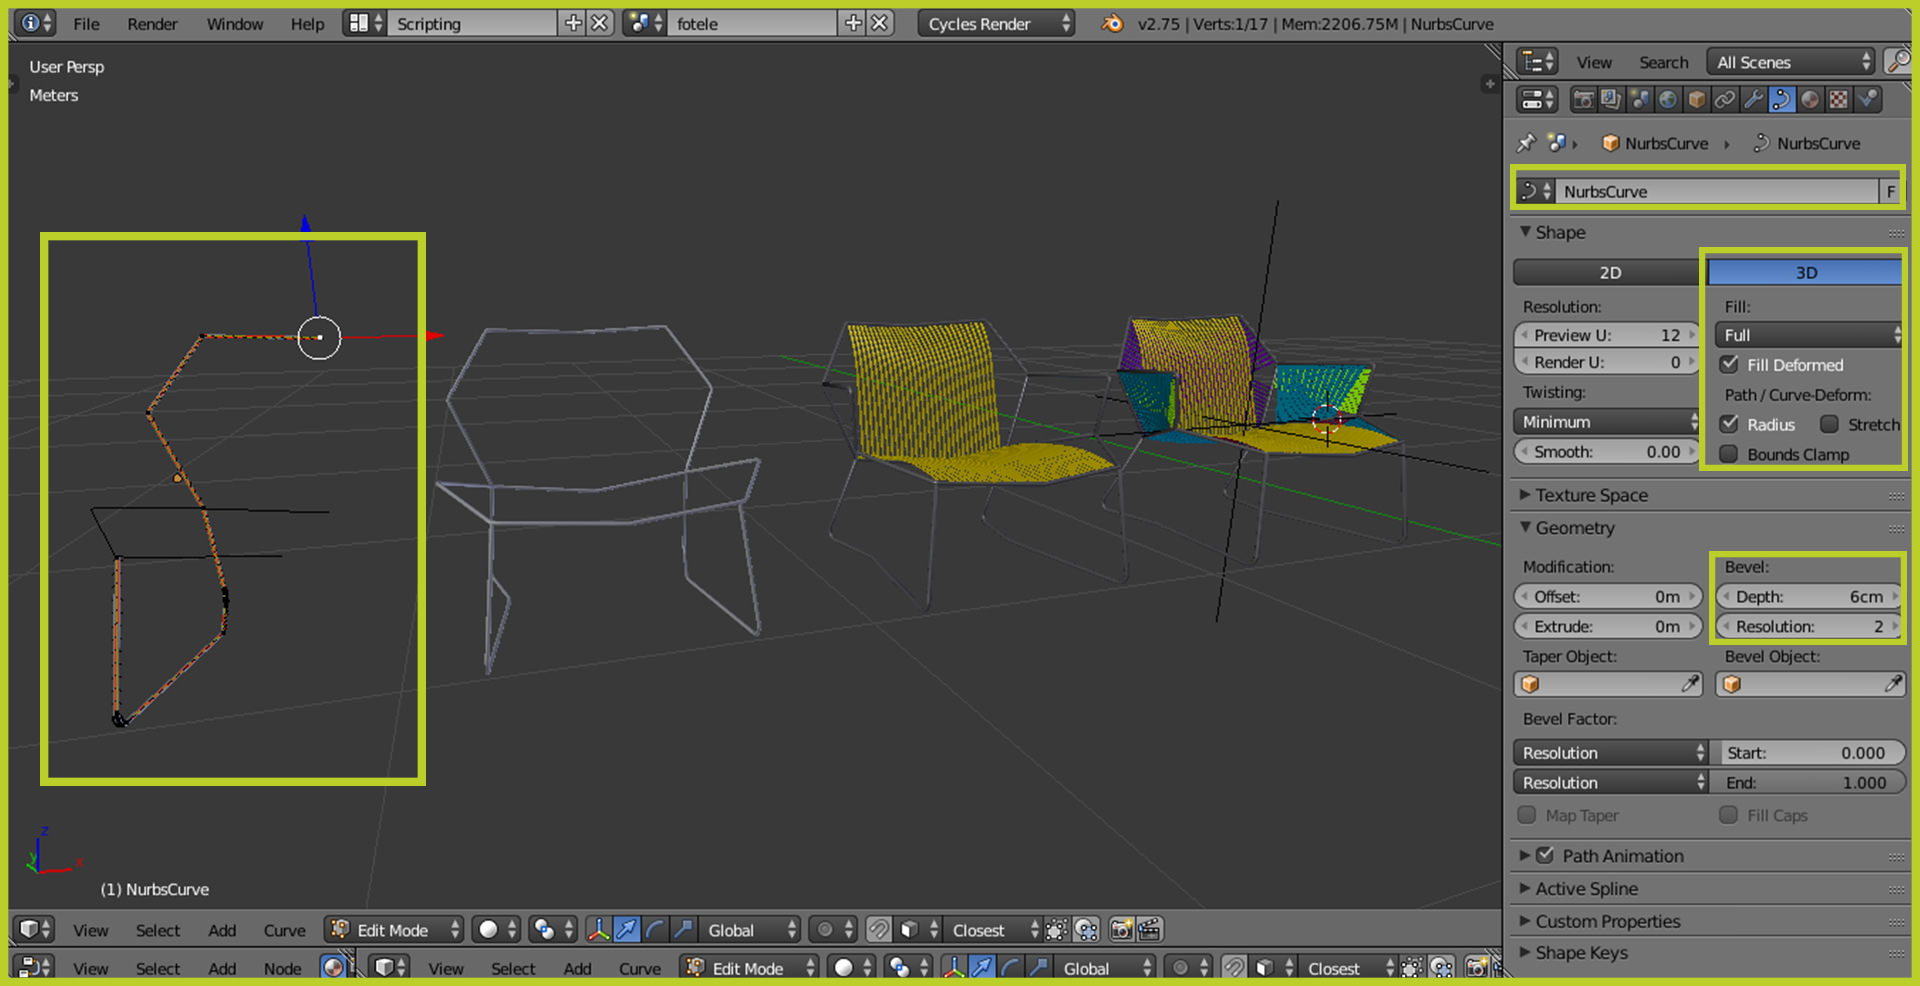
Than I used Mirror Modifier to get a symmetrical other half of the frame.
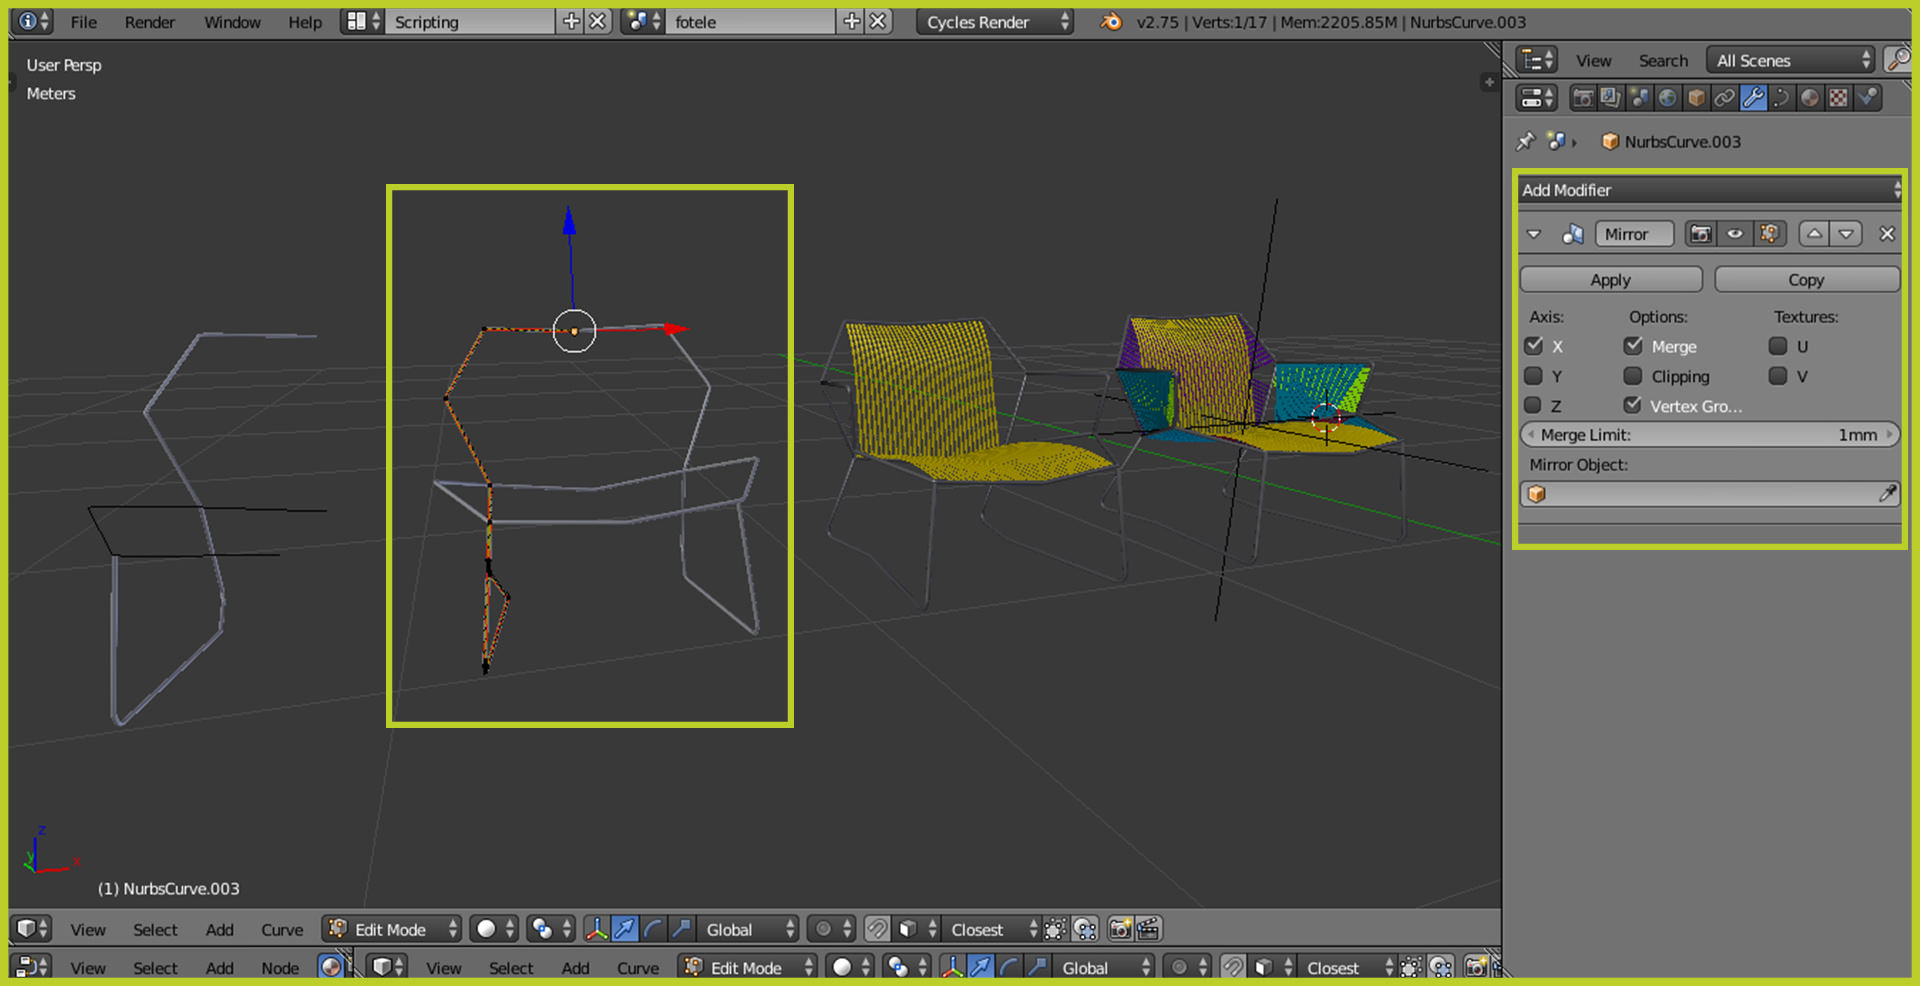
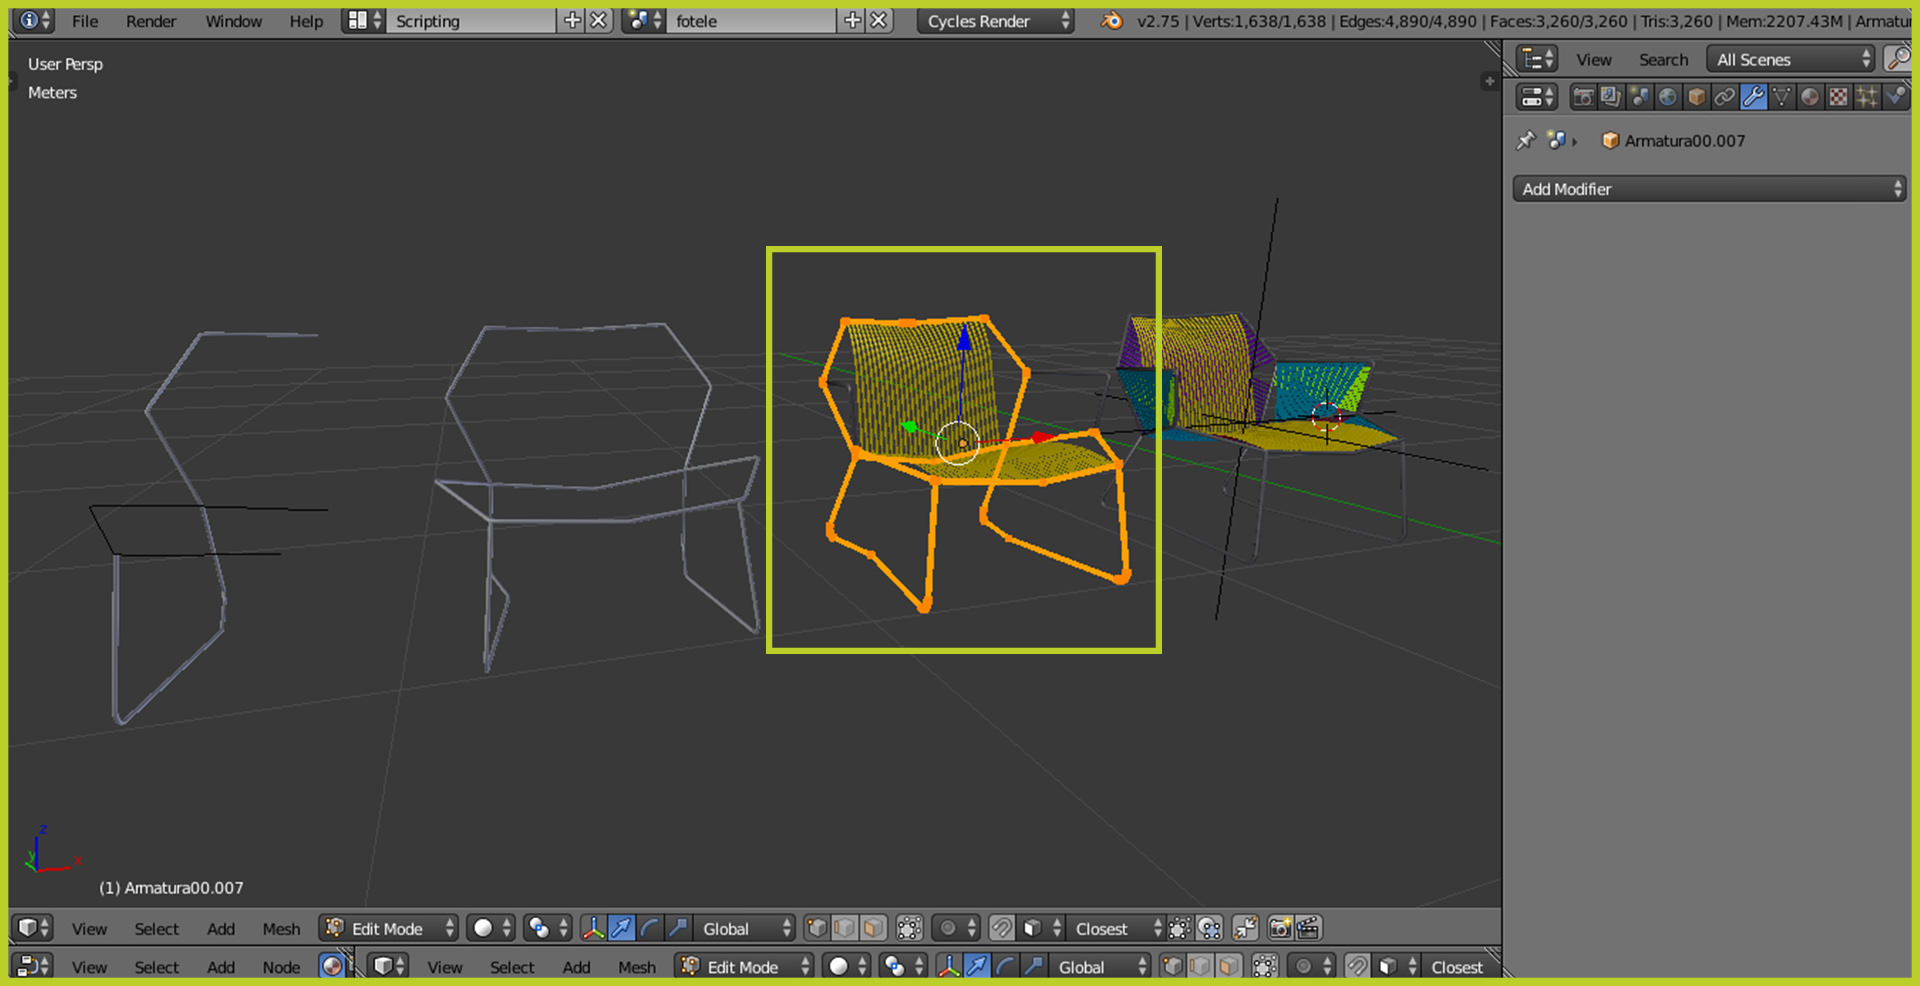
I used a similar method to create material inserts – strings for back and for seat of the chair, with the difference that instead of a round cross-section strings here strings are flat.
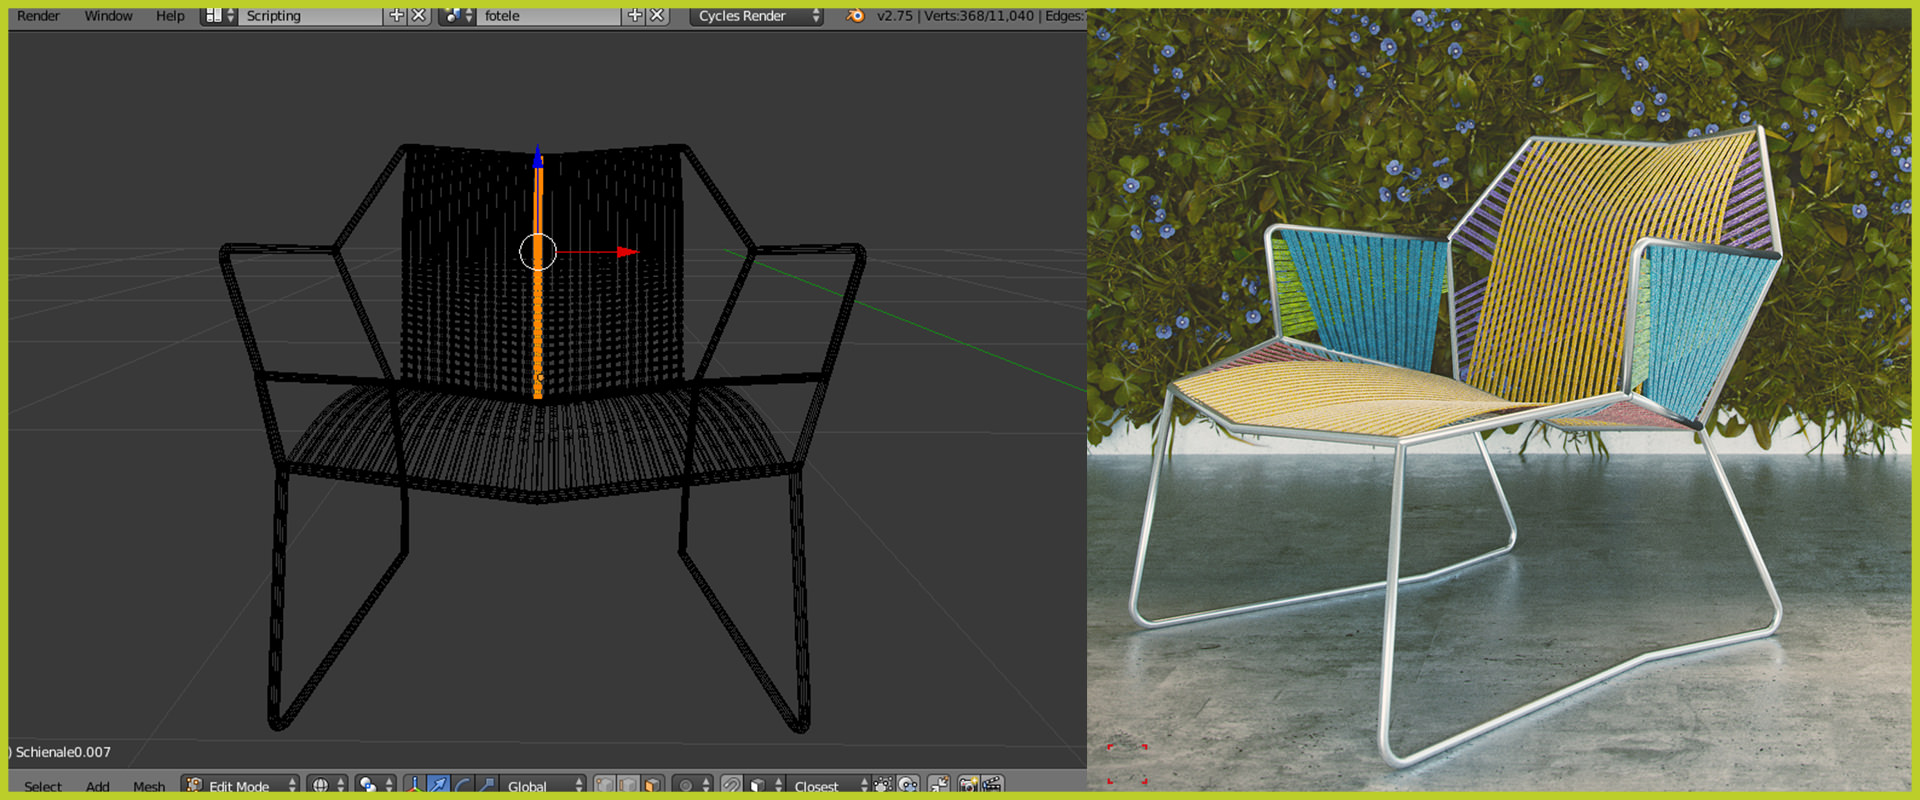
When I finished to model stripes I converted all of them into mesh (curve to mesh) and joined them to one object. It allowed me to shape the convexity of the seat using proportional editing.
Concrete pot was made using cylinder mesh.
Paintings was made from basic cube stretched to a height of more than two meters.
Models of lamps are from Evermotion’s 10th anniversary collection.
Great models by the way!
Vertical Garden
All models of grass used in this piece were from BlenderGuru’s Grass Essentials Pack.
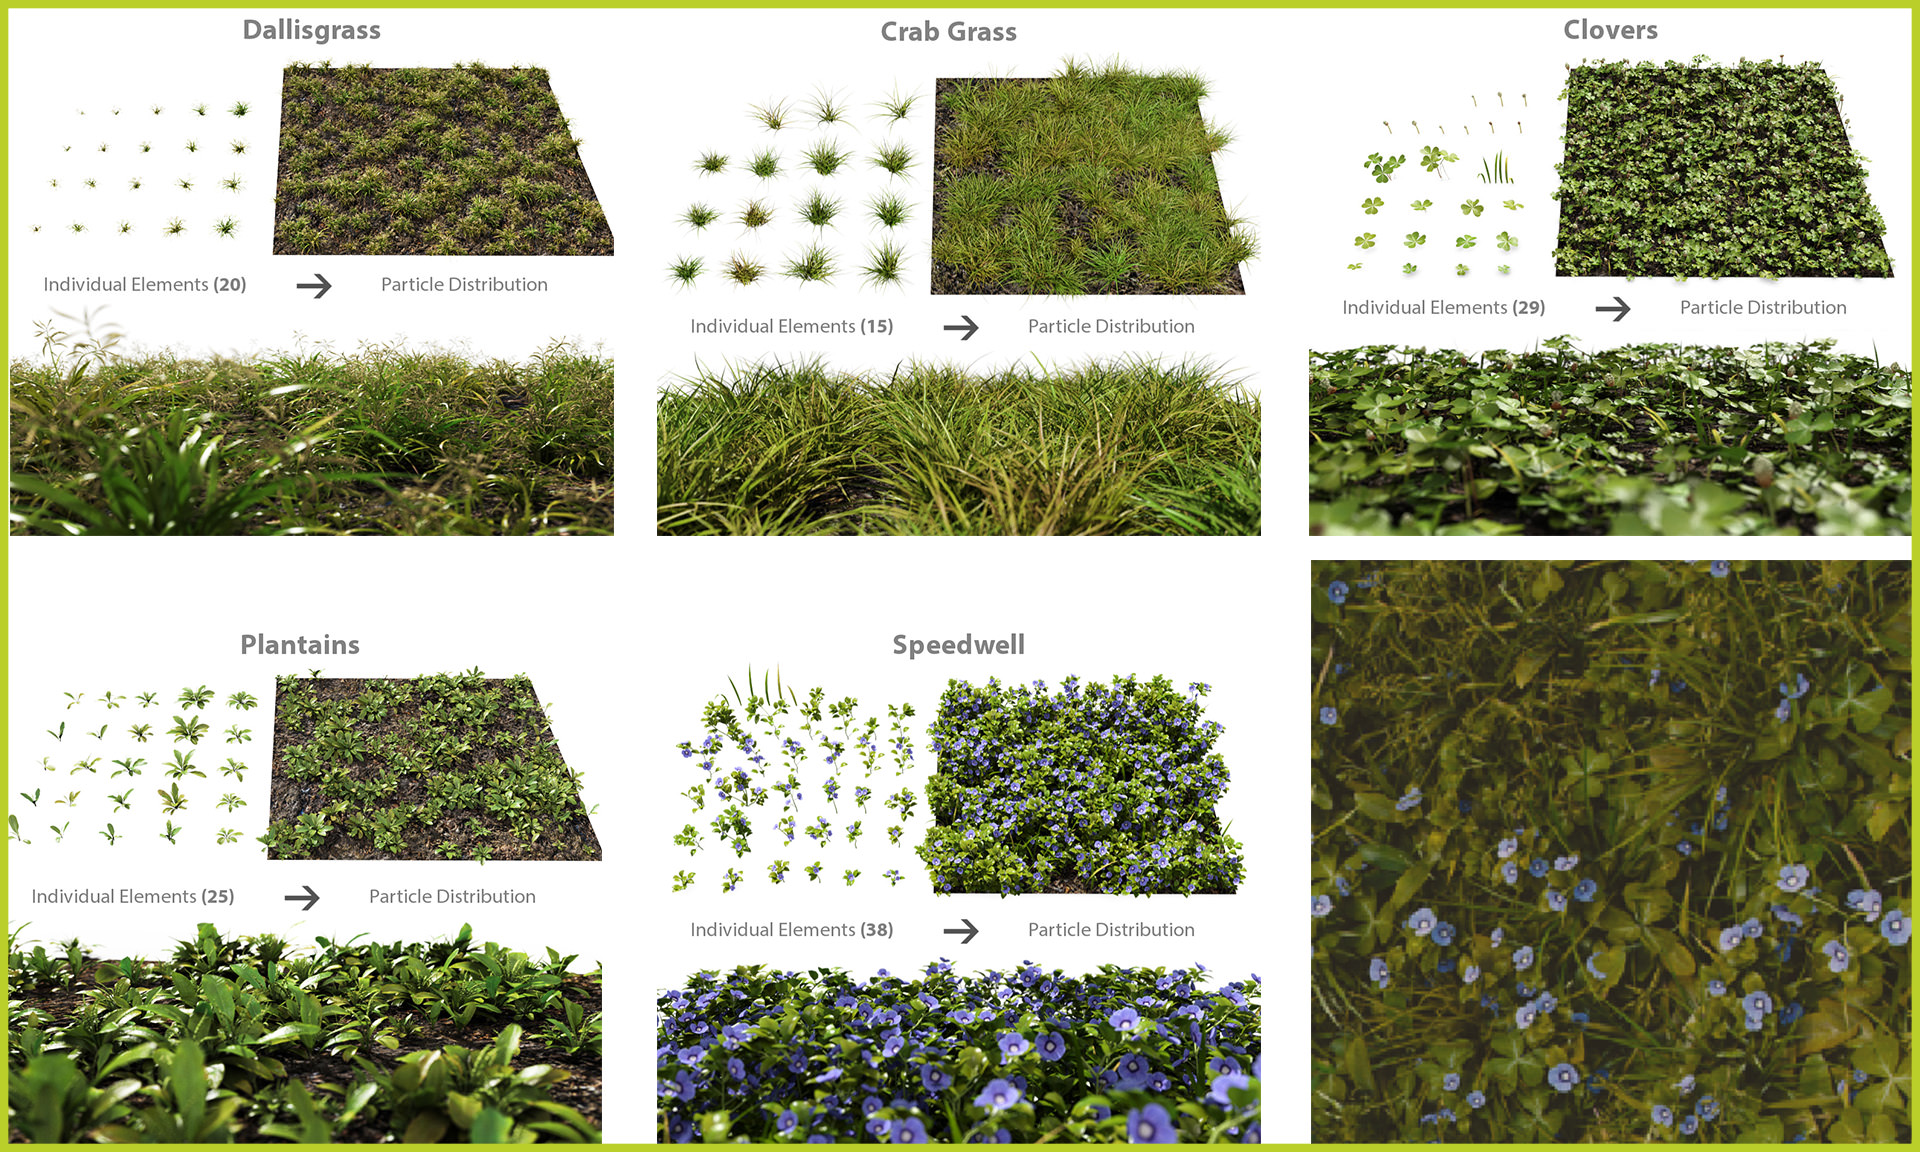
I choose 5 species of grass and grass weeds to decompose them on the wall and then I made a simple plane and subdivided it few times. This plane was my base to set a particle systems.
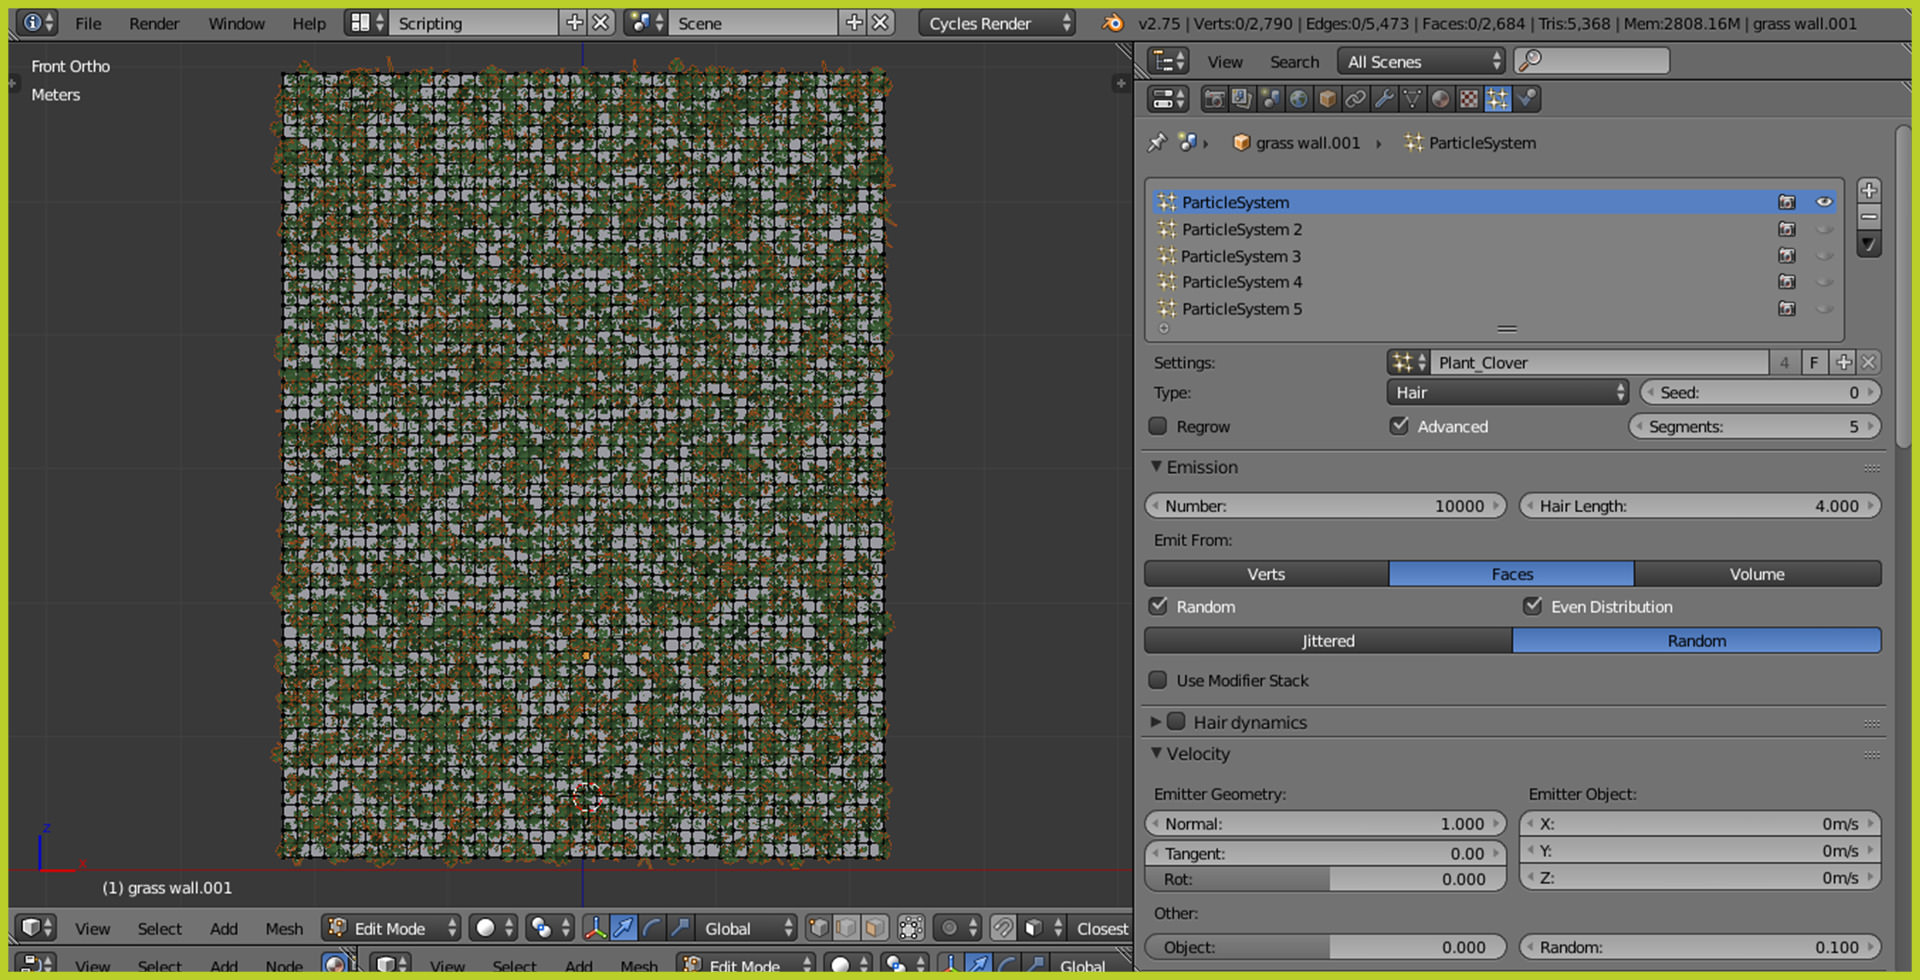
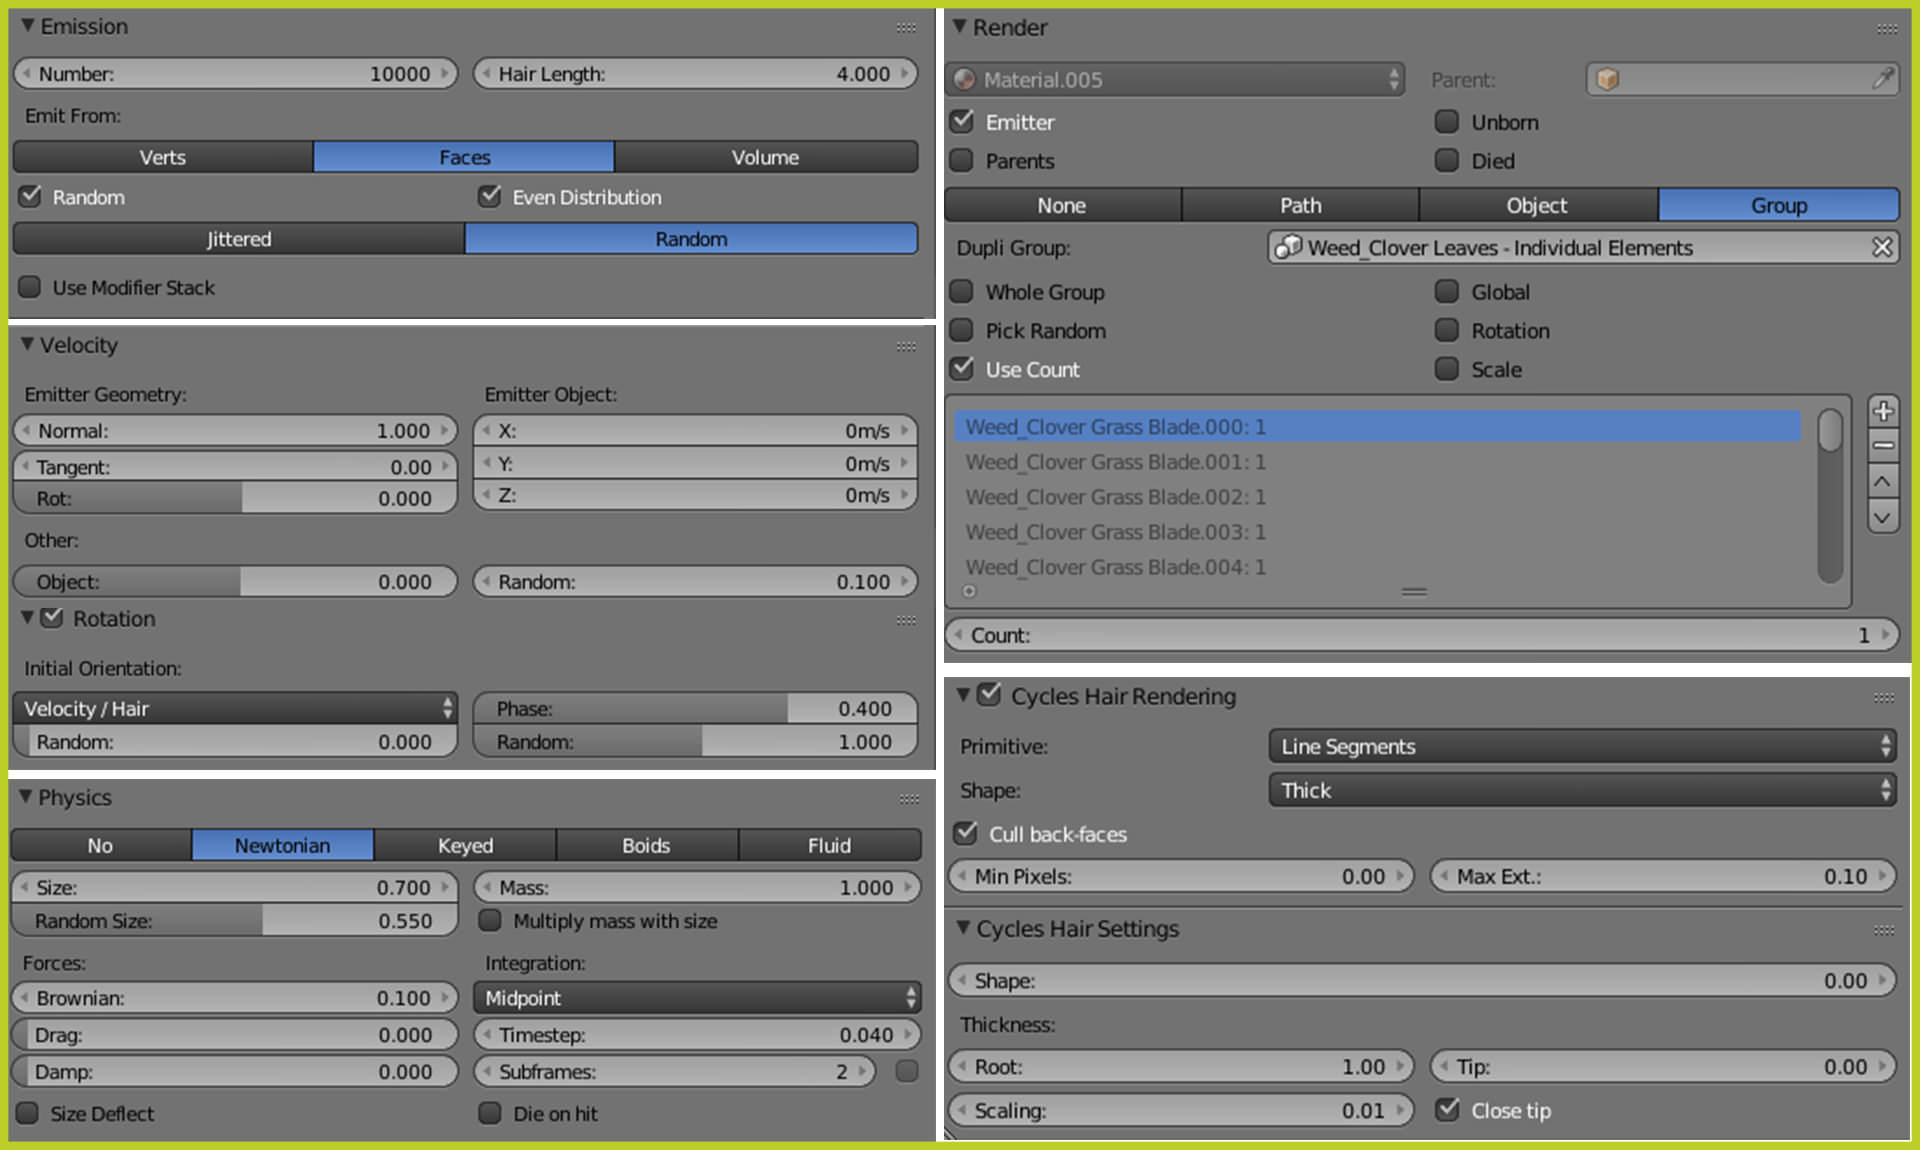
I made 5 separate Particle Systems on this one plane. What you can see below is first particle system. All the rest was based on it with some tweaks in length and emission number. This allowed me to fill all the gaps in my plane.
Final grass wall looked like this.
Materials
The best way to create more advanced materials is by using Node Editor.
After setting up Cycles as your render engine you can add new material in Properties panel on the right side of Blender window.

If you will add new material using New button in Materials properties panel you will see node tree in the Node editor window.
In the Material Properties panel you can preview your materials.
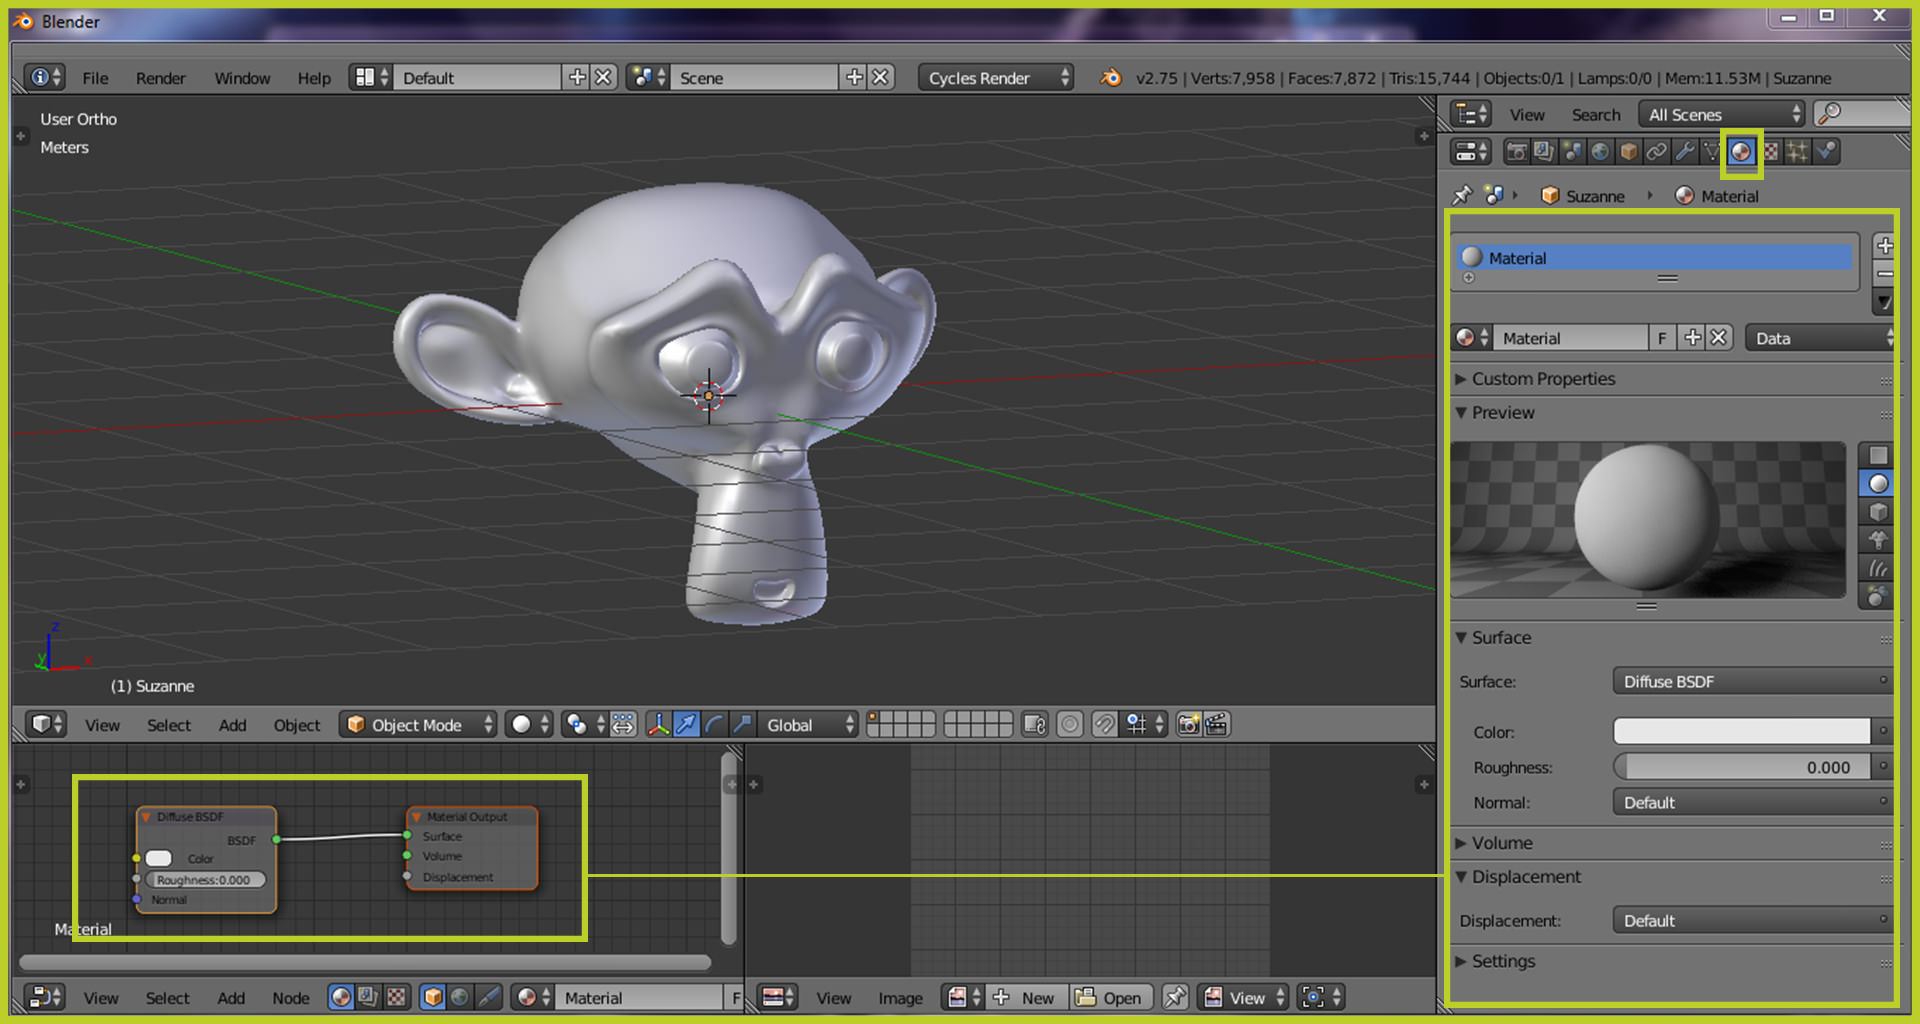
You can add new shaders and tweak them. You have to simply use Add button in Node editor to choose what you really want and to make your materials more realistic.
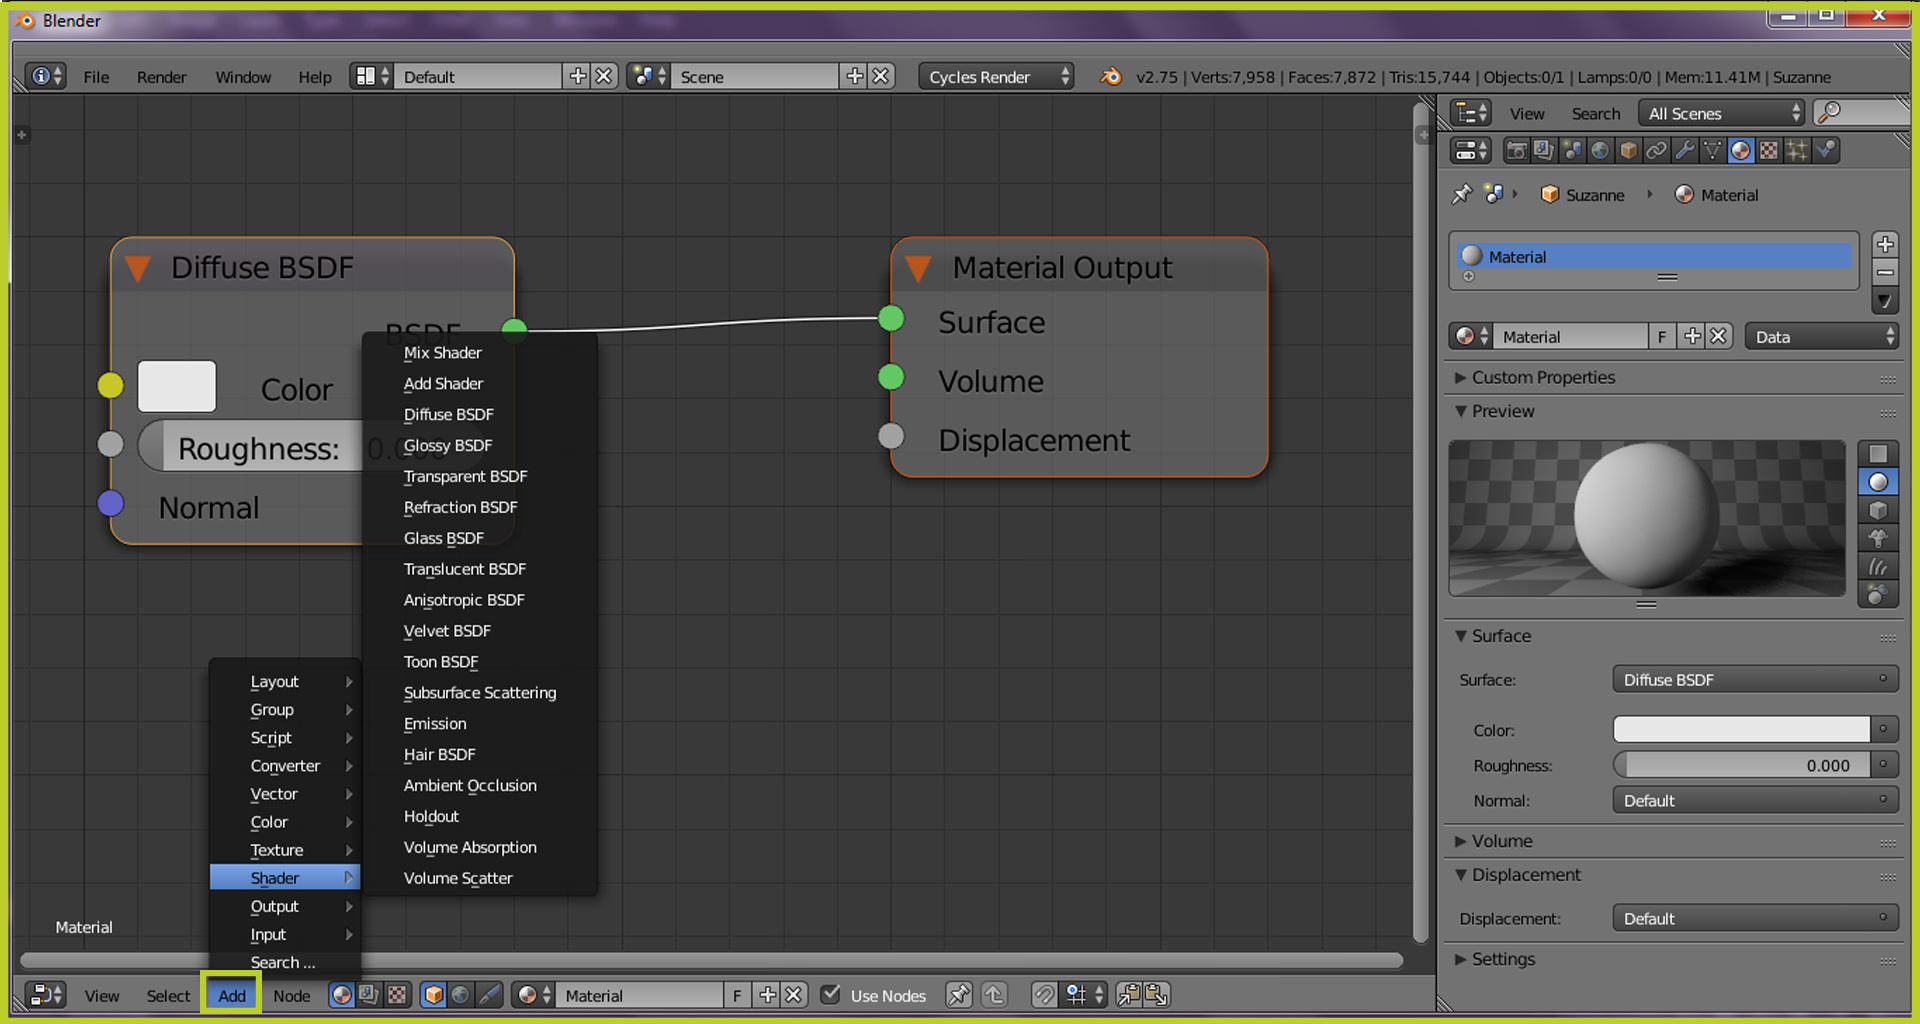
Below You can see the basic material made by mix of diffuse and glossy shaders.
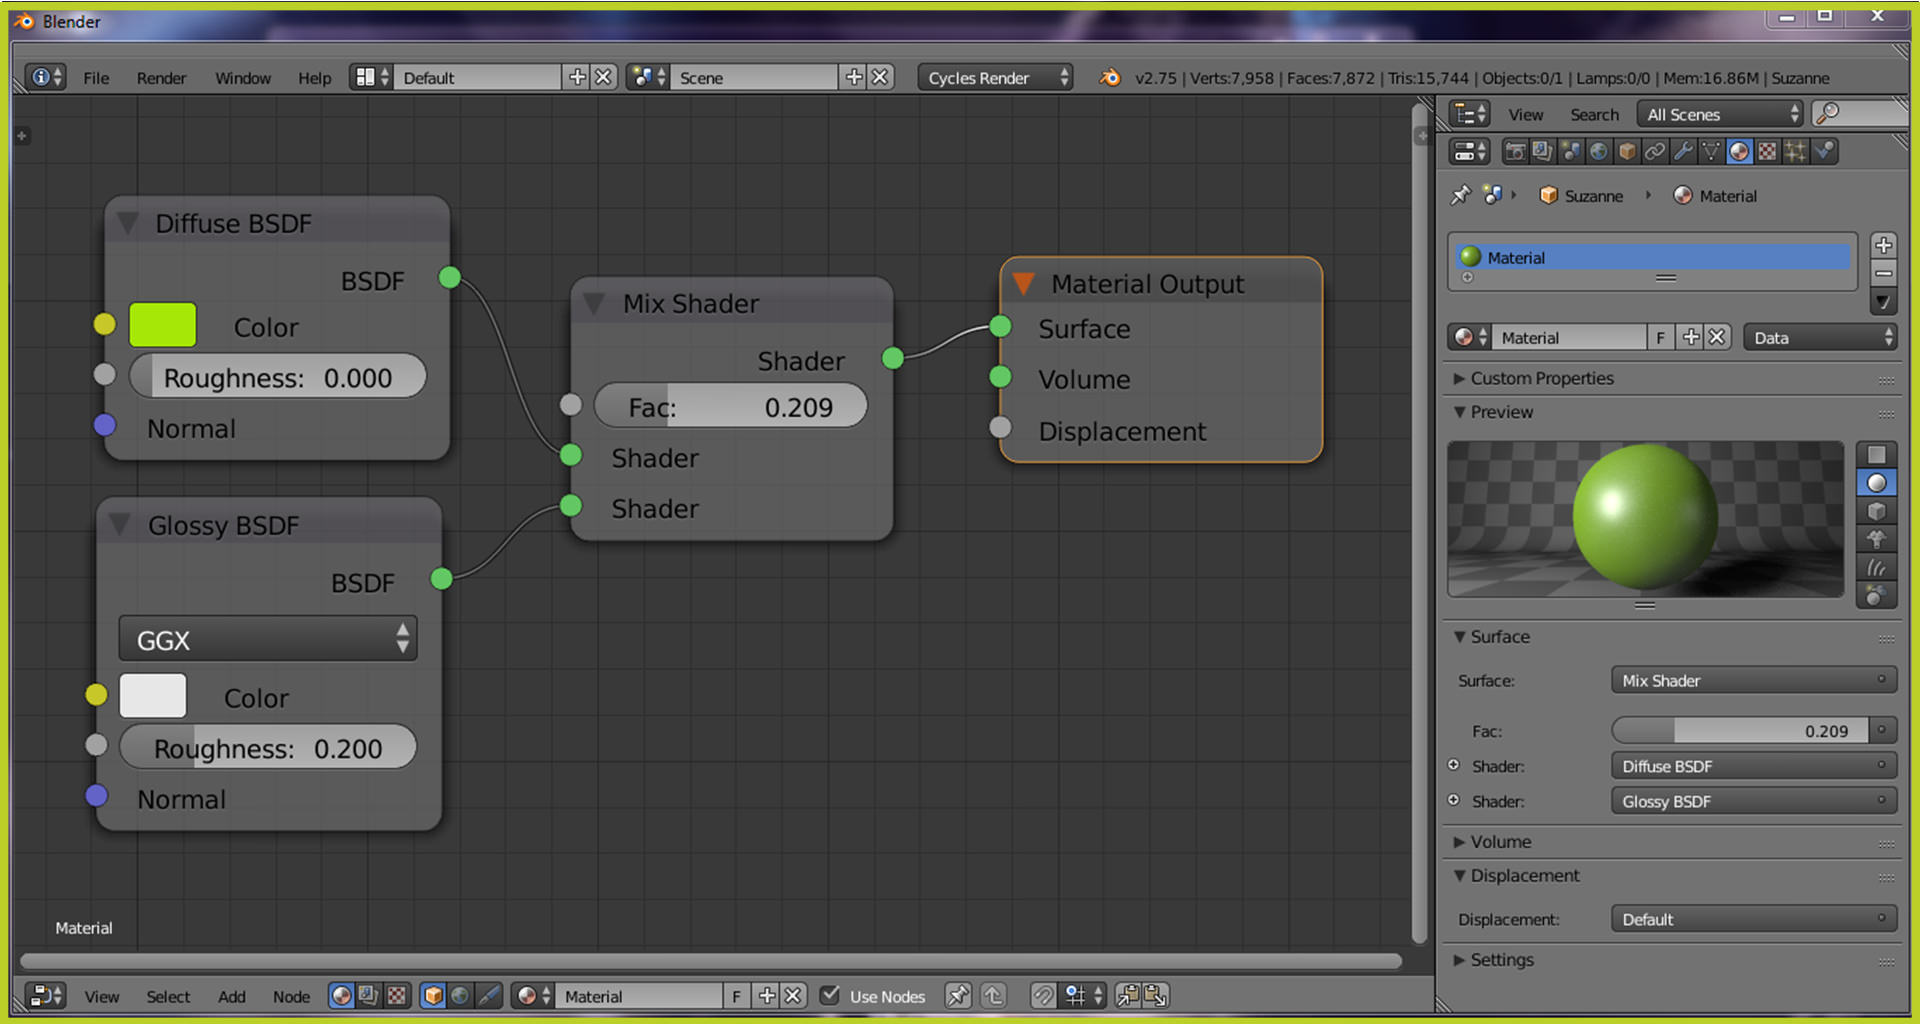
There are few basic shaders in Cycles: Diffuse, Glossy, Glass, Emission and so on but you can adjust them to your needs by using different combinations and by using more complex nodes.
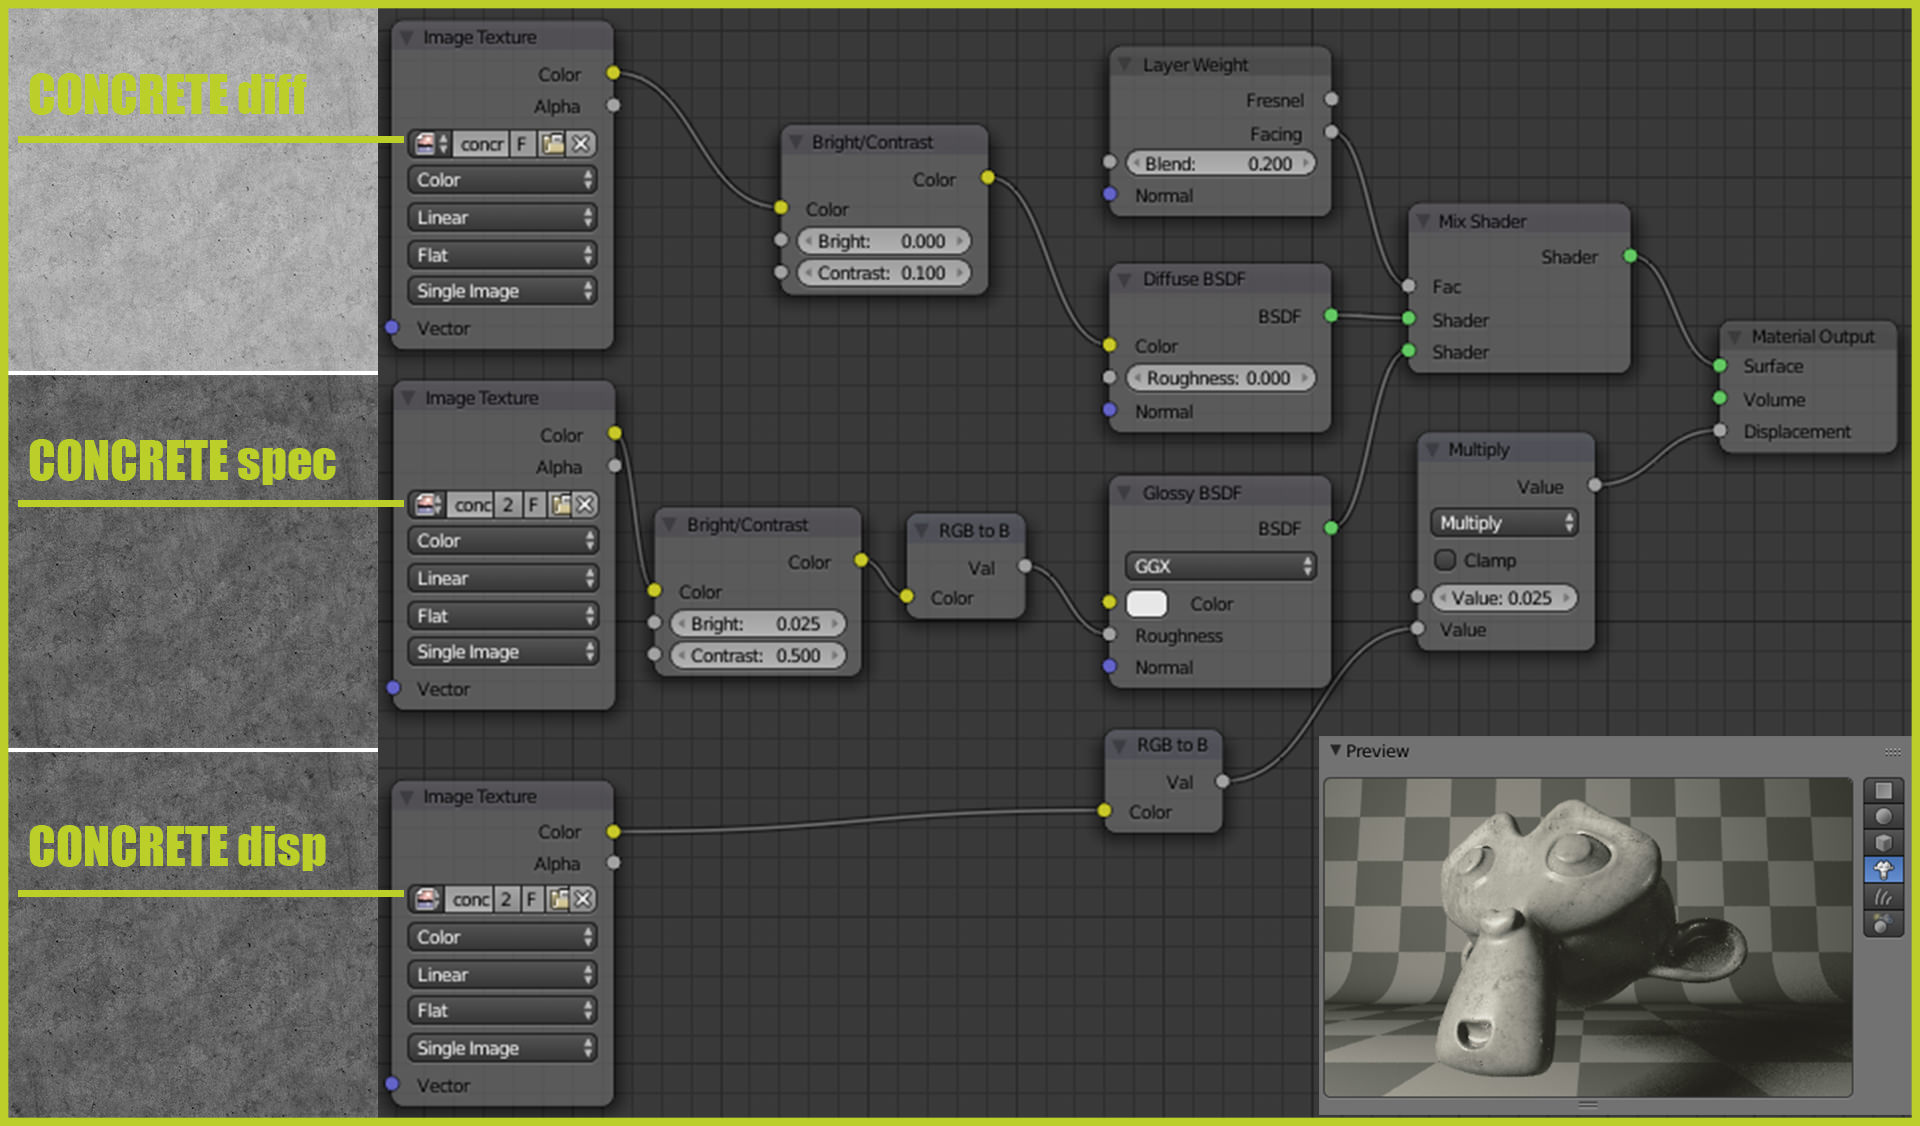
My materials for Vertical garden are really nothing fancy… I always use diffuse map – which shows basic color – and map of bumps (it could be done from simple diffuse map but with higher contrast level just like in the example below in my concrete material). I used this material to create concrete floor and stairs.
Textures are from CGTextures.
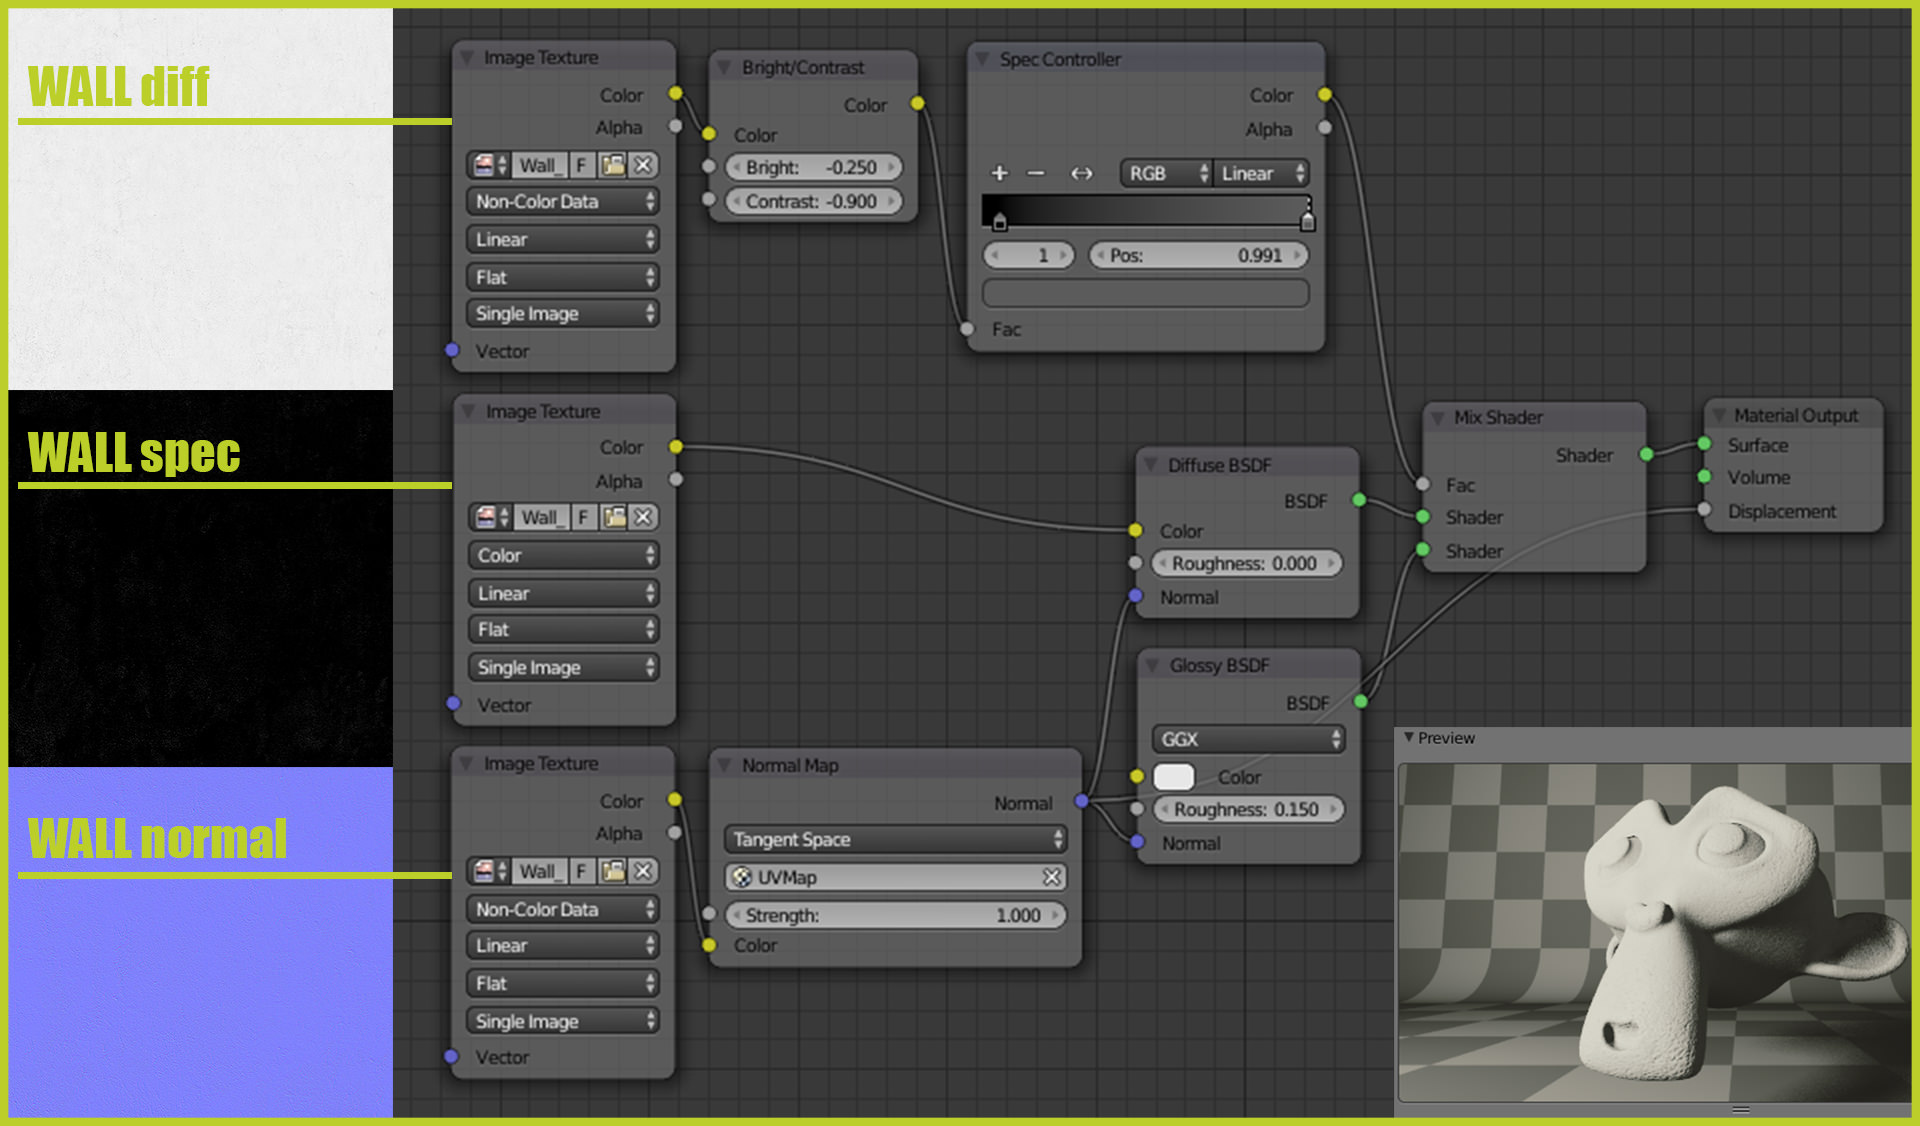
For wall material besides of diffuse and specular map I also made a normal map using Gimp. If you want to know how to make your own normal map using Gimp you can follow any YouTube tutorial like this for example.
All other materials are easier to create. They were based primarily on combining diffuse and glossy shader, in the case of the rope velvet shader was also used.
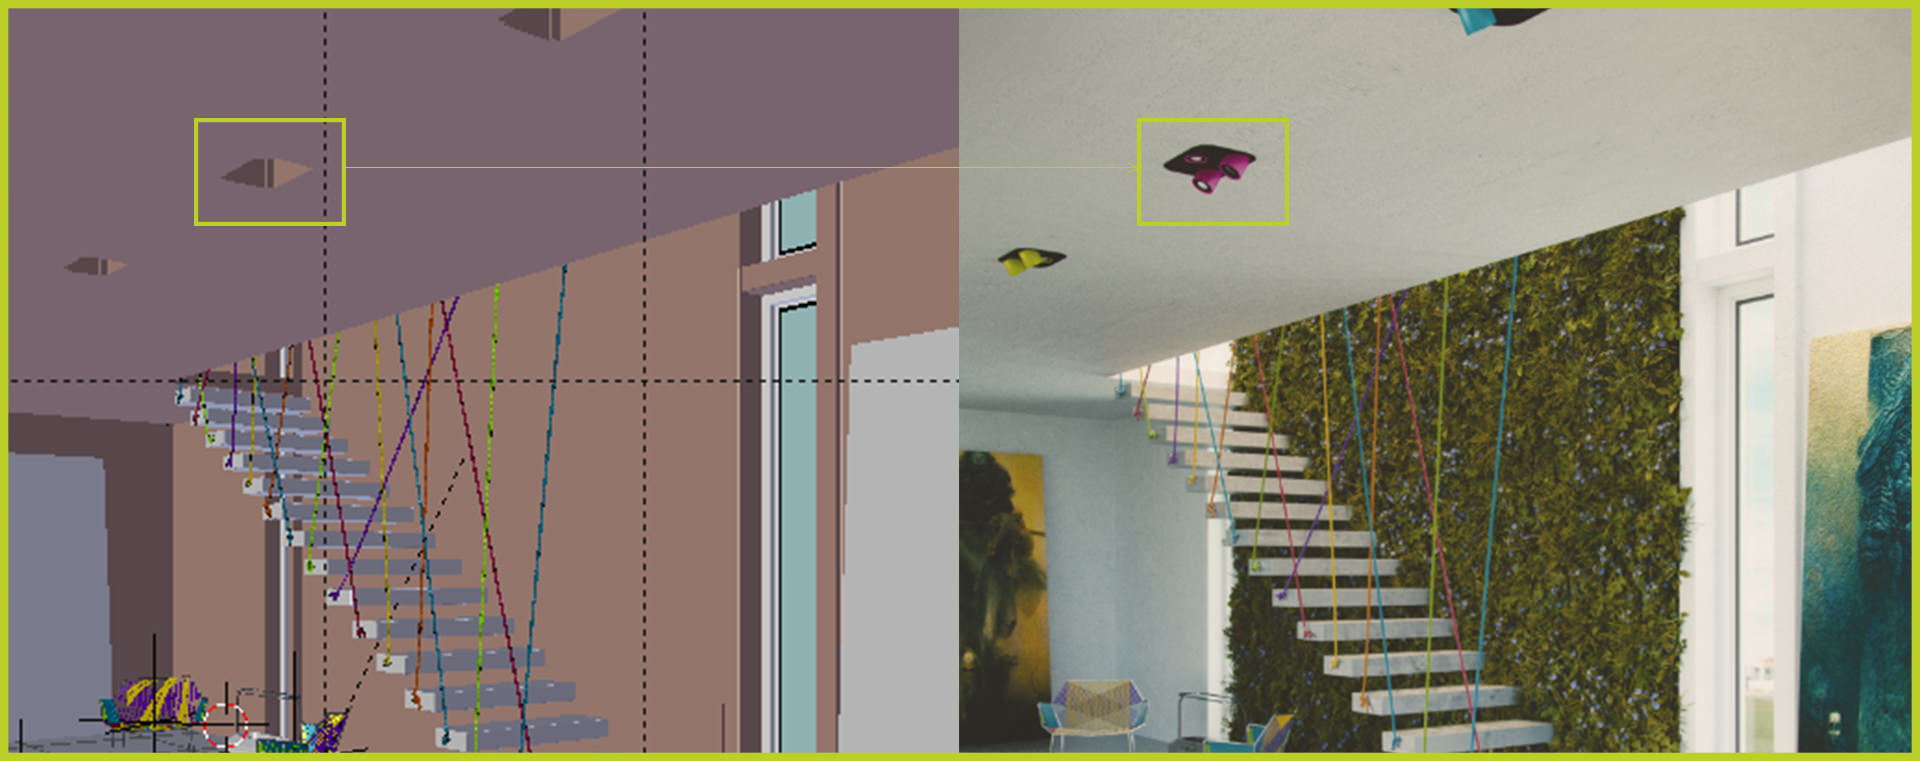
Lighting
In Vertical Garden scene I’ve used 3 light sources.
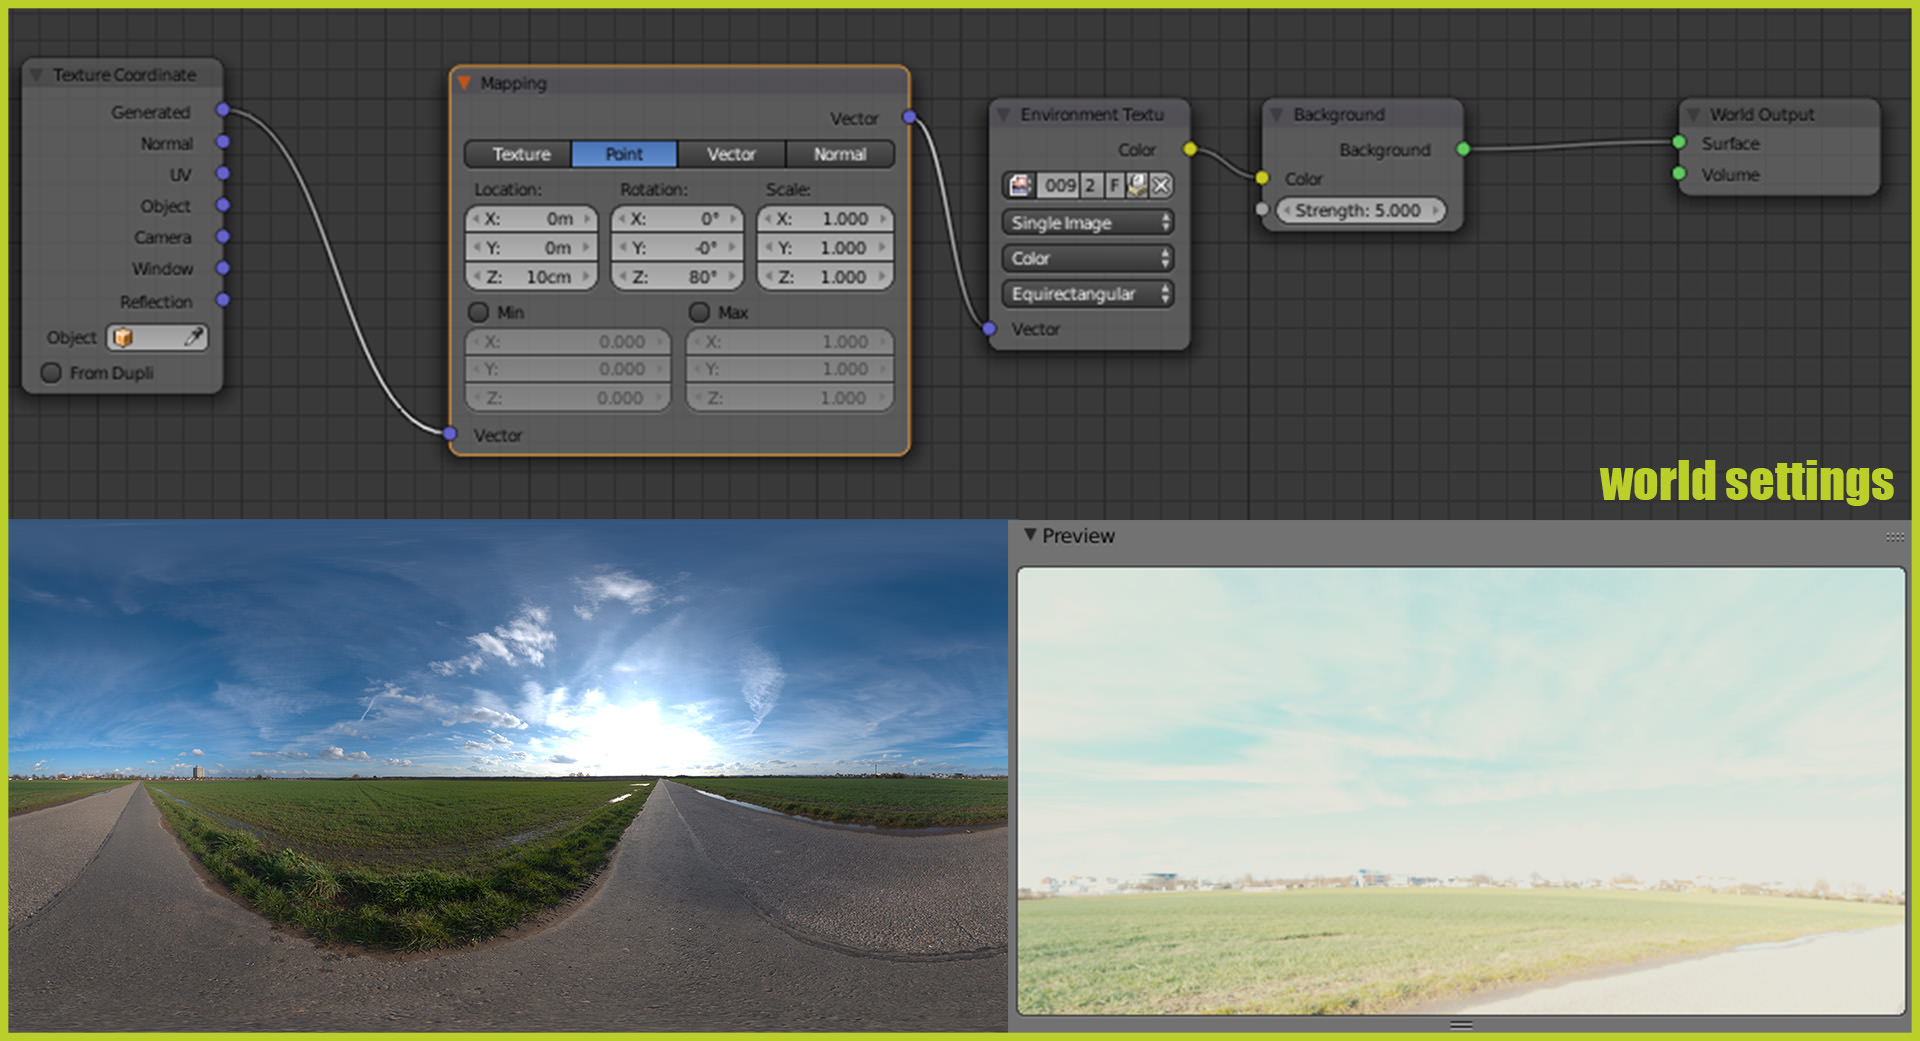
HDR map
I had to rotate it in order to match the horizon. The map itself is from Blender Guru.
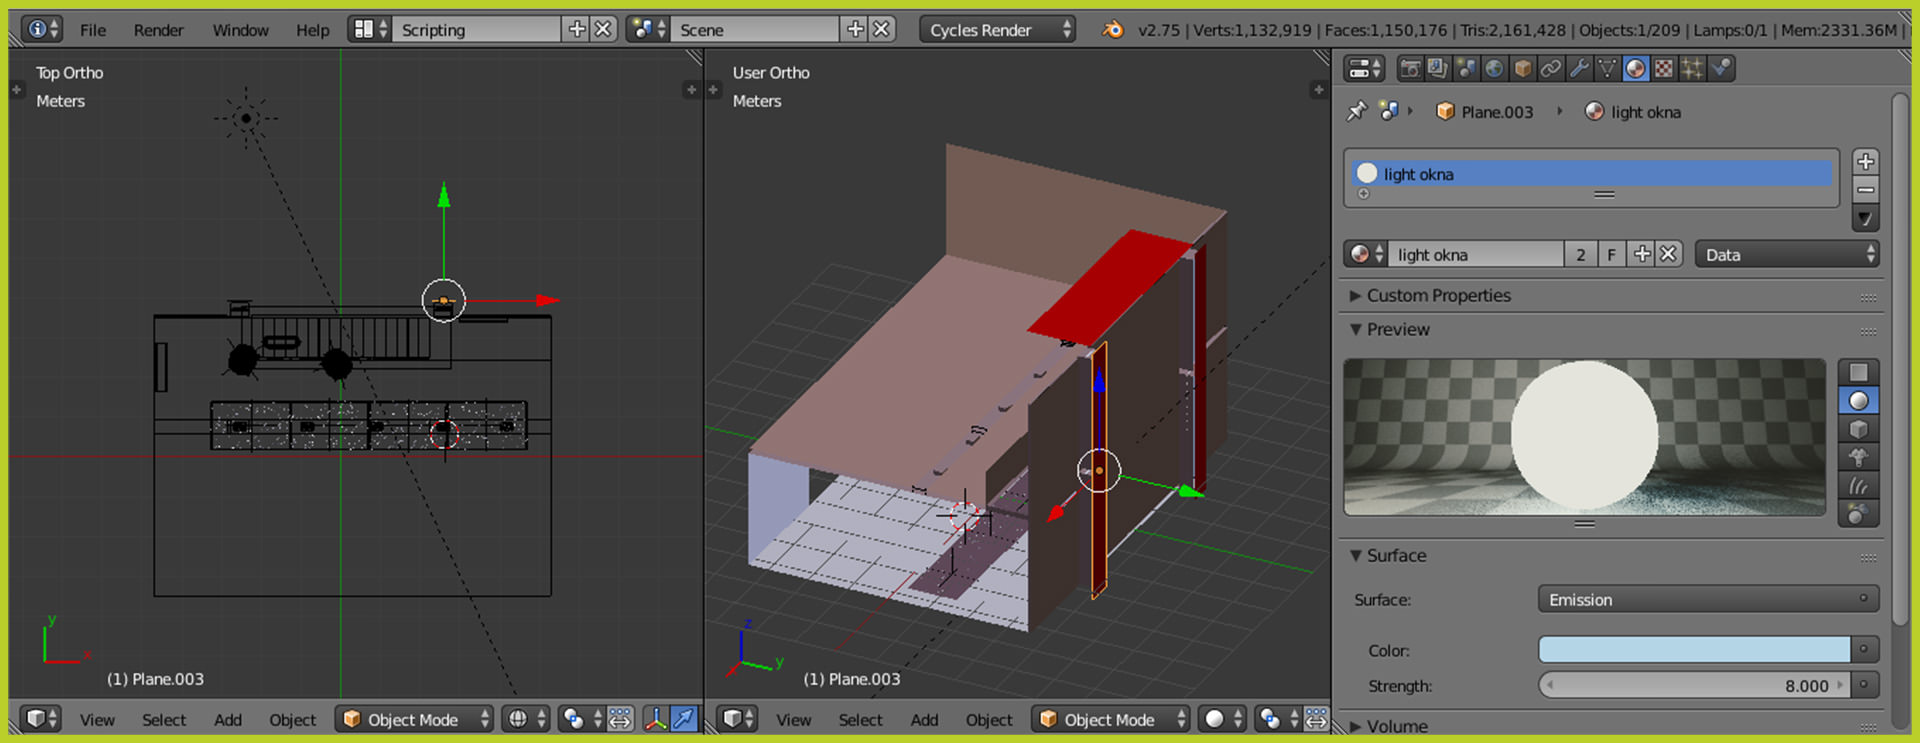
Emission planes in windows
Sun
Although as I realised later, sun wasn’t needed that much.
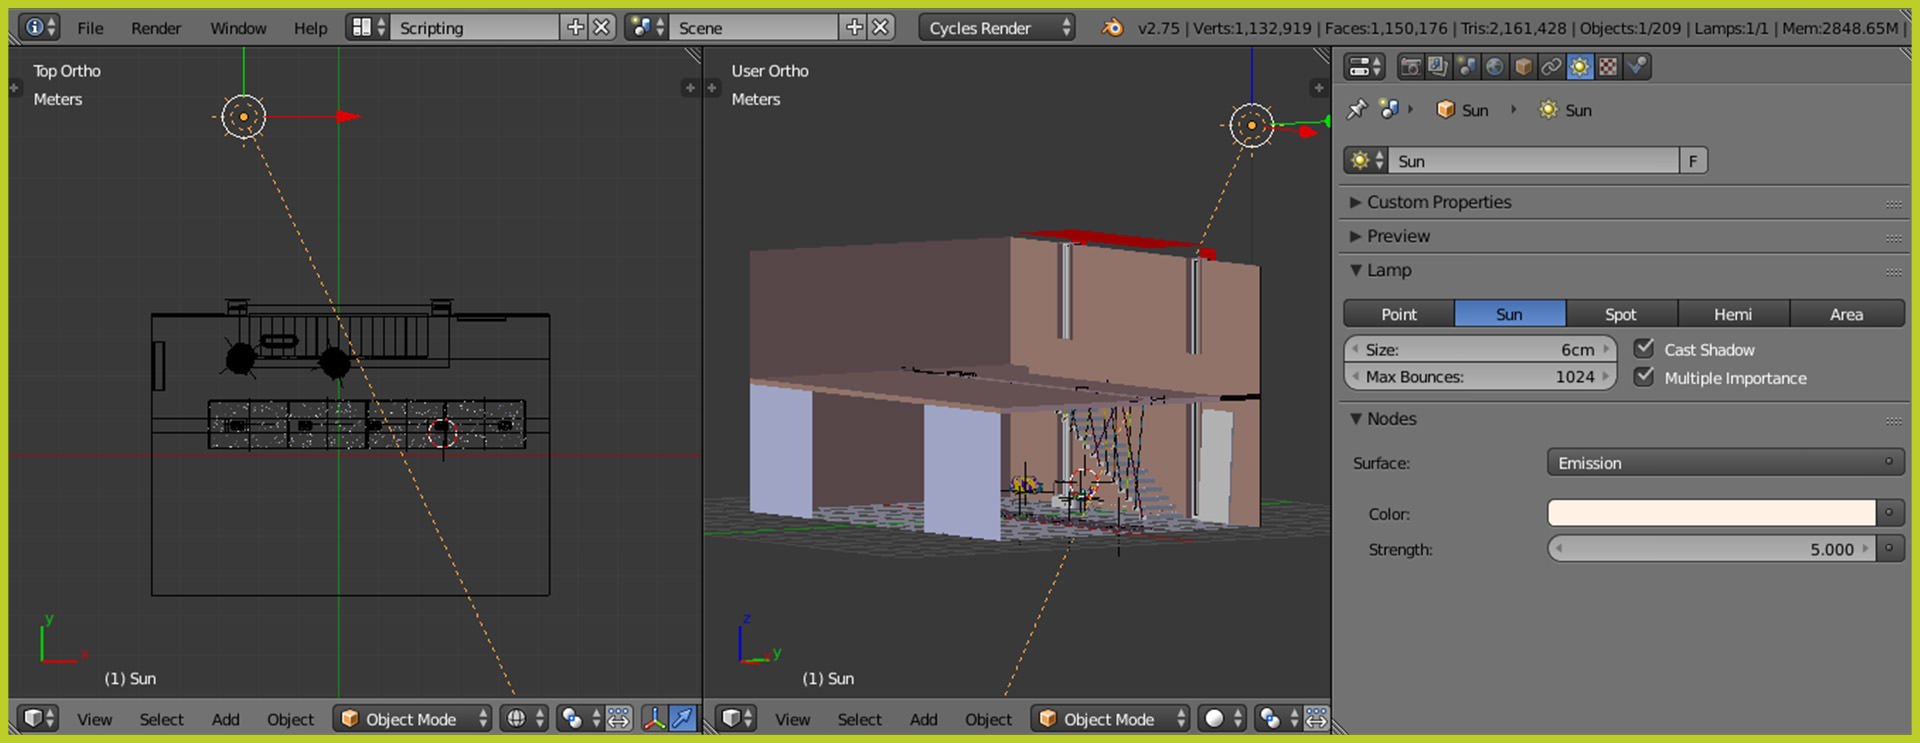
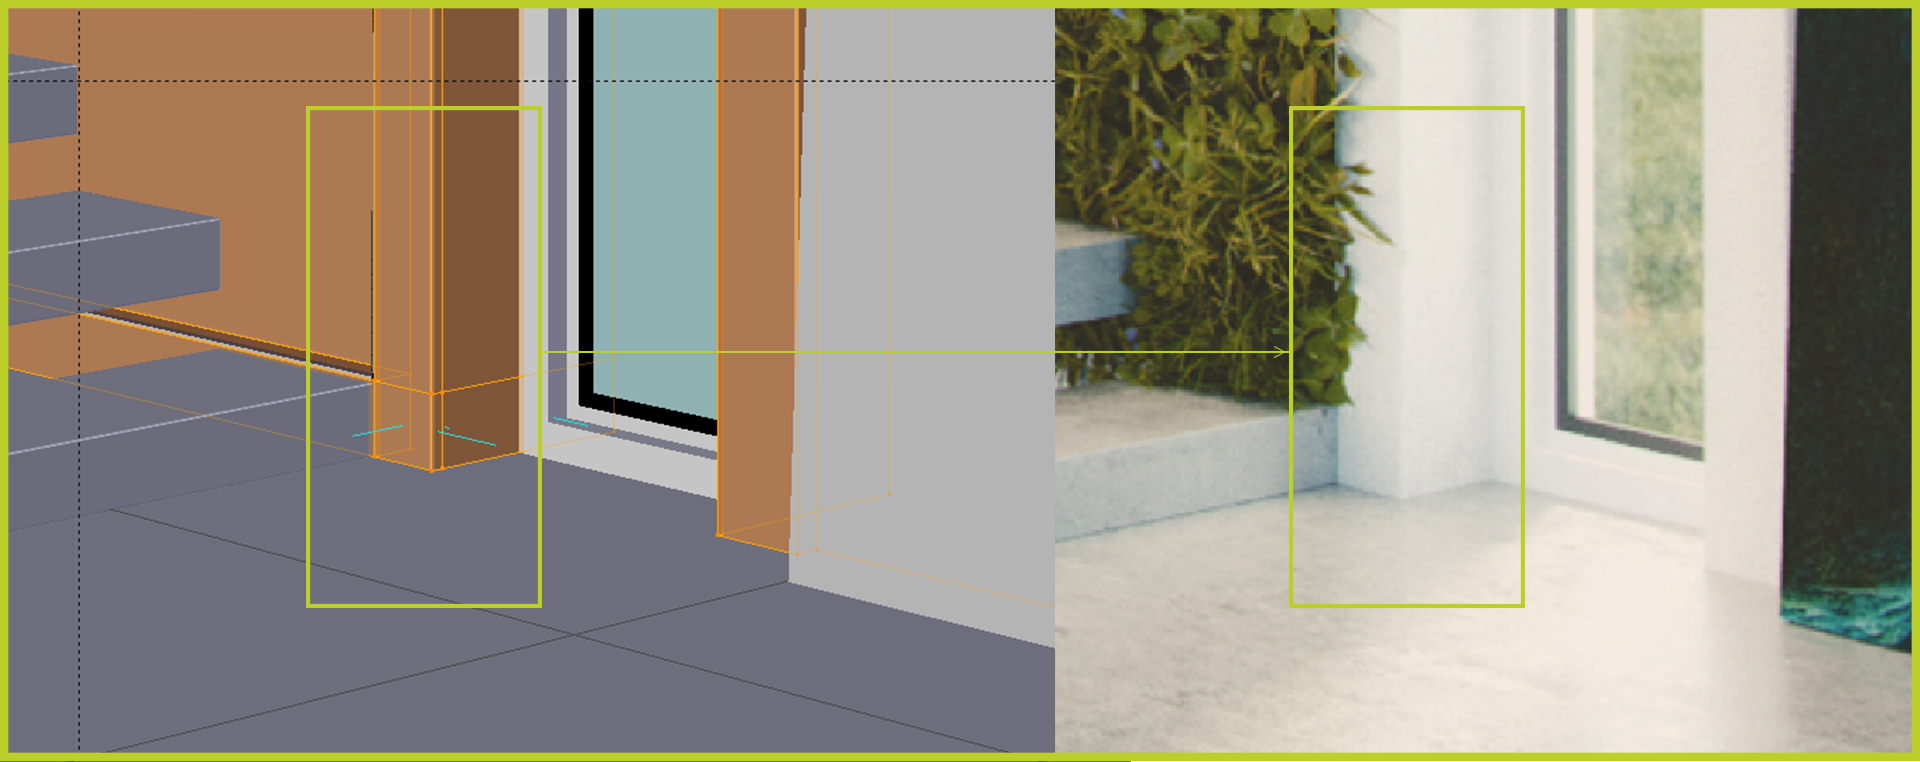
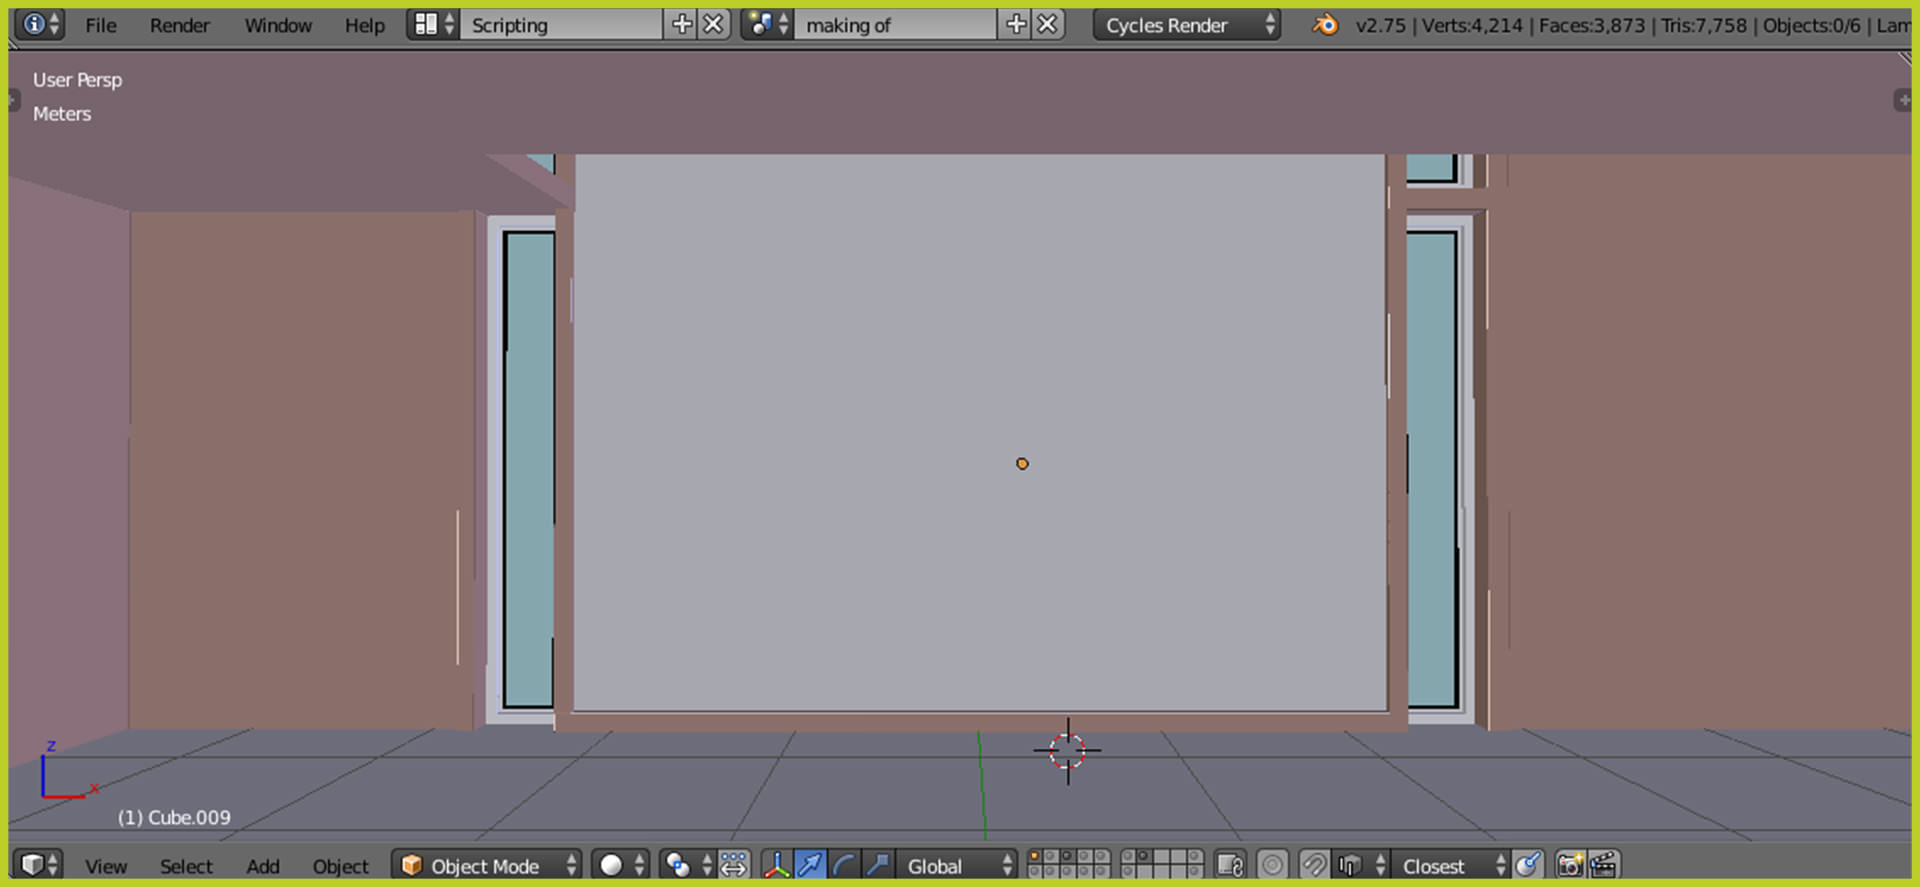
TIP : Important thing if you are working with Cycles Renderer and interior scene – My experience shows it is much better to open your scene in some way (for example put one of the walls invisible to the camera on the layer which will not be rendered) it speeds up noise reduction and allows light to come and bounce in the interior. Visualisation will be little brighter and noiseless.
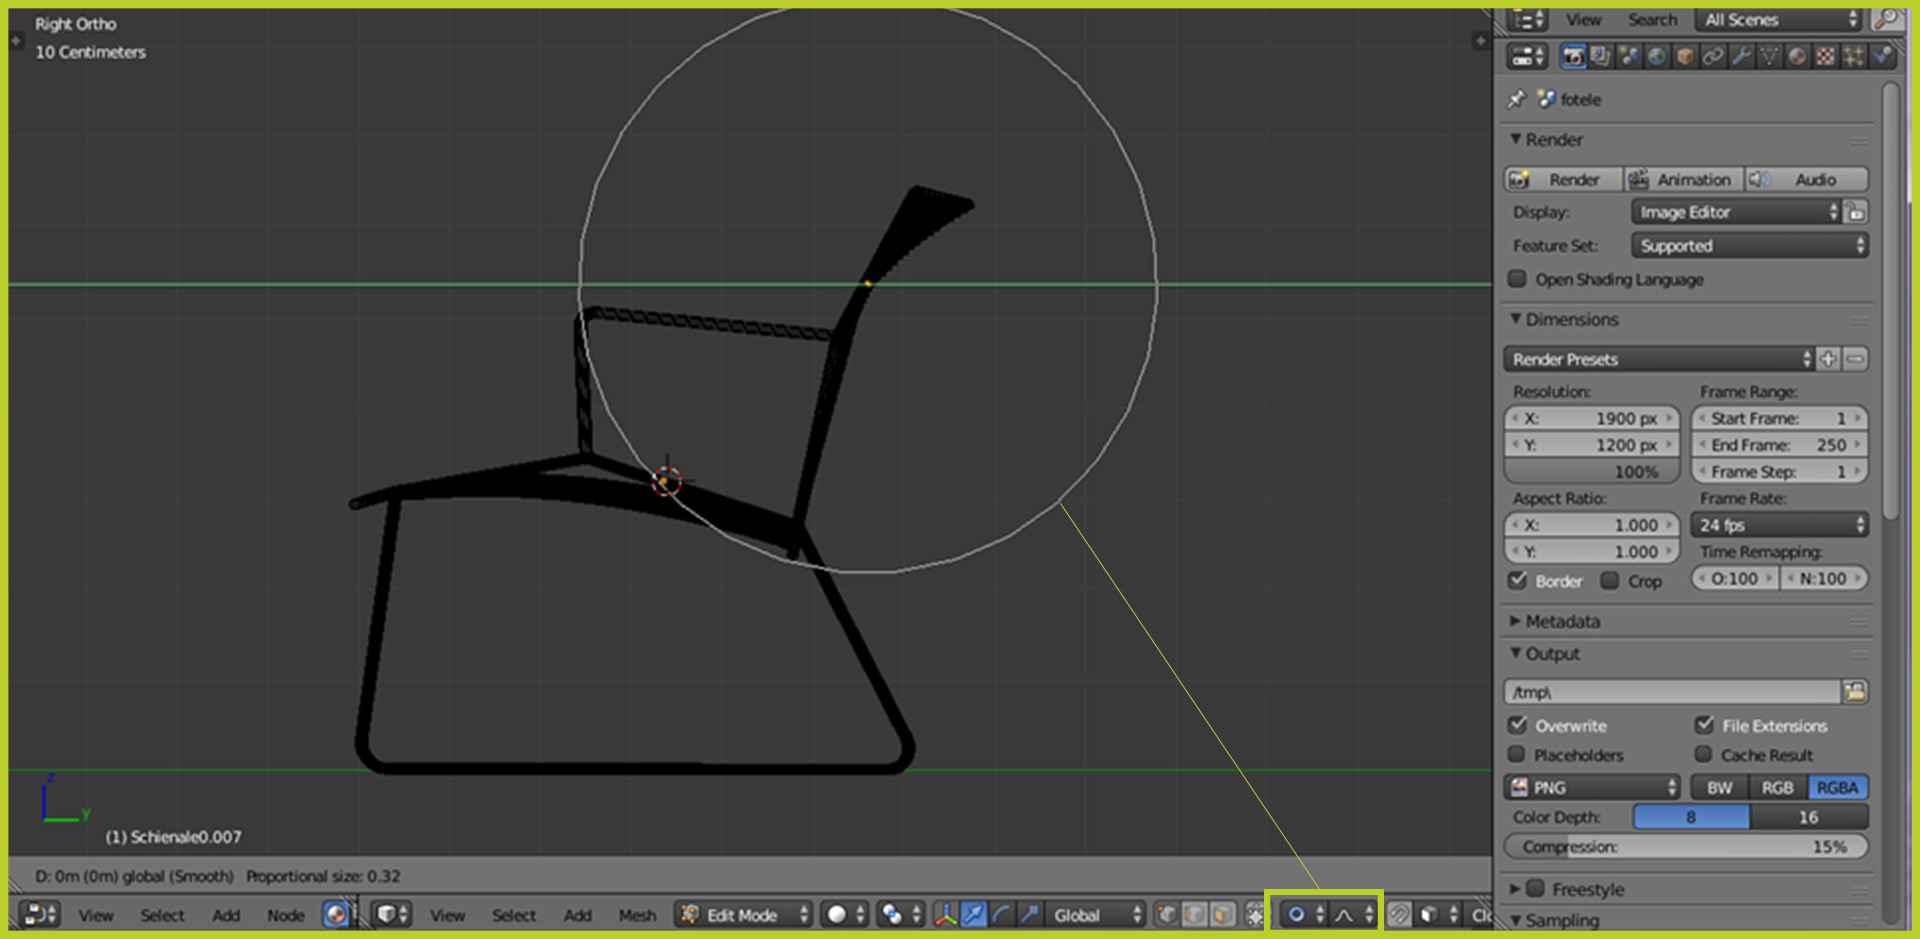
Render Settings
My basic render settings are below.
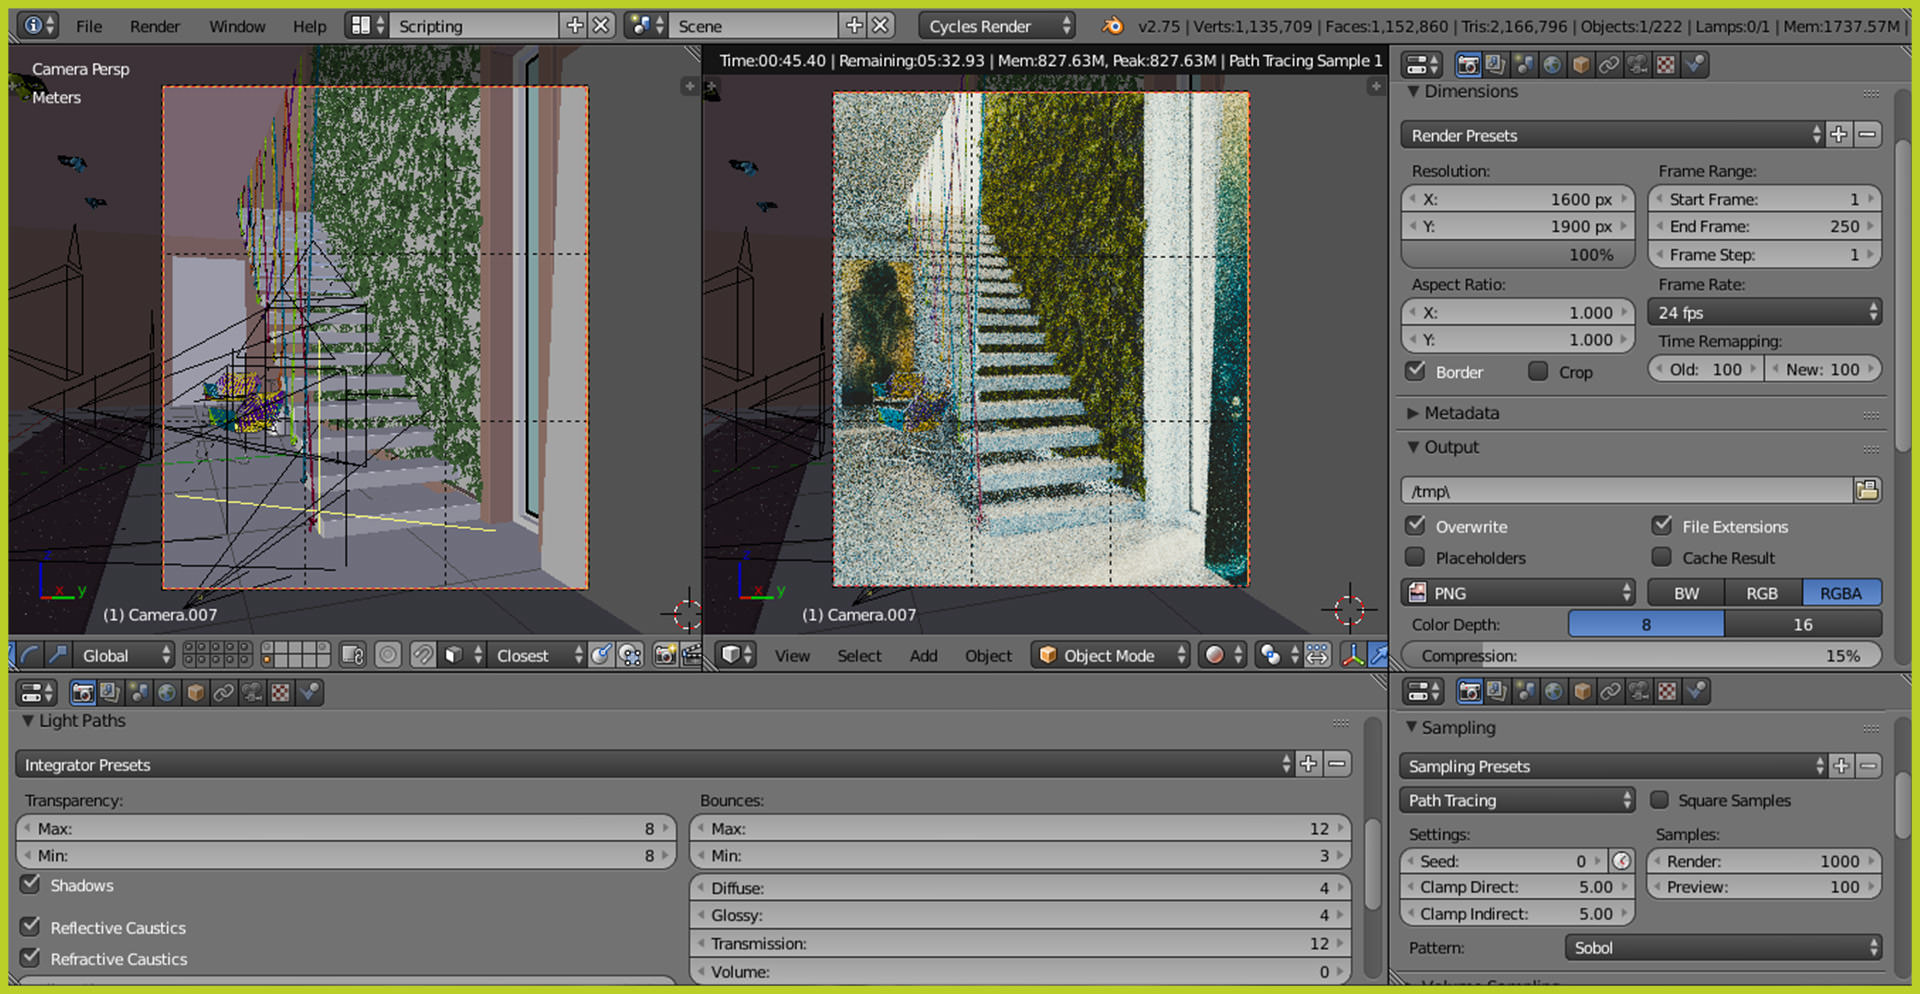
The scene was rendered with about 1000 samples for each camera view. For decreasing the amount of fireflies I used Clamp Direct and Indirect set to 5. All other settings were rather common.
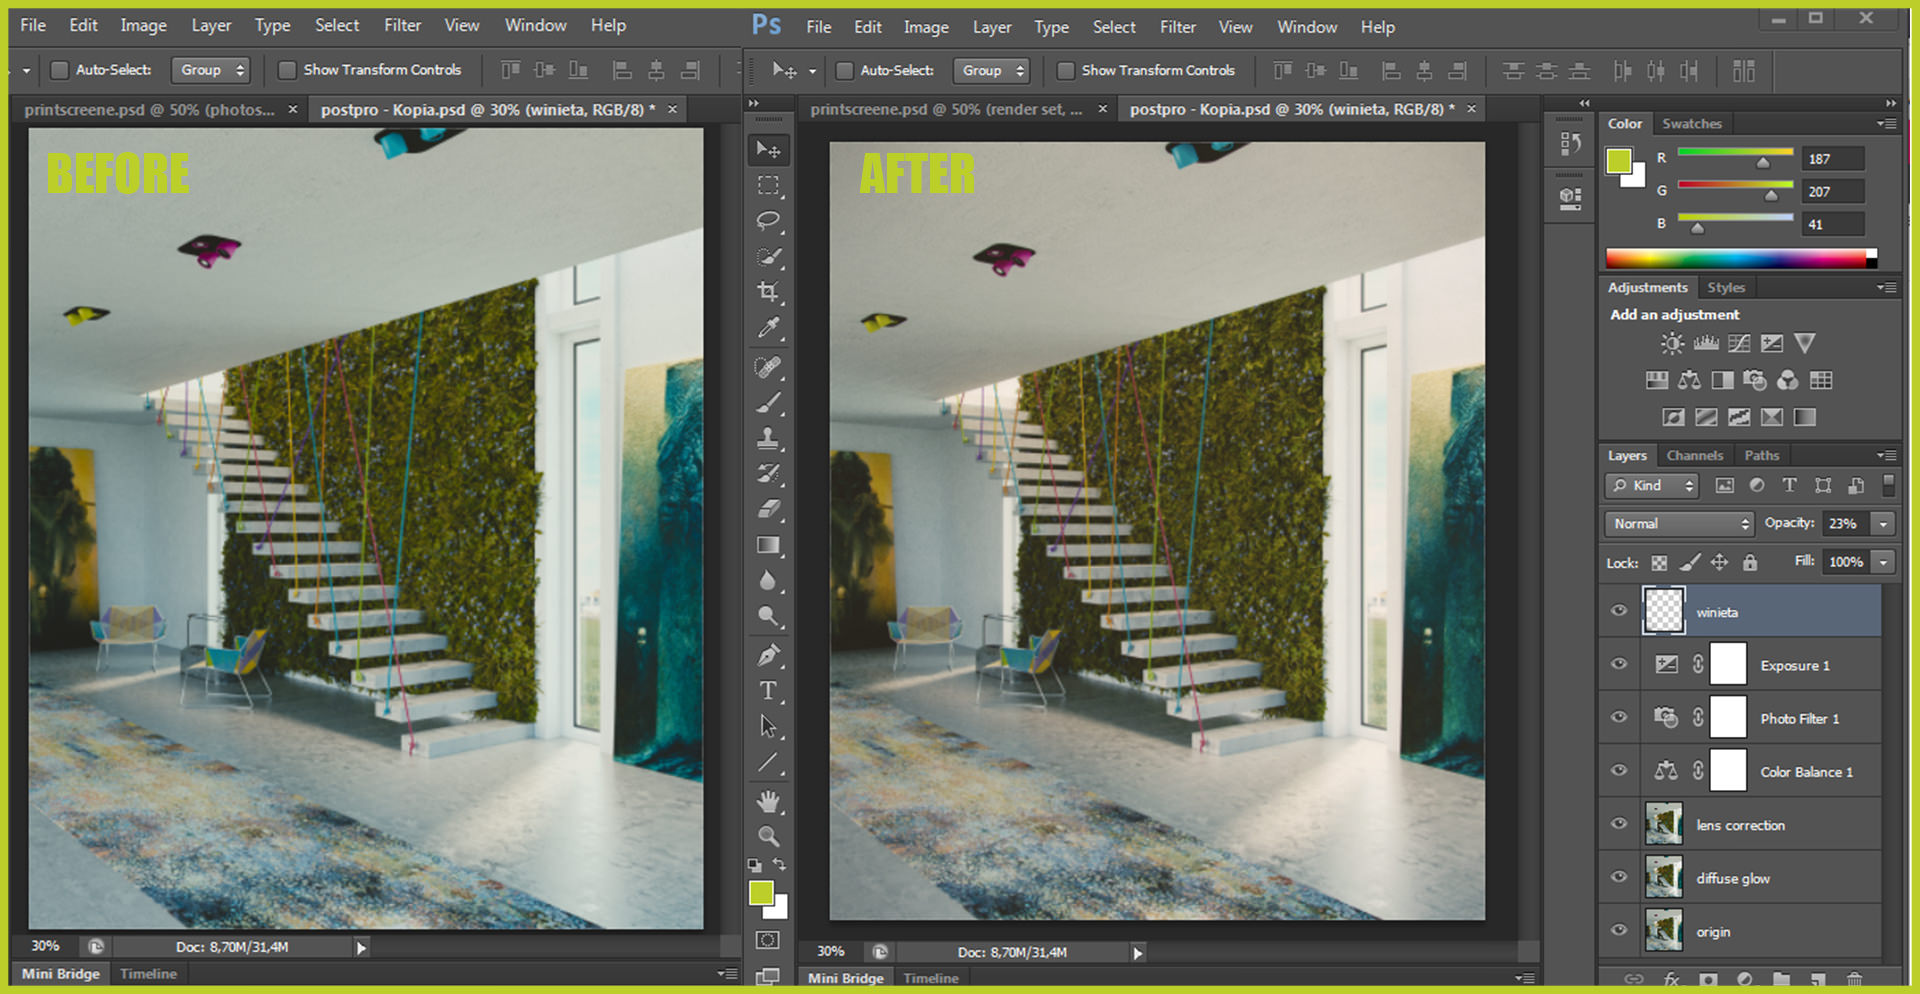
Post Production
I like to fine-tune my renderings to such a level where I do not have to use too much of Photoshop.
So my post production is limited to such things as:
- 1 layer – Original picture.
- 2 layer – Diffuse Glow.
- 3 layer – Lens correction to add some chromatic aberration.
- 4 layer – Color Correction.
- 5 layer – Warm Photo Filter.
- 6 layer – Exposure.
- 7 layer – Vignette.
And it’s all what I’ve done with this pictures.
And that’s it!
Below are some useful Blender links to start with :
Official Blender Foundation Website – Except that here you can download the latest version of Blender, you can also read about the interesting history of Blender and find information about which direction Blender is developing and what new things will be in it.
Blender Artists – The largest forum dedicated to Blender. A great source of help from the community to the community. You’ll also find there a whole bunch of inspirations, tutorials, add-ons…
Blender Guru – Website created by Andrew Price (I also learned from his tutorials) a great resource for both beginners and advanced users of Blender. A lot of tutorials and tips for free and valuable products to buy.
Blender Cookie – A website which provides Blender courses both for free and in membership option.
Creative Shrimp – I didn’t know about this site till this year. Gleb Alexandrov – very creative guy who makes tutorials for Blender users – his Open Lighting Project especially worth mentioning.
Cheers, Paulina.
Paulina Kochanowicz is an Interior Architect and a graduate of Warsaw Academy of Fine Arts (2011), She is also a founder and chief designer at Seryjny Projektant studio. They design architecture, interiors and products. They also run designing courses in Serial Designer Academy.
After several years in the profession, by curious coincidence she stumbled upon Blender software, which has accompanied her ever since. Making visualisations became Paulina’s true passion and invaluable complement to her profession.


I too have been using blender cycles for a couple years and have started to introduce it into my office for professional work. It’s really nice to see that other people are using it for architectural work as well and found this article very insightful. Thanks!
Nice article, very detailed and well written. Also good to see an article about blender and not 3dsmax for once 🙂
Thanks!
Very nice and detailed tutorial, I normally use Blender for my professional architectural works for six years and I fully agree with everything you show here. Excellent !!