


Making of Cliff House
The Cliff House won Best of week 35/2015 and today I’m happy to share this making-of by Matias Moret , as he details the process of visualising this west coast, British Columbia, Canada based house. Looks like a great location to live in. Enjoy!
First of all i´d like to thank Ronen for giving us the chance to share some of our work process with this ever-growing community of CGI artists focused on architectural visualisation.
We named the project above the “Cliff House”, stating the obvious. In this particular case the work process was quite special. For better or for worse, photos were not available due to its inaccessible location. So the client described how it looked over Skype. Some pictures captured from Google helped too.
Getting Started – Setting up Mood, Model & Camera
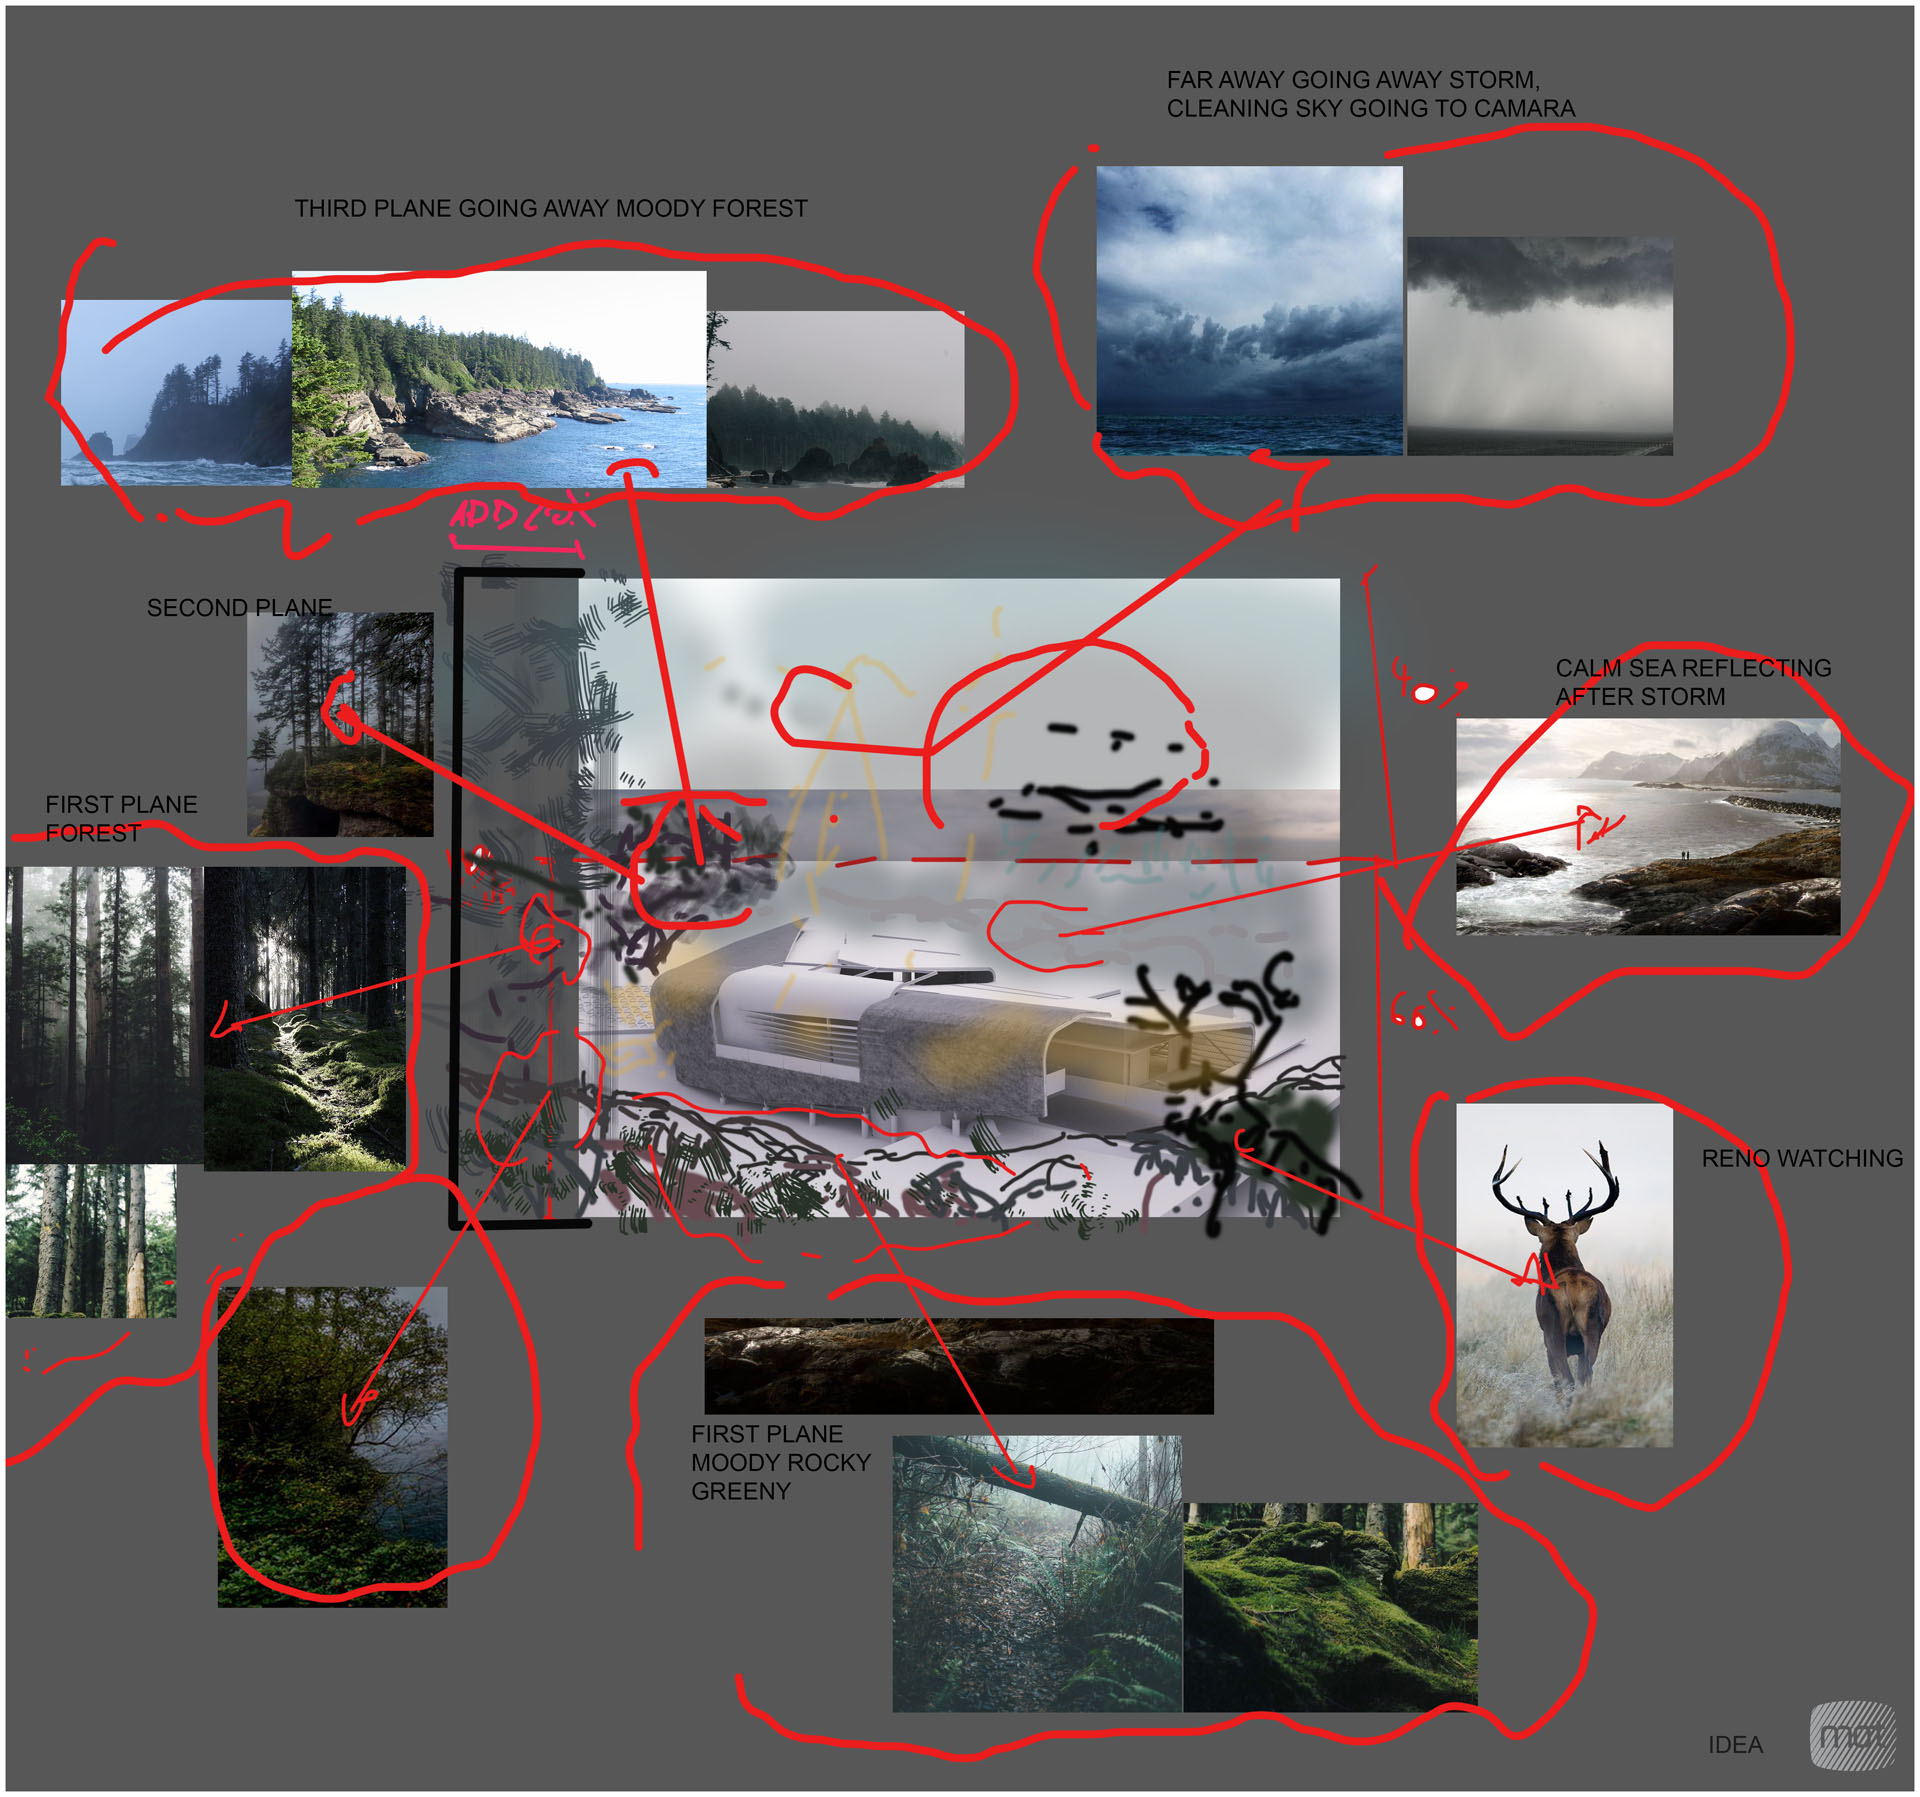
After a couple of talks, we got down to it. First we searched for inspiration and selected the pictures that would help us build an atmosphere for the image. Here you can see our selection, that is, our references.
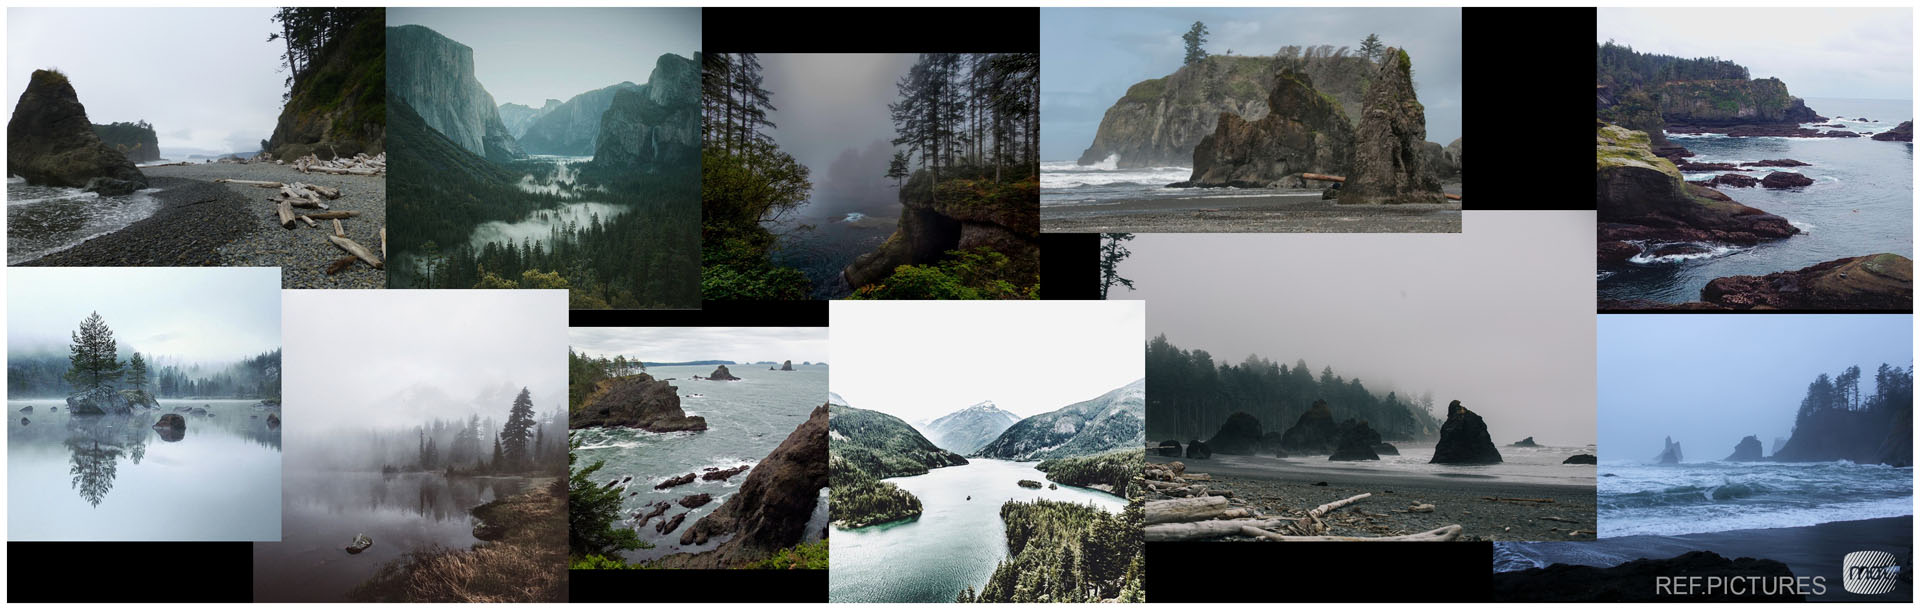
As soon as we decided on the atmosphere we wanted to convey, we had to think about the image.
It was very important to move safely forward, one step at a time, checking with our client that we were progressing on the right track, in order to avoid unfocused work.
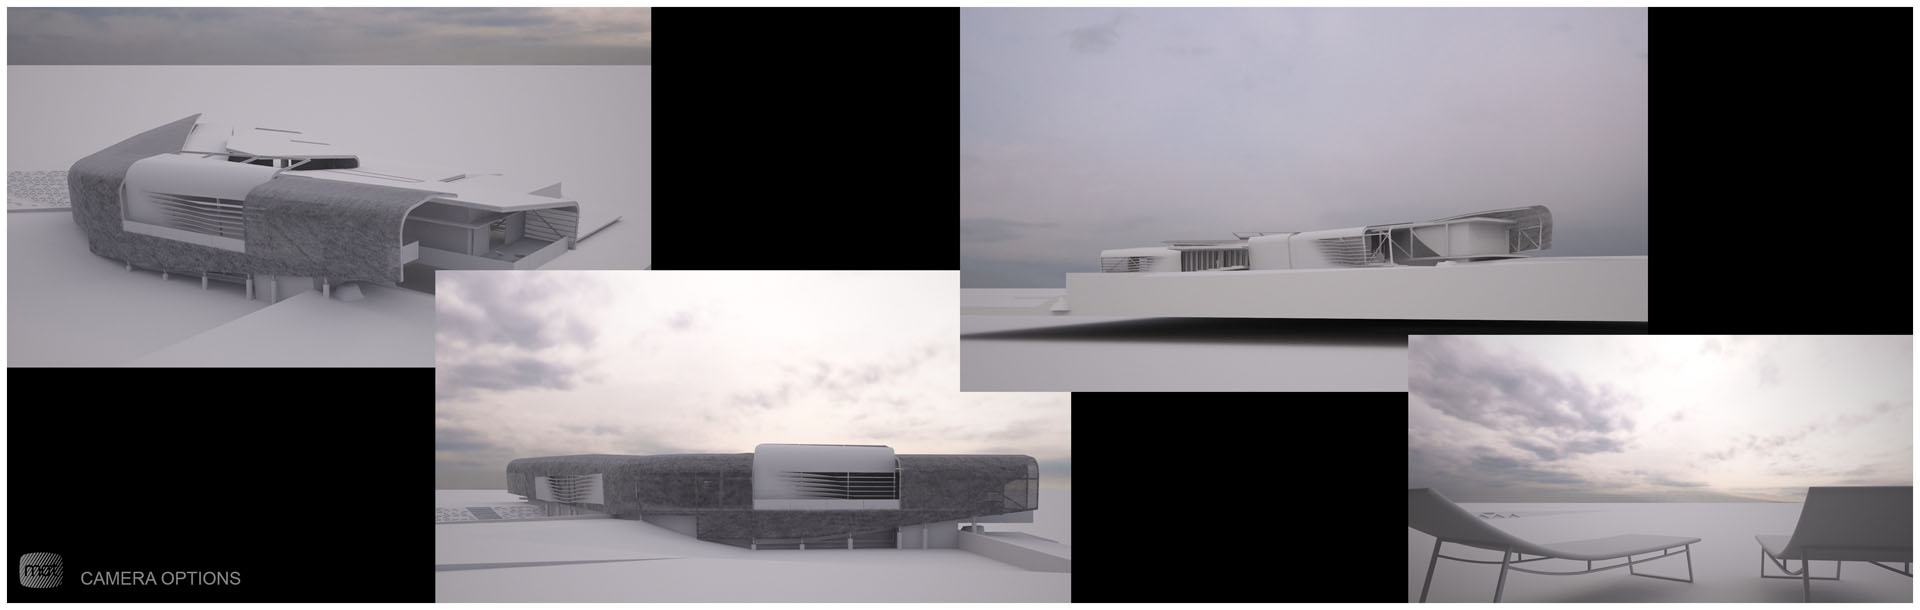
Once the camera´s been chosen, we design our proposal. Here you can see our first sketch.
After one or two round trips, our proposal returns accepted. Our client likes it.
Now that we´ve promised, we must deliver!
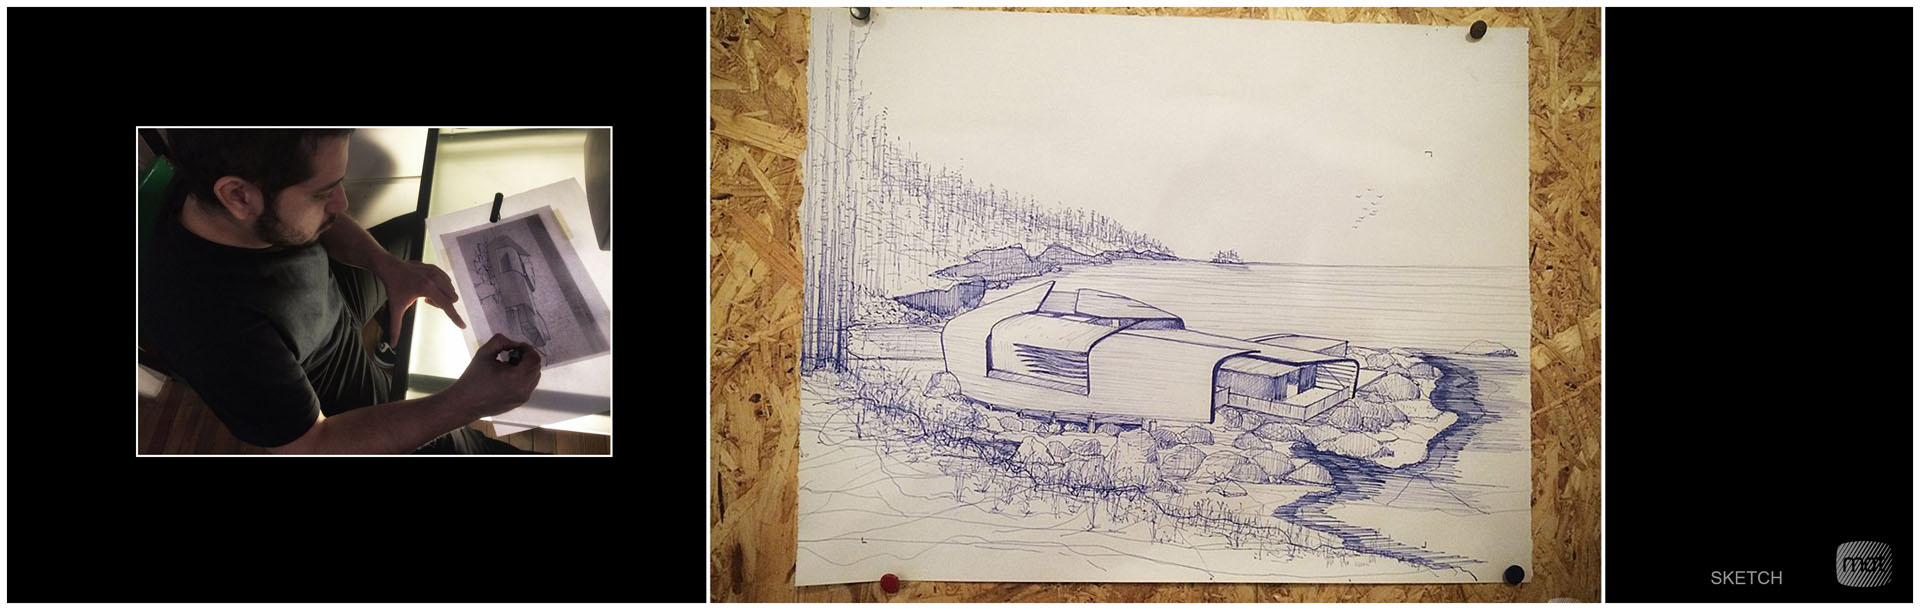
Although the first sketch was ok, we need to make it clearer. Both for us and for our client. What could be better and faster than an excellent hand drawing?
Luckily we have a great artist in our team, who can often help us save a lot of time with a single drawing. The pencil still works its magic!
Yes, it works.
Here you can see Fabricio going at it and the result of him doing so, the finished drawing.
The drawing is great, it charmed our client, everyone is happy. Now, we have no idea how we´ll pull it off. I´m thinking the answer will involve lots of Photoshop. It´s a good thing the king of Photoshop is also in our team, but we shall leave that for last. First, we tackle the lightning of the scene.
Lighting
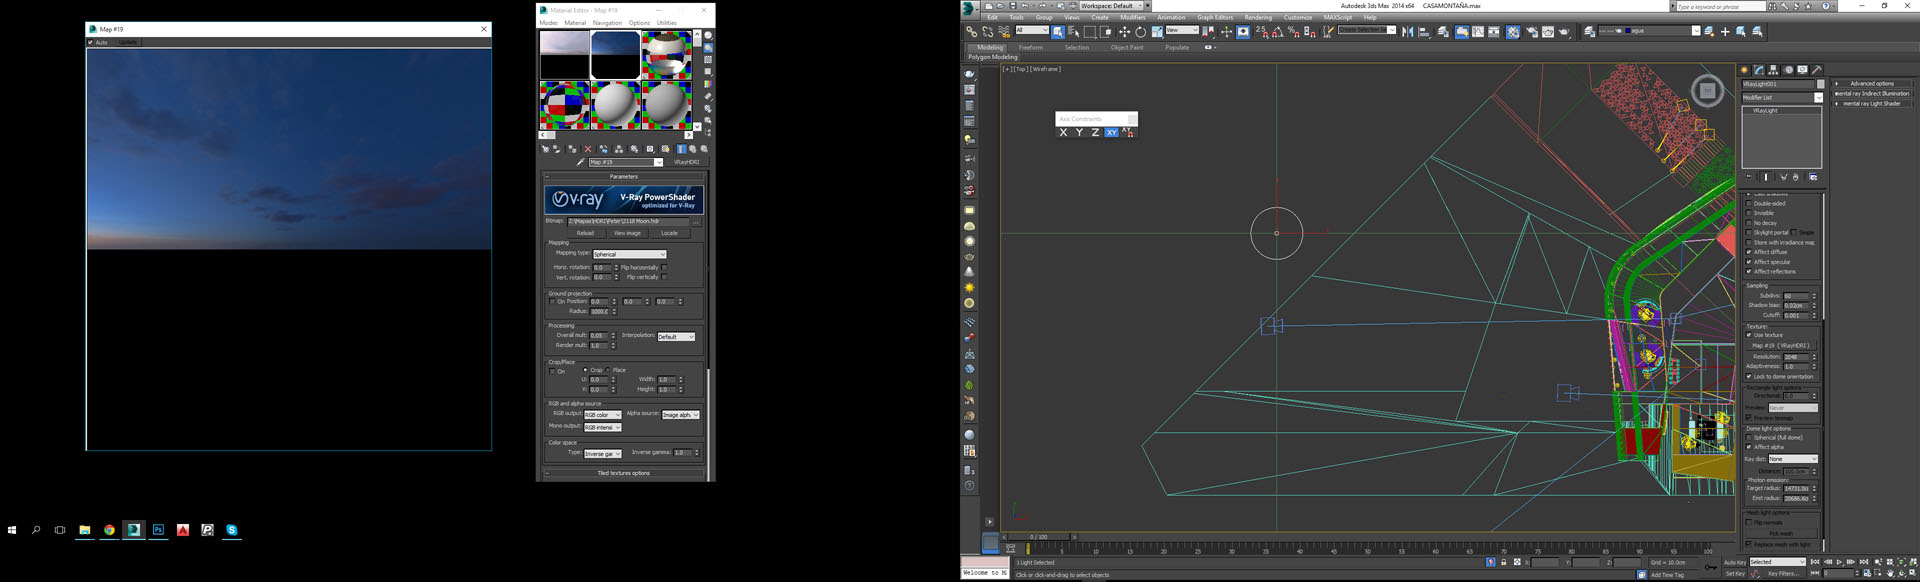
For global illumination we only use a dome light, with an HDRi from the great Peter Guthrie. Here you can see the settings.
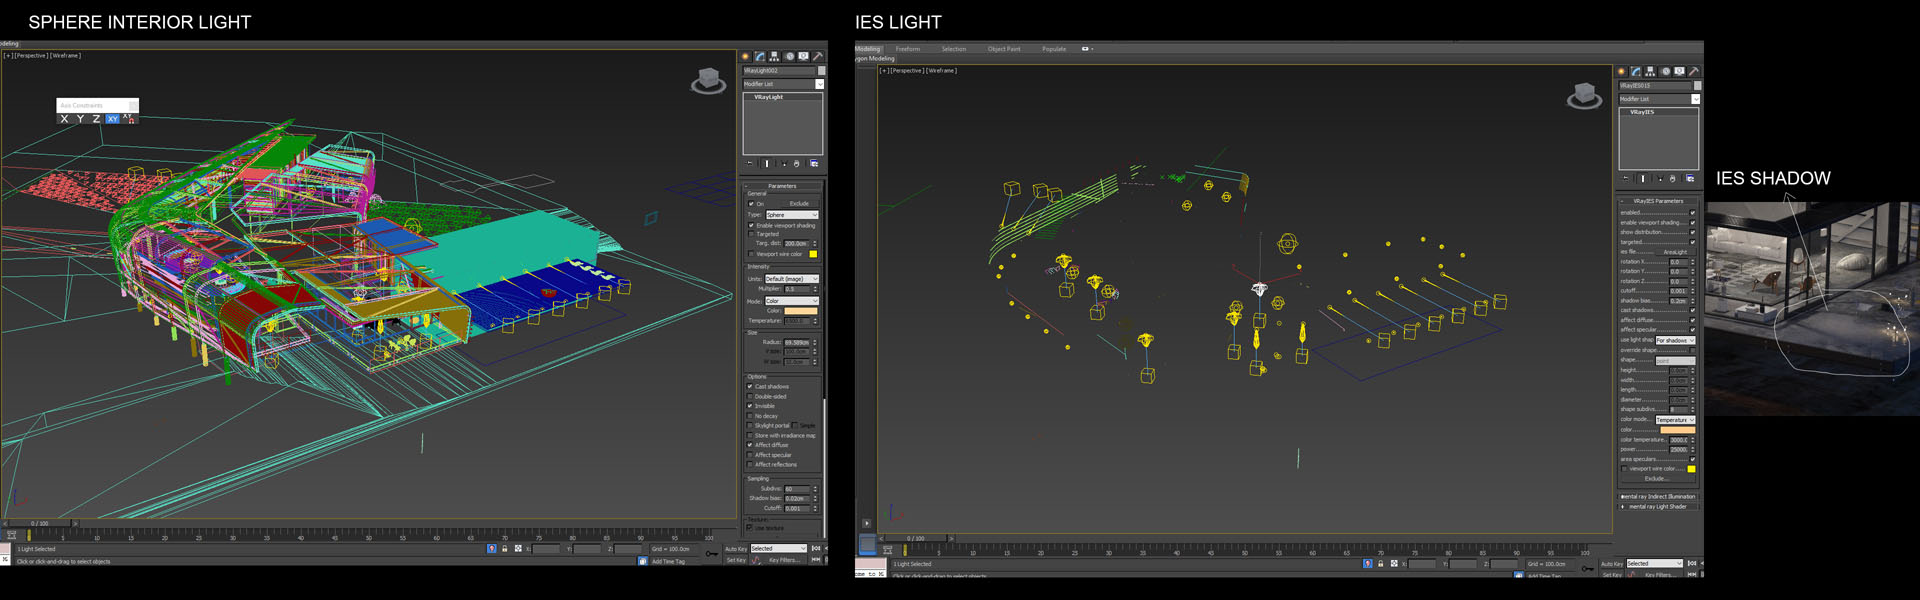
For the interior illumination we use only sphere lights with a very warm tone set-up, and some V-Ray IES to generate more real-looking shadows on the exterior surface of the house.
And that´s about it with the lights.
Materials
Now, the materials. In truth, not many and not too complicated.
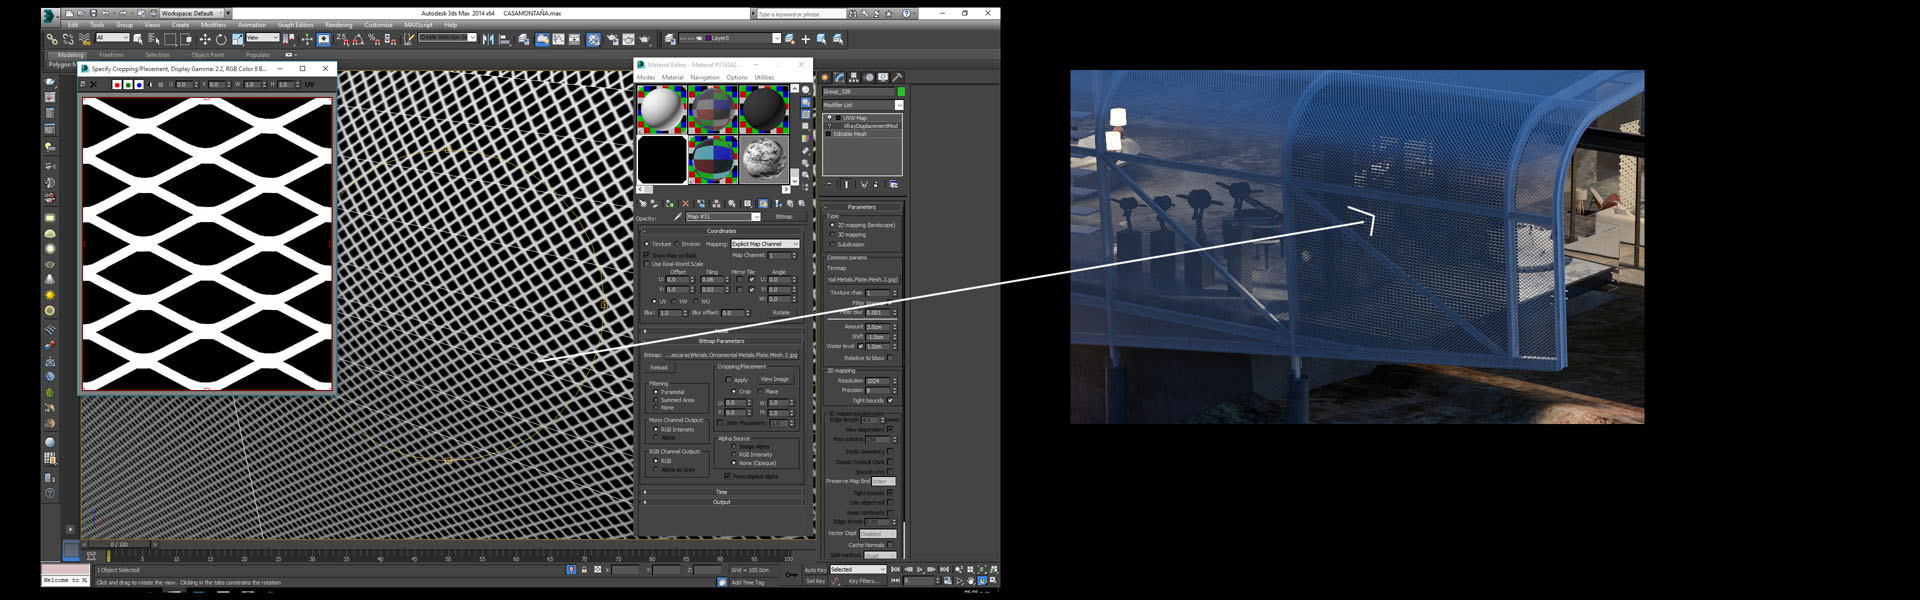
The mesh in which the house is wrapped was somewhat tricky, since we wanted light to shine through the grille. This we solved by using an opacity map together with affect shadows, which brought along a massive amount of render time. We couldn´t figure out any other way.
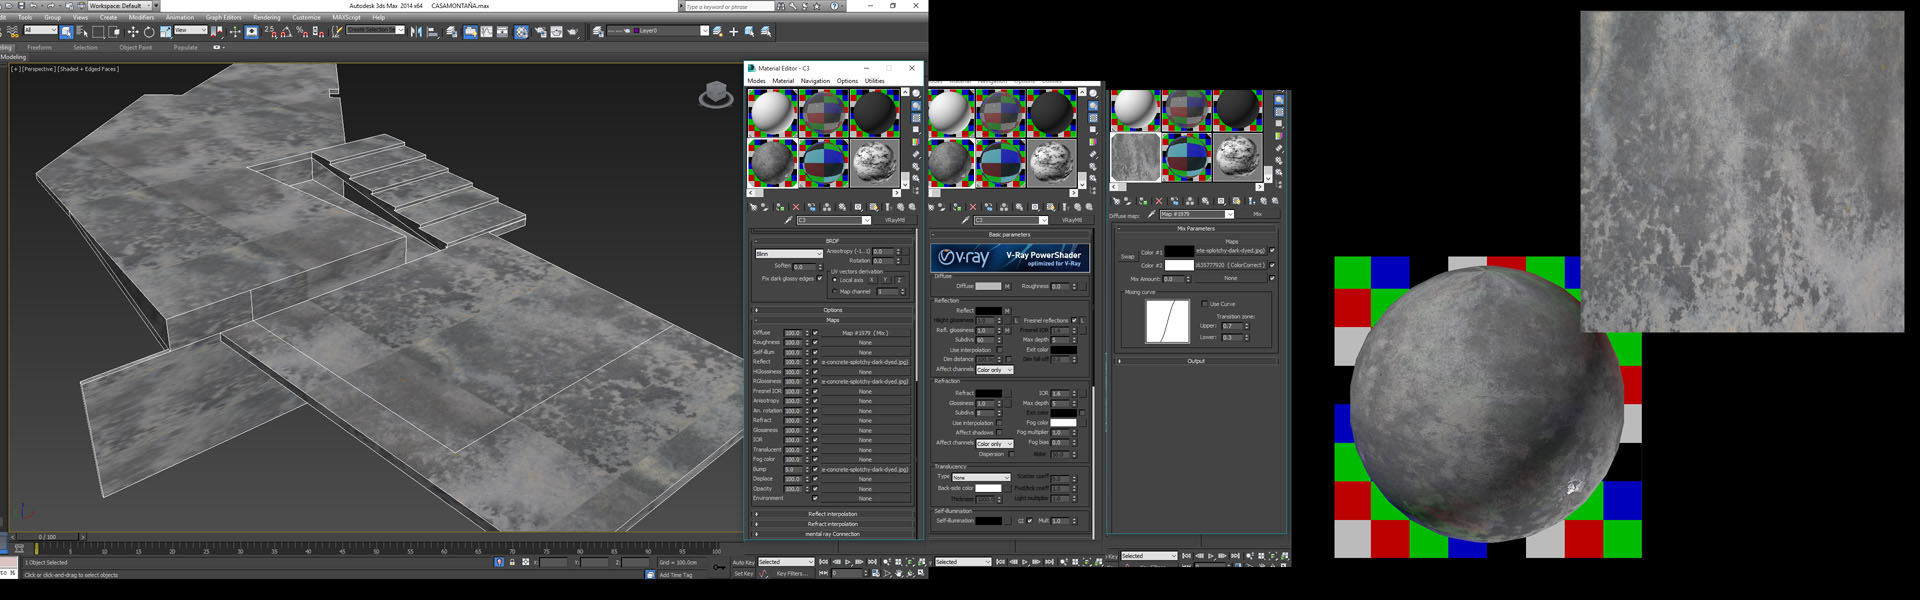
Concrete floor, as usual, slightly brilliant but not too much, plus a mask to avoid repetitions and make it look more real.
And last, the wood, also quite simple. Here you can see the settings.

That´s all there is regarding the materials.
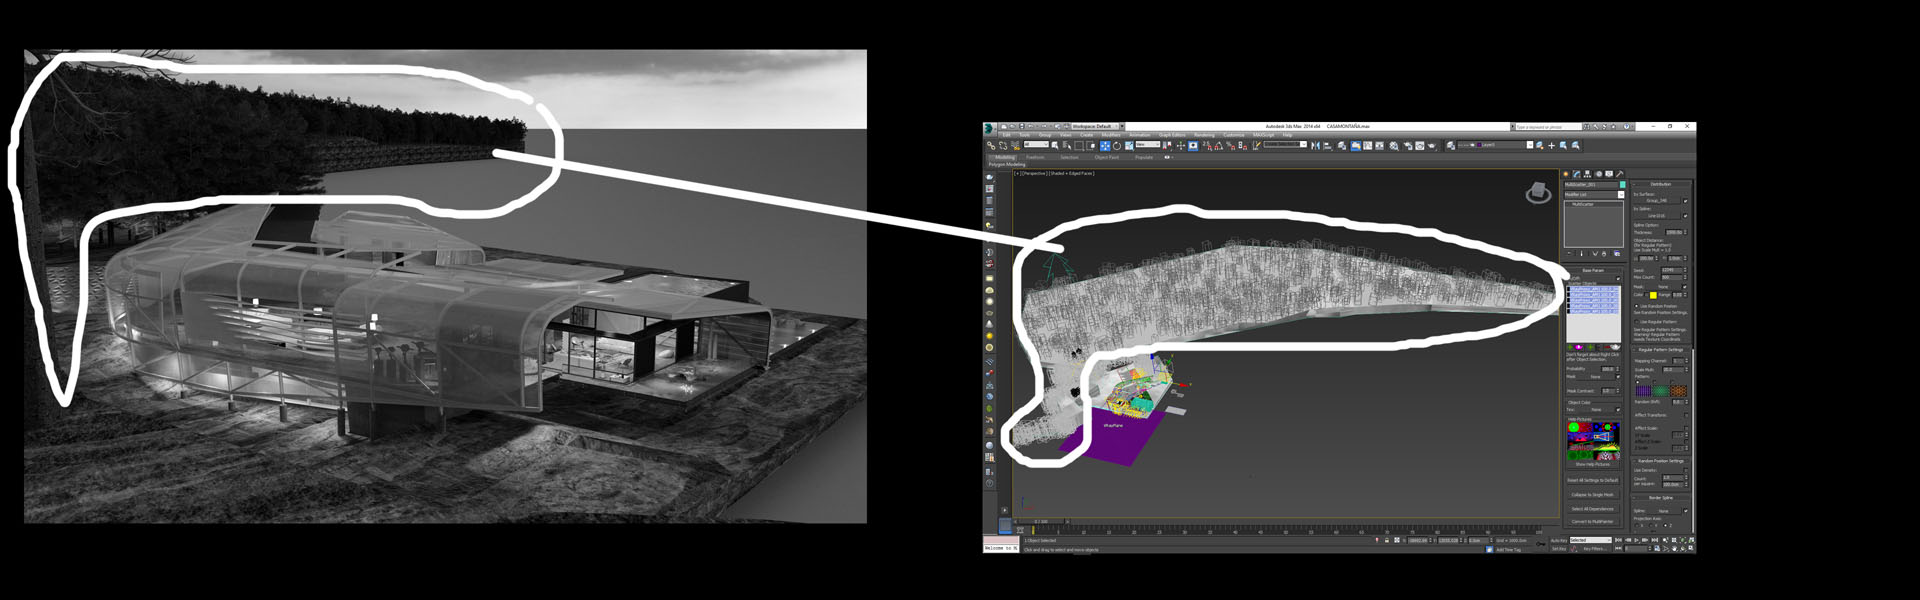
Trees
I forgot to mention that, although the environment was created with Photoshop, we also made sure to scatter plenty of trees across the scene, so they would reflect nicely on the house. Here´s an image where you can see the 3D trees.
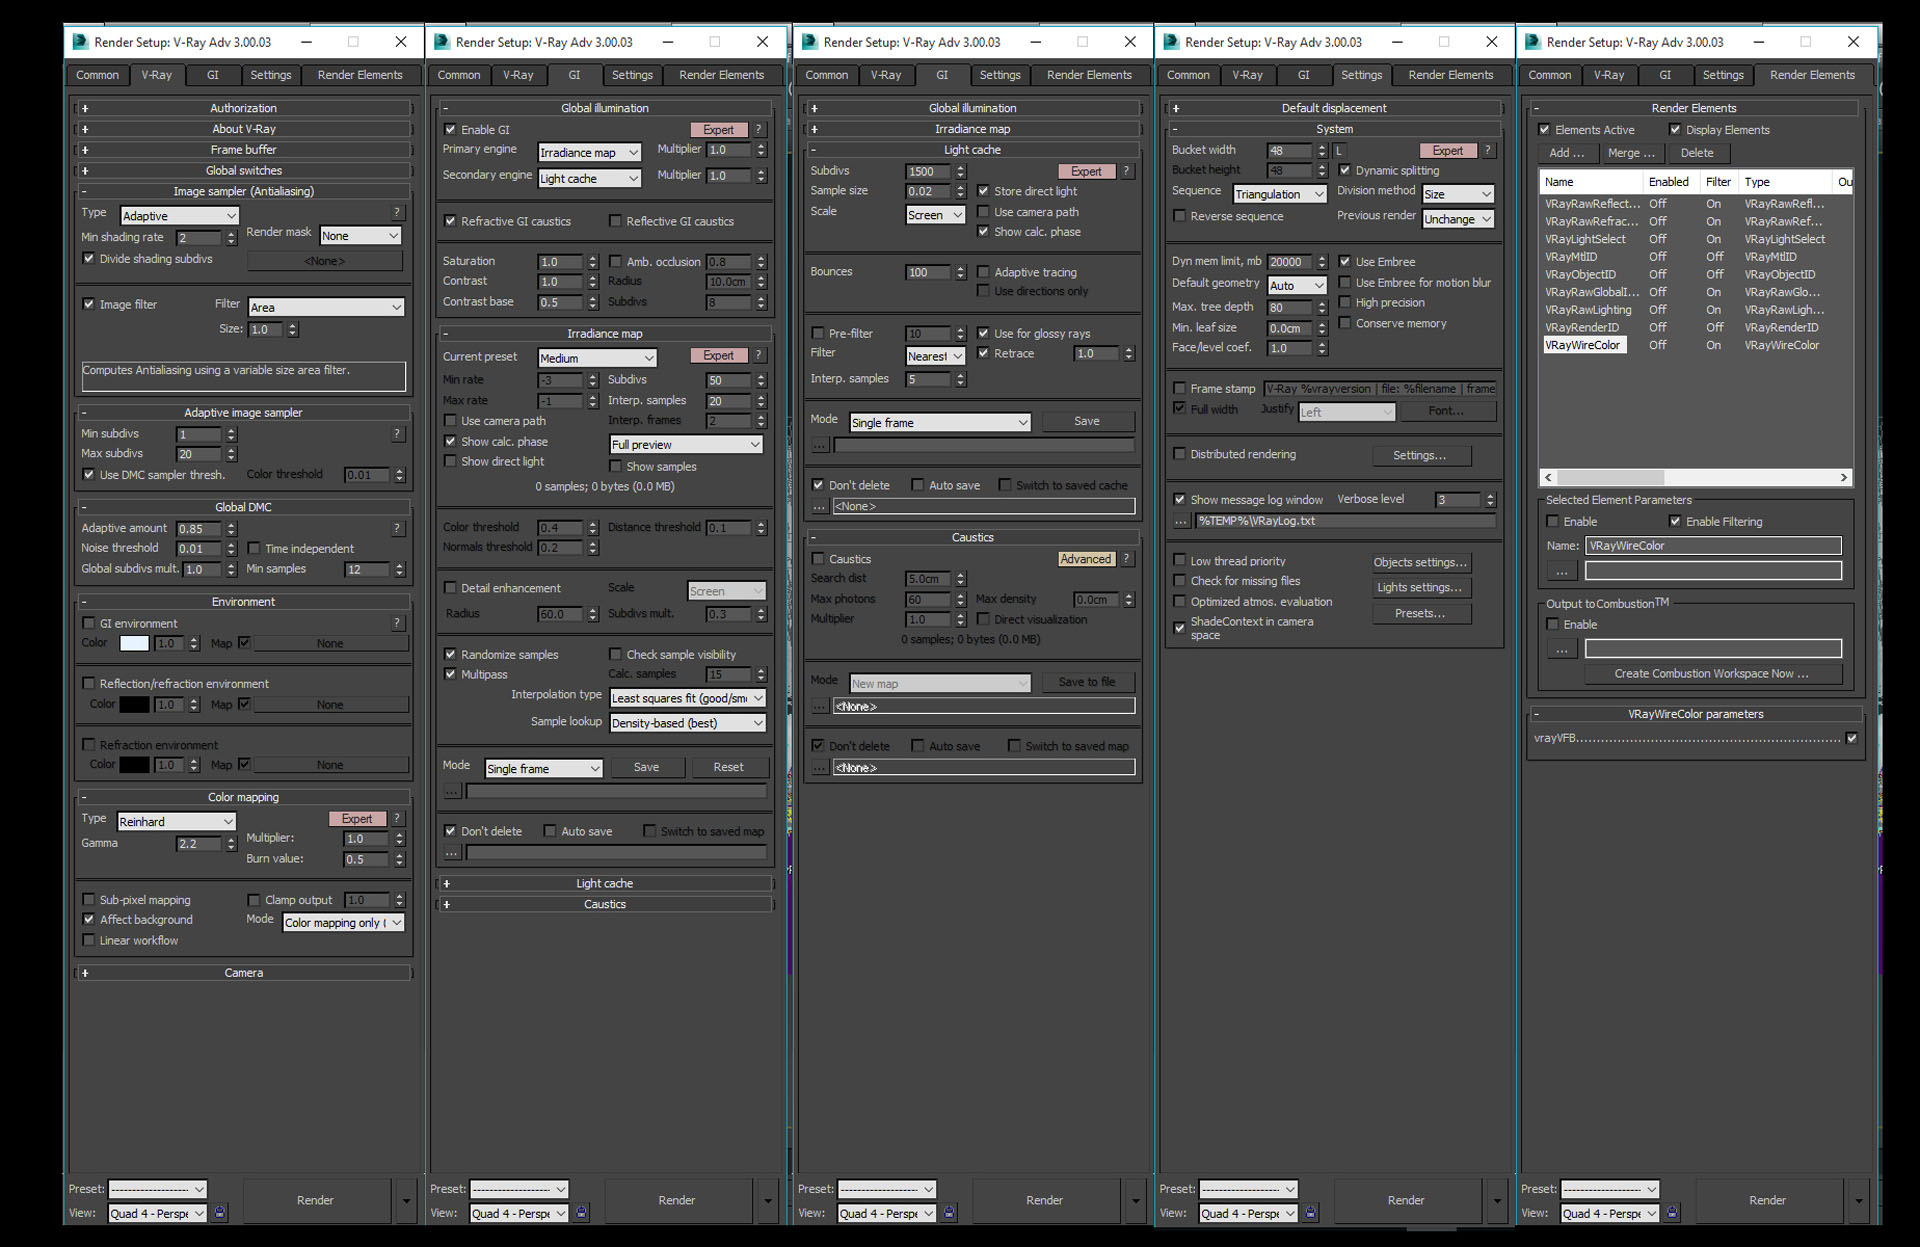
Rendering
Also, for settings fans 😉
here are the ones we normally use on almost every scene.
Post Production
Finally, we come to the Photoshop stage. Here is where the magic happens. Walter (codename Walcom), who had been closely following the whole process, said he could translate the drawing to the computer. And so he did.
Anyway, we thought we needed more than words and still images to convey the work process. So we also made a short video that shows better how the image came to life.
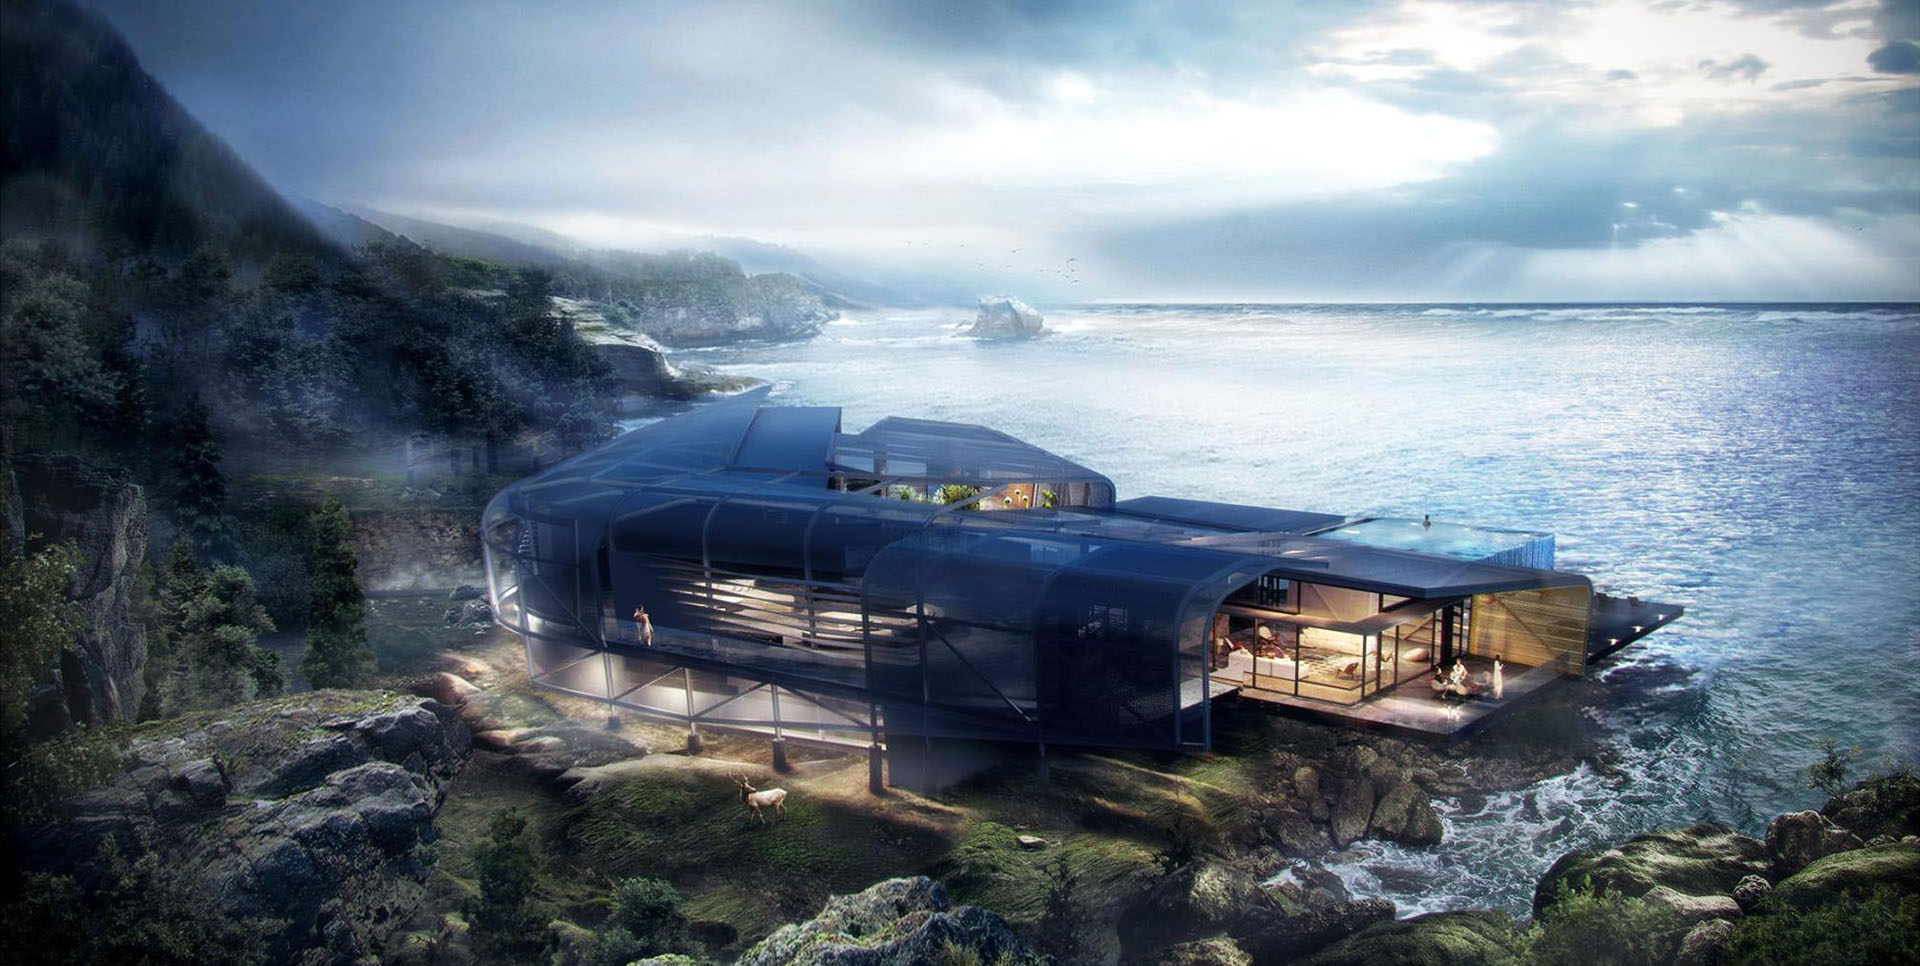
And here, the final result.
I hope you had fun reading and watching this making-of.
Thanks a lot for bearing with us to the end.
Cheers!
Matias Moret

Estudio MOT specializes in home made visualizations


Great tutorial!!!
Very helpful tutorial, thank you! For the concrete floor have you mixed the bitmap with a procedural map to avoid repetition?
tumfyboy
Hi Tum, we mixed two diferents bitmaps with a mask
Good Aritcle, Preksh provides Virtual Walkthrough for your Online Store. Visual Merchandising in AR enabled Kiosks would Increase In-Store Productivity and Sales.
https://www.preksh.com/solutions/Visual-Commerce-Webstore-ISP