


Making of Astridhof Residence
Patric Verstraete recently published his latest work for VEELAERT ARCHITECTEN’s Astridhof Residence project, showcasing extensive environmental work to achieve similar look to that on site without relying on photography. He kindly share his process of making it using 3dsmax and V-Ray as his main tools, as well as Forest Pack Pro, RailClone and Mighty Tiles Pro. Enjoy!
Introduction
It is a fantastic feeling being invited by Ronen Bekerman to write an article for the Making Of section on this Blog – Where I’ve learned so much from, and which has always been a great source of inspiration for me.
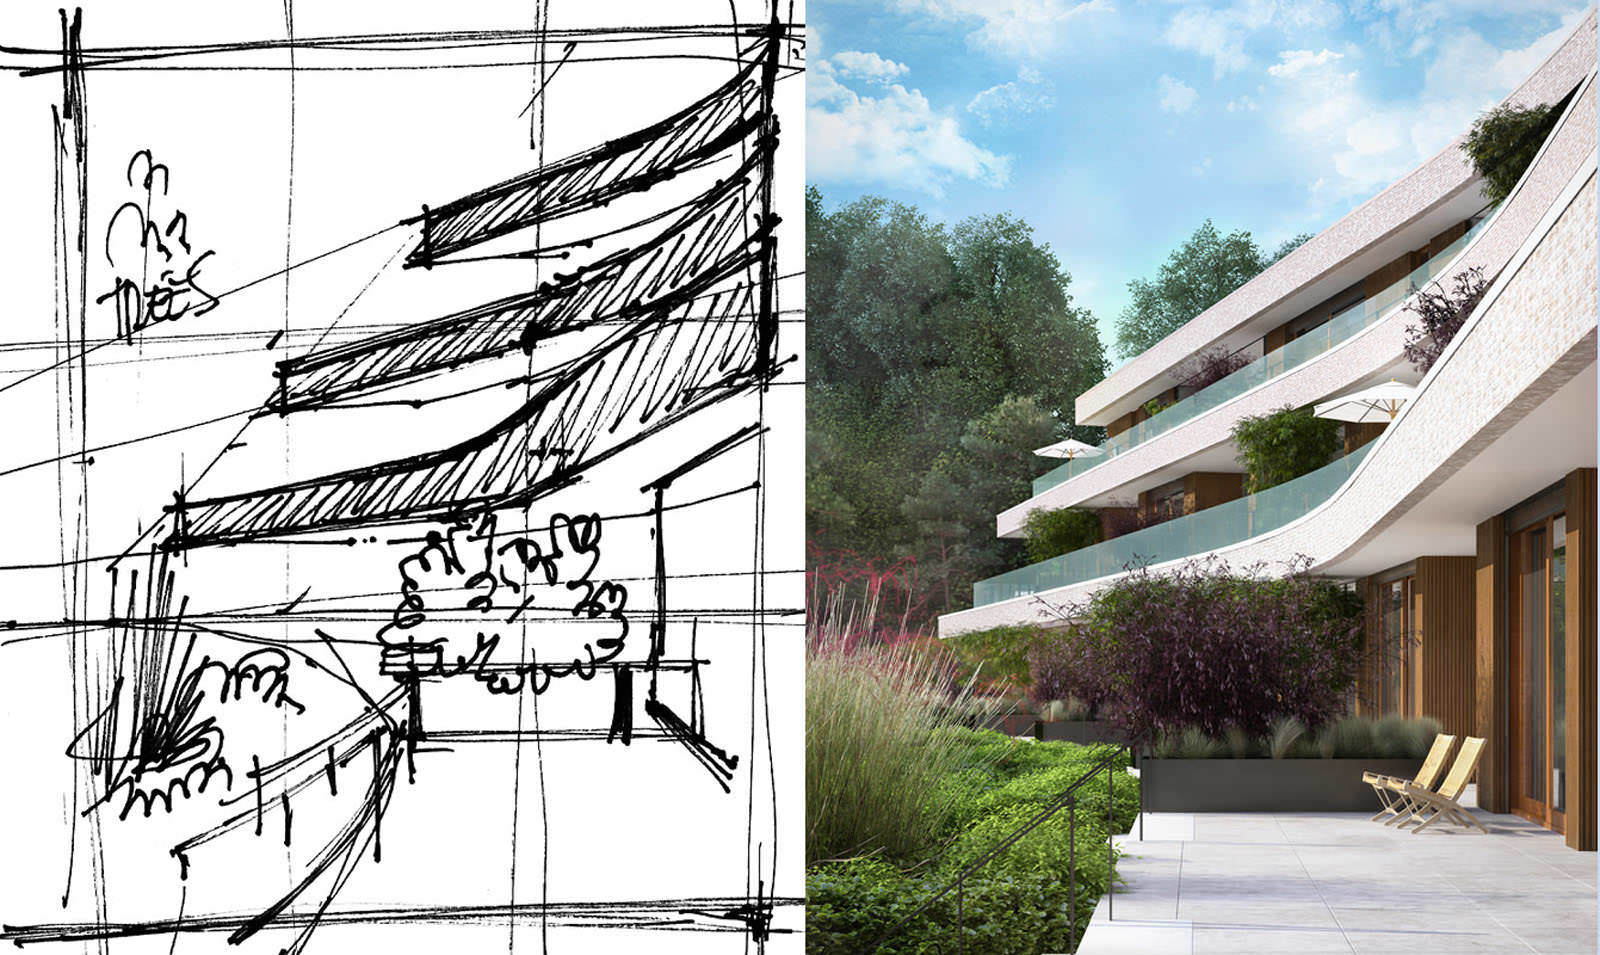
ASTRIDHOF Residence is situated in a beautiful wooded surroundings in Belgium and designed by VEELAERT ARCHITECTEN.
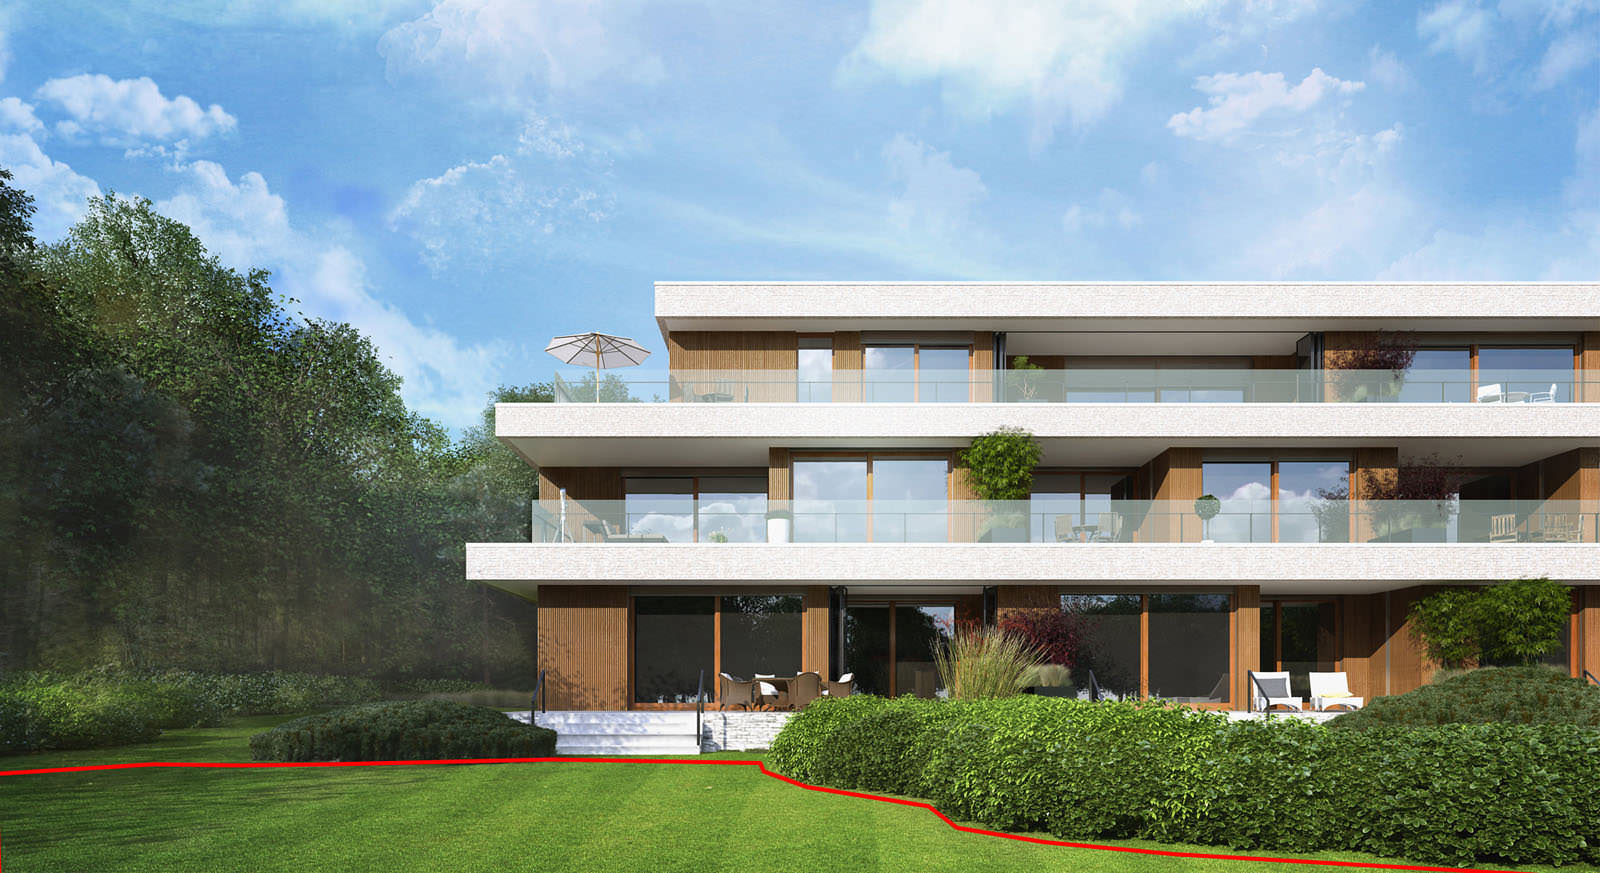
The design and positioning of the building is fully focused on the south-western open space. The building nestles as it were, against the tall tree line. It forms a continuous line with a slight bend based on the shape of the terrain with materialization and detailing that accentuates the strong horizontality of the building.
The architects strongly emphasized the need to show the integration of the design with the environment, making it part of the landscape as much as possible.
For this project I used :
- 3ds Max 2014
- V-Ray 2.40
- Mighty Tiles Pro
- Forest Pack Pro
- Laubwerk Plant Kits
- RailClone
- Photoshop
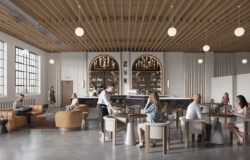
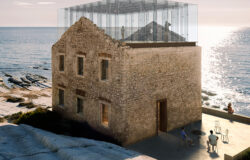
Here are the exterior visuals made in this project :


And interiors I’ve recently completed too :


Basic Scene Setup
Here are the general scene setup settings I always use.

Modeling
I arranged the plans inside 3dsmax to form a rig to which I can refer to in my modeling. My Units are set to metric and centimeters. It´s important to check the measurements of the plans to get the right scaling of the house.
![AB.02_GRONDPLAN NIVEAU +0_+1 [A0]](https://www.ronenbekerman.com/wp-content/uploads/2014/03/Astridhof-plannen.jpg)
I used very simple and basic poly editing method for creating the model. I had to carefully put all the elements of each floor in different layers, so it would be easier to work on. The client asked me for interiors as well which made the use of layers even more handy.
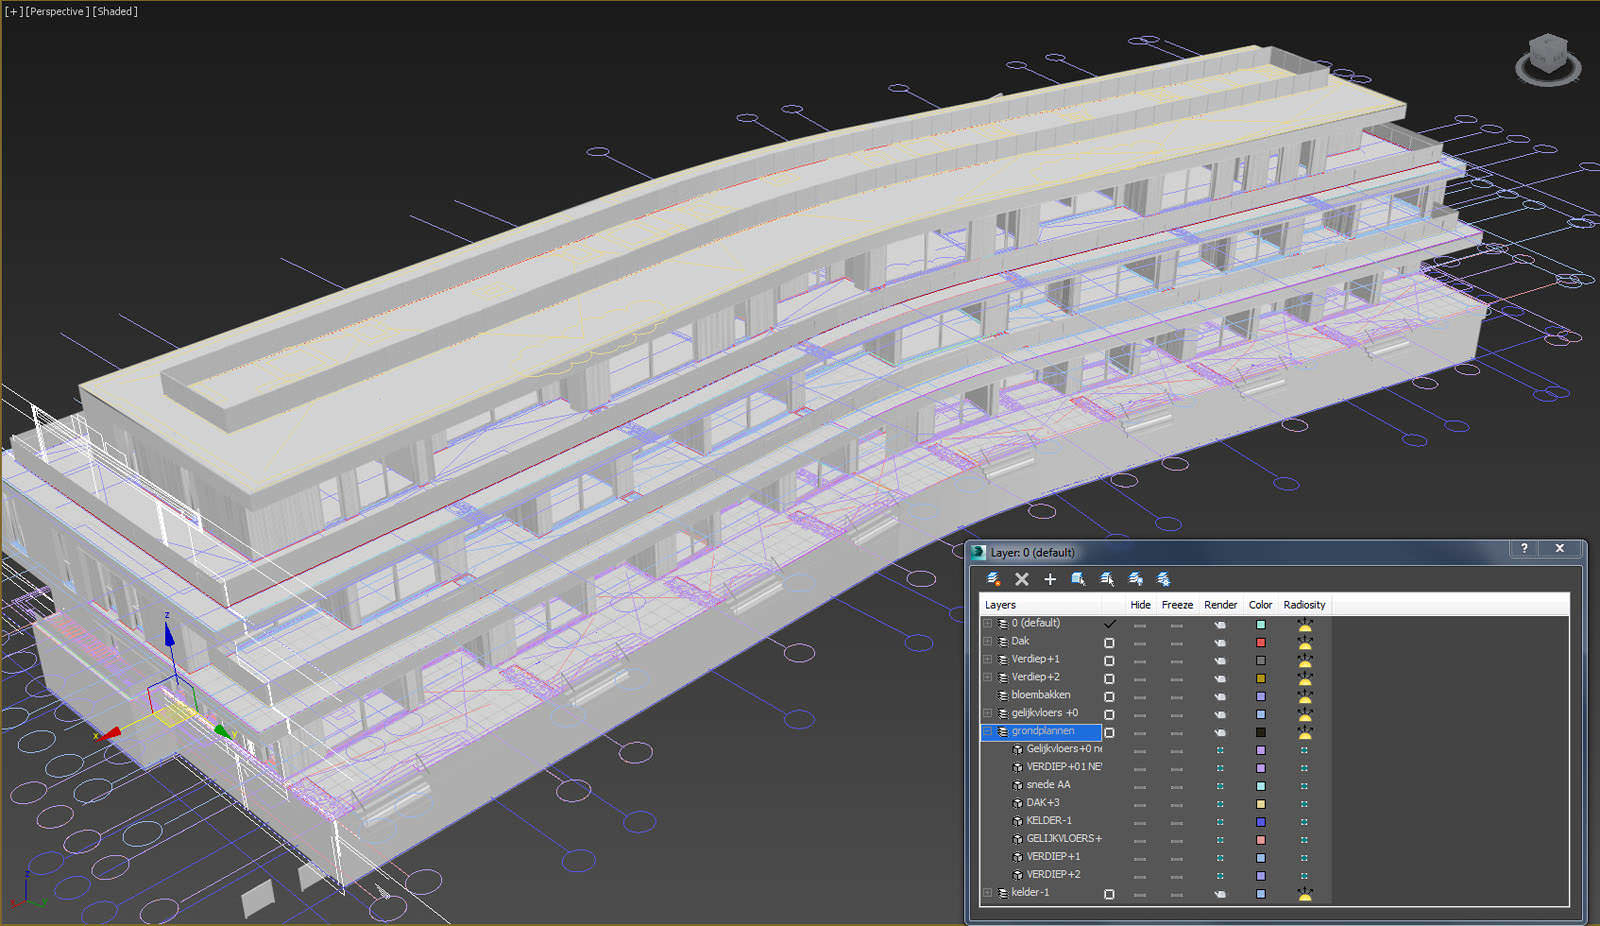
Below you can see the layer structure.

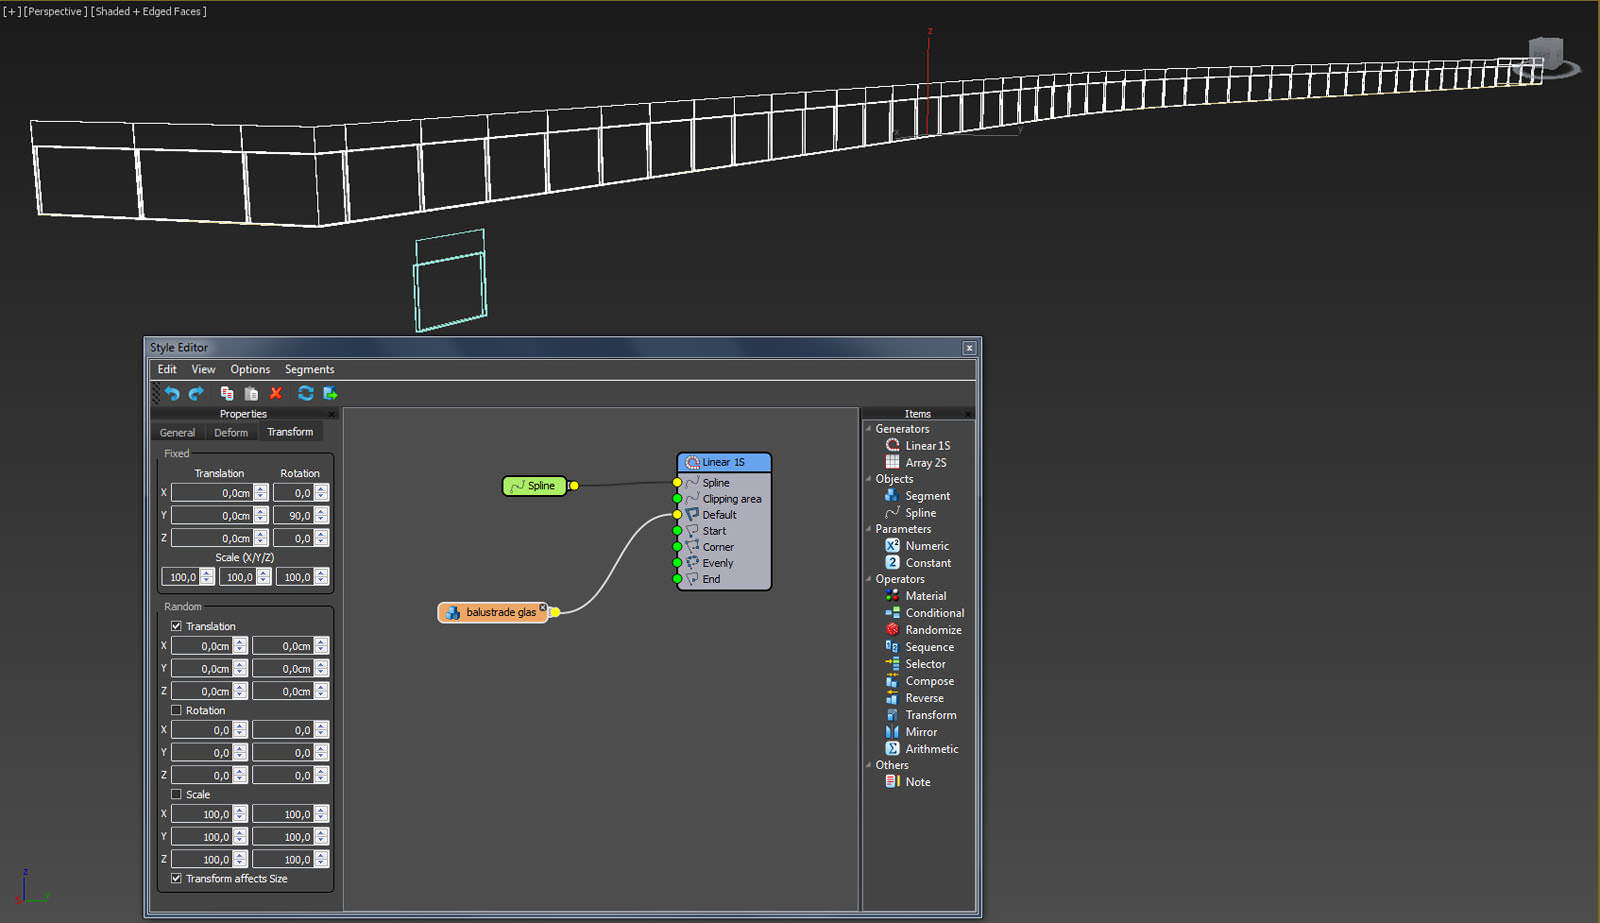
Modeling with RailClone
For the glass railings on the balcony I used the time-saving plugin by iToo Software RailClone. I just needed to create a spline, and attach the geometry. The design of the balcony changed twice during the time I was working on the project, and all I had to do is change the basic railing unit model and it all changed on the fly.
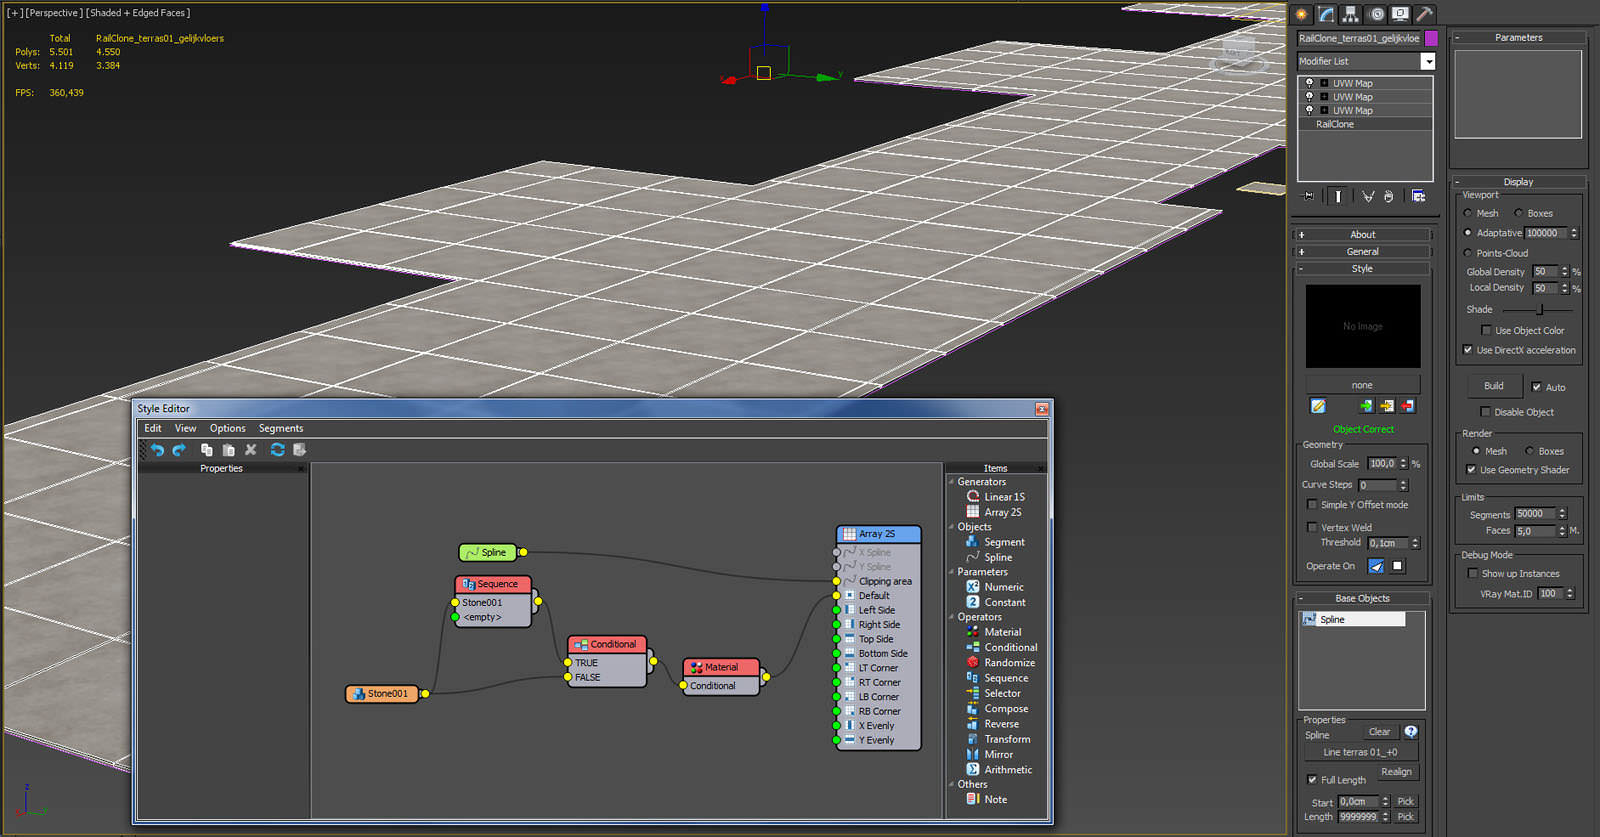
I did the same for the terraces, creating several splines and attaching a stone segment to them. For a good tutorial about how to do this, visit the RailClone Parquet Flooring Tutorial.
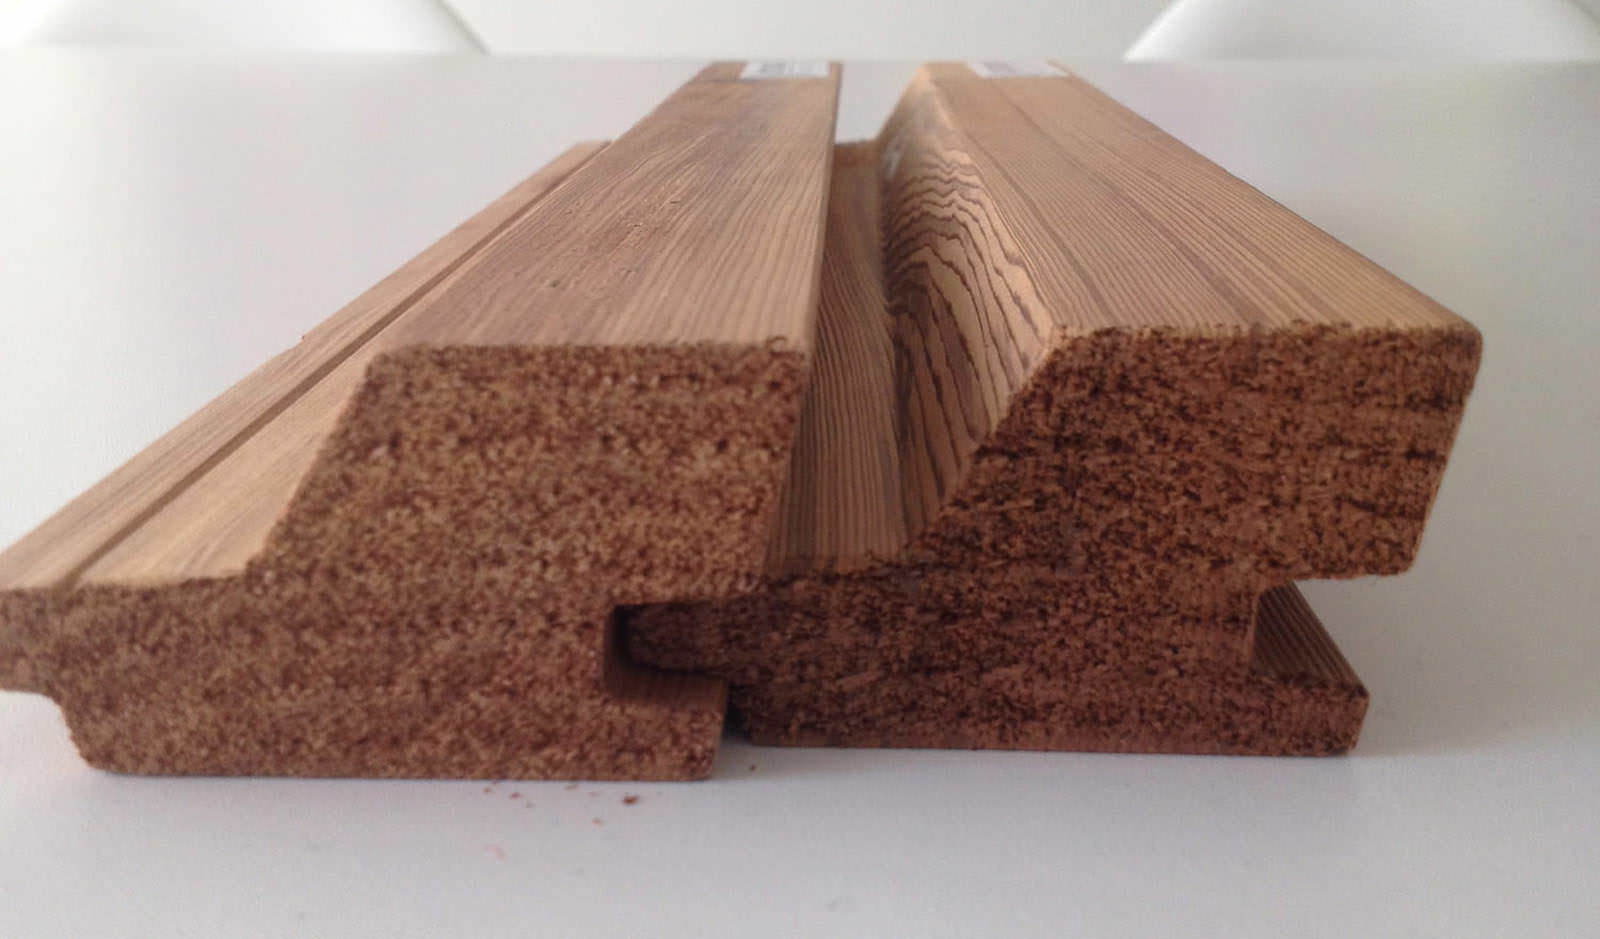
The biggest challenge was the wall cladding. Using a texture was out of the question because the Wooden Boards from Outdoor Wood Concept will show up multiple times and in close-ups.
This is where RailClone really came to my rescue, allowing me to distribute the single wood elements adapting to any spline I gave it to follow.

Lighting Setup
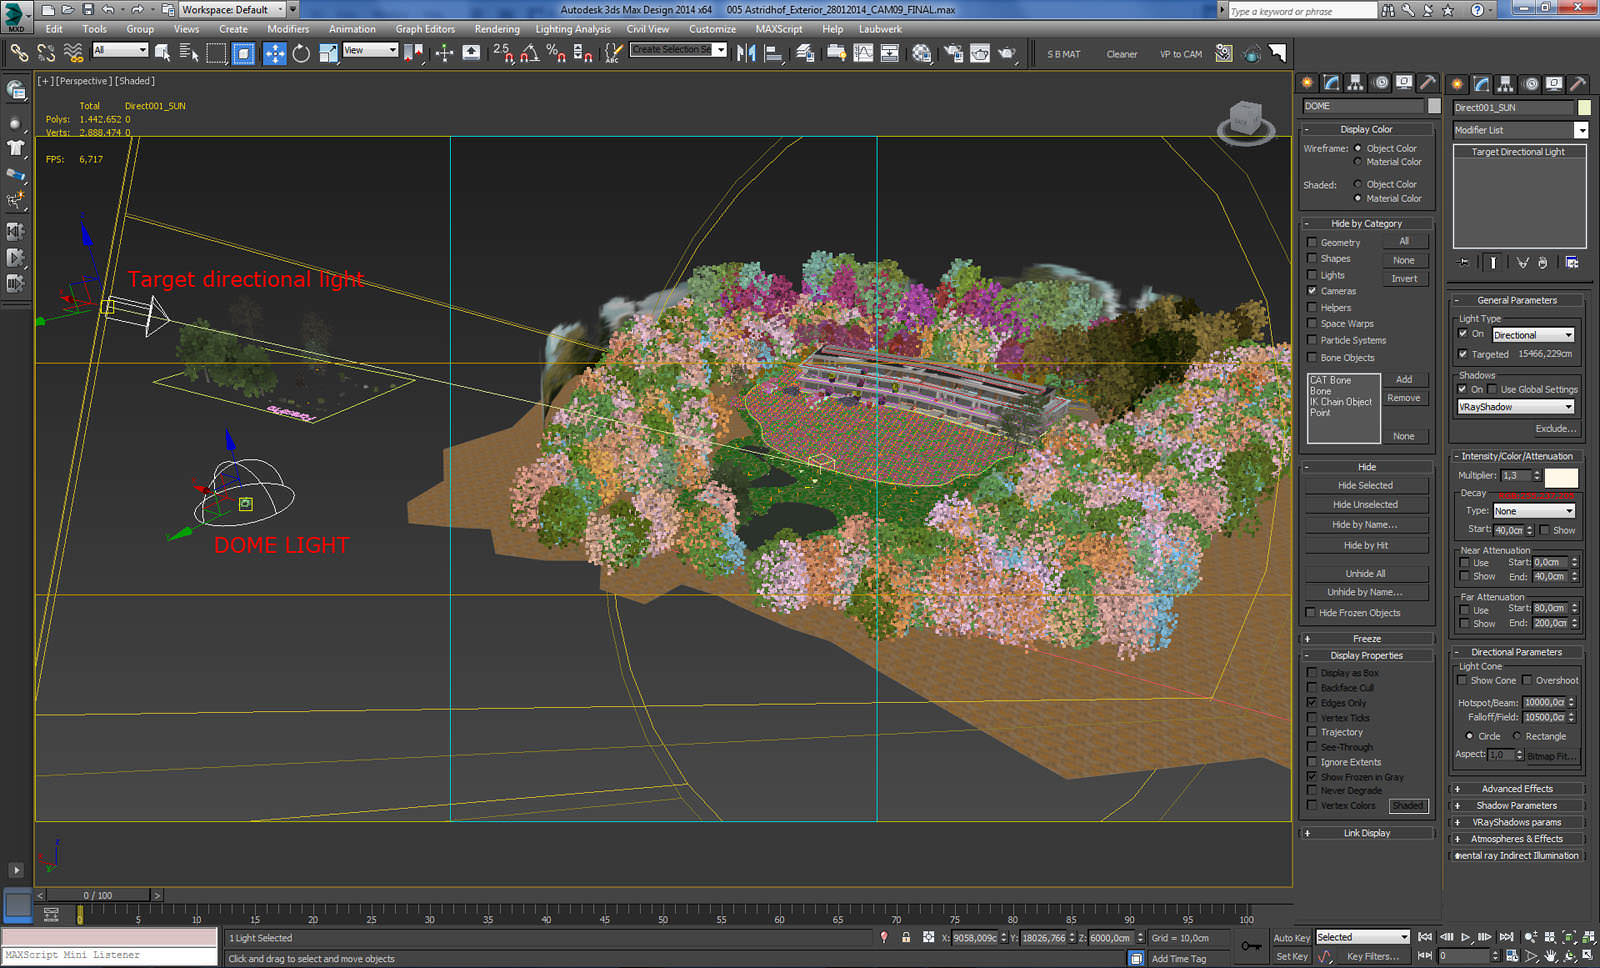
The scene setup is quite simple. Just a V-Ray Dome light with an HDRI texture from VizPeople for the global lighting.
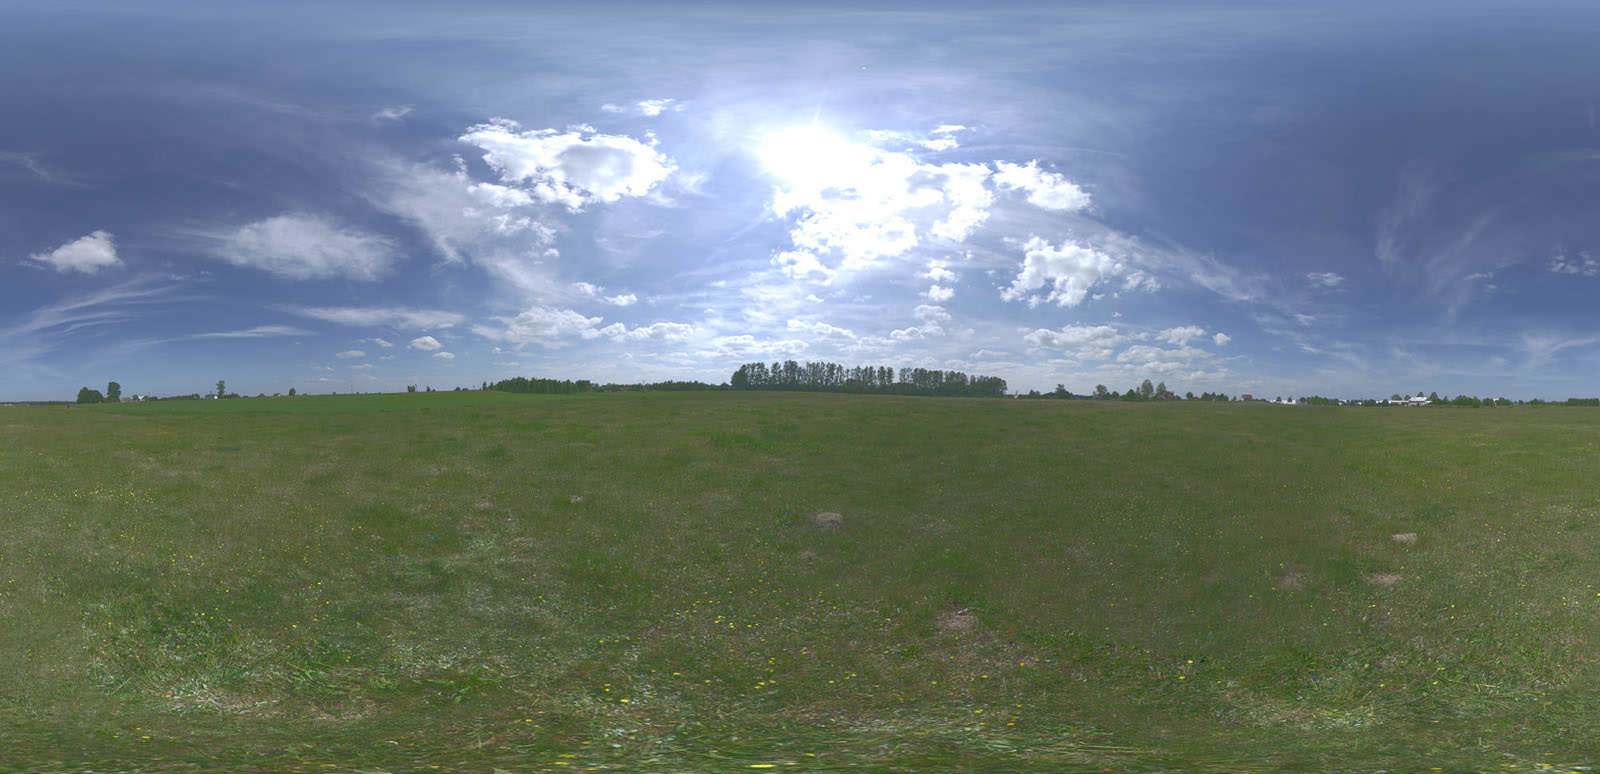
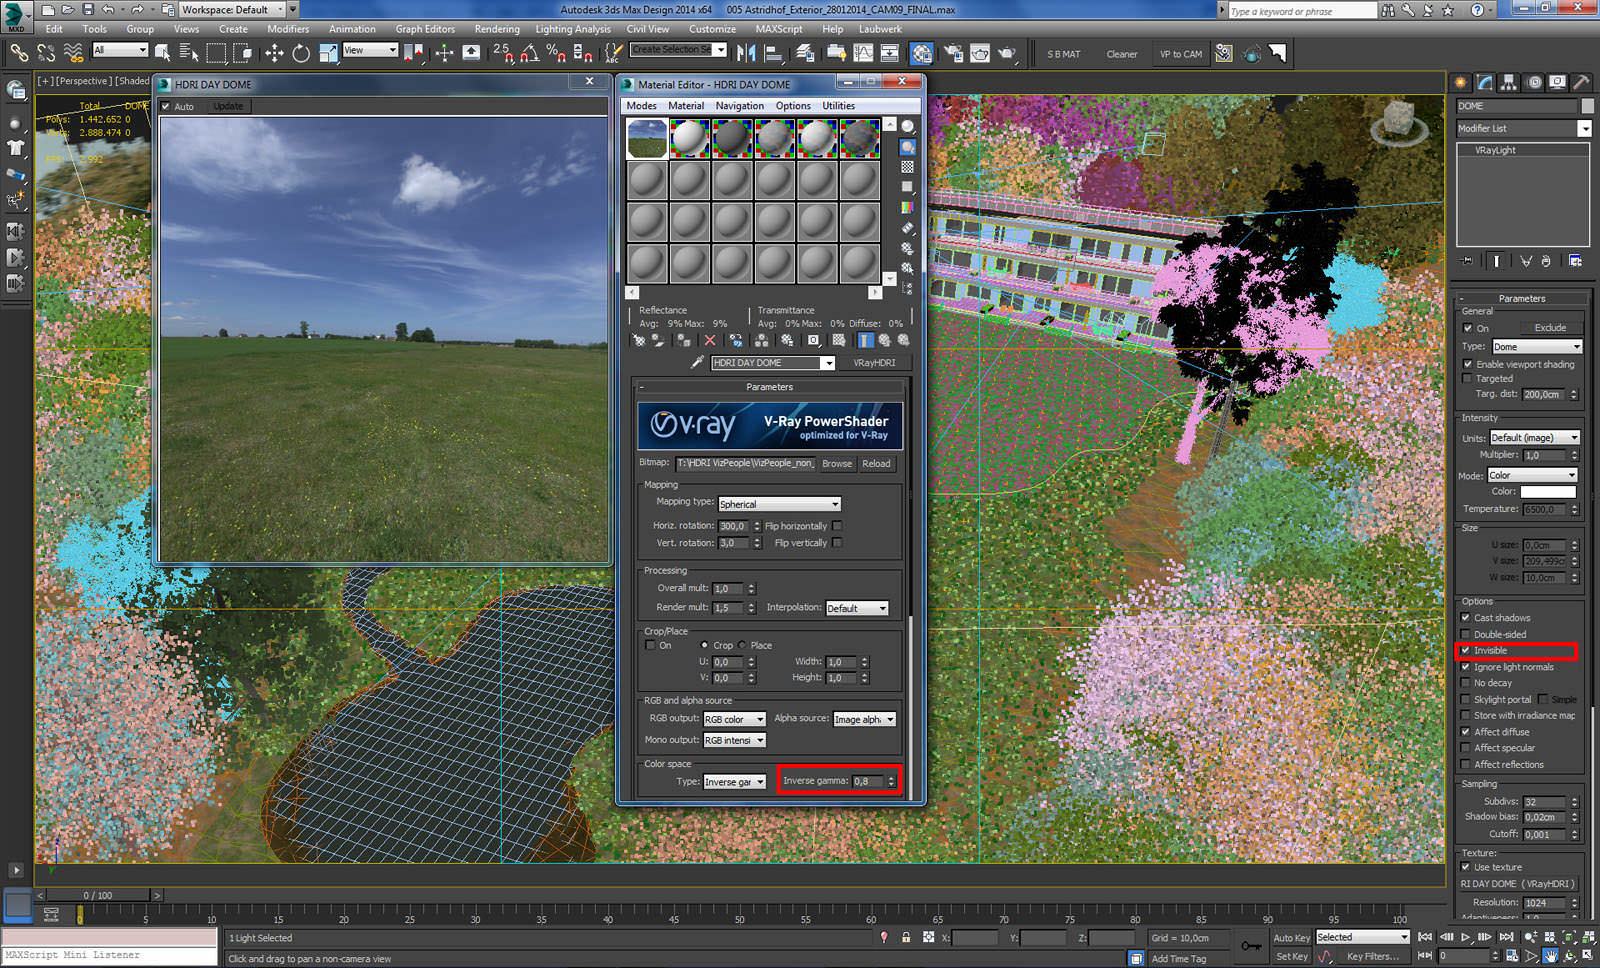
For the daylight scenario I needed to have full control over the shadows of all the trees falling on the building. To accomplish this I decided to use a targeted directional light, which was used as a sun.
Camera Setup
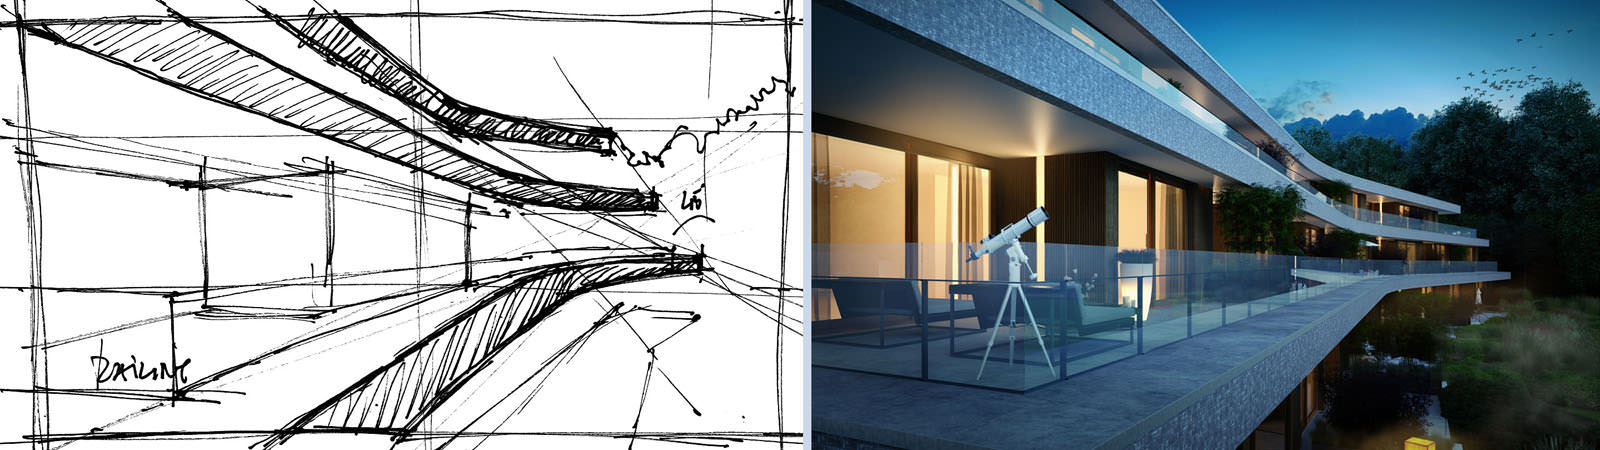
Usually, I put up a bunch of different cameras based on a rough viewpoint idea to get some interesting frames. During the preparation of the project I already made some rough sketches for the images I had in mind. The compositions are mostly based on the dynamic perspectives of the building.

Environment Setup
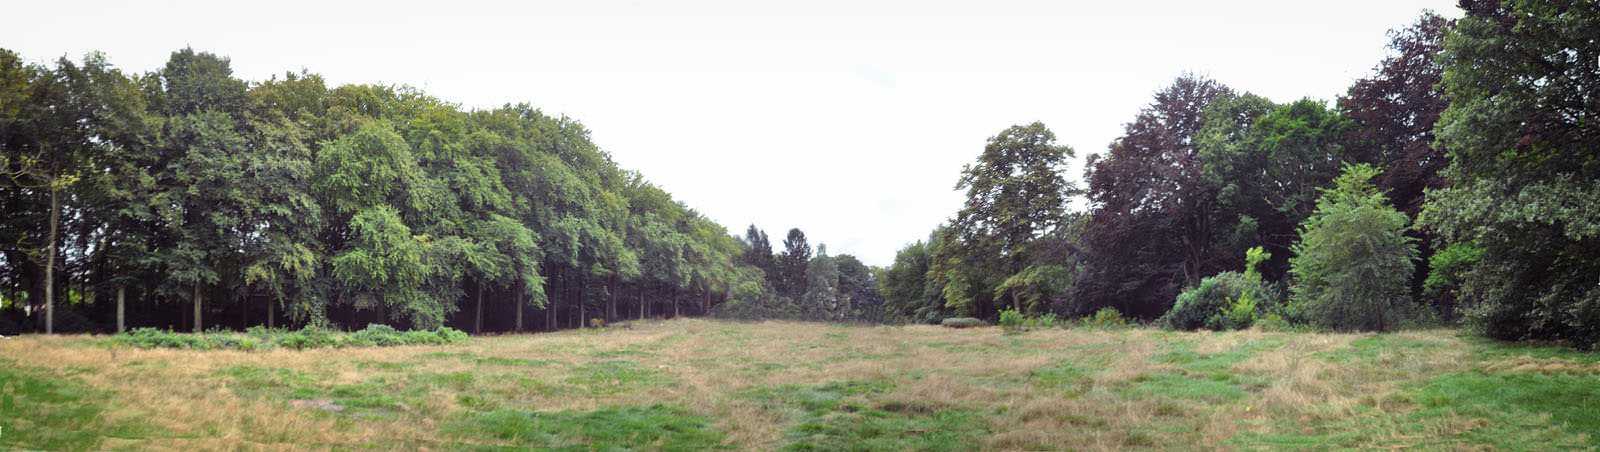
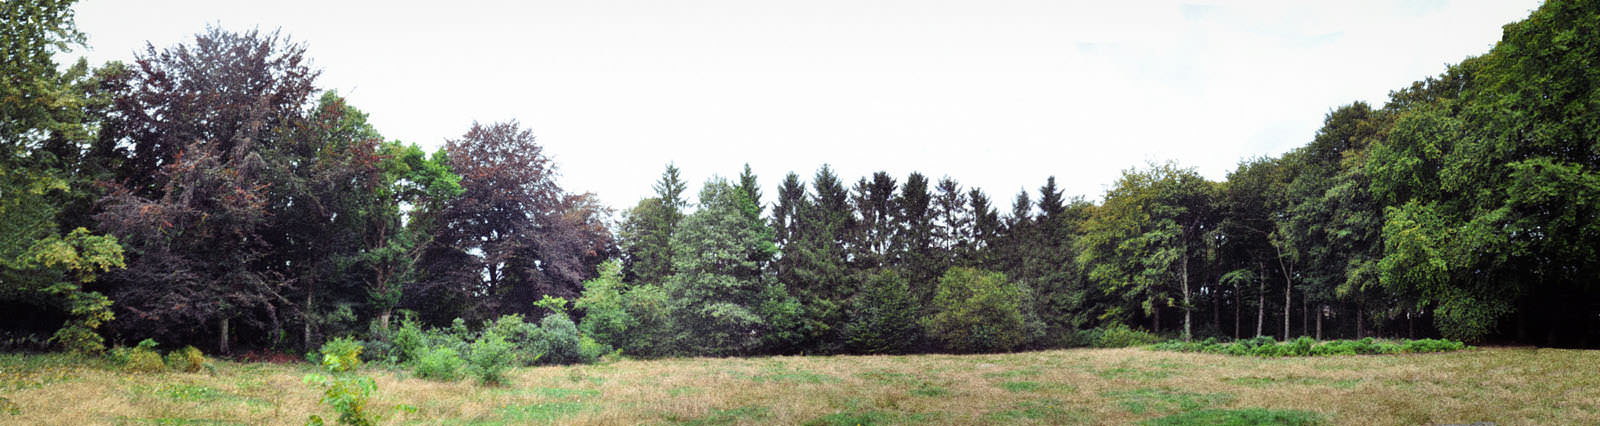
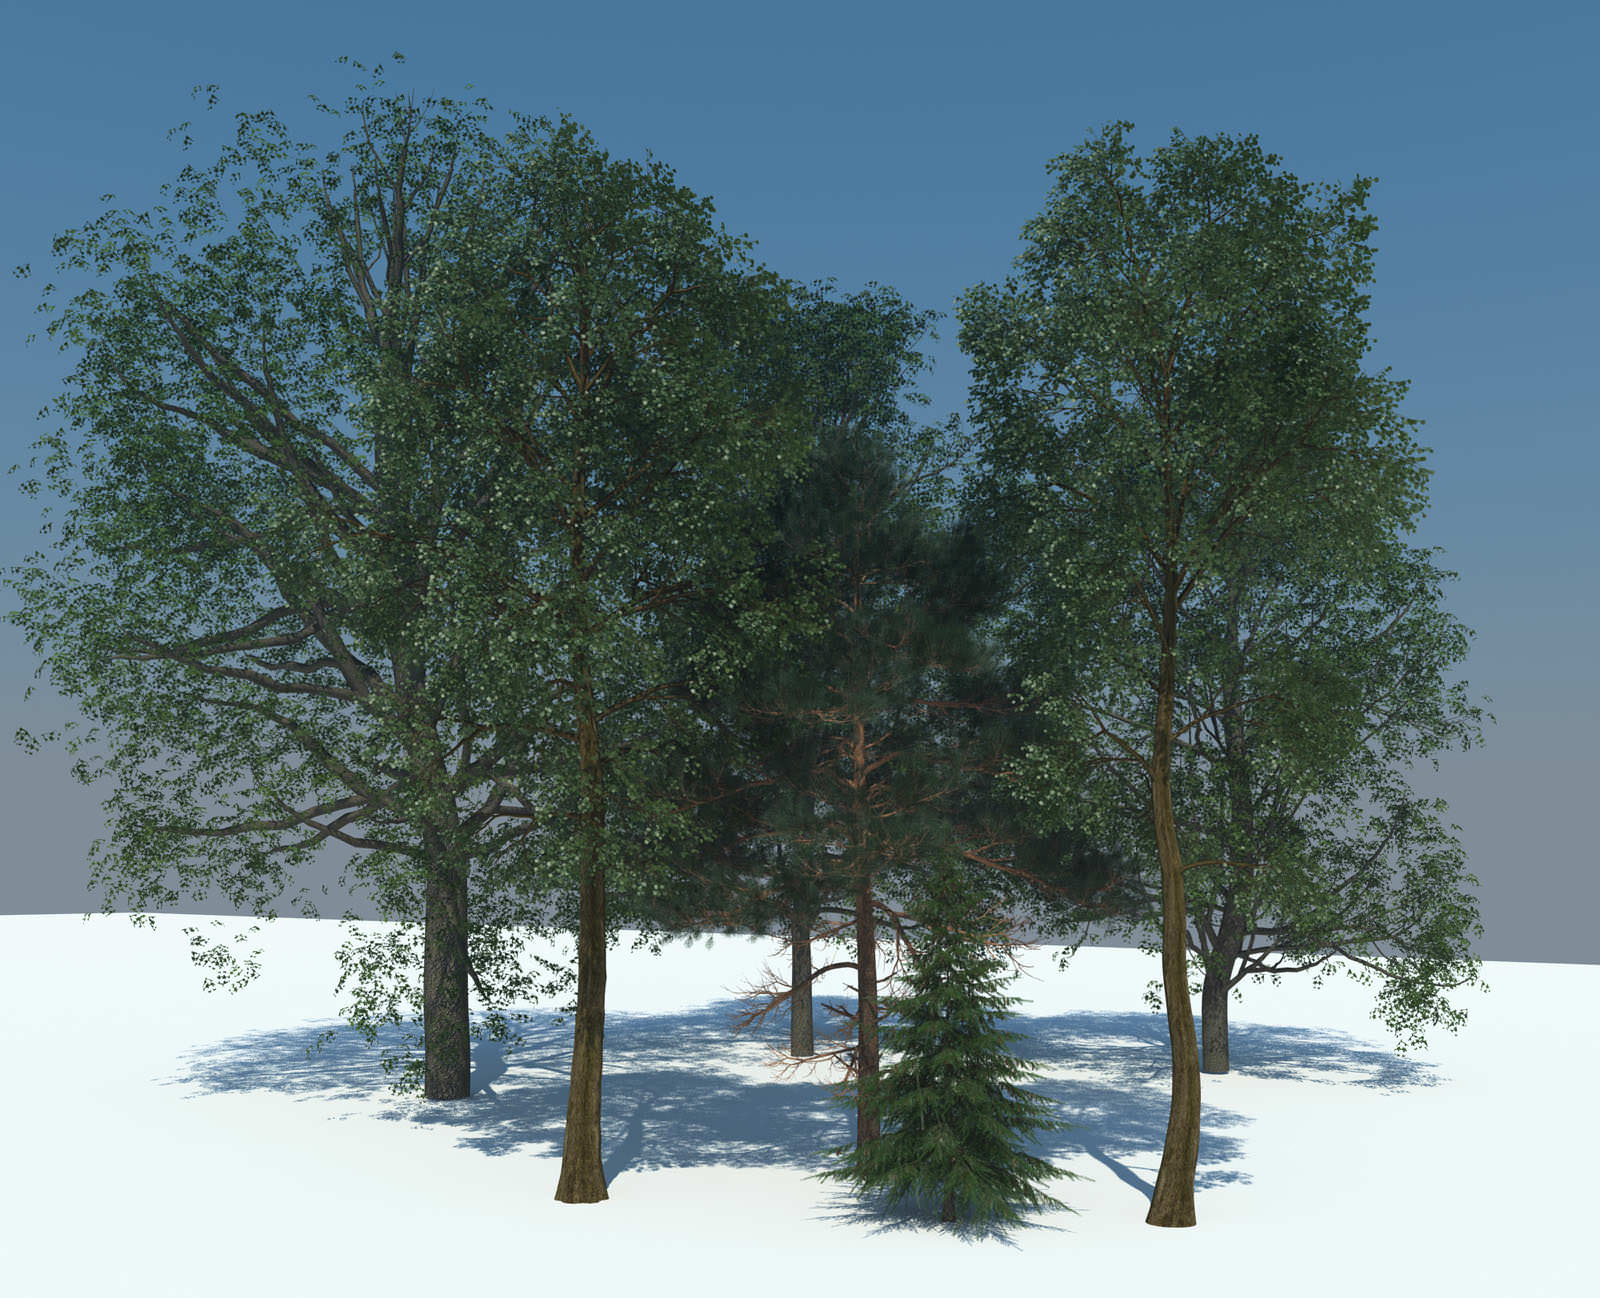
The next big challenge was the planting of the forest around the building. I used the marvelous Forest Pack Pro plugin by iToo Software (again) for scattering the vegetation with models mostly from R&D iCube.
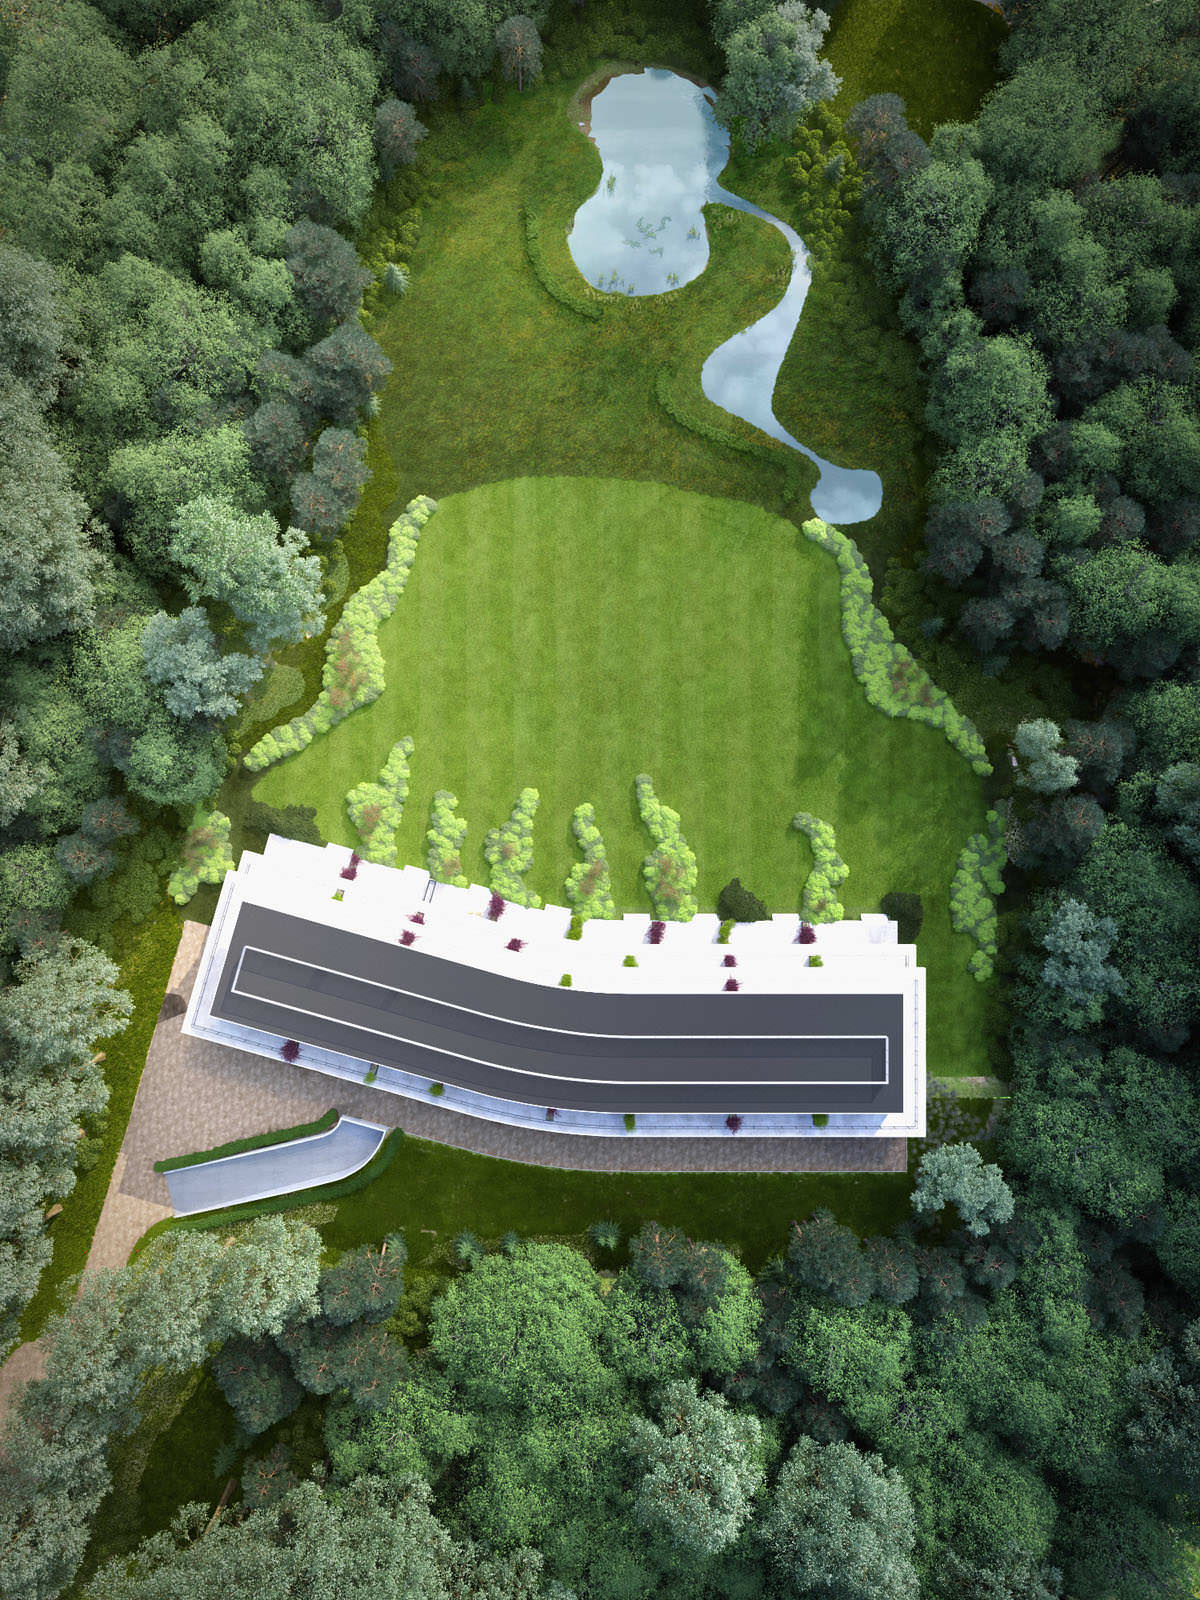
In order to have more variations of the textures and colors across the models, I used a color map in Forest Pack Pro. This unique feature allows you to create great looking and unlimited variations of color to the vegetation.


I wanted the lawn-grass at the back to have the characteristic stripes, often seen when a lawnmower with a heavy roller is used. Again, I found a good tutorial about that on the iToo website – Forest Pack Football Field Tutorial.
Texturing
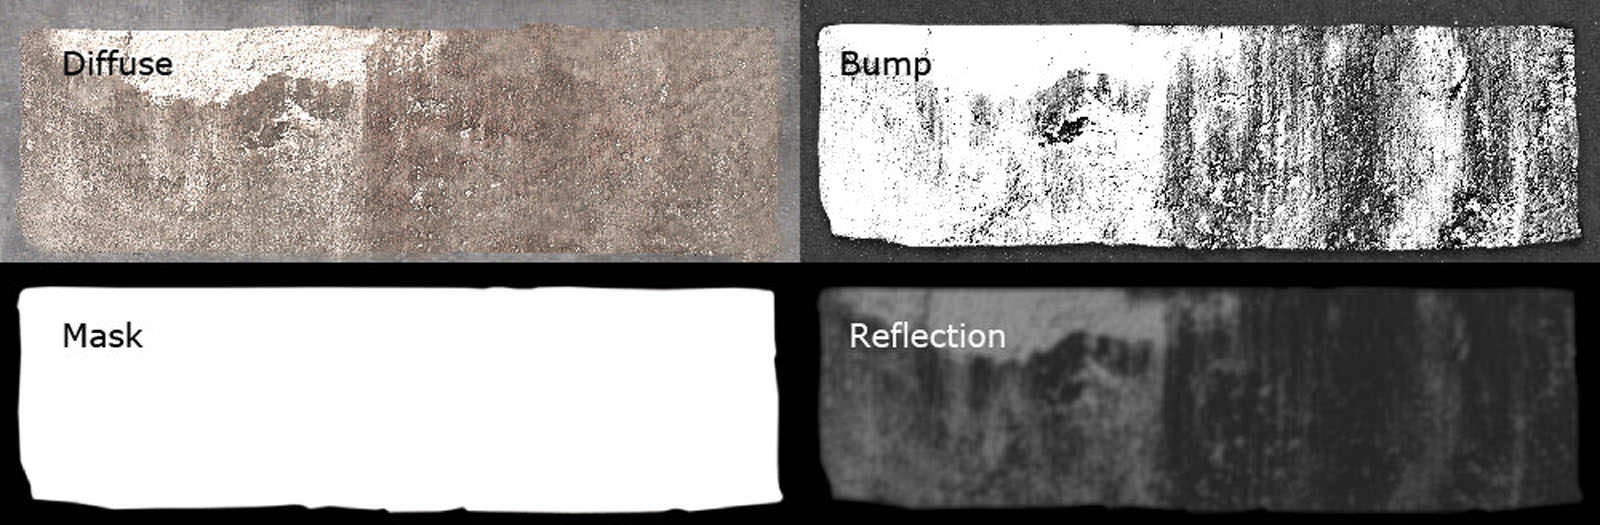
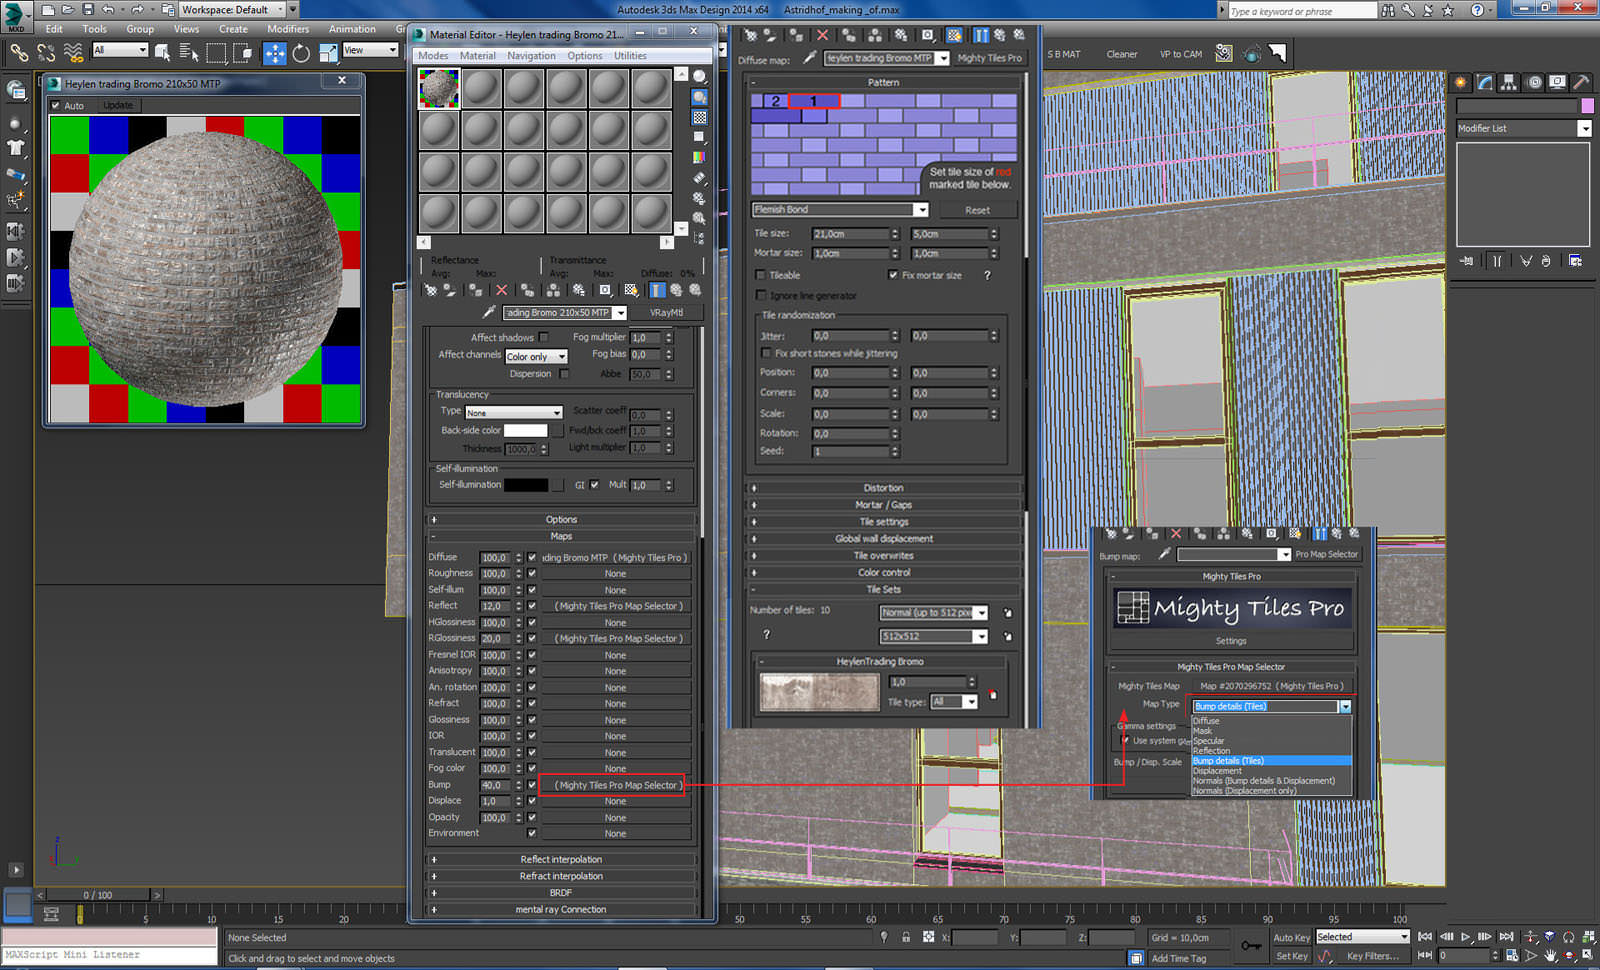
For the north side of the building I needed a good-looking material for the bricks (Heylen Trading Bromo). I couldn’t find any good texture of this brick, so I decided to paint it myself in Photoshop, and used the new plugin Mighty Tiles Pro to create a large section of it to form the full bricks texture.
Texturing with Mighty Tiles PRO
In this section I will give a brief introduction on the workflow of Mighty Tiles Pro, and what it is all about.
Mighty Tiles Pro is a plugin that creates procedural floor and wall textures (or any other type of element that can benefit from the procedural aspect).
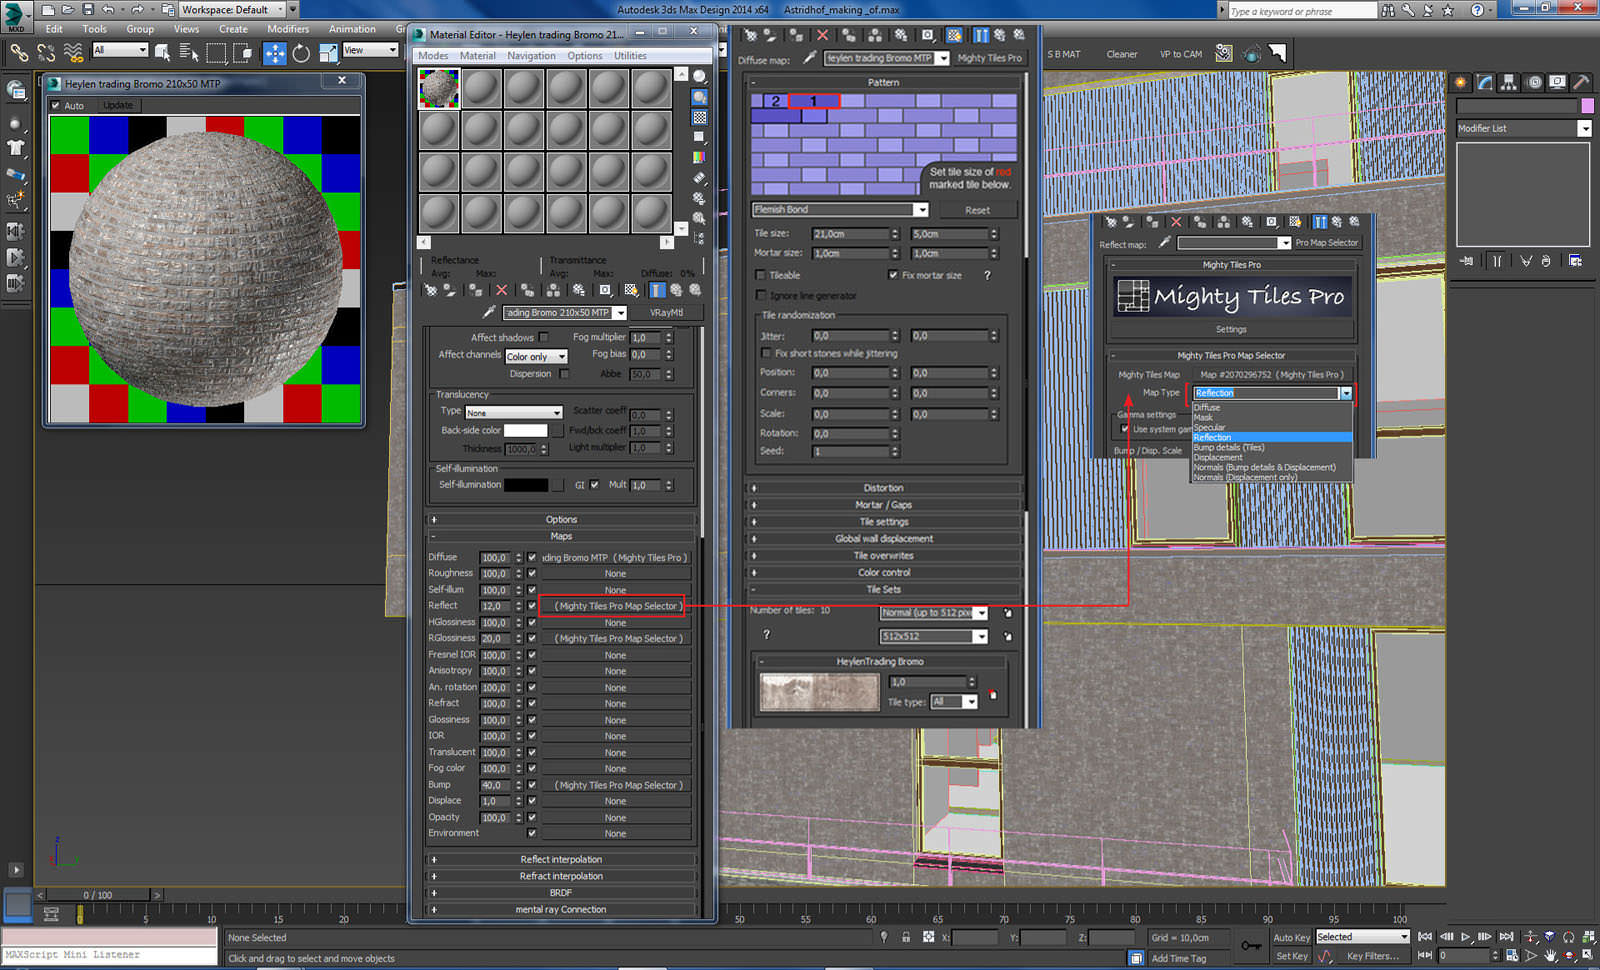
I’ve started the material creation by selecting the Mighty Tiles Pro texture map after clicking on the diffuse slot to bring up the Material/Map Browser.
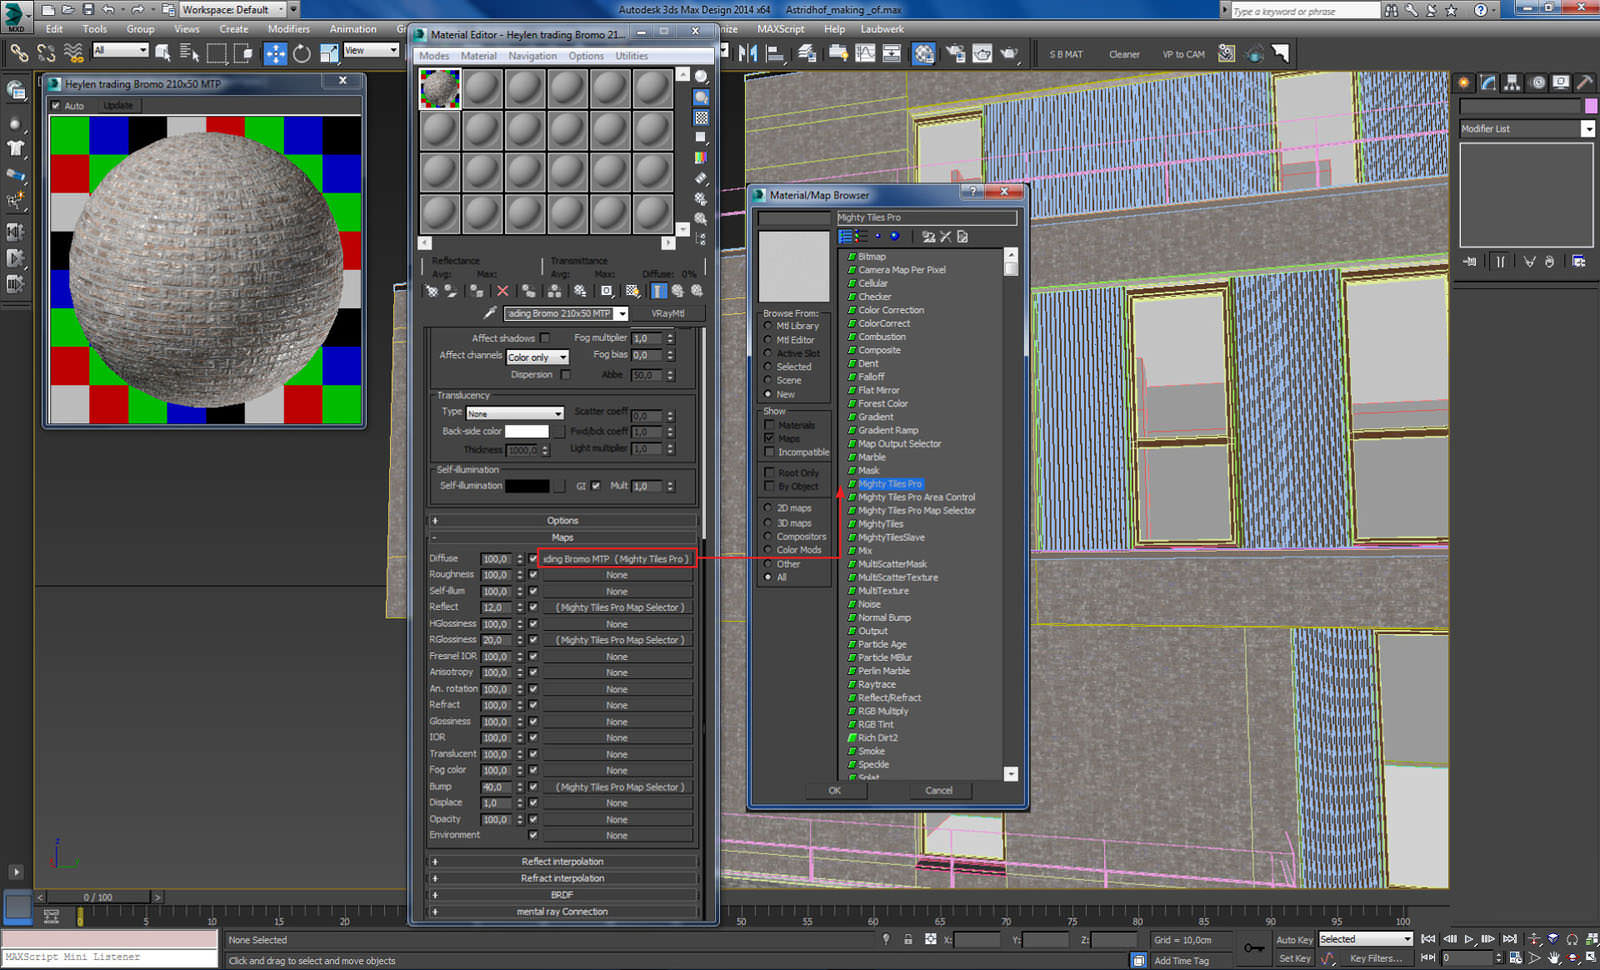
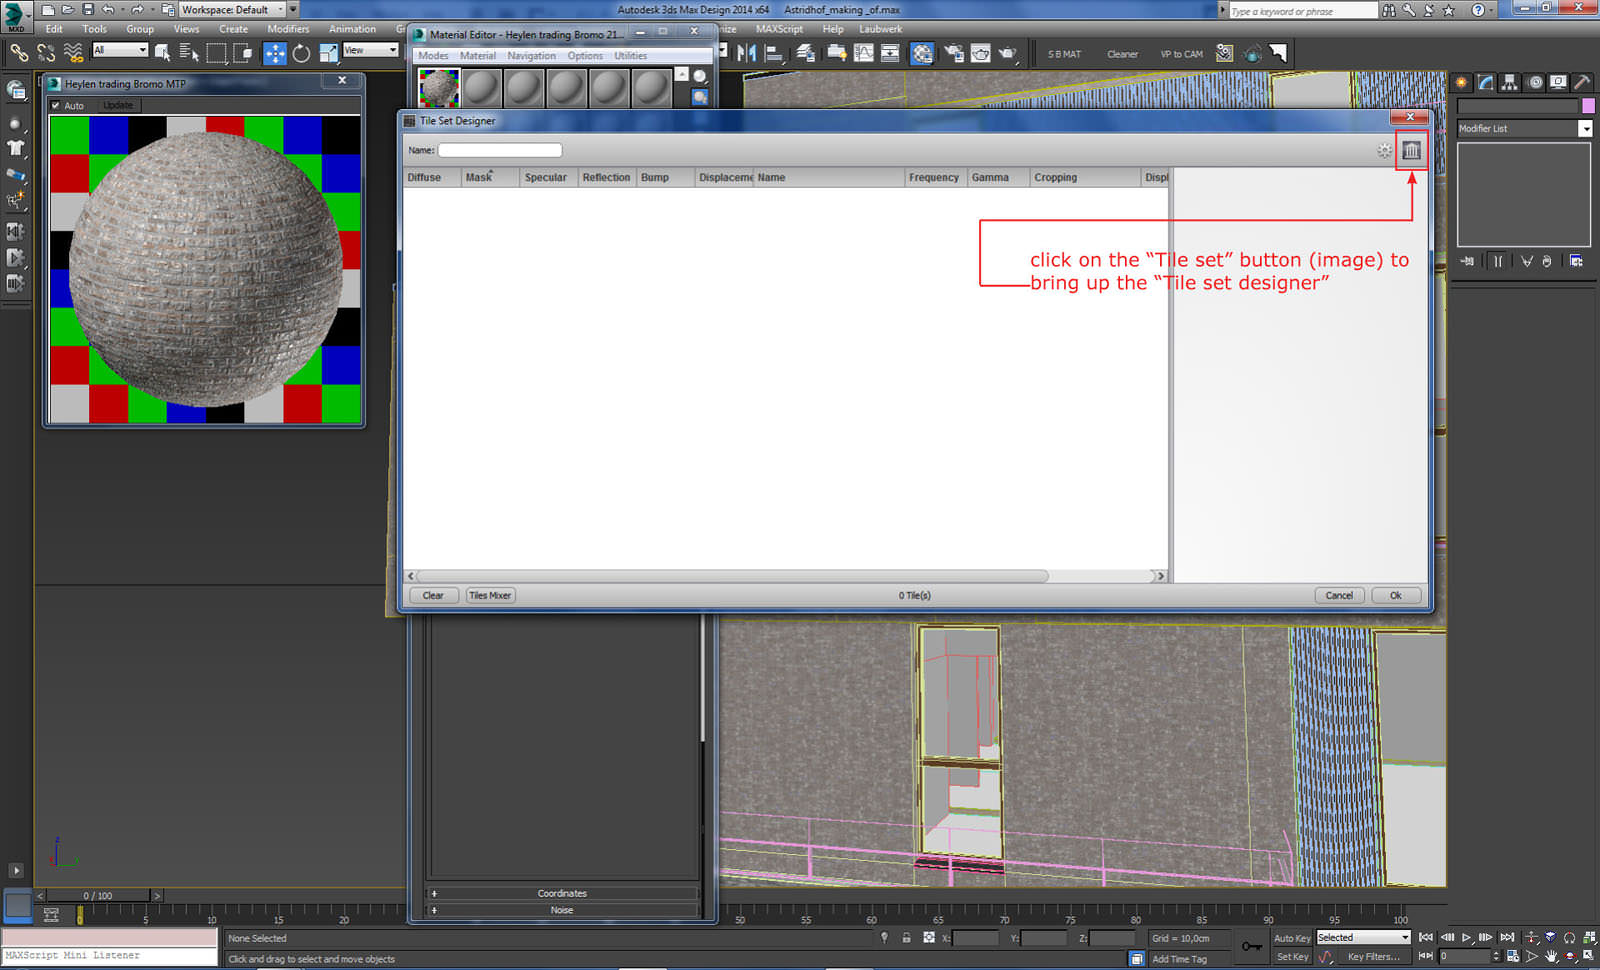
Here you can choose between a vast amount of patterns, where you also define the width and the height of the tiles, in this case 21cm wide and 5cm high.

Clicking (see image) on the “Tile set” button to bring up the “Tile set designer”.
The process is easy with dragging & dropping single or multiple images or entire folders containing the images you want to import to the sidebar of Mighty Library.
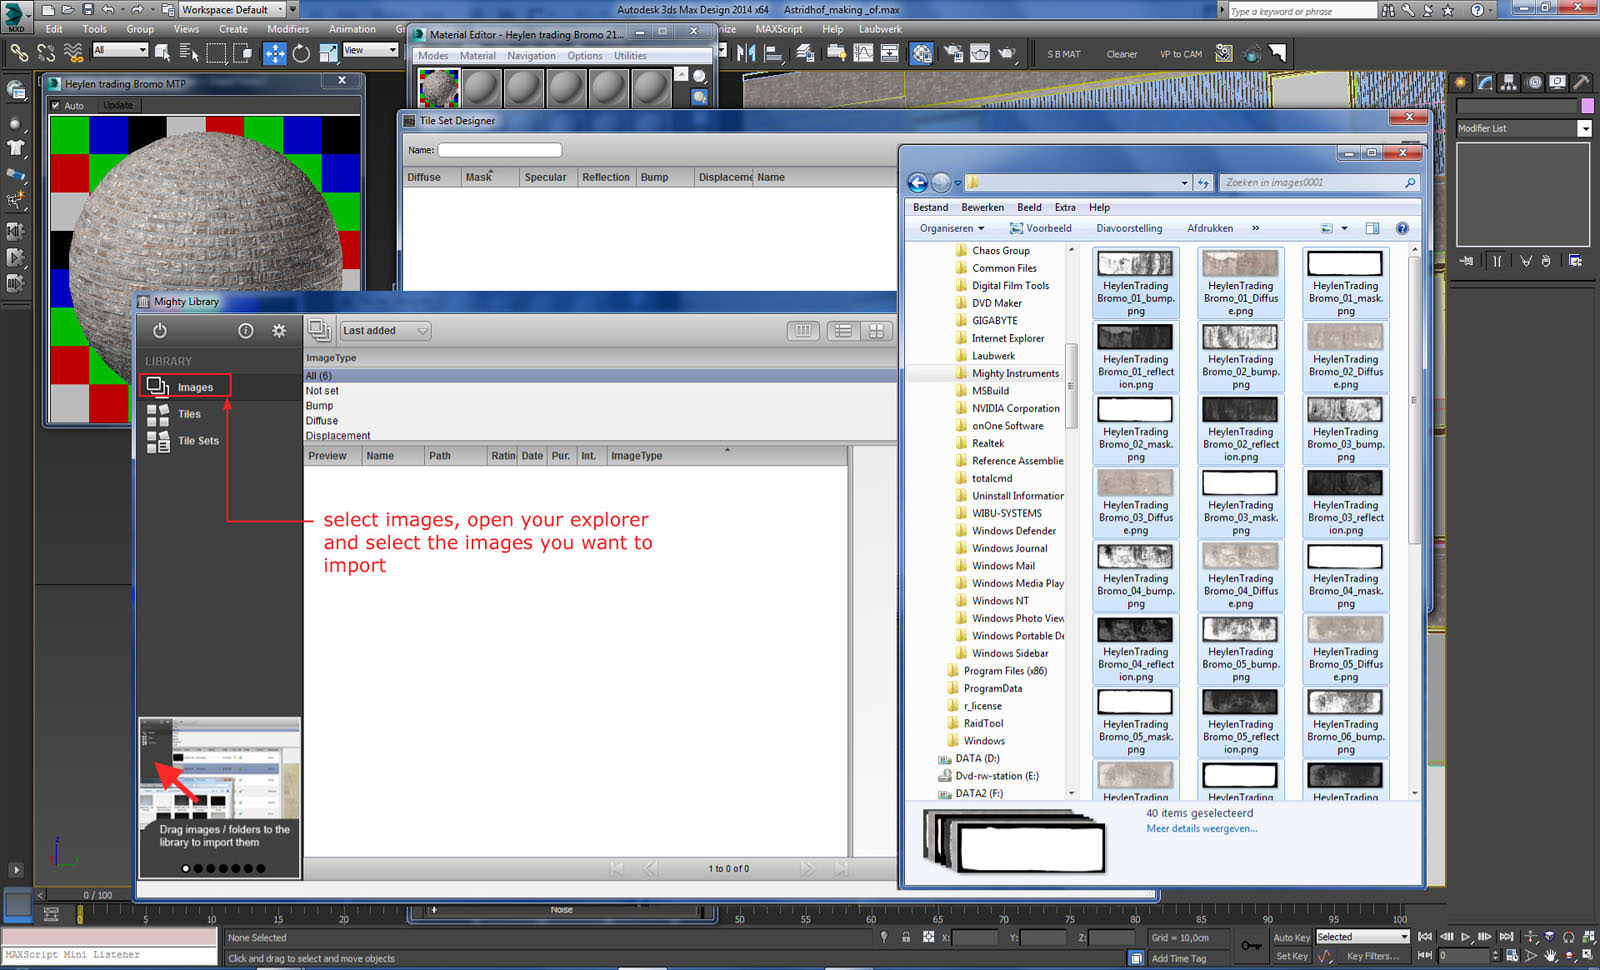
Drag & Drop them in the Tile sets.
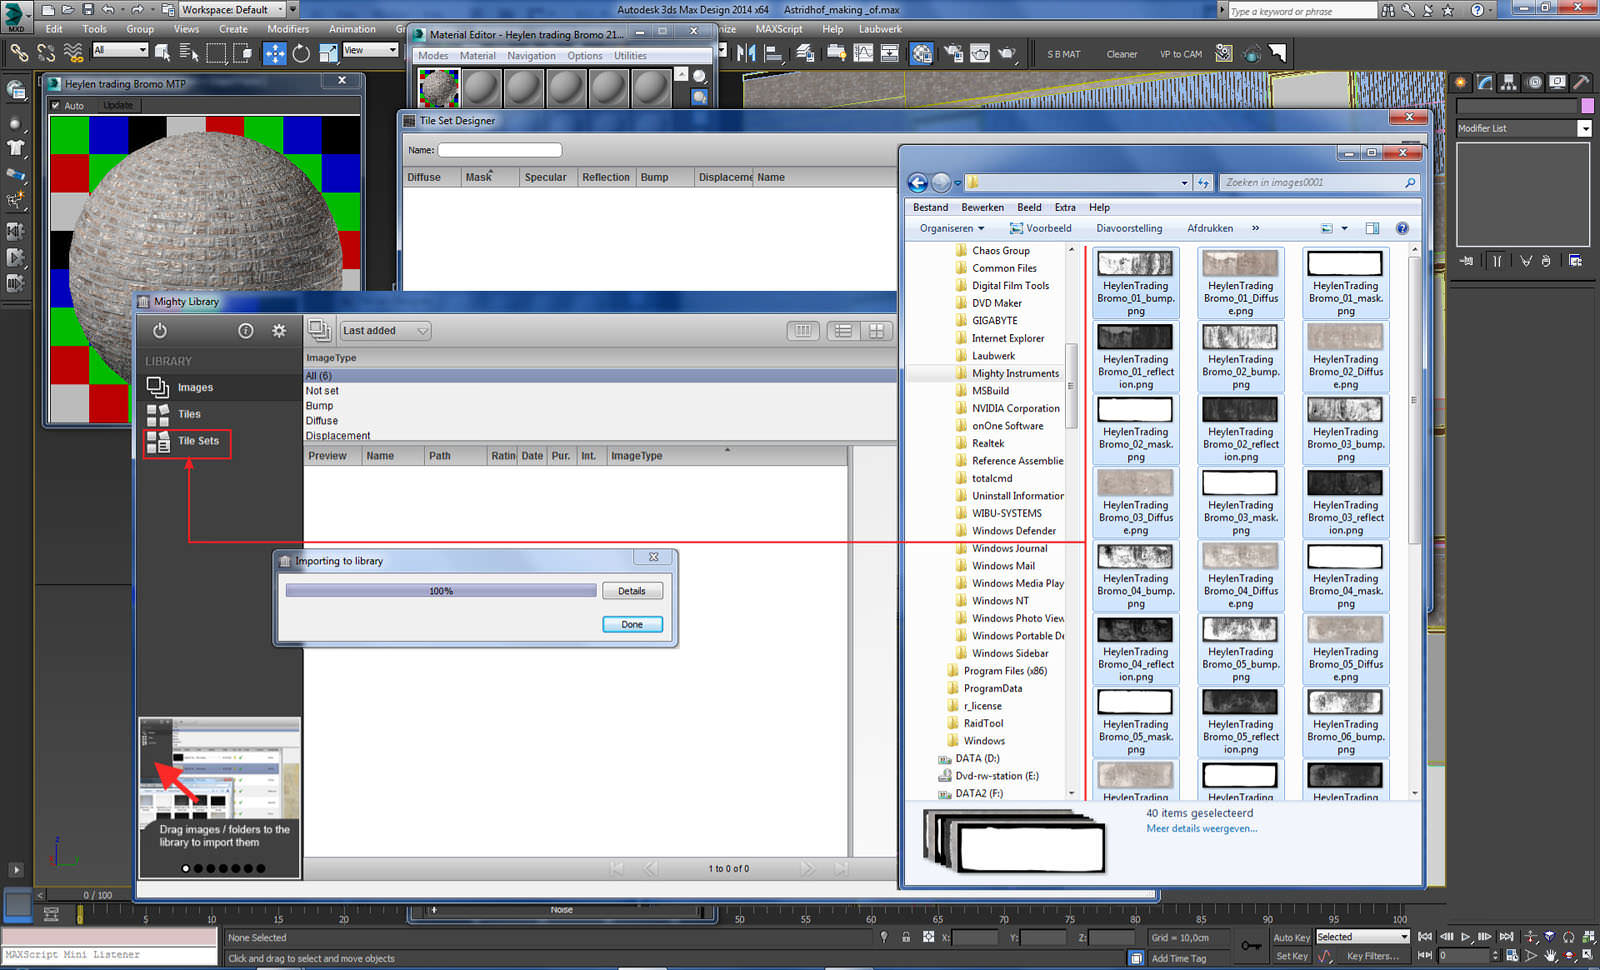
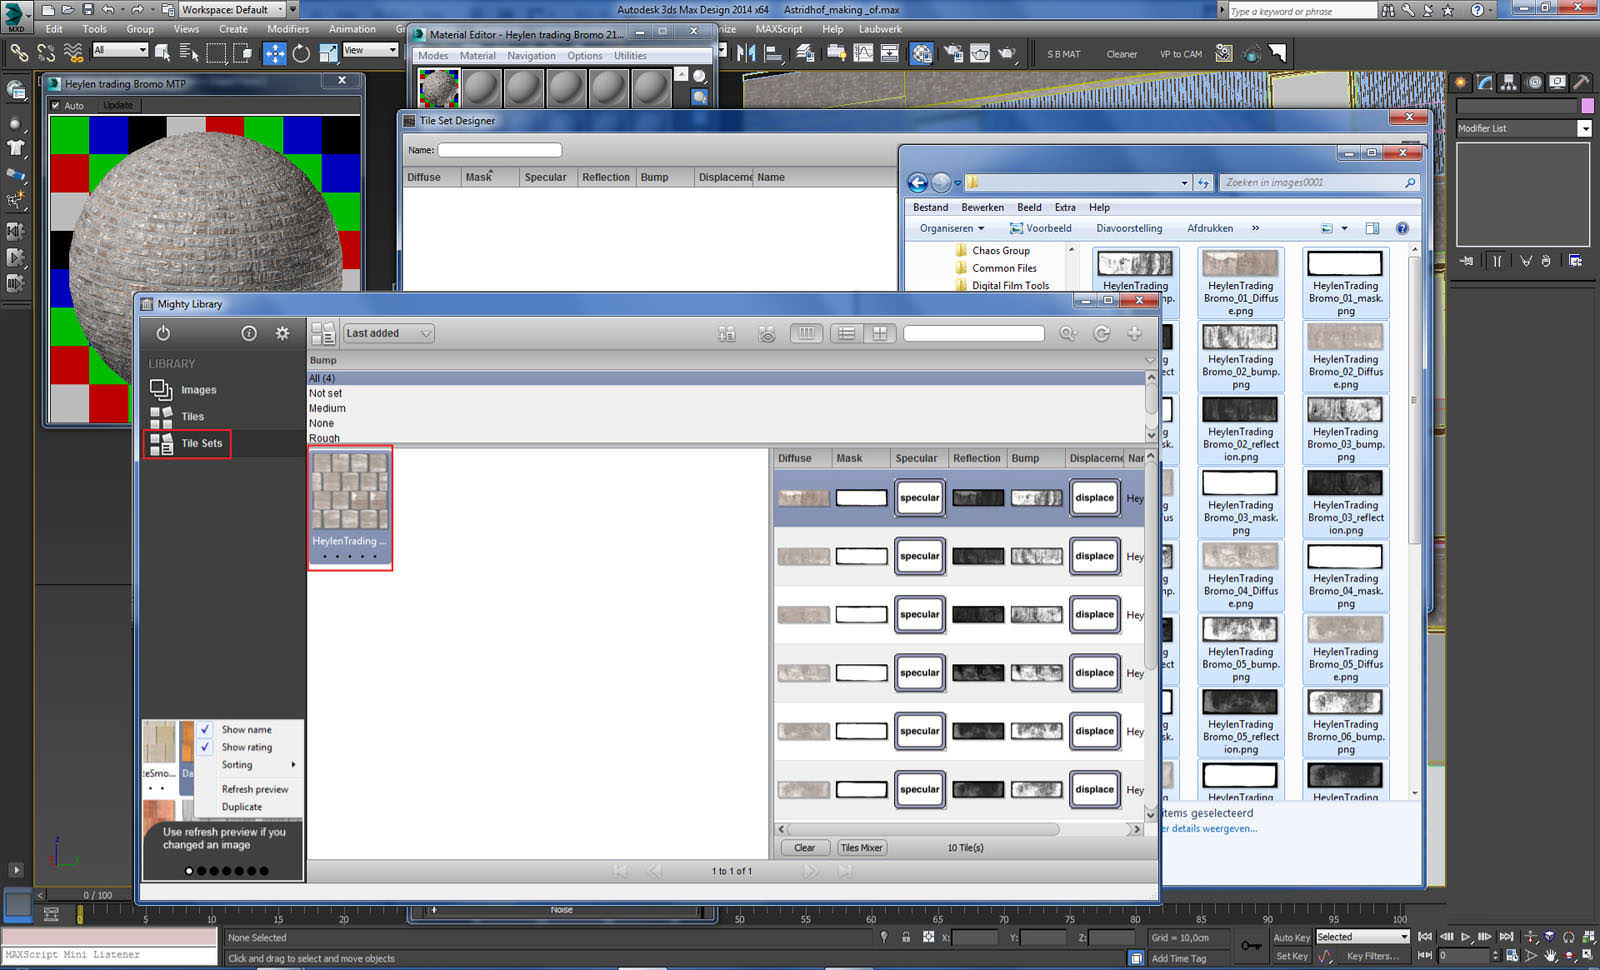
Finally, I’ve selected the tile set, and drop it in the Tile Set Designer.
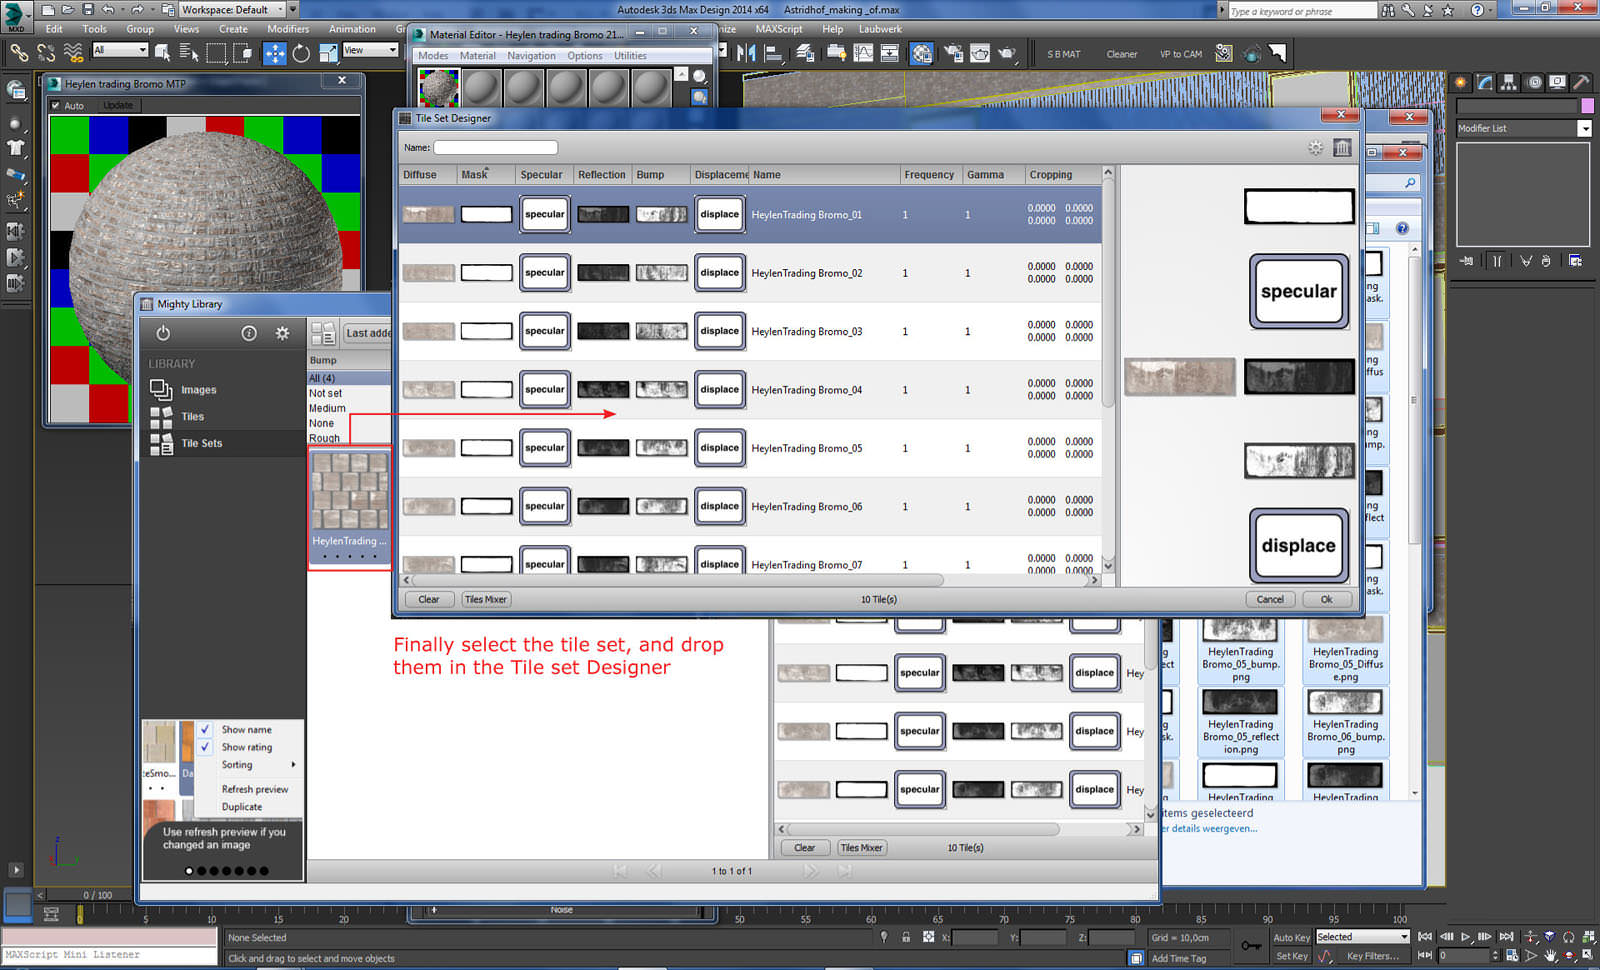
Now you can add a bump and reflection map, by selecting Mighty Tiles Pro Map Selector in the Material Map/Browser.
Here you select the map type for output. There are eight (8) different map types : Diffuse, Mask, Specular, Reflection, Bump details (Tiles), Displacement, Normals (Bump details & Displacement), Normals (Displacement only).
The Wooden Boards
For this material I used a Blend Material made from a Wooden Board as Base Material and one dirt material as Coat Material and a black & white texture as the Dirt Mask to facilitate the blend.

Render Setup
I usually render day time images with an Irradiance Map and Light Cache solution with moderate settings. I worked with gamma 2.2 color mapping which resulted in a lighter image with less contrast. It is easy to make the image darker, and increase contrast during the post production.
The final renders were intended to be in a commercial handout thus the resolution had to be high at 4000 pixels wide. All the images were rendered on 2 workstations with this configuration :
- Motherboard Intel 79TO
- Processor Intel Core i7 3930K 3.2 Ghz, 6 cores, 12 threads
- Graphics card ASUS GTX TITAN-6GD5 6GB Memory
Post Production
I didn’t have to do very much postwork on any of the final renders. I have used a couple of render elements such as VRayRaw Reflection, VRayRawRefraction, VRayReflection, VRayTotalLighting, VRayWireColor, VRayZDepth and VrayExtraTexture as AO pass.
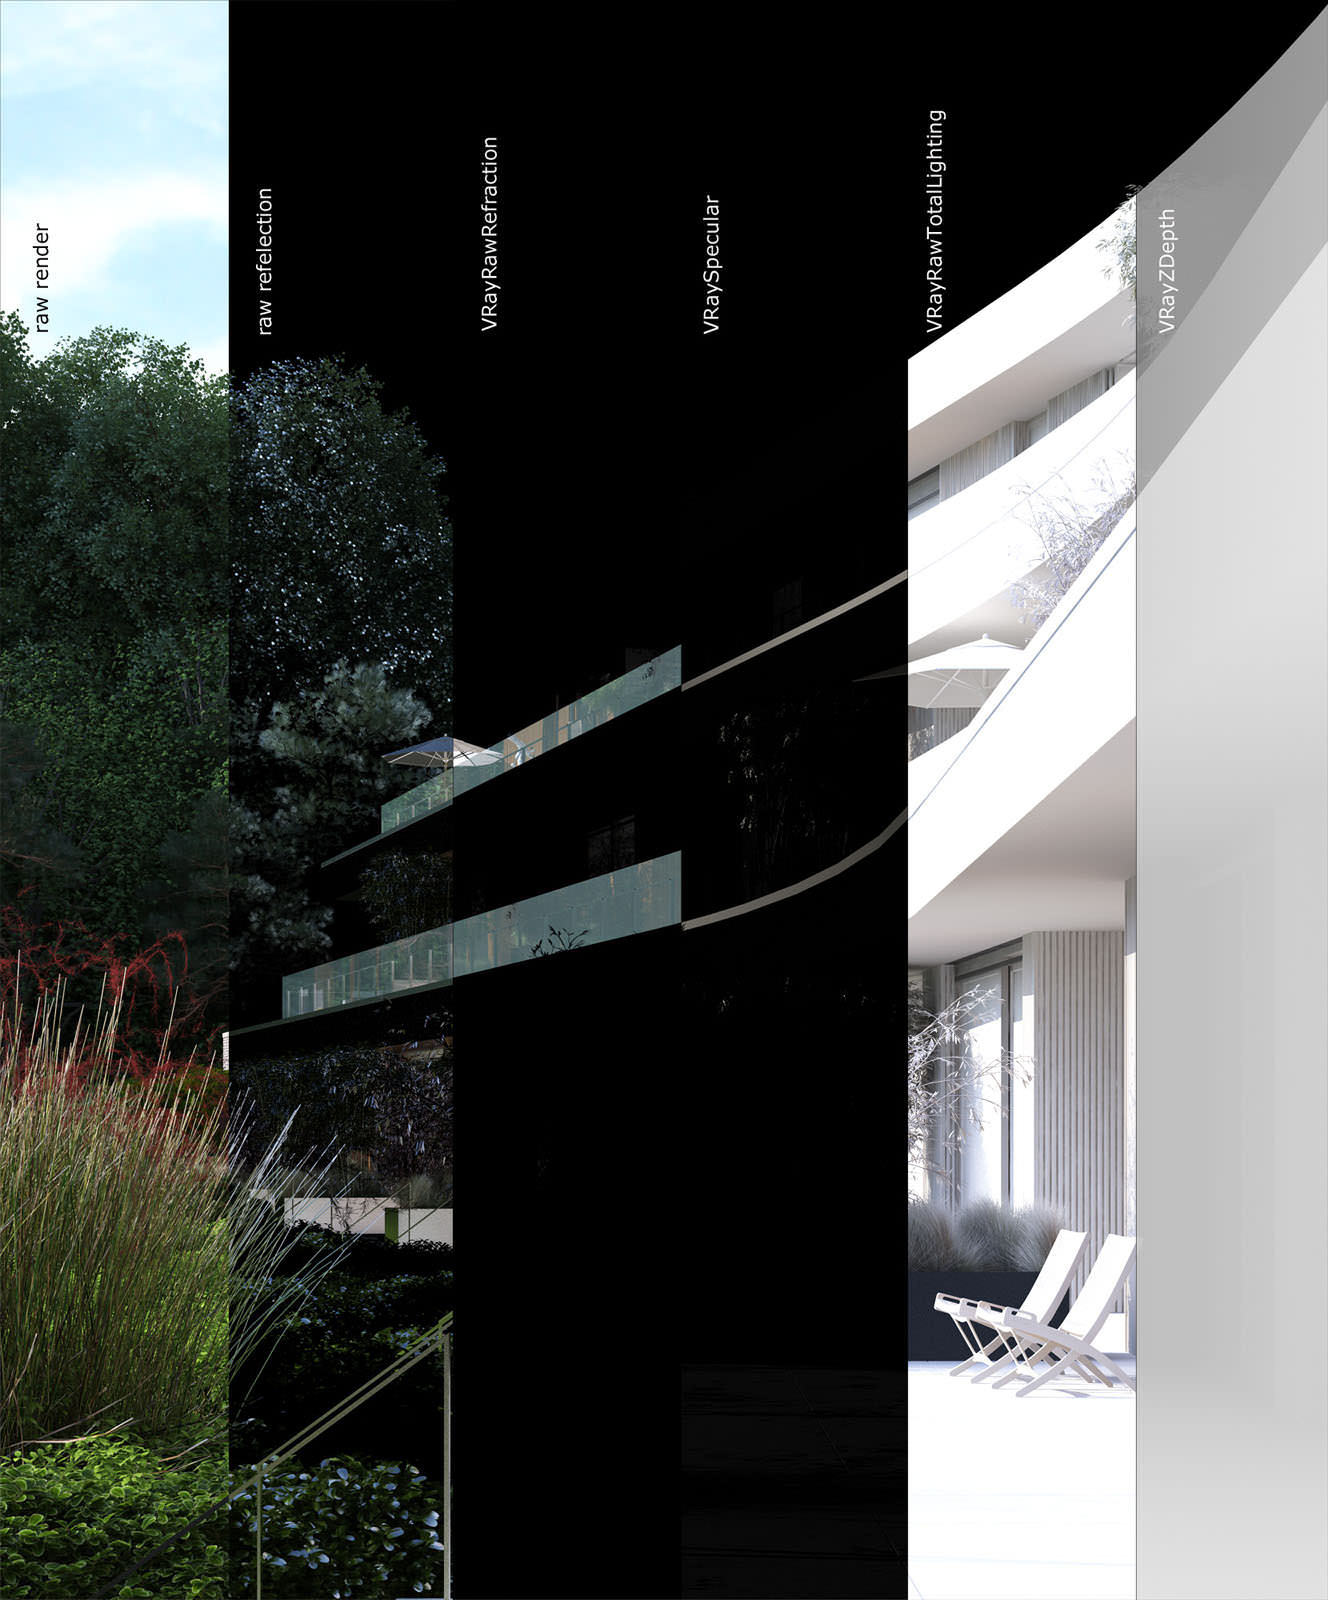
here is an animated GIF sequence showcasing the stages of post-production :

I hope you enjoyed reading this article and find something new or interesting to add to your workflow.
Thanks!
Patric Verstraete.

Patric Verstraete is a CG and 3d Architectural Visualization artist based in Belgium. Starting as a freelancer in 2009 he now heads Vizcon3D, specialized in architectural spaces through images with passion.


Well done Patric!
Many thanks, it’s a pleasure working with such great tools:))
it’s too good . i only have a question . this the raw rendering or something edit in Photoshop . colors of greenery is actual with lighting in max or edit in Photoshop .
Hi,
Can I have ur mail id so that I can ask few doubts regarding this post which u have done.. it would be great that if ur share ur mail id…
Thanks
Regards
Vinodh
Hi, I really appreciate you for all the valuable information that you are providing us through your blog…
<a href=”https://www.bestwesternuniversal.com/”>Hotel near universal studio</a>
Hi Patric,
Where you able to render the scene in print res on the GPU?
Thanks
Per