


Making of Phoenix & Vieques House Animation
Viktor Nassli shares two interesting animations created for Messana ORorke Architects – The Phoenix and Vieques House. This is a great example of a pragmatic and design driven approach to making an animation under short deadlines. Instead of going for just a few stills, they add a maquette-like style animation with the stills merged in as if camera snapshots were taken. Sound also plays a big part here!

Introduction
Hello Everyone! I am Viktor, architectural designer at the office of Messana ORorke. I would like to present two architectural walkthrough animations that our office produced for Global Architectures exhibitions in 2013 and 2014.
I would like to thank Ronen for kindly hosting my article and to all the artists here for the substantial knowledge that you share. I have learned so much from you…
Here are the animations :
Phoenix House (2013)
Vieques House (2014)
About Arch-Anims
I’m always interested in experimenting on the edge of graphic design – illustration – architecture – animation, and I was eager to create an architectural walkthrough that is not conventional and has its own style and narration. It seems to me that architects use virtual walkthroughs only to document their projects and dont think of them as individual artistic pieces. It is just not in their focus and usually before a deadline they throw together something that is just… there. Long, repetitive, uninteresting shots and medium quality renderings. Its informative but not engaging. Of course making a high-end movie is an option in about every 2 out of 100 cases.
Therefore, the best architectural videos are personal developments. For instance the best architectural animation ever – Alex Romans The Third and the Seventh. You can see the heart & soul that went in it and it is also enjoyable for nonprofessionals, because of the pure beauty of it.
https://vimeo.com/7809605.
However, I think that there can be great potential in architectural animation without having the Big Shiny Yacht. I am going to show you my workflow that can be great when you have to act fast.
Making these videos was a great experience for me and fortunately the open-minded office of MOR have always been very supportive of this kind of experimenting.
The Concept
The whole concept of the videos started with a DEADLINE over our heads. I made 6 renderings of Phoenix House for GAs exhibition of 2013. We submitted them, but they asked us to send them a quick animation of the project as well within 1 week. First, we were leaning towards an un-inventive SketchUP walkthrough. However, one of the partners at MOR was in love with the purity of ambient occlusion passes of previous renderings and this gave us the idea. Making AO is fairly fast and easy and we already had the 6 renderings. I just had to stitch them together and were done (hopefully within 1 week).
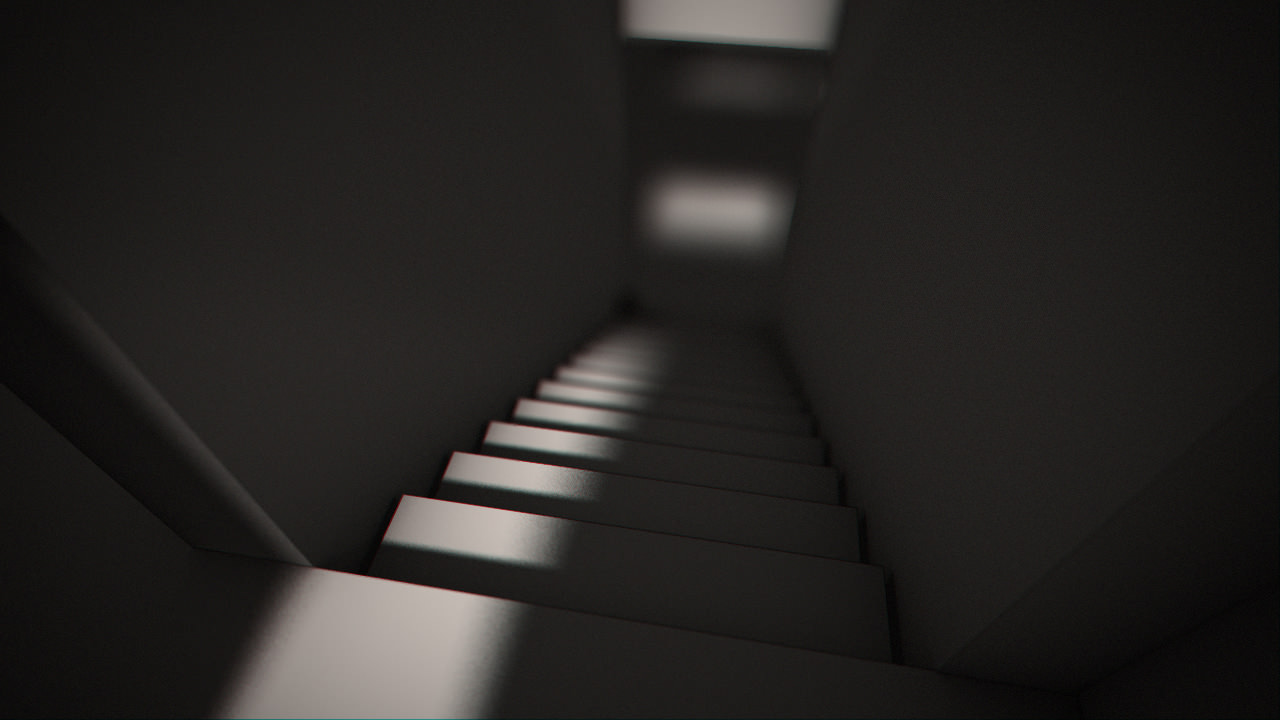
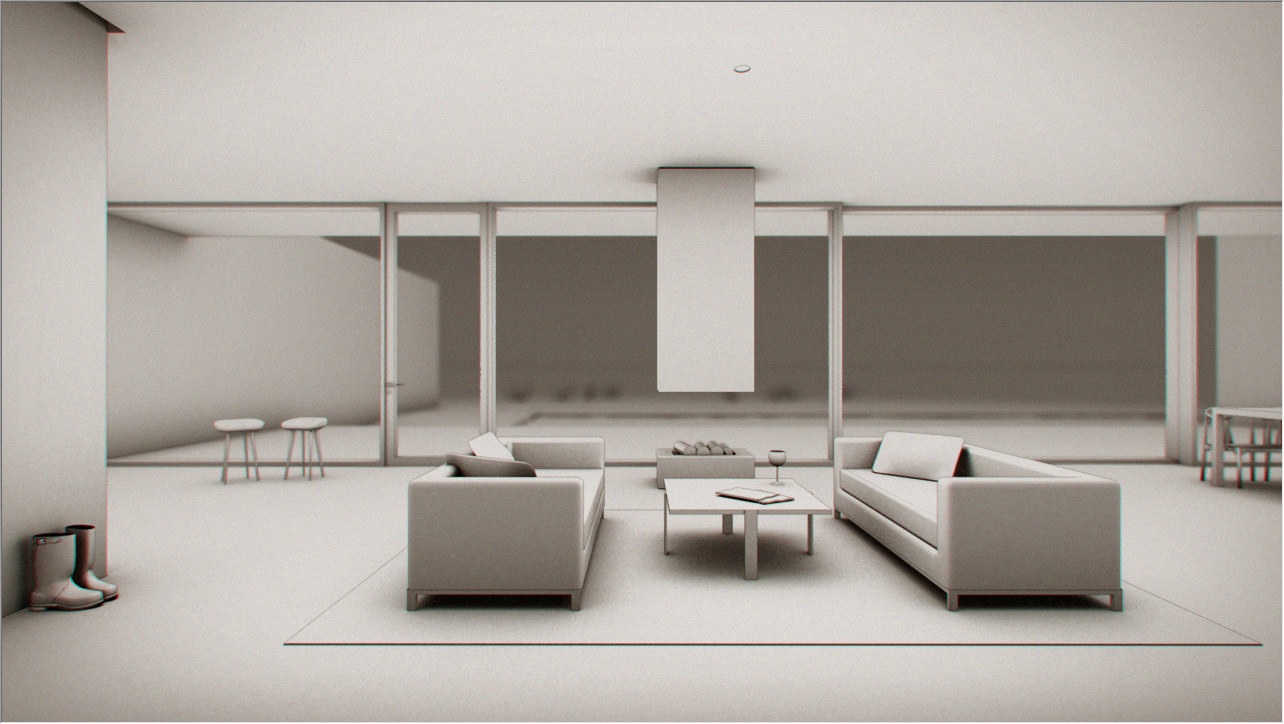
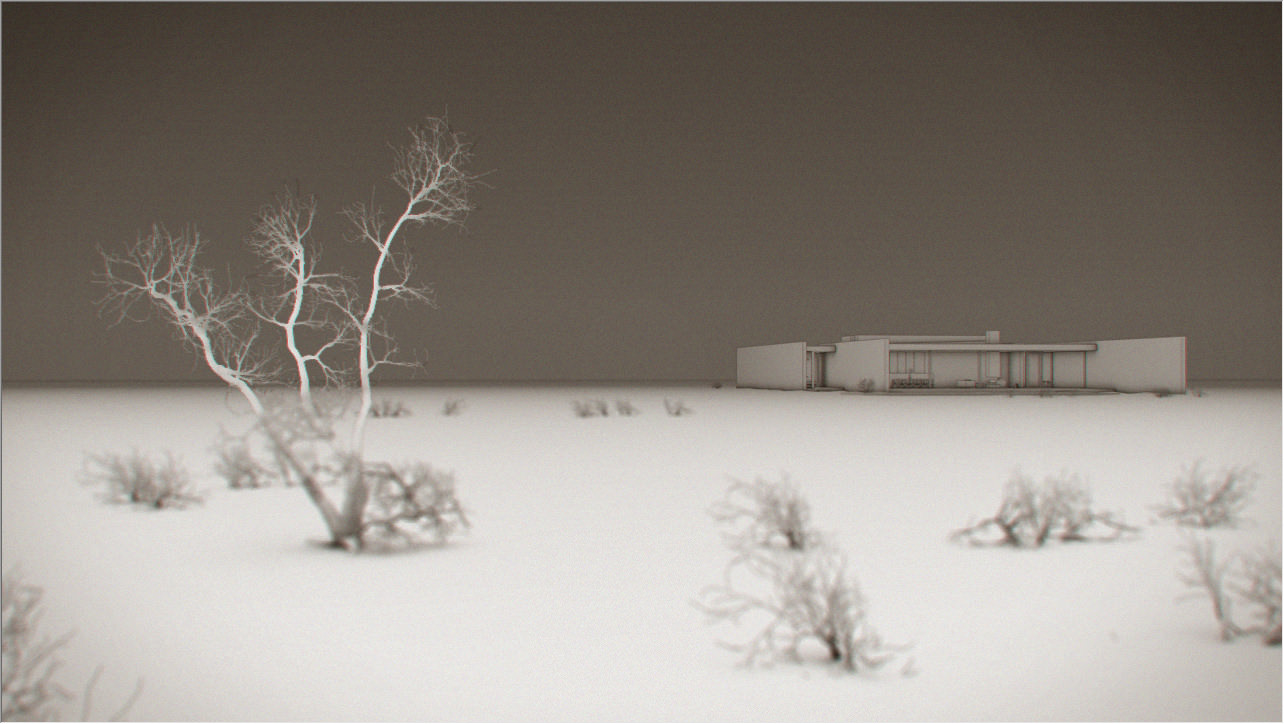
So our concept was to create a monochrome, maquettelike, raw style with glitches, grain and other imperfections and to have the colorful renderings as glimpses of the real thing. (two worlds if you like). We liked the idea of this juxtaposition, and how the images became accentuated climactic points in the animation. We basically tried to mimic the process when you are turning a maquette in your hand and looking for the best views. In the case of Phoenix House the raw animation was also a perfect way to show the secluded nature of the building.
As far as the story of Phoenix House Video is concerned, the beginning and ending framed the narrative. We wander in the desert, find a cactus flower, it opens up for us, then closes itself up again and we leave it behind.

With Vieques we tried to raise the bid. We were to have the same concept as for Phoenix House, but we aspired to create a unique character to it. Here I made the fault of overstuffing the concept (just like the Transformers sequels). Luckily, MOR has a reductive way of thinking so the excrescent sequences were simplified greatly.
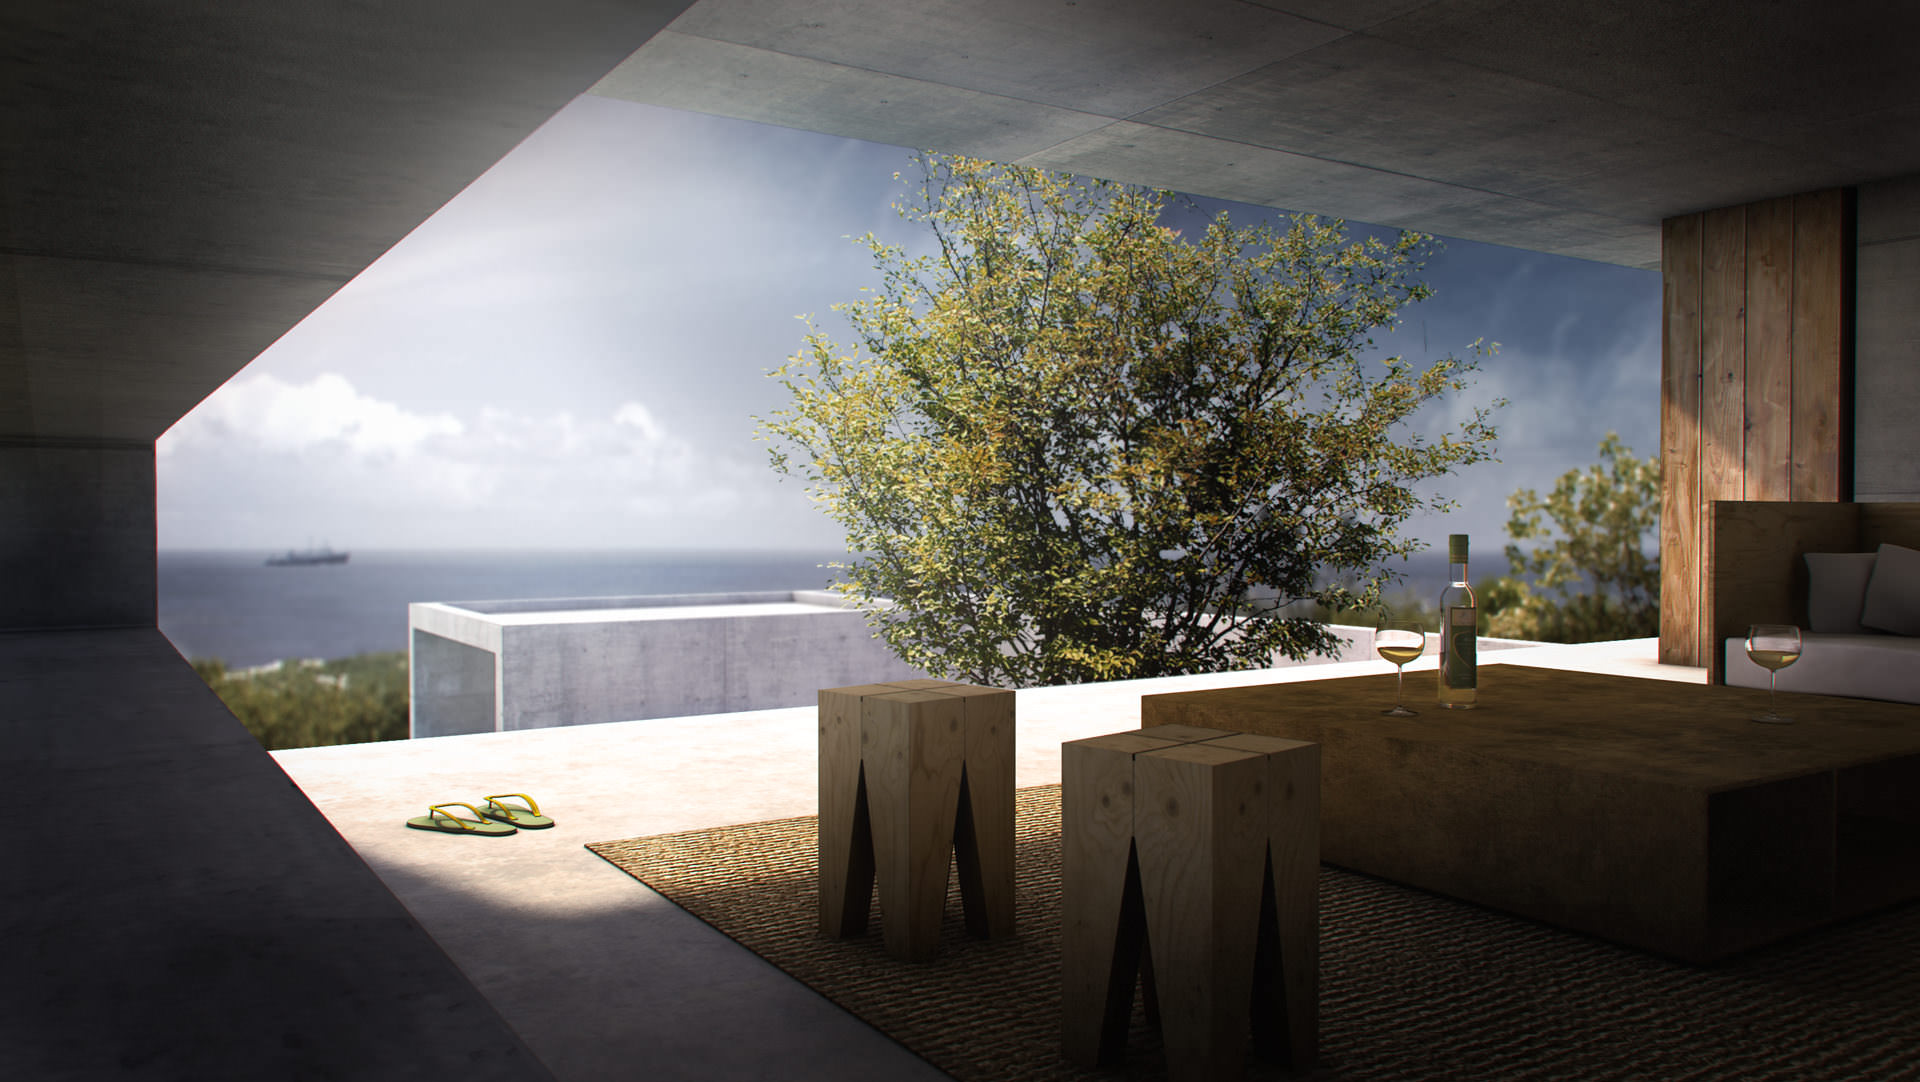
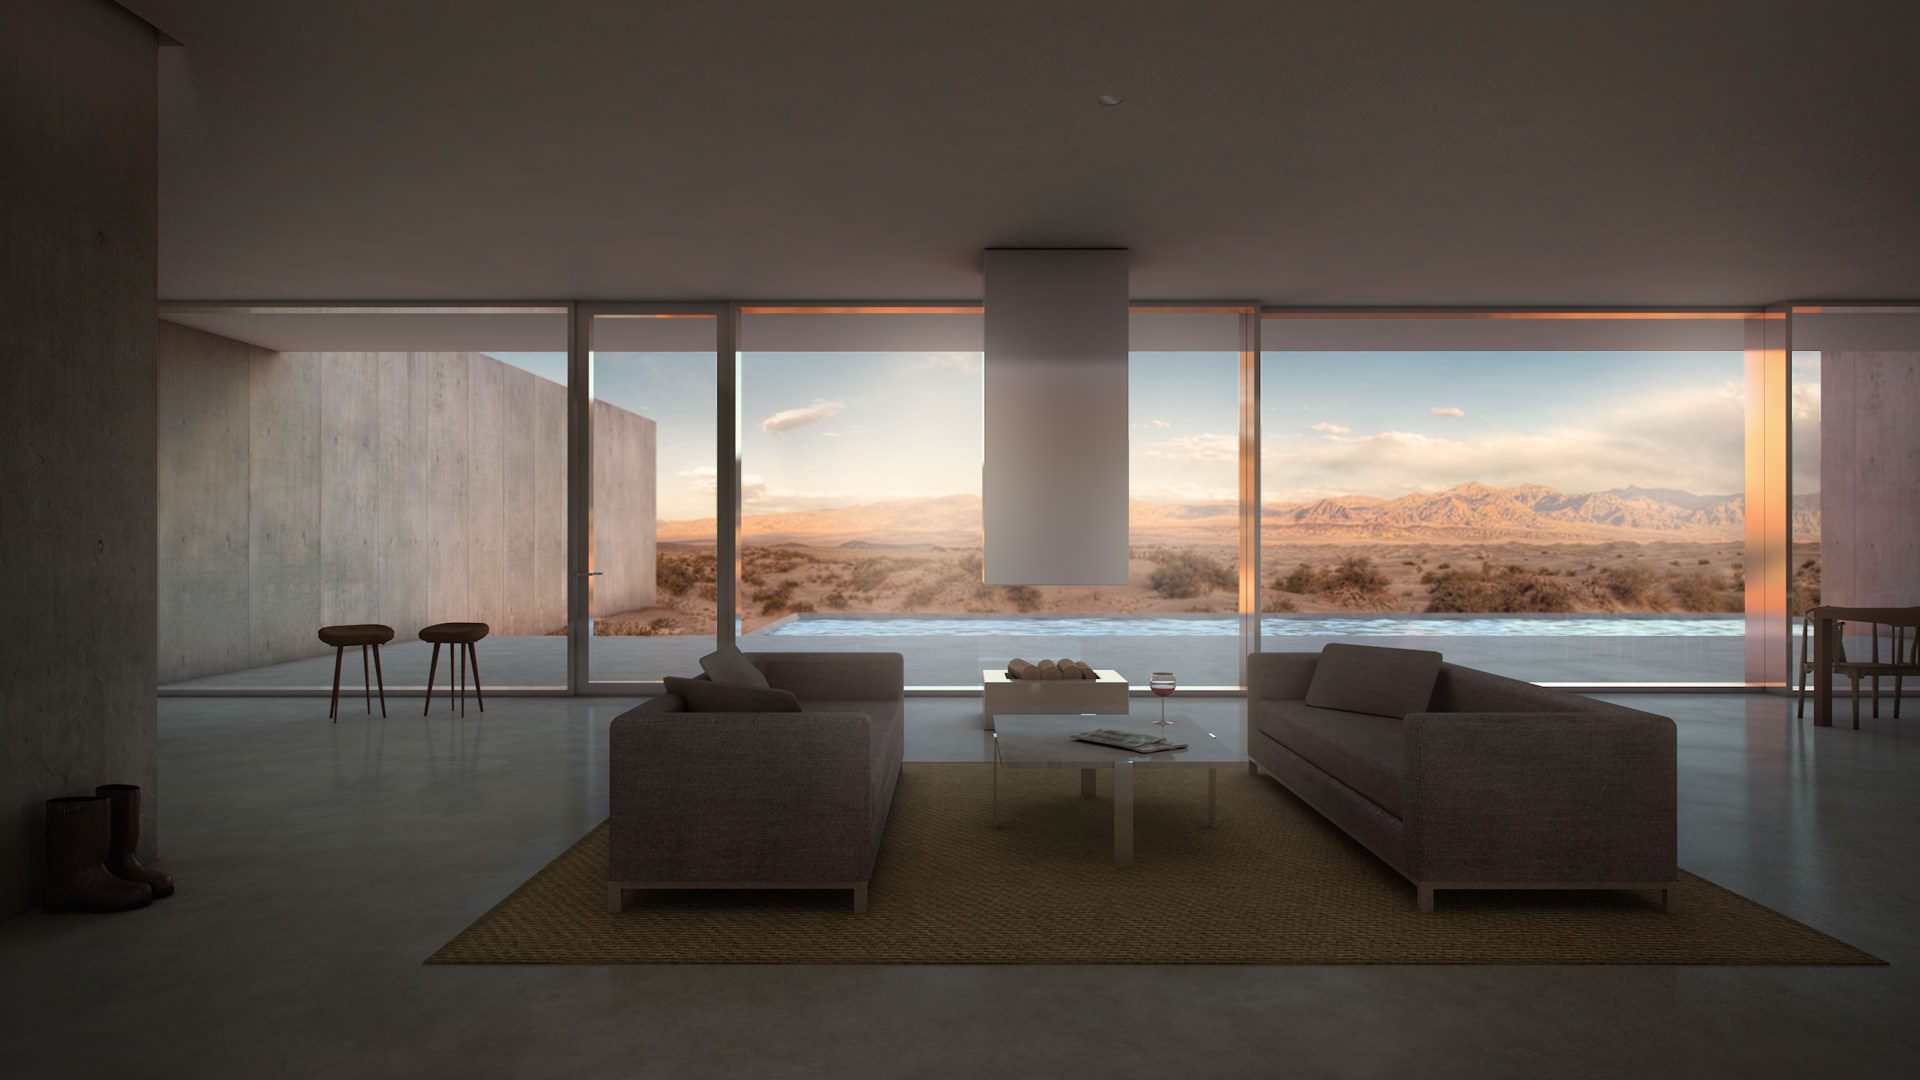
The only new feature we had was light & shadow. Since Vieques House was designed as a tropical vacation house, light and shadow were very important. Therefore we wanted to introduce them as part of the story and have some playfulness within the monochromatic style. We were inspired by a YSL commercial. It is just so simple. Of course it is telling a totally different story, but we liked how the light is a part of it.
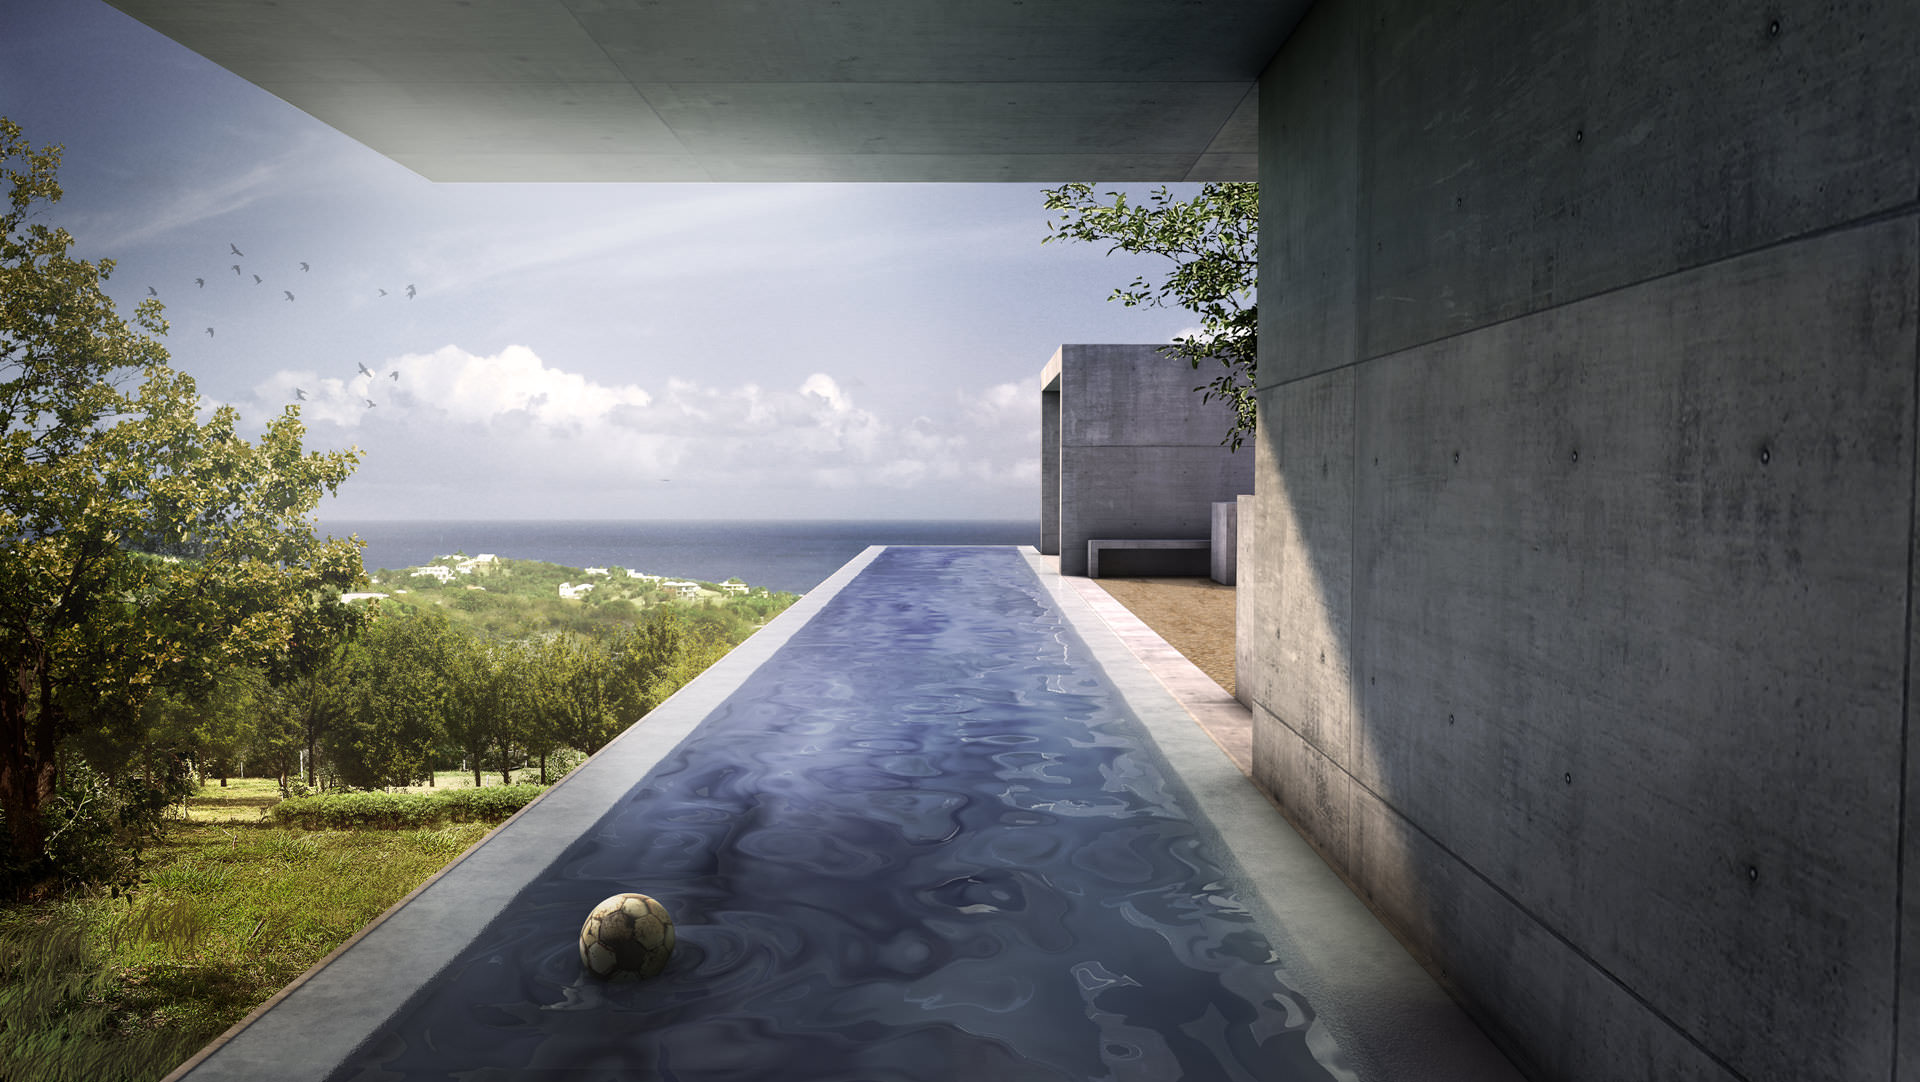
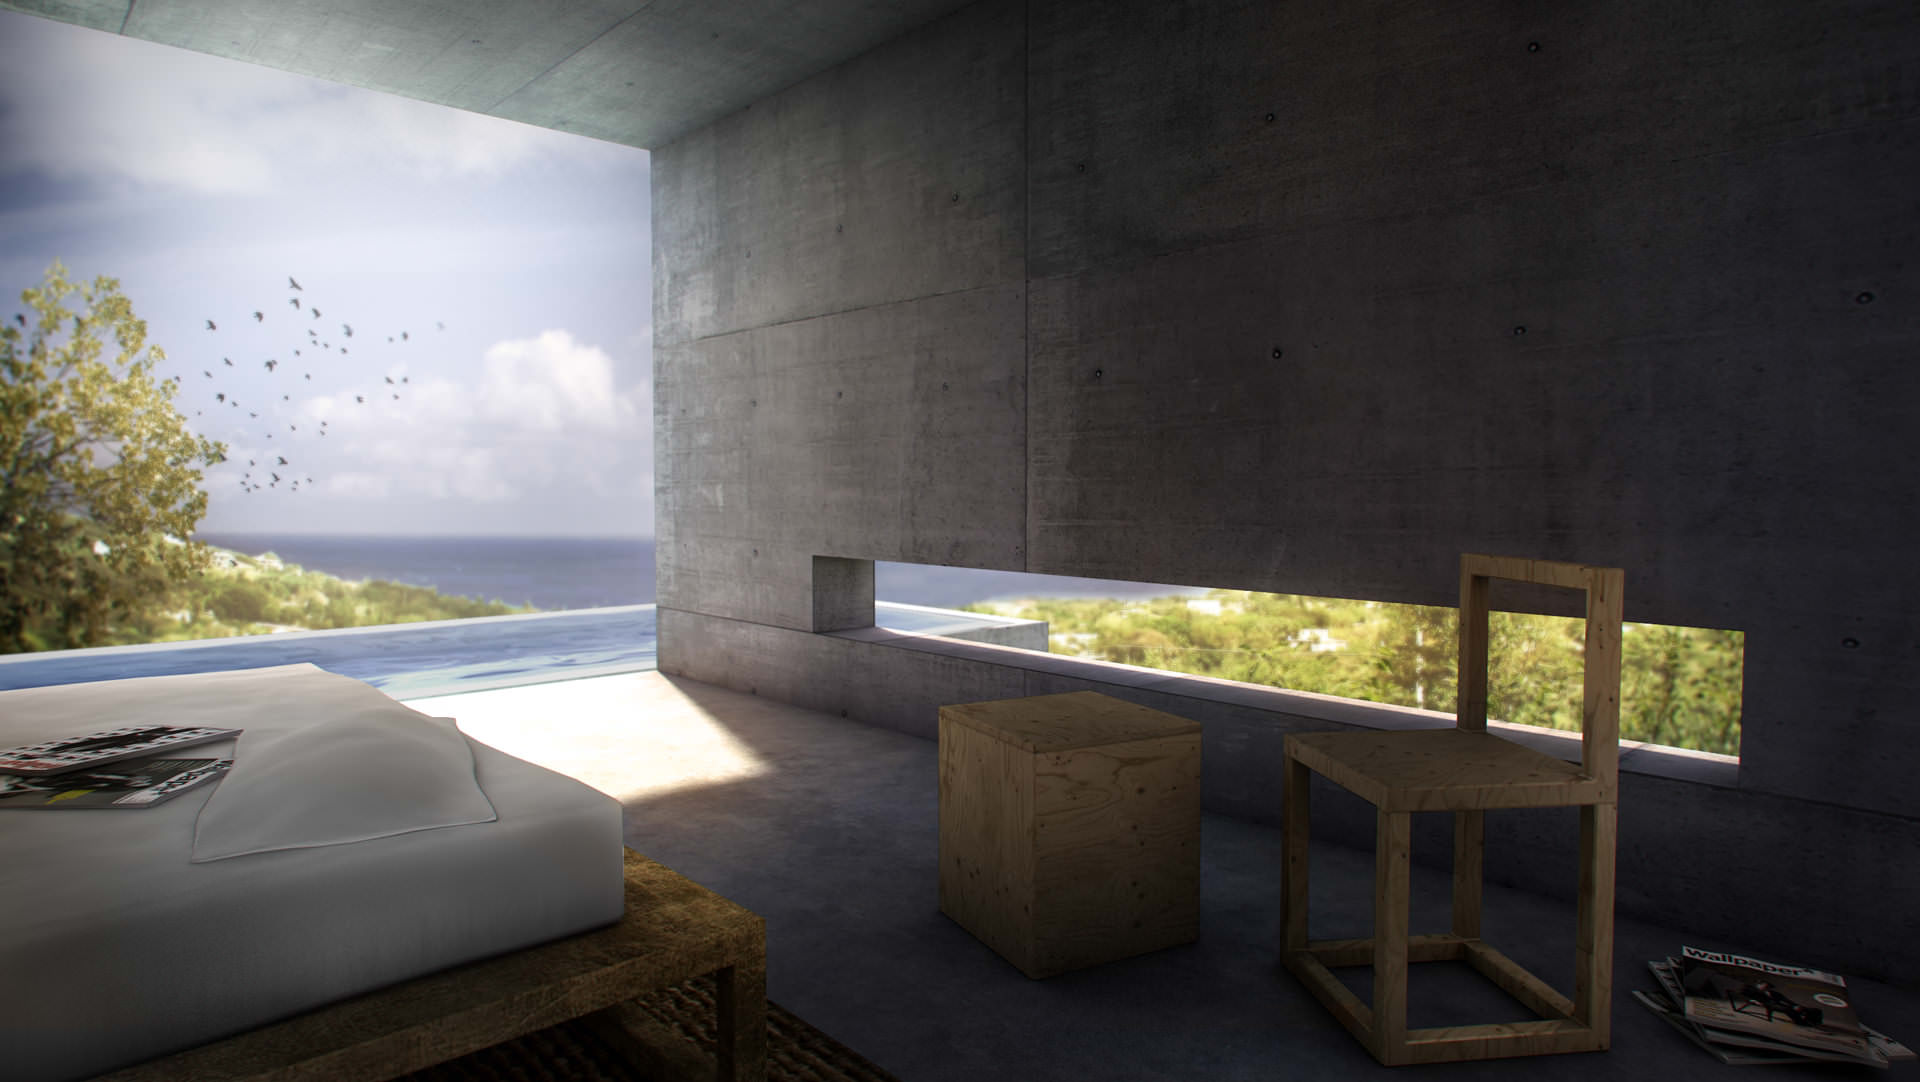
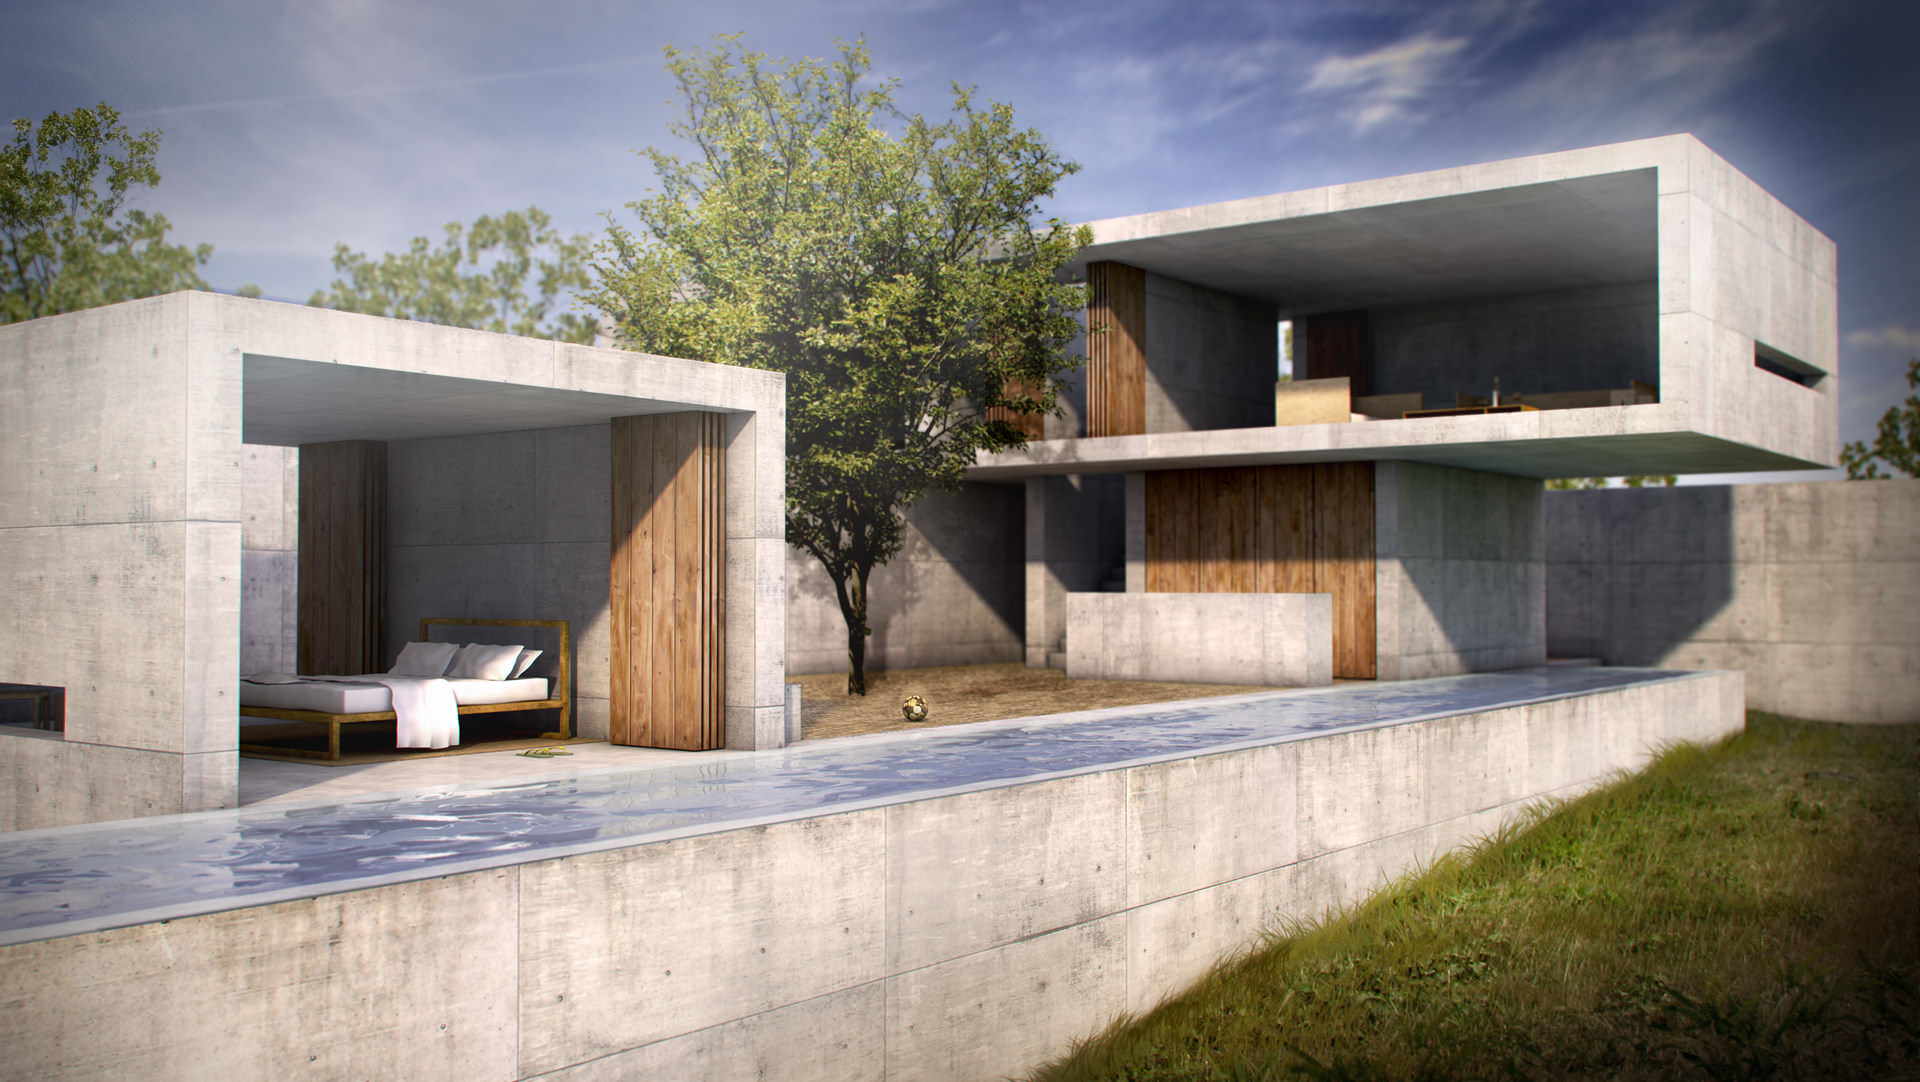
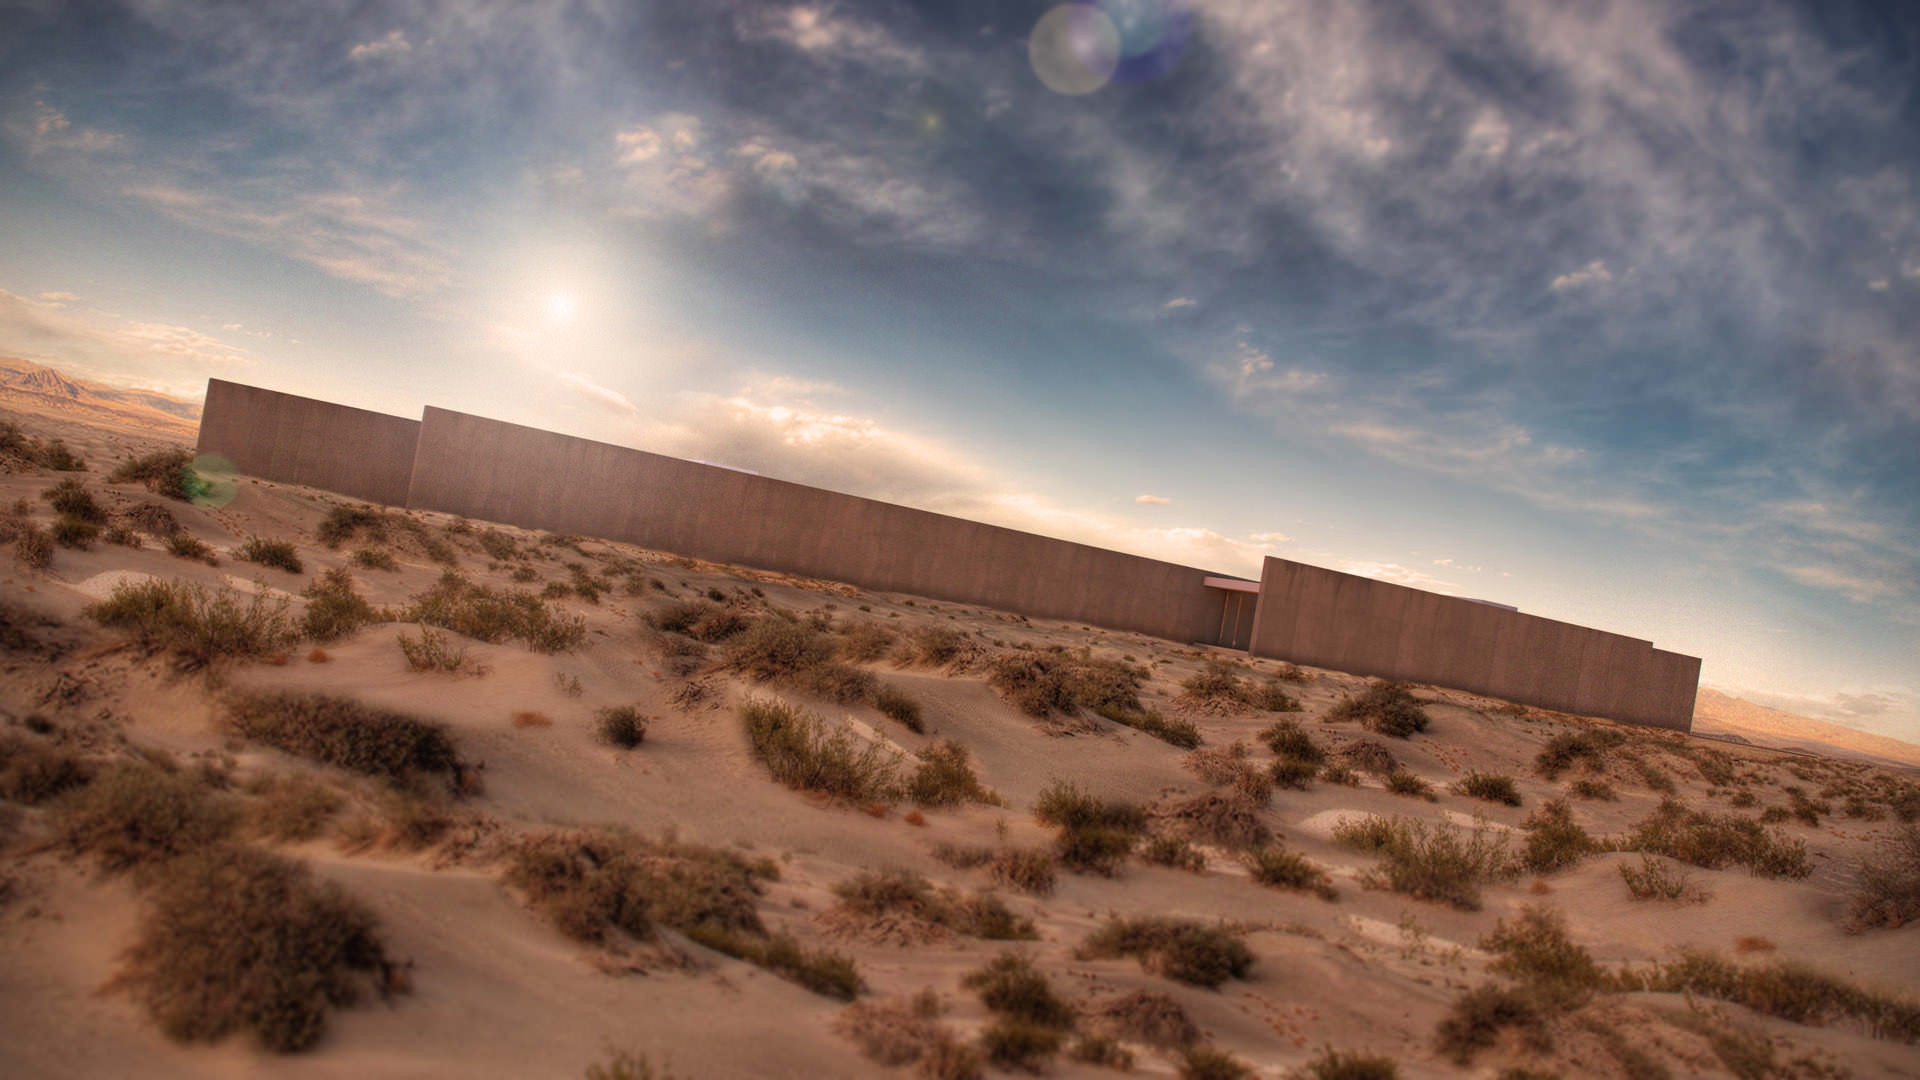
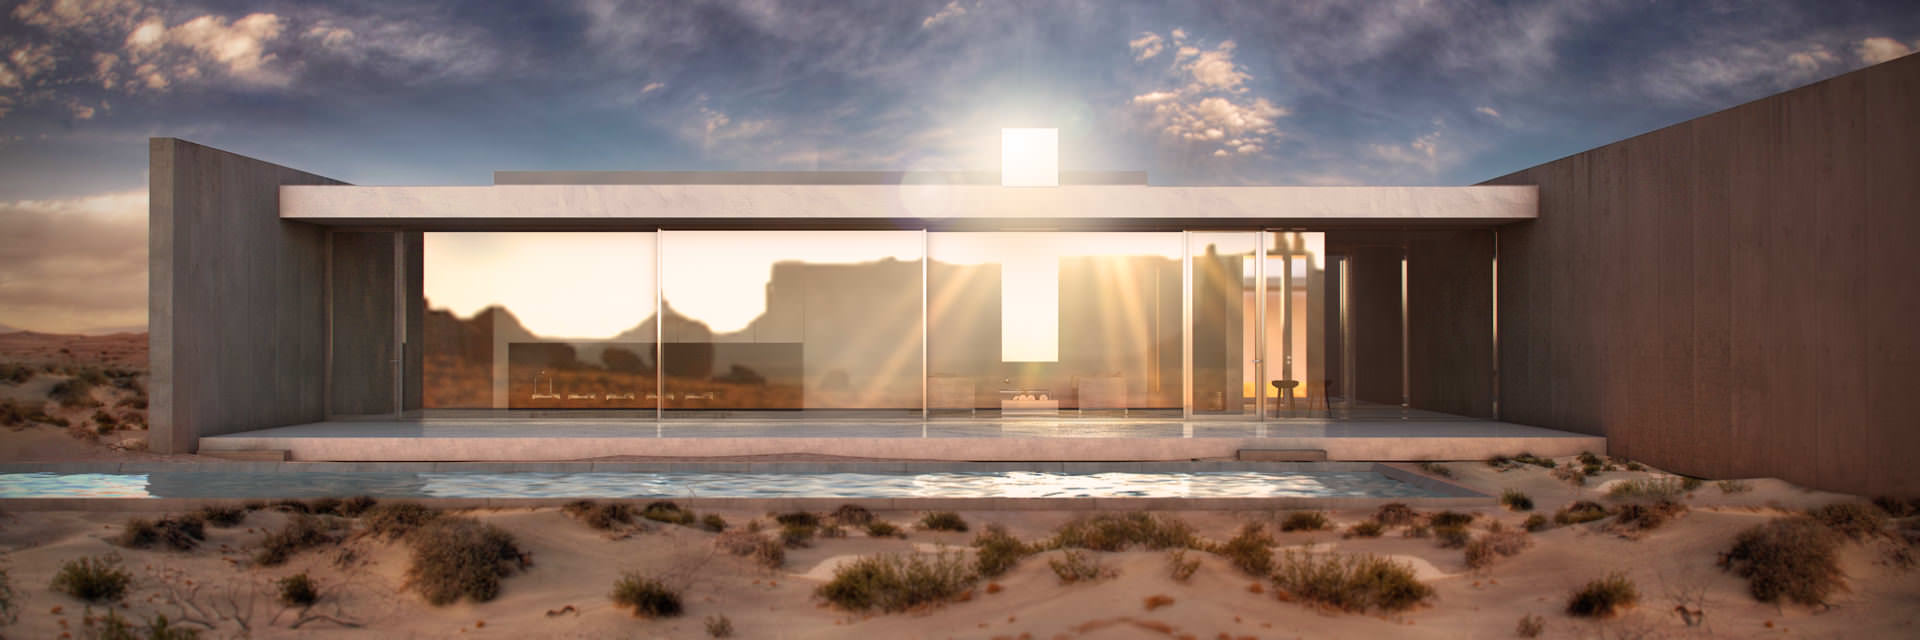
The client of Vieques House required a minimal living environment, where he could disconnect. A place that gives a strong shelter from the quickly shifting weather. Messana ORorkes response was to create a modern version of a fortress. This gave the idea of the story – it is about conquering this fortress. At first it is just not welcoming at all. It is threatening from below but as you get closer and start to understand it, it becomes comforting and cozy, up until the point where the viewer just dissolves in the lap pool.
In comparison with the framed structure of the Phoenix House animation the structure of the Vieques House animation is concentric as we are getting closer and closer and closer to the subject.

Now, I am going to go through the making of Vieques House as it is more complex. I will also refer to Phoenix House at some points.
Modeling
The base model was made in SketchUP. I always use a combination of groups and layers in SketchUP. I only put the grouped entities onto different layers and leave all edges and faces on the default layer. This way there is no conflict. I always make sure not to have flipped surfaces because they cause a lot of headaches later on. I like to model all small reveals of doors, windows in this stage. I only use colors at the end of modeling to separate the different materials.

Then in 3dsMax I made further enhancements. I chamfered some edges, made and imported a couple models. For the renderings I used 2d vegetation, because I had to do them fast. For the video I used VRayProxy trees and bushes.
Rendering and Post Production
The 6 + 6 rendered images are just not at a level that I should brag about. There are way better making-of’s on this site regarding beautiful photorealistic renderings. I still have a lot to learn about materials and lighting of 3d scenes. I do most of the work in PS.

Cameras, Lights and Props
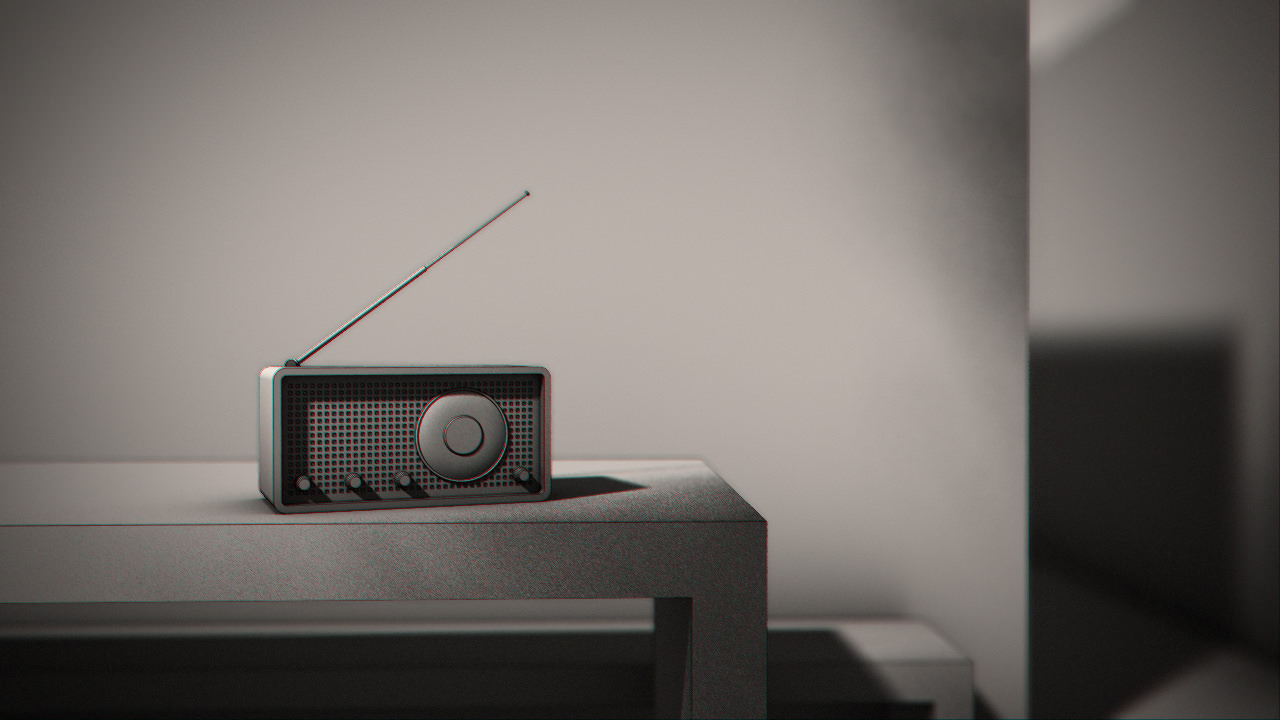
Animating the cameras was a relatively long process. I wanted all camera views to be interesting, but also to be coherent with the one before and after, therefore I was constantly looking for references in the shots (a corner of the building, the radio, the middle tree). I tried to balance steady shots with moving ones. I changed the cameras focal lengths at certain points.

I only put one VRayLight in the scene. It circles around the building. We wanted the light to be artificial. Instead of imitating the sunlight the idea was to imitate a table light that you would use to enlighten a maquette.
I made a couple of copies of the light and controlled the speed of them separately for each scene. Wherever the camera moves fast the light moves slowly and vice versa. The constantly moving light was a good way to make the environment lively in comparison to Phoenix House.

Afterwards I animated all the moving elements like the birds, the ball, the splash and the slippers. My favorite was the animation of the birds. I made one lowpoly bird, animated its wings with the Bend modifier. Then I scattered a couple copies, offset their keys and changed their trajectories. I refined them up until they looked good from the camera.

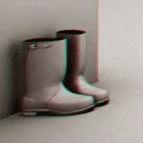
In Phoenix House the only animated props were the tumbleweed and the boots. I only put the boots in as Easter eggs and was about to delete them. However, the partners at Messana O’Rorke just loved them and they became signature elements. The comments that we have received always mentioned the boots. I really like them because it breaks the “architectural seriousness” of the animation with self irony at a climatic point. I hid an Easter egg in Vieques House as well. If you find it you must have enormous Waldo/Wally experiences 🙂
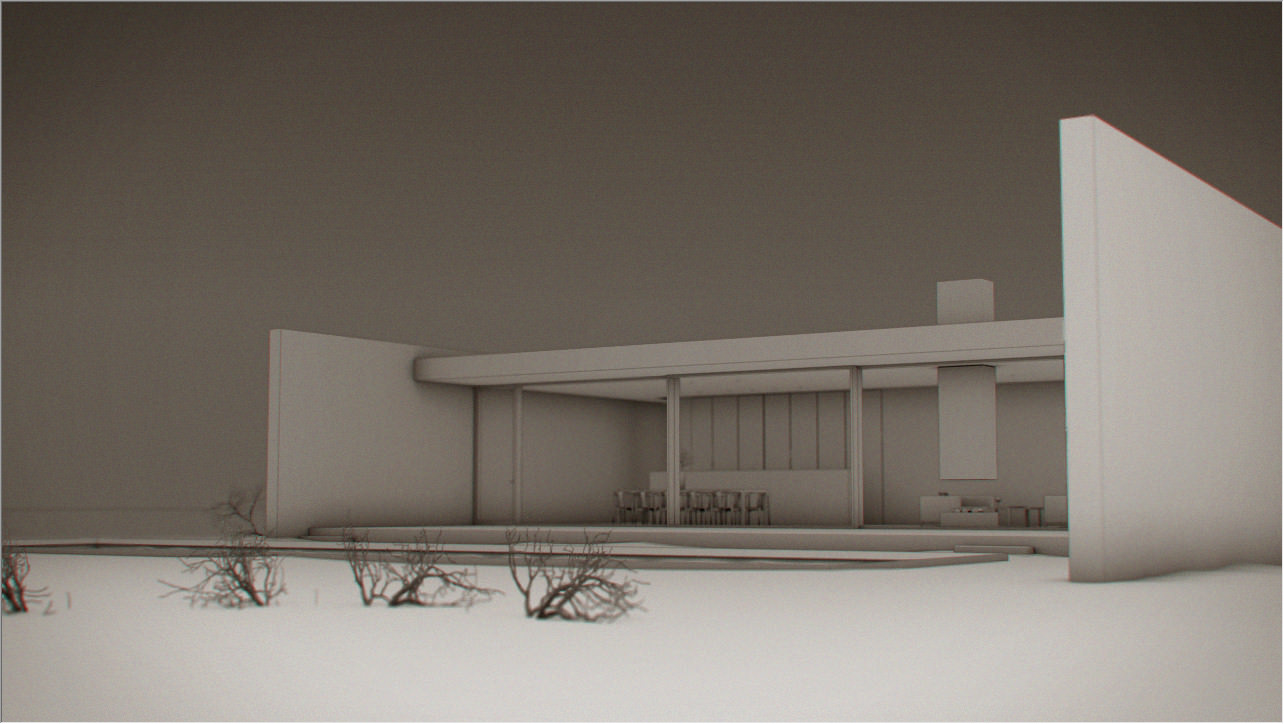
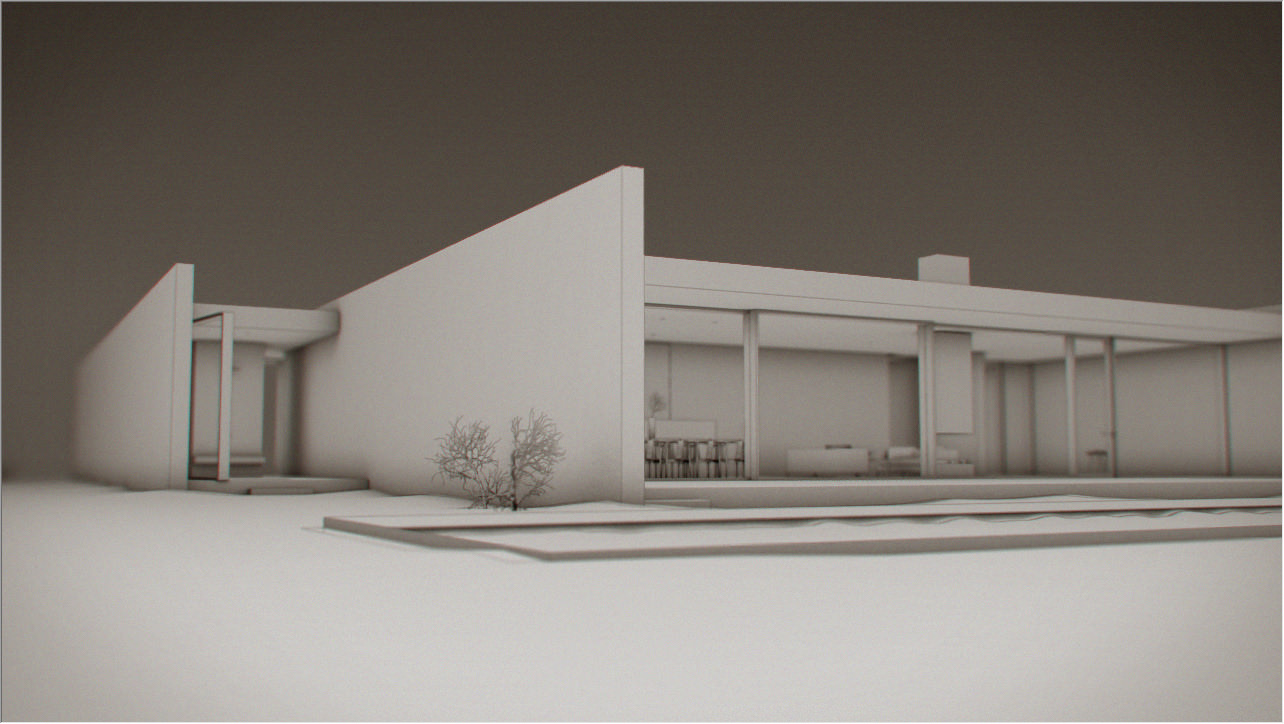
Rendering of the Sequences
I made draft renderings and created the final look of a couple frames in PS before I started rendering whole sequences. When we were happy with these reference images, I started rendering.

I used V-Ray with Render Elements : Beauty, Alpha, Zdepth and ExtraTex passes. ExtraTex render element is I think the best way to create ambient occlusion.You just have to add to it the VRayDirt map that you usually use for an AO material.
I only had direct light in the scene so the frames rendered relatively fast. Although, I had troubles with the anti-aliasing. Its calculation is based on the beauty pass so whenever a detail was in shade it didn’t use enough samples there and the additional passes had zigzagged edges. Therefore I had to increase the AA sampling.
I rendered the contour separately using VRayToon, because I couldn’t find a way to incorporate the contour pass into the the Render Elements. I turned the lights off for these sequences so fortunately the rendering was super fast. I rendered at 24 frames/sec in order to have a more imperfect look for the final animation.

Usually I am just not patient enough to document my workflow, but I had to do it this time. I made a table with all different cameras and necessary settings. If you do a table like this, just make sure to update it.

Composition
When I had all the render passes (around 32,000 individual images) I started putting them together in After Effects. I used the AO pass as the base and multiplied all others on top with different opacity. Then I animated the lens blur effects using the Zdepth pass. These lens blur glitches were elemental parts of the story, so I paid much attention to them. The lens blurs were also great to hide a couple weird-looking camera movements.


Afterwards, I pre-composed the sequences and added grain, sepia filter and vignetting and oh… a little chromatic aberration. Since there is no such effect in After Effects as chromatic aberration I used a manual method that I found here :
(I cannot really get used to plugins (that is just me) so I am always happy if there is a manual alternative). Chromatic Aberration was great because it gave a little color to the monochrome images.

Editing
Once I had all the sequences exported from AE, I started the editing part in Premiere Pro. This was my favorite phase because all the previous effort became tangible here. At this point you see how the sequences work together and you can modify/enhance/fine-tune the mood to a great extent with the sounds and music.

The sound effects gave so much life to the animation. The ambient effects like the whistling wind in Phoenix House or the chirping birds in Vieques House were great for setting up a mood. I really like the juxtaposition of the graphic environment and the lifelike sounds. I made the camera sound effects (zooming, flash recharging, etc.) loud to accentuate the rawness of the animation.
This is a great resource for sound effects: https://www.freesound.org/
Since Vieqes House is a Puerto Rican vacation house we found a lounge music with a tropical mood to be perfect.
The music of Phoenix House was a tribute. We always talked about Phoenix House as an architectural ‘Clint Eastwood’. It is in a dreary environment, in solitude. Hard as rock. The strong horizontal lines of the facade and the strong horizontal lines of Clint Eastwoods face are just remarkable. For the startling resemblance see the next image. (I tagged both of them not to confuse you).

Therefore we had to pay homage to the spaghetti westerns with the music of Phoenix House.
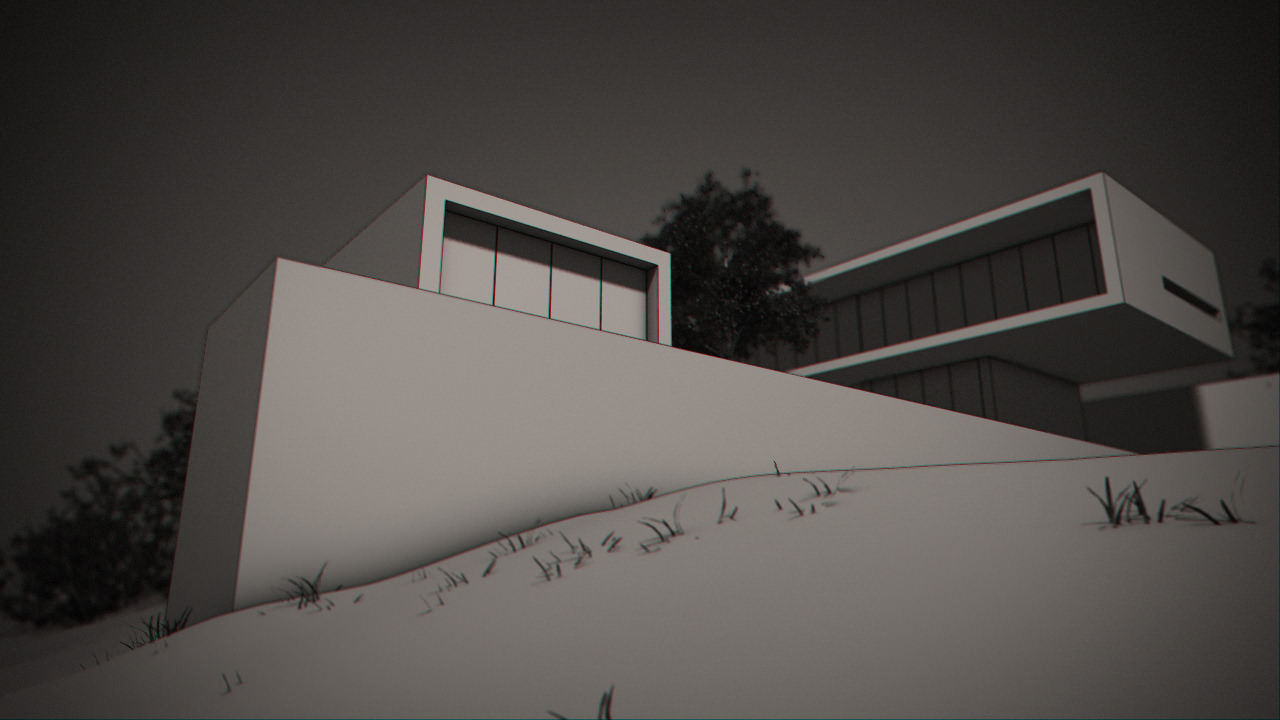
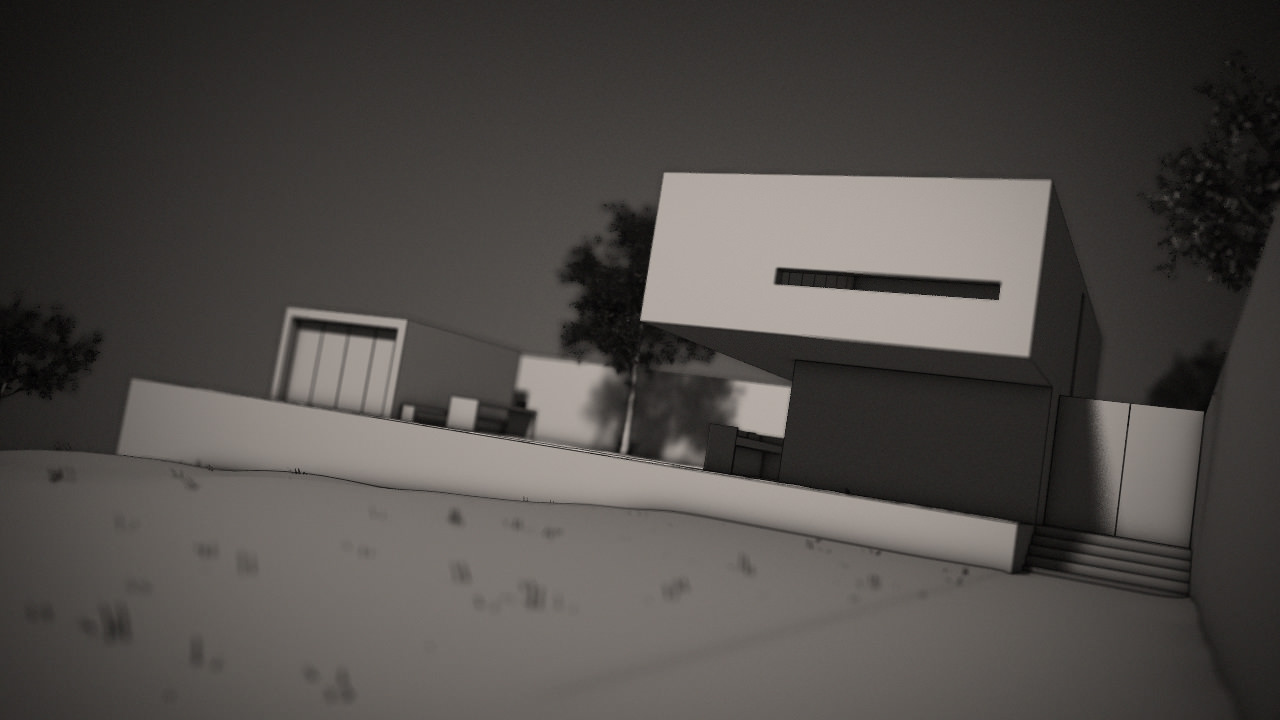
Finally here is the breakdown of Vieques House :
And some frames of the videos :

Here are some view from the Phoenix House too :


Thanks for reading and if you have any questions I am happy to answer them below.
Viktor Nassli


please make us a howto on your sand shader.
great job
niighthawk For sand making you can visit this article on the blog : https://www.ronenbekerman.com/modeling-3d-sand-dunes-3ds-max/
niighthawk And this one too : https://www.ronenbekerman.com/procedural-vray-sand-material-how-to-use-it-video/
yeah but i really like the sand from Viktor Nassli
The renderings look awesome, in my opinion the video making was totally nonsense… no real production on it, nothing new or learnable from it, this article should have been a MAKING OF the render still images and not the boring video kind.
Congrats for the blog Ronan, can’t start work every morning without visiting 😉
Interesting!…But where can I see the final animation?? This dirtmap animation looks like a Animatic phase.
i like this article , lots of stuff to learn from.
long time ago i had the impression that everything should be done in max , with time i came to learn that photoshop is not a cheat.
and that rendering can be 3d or photoshop or free hand.
after that i started thinking that photoshop is a good option but not for animation work.
now after i read a couple of the articles here i saw that you can fool the mind into thinking its 3d work, you just need to be smart about it and know what you are doing.
very interesting and the video gave me some ideas for the project am working on right now, i can save time to render a clay render as animation, and still shots for finals, this will solve a big issue for me.
thank you
sir, how long should an architectural animation should last? beside from the usual 3 minutes video? Thanks