


Making of Bathroom at House N
I’m happy to bring you a new tutorial by Javier Pintor from Málaga, Spain. In this article he will describe the creation of a bathroom interior in his personal study project, House N, that was posted in the forums. I hope you’ll enjoy this article, learn from it and share your thoughts by commenting at the bottom of this article’s page.
Javier Pintor has recently finished six months of 3d archviz school and currently work on preparing his portfolio. House N is one of the projects related to that.
Introduction
Before we start I would like to thank Ronen Bekerman for giving me the opportunity to participate in this great website and share with you my work on this scene.
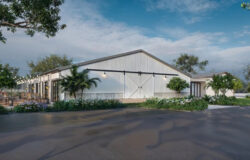
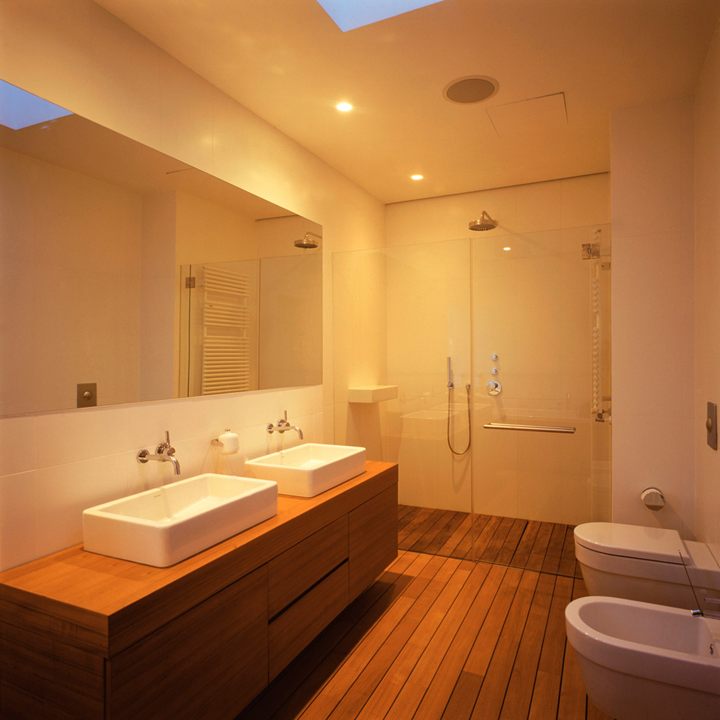
The idea of making this personal project was for learning purposes. The design of House N is by 3LHD Architects and my idea was to recreate (not match) this photo, giving it my personal touch.
 Programs used – 3ds max 2009, VRay 1.5 SP2 and After Effects CS4 + Plugins.
Here’s a short 2min preview of the modeling process by Javier…
Modeling
I started with modeling the entire house based on plans because I wanted to make renders of different rooms and some exteriors too. After that, I drew the bathroom shape with a spline Line tool, adding the Extrude and Edit Poly modifiers to create the windows and door holes. The aim was to isolate that room from the rest of the house, useless in this render.

The floor and walls of the bathroom was done using Floor Generator plugin, it is fast and really easy to use. And you can find more information about the use of this script at using Floor Generator script by Bertrand Benoit.

All of the elements in the bathroom (toilet, bidet, sinks, faucets, shower, etc) were modeled using poly modeling and subdivision surface, I realized that the most difficult thing for me was to keep the proportions of every element in scene in check when using just one photo as a reference, but anyway in such a simple scene it is not a huge problem after all.


Lighting and Camera
After all the modeling was done, I put everything in place and played around with the camera until I found the desired frame.

The illumination is simple aswell, just a VRaySky with two Skylight Portals in the exterior side of the windows, and four targeted VRayIES pointing to the floor placed just below the ceiling light fixtures. The following picture show the camera, sky, lights and skylight distribution and settings.

At this point I set the camera for a little bit of under exposure, maybe is just a mania but I like to have a good grayscale values so I have more control at post-production time. Then I made a test render to check if everything was under control.

Texturing
The scene isn’t rich in textures, the wood in the floor is from Arroway, for the walls I used a marble texture from CGTextures that I made tileable, and the other wood for the drawers I downloaded from Trespa, and made it tile-able as-well. All the elements in the scene have a box or planar mapping but the shower hose which has an unwrap UVW.

The following pictures show some of the materials I made.

I didn’t want the glass to be very reflective so I used a falloff map in the reflect slot and was playing with the mix Curve until I achieve the desired effect.

For the drawers I used a VRayDirt map in the Diffuse slot with a 2,0cm of radius and 0,2 of falloff and placing the wood diffuse texture in the unoccluded color slot, like that I added kind of ambient occlussion straight into the materials that I wanted.
Rendering
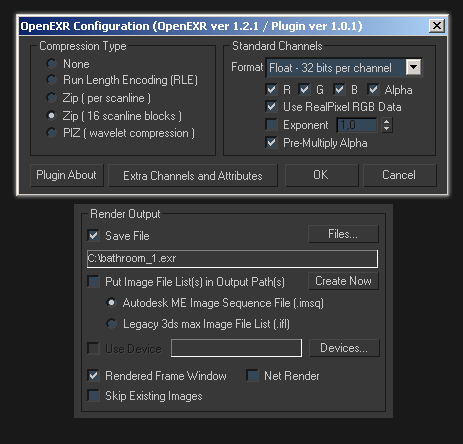
Here are my render settings for these image.

The only thing to point out is that I saved the image as a 32bit EXR through the render output just in case I wish to change the exposure later on without loosing information.
And after 5 hours here is the result… for now.

Post production
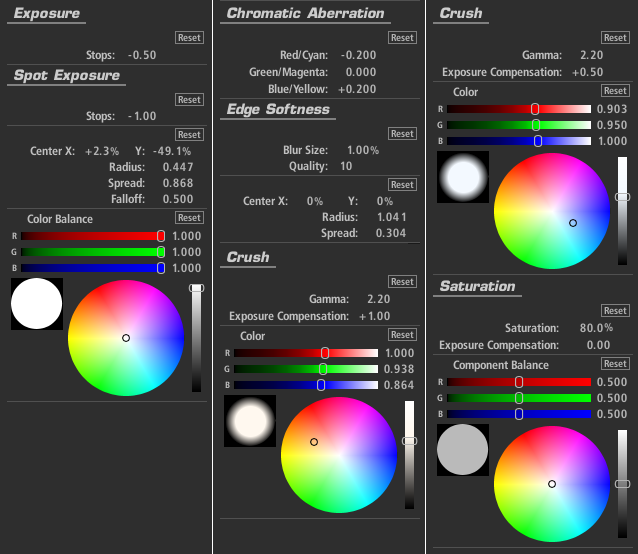
All the postwork was done in After Effects and with the help of the plugin Magic Bullet Looks. In Looks I adjusted the overall exposure and used the following tools, Spot Exposure for certain areas, Chromatic Aberration, Edge Softness, Crush and Saturation. After that I adjusted the Levels, added a Glow, Missfire Vignette and a Color Balance. The following picture show the Looks settings.
The next step I learned from Alex Roman. I applied two color masks (that I made in Photoshop) above the original render, covering all the image, blending mode as Soft Light, lowered the opacity about 40% to 60% and played with the Hue of the first mask until I found the mood I was looking for.

And the end result…

Javier’s original House N 3d renders thread
You are welcome to comment on this article and ask questions using the comment box below!


Great work Javier! I like your lighting much more than reference photo.
Thanks you very much Kostas.
Great tutorial, Thanks!
Can you talk a bit more about the 2 color masks?
Is there a yellowish color mask over the whole scene and then a bluish mask around the edges?
I can’t quite tell what’s going on there.
Brodie.
Thank you Brodie!
This video is the best way to explain what is this color masks trick.
http://vimeo.com/8217700
Around minute 14:05 Alex made this color grading method.
I agree with annkos, and this after effects techniques seems to be very intriguing. Great lighting and composition!
Cheers!
Hey Ivo, thanks!
Yeah it seems intringuing but its really simple and I found it fits very well in this render.
Great work Javier. couldn’t have done better myself. seriously… thumbs up.
Thank you Dadi Dindul!
I’m glad you like it.
Great tutorial!
Are you planning to build some teaser or animation on this? Magic bullet products are mostly focus on animation, i would love to see this material in motion 🙂
Thanks for sharing your workflow with us.
cool.. really helpful…thanks for sharing…
Good luck!.
Wow… Nice it is. I will apply this idea when I am gonna to remodel the bathroom
Really it is a very nice i really like it thanks for sharing it.
http://www.blitz3ddesign.com/3d-interior-rendering-services.html