


Procedural V-Ray Sand Material by Javier Pintor
Many of you asked for it and here it is – Javier Pintor’s Procedural V-Ray Sand Material as showcased in his forum WIP thread. You will find here a short textual how-to supported with a video without commentary and the 3ds max scene file. Feel free to use it for any project you like.
Step 1
Open the “sand_start.max” scene and assign V-Ray as the rendering engine (no matter what version you are using). Set it for a test render so you don’t waste too much time in this demonstration. The following image show how I usually do it, which doesn’t mean you can’t do it your way 🙂

Render Settings
Step 2
Next step will be to create a plane of 500x500cm centered in X, Y and Z and with 100 segments in both directions like so.

Setting up the work plane
Step 3
Now let’s add a “Displace” modifier, set the strength to 30cm, open the material editor, go to the very last material and instance the map from the diffuse slot to the empty map slot in the displace modifier.

Adding Noise
Step 4
Apply the “Sand” material, you will see how the colors will change in the plane to a red, green and blue gradient. The gradient will determin the levels of the color, bump and displacement depending on the height of the surface, and for that reason we need to add a “UVW Map” modifier and set it as shown in the following image.

UVW Mapping of displacement height
Step 5
First Make sure the “Real-World Map Size” option is turned off and then, the last step is to add a “VRayDisplacement” modifier, set it to 3D mapping with amount of 30cm, then back to the material editor and in the “sand” material, instance the gradient from the “Displace” slot to the “Texmap” slot in the “VRayDisplacement” modifier.

V-Ray Displacement
Step 6
Hit render and that’s it for now.

Initial Render
I made available also a video tutorial where I go further and apply some other technique like adding grass with Particle Flow or a VRayDisplacement to a tree. Please check it out above, at the beginning of this post, if skipped it 🙂

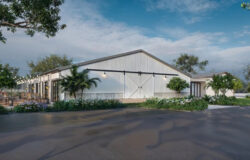
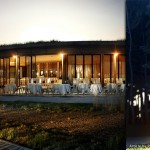
Final Render
Thank You, Javi Pintor.
[wpsharely]
[/wpsharely]
You are welcome to comment on this article and ask questions using the comment box below!

Thanks Javier!! Great work!
Excellent ! Thank you !
Fantastic tutorial, great Job, Thanks!
good job Javier. thank you for sharing !
Thank you guys!! and thanks to Ronen for posting it.
I’m glad you like it.
beautiful!!!
Thanks Author, Javier! and Ronen too for this opportunity. Very usefull!
thanx dude,,,,,,,,,,
Really good material work. We are waiting your other good metarials.
Keep going.
Great – tutorial – I learned alot!! Thanks for sharing.
thanks for share Javier!! you did a great material
Hi all,
Great effort and free material. Amazing rly.
1 question:
If i want to use the sand mat in an huge surface how will it work best. Sry havent seen the video yet.
Cheers
Thanks metrocubicodigital.
The setup shown in the video work very well in huge flat surfaces, not with big dunes, also for huge surfaces I would recommend to use a noise in the bump slot because the speckle will produce a very noisy result.
Anyway you can combine the properties of the three materials to find the best results.
Cheers for the vid and mat file mate.
thanx for sharing everything…u did very nice 🙂
thanks for share.. really like it 🙂
Thank you Javi for share and tutorial.
Yeah, It’s really nice (it’s a shame it doesn’t concern the image from the banner though).
thanks
Hi, I’ve a problem I haven’t the small waves. I don’t understand can you help me please
@ThomasLeudet Hi Thomas, I’m not sure if that gonna solve your problem but when I opened the scene the displacement map was not loaded, so you wont be getting desired results, however you can download the map separately(its the first file)then drag it into diffuse slot into last material, hope that solve your problem
Hi Could you please re upload the material ..!! Megaupload link is not working ..!!
Hey! Great Material, would love to use it. Unfortunately I am having the same issue as aayushchopra.
Could you please refresh the link. Thank you.
maken Hi. Fixed it – You can go ahead and download now 😉
ronenbekerman maken Thank you.
Hi, same problem for me, impossible to download the file. Could you please re upload it ?
Thank you
Ronen where is the file? i cant find it to use the sand material 🙁
Hi all, sorry for this mishap… here is a direct link – http://we.tl/M7fcpdYVHt
RobertAndresArenas added a link above
ronenbekerman Thank you Ronen !
ronenbekerman thx you so much Roben! that material is awesome 🙂
First thanks a lot for sharing . i tried this mtl to learn sand shader,
but as
displacement was being complicated for me so i decided to make it little
easy. and here is the result. first image is my result . second image
is what javior pintor made for displacement so basically i
was need the same to get same displacement. and what i did – i went to
inside of javior pintor displacement map and captured a image (3rd one)
and i made it seamless to get rid black edge on corner while uvw mapping
. then i used gradient map same as javior
used (image 4) but i just put that jped which i captured and it worked
perfectly . and last image(5th) is snapshot in slat mtl mode. even i
couldn’t get perfect sand but it’s little easy for me. sorry for my
english and thanks again to Ronen Bekerman and javior pintor for
sharing.
Very good and thanks for sharing. Perfect tutorial.
Good job Ronen and Javier