


Making of ASGVIS VRay for SketchUP Winning Render
Dirk de Jongh from DWanimations won the very first render contest hosted by ASGVIS in March 2009 for an interior render done with VRay for SketcHUP with the image you see above. He kindly shares his process with us in this first SketchUP + VRay article on the blog. I hope you’ll enjoy this article, learn from it and share your thoughts by commenting at the bottom of this article’s page.
Dirk is the founder of DWanimations, a visualization studio creating images for the real-estate market and also providing training about SketchUP for architects and architectural firms to better their workflow.
Youve probably seen his V-Ray for SketchUp renders in the V-Ray Forum, ASGVIS website, newsletters, and other ASGVIS marketing materials. He is a major contributor to the V-Ray Forums, and a huge part of the SketchUp community.
Feel free to comment about any aspect of this article or things you think need more detailed explanation. I’m sure Dirk will answer it all 🙂
Introduction
The following render won the first VRay for SketchUP render competition. I was really glad to have won the prize because I was just starting out my own company in Holland, at age 19 at that time, and got great exposure after the win.
I designed this scene as a case study for the combined use of SketchUP, VRay and Photoshop. I wanted to know how far I could go and how realistic I could make things look. Since my background is architecture, and I tend to run concepts in my head for a long time and gather sketches about them, I just had to implement this specific one about an open living space where you can have the most common and general functions one will daily do.
The Process
I started to work with only my sketches and my imagination at my side. I did not had any idea about what materials I would like to use. Eventually It came to me that I want to keep the colors basic but with a nice contrast. For the floor surface I used a concrete texture with a soft reflection so it gives you a contrast to the rest of the room.

Concrete Texture Map

Concrete Material Settings
The other part that springs into focus is the ceiling, the texture I used is a wood with a high gloss look to it. In combination with the shape and flow of the ceiling that gave me a nice effect.
Render Settings
The render settings used to make this shot were not too difficult. The output size was 2048×1536 and the render settings are as shown below.

Render Settings 1

Render Settings 2
Outline Overlay
I did not use any AO (Ambient Occlusion) pass because at that time (2009) Vray for SU did not give you that function to use, in the new version it is included :D What I did to compensate the lack of the AO is to get the outline of SU render end put it over the actual Vray render in PS, so I could get some kind of AO. So you can see it in the render near the windows.

SketchUP Outline Saved Image

A closer look on how the outline blends in.
I wanted a nice long shadow on the floor so I edit the time of day in SketchUp to get that effect. I then edited VRay Settings to get the soft shadows as you can see below.

Shadow Settings
Furniture
The furniture I modeled myself or downloaded from the net, for example the carpet on the floor, that was from the Warehouse, thats a good place to find stuff, its a pity that some people use it to dump their designs on that are not build properly so I always search on most downloaded or best rated.
The cushions ware created with a plugin for SketchUP called subdivide and smooth. Actually, everything that I modeled in SketchUP is created with the help of some plugin that adds more tools to create organic and realistic models. That is what is so great about SketchUP – there are many quality free tools you can add to it and use in your workflow with a large supporting community at your side too.
Curtain
Here is the curtain creation process…
- First create an rectangular.
- Use the bezier curbs to create the flow of the curtain (I used a curve made out of a 100 segments).
- Use the Push pull to extrude one of the segments you have just made by dividing the rectangular via the Bezier curbs.
- Delete al the unnecessary edges you that you only see the curtain itself.
- Make it a group.
- Turn it horizontal.
- Use the sandbox to create an grid below the curtain.
- Use the drape tool to drape the grid on to the curtain.
- Turn the curtain back vertical.
- Now activate the 3×3 FFD.
- Try to fiddle around till you are happy with the look of the curtain.
- Now you can delete the FFD points and smooth the curtain out.
- The curtain is done.


Trees
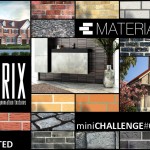
I got the trees from XFrog and converted then for use inside SketchUP with VRay. It took a long time to get the textures end alpha channels just right, but the effort was worth it. The interior plants are basically the same trees as exterior, but than in a different scale. It is an imported part in this shot because the trees are visible in the shadows on the floor and that gives for an interesting shape to the shadow, and gets the shot alive. Otherwise the shot would be a bit dull.
Camera
An important part of this render is camera position. The thing that I always do, and is very common to architecture photography, is set the vertical lines in a shot exactly vertical. VRay for SketchUP does not have the ability to correct perspective or use the SketchUP native corrected viewports so I had to do this in post inside Photoshop. In PS I just stretched the render until the verticals were exactly vertical. Dirty but effective method.
Postwork
When that is done I took the render into PS and started working on:
- contrast
- bloom
- sharpening
- hue/saturation
- levels
- exposure
- brightness
- background
- lens flare
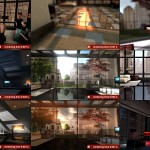
As you can see I used around 30 active layers to create the final render.

General Layers Overview
First when I start using Photoshop I try to change the colors of the render to make them more uniform. A great tool to make that happen is the gradient map. I apply it with soft light mode.

Setting up a Gradient Ramp "Soft Light" Layer
Usually an opacity of 35% is used to generate a more contrasting effect, that gives more depth into the render. In the next example you can see the effect of a gradient map.

Gradient Ramp "Soft Light" end result
To create the bloom effect from the windows I first use the color range tool to select only the colors that you see outside.

Color Selection
Then I copy the selection and use the Gaussian blur in combination with the smudge tool to create the bloom like effect from outside.

Adding the Bloom
For the texturing of the cushions I created an new layer. For the layer I used Hard light and a opacity of 80%. I traced a selection around the cushions I wanted to apply the pattern too. Then I selected a brush with a design that I like and put it on the cushion.

Adding texture to the Cushions
Than you can apply a slight Add noise to create a more textured effect.

Raw Output

Final Output
You are welcome to comment on this article and ask questions using the comment box below!


Very nice ! Intresting parameters 🙂
Big Ups! Appreciate the post.
Mind to educate how you set up the other materials such as metals, cushion or chairs you used? =)
Thanks man, this tutorial rocks!.
Nice to see your work on this blog, Dirk!
This workflow is very familiar for me 😀
Beautiful image indeed.
Very nice image indeed!
Thanks for sharing
nice rendering but the glow is too much in the final output
love your postwork.
thanks for share.
keep posting and sharing your experience .
which version of V-ray did you use in this article?