


Making of Keep Calm and Travel to Japan
The “Keep Calm and Travel to Japan” image by Mojtaba Yaghoobi is among the showcase posts that captured the most attention in the past two years! And today, I’m delighted to showcase the making of this fantastic work. Enjoy!
I am Mojtaba Yaghoobi from Sari, Iran. I’m quite willing to give you some details on this personal project, which shows my pure interest in the unique, mesmerizing traditional architecture of Japan.
But first, I would like to appreciate Ronen, who has provided such a superb connection among all 3D artists worldwide and had a significant role in developing this industry. I’m deeply grateful for having such a magnificent opportunity provided by him.
Introduction
The project name is “Keep Calm and Travel to Japan”. This project has been done in less than one day, and I’ve tried to put my deepest feelings and efforts into it. The principle of my work is based on simplicity and lightening up the scene. In my opinion, simplifying the process leads to much faster and better outcomes.
Resources I used in this project are :
- 3ds Max 2016
- V-Ray
- Grow Ivy
- Advanced Painter
- Photoshop
- EVERMOTION Archmodels 154 and 85
- Wood textures from Top Texture’s collection
I’ve used free internet objects and my own models for the rest of the models and textures.
Reference
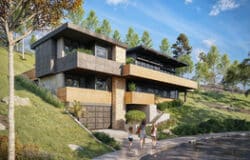
To start any project, you need a reference. Needless to say, Pinterest is an immense galaxy of ideas! These could be somehow inspirations, leading to final ideas.


3d Modeling
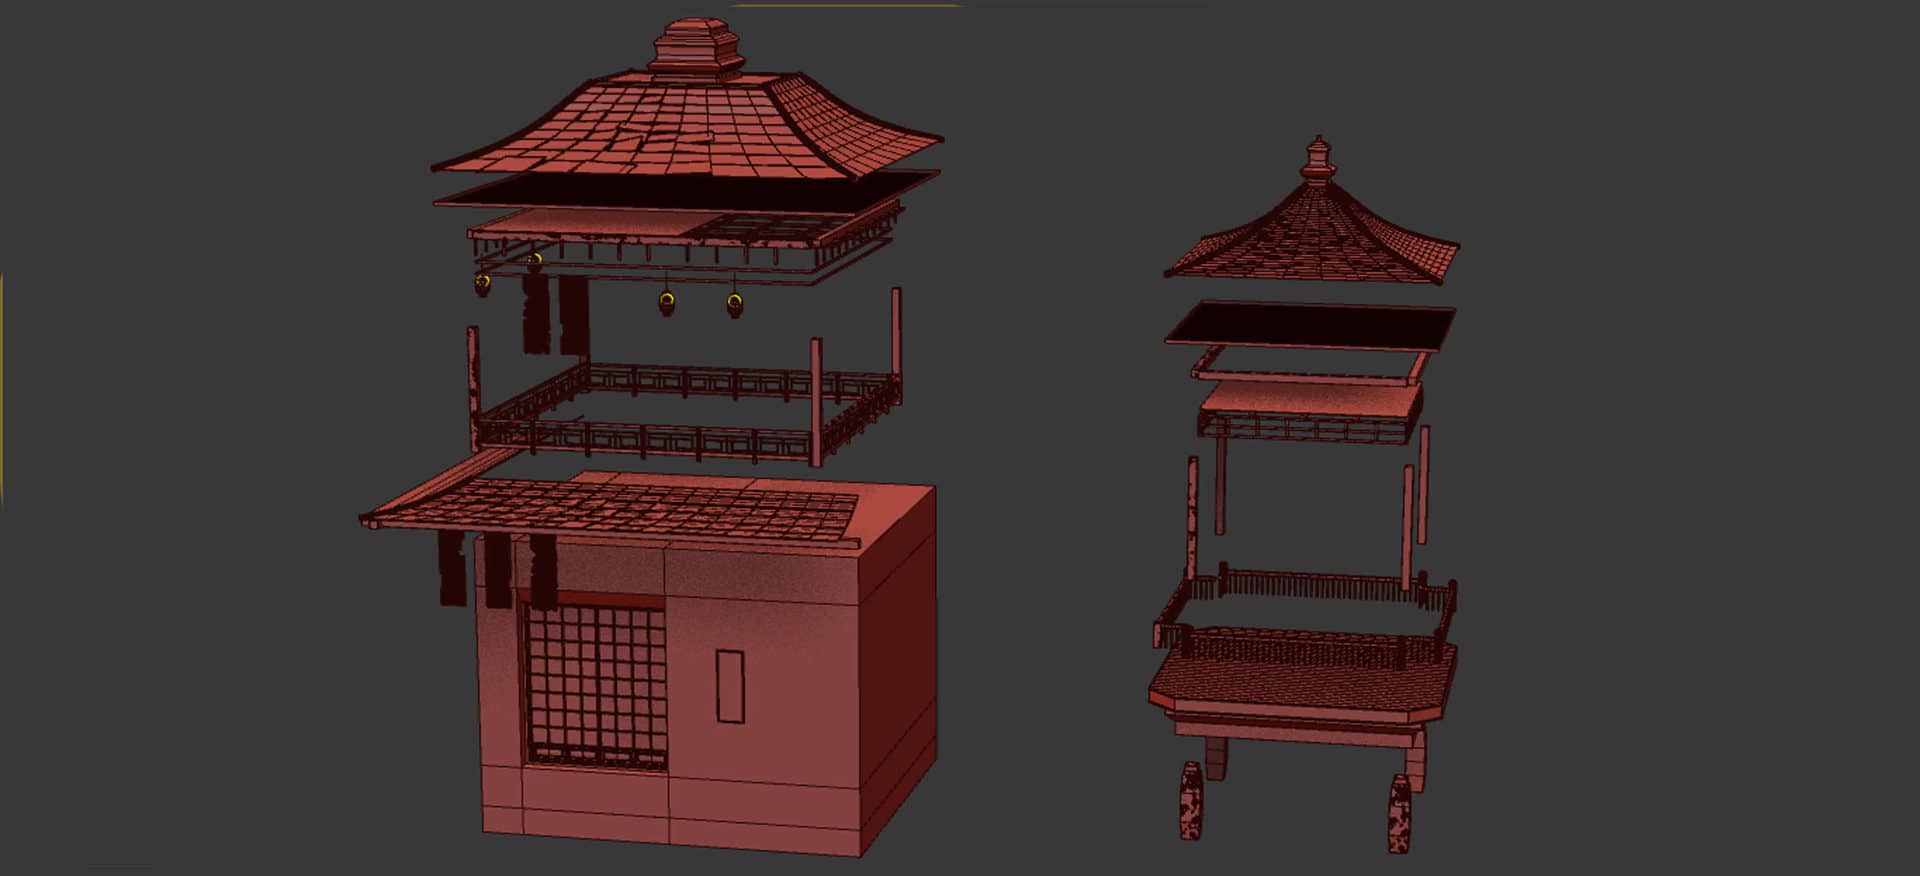
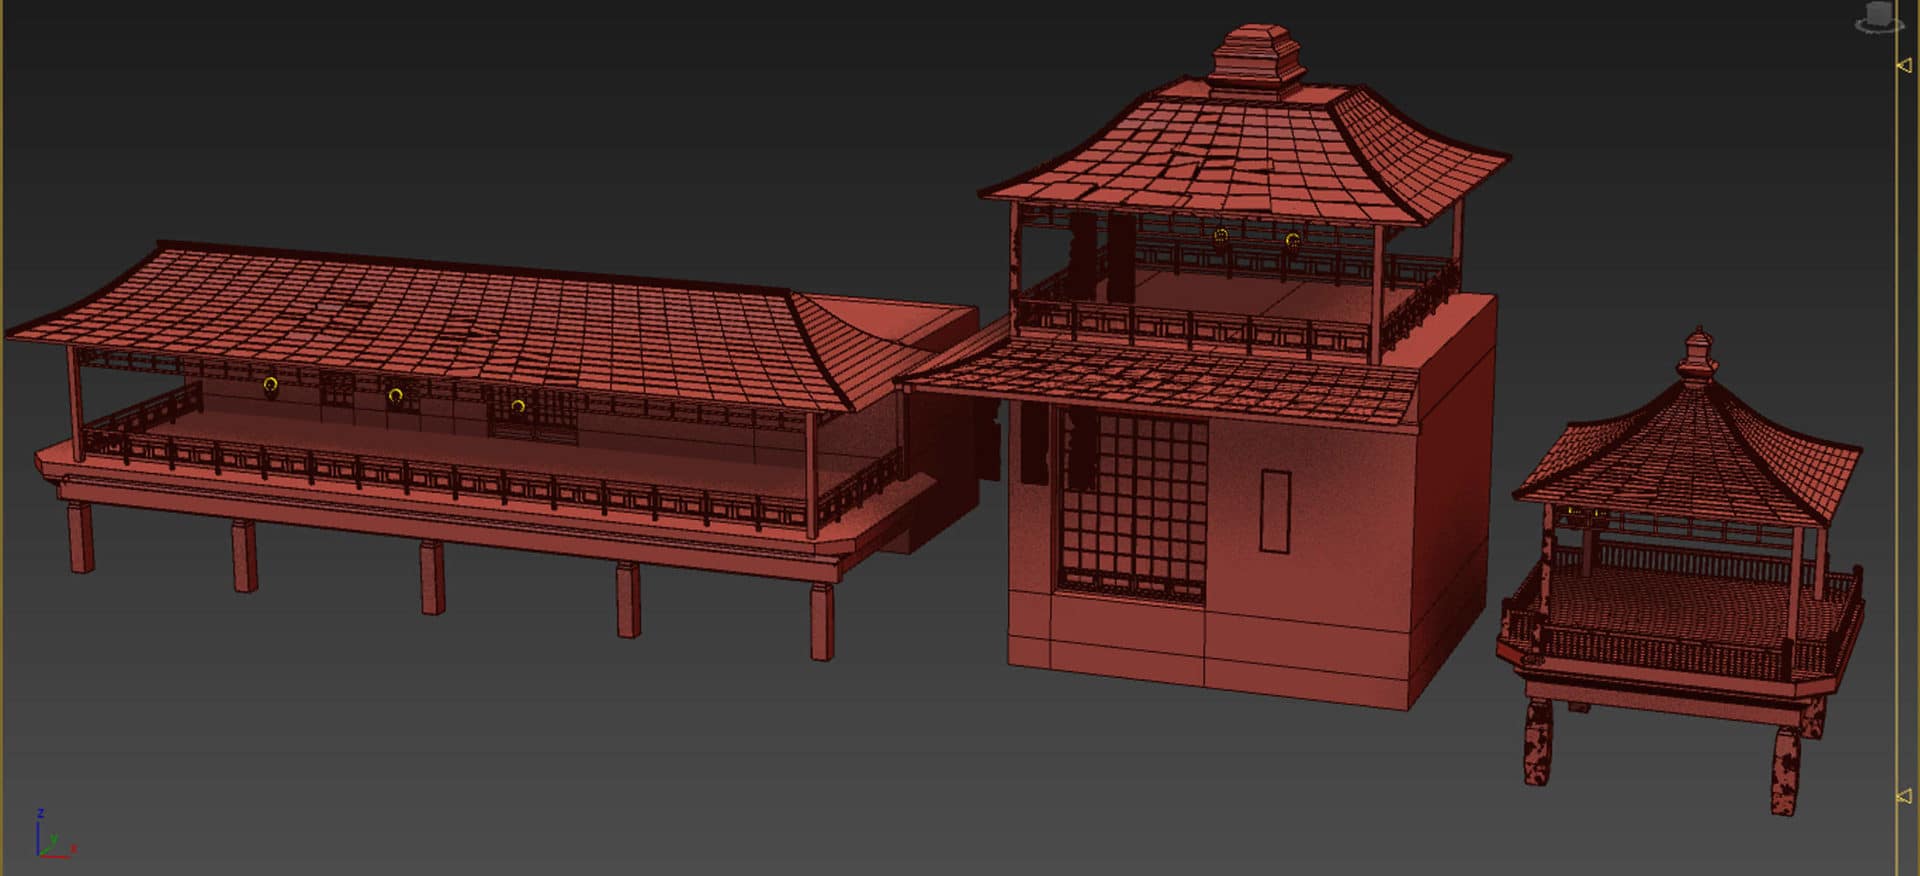
This process is one of the most essential parts of a project. Based on my principles (simplicity and optimization), I’m going to show you the steps involved.
The initial shape and form of most objects are based on a box and a plane.
The next step is to work with “Editable poly” for having more details.
The last step is to add details such as Chamfer, Noise, Shell, and TurboSmooth.
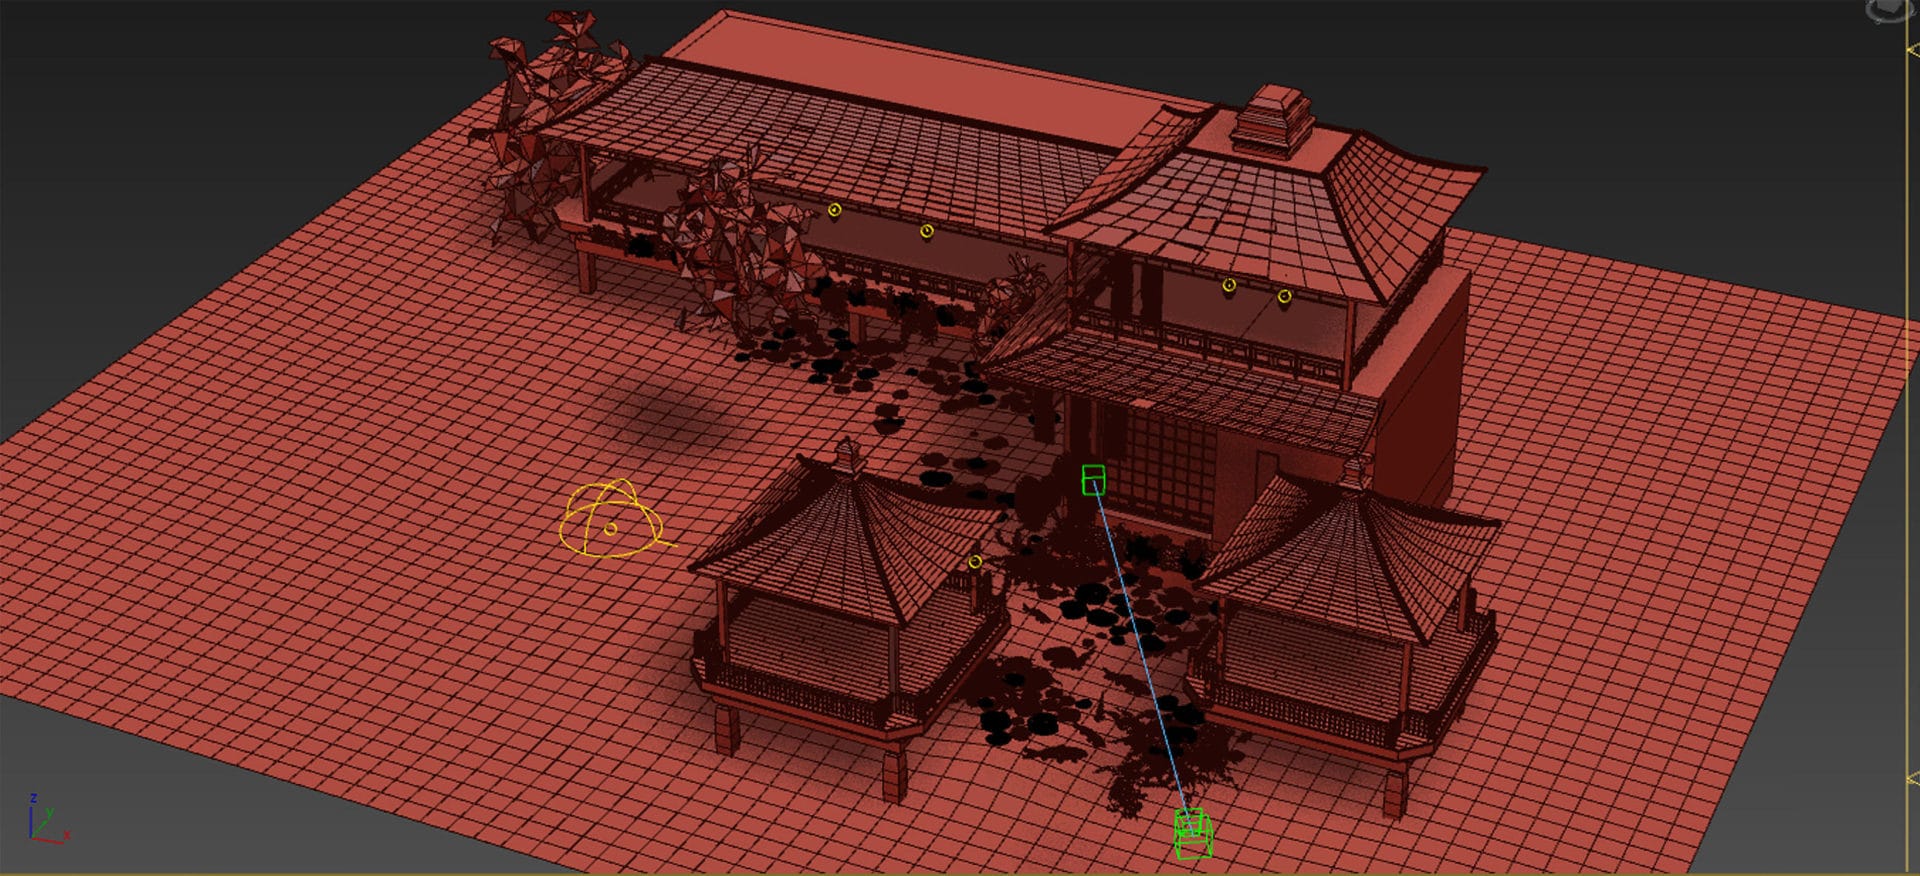
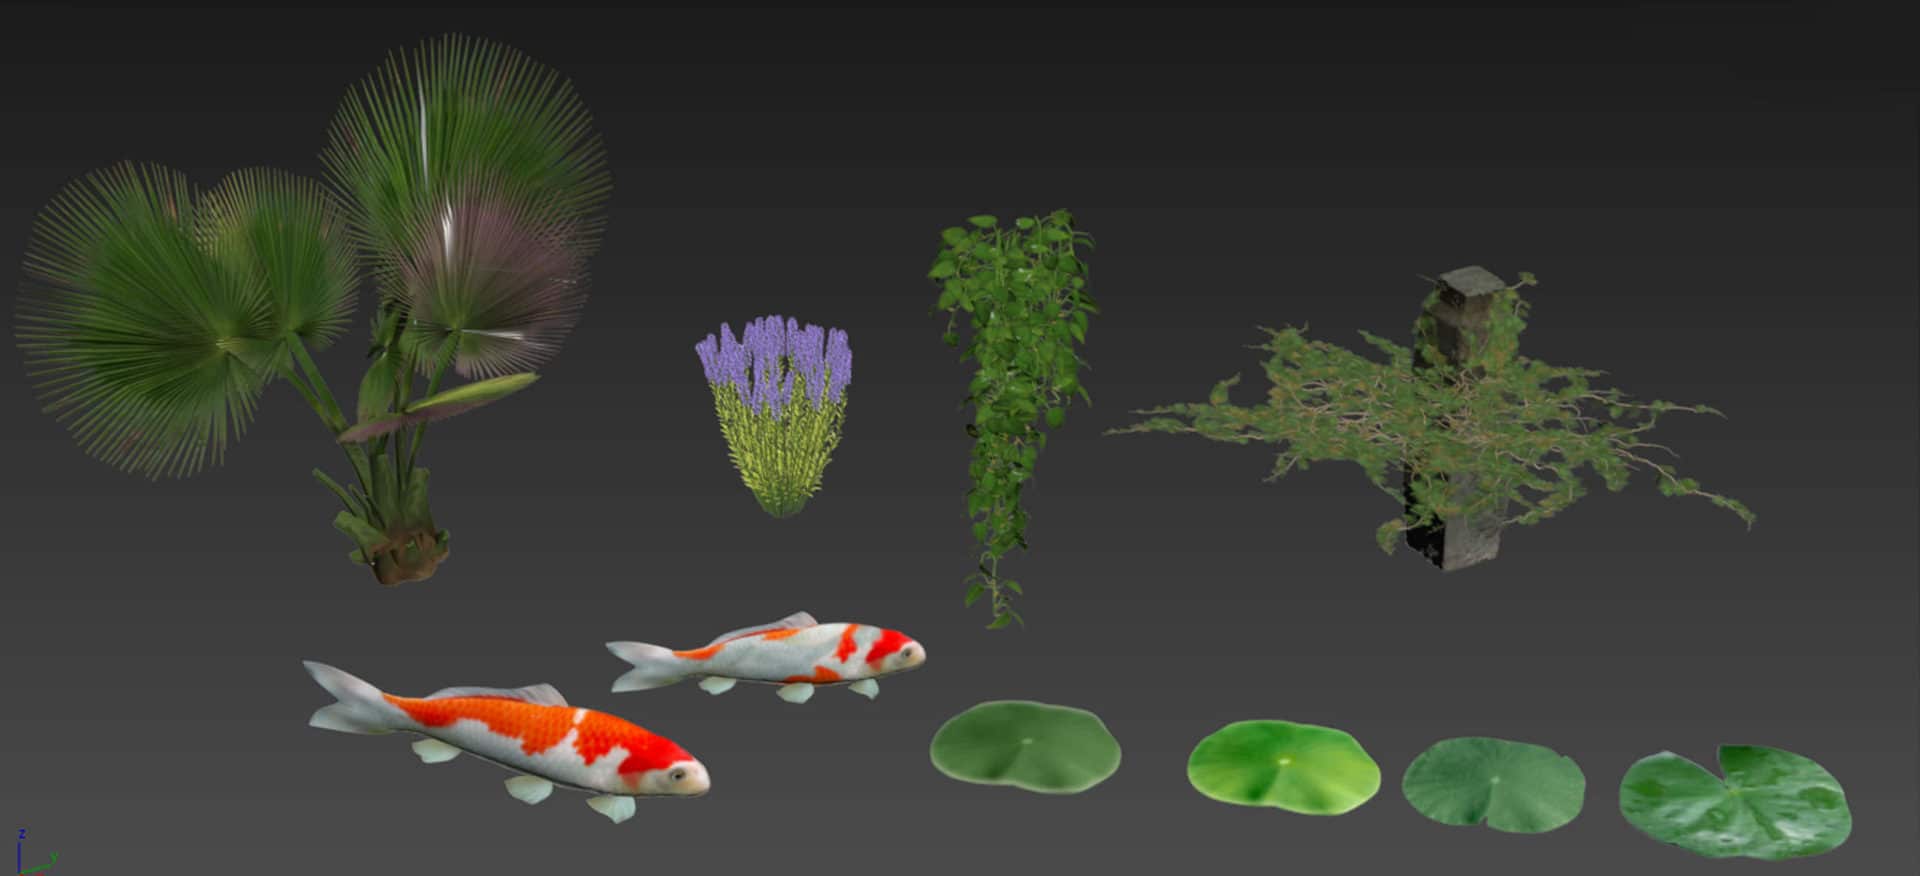
You can see some parts of the modeling process and the elements used in the scene.

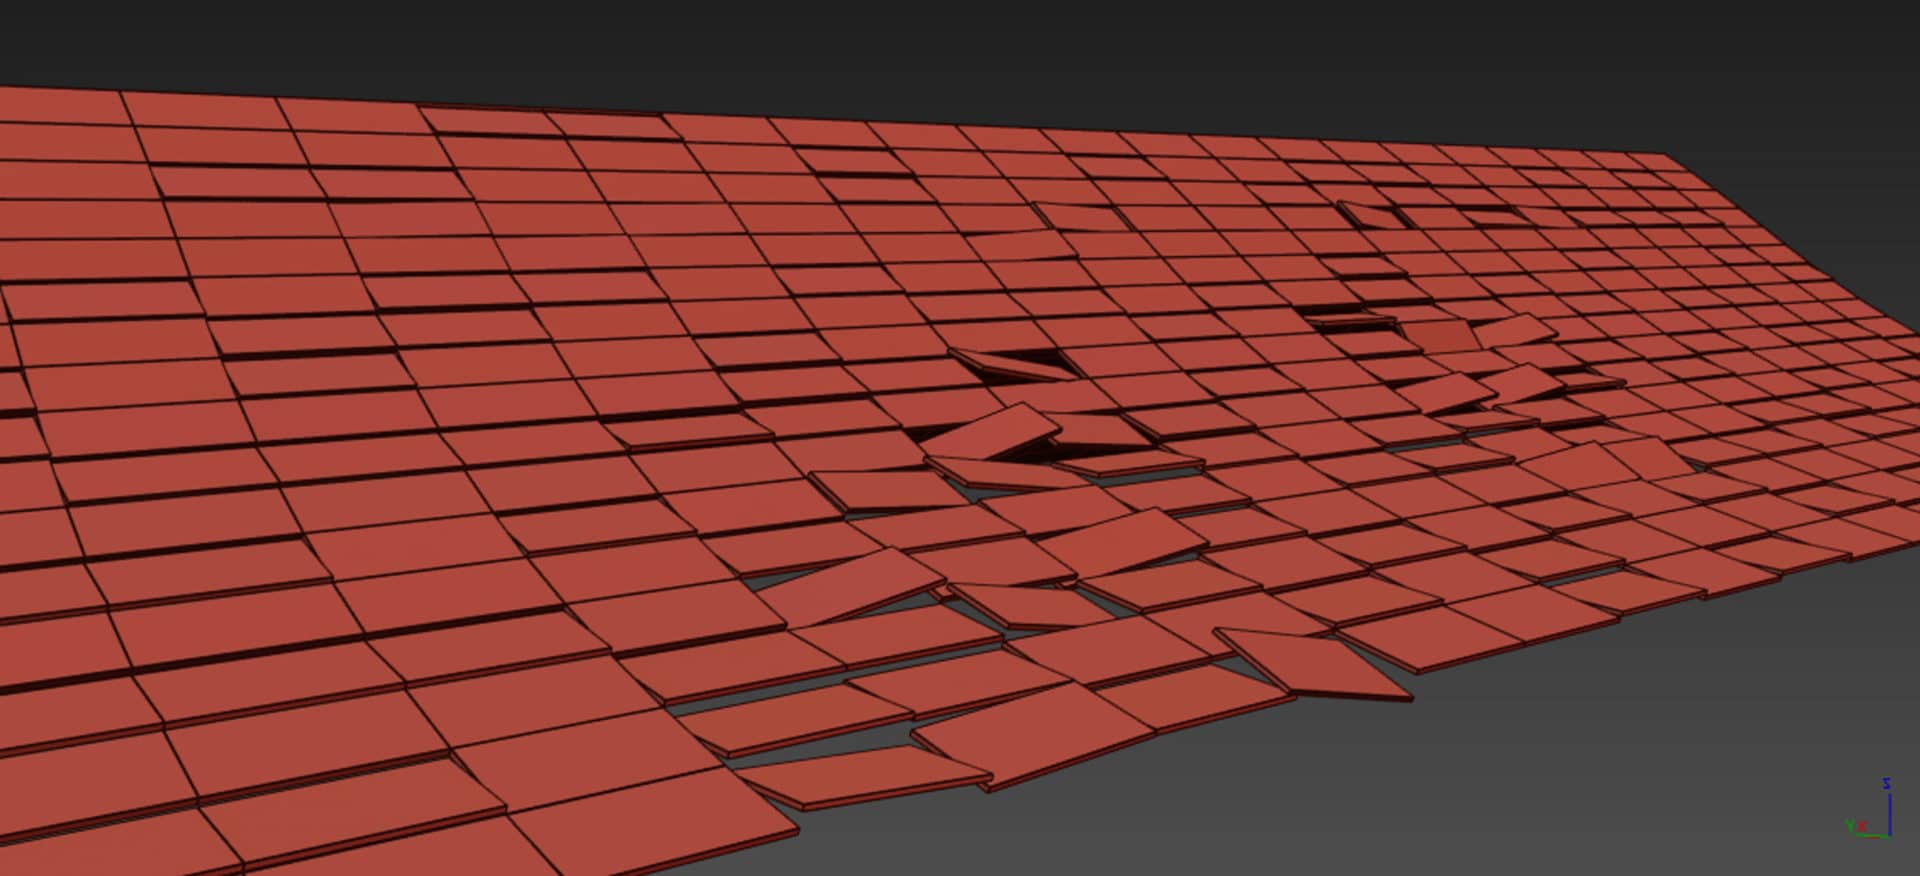
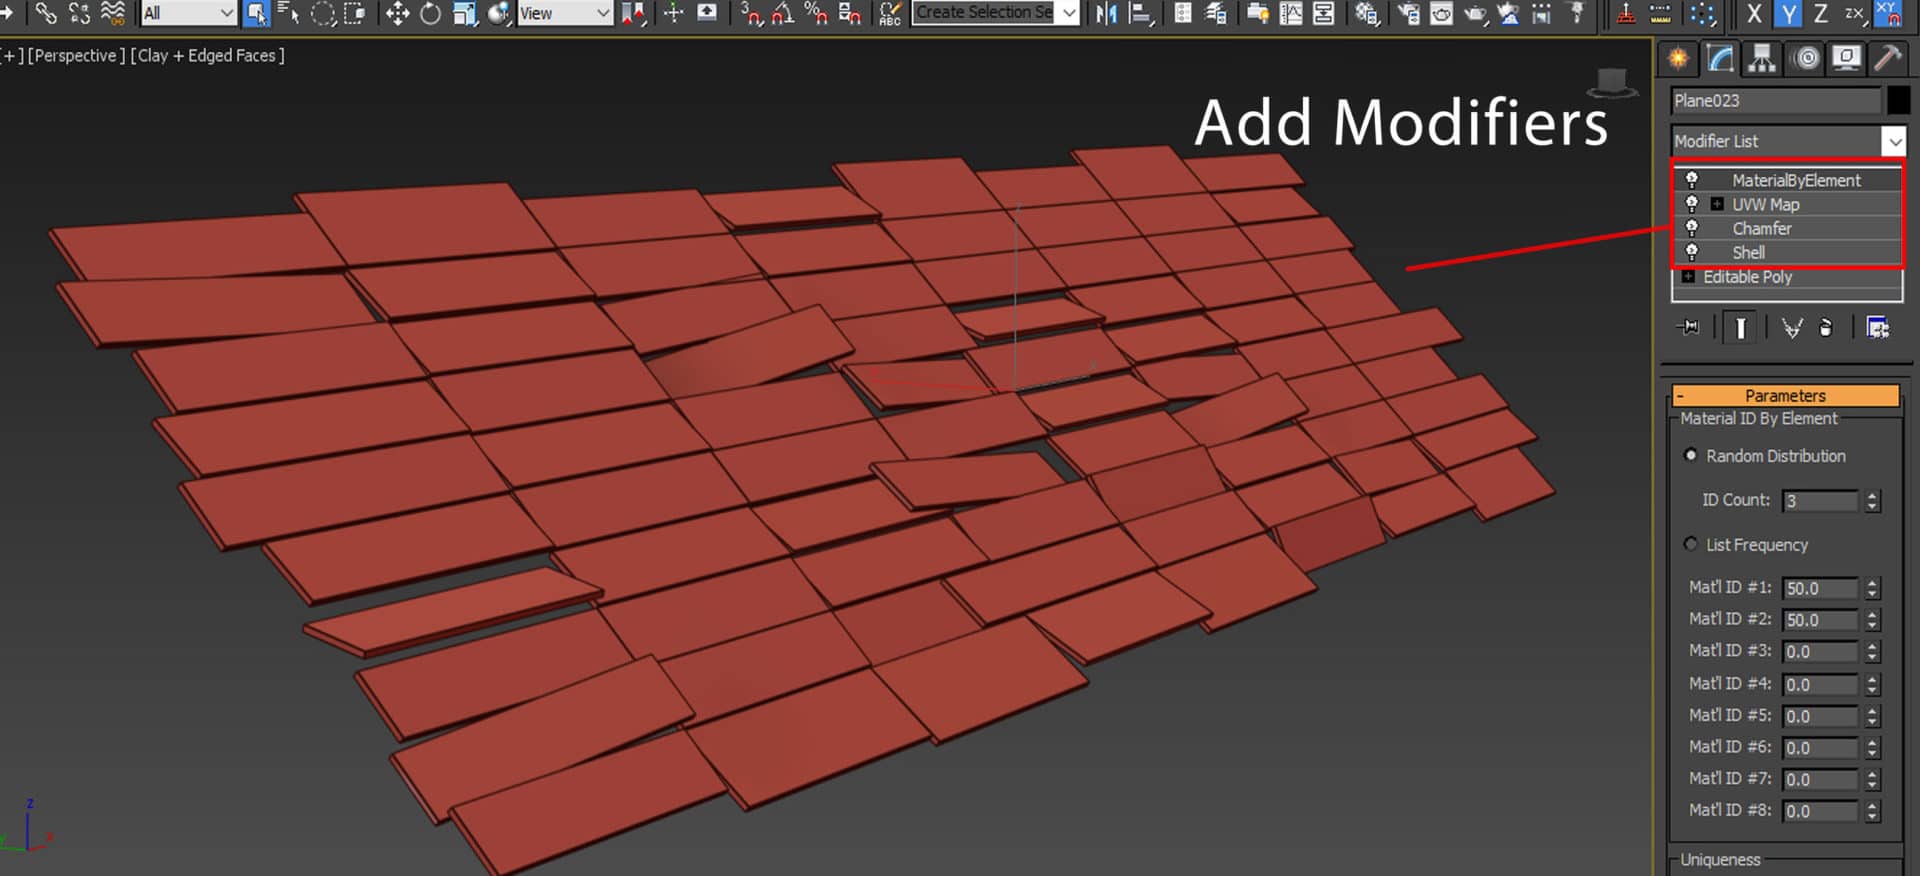
3d Modeling of roof tiles
After making the initial shape of the roof, we can divide it into identical quads.
Select all Vertexes and then use the Break option.
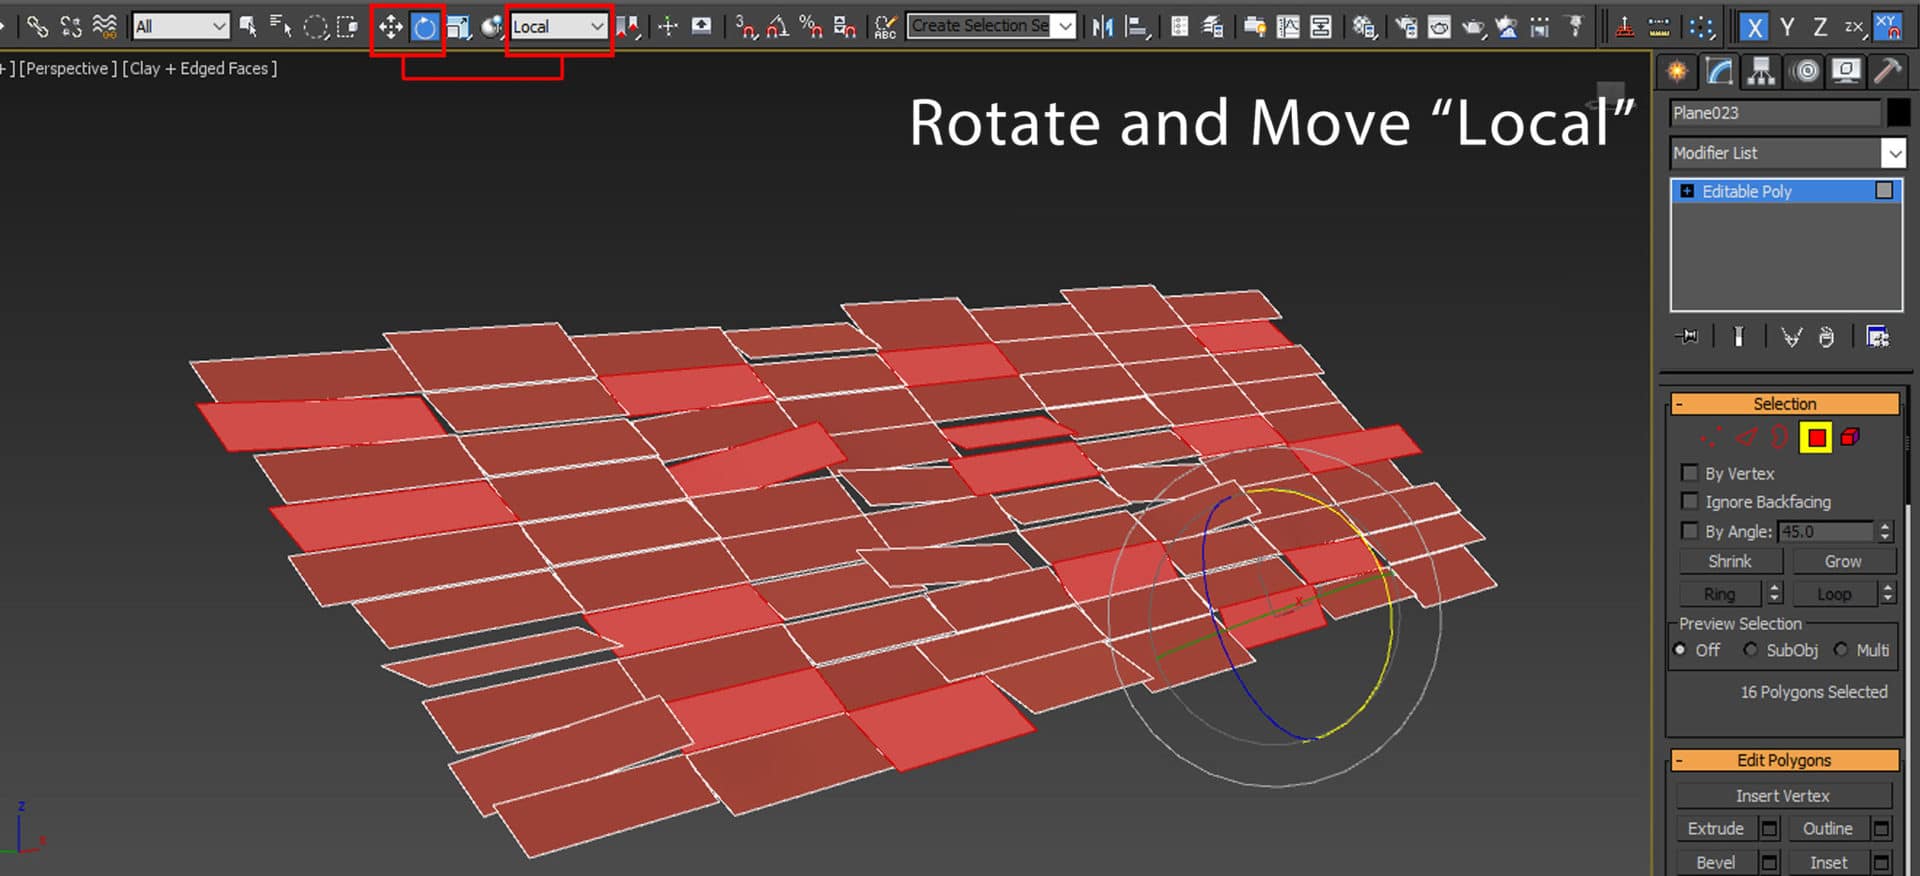
When the tiles have been separated, you can transform them randomly. Move, Rotate and
Finally, add Shell and Chamfer.

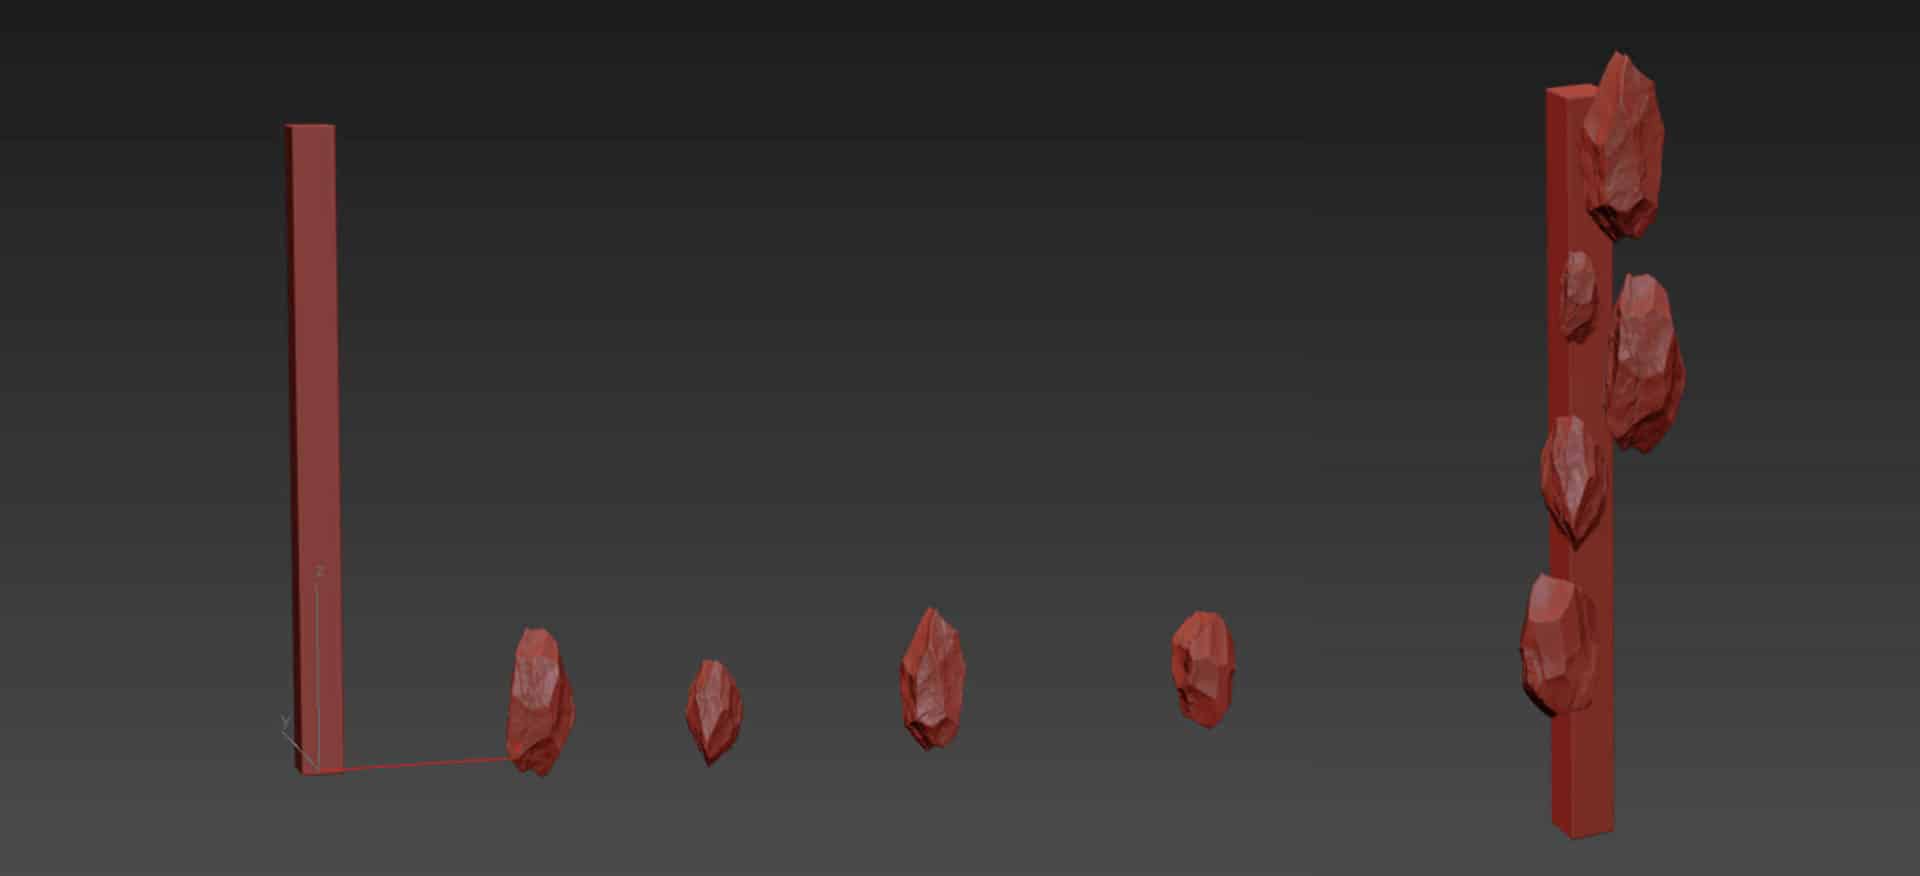
3d Modeling ‘damages’ on the objects
Build the initial volume
Build some kind of rocks with RockGenerator script,
Then, you can place the stones on different parts of the column.
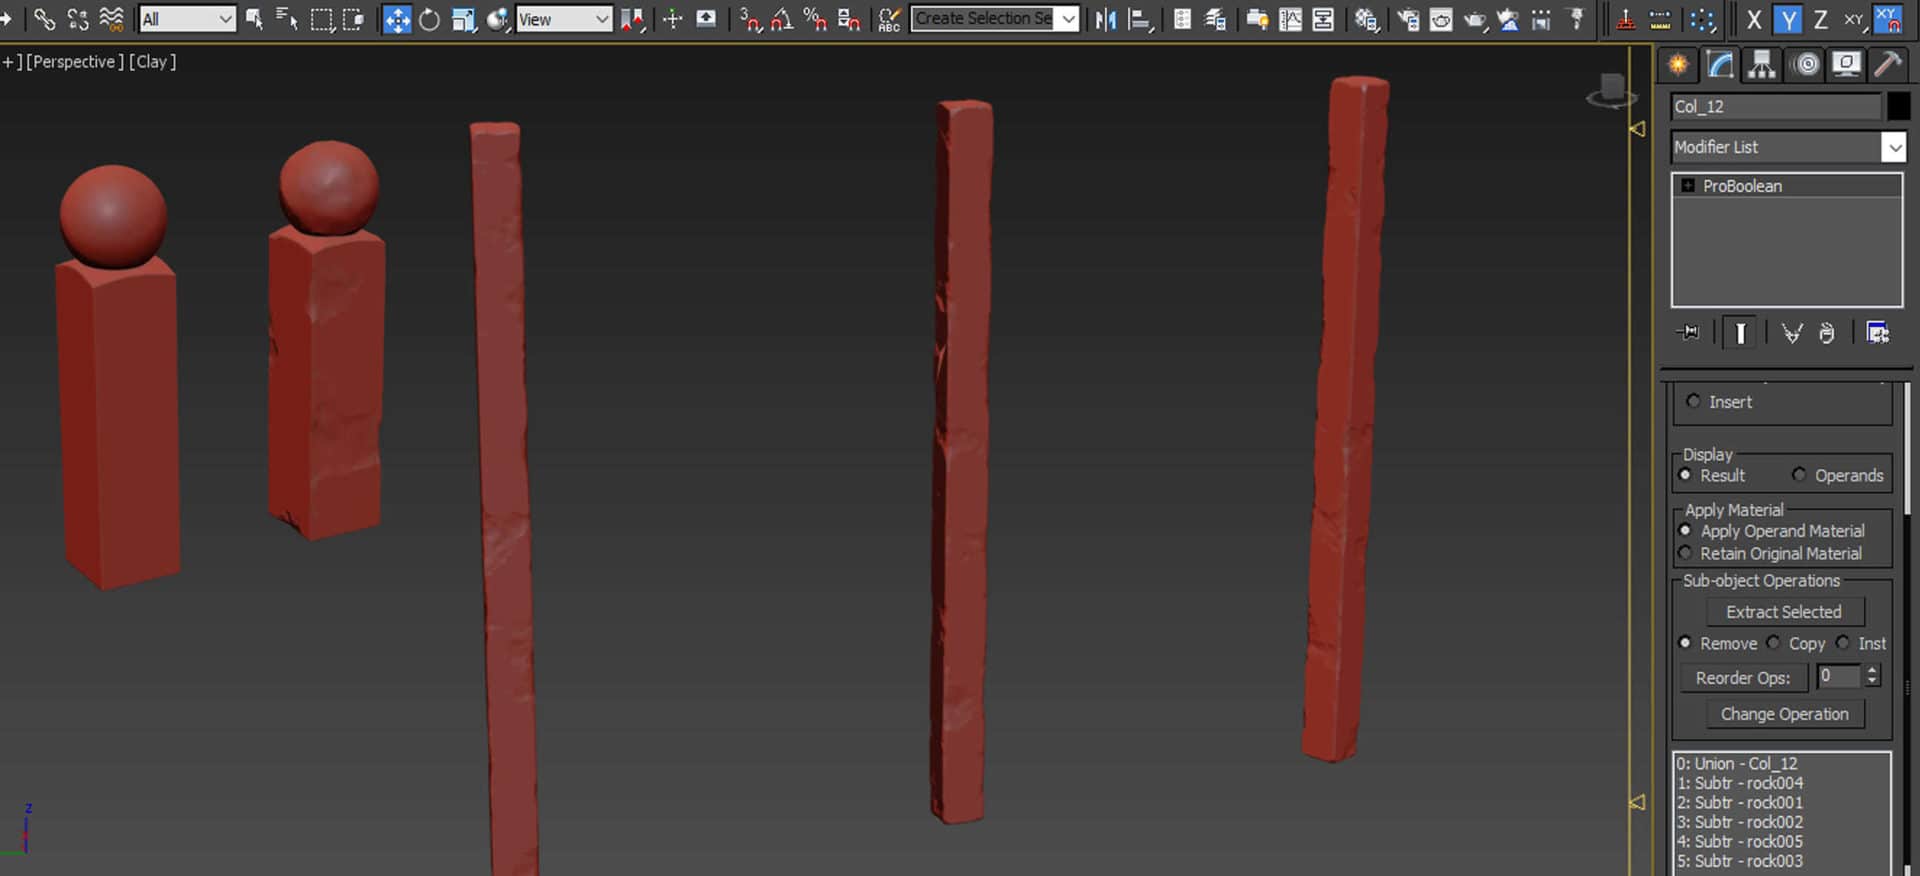
Finally, using Pro Boolean, we can create the details of destruction (Damage).
(we have the choice to attach all the stones from the beginning and then use Boolean, or Boolean them separately and individually)
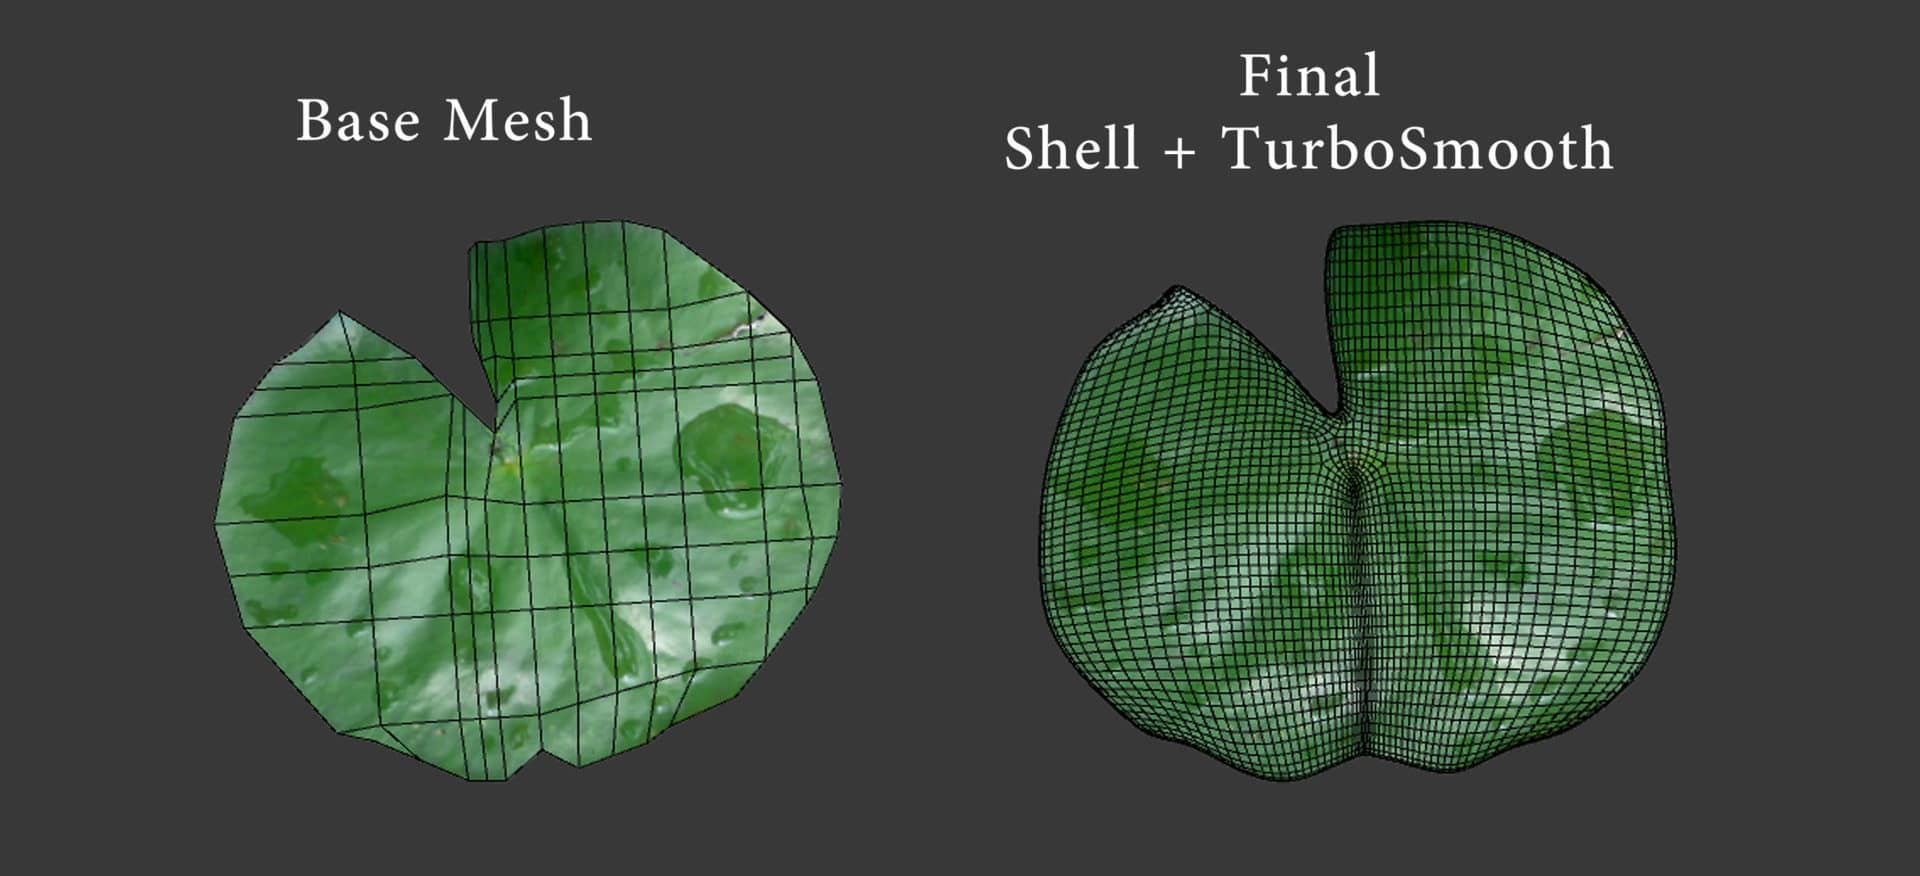
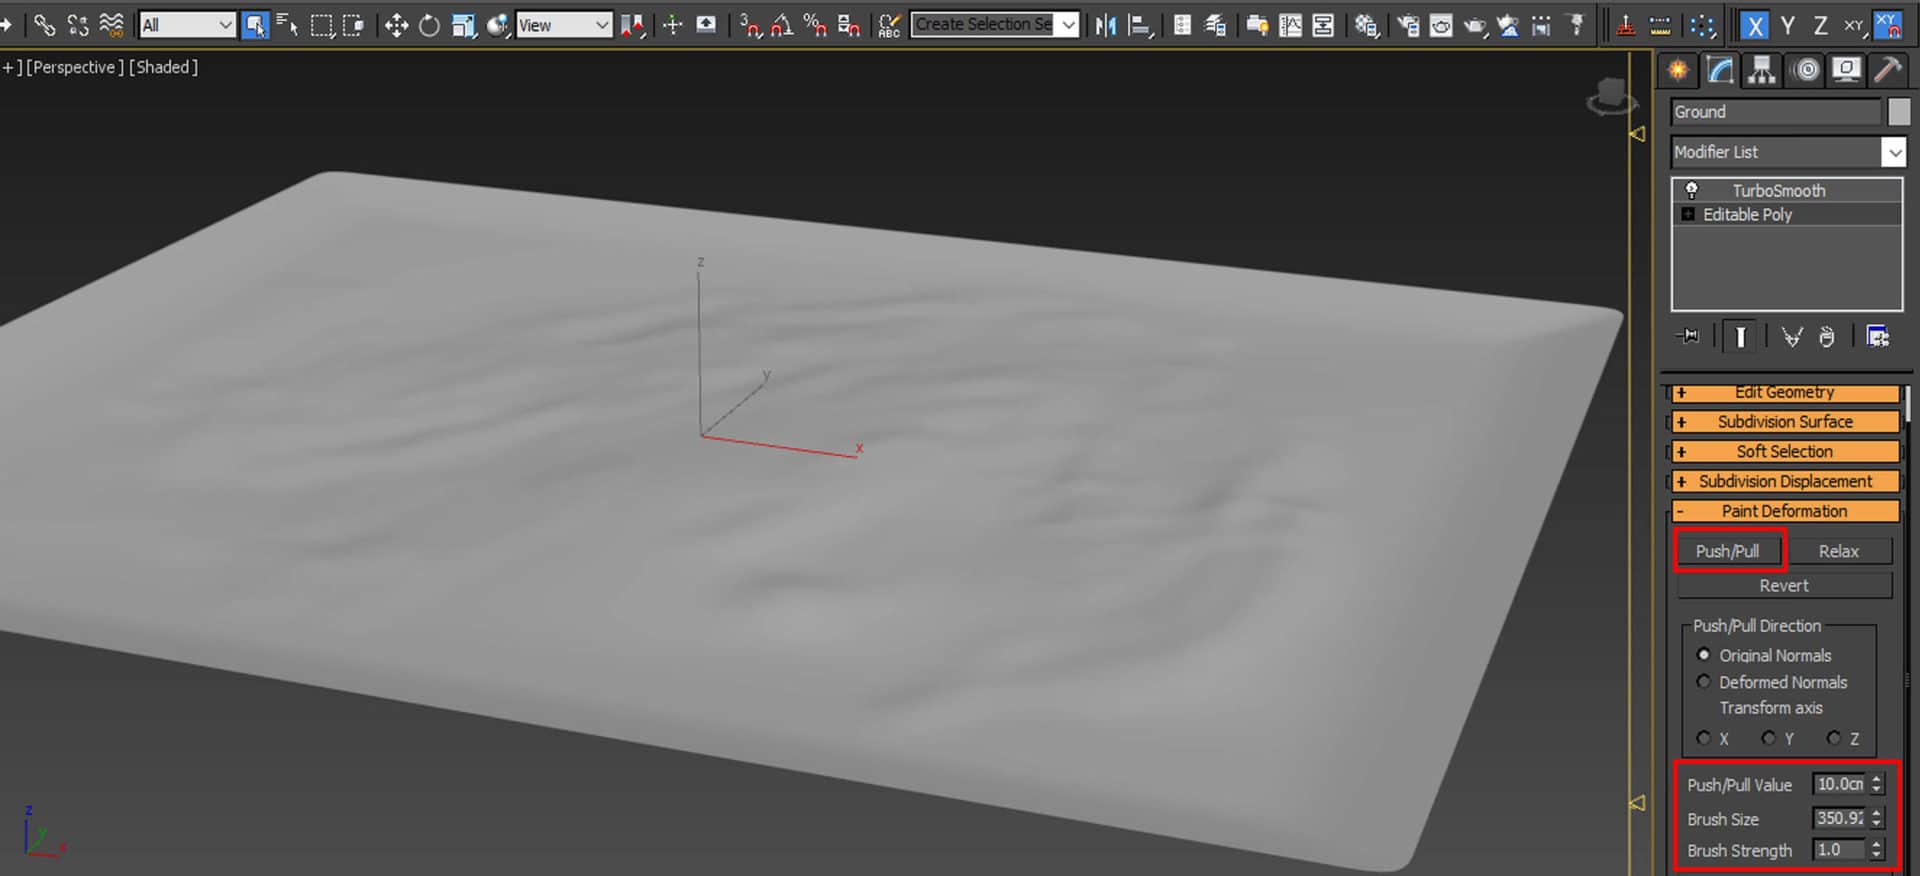
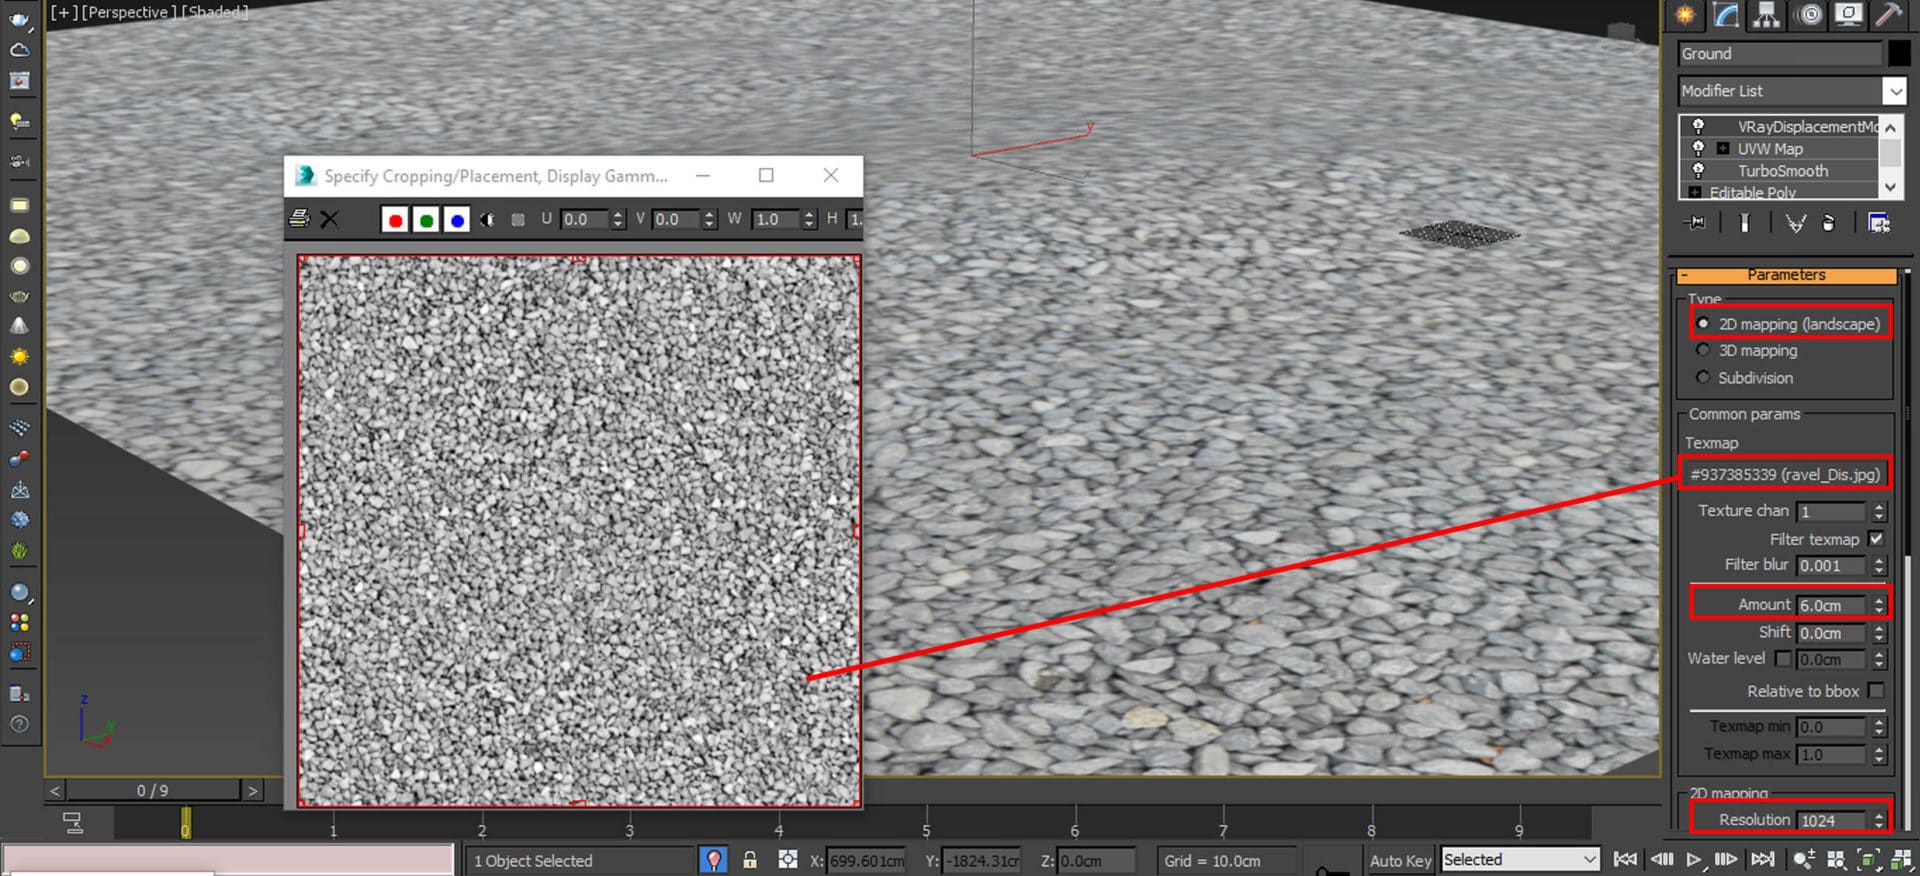
Underwater surface modeling
First, we make a high segmented plane,
Having made the plane, we give more details with Paint Deformation, and finally, we add TurboSmooth.
Then add VrayDisplaceMod for extra detail.
The Lighting
The most beautiful part of any project is the lighting part because this is where you can decide what the mood, theme, and style of your project can be.
So be careful in choosing HDRI and lighting methods.
The Hdri file that I used clearly brings such a nostalgic theme and mood to the project. I’m delighted with the result 🙂
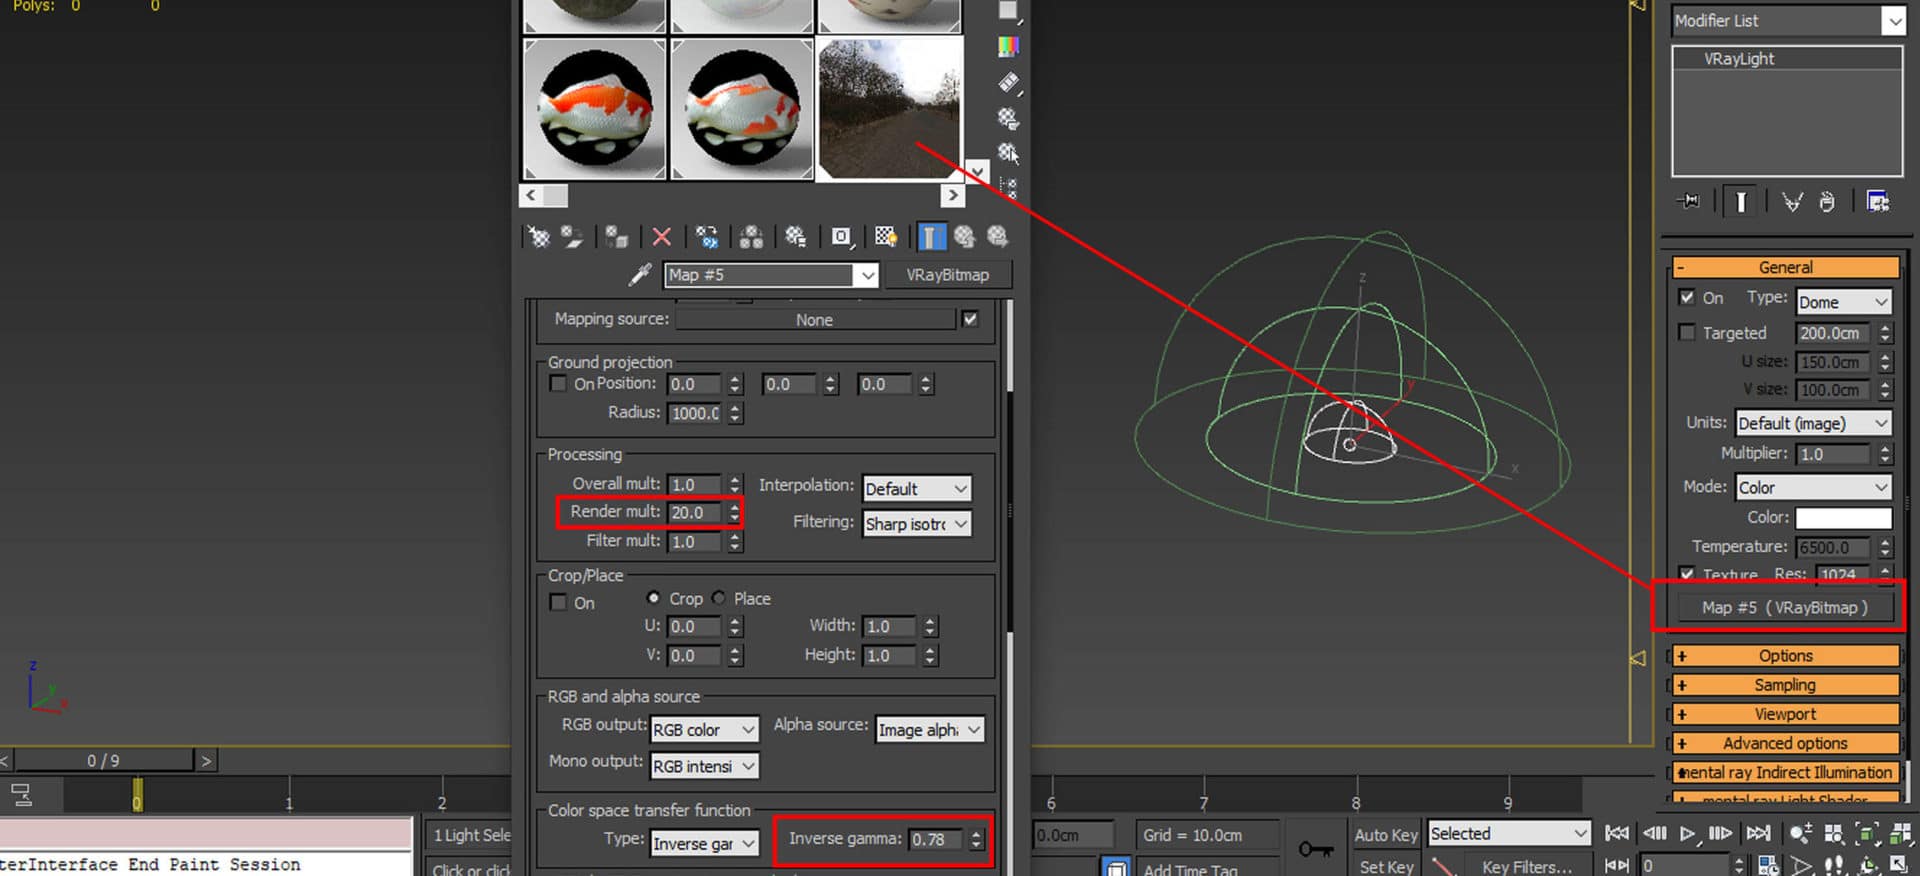
The method which I’ve used for this project is the combination of Dome + HDRI. This is the simplest method for lighting simulation.
Note: You can decrease Inverse Gamma for more Contrast.

Materials
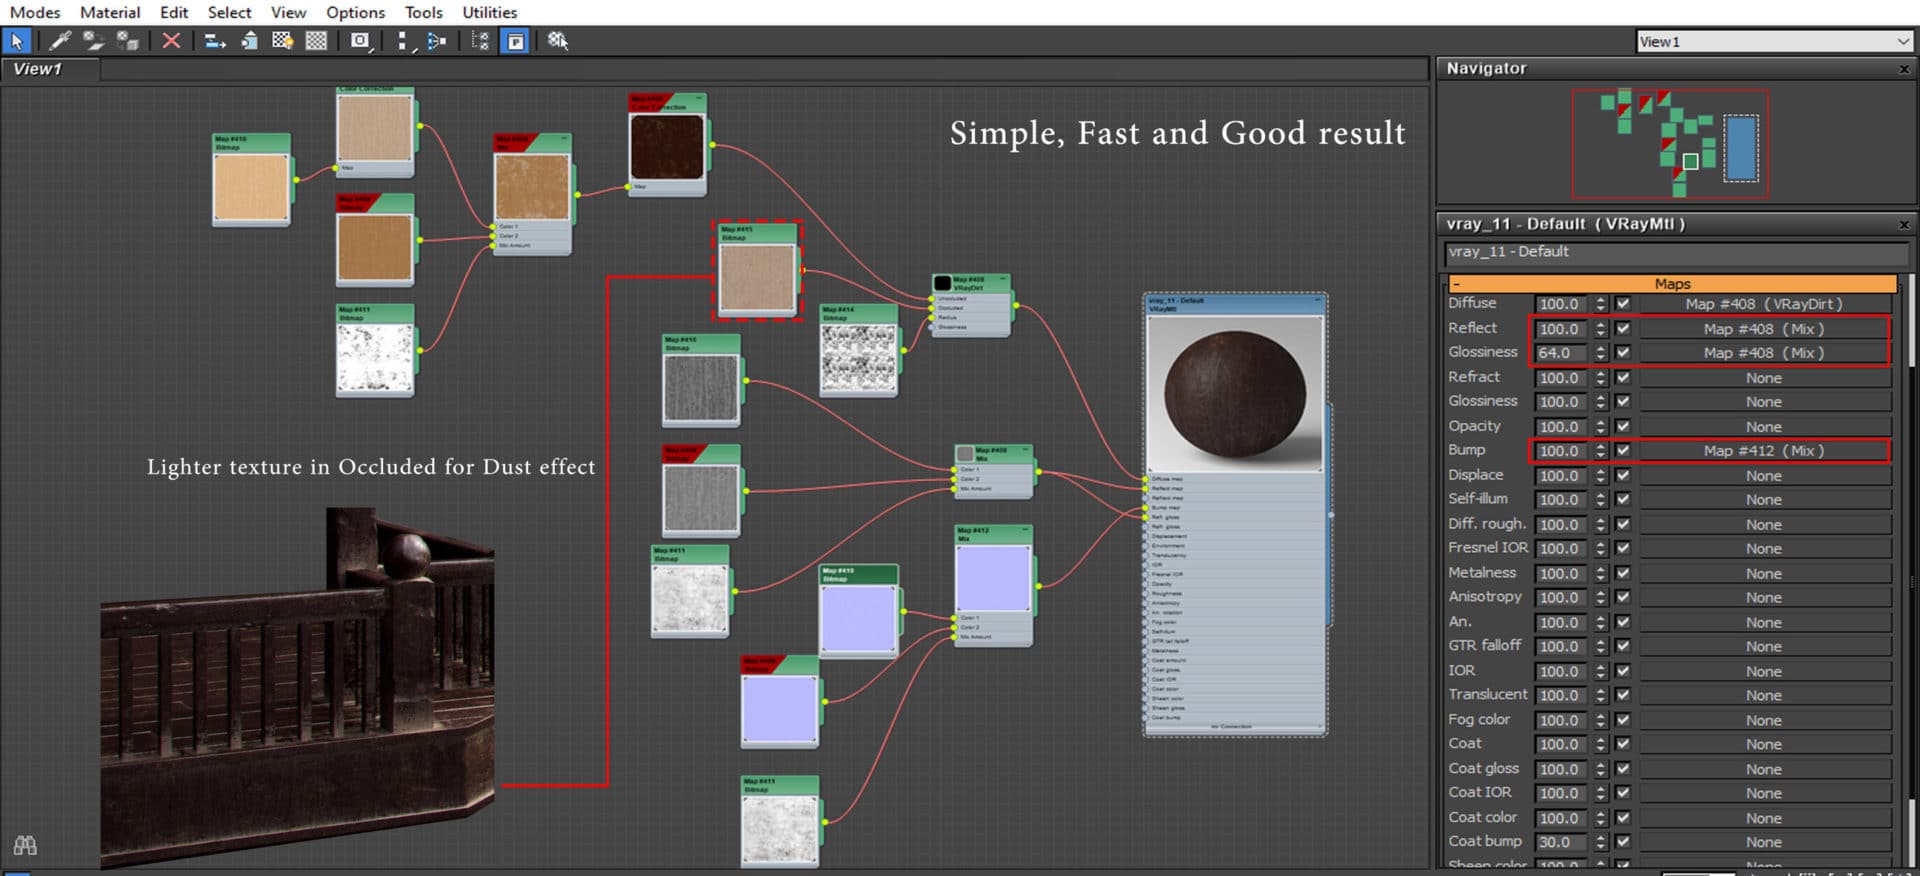
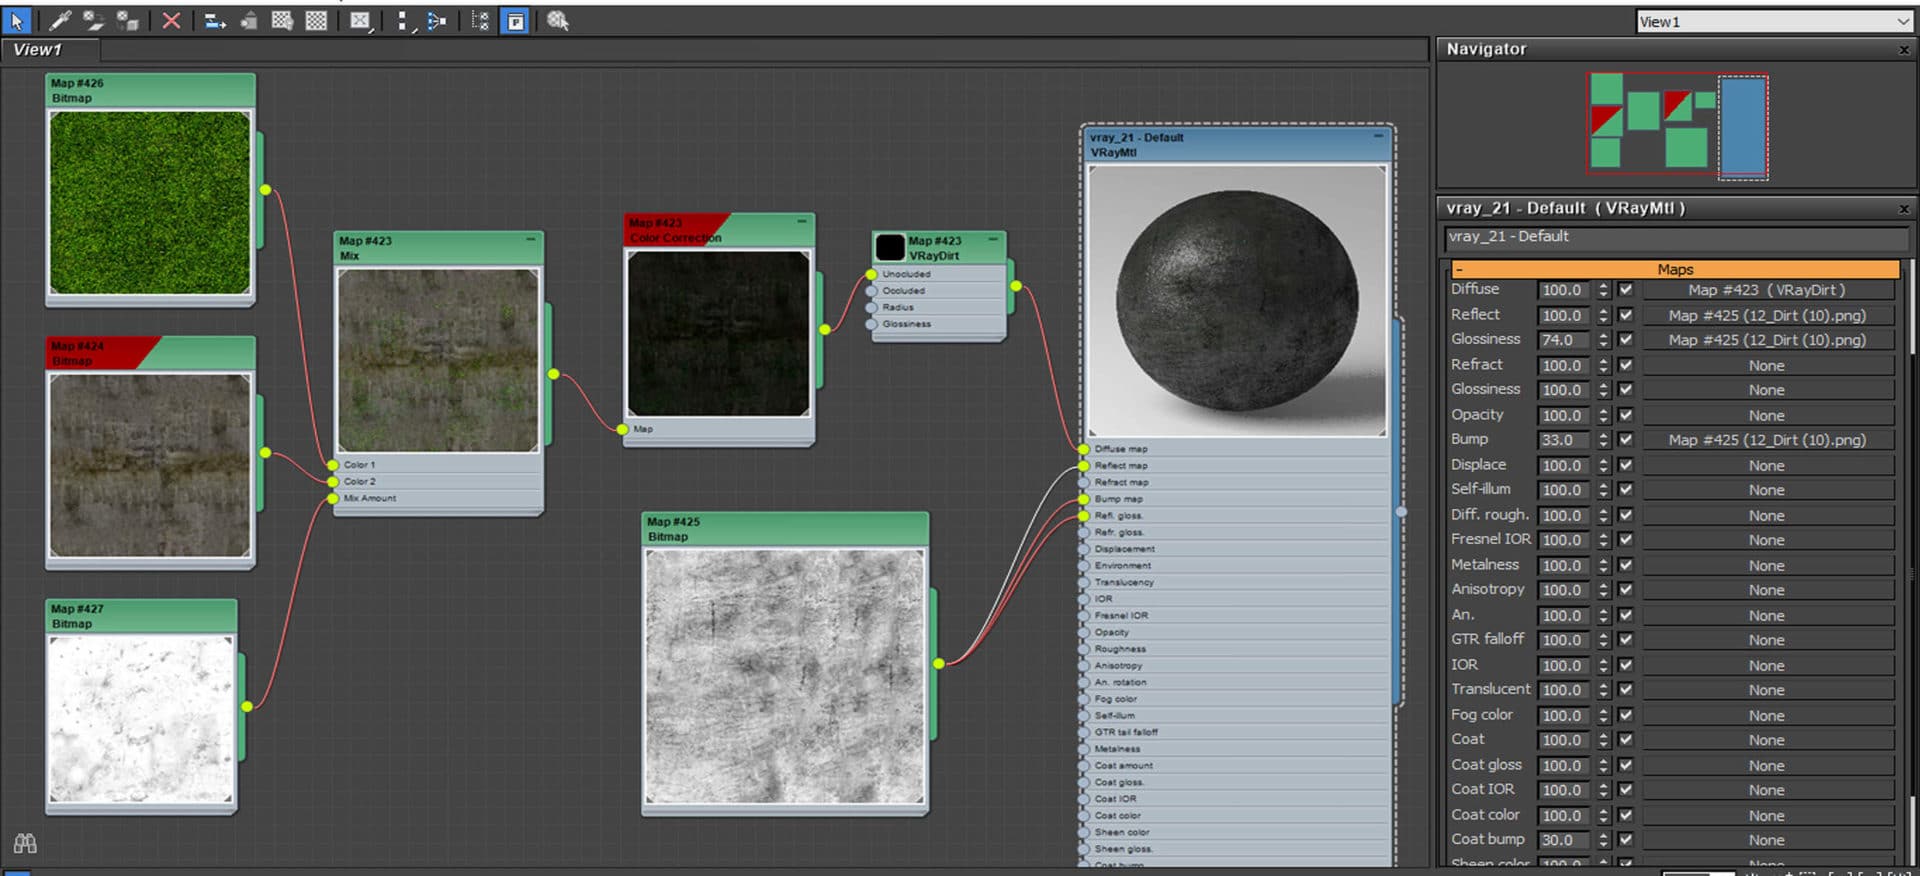
All materials are made using a similar method (with a combination of V-Ray Dirt, ColorCorrection, and Mix).
You can see the process involved in making the materials in the picture.
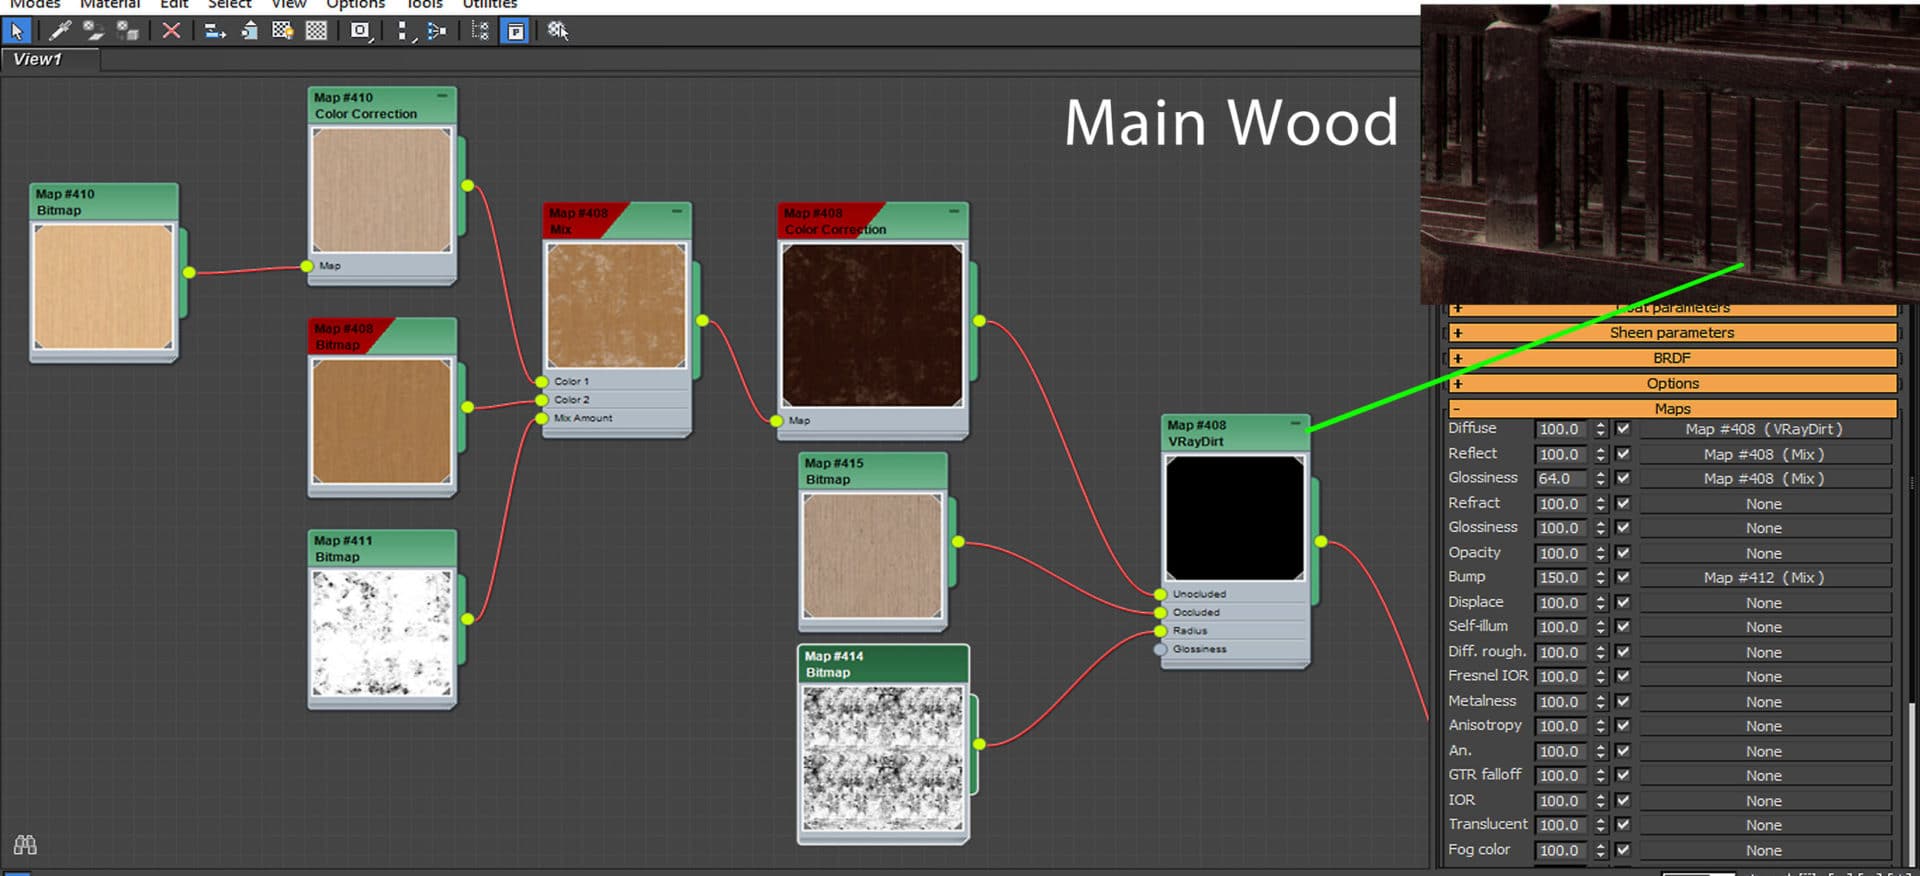
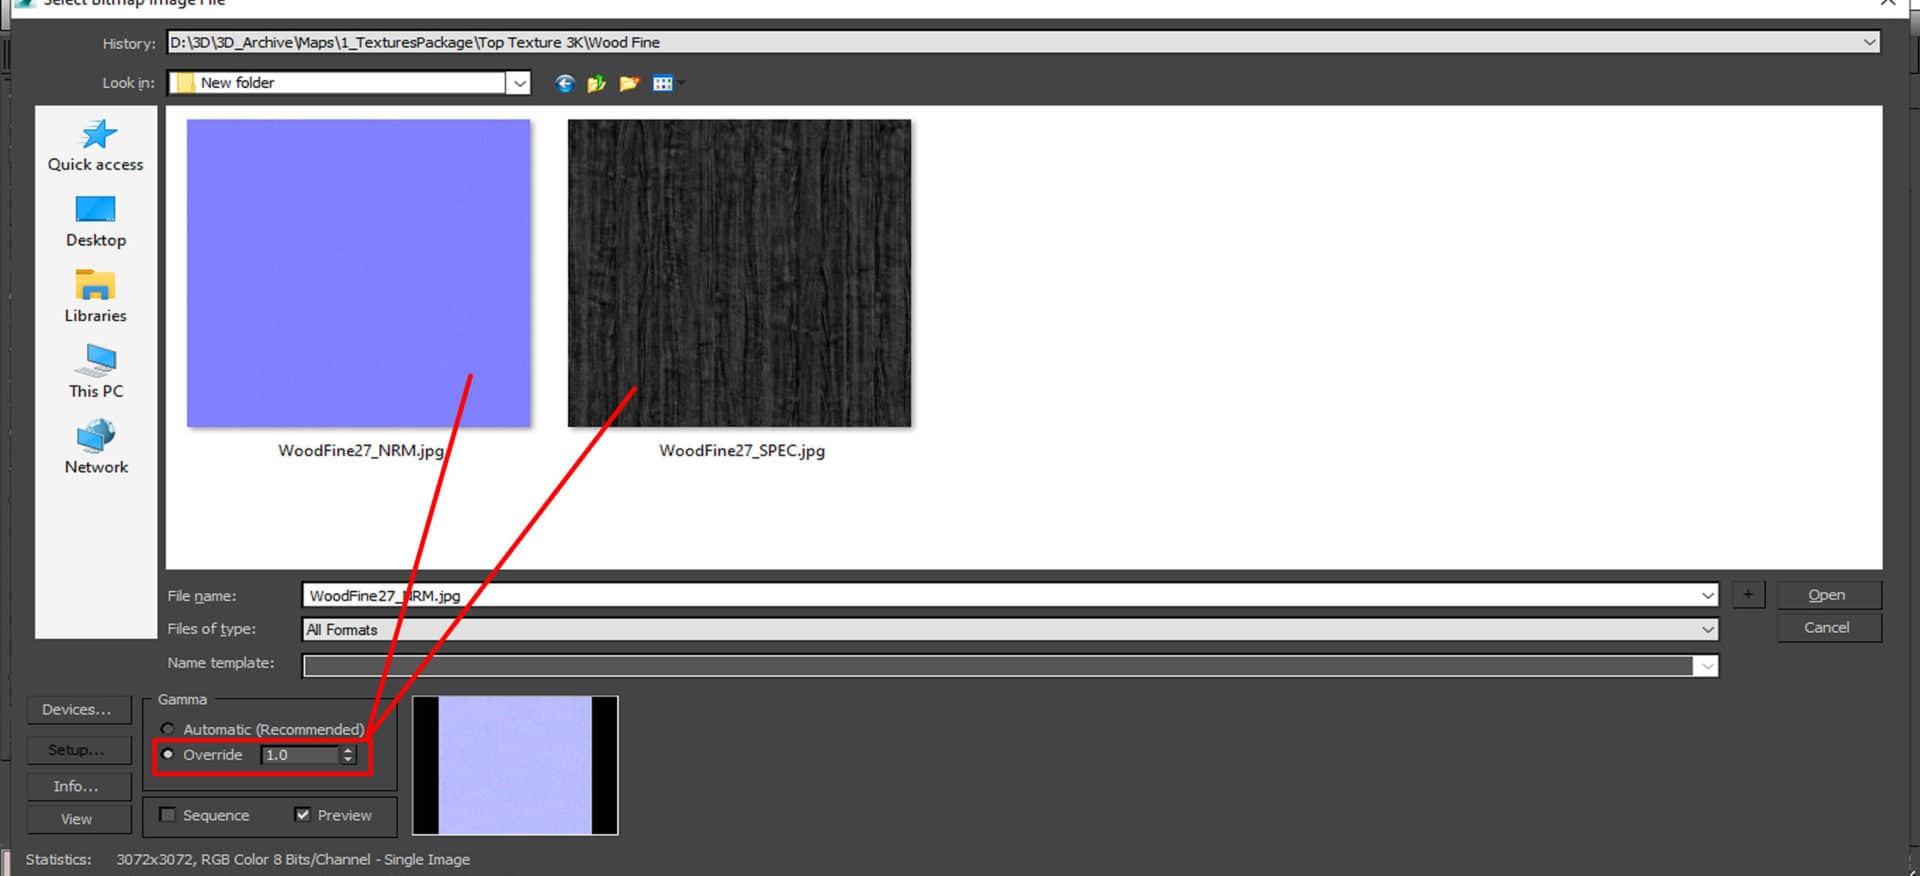
The Main Wood Material
As shown in the image, It is made of the combination of Dirt, Color Correct, and Mix.
For having Reflect, you can make this textured black and white using Color Correct or use some pre-prepared textures.
For having Bump, you can use Normal V-Ray with a pre-prepared map.
Don’t forget if you wanna have a dust effect on your object, In the VrayDirt parameters, add a lighter texture or Color to the Occluded with a mask into the radius.
Important note:
For Normal, Glossy, Roughness, and Bump, be sure to use Override 1.0. Because these are data, not color channels.
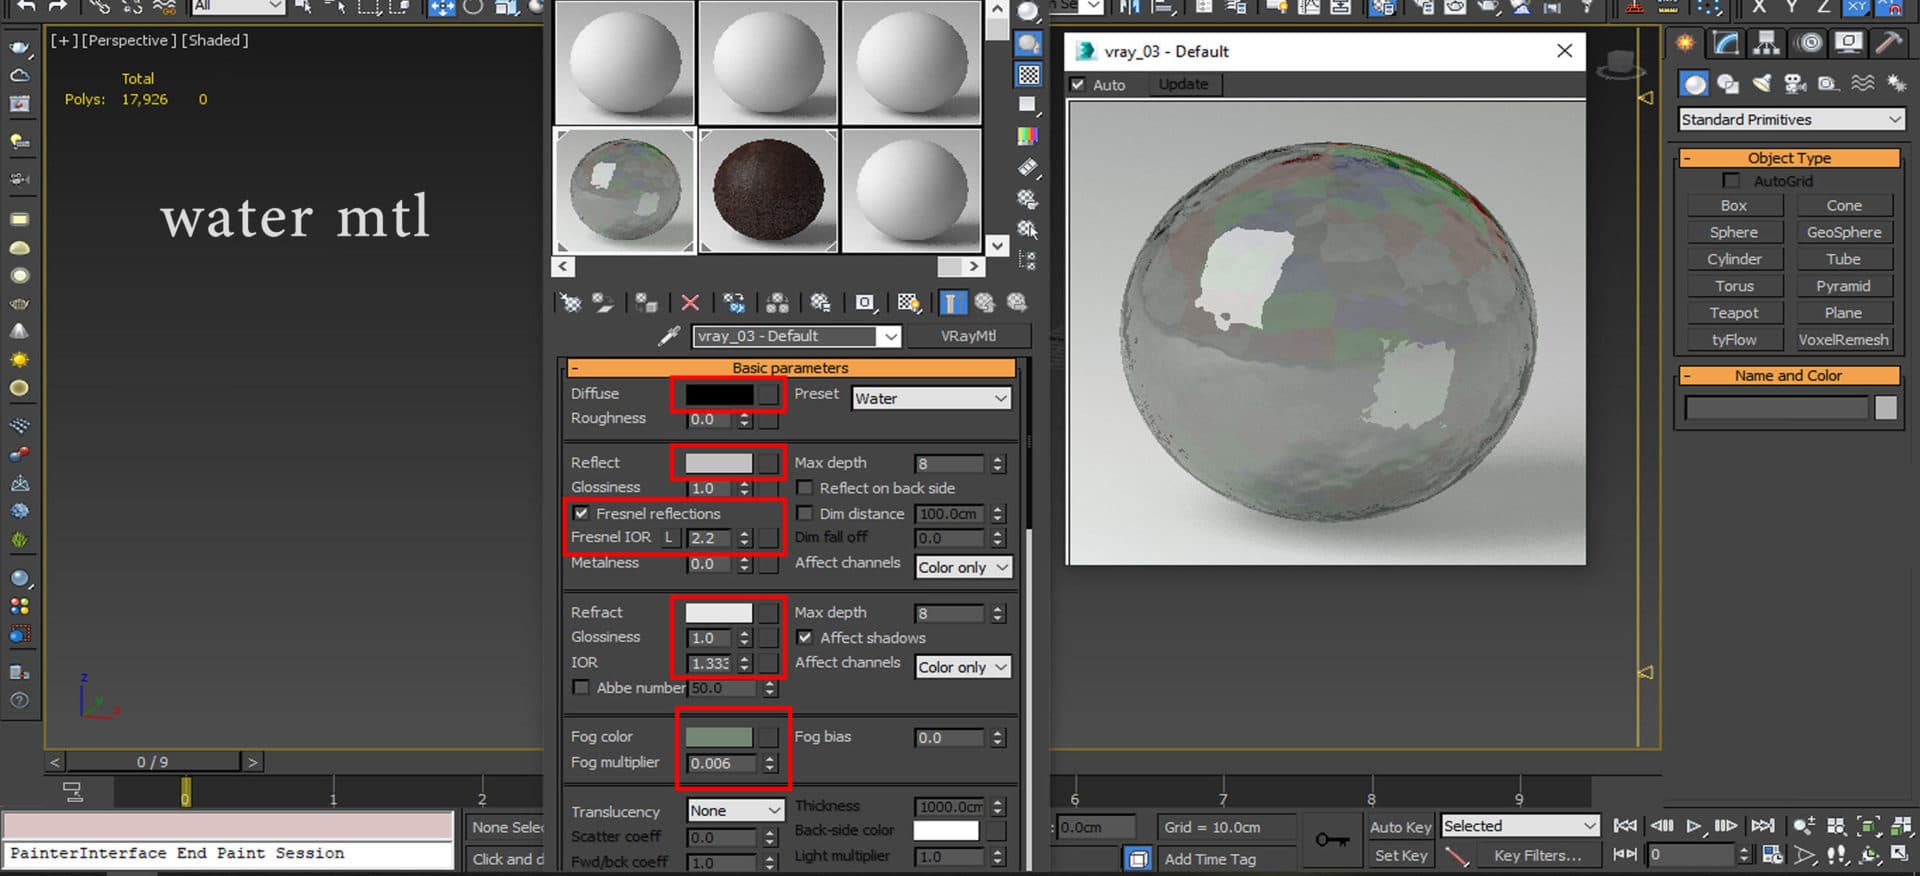
The Water Material
Noise is used to create a bump.
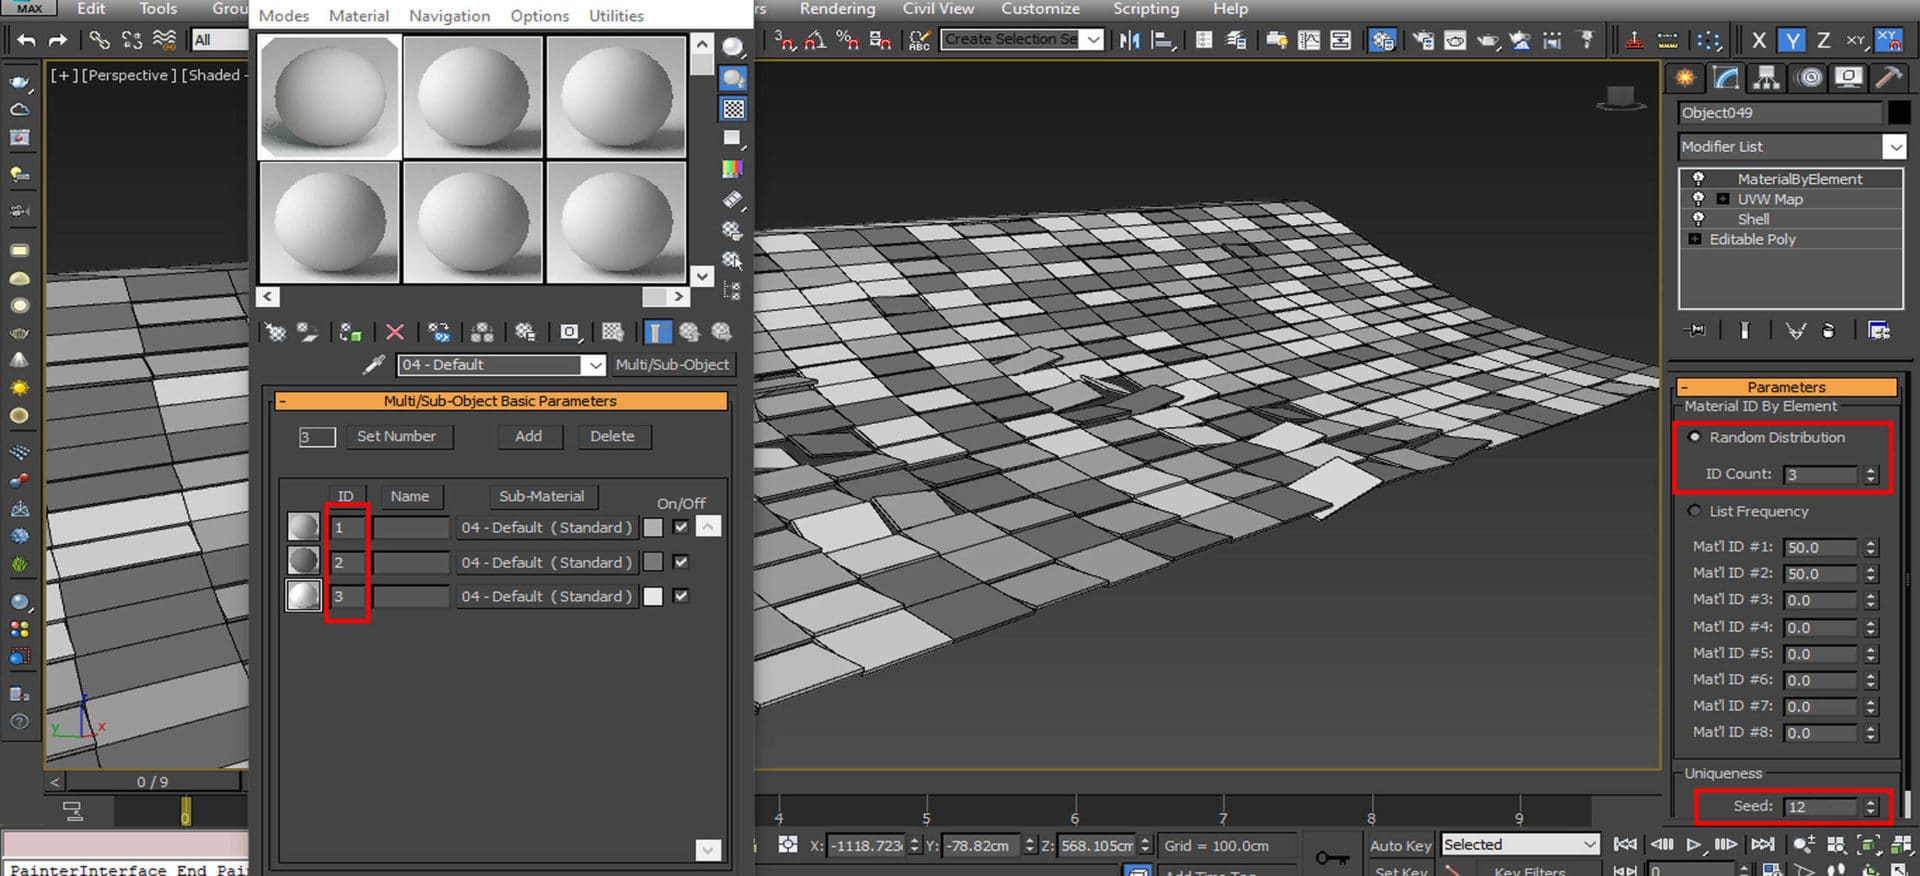
The Roof Material
You can use any number of materials you want in ‘MultiSub’ and then assign it to the roof.
To prevent duplication of roof materials, do not forget to use a different number for Seed for each roof in ‘Material By Element.’
I’ve made a base material for the roof and then created a dark and light color variation for the other roof ID’s with ‘Color Correction.’
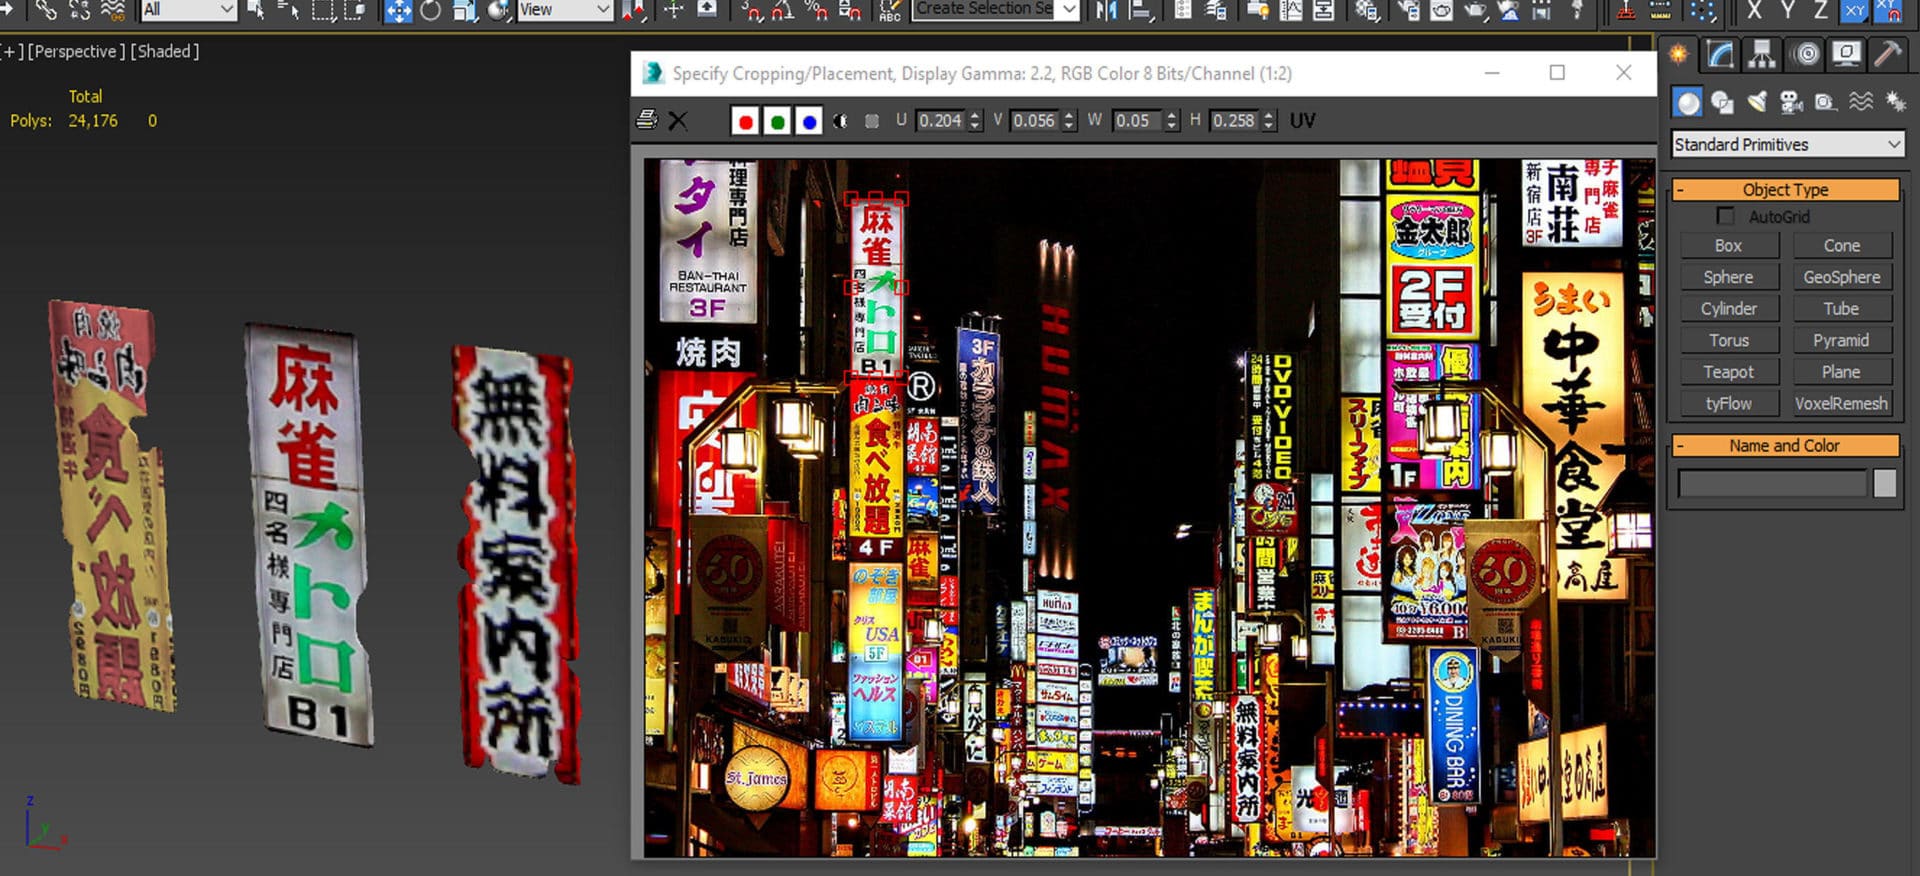
Further details:
The text shown on the banner is cropped from this photo. I really do not know the meaning of it. Actually, I’ve done it just to make it more natural and real 🙂
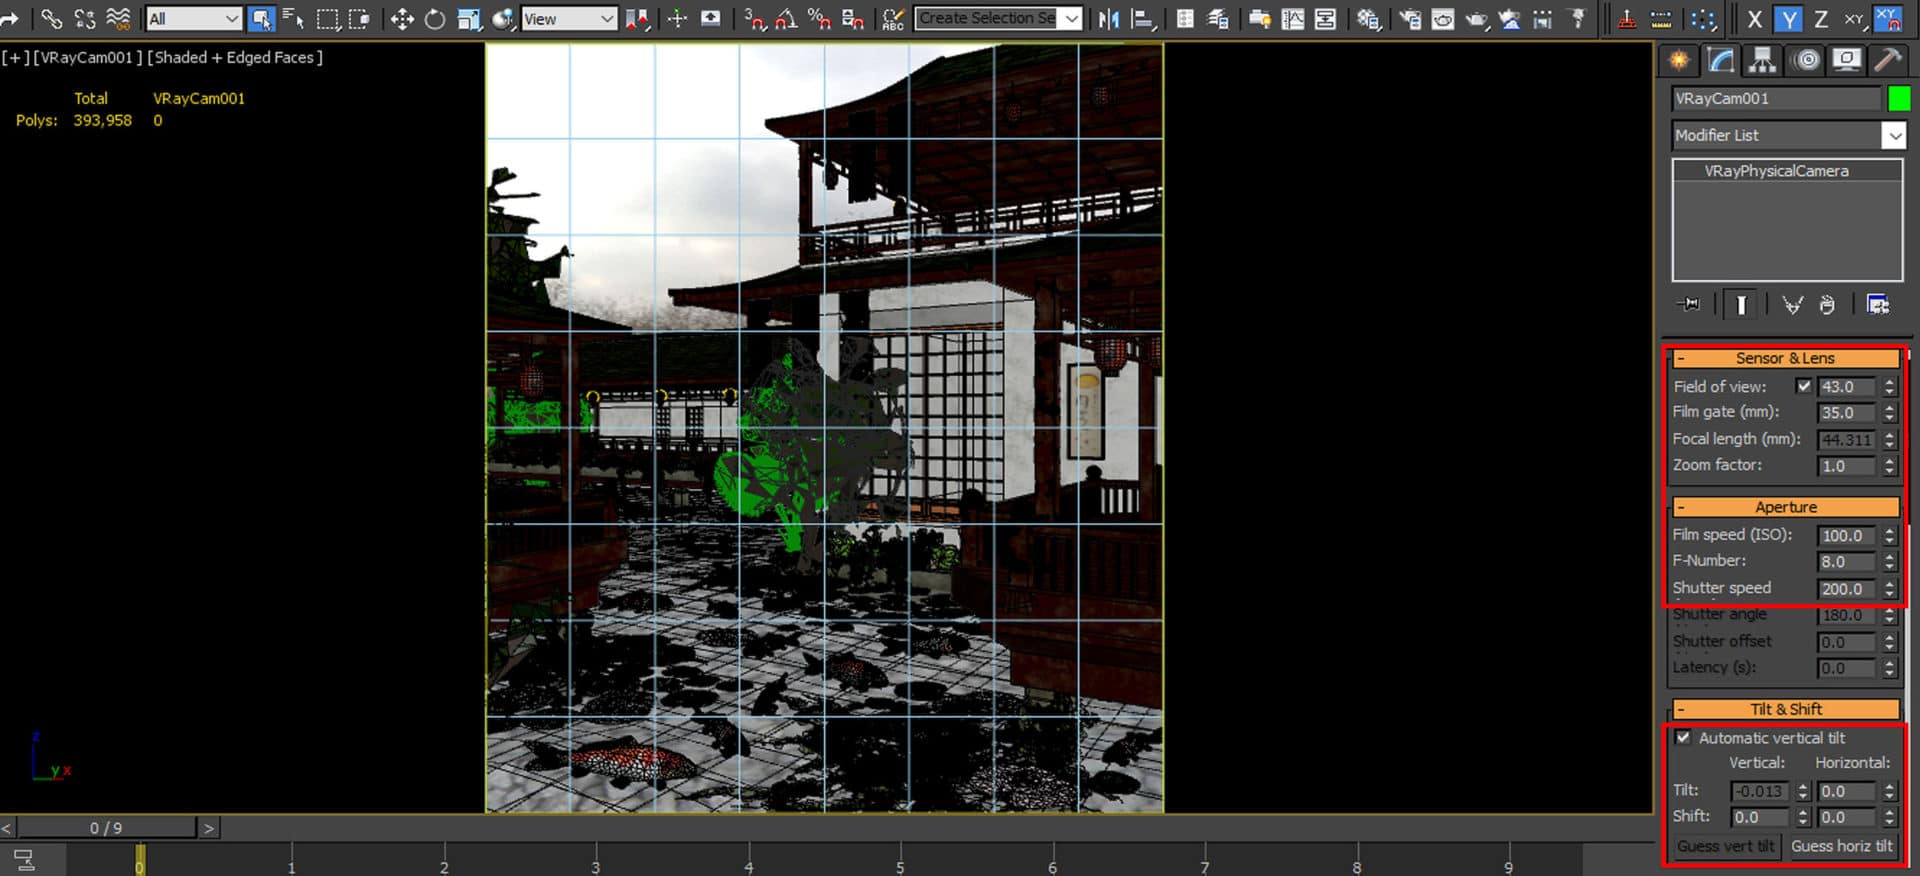
Cameras
Well, It’s all about camera settings, choosing the right lens, and the correct camera angle.
Choosing the correct lens and right angle for the camera could be firm proof of your understanding of subjects. So be careful in selecting the angle.
Render Setup
Never be strict about Render Setup and rendering settings as it does not really make any difference in completing the project more natural or realistic. It’s just an option to improve image quality. I always use the most straightforward setting possible.
Another reason I use optimized and straightforward settings is because of the relatively weak laptop I work with.
CPU 4710 MQ ; 8GB Ram ; VGA 820m
Except for the change in the rendering dimensions, the rest of the options are set most simply without any complexity (as it can be seen).
The image resolution is set on 2500 * 3000 (about 2 hours rendering time)
Post-production
For post-production, I use lovely Photoshop!
The Raw Render
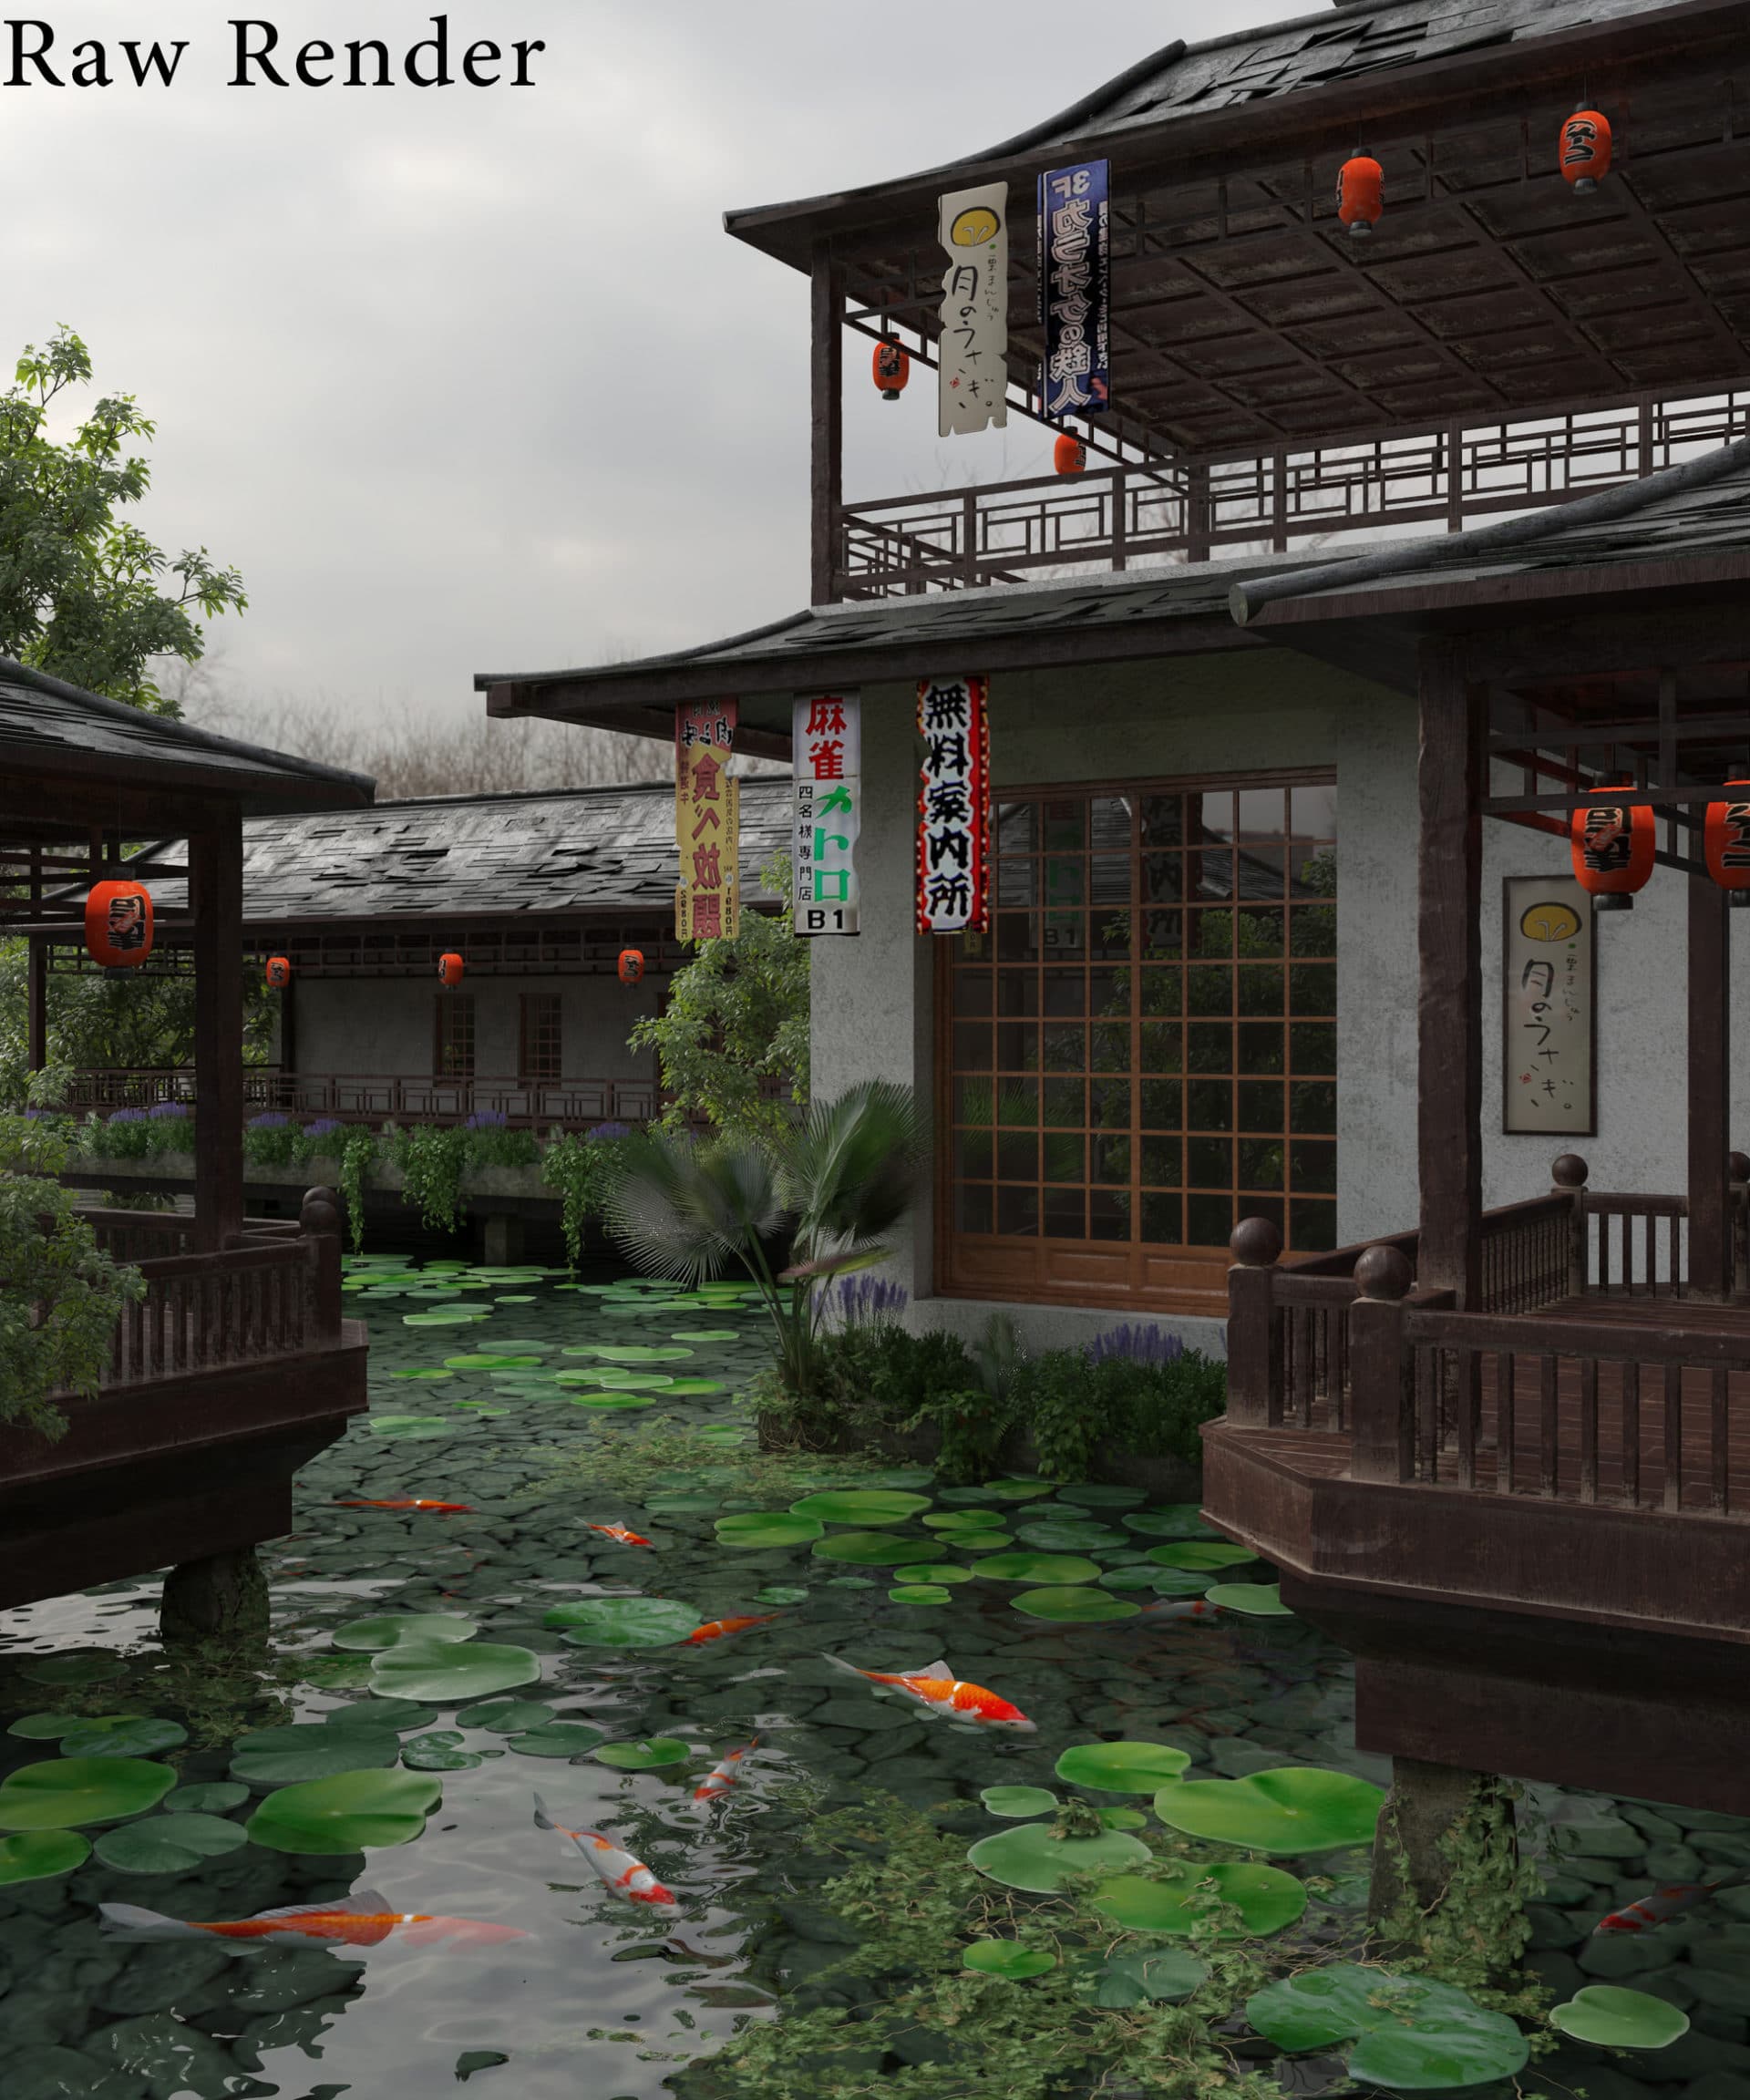
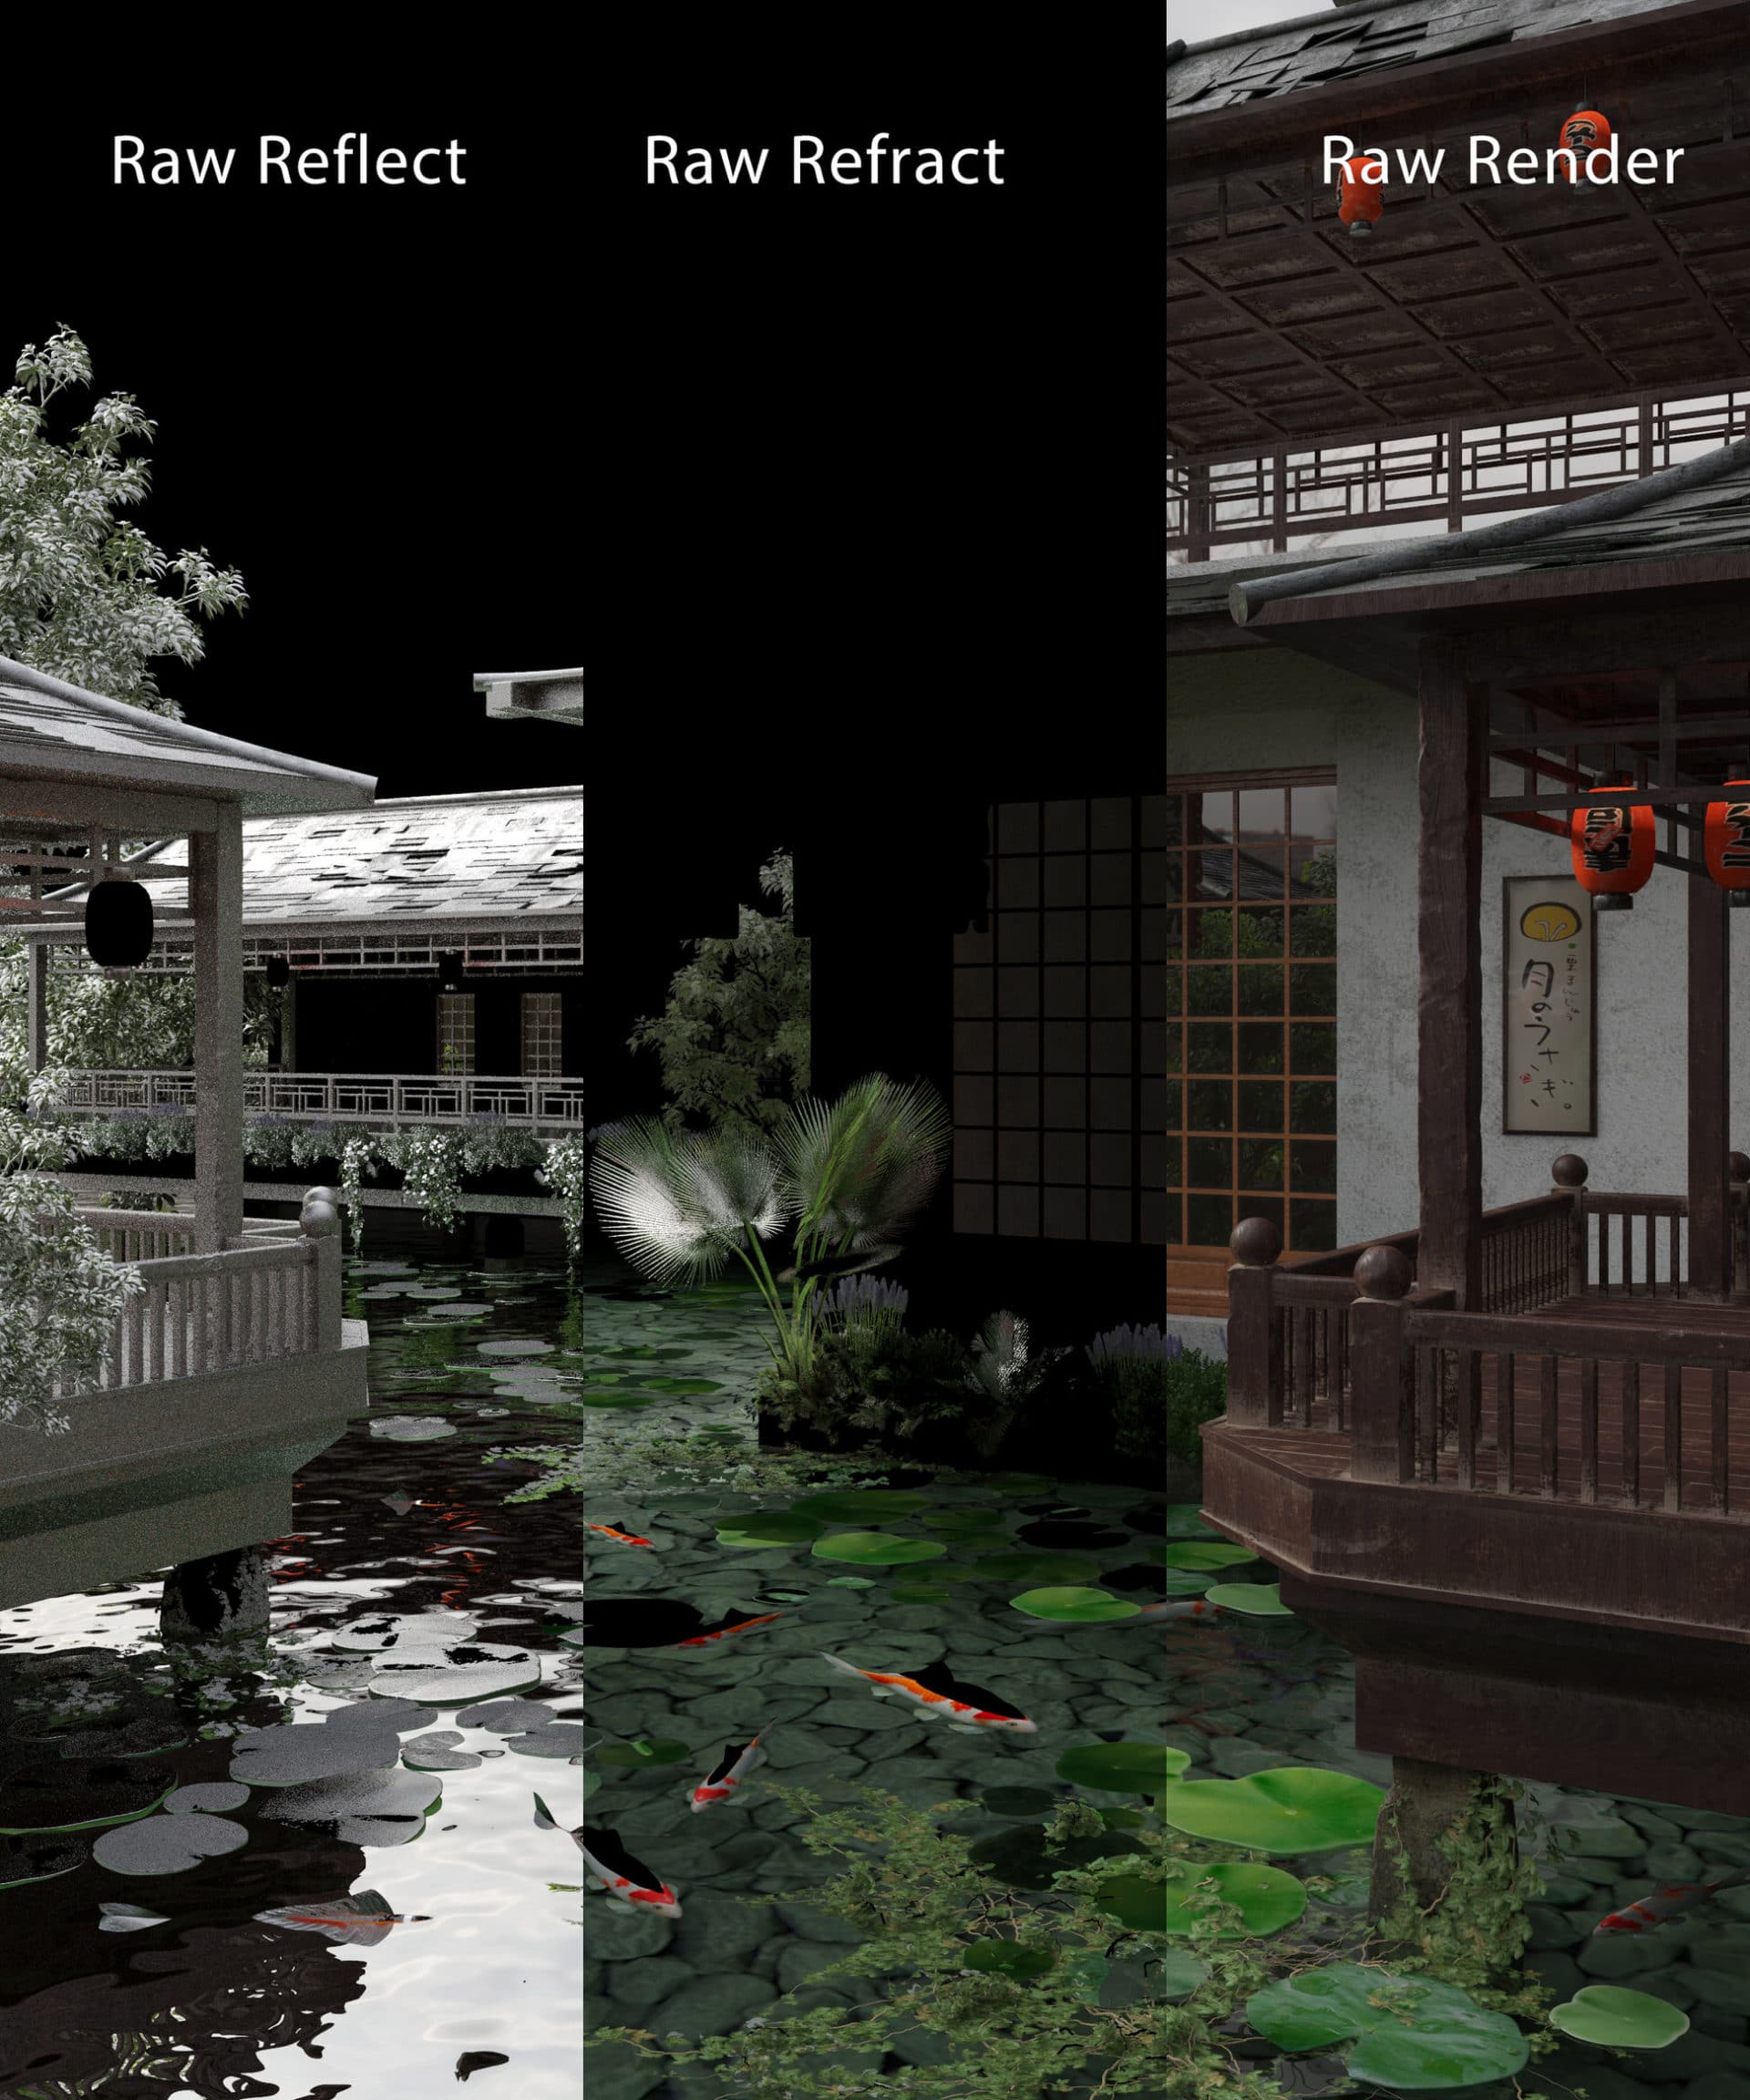
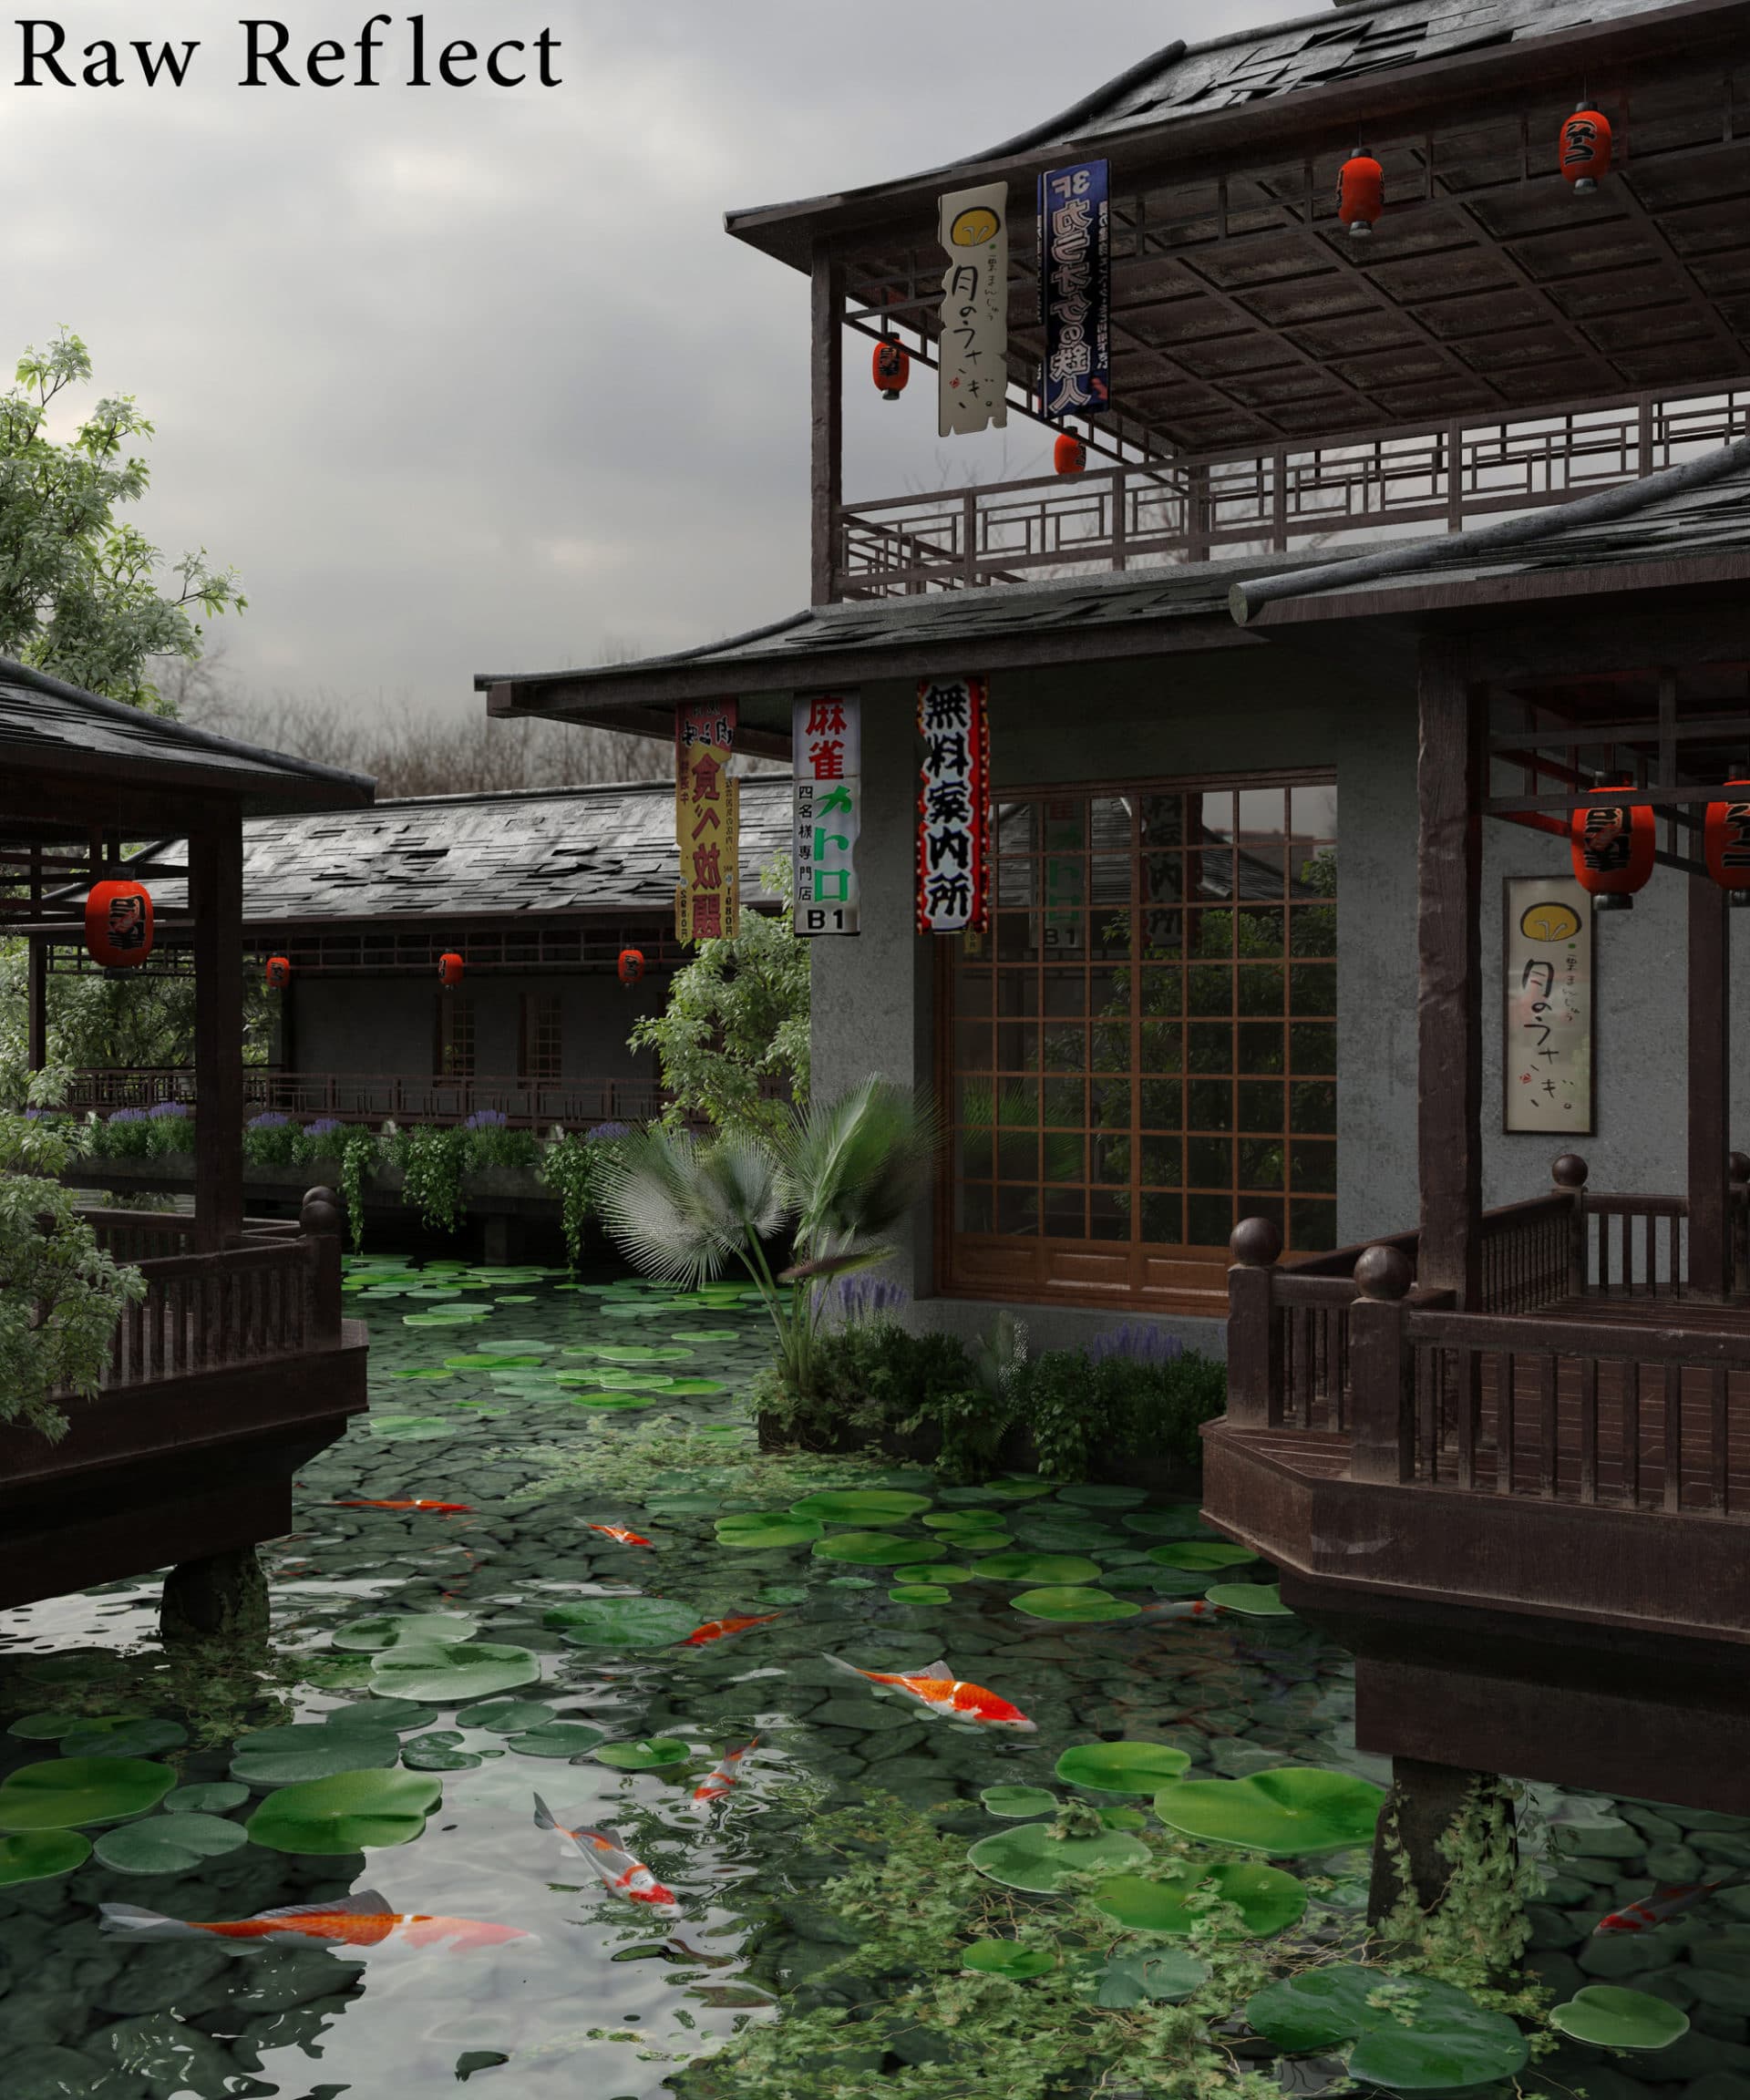
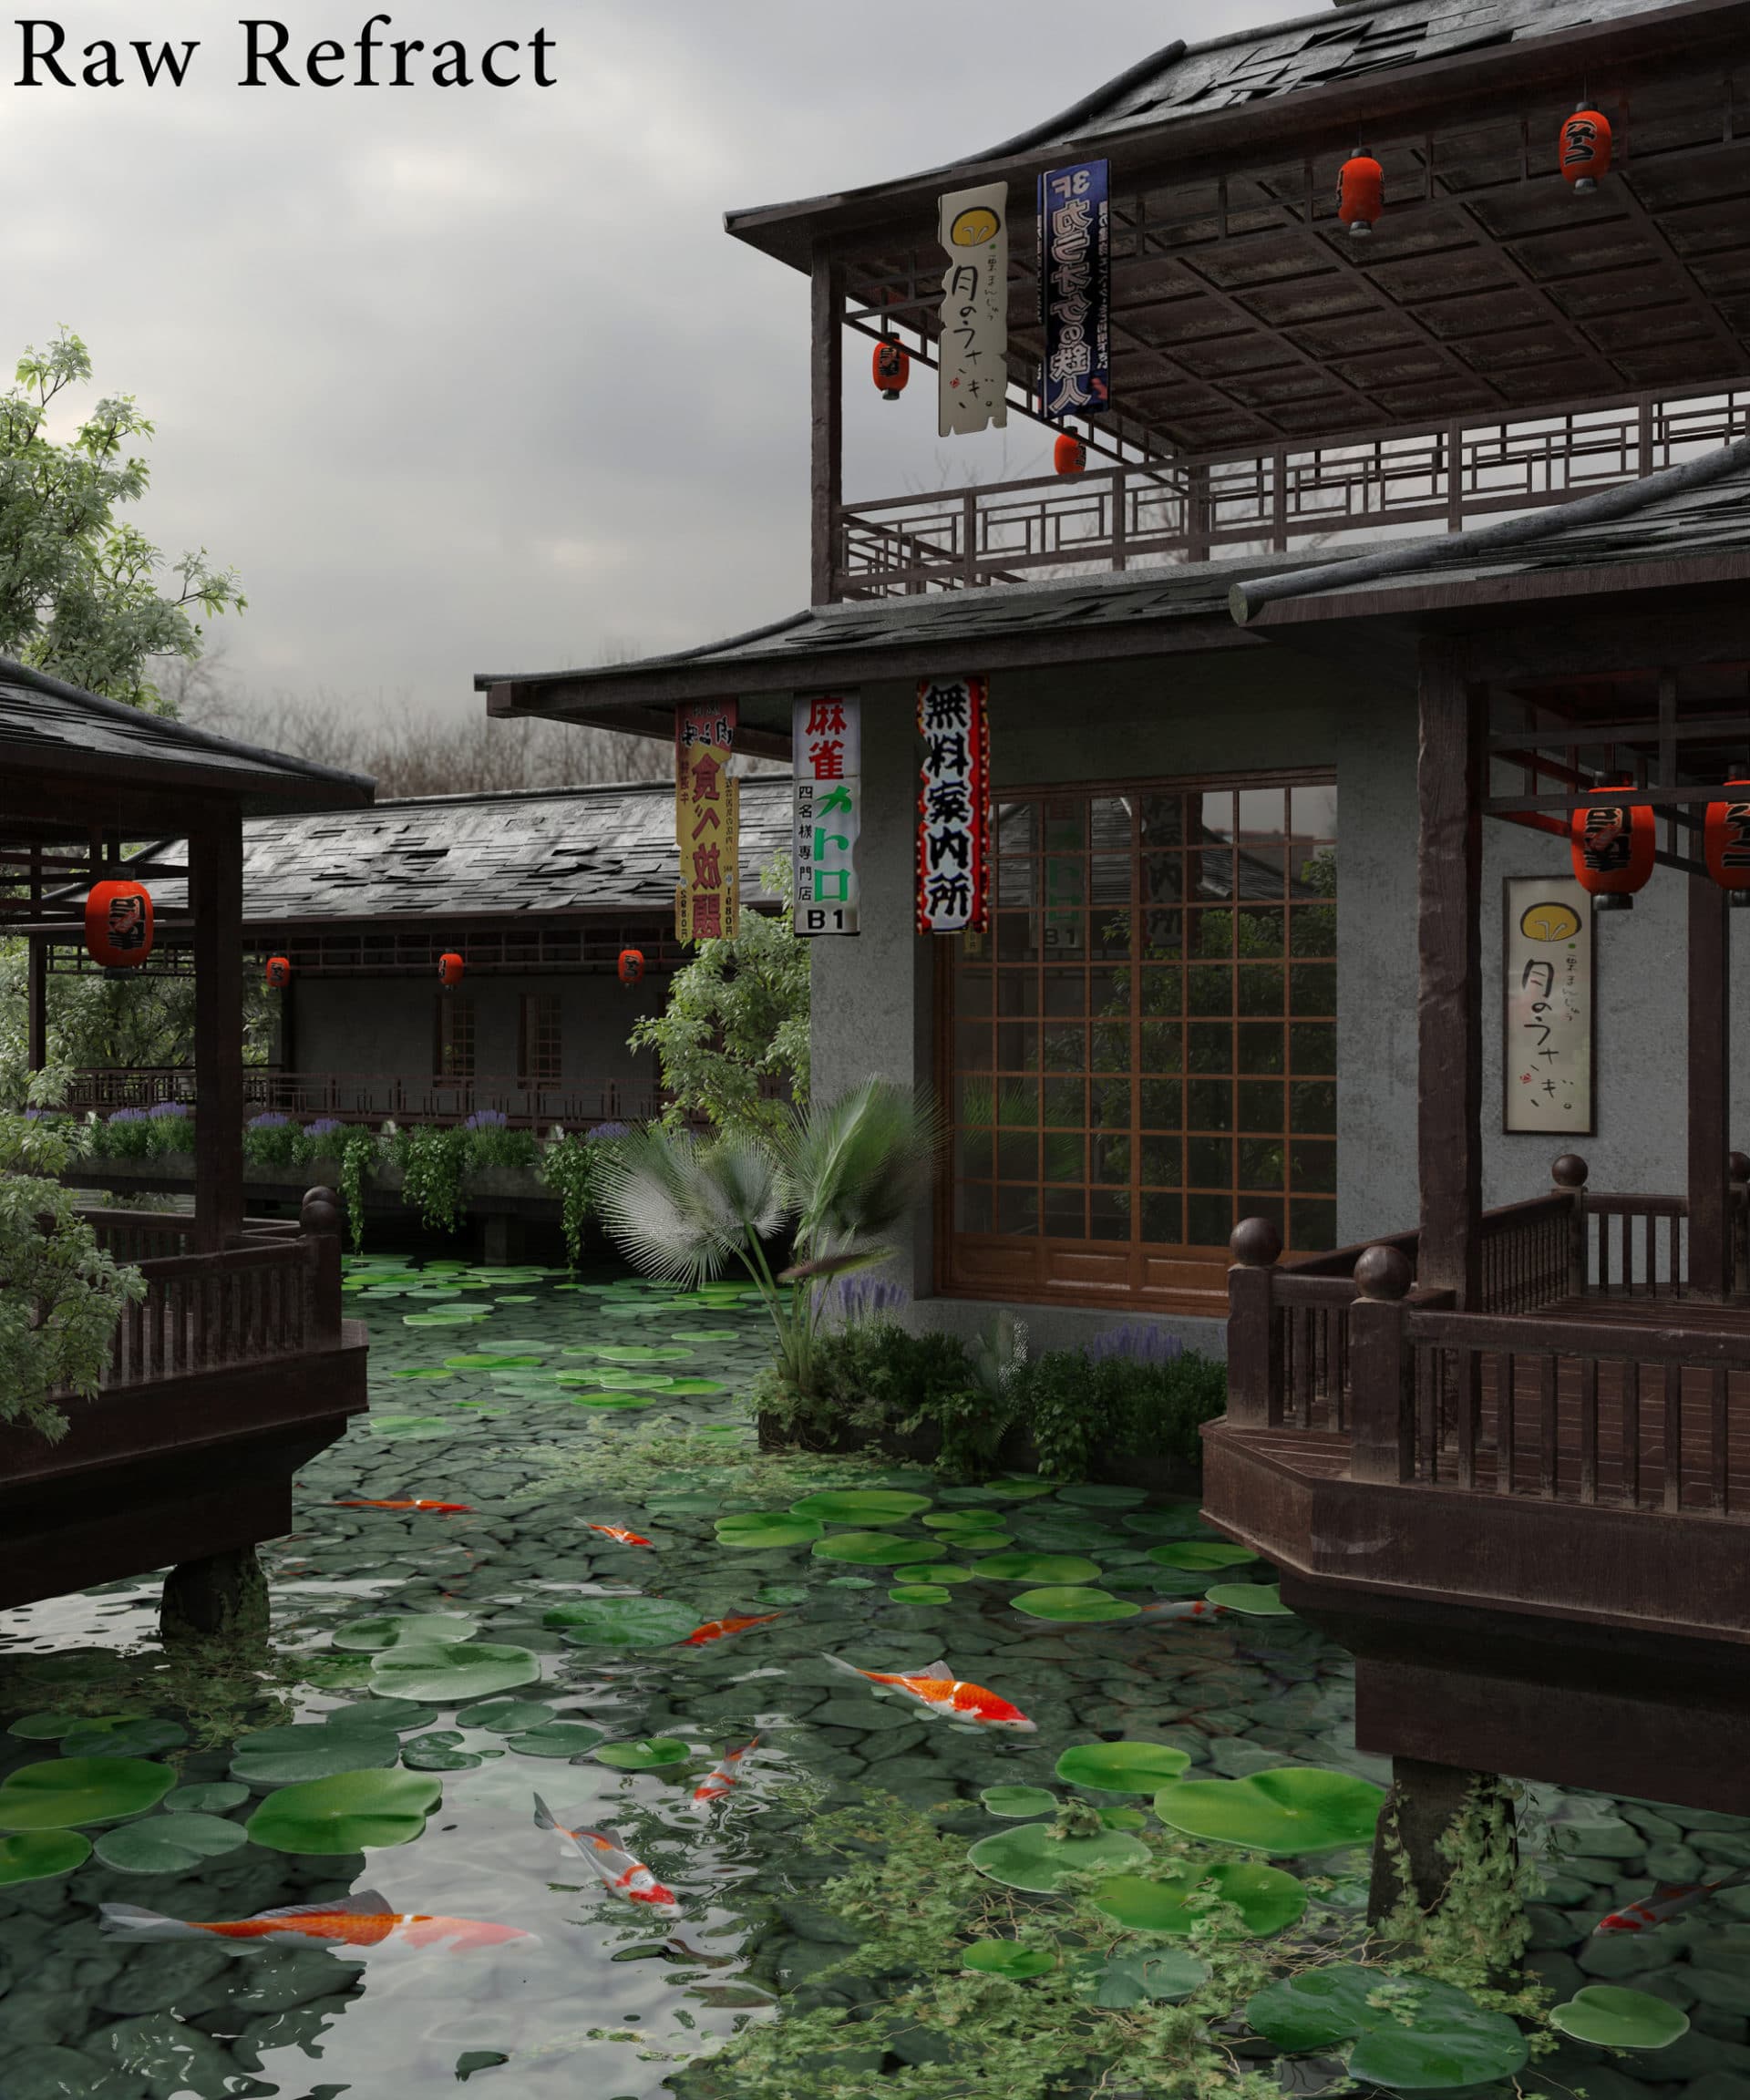
Channels I used in Render Element are Denoise, Raw Reflect, Raw Refract.
You can see the post-production process, which is easily understandable and needs no explanation at all!
Set the ‘Raw Reflect’ channel on ‘Soft Light’ mode with the appropriate opacity.
Set the ‘Raw Refract’ channel on ‘Screen’ mode with the appropriate opacity.
For foggy mode and giving depth to the image, we can use white Color and brush on ‘Screen’ mode with low opacity and add gaussian blur. Then, playing with different amounts of opacity helps us check and control its intensity.


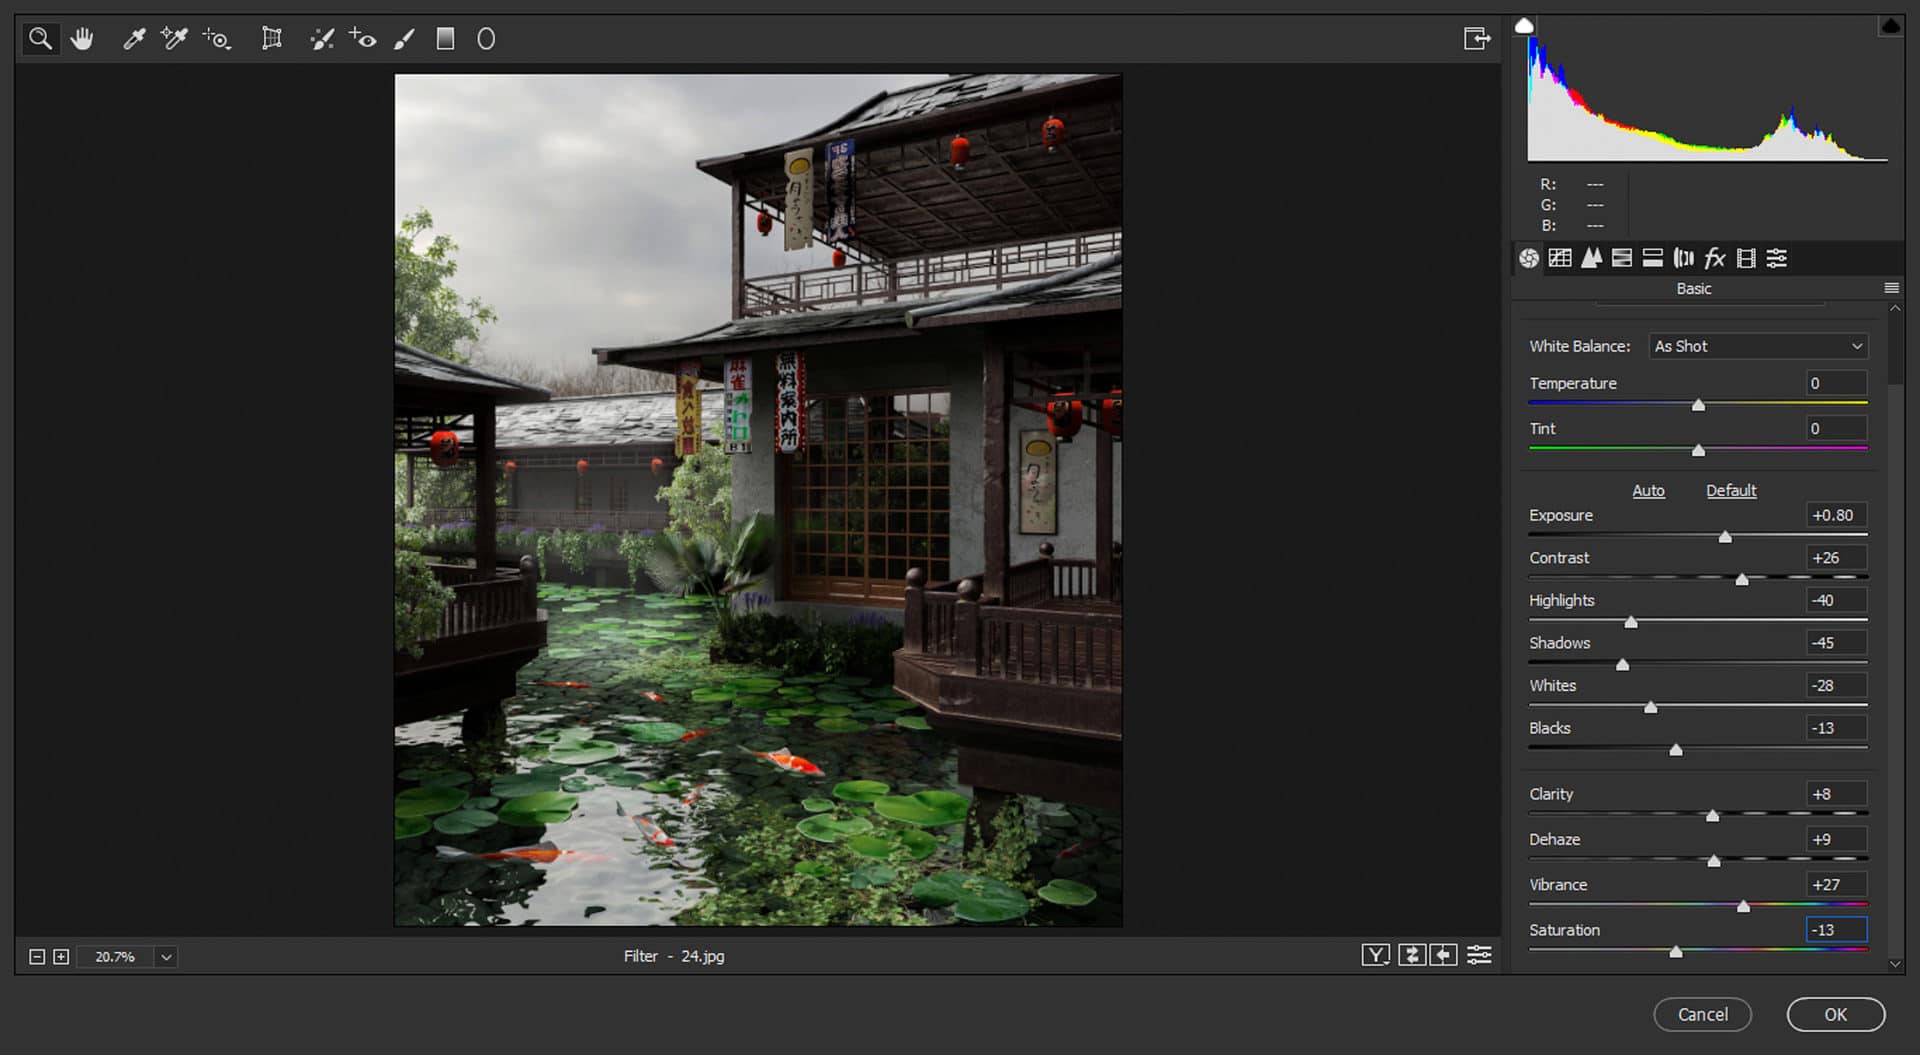
At this point, we can adjust several basic parameters such as Contrast, Brightness, clarity with the unique ‘Camera Raw filter.’
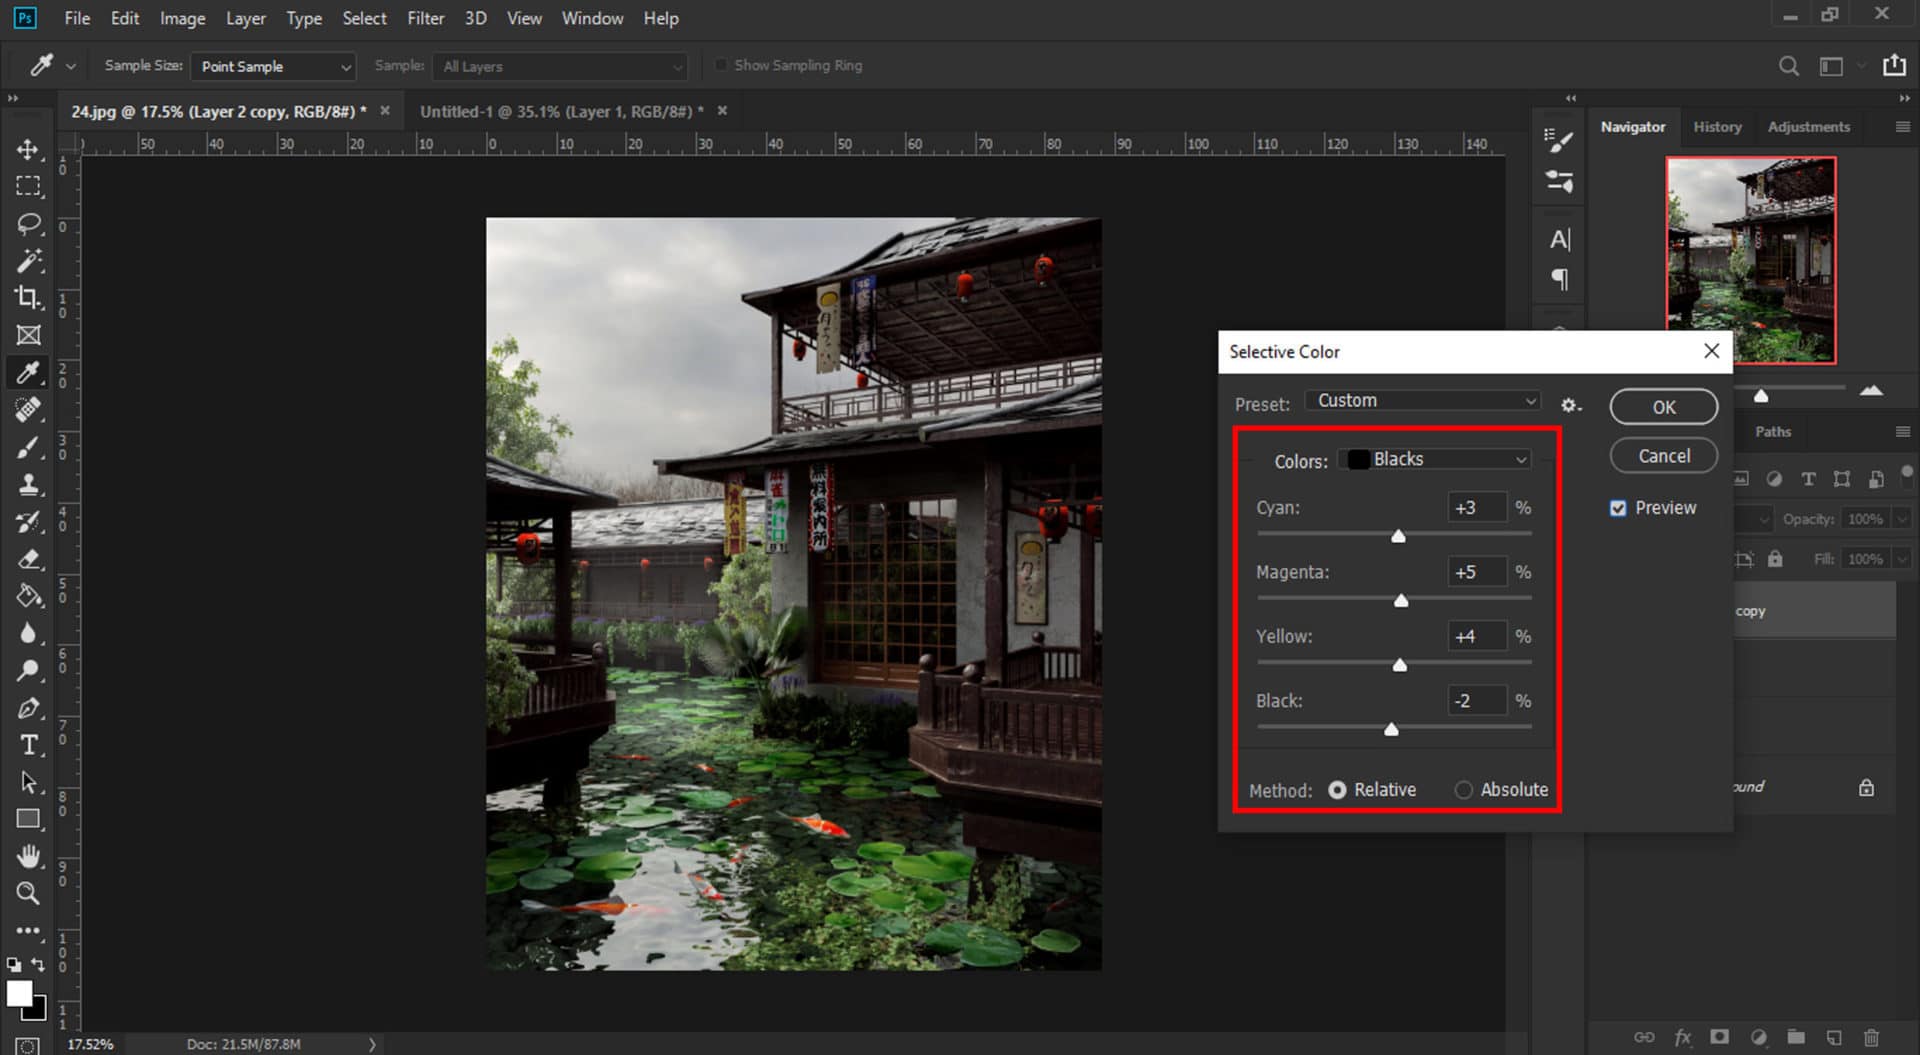
You can use the ‘Selective Color’ command, an extraordinary tool to assign feelings, themes, and mood to work.
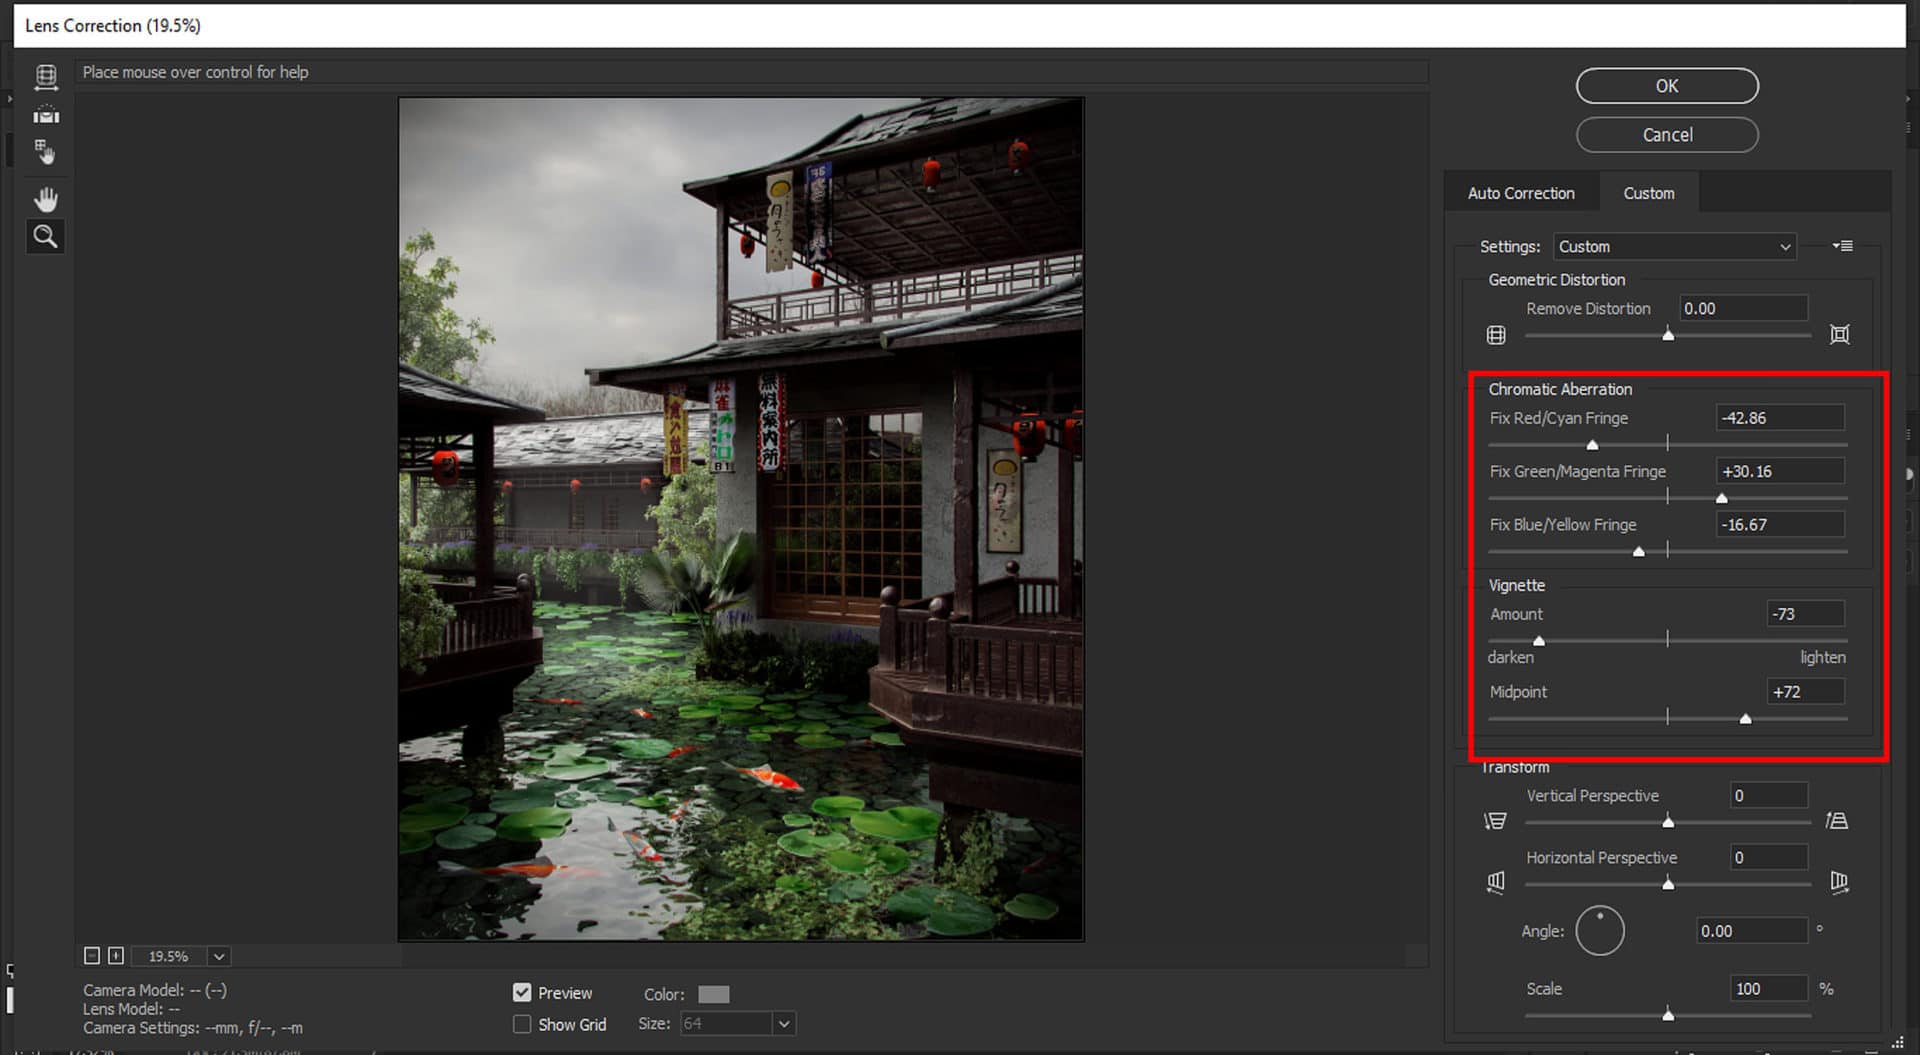
Don’t forget to use the ‘Lens Correction’ for set ‘Chromatic Aberration’ and ‘Vintage’ effect for final editing.
You can See the Animated Gif (PostProduction process).

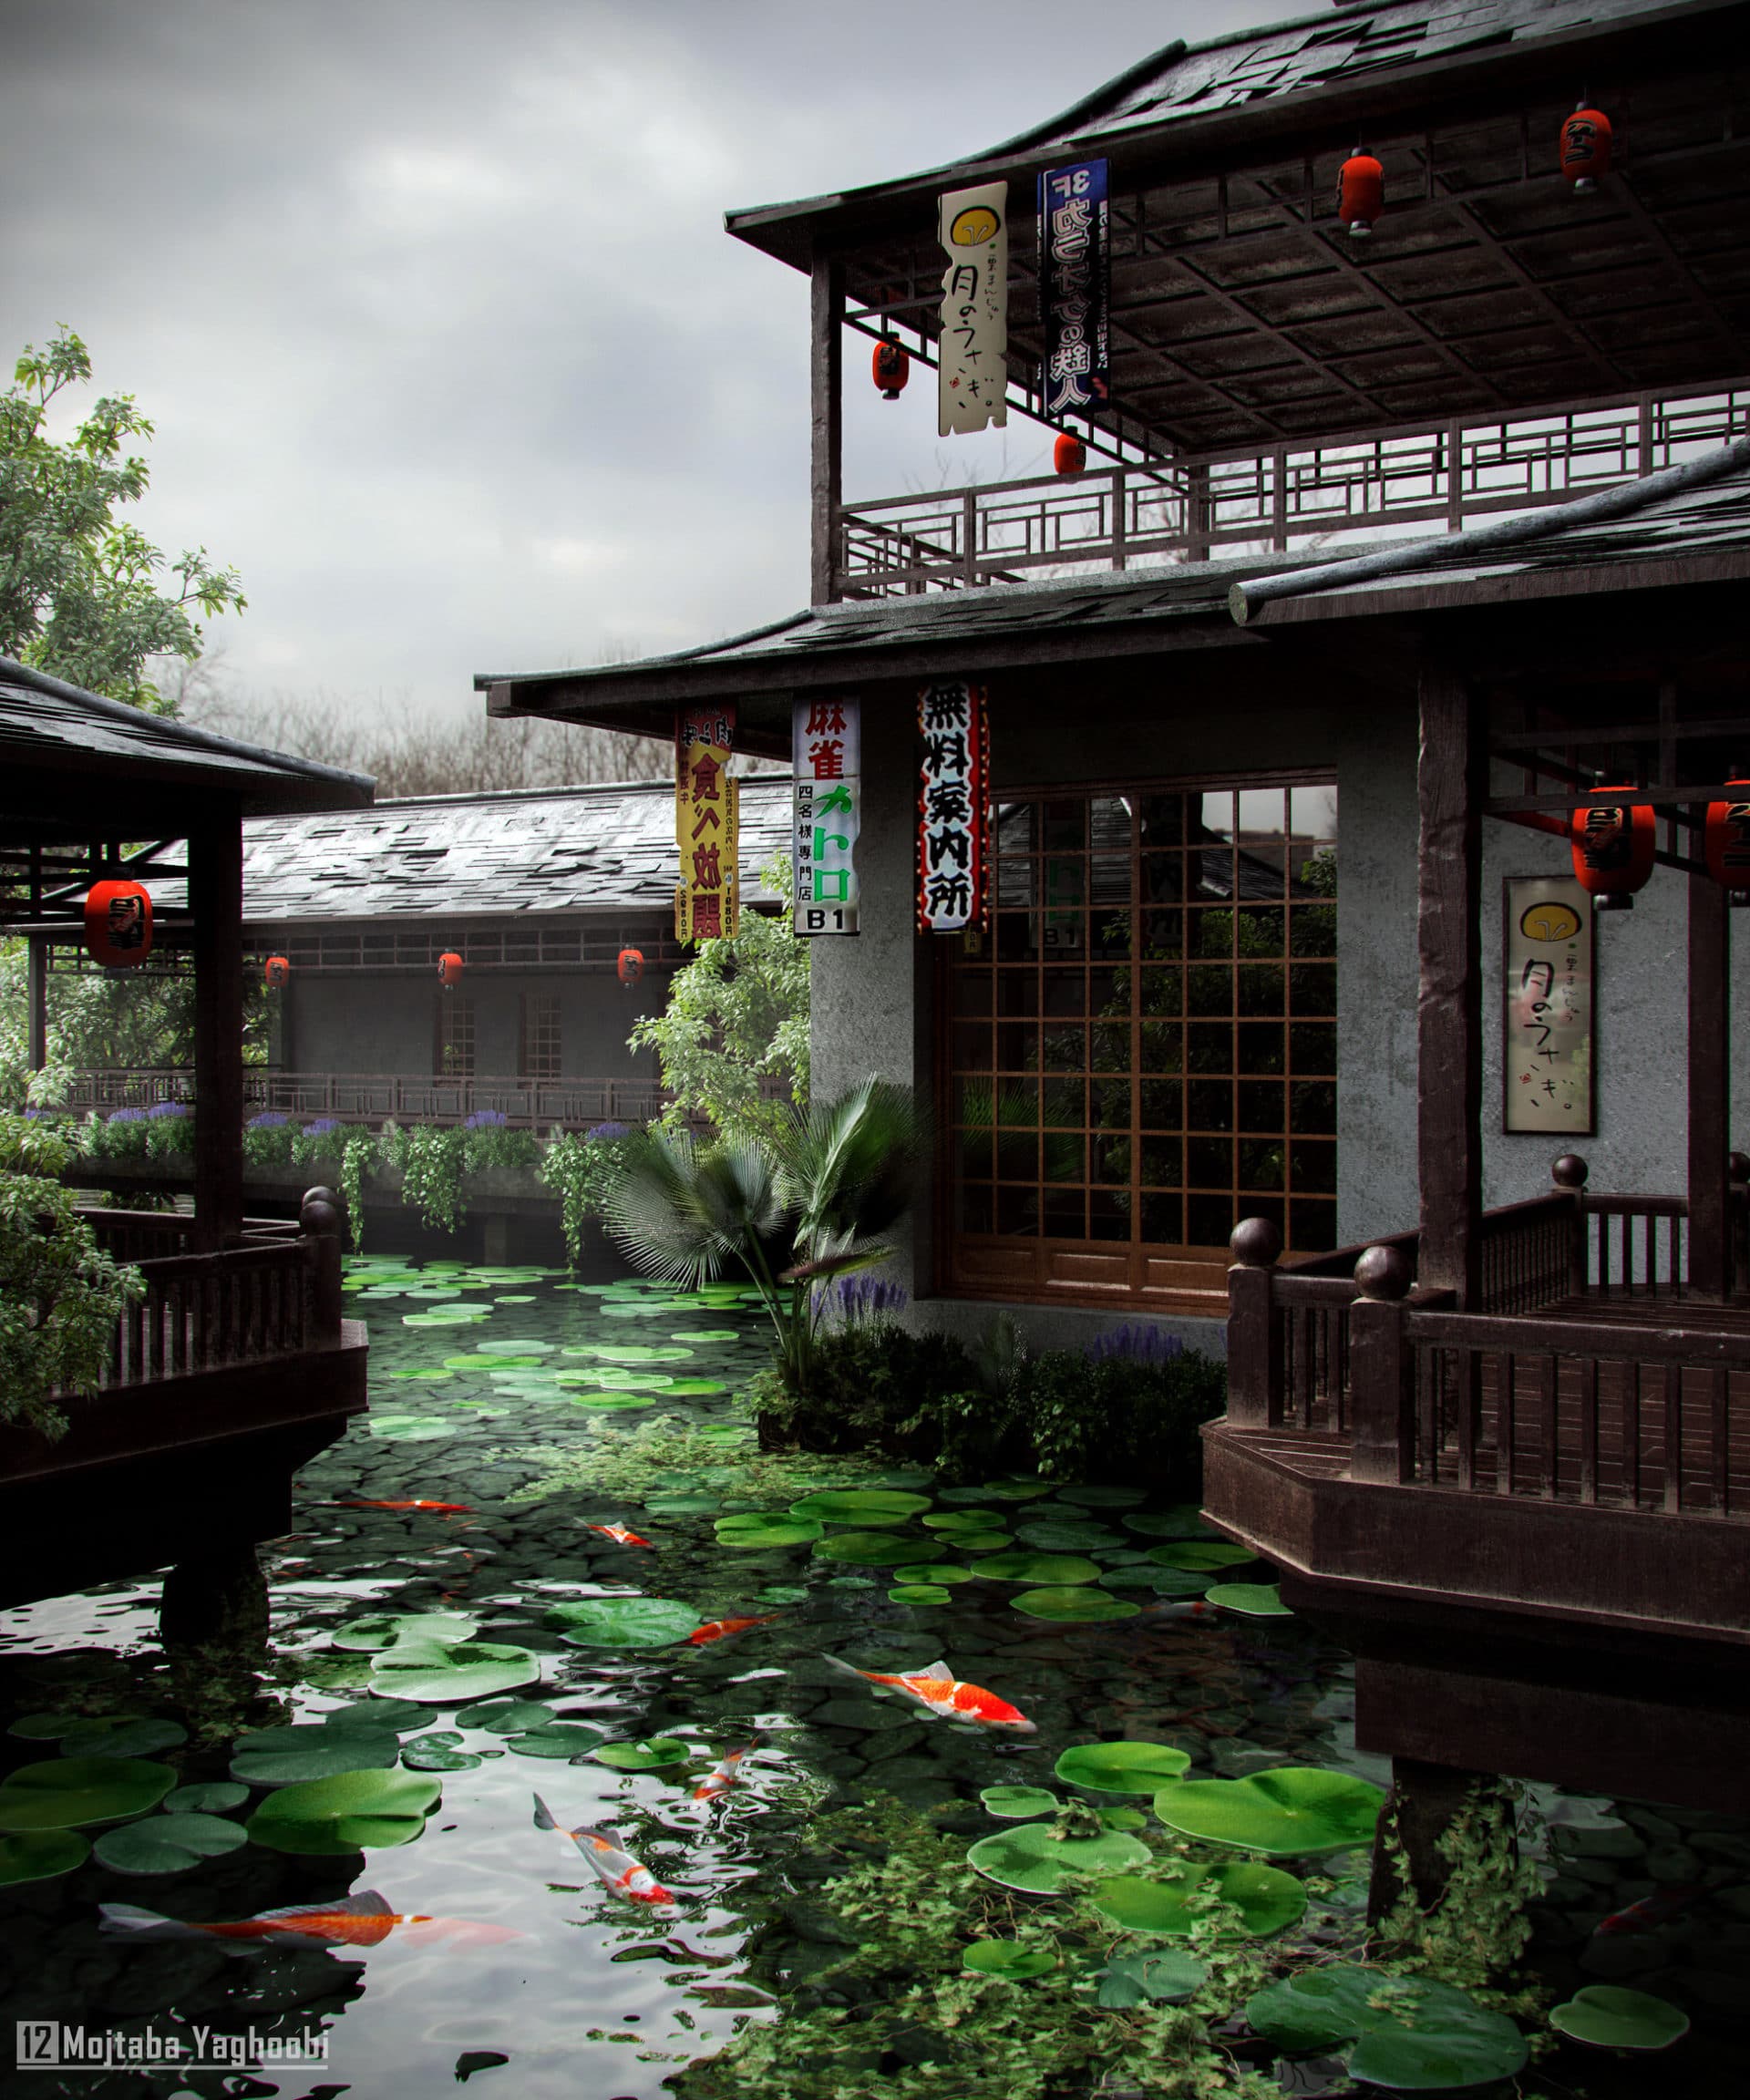
And after all the steps, now you can see the final HQ render.
Conclusion
The 3D industry is advancing rapidly, so we have to update our knowledge and method every day to be in sync with this growth. Such as me using 3dmax 2016.
Also, never make excuses such as a weak computer or lack of time, etc.
Try to implement your ideas, even if you do not know how to do it correctly because it is more important than the implementation.
Don’t forget that all of the impressive projects are only starting with a BOX.
And finally, I would like to thank my dear girlfriend, ‘Foroogh Mehran’ @forooghmehran, who has always supported me and helped me a lot in this process and made a lot of effort in preparing this article with me!
Looking forward to hearing from you
Sincerely yours,
Mojtaba

I love the contrast that the orange fish add to the composition.
Very much so! Welcome to TALK @themodeldesign
Valid points @ArchStarter and very important you share these with us here!
Goes to show we all need to learn more. Sharing the work and getting feedback is a great way.