


Making of ‘Treevillas’
Pre-Fab is sure showing a lot more lately, and I like it! Jacinto Monteiro owner of Metro Cúbico Digital ArchVIZ studio recently showcased a remarkable set of visuals they made for Portuguese architectural company RRJ Arquitectos and constructed by “Modular System” showing a single vacation home design they made for the Pestana Group – Ecoresort. While the “House in the Forest” theme is generally overused, this one was done to resemble the exact forest-like location with great results. Join in as Jacinto takes us through there process of making these project. Enjoy!
Introduction
First of all, we would like to thank Ronen Bekerman for inviting us to write this Making Of.
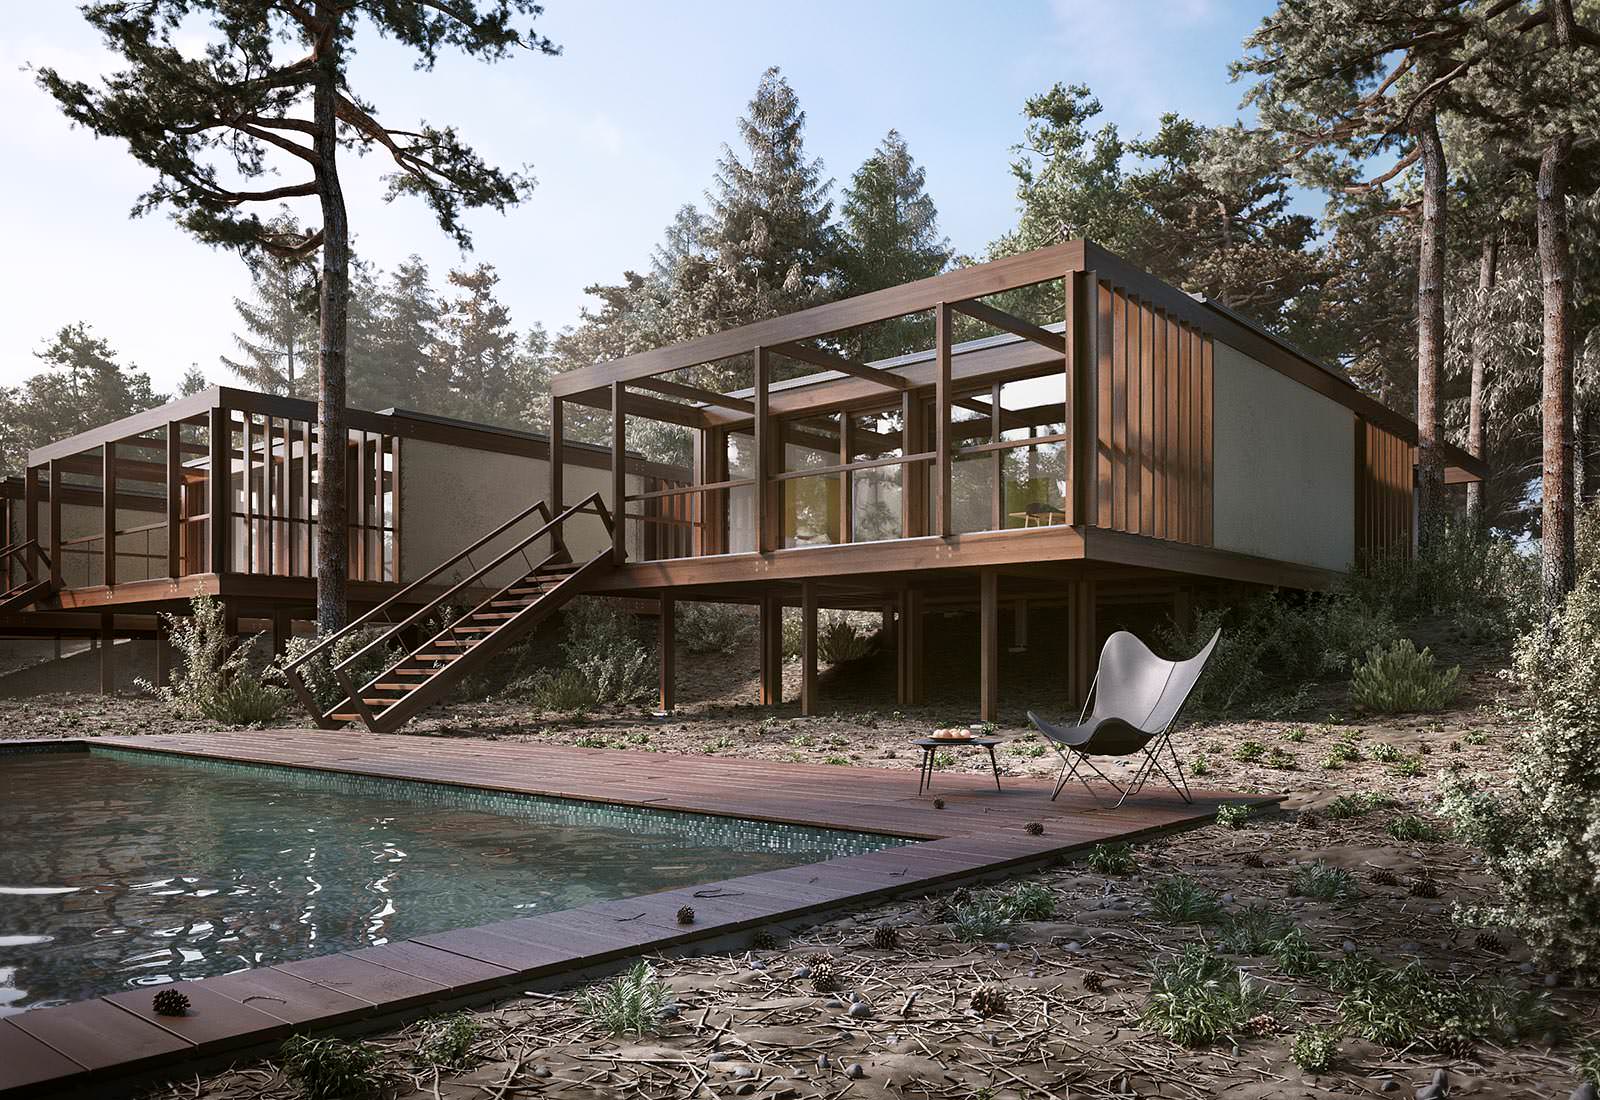
‘Treevillas’ was a work done for a Portuguese company called Modular System. and designed by RRJ Arquitectos. Unfortunately, we aren’t authorized to show the modelling form inside-out with all it´s beautiful detail due to technical confidential issues, but I’m sure what we do show is great enough.
These vacation houses are essentially Pre-Fab designs due to its modular construction, easy assemble/disassemble, flexibility and economy. It could be considered as eco-friendly since it is non-aggressive to the surroundings in which it is being placed. That´s why these houses were approved to be inserted in an eco-resort, located near the Bay of Troy in Portugal.
The goal of this work was to develop for the client very realistic images before the end of the construction, so that pre-sales could run more smoothly or efficiently.
Inspiration
Like in architecture, location is everything. The client sent us several photos of the existing location of the project as well as photos of the actual house under-construction and other similar houses located in the same eco-resort.
Below you can check out some of these photos and other shots we used for inspiration. Always use real photos for inspiration!


Landscape
We are big fans of the raw render process, in other words we prefer to have everything in 3D and not use Photoshop… We don´t like to rely on it.
There are very few exceptions (I would name Christopher Malheiros as the best Portuguese example) but for us the excessive use of Photoshop makes images look unrealistic, sometimes even cartoonish.
To avoid Photoshop, time needs to be used very well.
When a new job comes along, most times we start doing the landscape even before the project is ready or even started.
Why?
Because as we all know, architects only have the project finished at the last days. Once they have it, we got a cool scene already prepared to merge it into. When time is available, or in personal works, we don´t follow this procedure to the letter.
After analyzing all the existing landscape information we started gathering all the elements to insert into the scene. The most important thing was achieving realistic ground. We knew most of the images would have it in the foreground so we needed to pay special attention to it – which was simple really.
The texture was download from CGTextures.com and we almost didn’t touch it in Photoshop. We created a simple V-Ray material with soft reflection (0.6) a diffuse map in color correction (-20 desaturation) and gamma (0.6) to make it darker. We then inserted this V-Ray material into a V-Ray blend material with another V-Ray material with fractal noise to avoid some map repetition.
Below you can check the slate editor, diffuse and bump map (for 2d V-Ray displacement we used the same map with just 2cm strength, 516 resolution and 8 precision).
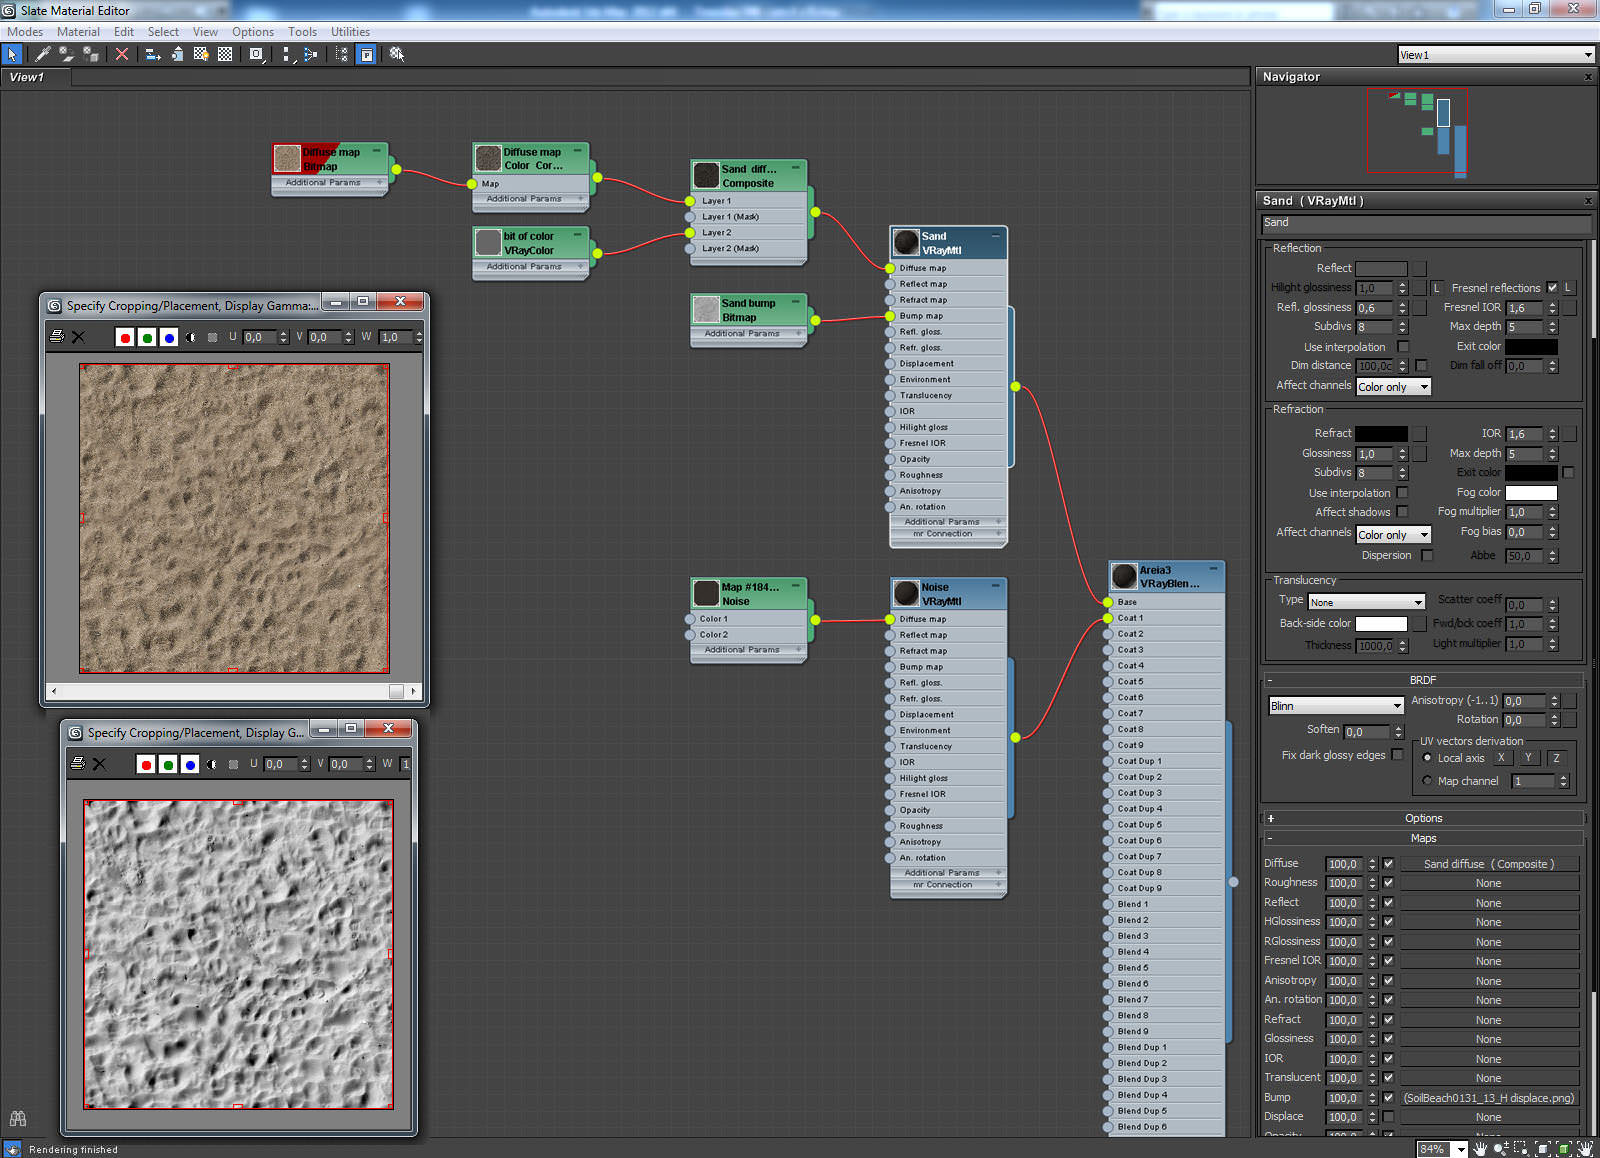

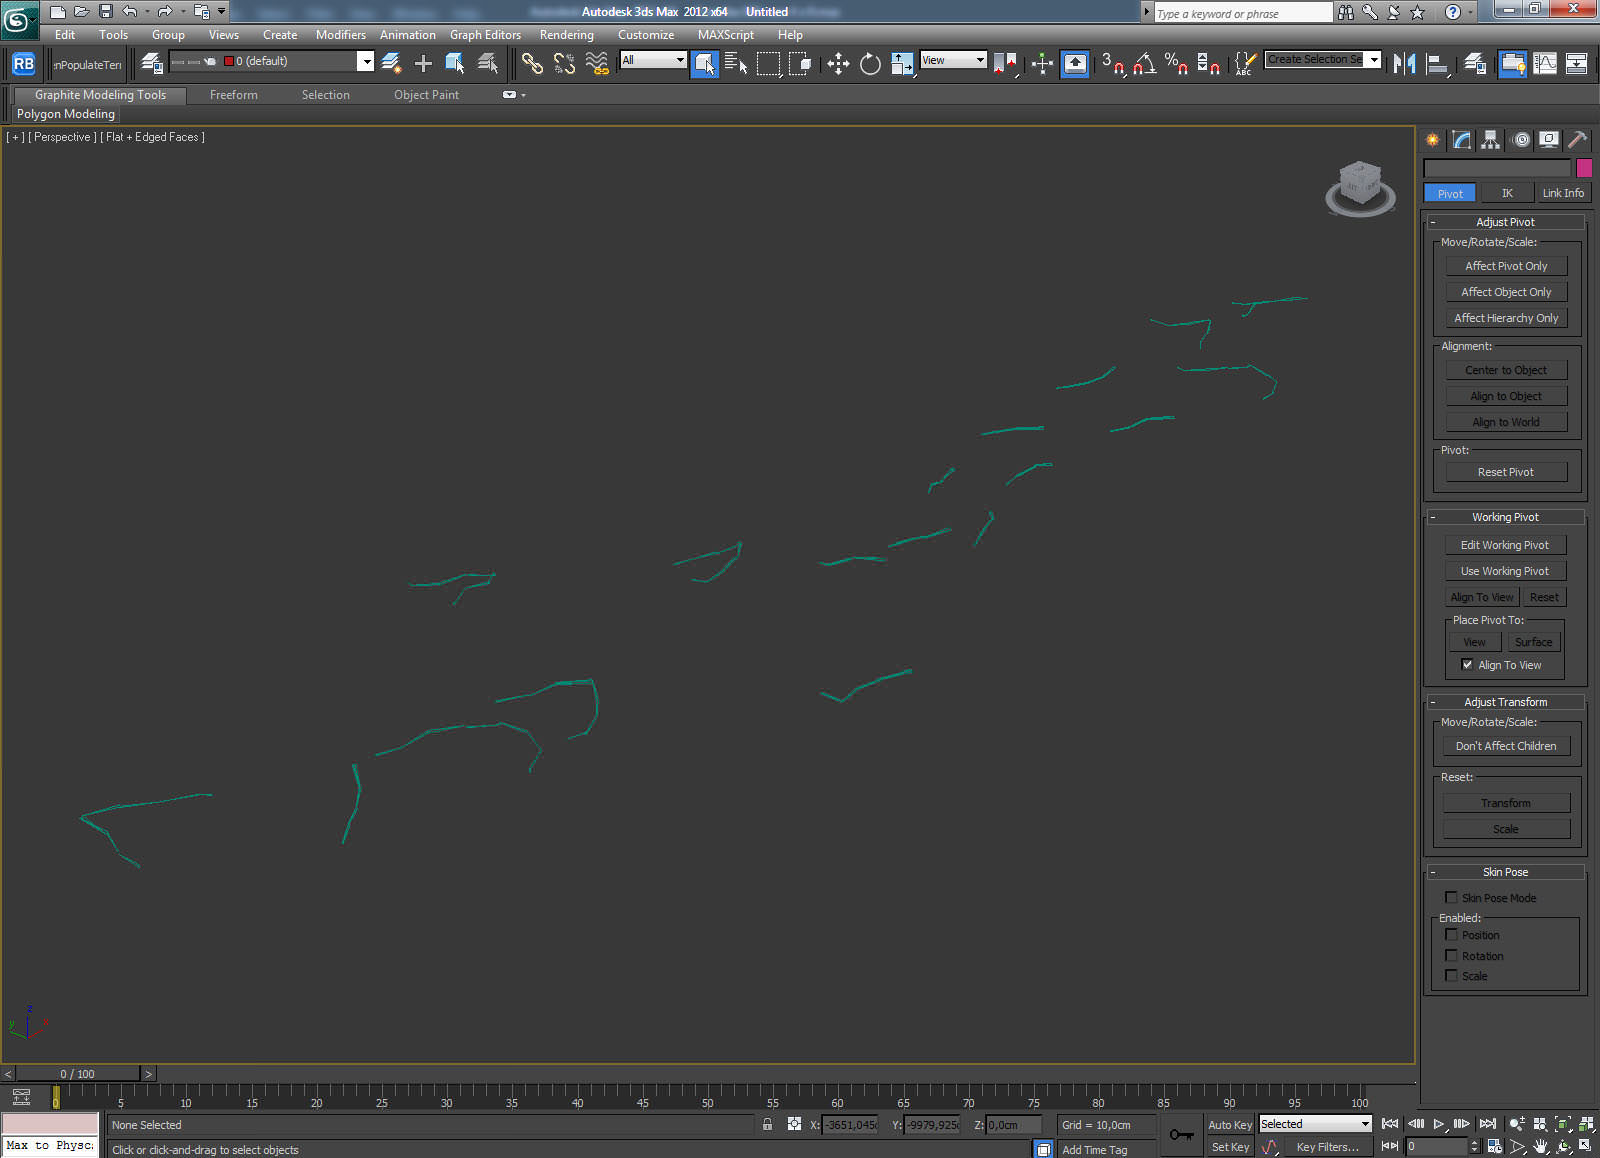
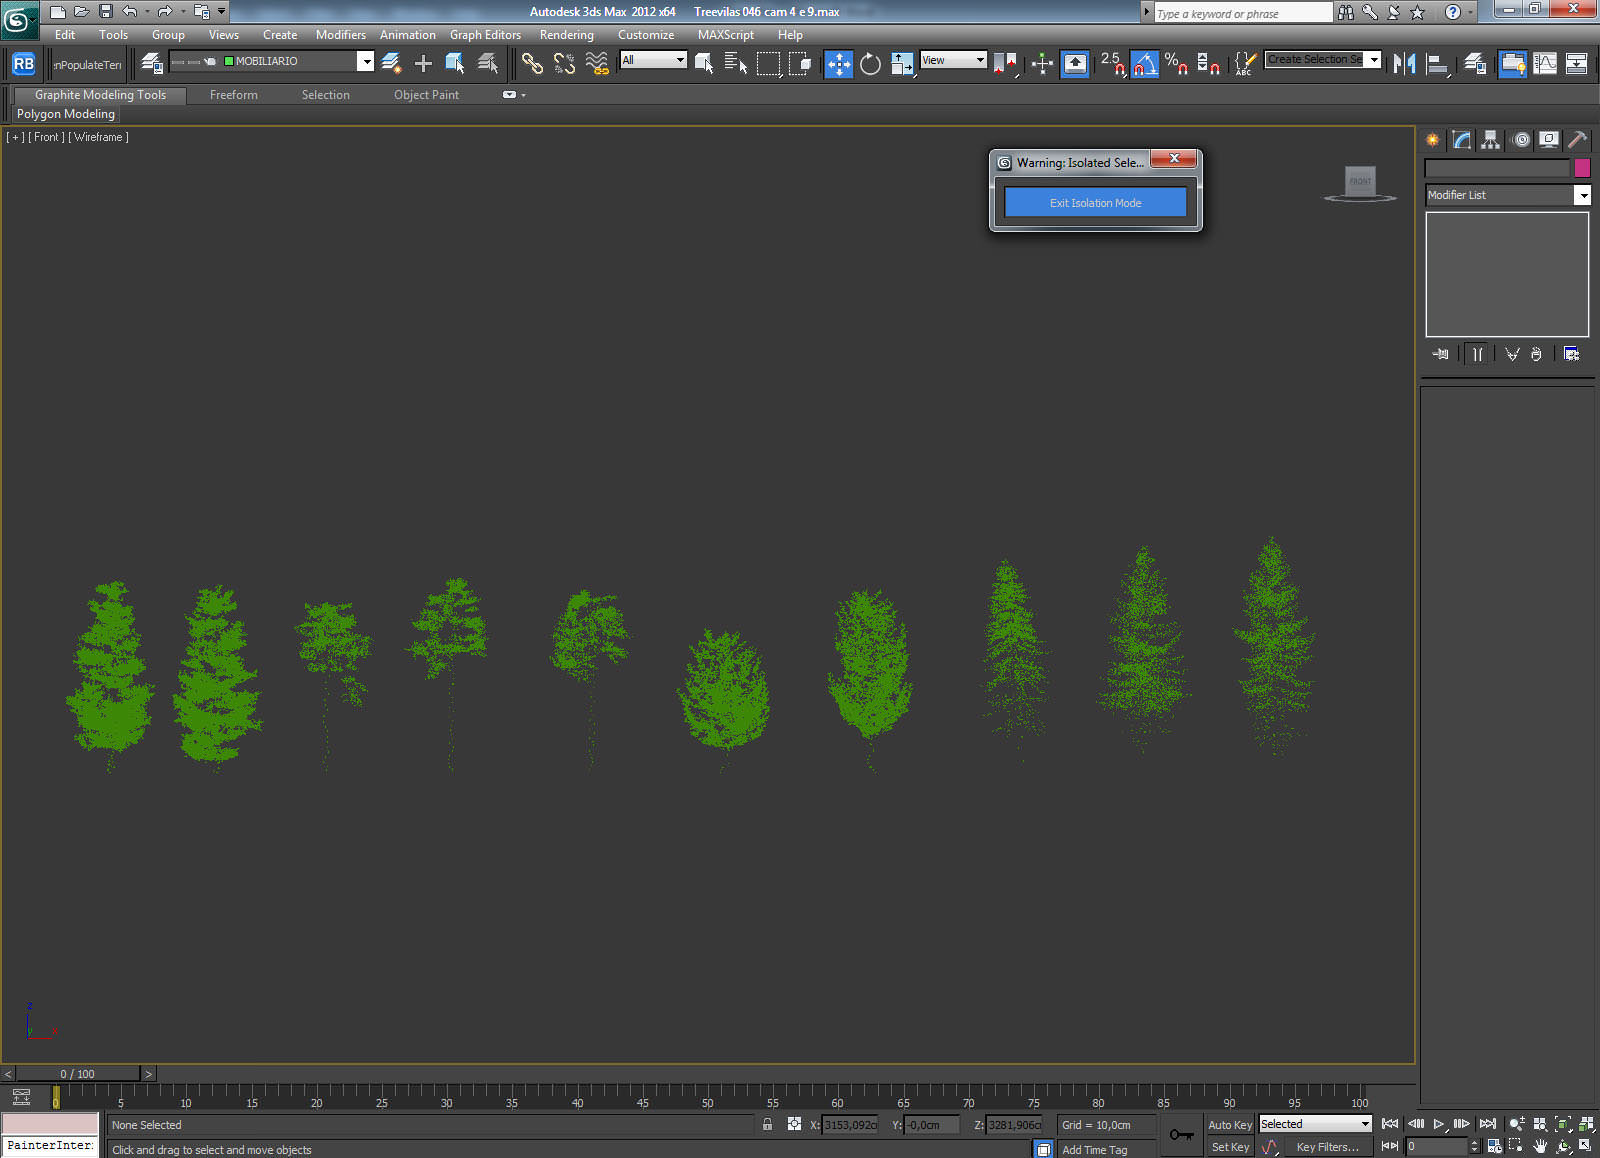
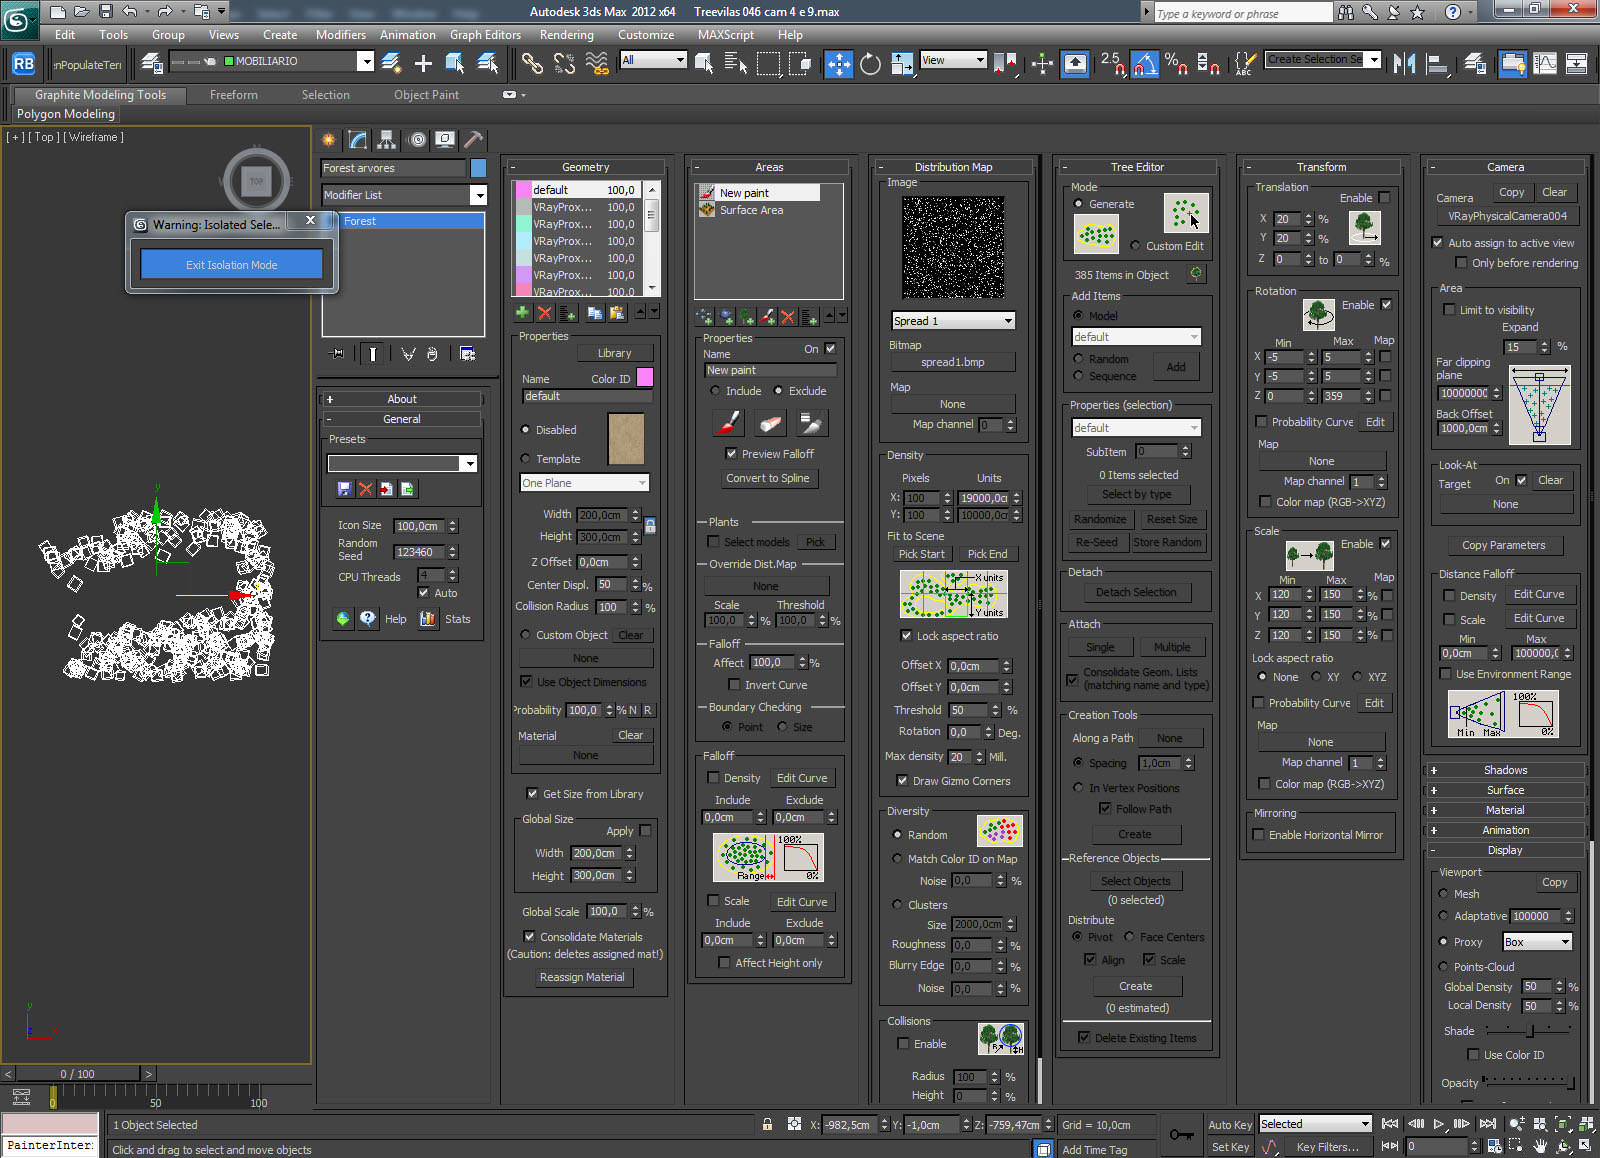
Next we selected the vegetation from our library. For the trunks we modeled around 15 different types of branches. Once they were spread all over the ground we had to move the iToo’s Forest Pack Pro branches object up on the Z axis about 2 cm because the ground plane had 2d V-Ray displacement and was covering most of them.
Below you can see the objects and the iToo Forest Pack Pro settings.
As you can see, there´s nothing special about it except that we used Area to delete some trunks here and there, and we used Forest Color in the material diffuse slot which we will show a bit later.

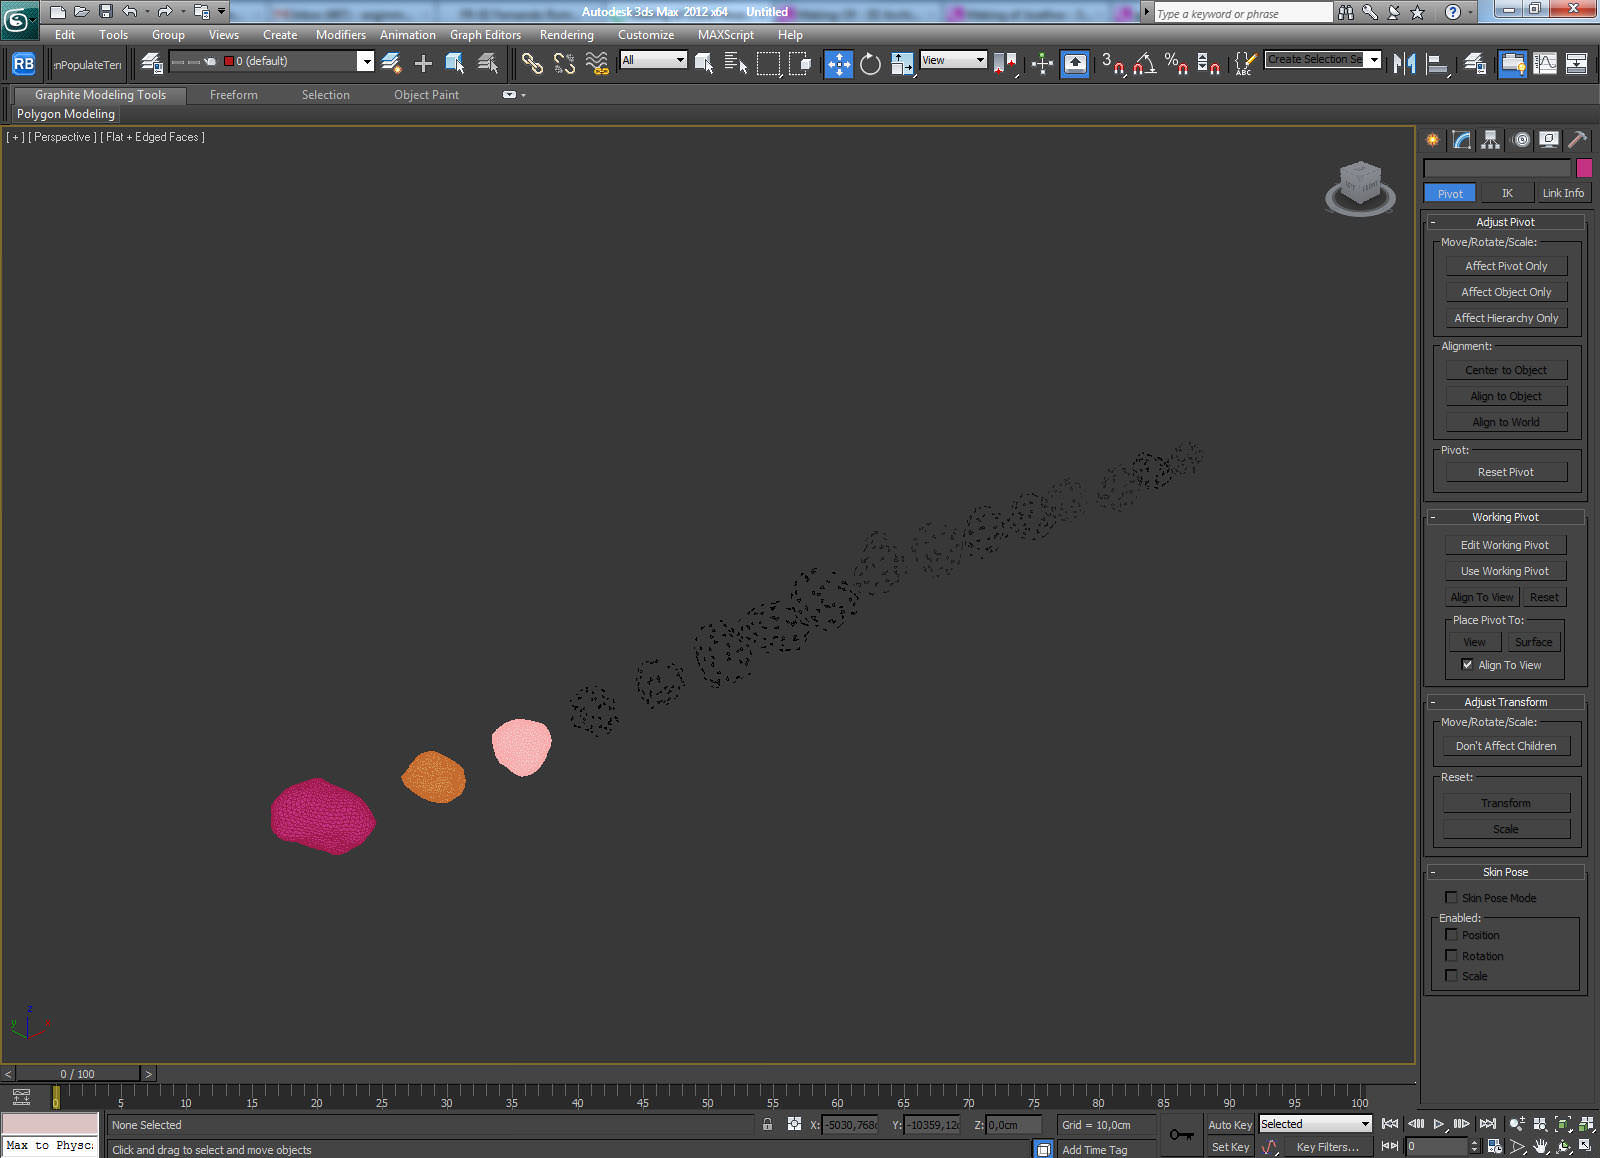
And below you can see the rocks, low vegetation, mid-high vegetation and conifer cones that we also spread throughout the terrain. All objects were converted to proxies (though, with the use of Forest Pack Pro, it is not a must).
For low vegetation we used iAlpine form iCube.
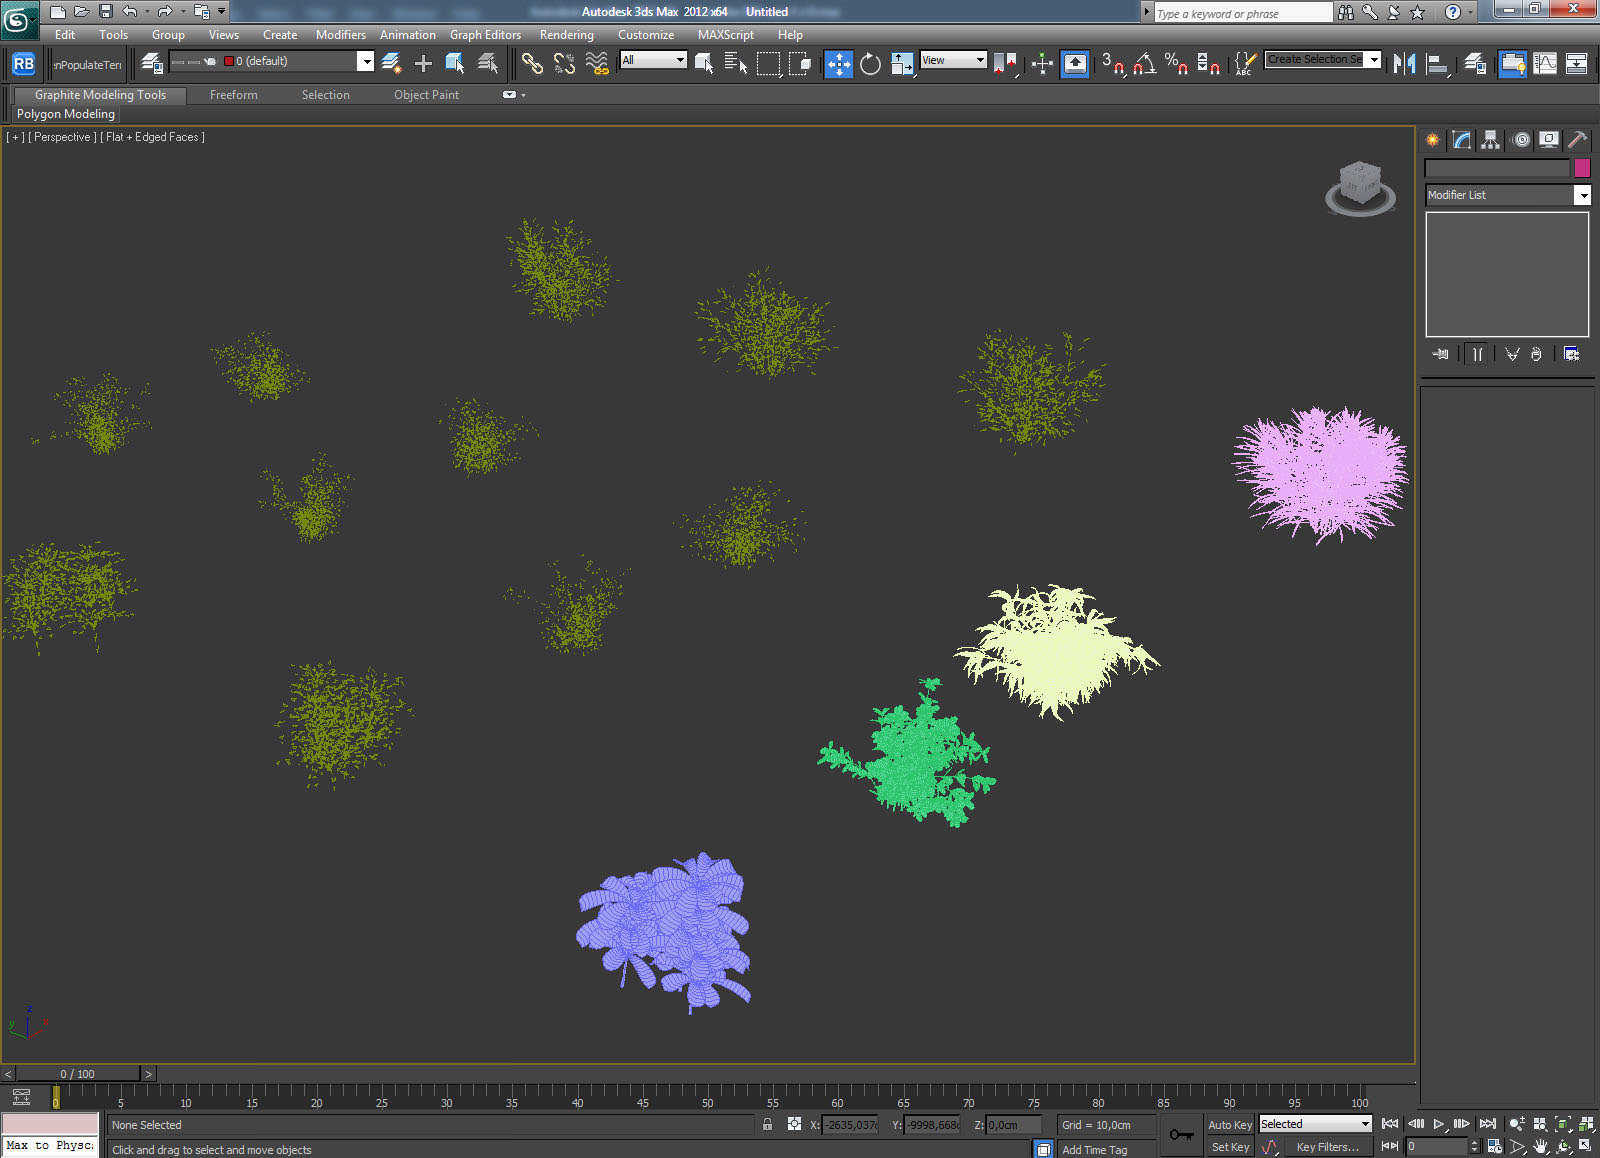
Mid-high vegetation was done with iCube iTree summer.
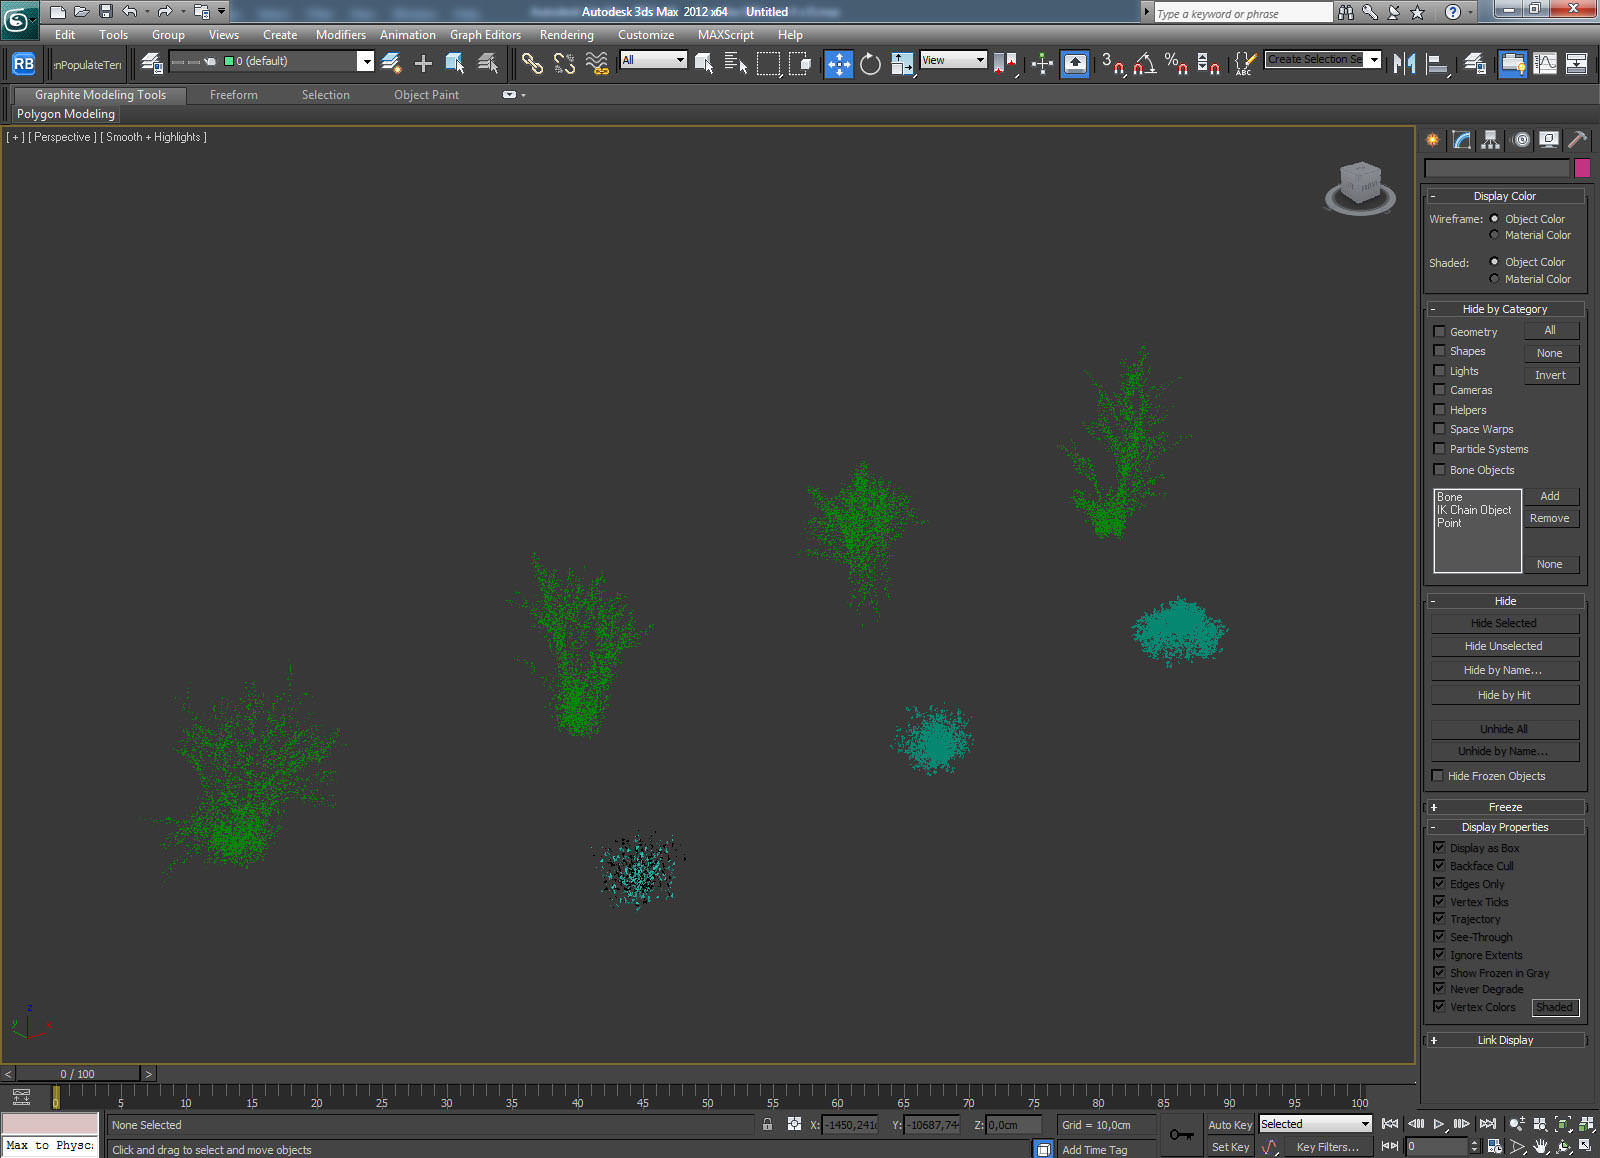
Conifer Cones, model from Evermotion (don´t know exactly from which vol) :
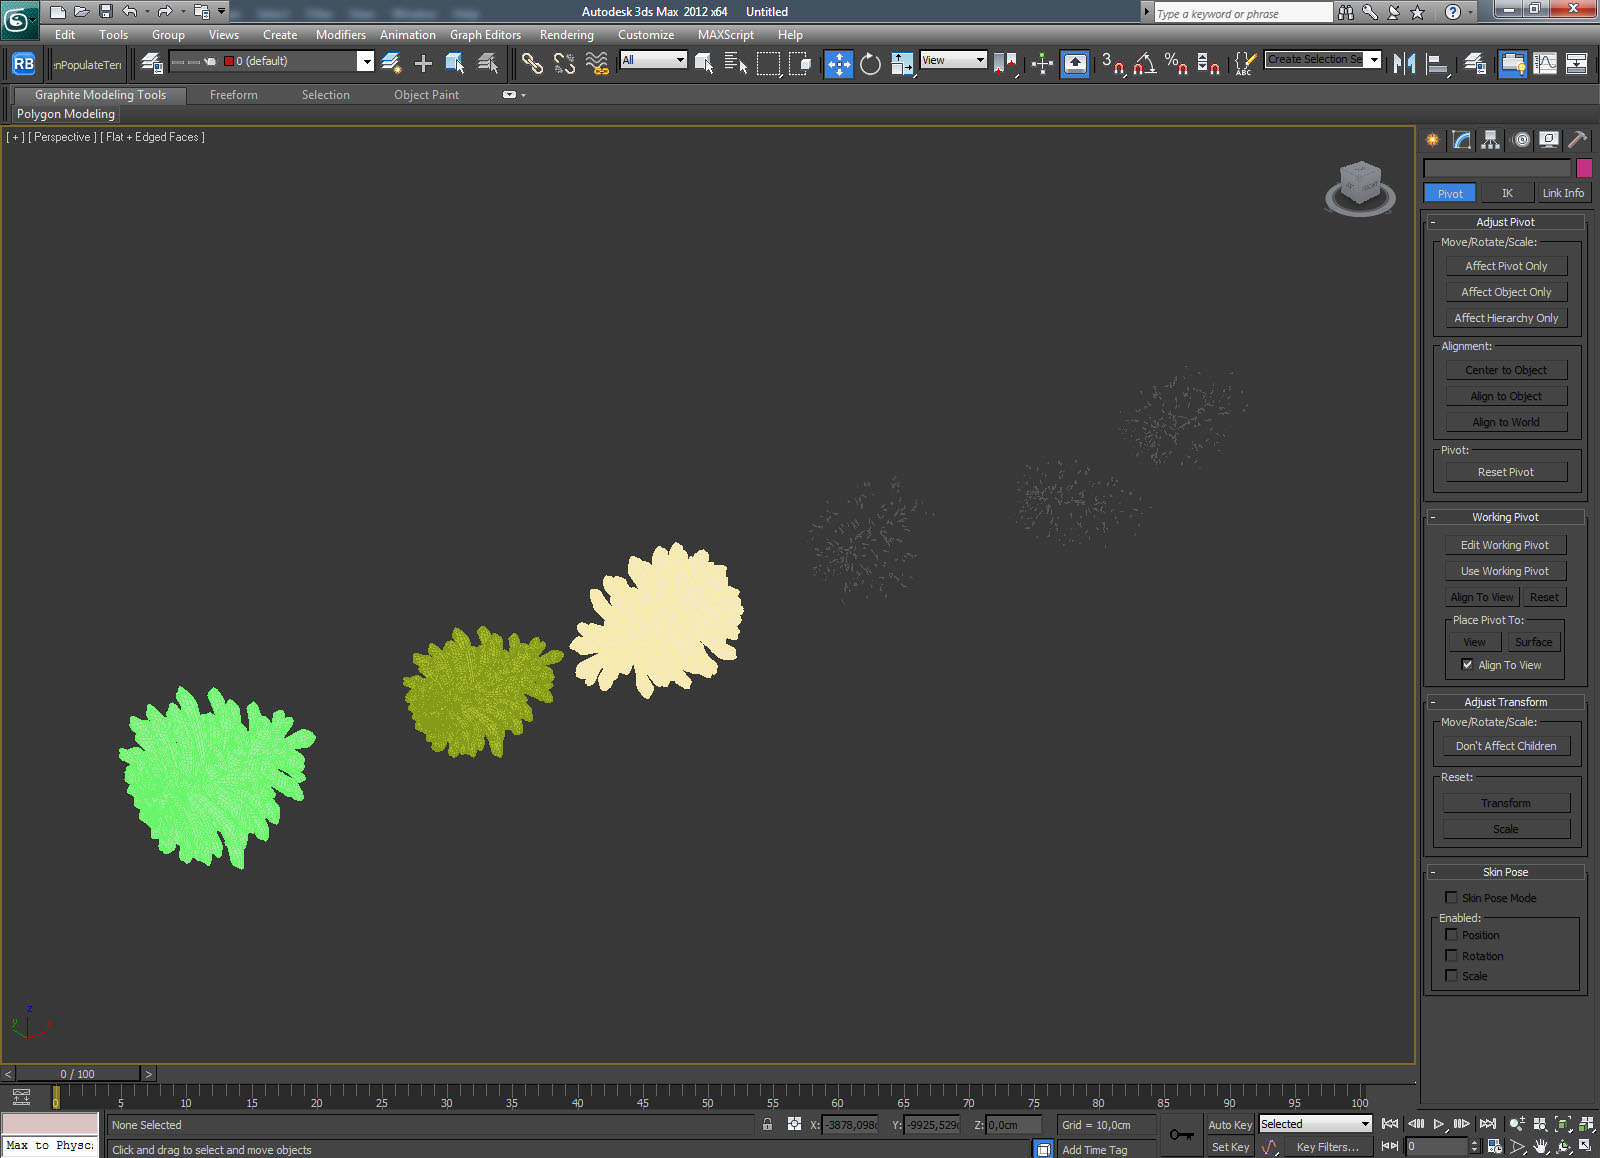
Small rocks :
For the trees distribution we also used iToo’s Forest Pack. We took advantage of an area to also delete trees where they weren’t desired and Forest Color in the leafs diffuse slot to achieve a more colorful random result.
Texturing
It doesn’t make sense to show every single mat we used so we will focus on the vegetation where we used Forest Color and the water material.
Below you can see that in the branches diffuse slot we used Forest Color, and inside this one, there are four copies of the same diffuse map. With the color correction we changed the gamma or the RGB of each map to achieve slightly different results. You can also use Get color from gradient inside the Forest Color.
Branches Material :

V-Ray 2 Sided – Tree Leaf Material :

For the water we created a plane and subdivided it (50×110). We then applied Houdini Ocean (plugin) to it.
This plugin is free and you can download it from here :
https://www.guillaumeplourde.com/
It is an amazing plugin to create waves.
Below you can see the material settings as well as the Houdini Ocean settings. In this case, the amount of waves used was very low, but mixed with bump noise I think it created a nice result.

Lightning
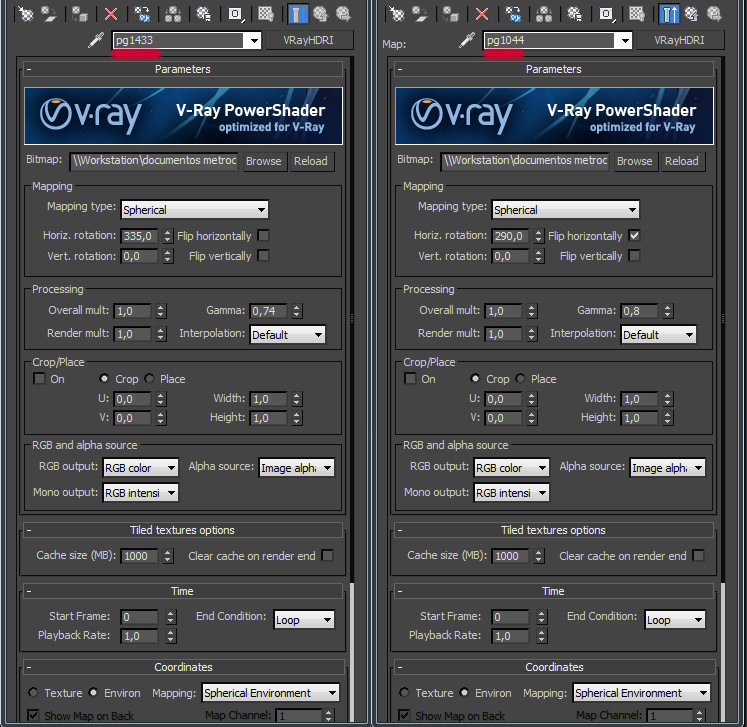
For all shoots we used a HDRI inside a V-Ray Domelight (default) without V-Ray Sun. For the normal day shoots we used Peter Guthrie´s HDRI 1433, and for the fog and interior shoot we used his HDRI 1044.
Here are some light tests we made :

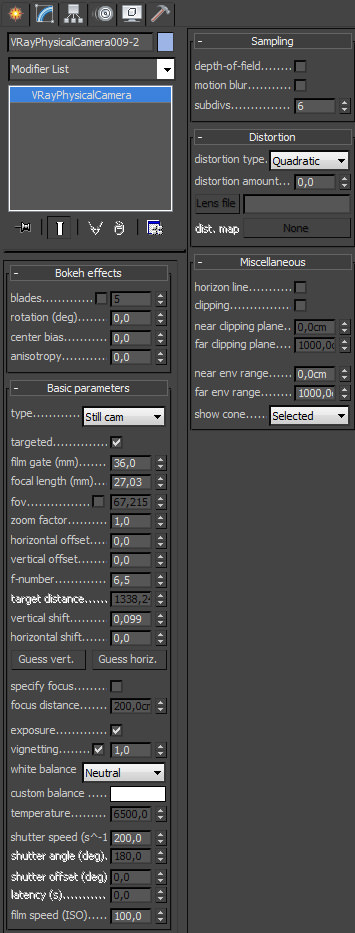
Below you can see both HDRI settings and camera settings (almost default) used for the shoot where we see the swimming pool + chair.
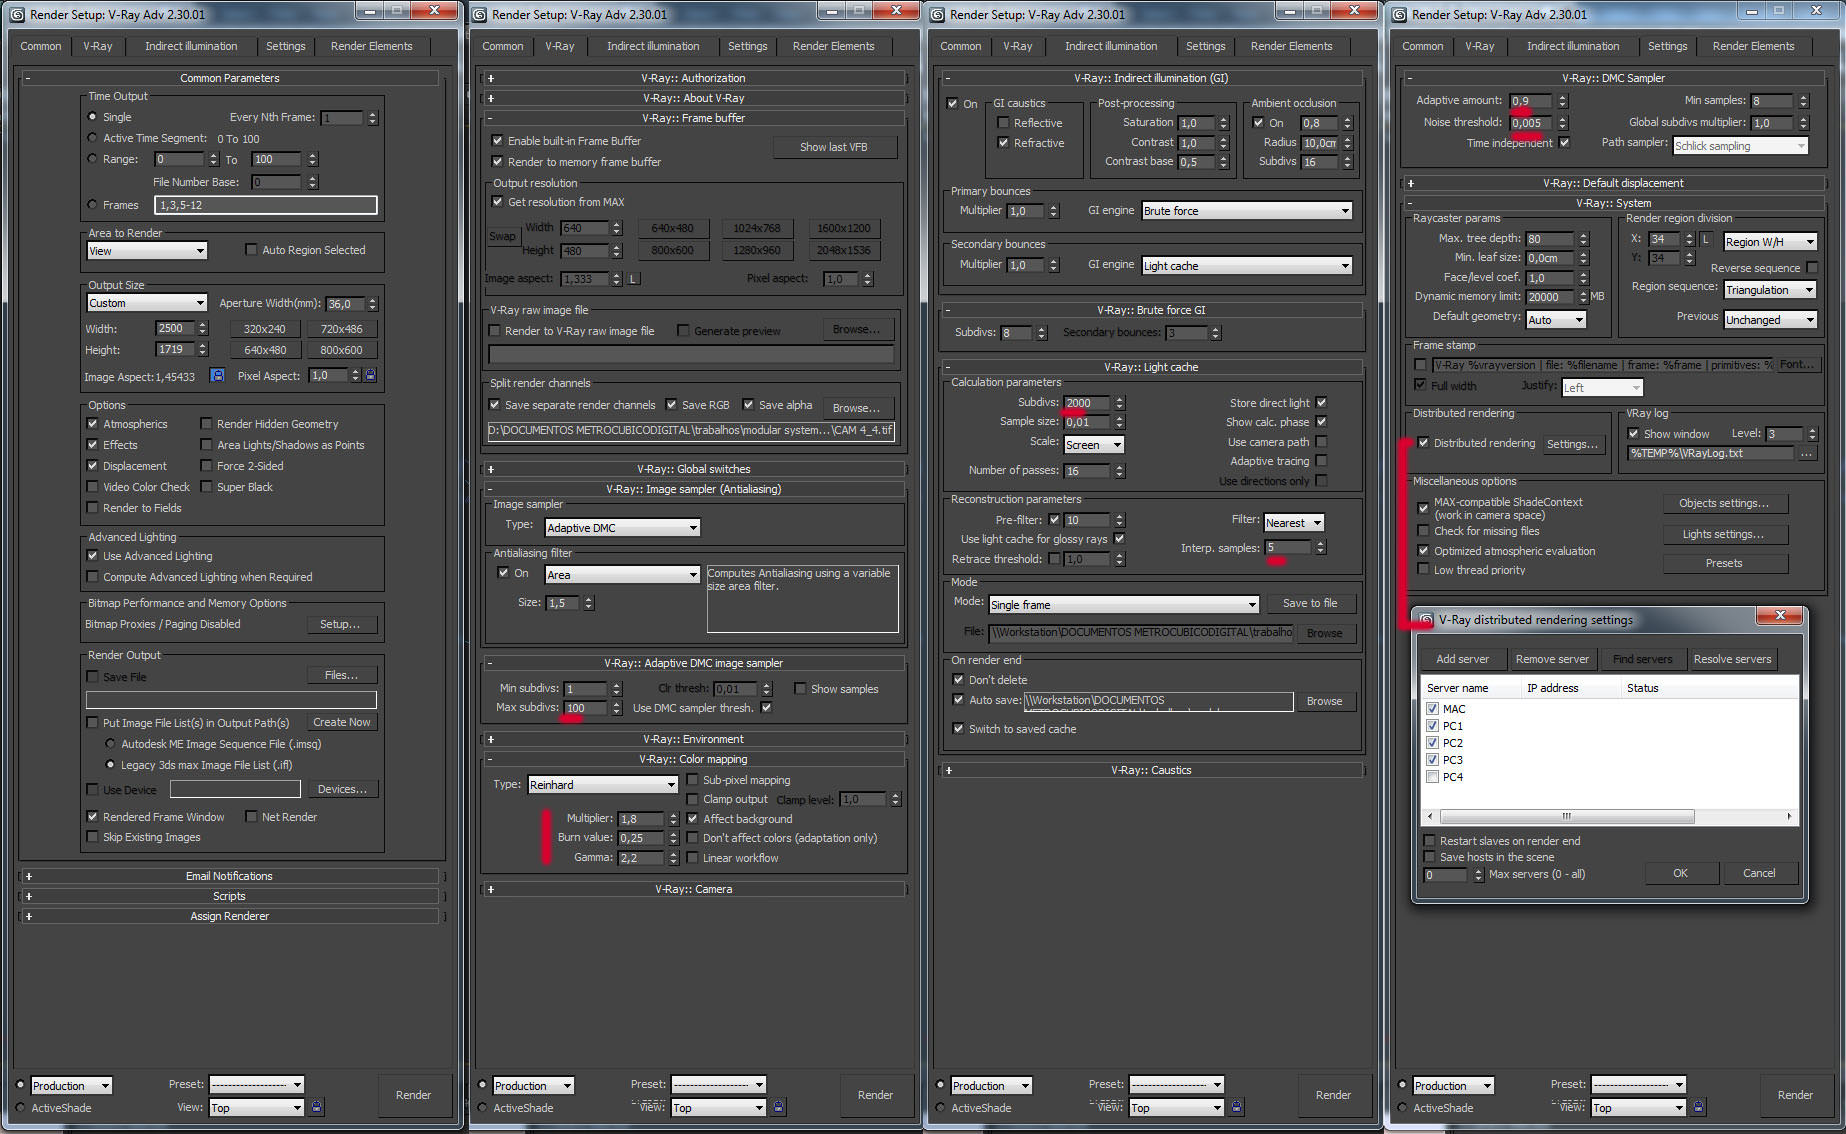
Rendering
For all exterior scenes we used good old Universal Settings exactly like below. The only difference for the interior shoot was changing the Reinhard Color Burn to 0.05 and multiplier to 1.2.
Post Production
We show below a sequence of the post production in Photoshop done for the general exterior shoot. For the other shoots we used almost the same procedure.

STEP 1 – Raw Render

STEP 2 – Levels

STEP 3 – Color Balance

STEP 4 – Red desaturation

STEP 5 – Yellow and Green desaturation

STEP 6 – Curves

STEP 7 – Dark zones exposure

STEP 8 – Vray Specular Channel

STEP 9 – Vray Atmosphere Channel

STEP 9 – Vray Extra Tex Channel

STEP 10 – Vray Reflection Channel

STEP 11 – Vray Refraction Channel

STEP 12 – Vray Specular extra Channel

STEP 13 – Magic Bullet Looks – Black Diffusion at 75 percent

STEP 14 – Vray Zdepth Channel

STEP 15 – Flatten and 35 Sharp Amount
I hope you found the ‘Treevillas’ Making of useful. Good luck and see you next time!

Metro Cúbico Digital, headed by Jacinto Monterio, is a firm committed to deliver high quality 3D visualization images and animations, destined to architects, designers, real-estate investors, furniture industry, publicity or private individuals.


Beautiful. the post production topic is so much helpful to see the differences between effects… for me that is learning xD
btw, ty Ronen for the nice updates and the author of this project
TOP
Nice! The mood, colors, attention to details….very lovely! I really like how the vegetation came out.
Cheers.
Very nice work, neatly done … i was wondering what’s the numbers above the HDRI test ? is it the timing ? how can i control it ? .. Thank you.
very nice work
thanks for sharing
In your screen of the water material, the diffuse map is uncheck. is it normal ?
so why did you put the jpeg in the diffuse map ?
archijex
After some testing the diffuse map wasnt used/needed in this case. Its just there to show that if you want you can had it for other water effect.
essmensh
Its just the name of the HDRI (1004 means 10:04). You can´t change day/night time in an HDRI.Its fixed.
First of all thanks for this awesome tutorial, it’s a great work as well. I’ve got a question: why the Brute Force subdivs amount had left default? Is it something there to compensate this low amount? The explanation will be really useful for me. Best regards!
SlavaKuzmin
Many thanks!
Max subdivs Adaptive DMC Image Sampler is set to 100 so no need to increase BFsubdivs.
Hi
I did some tests using the same setting from you, but I can’t get same image brightness as yours(1433), it is always over burn the white model but the sky is to dark and not as saturated as your image. Am I doing someting wrong?
Lantrancy
Hi! It´s impossible to copy settings into a completly different scene and expect similar results. You mention your model is white. There´s no white in the scene above and white overall makes things burn. You can use settings as reference but you need to adapt.
In resume, each scene is different.
JacintoMonteiro Lantrancy
sorry, I mean I use a grey material override in order to tweak the HDR, I know there will be differences between defferent scenes, but refer to your lighting test image and settings, the difference is too large, at least the HDR background should be close with same settings, I think I still miss something
Just beautiful! I thoroughly enjoyed this particular “making of”. Thanks Jacinto and thanks Ronen.
I did have one question though….you mentioned you achieved the lighting with the use of an HDRI and NO vray sun. How were you able to get the sharp shadows? I’m curious because I’ve tried a similar approach but always find the need to use a vray sun to get the sharper shadows. I too use Peter Guthrie’s HDRI’s (1103 Clouds and 1433 Sun Blue Sky). Any pointers would be MUCH appreciated. Great work once again!
JacintoMonteiro
Just beautiful! I thoroughly enjoyed this particular “making of”. Thanks Jacinto and thanks Ronen.
I did have one question though….you mentioned you achieved the lighting with the use of an HDRI and NO vray sun. How were you able to get the sharp shadows? I’m curious because I’ve tried a similar approach but always find the need to use a vray sun to get the sharper shadows. I too use Peter Guthrie’s HDRI’s (1103 Clouds and 1433 Sun Blue Sky). Any pointers would be MUCH appreciated. Great work once again!
malmond JacintoMonteiro
Yes, to get sharper shadows you should tweak the gamma of the Vray HDRI, in the material editor. Place around 0,7 and 0,9. Depends on the HDRI. Hope it helps.
sir can u please show how to do post production in photoshop for the above Making of Treevillas