


Making of ‘The House’
Rarely have I ever seen a private house residential project get so much attention and done with so much detail as ‘The House’ by Atelier York. This project marked the beginning of Alex York’s Atelier, starting as a relatively simple commission to produce exterior renders, but over the span of four years transforming into a complete 3d creation of the house using 3ds max & Mental Ray as the main tools producing more then 40 still images and the ‘Highlights Reel’ animation that you can see here. Follow Alex as he describes the process of creating this project, there is much to learn from him. Enjoy!
Before I hand it over to Alex, Let me just say that this might not be the typical making-of article you would expect, since it does not show actual settings accompanied by viewport screen-shots. The main focus of this article is the animation, with actual snapshots added to support the text which turned out to be long, but very informative. A second part might be published with more specific in depth material… but lets wait for your feedback first 😉
And now… to Alex,
 Author: Alex York
Atelier York is an architectural visualization studio based in London, UK, with over five years of experience in the field, working with some of the world’s largest architectural practices, interior designers and developers, from Foster & Partners to Richard Rogers Partnership, MMM Architects to John Pawson and Barton Willmore among many others.
Founder Alex York is a council member of the Society of Architectural Illustration. His work has been published in the Architects Journal, Building Design, 3D World and in various architecture/design books and publications, both in print and online.
The studio’s specialties include computer-aided 3D design for the architecture industry, architectural photography and digital image manipulation, covering everything from luxury high-end residential projects to offices, public realm and planning work (master plans, eye-level planning shots etc.)
THE HOUSE
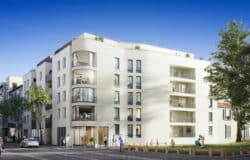
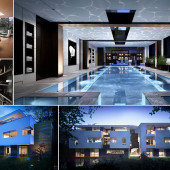
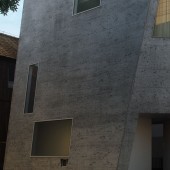
Before we dive into the details of this project here is an overview of the house from outside at dusk and the video. You can find a full set of the images in the Inspiration section – ‘The House’ by Alex York.

BACKGROUND
“The House” is a project that started life for Atelier York back in 2008, with a commission from the architects to produce a few relatively simple exterior renders of a new project they were working on, to better help them visualize their design. We were then asked to produce planning stills showing the proposed building in situ and its (very modest) impact on the existing building and landscape. A fly around animation was also produced. The building was granted planning permission and this quickly evolved into commissions for detailed, full-scale visualization content, including high-res externals, detailed interiors, updated fly around animations and, finally, two 7 minute fly through animations. The first to show the primary spaces within the house and to convince the Client to green-light the project, plus a fly around of the exterior, the second to show the secondary spaces and to help the Client choose finishes and to tweak details.
After almost four years of hard work, we are thrilled to finally be in a position to present the studio’s “Highlights Reel” – a collection of our favorite shots from the full 15-minute animation, with accompanying stills. In total, over the last four years, the studio has produced over 15 minutes of animated footage for the client, and more than 40 still images.
We enlisted the help of several well-known industry professionals and services including London-based freelance artist David Connolly of Insightful Light, Workstation providers BlueGfx and RenderNation, the studio’s render farm of choice for demanding projects.
THE PROCESS
CAD

The fly through part of this project kicked off in early 2010. The architects supplied us with an enormous pile of DWG CAD drawings for the interiors and some mood boards, sketches and material, lighting and furniture specs. At this stage we already had the full exterior model including the landscaping completed, as we’d already produced a set of exterior stills for the Client’s approval.
CAD drawings were stripped of any blocks, hatches and text using the usual filter command. The plans that were supplied to us were construction drawings, so they contained a lot of unnecessary info that could be removed for modeling. All CAD drawings were moved to the original to remove any possibility of distortion when imported into MAX.
MODELING
The first step was to take our existing exterior model and model up the interior spaces.

The modeling process itself was relatively straightforward. There was an enormous amount to do but it was just a case of getting our heads down until the work was done. Approximately one month was spent producing the furniture and lighting models alone, with one further month working on the structural geometry and facade details. We used stock libraries for a few pieces but the majority of the furniture was either bespoke (designed by the architects) or antique and not available online. In total I think there are over 500 unique pieces of furniture, artwork, lighting fixtures and design objects in this house.

All of the modeling was done using poly modeling with frequent use of the Slice command (and quick slice) to cut holes in ceilings for the spotlights etc. Virtually every corner of every wall and shelf was chamfered to allow for extra detail. We used a fantastic script called Stone Placement Tools to create the stacked island stone wall shown in the pool gallery space.

Here is a video showcasing what this script can do.
We produced our own little script to automatically go through the thousands of unique stone objects and set each one’s Turbosmooth value to 2 or 3 depending on their scale in the view, to keep rendering fast. We also made great use of the wonderful Grass-O-Matic plugin to generate all the grass and bamboo objects. We used everyone’s favorite ivy plugin IvyGen to create the ivy for the entrance walls and the retaining existing walls surrounding the site.
Once completed to an initial level of detail, white renders were supplied to the architects for comments and refinements made as needed until they were able to sign the geometry off. We used approximated camera positions/views that we knew would roughly match the animatic cameras, to make sure that they weren’t commenting on items that would never be seen in the final piece.
ANIMATIC AND ANIMATION
With all the interior spaces’ geometry signed off, we pushed on with producing the first draft of the animatic.

They also supplied us with their own storyboard (a simple set of camera paths drawn in plan for each floor), which we used as a basis for our own animatic. Refinements were made to their paths based on discussions in various meetings. One of the main requirements of the architects was that we needed to show as much of each space as possible, so creative camera moves were limited somewhat. We kept the sequences as short as possible and tried to avoid the usual “walk-through” look present in a lot of architectural animations, opting more for a smooth-flowing path through from space to space.
We used ease-in and ease-out for the camera paths and used Bezier controllers on the Path Percentage element to control how fast each shot progresses.
Moving objects such as doors, mirrors and windows were animated simply using key frames. The architects (and we) were keen to keep animated objects to a minimum, as this was more about the spaces and not the items within them.
MATERIALS
We work solely with Arch&Design materials, to ensure maximum realism and photographic/physically based results in conjunction with the Daylight System and our Photometric lighting setup. We created a library of common “house materials” that were specified by the architects, from a simple white plaster and the wood floor to more complex materials such as the bumpy, dark bronze, the slatted stone and the island stone silver/brown walls on the lower ground floor.

Samples were provided to us for all the materials. Photos were taken at the architects’ offices and brought into Photoshop where any obvious unique “hotspots” were painted out and the maps made tileable (manually, using Offset). Any very strong colors were de-saturated, particularly from the main dark wood texture, to ensure that when warm sun hits those objects the wood doesn’t go green/yellow.
For the main dark wood material and floor wood material we used edited Arroway textures maps, including reflection maps. We did not use any Arroway bump maps on any materials, since the effect would not have been noticeable in the shots and would have increased render times enormously. Since most materials had some degree of reflectivity, there would be enough visual detail in them not to have to worry about this.

The main challenge with materials was the large expanses of the dark wood, particularly in the basement and ground floor. In order to keep render times as low as possible and to remove the possibility of speckles and fireflies, we used the Falloff to Color distance limitation in the A&D materials for any glossy reflective materials. This setting forces MR to stop reflecting the environment and objects beyond a certain distance, usually a few meters. Beyond that distance, you tell MR to reflect a solid color, such as a mid grey or light blue. To give one example, one of our shots was taking around 25 mins per frame to render with this disabled, and there were some speckles in the wood. With it enabled, just on the wood, it went down to 4 minutes per frame, and the speckles were gone.
Ambient occlusion was used on most of the materials throughout the house, particularly on the white and cream plaster (ceilings and walls), the floor and any large expanses of a particular material. Initially we used “real” occlusion that picks up the neighboring color of objects, for more realism, but this quickly killed our render times. Removing this and forcing the AO to be one solid color (usually a light grey for the plaster) brought render times right down and the results looked almost identical. We will talk about passes and why we didn’t render AO passes a little later.

One of the main challenges was handling the glossy reflections in the dark wood, particularly in the shots where it was most visible such as the basement shots. We initially tried using interpolated glossies but MR simply can’t handle this properly without some serious post-work being required to clean it up afterwards, negating the speed benefits somewhat. In the end we had to go for a brute-force approach and simply crank the glossy samples right up where needed, anywhere from 32 up to 64 in places. We had the render-farm standing by so this wasn’t such an issue.
The two most challenging materials to create were the floor of the pool areas and the books used throughout the scheme. Both were produced by using Multi-Sub Materials with many different variations on the base material (i.e. 12 different variations of the Vals Quartzite and 15 different book textures). We used the Material By Element to randomize the IDs and shifted the seed until a good, random generation was found.

The fireplaces were handled using bought footage of fire from a stock website. The footage was duplicated and mapped onto two rectangular planes, one behind the other to give depth. Subtle lights were placed just in front of each fireplace to throw some warm, flickering light onto the floor and objects nearby.
LIGHTING AND RENDERING
Lighting for this project was handled almost entirely photometrically. The architects had used a lighting designer to specify the exact lights and bulb types for all the fixed lighting in the house, such as spotlights and floor lights, even the garden lighting. We used the spec images and drawings from the lighting manufacturers’ websites to model each light source accurately (e.g. Rectangular, circular, long strip, tall strip, cylindrical cold cathode etc.) and, where possible, initially started by using the manufacturers’ supplied IES data. We knew that we didn’t want to be using real IES data for the lights in the final renders, since you don’t get much control over spread and the cone shape, but we used the IES as an indicator for how each light should roughly look and then replaced it with a normal photometric spot or spherical light, or in many cases a Line or Cylinder shaped Photometric light.

Almost every spotlight in the house has a real size and therefore real “area” shadows. In order to keep render times down, we started with only 8 shadow samples for each light and increased as necessary up to a maximum of 32 samples for very large lights and flood lights (coming down staircases for example). If we could get away with point lights/shadows we did. These were normally used where the light was so close to an object which blocked it that there would be no visible effect of using anything other than point, and kept render times manageable.
Every single light in each scene had attenuation enabled and set either just beyond the bounds of the scene (.e.g. 12m>15m) or smaller if used for creative purposes. Again, this helped keep render times down.
Specular was disabled for every single light. We wrote a little script to do this with one button push, which can be found at our site under Tools for Artists. Using specular on lights in Mental Ray (and other renders too) can often result in speckles and fireflies on your objects. Disabling this fixes it.
Occasionally, non physically based lights were used. The most obvious examples of this are the dusk shots, where a simple Skydome was used, with a solid color, and a Gradient background map. We simply needed to find a suitable light level for the main scene lights to compensate for the fact that this wasn’t physically based, but it worked very well indeed.

We avoided using Global Illumination where possible, to simplify our workflow. We also found that some scenes required such enormous numbers of photons to resolve blotchiness and color-bleeding that it negated the speed benefits of using GI in conjunction with FG. Some scenes rendered faster purely using FG, and were easier to control. We kept the number of FG bounces down as low as possible and used as much direct light as possible to keep things snappy.
Exposure was handled entirely using MR Photographic Exposure. We found that a white balance of 4500 was perfect for most of our scenes. All of the ceiling spotlights were set to a WB of 4500 to ensure pure white light hits pure white walls, for correct WB. Warmer lights tended to sit at around 3500>4000 and cooler, bluer lights up at 4600-5000.
The strip lights proved an interesting issue with this project. Mental Ray simply cannot handle Photometric Line/Rectangle/Cylinder lights using normal FG Interpolation. At the default interpolation of 50, these light types are almost guaranteed to “bleed” onto neighboring objects. E.g. A strip light bleeding through a ceiling cove.
In order to solve this you can reduce the Interpolation right down to something like 10>15 or so, but you will end up with blotchy FG, so you must compensate by using many more FG points and much denser settings. Inevitably, this slows renders down hugely. We did use this technique on some of the stills, but for the animated shots we chose to fake the effect of strip lights by using a very simple gradient on a rectangular plane, set to fade off using the same gradient in the Cutout slot. These objects gave a very good effect and rendered in no time at all, and didn’t flicker. The only limitation of this is that you cannot use AO on any materials/objects that are directly behind/underneath these faked lights, since they will render with artifacts. You simply disable AO for those objects. Another way of doing this is to use self-illumination on the material and actually light the scene using FG, but this requires enormous numbers of FG points and was not practical here.
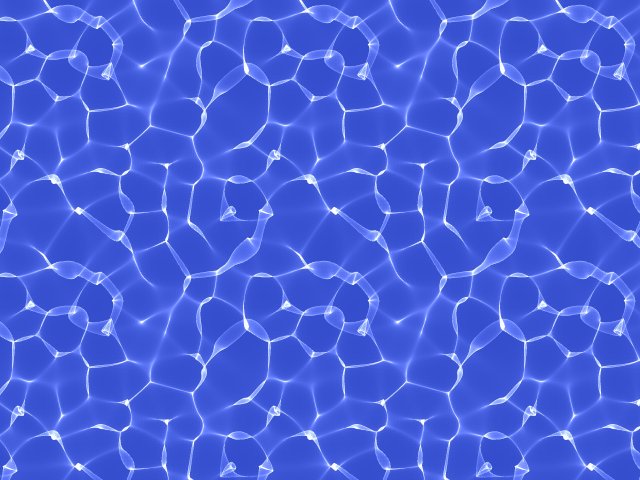
Caustics were faked. We used the Caustics Generator (free online) to generate our repeating/looping map and simply projected it through a normal light. This effect can be seen in the pool shots and the snooker room shots.

As I mentioned earlier, we made the decision not to work in passes for this project at all. This was done for the reason that we knew that the architects would need to see many different versions of each shot in draft form, and there simply wouldn’t have been time to re-render many different passes for each shot. We had almost 40 shots to render just for the second part of this project and well over 80 in total including the first part, so we needed a workflow that allowed us to tweak based on their comments, render and simply send it off to them as-is for approval. It also meant that post-production was extremely straightforward. Naturally this approach relies on your ability to “nail” your shots out of the box, with only minor color corrections and effects work needed in post.
Anti-Aliasing is always our worst enemy. We kept the threshold quite high for these shots, at 0.06 but used 1-16 samples to ensure there was no noise visible. Lock Samples was disabled and everything was rendered using Box filtering, which was more than sharp enough considering these were mainly animated shots. The stills were rendered at anything up to 0.02 threshold and Mitchell filtering, since they took no more than one hour each. We kept the blur values for texture maps tightly controlled, so that textures that required fine detail (such as wood) had low blur values (0.05 or 0.07) and textures that didn’t need such fine detail (such as plaster and the armourcoat render) were at the default of 1.0 to keep things quick.
Every shot was rendered at 720p 32-bit to EXR. This gave us the maximum flexibility to re-expose as needed in post. In the end, there were only perhaps 2 or 3 shots that needed a little re-exposing, and only a few objects within those shots. One good example is the snooker room shot (02:35), where the sofa on the far right was completely over-exposed but the rest of the scene was perfectly exposed. It was not possible to fix this in the scene itself, so we simply rendered a channel for the sofa and decreased the exposure until it matched the rest of the shot, with no noise and no artifacts present.

Many of the still shots were mapped onto curved planes and re-rendered with a moving camera to give the impression of a true 3D pan. We also used subtle zooms and pans to help animate the spaces.
We created a very strict check-list which was broken down into sections Modeling (deleting unnecessary CAD, frozen objects, collapsing as many objects as possible), Lighting (turning attenuation on all lights, turning off specular on all lights, shadow samples etc.), Materials (checking wood materials had enough samples, checking flipped normals, using faked AO, removing unnecessary bump maps) and the usual general scene checks such as file paths and making sure there are no missing maps or proxies.
In order to allow the architects to comment (and hopefully sign off!) the shots, we rendered several stills from each shot along the camera path. Once these were signed off, everything was checked, double-checked and triple-checked and the FG passes (and GI passes where used) were rendered in-house on our relatively small farm. Once complete, everything was packaged up and sent to Render Nation for testing. They supplied us with test frames so we could check that everything was spot-on and the final renders green-lit.
POST-PRODUCTION

As we mentioned earlier, our workflow for this project was very much to get everything working as well as possible out-of-the-box (i.e. Straight out of the render). However, there are always things that need tweaking in post. The most obvious of which is the tone and general warmth of the shots. The architects were keen to ensure that the family spaces were warm and welcoming to match their softer furnishings, while the more staff-based areas were kept cool. The other most common post technique was to add faked depth-of-field to the corners of the shots. This was done with a very simple painted mask and a little Gaussian Blur. Light vignetting was also used to draw the viewer’s eye to the focal point of each shot (usually the dead center). We also added subtle glows and glints to some of the shots, especially to the chandeliers and other exposed light-sources. This was done by rendering a simple black-and-white channel for the bulbs and using that as a mask to generate the glints/glows. Subtle glows were added to most of the lamps using this technique.
The only element of “compositing” as such was to add the background pass to each shot. This was done very simply by layering the beauty pass over the background pass and applying relevant color-corrections, blurs and glows to the background to comp it in convincingly. Glows were particularly useful in allowing some light from the BG to spill “inside” (i.e. On top of the beauty pass).
Inevitably, there are always a few artifacts and issues to fix in post due to certain materials not behaving as expected, unwanted noise etc. We made extensive use of Render Subset of Scene to re-render new/fixed objects over the original beauty pass to handle this process.
One of David’s more inspired moments was to go out and shoot video footage of some tree canopies outside our studio. We comped these over the final exterior night shot, added some depth-of-field and color-corrected to match the render and BG plate. It looked so successful that we used some of these tree footage files through windows in many of the still shots.
Drop by and visit at our Atelier website too – Atelier York
You are welcome to comment on this article and ask questions using the comment box below!


@alexyork3d exciting… just about to click the links!
@paguthrie Hope you enjoy it Peter!
@alexyork3d let’s have a in-depth read ! thanks for sharing
@TAvisual our pleasure! enjoy 🙂
@alexyork3d I dream of getting some much time on a project. Excellent work!
@renatomarchio thank you! Yes it was a long one… Actually it’s still ongoing! Not quite finished yet!
@alexyork3d Hopefully you will get to see the finished project when it is built and it looks as good as the animation!
@renatomarchio we’re in talks with the architects to shoot the build as it goes up (timelapse) and stills and possibly video too. Hopefully!
@renatomarchio It will be surreal walking around it once built. I think we know the house even better than the architects by now, in a way!
I been reading this a few times while editing it, and now I dive into it again – in relaxed mode! hi hi
Big thanks to alexyork3d connollydavid and also bluegfx and rendernation
@alexyork3d just watched your video mate with iain and the gang, congratulations mate, Nice work 😉
Correct @renatomarchio We all hope to get such Clients and the time to get it right, aren’t we 😉 (right pay too)
Amazing I thought you’re working on Hayes Davidson team!
@cgrecord He did, but he is his own boss now 😉
@ArkinAdamEsref thanks mate!
@alexyork3d @connollydavid Congratulations fellas, it looks great! Well done on 4 years hard work Alex. Looking forward to reading making of
@alexyork3d Gr8 work alex, love the exterior dusk shot. Nice one!! Well done…
@ZeroNyne09 thanks mate glad you like it 🙂
Pretty amazing work. The only thing that I “bothered” me is that the water don’t really look like water… seems more like a glass surface to me. You can see the water ripples on the ceiling and walls but no on the water.
Other than that, truly amazing work.
Pretty amazing work. The only thing that “bothered” me is that the water doesn’t really look like water… seems more like a glass surface to me. You can see the water ripples on the ceiling and walls but no on the water.
Other than that, truly amazing work.
@bluegfx no worries! Thanks for your resources and help with the project!
Thanks for your feedback! The water itself is rippling but only very subtly. The architects were very keen to make sure it looked serene and the water undisturbed, otherwise me might have exaggerated the effect a little more. Thanks again and very pleased you like the piece!@DrorBekerman
I used to work at HD many years ago but founded Atelier York back in 2008. Very pleased you like the project! @cgrecord
@alexyork3d @ronenbekerman Great work! enjoyed making of. Bet there were some hurdles with so much animation! Nice to see MR here too 🙂
@JohnW_3D Thanks! There certainly were. Perhaps in a future piece I might be able to talk more about the client side of things. Thanks!
@andrewmartin3d @alexyork3d cheers fella, it was Alex’s vision to be honest, I was just making the tea 😉
@connollydavid @andrewmartin3d but what tea it was! no, really, it was 50/50. 🙂
@ronenbekerman @alexyork3d well done on the blog Ronen, looks fantastic! 😉 thanks for the exposure!
@alexyork3d Ahh so that’s it is that all lmao fking wicked love the AY logo on the tv hehe well done. U tube version too quick. So detailed!
@_slymon_ cheers! yes the TVs originally had the project logo on them, which we had to replace for this online version.
Great work Alex! That’s a massive amount of custom modelling/set dressing! It’s also wonderful to see MR getting some love! 15 minutes of detailed interiors is no joke when it comes time to render in any engine. That’s 21600 frames at best! Your optimization methodology was spot on! A very enjoyable read. I really liked the light touches of specific techniques and settings without getting “Down in the weeds” so to speak. One question regarding post work, did you entertain adding DOF and or MB with zDepth/vector passes or was this something taken off the table due to the huge amount of animation to be done? Great article!
Thanks for doing such a fantastic job with the write-up, Ronen. Very much appreciated!
Hi Samuel. Very pleased you like the piece! It was indeed a huge logistical task. Regarding DOF, we did think about it but the architects were very keen that this was more of an “explanitory” piece than something arty and “filmic”, so they needed to see every detail across all frames, including objects right at the corners and in the distance, so DOF wasn’t really an option. If you look very closely you can see that we did add some simple post-DOF to the very edges of the frame, but nothing too strong. We think this helped a little to give it a filmic “feel” without causing issues for the client to “take in” everything. I hope that answers your question! If you have any more, please fire away. Thanks again! @samuelconlogue
Sure thing guys @connollydavid @alexyork3d It is great work and very interesting read. Nice to know more about Mental Ray actually 😉
@ronenbekerman thanks again! And be sure to follow @MentalRayTips for specific MR tips used in the project.
@alexyork3d @MentalRayTips I am actually, from the get go 😉 Since I was interested in iRay… It should work just the same with #MR scenes?
@ronenbekerman pretty much yes. although iRay is very strict with physically-based things. MR is more relaxed and most tips cover…
@ronenbekerman tips that help to solve bugs and other issues that iRay doesn’t have or won’t let you do.
@ronenbekerman @alexyork3d Just read the “Making of” – very informative and nice to get such a detailed breakdown. Thanks for sharing!
@andrewmartin3d thanks! very glad you like the piece
really, really hardcore work. never thought that a project like this ist possible with an architecture office (know bout the permanental corrections from architects, but u showed me that its possible to do an animation like that with such clients. thougt its a real estate company, u worked for… RESPEKT!
@alexyork3d @connollydavid Guys very well done for the House.
It’s been a long way but you did it! Bravi!!
@superpeo Gazie mate!
Thank you! Very much appreciated. I think we were (and are) lucky in that the architects are just very, very good. I love their style and their workflow and we’ve become good friends as well as business partners. I know what’s in their head and they know how we work and how long things take, so it’s a great relationship. I think one of the most important things was to set the scope of the project out very clearly from the start, so everyone’s expectations were the same. There was a time during the project where a 3rd party influence tried to turn it into a Disney-style hollywood animation with sound effects and other gimmicky elements, but he got a swift talking-to and we resumed as planned. Was rather tense for a few weeks! Thanks again and we really appreciate the kind words. @AndreasRenderWeirer
Thanks for the making of. Great quality in those shots and huge work, congratulations.
I have a small critique if i can. I felt a bit dizzy after the animation, I felt like low frame rate, motion blur in post for those fast camera movements maybe would improve it.
@alexyork3d excellent work, well done to you both. cool house too!
@andybrotchie thanks mate. It is indeed a fantastic house! Wish I could afford to live somewhere like that! One day…
Thanks! That’s a very fair point. We also had trouble with this side of things during production. The trouble was that we had so many shots to fit into a relatively short film. The other consideration was that this was not designed to be viewed online or on DVD/Blu-Ray etc. but only on an iPad (the Client’s own iPad), and the idea was that they could simply pause it at any moment and take in the spaces. So slow moves were not necessary. I think as a “film” it could certainly benefit from being a bit slower. Cost was always a factor, too. Double frames = double cost! Thanks again. @jpintor
@andybrotchie @alexyork3d Nice work!
@3dVws thanks very much!
What a great work and making-of !! The rock script is stunning 😀
thanks! yes it’s a fantastic script. very useful indeed. the same person also made a rock generation script, which is very useful too. By the way, my “Kill Specular From All Lights” script can be downloaded from http://cargocollective.com/alexyork/#1624148/Tools-for-Artists. We used it many times during this project! @TAvisual
@TAvisual That was a nice little surprise… I think I’ve seen it before, but never in context of actual viz work. Thanks alexyork3d for bringing that one to my attention again.
oh, and the script to automatically change the number of Turbosmooth iterations on the bricks that that script generates is:
for i in selection do i.modifiers[#TurboSmooth].renderIterations = 4
Change 4 to whatever value you want.@TAvisual
thanks for feedback, and many good clients for the future.
This work is good, but I do have some major concerns about the article. So, I’m going to step out on a limb and be a jerk.
It sounds as if you don’t have a full grasp of Mental Ray, as there are so many false statements about what it can and cannot do. Yes, MR can handle interpolated glossies very well. You just have to know how to adjust them in the settings to add a bit more detail. By default all materials only look up 2 neighboring points for interpolation, simply set these to 4 or 6 and your artifacts disappear without increasing your render time much. You also want to make sure for large surfaces, you don’t drop below 1/2 resolution. These settings are per material, so you can mix and match as needed.
Yes, MR can handle strip lights in the ceiling without color bleed. No, you do not have to crank up your FG solution to decrease splotchies. I suggest you check our some of the videos by Jeff Patton. Also check out Jeff Patton’s blog as well as writings from Zap Anderson before you make claims about what MR can’t do.
Your high amounts of bleed are more than likely related to your light settings and exposure settings. Your high FG is because you don’t have proper lights set up. If you increase the amount of photons in your lights, especially for night scenes, you don’t need to jack up your FG. Yes, increasing your photons does increase render time but no where nearly as bad as high FG.
As far as turning specular off for all the lights, that leads to very flat renders that are tell-tale signs that its CG. Rather than figure out why the materials are showing sparklies, you just turned them off? That’s a problem with your material not your lights. That’s the user not knowing what to do versus a internal problem with Mental Ray.
With the advent of render elements, there is no excuse to not render out passes for things such as reflections, specular, ObjectID, RenderID, and MaterialID. These render with your scene and do not add extra time. Using baked in AO through the A&D material is far slower than just rendering out one AO pass. The “out of the box” mindset hurts you more than it helps. It costs you far more time.
For a making of, it contains many more false statements and misleading information than it should. Rather than figuring out why things weren’t reacting right, which were clearly errors, you just decided to turn them off or not use them and make blanket statements about Mental Ray.
It’s an impressive set of work, though the camera moves are in serious need of work, but the actual writing itself is quite full of misleading information.
Hi there. Firstly thanks for taking the time to offer your feedback. Not particularly constructive, given the tone, but nontheless I think it deserves a reply.
I did make a couple of blanket statements about MR. The fact is that we spent many, many hours (over months) tweaking and trying different settings to achieve certain goals, and found that the “out of the box” approach worked for us, on this job, this particular time. Most of the time, passes are the way forward. But we needed sign-off on each shot and it was crucial that we didn’t need to have complicated post setups for the 60+ shots that we produced. It was, or would have been, counter-productive. I disagree entirely that specular speckles are down to user error (with materials or otherwise). MR simply does have issues with specular generating speckles. Turning it off removed the speckles and we didn’t lose any reflective detail because of this, because we used real lights and reflective light sources. “Specular” doesn’t exist in the real world (or in photography). It is simply a faked reflection of a light source. This is not needed when you are using “real” reflected light sources. Similarly, why spend hours and hours digging through everything to try to resolve the issue when simply disabling specular entirely solved it in seconds? We had deadlines and a limited budget to work with, as do most people. I’m sure you can appreciate that.
With light bleeding with FG interpolation – this was very much the same situation as with specular speckles. We spent a very long time tweaking and hunting for a way around this, including changing the FG noise reduction values. You’ll just need to trust me that our geometry, materials, lights and exposure settings are 100% flawless on this project. The issue is very much with the way MR works with interpolation and photometric line/rectangle/cylinder lights. We found a workaround that worked for us. There might be other ways of getting this to work, and I’m all ears! But we had to at some point just decide on a workflow that didn’t have issues and we found one. It might not be quite what you’d have done, but that’s fine.
The Interpolation settings for glossy reflections – same deal here too. We tried every combination of settings and there was always some kind of artifact. It *does* work. But not in all situations. Perhaps I should have qualified my statement a little, but I think I got the point across that it has issues.
Regarding baked AO v’s AO passes – this comes under the same issue as I mentioned earlier. Same, with your reflection passes etc. The only reason to use passes at all is if you are definitely going to need to use them to tweak your renders in post. We achieved the look we wanted without having to do this, and it saved a significant amount of production time in doing so. Using passes when you don’t need them is a waste of time. And rendering AO in the beauty pass really isn’t a big deal in terms of rendertime.
With FG/GI etc. I tried to make this clear earlier in the article. One man’s solution is another man’s problem. In our case, it just wasn’t practical to use GI on most of the shots, and it wasn’t needed. The FG passes rendered extremely quickly (due to spending many weeks optimising the models, materials and lights etc.), so spending even more time producing the PMap passes simply wouldn’t have been worthwhile. I also don’t think GI adds all that much to renders in some cases. More often than not, very good direct lighting with subtle FG can be all you need to light a scene nicely, and quickly. It’s just another case of what works per shot, per job, per person. I’m sure you work differently, and that’s fine. But the way you personally work is not necessarily the “right” way, and neither is mine.
I also tried to explain in some detail why we chose the camera moves that we did. It’s always a difficult situation where you have not only the client but the architects directing the moves, or at least specifying the general moves. I’m sure you can understand that there is a huge difference between how a commercial project looks and how a personal project looks. I think we managed to produce something that works on both levels.
Thanks again for your time and I hope this goes some way to addressing your points.
@Clamps
I should add, because I didn’t mention it in the article, but we did render an enormous number of object passes (simple matte channels). And there were a good number of RSoS passes for additional objects and reflection replacement etc. @Clamps
http://jeffpatton.net/2010/12/mental-ray-faq/ This post covers many of your issues. At the bottom, the overbrights are covered. The sparklies tend to be generated with a 32-bit frame buffer as the highlights exceed a value of 1. http://area.autodesk.com/forum/autodesk-3ds-max/lighting—rendering/mental-ray-chrome-problem/
Disabling specular on one or two lights is fine, but reading that you did it globally made me spit coffee all over my desk.
Turning on GI solves the splotchy issue you were seeing (see the detailed breakdown of FG/GI in #20 of the FAQ link). For most interior scenes, you pretty much need to use FG/GI in order to smooth things out and especially if there is no direct sun source. For a final render, low FG with basic GI settings works very well. The larger your frame size, the lower sampling settings you can use. What works for 864×480 is overkill for 1280×720 and vice versa. Well, if you post your images, because after you add in some soft bloom any extra noise is eliminated by post work.
MR portal lights also help, even used as fill or bounce lights as in a studio lighting setup. They just blast the scene with photons, which more photons mean more information which leads to a less blotchy solution. Again, render time does increase, but no where near as much as cranking up other settings.
If you used a reflection render element, that renders at the same time as your frame at no extra cost, you can use that in post to overlay/screen/soft light onto your reflective surfaces and if you add some blur to that you can eliminate most if not all noise. Therefore, you can use a little lower render settings and get faster render times.
Also, his (Jeff’s) videos over at the Gnomon Workshop solve your issues as well. All I’m trying to say is that there are solutions out there to what you couldn’t do. I do suggest the interior mental ray lighting and solving noise in MR videos. I have them, I used them when I learned Mental Ray. I now teach MR at the university level as well at Autodesk certification centers, and I always show them to the students.
http://www.thegnomonworkshop.com/includes/bundles/jpa_bundle.php
I guess what it comes down to is personal choice. I think your work is great, but your workflow is that of 10 years ago. The jaw-dropping viz work that is out there today was not render out of the box. There is a large post production component added to them. Though, in the end, what you did worked and you got a great result so I guess that’s all that matters.
I hope that you don’t think I’m doing this just to be an ass. I just read some stuff in your article that really stood out to me as older or obsolete methods.
I appreciate your taking the time to link to some of those articles. I’m familiar with most of them but one or two are new to me and I’ll give them a good read through soon. I think one issue here is that there is only so much detail we had time to write for this article and I’ve probably left you with the impression that hardly any post work was done or that certain things were simply left “as-is” because we didn’t have time. But that’s not the case at all. If I get another opportunity to go into detail on some elements of our workflow I’d be happy to cover these. They include our use of Sky Portals, as you mentioned.
As I say, Specular is actually a good example of one of your “old, obsolete” methods. I really don’t think it’s needed these days, not when you’re reflecting actual light source geometry. So I’m not sure your solution deals with the real issue, although it’s certainly useful for people who might still be using the technique.
As you say, all that matters is the result. How you get there isn’t so important, so long as you’re not wasting time or money, which we didn’t. I think when it comes to rendering, we’re all still learning. @Clamps
@alexyork3d @Clamps Some serious MR information is flying around here! Can’t understand most of it, as I’m 100% V-Ray user currently… But I bet most MR users appreciate this valuable discussion.
I hope I do not open yet another can of worms, but perhaps the reason V-Ray is more popular in archviz is due to the fact it gets things done with much less tweaking around?
Feel free to prove me wrong 😉
haha indeed. well I actually feel the reverse is the case in my line of work anyway. I used vray for several years before moving to MR and found that MR required quite a bit less tweaking to get good, clean results out of than vray. i think of it as a renderer that sits somewhere between vray and maxwell in that respect. but I guess it’s a simple case of when you know your renderer inside-out it’s going to work for you, so it doesn’t matter what tools you use or even how you use them. I do think that MR has a certain reputation with the arch-viz world as being “behind” vray, which in some aspects is actually very true, since vray certainly has more “features” to play with. But results are what matter, and you can achieve amazing images using MS Paint if you really want to! I’m glad that there’s a great selection of tools we can all choose from. I’m going to be looking into Fry and Indigo next. Why not? :)@ronenbekerman @Clamps
@alexyork3d @ronenbekerman @Clamps Don’t forget about NOX Renderer, looks very promising
Yes i just saw this the other day! Looks great. Thanks for reminding me to check it out! 🙂 @jpintor @ronenbekerman @Clamps
@ronenbekerman @alexyork3d @jpintor I just started playing with it. Pretty interesting approach to the post side of things. Potentially removes the need to go into Photoshop for color correction as it has a RGBL curves editor+ post DOF, Glare, Bloom, Chromatic Aberration etc. I wrote a blog post on it just this morning. http://www.infusionstudios3d.com/?p=726
I just wish it was faster, but hey it’s a beta.
@samuelconlogue @alexyork3d @jpintor Thanks for this link. Very intresting. I commented about it on your post.
All the tech aside, hate the music, if this piece is used again I might cut my wrists and some of the materials and furniture need burning but thats more to do with the architects I’m guessing?
Some scenes look really cool and some a lil overly reflective and fake looking.
Looks like a huge amount of work and effort gone into it though, just needs some softening up, I like the idea of using some depth of field.
You’d still get most of the detail and a hell of a lot more realism.
All in all pretty amazing stuff, thanks for putting it up.
Haha yes the music… it’s a funny one. I personally grew to love it, and it’s definitely a move away from the usual “chilled-out pop” that plagues a lot of arch-viz animations these days. But it’s a taste thing. The idea was that this music fits the “theme” of the house. I can’t go into more detail on that, as it would break the NDA, but it was chosen for a specific reason.
I really hope that we get a chance to do something more “filmic” in the future, and include things like the classic DOF look and a little motion-blur, but as I mentioned in the article and posts here, the brief for this project was to keep everything absolutely in focus, sharp and clear, so these things weren’t an option.
Thanks again for the kind words and I’m glad you like the piece.
@Softminimal
@alexyork3d @Softminimal Probably the client is an executive at British Airlines )))
Mental forever 🙂 great works.
thanks! yep, there’s life in MR yet! I would encourage more people to try it if they haven’t before because they heard that Vray is “the” arch-viz renderer. Lots of options out there. @Tolgahan
The house is nice with such high level of detail.
However, seriously, fly-through animation is so 1998. The speed control and movement aren’t consistent and some shot I got dizzy because of the wild turn and fast speed. Guess, this wasn’t your fault, maybe it was the request of the client. I think with your creativity, you could do thousand time better than that edit.
Instead of a long movie which the viewers get bore right at the first half, it needs show jump cuts, some cinematic camera angle and a good transition between the shots. Adding a dip to black between the shots will make a big different. It gives the viewer a rest to take in what next. Right now, it’s like a machine gun, shooting thousands of things to the eyes.
Music was a bad choice, the animation doesn’t even go or match with the beat of the songs.
There are a lot of things that can make this edit even better and it starts from the most essential things. (And please no more fly-through camera :))
Best
@neighbourhood @_bendavies thanks for the link guys 🙂
@alexyork3d i’m really getting confused between mental and Vray.. i do all my projects on mental and it looks good (at least for me) having few problems with lightening.. but am still learning !! but people always tells me that i will do much better work on Vray… !
@AhmedMehyar@alexyork3d The basic is you can do it all in any render engine… be carful not to fall into doing stuff in a way since the render engine “confines” you – you should aim for what you like and the render engine needs to follow you!
I have no experience of value in MR but the general feel among the Archviz people is that you can have much easier work with VRay.
Like Ronen said, make the software work for you, not the other way around. But in many cases MR can be “easier” to use than VRay. Just depends on the scene, the project, the deadline and the artist. @ronenbekerman @AhmedMehyar
@Alex York please alex can you explain how to animate a still tiled map to get a real caustic animation ?i found the plugin but in pro version its not free
Hi Polygonner – you’ll need the paid version I think. You can just export from it to an image sequence. I think the website http://www.dualheights.se/caustics should explain how to do it in detail. Cheers,
@alexyork3d oh!! thx for fast replysorry, but i cant purchase the pro version, but can you generate a video 25 fps and upload so i can use it everywhere?
thank you in advance
no, sorry. i’m sure that would be against the licensing terms… 50 euros is not very much when you consider how useful it is! @polygonner
@alexyork3d i will if i cani am from Tunisia and we cant use internet payment from our country :(here is my mail if will change your mindotherwise thx for all your replymy mail polygonner@hotmail.commsn polygonner@hotmail.com
Alex, it’s amazing to me when “know-it-all” idiots post their stupid opinions of others work like they were sent from above to enlighten everyone else. In my experience, most of these “arm chair quarterbacks” are simply jealous and bitter that they couldn’t begin to create anything worth commenting on! So with that said, i would like to simply compliment you on The House project. I am a self taught 3D modeler/animator (Cinema 4D), have alot to learn, and seeing work on this level is very inspiring! Even more so when you consider you had to deal with clients! haha! I know all to well that there’s a balancing act between “what the client wants” and “what would like 10 times better”! So again, great job, this pushes me to work harder! Keep up the good work and don’t give the negative posts the time of day!
Hi Dave, Many thanks for the kind words. I’m glad this project has inspired you. It is indeed always a tough balancing act between what you want to see and what your client wants to see. They’re rarely the same thing as you say! Thanks again for your feedback. Best of luck with your projects!
I love your tutorials they are So Useful and They Are simply Amazing, many thanks!
Do U have any DVD tutorials? If Not You Realy Should Do One …Believe me thats kind of Tutorials that anyone will want. Take Those Text Tutorial And Make them On DVD
Thanks Shimon and glad you enjoyed it. I’ve not produced any video tutorials before but this is something I’ve been considering for a while. Thanks for reminding me!
Hi, Alex, Im a Maya User and im trying To learn how to use Vray And how to do Correct Lighting After i Saw Your Site BTW Amazing Works! and whan i saw the tutorials Section , Thats what im Been Seraching for a long tme.. 🙂
And im talking about Step By Step Complex Lighting..
@ShimonSundruci Many thanks. Well, this project was produced in Mental Ray, but I’ll consider producing tutorial videos soon. Thanks again.
Ok my jaw is on the floor and I seriously can’t pick it up its stuck… 😀
Parts at 1:03 – 1:08 and 1:56 – 2:04 ABSOLUTELY BLEW ME AWAY!!!
The best display of a hyper realistic lighting I’ve ever seen.
@vegeta.lssj Many thanks for the kind words! Much appreciated.
@alexyork3d Hello Alex! You are welcome and thank you for replying 🙂
BTW I just realized this project is done with Mental Ray!
Nooooo! 🙁 No matter how hard I try to forget about Mental Ray and switch to Vray(because simply put Mental Ray mentally tortures me with its instability, unpredictability and unreliability) I just keep noticing that Mental Ray provides more realistic lighting all the time… :(((
Of course I know its most about the artist…but so far judging by my long and painful research, Vray always turns out to look a bit more artificial to me…and I was just about to switch to Vray…now I don’t know what to do 🙁
May I ask, what would you personally recommend me? 🙂
@vegeta.lssj well, both are capable of allowing you to produce high-quality images. One is not better “quality” than the other, but I do generally find MR to be slightly easier to obtain high-quality results with than vRay. I think vRay tends to default towards medium quality renders and you need to work hard to push the quality. But then vRay can be considerably faster in certain circumstances after tweaking. It’s just what you prefer, really. Personally I use MR for high-end stuff and vRay for anything involving lots of trees or vegetation. You could always use both, then you have the best of both worlds! I hope that helps. PS. MR is in no way unreliable, unpredictable or unstable – I think your machine/setup/scene might be the problem, there.
Thank you for the reply! 🙂
Well maybe I just got a bit carried away 😀 But I really do have a lot of problems with Mental Ray in Maya…especially when it comes to fur and such.
But hey, I am still a newbie anyway so I blame myself for it partially.
Of course, I didn’t mean in terms of general quality….obviously they are both amazing…but somehow when I look at the interior renders that include a bright daylight with sun rays(and I saw a lot of them), 99% of the time I am able to say which work is Vray and which one is Mental Ray…isn’t that a good enough proof? 🙂
Thank you for your reply it does help a lot! 🙂
@vegeta.lssj Maybe. I think it’s more to do with how people use vray rather than what it’s capable of. Anyway best of luck 🙂
@alexyork3d Sure I’ll try to look on it like that and give a few more chances to Vray, because like I said – I really wish I was wrong.
Thanks and best of luck to you too! 🙂
HI all,
Great Visualization, wish one day I can produce such a nice Animation.
I have a small question, we still see in the animation (dunno what to call it) this jumping of edges, specially when the camera takes a turn, how can we overcome it, or minimize it more?
Well in my animation trials its huge and destroys the work.
Any opinion is highly appreciated.
Cheers
easy Render Kheireddine Ben
Looking forward to giving this a closer look on Monday. Renders look beautiful and Mental Ray tips are greatly appreciated.
AWESOME
r u use a hdri ?
i have some problem with hdri rendaring in vray ca u help me?
What a load of tosh!