


Making of Renaissance
I’m very happy to share yet another behind the scenes based on SketchUP + V-Ray. This time by Javier Wainstein. Follow him in this article as he describes the making of Renaissance, which he started to model referencing The Jane – A military church in Antwerp reinvented as a restaurant by Piet Boon.
Introduction
Hello All!
First of all, I would like to thank Ronen for inviting me to showcase my work in this great community and its blog, which I consider part of my daily inspiration dose.
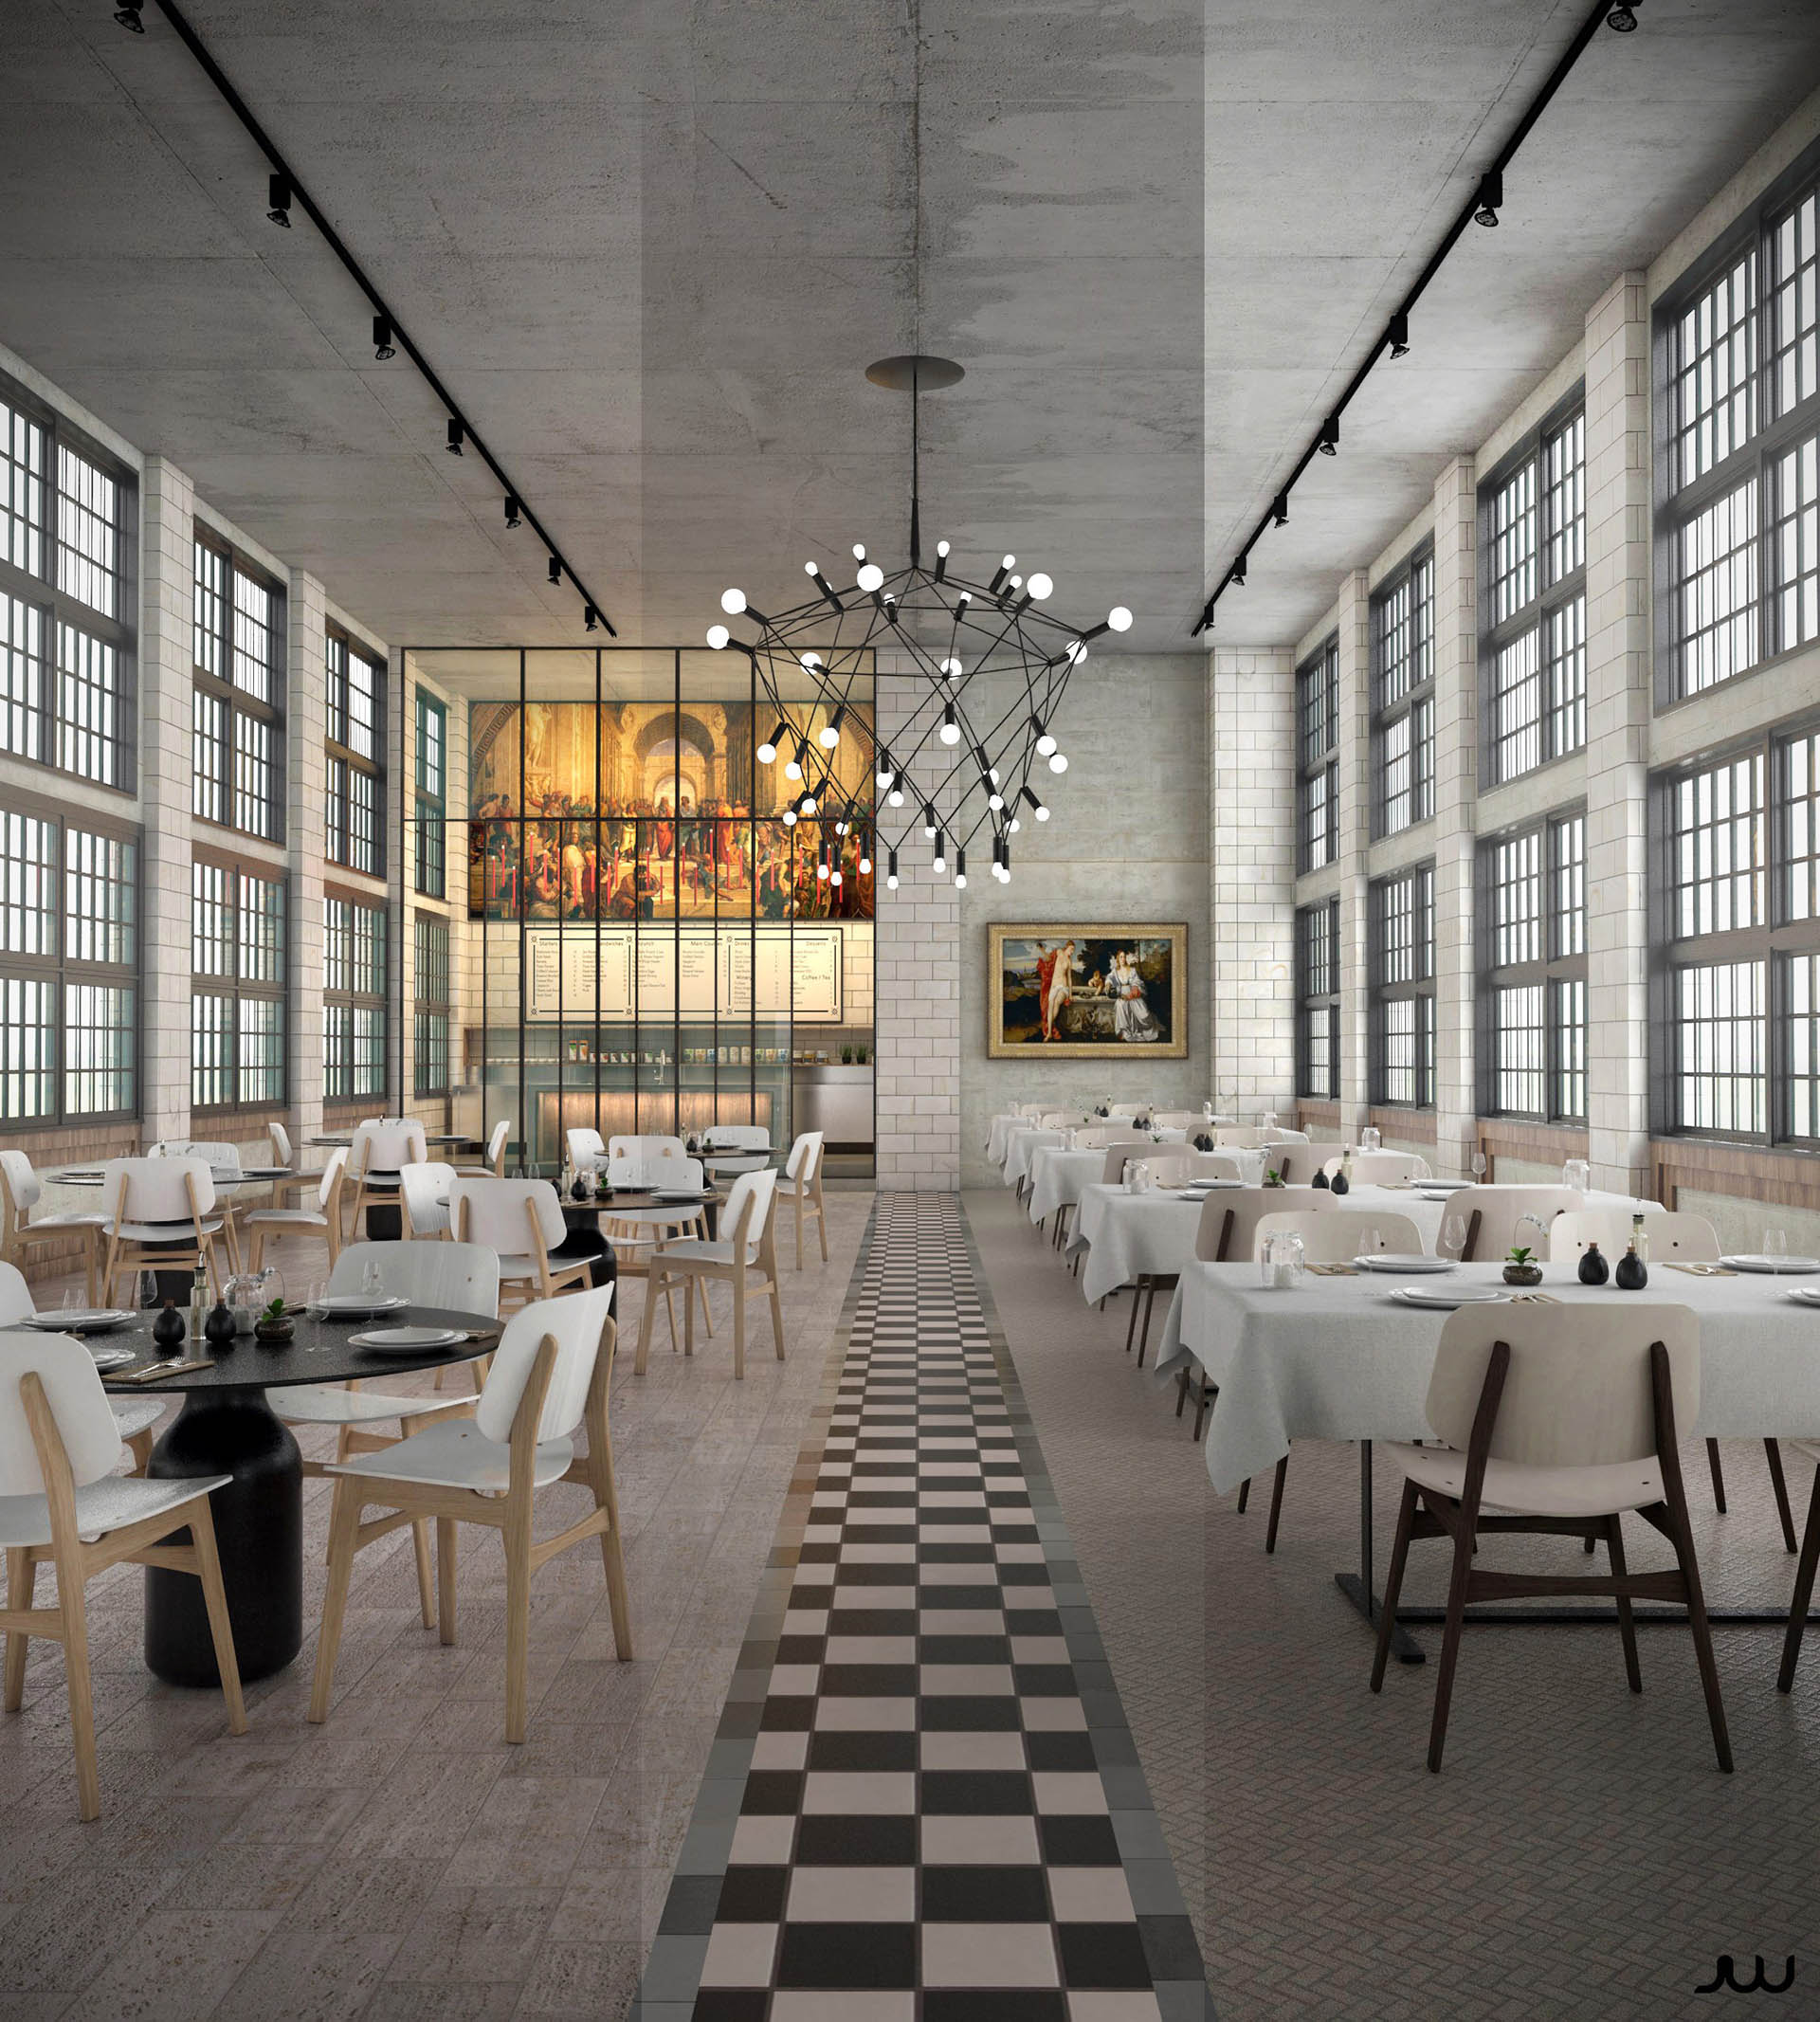
One of the last projects I did, and of which I am most proud of is “Renaissance”. Here you can see the final images I uploaded to the blog not long ago.


Inspiration
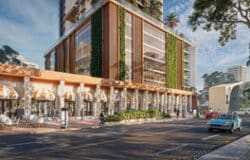
I am a great admirer of works by designer Piet Boon, with furniture just as much as the architecture. One of the projects, which I always felt captivated by, was the design of the restaurant The Jane in an old church in Antwerp, Belgium.


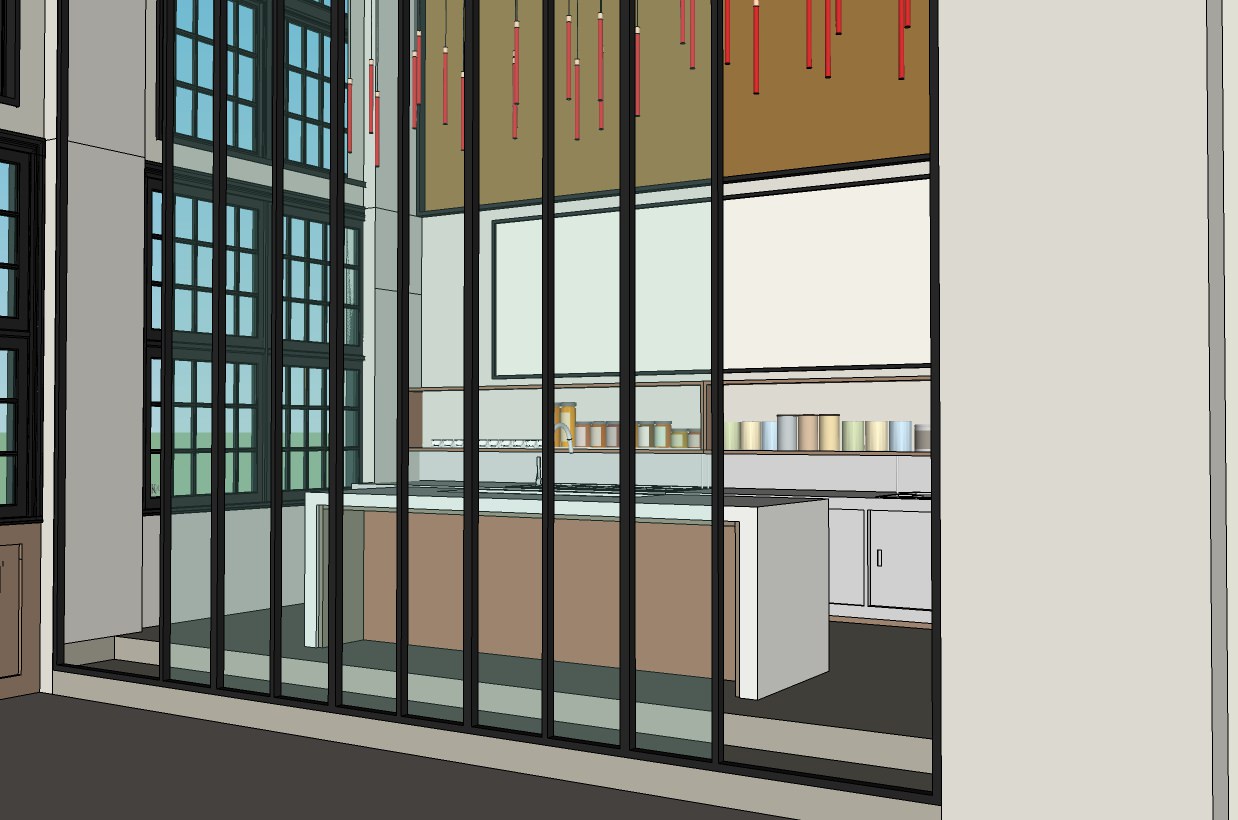
3D Modelling
With this idea in my head, I began to take shape the 3D design of the restaurant. I found, in the 3D Warehouse of SketchUP, a very basic model of what the user called “Loft”. I chose this model as a starting point because it had similar features.
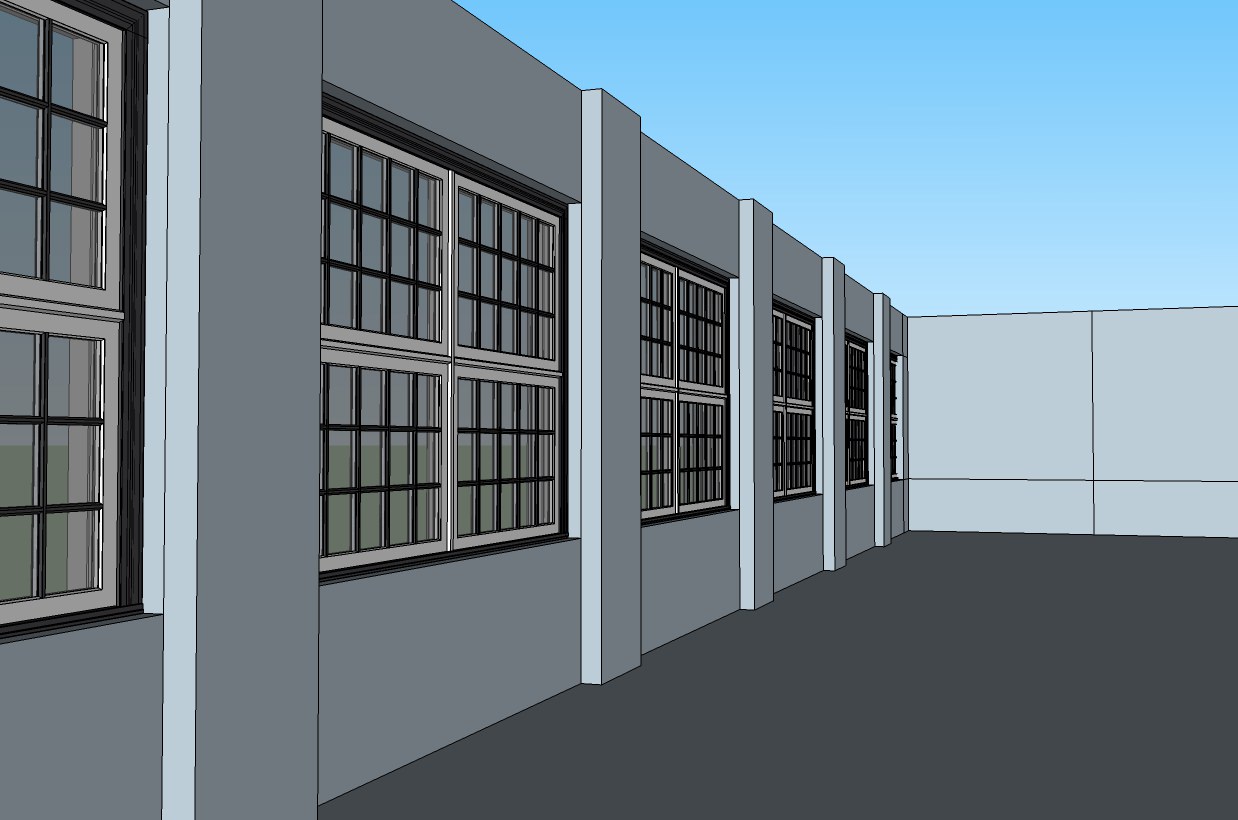
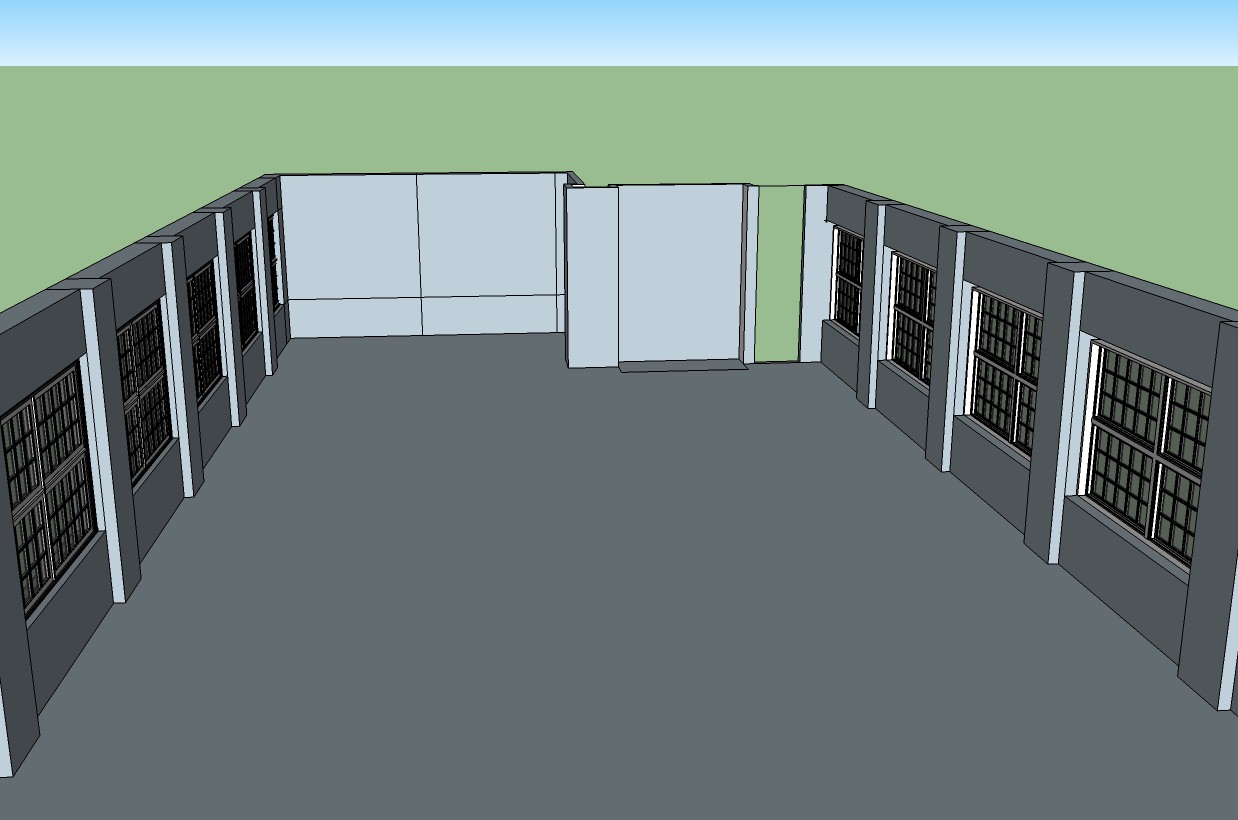
I would like to clarify that I never tried to do exactly the same Restaurant in the 3D version, just used it as a starting reference point. I began to edit the 3D model, and adapt the design I had in mind as I went along about it.


Furnishings
Once the space was defined, I started my favorite part… furnish the space!
I mostly used free items I found on the 3d Warehouse, and a few that I payed for on Design Connected and model+model.
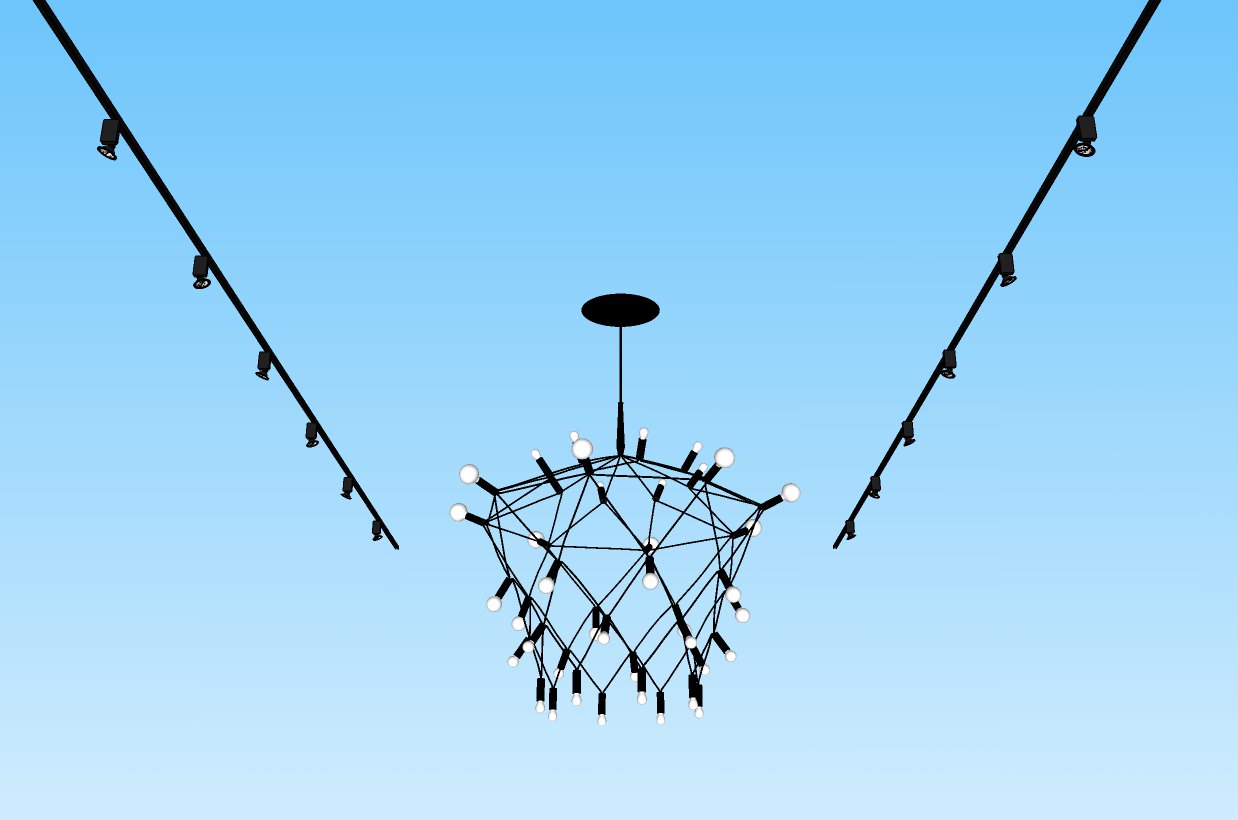
Naturally, I wanted to use an imposing piece of furniture, such as in the actual design, a lamp of great size. I found an ideal one on Design Connected… the one in the image below. It is the Townsend Design Orbit Chandelier.
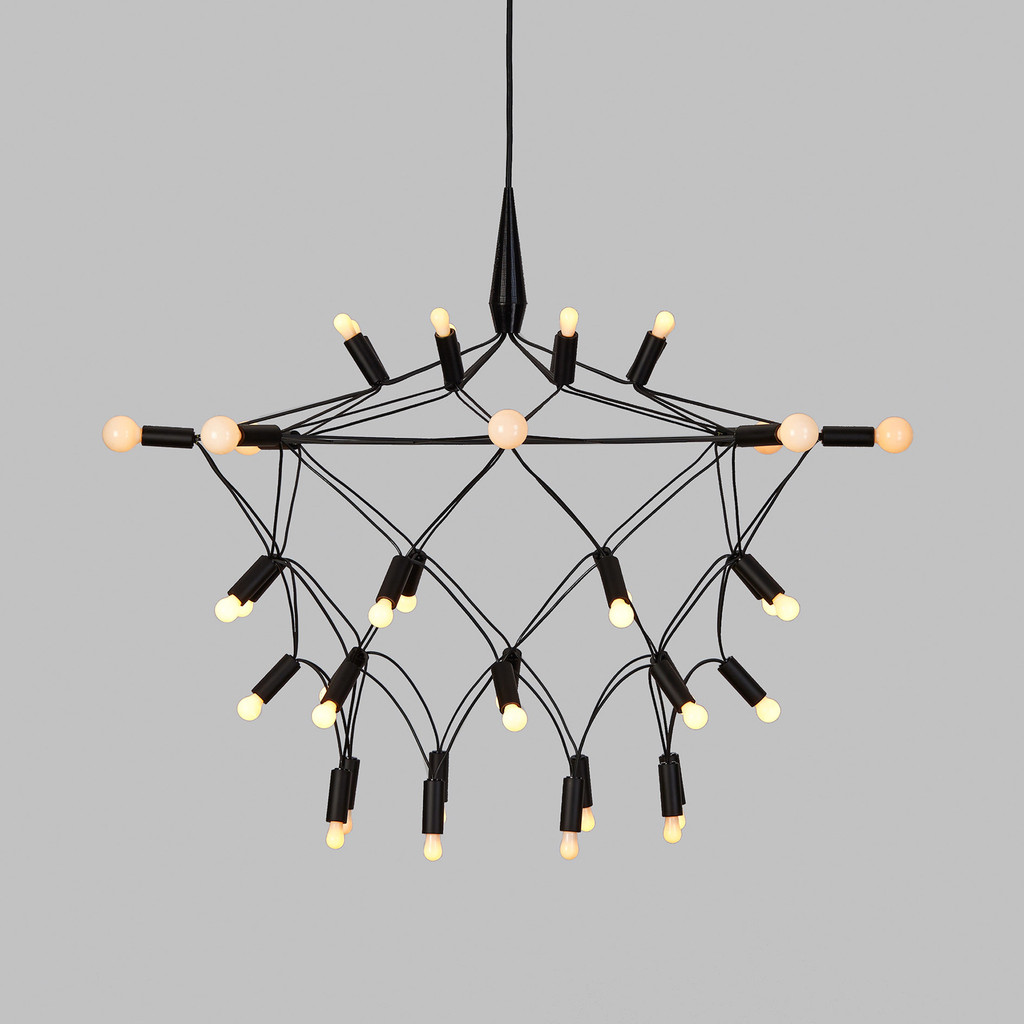
See it on the Townsend Design website as well.
I set up two typologies of tables, using mainly Soborg Fredericia chair.


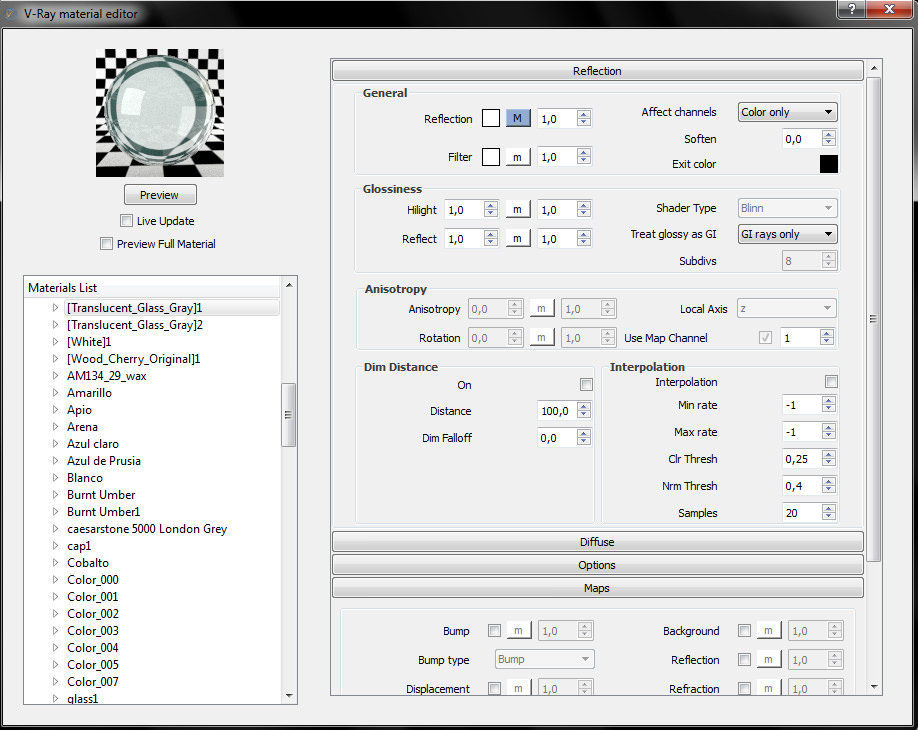
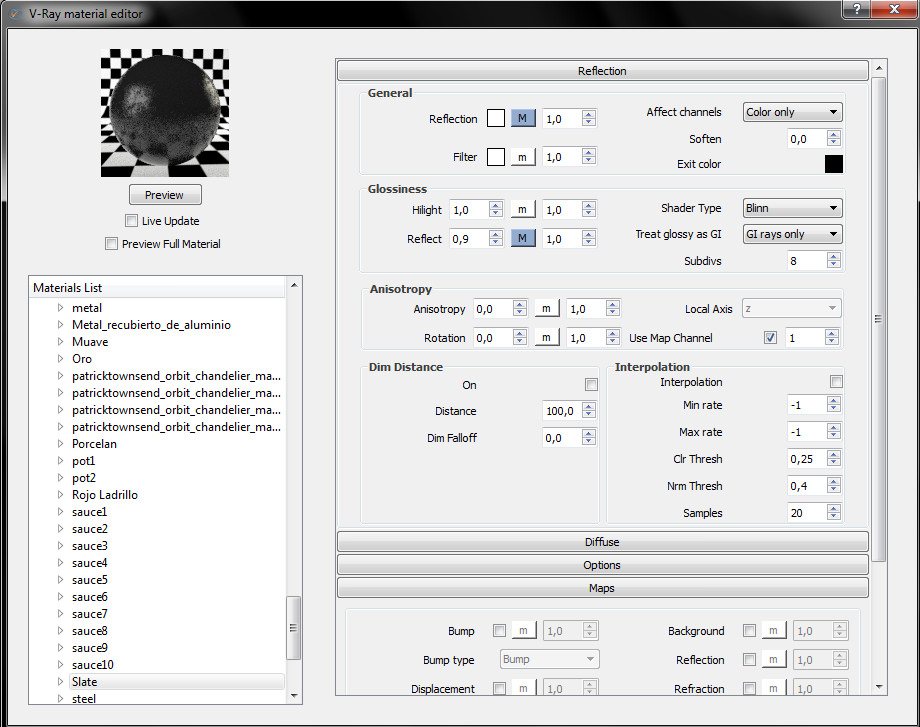
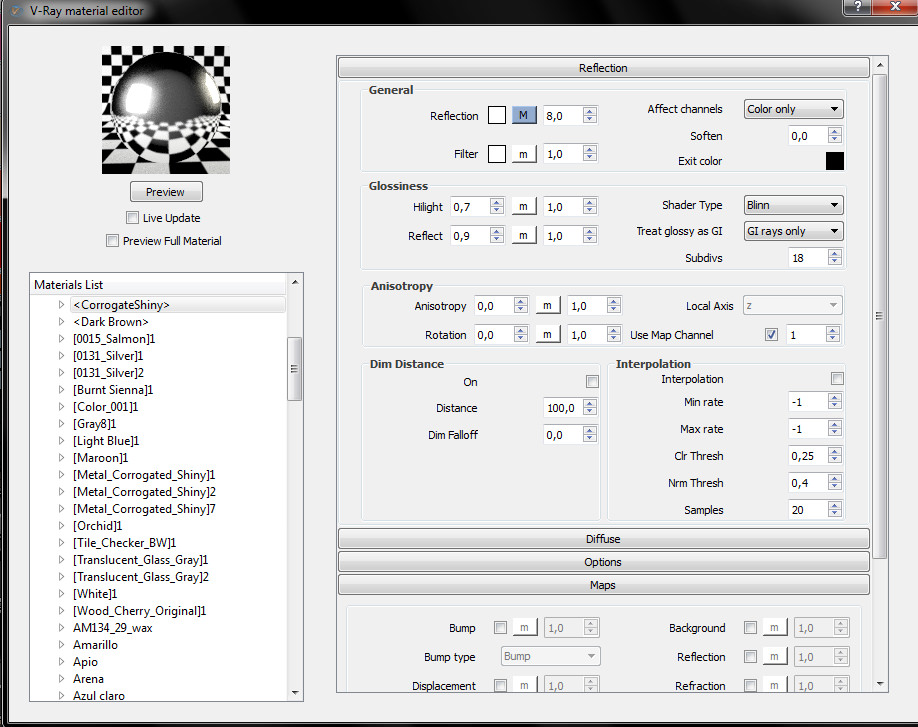
Texturing and Materials
Then I went choosing materials and working them with the editor of V-Ray materials.
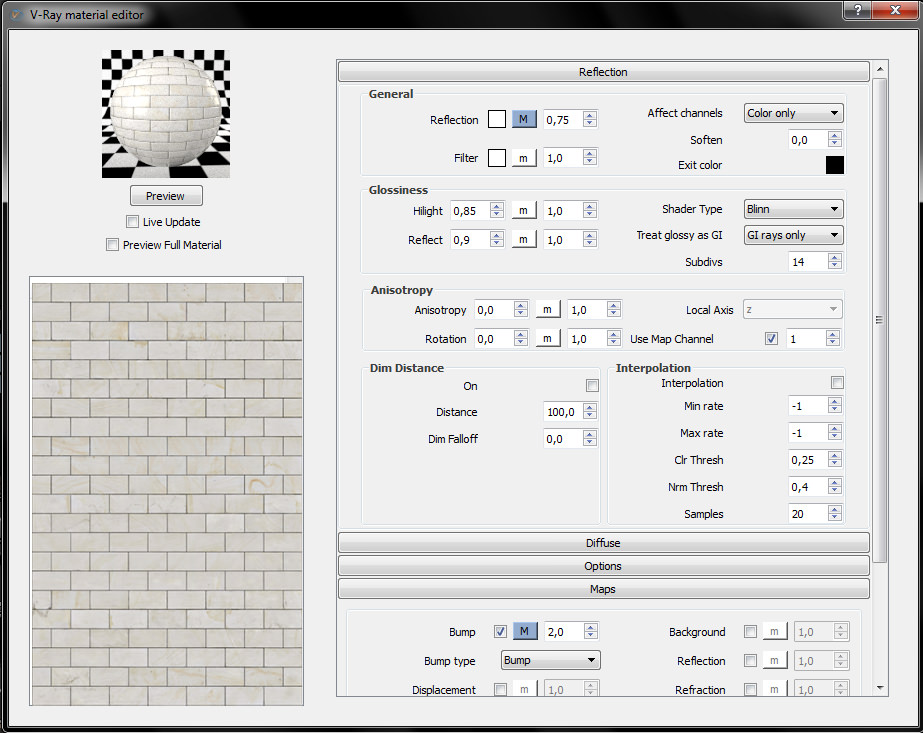
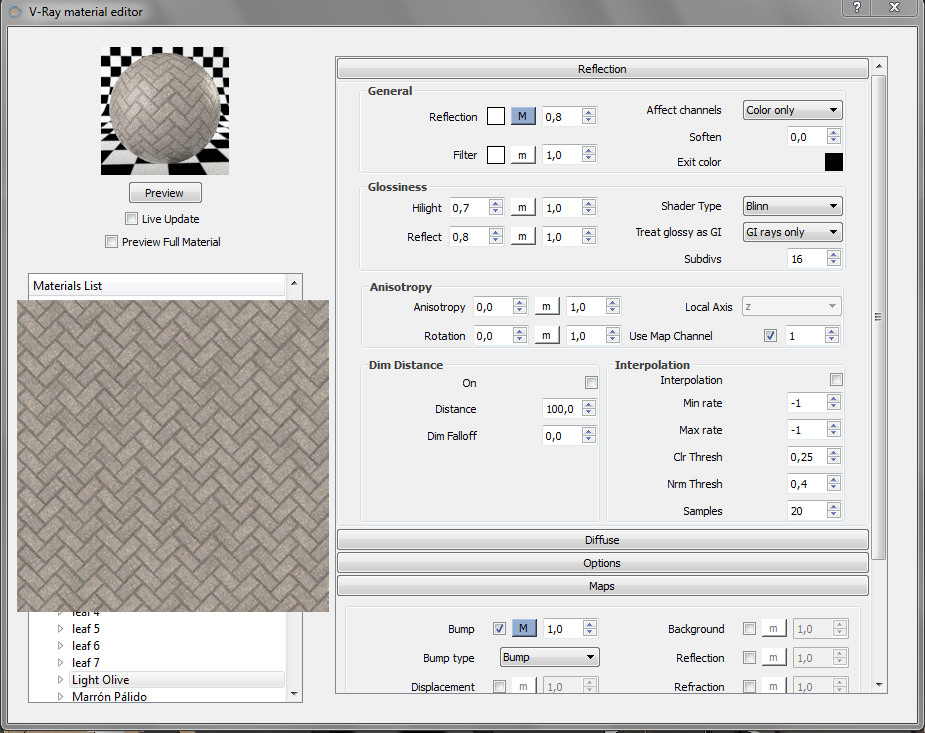
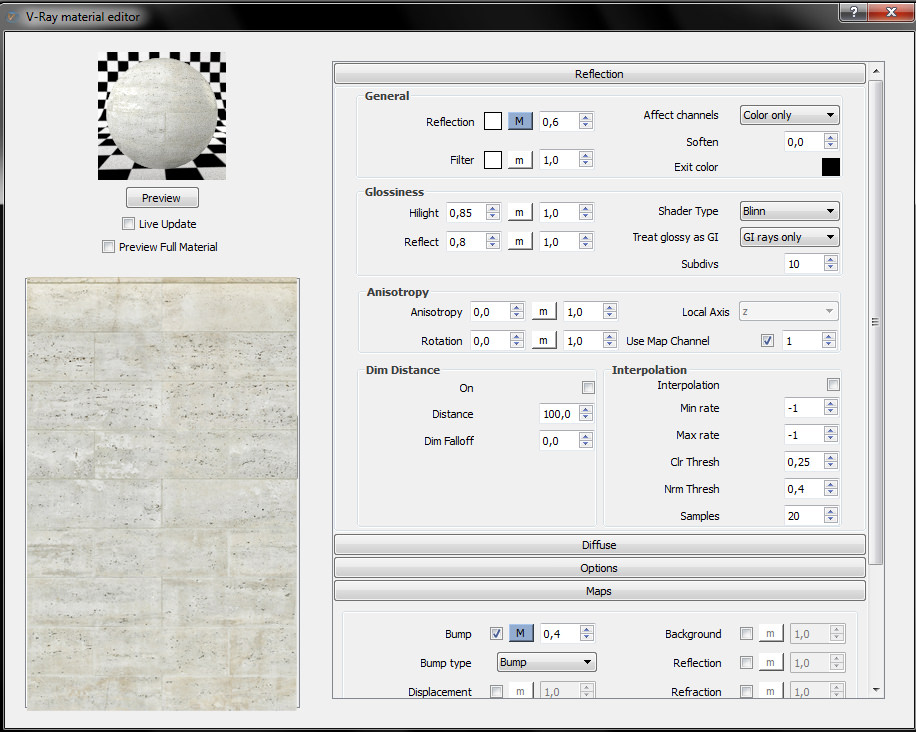
Unlike many SketchUp users, I prefer to assemble each material on my own. I do not use pre-assembled materials, known as Vismats.
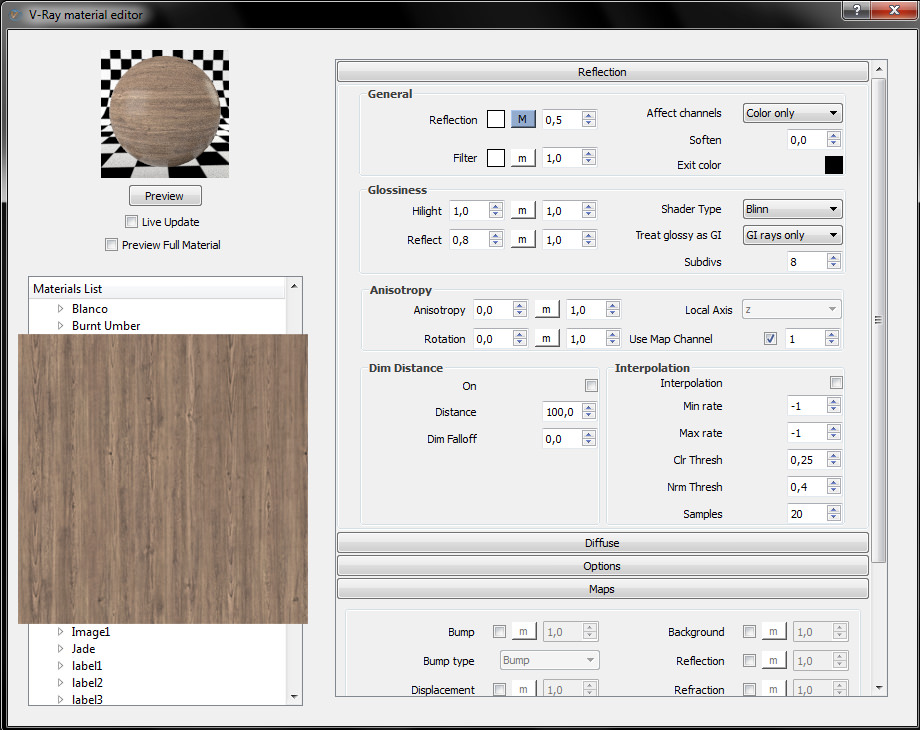
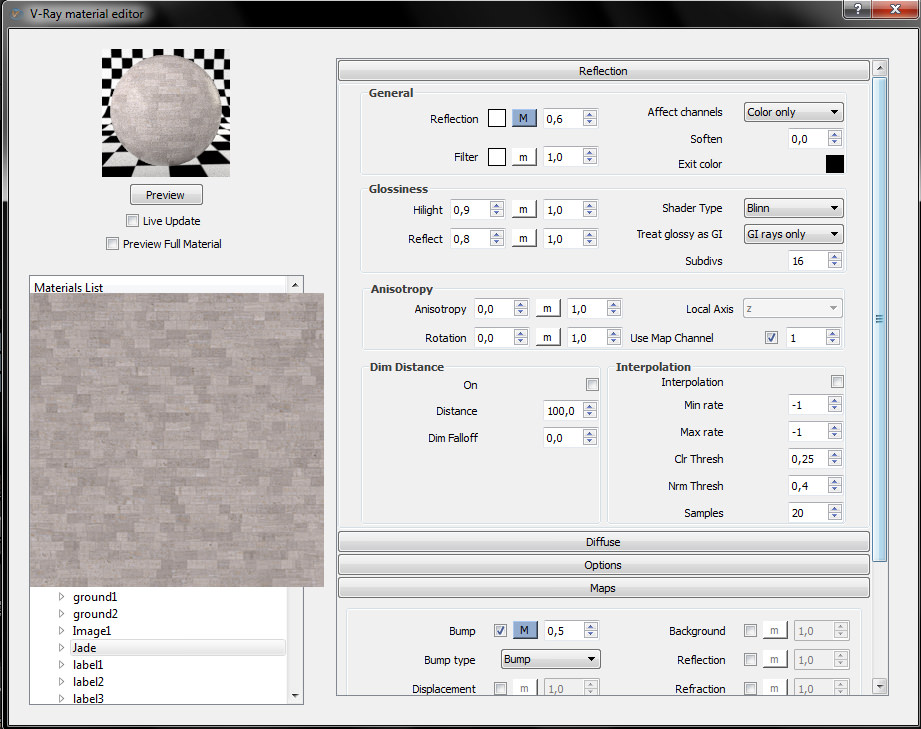
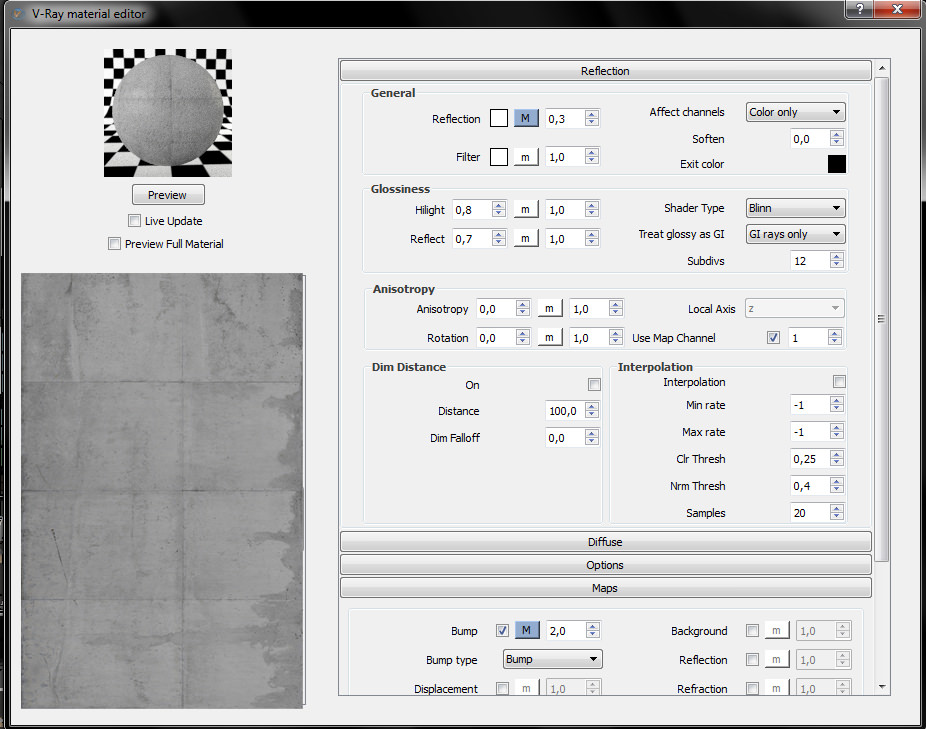
The textures came mostly from Google Images, and some from sources such as Evermotion and Arroway Textures.
The menu was made by me in Photoshop 🙂
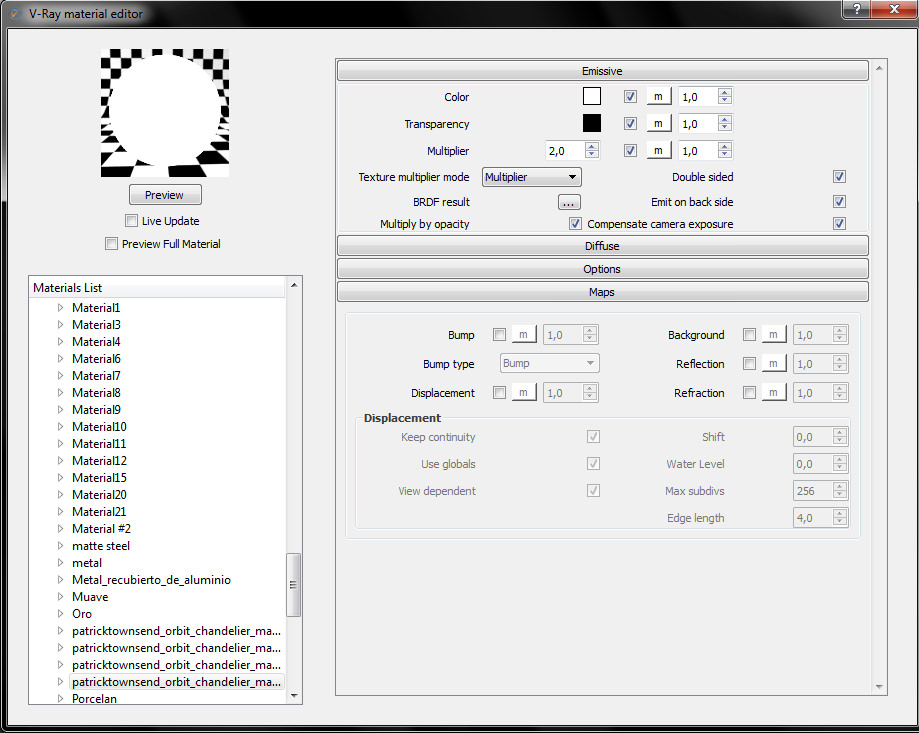
Lighting
Lighting is the most important part of a render. Get this bad and all is bad. After much practice, I found it very useful to use HDRI in interiors. I love to use one in particular by VIZPARK – HDRI NO. 19 😉
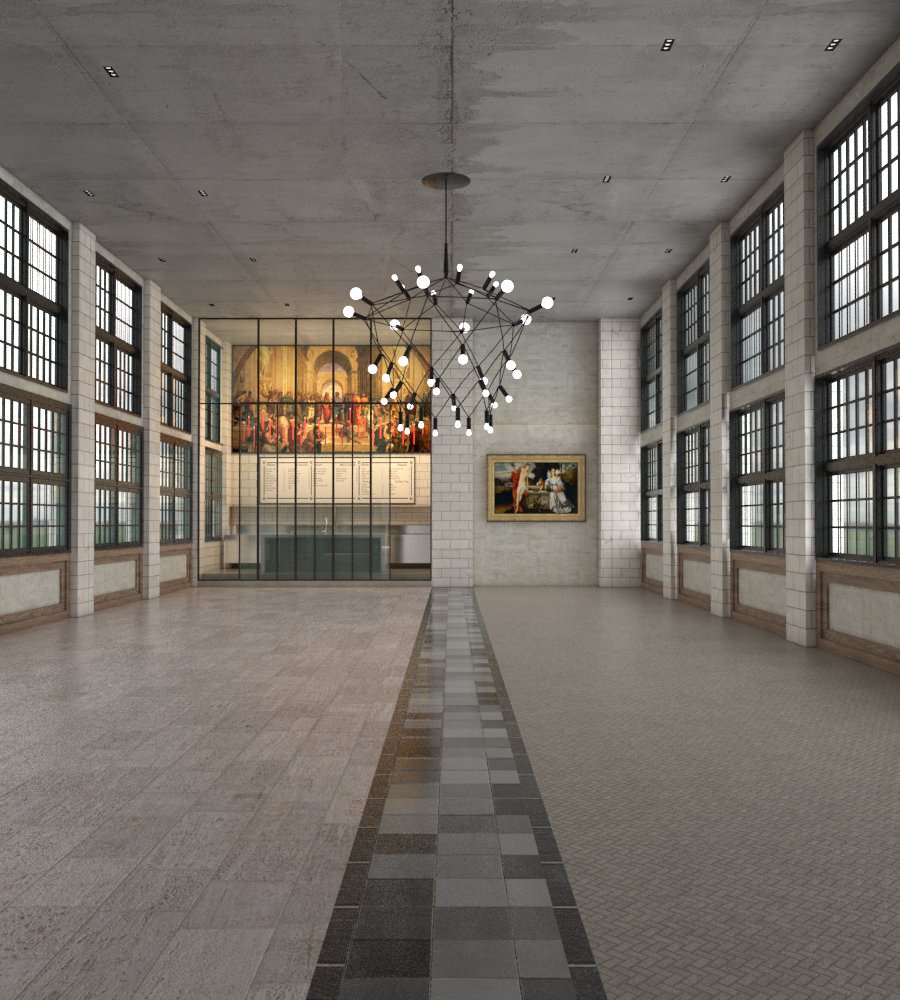
I aimed for a soft mood, without direct sunlight coming in and sharp shadows.
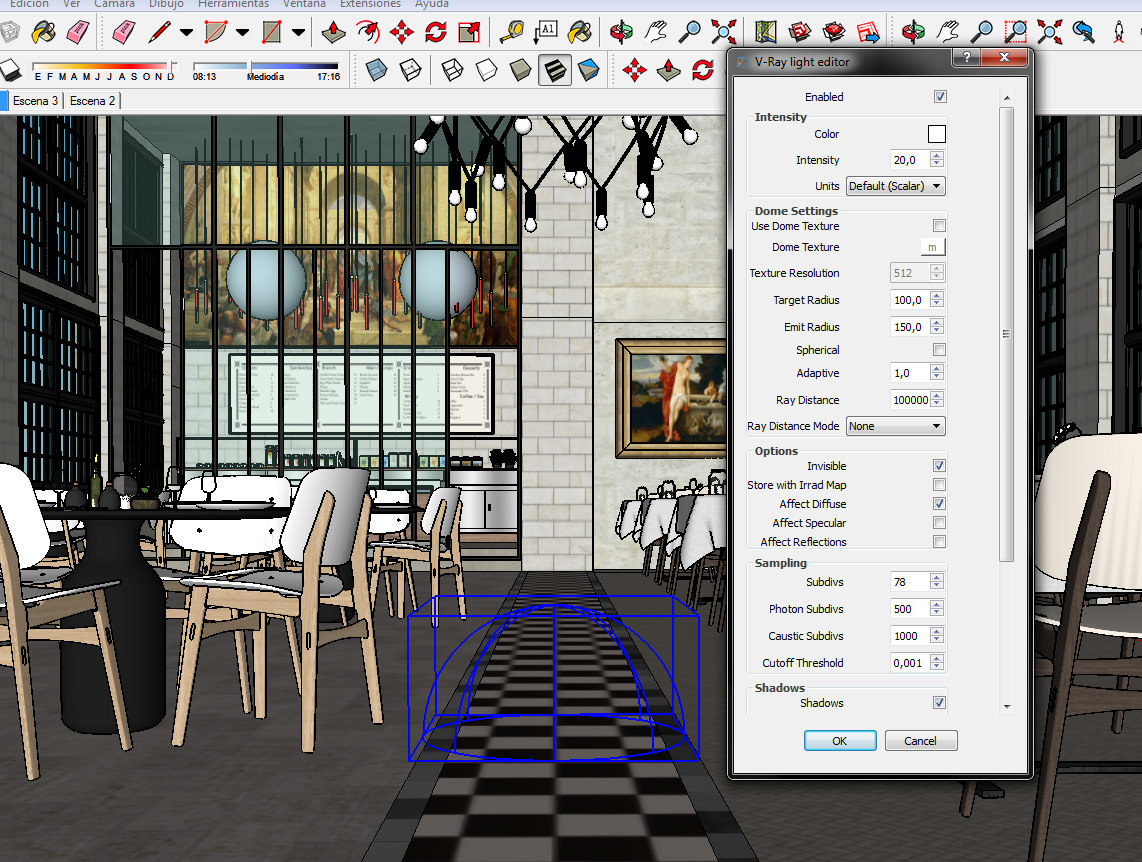
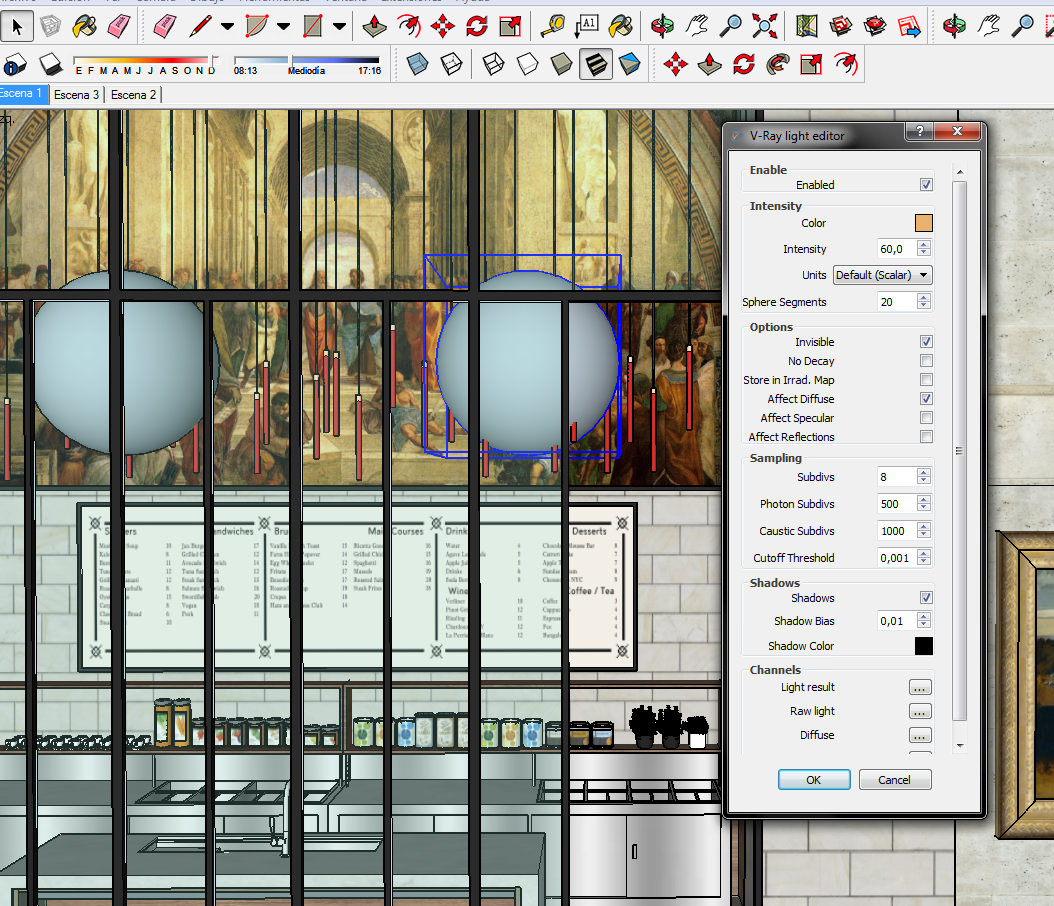
To create the warm atmosphere of the kitchen, I used two spherical V-Ray lights.
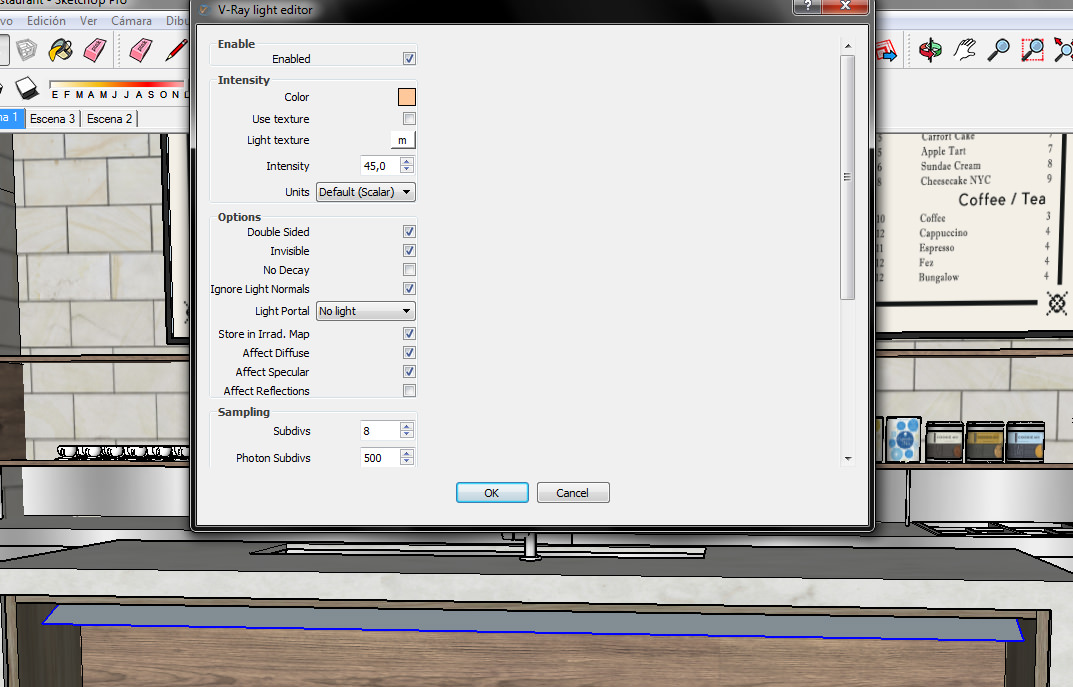
Finally, I used a rectangular light for adding a small touch on the bar.
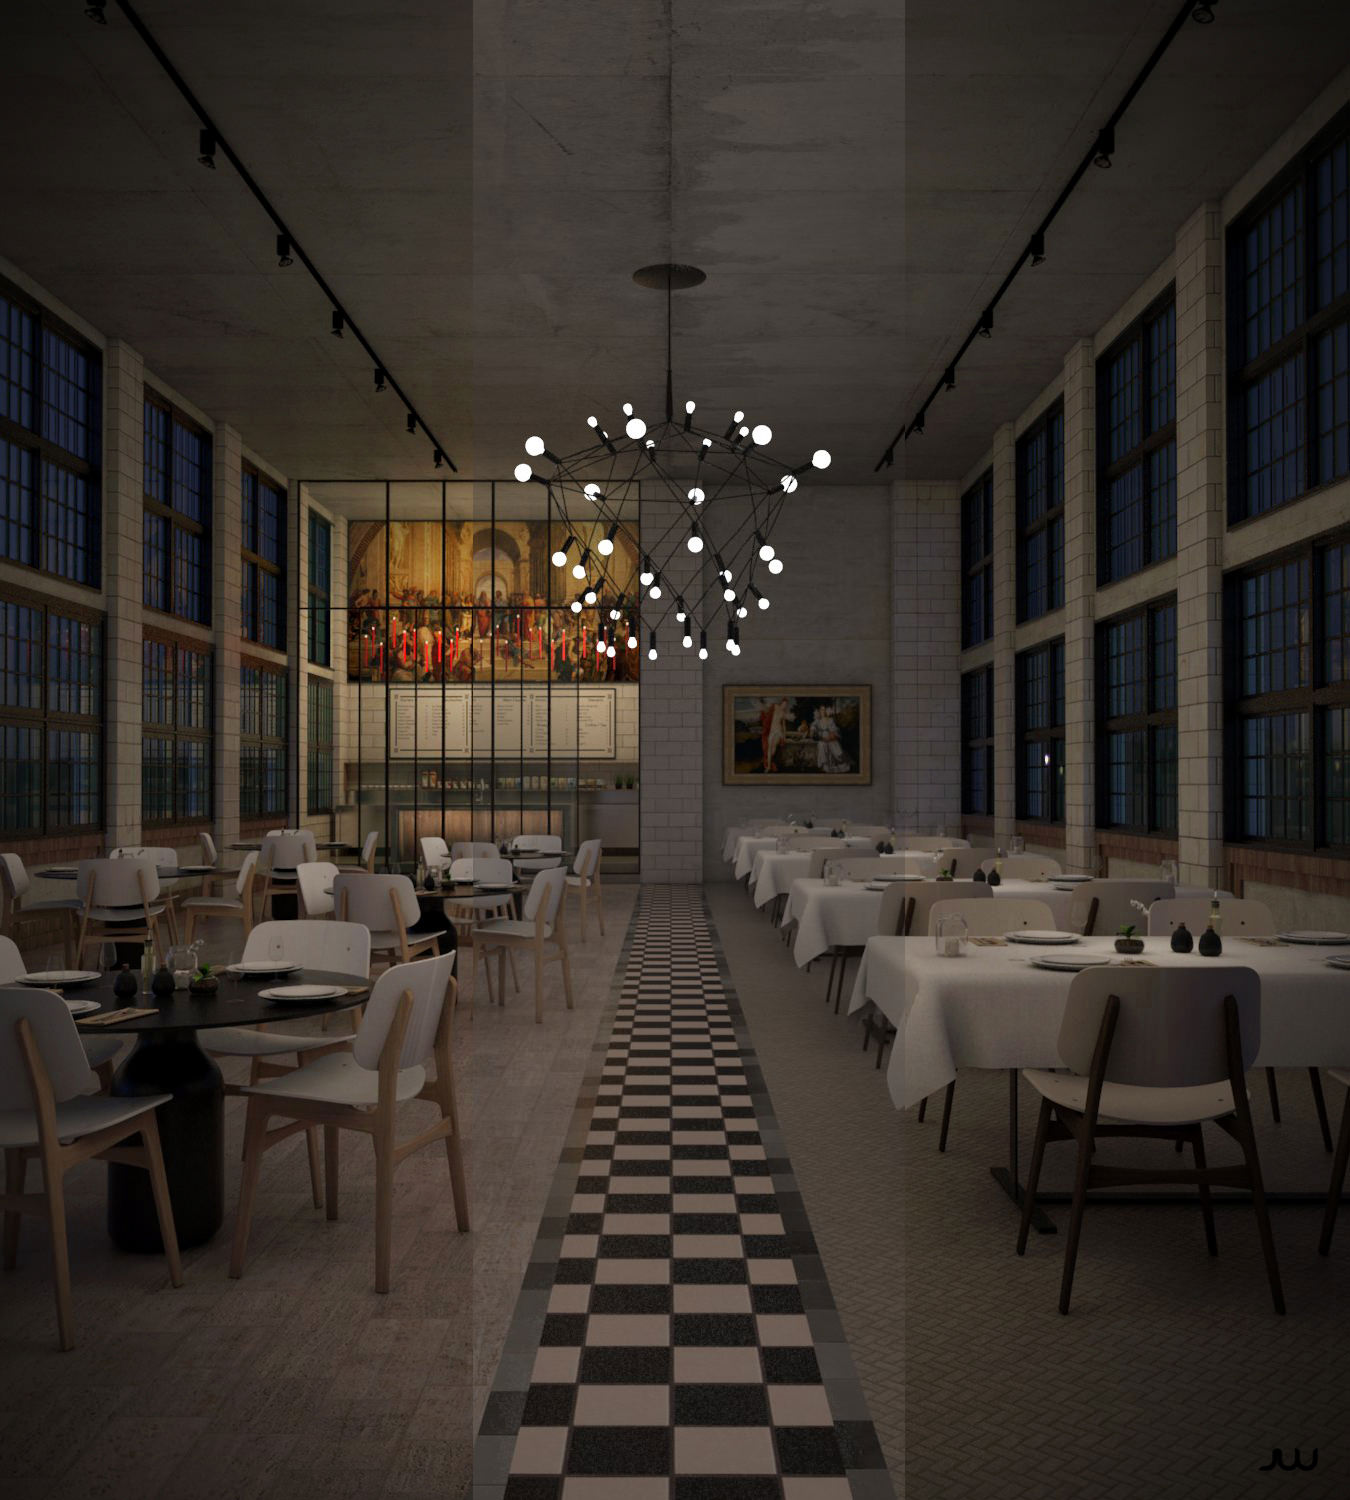
Pretty simple setup actually… For the night version, I used HDRI No. 04 from VIZPARK.
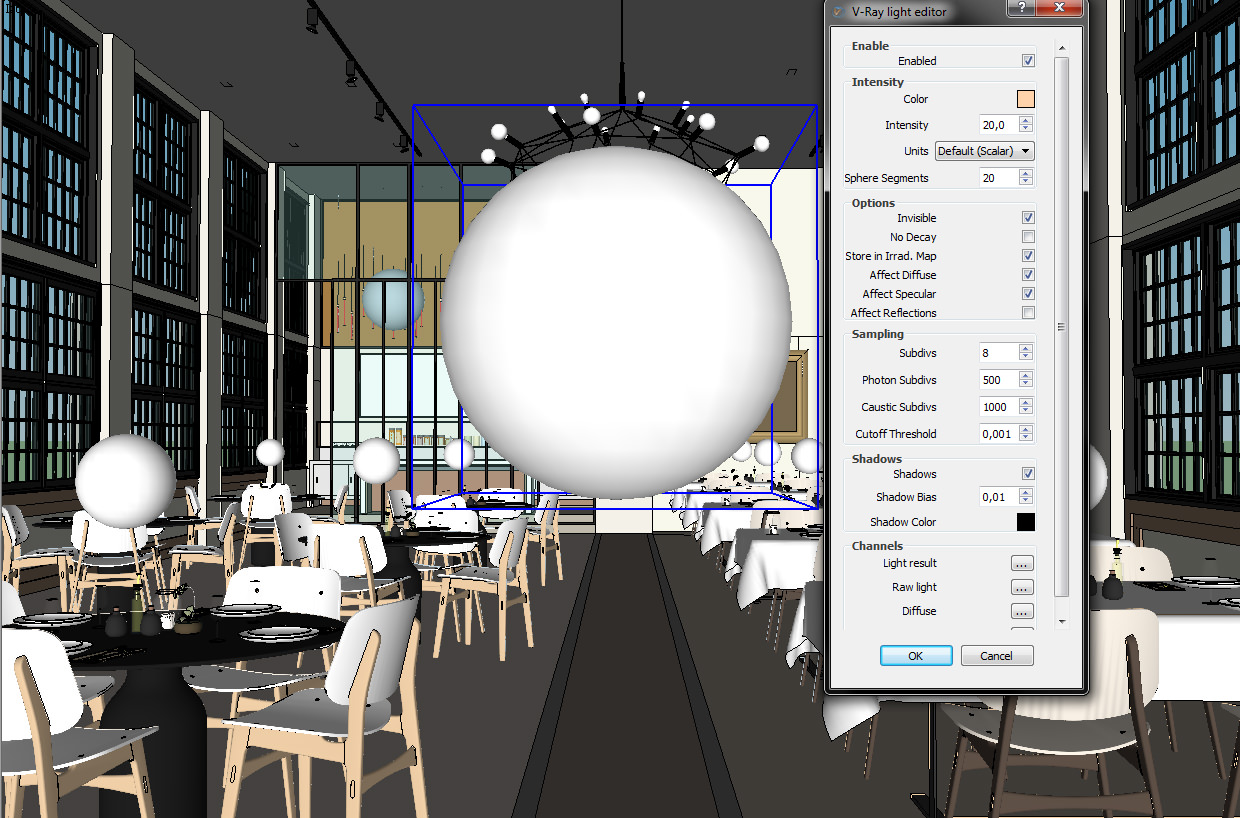
For the overall light I use a big general spherical light, warm color.
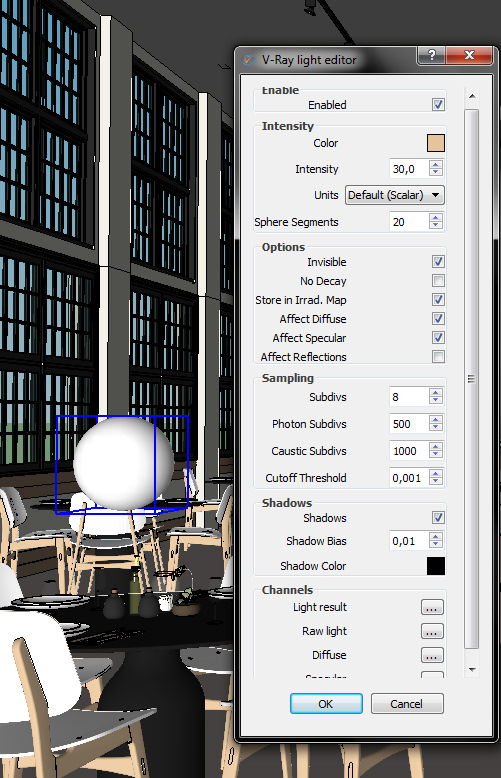
And small lights on the tables.
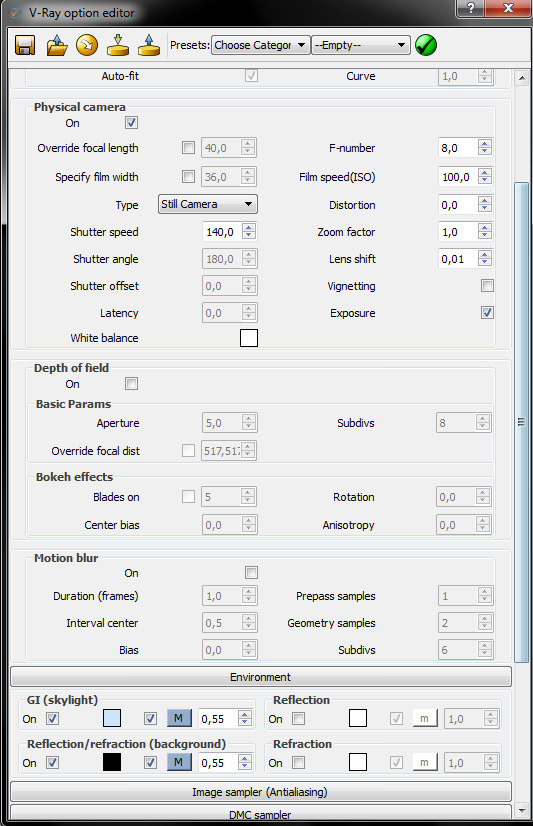
Rendering
These are the parameters that I use.
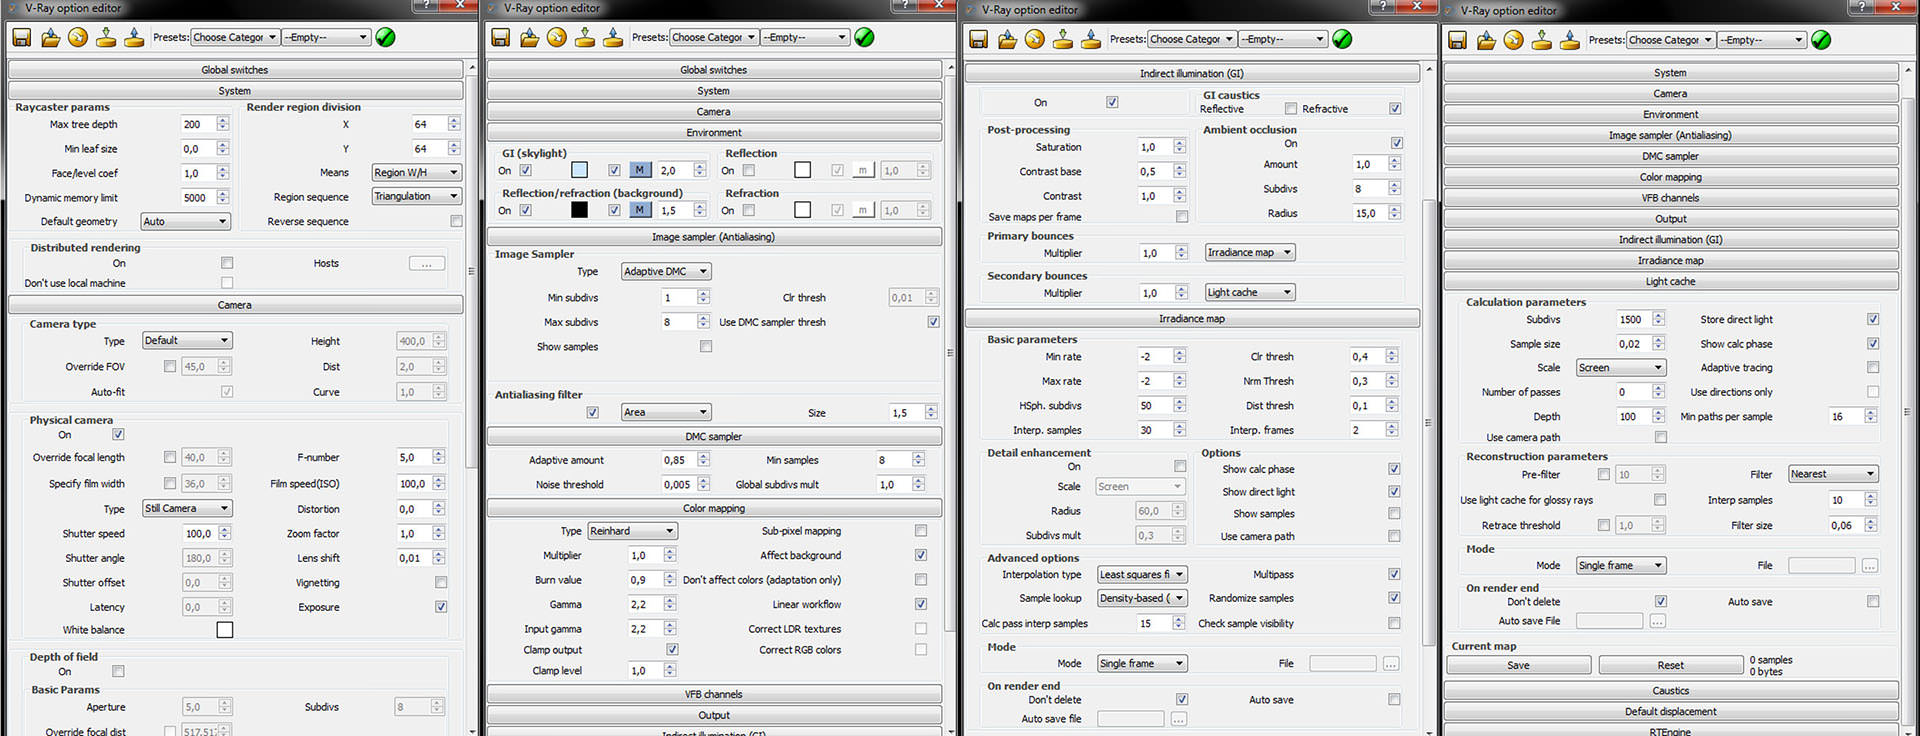
Post Production
In usually keep it very simple and minimal in post. I always aim to get it mostly done in the render. In post I simply adjust colors, tones and contrasts.
In these images in particular, I also added some light glows.
That’s it all!
I hope I’ve help you with this article in some way. Don’t hesitate to ask me anything you like in the comment section below…
JW.

Javier is a student of the Industrial Design in Buenos Aires, Argentina. After some additional studies in Canada and Germany he went back working for architectural firms in Argentina, and today specializes in 3d interior visualization.


great images, great tutorial… thanks for sharing! how do you achieve the rounded edges on sketchup geometry? does vray have an option to do that at render time? i never considered using sketchup for high-end work since i thought its geometry was always too simplistic to look good. you’ve proven me wrong.
billycazzy Thank you!
There is a plugin for Round Edges, I think it’s called that way exactly.
Vray does not have that option you mention.
Greetings!
Thanks for sharing!
Great work. I see you used Vray sun and sky in conjunction with the hdri. It would be interesting to read more on why you chose to do that. Is there something you feel you miss by only using the dome light?
Thanks again for sharing. Keep up the good work!
MartinWahlberg1 I did not use Vray sun or sky, simply an HDRI and a light dome (to strengthen overall scene). I chose this because I did not want harsh shadows, I do not like in the interior scenes harsh shadows.
Ojo!!! Sergio Pacheco
Thank you Ronen!, It’s my pleasure.
Full project here: https://www.behance.net/gallery/24245379/Renaissance
JWRenders MartinWahlberg1 I was wondering this same thing. Why would you use the skylight with the HDRI, especially since you expressed not wanting hard shadows in this series. I only ask because in your rendering settings screenshot above, you have skylight and background ticked. Maybe these were settings for a different render…just a guess.
Do you only use diffuse,bump and reflection maps? Don’t you use specular maps?
VictorPineda Exactly.
JoshuaDeacon JWRenders MartinWahlberg1 If the scene was illuminated by a Sun, would have strong and sharp shadows. Since I do not want this, I use a HDRI (which does not generate shadows and lights globally), if I need strong shadows, then use rectangular lights.
The HDRI is inside of the Enviroment, and the dome light is only light simple, just for reforce the image brightness.
Thank you!
@JWRenders @JoshuaDeacon @MartinWahlberg1 Understood, thanks for the clarification. Again, beautiful work, thanks.
JWRenders MartinWahlberg1 Oh, I see, I just took for granted that you used the HDRI in the dome-light. Sorry about that. I never used a HDRI in the Environment slot. I always use a vray dome light for that. Do you find any particular reason for using it in the Environment slot? If you had used two dome lights (and disabled background and skylight), one with the HDRI and one with the other light properties you used in the scene, would the result be the same or is there something I’m missing here?
MartinWahlberg1 JWRenders Actually, whenever I started to do so.
I recently learned that you could also put in Dome Light, but as I gave good results that way, (and could also use a Light Dome as normal light without the need for 2 in the scene, one for light and one for HDRI), kept doing so.
The DomeLight has some better than the Enviroment aspects, such as the possibility to increase the resolution and the subdivision of the image.
JWRenders MartinWahlberg1 I see, it’s just a matter of taste then or what you’re used to. Thanks for clarifying that.
What plugins you use? Just name them
THX 🙂
Jonathan Grooms No one.
Lindo, maravilhoso !
MarioJorge gracias!
JWRenders Hi sir! I am Jayson Gigantone from the Philippines and i see your work, its stunning! i want to seek your help. because I do the rendering, the lines are not that sharp. It still looks blurry/pixelated line. How can I make a very sharp lines that will make my rendering more realistic? I hope you could help me. Your work is such a GENIUS 🙂
Fantastic Work! thanks for sharing~
But I got question with your camera settings,with Shutter speed:100 / F-number:5,your lighting intensity would be too powerful in this background settings,should lead to totally exposure,but apparently this situation didn’t happened.Really curious why???
Is there another parameter involved in?
Lewis Chang Thank you!
I am adjusting the values as I do tests, so if burned would at some point, the values have changed.
Everything affects the image, materials, artificial lights, HDRI, everything.
IamJaysonGigantone JWRenders Thank you!
You can use Catmull/Rom as filter on Antialiasing.
Hi Javier, Great work!! Thanks so much for sharing and keep it up 🙂
Always good to remember it! thanks !