


Making of Toyo Ito’s Sendai Mediatheque
Today I’m happy to share with you the making of Best of Week 42/2014 – The Sendai Mediatheque remake by Imagine Studio from Sofia, Bulgaria. Done as an in-house project they achieved remarkable results, especially with the dusk views in this set, which makes this an interesting peak. Enjoy!
Introduction
Hello everyone! We are Imagine Studio. Our team is located in Sofia, Bulgaria.
Imagine Studio presents Sendai Mediatheque as personal project. It was made for educational and experimental purposes concerning the architectural visualizations.
Sendai Mediatheque (the reference building) is a library in Sendai, Miyagi Prefecture, Japan. It was designed by Toyo Ito in 1995 and completed in 2001. We wanted to represented this beautiful architecture, refracted through our minds. It includes several images during the autumn season with different lighting scenario. We decided to share our knowledge through this article presented in Ronen’s blog. Enjoy it!
Concept & References / Inspiration
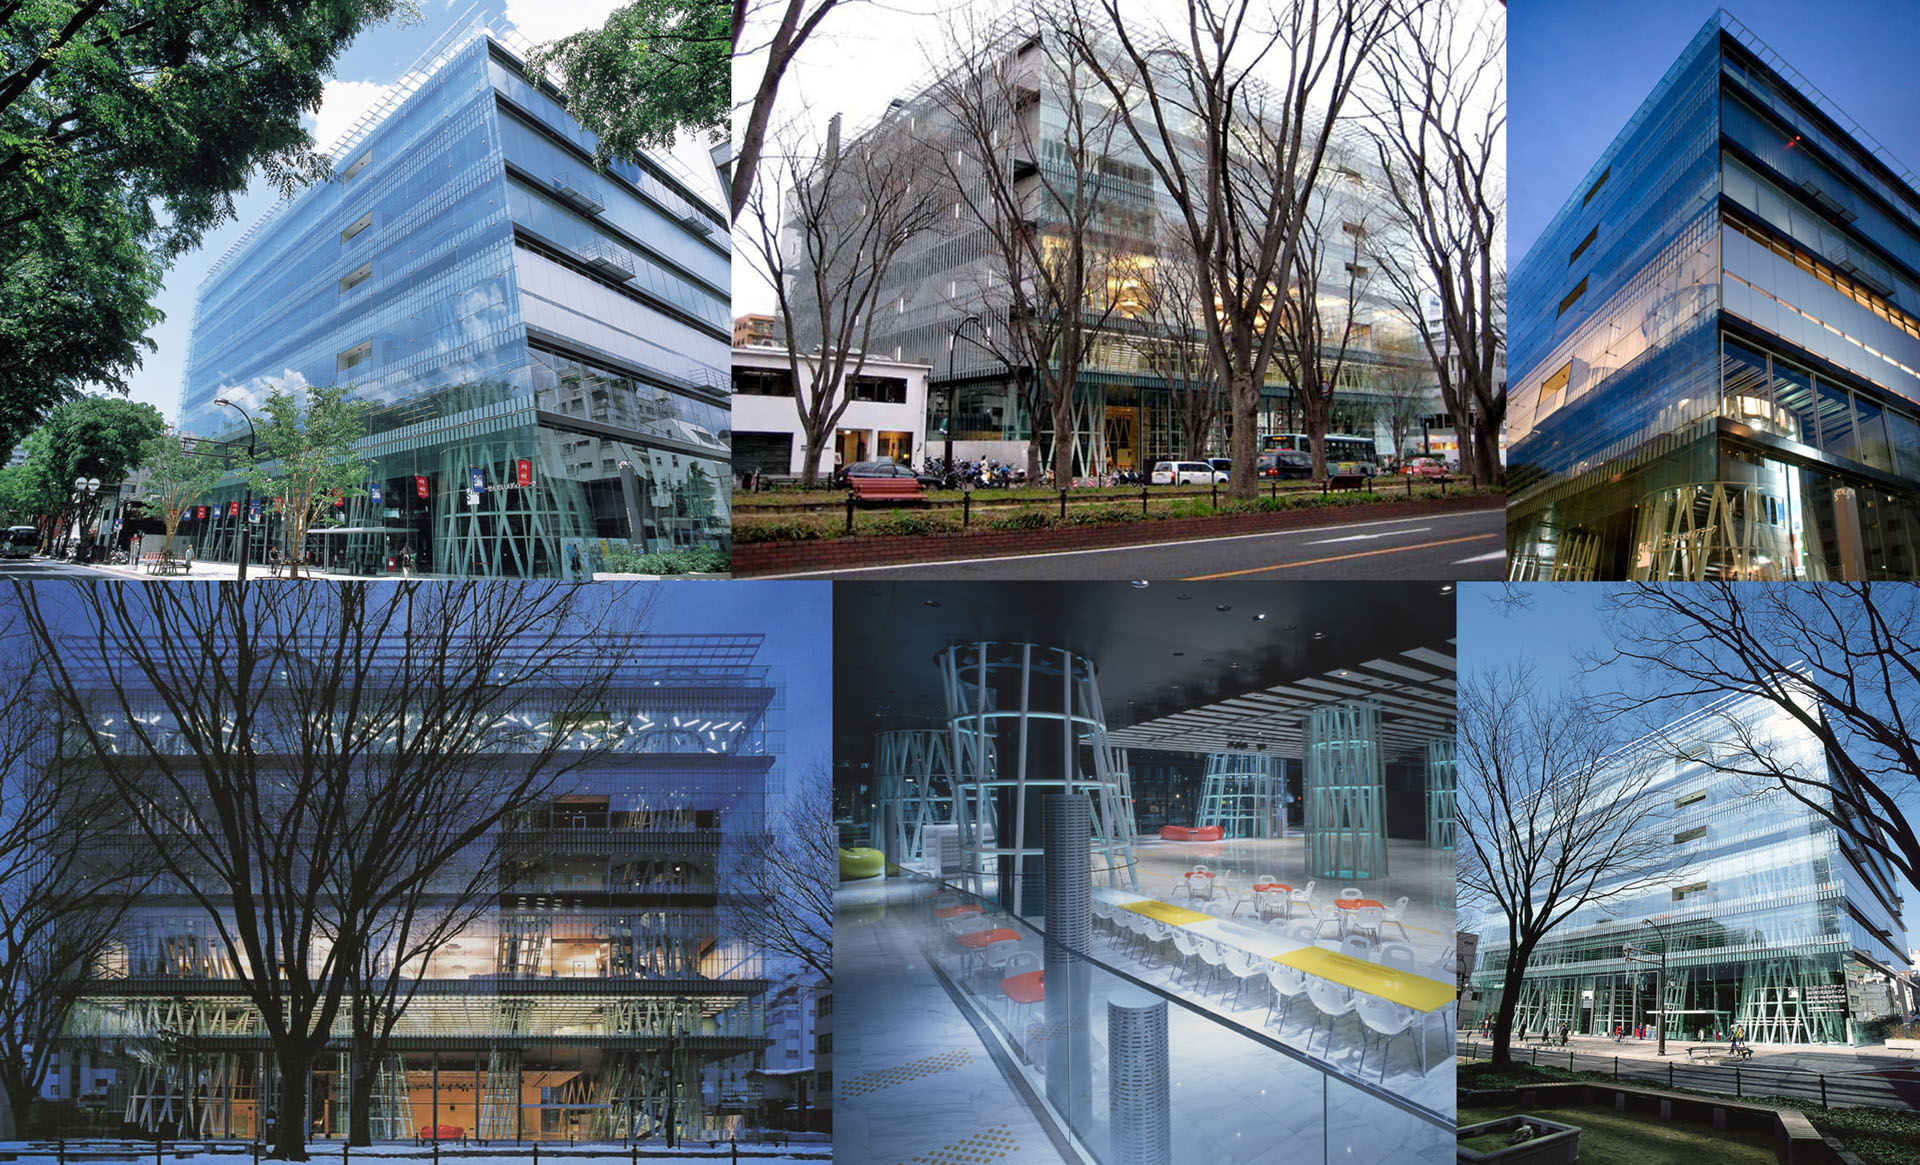
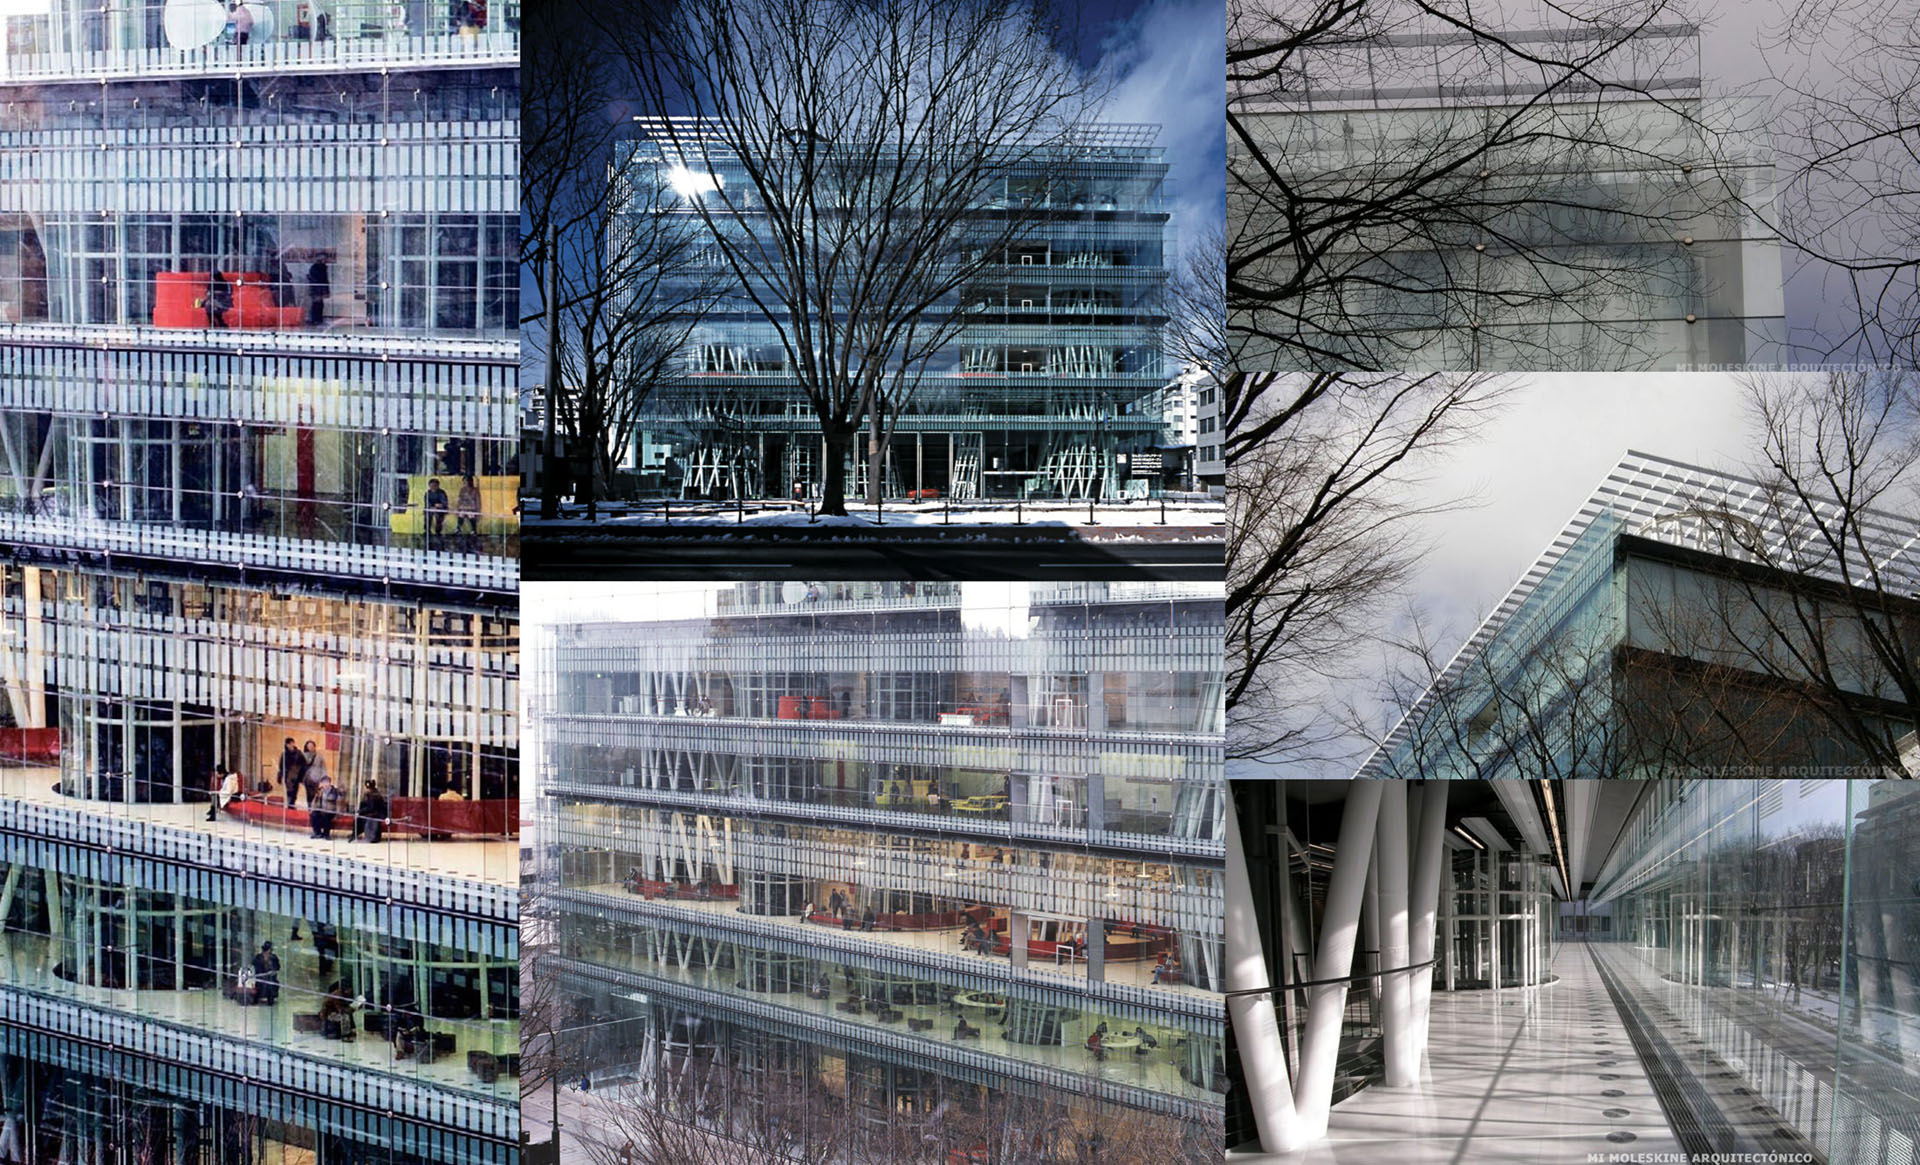
We needed some references for inspiration and information also. Here you can see some of them
Modelling / Cameras & Composition
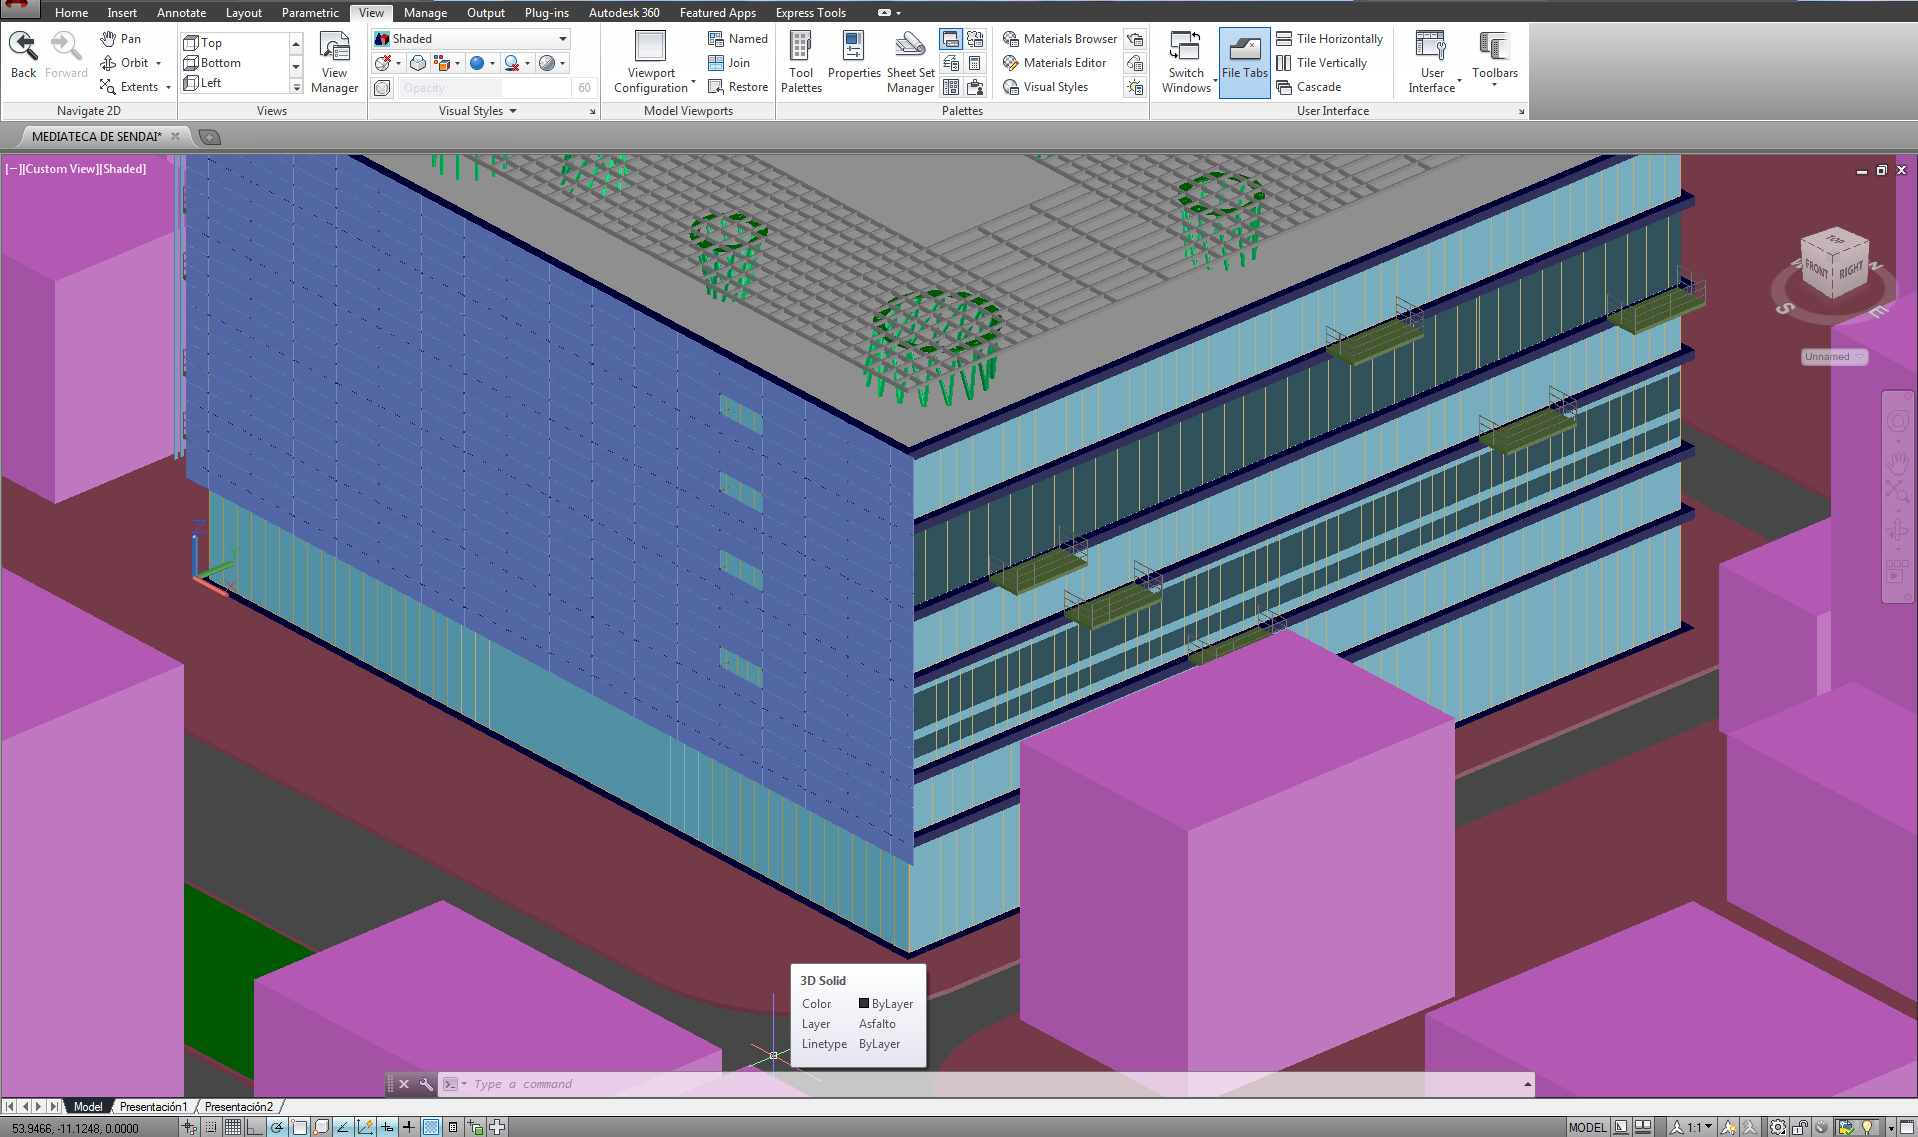
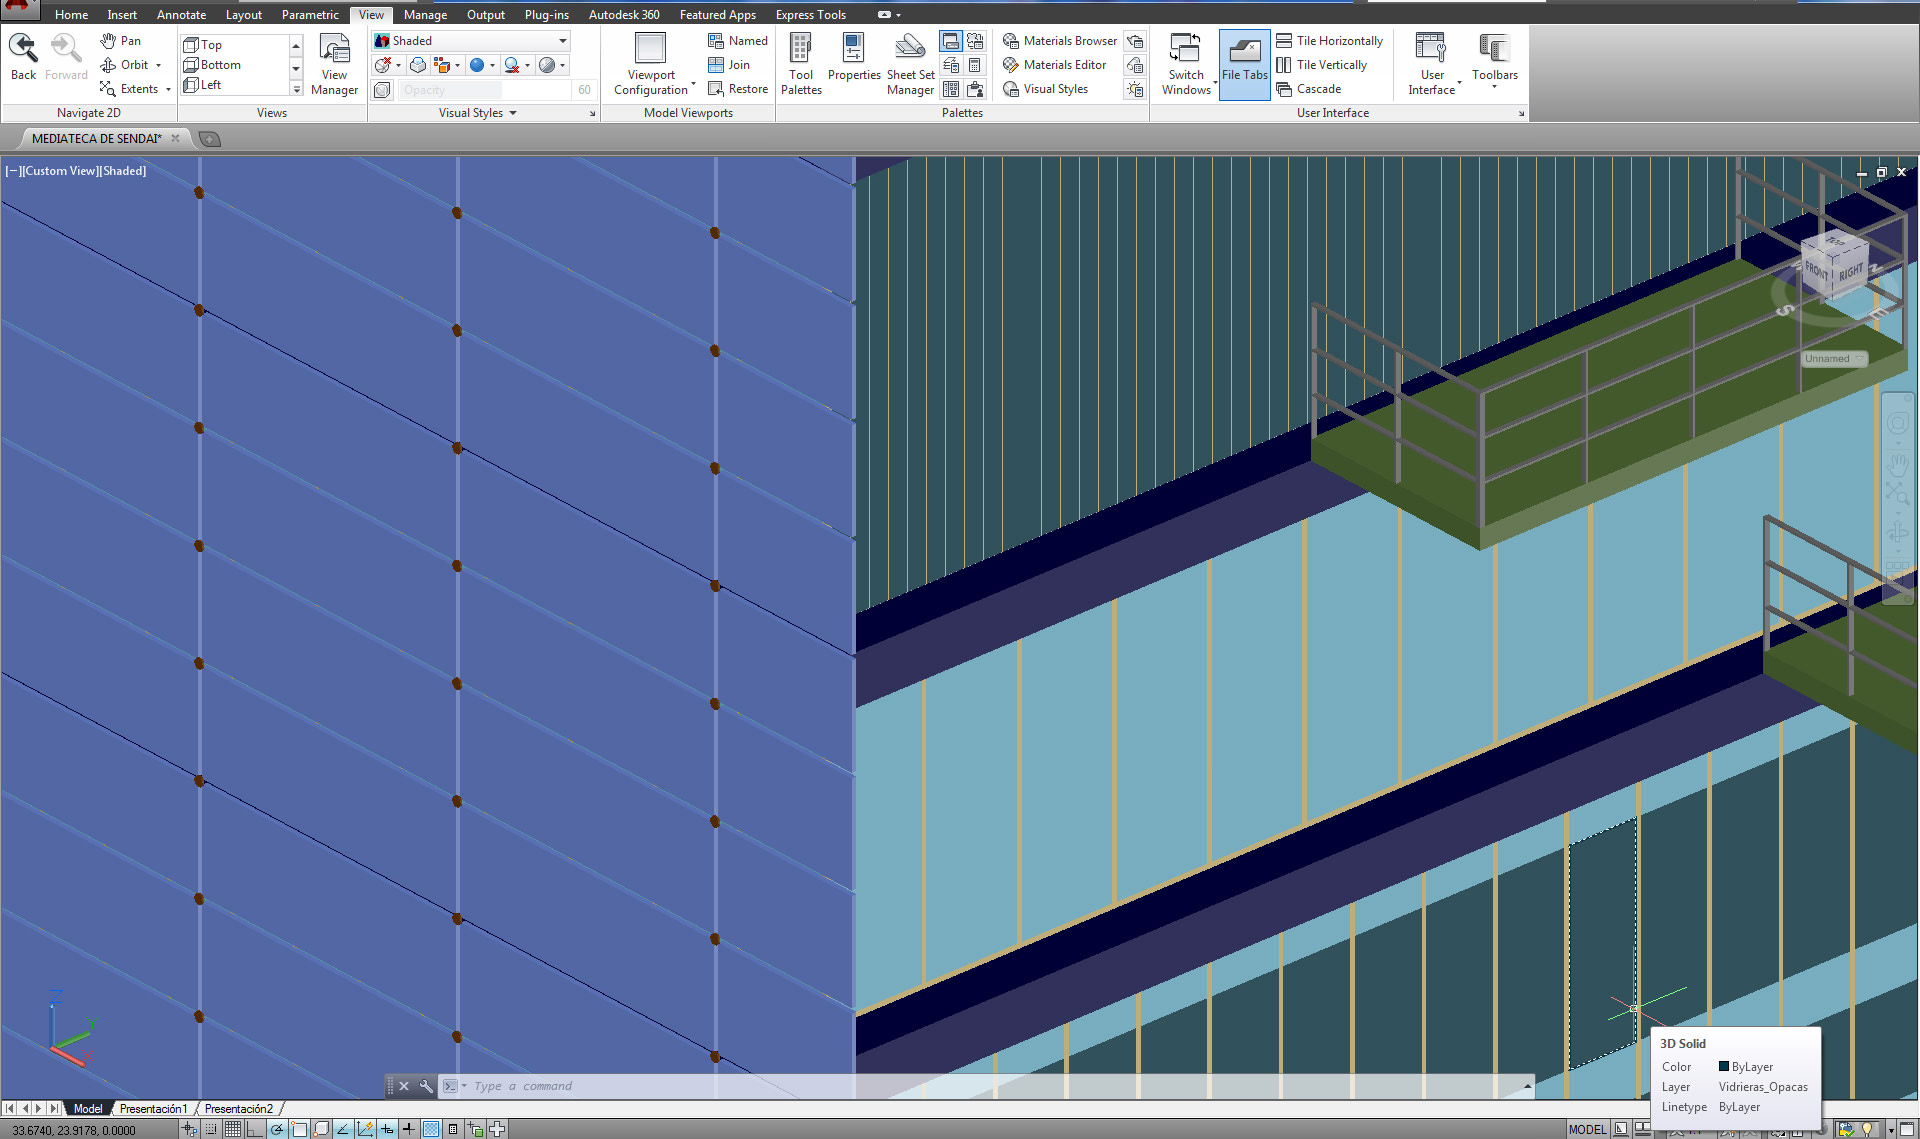
We looked for some drawing, 3d model or any info that would help us to get the basic lines of the building and the environment. We found several drawings and a 3d model. It was not detailed as we wanted it, so it was fixed a bit and some details were added :
On the following screenshots you can see what we did with the environment. Our desire was to prepare the landscape a little bit different from the original :


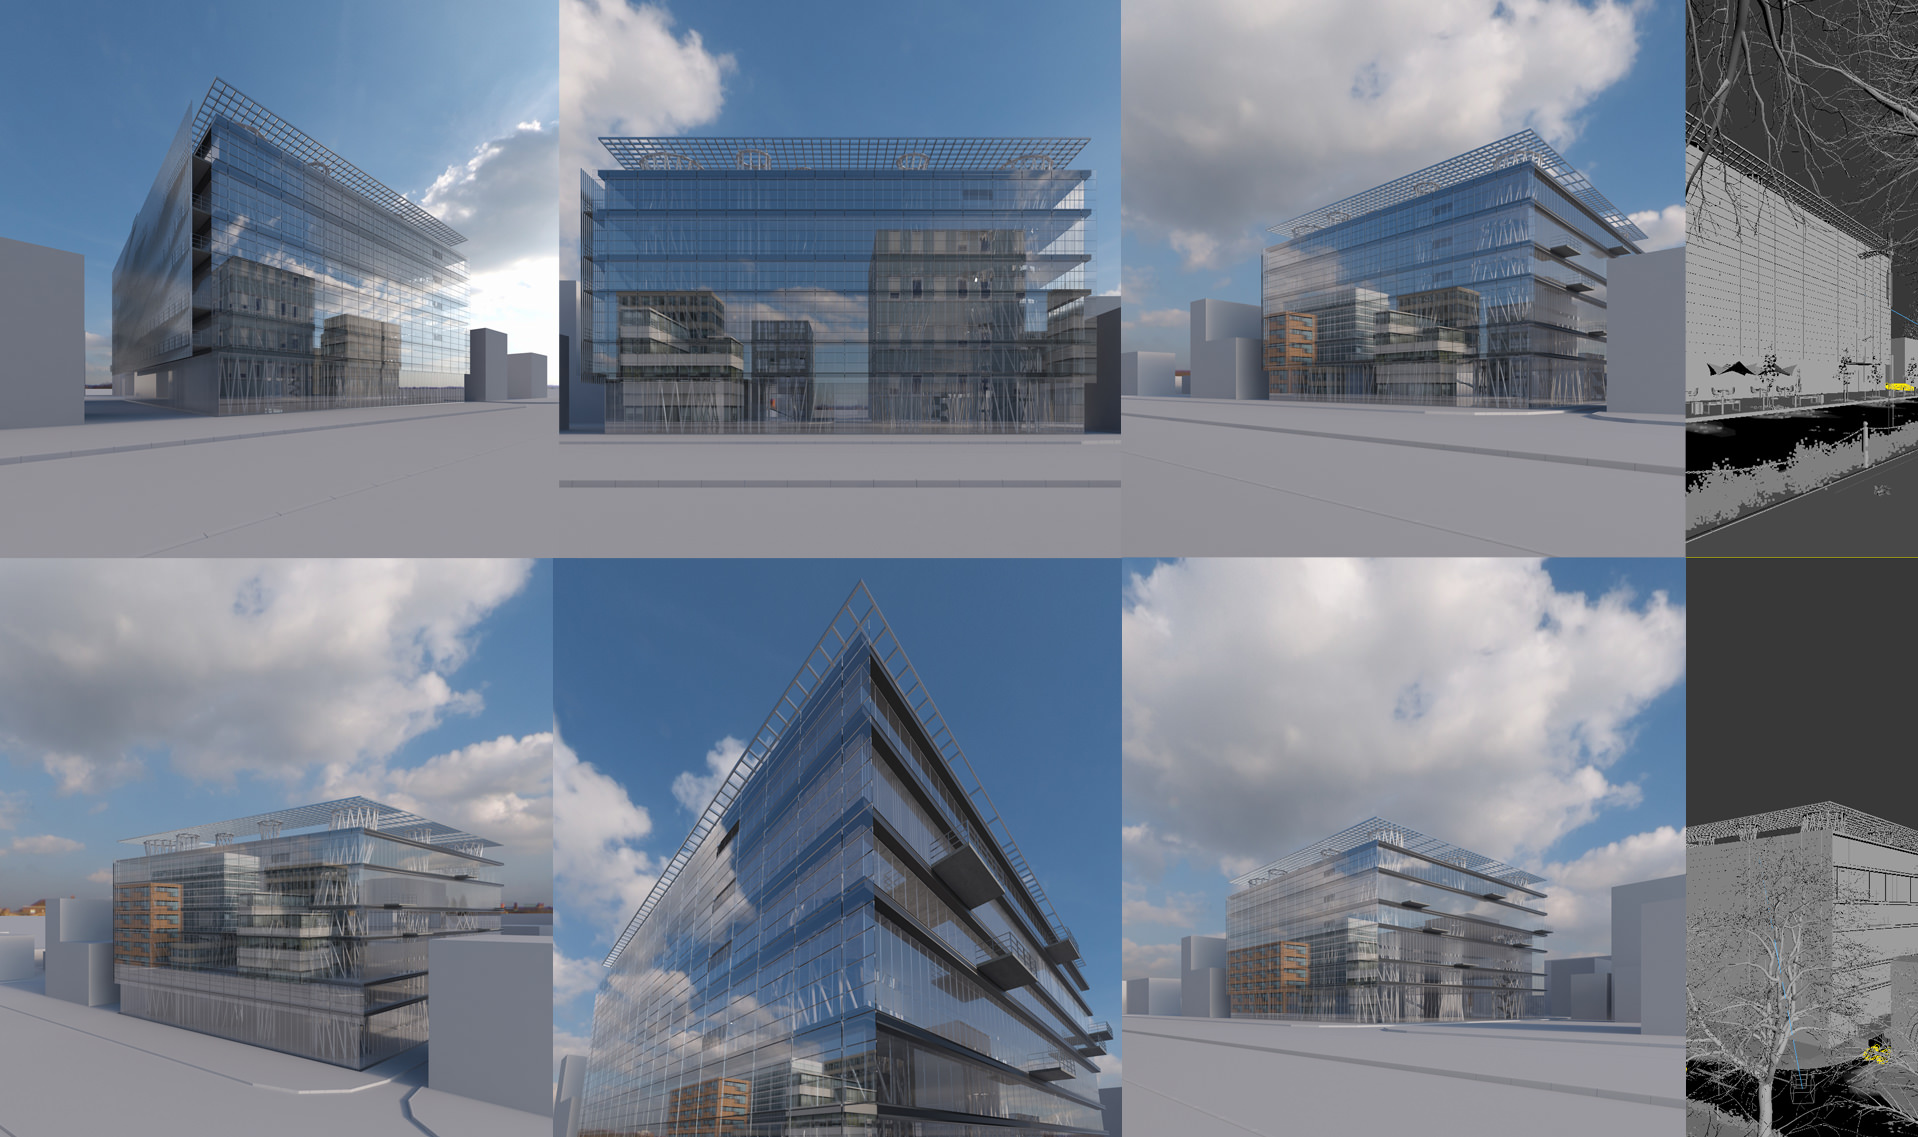
For finding the most appropriate camera angles we tested different points of view. We chosen 9 of them, which had most interesting composition. The following illustrates first drafts :
Credits to our friend Asen Todorov for the wonderful model of the Mercedes W123
Materials
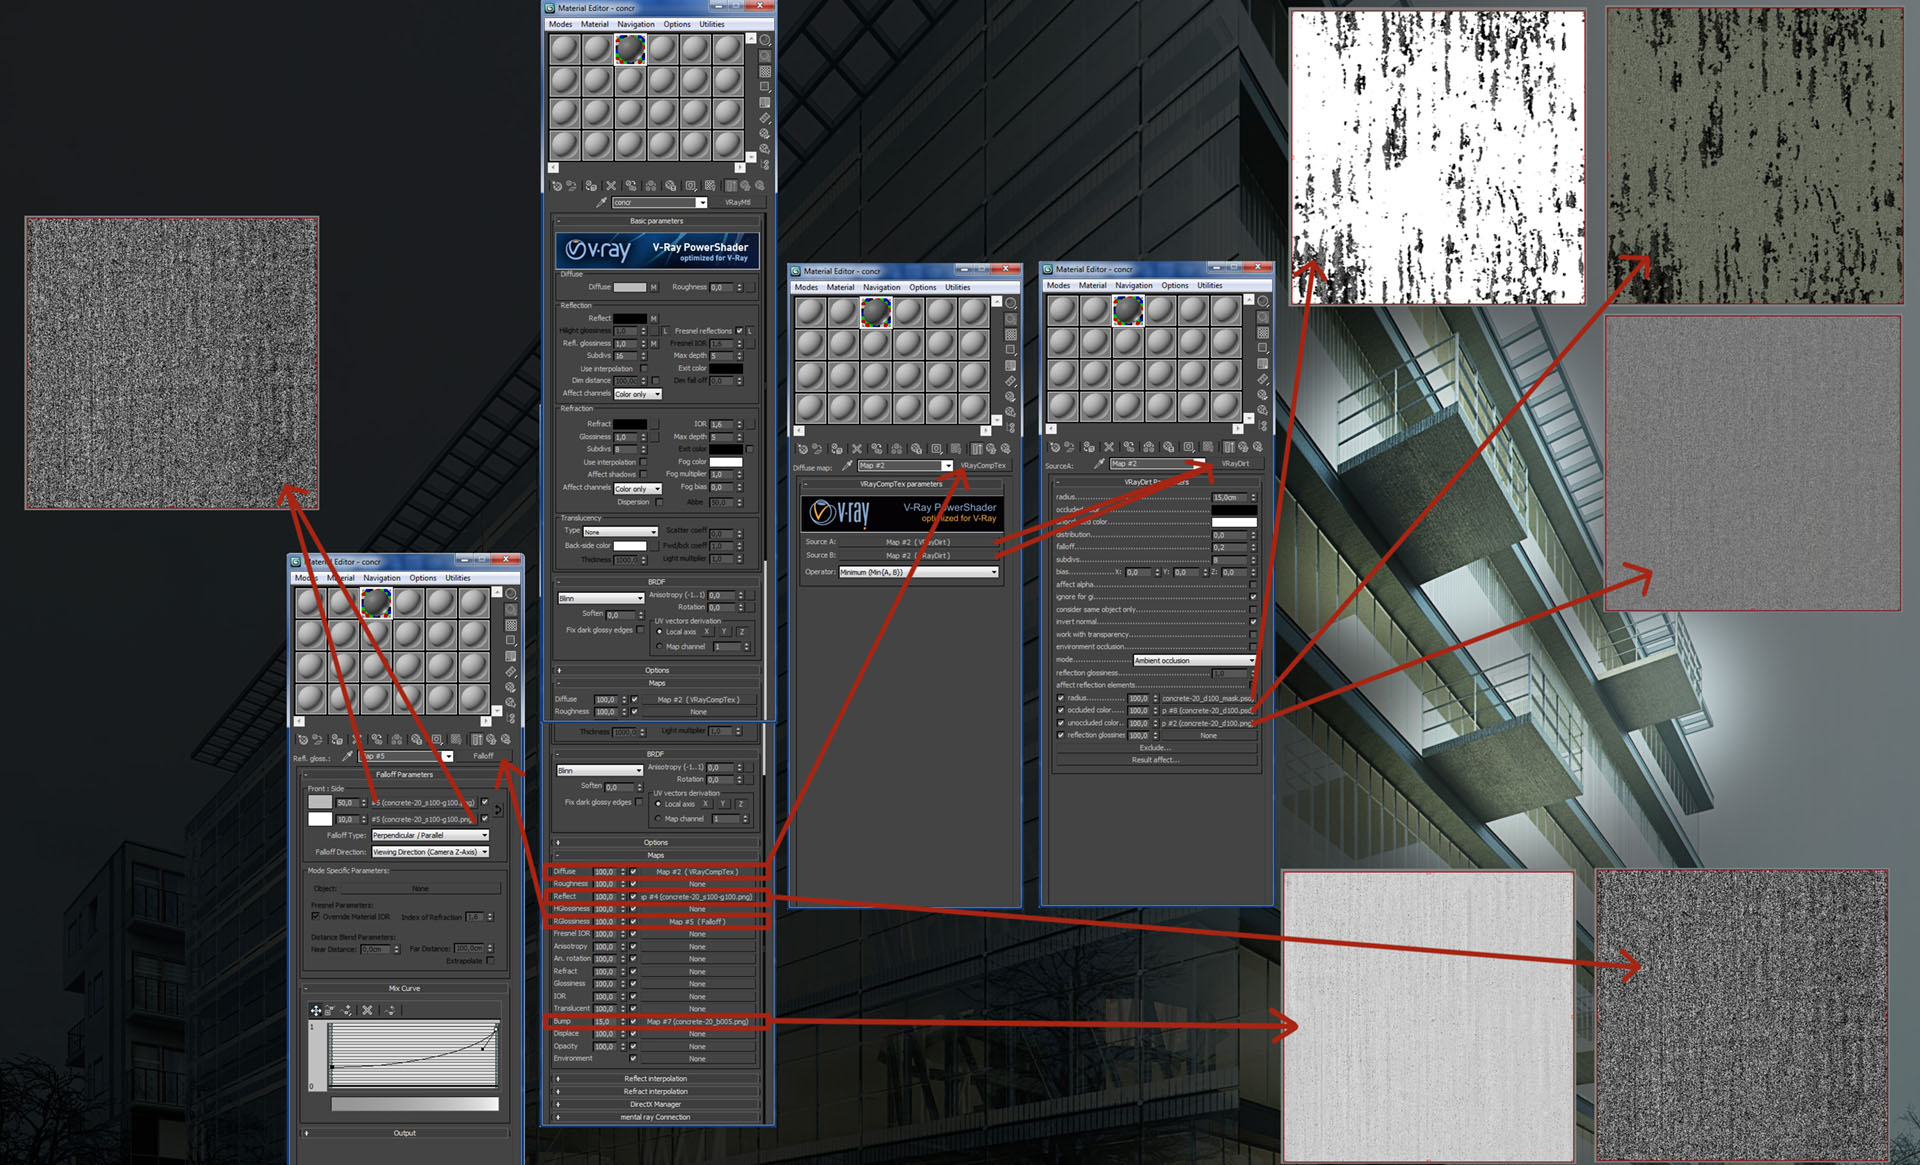
There is nothing special about the materials. You can see it below :
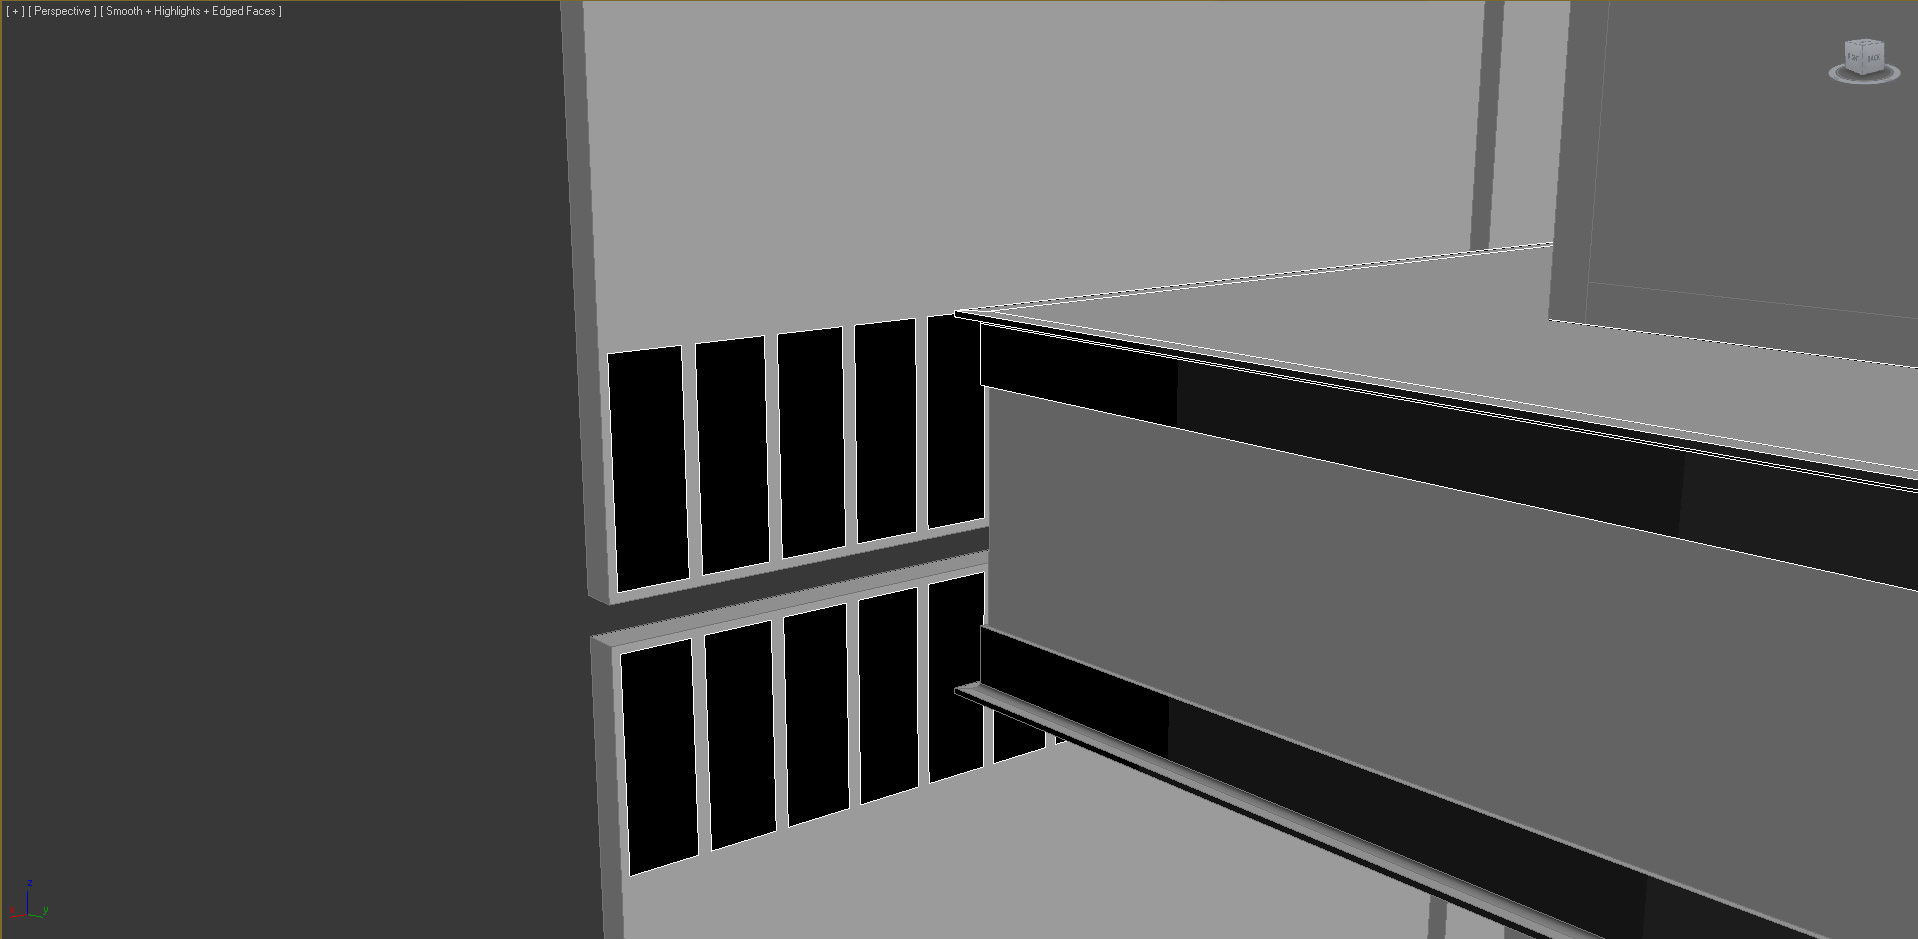
Concrete – We wanted it to look used. It was made with VrayCompTex
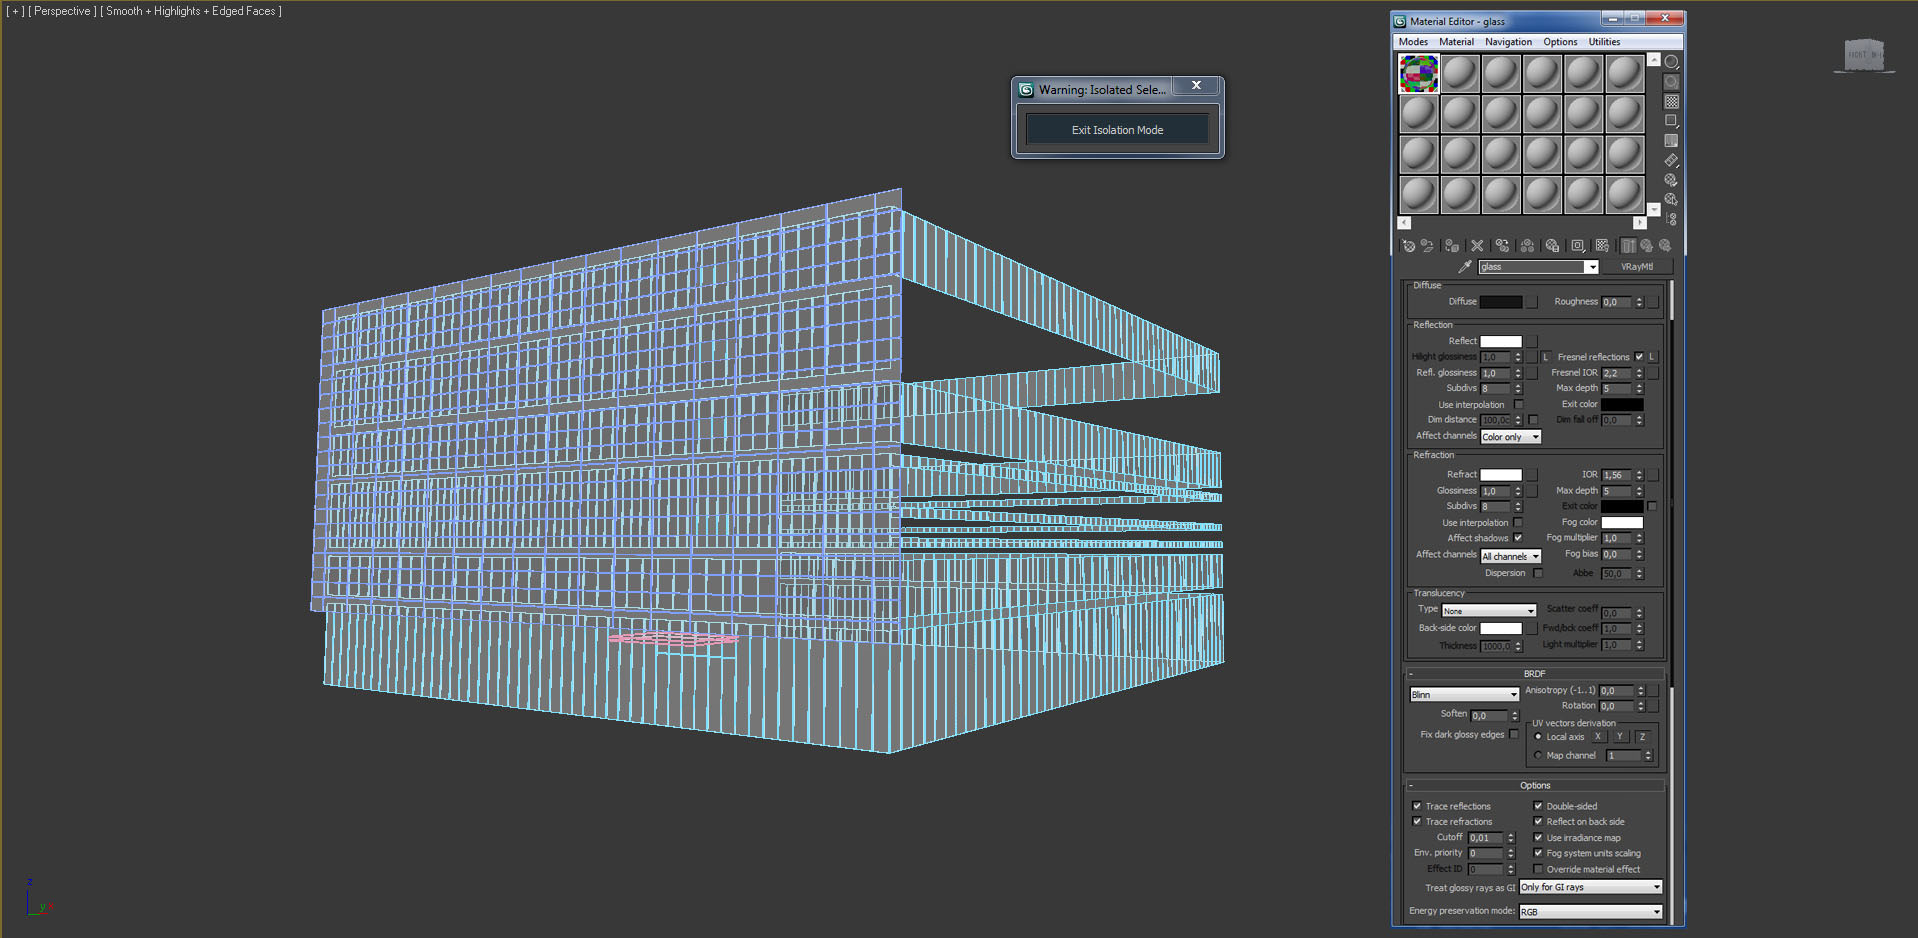
Glass – As you can see on the screenshot, the glass material is really simple (but effective)
Road markings – The material is composed only from a diffuse map. We applied VrayDisplacementMod modifier on the object which is 0.6 cm under the road

Vegetation
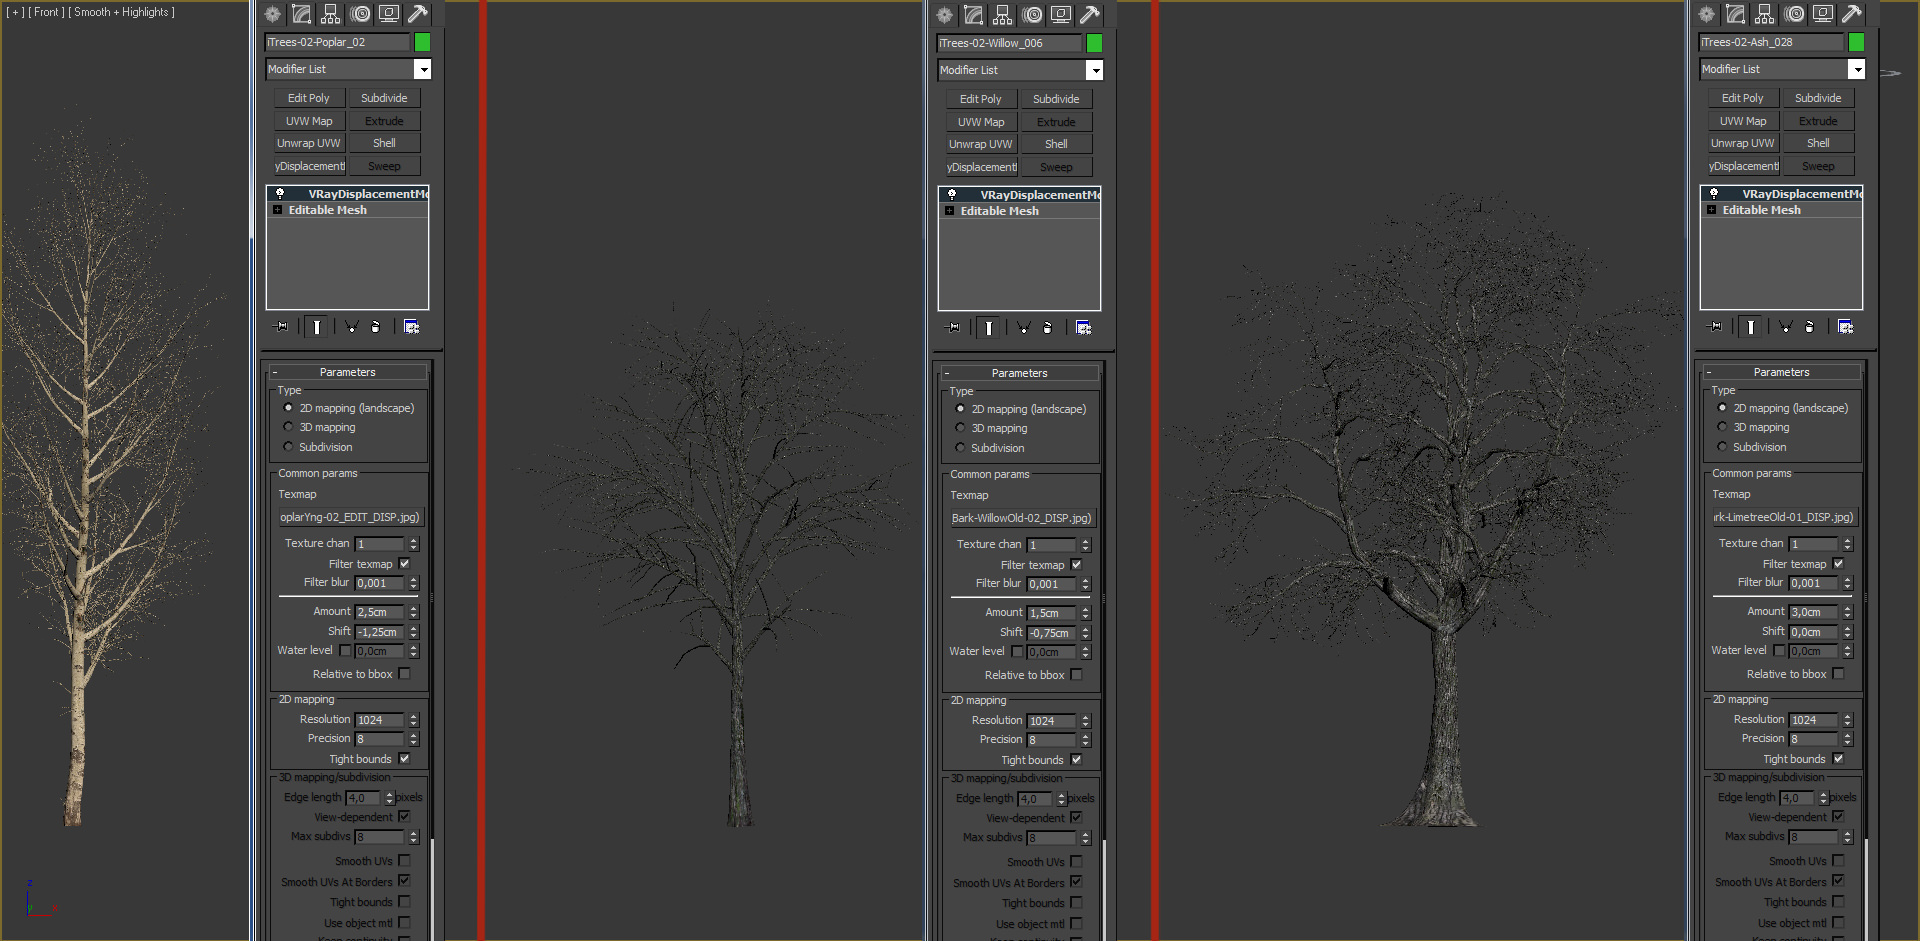
We decided to make an autumn scenario. The trees are from iCube, and we have erased the leafs, made some basic adjustments on the materials and added a VrayDisplacementMod modifier for more detailed bark appearance :
To generate the flying leaves we used particle flow. The objects were three slightly different variations. Geometry of the leafs is one faced plane with noise modifier. The material is composed from diffuse and opacity map :

The fallen leaves on the ground, we made with the help of MultiScatter. The settings you can see on the following screenshot.
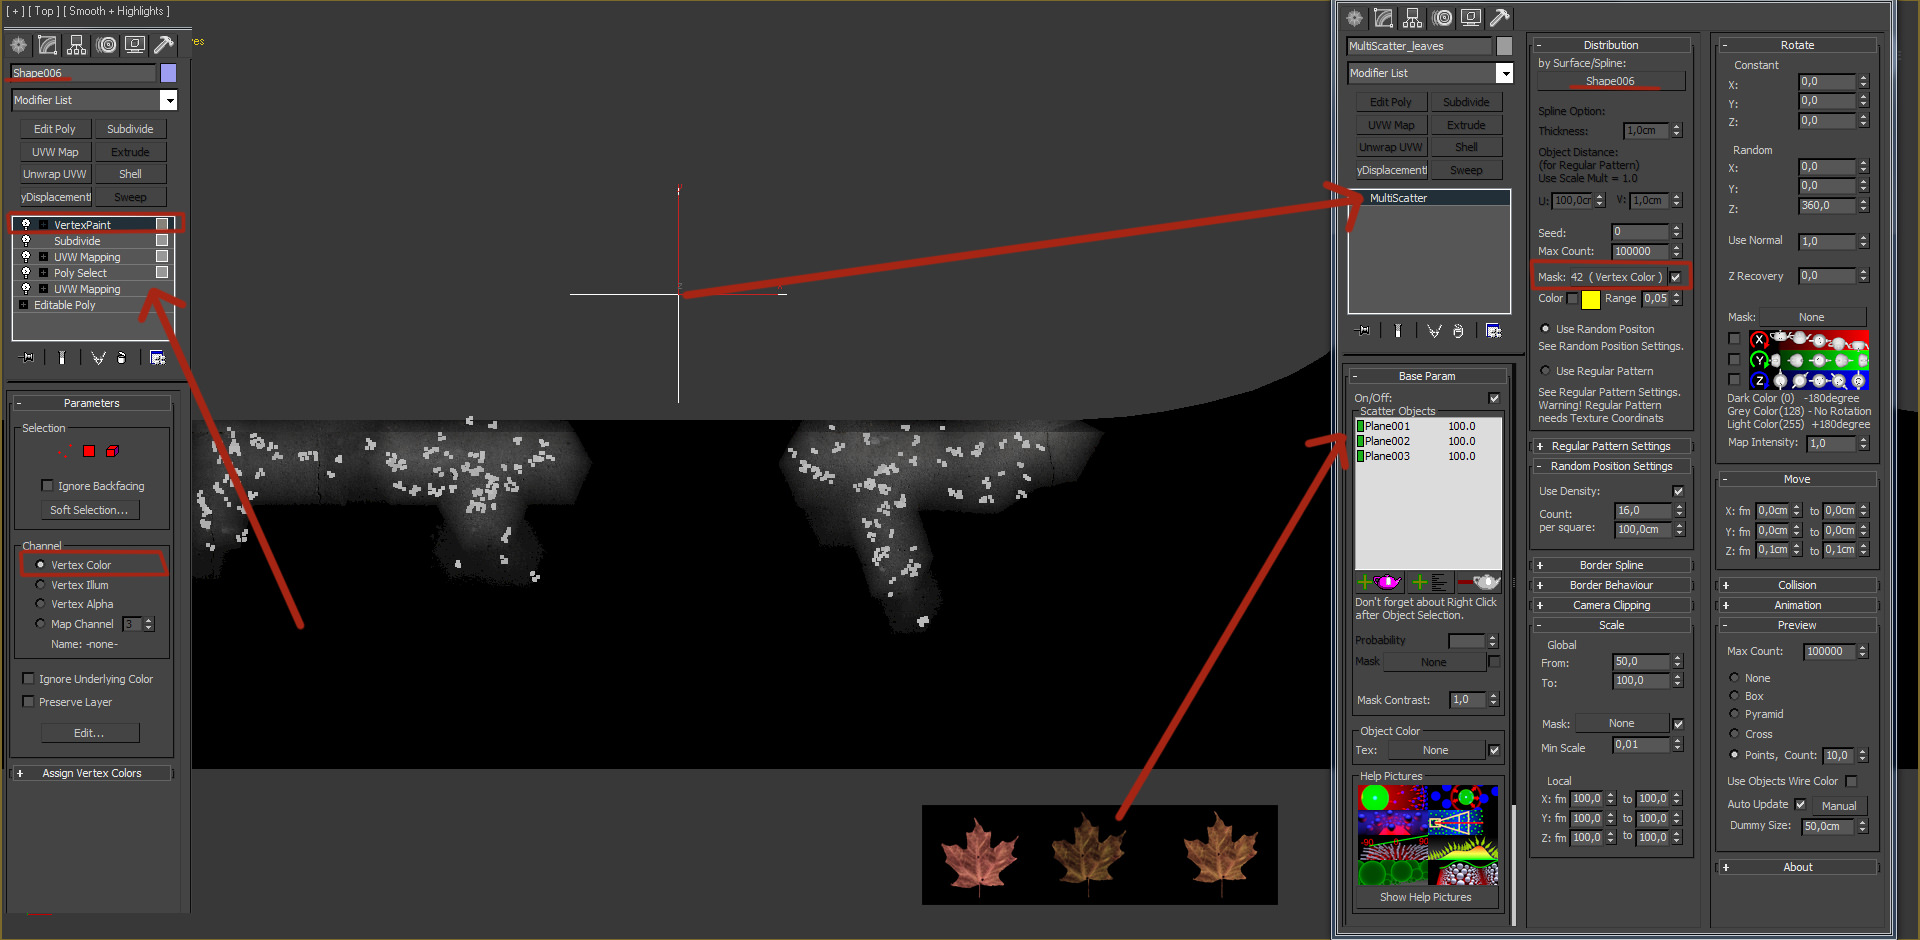
We wanted the leafs in specific places, so to do this we used VertexPaint modifier. That way we painted the areas with the leafs.
We made the grass that was sticking from the tree metal grate with MultiScatter as well :

Lighting
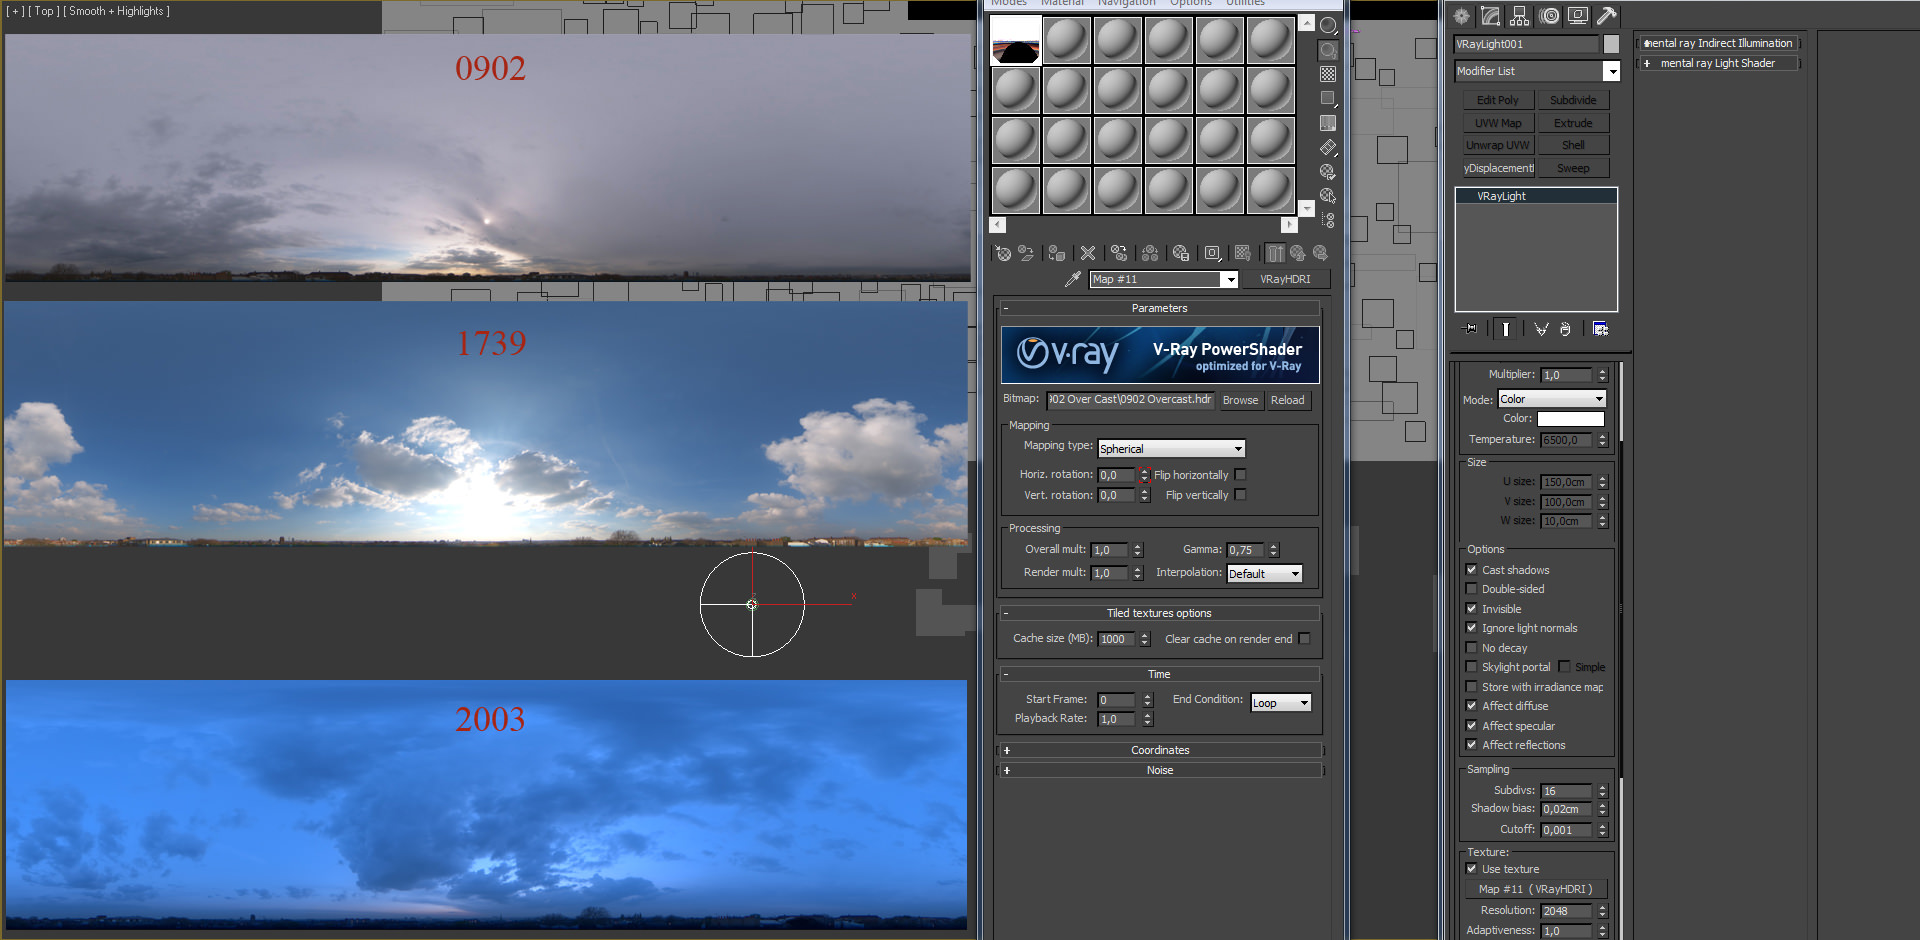
The idea was to achieve realistic lighting. For illuminating the scene we used VrayLight Dome with an HDRI. We used our favourite HDRI’s by Peter Guthrie :

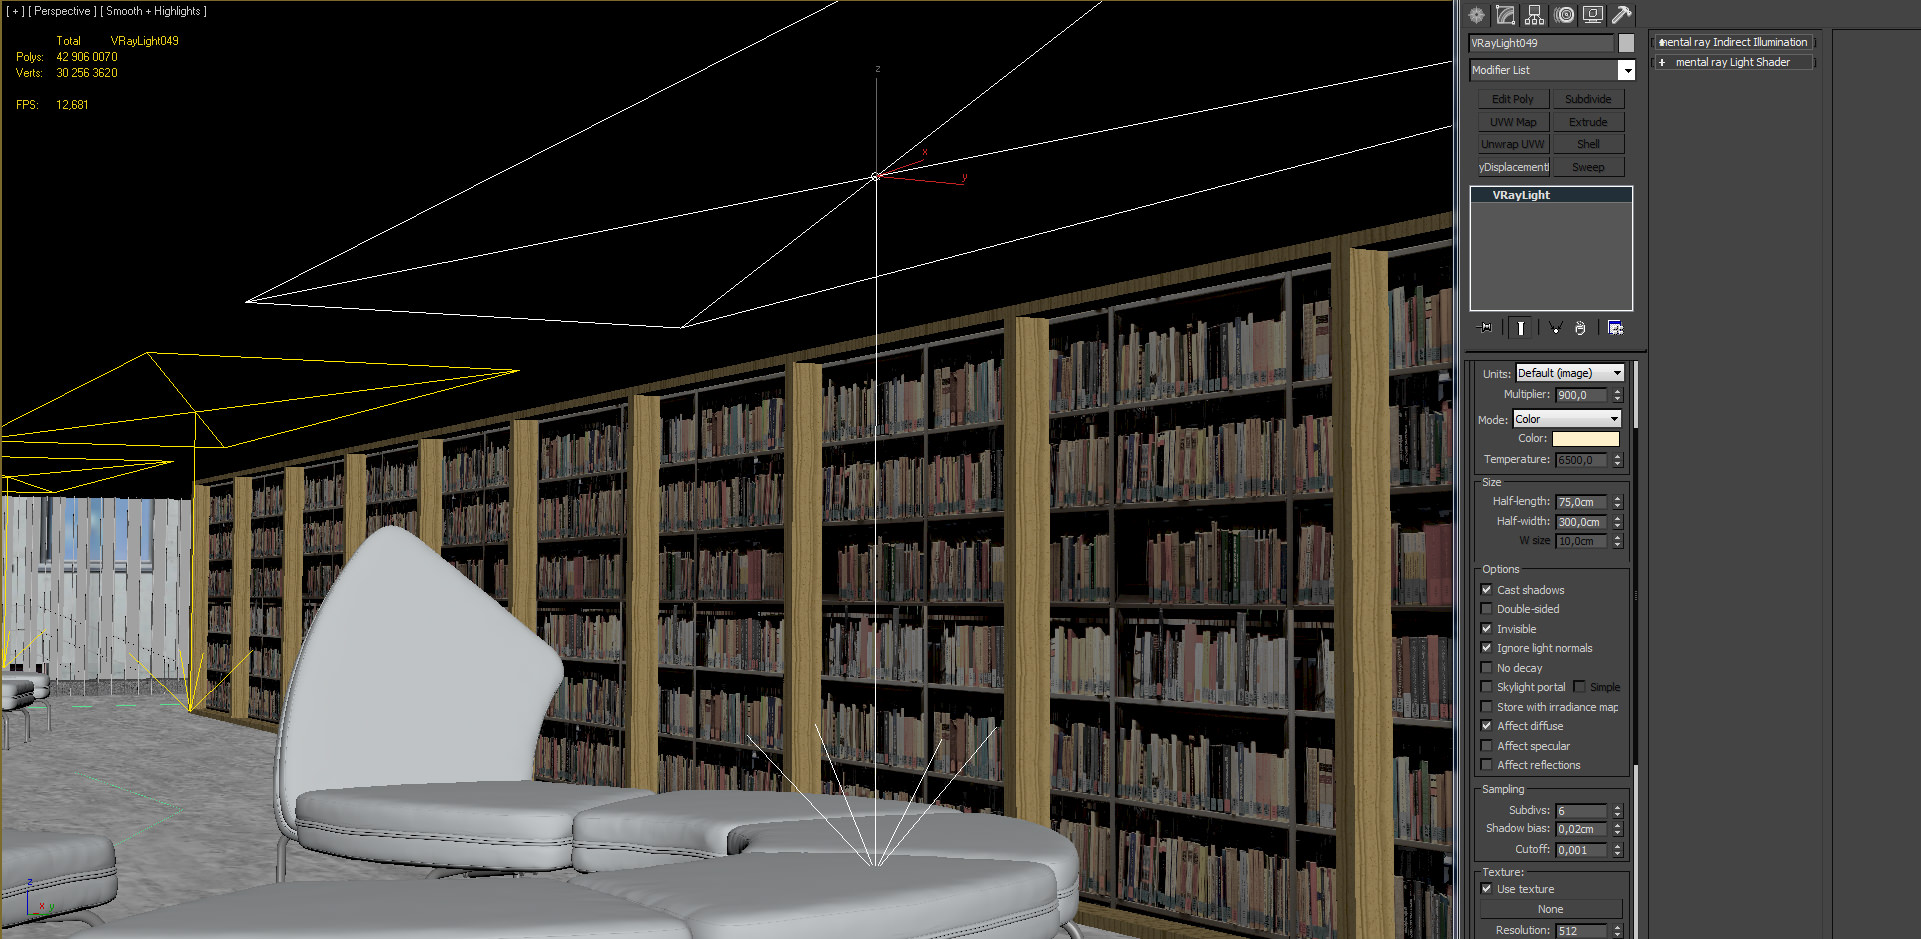
For lighting the interior we placed VrayLight Planes :
Rendering
We used irradiance map plus light cache for the GI bounces. Each render took from 7 to 10 hours on one computer – i7, 48 gb ram, resolution of 4000x. Only the top view with the flying leaves was very slow (motion blur was generated with the vray camera), and it was around 17-20 hours.
Post Production
Usually we use render elements to fine-tune the materials, and the standard photoshop tools (mainly curves and hue/saturation), as for plugins – PhotoLooks (Magic Bullet).
Final Result
Here you can see the final images :


So, that`s it.
I hope you enjoyed it. If there is any question regarding any subject I would be pleased to answer it.

IMAGINE team is composed from cg and architecture visualizers, architects, interior designers and graphic designers based in Sofia, Bulgaria.


Really beautiful! Did you use ghost town for the surrounding buildings?
Jon Morris Thank you! Nope, some of the surrounding buildings are ready-to-use models, some of it are just boxes with the proper maps.
Thank you for sharing guys !
Hi.
How did you control the over exposure when you set 0.75gamma in 1739HDRI? What’s the tonemapping settings you used in vray?
Lantrancy hello..reinhard with burn value of 0.25
so great. what file output are you using?
hi guys!!
It’s a really great job, and it’s a great tutorial!!! just one question… could you explain the road’texturing??? thx a lot
Hello Claudio,
Thank you! about the road texturing – diffuse: road texture(XL/XXL) from cgtextures.com mixed with basic tileable asphalt texture (closeup); black/white reflection=same to bump slot=similar to vraydisplacement modifier. it is all about testing and adjusting the settings.
Viktor Petrovich 8bit
Hi please can you post a link to the 3d model you found online??
Awesome work! What does it look like in the RAW render? Thank you!
Hi would it be possible for you to send me the 3D file for this? i require it for the project. Even the base file is fine.