


Making of THE BRINK
Following up on showcasing THE BRINK, Romuald Chaigneau shares with us the making of this work today. Touching each step of the process all the way to the animated camera mapping which gave it all a cool twist. Enjoy!
Introduction
Hello to the community!
First I would like to say that I am truly honored to have attracted the attention of Ronen Bekerman, and write these few lines right now. I would like to thank Ronen, the whole community, and the people who are helping me during the process to realize this little animation.
The objective of this personal project was first to achieve a matte painting in the mood of the video game Final Fantasy IX. A video game that really made me dream during my childhood. In the middle of production, I decided to make a short animation. A very good exercise to progress.
References
First order of business was finding references.
For connoisseurs of FFIX, I chose an environment lying near to the village of Dali. This is a kind of pier for flying boats lying at the edge of a cliff. This environment always make me dreaming.
Here are is my main references :


Modeling
I started with a basic model form in 3ds Max.
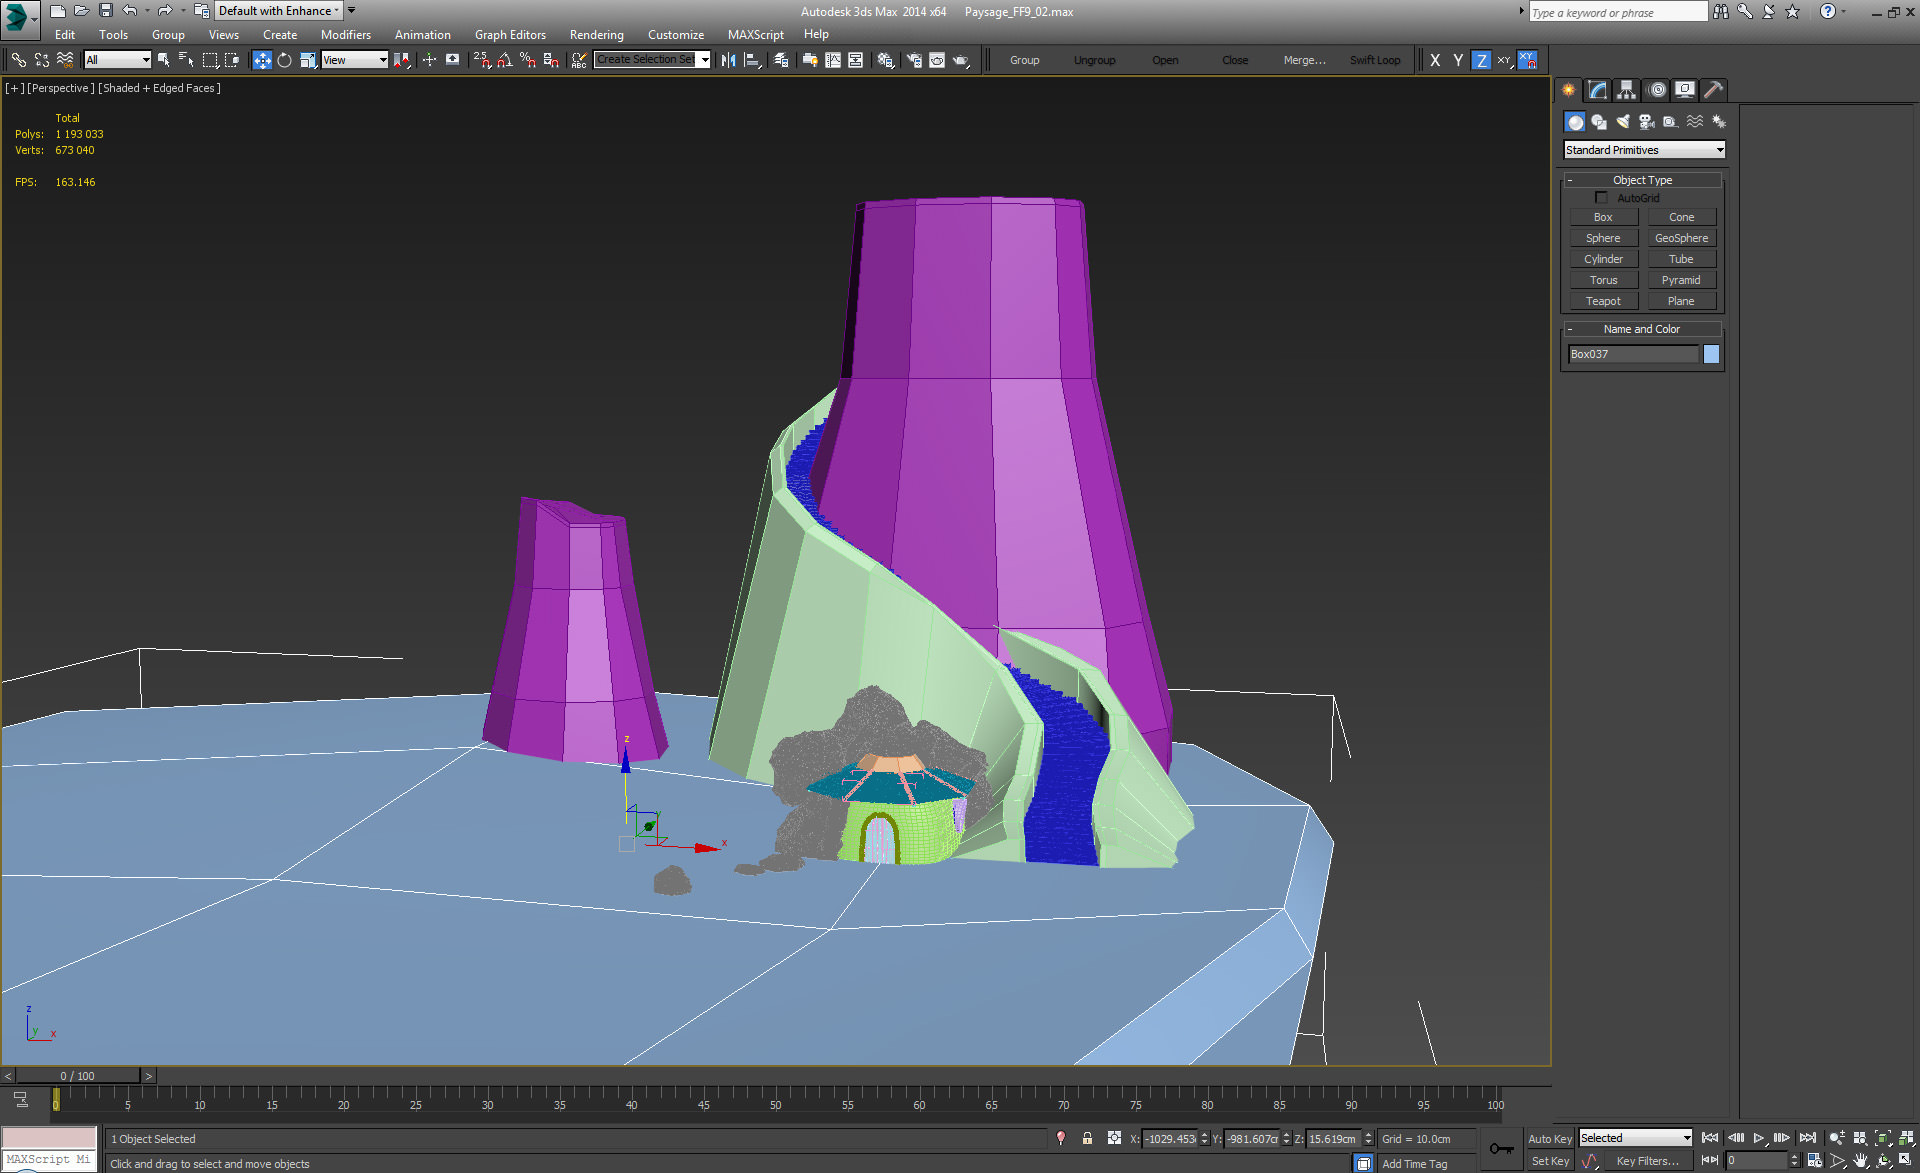
I also modeled few objects like barrels, crates or barriers. I also used the “rock generator” script to add some more detailed rocks in the foreground.
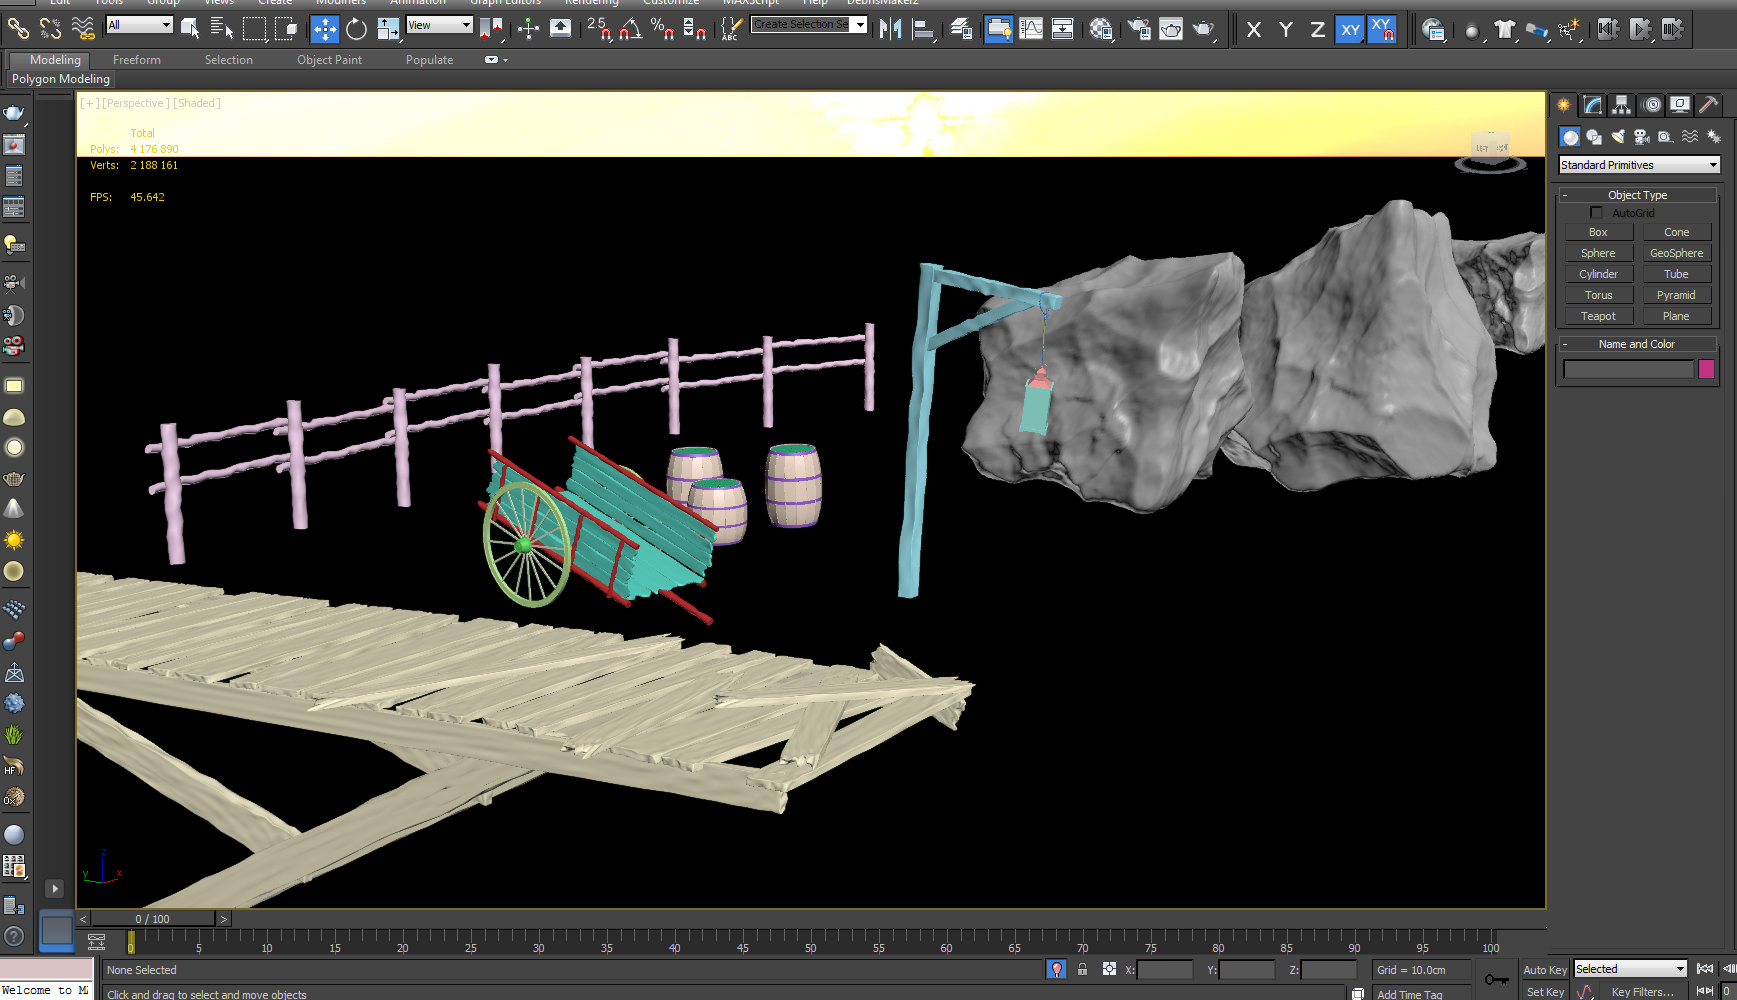
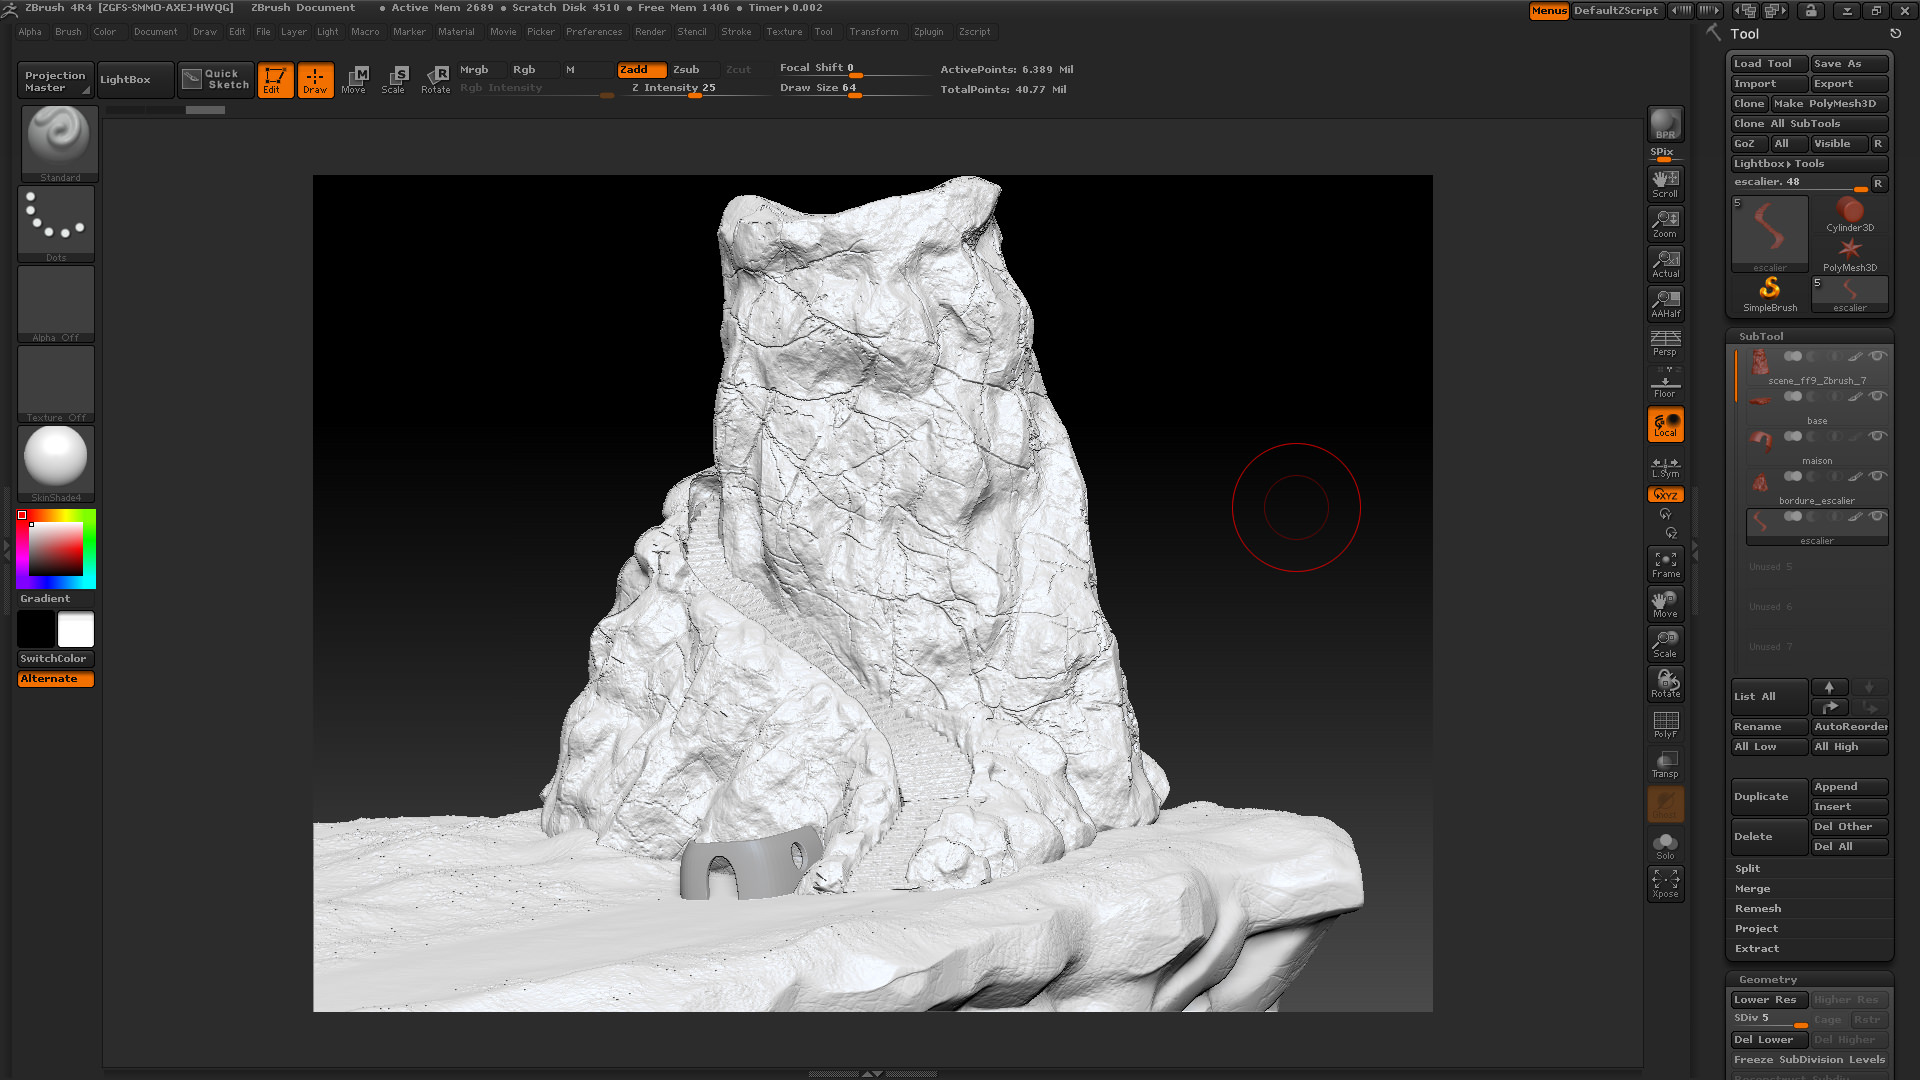
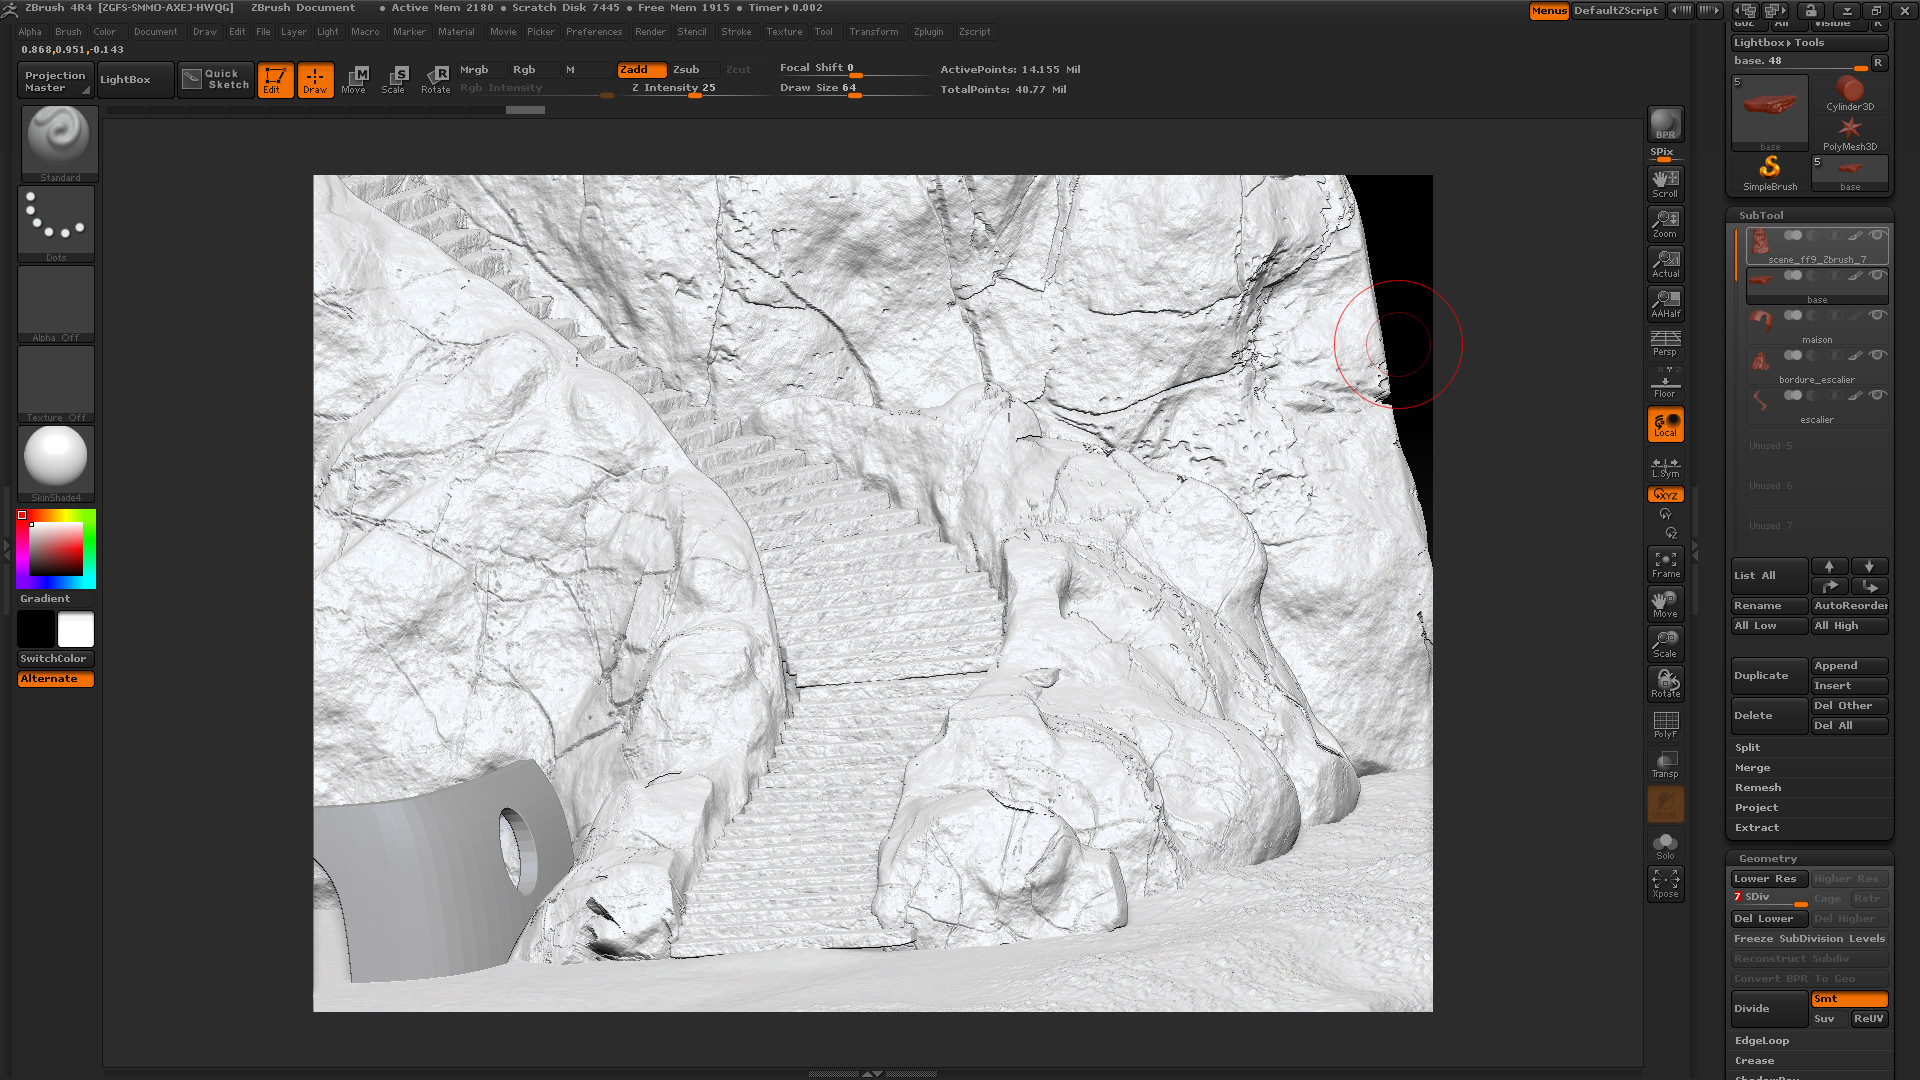
Then I exported the main rock in ZBrush to rework it. I am not an expert in ZBrush, so I mainly use the brushes “move”, “Standard”.
For the boat, I was mainly inspired by the works of Ian Mcque. Check out these illustrations, they are awesome.

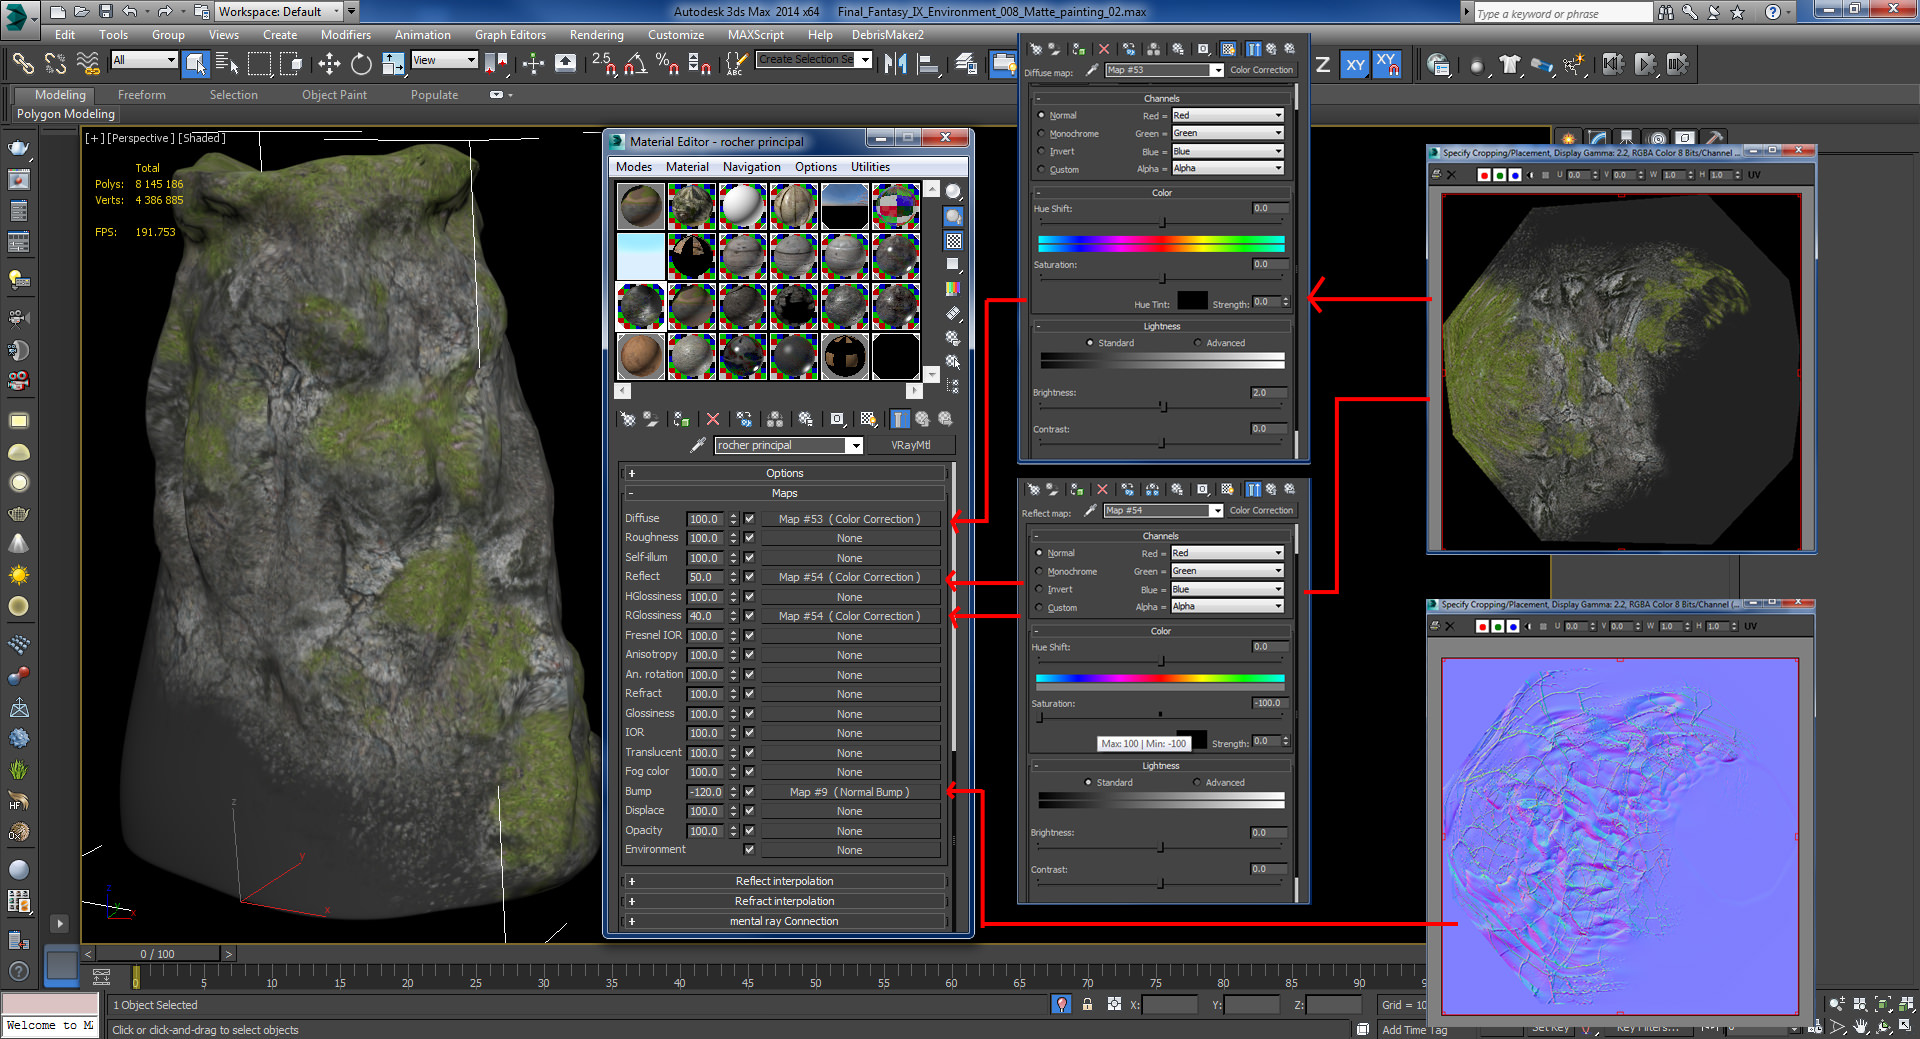
Texturing
The Polypaint in ZBrush allowed me to texture my rock as I wanted. I played with several maps of rock.
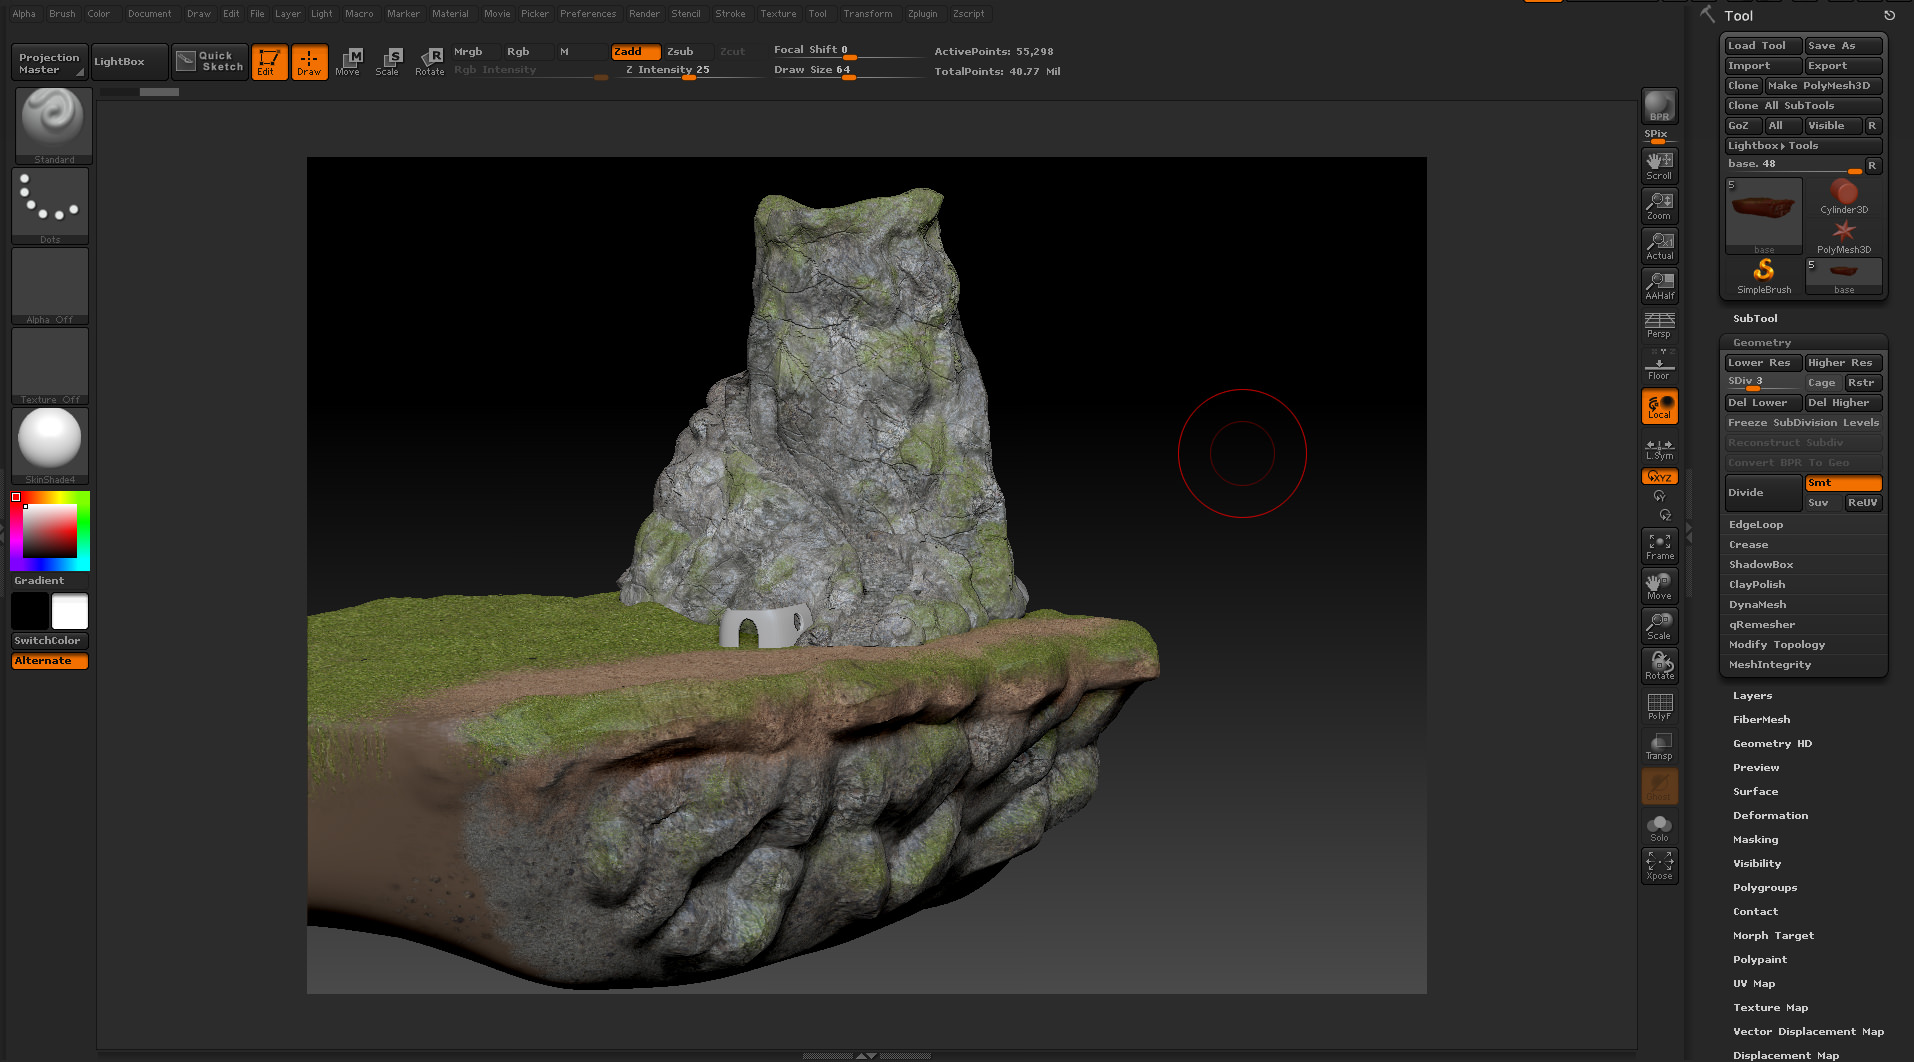
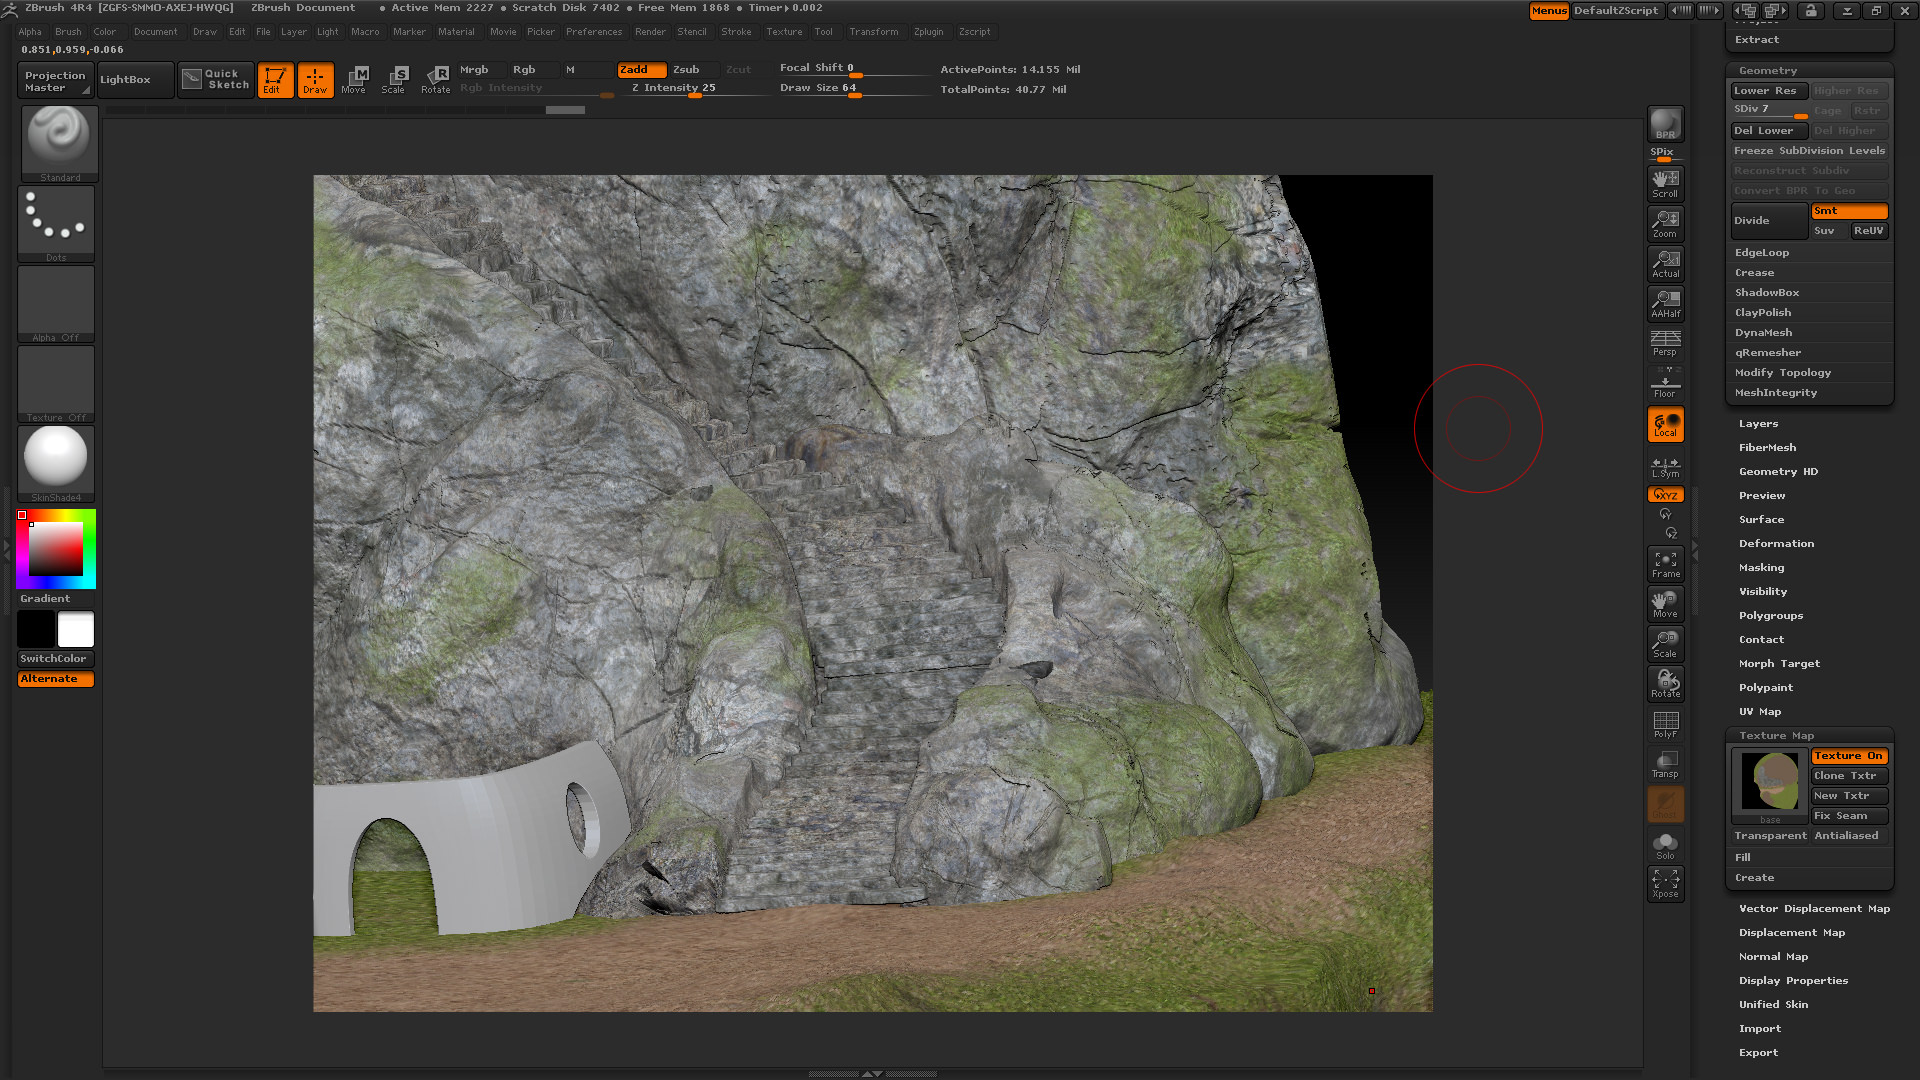
Then I exported my diffuse maps and normal maps.
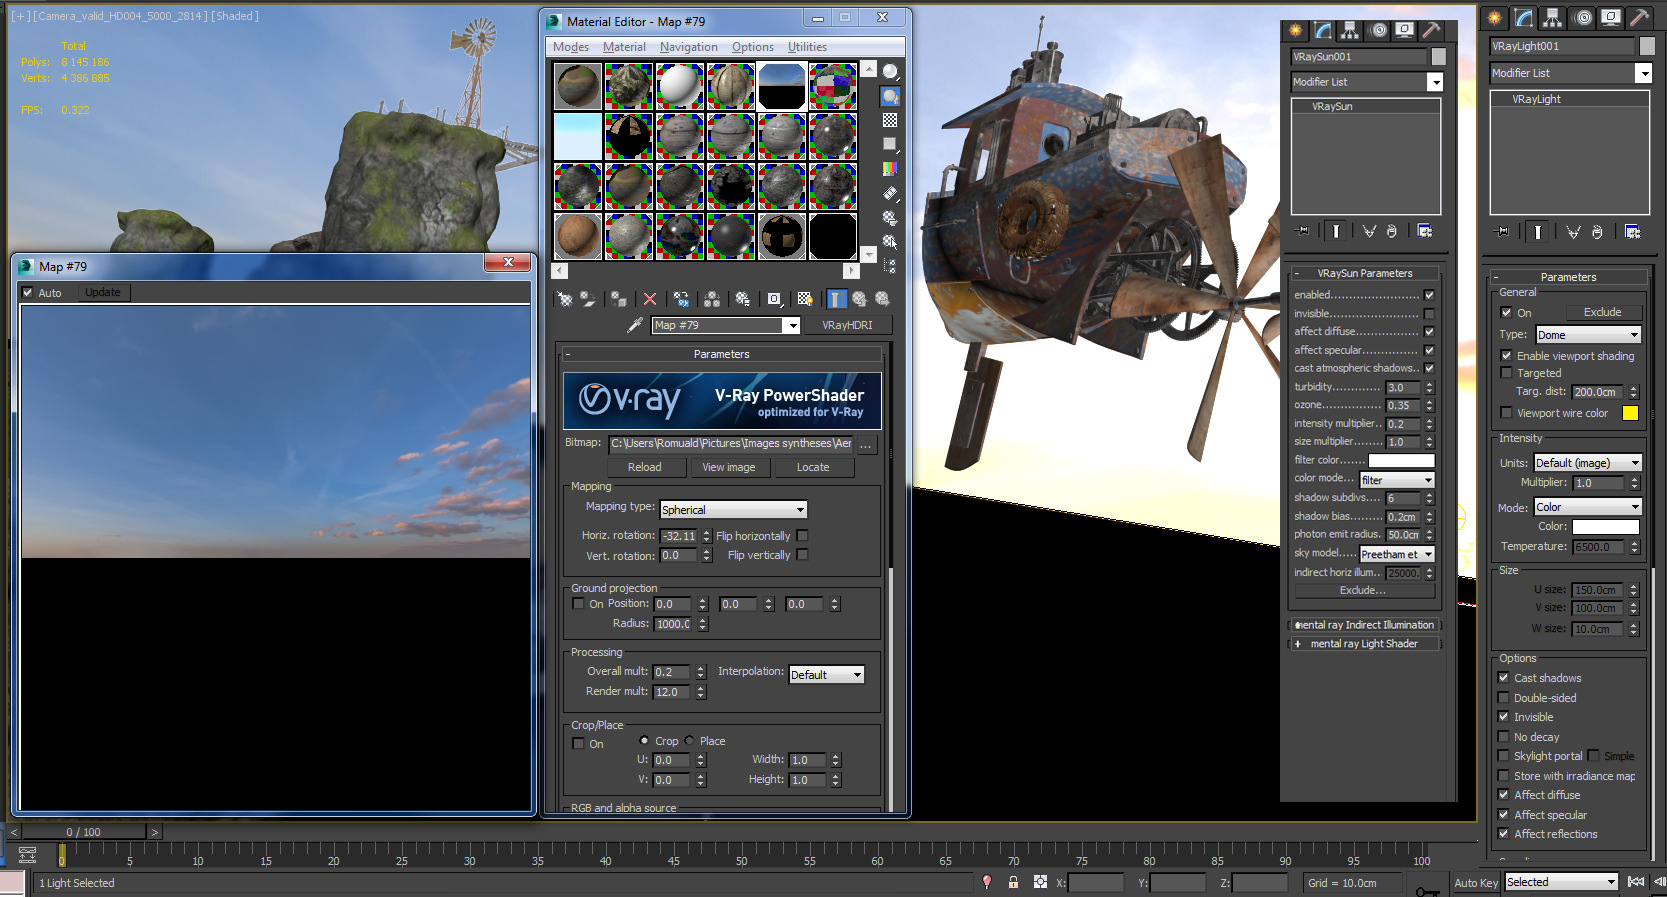
Lighting
My lighting is simple. I use an HDRI on a V-Ray Dome Light and a V-Ray Sun to accentuate the shadows. My camera is simply a standard camera.
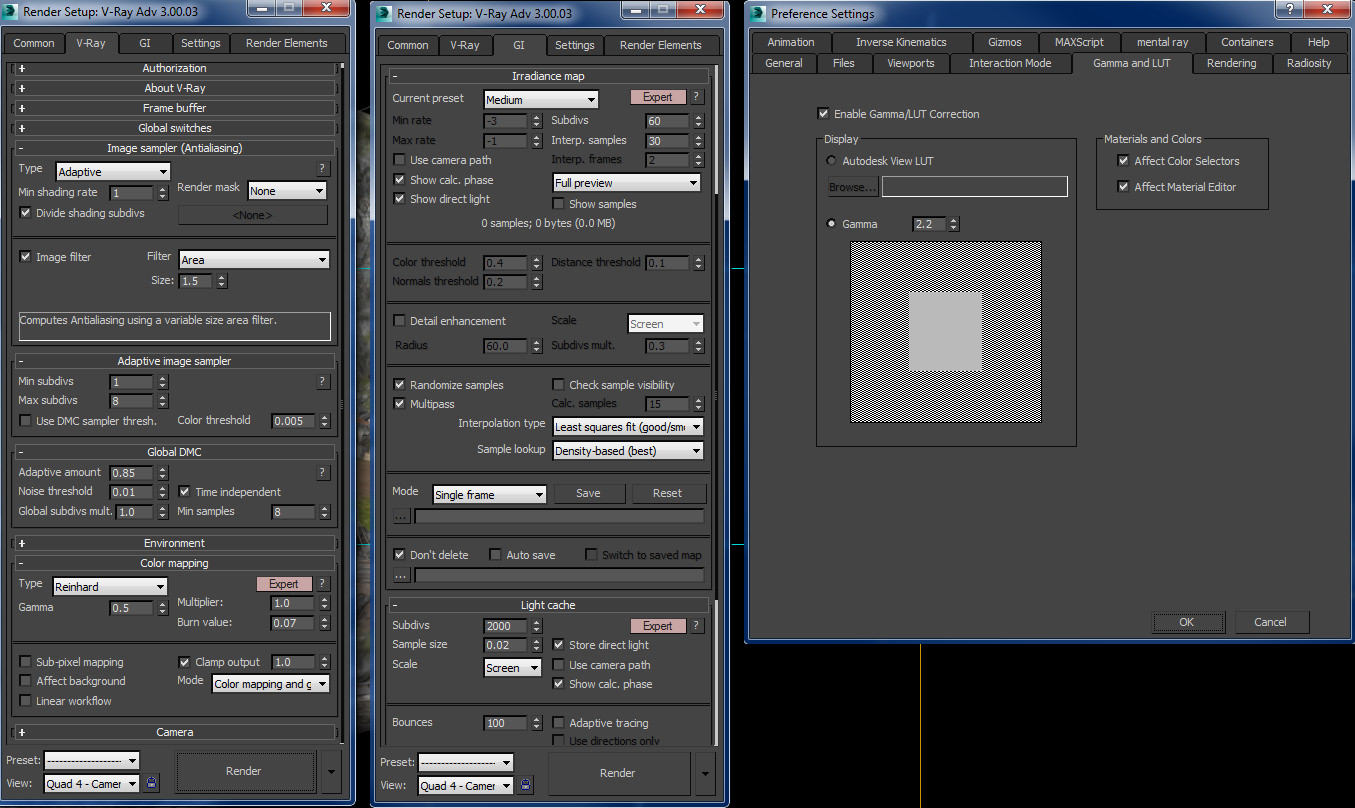
Render Settings
Here is the render settings that I mainly use. On this project, it did not really matter because I knew I would recreate almost all materials in Photoshop in adding 2d elements. However I had render the picture in 5000px x 2814px order to have the same image aspect that Full HD format (1.778) and not have any problems to working the animation later.
Matte Painting
This is the part that I enjoy the most! The goal is simple, collect full of images, combine them, play with them, to realize the background entirely in 2D. I also reworked the materials on the rock and the boat, and refine the lighting in Photoshop.
I have not hesitate to increase the effects, to give a fanciful and unreal side. I was not looking to have a realistic image.
Don’t hesitate to watch this video to understand the steps of matte painting
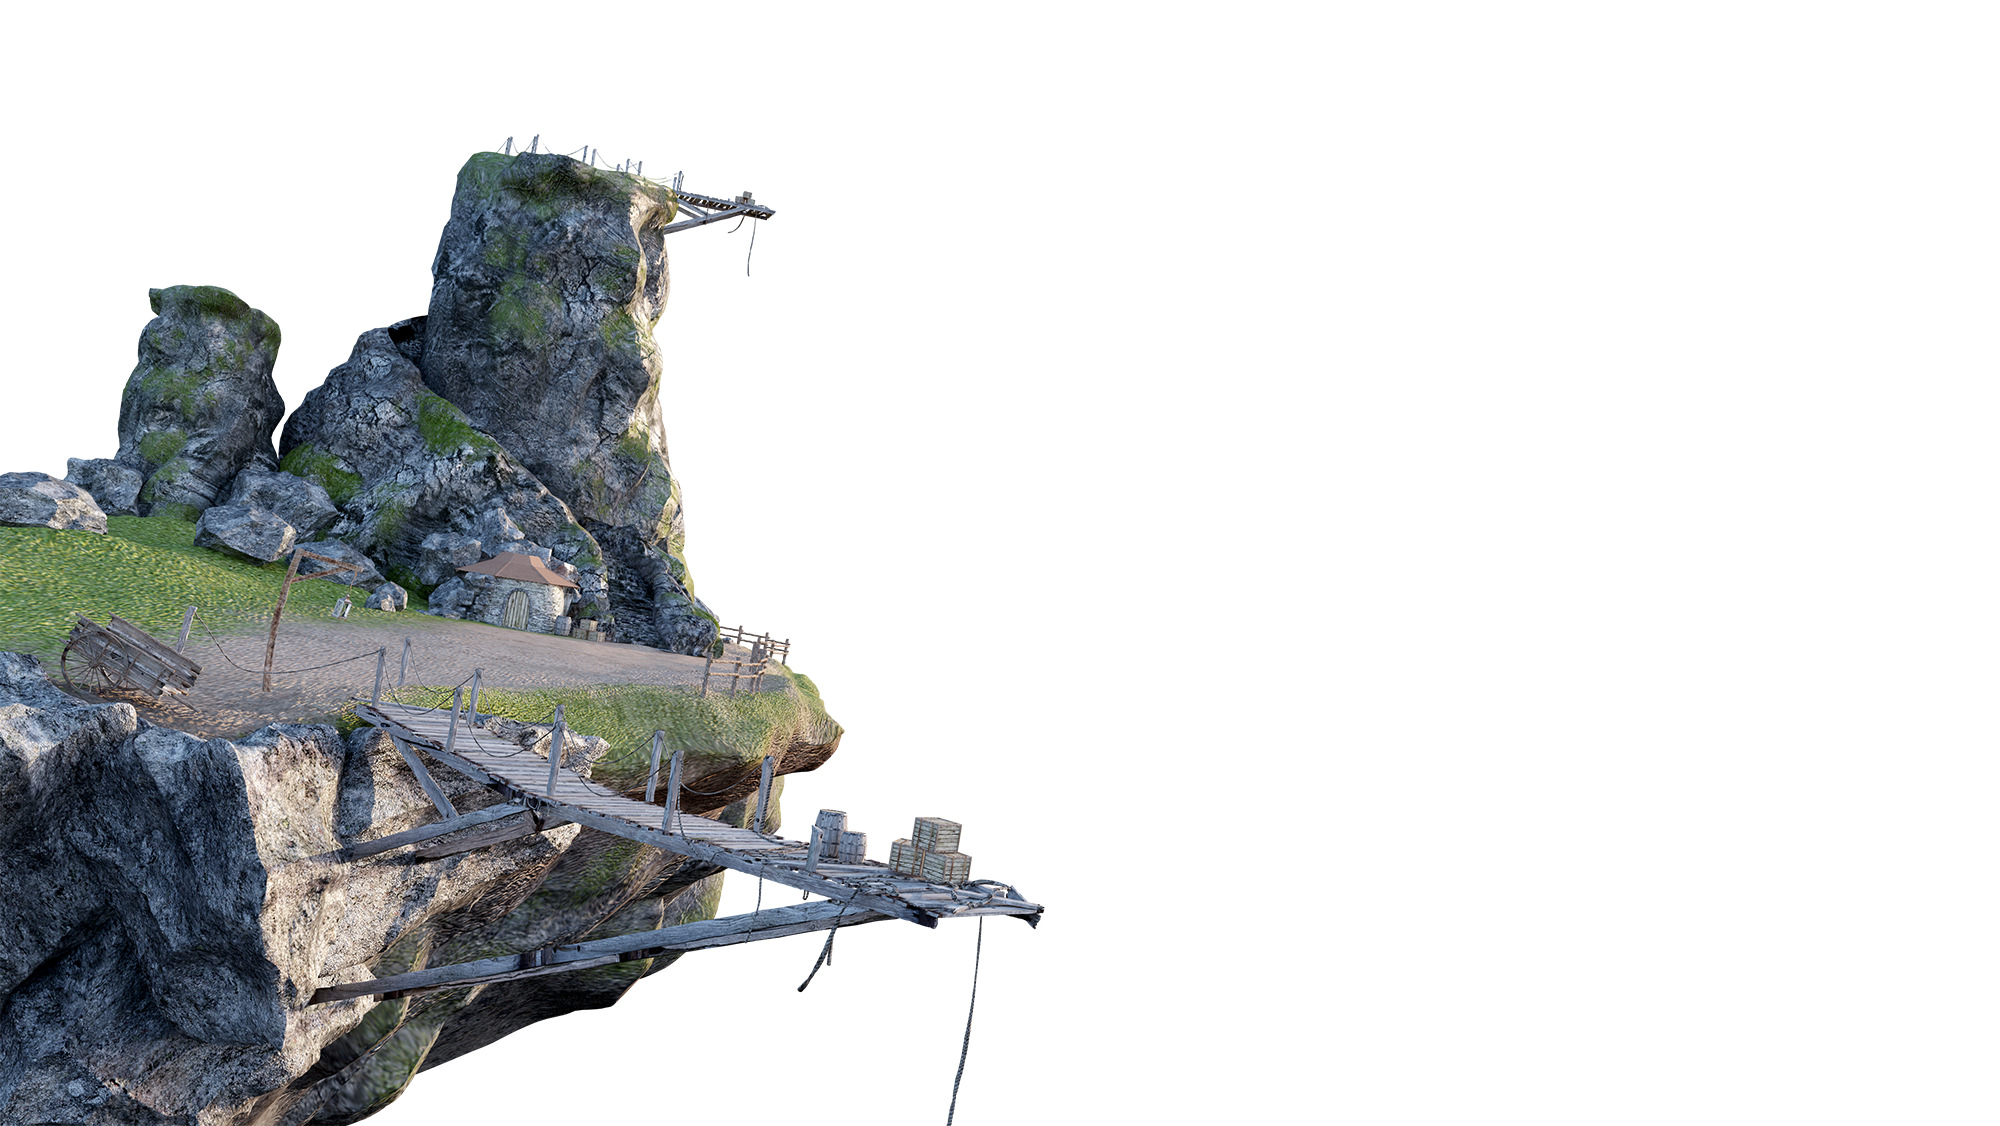
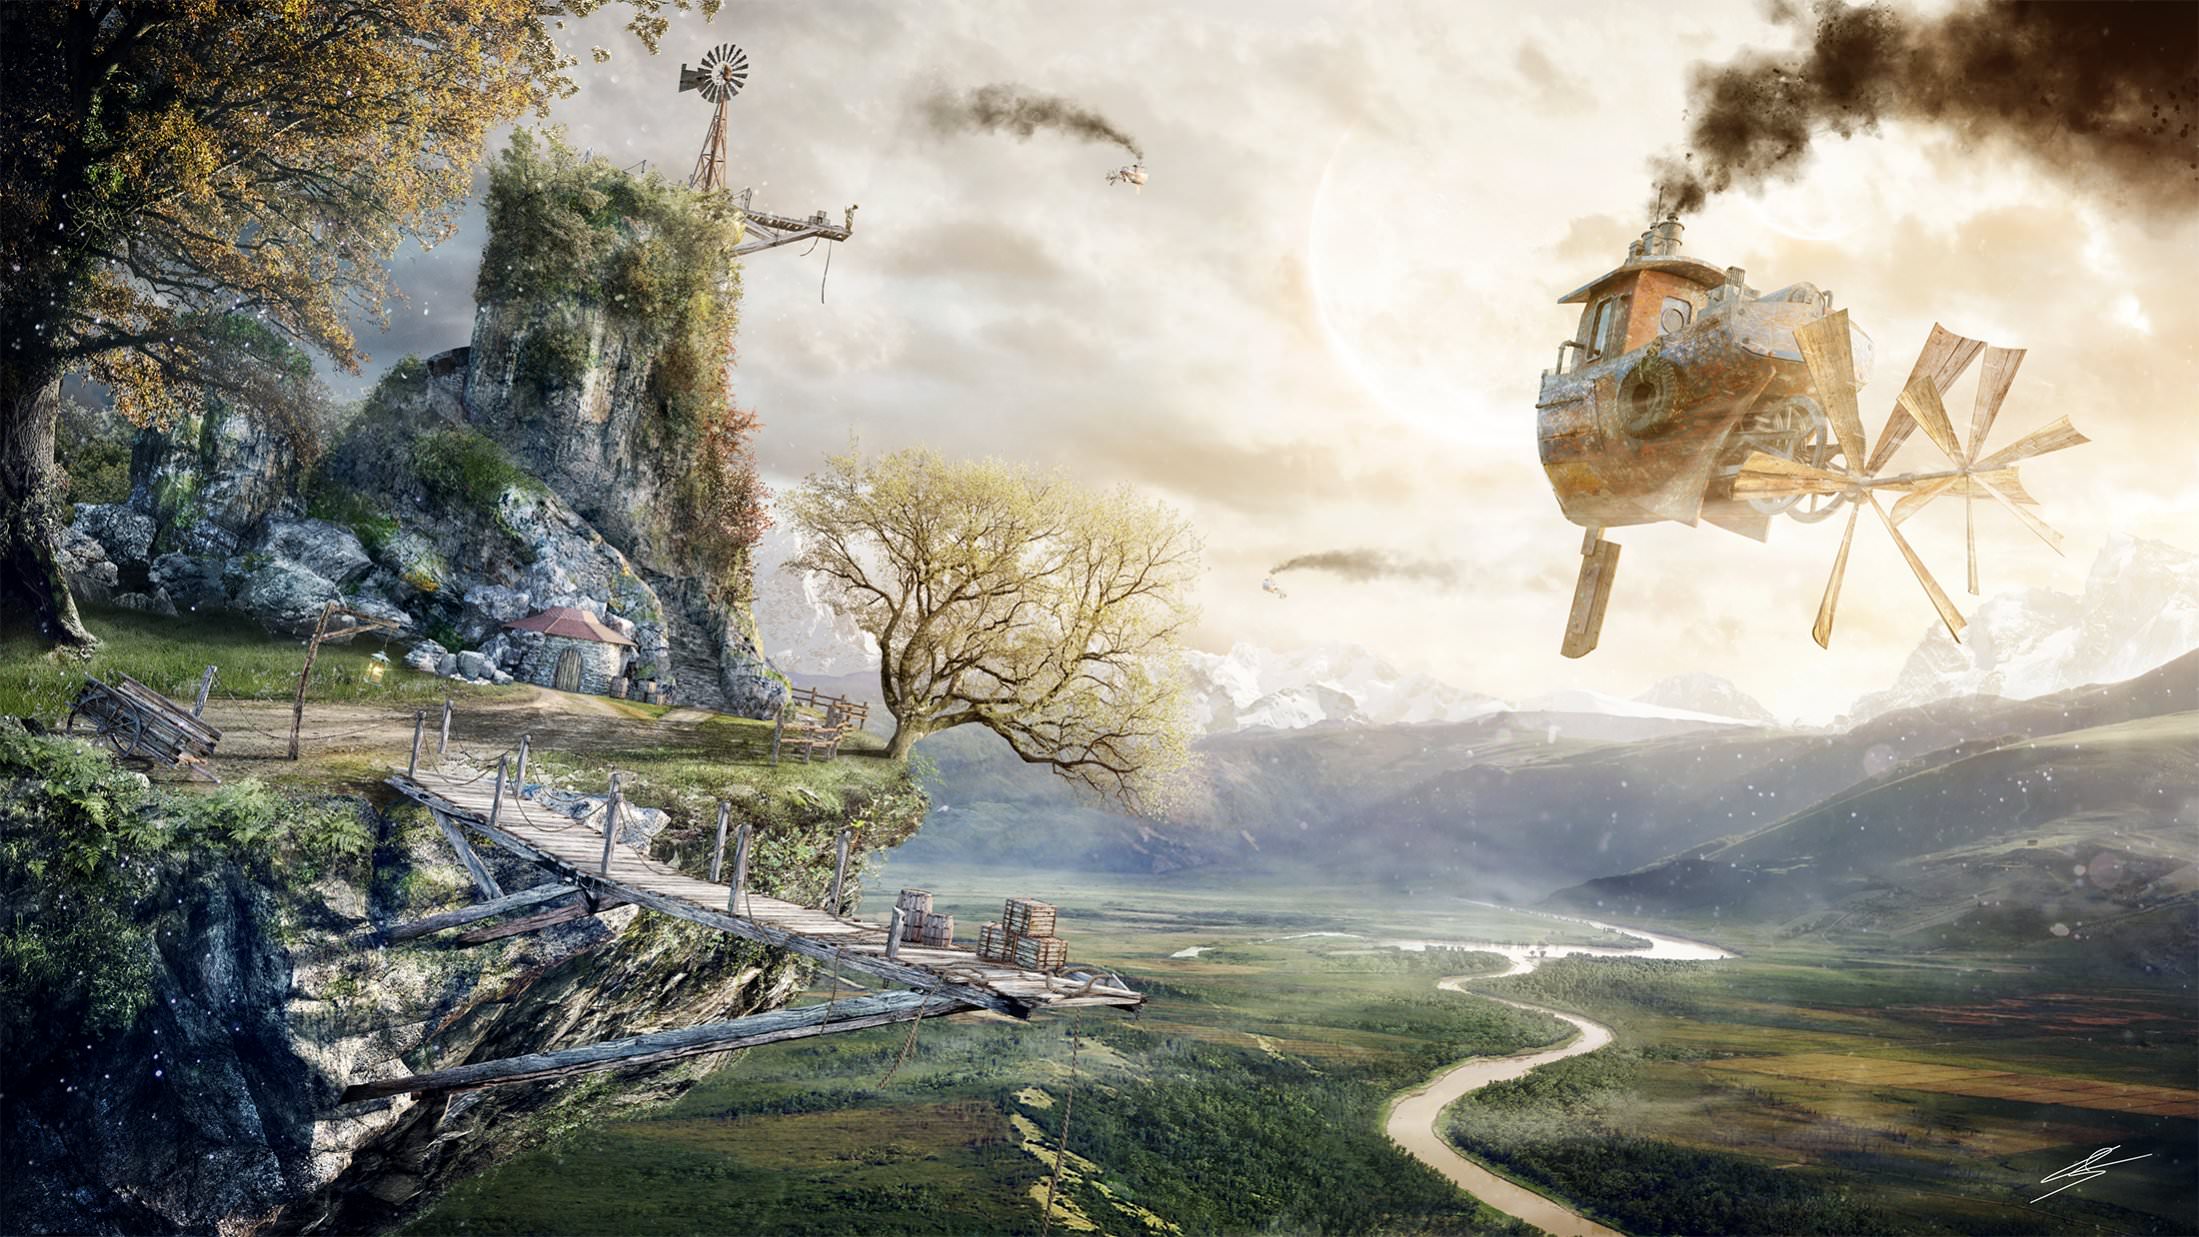
Here is the base rendering :
The final visual…
And some crops :
")
")
")
")
")
Camera Mapping
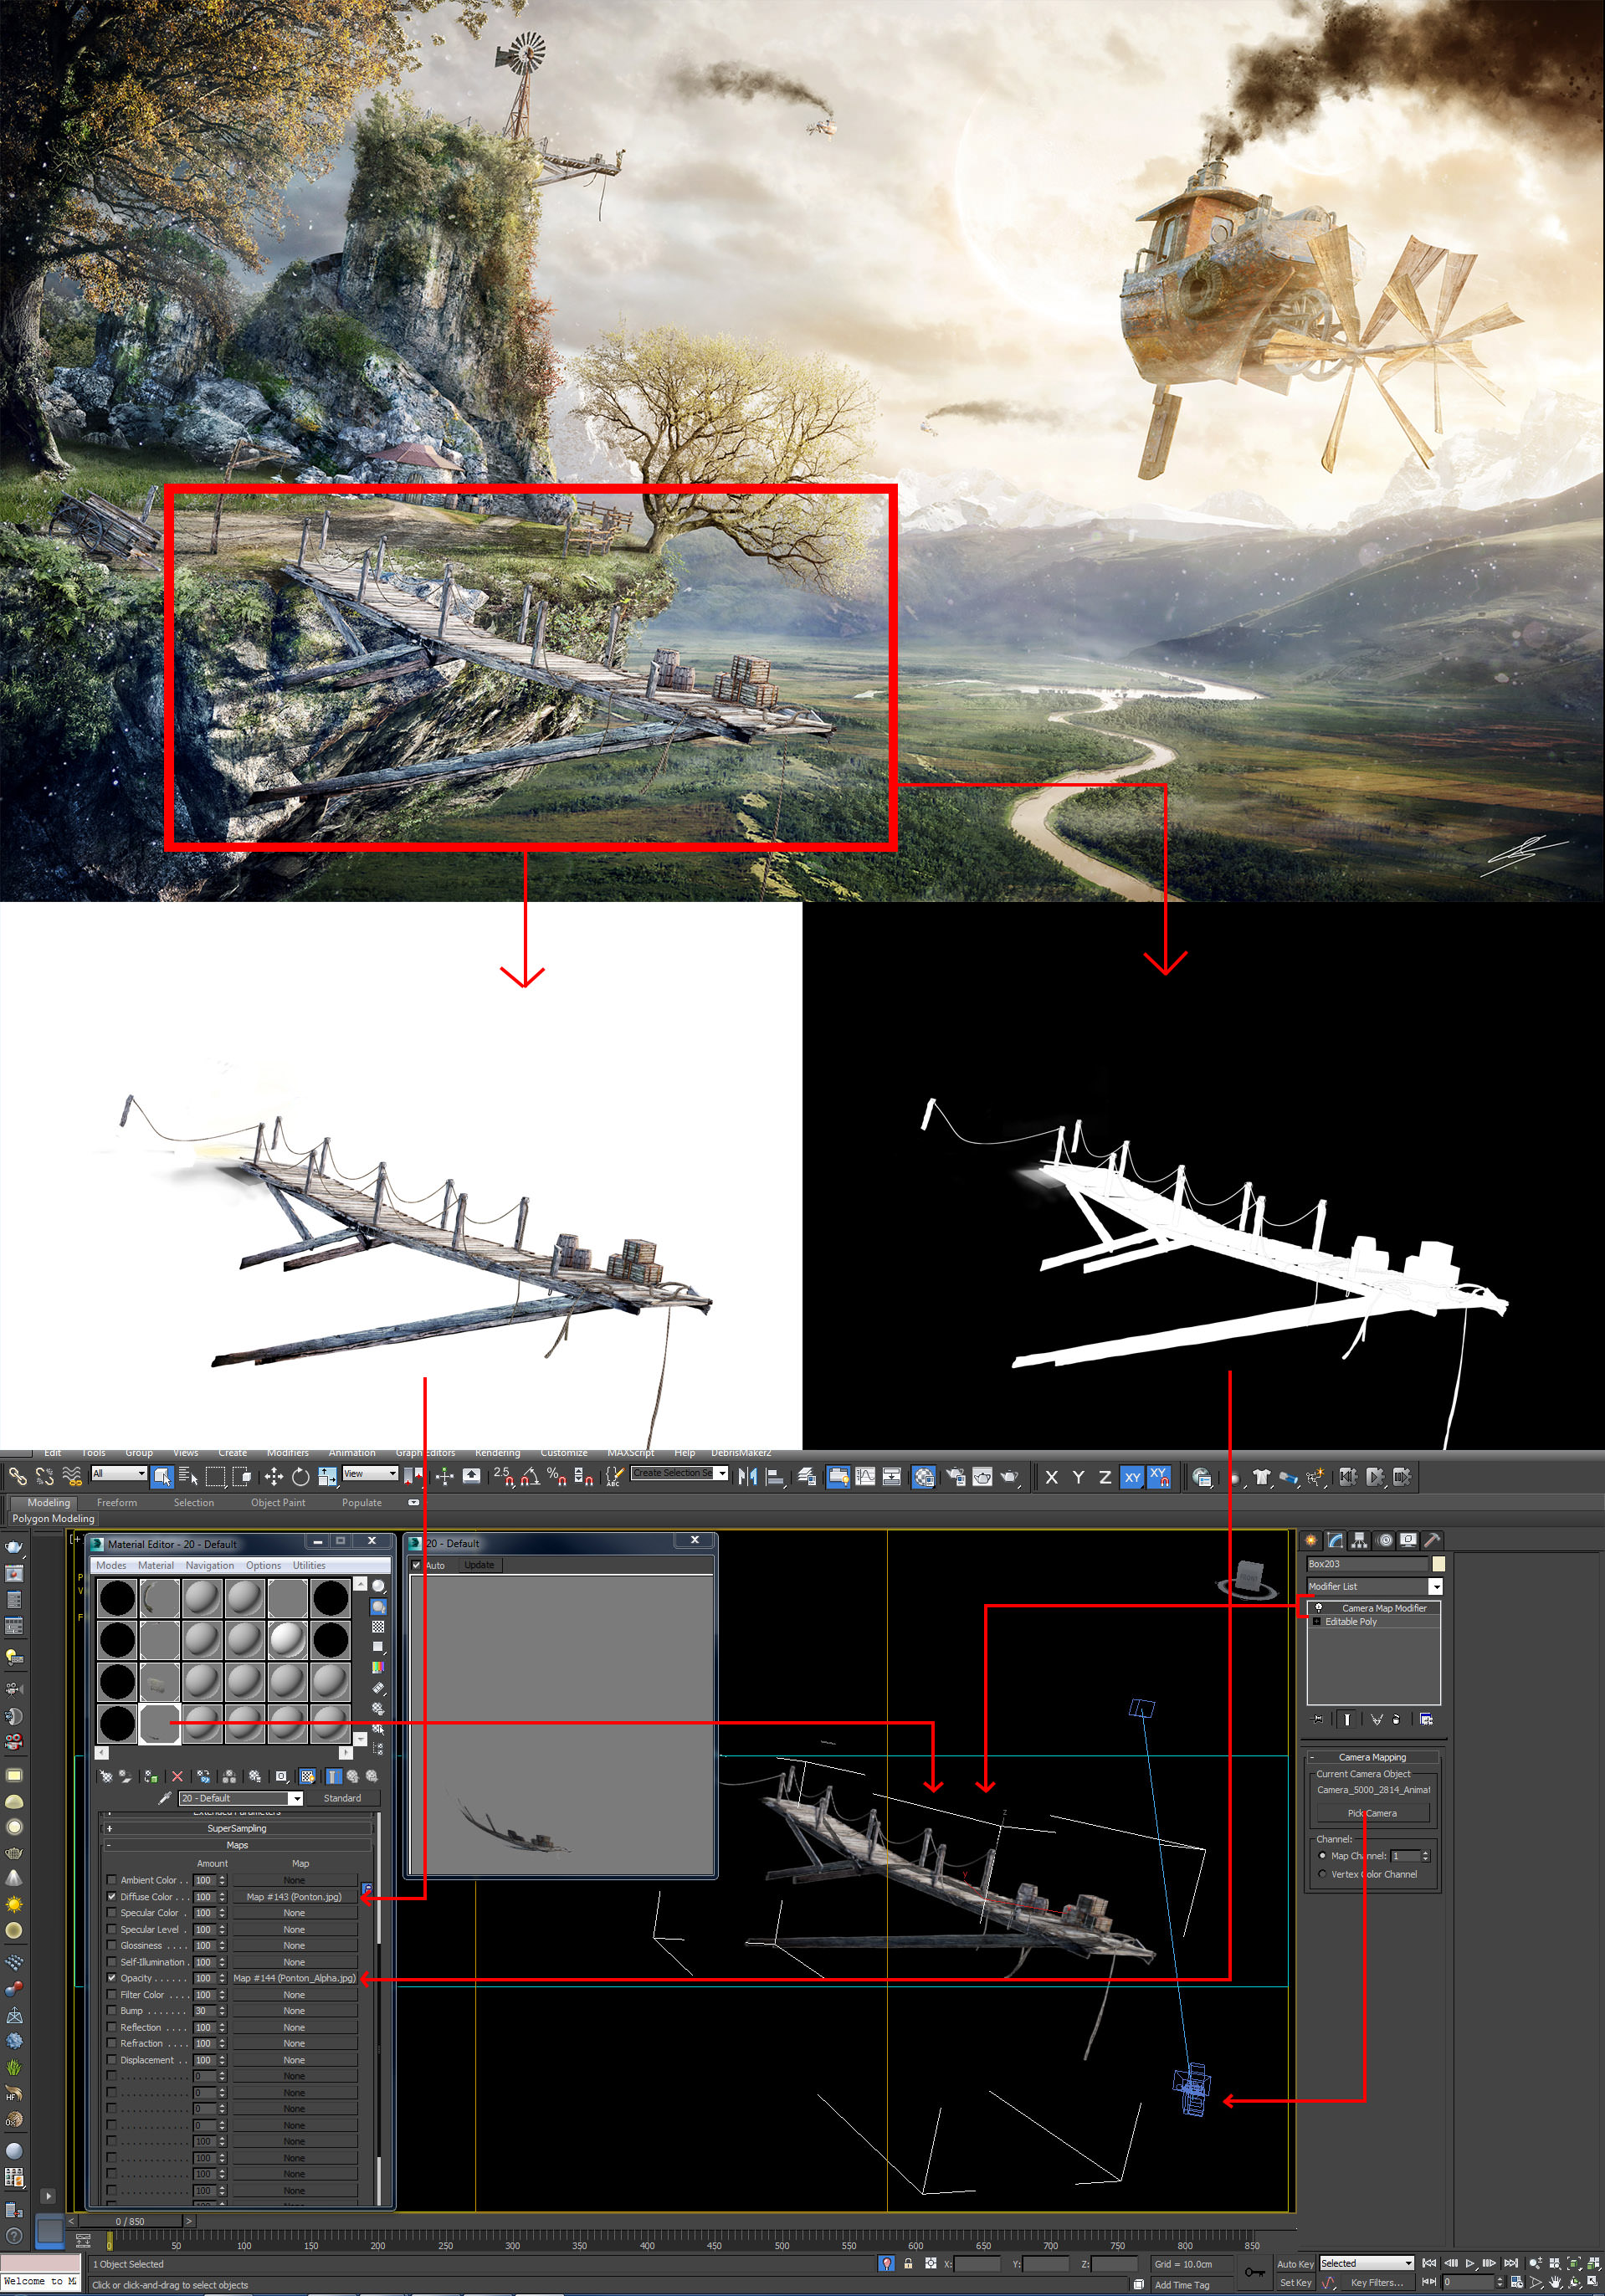
To achieve a short animation, I chose to use the camera map method. Especially as my matte painting and my 3d model corresponded perfectly.
First I merged all in a new 3dsmax scene to work with the renderer and standards materials of 3dsmax. Indeed, V-Ray is not useful in this type of work because my lighting was already been working on the matte painting, and times render are much faster in scanline mode.
I cutted the 3d scene by group. A group for the pontoon, one for the cart, one for the rock, one for each tree, etc … Meanwhile in Photoshop, I exported the pass that corresponded exactly to those groups. It remains only to apply the modifier “Camera Map Modifier” on each of this groups and pick the camera.
Here’s a picture to understand.
Animation
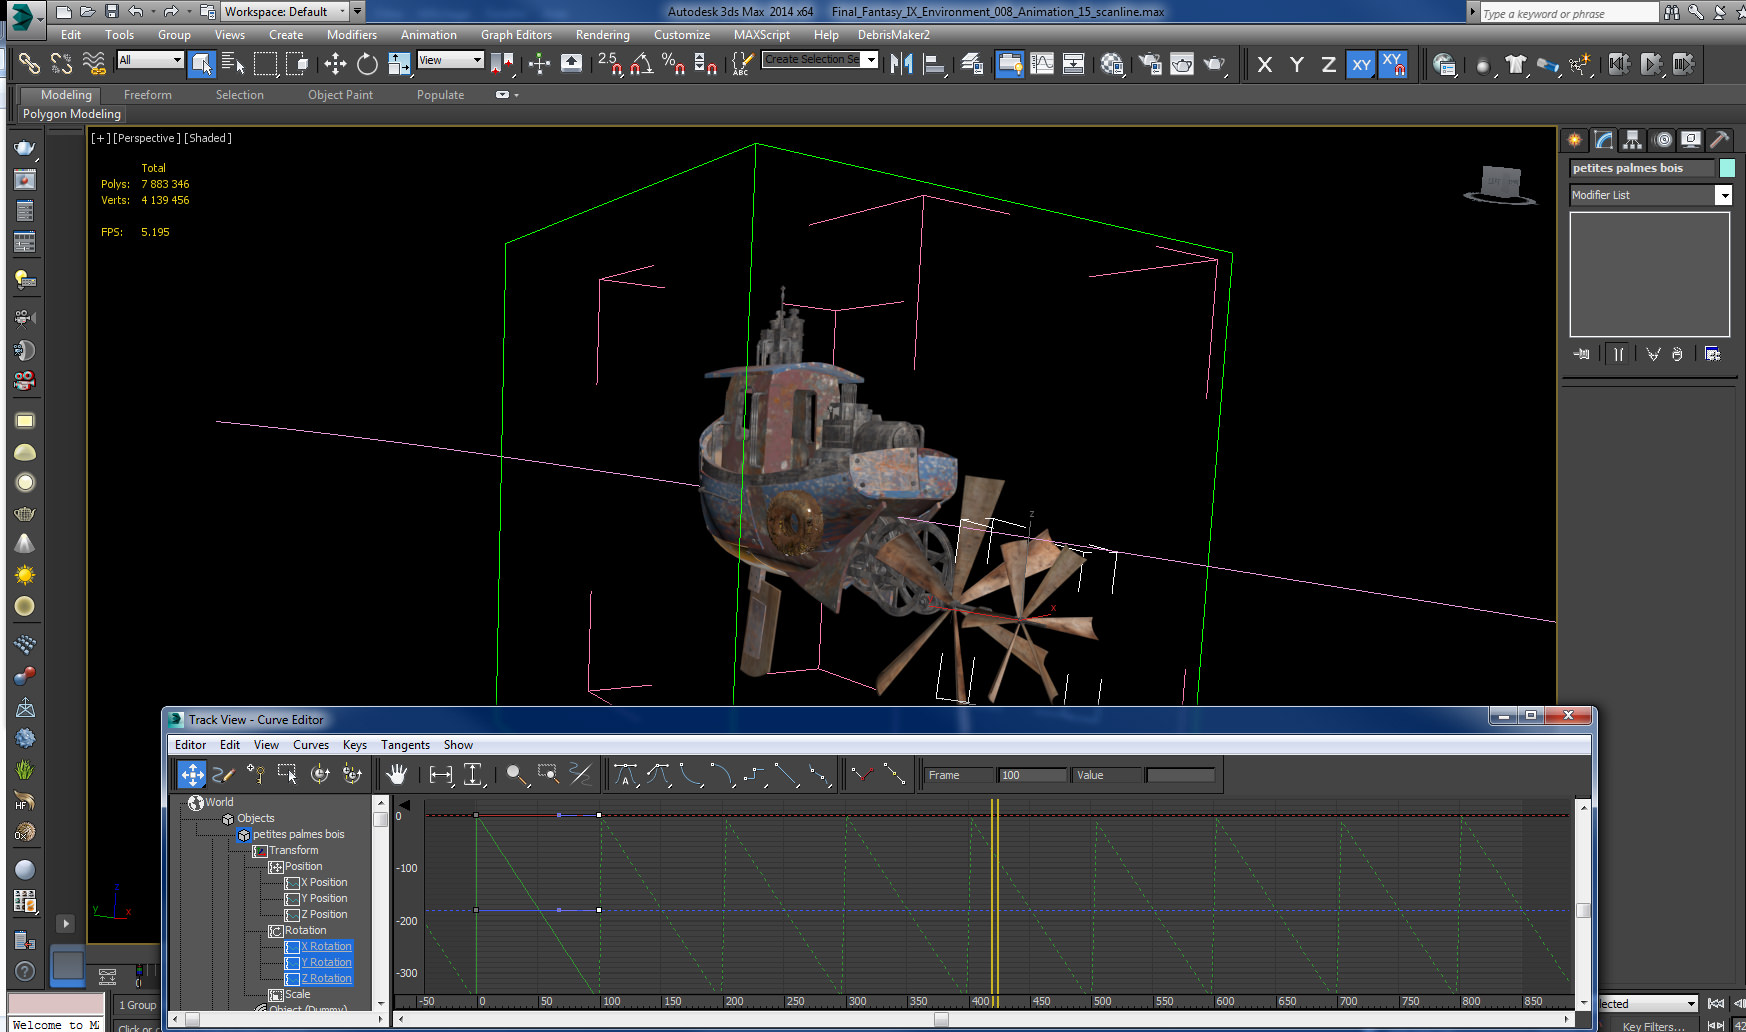
The animation is very simple. I chose to do a simple camera movement because the camera map method is restricted. The boats are animated on a path curve using a dummy. With the Track View, I could repeat the rotation of propellers.
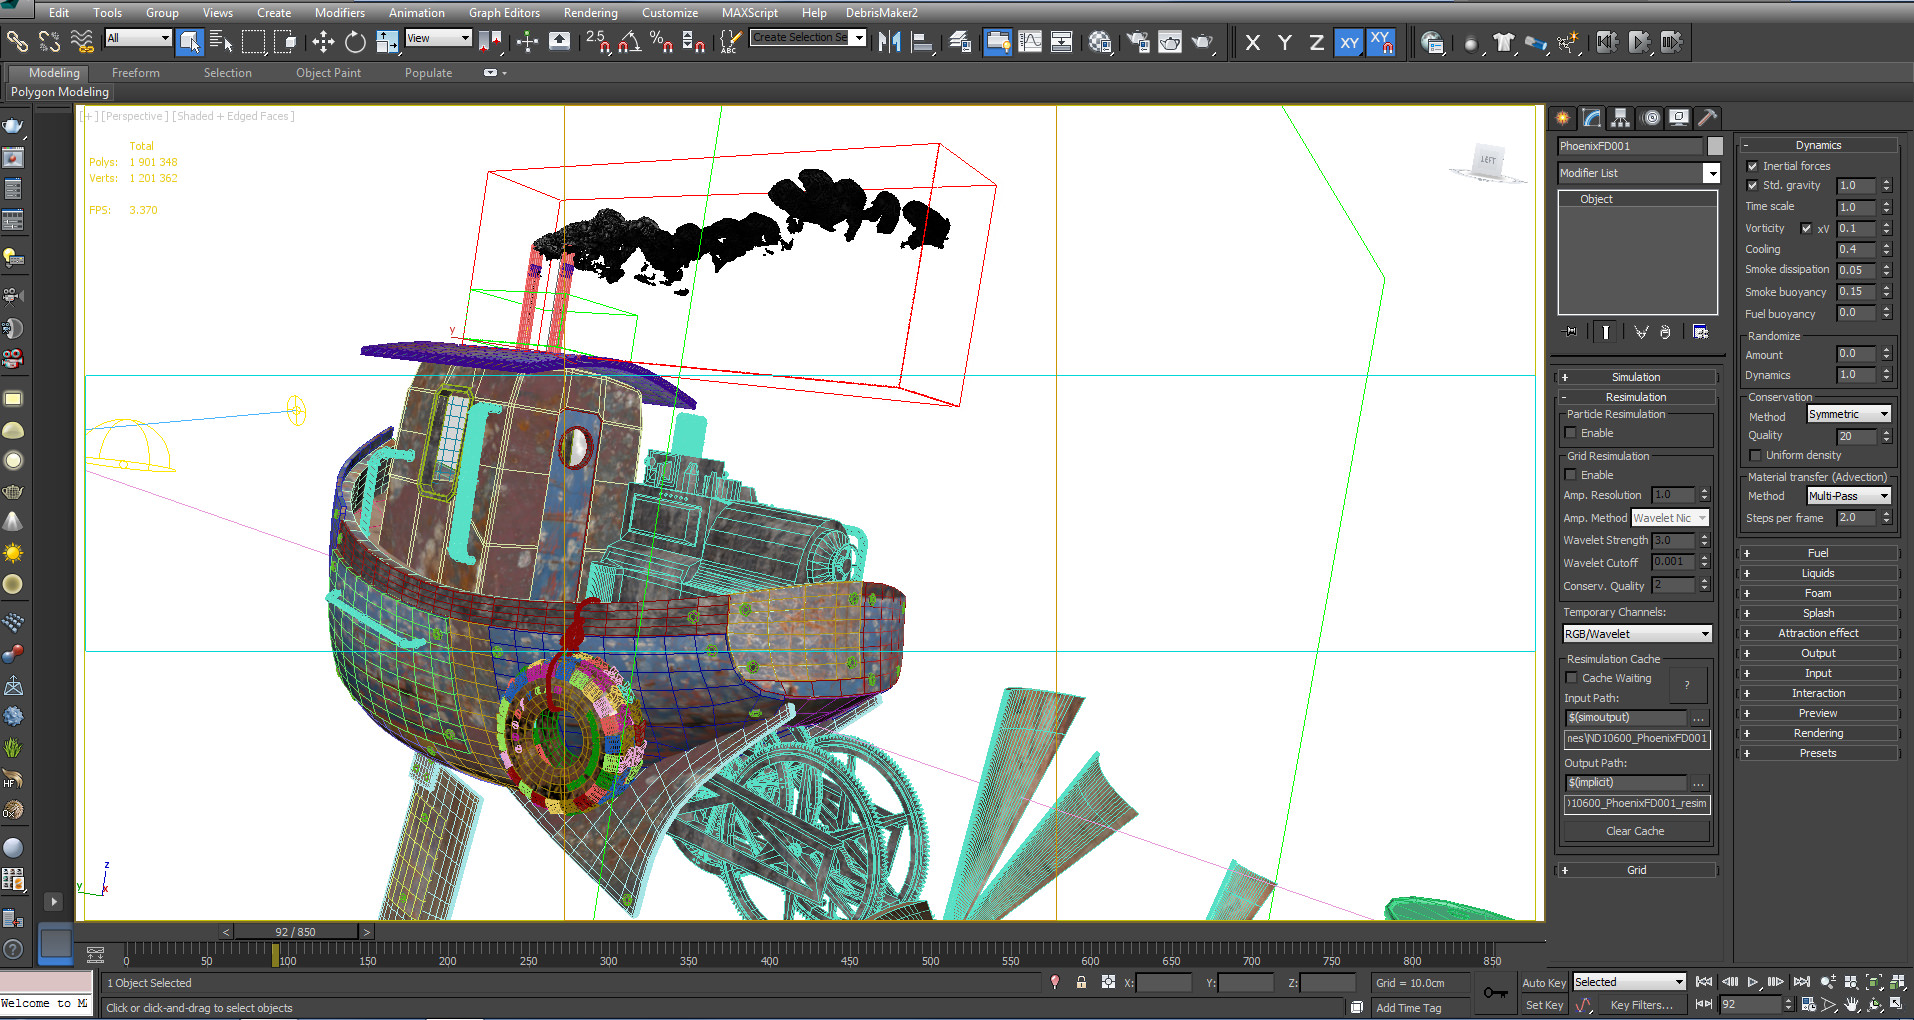
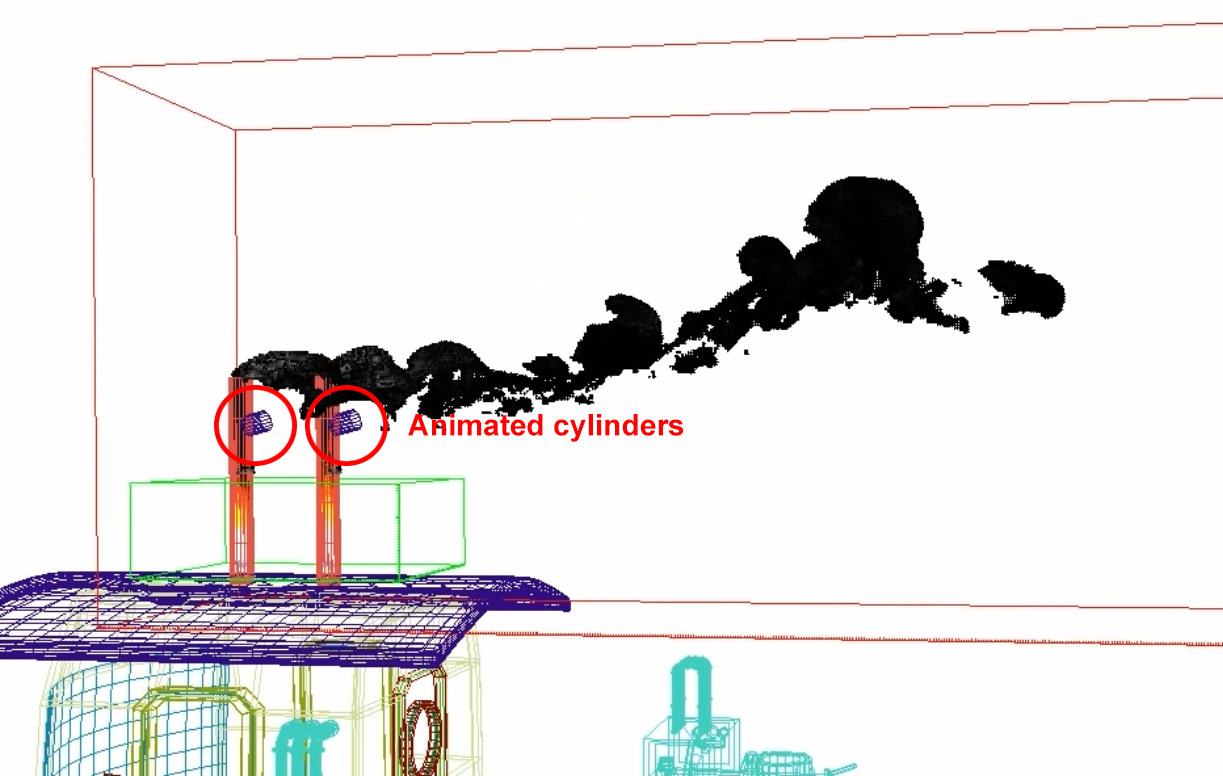
The realization of the smoke was a huge problem for me. The smoke in foreground had to be realized imperative in 3D. I chose to use phoenixFD. I added two animated invisible cylinders that serve as valves for given movement to the smoke, as you can see in the video of the making-of.
Composition
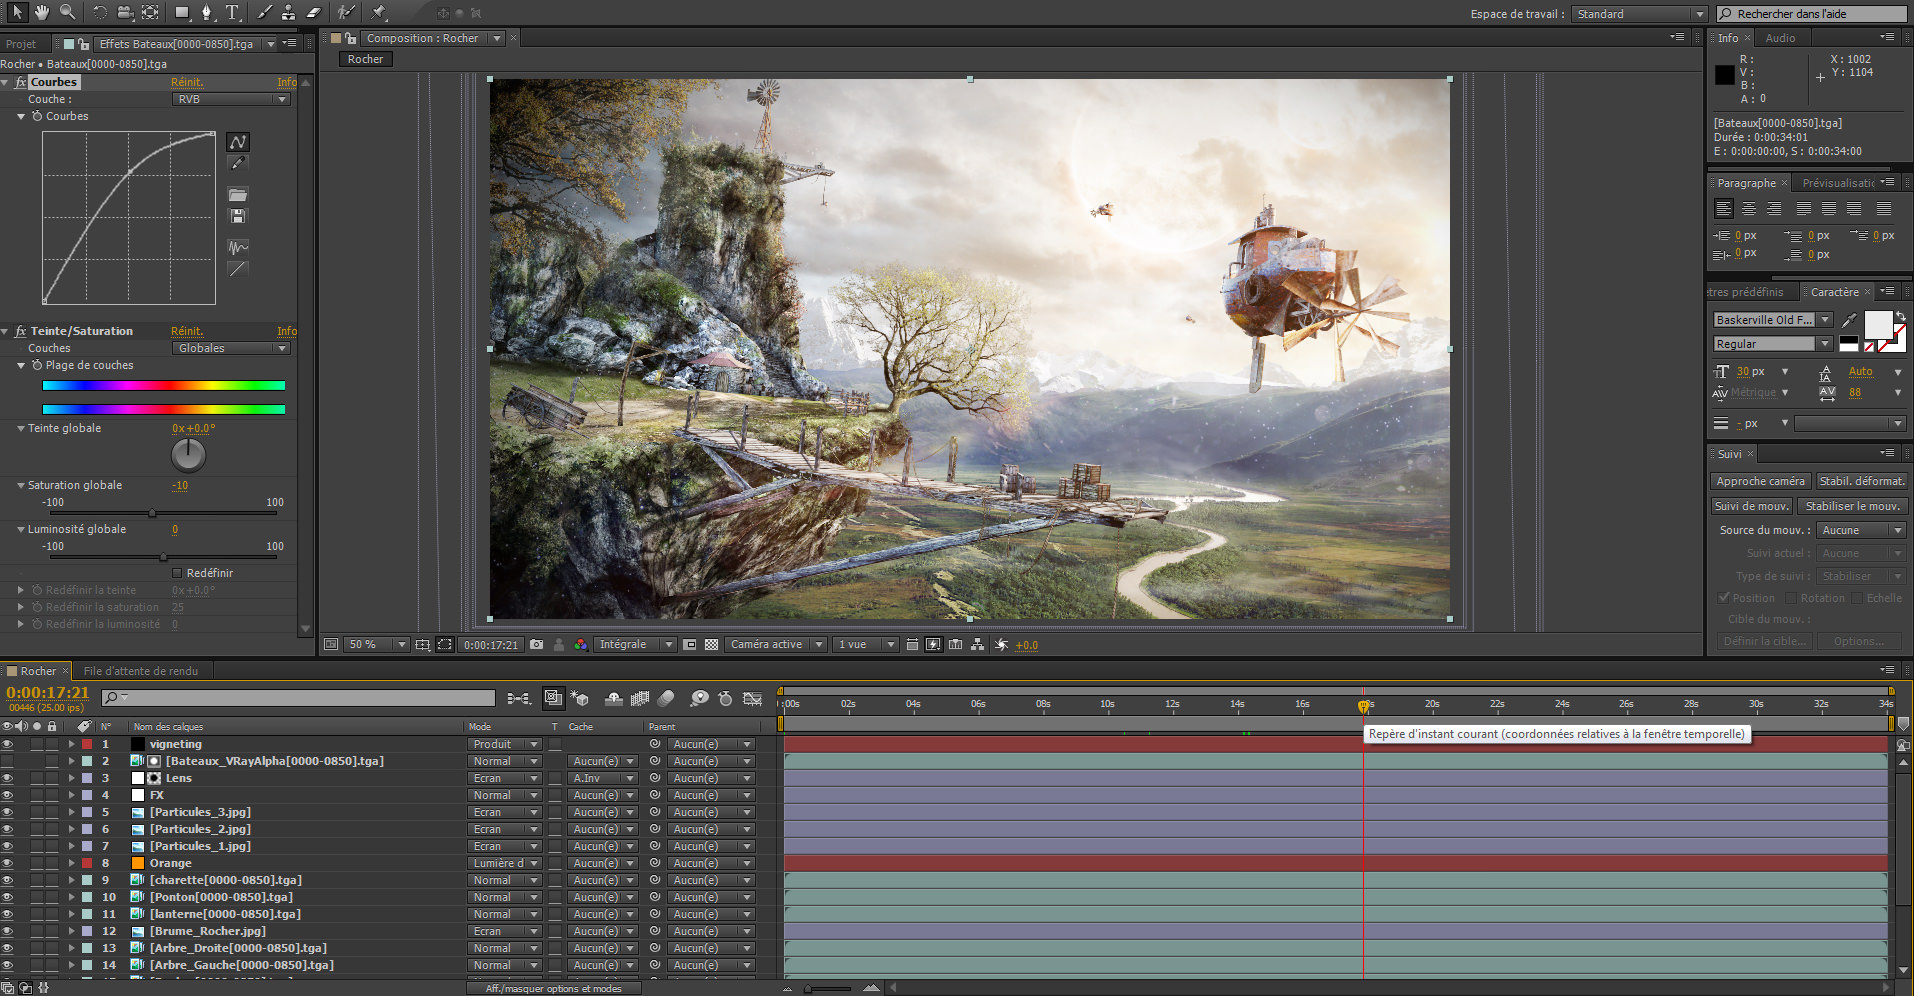
After rendering all pass, recompose the whole in after effects was very simple.
For background, I took the background created in Photoshop for matte painting. I simply scale up it a bit to animate by hand with just a slight translation.
The smoke of background boats was created with Trapcode Particular plugin.
I also used this plugin to realize dust particles. These are composed to three layers with different depths in order to have a better immersion.
And here’s the final result once more…
Thank you very much for taking the time to read these few lines.
I sincerely hope that this will help people. Again, I thank Ronen, community, and people who supported me throughout this project.
And remember, stay creative!

Romuald Chaigneau is en French 3d artist living in Vannes, France. Self-taught in computer graphics since his young age, he working today in 3d architectural visualizations. Also he is passionate about matte painting, photography, and video games which enables it to be creative elsewhere than in the architecture.


“3D Architectural Visualisation” 😀 Flying boat mmmm (Artwork, concept work maybe more ?)
A great honor! Many thanks!
Might be a stupid question since I never used ZBrush, but where did you make UV-maps? <3
Wow, that was incredible. Thanks for sharing this with us!!