


Making of Stadtpark Biel
Phil Buerer‘s ‘Stadtpark Biel’ visuals had several color views, but the Black & White ones up top captured my attention the most and awarded him Best Visualization of the Week NO. 22/2014.
I love the architectural subject and contrast between the two parts of it, as well as the well thought of composition and balance between sky, clouds, trees, house and the grass in front of it all. Today he shares with us the story behind this project and the process of making these great looking visuals. Enjoy!


Author : Phil Buerer
Phil Buerer is a freelance digital artist, with a great passion for architectural visualization. Educated and certified as a draftsman and web & media publisher he works with pencils, sketchbooks and construction drawings, as well as pixels & polygons.
Project Forum Thread : Stadtpark Biel
Thanks Ronen, Hi All
Given the chance to write an article about my latest leisure project, I will (ab)use the opportunity and give an in-depth overview, focusing on my workflow and my own, probably debatable techniques… So I do expect to see your comments below after you finish reading.
Software Used
- Cinema4D
- V-Ray for Cinema4D
- Photoshop
Introduction
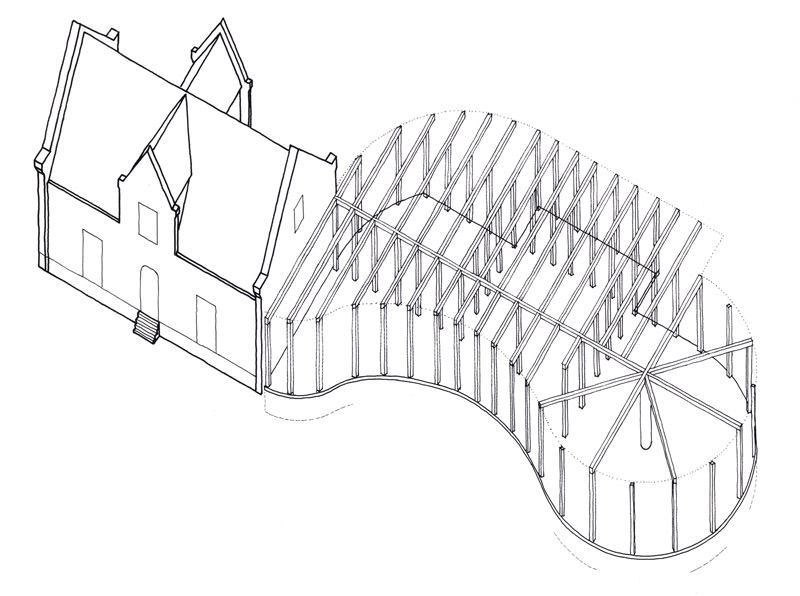
The project “Stadtpark Biel” dates back to 2002 when I was studying to become an architectural draftsman. At the time, there were plans to build a kindergarten within the confines of the “Stadtpark” (literally: City-park) in Biel/Bienne, Switzerland. An existing building, formerly housing the caretaker of the park, was to be re-purposed and extended in order to have enough space for all the kids.
Consequentially, the school I was studying at made it a project for students to come up with ideas for said venture, with the promise of actually building the kindergarten according to an eventual winners drafts. Surprisingly (or not), none of our ideas ever have been realized. Hah!
Being an aspiring architect, my ambitions were as follows – Design a building that belongs. Adding to the park atmosphere in a subtle way yet leaving a lasting impression on passersby. All while respecting the beauty and spirit of the existing building, which I found to be worthy of preservation.
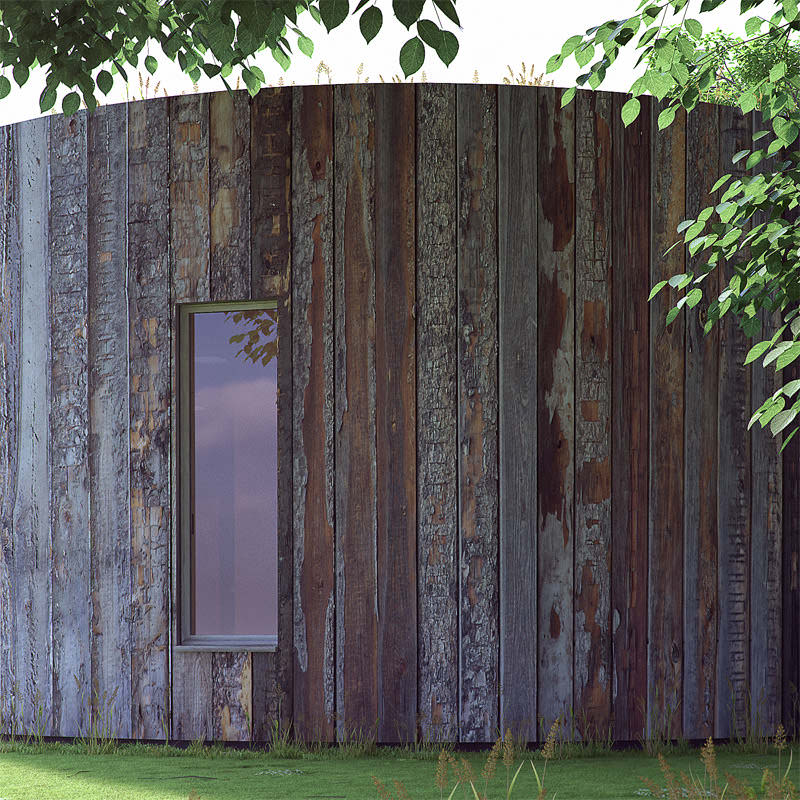
So a building new and old, and integrating smoothly into a park it was. Soon I had this idea to coat the facade with tree bark planks. Trees are round, usually, so the facade would be curved.
Also, trees don’t have a lot of holes admittedly, but the few openings for doors and windows wouldn’t disturb the illusion of an uninterrupted wooden facade too much I figured. The general concept was born, I conjured up the usual drawings and views, the project was done, I eventually graduated from that school, and had all but forgotten the whole thing…
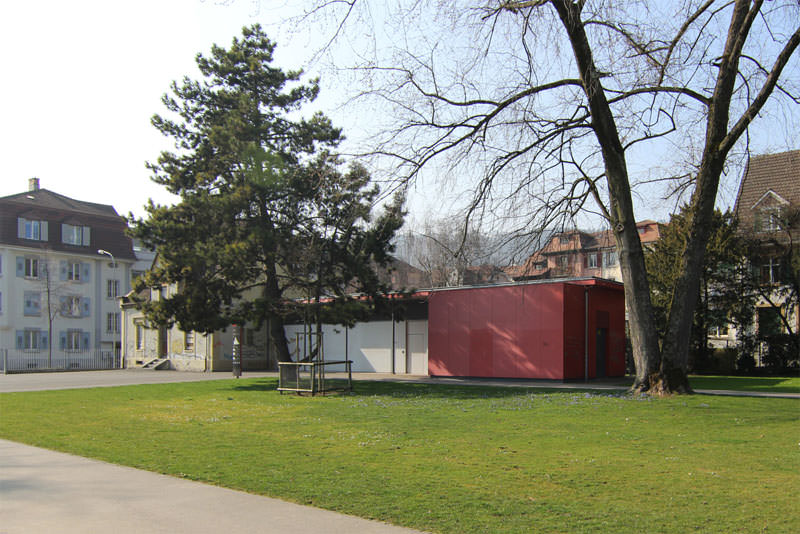
…until a few months ago, when I visited the park, and to my utter disbelief saw what they actually built. There’s no accounting for taste, as the saying goes, and without wanting to offend anyone, I don’t like it at all.
It being spring and monty python and all, the bright side of my short stroll through that park, was that I remembered my old project from way back, and had a sudden surge of motivation to dig out my old sketches and have a go at it again. This time in 3d making use of that decade of advances in computing power, rendering technology, and… well my hopefully much improved skills. After all the ability to create nigh perfect illusions out of nothing just with polygons and pixels, is what still, after all this time, fascinates me the most about visualization and 3d.
Right then, off we go.
Preparation
The one thing I learned, if nothing else, is that proper preparation goes a long way. I made it a habit to outline a neat little schedule on a piece of paper at the onset of every project. Roughly estimating how much time I’m going to spend on what. Nothing says you’re done now like a deadline. Even those self-imposed. In this case one month.
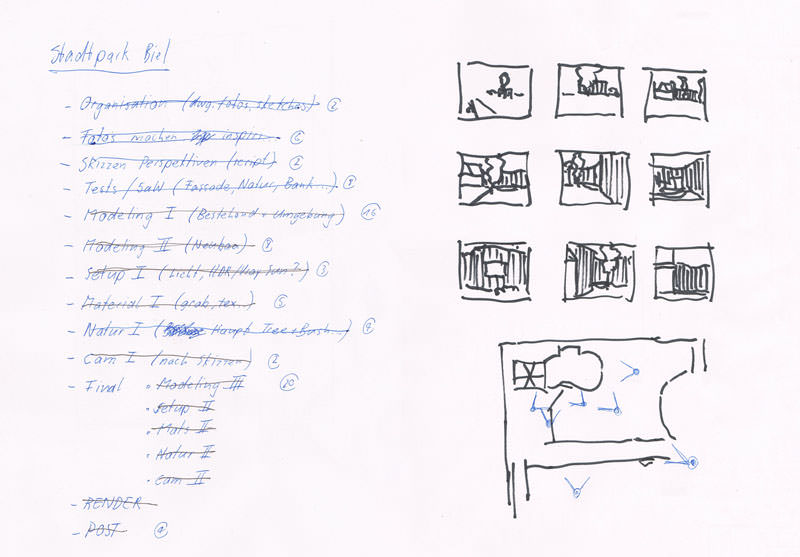
So by now I know I want to render various exterior shots in different conditions (weather, time of day etc.). Also, I decided against photo montage, because I wanted to be able to choose camera angles freely, and not waiting for all the different weather conditions at day and night to take all the pictures. As a result you’ll notice that the focus of this project is mostly 3d, and almost no post-processing.
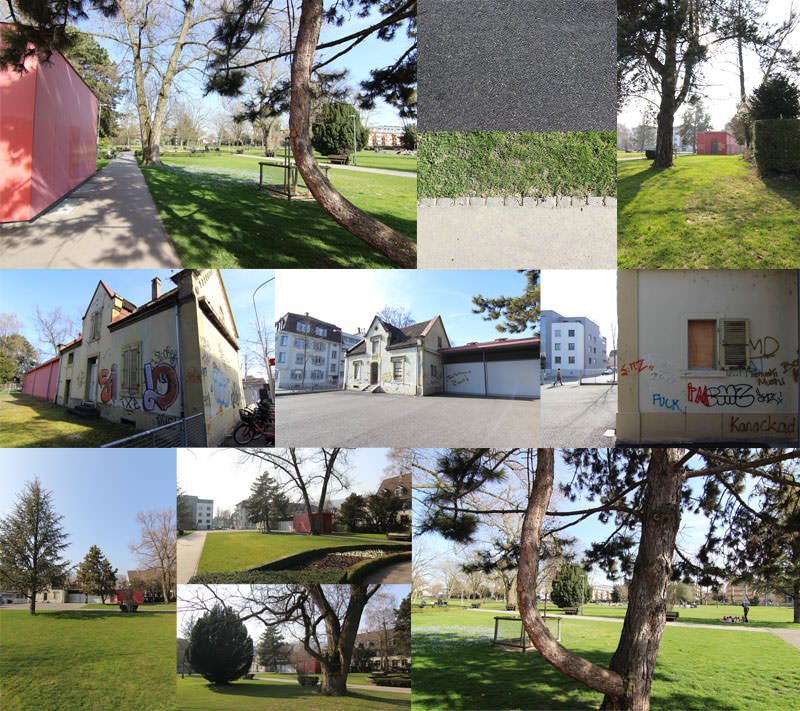
Here’s a selection of pictures I took during my recce that I use for inspiration and reference.
Experimenting
Or proof of concept. But I like experimenting, for this is how I learn the most with the most fun being had in the process. Having an idea and trying it out in a “quick and dirty” is far more rewarding than looking for and watching tutorials. In this project the most obvious and important thing was going to be the wooden facade elements. So I made some quick preliminary renderings of a simple scene showcasing the wood. My first idea was to take a few pictures of wooden planks to make them into simple textures in Photoshop and apply them one by one to geometry with a displacement map.
Turns out that didn’t work too well. I would have had to take and process (extract displacement, spec maps etc.) way too many individual pictures of matching planks, to avoid obvious pattern repetition in renderings. Also, that one simple picture took hours to render even with the lowest settings. Something was obviously wrong here, I didn’t really know what, but I had another idea instead. Details about that later.
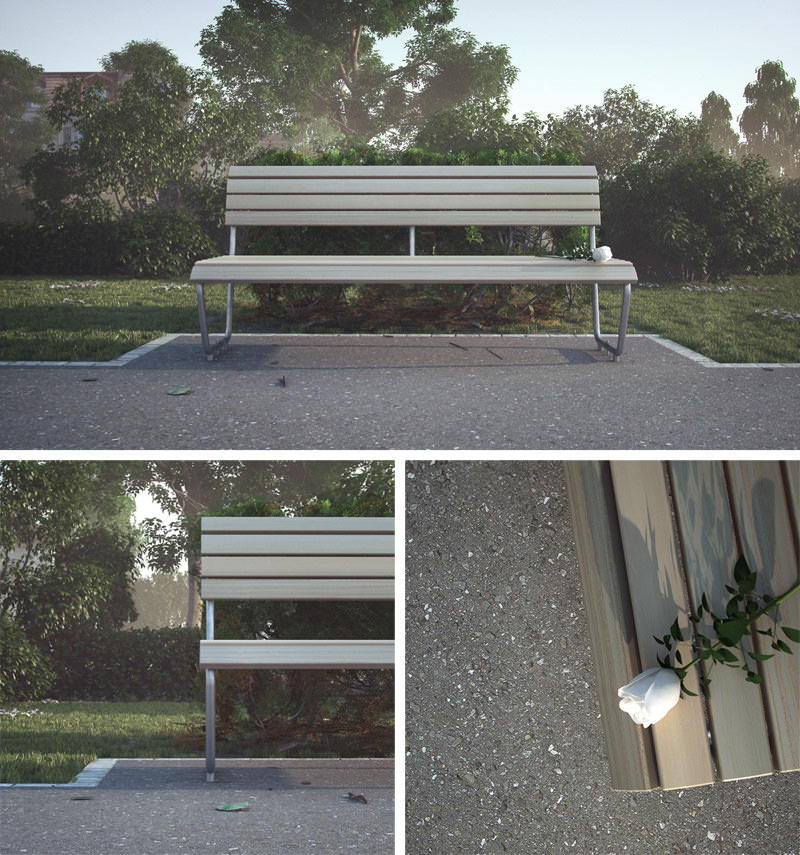
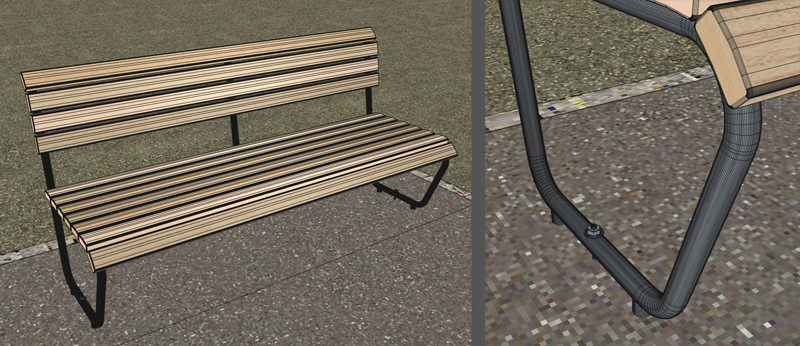
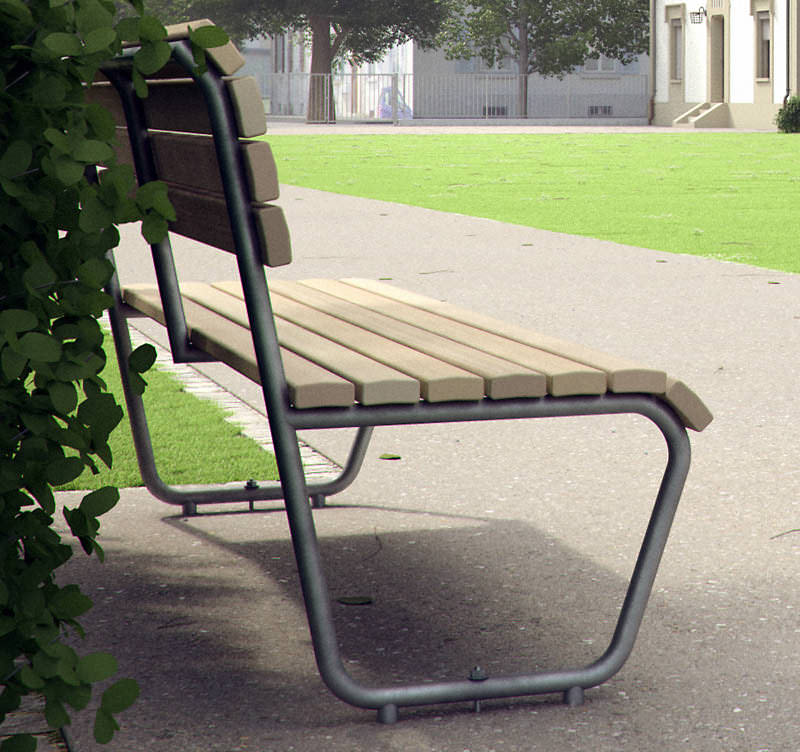
Another idea I had was a shot over a bench. Not just any bench, but that very particular model of benches that are found all over the town. That bench needed to be perfect and exactly to spec. So after modeling the bench I needed some preliminary renderings asap. And while I was at it I decided to test some grass, trees and ambient settings as well. Almost making it a project on its own.
And this is where I’d usually get very lost with experiment after experiment in a project. Thus, my self
imposing of deadlines and planning. But also this is where I learn a lot, which is why I make 5 very small conceptual projects a week aside from everything else : www.guachinarte.com/drafts
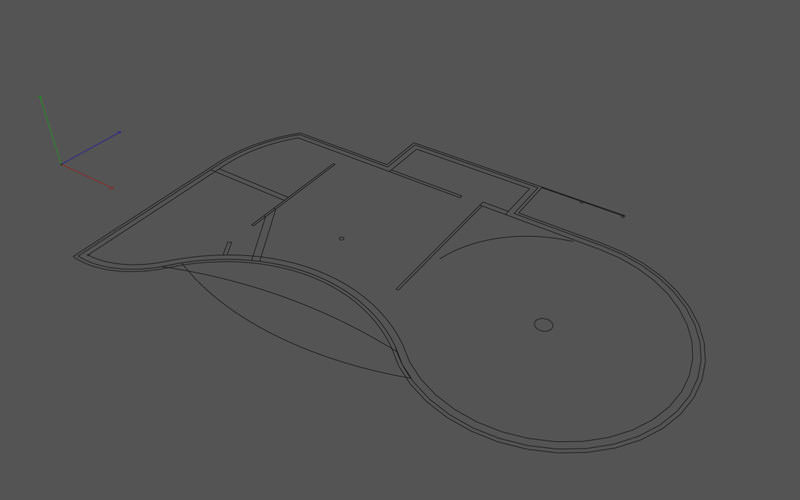
Modeling
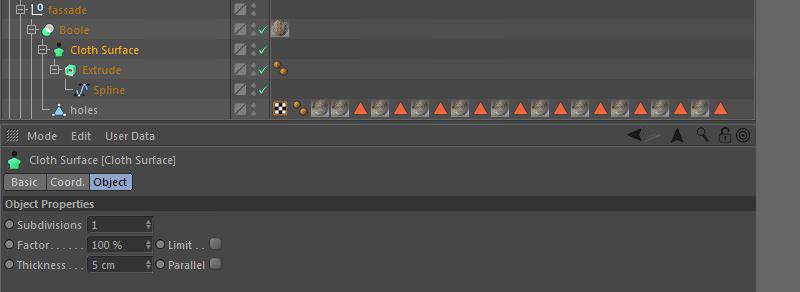
Really nothing new or special here, just time-consuming laying splines, extruding, chamfering etc. I imported the dwg file, so I had the dimensions and proportions as needed. The Cinema4D snapping tool made the modeling after the reference a breeze.
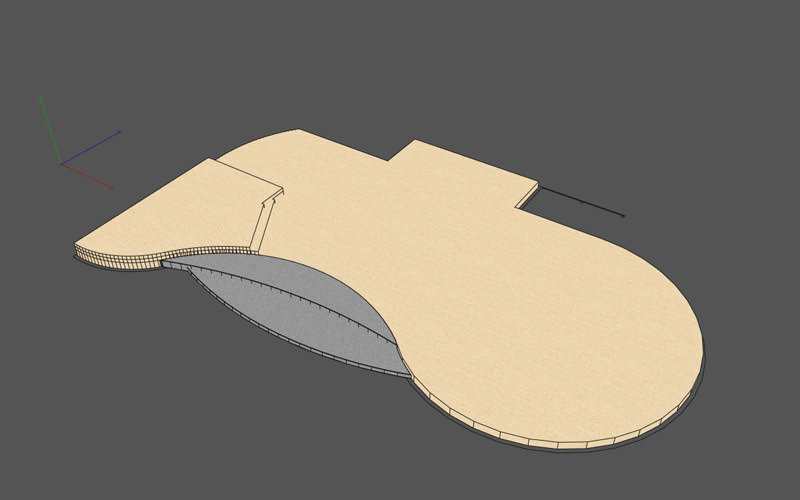

This is how the composite facade object looks like in the manager.
The rest of the building takes shape.
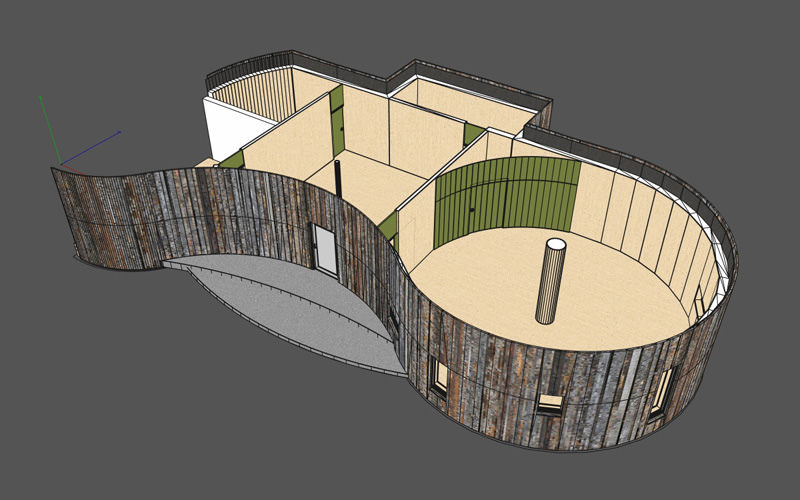
The existing building reproduced.

And of course the ominous bench.
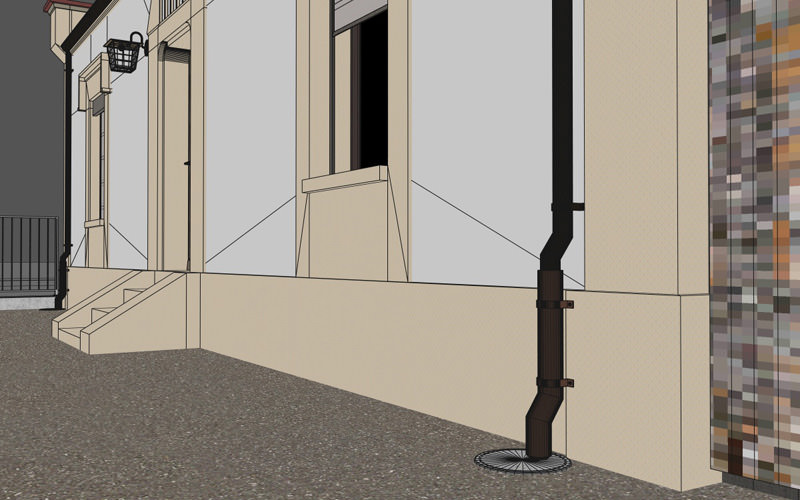
Environment
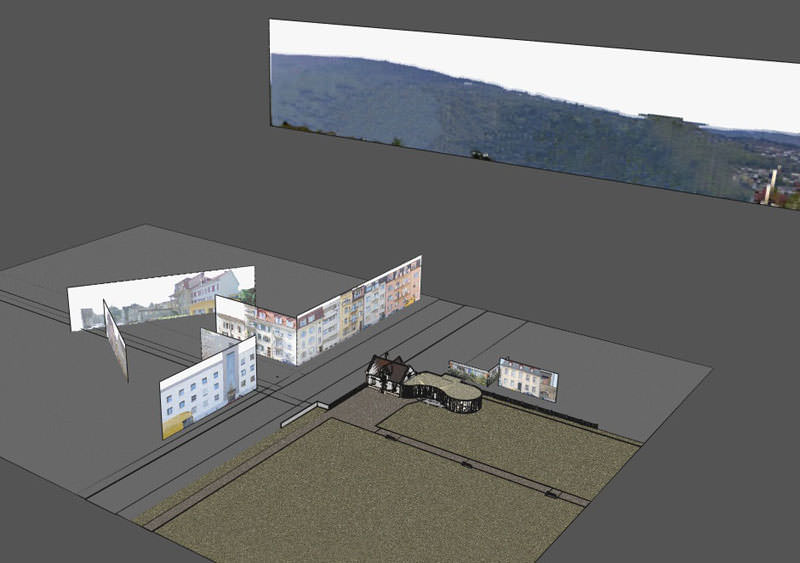
To save time I decided to take pictures from the surrounding buildings. Using them on planes does the job for a background perfectly in most cases anyway. I think the small errors in the perspective aren’t obvious enough to destroy the illusion. Using Photoshop lens correction filters to adjust the perspective and some manual skewing and tweaking I was able to create the composite background texture reasonably fast.
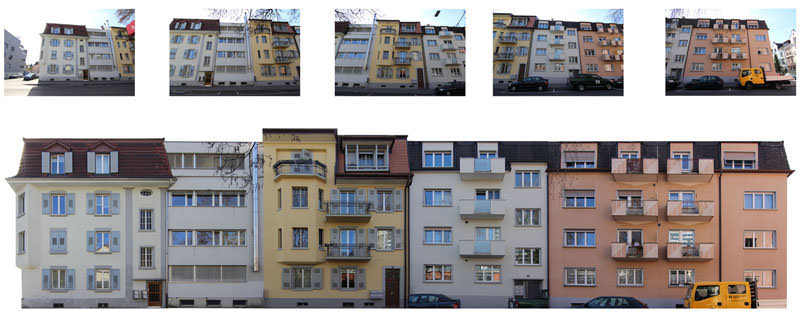
Applying the textures on planes and positioning the planes in the scene led to a satisfying result. Done.
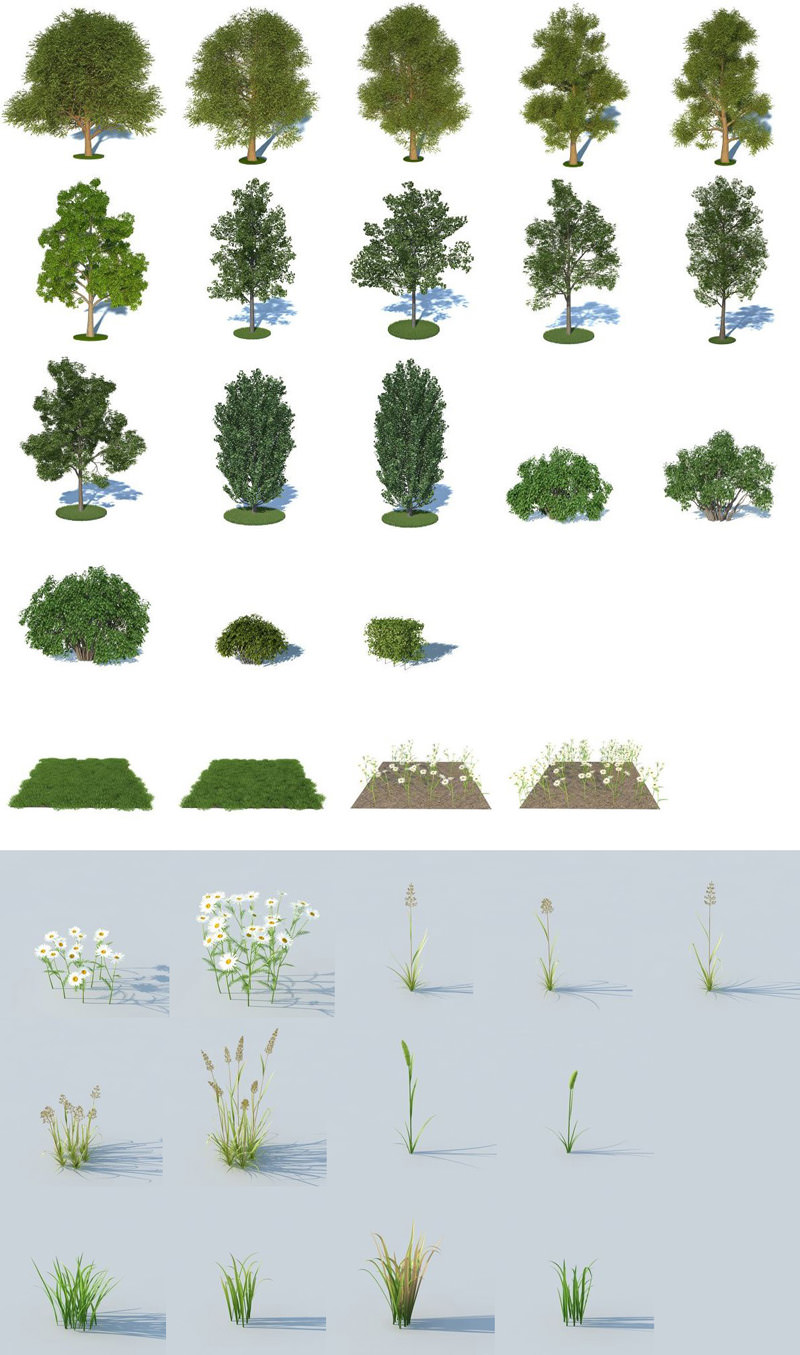
Vegetation
I basically used HQ Plants / HQ Grass for the environment, they work perfectly for background trees and I’m happy with the grass as well. I tried many grass types, also self-made grass, c4d hair (still haven’t checked the new c4d architectural grass), but normally I end up with the HQ Grass models, they satisfy my needs in most cases. Here are all models from the HQ Plants / Grass library used in this project :
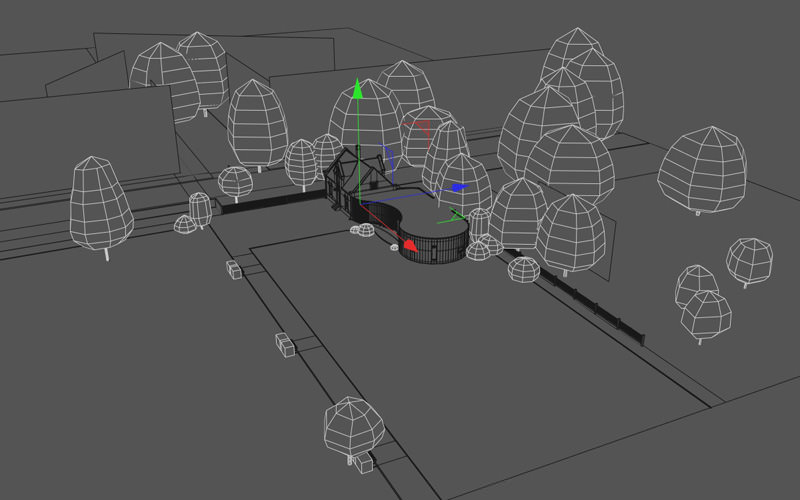
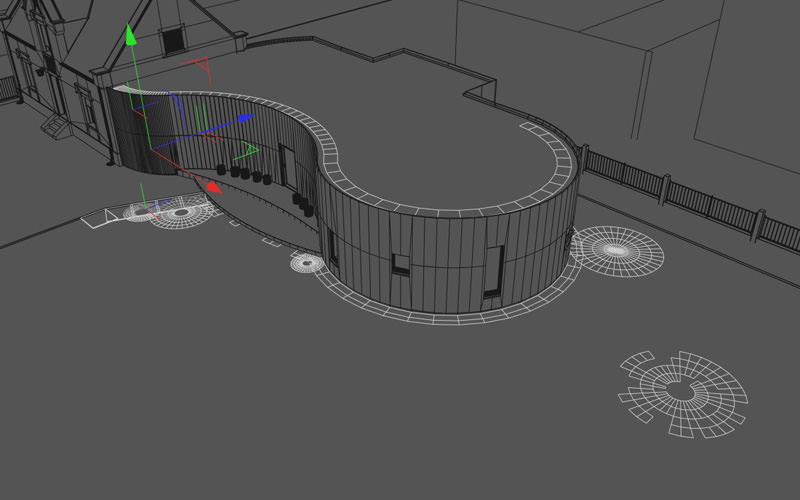
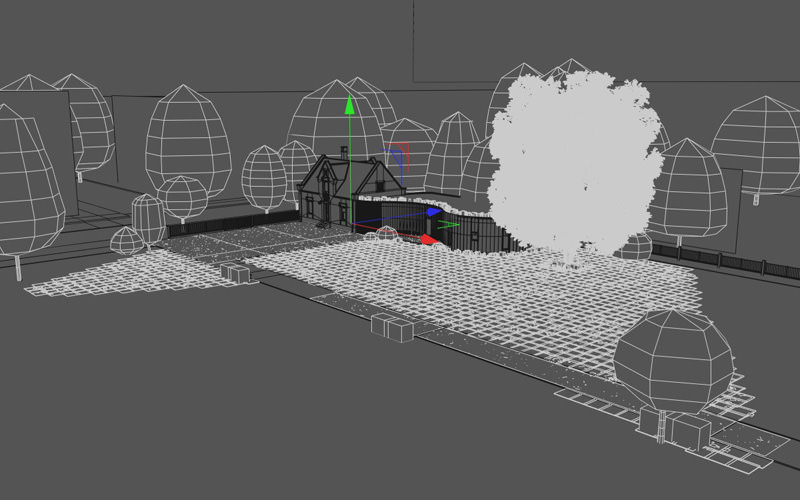
The trees and bushes were manually placed into the scene, making the viewport look like that at this stage :
For the most prominent tree in the foreground I used an Evermotion tree, because it has/needs much more
detail than HQ Plants. Not quite as detailed as I’d like them to be, but I guess render times are a concern.
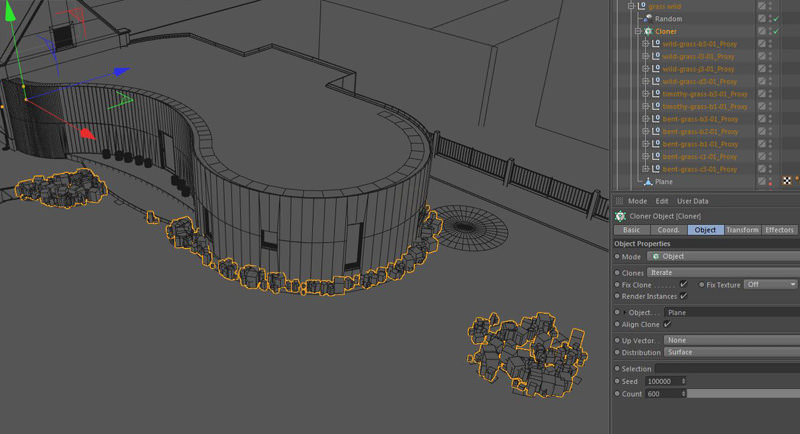
To un-uniformly distribute the grass I used Cinema4D MoGraph. The best tool ever in Cinema4D! For the
overall area I used two different HQ Grass patterns, piped into a MoGraph Cloner object, and connected the cloner with a plane. The MoGraph Random Effector object in Cinema4D makes it look natural by randomizing size, rotation and position of the individual tiles.
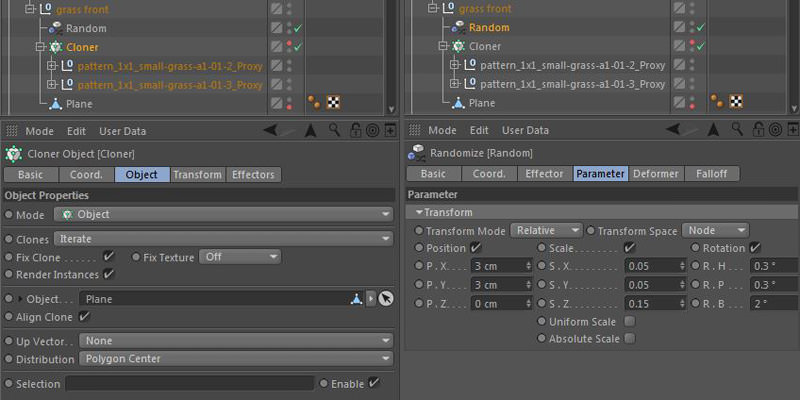
The poly count of the plane defines the amount of grass (patterns). To keep the viewport performance I deleted grass from the parts that would not be visible in the rendered perspective.
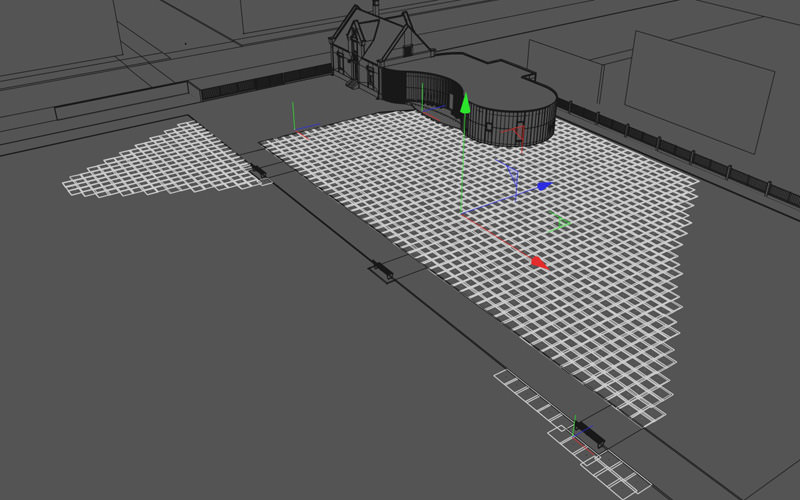
This worked well in linear spaces. But along the curved facade I used the same method with smaller grass
models. The same goes for the higher grass in front the building and around the trees and the bushes.
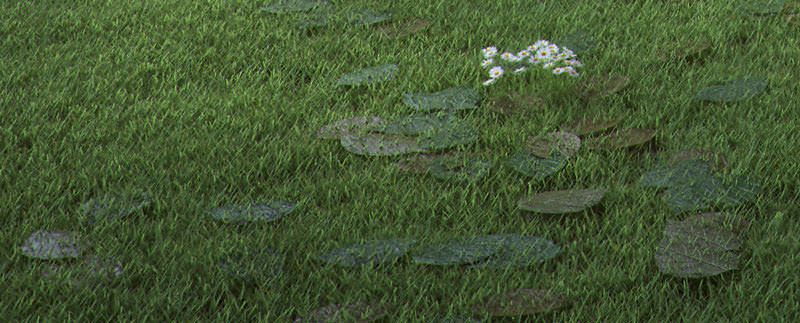
To give the whole scene a more natural feeling I added some random flowers, dead leaves, stones and
branches all over the place using the same methods involved in placing the grass. MoGraph – Cloner – Plane – Random Effector.
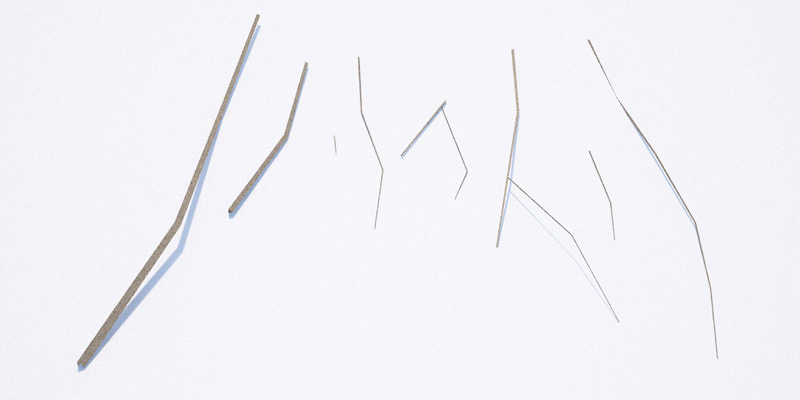


For the dead leaves I should probably use another method, calculating collision detection to place them on the grass, because there are many leaves where the grass protrudes individual leaves. This is something bothering me quite a bit. Really gotta come up with something else next time.
All the vegetation at the same time.
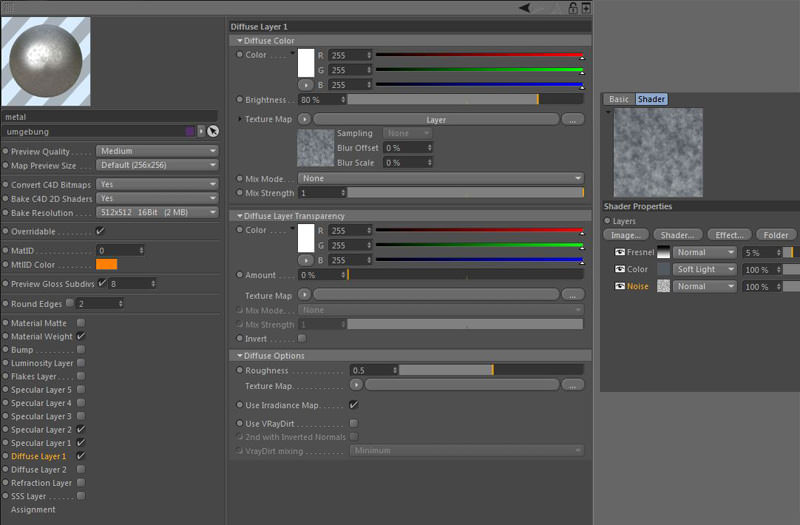
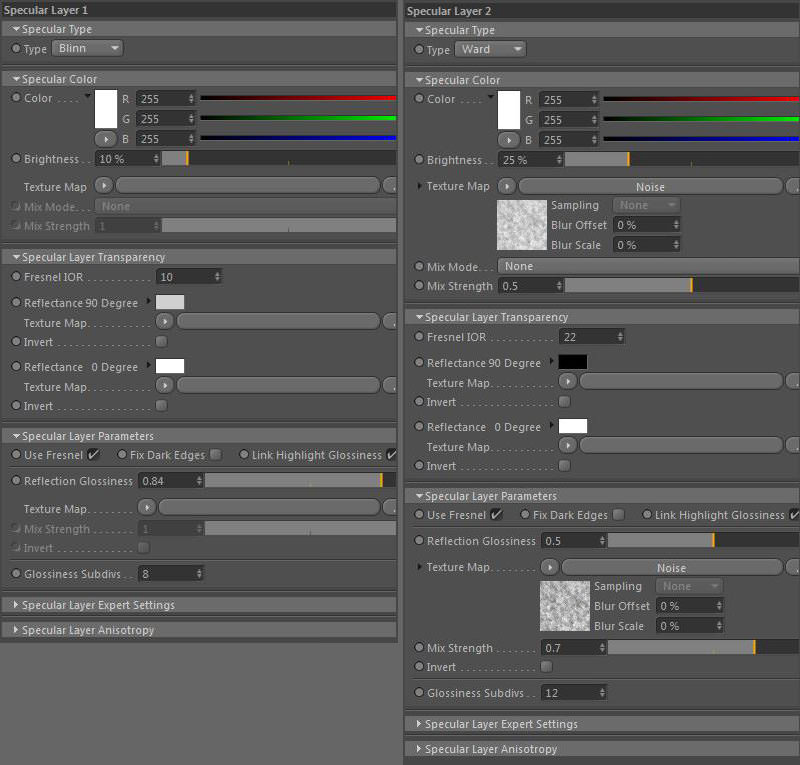
Materials
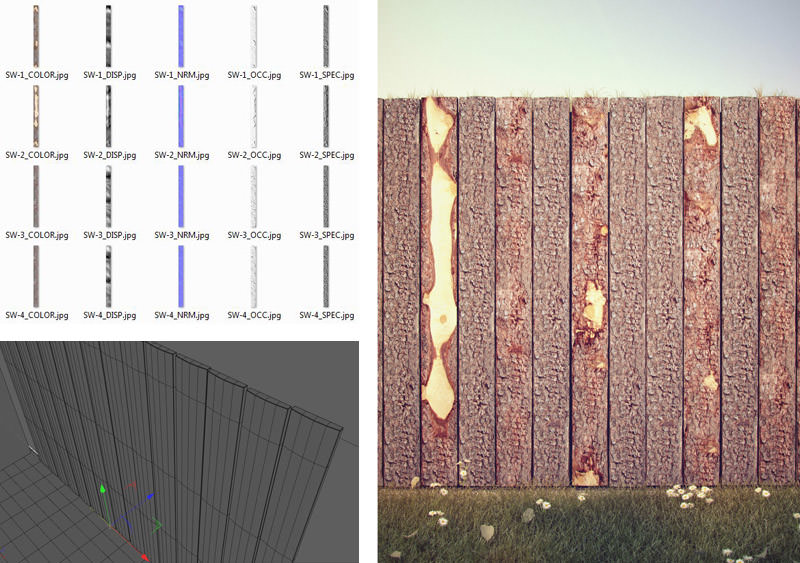
The biggest challenge with texturing was to get the wooden facade right. After the unsuccessful experiment
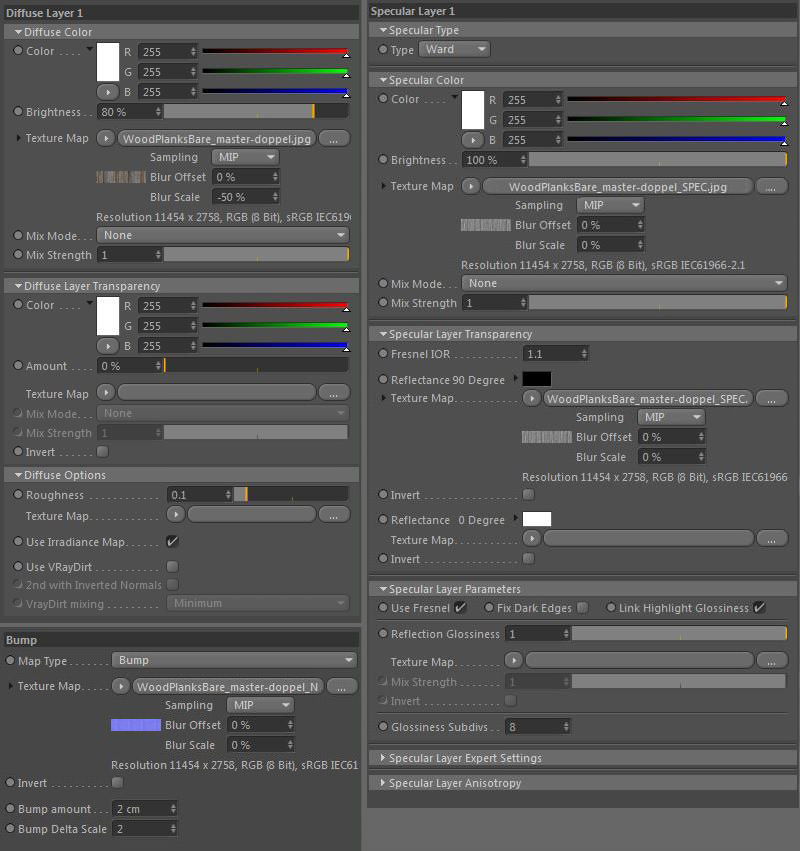
with single individual cubes I decided to use one single texture. I found some very good examples on cgtextures.com. Out of various textures I made a single big one in Photoshop with a large amount of different boards. The texture still not being quite big enough I duplicated the whole thing, rotated and mirrored it. Happy with the result at this stage I didn’t feel like manually adding more randomness. The final texture has a resolution of 11454 to 2758 pixels. Using a demo version of crazybump I then extracted the normal and the specular map.
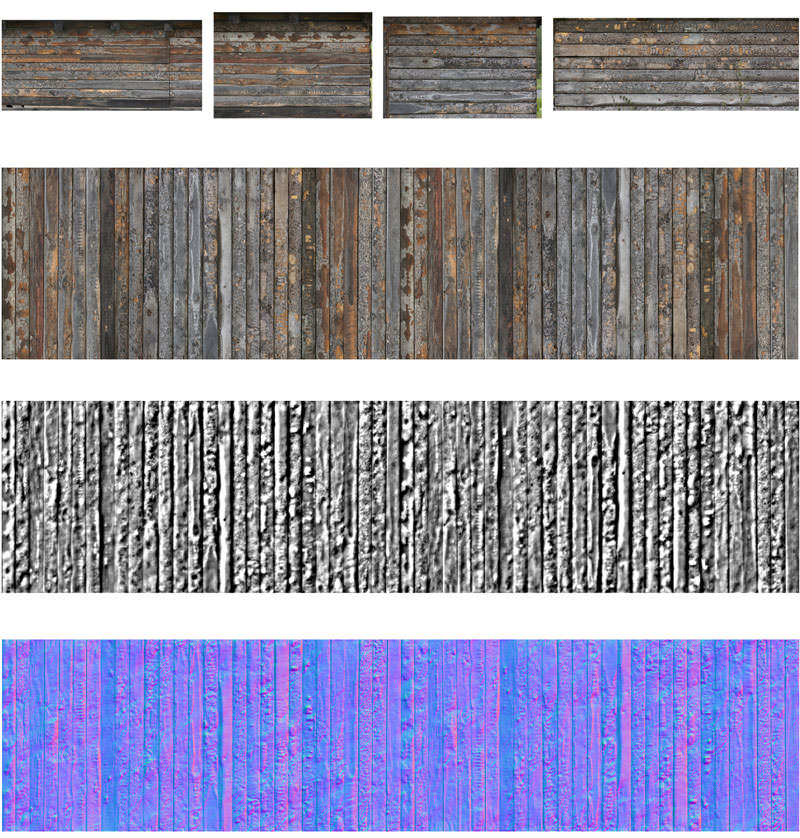
Then combined all 3 into a material as follows :
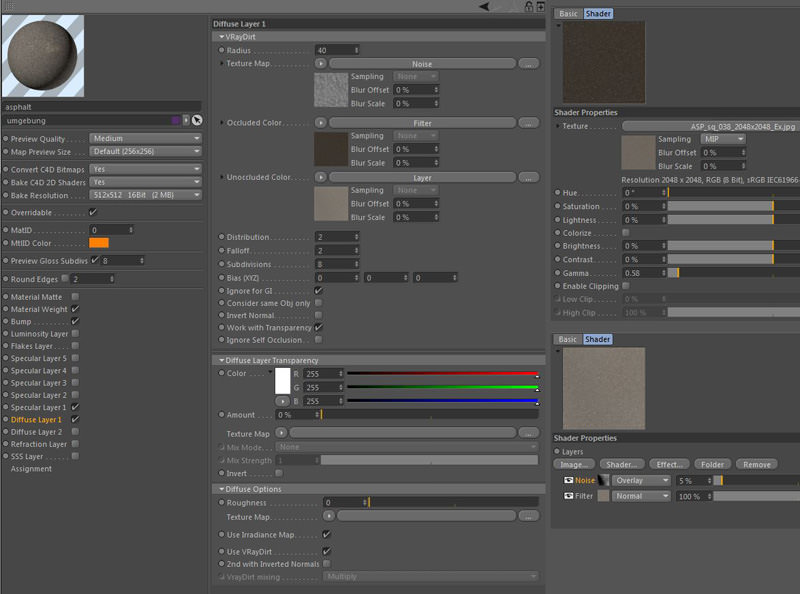
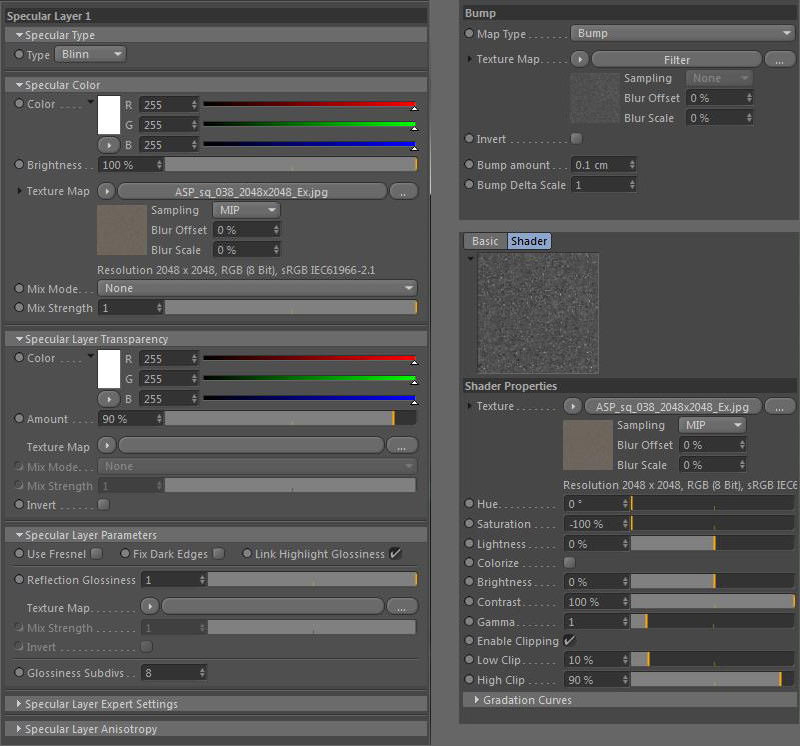
Another texture that I’m very happy with it is the asphalt. To achieve the right look I used VRayDirt. Everything is made with one single texture in combination with different noise shaders.
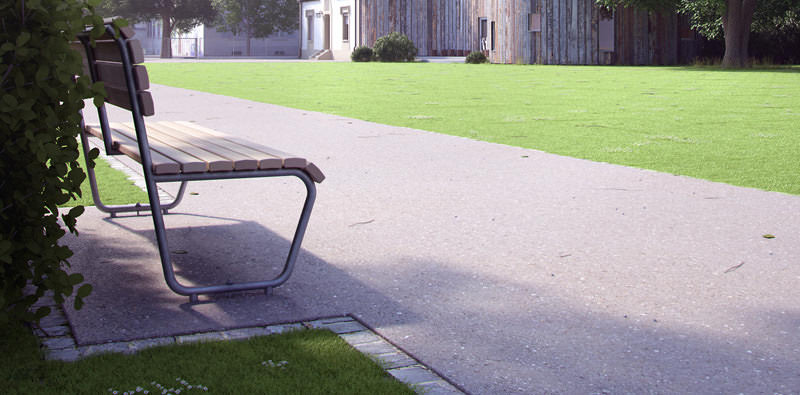
Finally, the metal material for the bench. Nothing special here. Much more special than nothing tho. It’s one of
those materials where I don’t really know how, but after a lot of trying and changing everything, suddenly “it”
happened.
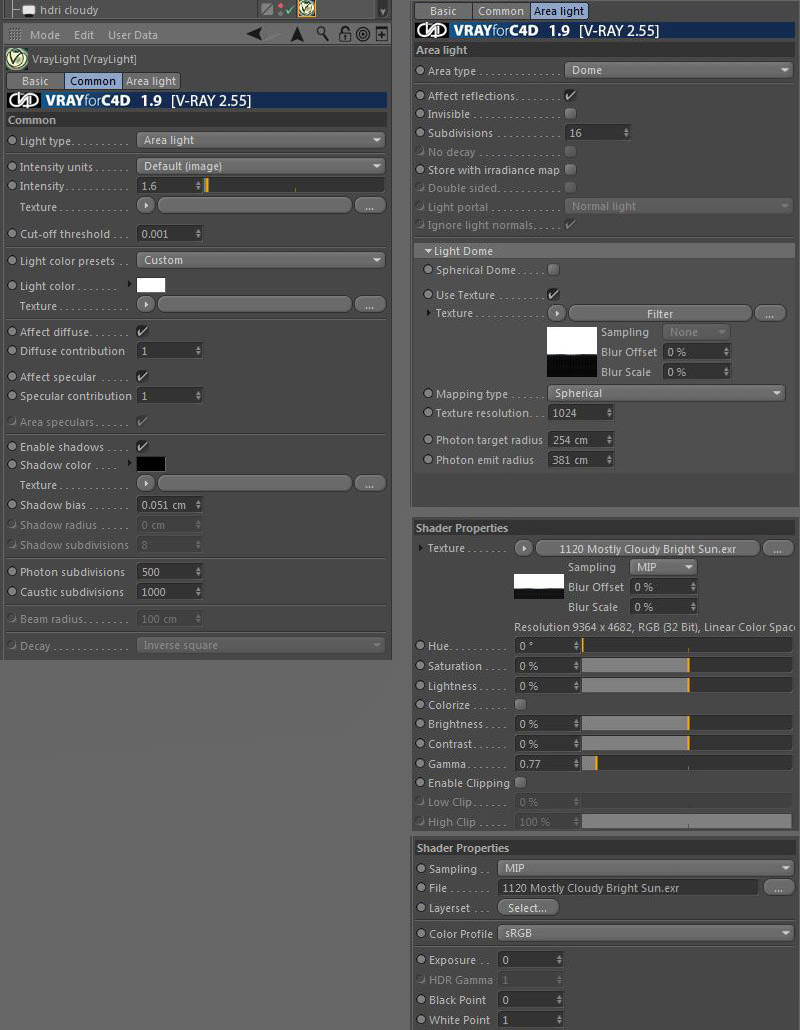
Lighting
This wasn’t all too complicated because I only have one light source. I used… dare to take a wild guess? Peter Guthrie’s HDRi’s. Not because everybody does, but because I simply can’t find any better.
I learned how to use it from these 2 tutorials that I strongly recommend to all VRayForC4D users.
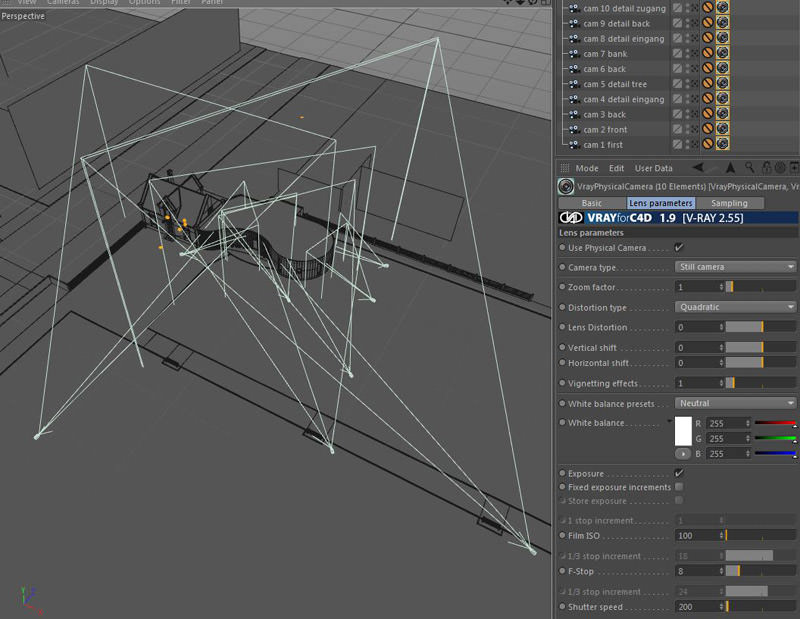
Camera
And here are the camera settings, pretty basic. I used a VrayPhysicalCamera tag with the same settings for
both HDRI’s and all cameras. And it’s almost the preset settings as well. With the exception of the white
balance. I tried a couple things but came back to the defaults in the end.
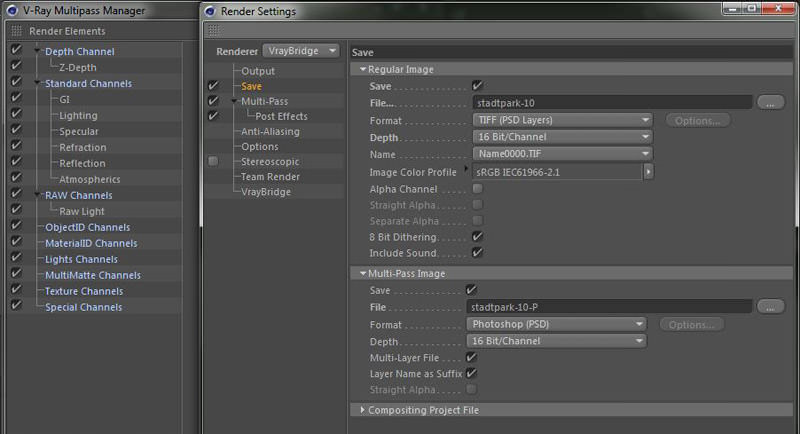
Rendering
I kept the settings pretty low quality in my opinion. Normally I tend to use much higher settings, but in this
case it was more than enough. To calculate Global Illumination I used Irradiance Map and Light Cache. I also
used just a tad of environment fog, but without any Gizmos and Light in it. Just an overall fog, to make the
trees and faraway scene fade into the background. Rendering the images at 3000 to 3750 pixels took around
4 to 9 hours per image.

I also rendered out some passes to have more control in post production. But I can’t really tell you much of
interest about rendering passes, as I’m still learning this myself.
And then RENDER!
Make sure to check for double Linear Workflow settings (C4D / VRay), if you work with render passes,
otherwise pictures look washed out. Here is a very good explanation – V-Ray Essentials – Linear Workflow about this
issue.
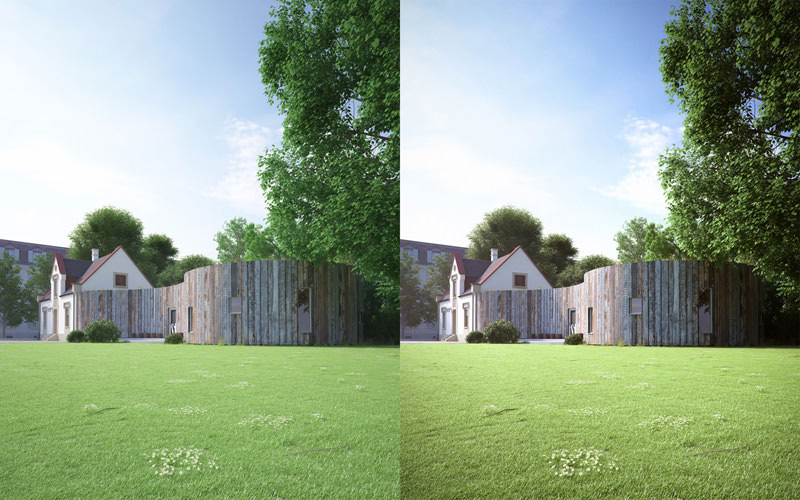
Post Processing
As I said before, post-processing would not be a big part in this project. So it wasn’t. I’ve worked exclusively
with Photoshop, because there is nothing you can’t do with Photoshop. No special plugins were used. Here is
one example, this is how almost all my psd files look like.

Raw to Final
FIN
I hope you enjoyed the article.
Questions are most welcome in the comment section!
Last but not least, thanks to Ronen. he is doing an amazing job. So many of us draw inspiration and can learn
so much from his website, a priceless advantage! Also, thanks to Michel who helped me to write this article
especially with my English. And an extra fat “welcome” to all the people thanking me for reading to the end of
their articles.
Saludos, Phil
All the final renders :


Yeah! Thanks Ronen Bekerman
good job mr phil U0001f609
backup link as the top one seem to fail – http://www.ronenbekerman.com/making-of-stadtpark-biel/
siiii
Danke Martin
Congratulations to this masterpiece (!) from someone who sees the Stadtpark everyday. 🙂
Congratulations to this masterpiece (!) from someone who sees the Stadtpark everyday. 🙂
BenjaminBolli what? do you live in Biel?
Phil Buerer Yes I do. I will have to go and imagine your version of the kindergarden. I’m doing Arch Viz as well but we use 3ds Max instead of Cinema.
BenjaminBolli Ha :)! it’s a small world! We should meet us there..
BenjaminBolli just sent you a message on FB
BenjaminBolli just sent you a message on FB
hello sir ,
I am relay impress with your work. can you give the right direction in 3d max work.
ajay123 in 3d max? There are so many good tutorials, making ofs with 3d max, here on this website. I can’t give tips for 3dsmax, sorry, but check out the others articles here (http://www.ronenbekerman.com/architectural-visualization-tutorials/) mostly 3dsmax 🙂
Nice to see a clear tutorial about Cinema 4d+Vray, and congratulations on your work and website.
I have a question concerning the HDRI texture resolution you set in the vray area light. I see it’s 1024. First of all,I guess this value affects the resolution of the background, of the reflections and the overall lighting precision. But how do I define the right value for the texture resolution? Can’t it be even higher considering you’re using a 9364x4682px PG hdri? Thanks a lot
archbit
Thank you archbit. As far as I know, you don’t have to define the texture resolution, vray always takes the full texture size (I read about it.. here http://www.forum.vrayforc4d.com/index.php?threads/13128/#post-97180) so, “the tex resolution is only for the importance sampling before render” is this what you mean?
Phil Buerer archbit Yes, exactly! Thank you very much for your help!
I’ve had these renders in my inspiration workflow for so long.. I actually didn’t know they were made using Vray & C4d.. Whoa, amazing work! It’s really reassuring. I have taken up Archicad, Cinema & Vray as my main working tools but I still feel that my end results really miss that spark and I really don’t know where I’m going wrong. A couple of questions,
1. How do you soften edges in Cinema 4d?
2. What do you use to guide your shot composition?
3. On materiality & lighting, any tips for a Cinema user?
Hi In_Victus. I’m glad you like it 🙂
Well, your wrote “I have taken up Archicad, Cinema & Vray…” maybe, also an important part would be postprocessing, like photoshop. And, to be honest, I never get good results with models from Archicad. I’m sure it is possible, but for me, best is always to model directly in Cinema. You could do hard edges in Archicad and just do it in Cinema with the Bevel deformer, or just use the Vray “Round Edges” in the materials, that would be faster. And for composition I often use the Cinema camera “Composition/Grid” option. And for materiality & lighting I would suggest what I wrote in the Making of 🙂 Hope this helps a little bit.
Phil Buerer
First off, thank you so much for taking the time to reply Phil. I’ll definitely give your pointers a shot. If you have some time, would you mind giving me a personal critique of a render I recently did?
In_Victus Phil Buerer sure, just post a link here.
Phil Buerer In_Victus
There you go
https://drive.google.com/open?id=0B6naX4AXimkIQmNDUGVrU1NHWjQ
In_Victus Phil Buerer hey In_Victus, that doesn’t look so bad, you’re on the right track. It just look not finished yet. Could have some more details, interior, round edges, dirt maps maybe… and I would not go with this camera angle, it’s like you’re lying on the floor. I would go higher and shift the camera on the Y-axis.
Hello Phil,
It’s been a minute. Just thought I’d show you some of my new work for your critique. Please take some time and have a look. i still really don’t know what’s missing
https://uploads.disquscdn.com/images/baf6a999735f298bf141ab87ec4868f3df59632d122a91f9b6dbbc36168465ac.jpg
https://uploads.disquscdn.com/images/ce83517a28d780e74a6edcb80aa8e91205aa61d497ccf10a3e7ce3683f720e5f.jpg
https://uploads.disquscdn.com/images/f7b3ba88709f15b76d72df8c160926f2645ddab7feecd01d5046ae157d222805.jpg
https://uploads.disquscdn.com/images/a22669b4ef2b4cf94f1e1ae3c1d1d7c84367ef661514373e41eb697af5f51cdd.jpg https://uploads.disquscdn.com/images/9e5675d09166f2d85788f899a4155f1b61b606ae605c509b7115c4bcd380ceb4.jpg https://uploads.disquscdn.com/images/8ab81bba64826883cf5c13a1f35b3f25e61fe522e36b45afcb2ed9f723567fd2.jpg
Phil Buerer In_Victus Thank you Phil. Yeah? I’ll give it another shot then get back to you when it is complete. Right here is fine ya?