


Making of O House by Marcin “Neb” Jastrzebski
Marcin Jastrzebski posted his beautiful “O House” project on the forums back in July and was Highlighted on the blog too. Today I’m happy to share Marcin’s making-if this remarkable piece of work, which was done using MODO 701, Cinema 4d and Maxwell Render 3 as his main tools. Enjoy!

Author : Marcin Jastrzebski
Marcin Jastrzebski works in the field of architectural visualization, he is the founder of NEBULA-GRAFIKA, which he runs for several years and cooperate with companies from all over the world. He studied philosophy, but his passion is 3D graphics and photography. He was born and lives in Lublin, Poland.
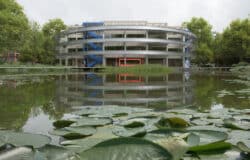
I would like to introduce my recently finished personal project visualization of House O by Jun Igarashi Architects. I’ve decided to keep previous assumptions started by the House in Matsubara by – Kenichi Otani Architects.
My main goal was to check again the entire range of possibilities with the new version of Next Limit’s Maxwell Render. I was trying to achieve realistic mood with simple but interesting modern Japanese house. I was playing with light, mood, weather and season. All details in the scene were created in 3D.
I’ve done final touch ups in 2D like color corrections, contrast, final color mood. I worked on that project about three months with a few pauses. All scenes were rendered from one to four PC machines. I know that many effects like steam, fog motion blur falling leaves, for example, it’s simple to make with post-production but as I said before I wanted to make all of those effects in pure 3d scene.
There are a few workflow details below :
- Most of the terrain materials have a displacement – Ground / Tarmac / Curbs / Pavement.
- Diffraction, fog, steam and volumetrics were rendered by Maxwell Render.
- DOF by Maxwell Render.
- Most models taken from Evermotion, Viz People and CGAxis 3D collections.
House O inspiration photographs and few details :


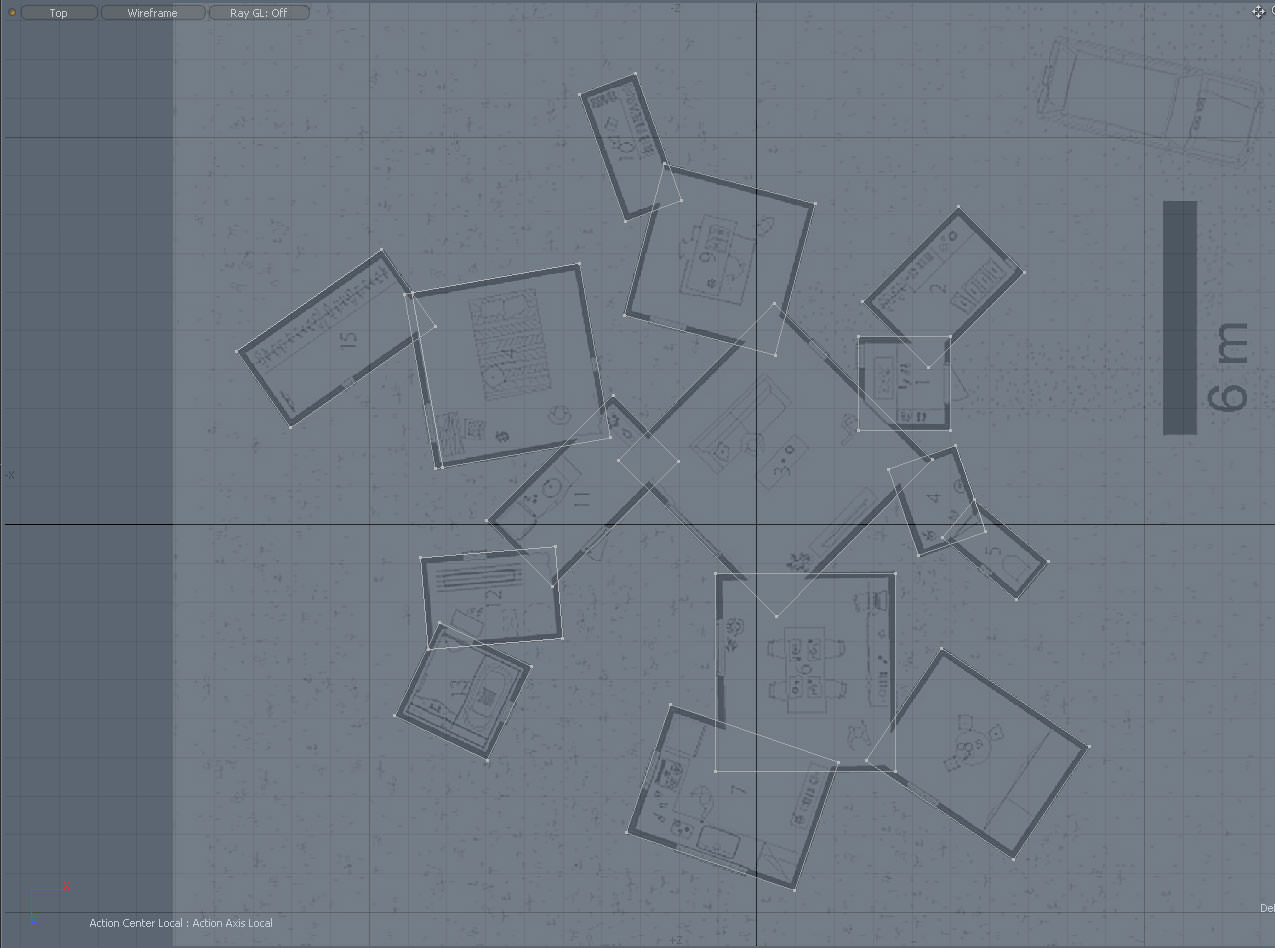
I downloaded as many blueprints as possible from the internet and outlined the basic building shape. Doing this with MODO.
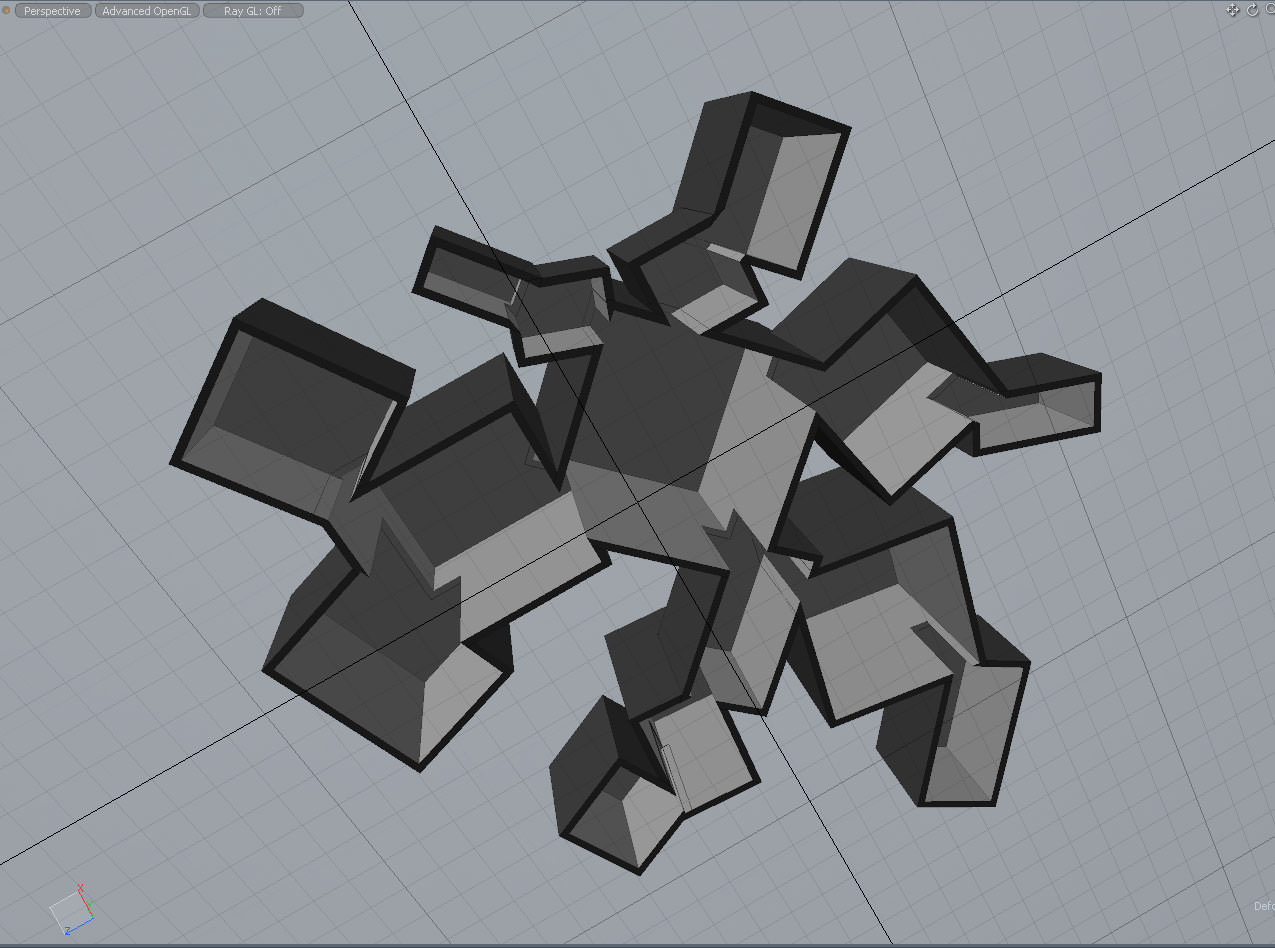
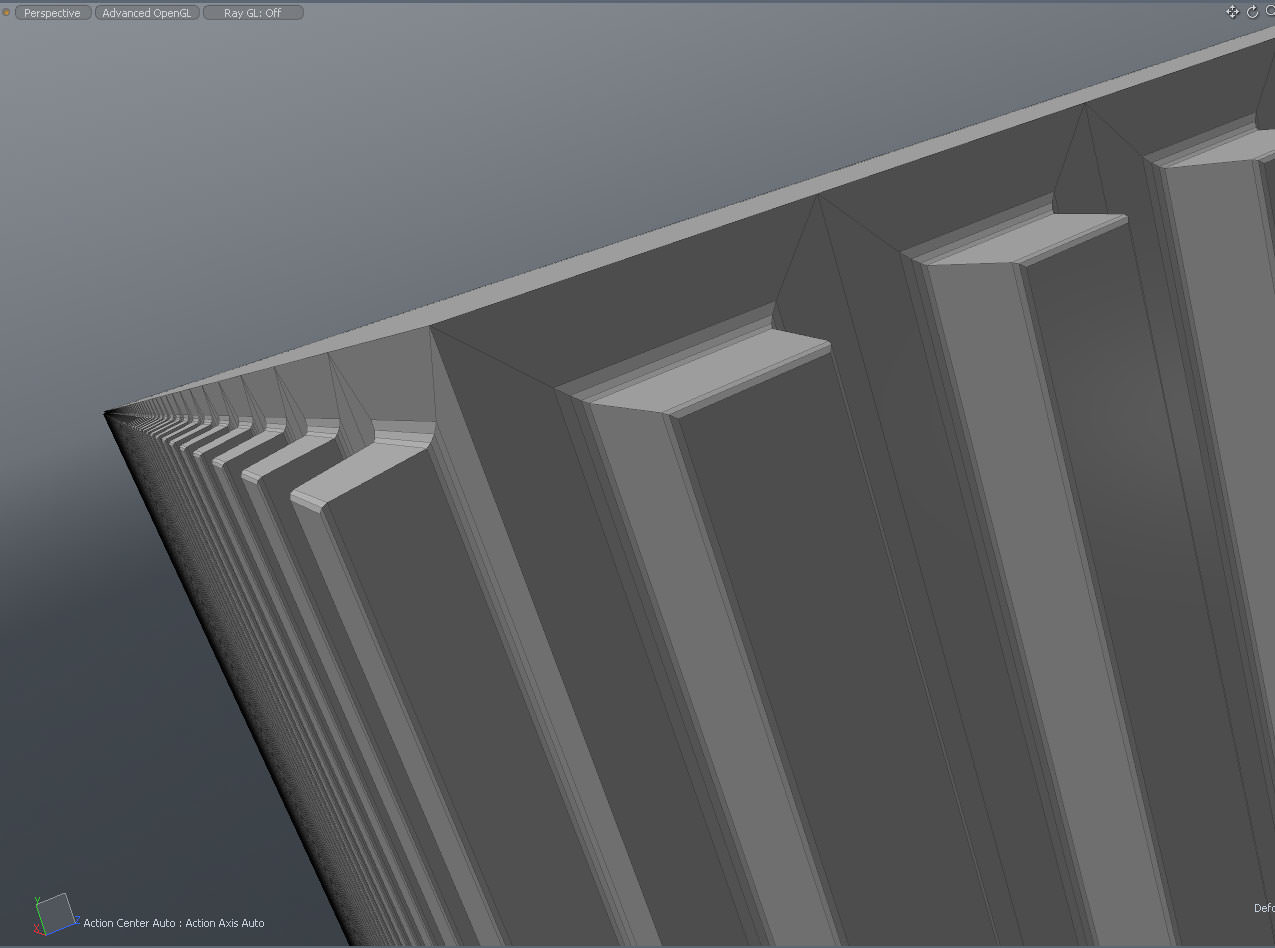
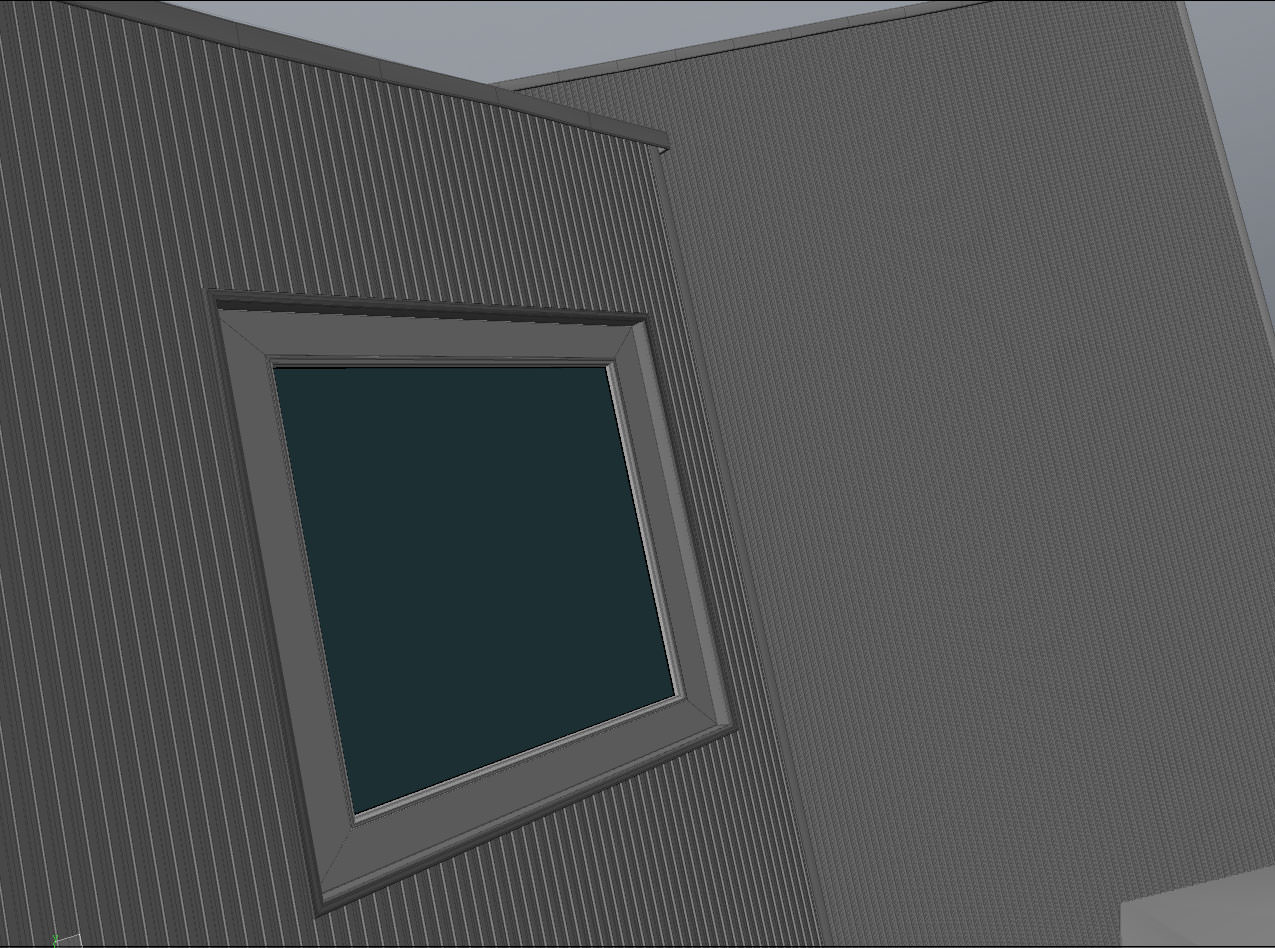
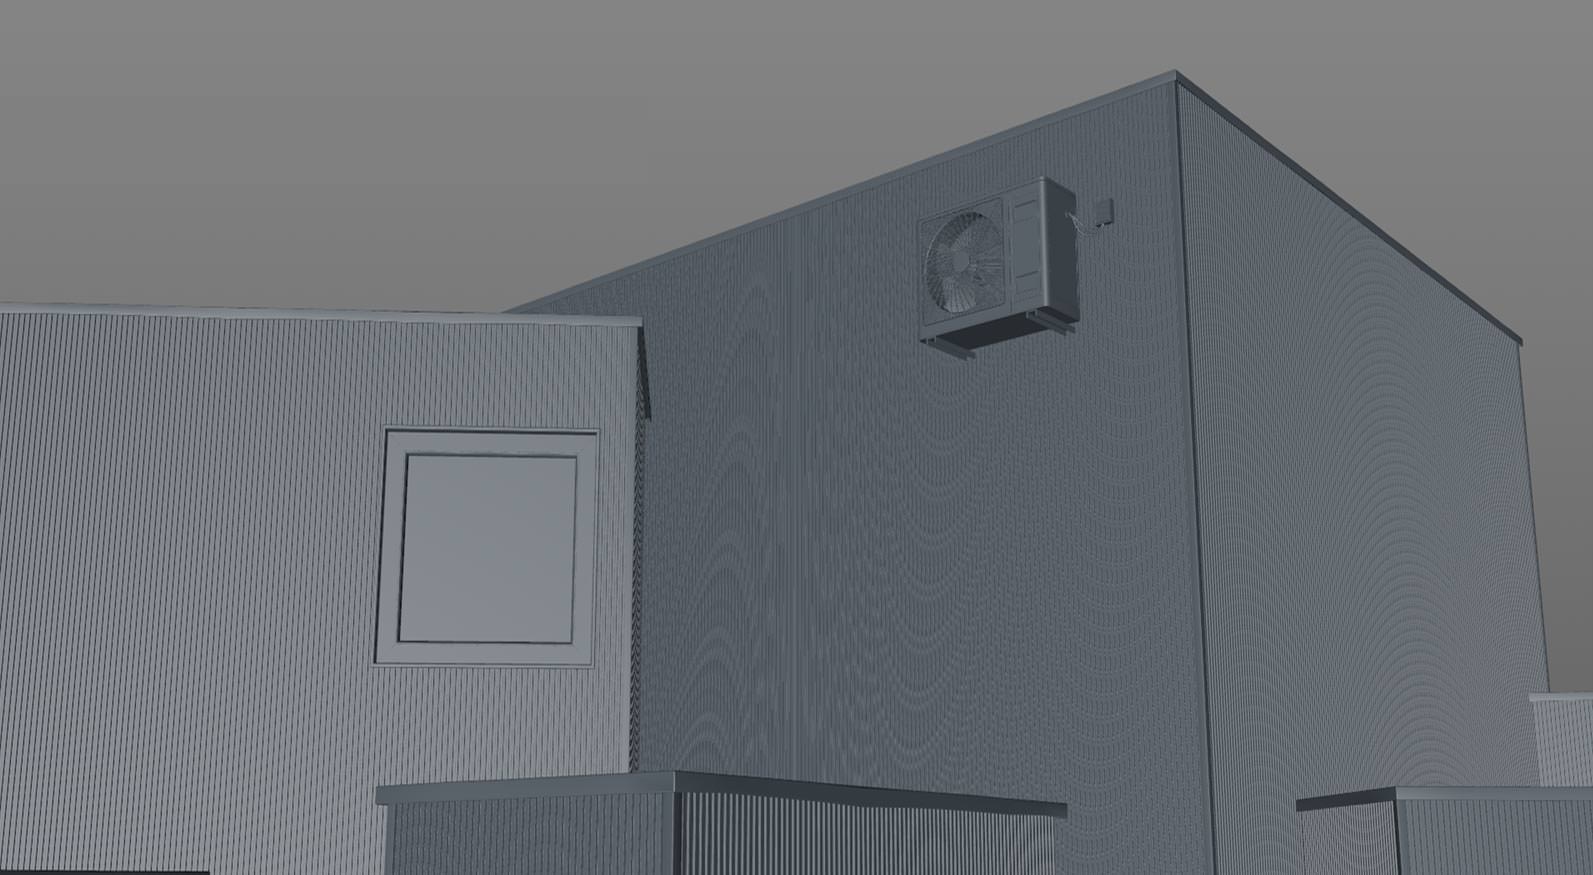
I decided that I would dive deep into 3d modeling of details, such as the bumpy stripes on each facade. At the beginning of the process I did not have a precise decisions about the final views, so I just wanted it all to be in the model for later. At that time I was thinking about one or two main views and also about close-up views. Having a detailed 3d model gives an opportunity to make flexible decisions about that later.
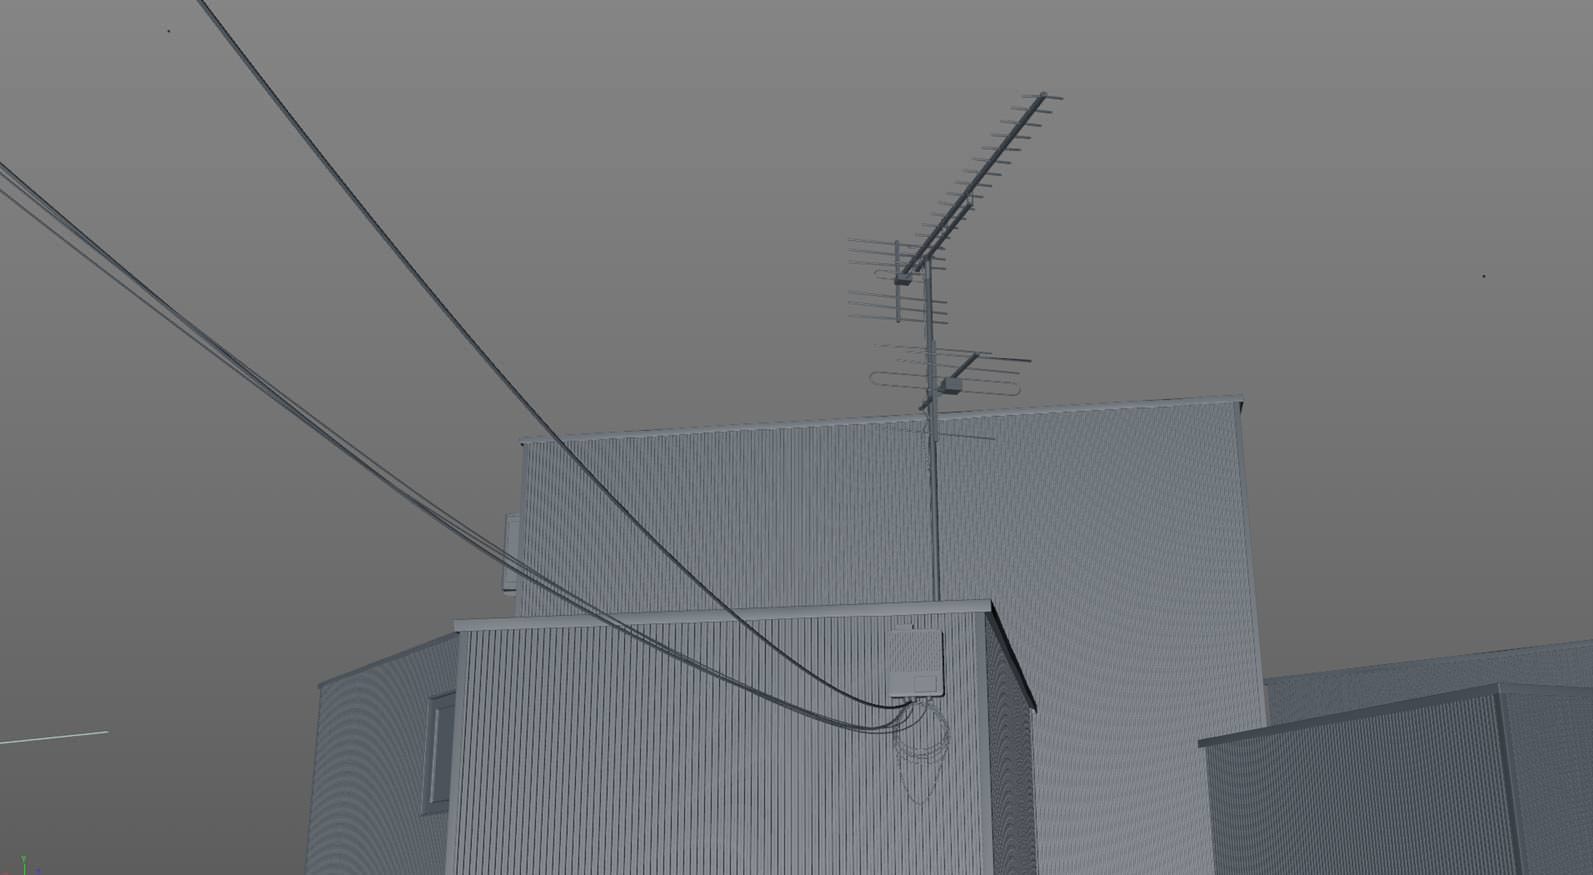
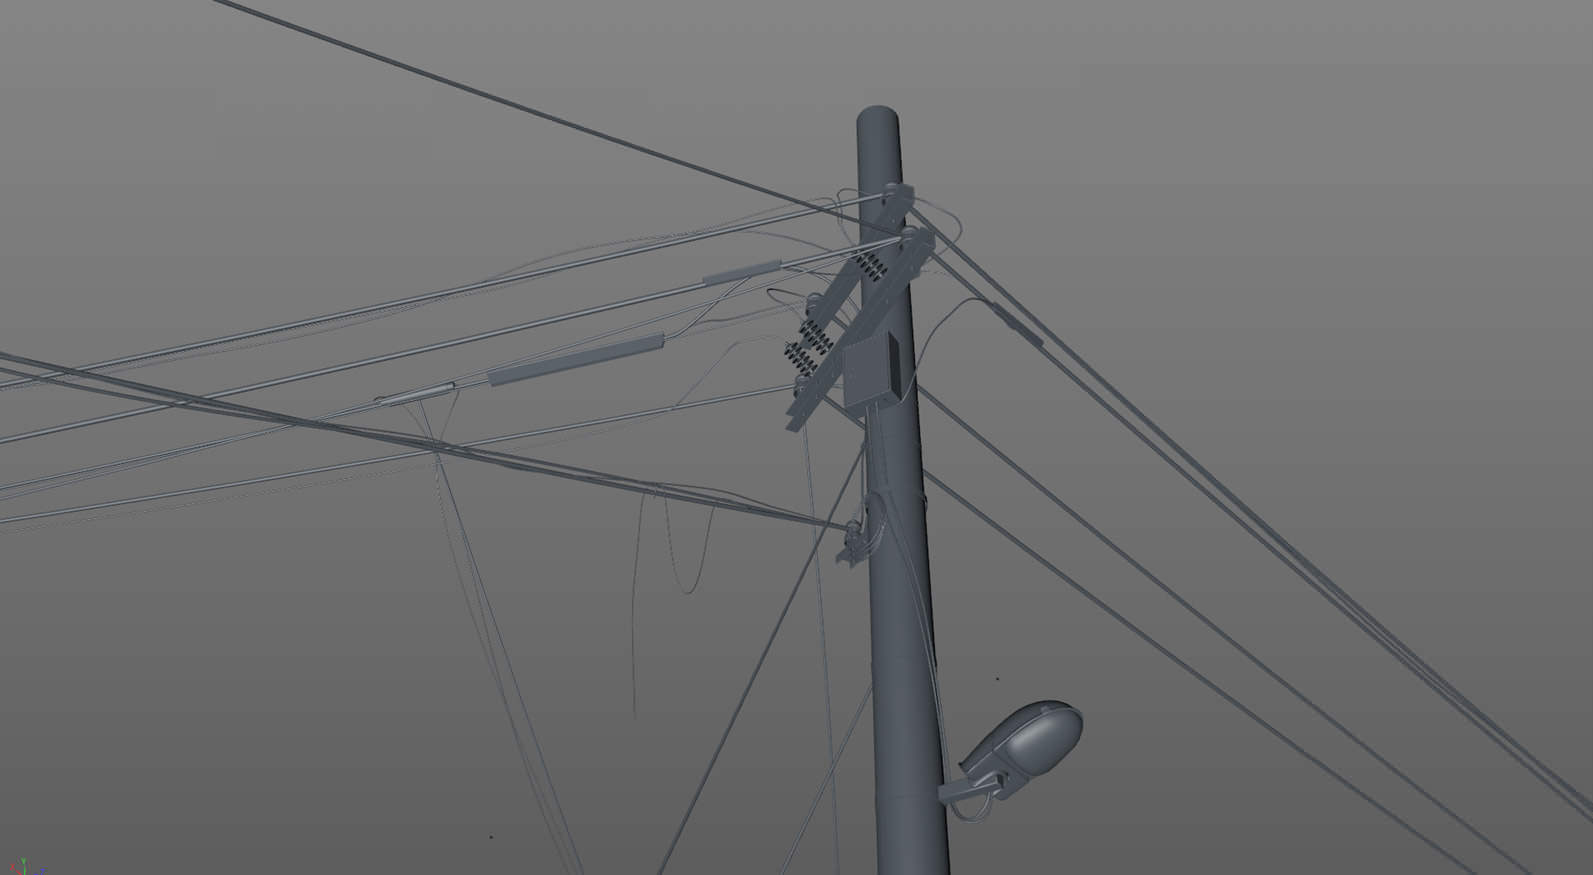
I continued with modeling the base of the house, road and ground. After I was done it was all exported to Cinema 4D to make a main composition quickly and avoid work on invisible details. I made the electric cables in Cinema 4D.
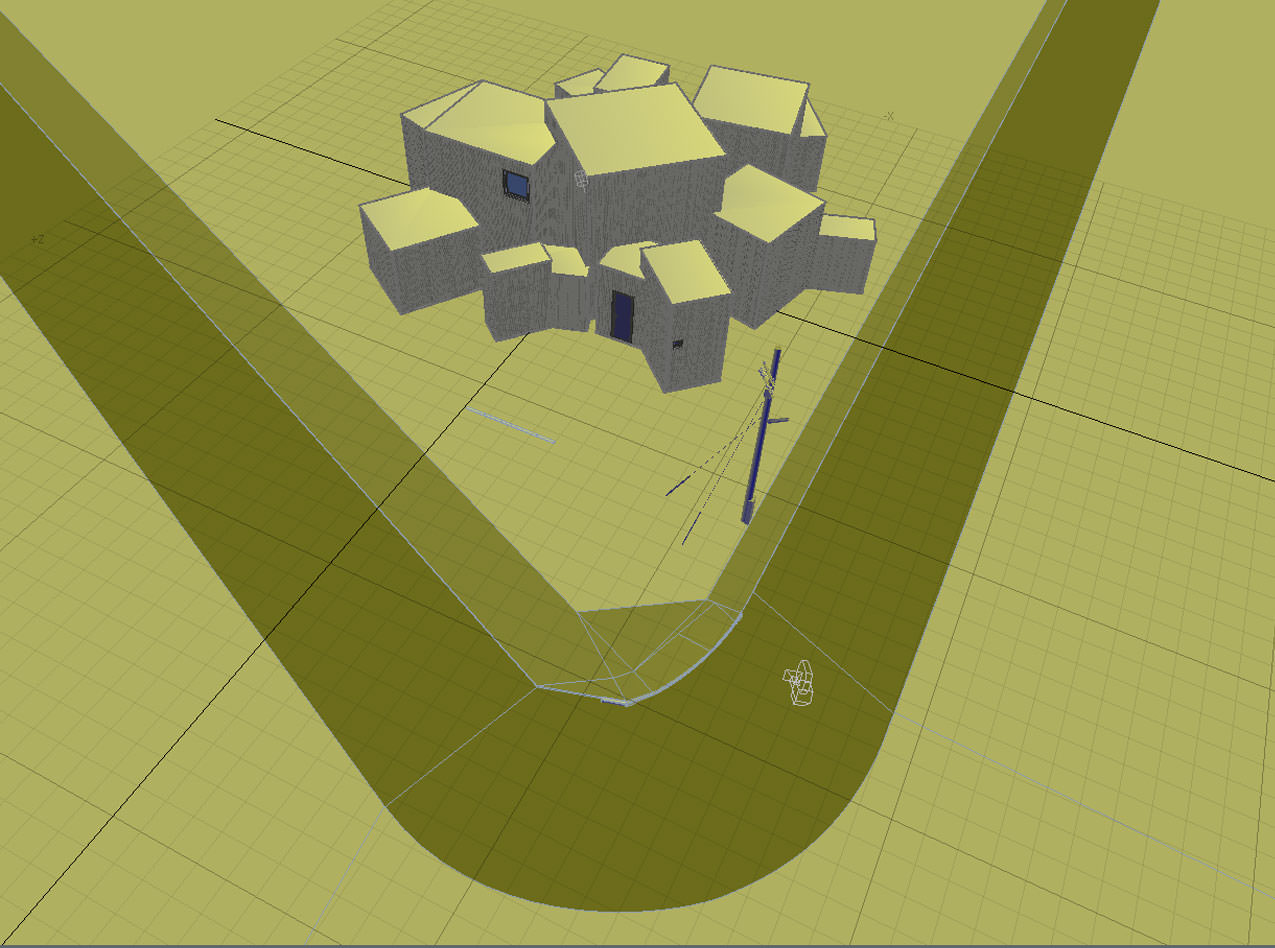
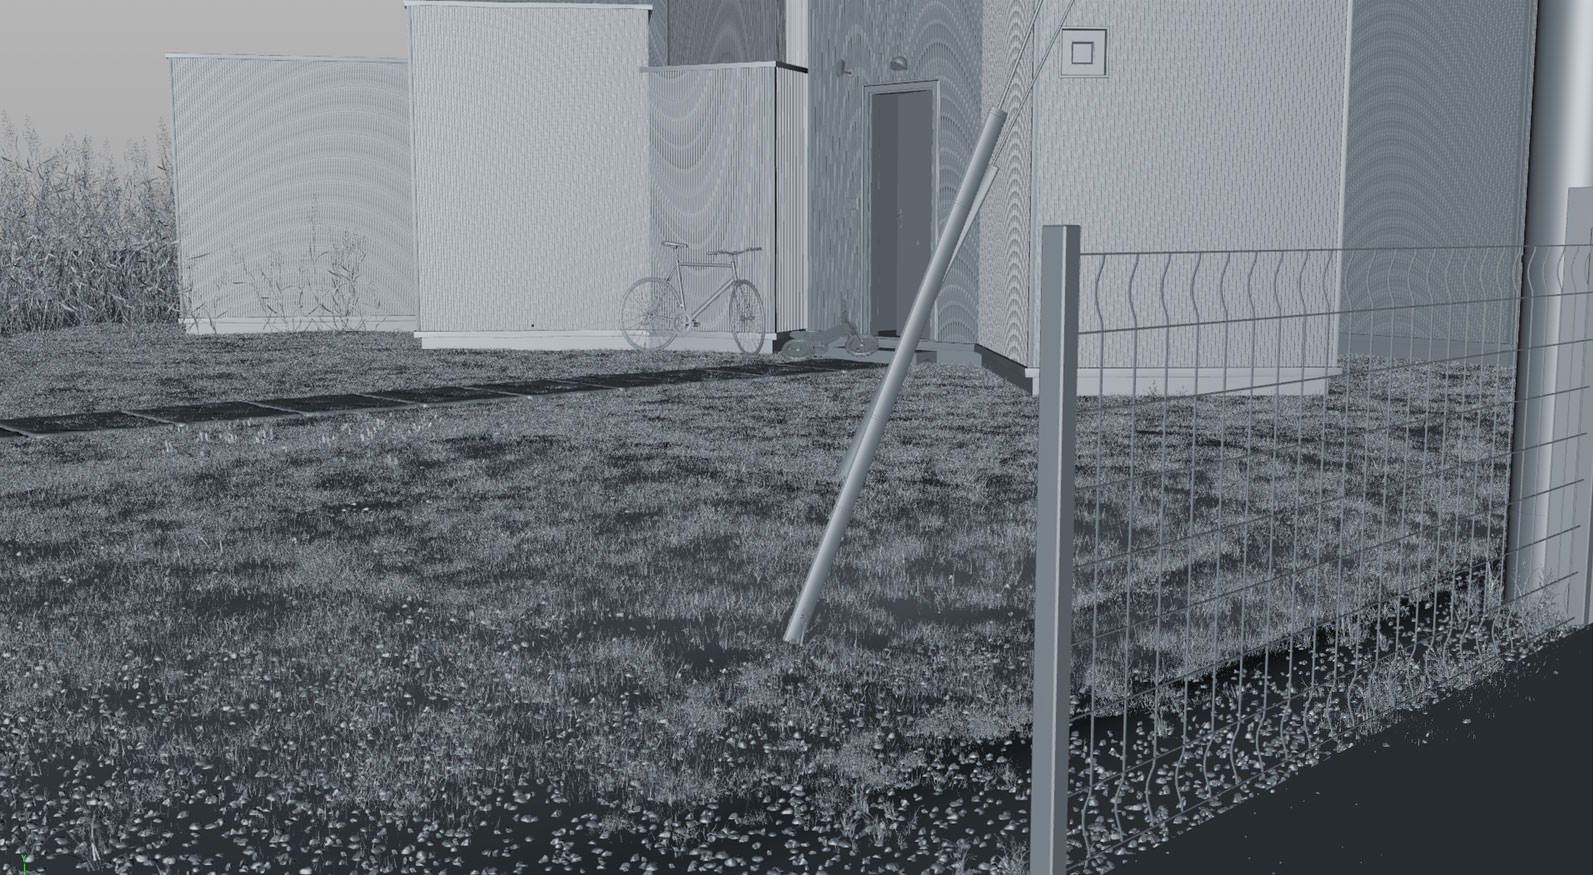
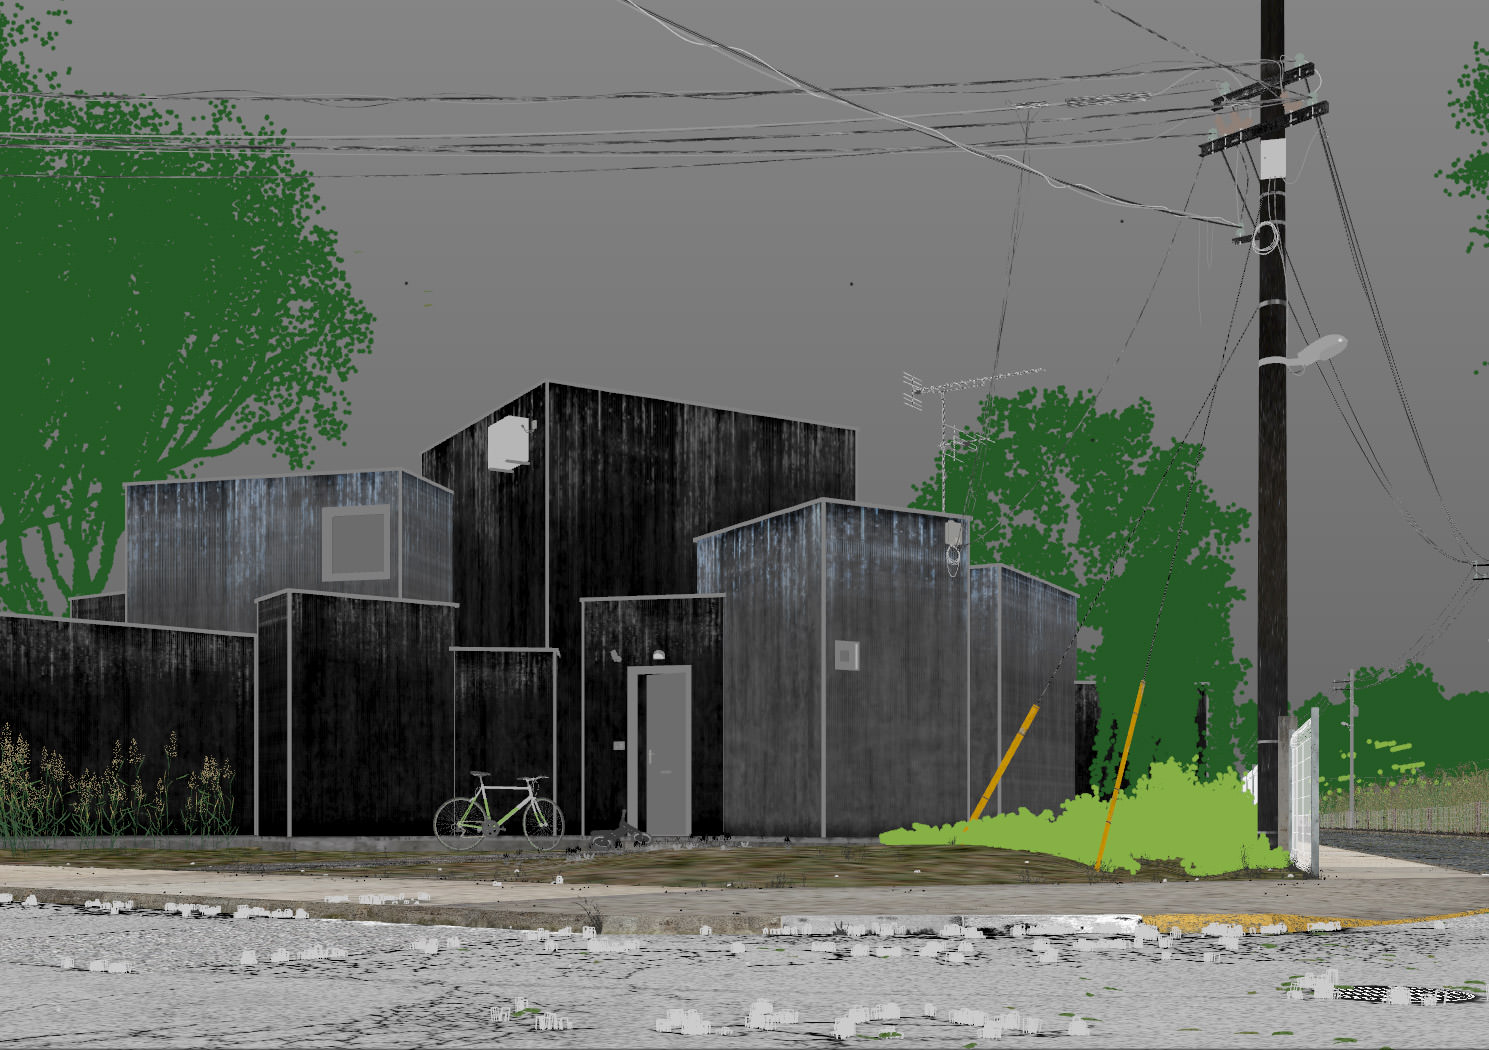
Here is a first draft screen from my main view :
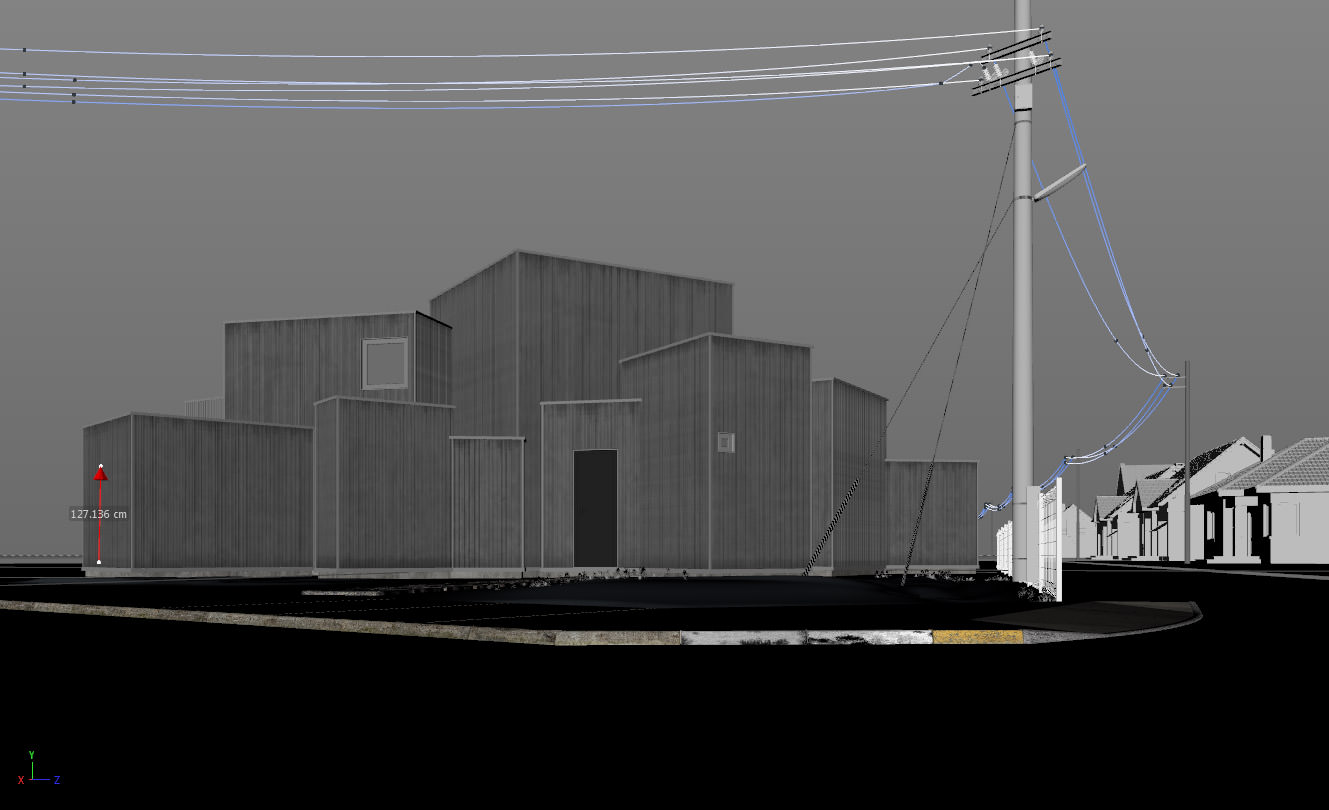
After the decision about the final camera angle, I added details to fill my scene. I added a few ready-made models from Evermotion, CG Axis and Viz People libraries and especially ground models like pavement and curbs. Also the antenna and electric pole and cables which I made on my own to give it all a real street feel.
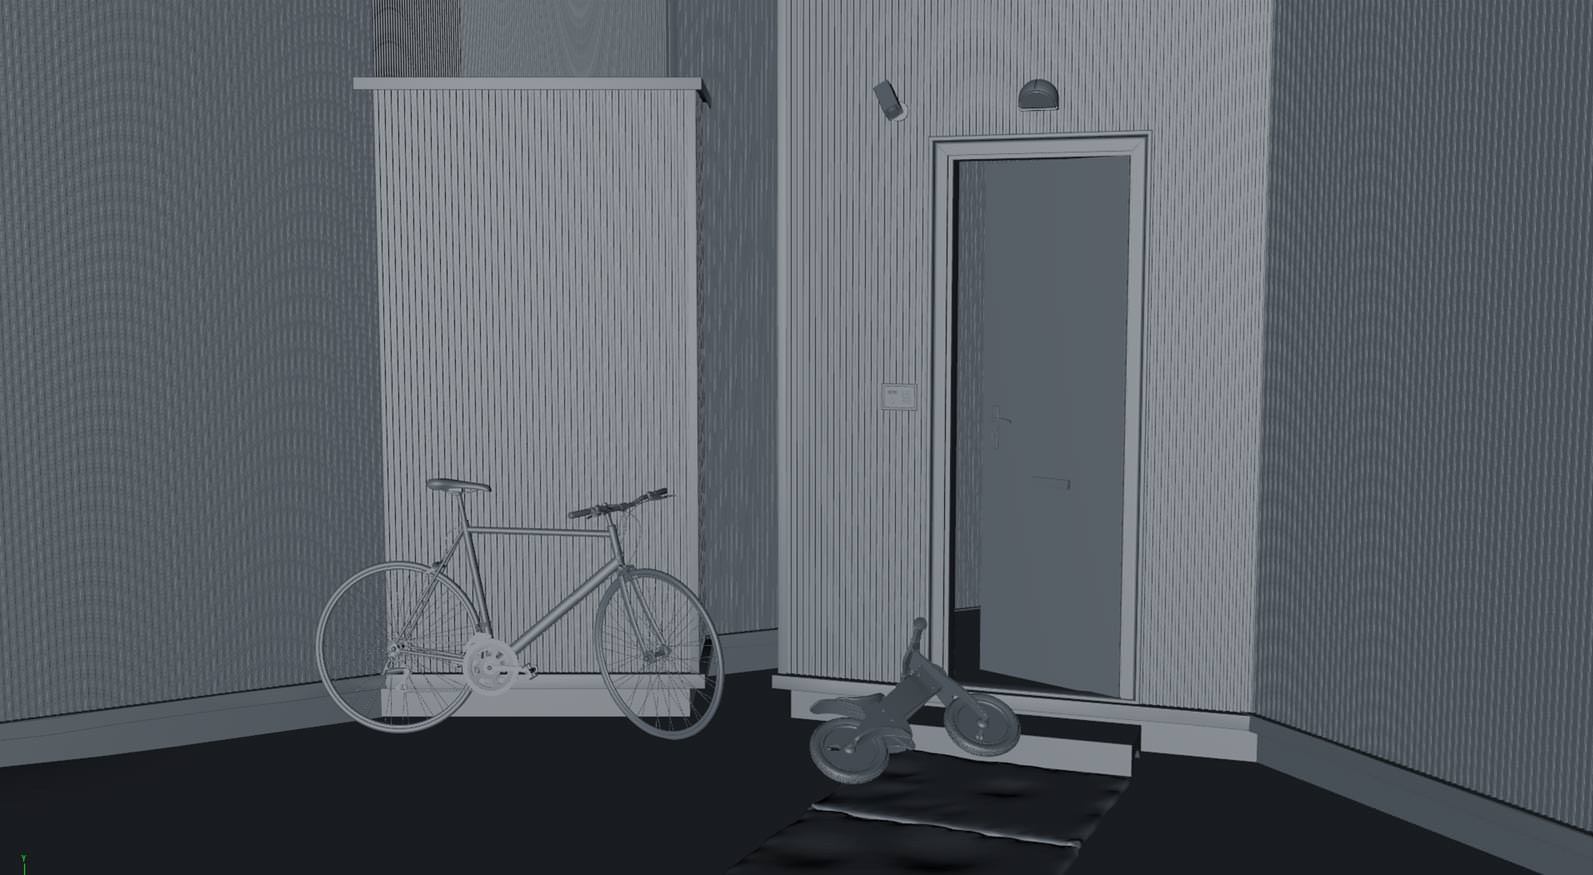

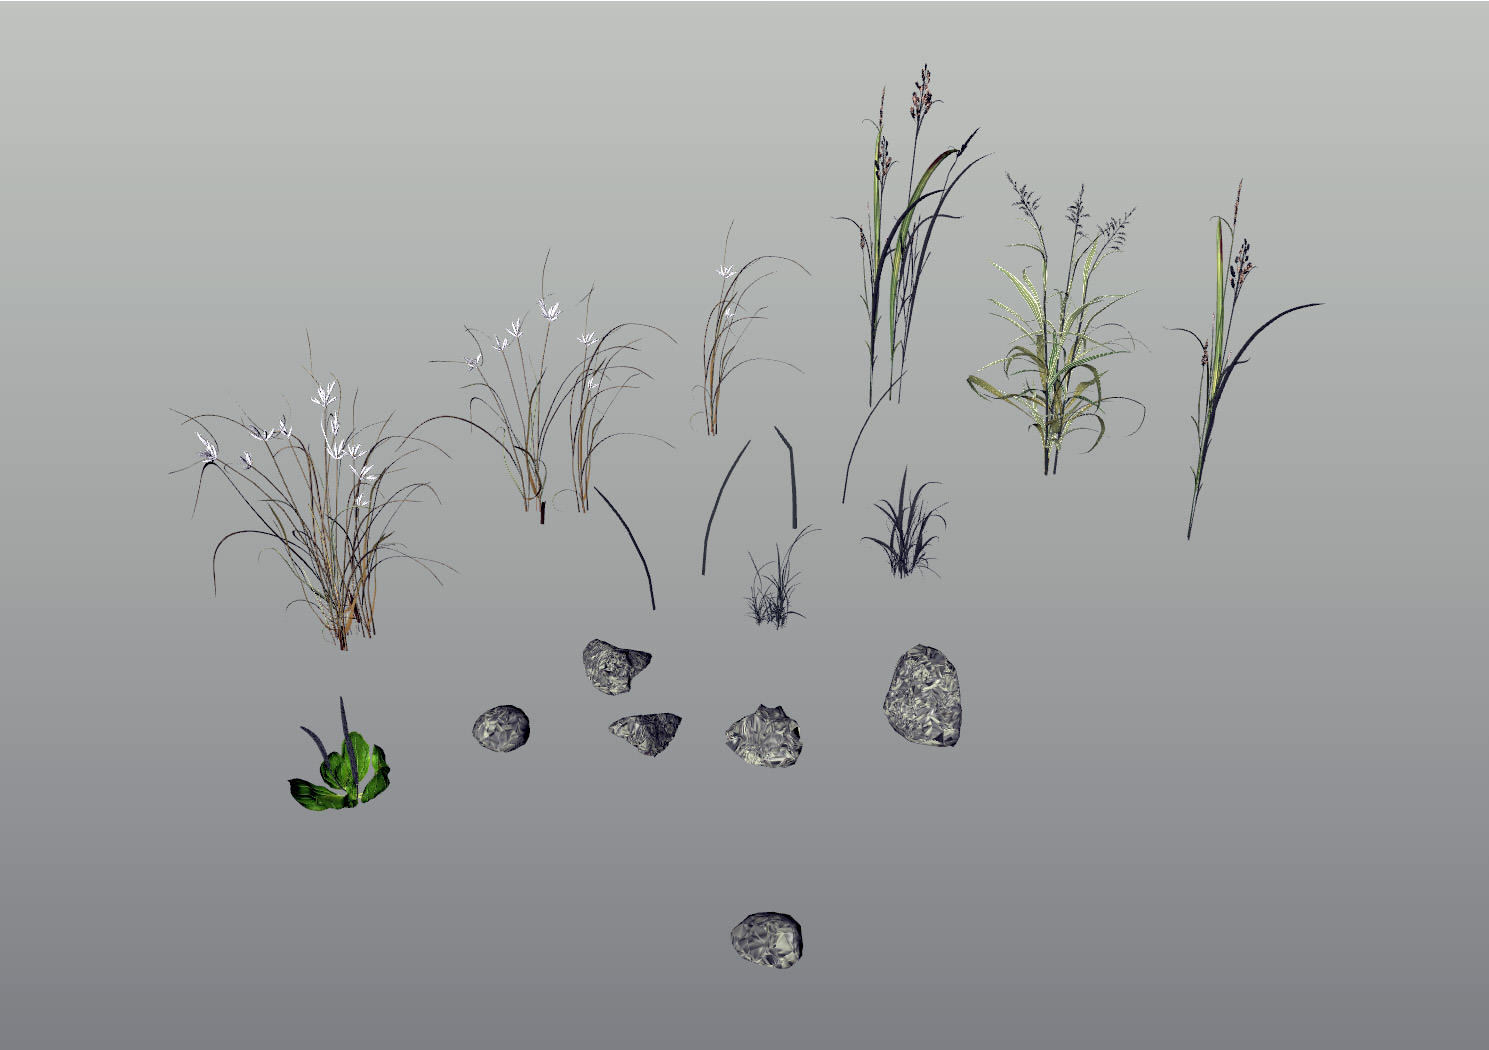
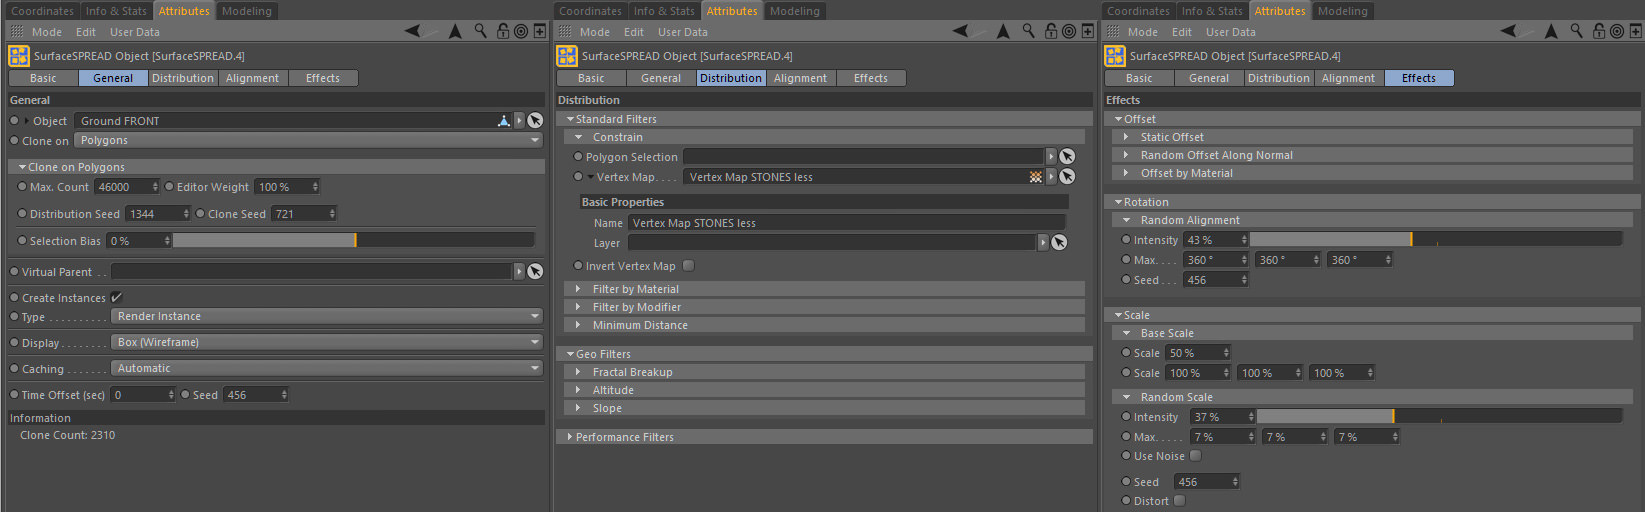
Next came a very impotent stage in the process in which I prepared models to act as the small and medium details to be spread all around my scene to achieve a realistic look in the final render. I like this stage of my work a lot. To do that I usually use two Cinema 4D plugins – Paint On Surface and SurfaceSpread to paint and spread very fast and effectively a huge number of objects in my scenes.
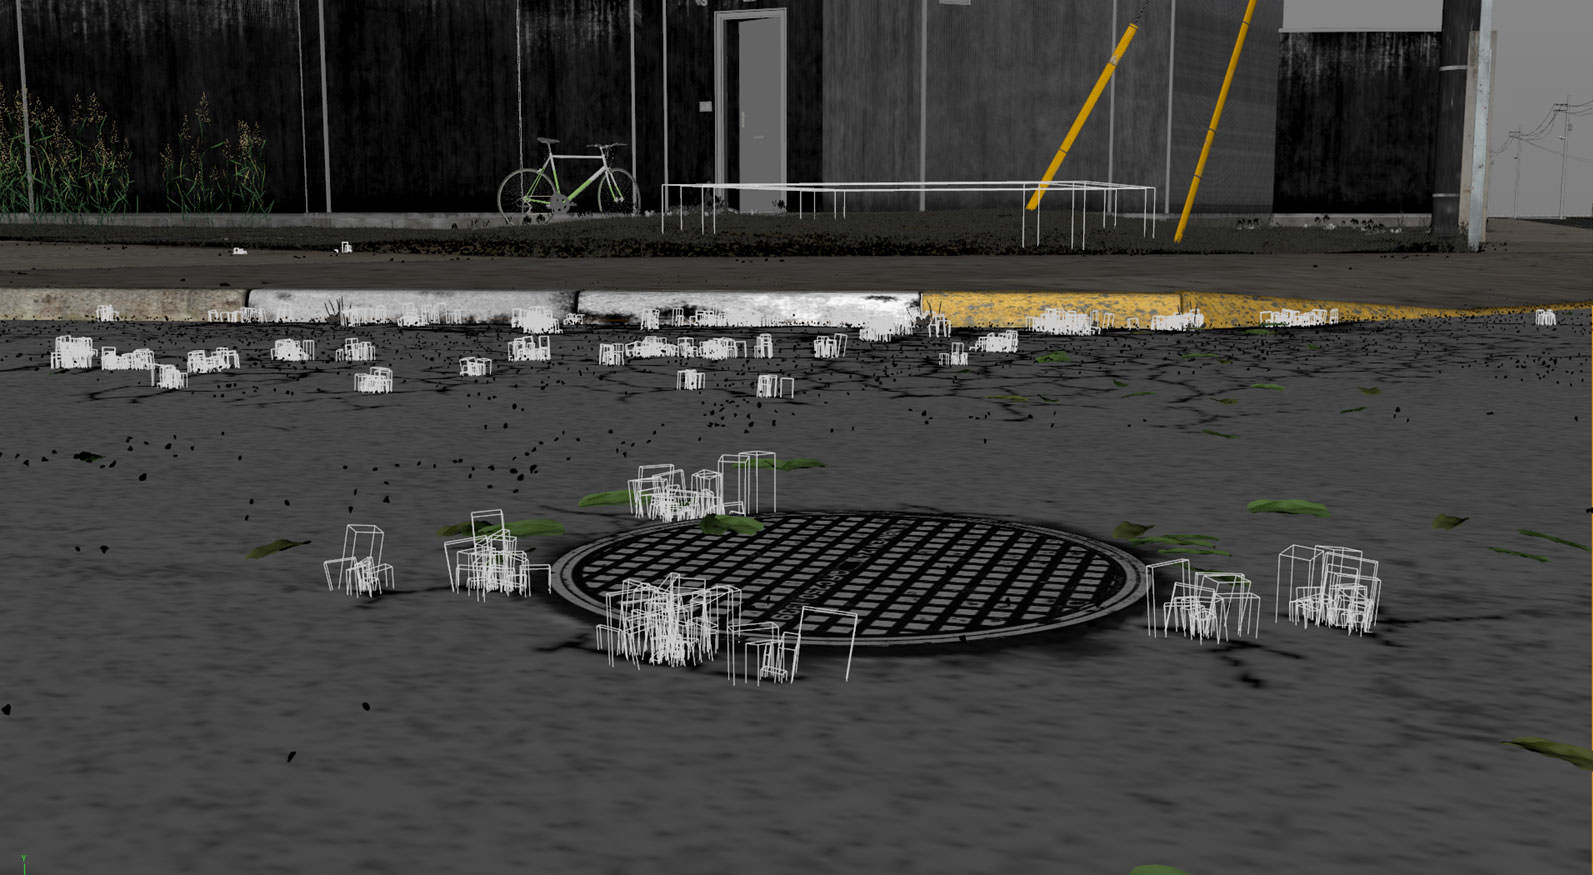
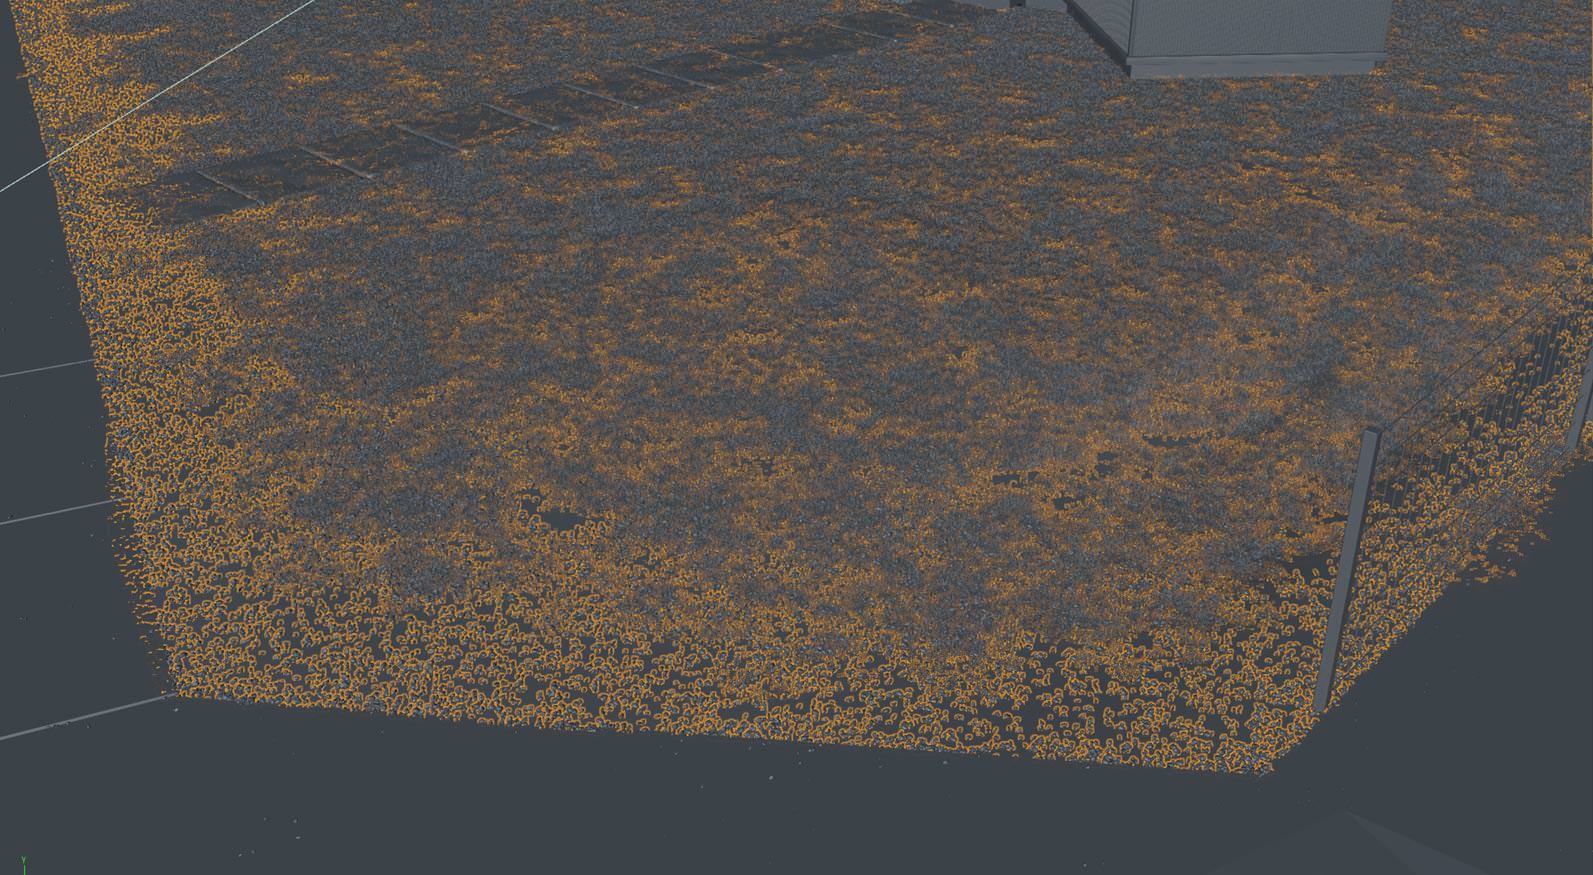
Above you can see screenshots directly from Cinema 4D with the finished stage of objects distributing. There are single grass blades to be used in painting on tarmac slits, small stones lying also on tarmac and pavement, also on the ground in front of the building.
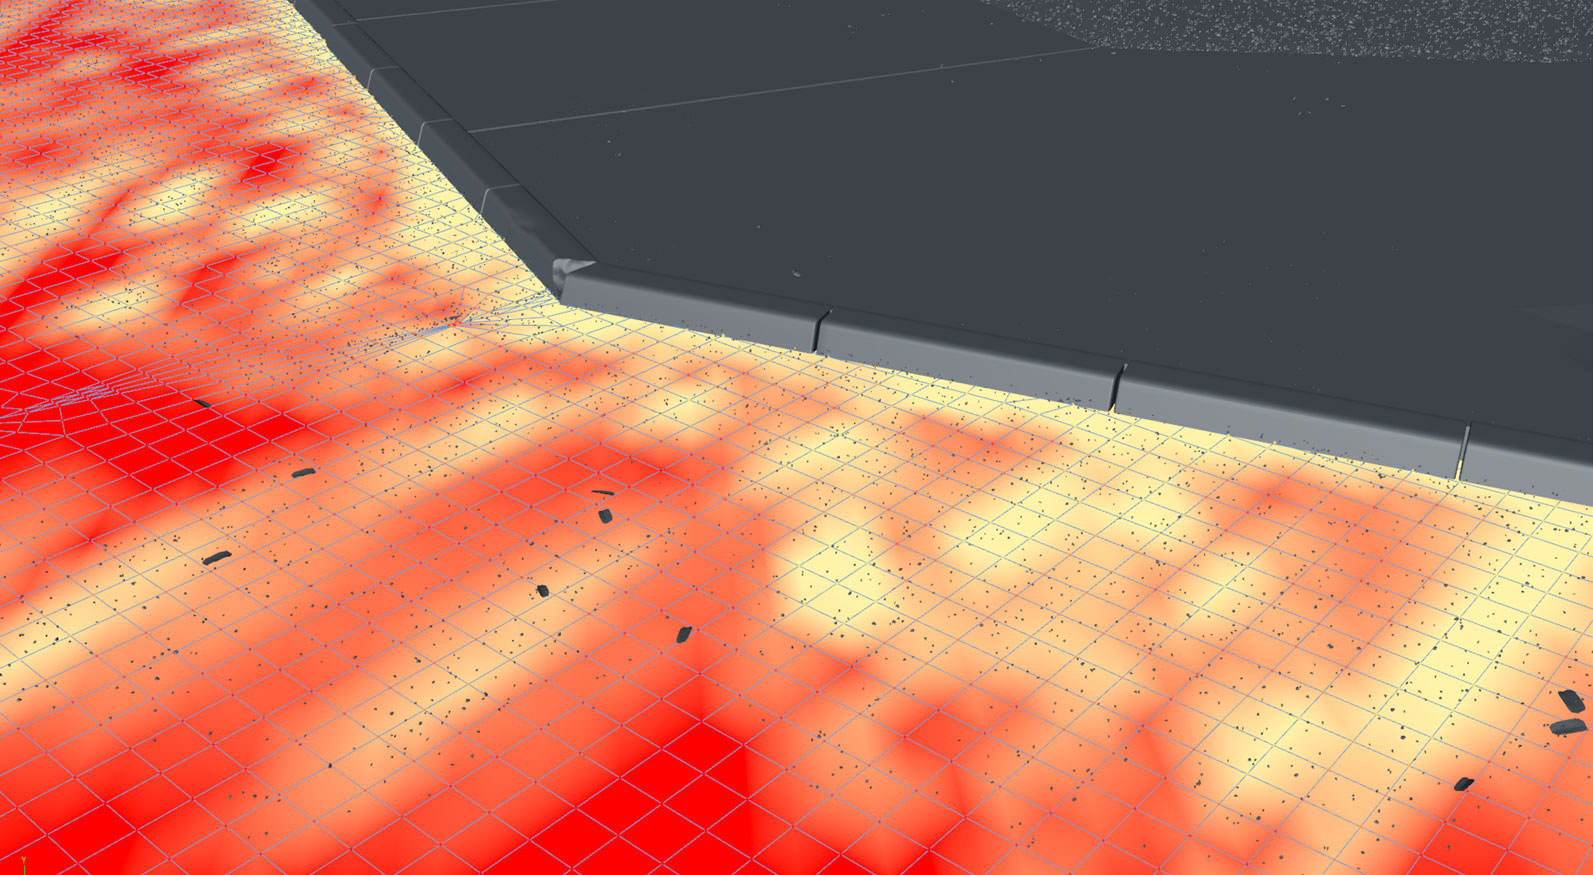
To manage this huge number of objects, as I mentioned, I use a weight maps. In this case this solution gives me an opportunity to edit positions of the groups of objects every time I need to correct that. Please look at the images below which show my weight maps for the House O scene. First two images show the tarmac two distributing layers for small stones. I needed two layers to precisely control small stones distributing with two ranges – from curbs to distance and the second to increase density of stones close to the curbs.

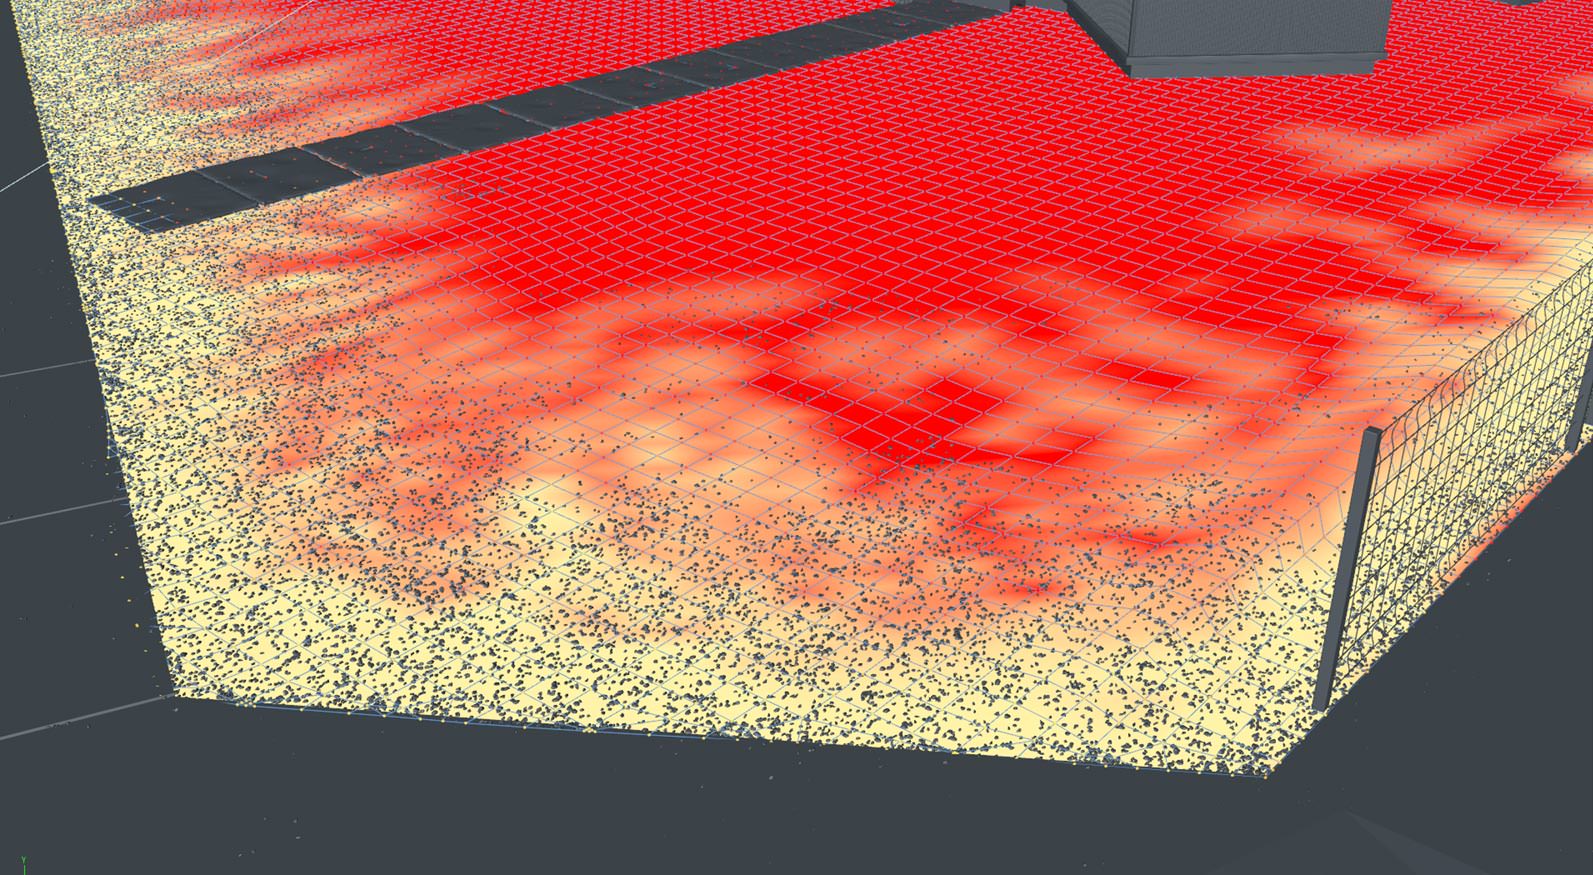
For grass and bigger stones lying on the ground in front of the house I painted and used the same weight map for both groups of objects. I was trying to keep a smooth dissolve between them, paint smooth weight maps borders for the final trick. The trick was based on the use of the same weight map for both spread groups of objects. Generally this weight map was created for stones but I used it also for grass with invert map option. It gives me a nice effect when the stones fade out and the grass starts growing. The first image below shows a weight map and the second final result for stones and grass on the ground controlled by the same weight map.
Here is an example of SurfaceSpread settings. Generally I use scale and rotation randomize options for natural look distributing.
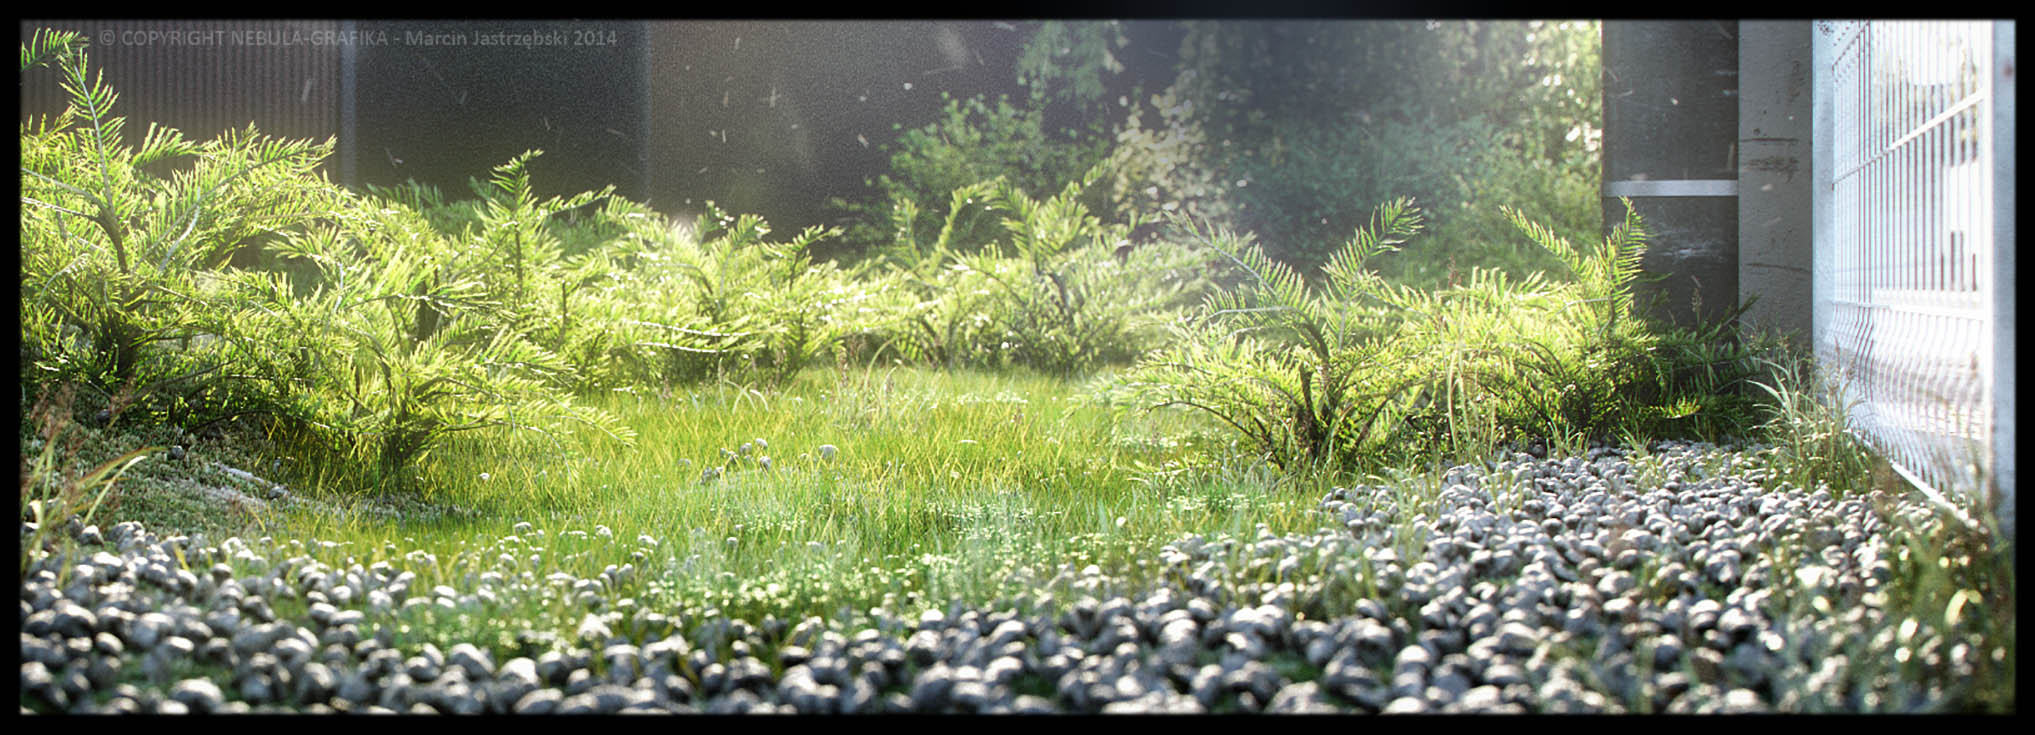
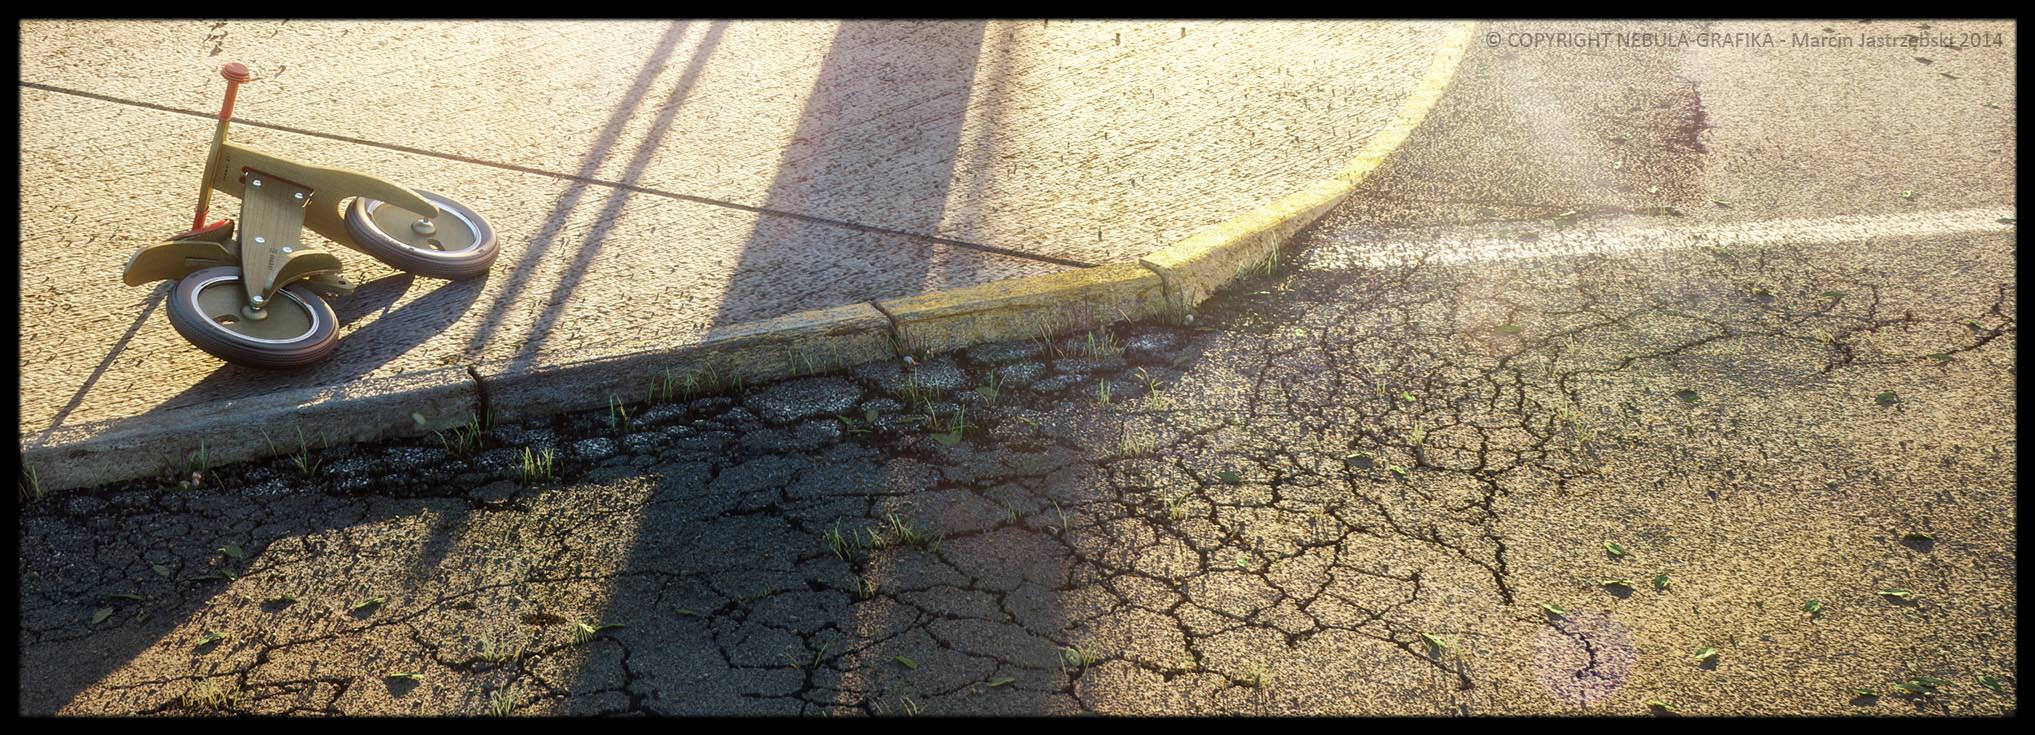
These two images are final renders from tarmac and ground areas. Spreaded objects looks very well at the final images. Please look at the second image. It’s a good idea to set light which generates long shadows. It makes small forms are very well visible.
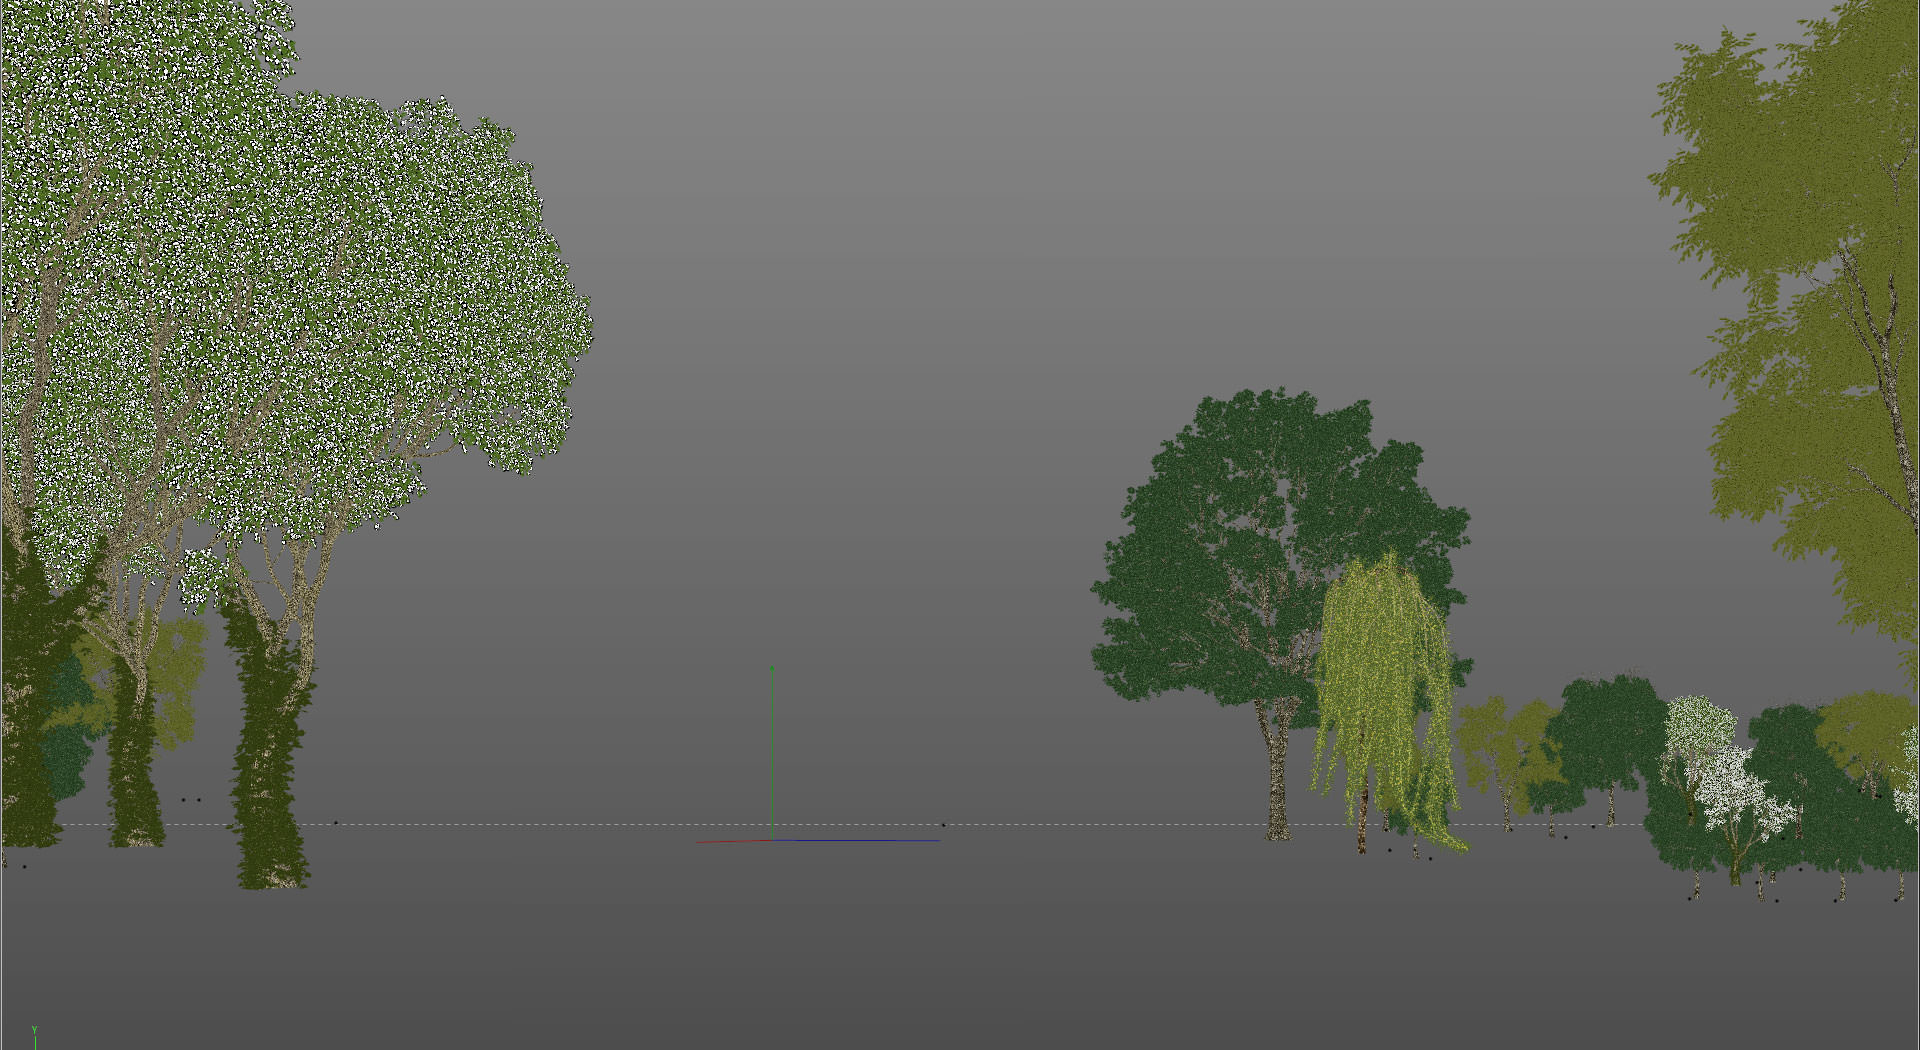
The Screenshot below shows the final camera view with all objects. As you can see there are trees and bushes by Evermotion. After I made the final composition and materials, I moved them to two separated scenes. One for the trees and one for bushes and small neighborhood houses. I created for both of them a mxs Maxwell Render file and put them into the main scene as xRef Maxwell objects. It always makes exporting time faster this way and I recommend this solution.
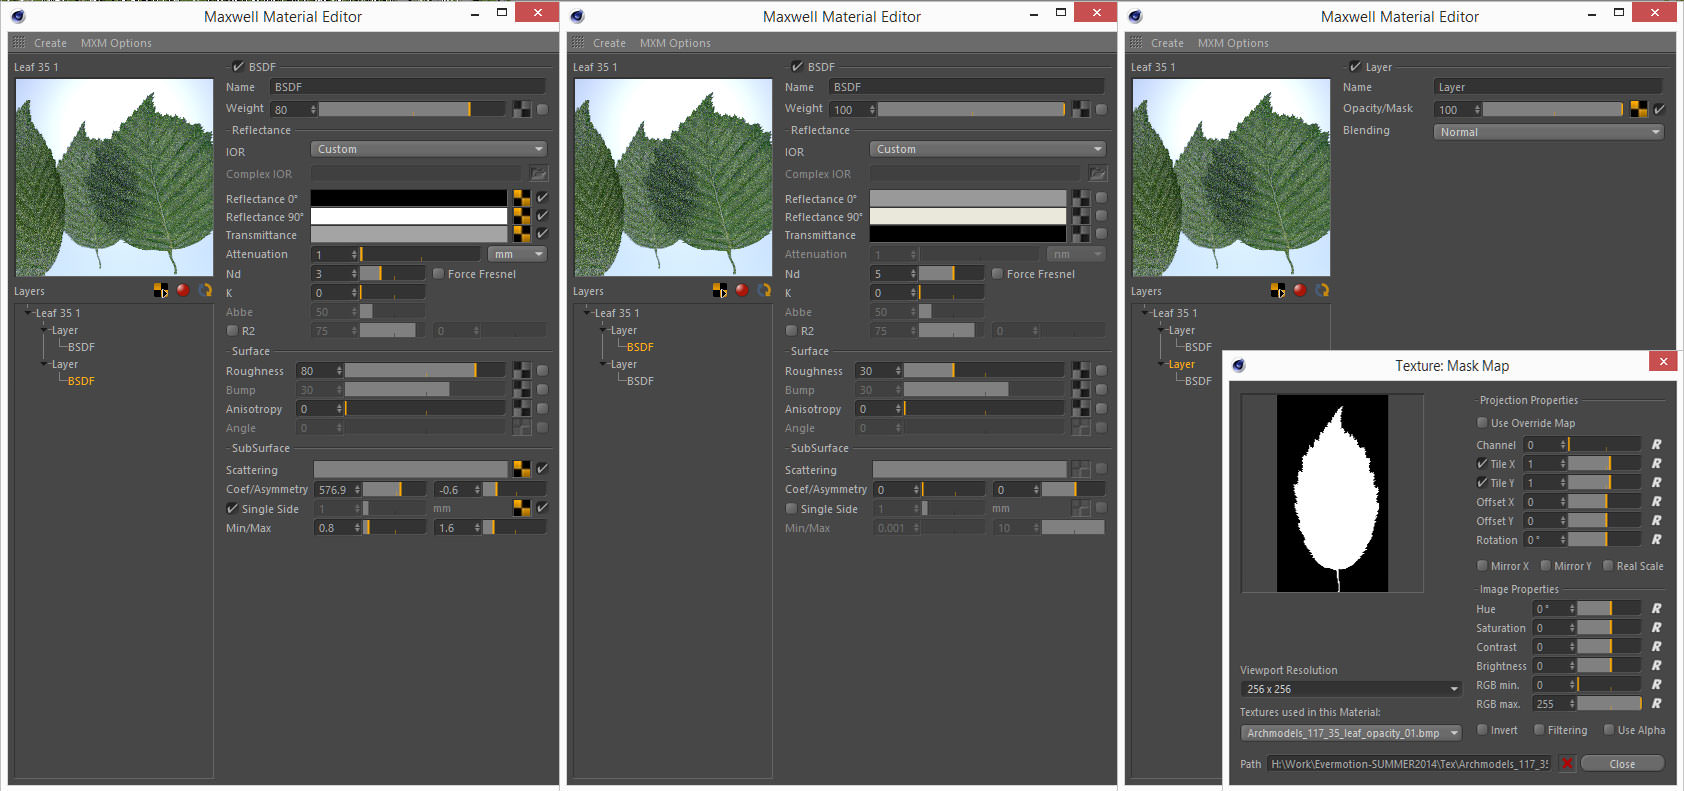
Below – xRef trees scene and sample leaf tree material.
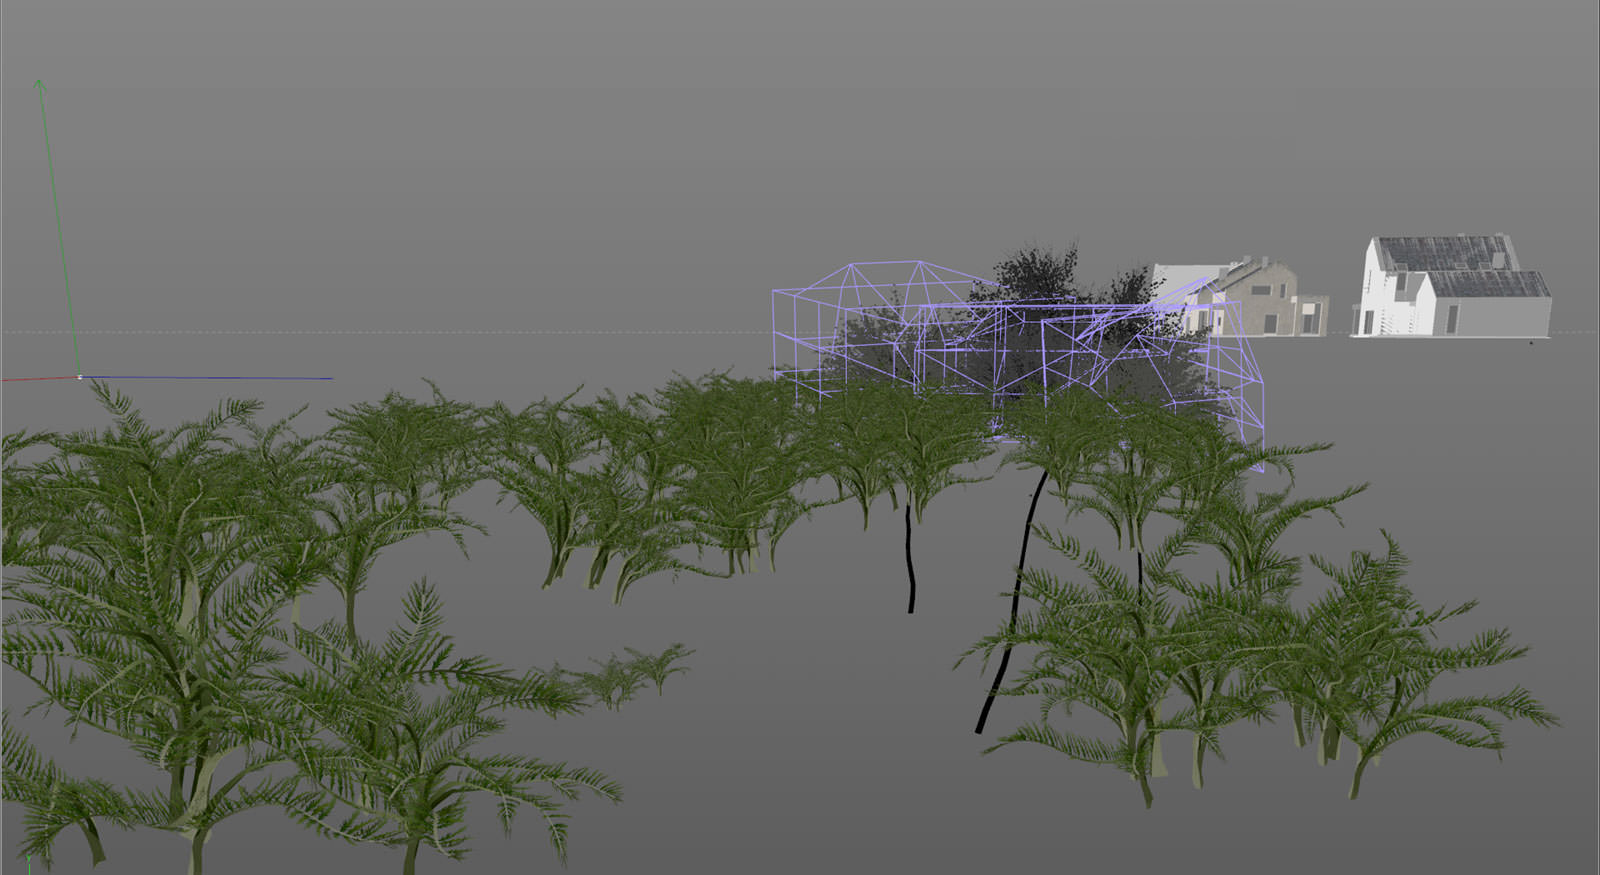
Below – xRef bushes and neighborhood scene and samples leaves bush materials. For a few bushes models I used a Cinema FFD modifier to deform their shapes as I need.
Now I would like to show examples of the ground and road materials.
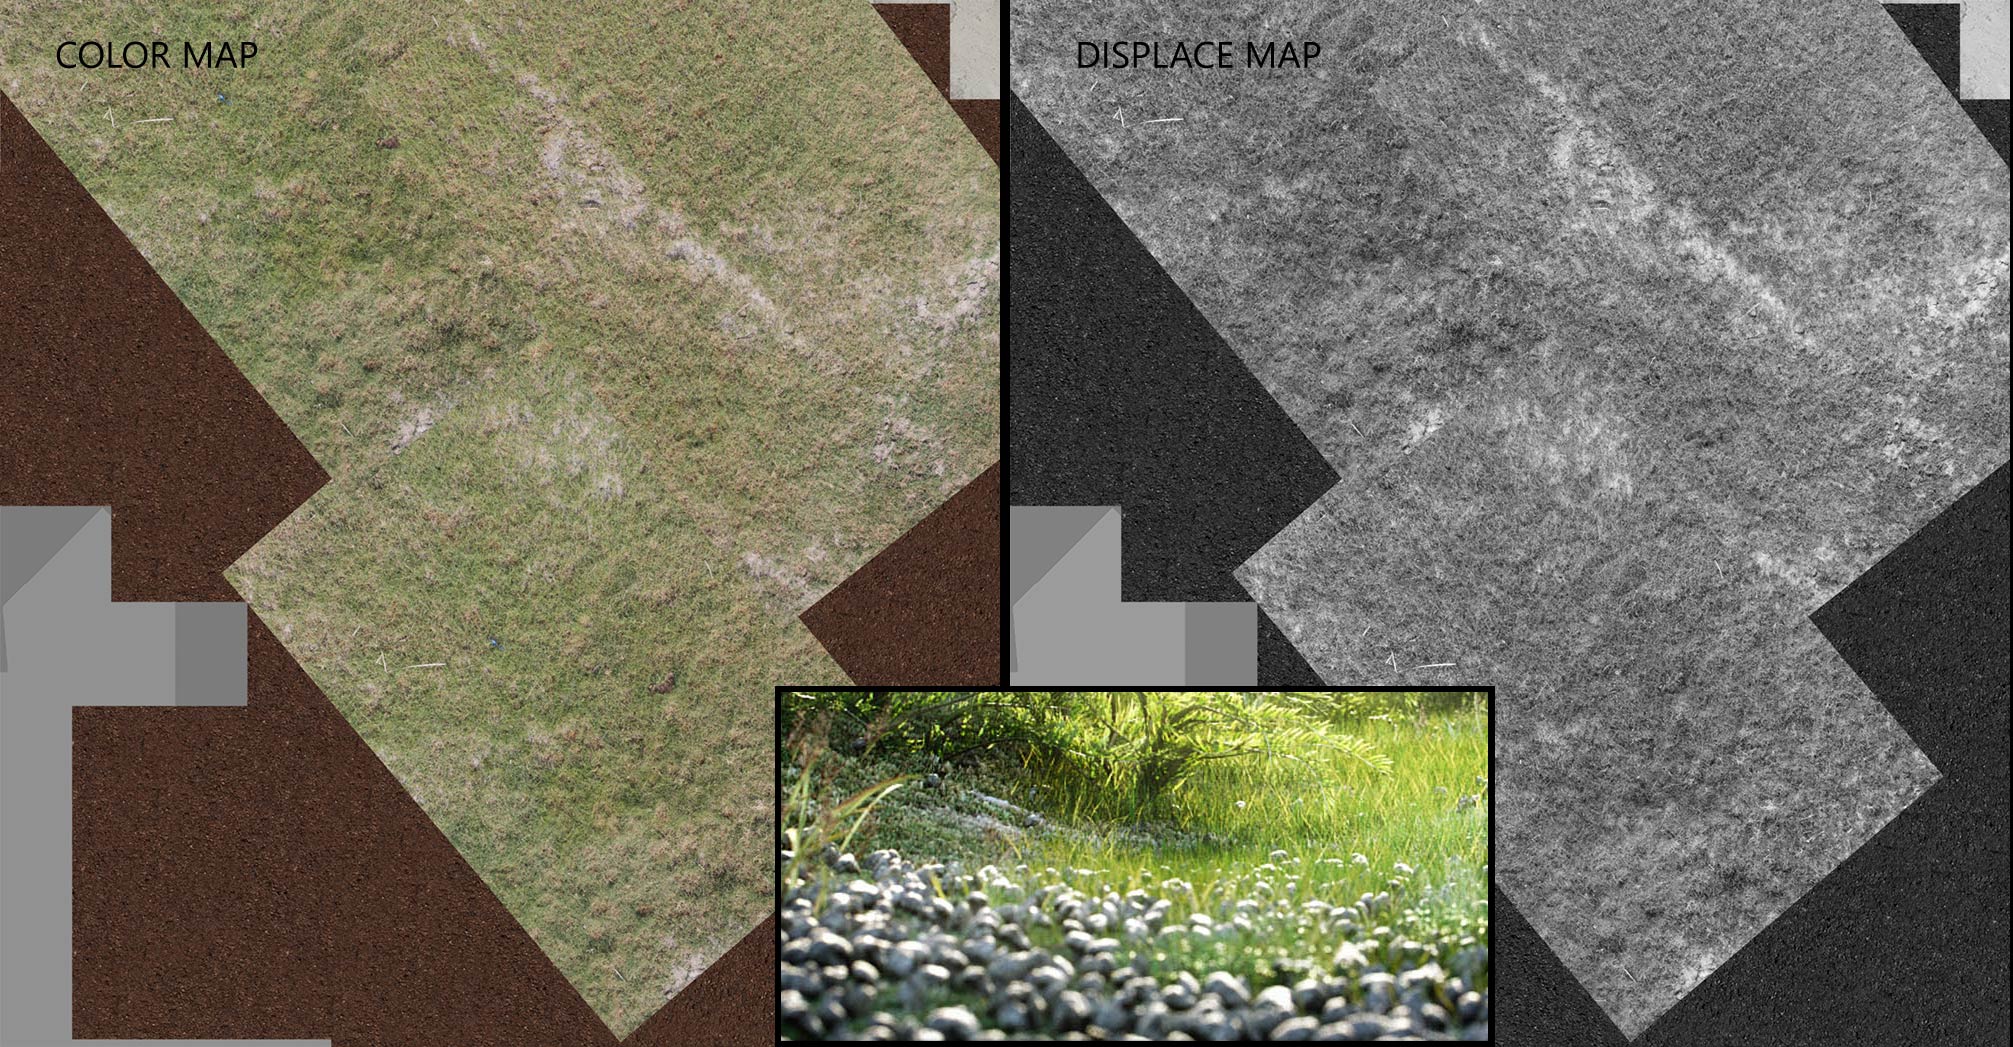
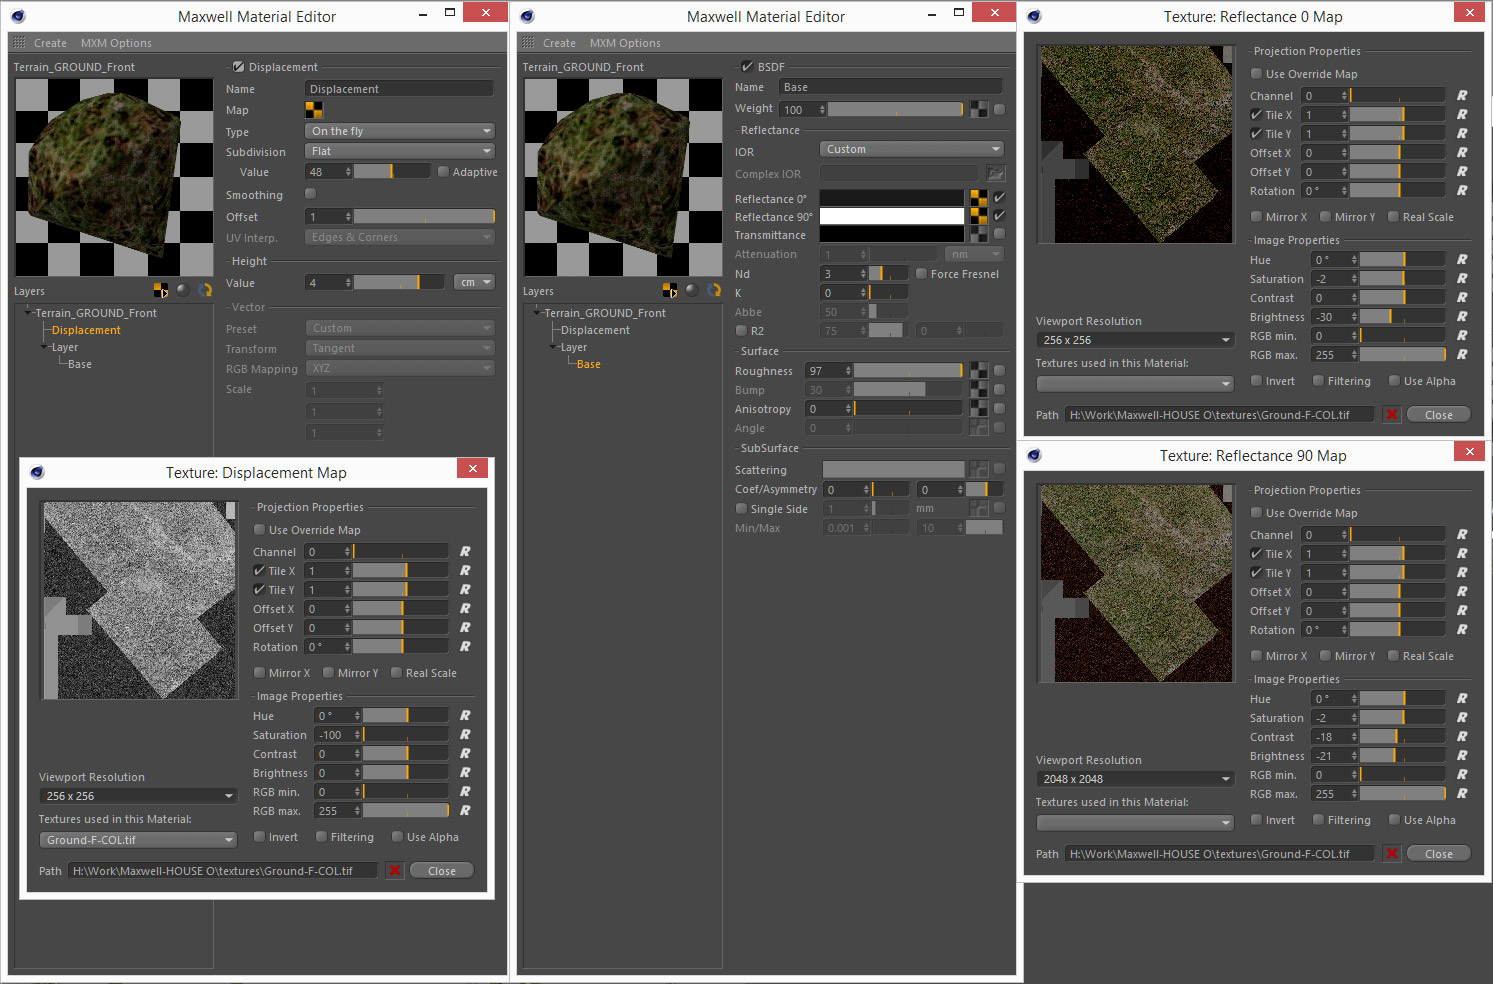
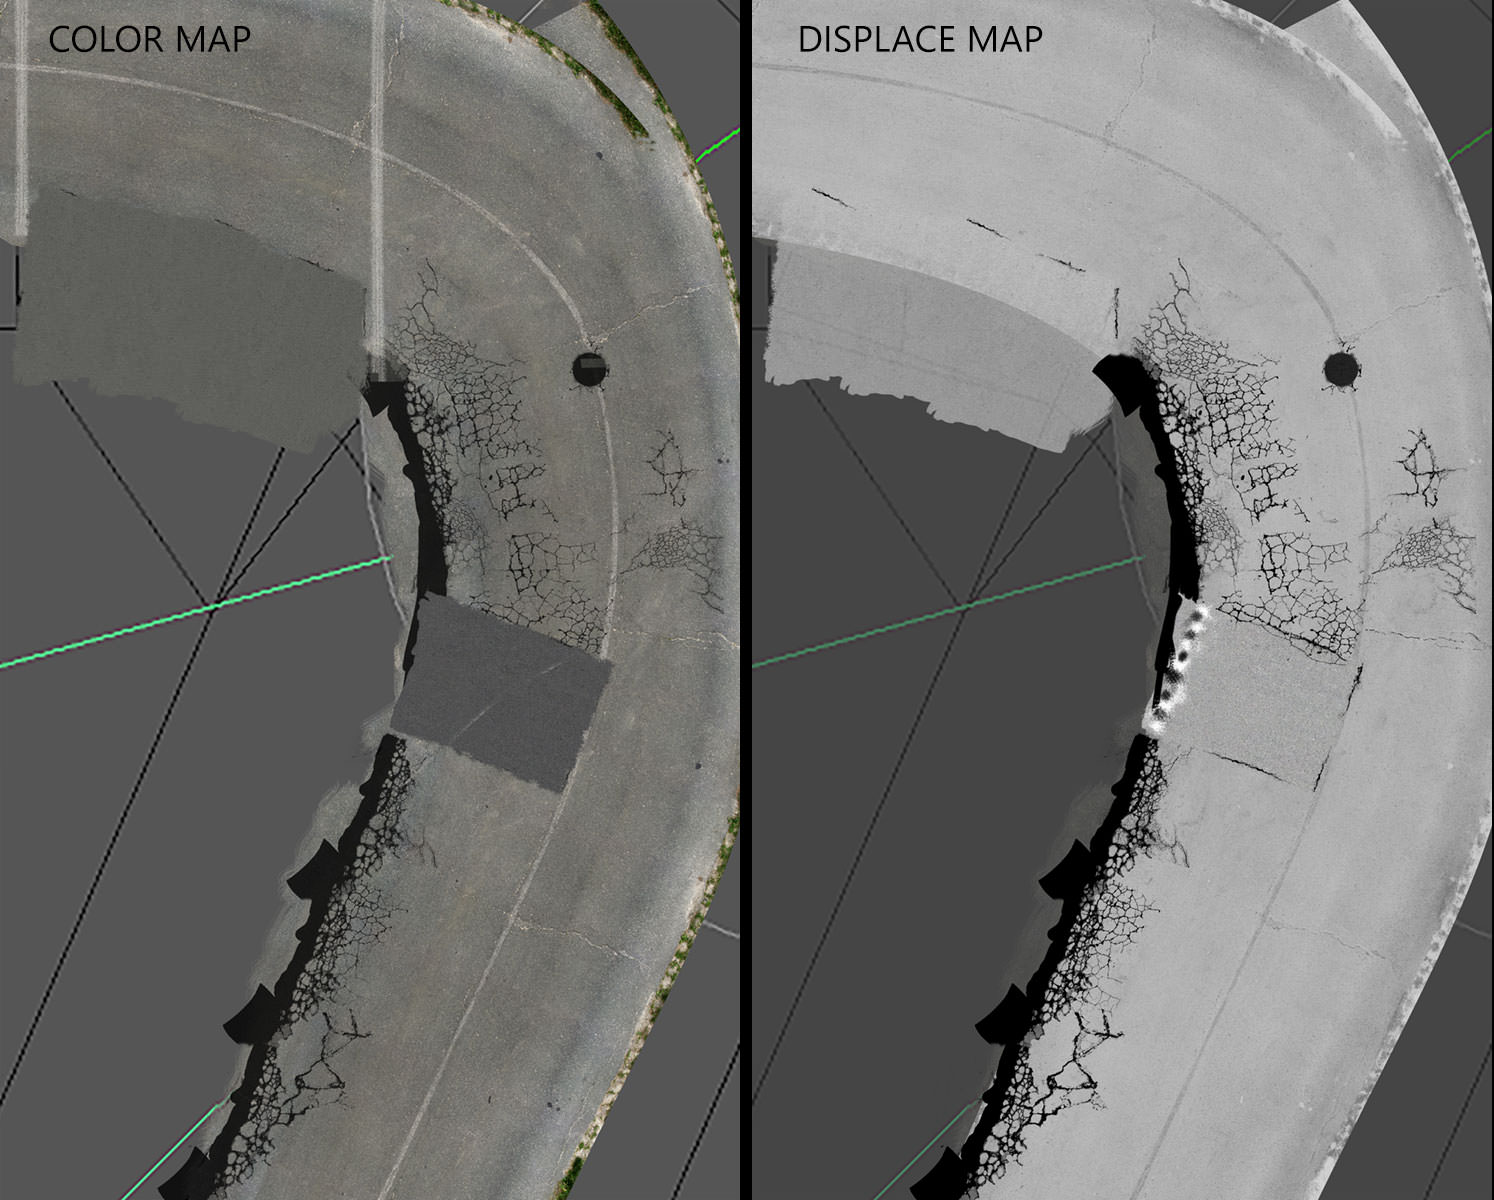
As I mentioned at the start I used a few displacement materials in my scene. I like to work with Maxwell displacements. It’s a powerful feature. It’s good advice to use 16 bit images at least for displacements or even 32-bit. The resolutions of these bitmaps should be also suitable. In this case my road bitmaps have 14 000 x 8600 pix. For the ground grass I use grass texture taken from cg textures site and with displacement it gave me a nice smooth ground look.
Please look at images below which shows used textures and created materials for them.
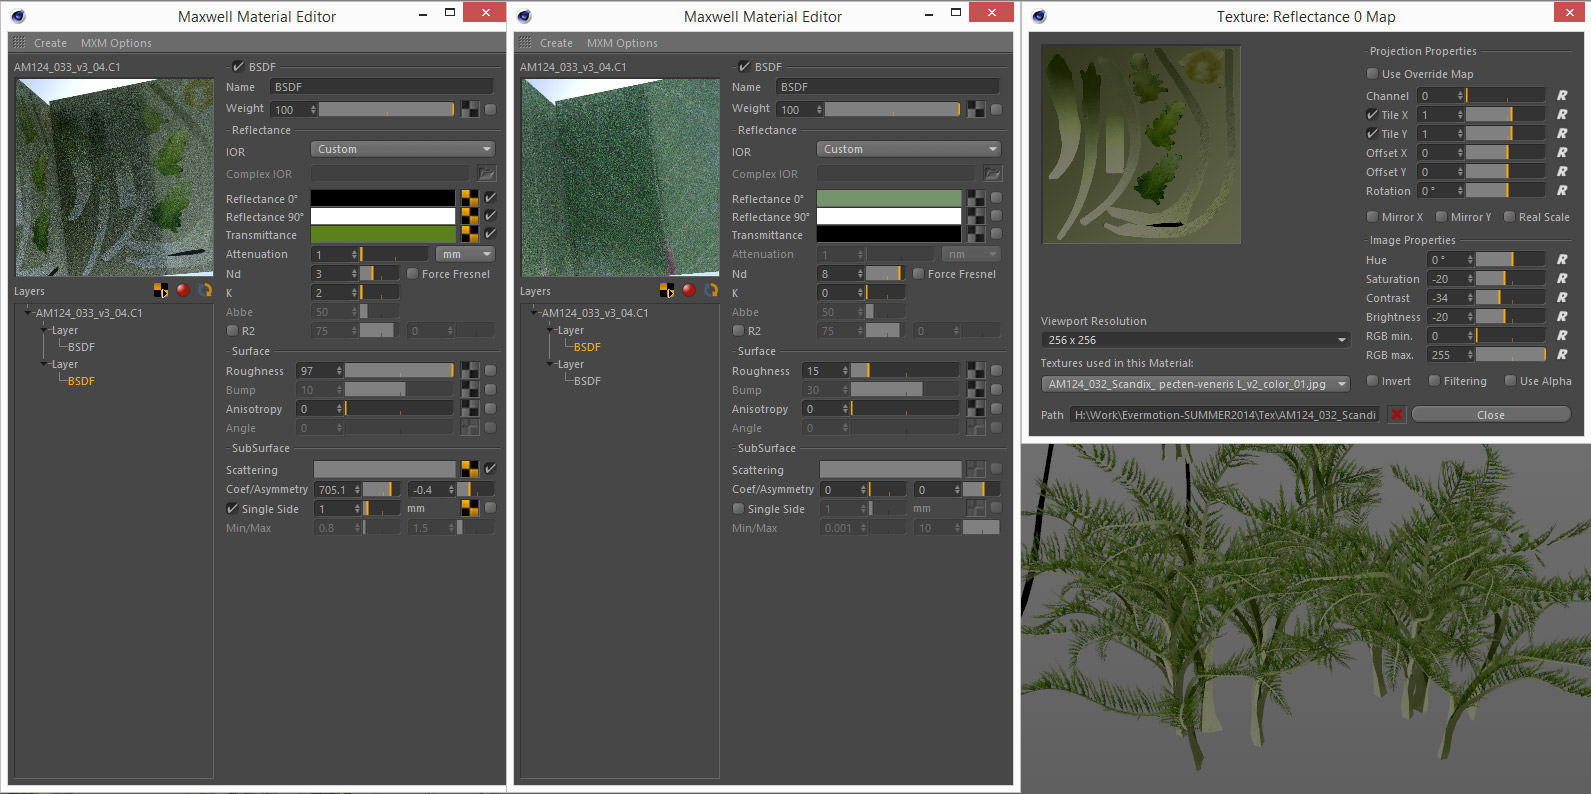
One of the most difficult materials was the facade material.
After some first tests I added a very dark base layer without textures and the second base layer with textures to add some dirt on the facades. I control how strong they are visible by changing opacity / mask value between them. Next I added two glossiness and reflection layers for realistic final look.
For this material I used textures for color and mask channel where it was necessary. These layers were very important when I created an autumn version of my scene, They were helpful to make a more wet material for facades.
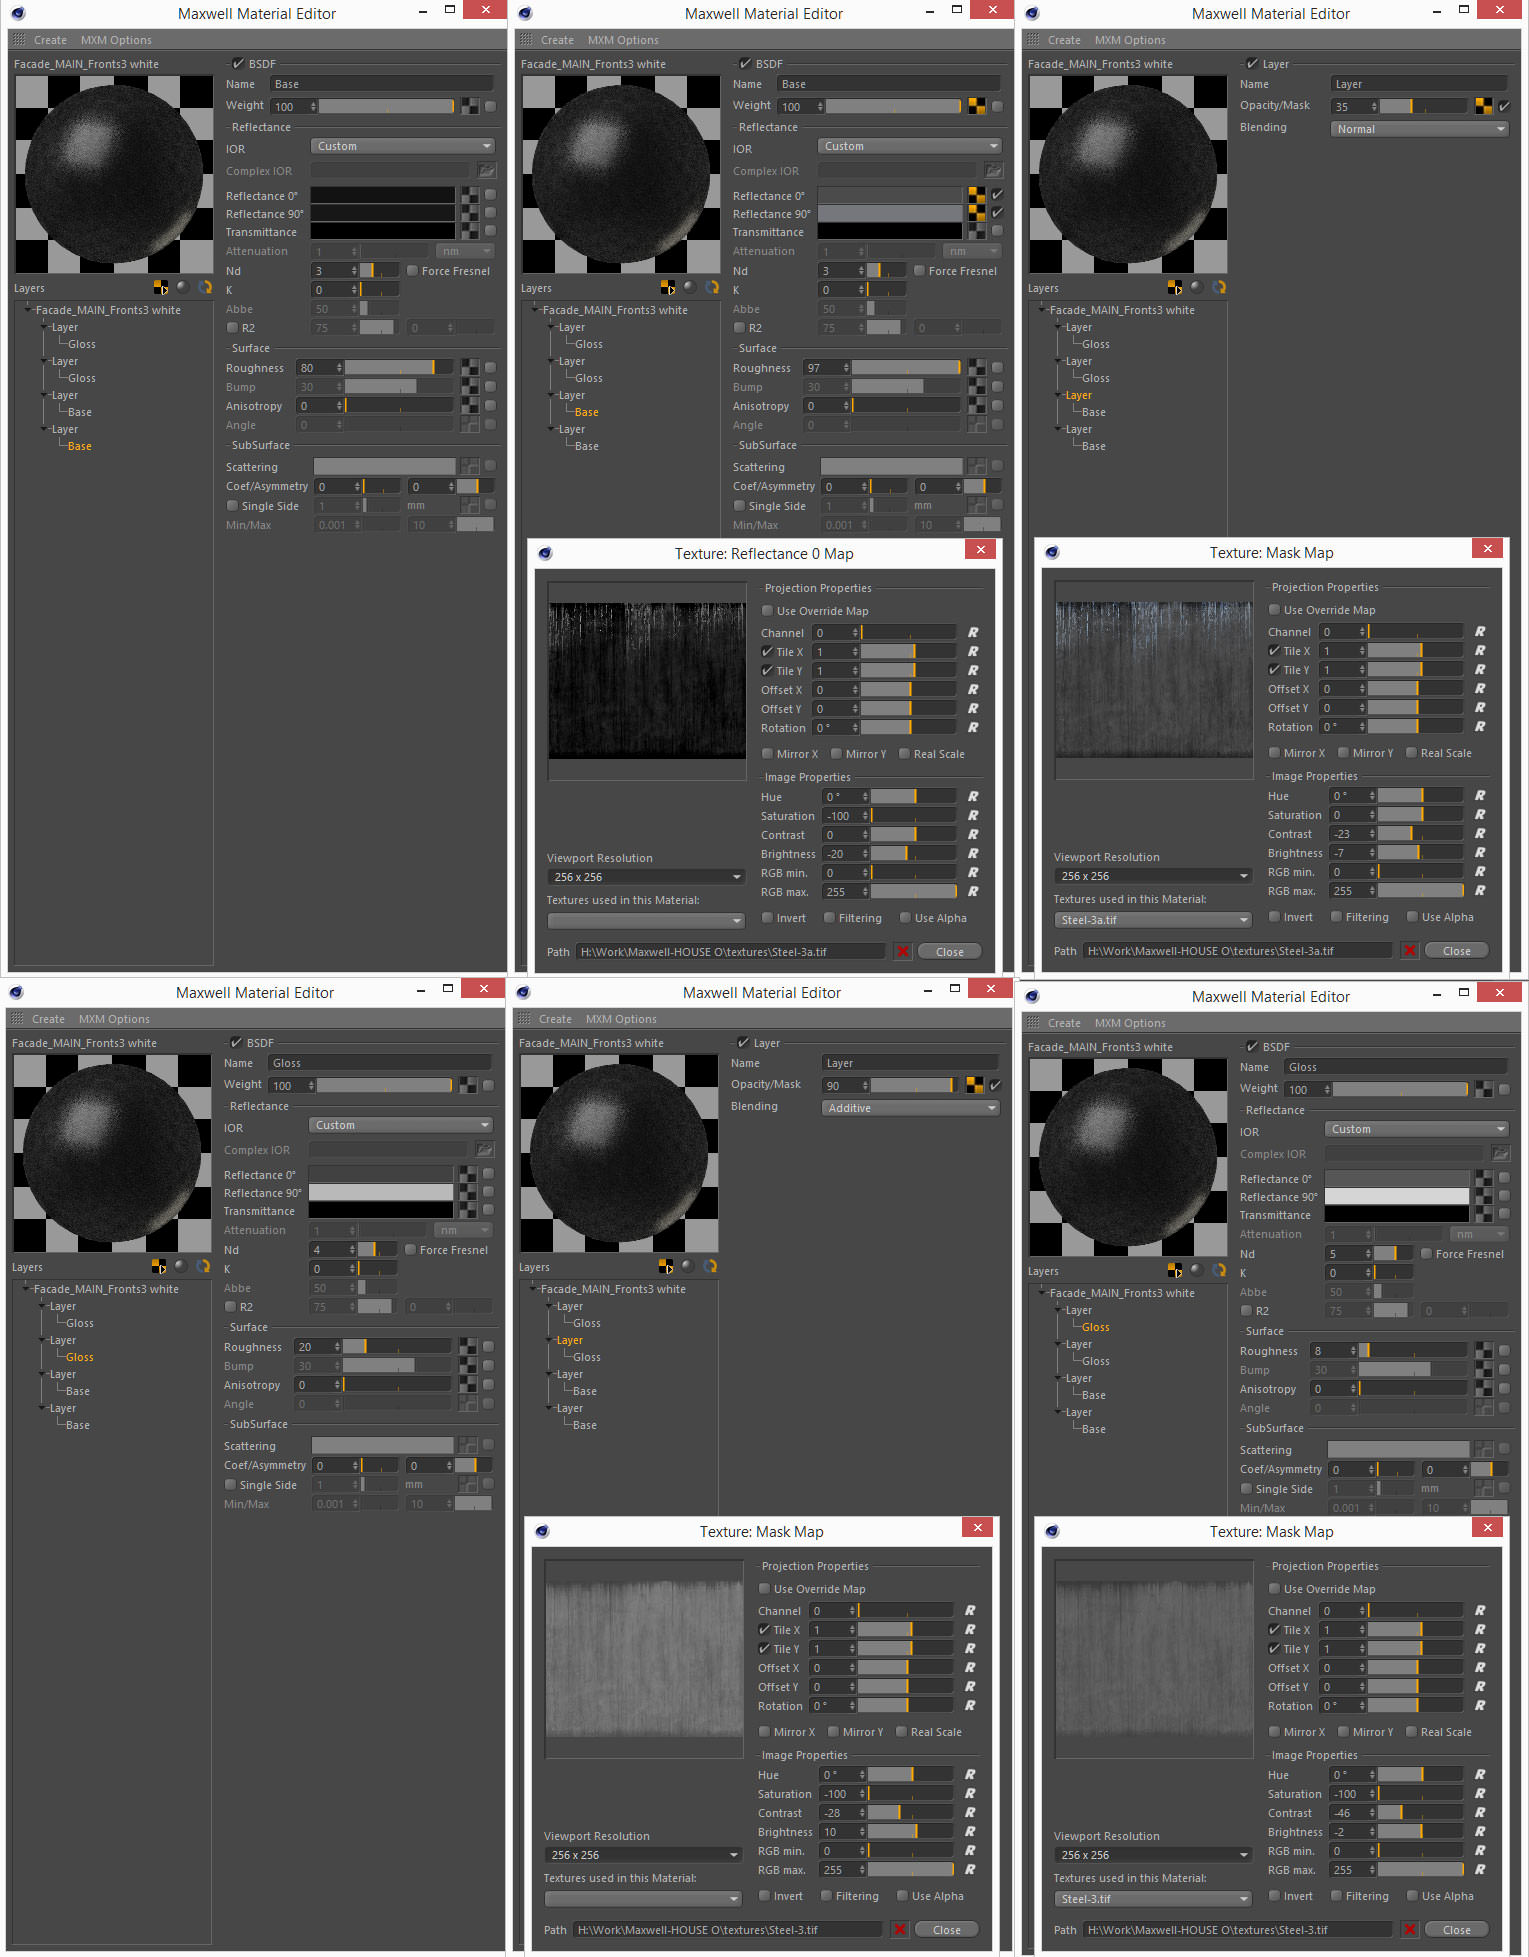

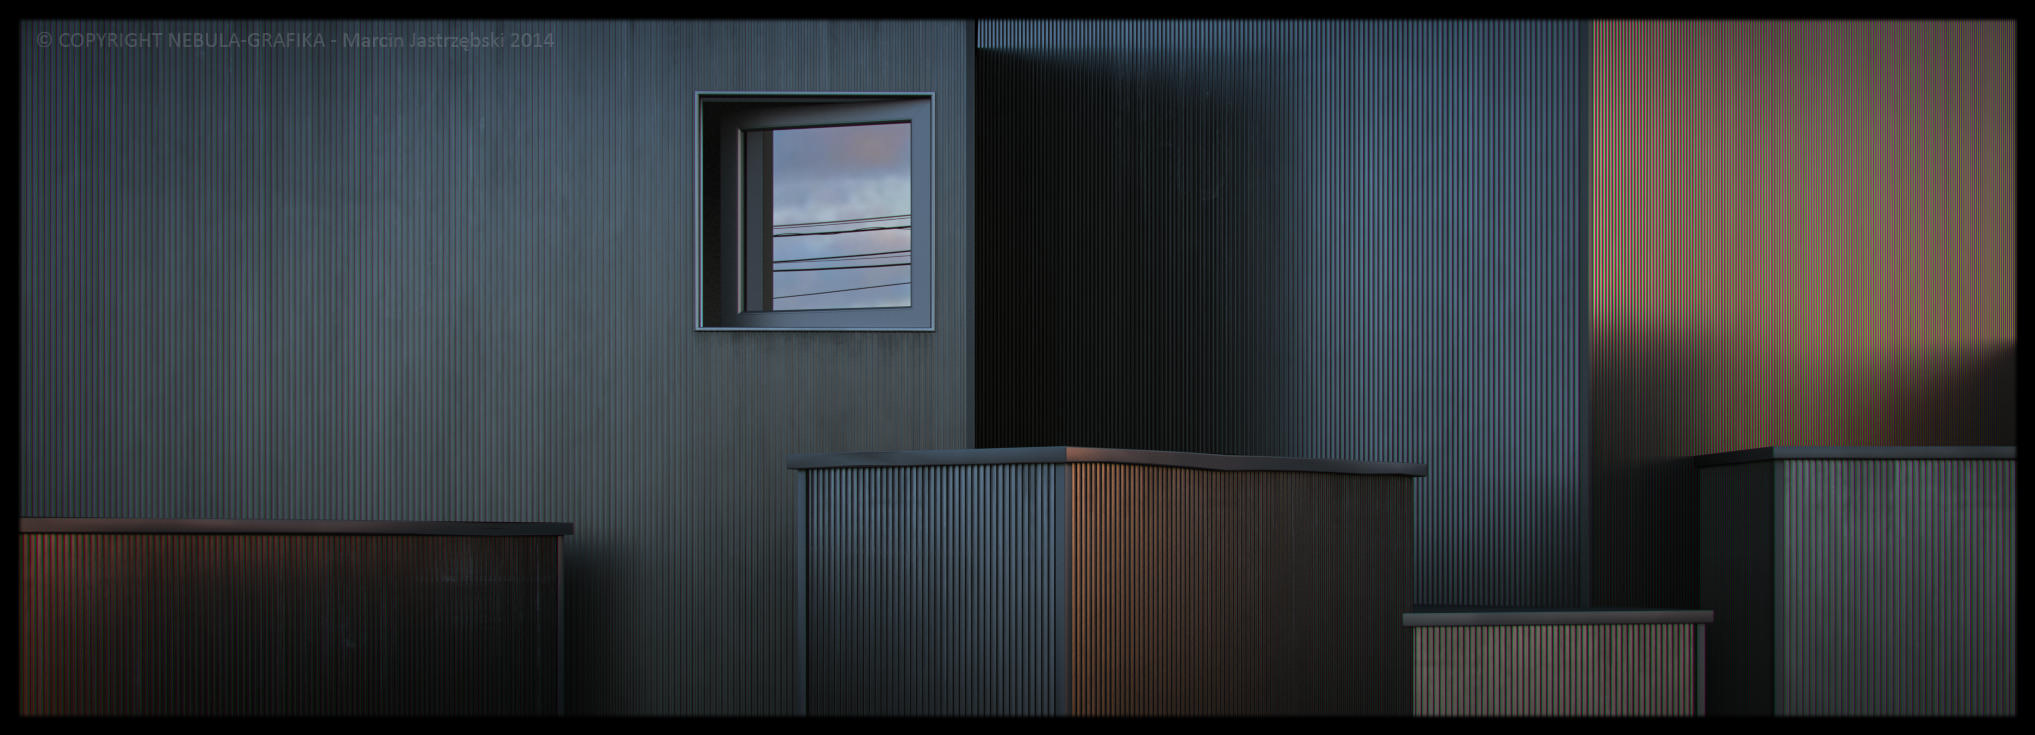
Here is a close up render to facade.
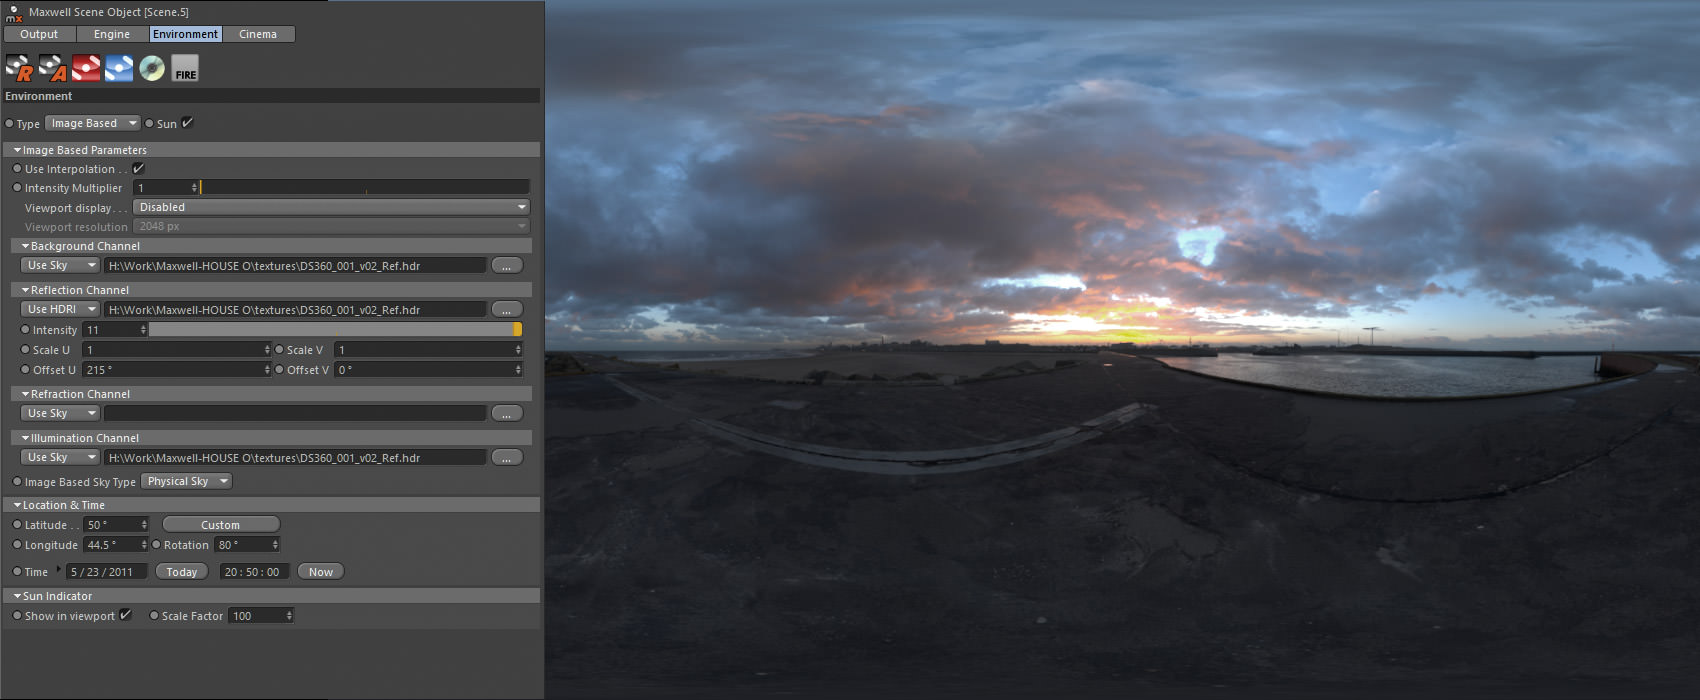
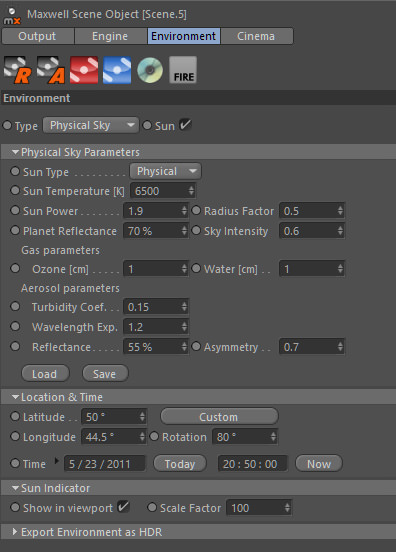
I like to play with light in Maxwell. Very often I mix the Sun and Sky Maxwell feature with Image Based HDR bitmaps. For the main light I set the Sun&Sky and I add additional HDR images for reflections and background channel. Sometimes refraction too.
I used the great Dutch Skies HDR bitmap from vol 1 package. It gives me an additional light setup channel in Maxwell Multilight mixer except the standard Sun and Sky.
After rendering, I started the post production stage. You should first know that I can’t really reconstruct very thoroughly the entire post production process because I like to improvise as I go towards the final image.
Very often when I work on layers in Photoshop I export my image to Lightroom or Red Giant Photo Looks and add some effects and then come back to continue with the Photoshop editing. Sometimes when I feel tired or feel that I miss my idea for a final look, I take a rest and come back to work next day.
I think it’s good idea to reach a point and say “enough” for the post production process which is really endless in nature and can be taken hundreds of ways towards a final result. In most cases I prepare a little bit less contrasty images for effective editing.
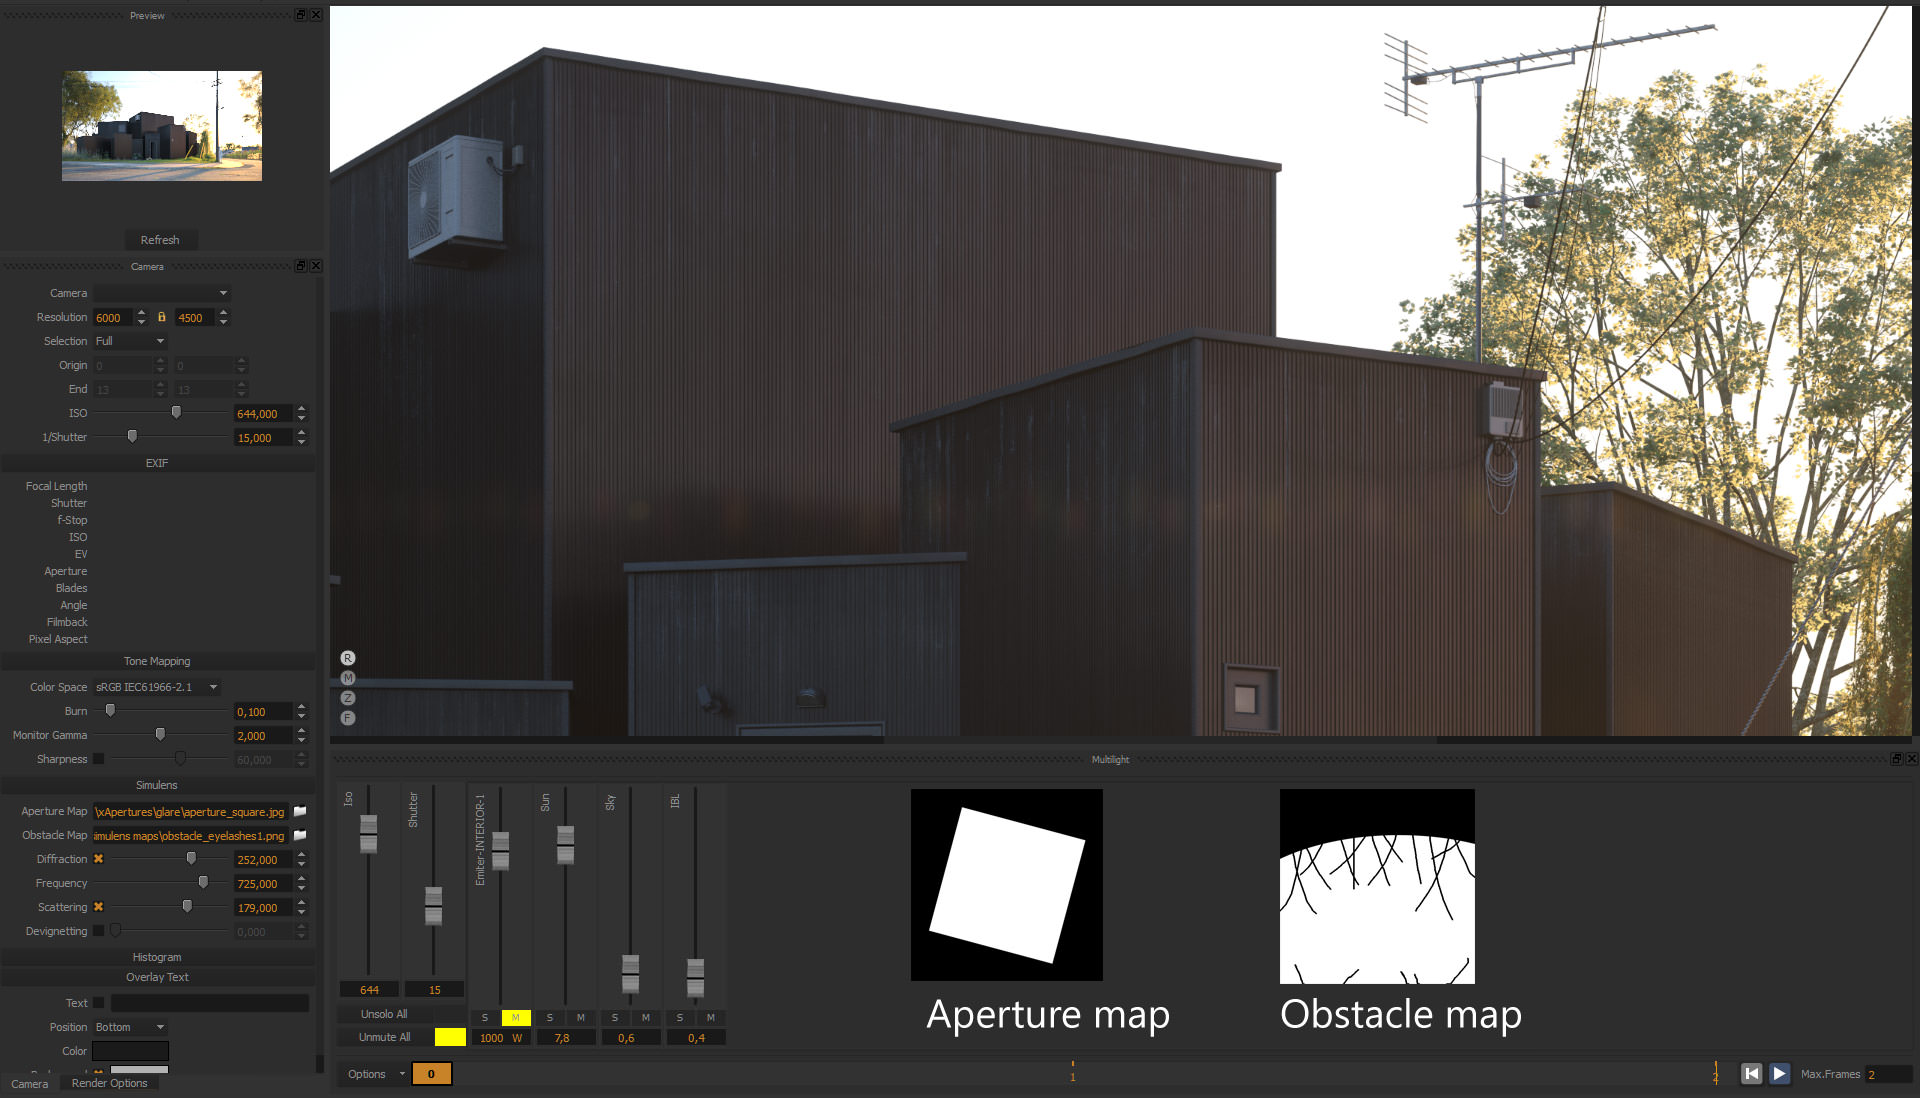
As for my rendering settings, I used an aperture and obstacle maps for interesting diffraction and bloom effects. The final image was rendered at 6000px x 4500px to achieve good quality for details. Low burn value gave me a diffraction flare visible.
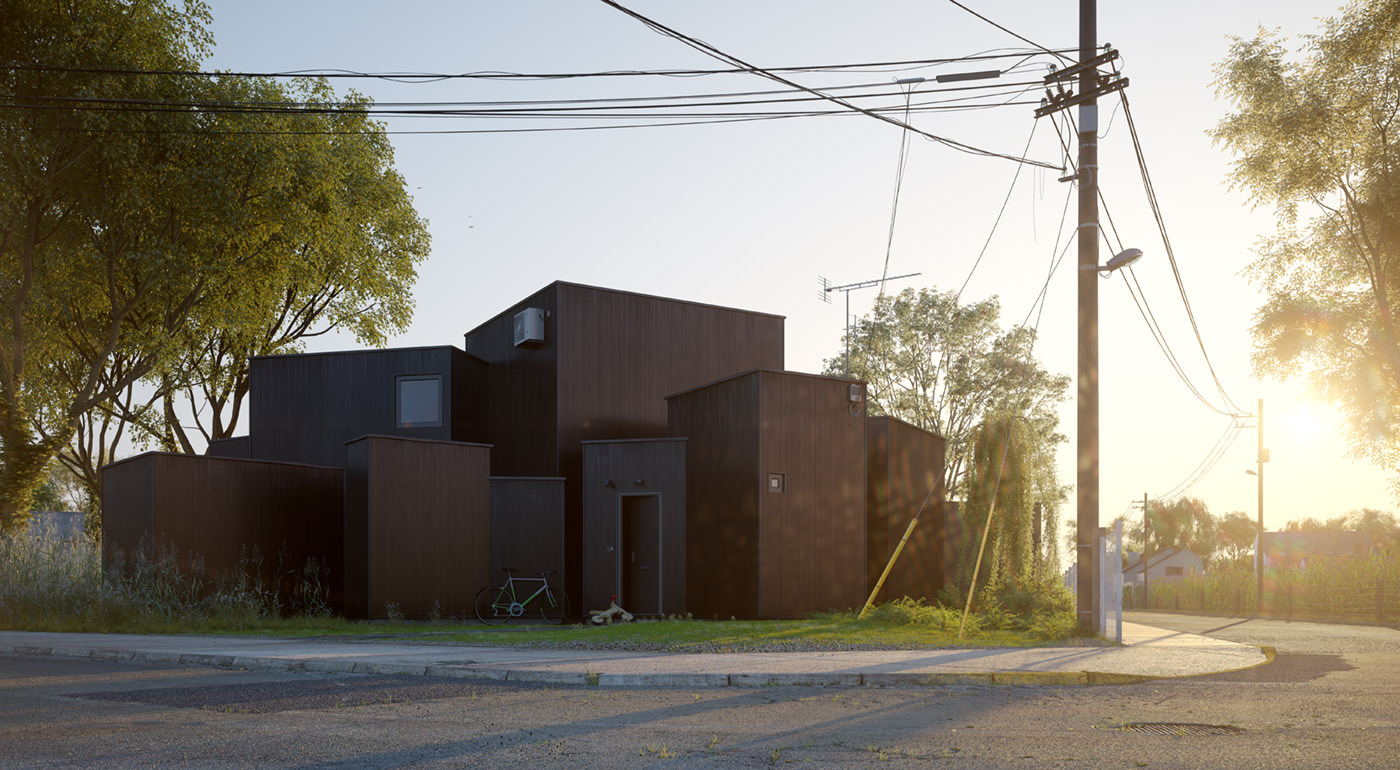
The raw render.
Next, I was making a few attempts to find an interesting mood.
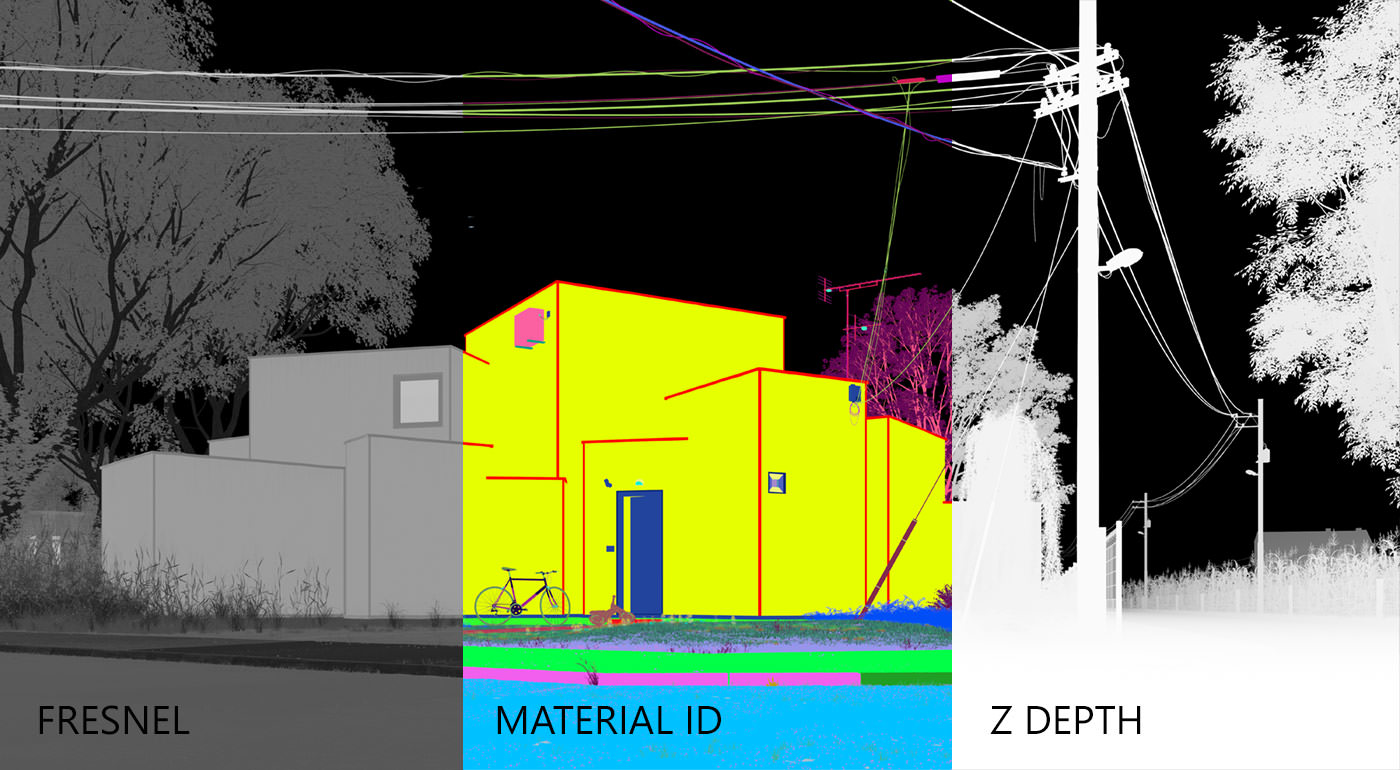
I rendered three additional channels : Material ID, Z-Depth and Fresnel for use in post-production.
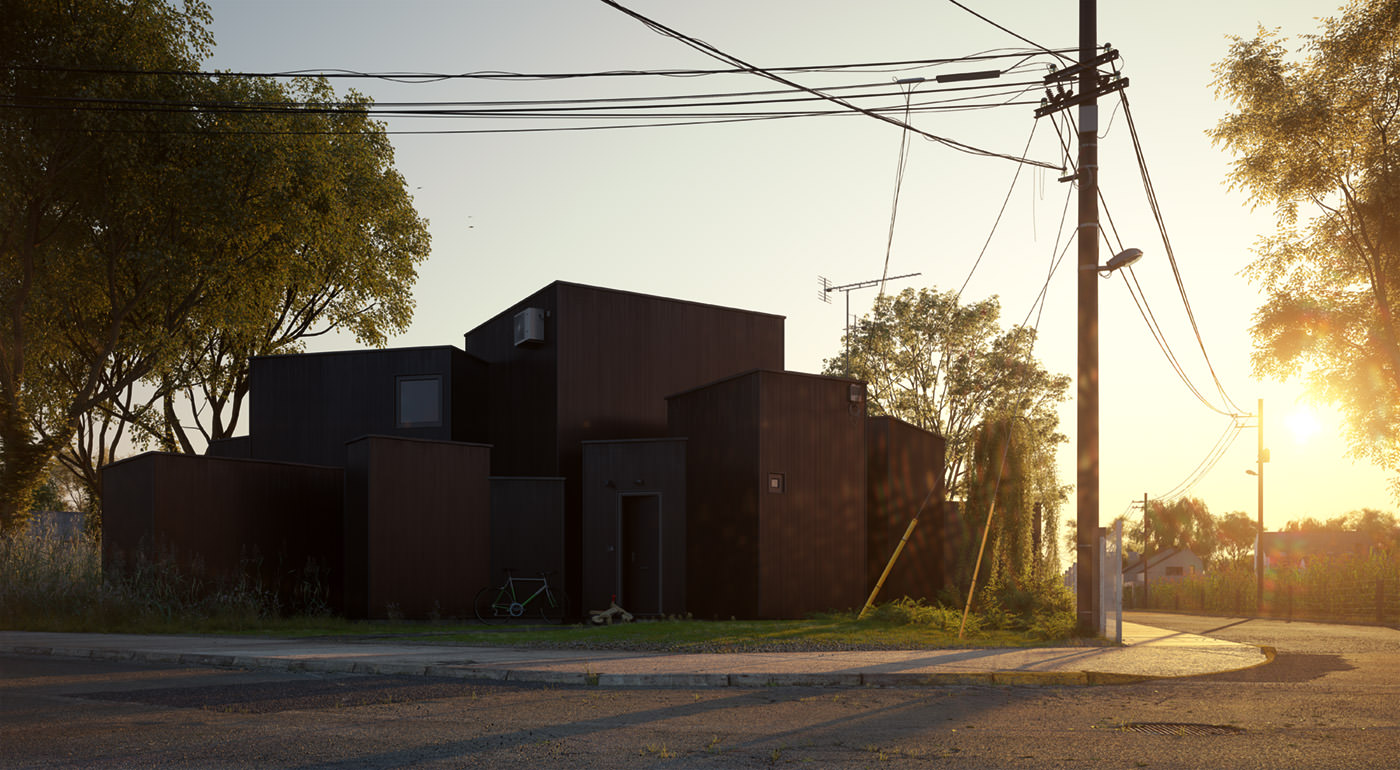
Here is an almost ready render with the final mood as I like and needed for my day version view.
On the right you can see my Photoshop layers. A few of them have a different types of blending mode like multiply, overlay or soft light for example. Generally, I improve some parts of the whole image like the building facades, tree crowns or tarmac.

And the final render with some last Lightroom touch-ups.

That’s all for the day scene.
It was pleasure to get opportunity to share my making-of on Ronen’s great website. If you have any questions please feel free to ask!
Marcin Jastrzebski


the detail is amazing!! and the computer you used has to be amazing, right? could you tell us the specifications of your computer to manage such an amazing scene? thanks you!
Stunning work.. Truly amazing. Hyper realistic in my opinion. +1 on your system spec.
very pretty.that render times has the image .?
Thank you for comments. I work on PC Hexa Core machine with 32Gb RAM. For lan rendering I use few PCs i7 from 2.6 to 3.5 Ghz. I think these aren’t a cosmic machines 🙂 Maxwell “eats” huge scenes very well. Usually I render final image up to three PCs. Render time is about a dozen or so hours. Day light House O image I rendered in 6000 px wide resolution.
That is great work. Love how you used particles for those subtle effects 🙂
Hi, great work (really impressive)!!
How could you manage to work with a such amount of polygons in cinema 4d, the viewport that is soo slow usually, that basically is forcing me to move to 3dstudio max..(software that I don’t love at all!)?
Am I the only one that find cinema 4d so buggy??
Thank you! For me Cinema is a one of the most stable software. For me viewport is fast even when I work with huge scenes. I can’t help you to make right decision. You should test the software and make a good choice for you.
Hi man, it is amazing work. Please, tell me how much time did you spend to do all the process, since a idea until the final render.
Thanks
Hi! Thank you. I spent about three months on this project. Of course it wasn’t a continuous work during this time. I think that I was working full two months after work time. Maybe not everyday but they were intensive two months 🙂
Hi Marcin, congratulations for the post. This making off truly lets you view all processes you have to perform to achieve these fantastic infographics…. building the house it’s a different story altogether 🙂