


Making of House in Giannitsa
Vasilis Koutlis from studio xDream3D, recently shared on the forums their work on the Giannitsa House Interiors which I really liked – specifically, the one shown up above for the composition, material work and lighting. I asked Vasilis to share with us some insight about the process of making this scene and this making of was born. Enjoy!

Author: Vasilis Koutlis
xDream3D is a team of experienced designers with a high level of knowledge in 3d Visualization & Graphic design. The team’s philosophy is detailed design and all projects are approached by an artistic perspective. Vasilis Koutlis was born in Athens in 1979. He studied furniture design. He began his occupation with 3d art in 2002, but then it was simply a hobby. In 2007 the idea of xDream3D was born and he started collaborating with local and foreign clients.
Hi guys!
First of all, I would like to thank Ronen for having us in his website and for paying attention to our work. I have to admit that after our last years distinction and the awards I was given by the blog for my personal project The Cube House, many new clients approached us and thus we gladly stepped up to the plate when asked to write about the making of our last project.
Here are the images we made for it…


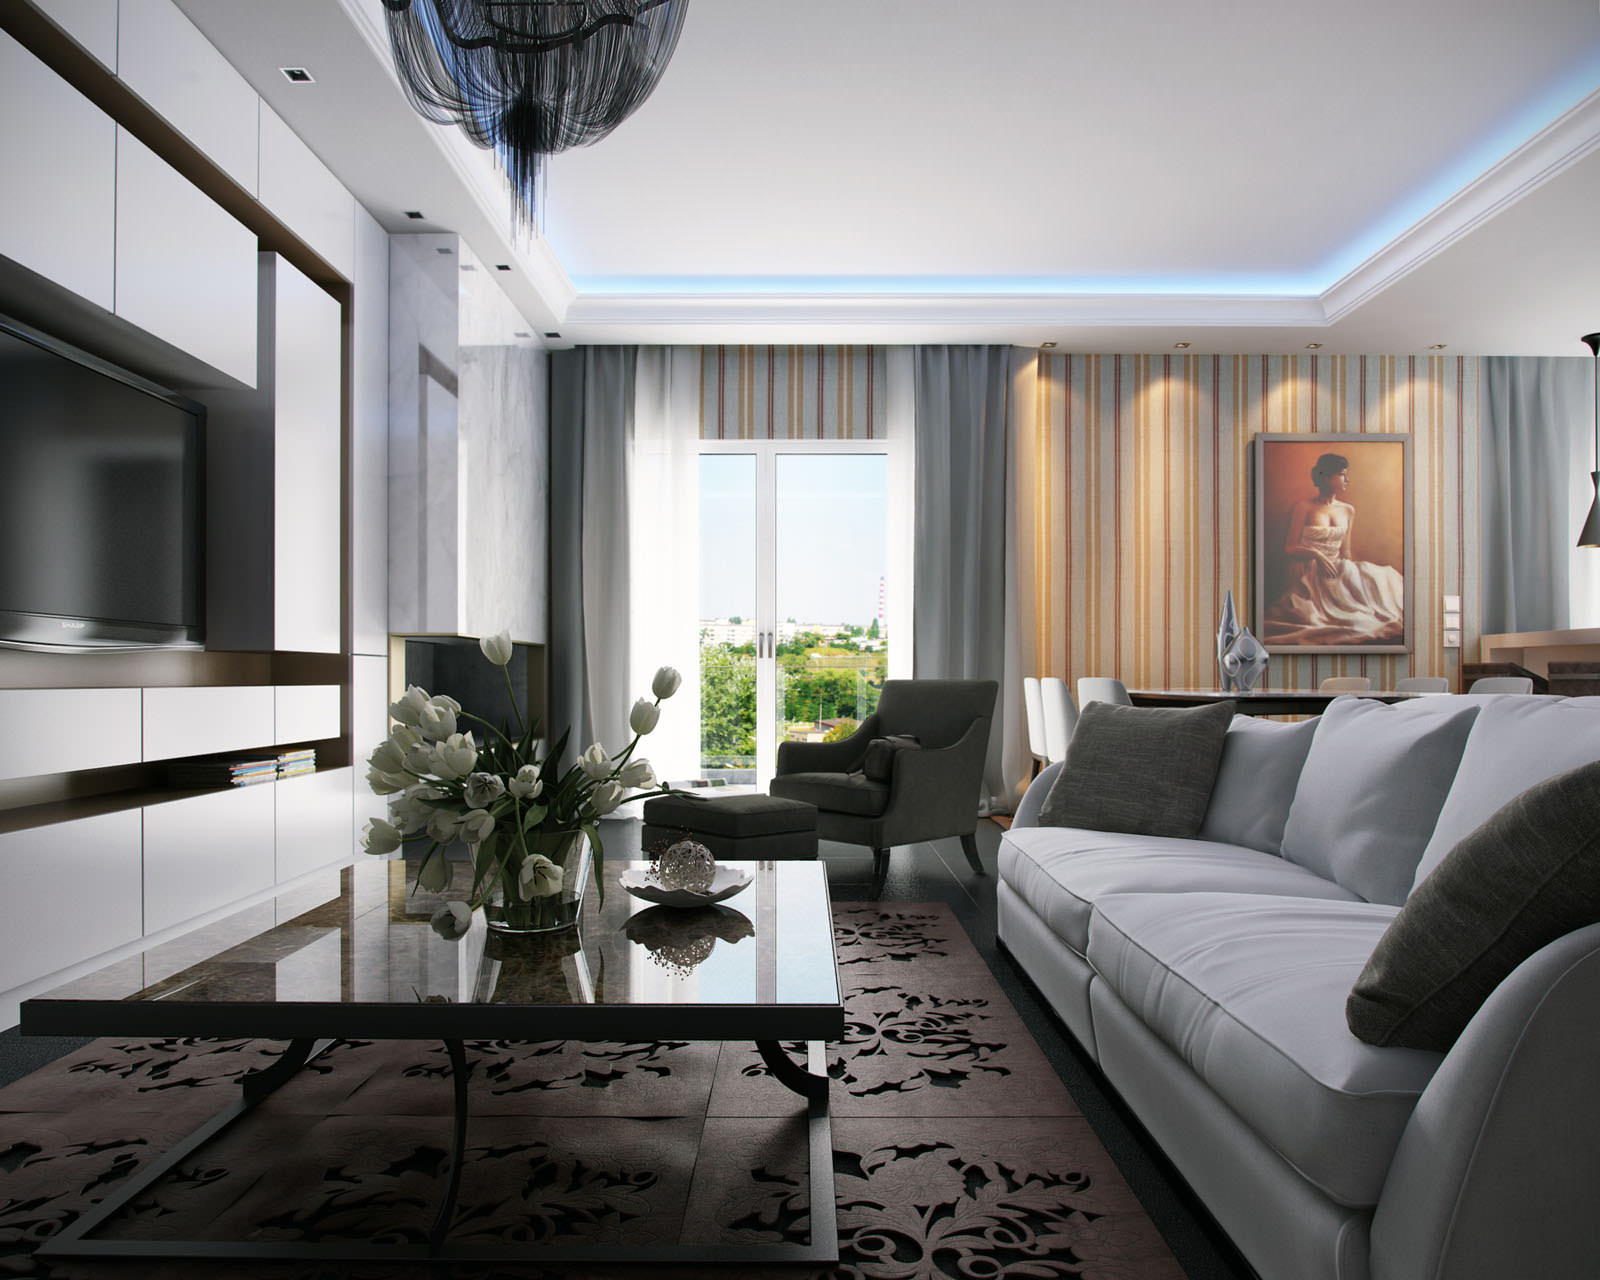
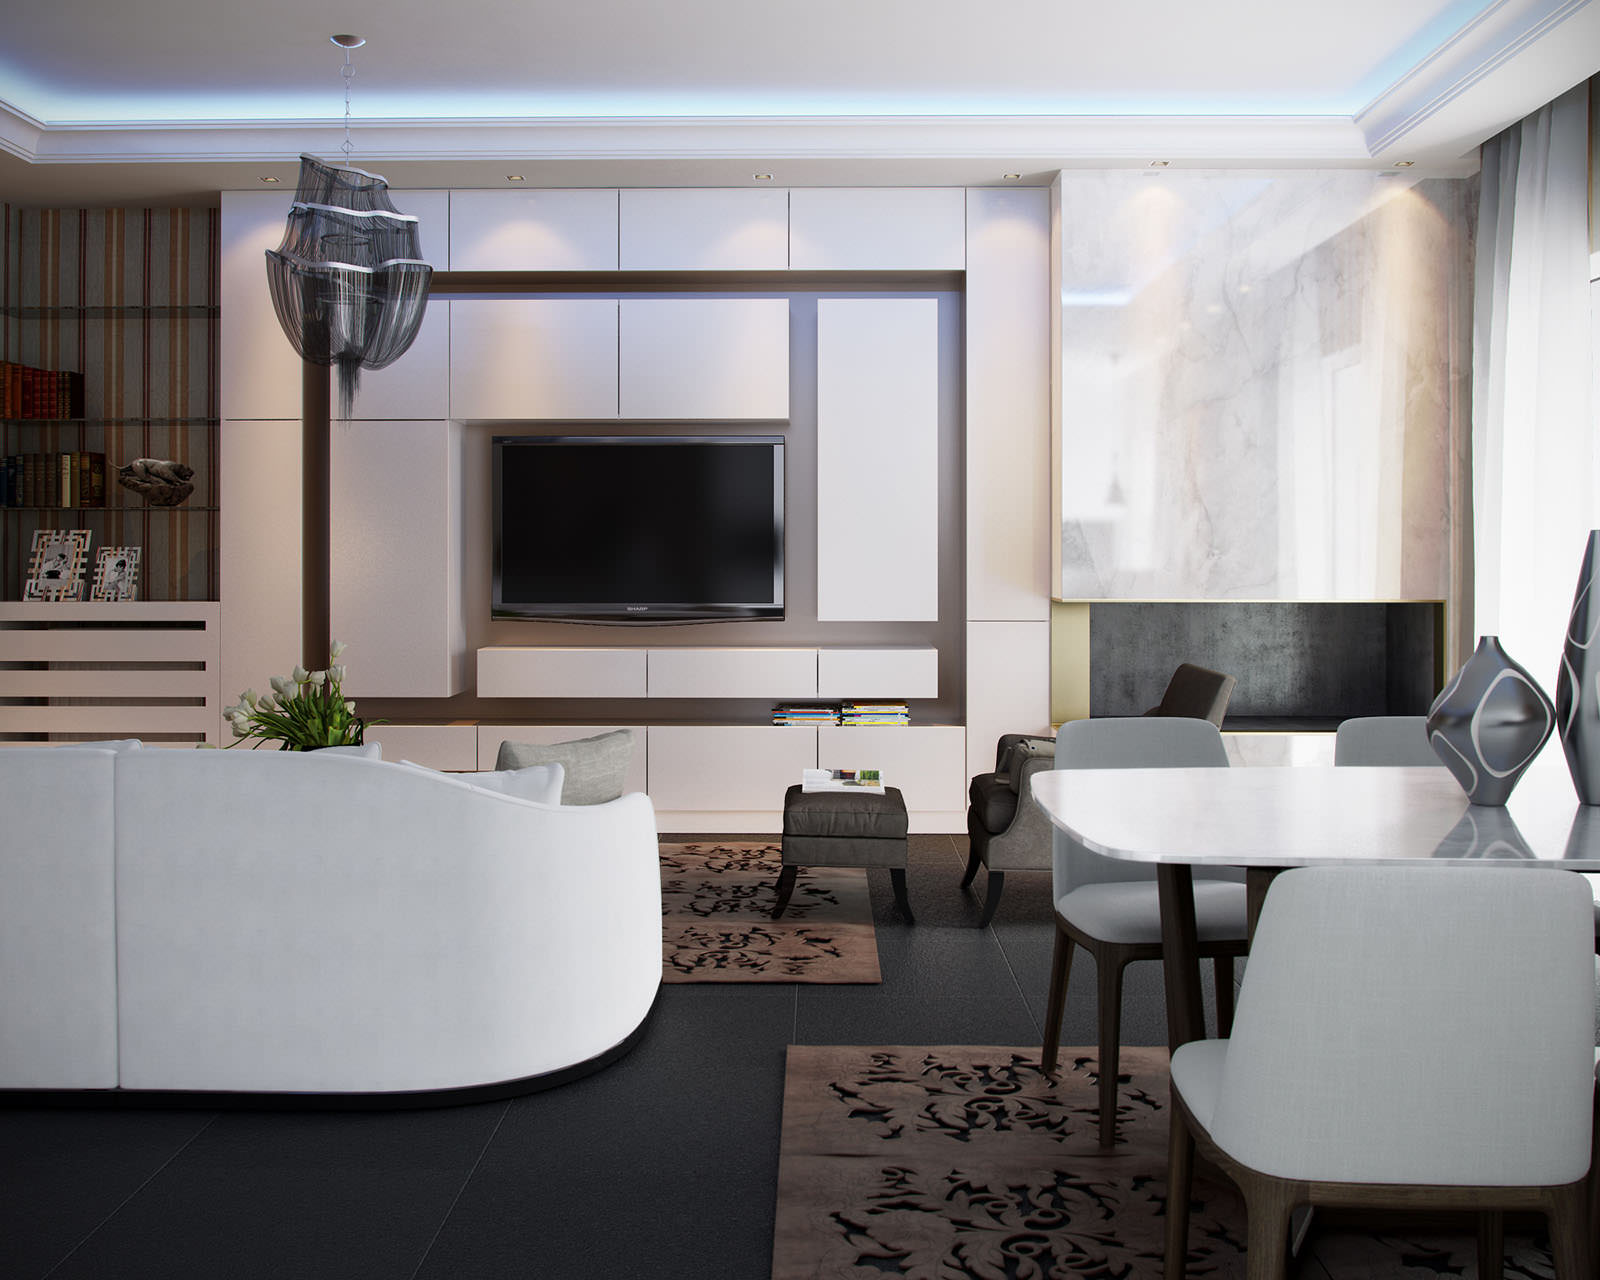
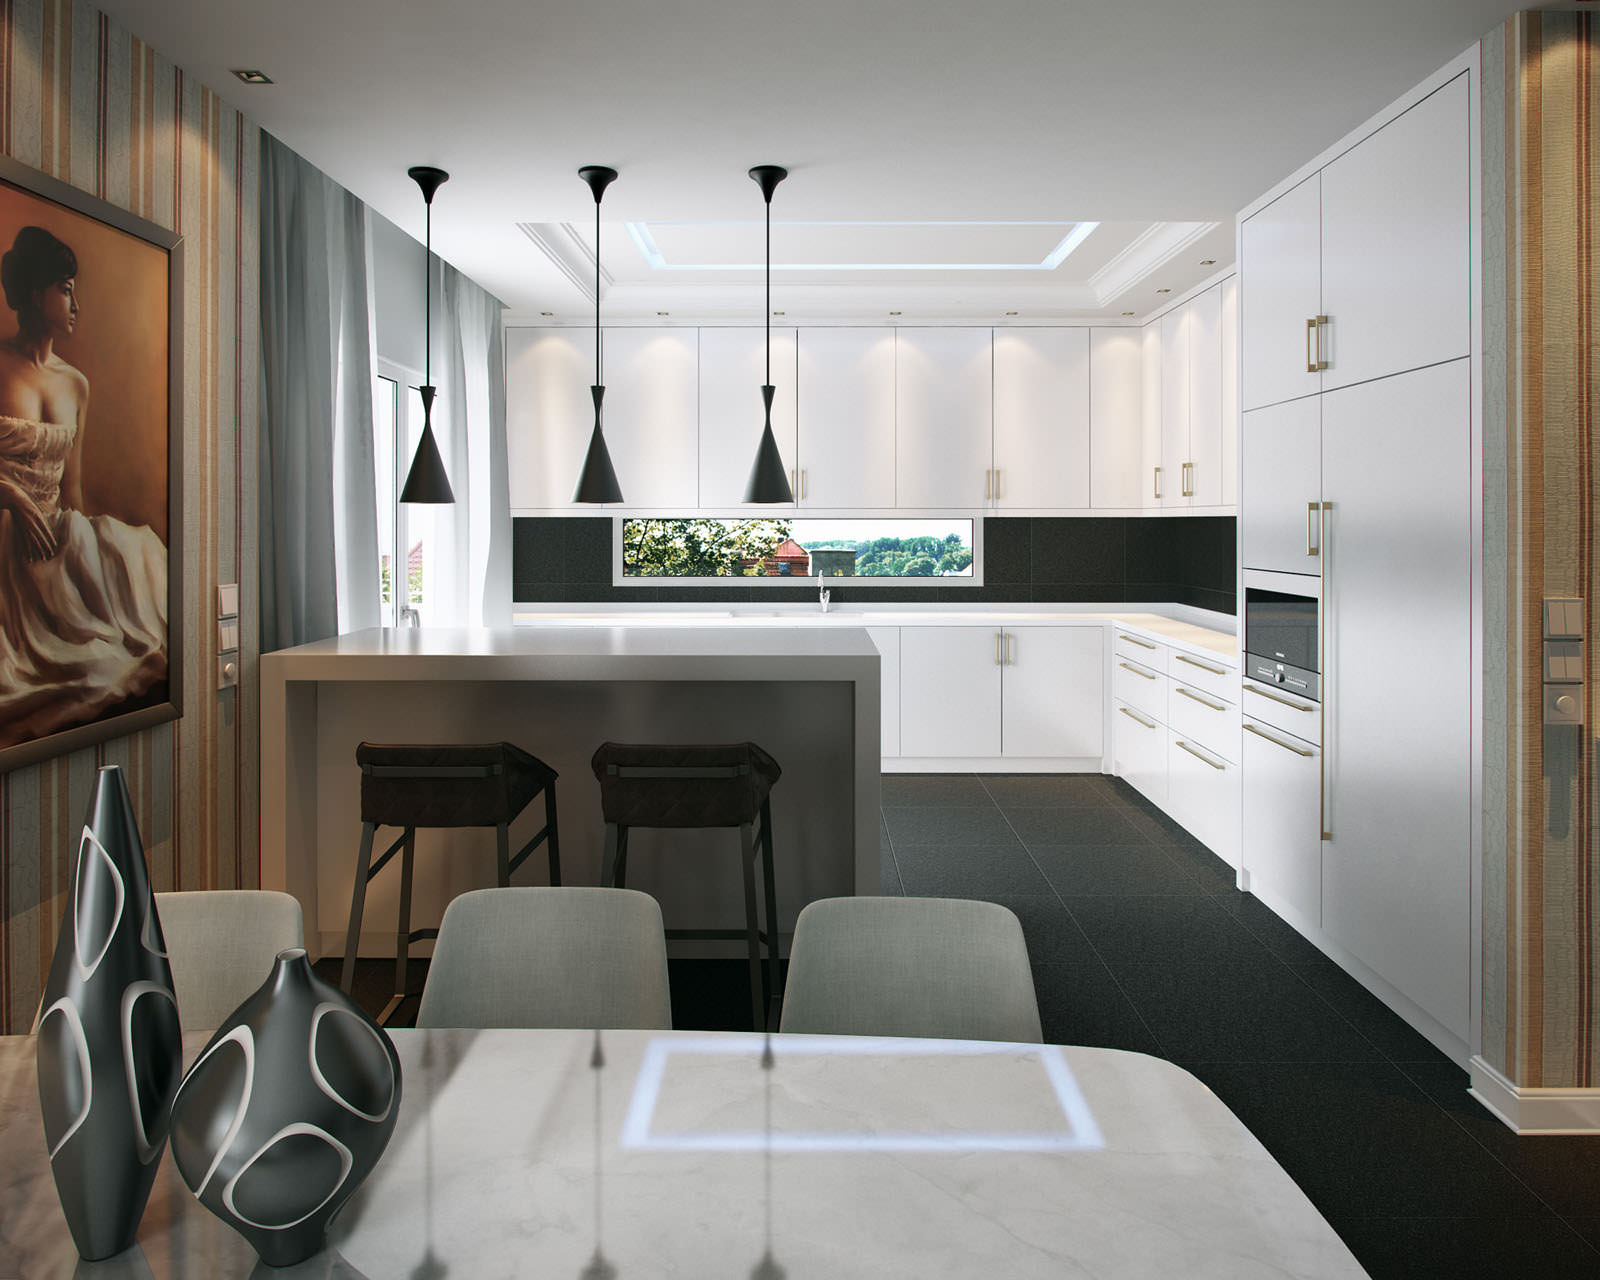
In the project – House in Giannitsa, we were asked to work on a design style which does not suit us, the neoclassical. Our proposition was to combine a few modern lines with clean-cut ones mostly in constructions and furniture so that the final result would be more appealing to the young couple.
Therefore, having the floor and the ceiling as our basis, since they were the two things the client liked, we made an effort to create a space that was basically functional and intertemporal. These are the pictures and the floor plans we received from the client in order to study his space.

Modeling & Decoration Style
Apart from the masonry of the house and some other constructions such as false ceilings, fireplace, TV cabinet and radiator covers all the other models I used for furnishings and decorations are ready-made 3D models by Designconnected and Evermotion so I will not mention these simple modeling techniques. I prefer to show you the study process we follow when we deal with this part and how it relates to the project photorealism.
In the beginning, the furniture was arranged to see the functionality of the space.

After quickly placing a camera and lighting I did some render tests in order to have something to talk about with the client.

The client didn’t like the result so much… To be honest, I didn’t like it either. So I began to rearrange the furniture and tried to fix the whole lighting issue that we will discuss later. The result after a few tries.

Software Used
The most common computer software we use are 3ds Max, V-Ray and Photoshop.
The basic scene setup I use since 2010 is LWF Gamma 2.2 and Im very pleased with it… especially with the shaded parts of my project. In order to work properly with LWF you need to use professional monitors and calibrator to see everything in gamma 2.2 and to have a really smooth gradation of the medium hues. Personally, in my main PC I use 2 Lacie 324 monitors.

Camera Setting
The choice of the photograph perspectives is something we adjust depending on the space. I can say that my favorite style generally is the low height. Usually, the height I choose to place my camera is not over 120cm.

With V-Ray camera I usually use the rule of thirds. Below you can see how we adjust it in the Viewport Configuration.

The most important thing in adjusting the camera is white balance. The choice of the right color gives us a result where white color appears clear on our monitor. Here you can see an easy tutorial for choosing the proper white balance – White Balance setup with V-Ray Physical Camera and 3ds Max.

As for the other camera adjustments, the only thing I find worth mentioning is the choice of shutter speed which may need totally different numbers depending on the HDRi well use.
Lighting
In my opinion, lighting is the most important element in 3d visualization and especially if doing it photo-realistic. When we lighten the scene properly, we have the following advantages.
- Quick test and final rendering.
- Beautiful and realistic material rendering.
- Will to finish our render in the best possible way!
In this project I paid great attention to the lighting since I wanted a result combining day light and artificial lighting. As a main source of light I placed a V-Ray Light Dome with an HDR map from CGSource.

I did these tests for all materials just with this lighting. When I finished most of them I added some IES photo-metric files and not V-Ray IES even if they are faster. I have noticed that the quality of the shadows with photometric IES is way better. I specifically chose IES files from the model+model Vol. 04 – Architectural Lights due to there excellent quality. Apart from the IES, I also used a V-Ray Sphere Lights for every spot to give a low-key light to its interior.

Then, for the hidden lighting I used V-Ray mesh lights. Its the quickest and most practical way to create hidden lighting, especially in complicated false ceilings. The only secret here is that the modeling of the recess should be realistic so that the light can be realistically diffused inside the space.
Additionally, I used two V-Ray Plane Lights for the openings but not with a skylight portal. I gave a slight intensity Multiplier of 2 so that the space can be brighter and the noise can go away without any high number of subdivis for the materials. An extra tip I used is that I excluded the windows from the two V-Ray Plane Lights, but not from the curtains because I wouldn’t have a realistic result. This improved the render speed a lot!

I have been studying lighting for quite a while now. Im still not totally pleased with the result…
Hopefully, I will be! Lighting an indoor space seems like a solution to an equation which, in order to find, we really need to know math (here, math is light). I would like to cite an article of mine in Vray World hoping that it will help new 3d artists as far as some general light principles and photography are concerned – Light in 3d Photography.
Materials
The materials I used were simple. In furniture, apart from a few minor changes, I didn’t change many things since the materials by Designconnected are of high quality. I will only show you the ones I created myself.
The Floor
The only thing worth mentioning here is that when we have a dark floor I use V-Ray Override Mtl to control the dark bounce of photons that will hit the wall and change the colors in the scene.

The Wall
The walls material is important and together with the window glass they help light to propagate better in the room.

The Wood
It is really nothing special; just a lot of subdivis for smoother results without noise.

Render Settings
I generally try not to make extremely high adjustments in the final renders. Just as much as needed to have a clean result as soon as possible. For example, in this project every render had a render time of about 1 hour at 2500px resolution and with a 20 core distributed render.


Post Production
For the color correction I would like to show a design from this project. I think that the most useful tip is color correction in the frame buffer during test renders. I like to play with levels and curves. I never touch exposure.

I save all render layers in .png format. Then I open Photoshop, File-Scripts-Load Files into Stack to quickly put all layers in the same .PSD file. This is the difference between original render and Post Production.


As you will find out there isn’t a huge difference because the first color correction has already been made in the Frame buffer. The first step concerns raw layers with which I slightly change GI and reinforce reflections. I sometimes use raw but also simple reflection as I did here with blending mode soft light. Below you can see all the adjustments of the raw layers one by one.


Then I continued with CC (Color Correction) adding a color balance and a curve for more contrast.

Then, with the help of selective color and render layers Wire Color and Render ID I chose specific parts of my render (Carpet, bag, walls, lacquer, marble, table, and sofa) creating masks and correcting their colors so as to look more vivid and normal. This is a process where the numbers we change are not standard. It takes a lot of practice and experience… Just do not be afraid to experiment and work with reference images trying to achieve the true colors you want.

Finally, I used Lens Correction creating a little distortion to the lens and chromatic aberration. Due to the fact that this creates a blur to the pixels I used a simple sharpen filter to finish it.


This is it! I hope you liked it and found a few useful tips in this article. Thank you for reading it and
if you have any questions, Im at your disposal.
Hi Vassilis,
Amazing work by all means. Great tutorial and professional explanation of workflow.
It would be greatly appreciated if you could perhaps provide information/specs about your computer’s characteristics.
Thank once more. Keep up the great work.
semagokalp Thanks a lot for your kind comments. I used a net-render of two 8cores workstations. My main pc has NVidia K4000 graphic card, 24GB of Ram & dual intel xeon processors.