


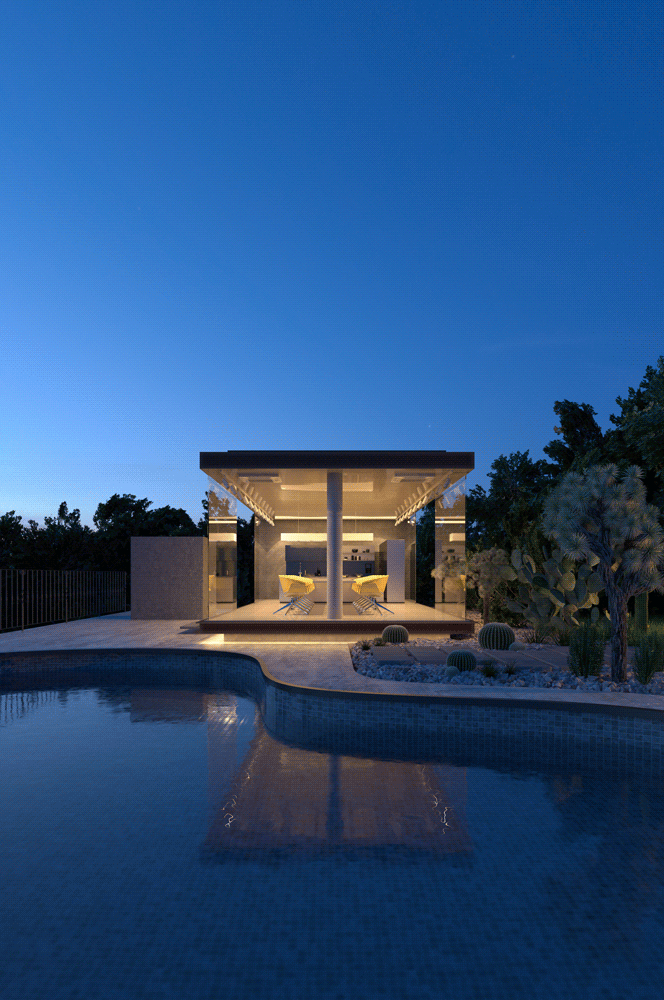
Making of “IRACEMA” in the Dusk
tresde’s Santi Sánchez makes a new appearance on the blog with his recent project “IRACEMA”. He previously posted the making-of ‘Crystal Box’ Villa, which was mostly post-production based and now we can see a mostly pure 3d / photo-realistic base approach. Follow Santi as he goes about describing his process from start to finish below. Enjoy!
Introduction
Hi, everyone!
First of all, I’d like to thank Ronen for inviting me yet again to contribute to the ArchViz community with this making-of about my latest project.
IRACEMA project was born with the idea to improve my current ArchViz workflow, with the aim of delivering results with a commercial characteristic in the shortest deadline possible. I know this kind of goal could sound so trendy or most of the time quite usual, but actually, during the process I’ve found some very interesting guidelines that helped me to achieve exactly the results that I was looking for in a short amount of time.
It is a pleasure for me to share with all of you this techniques and of course the philosophy that is behind my images.
Before I start, I’d like to share with you, my thoughts behind every single project I make.
To me, an image has two important parts, the first one is the beauty and this is given by the composition, the palette, a very solid foundation, knowledge, and understanding about how photography and real world works.
The second one is the technical aspect and this is given by a proper use of the tools that we choose for the project, knowing all the capabilities of software and hardware. These are crucial, because we can take a huge advantage if we know exactly what we have and how we can use it.
If we can balance 50/50 beauty and quality, there is no chance to fail or at least have an undesired result.
For this project, I used 3ds Max 2014, V-Ray 3.3, Solid Rocks, Forest Pack Pro, Siger Shaders, Photoshop Cs6, Red Giant Magic Bullet and Nik Software.
References
One of the most important steps at the beginning of any project is getting the right references.
I’ve found the IRACEMA’s gallery (Website) with a very interesting kind of moods, so I decided to use them as a base in terms of composition and lighting approach.
Initial Setup
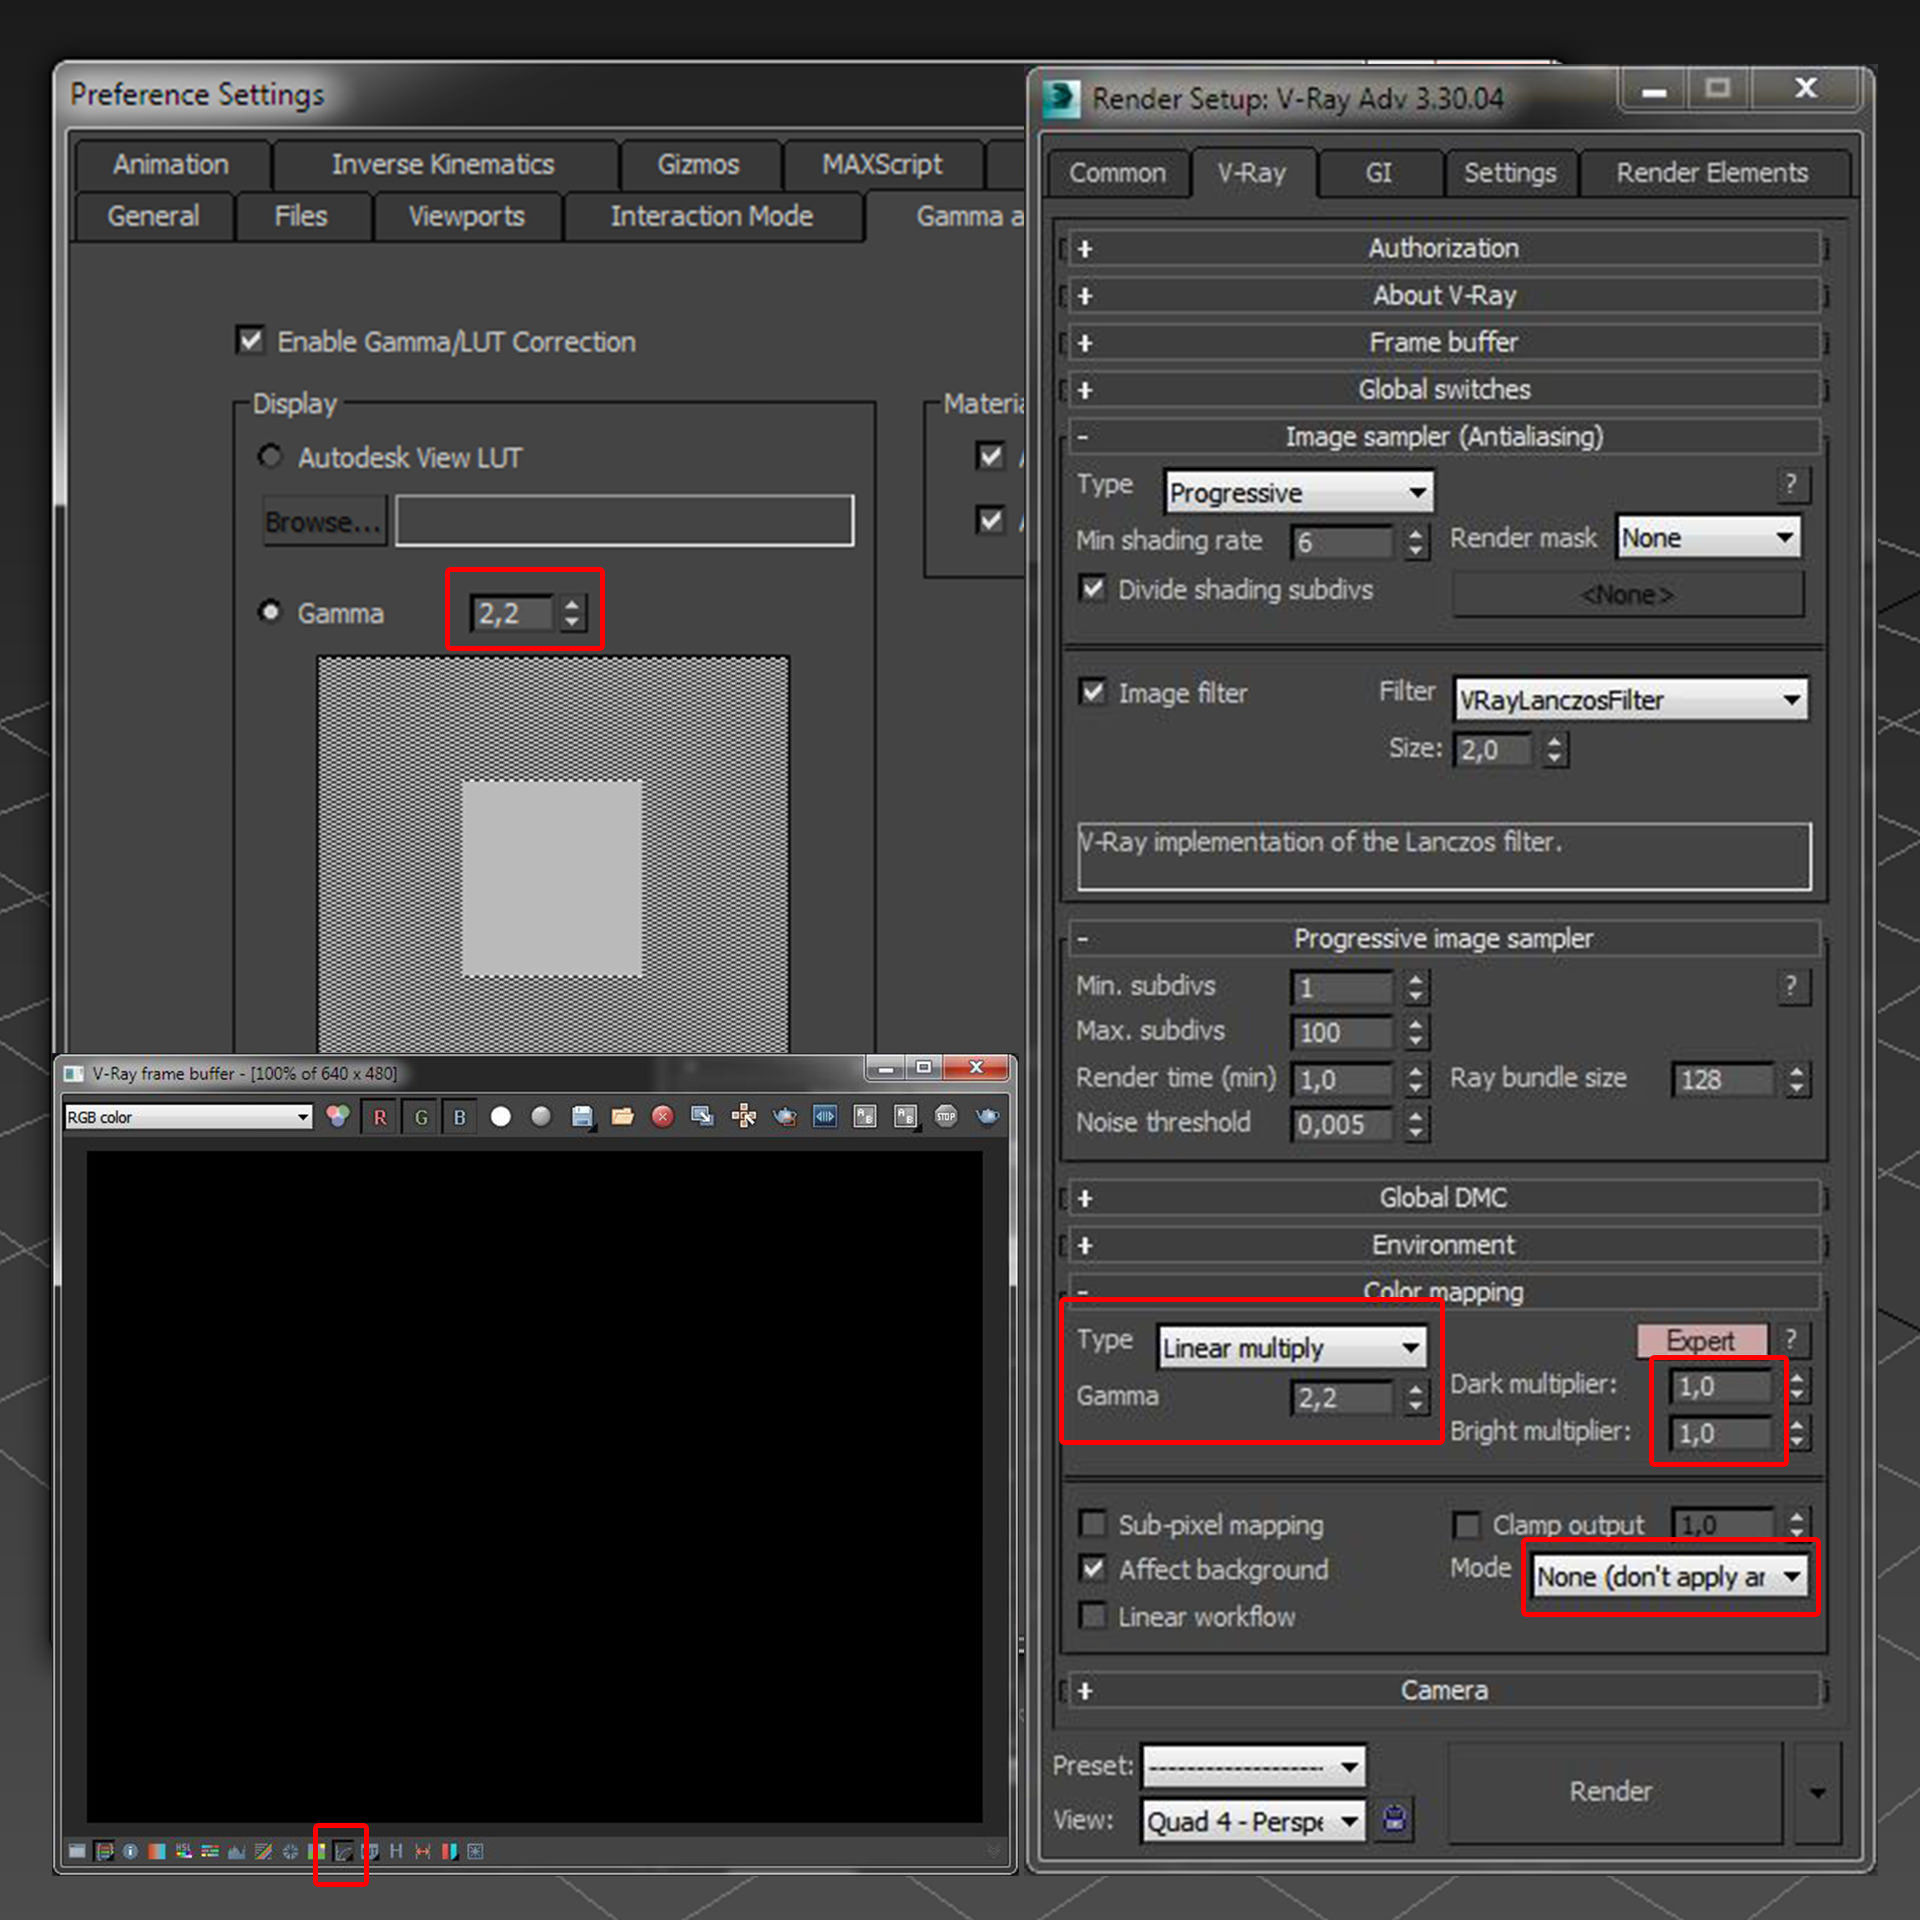
I always start my setup using the Linear Workflow for 3ds Max and V-Ray. Here are some images with all the information.
3d Modeling
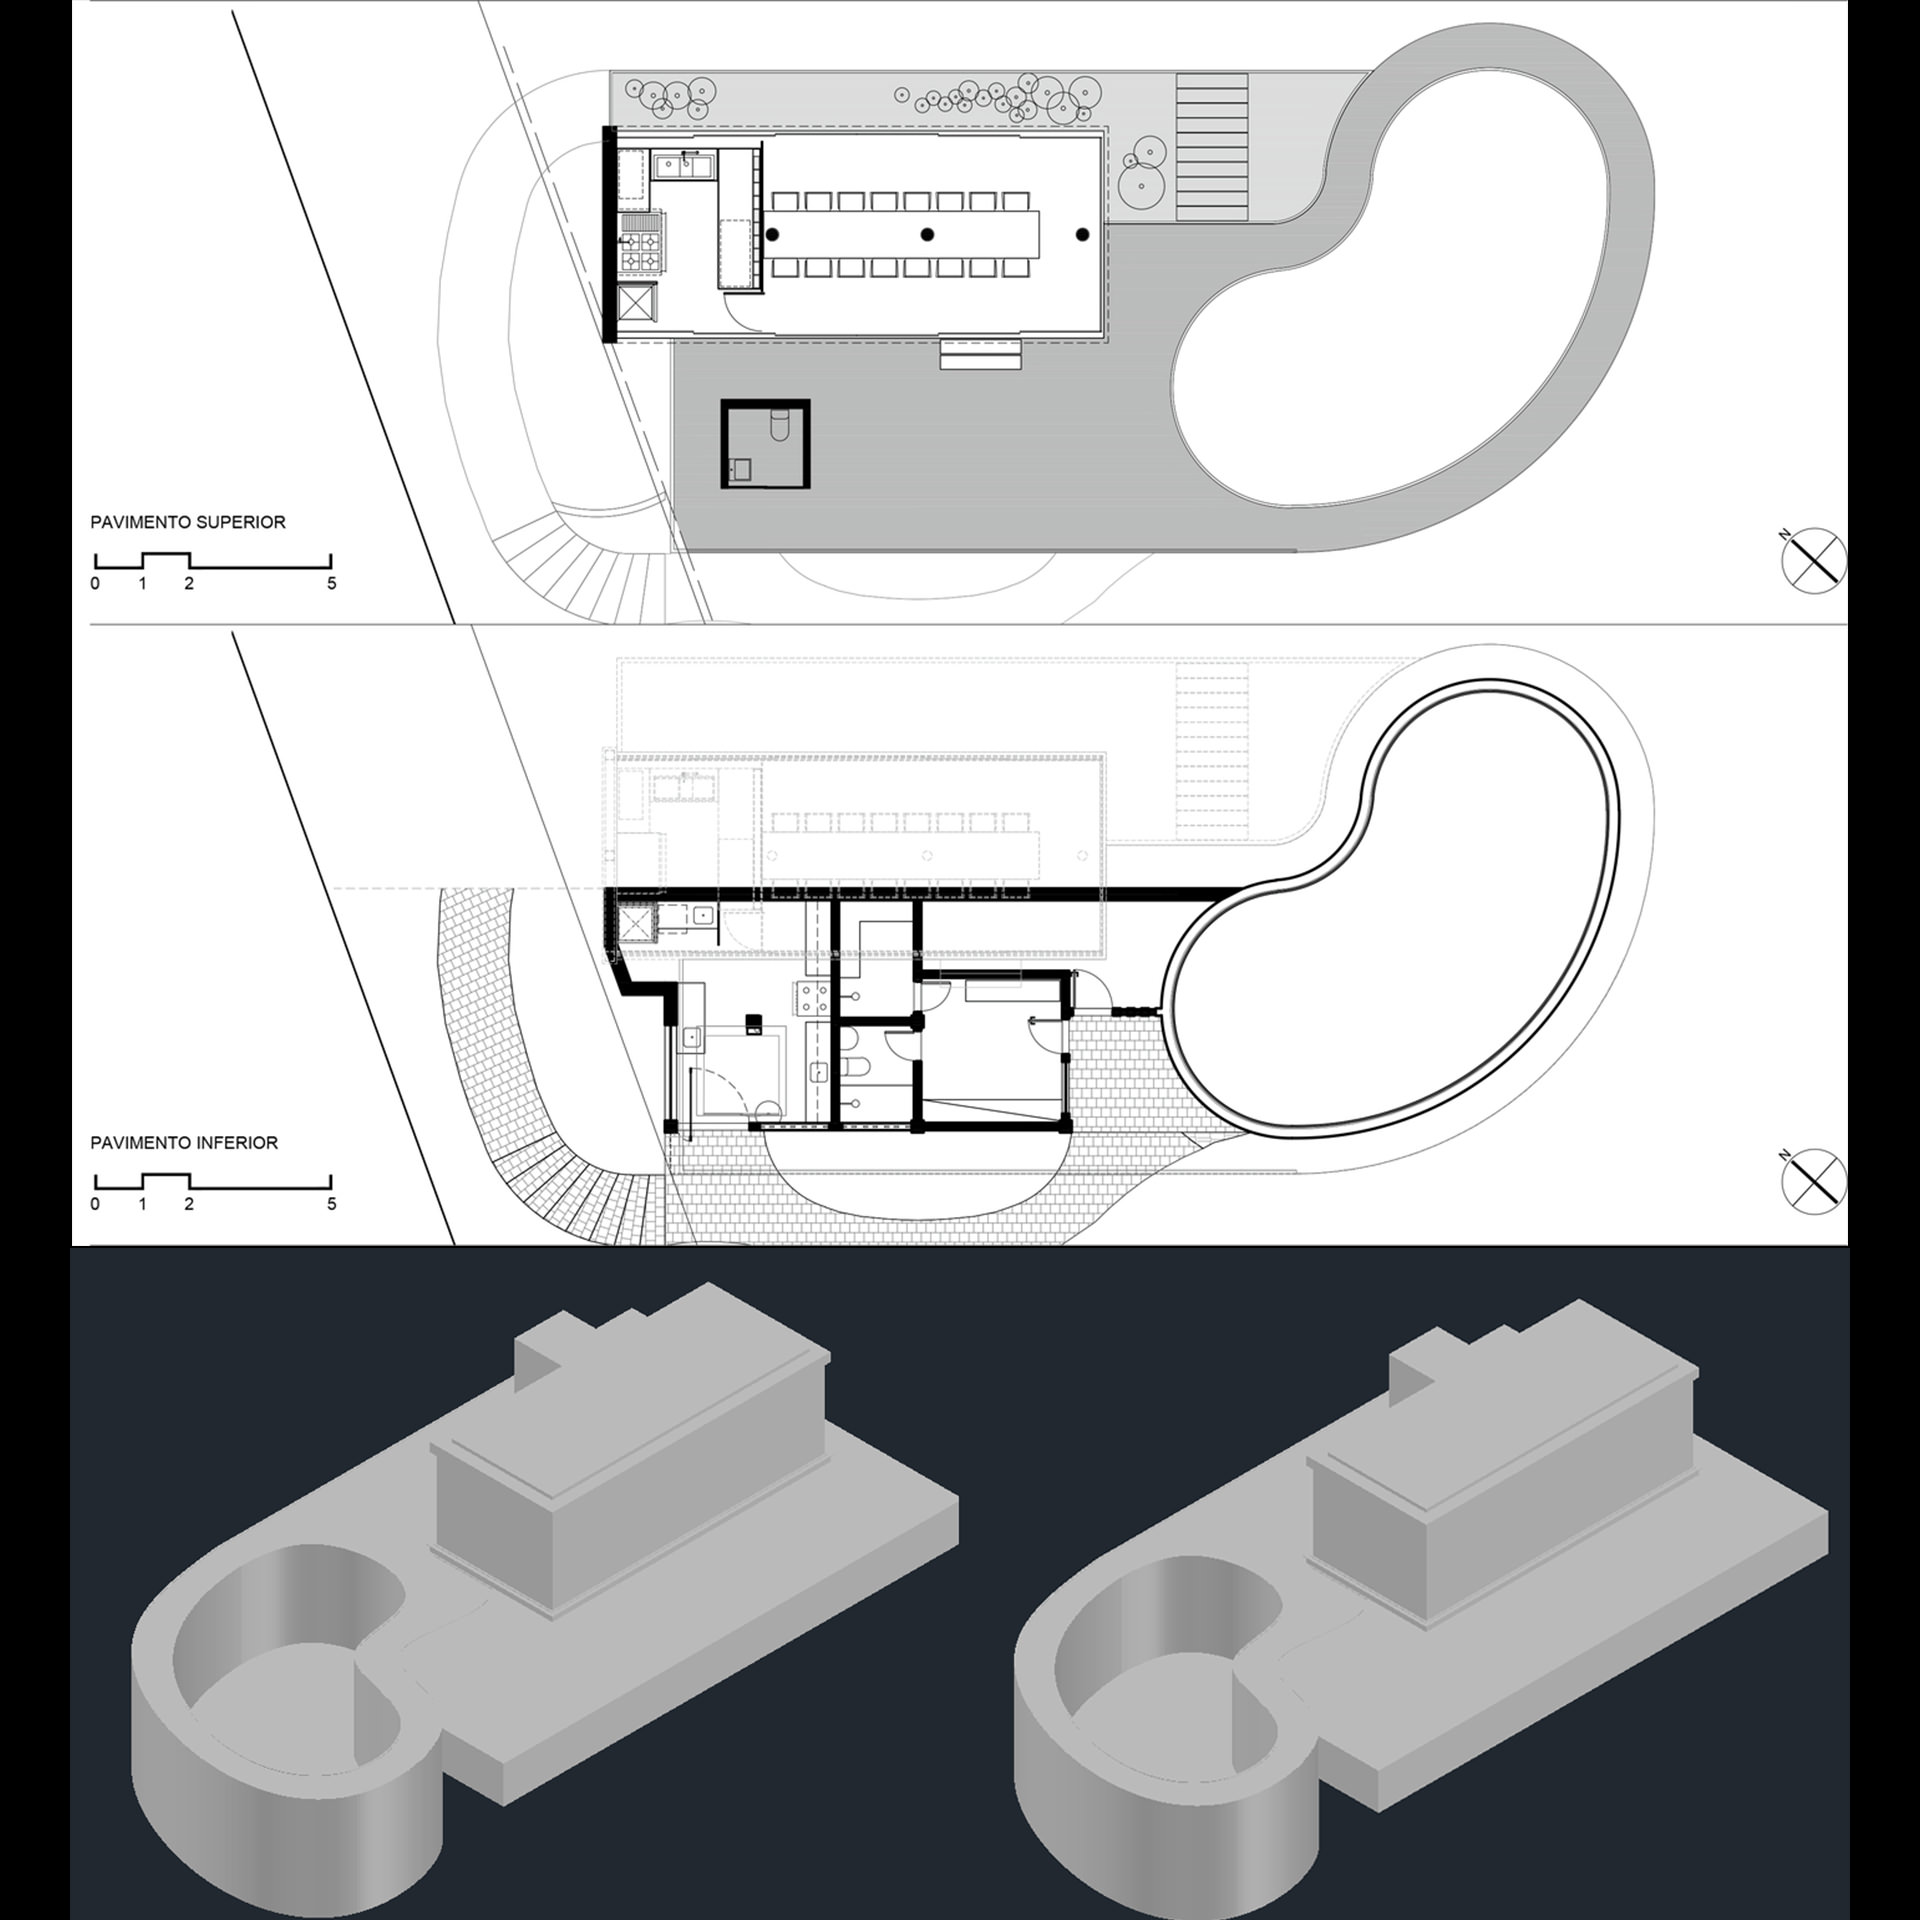
I based most of the 3d model on the blueprints that I’ve found from EB Arquitetura website. I used Autocad for the architecture modeling and I imported to 3ds Max. The rest of details were added during the process as an interpretation without diverting from the main concept.
The majority of the 3d models are pre-built models (Evermotion) that I have in my personal library so this reduced the modeling process and I just customized some shaders according to the references.v
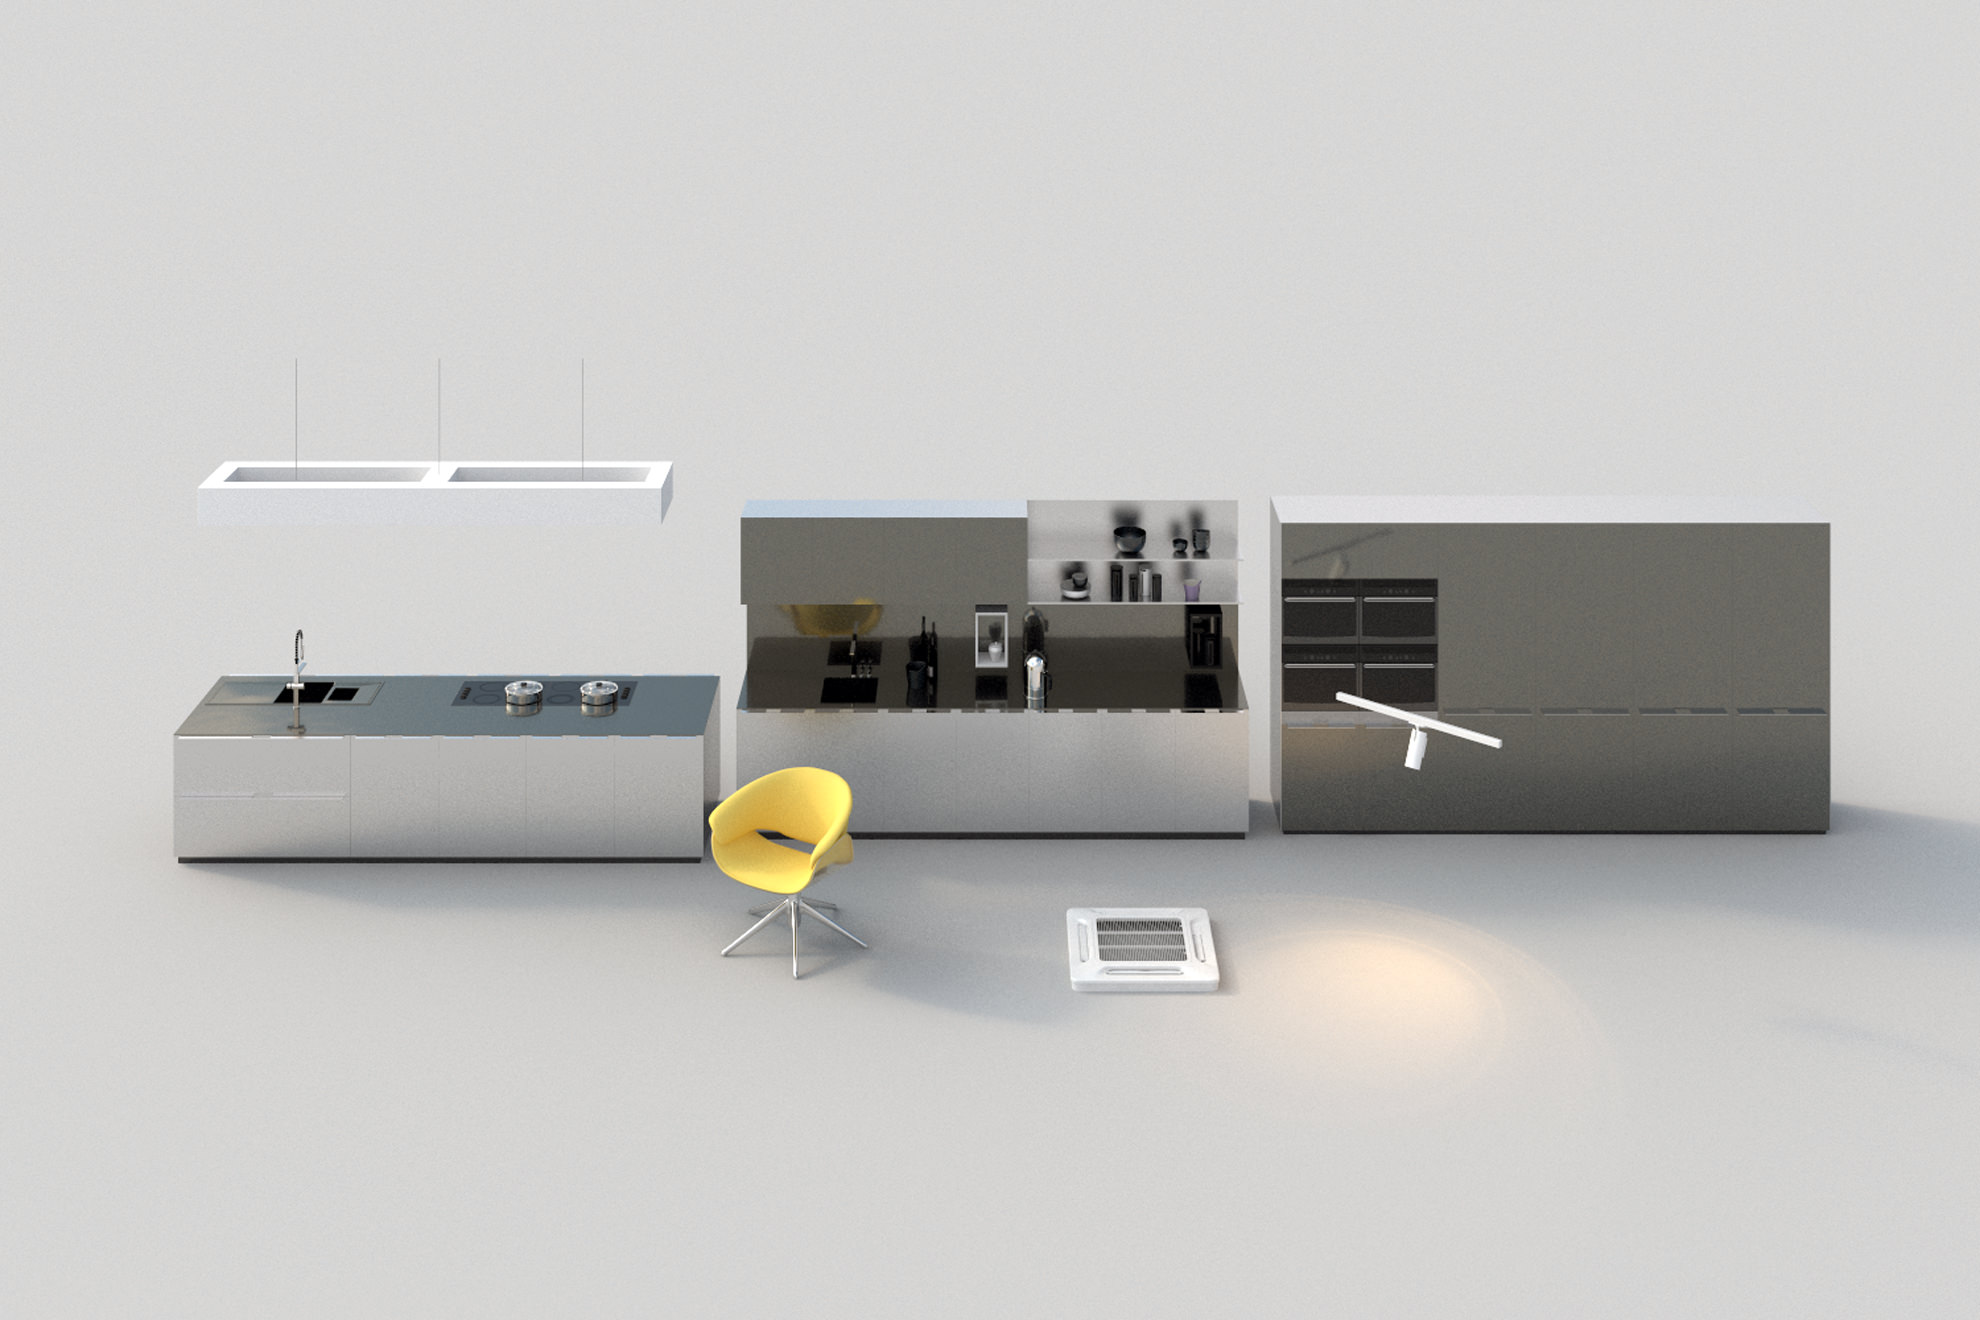
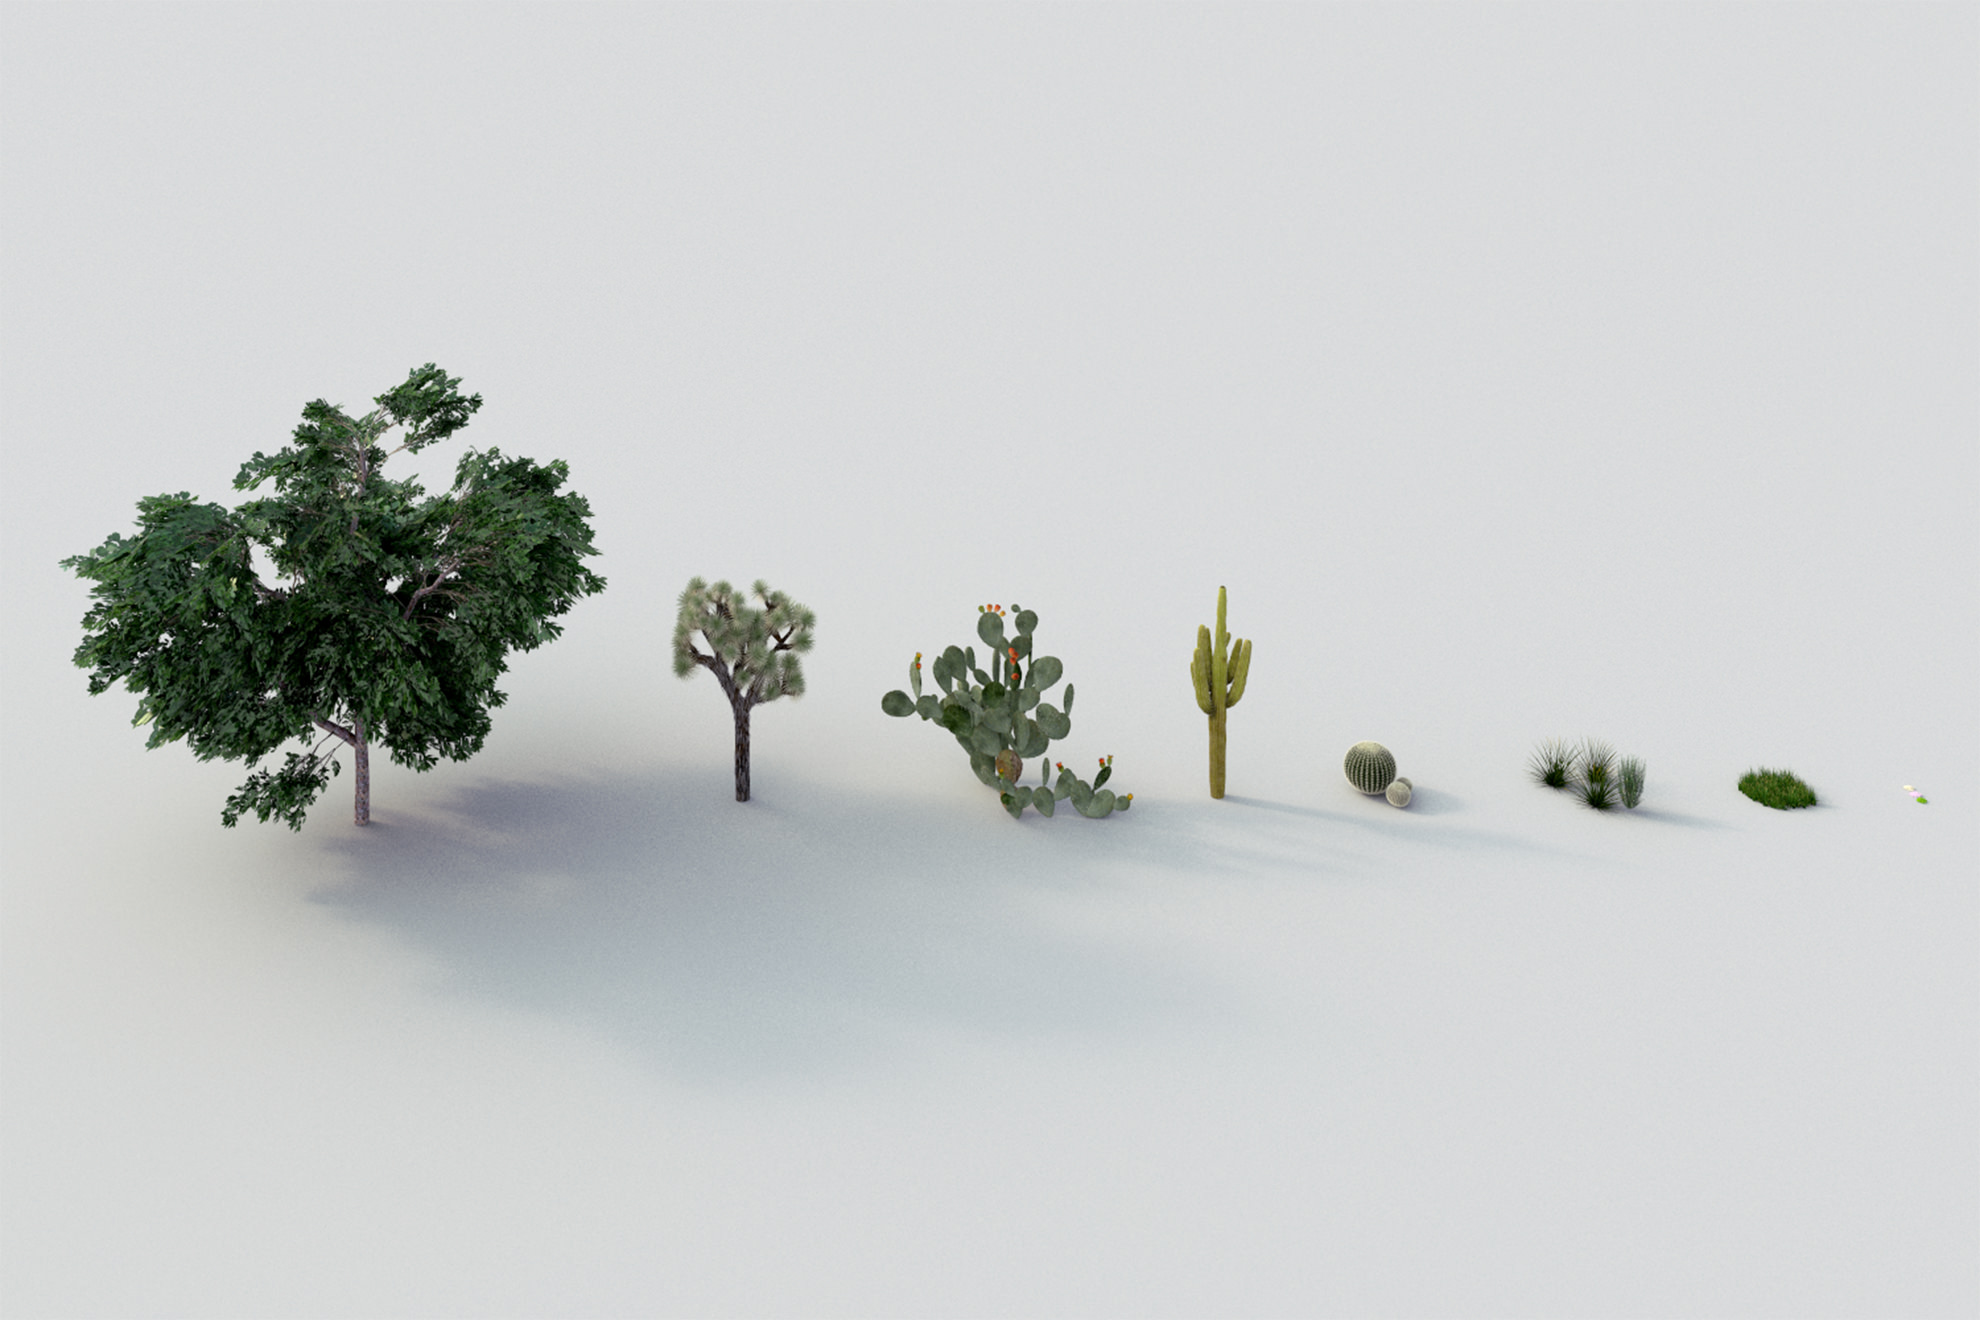
About the landscape and environment creation, I used Forest Pack Pro in order to generate and scatter the gravel stones, grass, and the surrounding trees. For the specific vegetation near to the architecture (cactus and small trees), I placed them by hand trying to follow the composition guidelines.
Texture & Materials
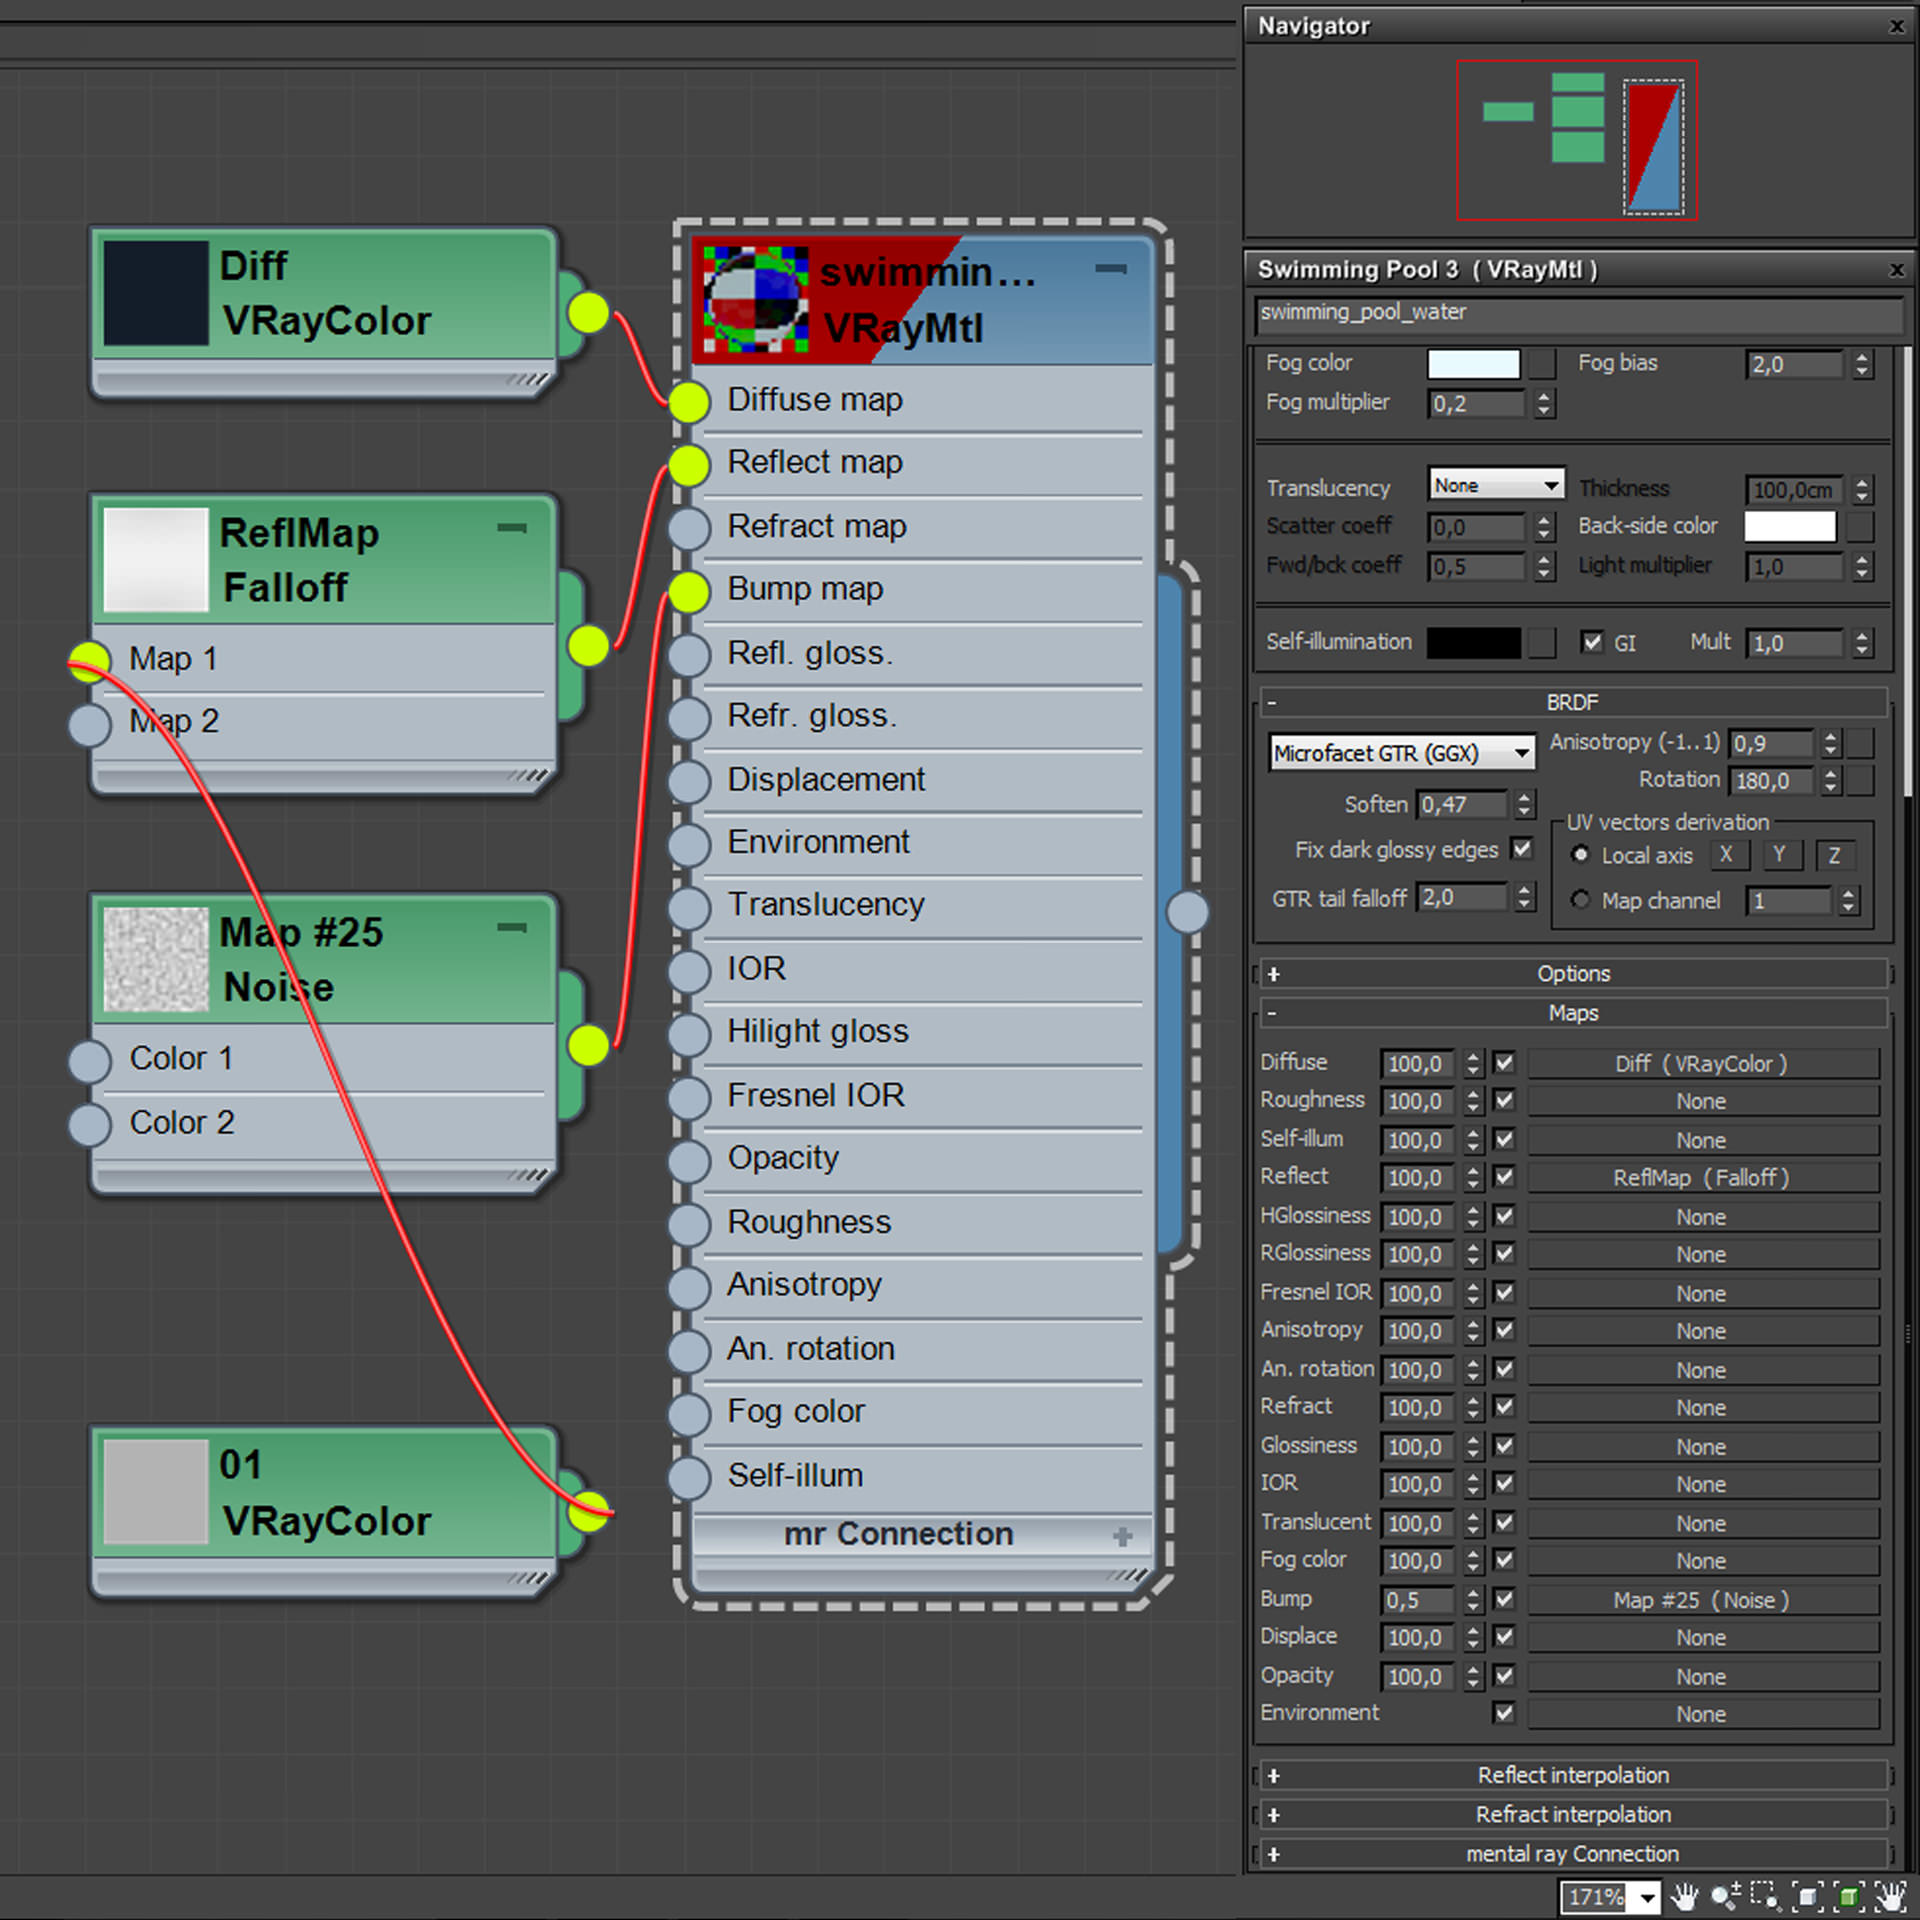
About the scene materialism, I’ve used Siger Shaders as a base and I customized them according to the project needs. I’ve kept all the shaders simple as possible, most of them has a basic structure (diffuse map, specular map, bump map) and all of them are based on references, so using pre-set shaders will give the chance to customize them in the easiest way, without spending too much time dealing with the full creation process.
I’d like to explain the pool water shader. This shader has a tricky refraction but at the end, the result was quite close to my reference.
Lighting
Lighting is one of the stages that I really enjoy designing and develop. In my personal opinion, HDRI lighting technique is one of the most useful and realistic ways to generate a very responsive and accurate result.
We can have several options at the moment we decided to locate the main light source (Sun), as a personal taste most of the time I like to include in one of the sides of my composition a warm spot (Sun) and create a subtle transition from warm to cold, from light to shadows. This kind of transition gives a more natural feeling to the scene and avoids having a flat sky pattern / color at the background.
For the exterior, I used a dome light linked with an HDRI bitmap (Peter Guthrie’s PGSKIES 2028), for the interior lights I used a mix of standard target lights with V-Ray shadows and V-Ray planes. Small lamps attached to the ceiling has a V-Ray light material to simulate light bulbs reaction and photometric lights with IES attached files.
Rendering
I guess this could be a “nightmare” or a “bottleneck” for most of us, once again trying to apply a simple but effective workflow I decided to give a chance to a very old but useful plugin, Solid rocks.
Solid Rocks has a unique approach to V-Ray settings (which was kind of done in the recent versions of V-Ray). The interface is quite simple to deal if you have a basic knowledge about V-Ray settings options, basically is like a more intuitive and friendly V-Ray settings interface. Following the philosophy explained at the beginning, Solid rocks could be a practical solution for people who aren’t interested to know how exactly V-Ray render works (funny, I know… maybe just don’t want to dive too deep and technical about all the settings).
I decided to use it and test it with my “usual” settings and the difference wasn’t a huge gap so I gave it a chance and I was pleased with the final results.
Here the setup :
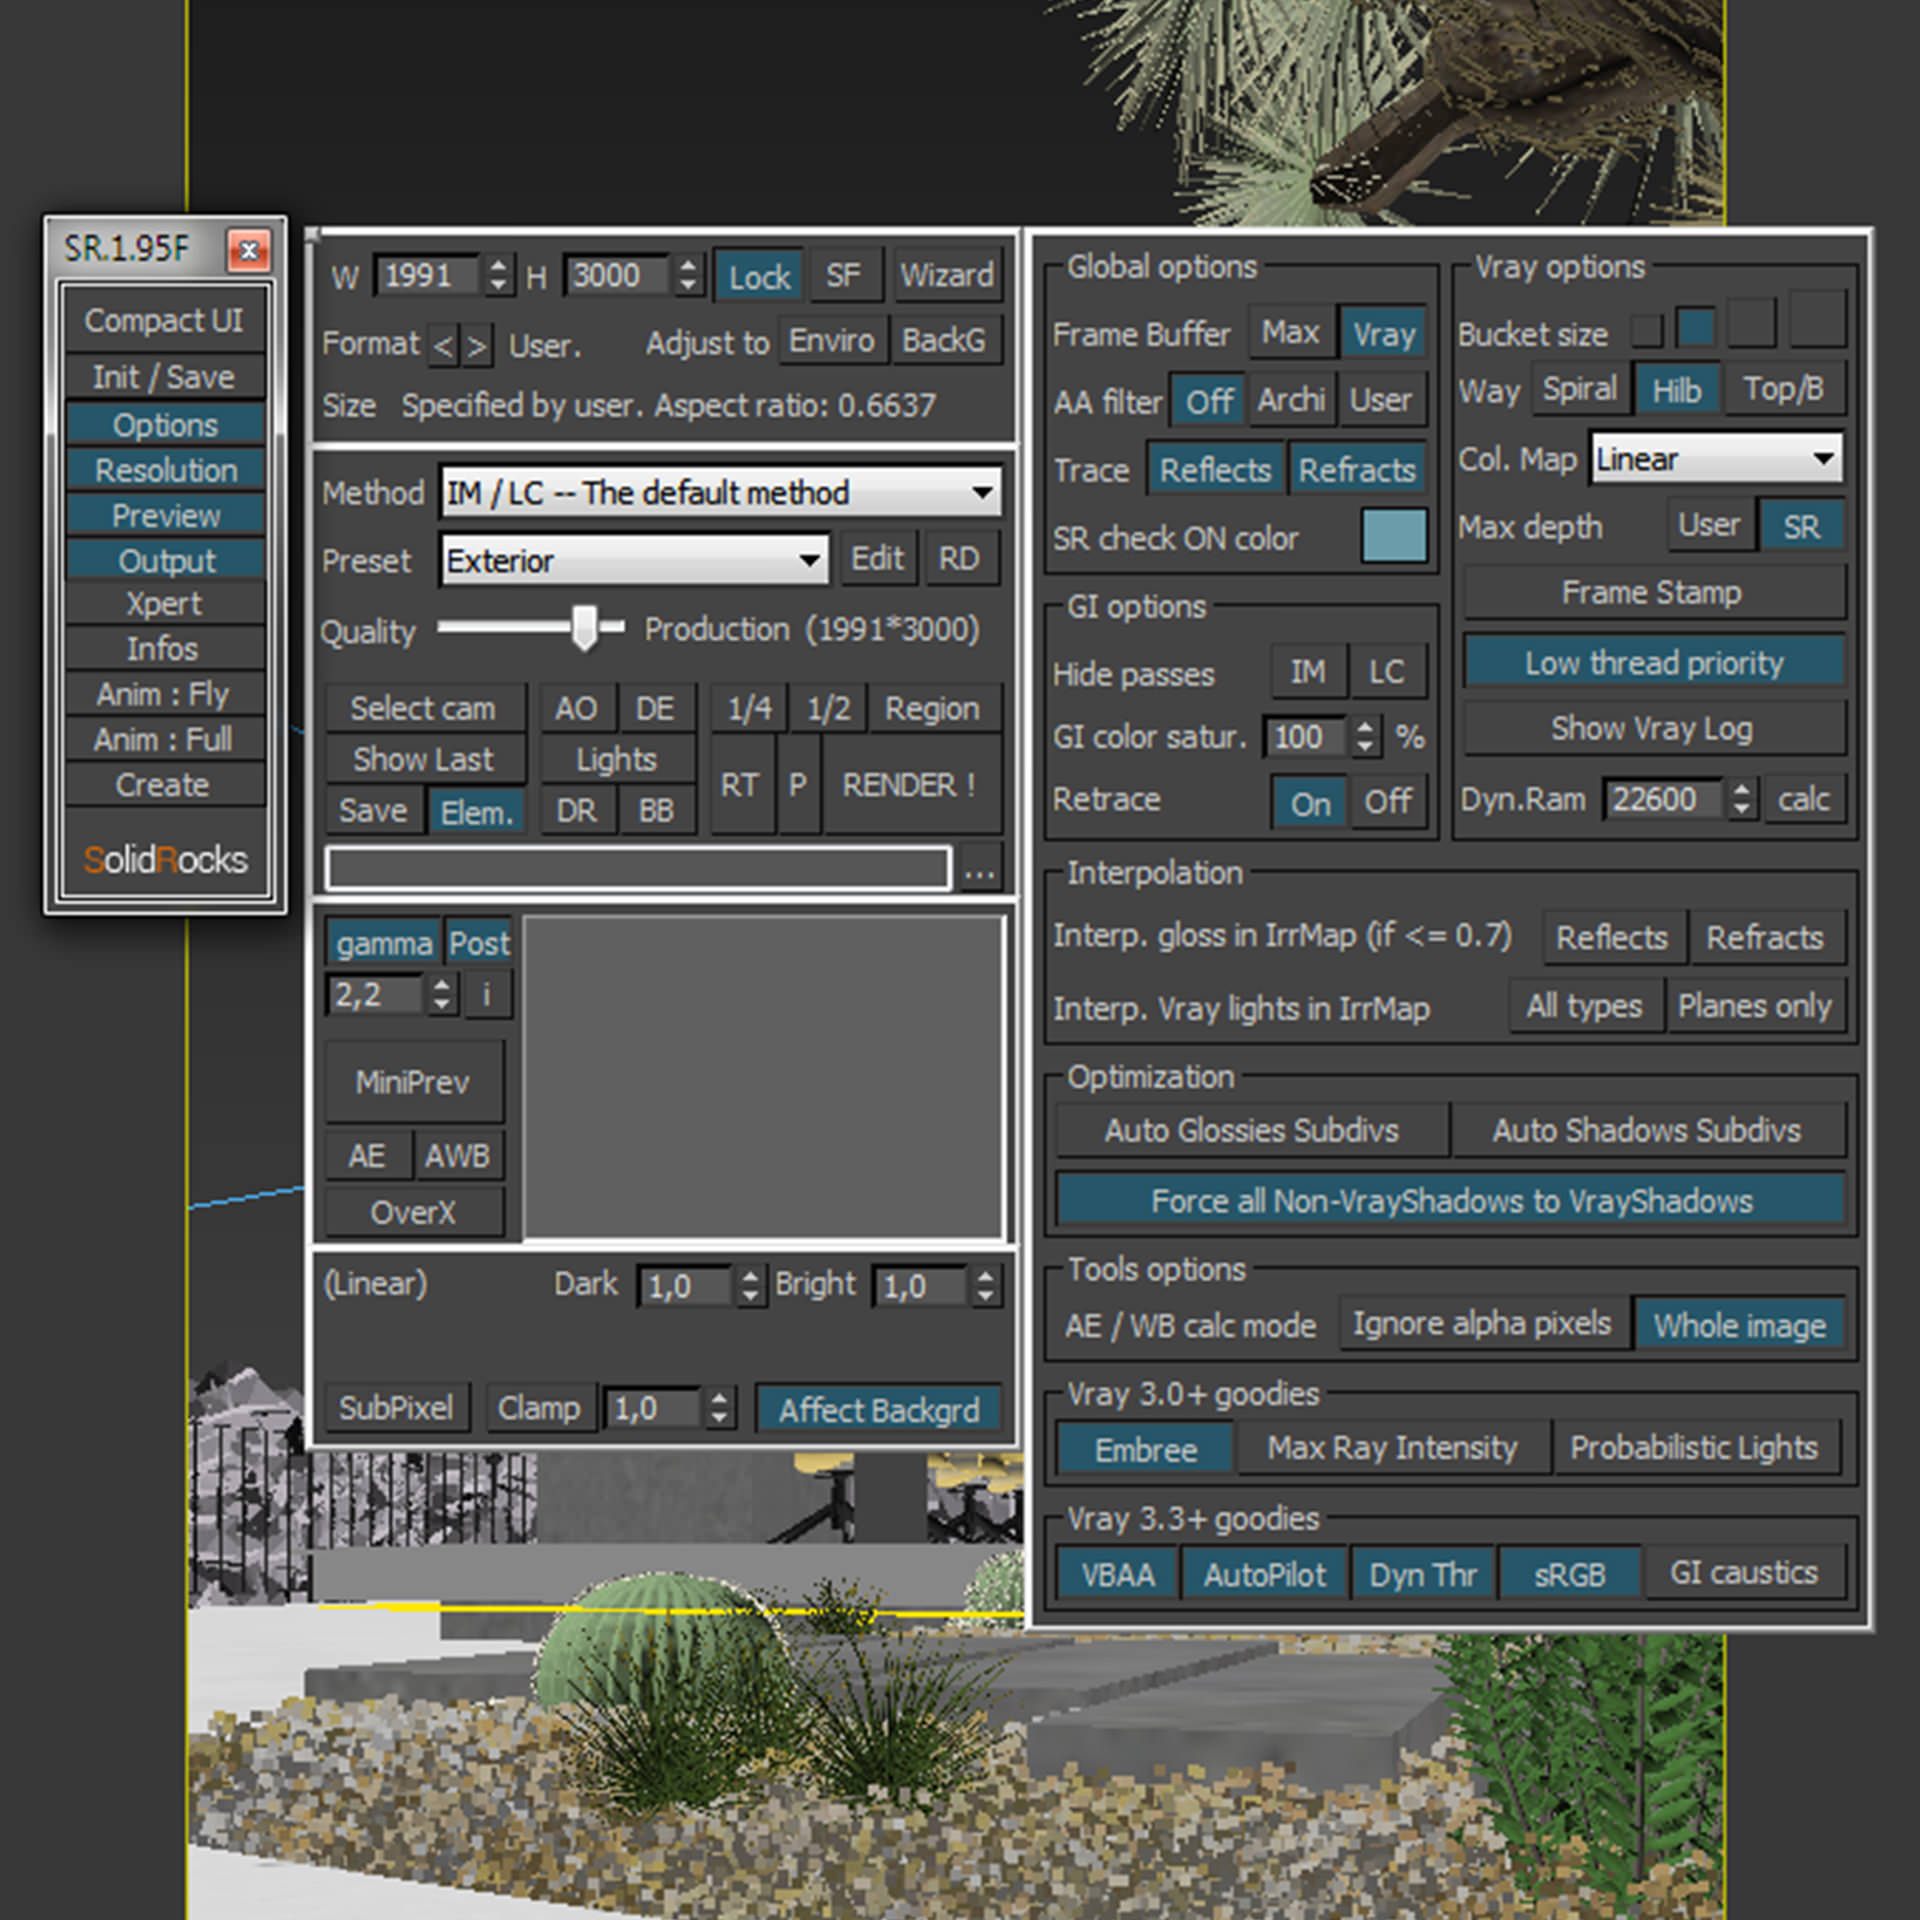
Most of the time I like to use the V-Ray elements that allows me to control quick selections (object id), light, contrast, reflections, and refractions, but for this specific project I just used the V-Ray raw Global Illumination pass.
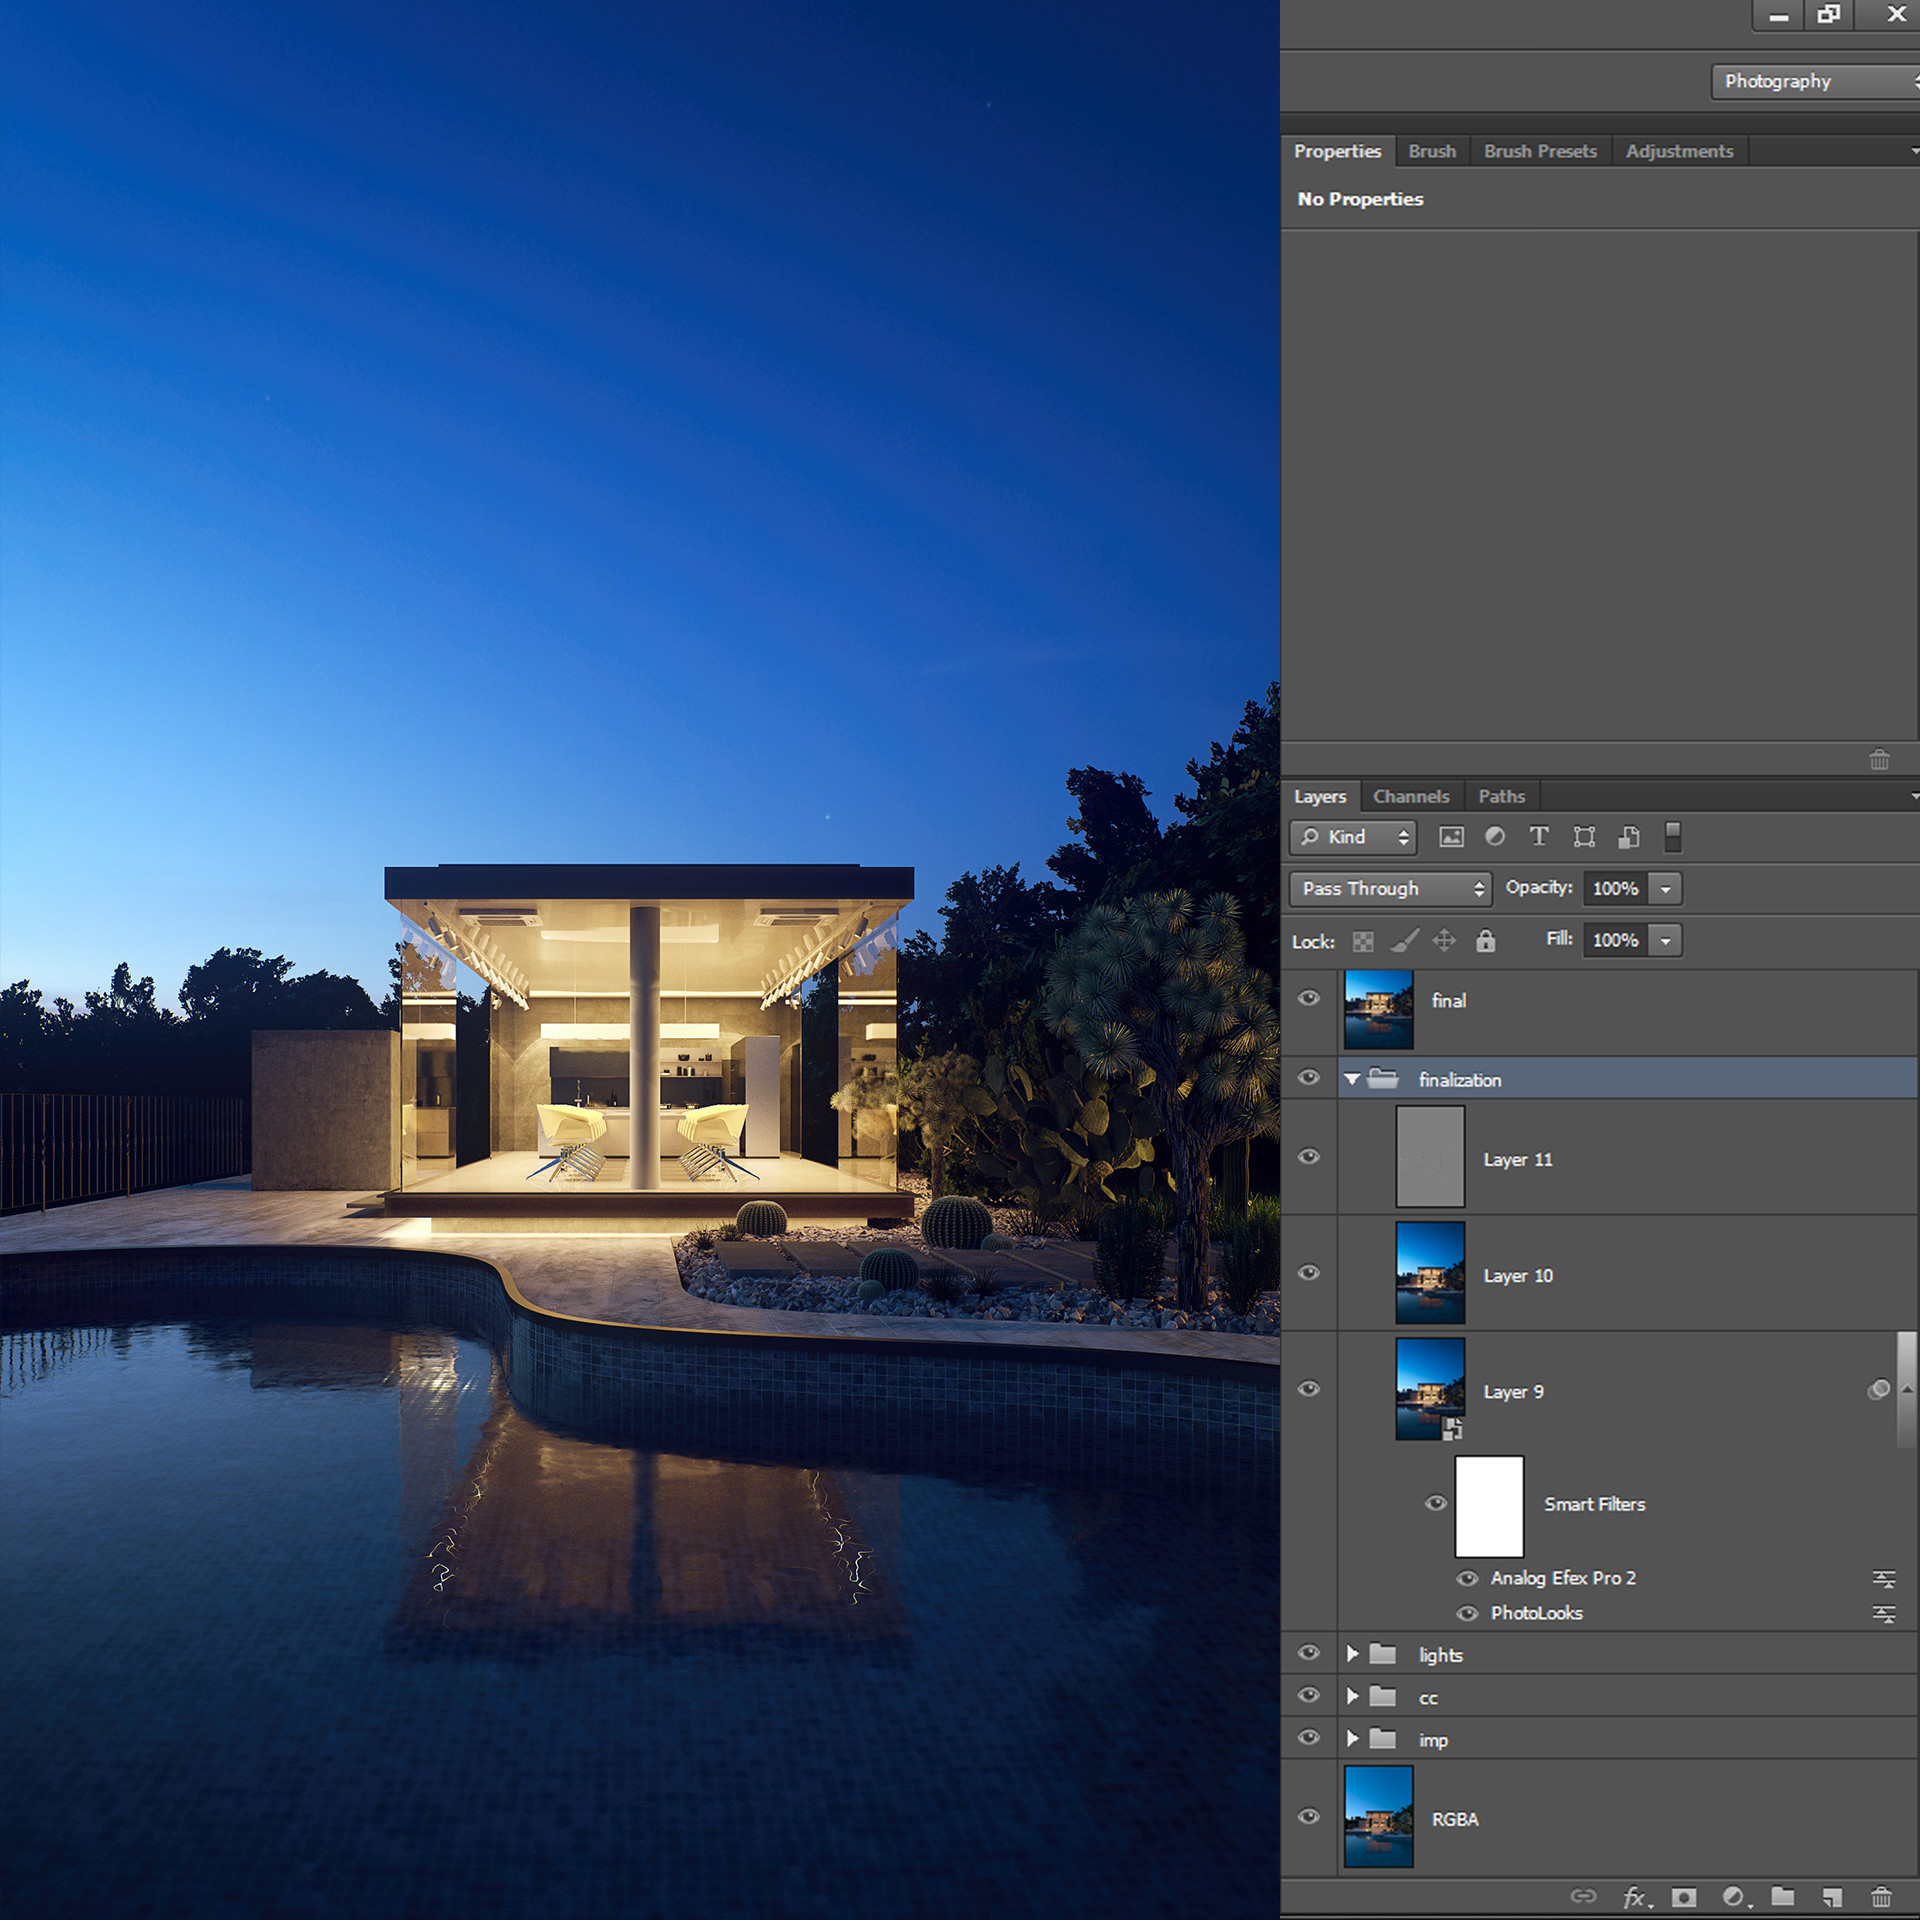
Post Production
Finally, we reached the final stage of the full process and here is where “magic” happens.
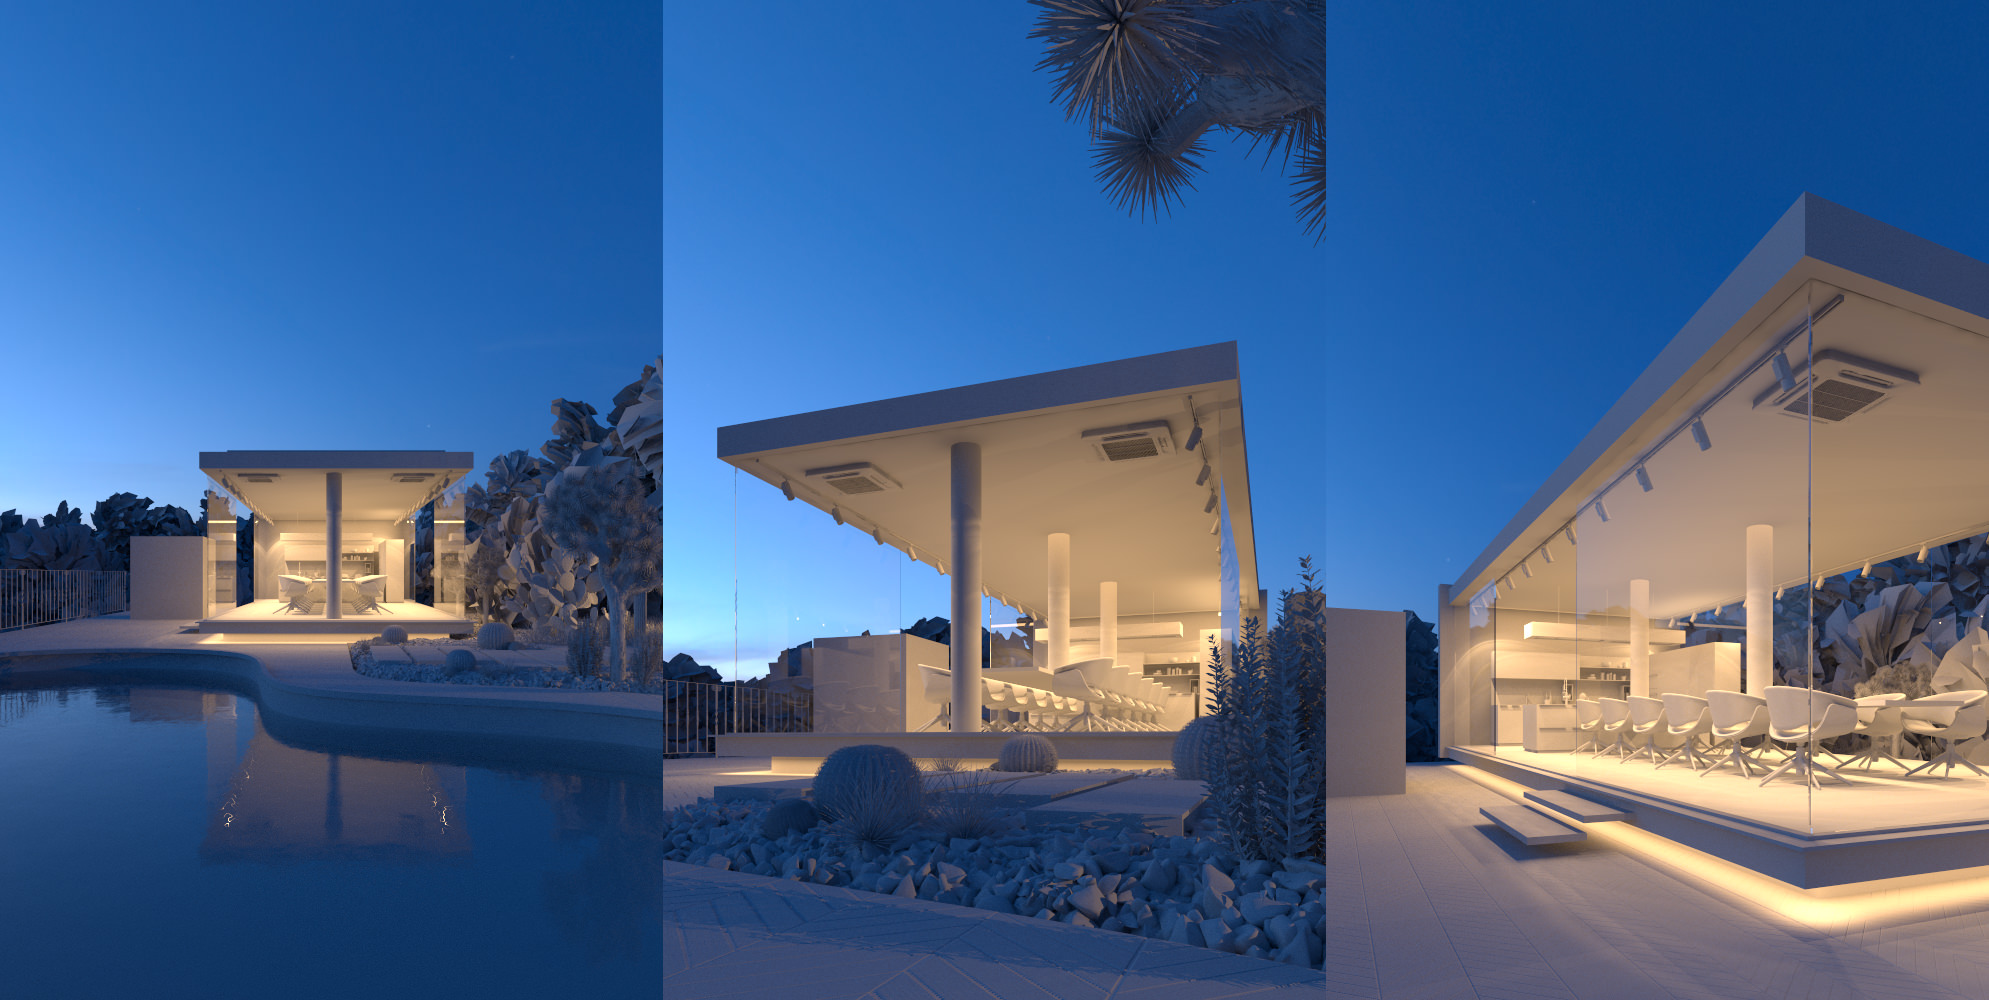
As I see a project, the composition will be the starting point and the use of a reference will give you a more specific idea about the final result to achieve.
Once again I will try to keep my post production workflow simple as possible. I will start blending the V-Ray Raw Global Illumination pass link it with a Hue / Saturation adjustment layer to avoid oversaturated interior light temperature. After that I will blend some dirt texture for the concrete volume at the left side.
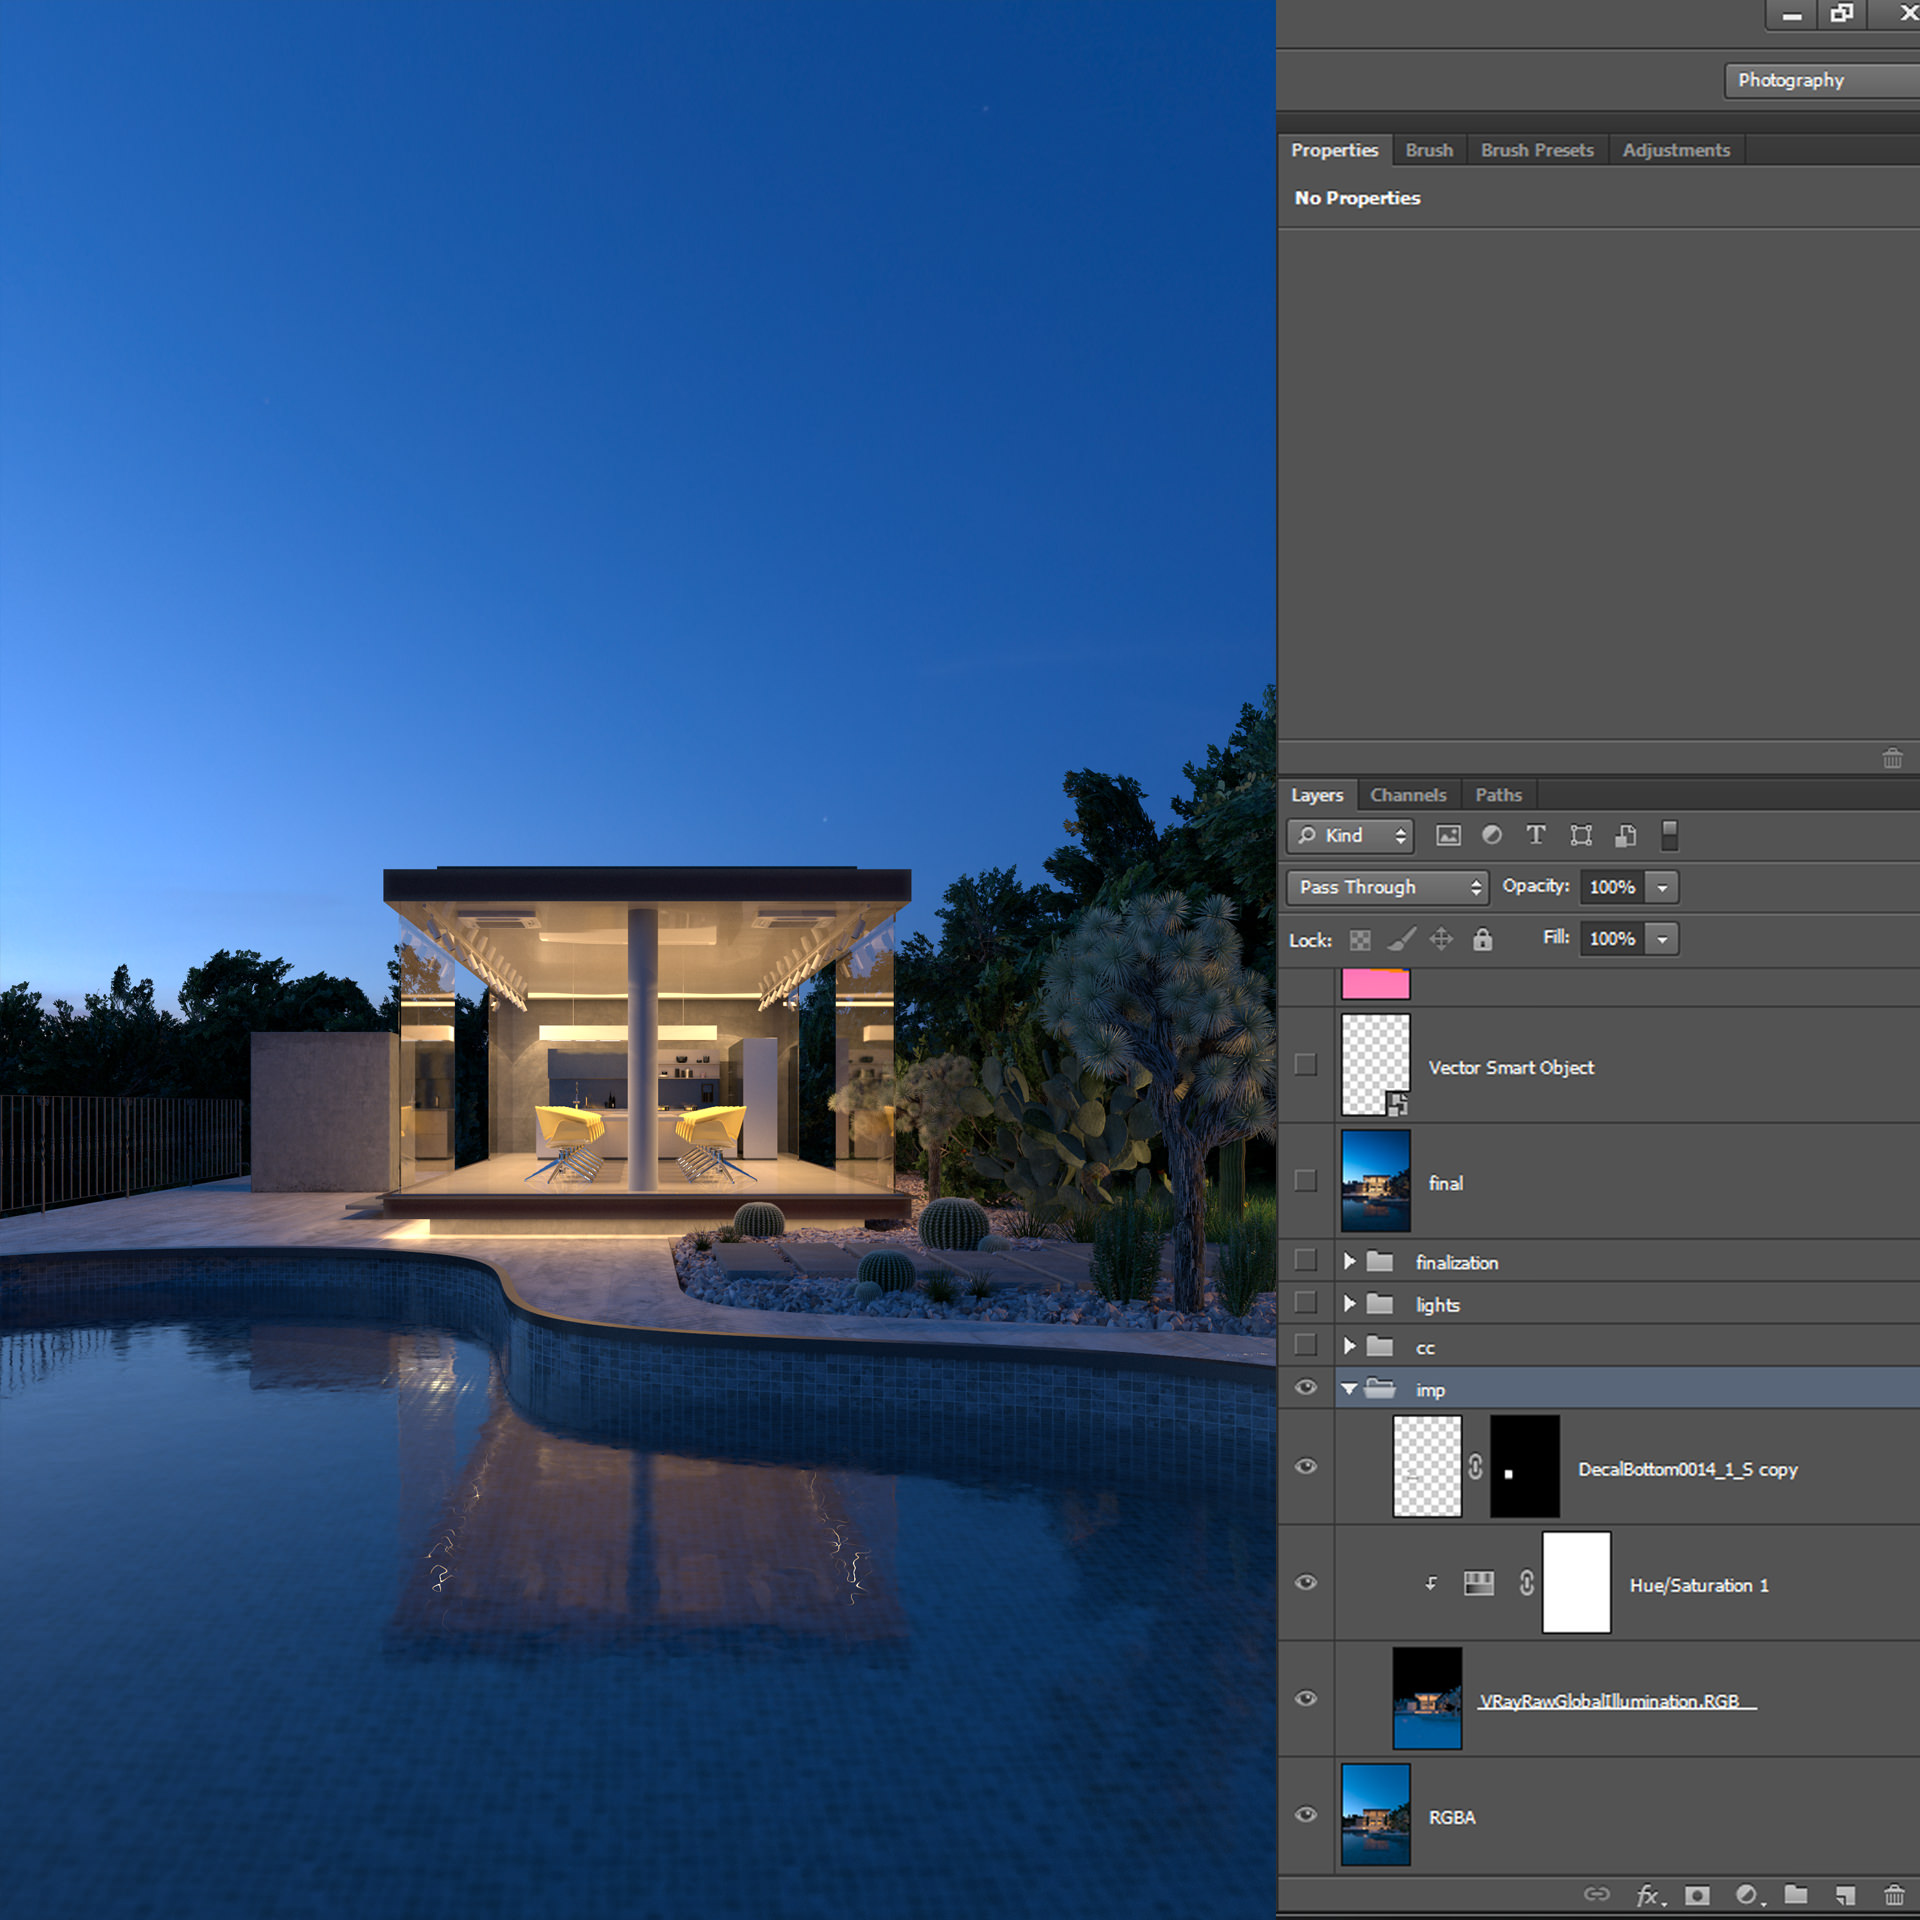
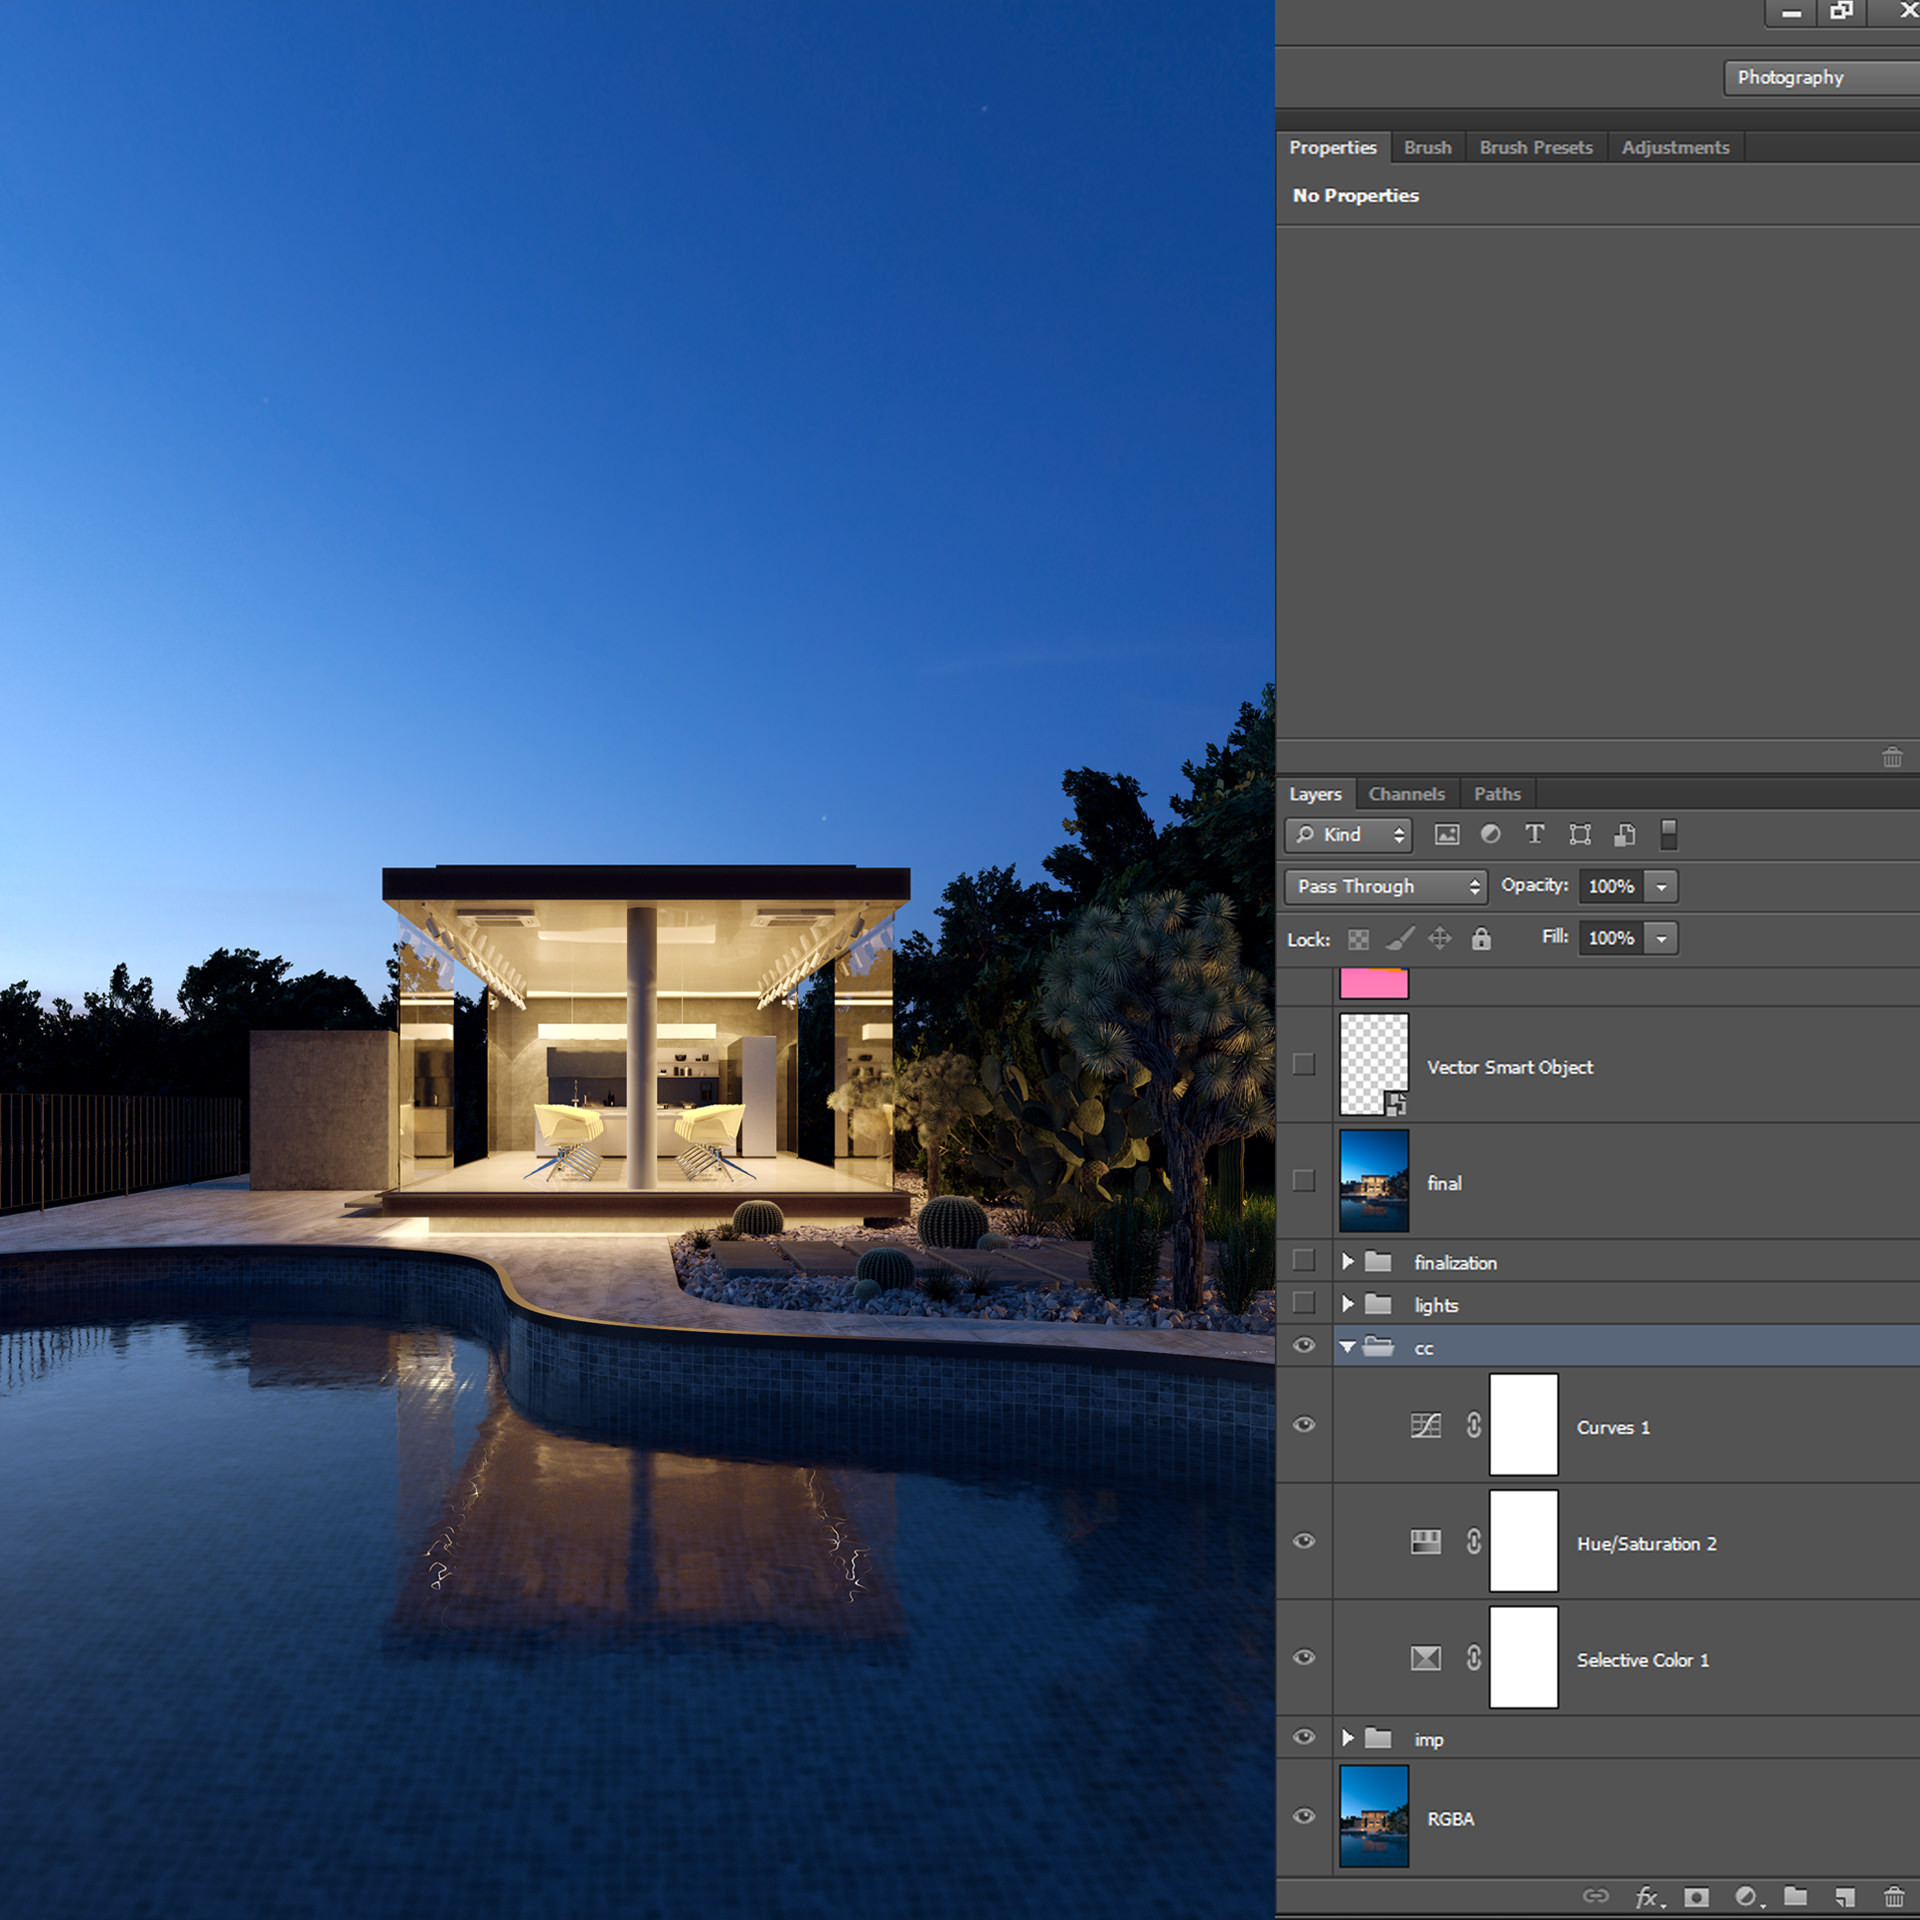
Because everything was done inside 3ds Max and V-Ray right now I can start with the color correction part of the process so I will start using a Selective Color adjustment layer because only this adjustment layer allows me to control every single color on the scene and the main idea behind this is try to keep with the subtle transitions between colors and temperatures, because this layer has pretty much all the colors and 4 sliders to customize each one, the flexibility is just so great and helps get a homogeneous result in terms of colors and tones.
The color balance combinations are unlimited, so this is the stage where having the right reference is crucial in order to emulate the same color scheme in the render. Probably here the “secret” is to respect the light conditions that we have in our render and find a reference with the same characteristics, this will give more sense to our final result.
We can use as well adjustment layers like Hue / Saturation or Curves to complement the previews correction with the Selective Color adjustment layer.
Now is time to put attention on the physical reactions that we can find in our scene. For example, light bulbs glare/glow. We can paint light easily in Ps just taking in consideration that light doesn’t have a color, light has a temperature and at the same time is an over exposed effect that we can control just over exposing our image.
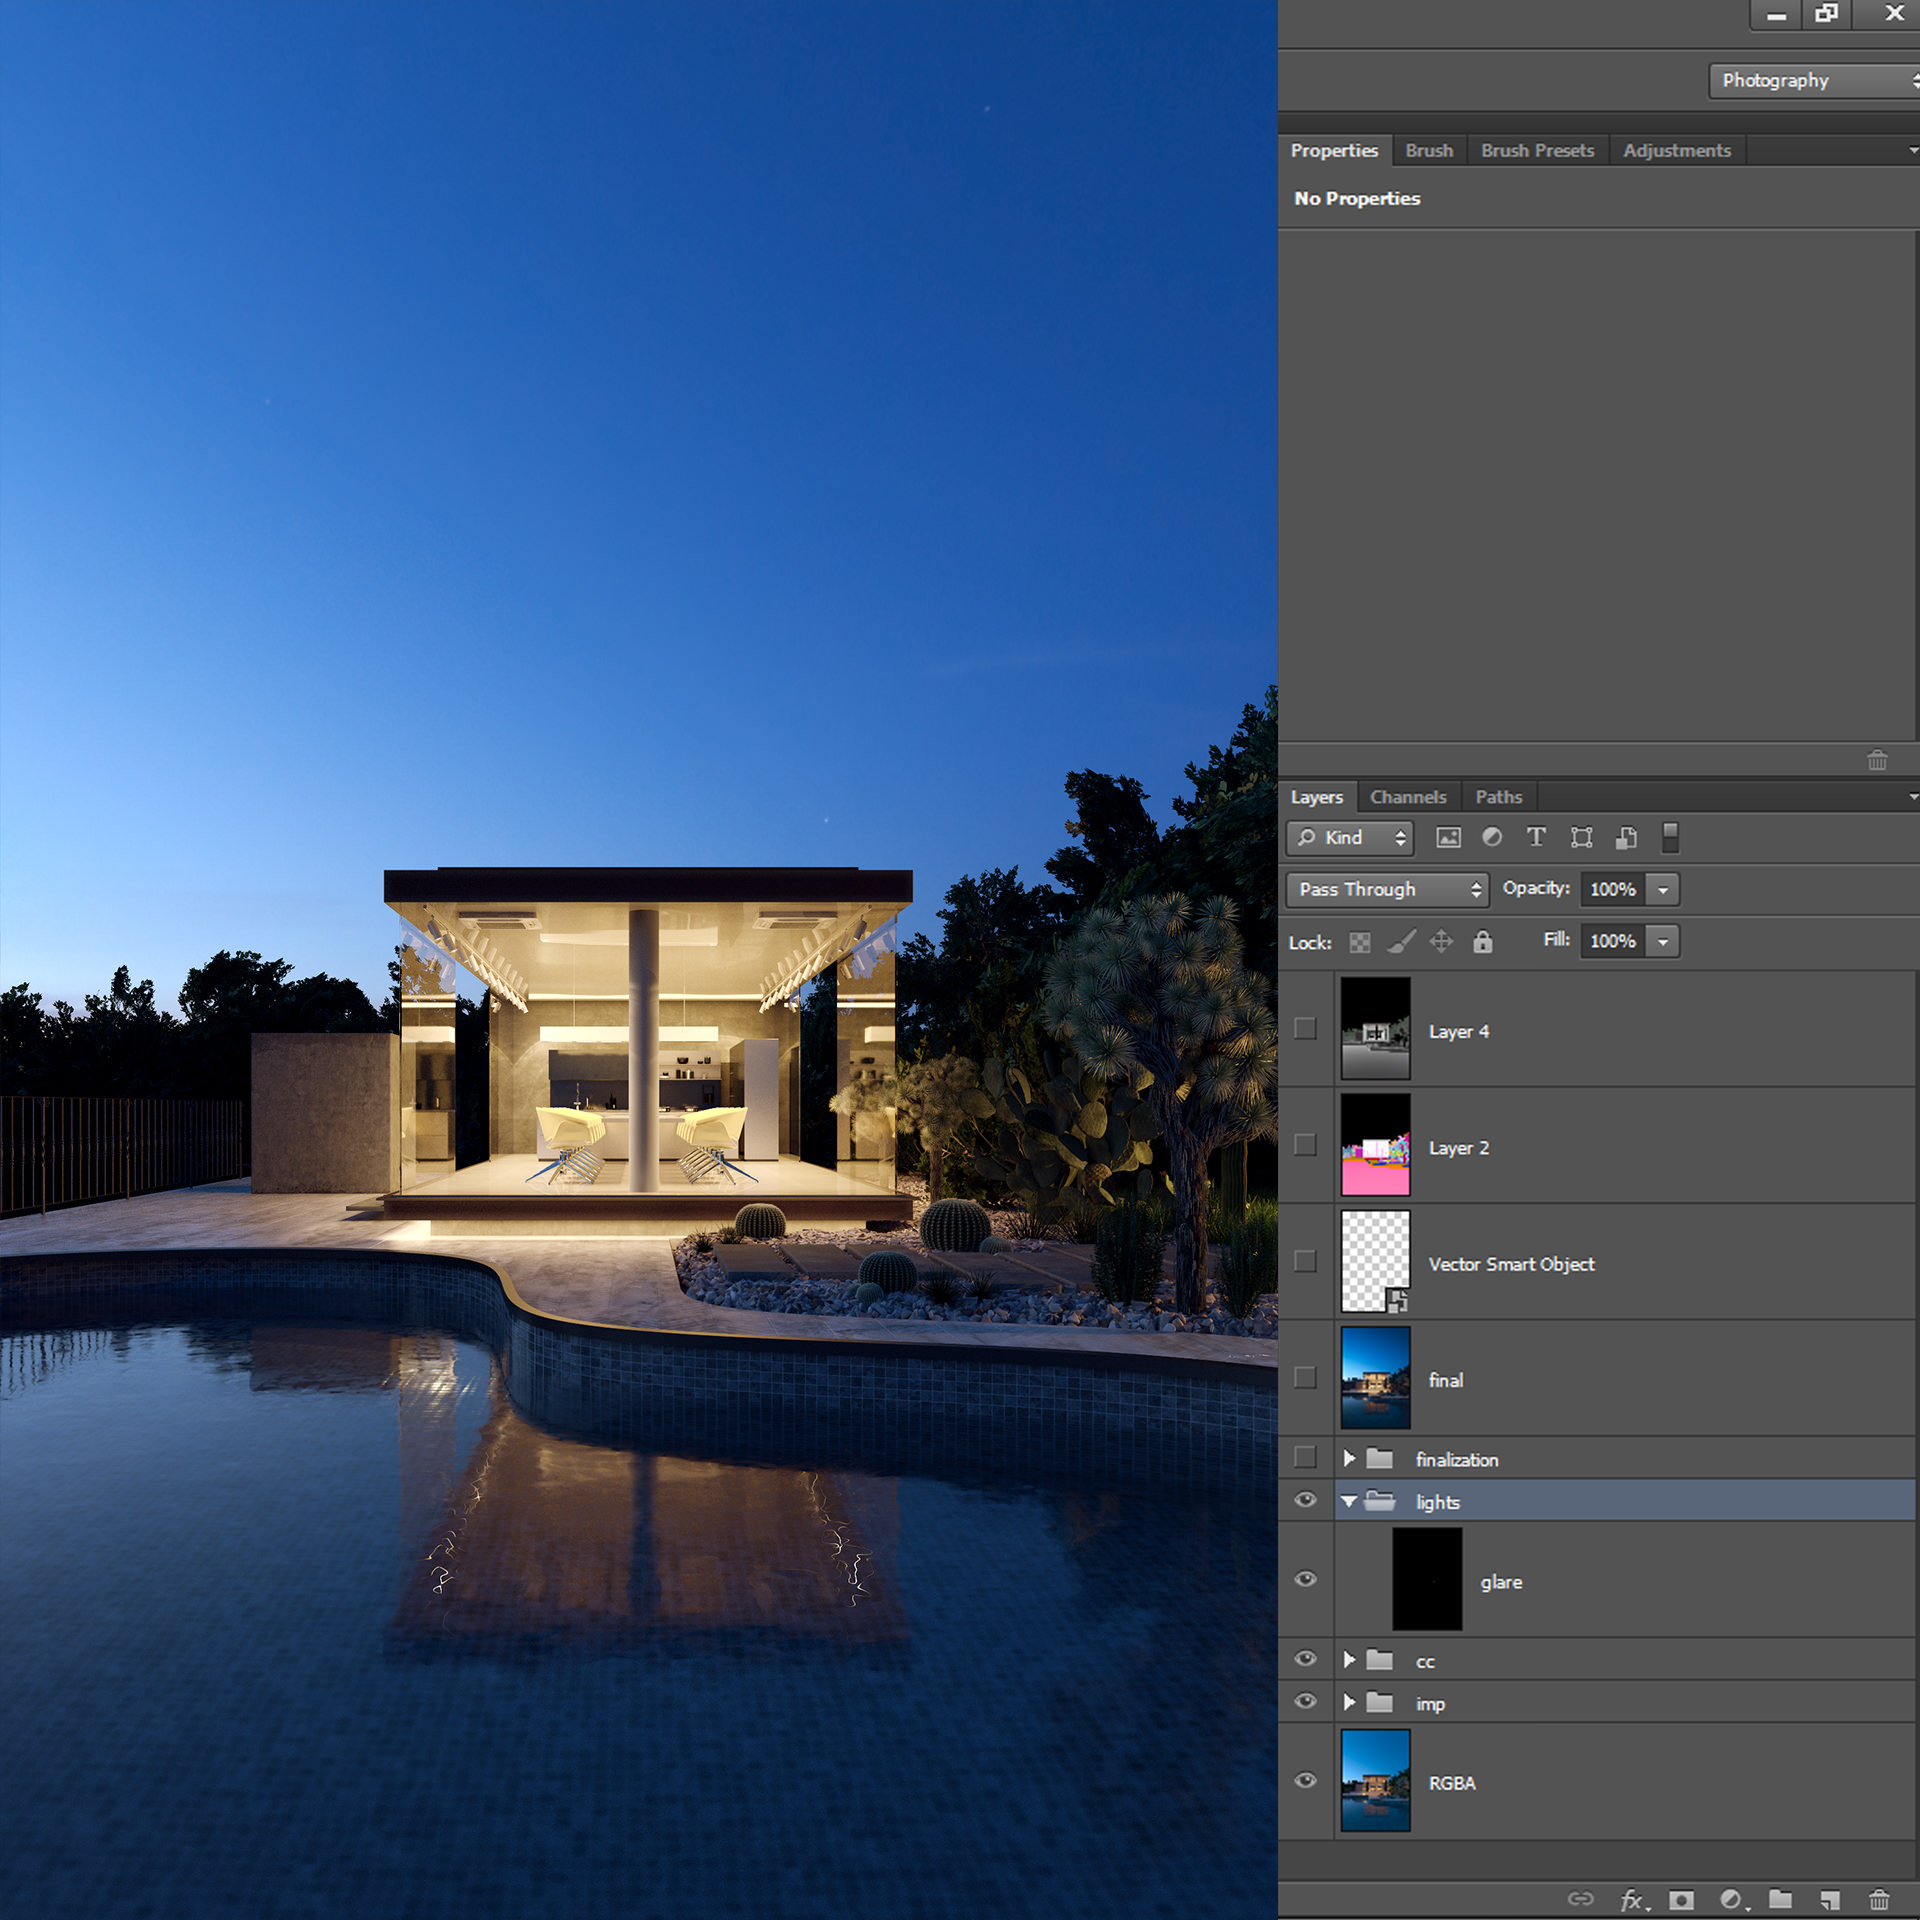
For the finalization part of the post production process we are going to use two of my favorite Ps plugins : Magic Bullet Photolooks and Nik Software.
The idea is to try to fuse and merge all the previews corrections, all the scene has to look seamless in terms of color, contrast, exposure, saturation, and diffusion.
As a night scene we must understand that the light behaviour will have a very diffuse characteristic so is very important to keep this in mind, because this is a physical reaction of trying to balance the exposure using a low shutter speed value, so when you are not sure about light response please check a real photo and you will be able to recreate this and other effects in a more accurate way.
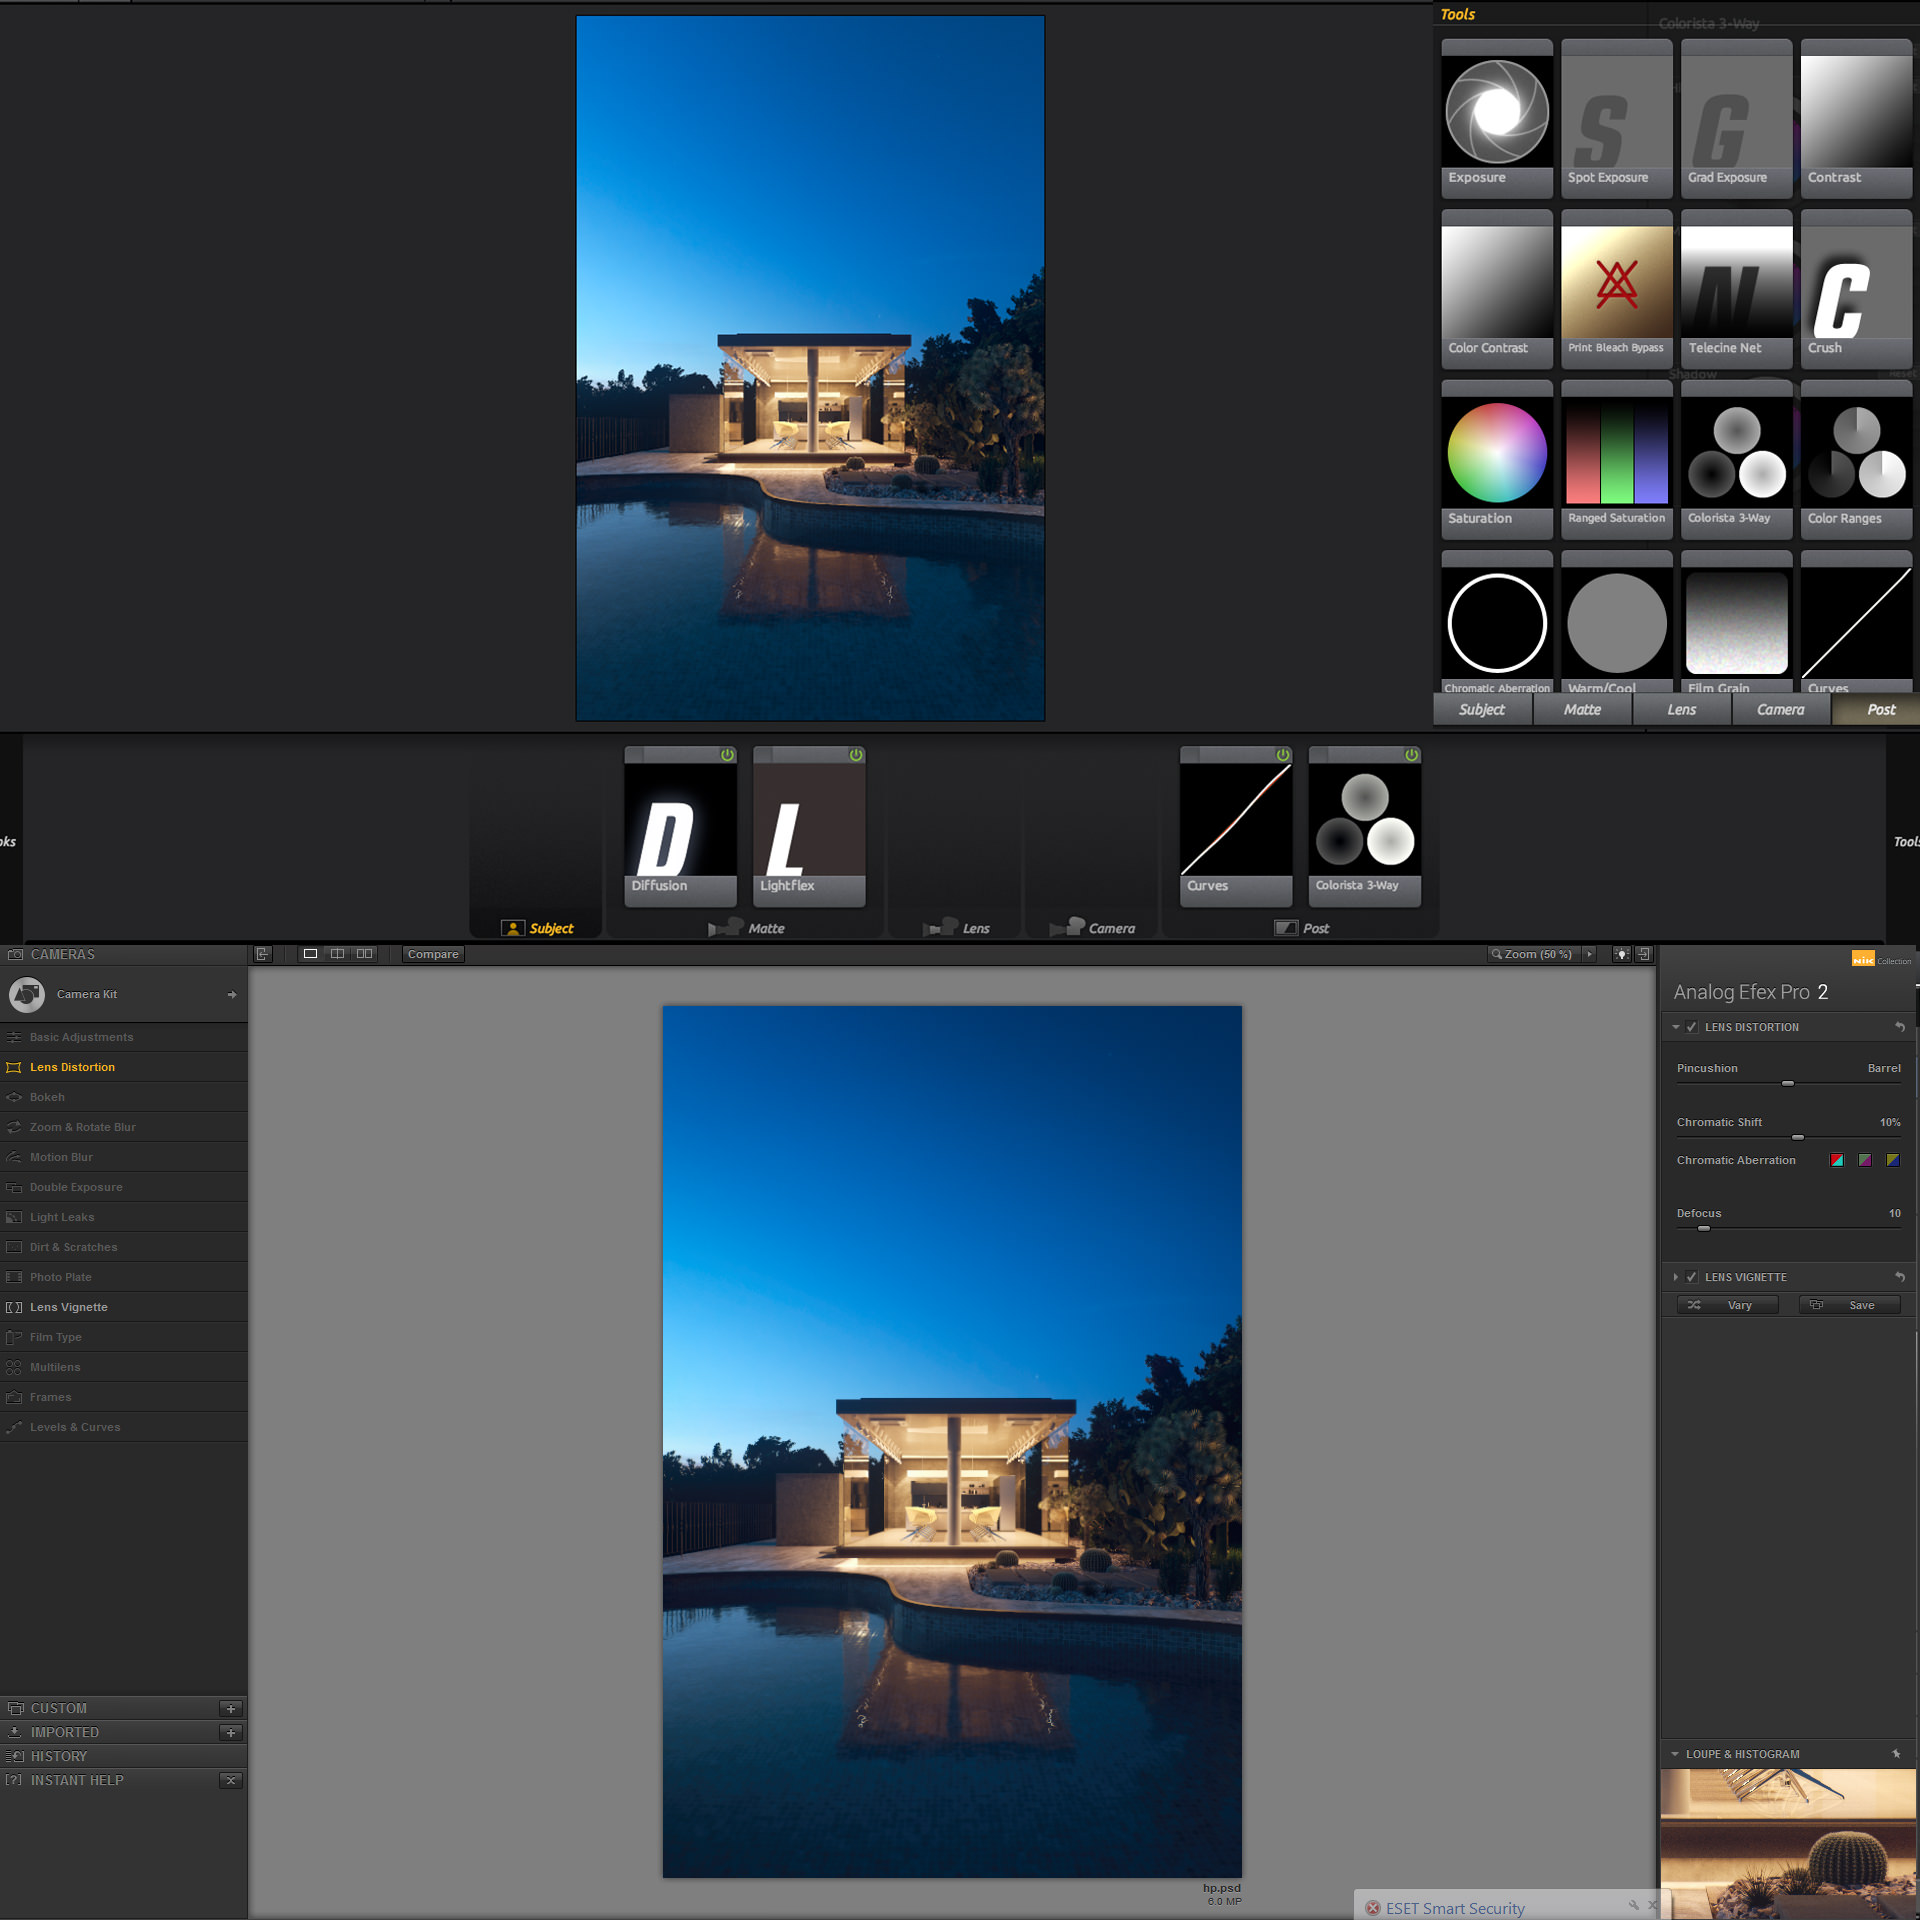
Because real photos don’t have a perfect anti-aliasing (AA) we can use Analog Efex Pro 2 from Nik in order to blur a bit (just a bit) the anti-aliasing definition. This will give a more natural sensation.
Chromatic aberration (CA) is a very “controversial” topic because, in photography this is actually an error and needs to be corrected but ironically this imperfection is quite common in photos so because of this when the human eye sees chromatic aberration in any image (render / photo / illustration) automatically thinks that is a “real” picture, so you can use it to emphasize the photoreal look.
My personal suggestion is to not abuse this effect, and if you are going to use it be sure you understand why and under which specific situations this error can happen.
Something that I really like about these plugins is that you can save the preset and reuse it for all the views so this ensures having the same result in every single image.
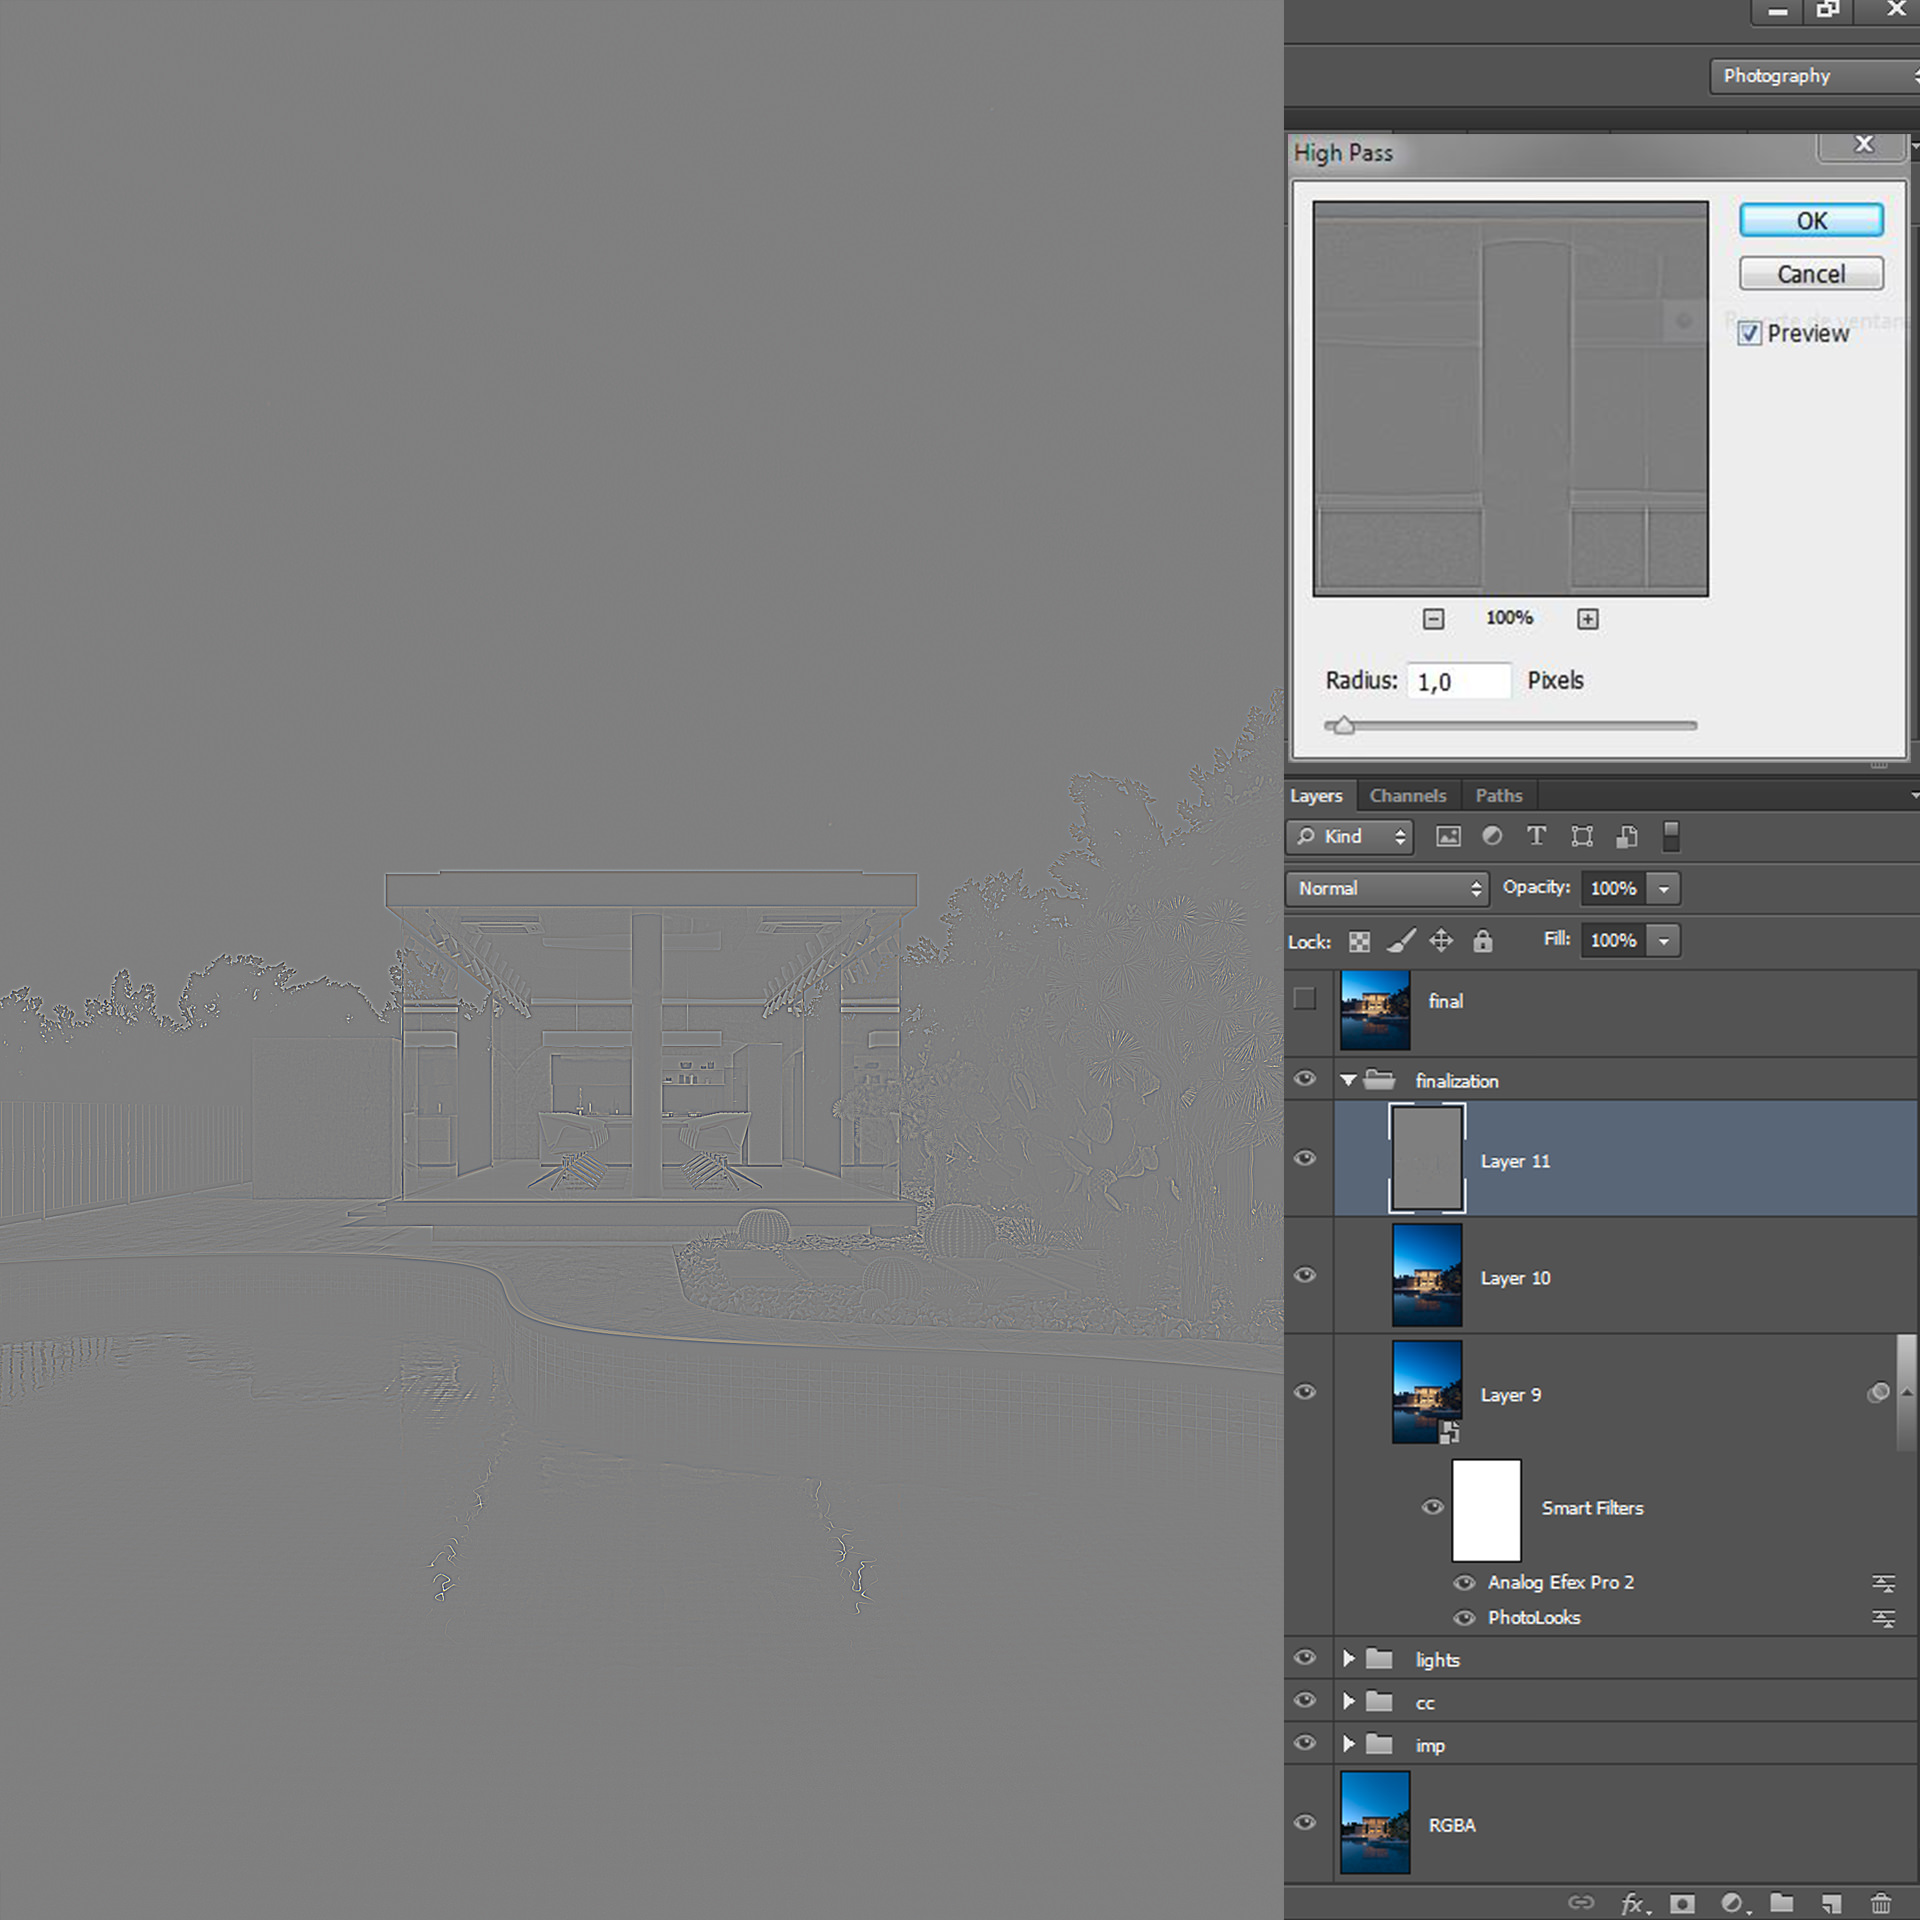
As a final step, we can use a high pass filter to sharpen the image and ensure if we are going to reduce the size to use it for the web we are not going to lose any information and definition.
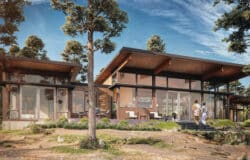
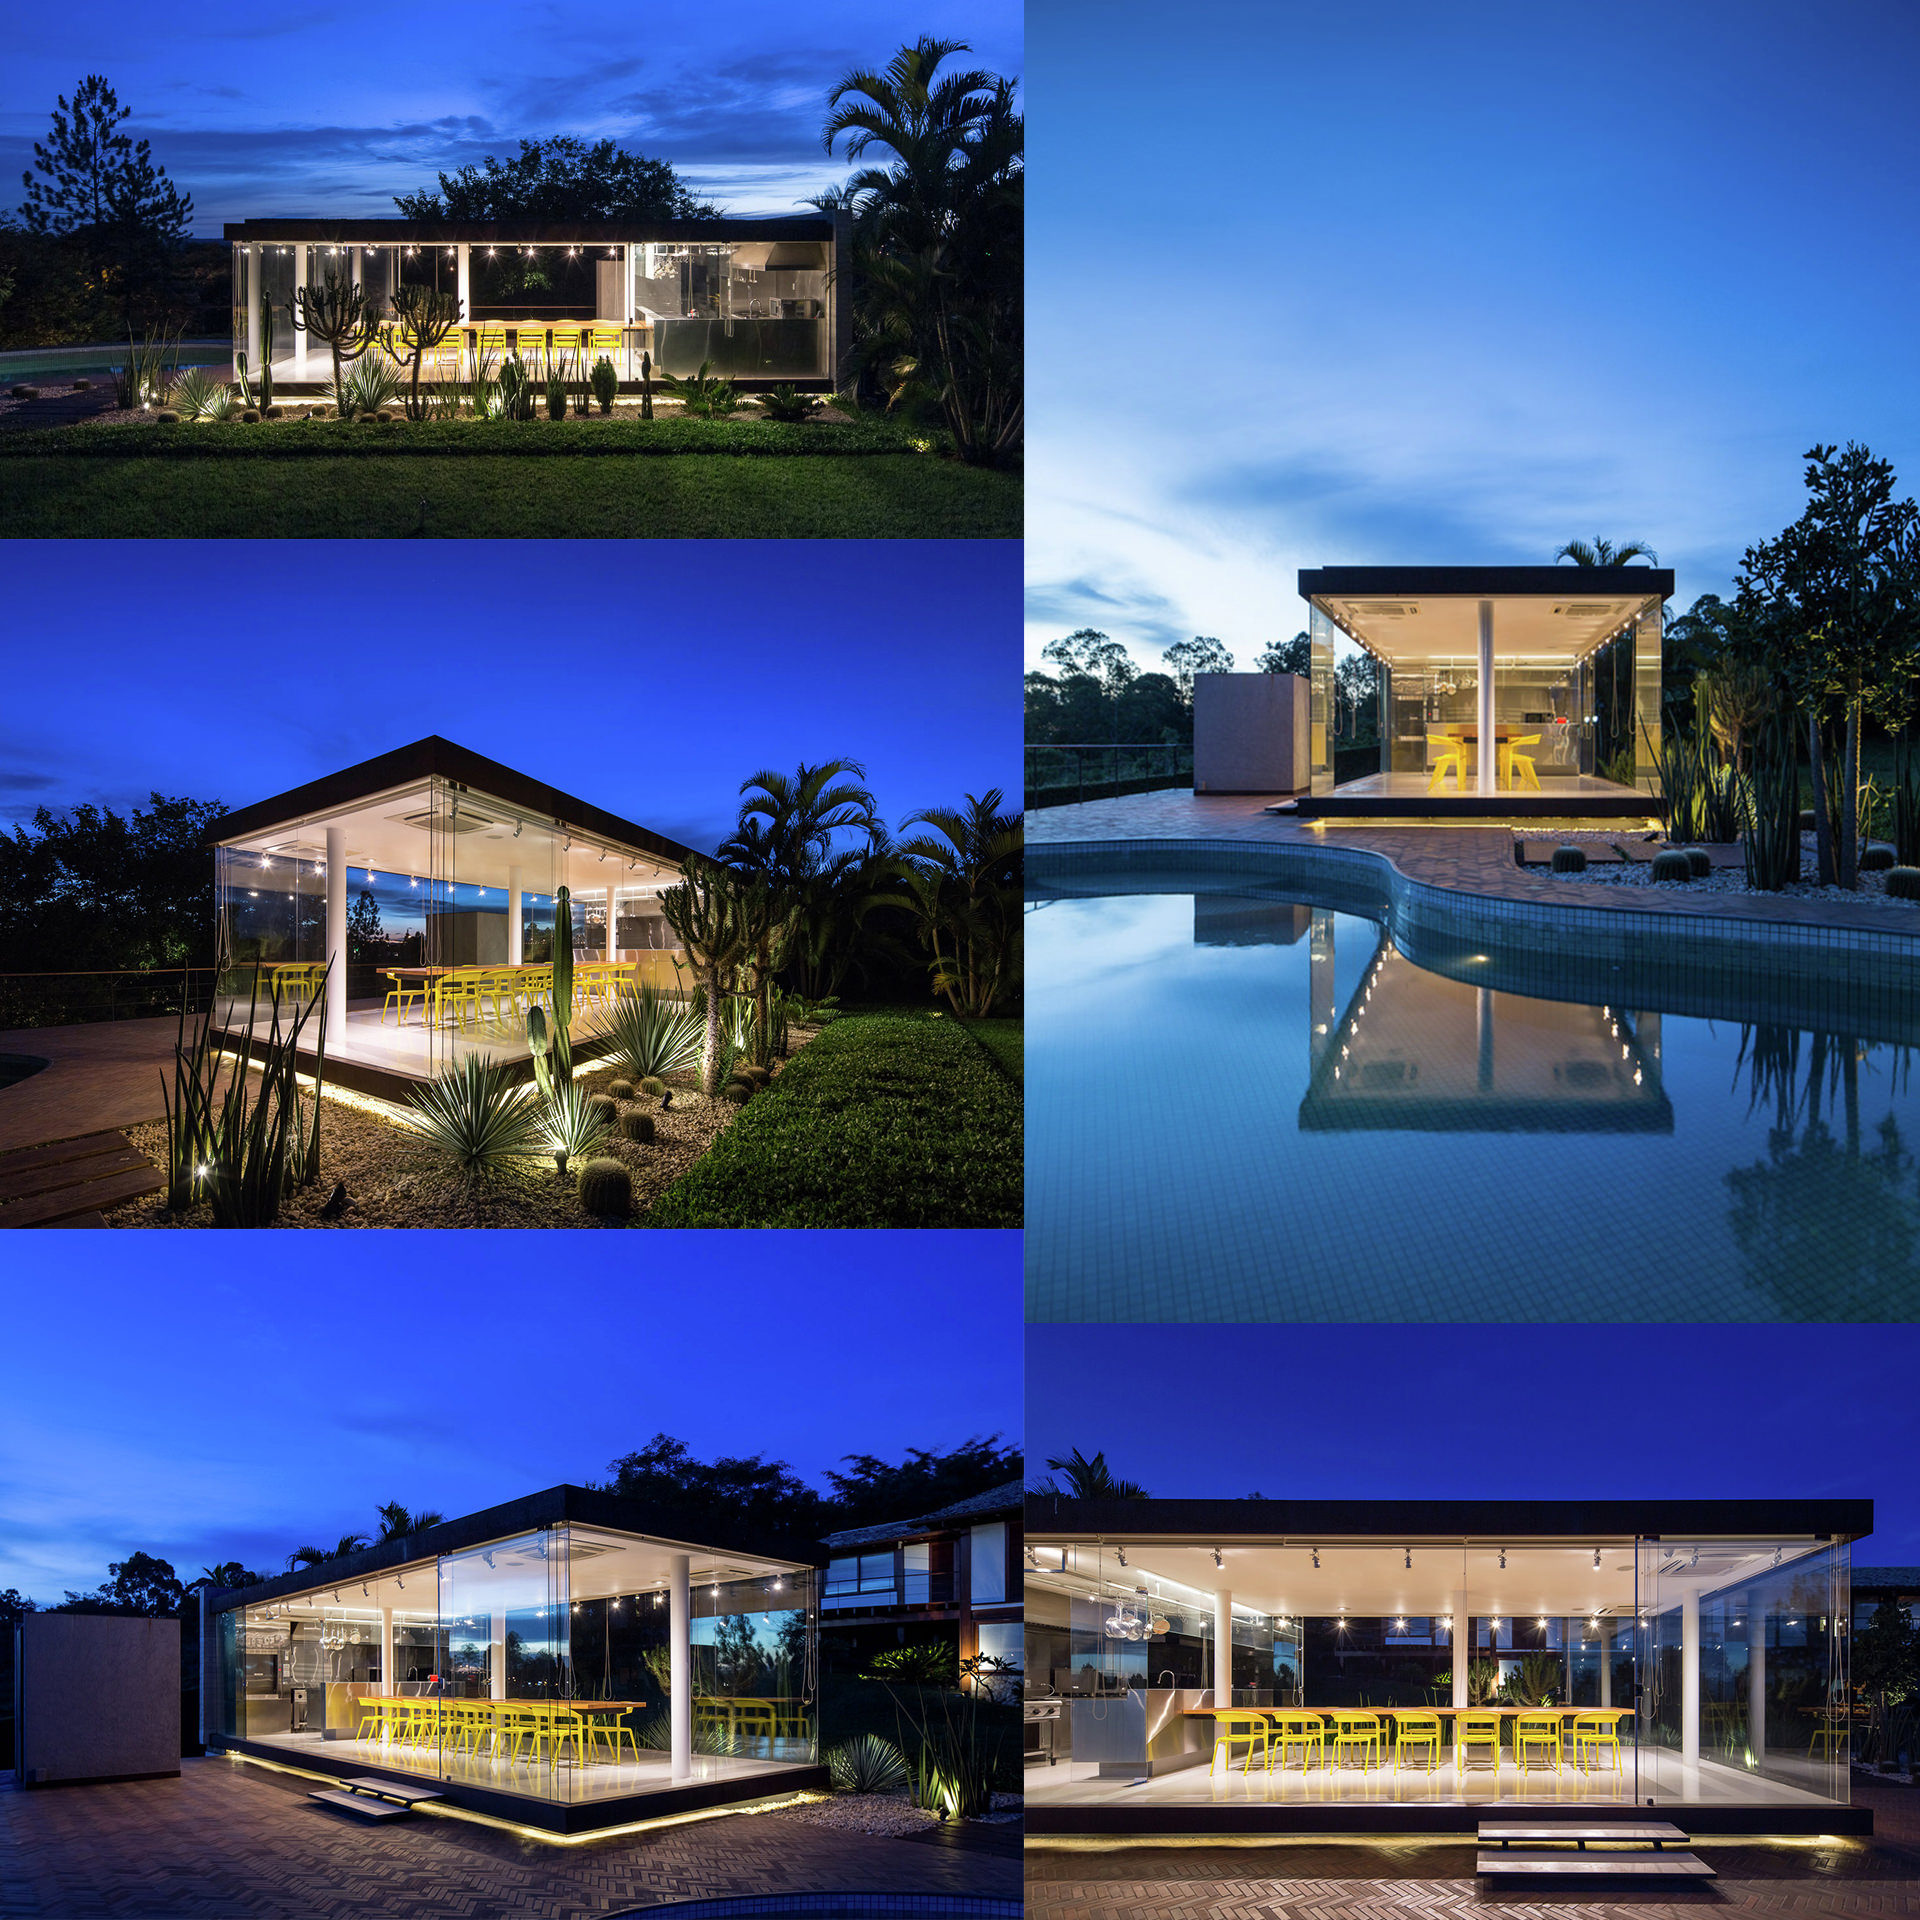
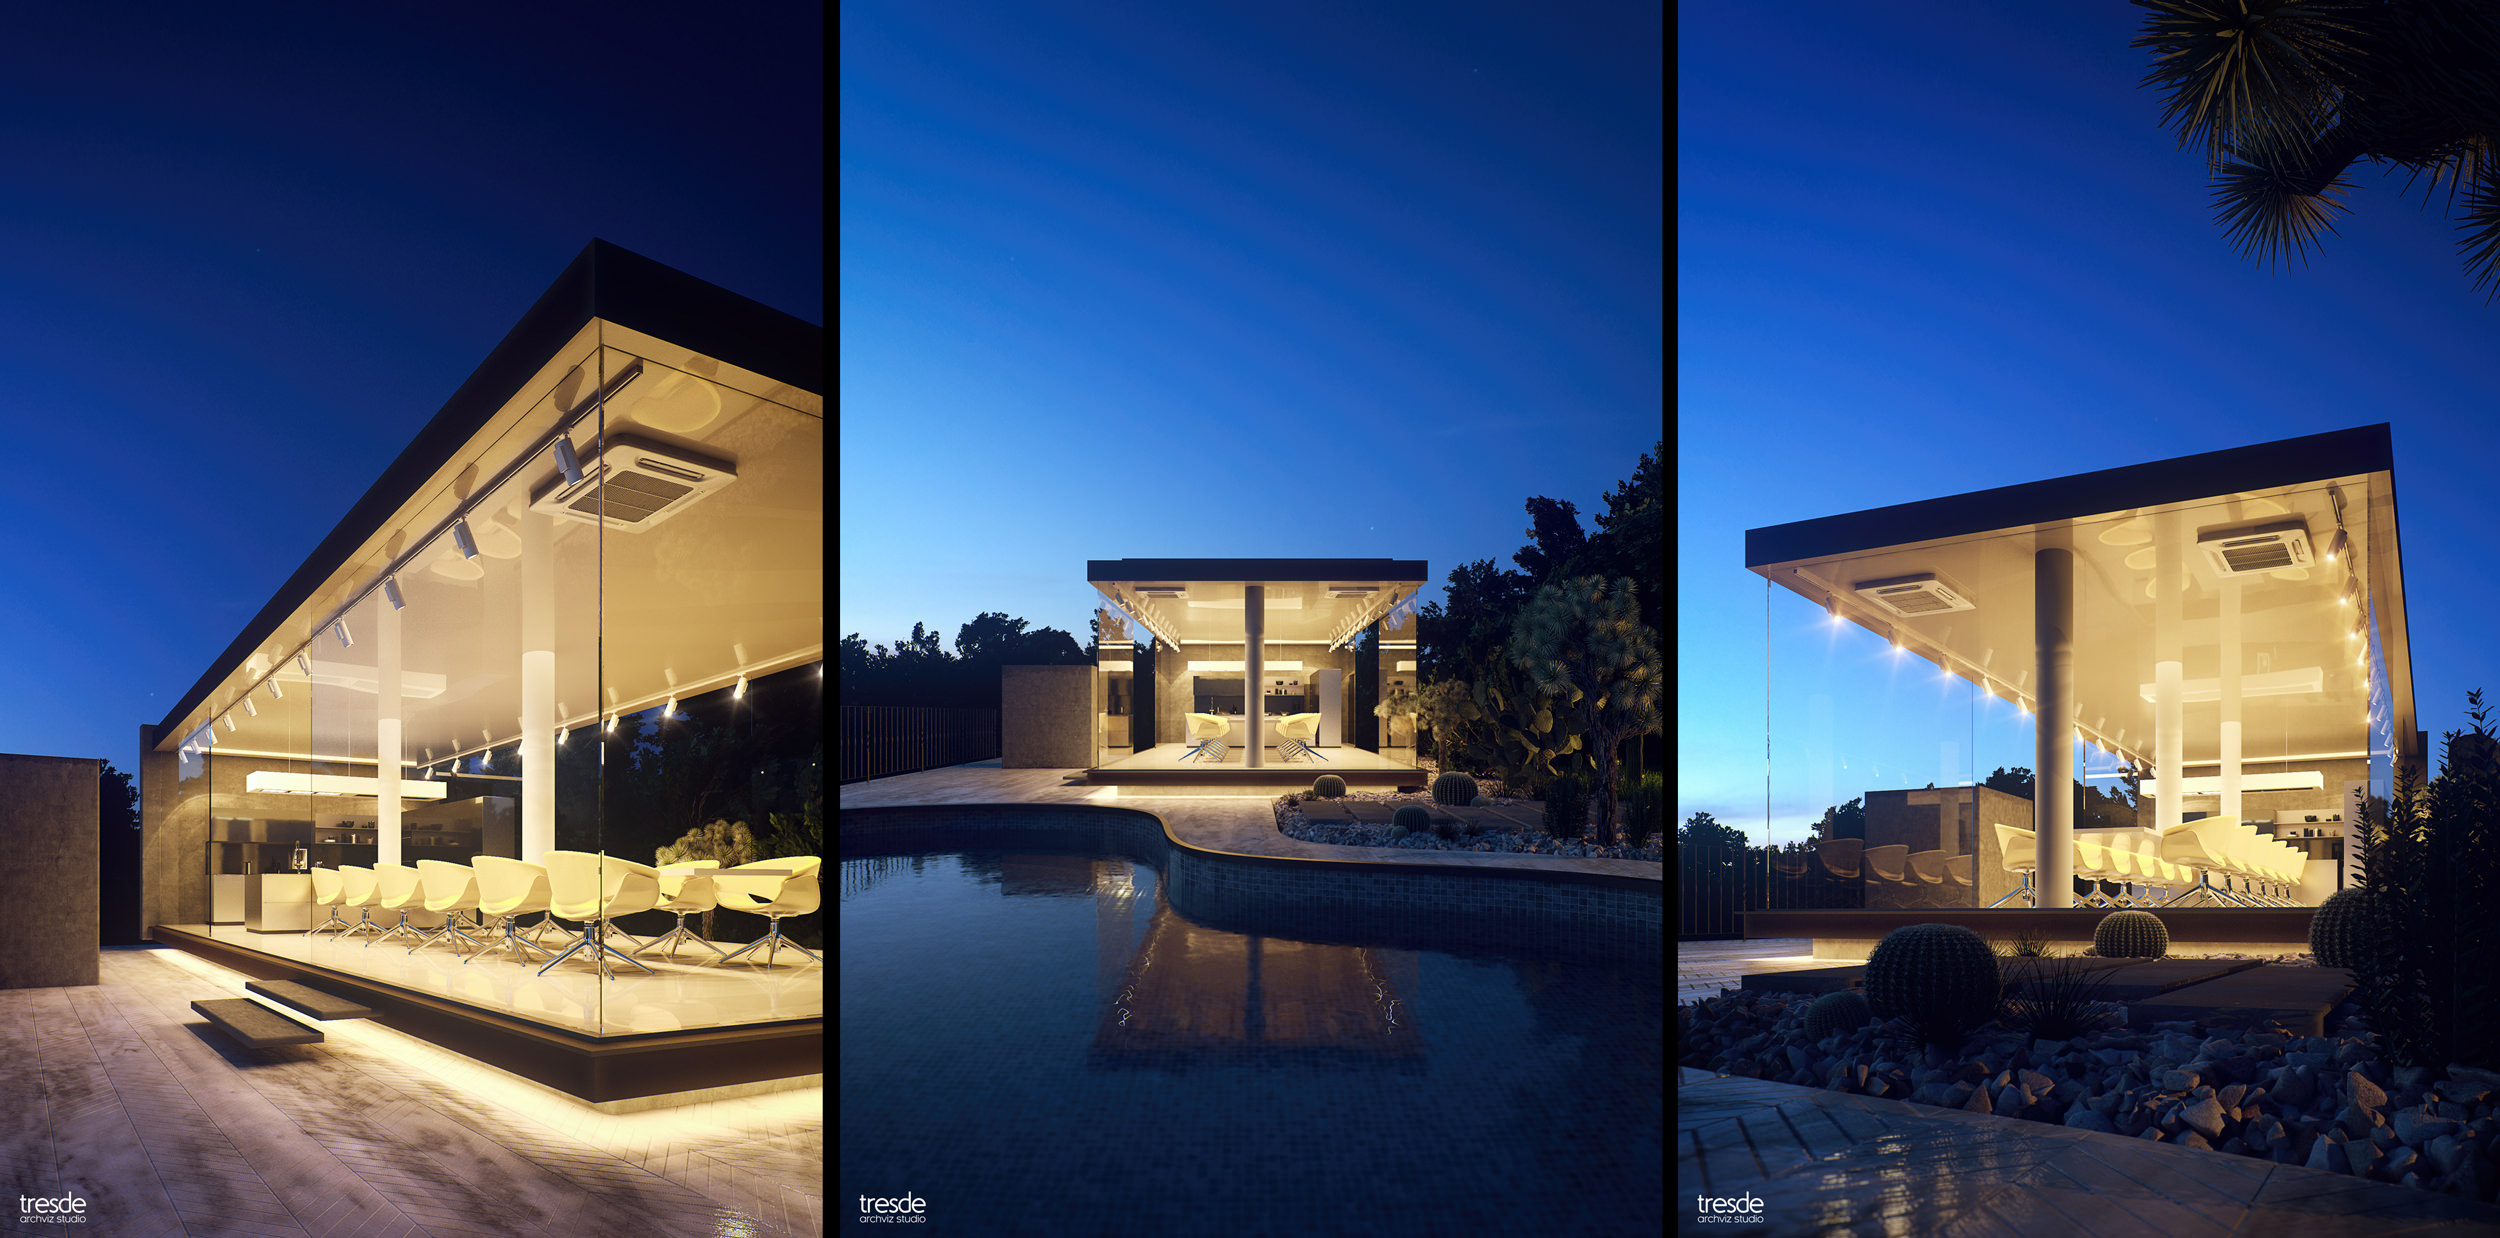
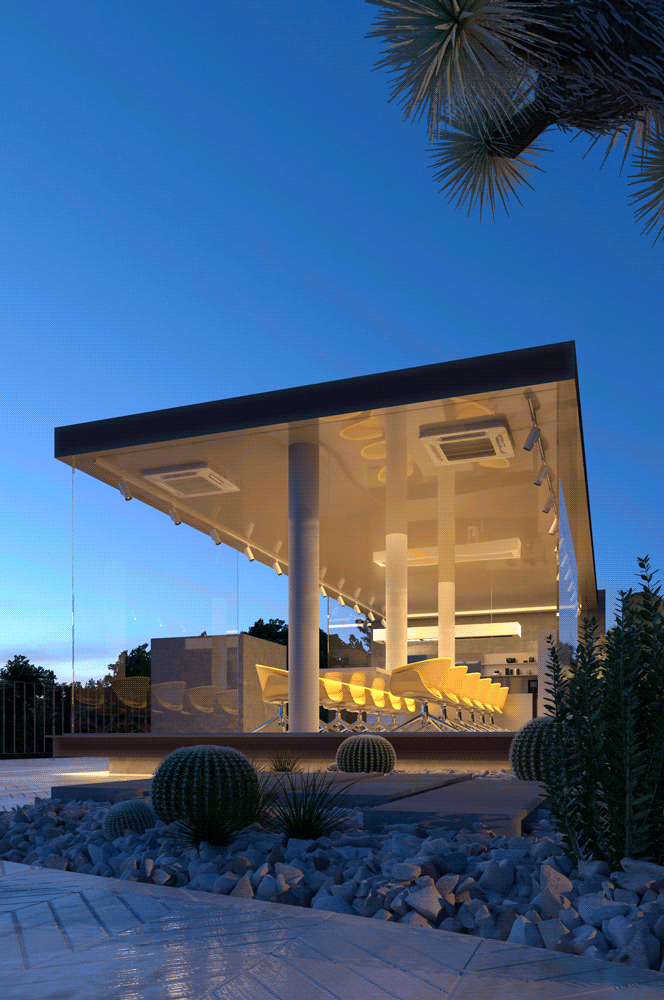
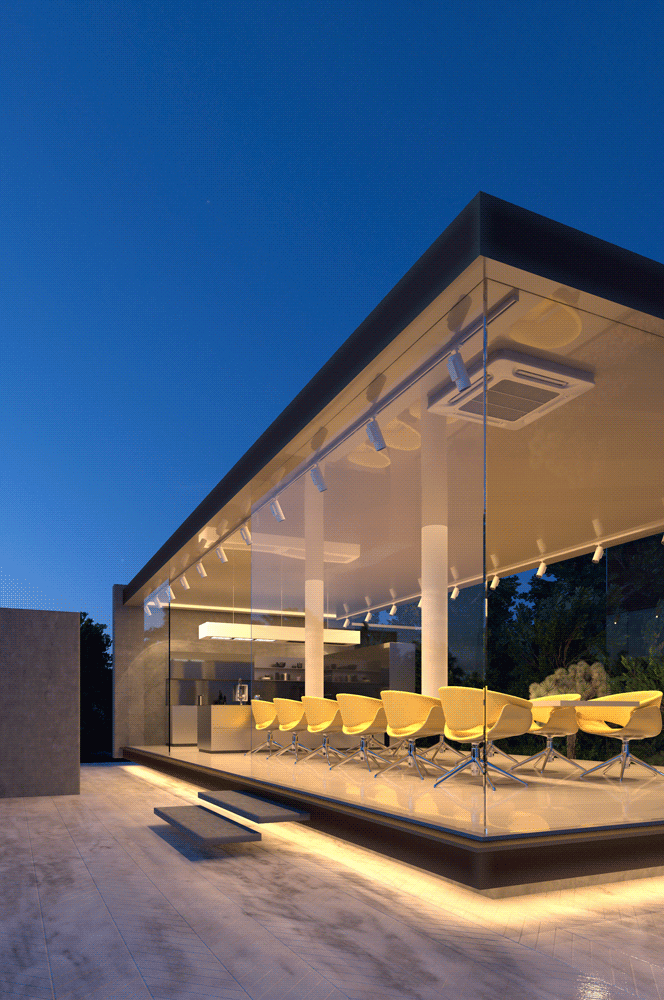
The Final Image :
And Before / After shots (Animated GIF’s) :
Final Comments
Create a practical workflow taking advantage of many tools we can get, is basically the way that I used to create this project.
Probably the difference about this workflow and other ones is I like to cover and control every single variable, must of time we can spend a lot of time trying to guess during the whole process and in a commercial environment time means money and in a personal environment means freedom, so I haven’t used any secrets, hard techniques or tools to create this project.
Keep all the things inside the workflow simple is just an advantage. Be flexible and learn to customize is the key to adapt any content to a project, but of course, on the other hand, there are projects and clients that demand specific models, shaders etc. In such cases, we have to be clear about what is the real purpose of the image.
I hope all of you guys enjoyed this making of, as a way to thank you for this opportunity I’d like to share the Photolooks and Nik presets, hope you find them useful.
Cheers,
Santi.

TRESDE is an architectural visualization studio focused on recreating outdoors and indoors scenarios fully photorealistic, providing the best possible quality in every single project.


Really cool! The copy-paste precision of the lines of chairs is getting to me though, especially in the pool image. It doesn’t seem realistic that all the legs would line up so exactly.
I liked the composition and the importance of dark areas. But i think the materials are not good at all…
Nice image but I don’t understand why publishing a making of when he used:
modelling: all built or downloaded
lighting: Peter
materials: Sigerstudio
rendering settings: Solidrock.
Well, where do I find the artist ability in here?
The compisitions?Oh no wait, the same as the references!
liuus86 He did say his goal was “delivering results with a commercial characteristic in the shortest deadline possible.” I’m thinking the point was not to be artistic, but to give a good-enough result as quickly as possible.
liuus86 Actually, that was what i was meant to say. Totally agree 🙂
Really love the final result. Thanks for the making of.
Nice seeing your work here at Ronen! Congrats!
I already saw these shots and really liked the scene, thanks for all the info!
rombout Thank you Glad you enjoyed it!
Phil Buerer Thanks Phil!
AkbarBinAbdulRahman Sure!
I wish these making of also showde more about the modeling. They alwaar trend to look the same and none show Some of the modeling progross just render-, material, scène-, proxies settings and Some post pro
No offense to you!
Nice image but I don’t understand why publishing a ” making of http://goo.gl/SuHRvK