


Making of Favela
Matthias Buehler approached me not long ago, sharing his personal project ‘Favela’ which immediately got me curious. Knowing Matthias works at ESRI as 3d Product Engineer involved with the CityEngine project I knew that some cool stuff are going on behind the scenes and I was eager to learn more about it. In this article, Matthias describes the rather ‘techy’ process of the procedural generated creation he and his friend Cyrill Oberhaensli went through over a span of 2.5 years working on it in their spare time. Enjoy!

Author : Matthias Buehler
Matthias Buehler is a 3D Product Engineer at Esri R&D Center Zurich.
Project Team :
- Matthias Buehler
- Cyrill Oberhaensli
Inspiration
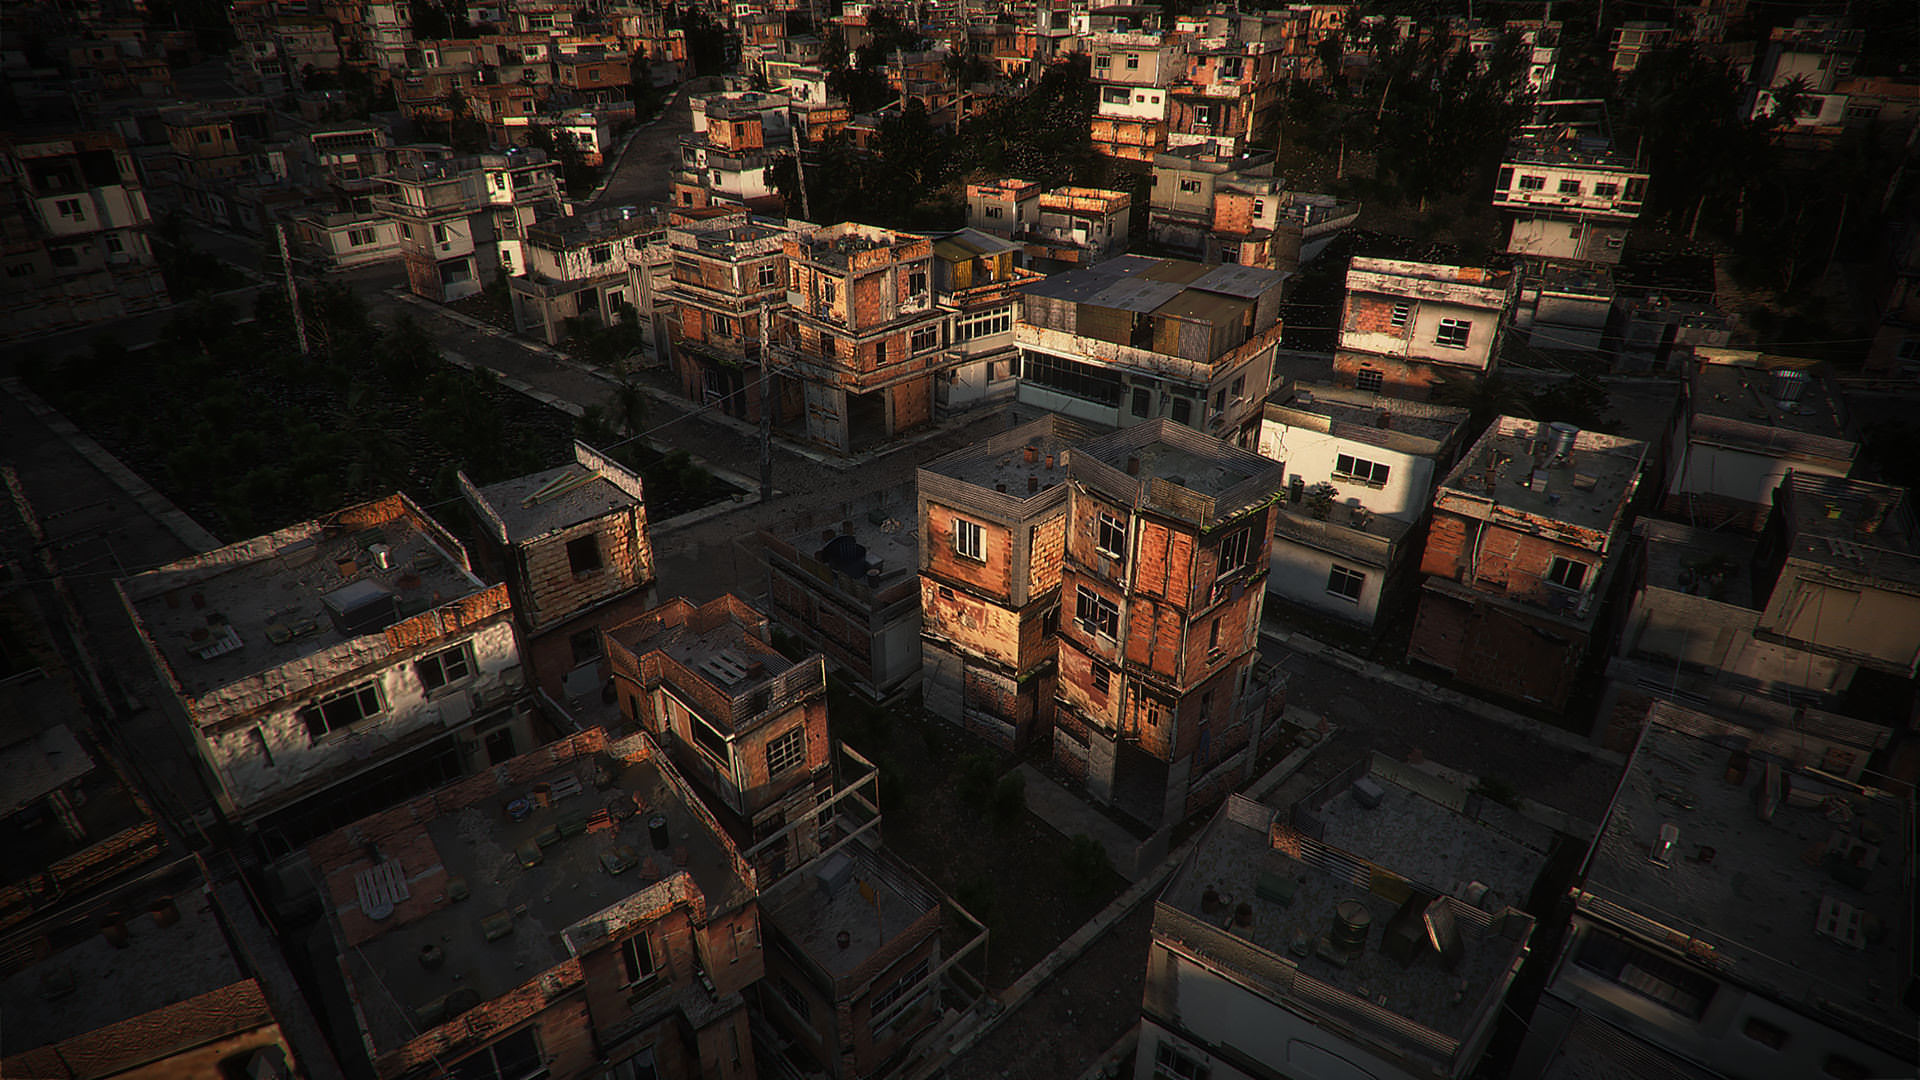
The inspiration for the project was a different Favela rendering I had seen about three years ago. It was a submission for a 3d city competition. Having studied all the details, I thought to myself that this could be done better. Soon after, I asked my friend Cyrill Oberhaensli, who had started with 3D just a bit earlier, if he wanted to join me for the project. We did not foresee that this would go with us for the next 2.5 years…
Above is the rendering of the full-scale Favela model and below is the miniature scale Favela model.
Here’s a brief overview as well :
Goals
I’ve been working on the CityEngine development team as a product engineer for 2 years by the time the project started and obviously never really had the time to do such a detailed project during work, so I started it in my spare time. It was supposed to display the culmination of all the know-how I had collected so far, but it went a lot further.
The second and more important aspect of it was to show the sheer potential of CityEngine as a tool in urban planning. CityEngine is still unknown to most city planners, thus this project is supposed to show the potential of the software to study and develop smart city models in all scales.
For the renderings, we chose Maxwell Render by Next Limit, which I have used for years and years and simply produces the best quality images without having to worry about setup or tweaking, which I so dearly hate. Sadly, some architects that have seen the images of this project just thought it was a ‘tasteless elitist mockery’ of the people who actually live in Favelas… It’s not! It’s sad to see that some people just read bad things in what they see.
Procedural Buildings
The core of the project was the procedural generation of the buildings and streets. In CityEngine, all geometry is generated by rules, which are written in CGA – CityEngine’s proprietary scripting language. The art of procedurally modeling buildings, is to find the ‘essence’ – the semantics of the architecture, and to translate those into CGA code. Writing such code for a building is basically defining the nature of an archetype and how it is constructed in all possible scenarios.

Building Volumes
After having studied many reference images carefully (plus a bit of trial and error and playing) I came up with a rule set which mimics the distribution of building volumes I was happy with. I added variety in number of floors, setbacks, volume changes and shifts, plus added code that makes the volumes adapt to the terrain.
Mass studies :

Floor volumes with flat and sloped bottom side (black / white) :
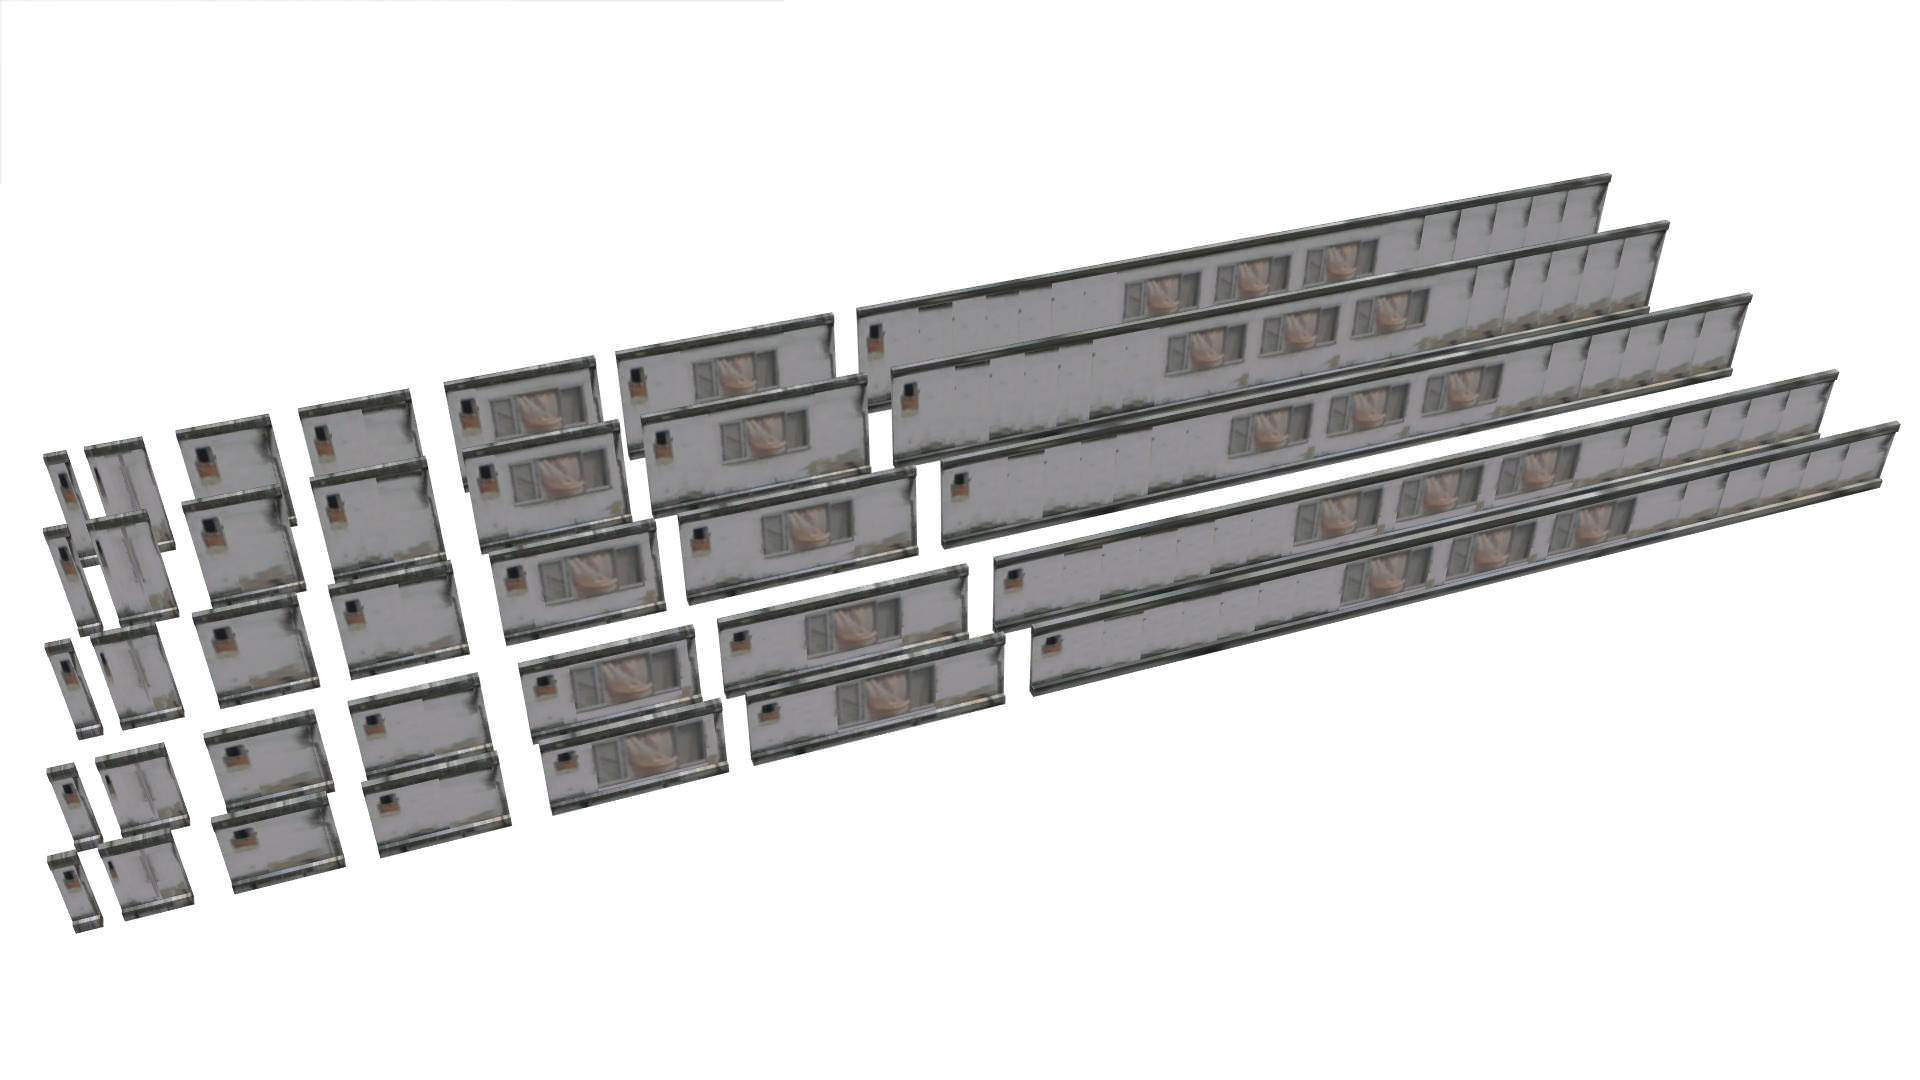
Facade Library
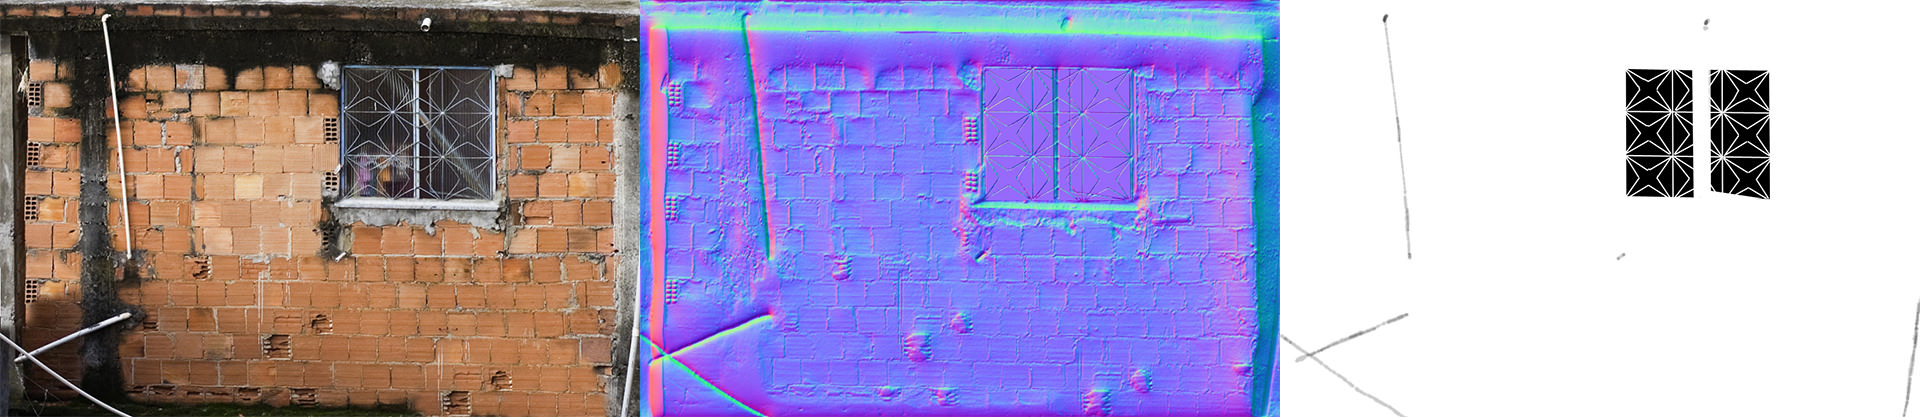
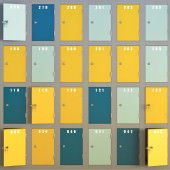
I gathered 60 images of individual facades (1 floor high each), with the same statistical distribution of grey brick, red brick and plaster facades, as found in our reference images. Each image was manually cleaned up and processed in CityEngine’s Facade Wizard to get 60 rules that produce a volumetric facade representation, which can adapt to any facade width.
Depending on the width, the splits that happen during the model generation, delete, repeat or scale individual parts to adapt to the given dimension.
The full facade library, assigned to 3 floor height variations :
The rules automatically adapt to any given facade width :
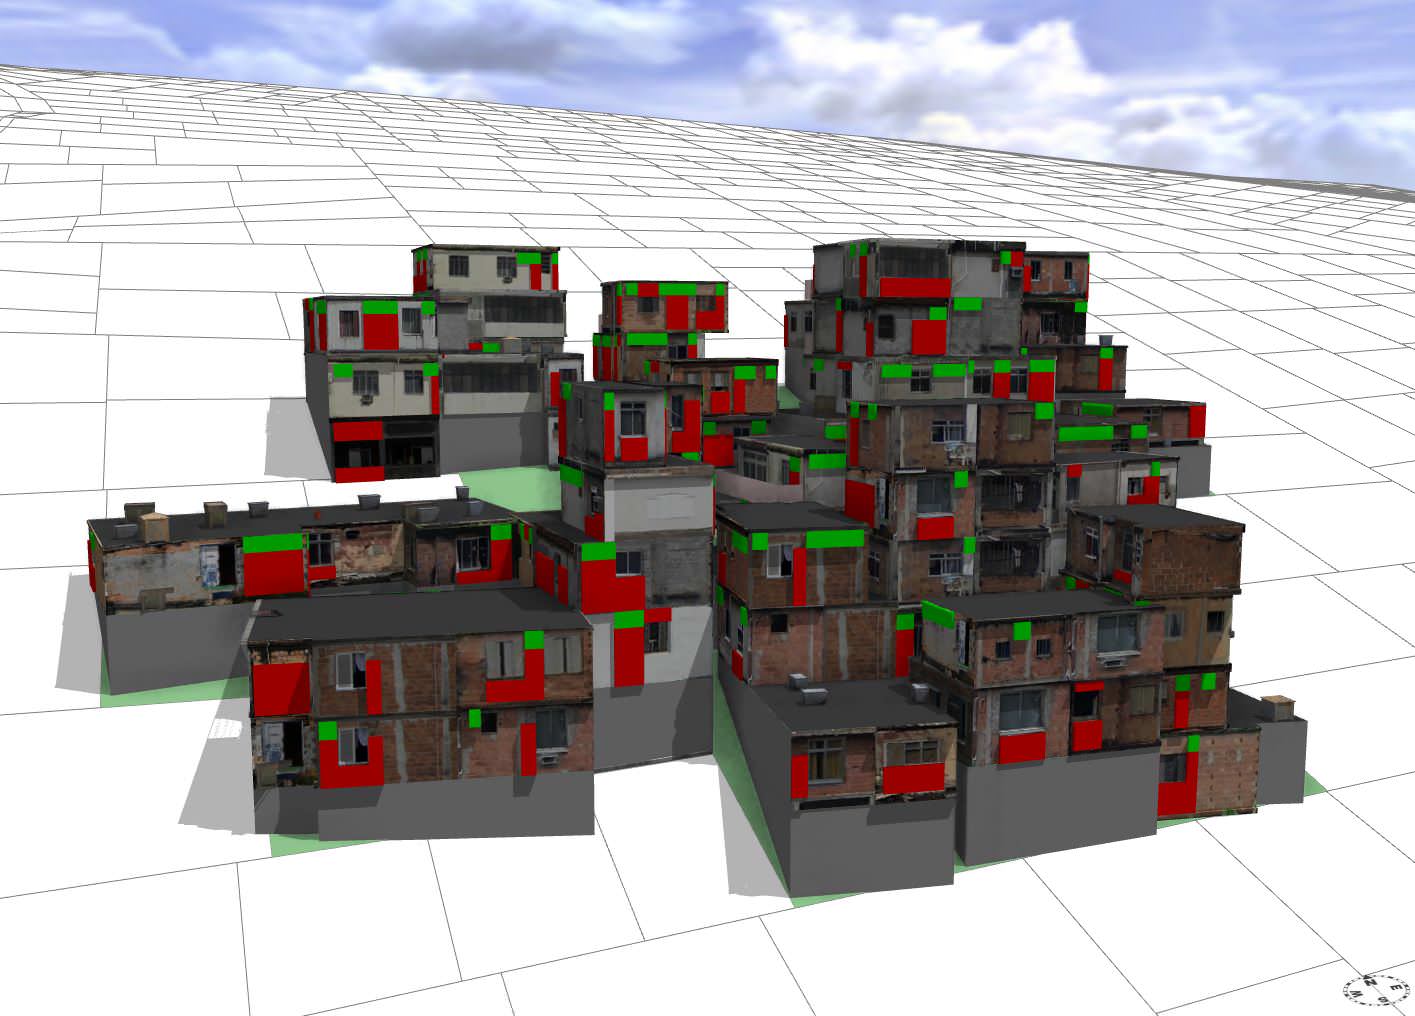
All 60 CGA facade rules were then manually post-processed to additionally produce polygons, where I first defined, which elements represent windows and which wall. Those polygons then were taken as further input, to define, where typical elements for each region can be scattered. Elements such as pipe fragments, AC’s, electric cable connectors or random peeling-off plaster.
Green – Areas of potential cable connections, Red – Distribution of facade details :
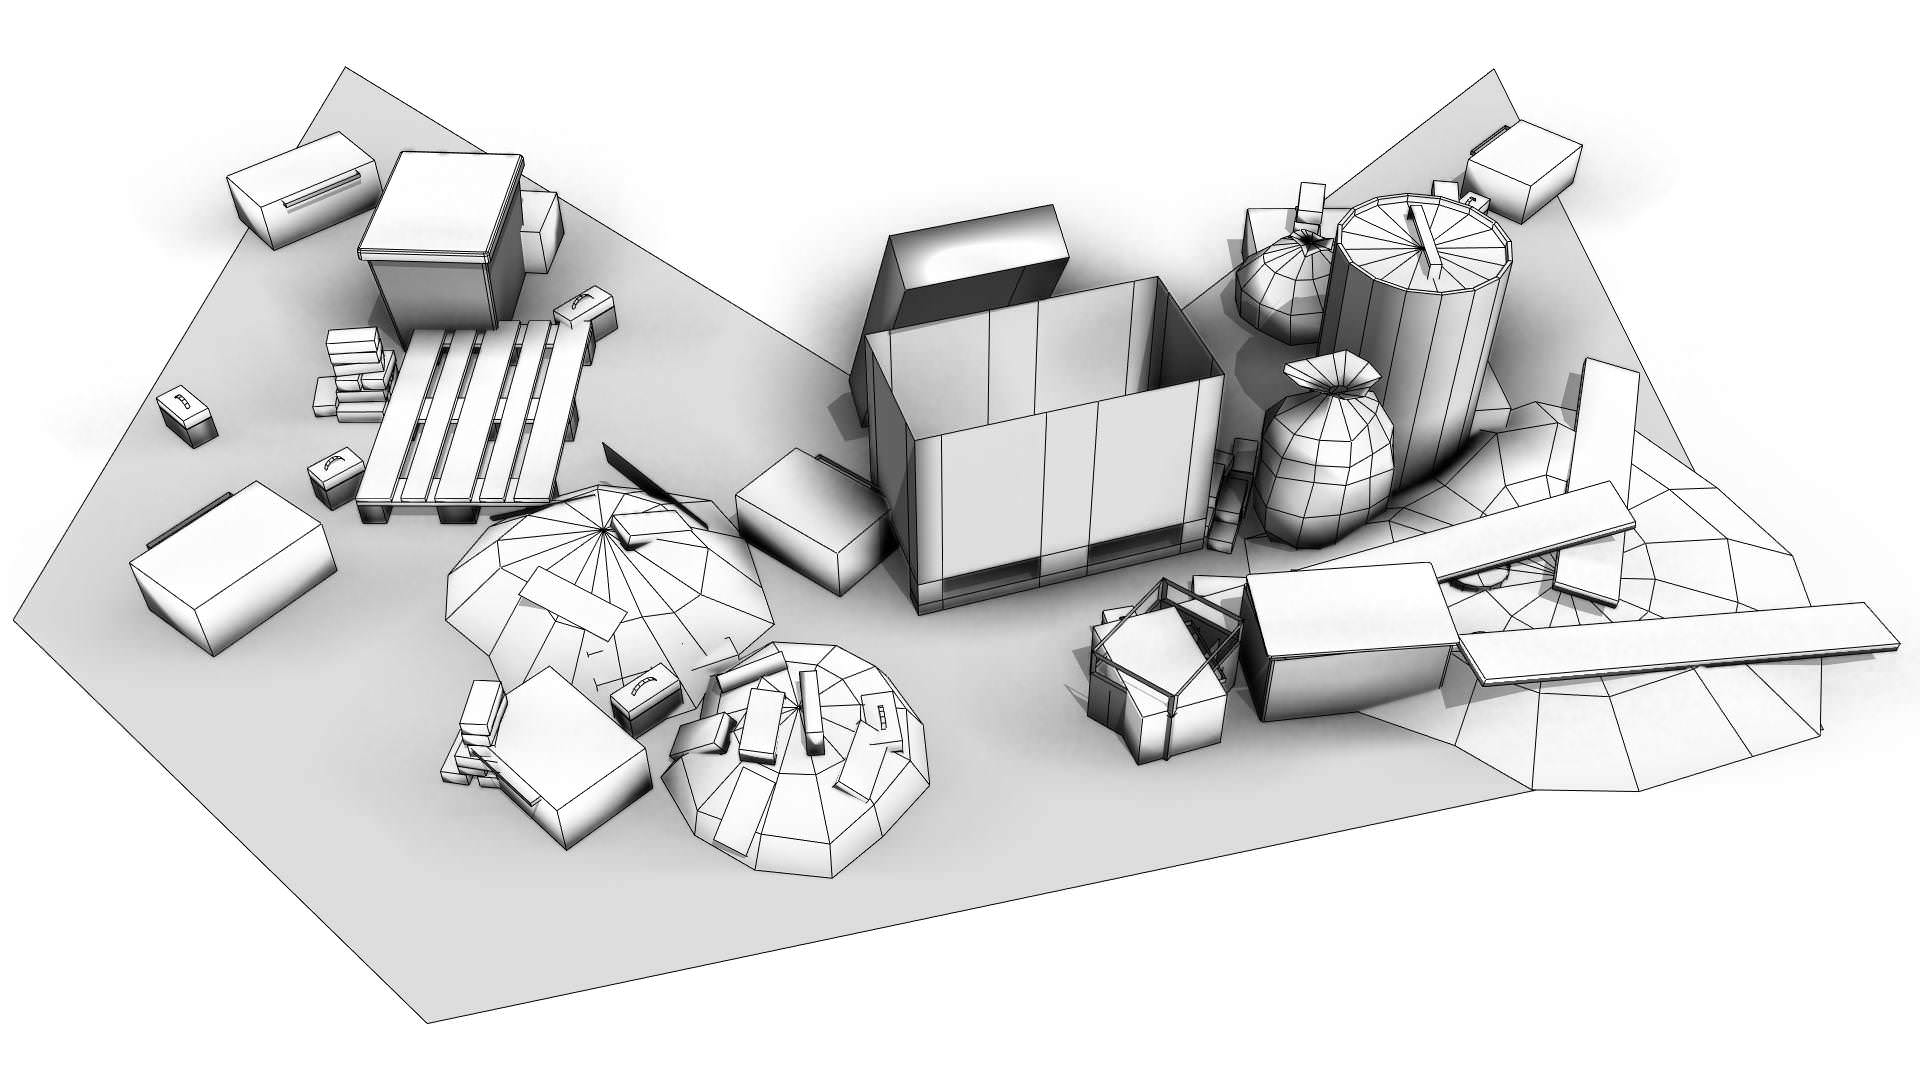
Assets
The assets that are scattered throughout the city were modeled and UV mapped traditionally, mostly by my friend Cyrill in Cinema4D, and some by myself in Maya. They were modeled as low-poly as possible, to keep the poly-count for the whole city model reasonable. The distribution itself is of course also rule-driven, both for :
- where which assets can appear, as also…
- how the asset types are clustered.
Some assets are rather ‘individual pieces’ that lay around (e.g. bricks, pallets), while others usually appear in a ‘geometric array’, such as electrical boxes or trash bags.
Rule-driven asset distribution on any polygon :
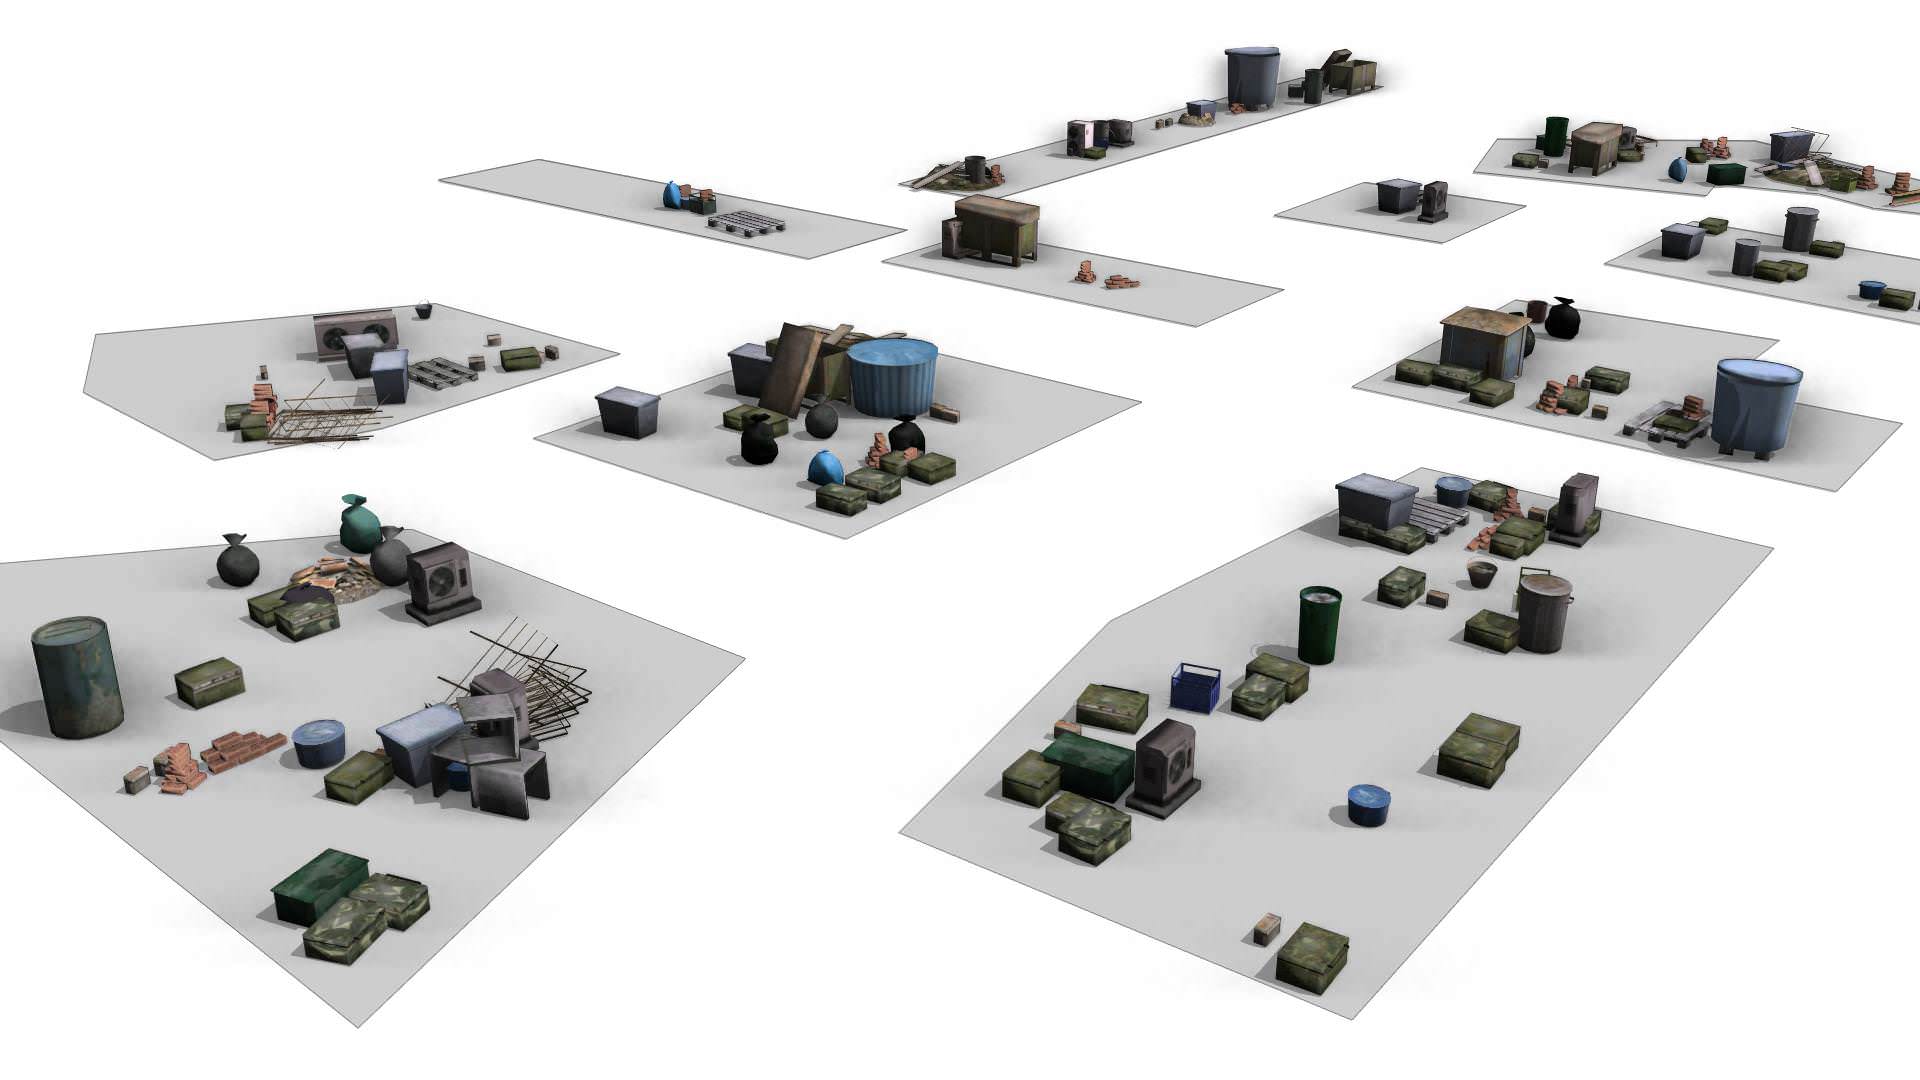
Distribution closeup: Low-Poly assets :
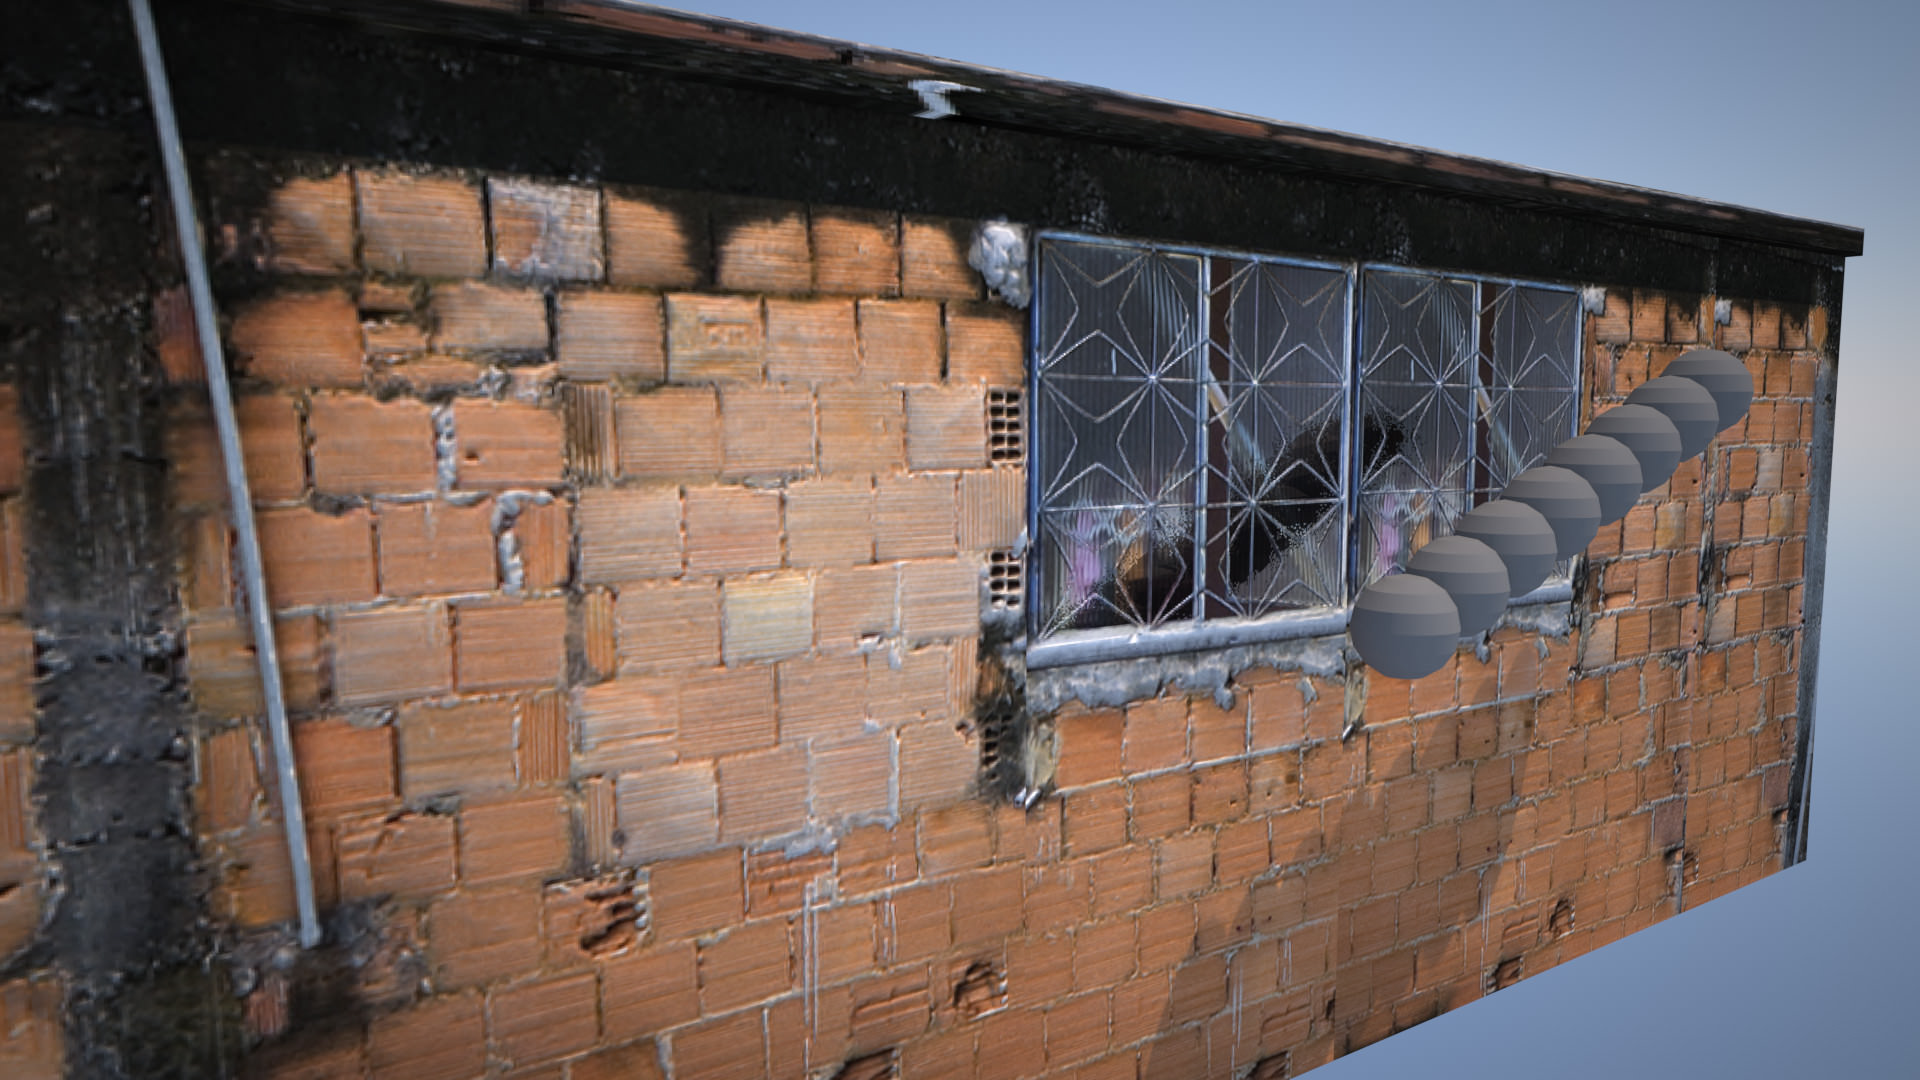
For every texture we made, we also manually created a normal map and a roughness map. For most color maps, we created a few variations in color. All together – city model plus interior scene – we ended up with 1070 textures!
Left – Color map, Middle – Normal map, Right – Roughness map :
Material test render with all maps. Notice the reflection of the grey balls in the glass :
Procedural Vegetation
All vegetation in the project is self-made. Of course the individual plants do not look as nice on closeup as if we had used a dedicated software. But again, this was part of demonstrating the capabilities of CityEngine.
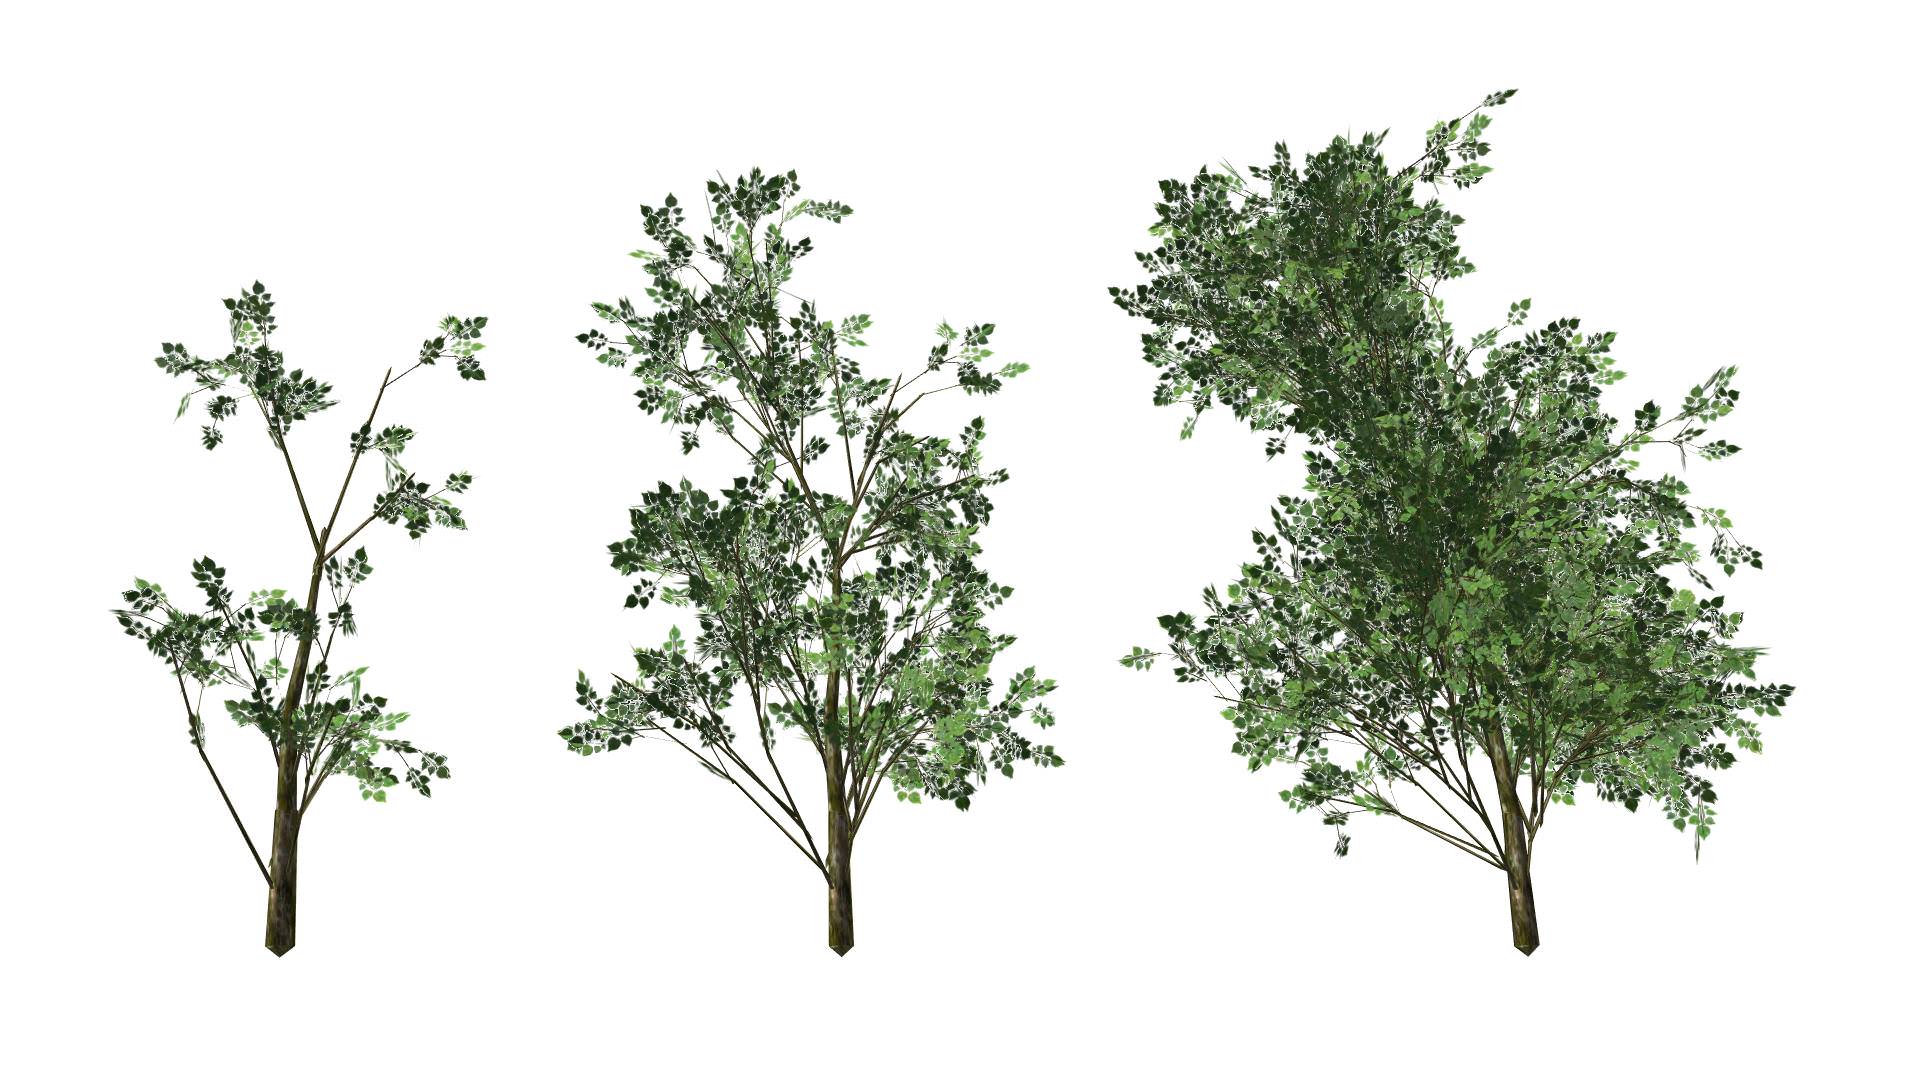
I created a ‘plant generator’ CGA rule that has about 100 attributes to drive every aspect of the plant I needed, such as trunk radius, branch length, number of branch generations ( branches on branches ) or the number of leaves created on a twig. Even gravity and a ‘per branch type’ LOD is built into the system. Depending on the attributes, different plant species can be mimicked… from grass to bushes to palms to highly detailed broadleaf trees.
Since the system generates purely random models, not each ‘seed’ (not every variation) looks very natural. Thus, I used this plant generator rule only to generate 5 instances of each species we needed in the Favela, which we then instanced using a separate vegetation distribution rule.
Number of branch generations: Left: 1 | Middle: 2 | Right: 3
Influence of gravity on trunk: Left: 0.5 | Middle: 10 | Right: 20

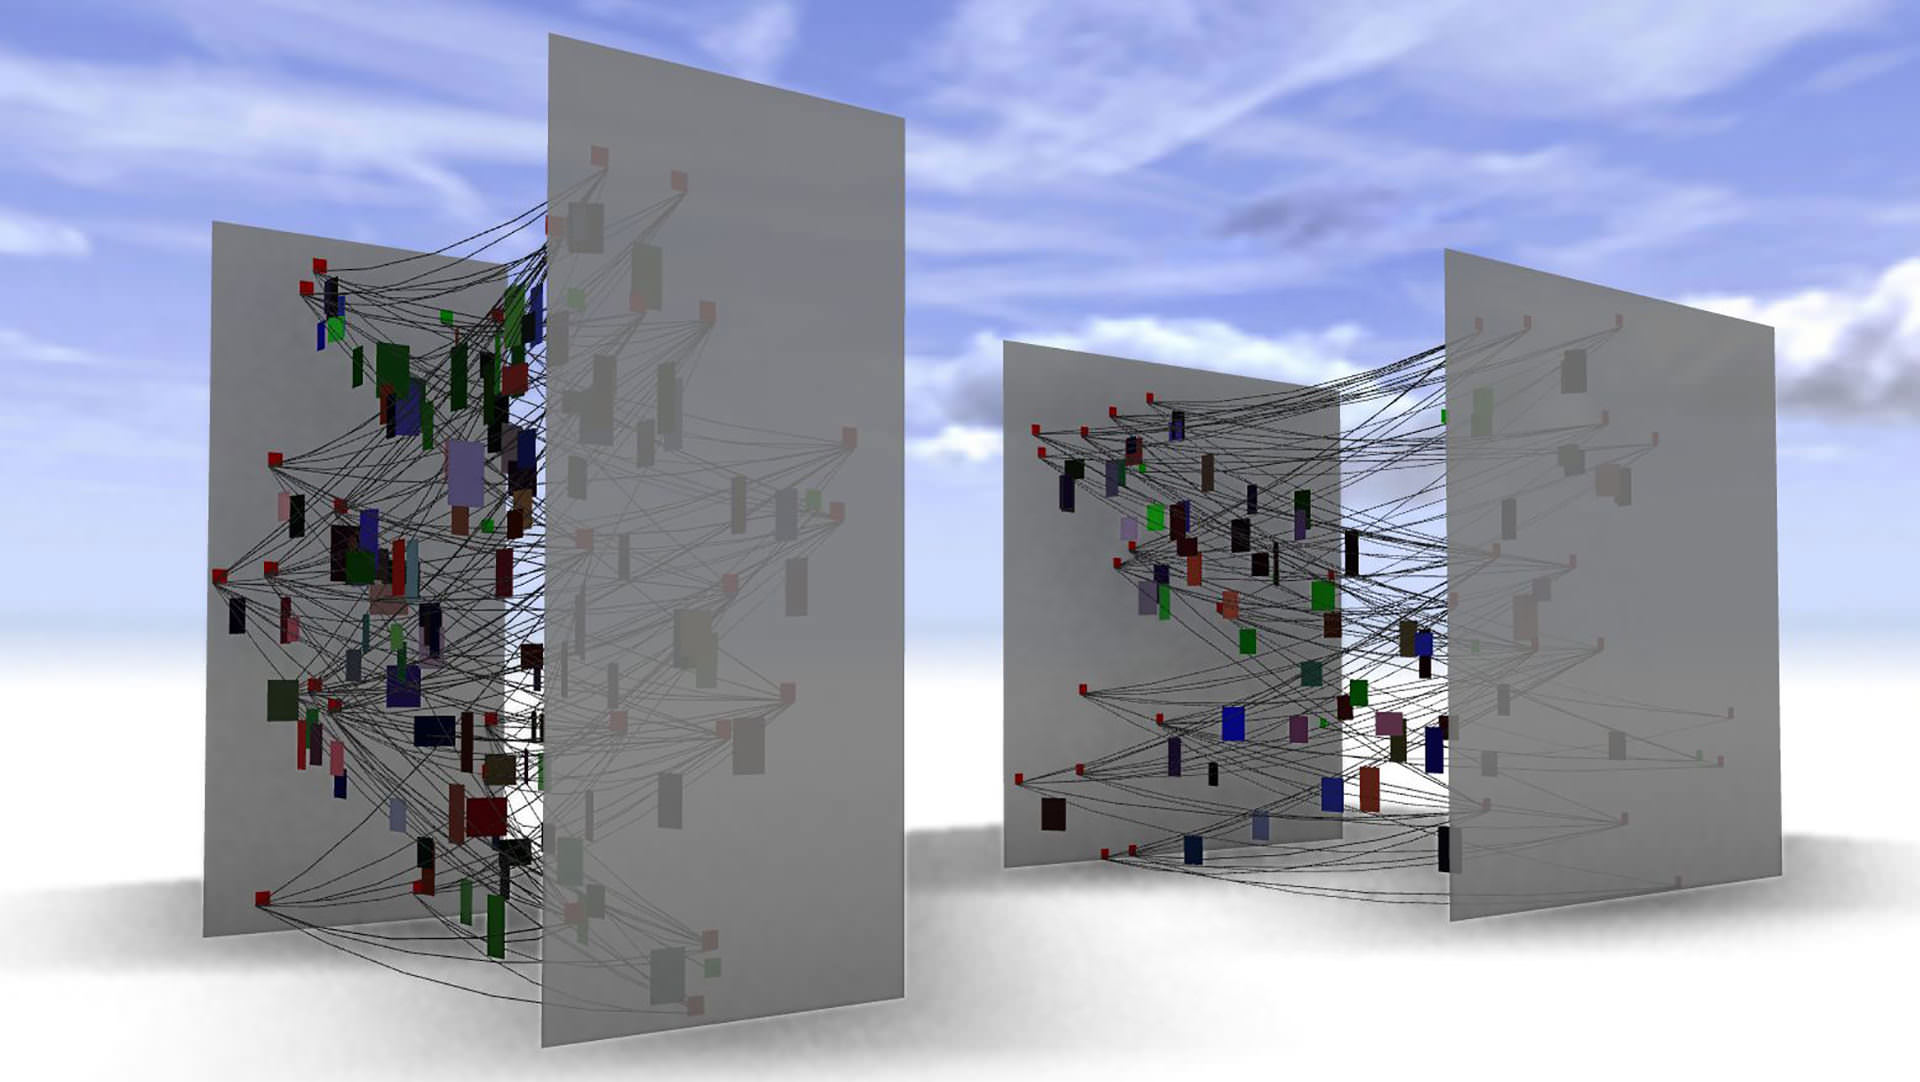
Cables and Clotheslines
Favelas have lots of things hanging around. For simplicity reasons, we decided to just use 2 types of cables : electric cables and clotheslines.
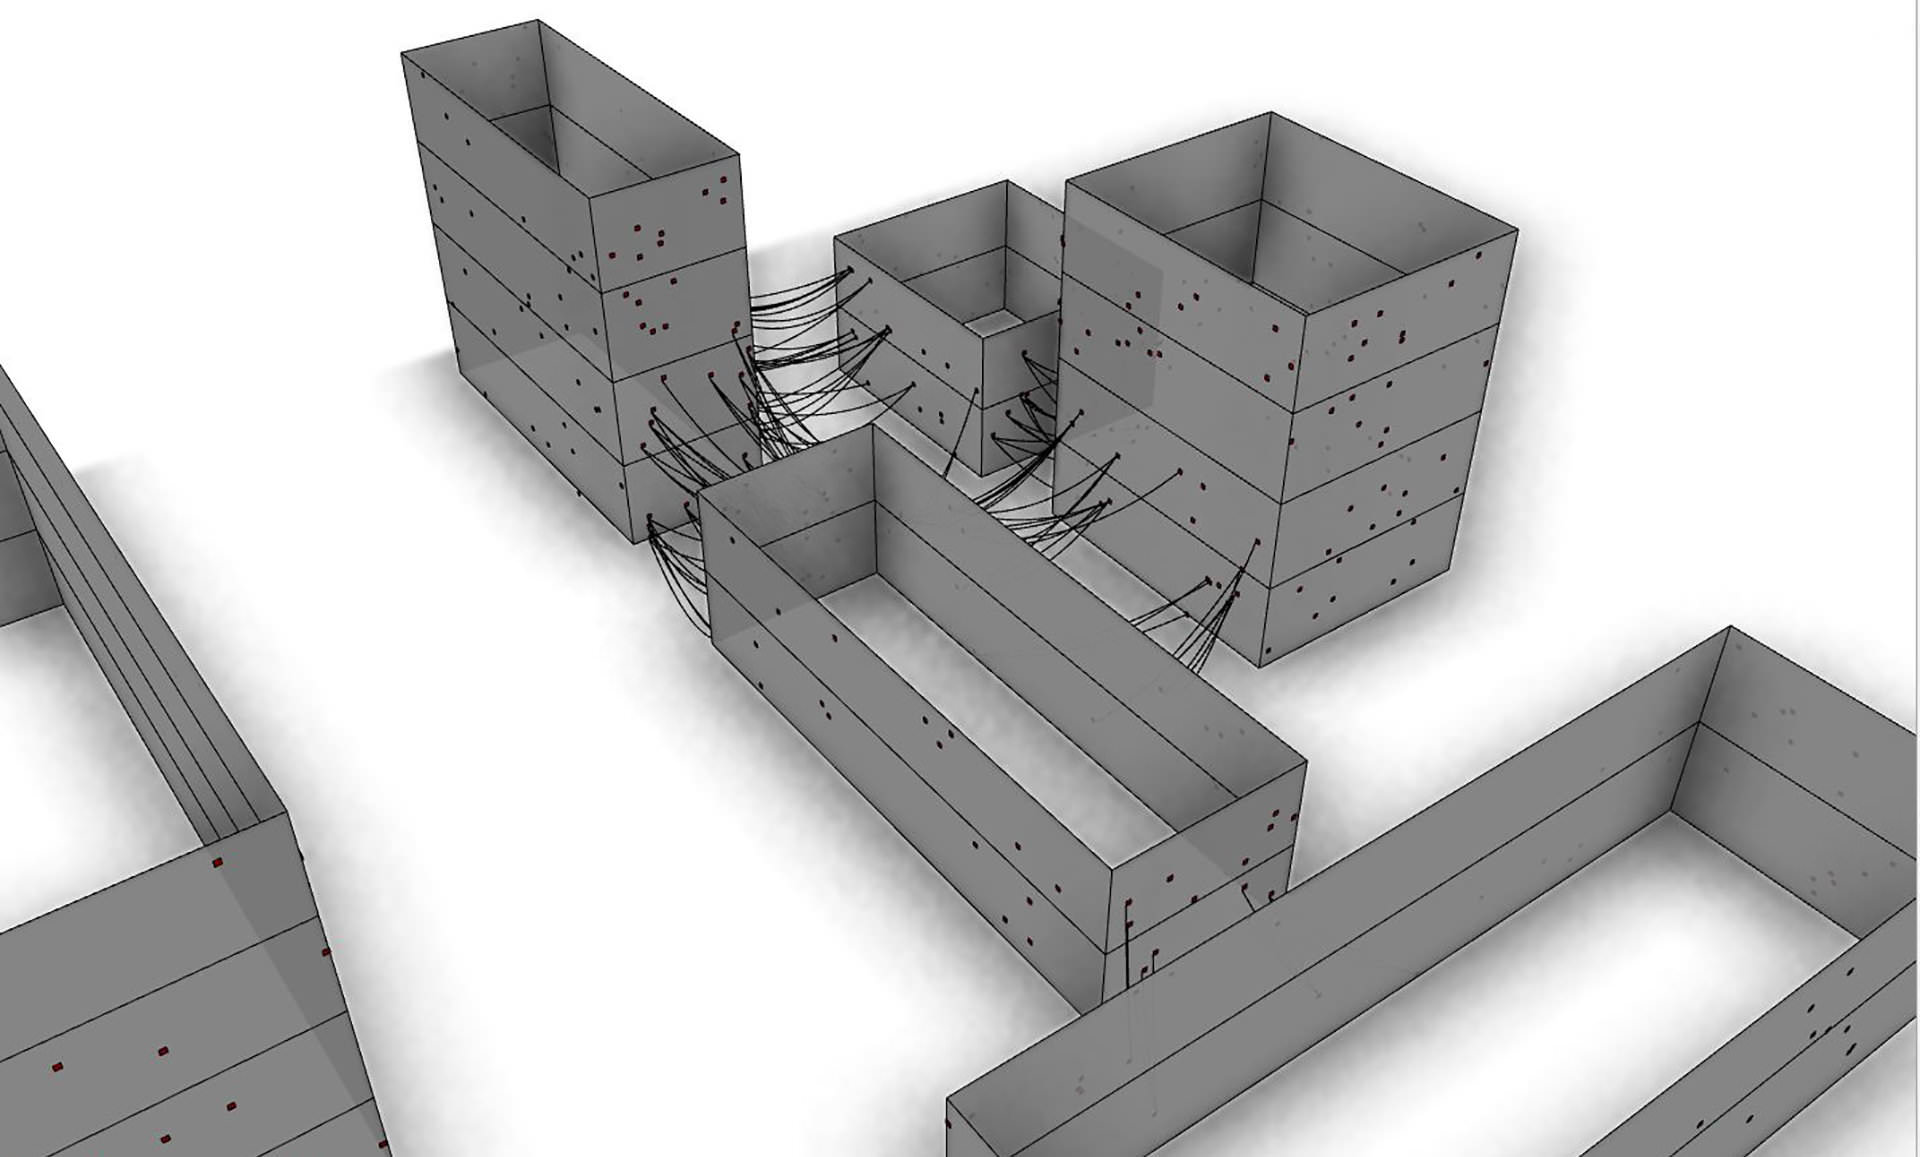
Each building model and wooden power line pole reports potential connection points in CGA. These reports include the location in space plus their normal vector, relative to the geometry (e.g. the facade). Using a python script, I can collect all potential reported connection points and compare them with each other. Then, I use a filtering system which filters out ‘bad’ connections based on :
- distance (too close or too far).
- angle (cables don’t connect to a facade at glancing angles or from behind it).
- maximum allowed number of connections per point.
Once all ‘pairs’ are found, I compute the catenary curve and create the cable geometry, either for plain cables or cables with hanging clothes.
Python Scripting : Creating cables from potential connection points.
Python Scripting : Clotheslines!
Scripted Pipeline
Most time I have invested in a pipeline that lets me efficiently do test renderings in final quality. Since CityEngine is a modeling application, there obviously is a tool switch involved, when the time is ready for rendering. I knew we’d be creating lots of different variations of the Favela before we’d be happy. So I wanted to have a process in place, where we can go from a few generated buildings in CityEngine, to starting a render in Maya within one minute.
I had played with different approaches. Some of them did not work due to bugs and other issues.
In the end I settled with the following 4-step pipeline. Each step is represented by a series of scripts, all written in CityEngine’s Python, ‘native’ Python, Maxwell Render’s pyMaxwell and Maya’s MEL.
1. OBJ-Based Geometry Export and Parsing
All geometry is written to the obj file format. The reason why I chose this format is because it’s an ascii file format, which I can fully parse. This allows me to alter the structure of all geometry and materials.
2. MXM Creation
Since we were using Maxwell Render and did not want to stick to any default material translations, I decided to find a solution to translate the default materials myself to the MXM materials that Maxwell consumes natively. For this, I created a python script which parses the material definition and automatically creates new pyMaxwell code, which when run, produces a separate MXM file for each material found. That way, I was able to control every aspect of the material types I needed – from metallic surfaces to mineralic surfaces to leaves and grass with thin-leaf SSS.
3. MEL Loader
This MEL script is quite simple, it loads all OBJ files from a specific folder, searches for the according MXM material and replaces the default material with the final MXM file.
4. Vegetation
I designed 3 ways to port the vegetation to Maya :
- Full geometry – This original approach I took was to completely ignore any instancing and go brute force: Simply writing out everything as polygons. That is 155 million polygons. That worked fine technically, but it turned out this was not a feasible approach, since the scenes produced needed about 45 GB of RAM to render. Test renders ran fine on my 64 GB RAM machine, but since all other 13 machines we had to render on only had 32 GB of RAM, I absolutely needed a different approach, using instancing (The final renders peaked at 21 GB).
- Base geometries to scatter instances on – This is the simplest of the three approaches: By just writing out the base geometry on which the vegetation instances should sit on, I was able to use the ‘scatter’ geometry modifier of Maxwell Render 3.0 to scatter massive amounts of instances on these geometries. The base geometries themselves I set to ‘invisible to camera and GI’, thus don’t render.
- Reported instance positions to particle systems – Since in CityEngine, all vegetation (including potted plants on balconies) is placed in a rule based manner, it was crucial to have a way of keeping track of the precise position of each plant. For this, I created a reporting mechanism that directly produces MEL code that stores the lists with the precise locations, separate for each type of vegetation. When running that code in Maya, for each type of vegetation, an individual particle system was filled with particles, representing each individual plant. I love creating code with code! The random rotation was achieved by a particle expression.
For the final data-set in Maya, I used a combination of the second and third approach: Base geometries to scatter instances of grass clumps (about a million of them), plus many thousand other instances via particle systems.
Maya : Selected particle systems for all vegetation types :
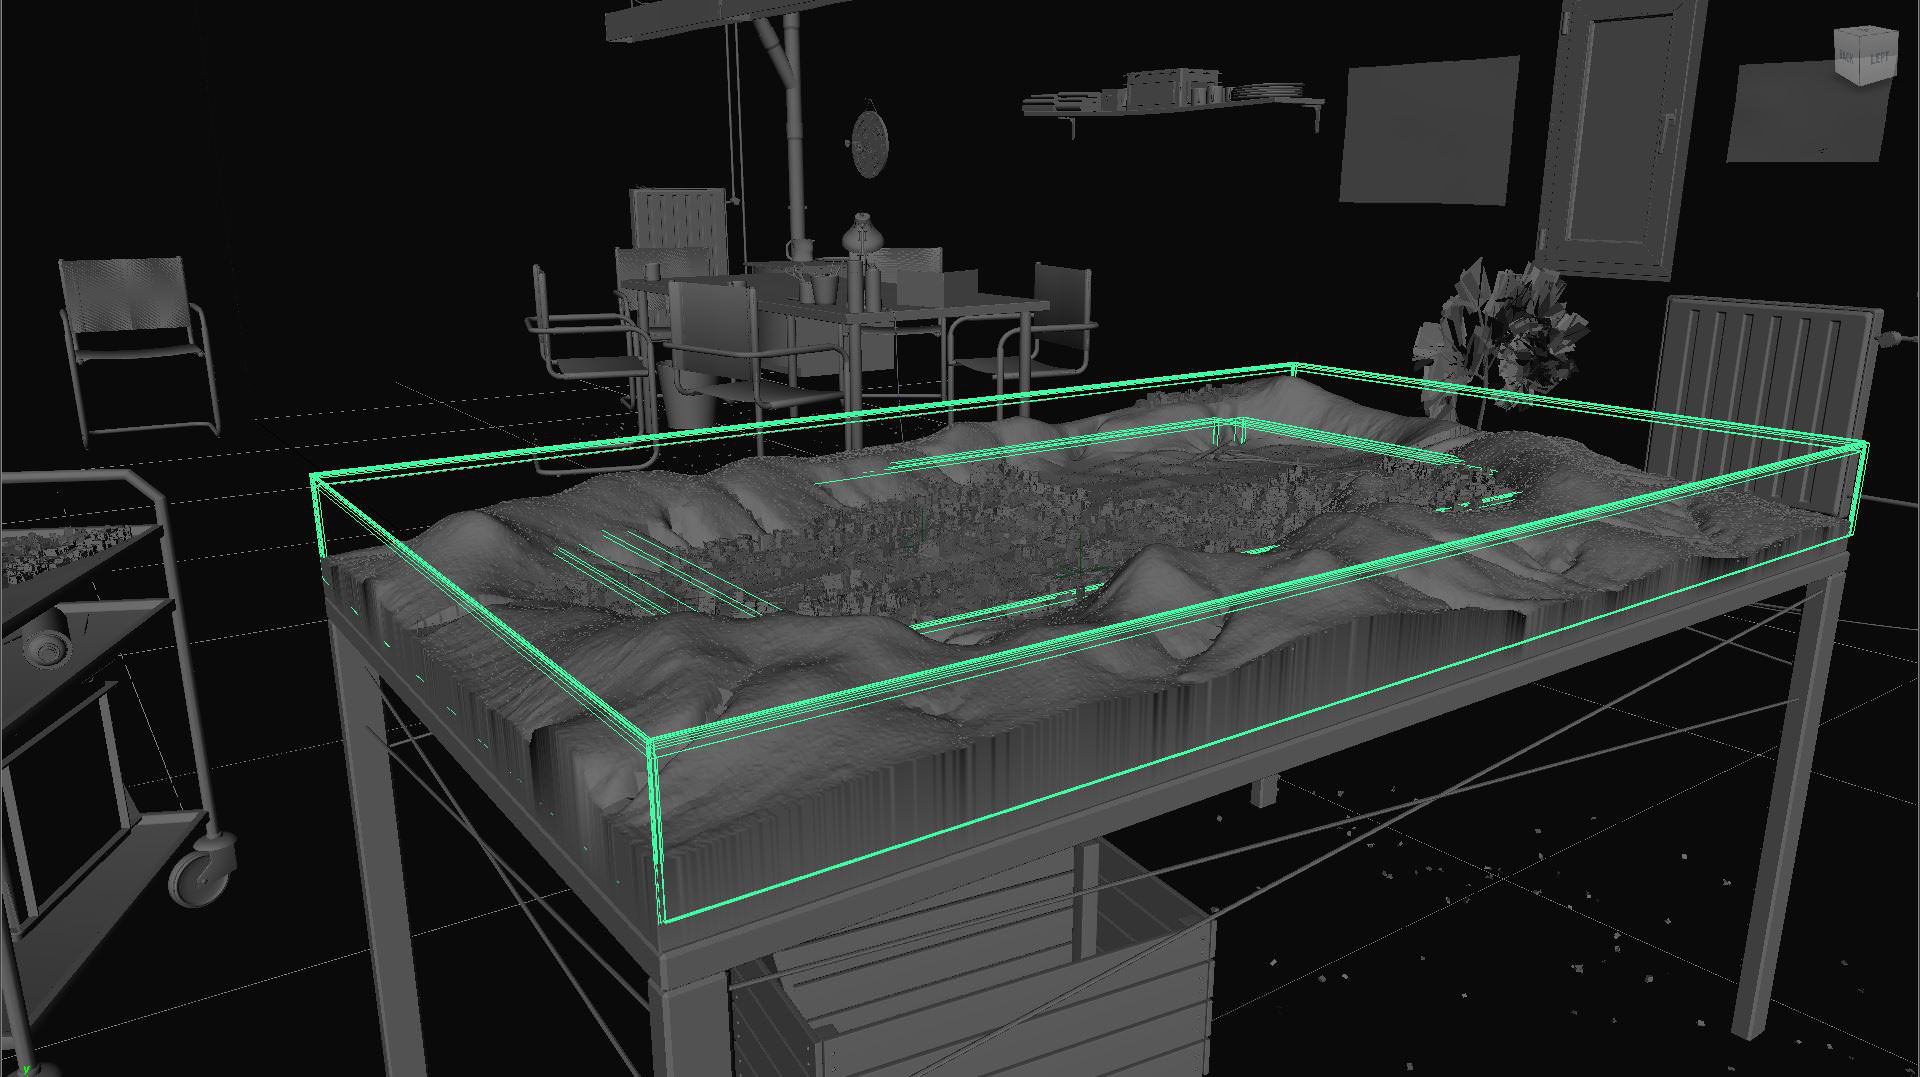
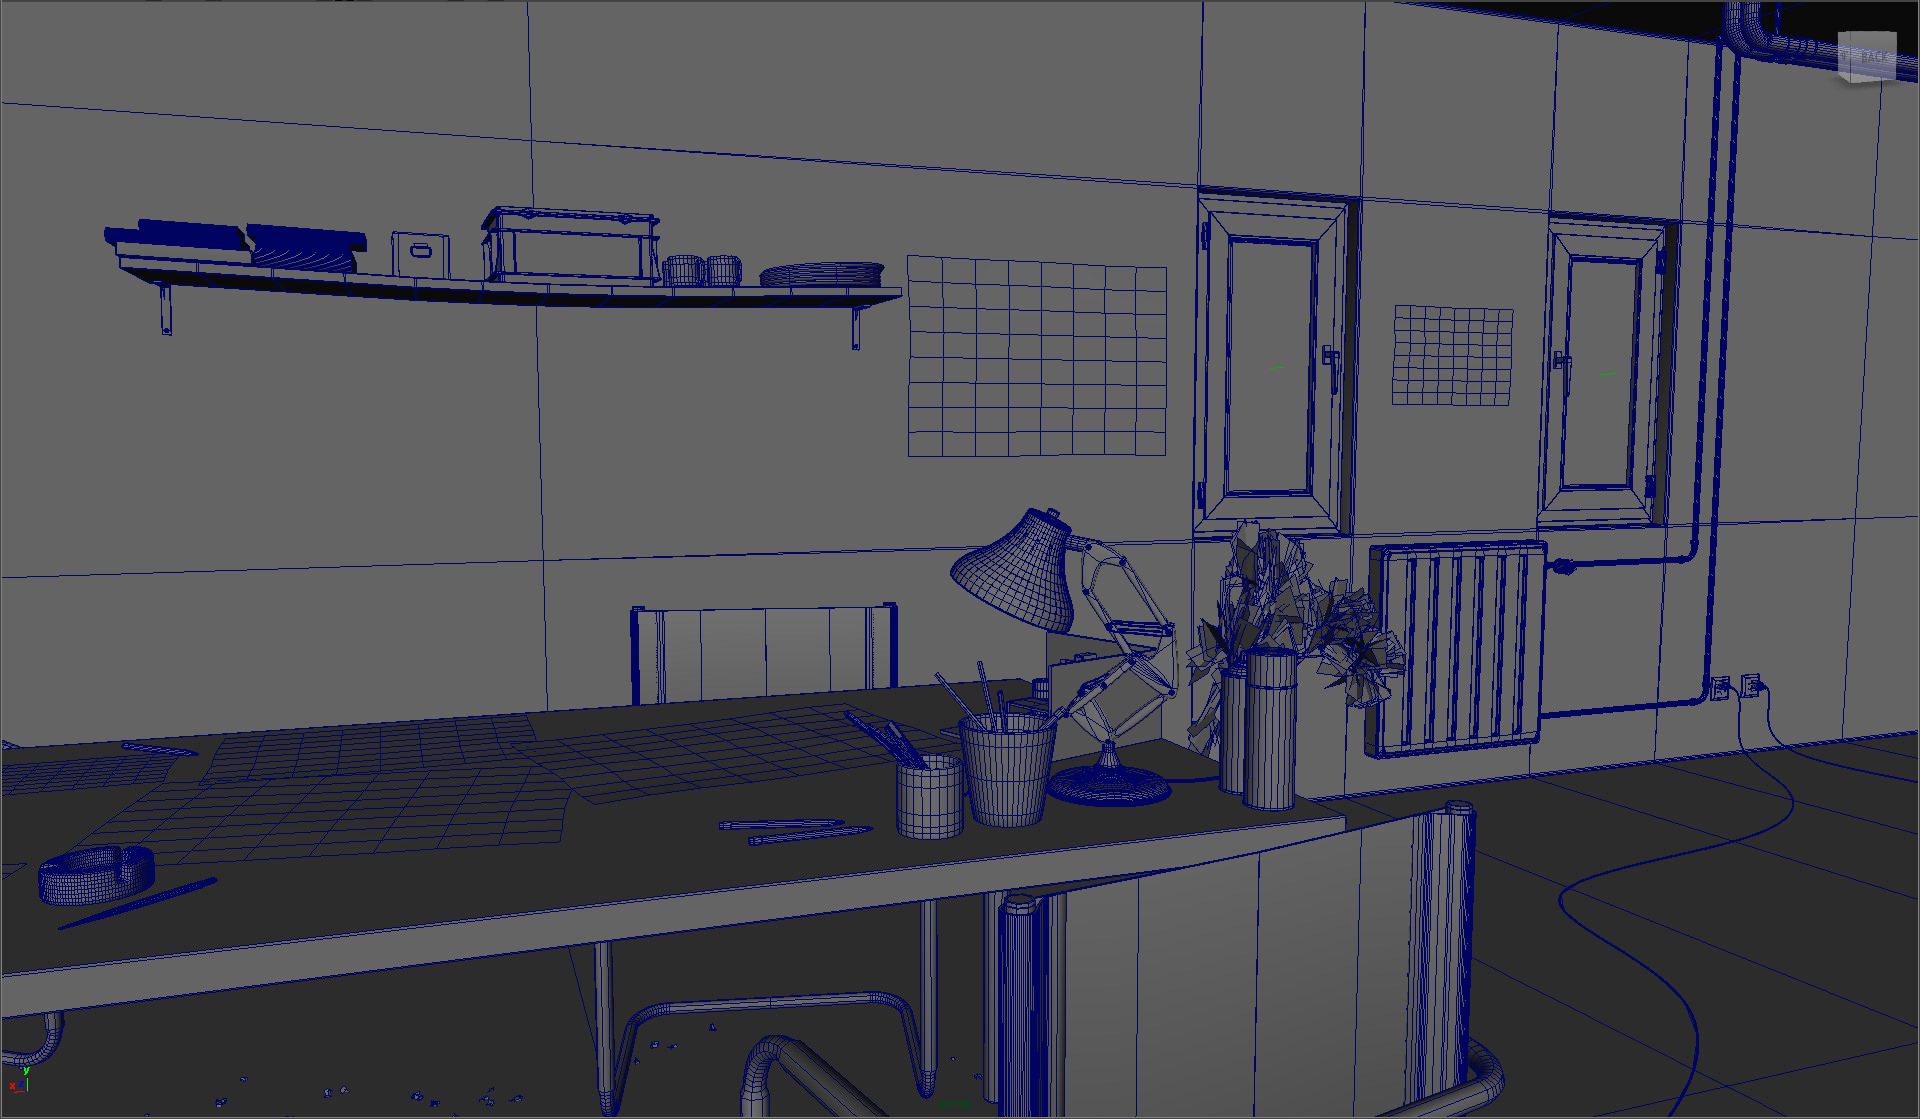
Hobby Room
Creating complete 3d cities is a daunting task and can never really be called ‘done’. After having invested a lot of time already in the full scale CityEngine model, we were still a bit unhappy that the city still looks a bit ’empty’. Cars were missing, bikes, animated people, animals, lights and countless other things. Fully aware of the fact that by just the two of us, we’ll have to live with this, we decided on a story that is both okay with the fact that :
- The city is missing some elements and…
- depicts the journey we had creating the project.
That’s how we came up with the ‘hobby room’ idea, where fictional people build this fictional physical model of a Favela. When studying the model carefully, one can see that the model is not yet completed – an other hint to the ‘WIP’ character of our project that took 2.5 years.
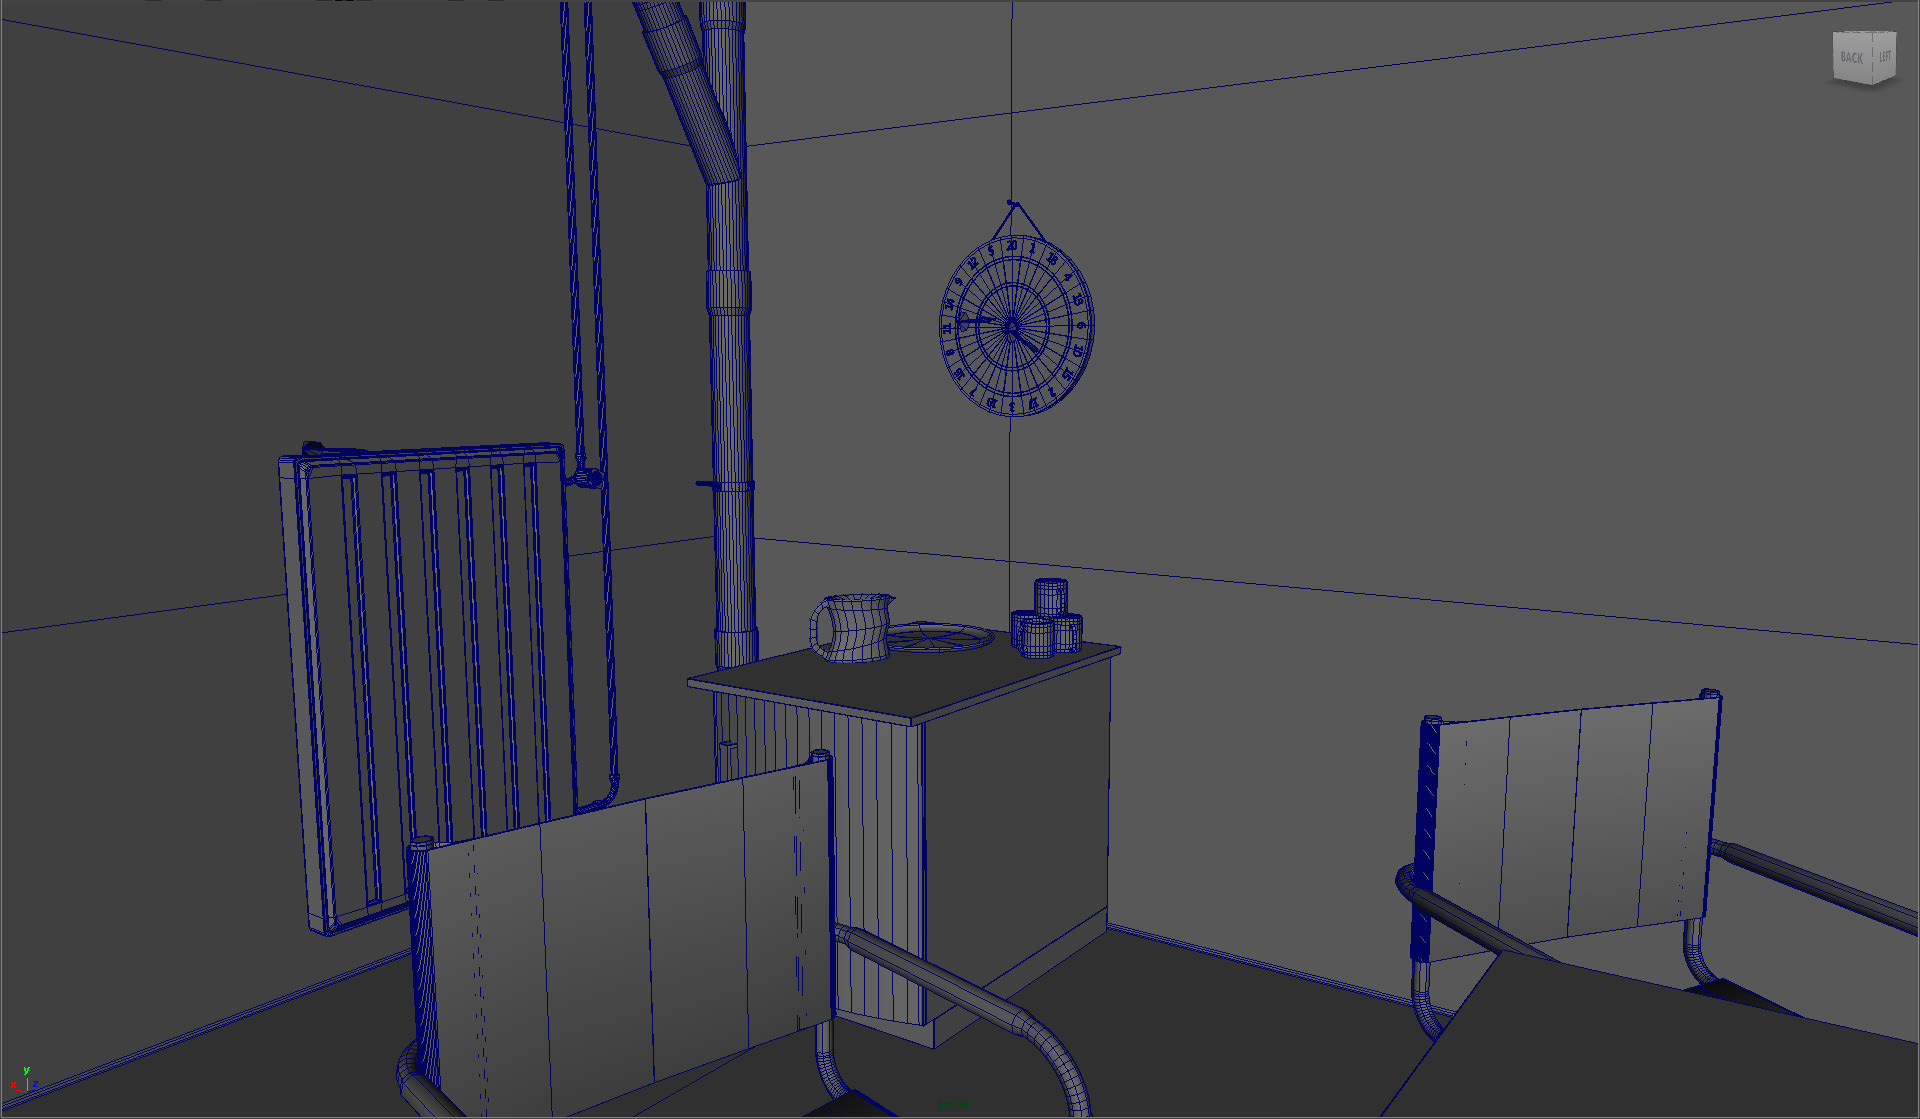
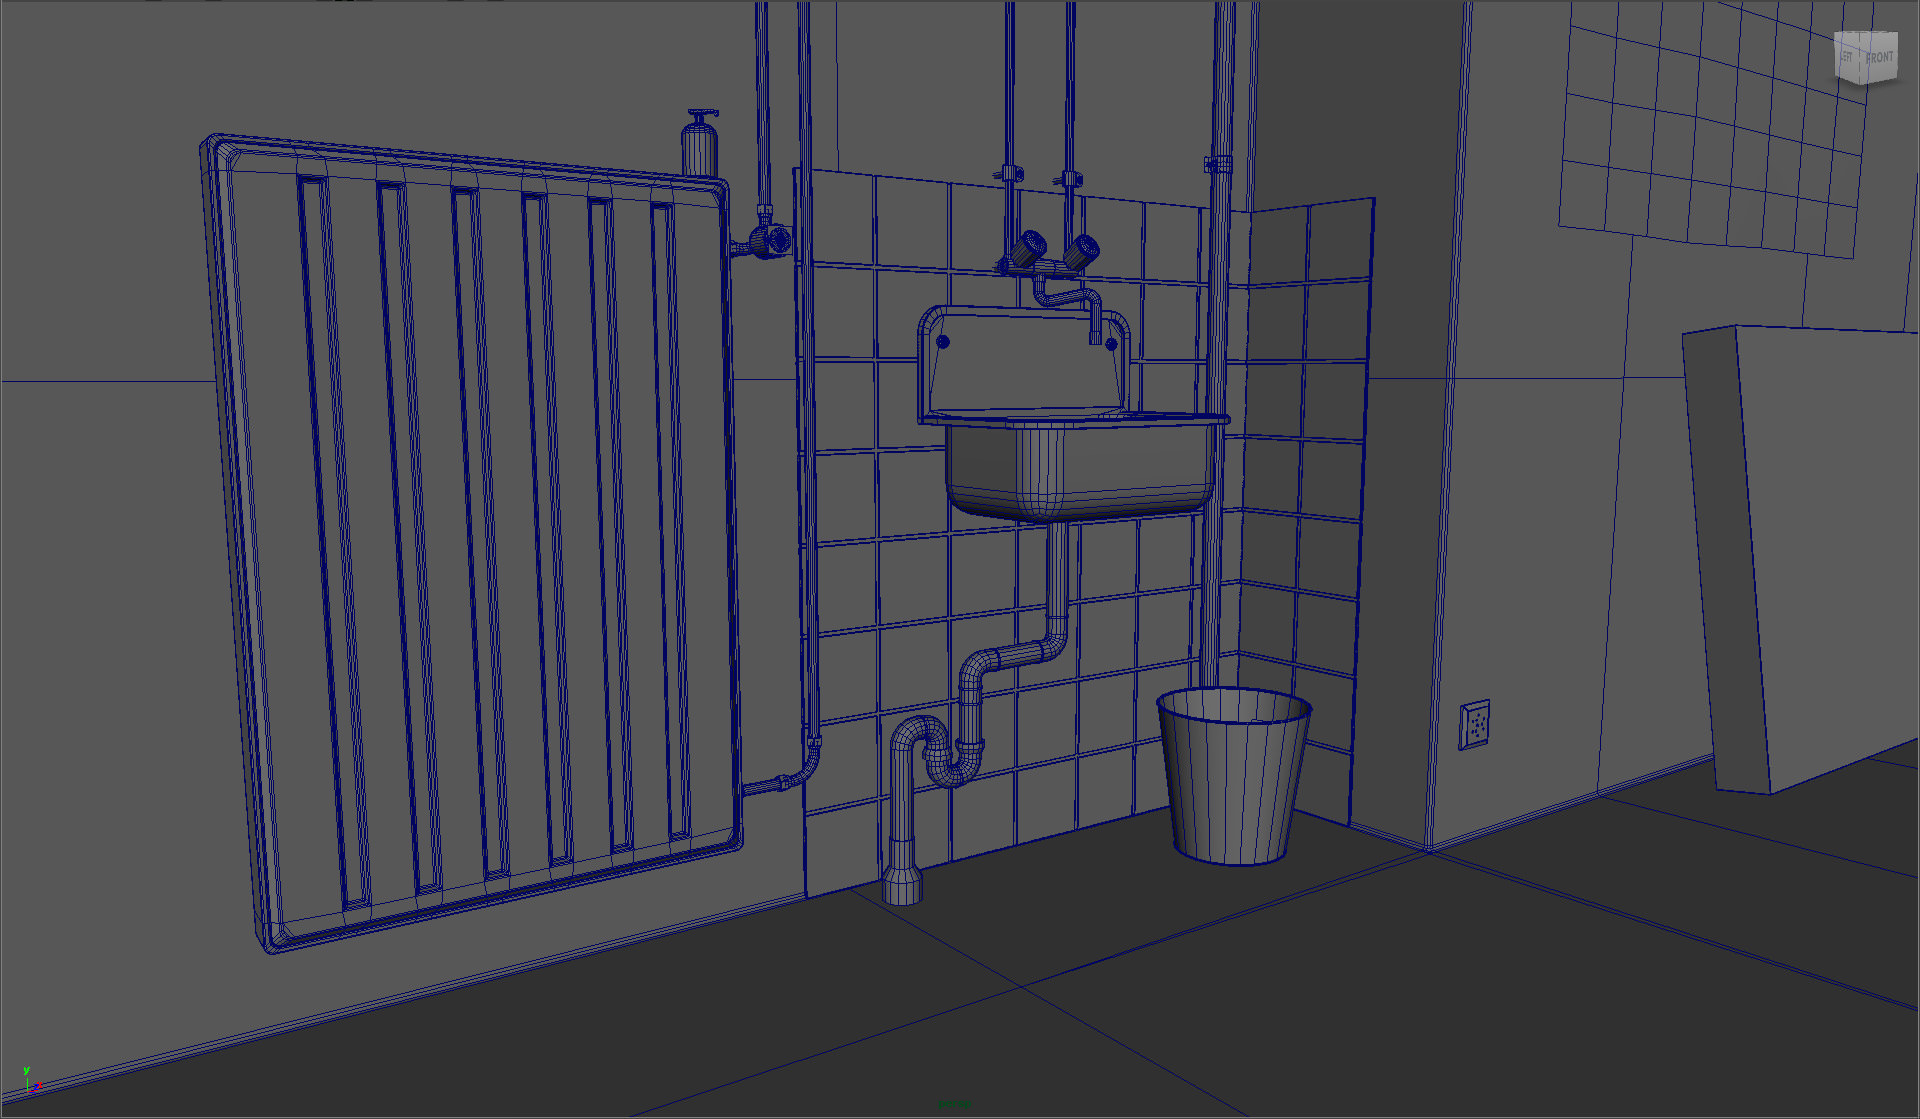
Throughout the whole hobby room, we placed objects and test renderings that we had collected during our journey. Thus, for us, the project represents the saying ‘the journey is the reward’. Cyrill modeled most of the interior, all in Cinema4D. He did an amazing job, modeling everything with enormous detail. And often, he reminded me that ‘bevels cost extra’!
Thanks again to Cyrill Oberhaensli, who provided some of the assets of his own indie game ‘Bunker 16’. Play it, but only if you’re not easily scared…
Maya : Perspective overview of the hobby room model

And more Interior Details :

Animation
We had planned to do a 40 second animation of the ‘Favela’. We had all shots sorted out, had the cameras animated (camera move, plus animation of camera focus) and started to render on our 14 machines we had access to. But after about 2 weeks, we evaluated the footage and had to give up the animation, because we struggled with noise distribution issues between the frames, especially on highly reflective surfaces that are strongly out of focus due to the heavy depth of field, as we have it. Thus, we decided to simply go for a series of stills.
Conclusion
Yes… The whole project is a bit ‘tech-oriented’, but it proves to us, the creators, what we’re capable of and it clearly shows my original reason to start the project : To show what can be achieved with CityEngine.
I’m sure you have questions regarding the process showcased here – So do ask below!
Cheers,
Matthias.

Nice to see some City Engine stuff going on 🙂
This is actually had me confused what was real or fake actually.
Haha and love the clothesline touch!
Nicolas Gaspar
I was waiting to see this post for a while now. Great work!
V??ng Thành Long
“ever really had the time to do such a detailed project during work, so I started it in my spare time.” LOL thats fake news so that he looks so devoted to ESRI 🙂