


Making of Winter Interior
I’m happy to bring you a new making-of article by Fietter Chalim. In this article he will describe the creation of his 1st place winning ‘Winter Interior’ scene, created for the IDVN Design Visualization Render Challenge 2009. I hope you’ll enjoy this article, learn from it and share your thoughts by commenting at the bottom of this article’s page.
Fietter is a 3D visualization artist based in Jakarta, Indonesia. Running a small studio with some partners, doing both fulltime and freelance jobs specializing in 3D architecture stills and animations.
Introduction
The ‘Winter Interior’ scene was created during my local forum IDVN render challenge. In this project, I was trying to create and work on a mood that I’ve never tried before – winter. The initial idea was to create an environment that has an after-rain or snowy kind of feel and mood. I also tried to bring nature into the interior by introducing plants in the middle of the interior, which I hoped will help to achieve the mood that I wanted. I searched the internet for reference images depicting the kind of mood that I had in mind.
Modeling
Some of the models used in this scene (such as lobster chair and fireplace) were modeled and some were taken from library. Credits to the house model goes to Erfin Infitar (RVN)

Reference for 3d model
Specifically for the circular and cow-skin carpet, I used 3ds Max built-in hair and fur feature, then exported it as a mesh. As I added the tree to the interior, I did slight modification to the floor and ceiling of the original model.
Camera and Lighting
Camera and lighting was crucial in this process, as this is what helped me to achieve the mood that I wanted. In this case, I set the camera first, before I play around with the lighting.

VRay Camera
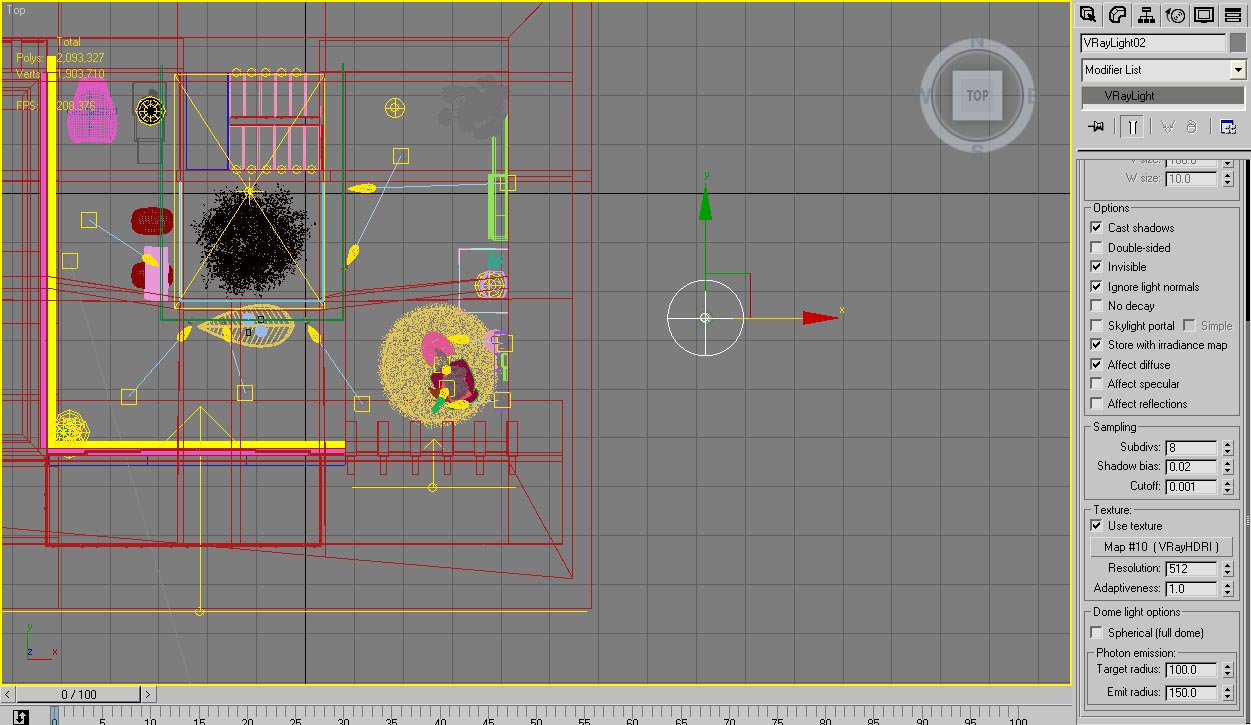
For the main light, I used VRayDomeLight (instead of VRaySun) with a suitable HDRI file that has a similar mood with what I had in mind.

HDRI VRay Dome
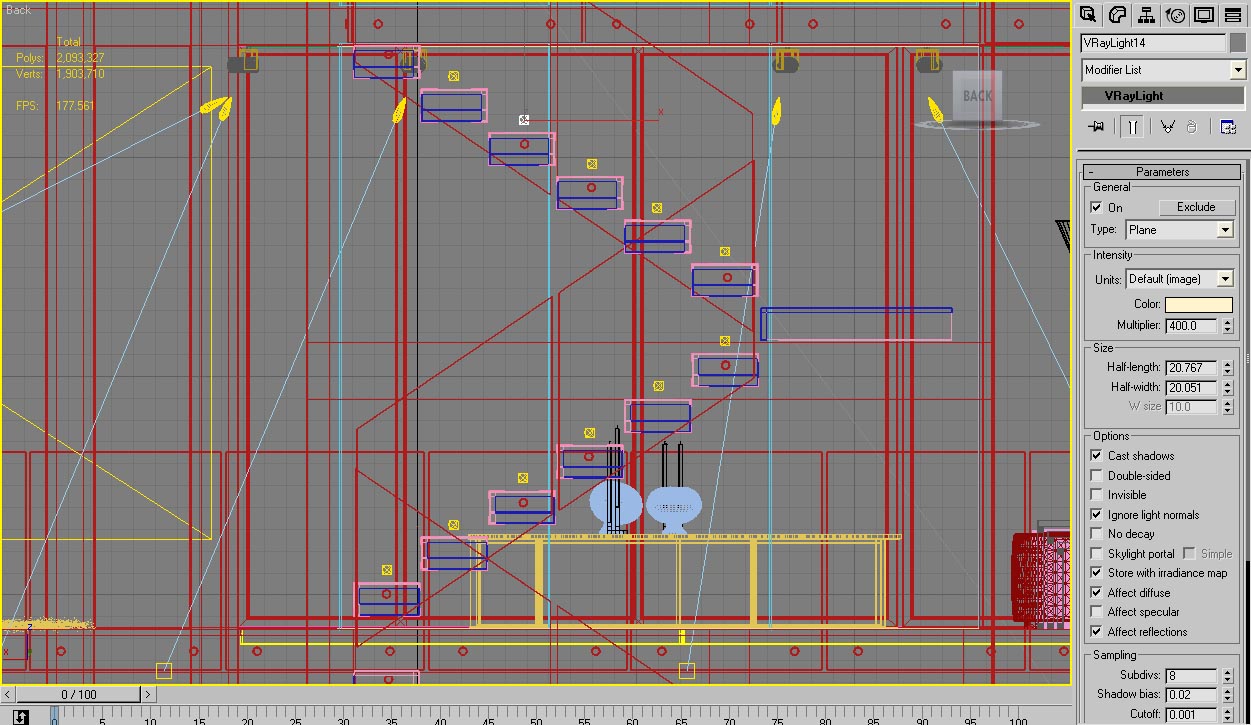
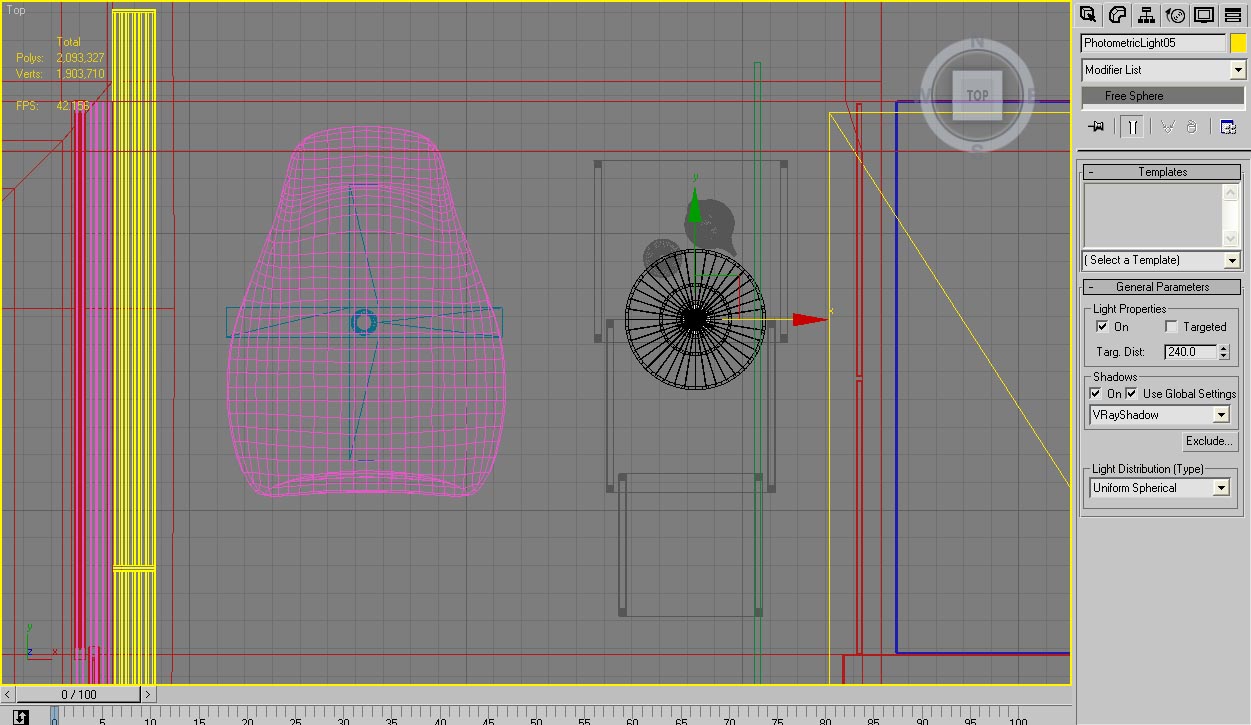
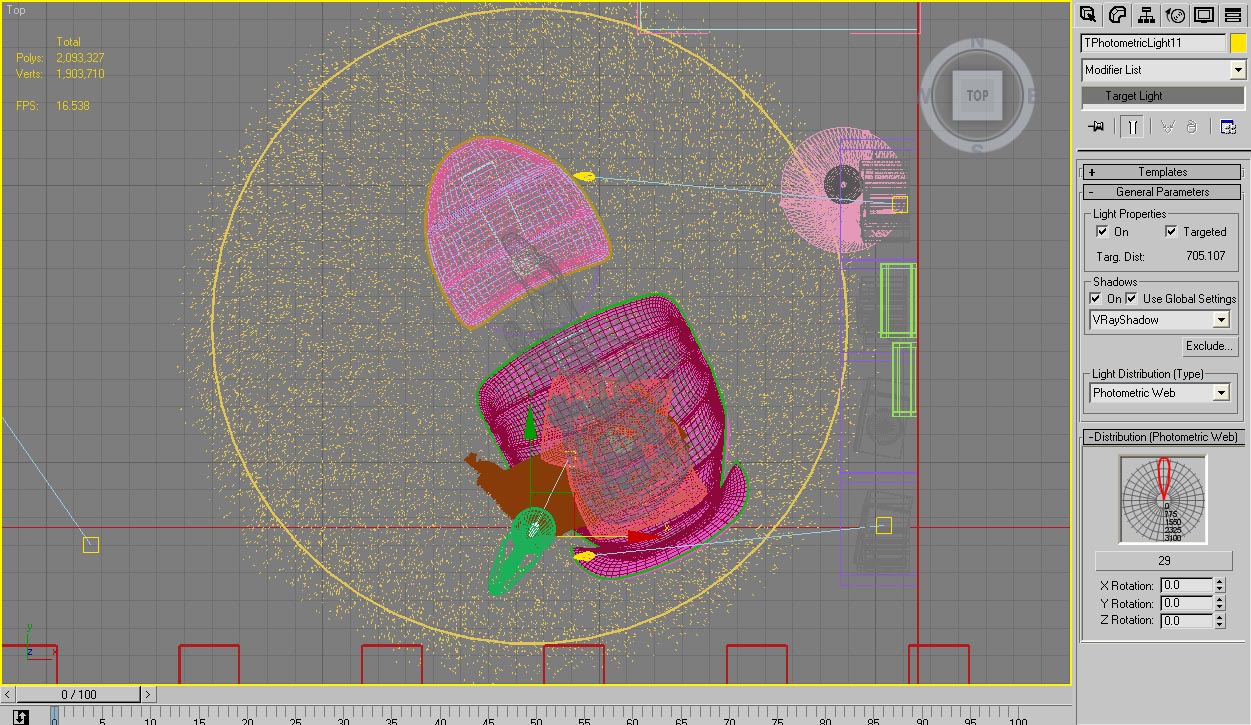
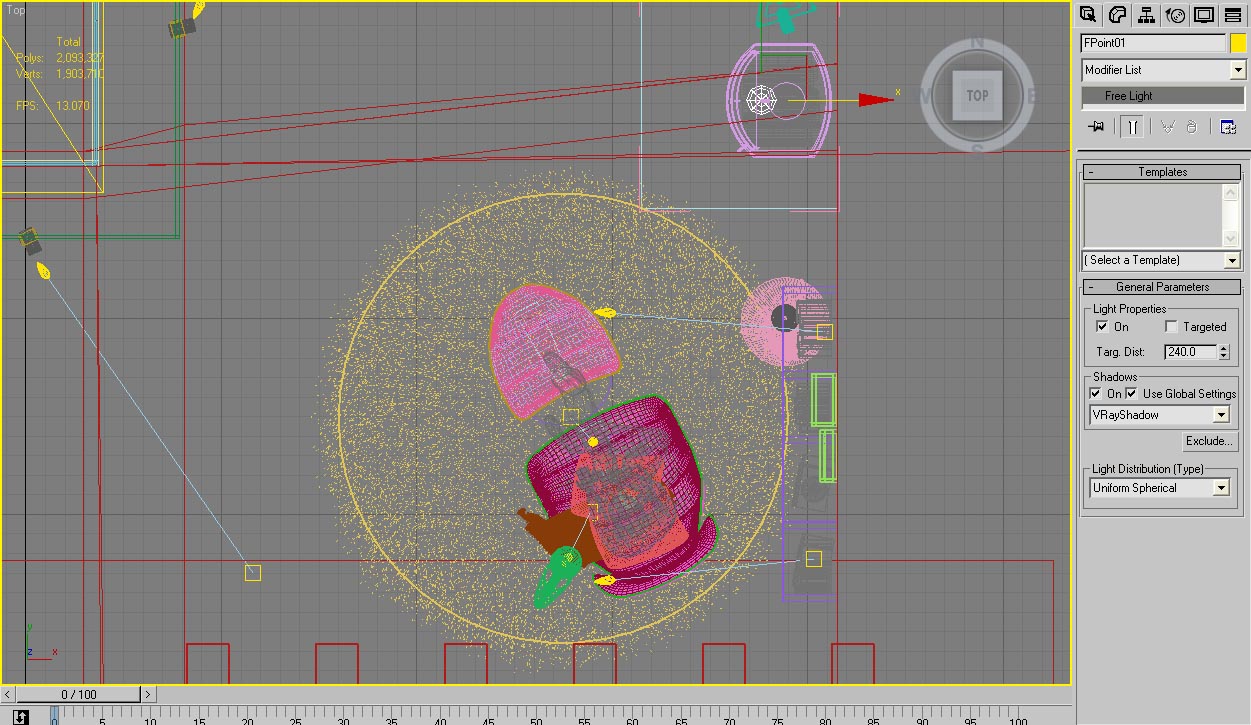
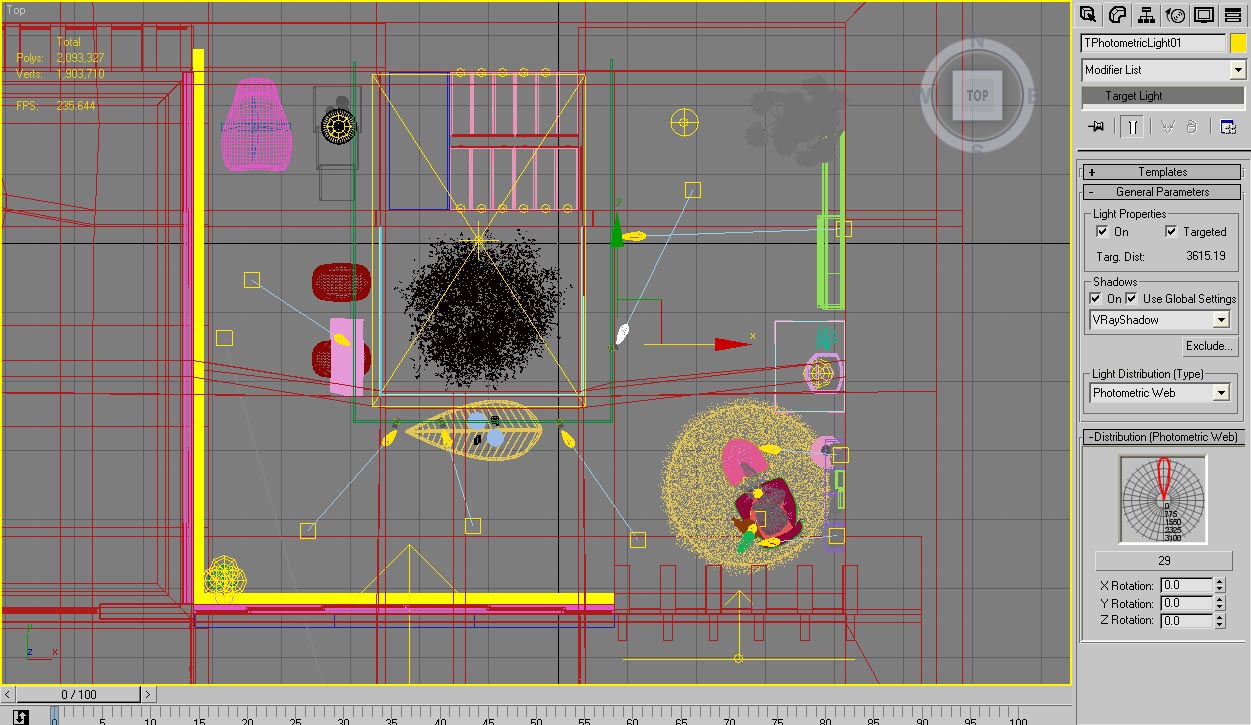
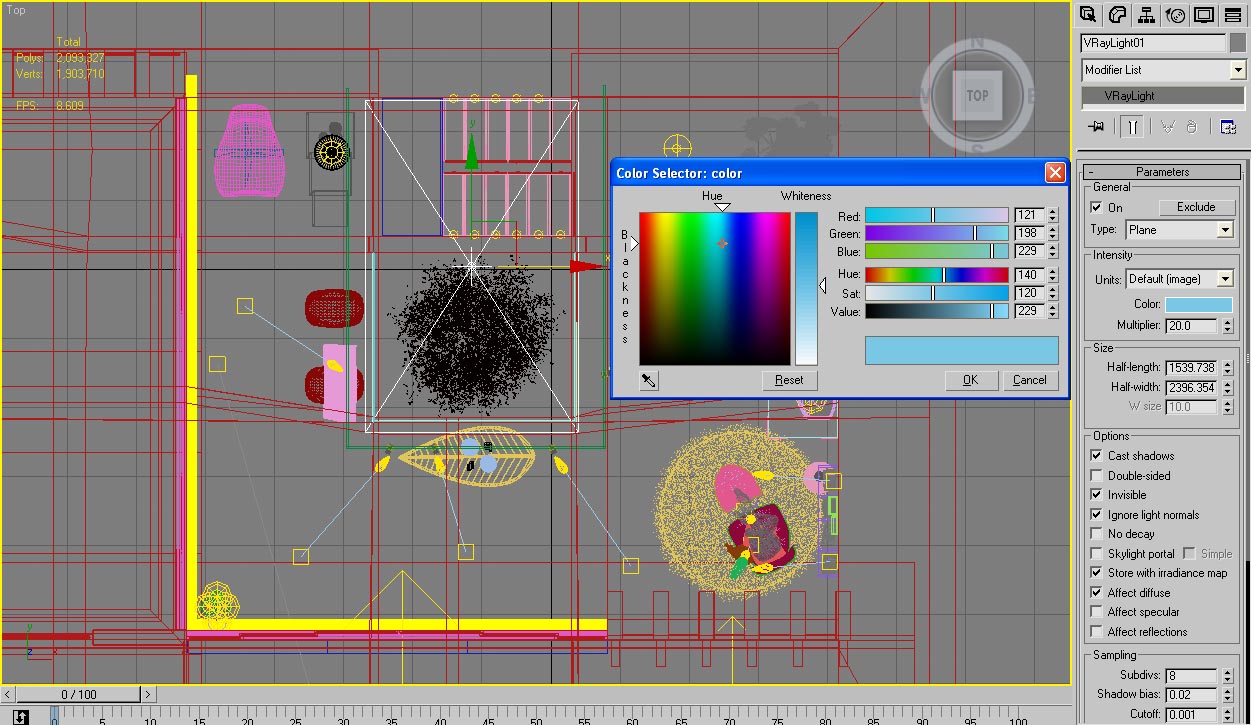
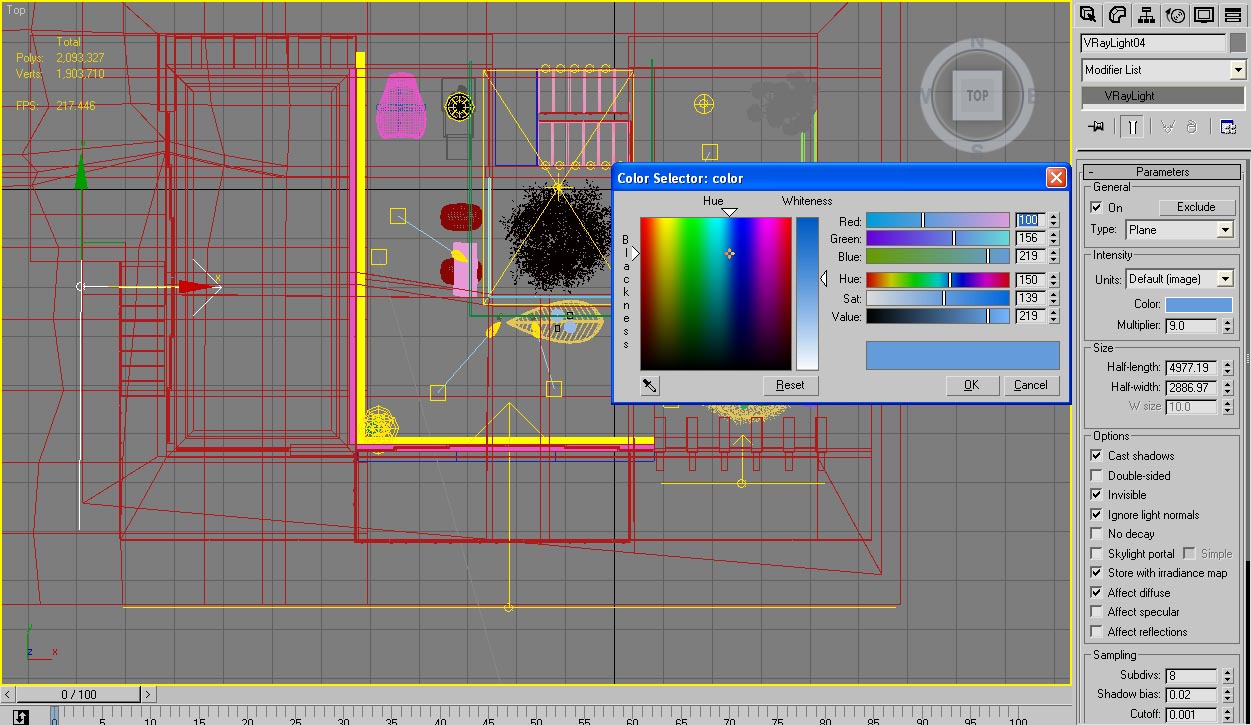
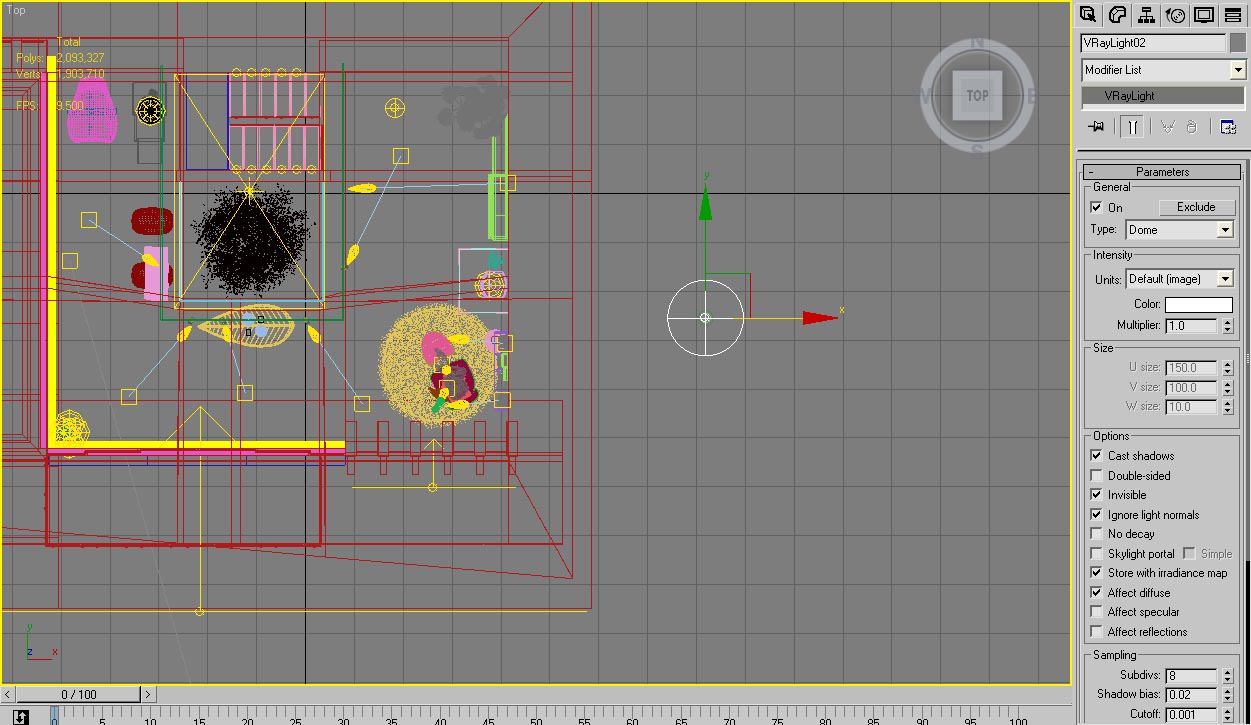
I adjusted the dome light multiplier in such a way so that it can light up the whole room without any additional lighting. I then added VRayLight (Plane) at every window to simulate the light that casts from outside the room. I also added point light for the fireplace and several photometric lights as the ceiling spotlight. For the overall interior scene, I wished to have a bit of orange / yellow hue in order to create a warm ambiance.

VRay Lights Settings
And here are all the lights settings one by one…


Texture
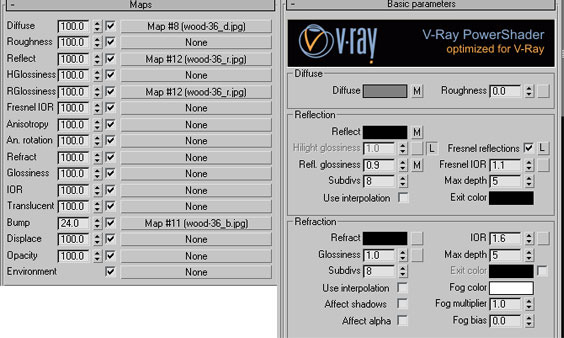
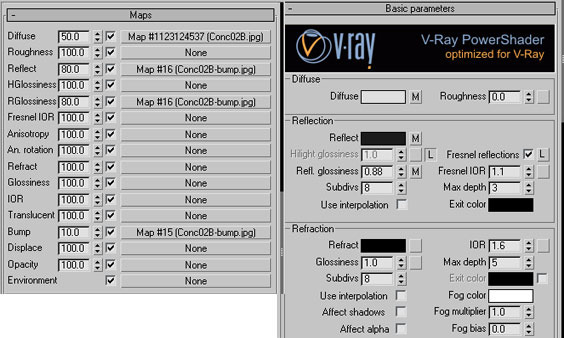
All the textures were taken from stock texture that I have. Based on this, I also created some specular map for the ceiling, wall and floor.


One thing that was new to me that I tried when creating this scene is the dew / frosted effects on the edge of the glass. I used masking (in Photoshop) to create several type of mapping for this. Each piece of glass basically has a different mapping. And I used VRay blend material, one is clear glass and the other one is frosted glass.

Window glass streak masks
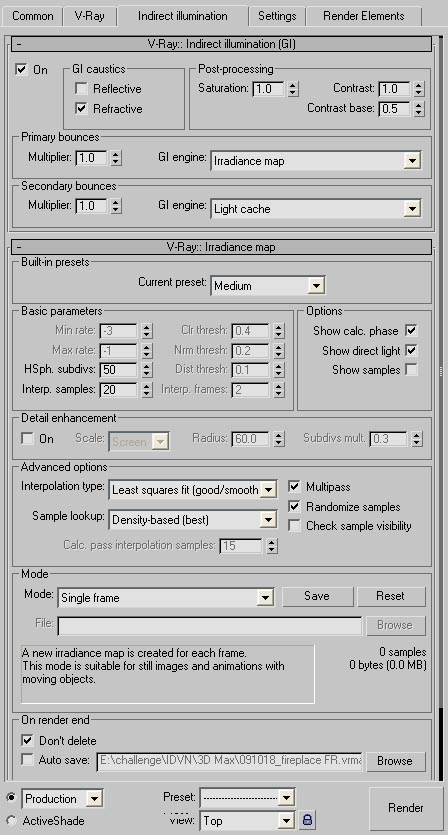
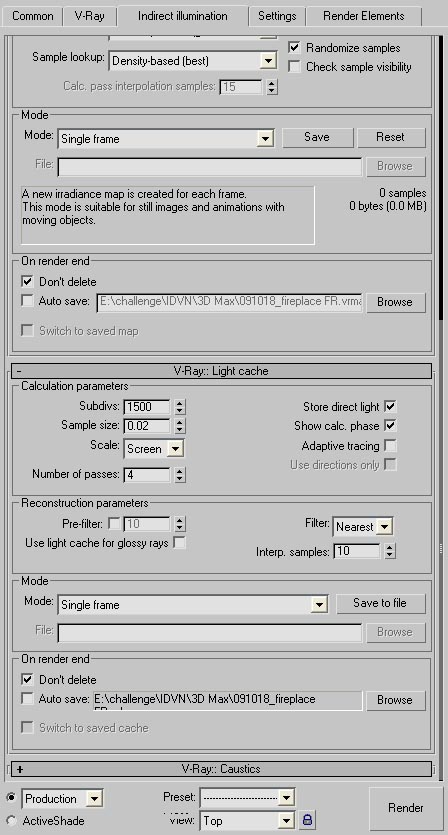
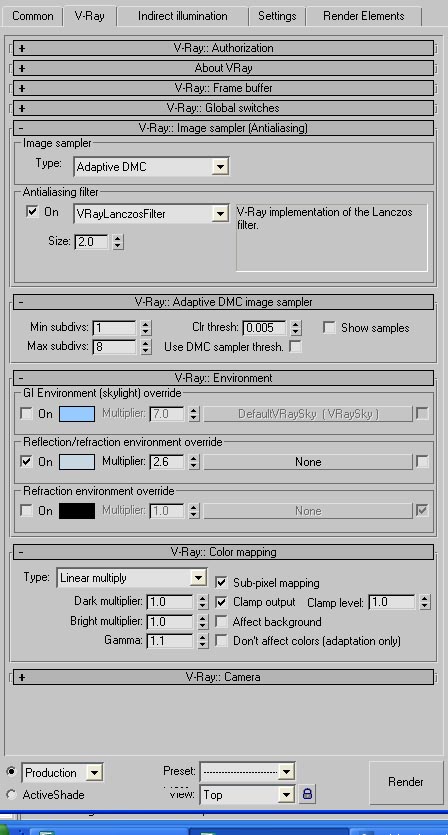
Rendering
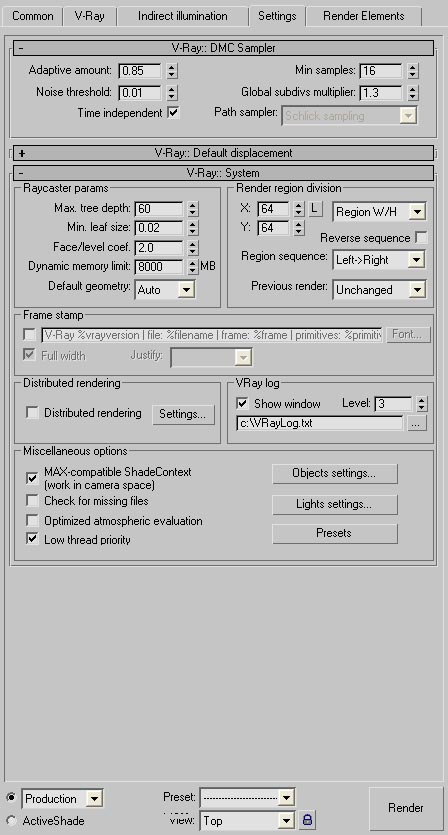
There is nothing special in the rendering process. I didn’t use a very high settings for this, as seen below.
Post Processing
Here, I did some exploration in order to improve the mood. Render output was saved as an .EXR file. This made it look a bit washed out, but I guess that’s fine as I will optimize it further in Photoshop.
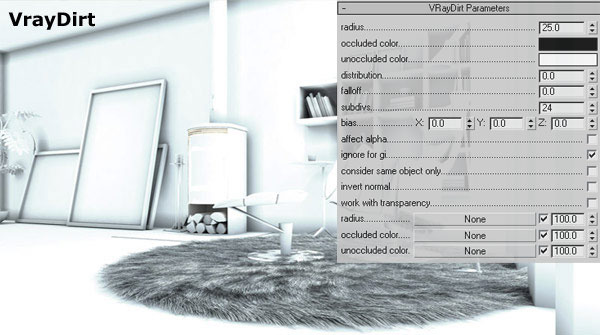
First of, I add VRayDirt layer on top of the original render. I used this as an Occlusion pass. This layer is set as Multiply. After that, I did some color balance adjustment to strengthen the mood and also curve to increase the contrast of the overall image. Next step, I added flare from Knoll Light, several glows and also a-bit of Chromatic Aberration effects, before I finally added the human into the image.

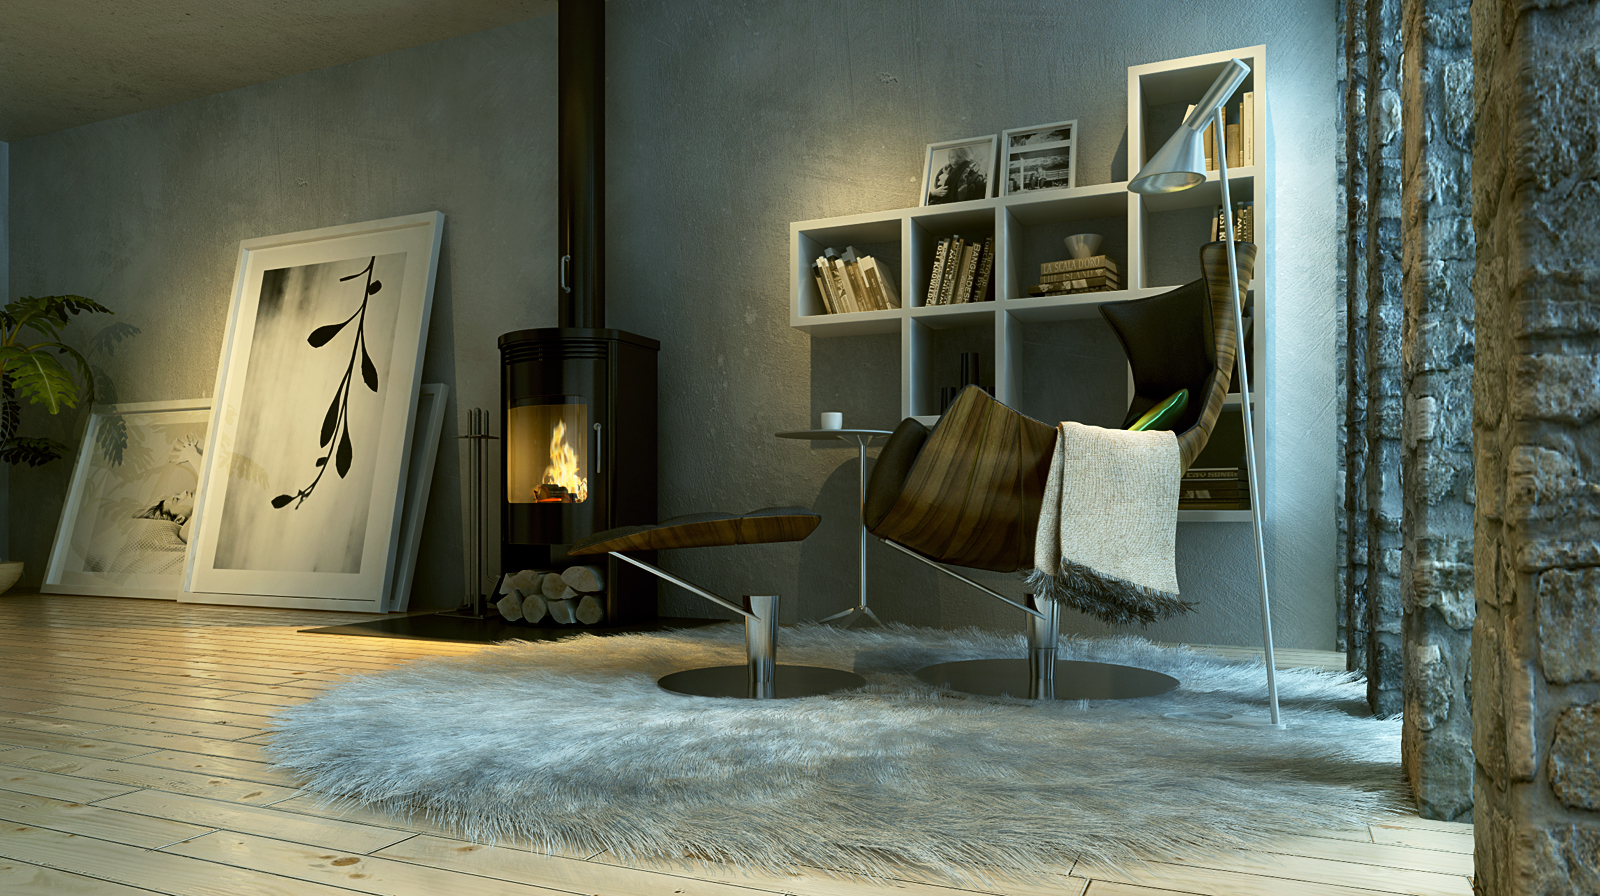
Original render
-

- VRayDirt pass
-
- Levels and color balance
-
- Dirt, glow and flares
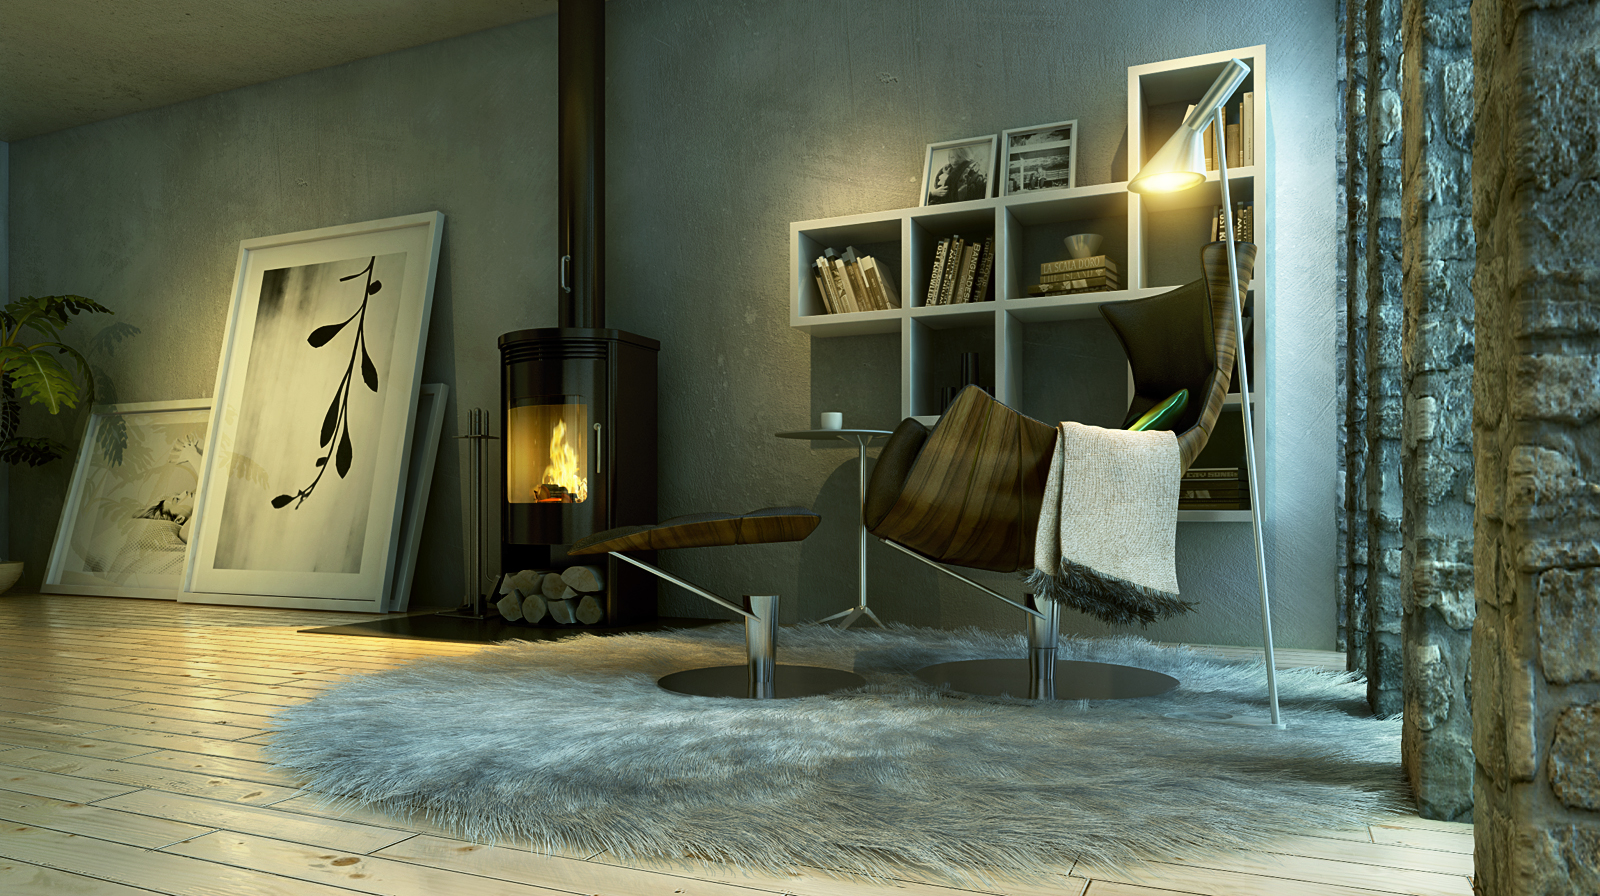
-
- Final image
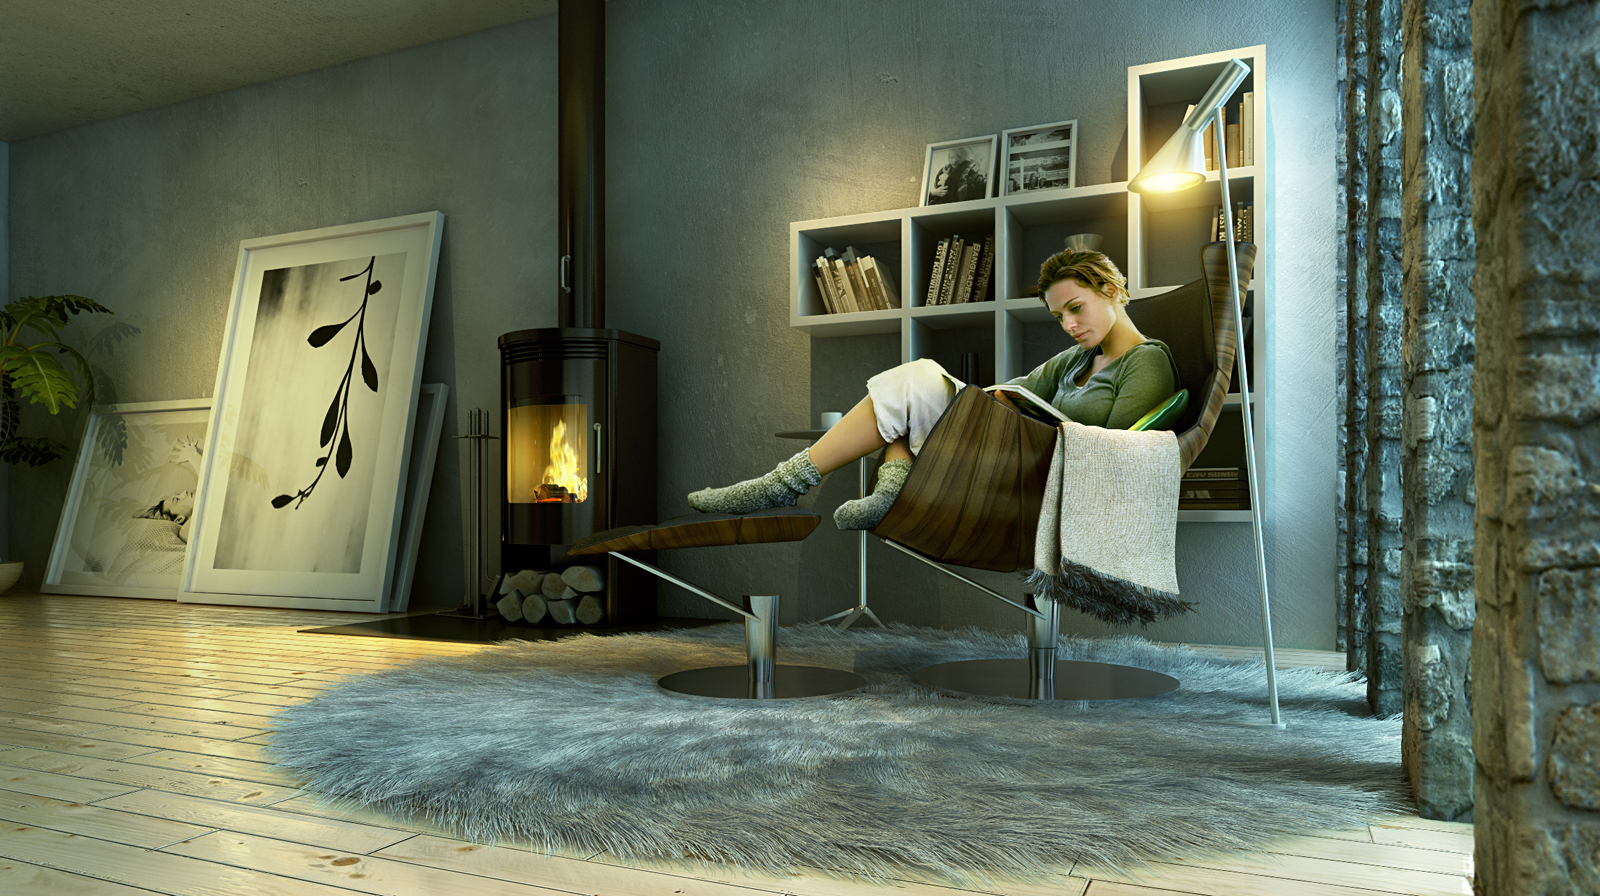
Some focus on adding of the human figure into the final render.

Adding the human figure into the image
So this is it. Below you can see all the images created for this scene. I hope you’ll find this short tutorial useful and inspiring.


Cheers, Fietter.
You are welcome to comment on this article and ask questions using the comment box below!


Well what can i say? Excellent work!!!
I have lots of questions but i will be brief…
1. How long did it take you to do everything except the modeling (setting up the scene and post-production)
2. This is a bit more general for everyone, does anybody here study architecture? because I do. Just wanted to know how many people actually study architecture because I think not that many.
Again great job!
All the way from spain, Miguel.
Hi Miguel, thanks!
Actually I did this scene on my spare time, usually some hours at night. The challenge give us two months but I start it at the 2nd month. so I don’t know exactly how long I did this 🙂
Great work.
Hi Miguel, I study architecture in Seville.
Saludos
thank you pedrosdt
Very nice….and thanks for the breakdown of it.
Where did you get the source for the woman cutout?
she is from BoConcept catalog.
and thanks for GREAT Making of
thanks mate…..I couldnt remember the website
The lighting looks so perfect, and I like the smudged glass texture, adds a nice sense of realism. Nice job!
epic tutorial… thanks for sharing
Hi, great work!
The human figure really adds a nice touch.
Would you mind telling us how you did the glow on the lamp?
Cheers.
I live in Mexico
Great Work….. Amazing……!!!
Tanks for Tutorial…..
=)
Hi Fietter thanks for share your works! but i have problem about froster glass… Can u detail the make of it? I have used VRayBlend but not with good result.
Thanks again 🙂
Really inspiring… very realistic!
Can you explain a little further how you used vraydirt… ?
Thanks for sharing, good luck!
as you get the effect glow and flares