


HDR Image Based Lighting 3D Scene Setup
This short video is a follow-up on a comment made by alex_starc in the 10 Free HDRI Spherical Skies Maps post. He had issues with the sky being too dark in the render so I just recorded a short session of how I setup my scene with Image Based Lighting (IBL) using and HDRI map. Hope this helps.
How to setup HDRI lighting in 3dsmax with VRay
In this video I’m showing how I setup scene lighting using a VRayLightDome and the VRayHDRI texture loaded with a HDRI (Viz-People HDRI Vol. 01 Map 03 and My own PureLIGHT No. 11). If you have any questions, please use the comment box below 😉
(Click here to watch on YouTube)
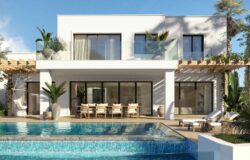
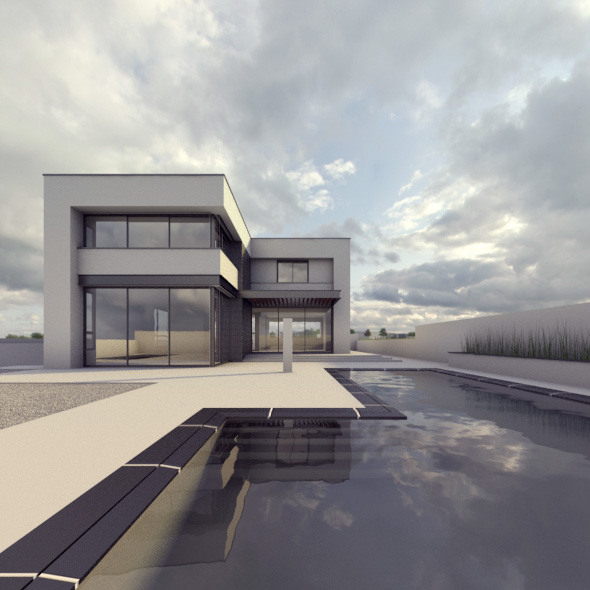
Here is one of the renders that I made during the testing of the new HDRI maps.
Tweaking the HDRI in Photoshop
Since the 2nd part is taking to long to get done, here is a short video to describe the Photoshop postwork that was done on the original HDRI in order to make the shadows look crisp.
(Click here to watch on YouTube)
If your workflow for setting up Image Based Lighting (IBL) is different, please share it with us by commenting below.
And one more thing…
 Get a free PureLIGHT HDRi
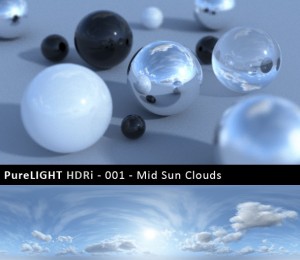
You can have my most popular PureLIGHT HDRi 001 – Mid Sun Clouds for free. Go ahead and take it for a spin… I would love to know what you think of it and how I can make these better.
Visit the PureLIGHT HDRi Help & Feedback Page for… well… get help & send me feedback 😉
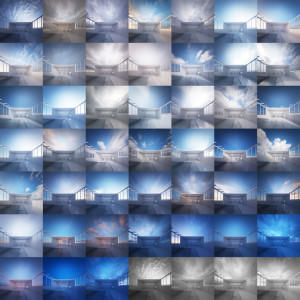
Peter Guthrie HDRi Skies Shop
Peter Guthrie is responsible for the most popular 360 HDRI skies being used in Architectural Visualization. There are currently 45 HDRI skies in his catalog, covering scenarios such as Cloudy, Sunny, Dawn, Dusk, Dramatic and Overcast. Named after the hour taken and span sun elevation from 0 to 50 with high dynamic range captured.

There are many HDRI’s out there, but what is the most important thing for you about them? is it the size? the actual landscape shown? just the sky? time of day?
I know I focus on the actual skydome and sun positions, since I use one map to light, reflect and be a background too.
Useful video – showing how useful RT can be for tweaking your HDR lighting setup! Helpful as always 🙂
@JohnW_3D
Can’t understand how I did this before V-Ray RT!!! Getting the light just right now is fast and fun. I actually get to test much more variations and get creative this way.
Bottom line – it might take more time in total, but the volume of work being done is larger and you get into more depth this way too.
@ronenbekerman Yea it looks great. I only got RT recently so haven’t had much chance to use it in practise (my recent project is basically all about proxies so RT cannot display them as far as I know). Looking forward to some smaller scale projects without such emphasis on VrayProxy to really give it a go!
Hi ronen great help…i have one question..how much is the multipier for the dome light in your video?default 30 or something else?best regards tim…
@tim.namy Thanks for bringing this up, I forgot to mention this 😉 I set it to 1 so all the intensity tweaks is in the texture (for a given camera setting)
V-Ray RT does support proxies in render. Just tick the proper check box in the activeshade settings dialog.
http://i.imgur.com/ts0rl.png
http://i.imgur.com/goVwI.jpg
http://i.imgur.com/XfWXp.jpg
Another good thing to add is the vraysun link to the HDRI light dome, to best fit light coming from the sun and the sun into the HDRI 😉
http://vimeo.com/11134608
And how to load and show EXR files into max 🙂
http://www.peterguthrie.net/blog/2011/07/hdri-skies-faq/
Thanks for your video Ronen 😉
@TAvisual Useful tip! Would make life easier if vraySun placement could be automated based on your chosen HDRI!…something like placing the sun target in the centre of your scene, getting into a camera view where you can see the Sun in the HDRI and take a quick render. Perhaps now a script can run that computes the brightest point in the resulting image (fairly quickly, as getting it in roughly the right place is probably good enough). Fire a ray through that brightest point from your camera position until you are a long long (simulating inifinite) distance away, and place your sun here…..?
actually on second thoughts there are problems there….anyways, just a thought! 🙂
@JohnW_3D There is a plugin / script that does that – link a sun object to an HDRI… I’ll look it up
@ronenbekerman@JohnW_3D you mean this one ? http://www.scriptspot.com/3ds-max/scripts/vray-sun-system
@TAvisual I know about peter’s method of linking the sun and HDRI but this is not really needed as long as you look for tweaking the sun intensity… you can do this in the HDRI faster and better (even color tweaks).
@TAvisual@JohnW_3D YES!
@TAvisual If you look for control over sun intensity and maybe even color then adding an actual VRaySun to the mix is overkill and more complex to control.
@ronenbekerman@JohnW_3D have you tried it with max2012 too?
@ronenbekerman@TAvisual hah…seems like someone got there before me! thanks guys 🙂
@ronenbekerman oh great…I just figured with the way they are dynamically loaded at render time that it wouldn’t be supported by RT….excellent!
@ronenbekerman so in this case you used a target direct light to simulate sun?
thanks now everything is working ;)….
@TAvisual No, just the HDRI.
i see this tutorial brought a lot of questions and answers. i’m happy u did.Thank you again for this blog!
Hi Ronen, first i want to thank you for sharing your knowledge…i watched your IBL tutorial, but i didnt get any “sunlight” in my renders..no hard shadows. I tried all HDRIs you offered…but I dont get the result you achieved in the tut. I also tried different unit- and colormapping setup, but still no real IBL direct light…Hope anybody can help me!
@RobertJohn No worries, I’ll cover that in the upcoming article 😉
@alex_starc You are welcome. Thanks for commenting about it and sharing your trouble with the HDRI – made me finally do a how-to video, first of many more to come I hope 😉
I tried the Vraysun script on max2012 but when adding button to the toolbar it crashes…someone else tried it on 2012? 🙁
Thanks a lot 🙂 @ronenbekerman
Quick Test… 3 min render time.. 5 min scene setup.. added sun for better shadows 😉
http://img801.imageshack.us/img801/9748/48151440.jpg
Mis sombras no eran duras hasta que modifiqué la gamma del VrayHDRI a 0.55 (2.2 / 4)
Estoy trabajando con gamma 2.2. No se si esto es correcto pero así empezó a funcionar al menos con una simple escena.
I often get overbright speckled noise in my glossy reflections when using HDR maps. The only ways I can solve this is to crank up the sampling on my glossies (which makes rendering animation impossible) or clamping my output (which gives me less leeway when working in 32bit float). Any idea as to why this happens or better ways to avoid it?
hi ronnen;
thank you for your great tutorial. making it more beneficial; i think vray dome’s light multiplier, gamma settings, color mapping settings should be exposed.
thank your for your great effort, hope to answer soon.
@junglejuz I know what you refer to – that is a problem more often the not! Sometimes calibrating the exposure does the trick, other times I just clump the render. I know this is not optimal, but I don’t always need full float.
I’ll try to address this in the upcoming HDRI Lighting post too.
@melihvahidy That information will be fully covered in the HDRI Lighting post 😉
Hi ronnen (Thank you for everything you do, and your blog here is fantastic!)
My problem (sorry for that): Whatever i do i can not get the hdri maps to emit strong shadows like yours. I use max 2009 and i dont have the v-ray power shader like you ( can that be it?)
I make my v-ray hdri texture like shoen here:
http://www.republicofcode.com/forum/showthread.php?1282-V-ray-And-HDRI-Tutorial
Hope you or someone else will look into it.
perfect
@gauten I using max 2009 and had that problem, a “possible” solution is what I mentioned before, lowering the HDR gamma to 0.55. It will be a problem of max 2009? Greetings from Argentina (Translated with Google do not speak English)
@gauten You should be able to use the VRayHDR map in 3dsmax 2009 too… perhaps an older V-Ray version is the reason. But regardless of that – You should be able to load the HDR with the bitmap texture too.
@inoxidable@gauten Lowering the Gamma can help to boost Light / Shadow contrast but going low as 0.55 is not recommended since this is to drastic and may change more then just the shadow quality.
Ronen, dude… U rock man!
seriously, ur blog and works are inspiring!
i come here eeeevery day of life, since october/2010! congrats dude!
and thnks, ofcourse!
@inoxidable Thanks to you and Ronen forhelping. i will try your solutions and report back. Thanks you are good people!
Got the same problem with 3dmax 2011 and Vray 1.5 sp5 as gauten.
Here is how it looks after render ( LWF, gamma 2.2, linear color mapping). All other settings are exacly as you shown Ronnen. (using the HDRI03 from the free Vis-people collection)
http://imageshack.us/photo/my-images/695/noshadowshdri3.jpg/
If anyone would be interested – here is the .max file (2011)
http://www.speedyshare.com/files/29669929/scene2011_noshadows.max Any suggestions
what did i messed up?
@KrzysztofKipa You have to use an HDR map which has a small, single pointed light source. In other words, the sun has to be visible, and not obscured by clouds. I think you are getting soft shadows because your light source is huge (ie. bright clouds). Try using a different HDR map where you can see the sun and see what happens.
@ronenbekerman@inoxidable@gauten you could do this but technically that would be altering from a strictly linear workflow, which for compositing purposes is undesirable. My advice: do those kinds of adjustments in post if need be, and leave your gamma set to 1.
hai mr ronen,im gede from bali,indonesia,..im new in 3d…im very impressed with ur IMB & HDRI video tuttorial..but i really confused how u make the vray sky and hdri setting because every time i used it,my rollout in material editor didnt look same as ur rollout,,can u xplain to me plisssss….if u not mind pliss send to my mail adress ..dita_arg@yahoo.com
im sorry i post it double,,i post it in the wrong place before
@junglejuz im using the same map as Ronnen in his tutorial, anyway ill try with other one.
checked with 5 different HDRI’s from VisPeople and couple other – still nothing…
@gede dita hey, maybe u’re not using vray! are u? Vray is one “plugin” to 3ds max, u should buy it, and install. then all features (lights, materials and utilities) will be installed! 😉
@b4rt_ im using vray ver 2.0 maxs 2010..the vray hdri rollout is not the same as the video…:( can u help me withthe workflow??
@b4rt_ im using vray ver 2.0 maxs 2010..the vray hdri rollout is not the same as the video…:( can u help me withthe workflow?
@KrzysztofKipa If you can wait just a little bit longer… I have one more video in the making for this – that should explain it all very well 😉
@gede dita@b4rt_ Wait for the 2nd part of this article + video about how to tweak the HDRI map.
@KrzysztofKipa Try VisPeople hdr_v1_07.hdr. I’ve tried it in your file and I can see long, defined shadows. They are easier to see if you change the HDR gamma to something like 0.8, but as I mentioned in an earlier post, adjusting gamma of textures in 3dsmax is generally not recommended when working in linear colour space, unless you are not concerned about accuracy when re-compositing in post.
@ronenbekerman@b4rt_ im really excite!! pliss give the workfow too… 😀 thx mr.ronen…thankyou verymuch
@junglejuzTried with lowering gamma directly in HDRI, but later i figuret out that if i set up gamma 1.0 in HDRI and on top of it i put ColorCorrect with gamma 2.2 it looks almost good. There are only 2 problems:
1) it lowers a lot acceptable level of increas for intensity (max is 7~9 for all HDRI in Vis-People collection) Still it is bright enough, and i can tweak in camera settings – if needed
2) the map cant be used directly as background – i had to take it out from ColorCorrect and alternate intensity (up to 35) and then it could be used as Background (in other case it would have too much contrast – and look dark in general).
So i ended up with 2 HDRI’s –
1 for light in VrayLight(dome)
– HDRI [ gamma 1.0, intensity 7 +ColorCorrect [ gamma 2.2], and the second one for background
– HDRI [gamma 1.0, intensity 35], no ColorCorrect)
@ronenbekerman definitly will wait for Your video 🙂 just when i start something i like to do this good 🙂
@KrzysztofKipa Interesting solution. I don’t have the color correct plugin installed so I can’t test it. One important thing to remember is that it’s not necessary to get everything correct straight out of the renderer. If you unclamp your output and save as a 32bit EXR file, you can make many changes to your image in Photoshop or After Effects because you will have a larger dynamic range than a simple TIF or JPG. For example, you can select your alpha channel and adjust your background exposure interactively, without needing to get it perfect straight out of vray. Same goes for adjusting contrast and brightness of your scene. A simple S-Curve in Photoshop should bring out your shadows nicely.
@KrzysztofKipa@ronenbekerman On closure inspection, there does seem to be something a bit strange about those free HDR images. If you try it with this one you should notice a huge difference and you won’t need to adjust the gamma at all. http://realfeel.biz/Temp/Cloudy04_lighting.hdr
@KrzysztofKipa@ronenbekerman On closer inspection, there does seem to be something a bit strange about those free HDR images. If you try it with this one you should notice a huge difference and you won’t need to adjust the gamma at all.http://realfeel.biz/Temp/Cloudy04_lighting.hdr
@KrzysztofKipa@ronenbekerman On closer inspection, there does seem to be something a bit strange about those free HDR images. If you try it with this one you should notice a huge difference and you won’t need to adjust the gamma at all.http://realfeel.biz/Temp/Cloudy04_lighting.hdr
@KrzysztofKipa@ronenbekerman I’m wondering if it’s because they were created with not enough stops of exposure, (ie. not enough dynamic range)
@KrzysztofKipa@ronenbekerman It must be something to do with the way in which the HDR maps are created to begin with.
@junglejuz@ronenbekerman Cant check the HDRI You shared junglejuz – renders black (no data inside? – it has 140kb size) anyway, back to the topic – i got info from Vis-People owner, that the free sample HDRI will be reworked next week prabobly. I think – the same as you figured out – that the problem is inside of HDRI files (checked the setup on the files from Vis-People – thats prabobly the problem) I’ll try to check on the files provived by http://www.openfootage.net/. Still i hope Ronen will show how did he tweaked the HDRI – i love the color mood he gets in the images (on the “raw” renders).
@KrzysztofKipa@ronenbekerman Sorry about that. Try downloading the file again from the same link. Its only a 298Kb file (512×256) but thats all you need for lighting purposes.
@KrzysztofKipa@ronenbekerman Sorry about that. Try downloading the file again from the same link. Its only a 198Kb file (512×256) but thats all you need for lighting purposes.
@junglejuz@ronenbekerman now this one looks good (well defined shadow areas) and not overbrightned.
Could you tell us what did you did with this HDRI? (if You tweeked it in any way)?
@KrzysztofKipa@ronenbekerman Not tweeked. It was a bought one from hyperfocal design, from their VHDRI range. Just reduced in size.
@KrzysztofKipa@ronenbekerman I am very curious to know the difference in these HDR images myself. Very strange.
im curious to know why Ronen’s images on the same HDRI looks different then mine 🙂
…and where is this magic button “Make cool IBL”
Cant wait for his 2nd part of video.
Btw Ronen if you read this, did you used on the 1rst video free HDRI sample? or the comercial one? (maby in the process of lowering it ressolution it lost some data?)
@KrzysztofKipa No. Like I said, resolution doesn’t matter when using it for lighting. The one I gave you is only 512×256 and its perfect. (not for background though)
@junglejuz yea i know – for the lighting its good enough the size Your image has. But maby (just guessing) if Ronen is using comercial ones (geussing) and im using lower ressolution free ones – there something happened in the process of lowering ressolytion that caused the fact that lower ress version of the same HDRI does not work the same. Not the actual pixel ressolution but maby some gamma shift? No idea. Ill wait for the 2nd part of video 🙂
Till now im using anyway VraySun + Sky for lighting, but would be cool to get something with different look, to the portfolio 🙂
@KrzysztofKipa I see what you mean. It’s possible but I’ve got some high res HDRs that also need a gamma shift to get a strong shadow. I’m tempted to save out some exposures and recreate the HDR in different apps to see if it makes a difference.
@junglejuz well this could show how are this HDRI realy build. Would gladly see the results – to compare HDRI with strong shadows, and similiar in look (clouds etc) HDRI without this shadows. This would tell us what is missing in the one with low shadow quality. Anyway – HDRI is not a “magic button” – and it still need work from the artist to get the results that are desired.
@ronenbekerman@gede dita thnks ronen! but let me see if i’m right.. one thing that i noticed, is that vrayRT produce more shadows from hdri’s from the final render, but still, my RT show me shadows soooo much softer than yours, what u do diferent? i noticed u “edited” ur hdri right? u have one “a” in his name hehe thnks ronen 😉
@KrzysztofKipa Upon examing the different HDR files in Photoshop, it appears that the Hyperfocal Design HDR file I sent you has a MUCH LARGER dynamic range (up to 17 stops of exposure compared to 6 stops). This could be the reason why it gives better light and shadow.
@ronenbekerman@gede dita take a look at my print.. http://imageshack.us/photo/my-images/830/capturarfb.jpg/ vray RT, with harder shadows and “burst” area, and the final render with soft shadows… ooh, and by the way ronen, u know how to solve that white points in highlighted area? my render config is high! 😡 and thnks again
@junglejuz well, this shows that there is much better contrast range – a lot more “bright” and “dark” steps.
Great that you checked it, and thanks for sharing the information. By the way, cool portfolio you got there 🙂
@KrzysztofKipa Thanks. No worries mate. Yeh I recreated the HDR file and it made no difference. I would say the dynamic range is the crucial variable in getting the best light from HDR maps. Unfortunately most you find online are not as high range as this, so tweaking the gamma and adjusting in post is probably the best solution. I’m interested in what Ronen has to say on the subject.
@junglejuz Opened the files (Hyperfocal [HP], Openfootage [OF], and Vis-People [VP]) in photoshop, and from what i have seen, the HP on very low steps (under -8) , when the other ones does not have this. Exacly as You said – crucial seems to be the contrast on low steps of HDRI (and this means that the sun on the image should be realy bright – then on low steps it is still visible – and can provide enough power to cast strong, good sharp shadows).
@junglejuz just started to wandering can i paint anything on the low steps of hdri? (this would help to “adjust” the low quality HDRI (without enough contrast on the low steps). Will check this when i ll get back home.
@KrzysztofKipa yeh. its still a bit of a mystery to me. I tried another HDR with about 12 stops of exposure and that gives soft shadows too. I need to know what makes that Hyperfocal Design one work so well.
@KrzysztofKipa As an experiment, I tried one of the Vis-People HDR maps using max’s own bitmap loader, instead of the vrayHDRI map. The result was fantastic. MUCH BETTER than using the Vray one. Just need to set the back and white points and Voila! perfect shadows. Just adjust the RGB Level in the Output to increase the brightness.
@KrzysztofKipa This has to be because max corrects the gamma of input bitmaps when using a 2.2 adjustment in the “Gamma and LUT Preferences”. (If you change this back to 1, you lose the nice shadows). The VrayHDRI map clearly does not automatically gamma correct it’s input images (hence the reason why it has it’s own gamma adjustment feature. However, VrayHDRI gamma correction does not seem to work the same as max’s native gamma correction. A value of 0.4545 would be the inverse of 2.2, but this is clearly way too much, so I’m not sure how they have implemented their gamma adjustment.
@KrzysztofKipa This has to be because max corrects the gamma of input bitmaps when using a 2.2 adjustment in the “Gamma and LUT Preferences”. (If you change this back to 1, you lose the nice shadows). The VrayHDRI map clearly does not automatically gamma correct it’s input images (hence the reason why it has it’s own gamma adjustment feature). However, VrayHDRI gamma correction does not seem to work the same as max’s native gamma correction. A value of 0.4545 would be the inverse of 2.2, but this is clearly way too much, so I’m not sure how they have implemented their gamma adjustment.
@KrzysztofKipa Correction. My mistake. This is identical to putting a gamma corerction of .4545 into the VrayHDRI map, which clearly does not automatically gamma correct it’s input images (hence the reason why it has it’s own gamma adjustment feature).
@KrzysztofKipa This kind of explains why the Hyperfocal HDR looks fine without gamma correction, because if you put a .4545 adjustment onto this HDR it looks completely blown out. The only explanation is that it must be already gamma adjusted.
@KrzysztofKipa Low and behold, I put a 2.2 gamma onto the Hyperfocal HDR in Photoshop, resaved it, and now it works the same with a .4545 gamma adjustment in the VrayHDRI map. (1 / 2.2 = 0.4545). Sorry for all the posts. I just needed to clarify what was going on here in my own head and decided it was worth sharing. 🙂
Hope it makes sense.
@ronenbekerman@inoxidable@gauten the solution is to set your gamma to 0.4545, which is the same as gamma correcting your input images to 2.2 using max’s gamma preferences. Since the VrayHDRI map doesn’t respect max’s default gamma settings, you have to change it manually with the inverse of 2.2. (1 / 2.2 = 0.4545)
@junglejuz sounds reasonable to me, i also get info from Vis-People that this HDRI free samples will be “fixed” next week prabobly.
I think about one more thing there – how would it work, if i would take for instance this vis-people HDRI now, and disasamble it to series of images, then tweak them in photoshop (increasing number of steps, by duplicating some of them and working on theire contrast, a specialy increasing brightness of the sun on the low steps) – and then marging them to HDRI again. This could be a bit “long” work i know 🙂 but could this fix the problem? Will try when ill get a bit of free time at home. Cheers!
OHYEAH!!! I stumbled upon my problem…it was the v-ray dome…i scaled it up (so it incapsled the whole scene) No i have a clear hard shadow from the sunlight…
OHYEAH!!! I stumbled upon my problem…it was the v-ray dome…i scaled it up (so it incapsled the whole scene) Now i have a clear hard shadow from the sunlight…
@gauten are u fckng seriously? hahaha i didn’t know that dome scale would make any difference! haha nice to know 😉
@b4rt_ im dead serious..and laughing all the way to the bank right now! Try it out
http://www.flickr.com/photos/dougklembara/2071469797/in/set-72157603320923940/
@KrzysztofKipa I wouldn’t bother wasting your time. I honestly don’t think the dynamic range is the issue. Its purely the gamma.
You are right.Scaling does create brighter light and clearer shadows BUT I would NOT recommend this method for several reasons.
1) it adds extra complexity. Now you have 3 variables controlling brightness; multiplier of vray dome light, size of vray dome light, and multiplier of HDR map.
2) it increases render times.
3) you get a noisy image. the only way to fix this is to increase your light sample subdivisions, which again increases render times.
plus another problem with scaling the dome light is that it had no effect in vrayRT.
plus another problem with scaling the dome light is that it had no effect in vrayRT.
@gauten@b4rt_
You are right. Scaling does create brighter light and clearer shadows BUT I would NOT recommend this method for several reasons.
1) it adds extra complexity. Now you have 3 variables controlling brightness; multiplier of vray dome light, size of vray dome light, and multiplier of HDR map.
2) it increases render times.
3) you get a noisy image. the only way to fix this is to increase your light sample subdivisions, which again increases render times.
Another problem with scaling the dome light is that it has no effect in vrayRT.
@junglejuz@gauten@b4rt_ I must agree with you and suggest the same. Scaling the Dome Light is not a controllable method. Did some tests and it is a mess.
I would stick to something that looks the same in V-Ray RT as much as possible!
@ronenbekerman@junglejuz@b4rt_ The problem for me then is that i dont use V-ray RT. It seem that the only way for me is to scale the dome light. I have done all the steps like you show in the tutorial but get nothing else then a little contact shadow around objects. FRUSTRATING AT BEST hehe
@ronenbekerman@junglejuz@gauten ooooh, so what makes ur ibl so special? so perfect, with hard shadows, so Bekermalistic, Bekermanbastic?? hahaha lol srry for my freak english ;P
@junglejuz@b4rt_ I dont use vrayRT does that mean that i cant get hard shadows from hdris?
@gauten@junglejuz@b4rt_ You can… It is just that the workflow for getting the scene to look the same both in actual render and V-Ray RT might be different the when you just work for normal render.
This is due to the fact that V-Ray RT is still not exactly the same as the V-Ray normal render.
Hi, first of all thanks for such great blog(; And now lets go to business I have one question, when I try to do vert. rotation i get such result: [IMG]http://img845.imageshack.us/img845/3474/20747654.png[/IMG] I used this hdri:VizPeople_non_commercial_hdr_v1_01 Mapping style is spherical
@ElBucijo yeah, this is the objective of vertical rotation, rotate the image in vertical position. If u want more control, u can put the mapping type in 3ds max standard, doing this u can control the U and V position. 🙂
Good technique has only one small problem the alfa in the glasses disappears when you puy a vraydome in the scene, i test with my scene and i have to erase de vray dome to recover my alfa, i do not understand
@JAVIREX Easy fix – Make the VRayDome Invisible and put the same HDRI image in the background environment slot. This will bring back your Alpha and keep the background too 😉
MANY THANKS
Too many test yesterday and I did not think invisible ……
@ronenbekerman@JAVIREX
@JAVIREX It is always that little thing… Happy to help 😉
@JAVIREX One way to solve this is to turn on “Invisible” in your light parameters, then instance or copy the HDRmap into max’s environment. Don’t forget to also select “Color + alpha” for “affect channels” in the refraction parameters of your glass material.
@ronenbekerman@JAVIREX Don’t forget to also select “Color + alpha” for “affect channels” in the refraction parameters of your glass material.
@junglejuz@ronenbekerman THANKS FOR YOUR COMMENTS
I did a test and everything went well. invisible is the only thing I needed
@b4rt_@gauten Thanks for help(; but I went other way 😀 I used PS to stretch hdri image that almost of canvas size would be sky. I dont know if this metod is right but it worked for me 😀
fantastic tutorial and im sure its helped a LOT of ppl just like myself! Priceless!
pretty new to this all so please forgive me for the simple questions…
a couple of things:
1. When i place the HDRI dome light, the scene goes very dark (black almost). Its only when i cahnge the viewport from realistic to shaded that it appears correctly…
2. when i try and add the viewport background, the sky goes grey?
Any help would be appreciated.
thanks @scostumatu I appreciate this very much 😉
Not sure about the Viewport thing you mention – perhaps a screen shot will help here.
Anyone else had experienced the same thing?
By the way, My PureLIGHT HDRI 001, was selected to be part of Envato’s 5th Birthday Bundle that will go live in two days! They have a Birthday too, so this is very cool 😉 You can check it out here – http://www.ronenbekerman.com/go/purelight-hdri-001/
http://farm5.static.flickr.com/4058/4410915094_3c65deeb63_o.jpg
And all of my PureLIGHT’s too at – http://www.ronenbekerman.com/go/purelight-sorted-sales/
I wouldn’t mind it if you grab some of them 😉
As a matter of fact I have 3 DesignConnected Vouchers to hand out…
so I’ll do it this way – Once the Envato Birthday Bundle is over send your receipt for purchasing either the bundle or one of my PureLIGHT’s and I’ll randomly select 3 winners among all of you that send me an email.
Each voucher is 100 EURO in value! Good Luck and Happy Birthday All 😉
Why don’t you go ahead and see what you can get with 100 EURO at – http://www.ronenbekerman.com/go/designconnected/
Hope there will be only three…including me..;)@ronenbekerman
@RobertJohn We are in conflict of interest 😉 Best of luck to us both then…
really good video tutorial, ronen!
it took a while that i had to set back the domelight multiplier back to 1 (default is 30) to get the results you have, but that was a good exercise for digging deeper into how it works.
What i don´t understand is that the hdri is not showing up in the background viewport in max 2012. tried the same scene in 2011 and everything works fine…
It´s kinda hard to position the sun, if you cannot see it in the viewport.
Have you got any hints on that ? Have i forgotten something ?
regars, ingo
Awesome tutorial Ronen. Thanks for that. You mentioned that you tricked the HDRI.. do you just adjust the gamma in photoshop or something like that? I read an article on Bertrand Benoit’s site about lowering the overall gamma to give better shadows so I was wondering if that was it.
@IngoBeckmann If you place the HDRI in the environment background slot and then set the viewport to use the image in the environment slot then it should work OK.
You can also try and set it manually by clicking shortcut ALT+B in the selected viewport.
Let me know how it goes.
@StephenInglis Bertrands tips is good… lowering small value will boost the shadows. What I do is tweak the actual HDRI and the “sun” area in it. I open it up in PS or HDRSHOP > Sample the values at the sun and surrounding it and then in PS add intensity to the “sun” changing the balance of the image – This will help with getting shraper shadows… but it can also overshoot your HDRI so be very careful with it.
I do all these tweaks with the aim of keeping my camera settings in correlation with how I would set a real camera in the real world for a similar sky condition.
Hope this helps 😉
I make some test for night mode in animation in my project, and finaly i put one dark blue light for the ilumination, because with the hdri is more slow for the render, i like very much in hdri but my budget for the renderfarm is not too high, but the next project for the static images i use the hdri i like very much.
@JAVIREX What is your time gain for when you add a light? in % per frame? I would like to know that for future reference 😉
@ronenbekerman 50% o more, depends the frame but in a frame that takes 8 minutes , with the hdri takes 15 with a 1500 frames ….
and i make frames with animation prepass because there are moving objets, and the ilumination prepass is more slow with the hdri.
I also could do more tests but time is running 🙂
Did everything as you mentioned, but without any success… running on a mac pro dual quad xeon with 16gb ram… perhaps the graphics card can´t handle the big filesize of the hdri? running on a radeon 5870.
but i can´t figure out why the background IS shown using max 2011…@ronenbekerman
In fact i just found out that it doesn´t show up due to the recommended nitrous graphic driver. when i switch to direct 3d instead, the background is showing.
any suggestions on that ?@IngoBeckmann @ronenbekerman
Will you give us a little Info on that? You mentioned a second video tutorial before… 😉 @ronenbekerman
@IngoBeckmann Can’t help with 3dsmax 2012 nitrous since I’m not familiar with it yet. Sorry.
Anyone else here that knows about it?
@IngoBeckmann Will do, But that video / article will wait until after CITY LIFE is live & running – Been holding that one way to long and the dedicated site is in the final stages now… took way longer then planned. pfffff.
Great tutorial! my problem is that i get noisy images.. don’t know why… i’ve not changes subdiv neither DMC… no matter which HDRI i use…
The Envato Birthday Bundle, featuring one of my PureLIGHT HDRI skydomes, just went live now 😉 Check it out at – http://themeforest.net/bundles/birthday?WT.mc_id=bundlesupersale1
Thanks Ronen, great tutorial.I noticed that in your scene you receive strong and defined shadows using those HDRI files. For some reason the shadows in my scene, using the same maps, are much weaker. Did I miss anything?
@covono Yep… The edit in PS bit – where I boost the sun values. I did not include that in the video, but it will be covered on the next article about this topic.
@ronenbekerman What i usually do is to laod the HDRI into Photoshop, put an exposure adjustment layer on top of it and lower the exposure till you see the hotspot of the sun. Now use the marquee tool and create an circle around the hotspot and delete the exposure adjustment layer and put a new one on top of the HDRI image (this will create a correct mask, where the hotspot is white and the rest is black). Now you can use the adjustment layer to increase the exposure on that hotspot which wil result in sharper shadows. Try a value of 2 or even 4 and you should get pretty good shadows…
@ronenbekerman Since you need to tweak the exposure values of a photograph to receive a shadow that you normally get in the real life…
So in other words you are saying that either ‘vray’ is not accurate or the HDRI photographs don’t give the right range of colors?
@covono VRay is as accurate as the input you hand to it. Since using an HDRI image is “External” to the VRay Engine it is a calibration issue mostly.
I wouldn’t use the word “Accurate” in such things. It is more what looks right for me that guides me in getting the final look of an image. This is based on experience in real life photography and many many observations I make daily looking at the built environment and how light plays in it.
Hi all 😉
Know it’s about Vray but…. If someone have or know where to find something like that but with Mentakl Ray just let me know or post a link or whatever.. 😉
And still this is the best site with Cg info in the world 😉
Cheers 😉
@ronenbekerman I think I dig it…So lets assume you edit an HDRI with PS. What is the float value you will give the center of the sun?Does it make sense to ask it? BTW, Thanks for the tips
@covono Makes perfect sense… I usually sample the current value at the sun (or image bright spot) and the area surrounding it. I then increase the intensity in 3-4 stops and test how it goes and tweak from there.
thats a tricky one, almost every hdri that i have has a value of 20,000 in PS, i havent figures out the math behing this. If you open a 32Bit image in ps you have this little slider at the bottom which you can use to lower the exposure, this way you can find the hotspot and you can measure it with the color picker. a better way then to “paint” into the image is to use an exposure adjustement layer like i described a coupe of posts below, if you increase the exposure on the adjustement layer by one then it means that you increased the brightness by 1 stop which makes it very easy and fast to test out diffeerent exposure on your hdri.
@olli3d That is a good way to do it, and keep control over the file for later tweaks. Until PS gets better with 32bit.
hi! i did exactaly same as you, but i can’t get the shadow as i want, actualy, i did not see the shadow like your tutorial , can you explain me more about that ?
hello,,where can i find (the 2nd part of this article + video about how to tweak the HDRI map.)??
@zardasht The video is linked here – http://www.screenr.com/XWps and I’ll also add it to the post body along with a little extra 😉
Scroll down a bit, check my posts. If Ronen is too busy i could also record a quick video.
@olli3d Oh, that’s great!!! can you make it ? pls.
Now, i can make the shadow stronger and sharper , in PS i selected a very small area , and then, i adjust the exposure of this area by Image-adjustments – exposure. make it stronger , and then i invert selection, make it very dark. save . in vray, i raise render multi value alot, after that, i can have sharper shadow as i want .But i am not comfortable with this method, so, can you make a quick video , about do a trick with HDRI in PS . Thanks a lot
@troda83 Hi… Busy, Busy – but I been holding on this too long a short video is in order 😉
http://www.screenr.com/XWps
I hope that this visual showcase will clear the PS postwork on the HDRI. Should you need more help let me know.
@olli3d Hey, Go ahead and do one too – If you have another workflow for this I would love to see it too 😉
@ronenbekerman Very helpful tutorial.Now eveything become more easier with me. thanks a lot
thanks ronen, i love your work. can you tell me what colour mapping setting you used in this tutorial please. thanks.
@KevinLaffey Linear with 2.2 gamma
It looks great one Ronen! I ll give it a spin for sure!
how do I download it? It’s for free right?
great, interested in downloading. At what time was the hdri taken? thx Ronen
very generous share ronen, thank you. i presume this is the HDRi before the photoshop post work? thanks again.
i can’t find the download link ronen? am i missing something? thanks.
i thought as much. i’ll have to become a twitterer i suppose!! thanks again.
thats my first tweet done ronen. i’ll retweet again when i’ve reached 10,000 followers!!
Excuse me,but why don t you share the scene file,because i don t get same affect as you did..
thank you..
I`m not getting any shdaows, why ? do you use another light, like directional light ?
@NatanaelBrandas No other light, just the HDRI… have you seen the video about the postwork on it?
@ronenbekerman how do you brush it in ? i`m sorry im kinda noob in PS.
Yeah, not sure if I understood correctly…Ronen, do you mean to pick the color with the corresponding F-Stop (12 in your example), than using the brush with this value to paint the sun?
then*
@kainfury Yep. Just pick the sun value as is – then boost the exposure value of it by 2-3 and brush it in. You can also do it by adding an exposure correction to the HDR and mask just the sun area. Both will do the same.
the photoshop video ?
Hey Ronen, I cant seem to get the Hdr to display in my Viewport background, Any ideas?
@Jamie Cook I have the same problem
please ronen could you help me
regards
Ola
http://www10.0zz0.com/2012/02/27/07/247315344.png
same hiere, i can’t display any hdri in backgroung. please help.
I have problem editing the HDR in photoshop. Since it’s 32bit file it dont let me brush in or adding exposure control layer. Did someone know why is that?
I am using photoshop CS5
@VasilKirov Actually I fugured out a way to do it in PS. I gues you need to have extended version to brush the sun in or add exposure control layer. My method is to make a selection circle at the place of the sun and then in image/adjustments/exposure I move the exposure slider with 3-4 up. This give tha same effect only in the selected area. It’s tested and works for me.
Good luck
Hey Ronen, I am testing the free HDRI files and this technique out on a file of my own. I can get the VRayRT working and looking great with the HDRI, but as soon as I try to render out a final image, it turns bright yellow/orange. It only does this AFTER I’ve adjusted the exposure in PS…the original HDRI works fine in both RT and final rendering.
Any ideas? I’m sure I have something incorrect in the render settings, but I have no idea where to start.
Oh…and thanks for this blog. It’s amazing!
@cyates74 Can you send me some image examples so I can better understand what you get?
Nice tutorial, but I don’t understand what to change…. I did the same as you, but I don’t have dropted shadows.
@TeodorMunteanu You change the intensity of the brightest spot, where the sun is… It usually needs a bit of a boost to allow for the shadow to start and show up nice and crisp.
@TeodorMunteanu Feel free to either open a dedicated thread on the forum with some previews and setting screen captures… or/and send me your scene so I can review it.
wow…u the man!
Any chance of a how to set up HDRI lighting in Mental Ray version?
@PaulStein Should be pretty much the same logic I guess… any MR user care to confirm this?
My Vray Dome doesn’t seem to show the environment in my viewport, are there specific settings I need to adjust in the viewport?
@Shuwei You need to set up the viewport background first, for that to show… Press the ALT+B shortcut and pick how you like to set it up. I usually put the same HDRI for the VRay Sky Dome inside the environment slot and I click on “Use Environment Background”
@ronenbekerman I followed your instructions, clicked the use environment background… still nothing! But when I browsed the file it showed up, but not in the spherical way that I desired! Are there something wrong with my settings??
@Shuwei I suggest you open a forum thread about this in the lighting section and add a screen capture of your settings… I’ll pick this up there 😉
@ronenbekerman Thanks Ronen, will do! Thanks for such a prompt reply!
@ronenbekerman Did you manage to get a look at the issue in the forum at all?
Hello ronen I’am not able to get any sun light and shadow in the scene using Vray dome. Did lot of trial an error but still cant get them. Checked the tutorials twice thrice but no luck. 🙁
Hi im having truble on finding in the materials the vrayHDRI slot!, i can’t find itin 3ds max 2012, any idea what can i do or if it as other name?!
@MiguelMeneses Hi – vrayHDRI is in maps slot – not in the materials! You can select vrayHDRI map in the Environment and effects and drag it into any material slot like instance – an then select your HDRI – or any other way you can find 😉
@Adrio999 thank you so mutch!
how can i get the link please he;p
Hi,
I have a couple of questions,
What is the Multiplier of VRAYDOME? I usually set it to 1.0
Whenever I increase the render multiplier of the HDRI map and I hit render, the environment/background map becomes brighter as well, unlike on your video, you have set the render multiplier with a huge amount but the environment stays on the same exposure.
How can I resolve this? Thanks!
Hello,
how can I either offset or rescale my HDRI map?cause in the material editor,the coordinates seems not working.
Also,I can’t see the HDRI map in my viewport. I’ve checked both the Use Environment Background & Display Background but still I can’t see anything in the viewport.
Thanks in advance!
hello i
hello
Hats off !!!!
I dont have words………….how to thank you for your this tutorial. I am amazed with what you have done, man. Hats off. U become my idol.
Thanks a lot.
please help! i’m doing everything step by step, but it just don’t work for me!
it always shows the bottom of the image ‘n the upper part of the image is pure white.
what am i doing wrong? any idea?
thanks..
Hey Thank you for your Tutorial. I am making one scene and I was trying this tutorial to make lighting from HDRI Map with V-Ray Dome Light but first of all I dont have place in my Dome light to instance the Map from Materials Editor. Second is that When I am trying to make Instance of HDRI Map from Material Editor to Viewport Background place so it not going there.
I am Using Max 9 and V-Ray 1.5RC3.. Would love to see? solution by you about my requests. Thanks.
hi and thanks for this useable tutorial.i have a question:how i can make a hdri with pic that i want?
Dear Sir,
Thank you for this post sir.
Dear sir
My Self shafi from Bangladesh
I’m your fan since whn i see your deisgning blog.
I Want to lear more things from you
Could you plz tell me how can get to contact you
Here is my mail ID creativehandz78@gmail.com
I hope i’ll get your feeback as soon sir
Thank you sir very much.
shafi
Video down on YouTube for whatever stupid reason they have… A new one is in order anyways 😉
Stay tuned and this is the time for asking about news stuff I can add in…
youtube link cant access brother ???
Hey link doesn’t work?