Tomorrow Challenge entry by User-14412875

This is my finished work. Unlike my usual workflow with heavy postproduction, I had enough time to complete most of the elements in the scene. I mostly did leveling and toning, to give the image more natural and warm look, enhanced depth of building volume, added atmospheric effects.
Because the upload is allowed in low res, I attach several partial views and comparison of Raw&Finished work.

Thank you again for organizing this interesting and exciting challenge, it was my pleasure! My best wishes to all the participants!

Tomorrow Challenge entry by User-17821908

Lighting

So far the scene has been illuminated with a fairly flat ambient light. Once modeling and shading are over, it is time to try different light conditions.

I do not like to do lighting tests with clay models. The materials have a fundamental impact on the lighting of the scene when bouncing and absorbing light. That is why, even if it translates into slowing the process, I prefer (when there is time) to do these tests with the shaders shown.

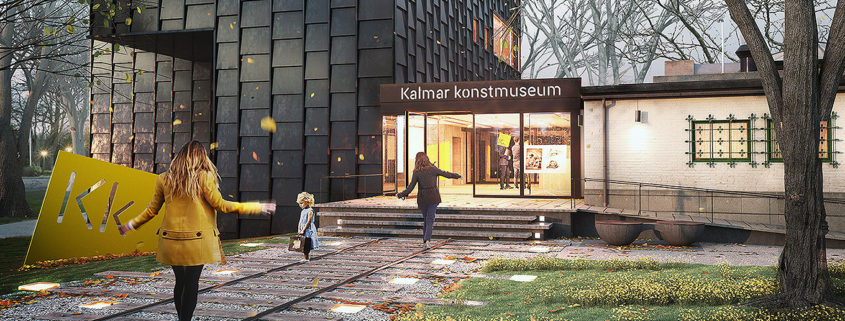
Before I get to illuminate the scene I take a preview of my image and draw the lights (img.1). The goal of lighting is to get the sensation of volume in the objects. Achieve the “chiaroscuro”.
The method I usually follow to illuminate is the following: I establish a hierarchy in the lights that illuminate the scene according to its function.

The primary light is that which establishes the direction of light and the most important in intensity. Secondary light balances this primary light in direction (not necessarily opposed) and intensity. It is not a matter of fighting between them, but of complementing each other.
Then there are tertiary fill lights that illuminate those parts where the other lights do not reach.

Finally there are accent lights. They do not contribute practically to the scene illumination but they paint flashes in parts of the image.
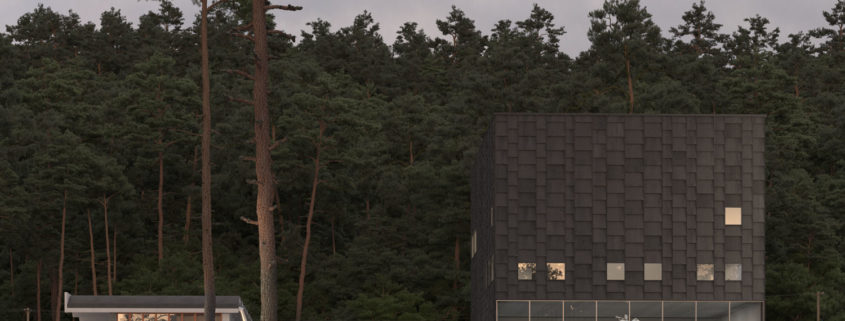
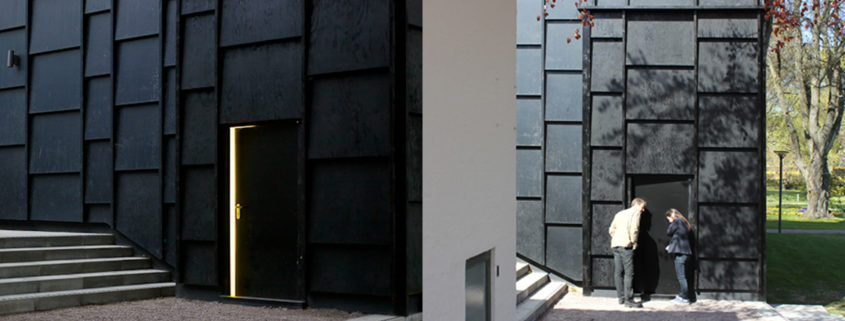
In this image, however, I have changed the rules a bit. I do not look for strong light with marked shadows in the environment, so I’ve tried several HDRI’s until I found the one I was looking for. (Img.2) (Marked in blue in the sketch)

I do not have a sun on the scene.

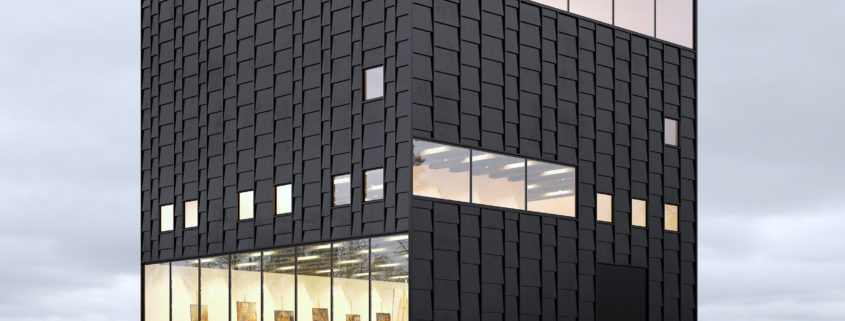
Once the environment is lit, I drew my attention to the small windows that do not constitute an interesting interior space in the image and I have treated them as if they were accents. (Marked in yellow in the sketch)

Once happy, I have illuminated the exhibition space following the rules described above. Primary light from the ceiling, secondary lights in statues, tertiary light in beams and accents in the luminaires. (Marked in white in the sketch)

Finally, I sculpted with light the key objects of the image: trees in the foreground, path, car, steps and facade of the museum. (Marked in red in the sketch)

For this process I use Vray light lister. Essential to efficiently manage all the lights in the scene. (Img3)

At this point it is likely that some of the materials need to be adjusted because of the change of lighting conditions. Nothing that can not be done in postproduction.
I’m going to rush the postproduction tonight! The end is near D:

Tomorrow Challenge entry by User-39287284

Here is my initial output with my lighting setup. I wanted to have the output with a color tone to be able to easily adjust during post production.

I have checked and made a little correction on facade due to my checklist before lighting works.

Whole work gonna be retouched by means of my lovely render passes but general tone is as in the visuals.

The foggy background that I planned in my concept was being tested until now and is still being rendered and gonna take place in my final submission.

I have made lots of arrangements on PS until now but I can share one of my draft work on layout of environment trees and look.

Up next final submission! See you there!

Tomorrow Challenge entry by User-70576282

After studying and googling the subject of the challenge , I decided to just keep the museum in it’s original location but maybe there will be little modification on the ground ( for landscaping . etc.). For my camera view, I think its really cool to locate the camera in the walkway showing part of the sea and the Kalmar Castle in the composition but keeping the Kalmar museum as the object / focus of the scene.

Tomorrow Challenge entry by User-17150373

My intention is to show in one image a detailed facade of the building, some exhibition taking place at the museum and people interacting with it. After some searching, I found an exhibition by artist Gustav Hellberg that took place in 2011 called “In your head”. This gives me all the elements I am looking for.
This artwork is located close to one of the entrances of the museum, in a segment of the facade that has been displaced outwards. In the middle of this new segment, a fixed slightly open door has been placed. Behind the door is a wall illuminated by hidden lights, making it difficult to understand the size of the concealed space. From hidden speakers comes the sound of a man’s voice repeating the phrase “Is it safe?”
I hope to finish on time.

Tomorrow Challenge entry by User-82056808

I don’t rely much on concept and inspiration to begin with as i get my inspiration from very random sources, the sparrow concept came from Shogun 2’s display image (I play in my break time, and i be you can’t defeat me when i’ playing with the chosokabe). But as i was saying, i have most of what i want to achieve in my imagination, and my imagination is boosted by some times unrelated stuff, like Aaron blaise’s paintings, but i did try to save some of the images from which i got the atmosphere inspiration and which i tried to mimic from. Here they are.

Sit tight as my Final submission goes up tomorrow morning!
Best of luck to all the other competitors out there!