


Making of Tobacco Company Headquarters by Vladislav Dechev
Forum member Vladislav Dechev (graffitiman) posted an interesting set of renders of the Tobacoo Company Headquarters in Sicuan, China. The design has a unique look, with a green roofs emerging from the ground covering the structural elements. Vladislav was kind enough to share a few aspects of the visualization creation. Enjoy.
Vladislav Dechev is 26 years old 3d artist from Bulgaria. Hes been dealing with CGI for almost 6 years now, and in 2007 he established Wireframe Studio. Meanwhile he also works as an architect for an international company branch, based in Bulgaria.
Hi everyone!
First of all Id like to thank Ronen Bekerman for letting me contribute to this architectural visualization CG community by showing one of our recent projects.
Project Details
- Project name: Tobacco Company Headquarters, Sichuan / China
- Architecture: STEPHEN GEORGE International / Bulgaria
- Head architect: Alexander Daw
- Assistant architect: Vladislav Dechev
- CGI / Visualization: Vladislav Dechev
Vladislav’s Tobacco Company Headquarters Forum Thread.
Starting with the roof
It was a challenge to model the green roof of the building, and since were working with ArchiCAD most of the time (doing the actual drawings) we also used it for building the 3d models.

Its almost impossible to do that type of structure in ArchiCAD though, so I took it into 3ds max. Using splines and adjusting the Bezier vertices Ive built the contour of the roof. (1)
After that I applied an Edit Mesh modifier to it, followed by Shell modifier. (2)
Then by using a reference of the initial spline, Ive easily created the curb around the grass with the Sweep modifier. (3)

Then I exported the 2 meshes as .3DS and imported them into ArchiCAD using its free add-on 3ds in. (4)
I needed that mesh inside ArchiCAD because I was going to build the entire building there and I needed something to cut the walls with. The 3ds in add-on works perfectly. It converts the initial model to a .gsm library part. It also keeps the different meshes apart by giving you options to apply ArchiCAD materials on them. (5)

For most of the walls Ive used the Profile Manager inside ArchiCAD, creating them from just a few fills, which get to be extruded later. This way you have only one object instead of 20 and Its easier to work with it. (6)

On the next image you can see the entire model put together in ArchiCAD and ready to be exported back to 3ds max. This step was done trough .3DS file which was imported into max using the ArchiCAD Importer script by Mirza. This one gives you the ability to update your model from ArchiCAD without losing the already applied UVW modifiers and materials in Max. (7)

In 3D Studio Max I used a VRaySky in the environment slot, linked with the a VRaySun. (8, 9)
I also used a VRayPhysicalCamera with settings you can see above. (10, 11).

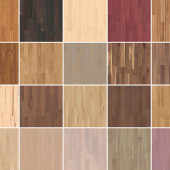
In terms of materials I used VRay materials only. Heres an example of the Marble (used for all walkways). (12).

The vegetation is done using Onyx Tree (for the bamboos) and for the broadleaf trees I used Evermotion licensed models. There also some benches and street lamps. All of them are converted to VRay Meshes and the Proxies are spread using the Advanced Painter script. (13, 14).

Next you can see the VRay render settings. Im usually using very simple ones. The most important thing here is to add some Render Elements for later usage in Photoshop. Absolutely necessary is to save the rendered images as 16 bit tiff (or other format that supports 16 bits) so you can play with the highlights/shadows without losing quality.

Heres one of the Raw renders opened in Photoshop. The final resolution was 3000/2000 pixels. On the right side of the image you can see the layer tree, not many adjustments, just some very basic color corrections, DOFs and some Levels. (15).

For the DOFs I used the ZDepth render element from 3ds Max. And since its a 16bit image you can adjust the levels on it as you need. (16).
For adjusting the color of the highlights I used VRayRawLighting map applied on a color balance adjustment layer, also on levels layer. (17).
And for the shadows, a VRayRawShadows map with the same type of applying. (18).

Next are some of the adjustment layers options. All done differently so they could mix perfectly with the underlined imagery.
And heres the final image.

I hope you enjoyed my Making of – Best Regards, Vladislav Dechev.
Vladislav’s Tobacco Company Headquarters Forum Thread.
You are welcome to comment on this article and ask questions using the comment box below!


Cool stuff, thanks for this ,
Noob Question: How do you know those are the right settings for the ambient occlusion settings?
Is there are way of testing it with out materials?
Also render region division is 32, I understand normally people use 64 or is that way to much for distant shots like yours.?
thanks 🙂
Nice looking project Vlad.
I’m an Archicad user to, so nice to see it being integrated with Max.
There is also a plug-in for Maxwell which I’m sure your up to speed on.
Thanks again mate for an interesting making of.
Hi,
I’am working with 3ds max for only 3/4 months now, and i’m having trouble importing my older archicad projects into max. How do you do it so smoothly? Using the archicad import wizard i keep getting incomplete or face missing geometry! 🙁
Can you please do a tut on the proper workflow, to get a good model to work with in max!?
Thanks, in advance… and great making of! loved it 🙂
Thanks, guys!:)
@Monad – well the ambient occlusion is really simple to setup, you can replace the materials from the “Global switches” menu in the vray render settings. and 32: well I prefer it because I can see the final result faster – that’s all:)
@Rich – 10x;) Well I’m working with ArchiCAD for a long time and it’s models are easily importable in 3ds max, it’s just a matter of tweaking;)
@Lucky_lux – I’ve been meaning to do a tutorial for this one for a long time, but will do it soon maybe. Some of the older ArchiCAD version are having problems with exporting as 3ds, but I’ll explain it further in the tut:) For now, try to use the most recent Software version – 14 and it should be fine.
Cheers!
Hi Vlad, congratulations on the images.
I wonder how old are these images, I´ve been working with BIAD people in BJ last year in this project and the architecture looks very different.
Cheers.
@PIC – Hi yourself:)
These images are totally conceptual, and were done by SGI just to show a different point of view, they aren’t based on a real architectural design, but just on an idea (as I said in the description).I don’t think they went through;)
Cheers
@Vladislav Dechev
Thanks for the reply! ;D keep the good work!
…there are many problems with archicad 12 and your favorite ArchiCAD Importer script by Mirza, to import in 3dMax 2011
> I know you did it with ArchiCAD 14
> is the limit of polygones bordered by exporting from AC14
> for me, the old way is to export it as 3ds > and clean the model
…but maybe somebody know an better solution
woow
thaks a lot. very good one.
hey there man, great job man, how did you go about the grass? was it simply a map w/ some displacement perhaps?