


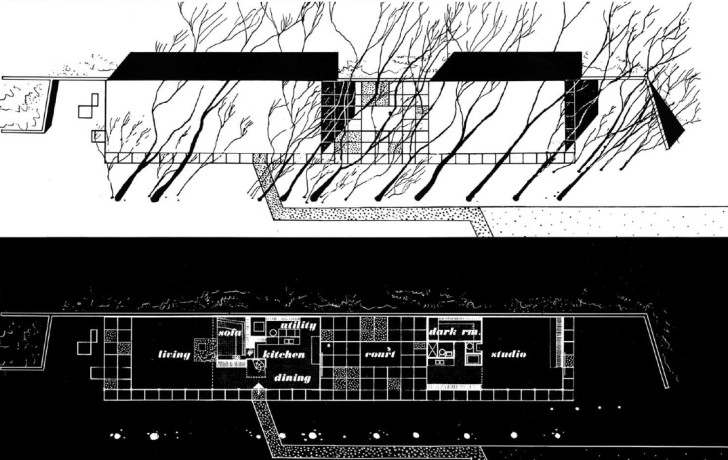
Making of Eames House / Case Study House No. 8
The Eames House is widely considered as one of the great buildings of the 20th century. Also known as the Case Study house 8, this beautiful piece of architecture was constructed in 1949 using only prefabrication and off-the-shelf materials. Sava Zivkovic recently published his personal animated short where he tried to capture the essence of the house. This project of his is in many ways a case study of its own, and the making of it is kindly being shared by him here. Enjoy!

Author: Sava Zivkovic
Sava Zivkovic studied interior and furniture design at the Faculty of Applied Arts in Belgrade, Serbia, where he graduated in 2012. Ever since he worked as a freelance 3d artist for Whale Shark Studio, there he worked on everything from logo animations through commercials to ArchVIZ.
Introduction
First, Id like to thank Ronen Bekerman for this great opportunity. I’ve been inspired by the contents of this blog for years and now I can finally give something back.
Why did I choose the Eames House?
Pretty simple really, I’ve been fascinated by the work of Charles and Ray Eames throughout all my studies, and I’ve always wanted to do some sort of short depicting of the house.
Before we dive into it all – here is the animation :
And some shots breakdown too :
The Concept
The whole concept for this animated short was evolving as the project went along, there wasn’t any pre-production or anything like that, but I did know what tone I wanted it to have.
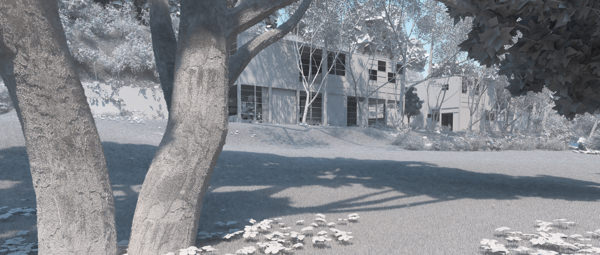
The Eames House is a happy place. Everything from the beautiful meadow it is located in to the wonderfully chaotic mess of artifacts inside the house is a colorful collage that the architect and the painter carefully placed or misplaced with that in mind.
I decided to skip any overcast or night scenarios, just go for a plain and simple beautiful sunny day. From the start I also knew that the music would play a big role, and finding the right song was crucial.
The first step was to create the playlist that Ill listen to while working on the modeling, texturing and lighting before I go into animation. Luckily I was able to find the right track that fits the concept perfectly in my opinion.
I wanted to make the whole animation look as cinematic as I can get it. That meant 2.35:1 aspect ratio, anamorphic bokeh and flares as well as extensive color grading, but more on that in the post-production segment.
First Steps and Gathering Reference
At the start of any project I copy my template folder structure to the project folder. I like keeping things clean and organized, and it saves me a ton of time otherwise spent sorting through hard drives.
Heres my file structure.
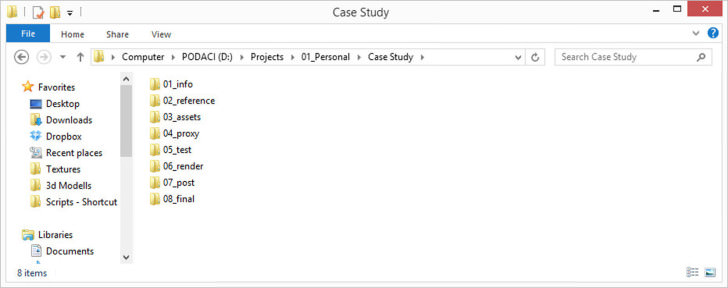
I like to give myself a bit of a head start, so for example I have a preset max file in assets folder and presets for after effects in post folder. That way I avoid doing the same daunting steps every time I start working on a new project and just dive into it.
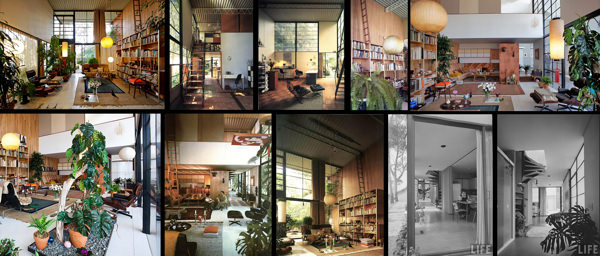
Reference gathering went by quickly as Im fairly familiar with the house, and finding good reference isnt all that difficult. Two of my friends visited the house so I had even more reference photos to work from. There are also some good video tours at the Eames Office website, not to mention the great documentary. I divided the references into two sub folders, one for the interior and one for the exterior of the house so I could easily find what I need.
Here are two reference boards I threw together.

After that everything was in place for me to start the modeling process.
Modeling the House
Even though there were some good plans I wanted to see if anything is available on the SketchUP 3D Warehouse, and sure enough there were some very good models there. Even though those tend to import very poorly they offer a great starting point, whether you choose to fix the model or just use it as a reference and build your own.
I did a mixture of these two, where I kept some parts of the house and others modeled from scratch. This is a very fast and widely known technique by Alex Roman as Im sure many of you already know It is important to note that this isn’t a modeling heavy project, I was relying on pre-made models to get to the main focus which was the animation.
I started off with the I beams, the proportion was a bit off but that was an easy fix just by scaling them a bit.
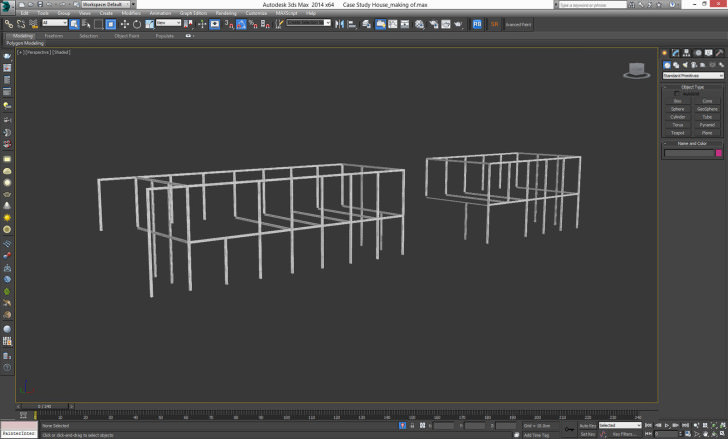
Next came the walls, windows and floors, really nothing special here, just the most basic box modeling.
For the wooden wall planks I used the well-known Floor Generator script.
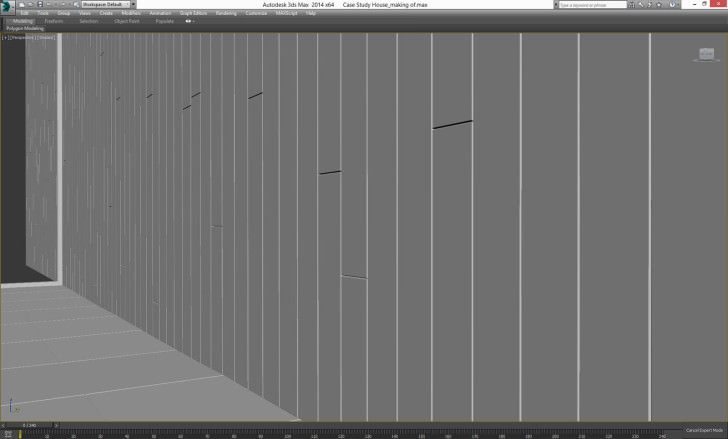
The floor tiles were also done with just box modeling but with a noise modifier applied to add some randomness. It is very important to add imperfections wherever you can in the modeling stage. Small things like noise modifiers and edge chamfers can really make a difference later on, even if you dont quite see it in the viewport. The subtle things do matter!
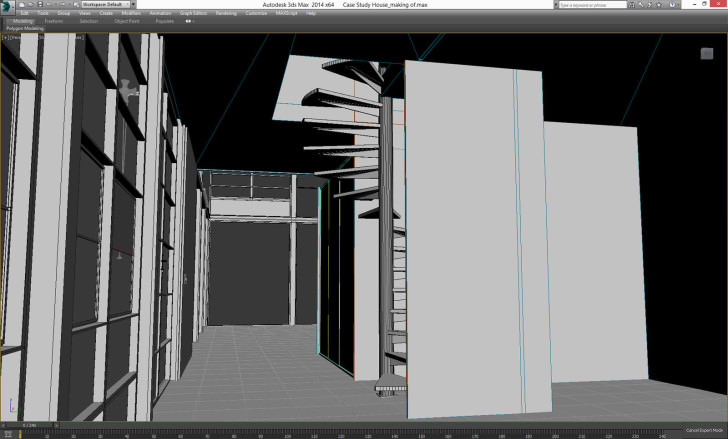
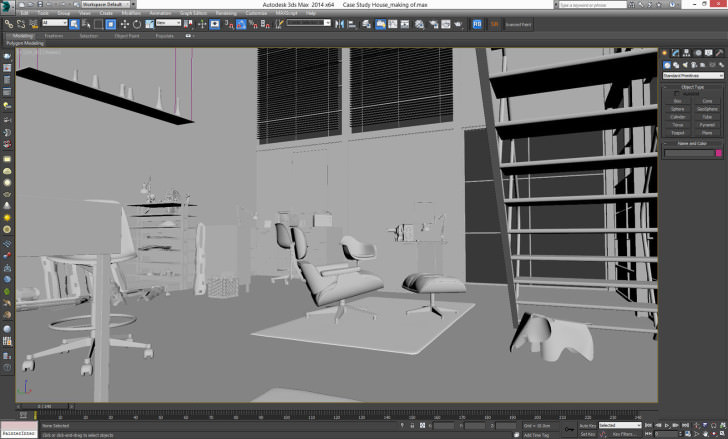
After just a few details such as the stairs and the doorbell the house model was finished.

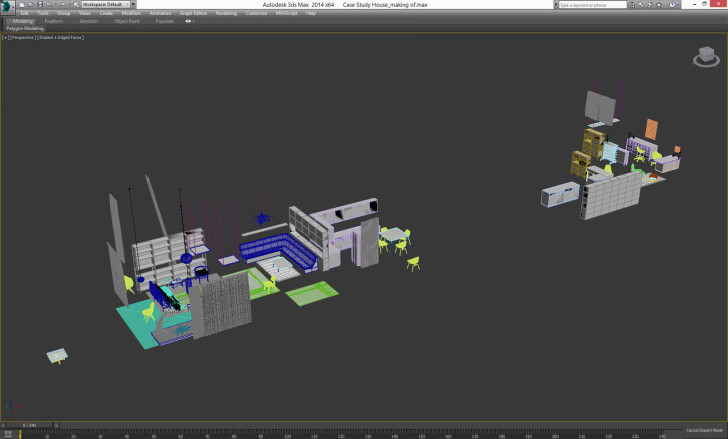
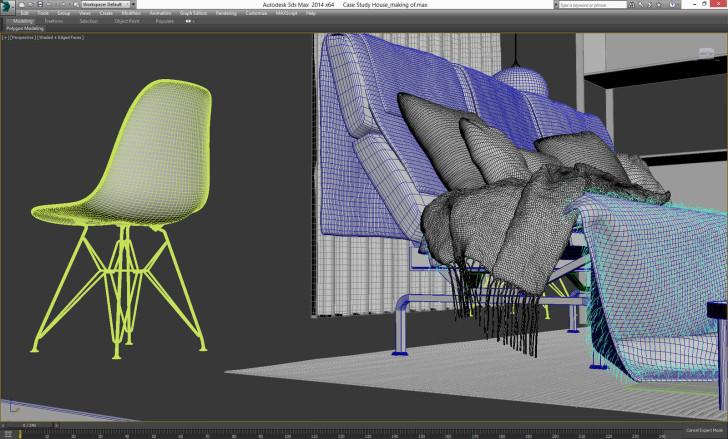
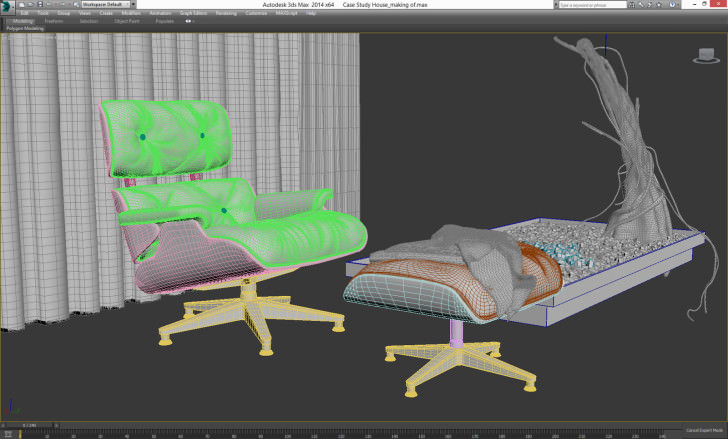
Most of the furniture was done the same way as the house, downloaded from the SketchUP 3D Warehouse and then improved upon. Some were pre-made models like the lounge chair from Evermotion, others I had modeled myself from scratch.
For the sofa I did some manual modeling and then covered it up with layers of blankets and pillows, some seamed with 3dsmaxs native cloth modifier others pre-made from Evermotion.
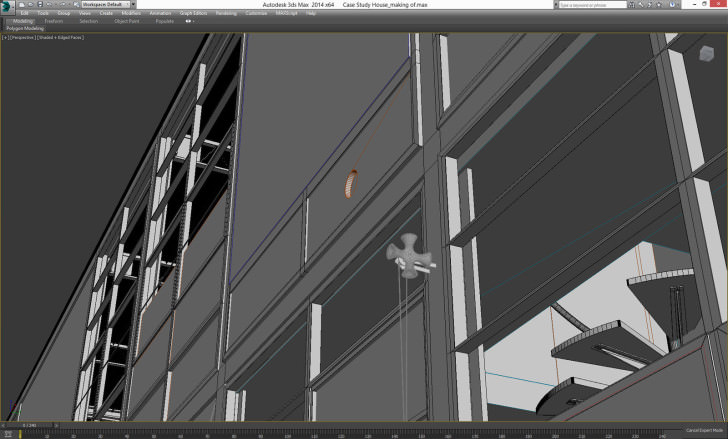
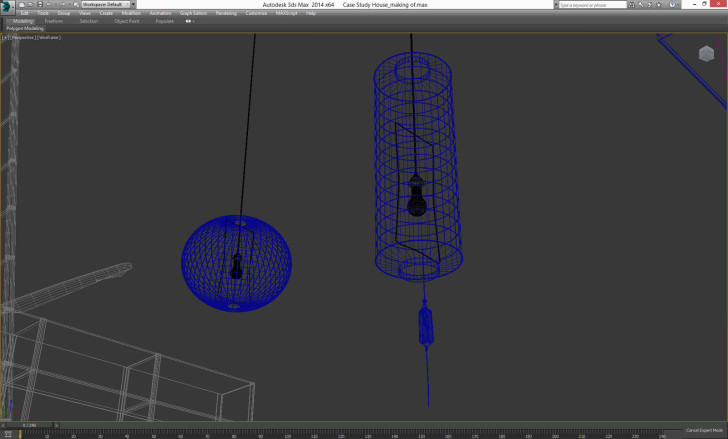
Some more simple modeling for the lamps and Ivy Generator for the hanging dry branches. Just standard stuff here.
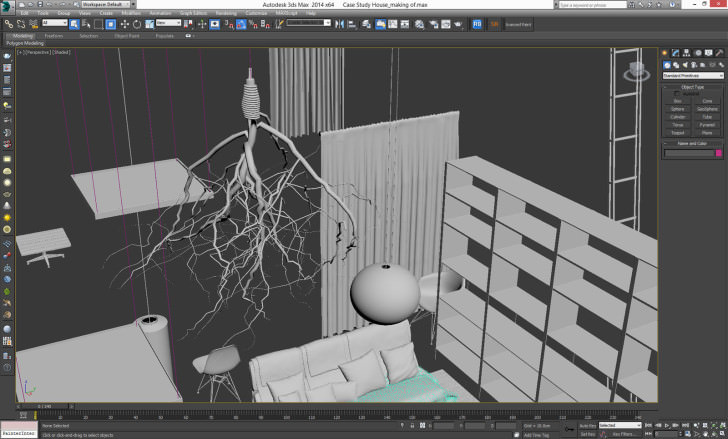
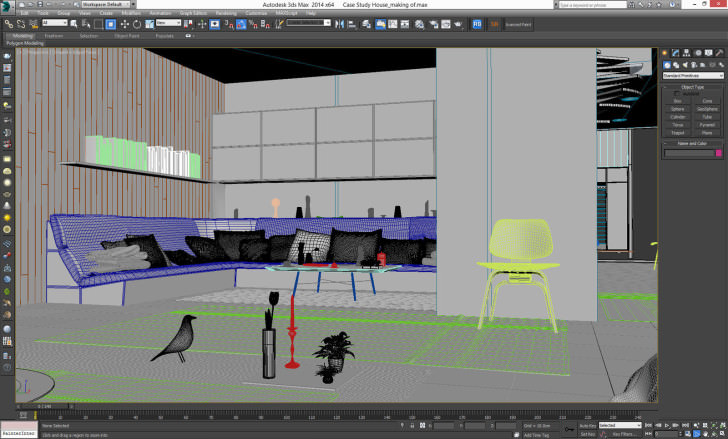
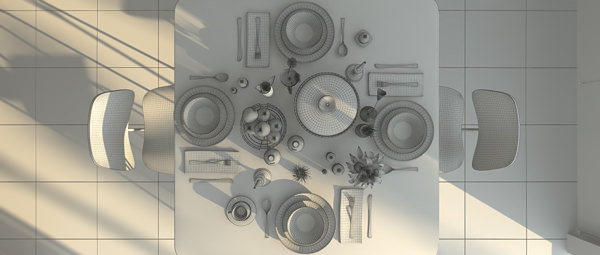
The last step for the house interior was details.
Here its almost all pre-made stuff as theres no way for me to spend weeks on modeling every single detail – The house just has too many, and like I said before this wasn’t my main focus for this project.
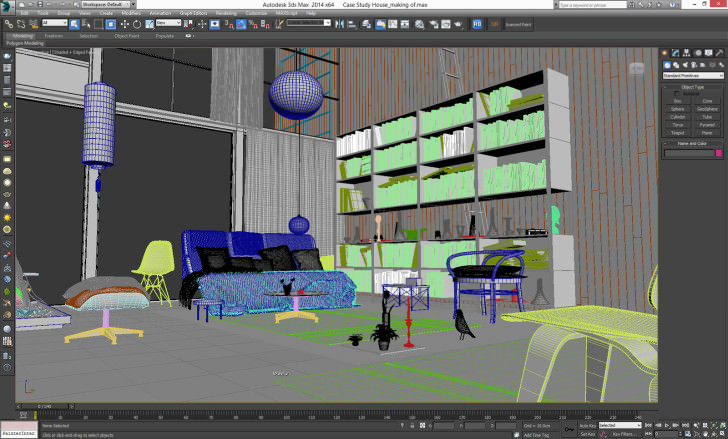
The books were all pre-made, but I have placed each one by hand to get that random look.

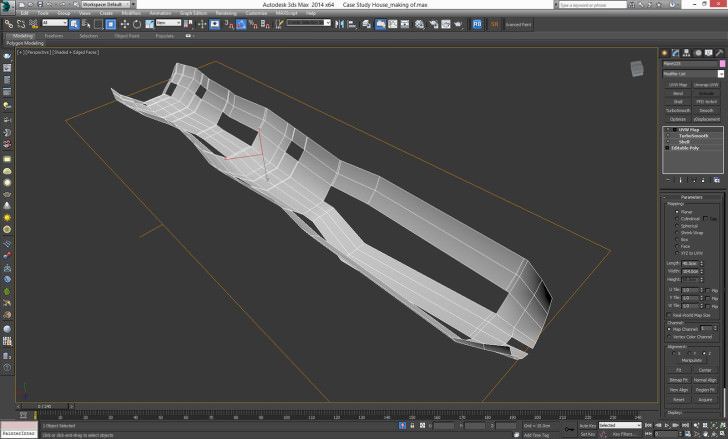
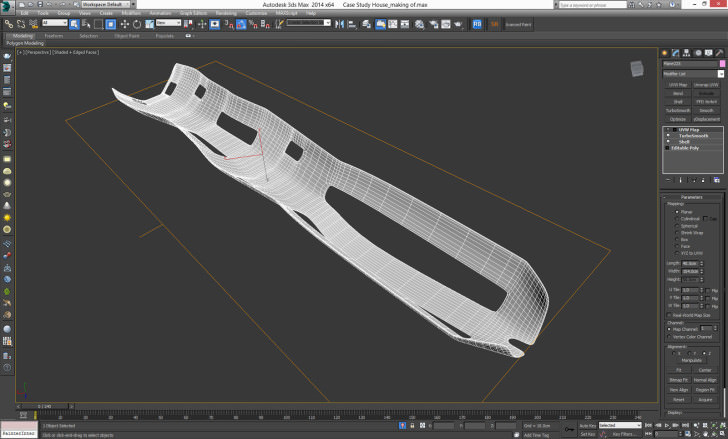
The plywood splints were made with simple plane modeling, and with shell and Turbosmooth modifiers applied.
After a couple of proxy plants the house was done.
Modeling the Exterior
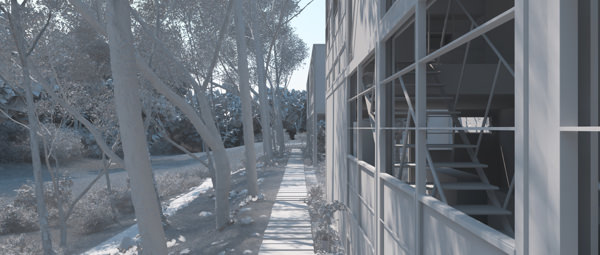
The beautiful meadow where the house is set worked out perfectly for the purposes of the animation. The house is surrounded by dense vegetation, so at no point was I concerned about neighboring houses, roads or horizon line for that matter.
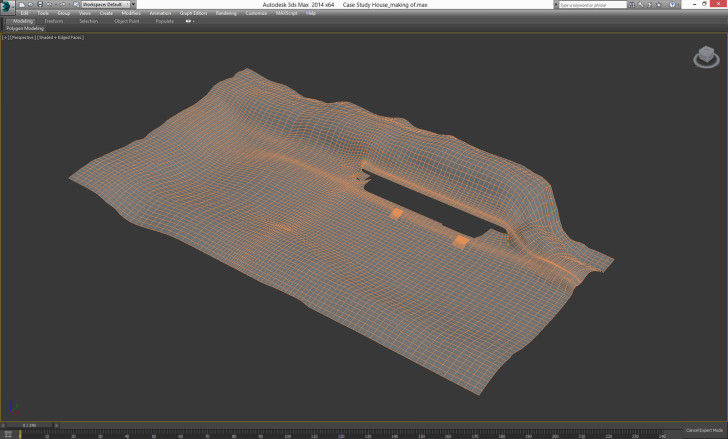
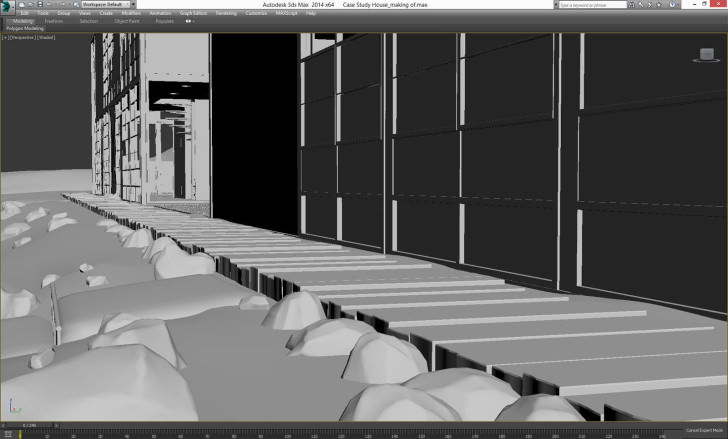
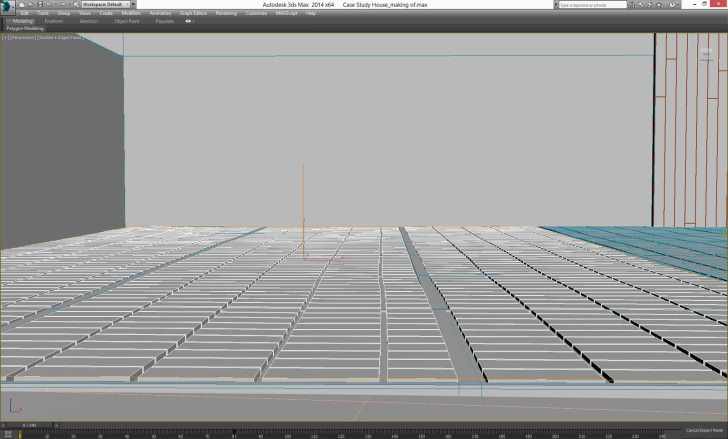
The first thing I did was model the ground plane using the plane modeling, subdividing where it needed more detail, which in this case were only two areas around the steps.
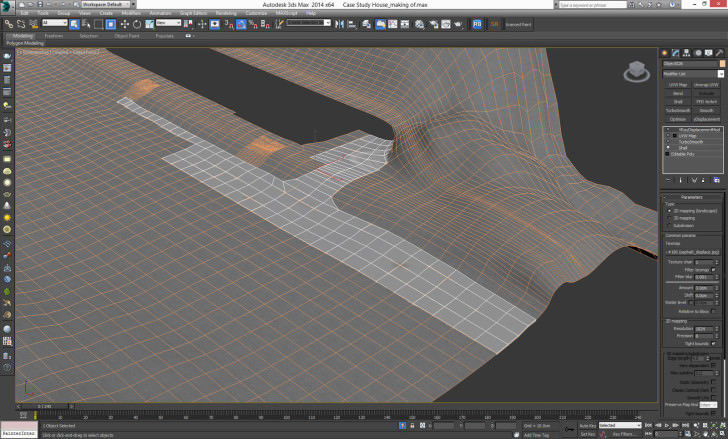
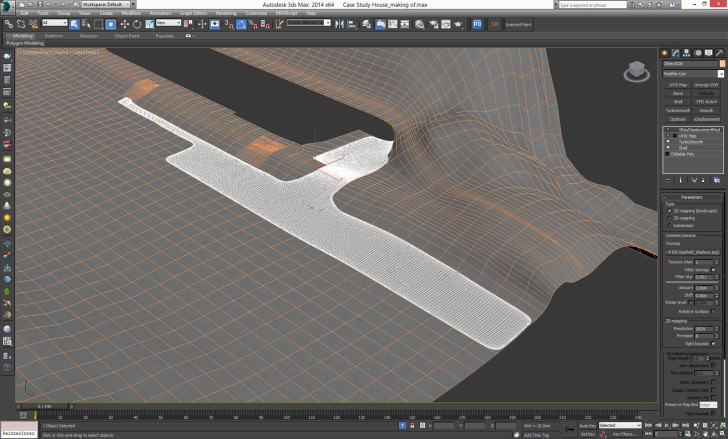
For the asphalt I just selected some polygons from the ground plane, detached them as clone and applied shell and Turbosmooth. Easy stuff!
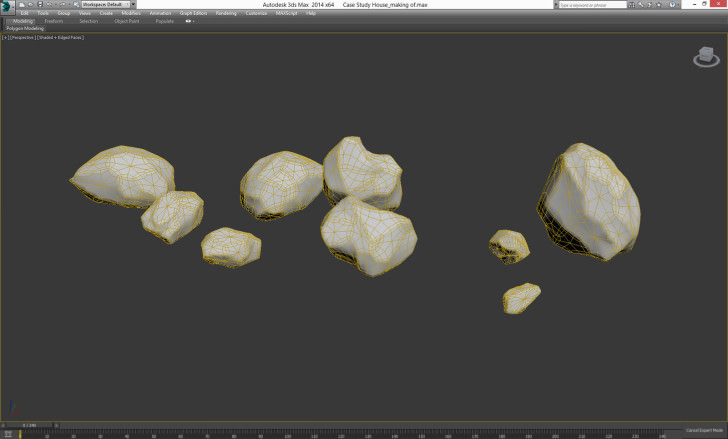
I used these low poly rocks from Turbosquid with Advanced Painter to start with some detailing.
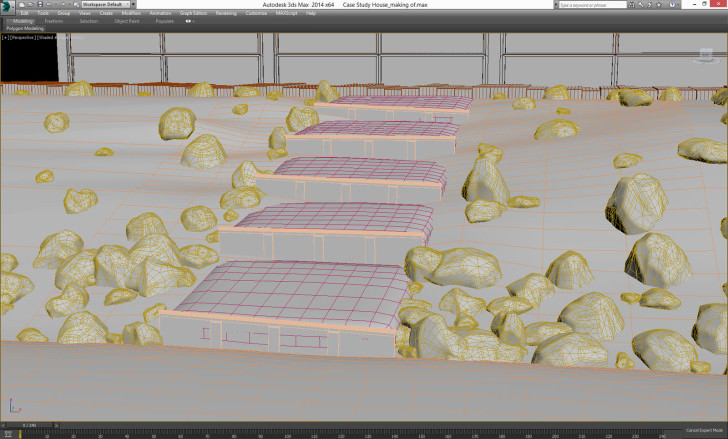
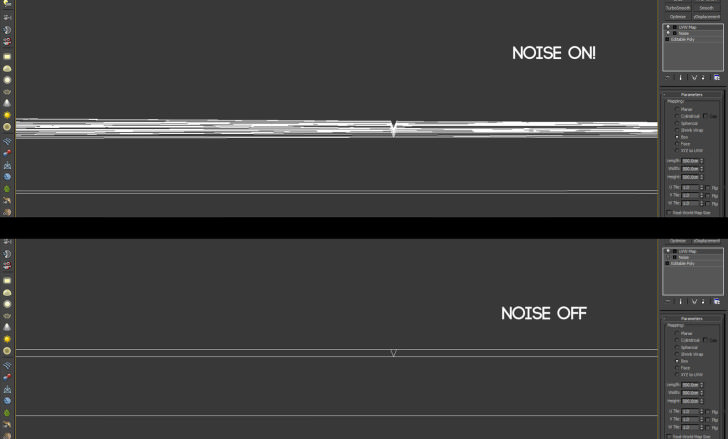
Again two examples of how noise modifier can get rid of the perfectly straight lines and introduce some randomness.
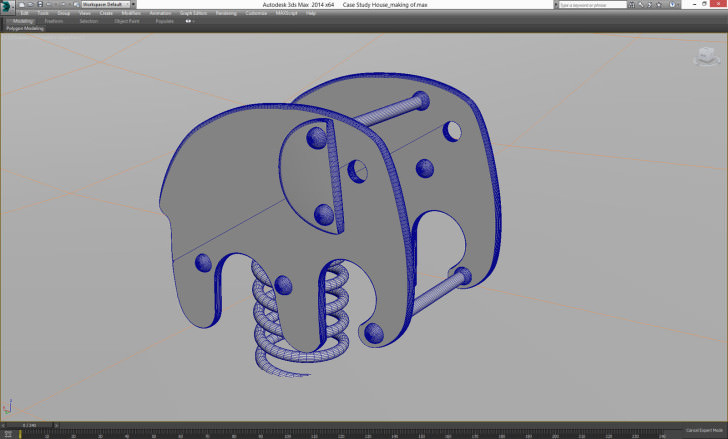
And I just had to get this little guy in…
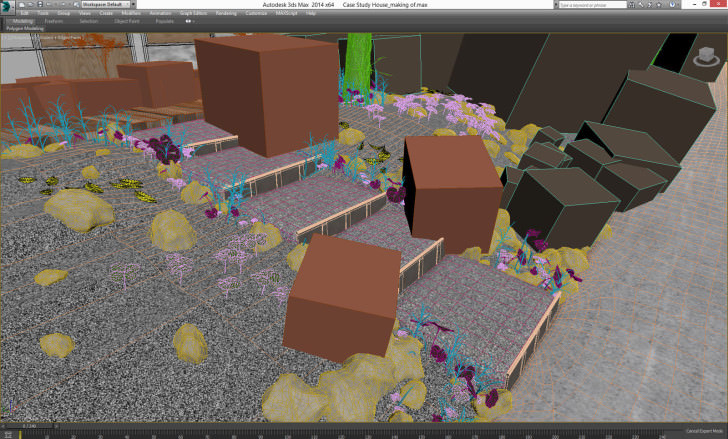
The foliage was where I met one of the first problems with the project. I wanted to use what was in my opinion the best technique for the grass MultiScatter. The plugin works great and gives a fast result which is very easily editable to reach a certain desirable look.
This was the model library set to be used with MultiScatter, a couple of flowers from iflowers collection, grass patches, some wild grass and leaves.
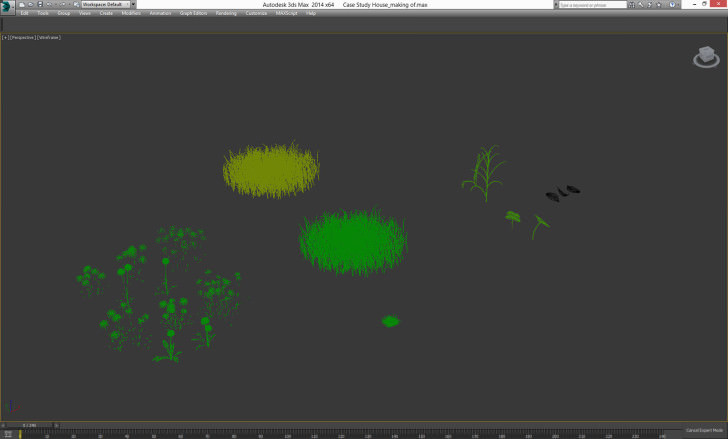
Heres an early test with the MultiScatter grass :
And it looked great, but the problem came later in the rendering stage, I had some nasty artifacts in all the foliage, but luckily the new and oh so awesome V-Ray 3.0 came out to my rescue. After I upgraded to 3.0 the flickering was gone but so was the ability to use MultiScatter due to compatibility issues. So eventually I had to redo the grass with V-Ray Displacement modifier.
Heres a great tutorial on doing the grass with displacement :
Again, to achieve as much randomness I used advanced painter script for the clovers and wild grass and scattered them around the house to compliment the grass. Without this it would have looked too clean, thus breaking the illusion of this lived in place.
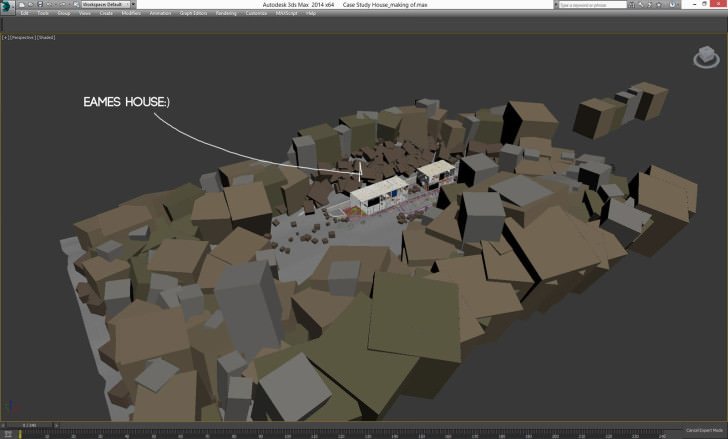
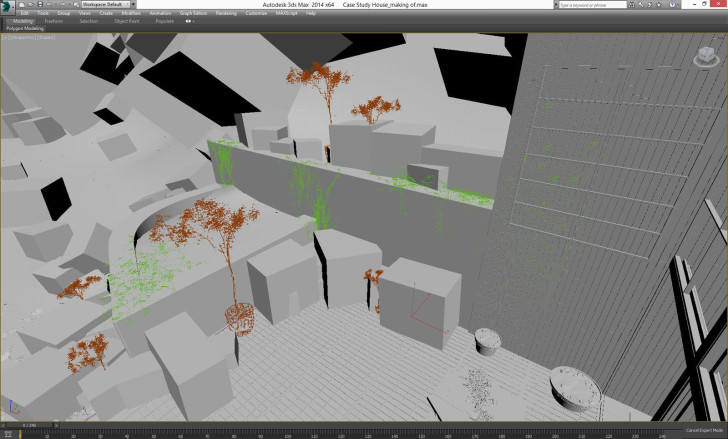
After the grass was done I imported some low poly trees from Evermotion for the background and some iBushes, converted them to V-Ray proxy objects and placed them in the scene with Advanced Painter (I love that script).
At that point the scene looked something like this :
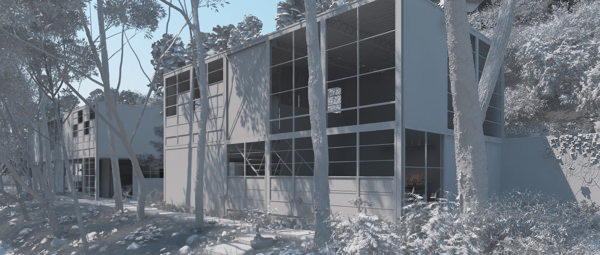
Next step was to add the hero trees. Right in front of the Eames House theres a treeline of beautiful eucalyptus trees that are far too specific to exist in any model library, and also very difficult to model. I wish I had more time to really delve into modeling these, but I had to use a faster approach. So I busted open the good old onyx TreeStorm plugin and made 17 different hero trees.
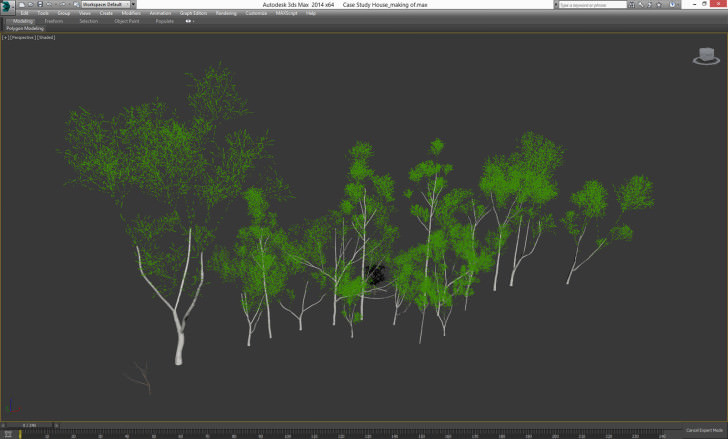
I used two layers of displacement to add a bit of variety. First was standard displace modifier that added extra geometry using a simple noise map with strong contrast.
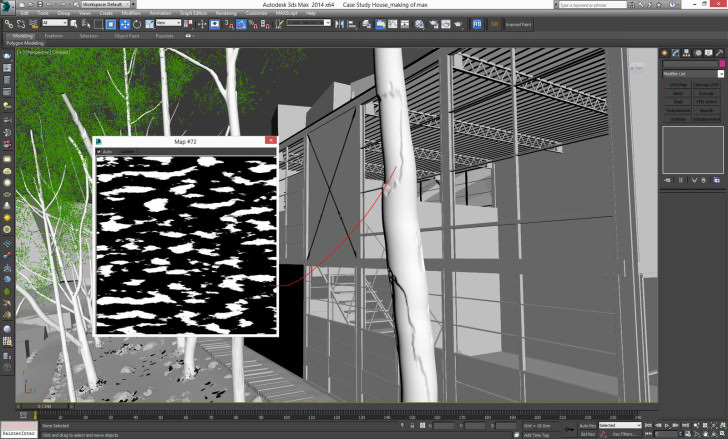
Then, when texturing, I can use the same mask to have different materials for inner and outer layers of the bark. The second displacement was the V-Ray Disp Modifier to add all those nice little details. Using V-Ray Disp Modifier is crucial to having believable tree barks.
As a last few steps I added lots of pots and some ivy with Ivy Generator, all converted to V-Ray proxy objects of course.
Thats all for the modeling process, pretty straight forward stuff, but its all in the details.
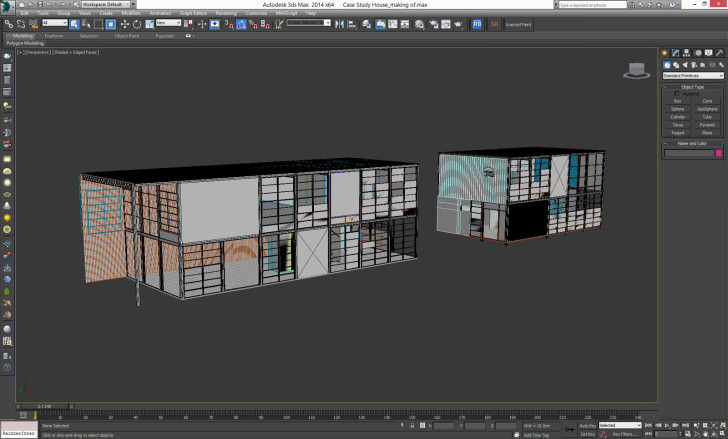
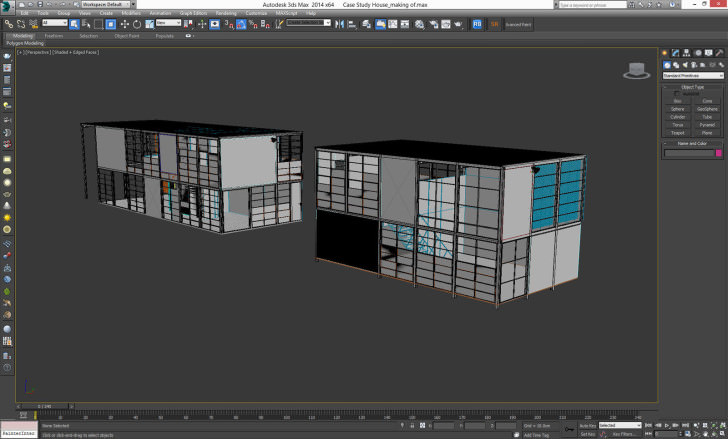
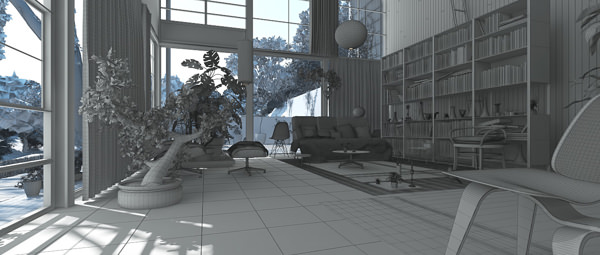
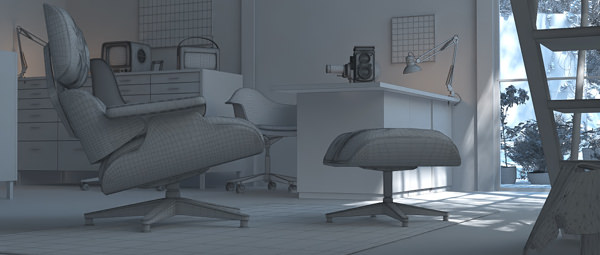
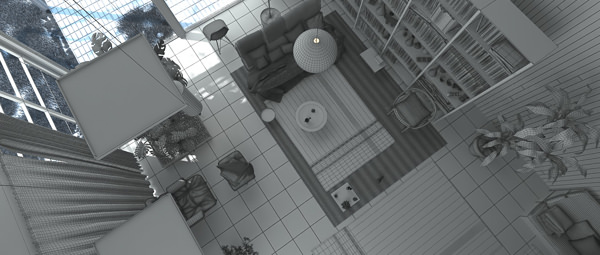
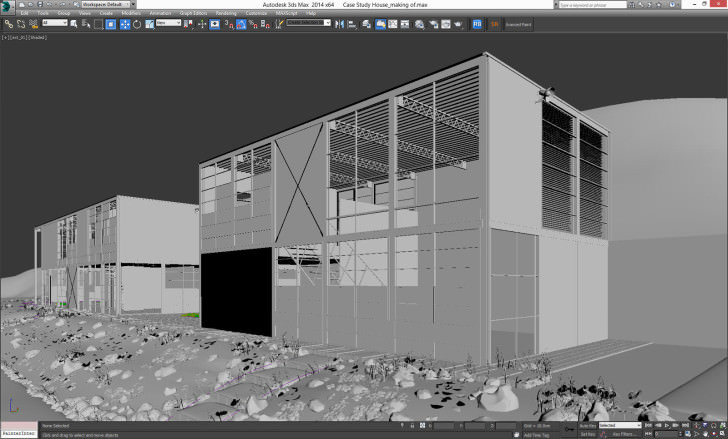
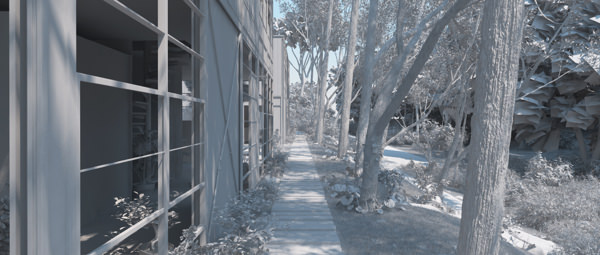
Here are some clay renders of the finished model with hidden windows layer :
Texturing And Materials
This is going to be a short segment because I want to spend more time on the post production, and I only used two setups for material which are pretty common in ArchVIZ – Standard V-Ray material and V-Ray Blend Material.
Keeping up with the fast approach, everything in the scene was textured just with standard uvw modifier. No unwraps or anything like that, but the house doesn’t really require that approach either due to its simplicity.
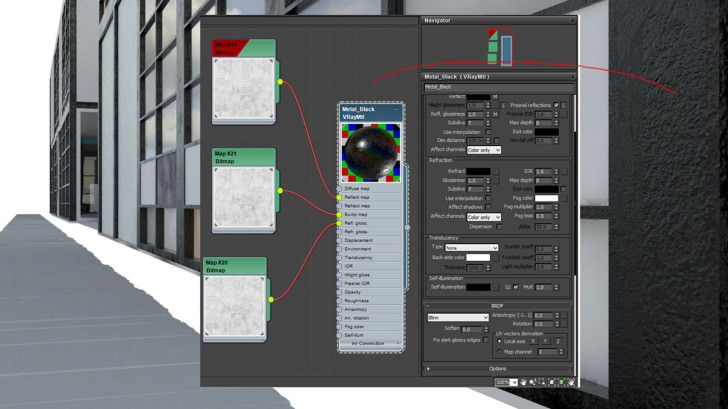
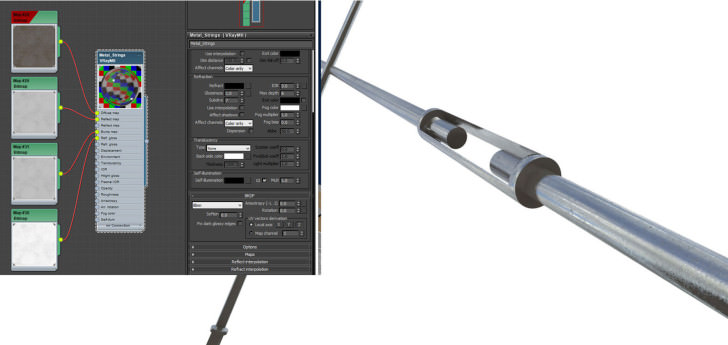
Kicking off again with the I beams, its a simple steel set up with the same texture in reflection, bump and reflection glossiness slots. I always check the Fresnel reflections options for every material, and go fairly light with the bump as it can sometimes break the realism if miss used.
Steel material and test render :
Dirty metal material and test render :
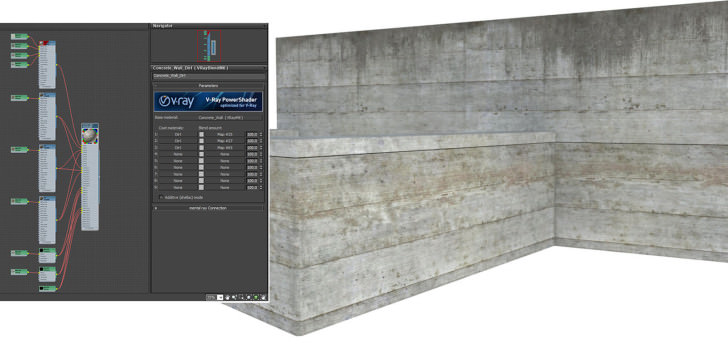
The concrete setup, and any other dirty material for that matter was a bit more complex, but nothing out of the ordinary. I used V-Ray Blend Material with the main concrete in the base material slot and three layers of the same dark dirty material but with a different masks. The first has a V-Ray dirt set as a mask so it would darken up the corners, the second is a very subtle noise mask and the third was the leak mask on the top of the model.
Similar approach with the asphalt material :
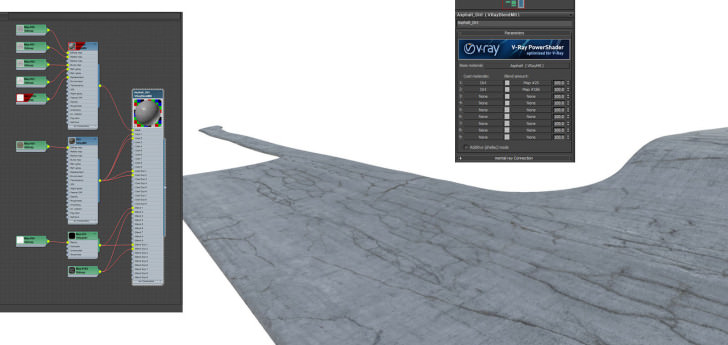
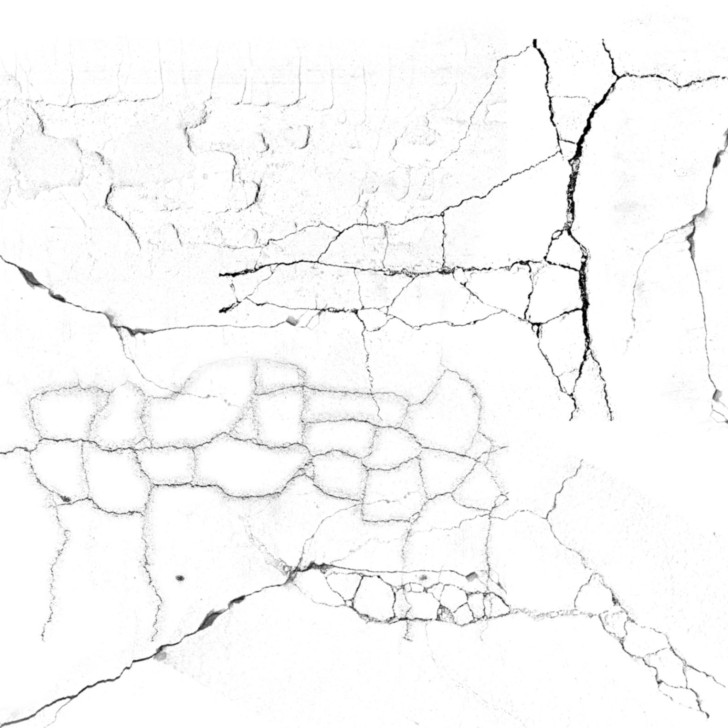
I used some textures from CGTextures.com to create the mask for the dirt and applied the same texture to V-Ray displace modifier. That made the cracks look more dirty, and you cant have enough of that.
Heres the texture :
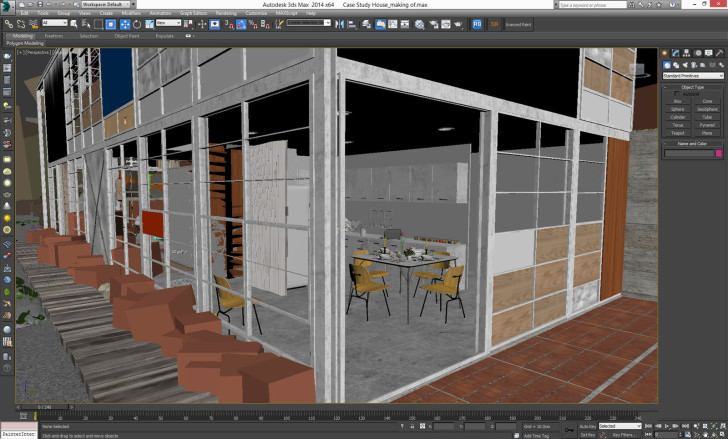
Heres a couple of screens with a fully textured scene…
The wall materials are the same V-Ray Blend Material setup but with different leak and dirt texture masks.

The grass is mapped with a cellular texture used for displacement and the gravel with some gravel texture and a black and white version in displacement as well.
The window glass material has some slight noise texture in bump slot to give it that uneven surface look that most windows have.
Like I discussed earlier in the modeling part, its really important to introduce as much randomness as possible as nothing in real world is perfectly straight or in this case clean. Adding as much dirt and imperfection helps you get that realistic lived in look, and thats exactly what I was after here. Of course you have to watch out not to overdo it, as it can add some undesirable effects.
Lighting and Rendering
Sunny day, so V-Ray Sun… Right?
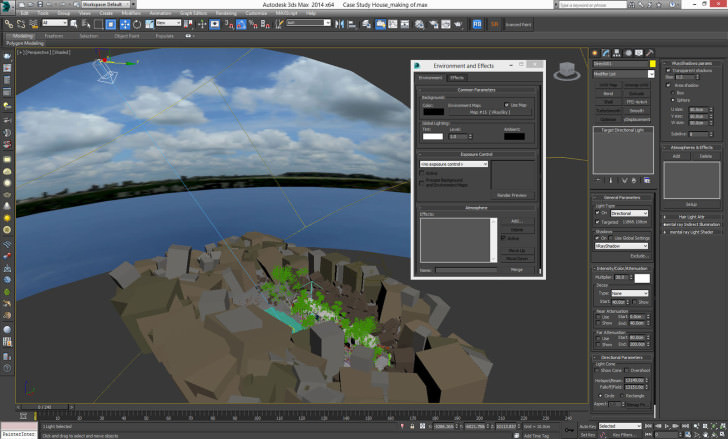
Well, I actually used the standard direct light with a V-Ray Sky in the environment slot. I just prefer it that way, and I like to control the area shadows manually. I also made some V-Ray plane lights and positioned them on all the house openings to get a little more light in and just a couple V-Ray Sphere Lights for some lamps.
Lastly I had a giant sphere with a slice modifier and a V-Ray light material with 360 sky texture. This wasn’t lighting anything but it gave the scene a slightly warmer tone, and it helps to have some clouds in reflections rather than just sky a simple gradient.
That is basically it for the lighting, its a really simple light scenario that works really well with almost any type of scene.
Now for the rendering, as you probably guessed by now, I used V-Ray. From the beginning of the project I had some restrictions to work with. For example the animation, it could be just the simple fly through, no animated objects, no trees and bushes waving around, nothing moving except the camera. Having objects move would have dramatically increased the render time, and thats something I just couldn’t have because I was rendering the thing on my two home workstations.
Regarding the render setup, up until this point I’ve always set everything up manually but after I tried solidrocks theres no turning back, at least not for animation. The whole plugin and its Fly-through Animation Wizard is a HUGE time-saver, and I cant emphasize the word huge enough. Usually, after you finish the testing, you would crank up the subdivisions of the materials, lights and GI, then pre-calculate the light cache, then irradiance map and THEN start to render. Sometimes you forget a step, sometimes you cant wait for the pre-calculations to finish and you miss your night-time worth of rendering a lot of things can go wrong… solidrocks does every step with just a few clicks.
Heres the interface, you basically set the GI method, quality and specify render output path and the plugin automatically cranks up all the settings and calculates all the steps and starts rendering all in one go. And the best thing, after its done it restores all the settings the way they were. Awesome!
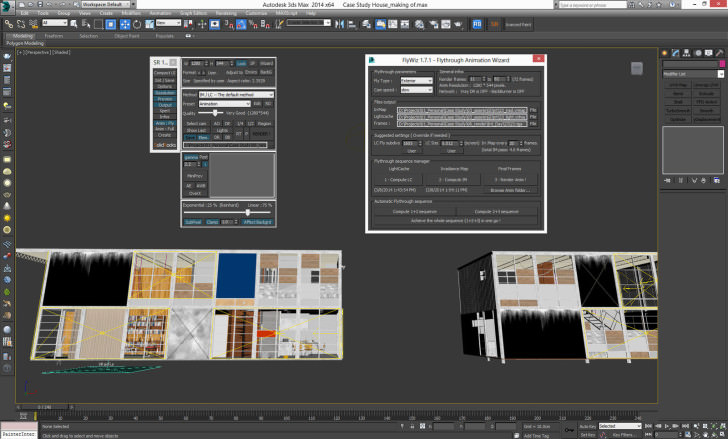
I wont go into detail about using the plugin as theres an official video tour that does it far better than I ever could
Its worth mentioning, since this is an animation project, I did do an extensive testing and previewing before committing to the final render. I did approx 100 shot previews and edited a preview sequence in premiere. Those were just standard max preview files, so basically what you see in viewport, but they do help a great deal to do a placeholder edit, then you know exactly what frames to render.
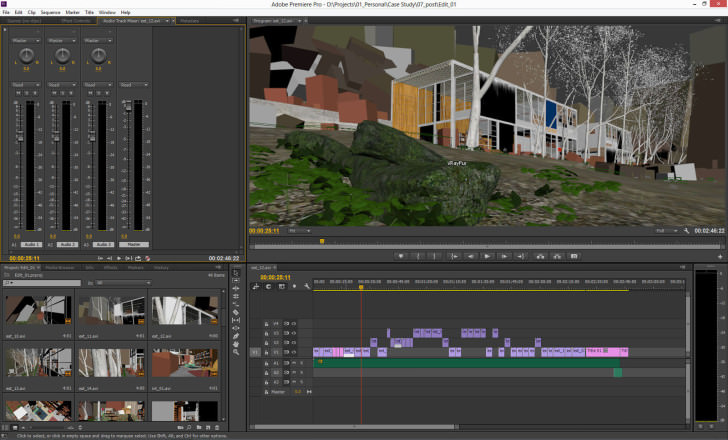
I eventually rendered out a grand total of 47 shots, 24 exterior and 23 interior ones, and 42 of them survived the cut and made it into the final short.
As for the render passes, the only ones I rendered out were the ZDepth for fog and depth of field, and the self illumination pass used mainly for the blown out sky.
With all this said, the rendering for the two and a half-minute piece took a whole month on my two machines, and with an occasional help from a friend. The interior shots averaged at 25 min/frame and exterior ones at 14 min/frame, which is ironic since I like the way they turned out more than the interior ones.
Post Production
Now for my favorite part! Who doesn’t like post production?
Its the part when you put it all together and marvel at your work, or you find out that you messed up miserably and have to re-render.
Im going to start from the beginning because the post work actually starts in early stages. Earlier I mentioned I have a preset after effect file, well heres how it looks :
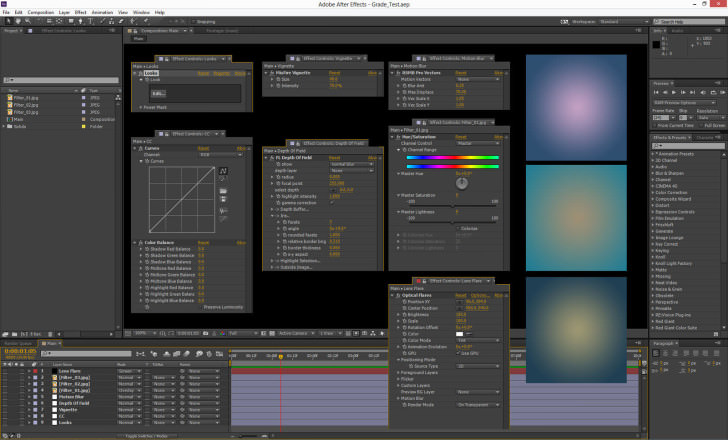
Its basically a composition set to 24 frames/sec (more cinematic looking, and less rendering) with a couple of adjustment layers, effects and some filters. They are all on default settings, meaning when I import the image sequence I still have to grade each shot individually. Theres no such thing as letting your computer do the work for you here, as every shot is different. I find that this is the most crucial stage, as you can really push the look of your renders, and often times re-purpose them if they dont seem all that appealing on the first glance. I rely heavily on red giant suite, but you can do this with the basic after effects color correction tools.
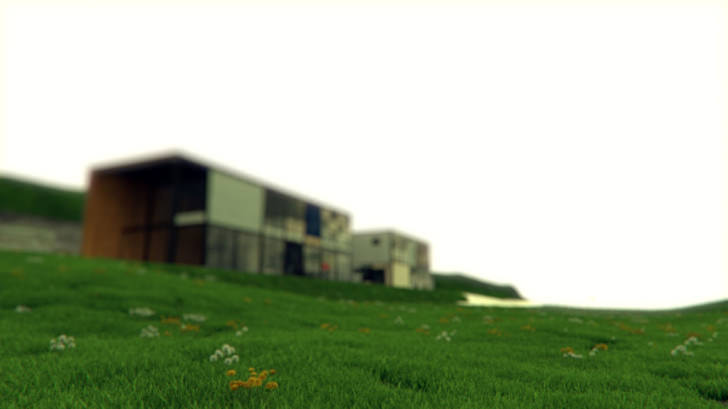
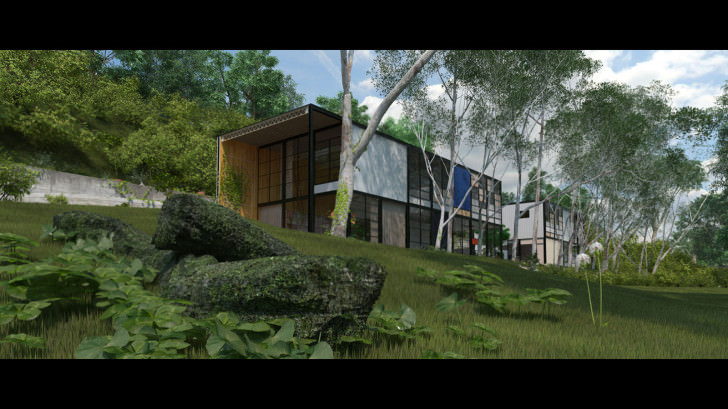
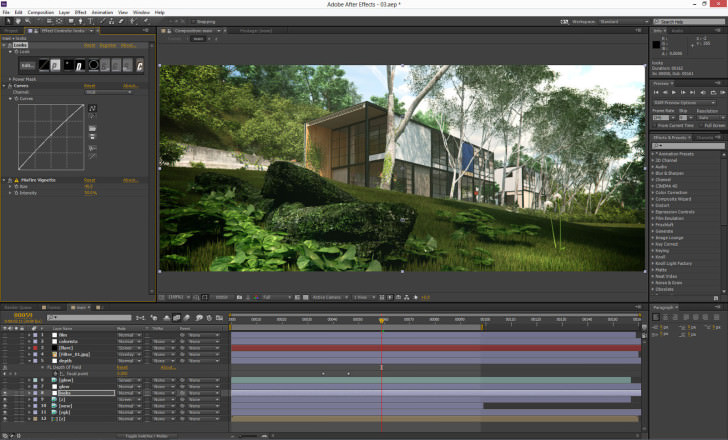
Lets take a look at this shot, heres the raw render :
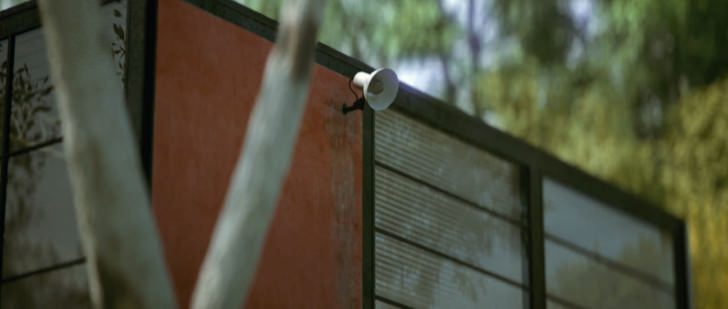
And now with all the color grading and effects :
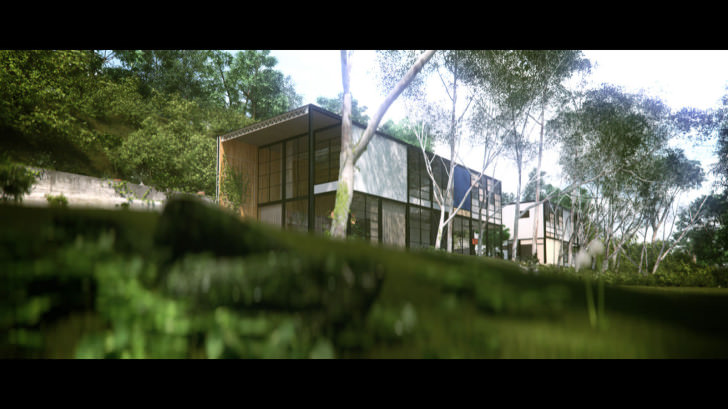
Theres a dramatic difference in my opinion. Lets do a step by step breakdown.
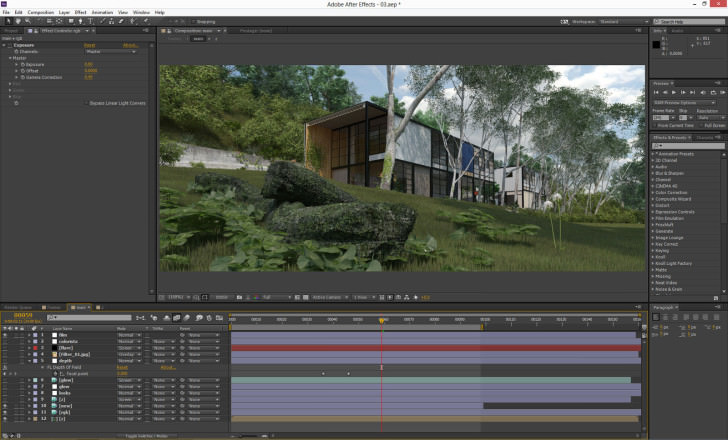
Raw render with exposure effect. It wasn’t used in this shot but I sometimes brighten or darken it in the beginning.
Inverted ZDepth layer used for the fog, very subtly.
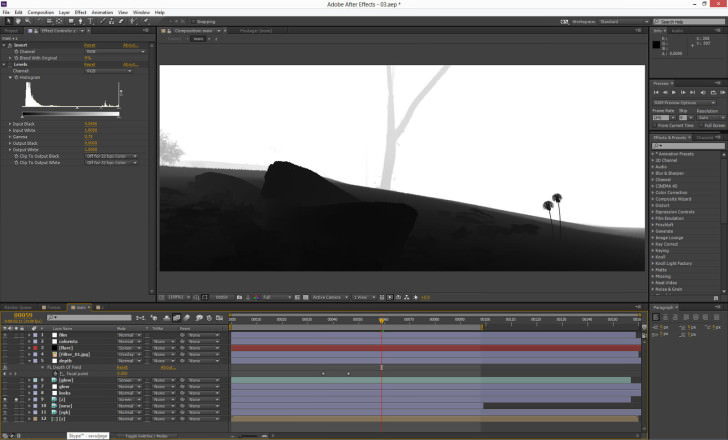
I also applied levels in order to darken the foreground a bit.
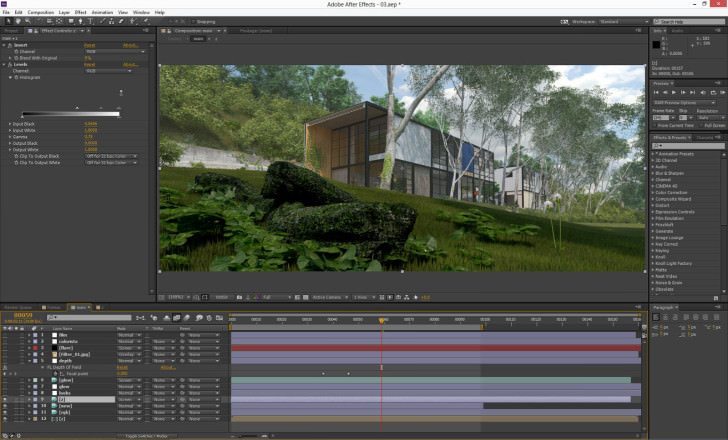
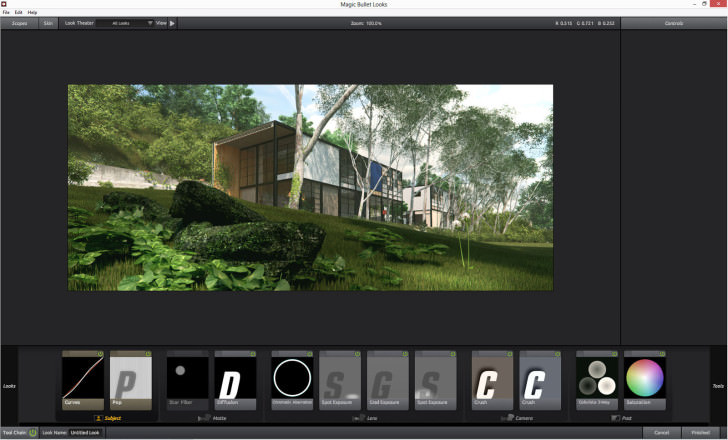
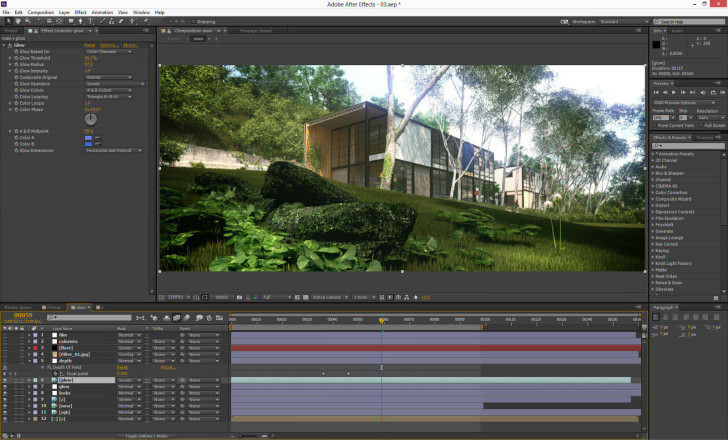
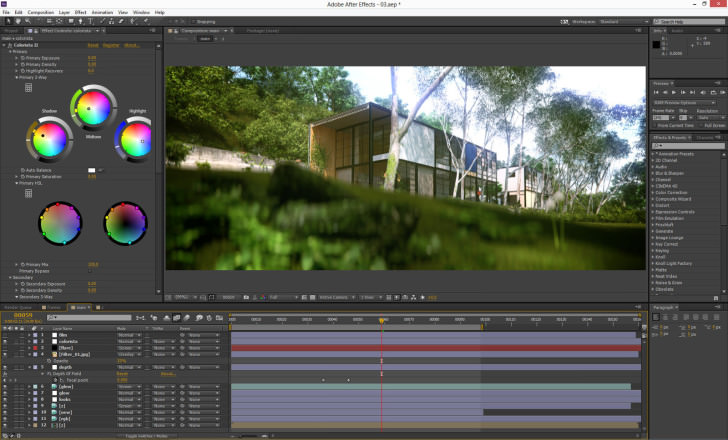
Next comes the magic bullet looks, this is where you start introducing the main color grade, as well as some relighting. The typical setup is some curves and pop for the contrast, diffusion for the glow, some chromatic aberration and spot exposures for isolating places of interest in the shot. Then for the grading I always use a couple of crushes with opposite color temperature, three way colorista and hue and saturation at the end, because the image can easily become over-saturated.
After the looks I apply some curves to brighten the shot just a bit and MisFire vignette. I dont like the magic bullet looks vignette as its fairly uniform, I think the MisFire gives it that really organic look, where it gets darker only in the darker areas of the image.
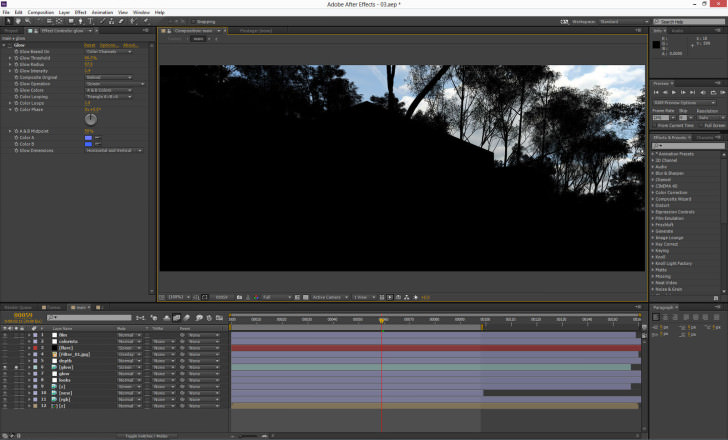
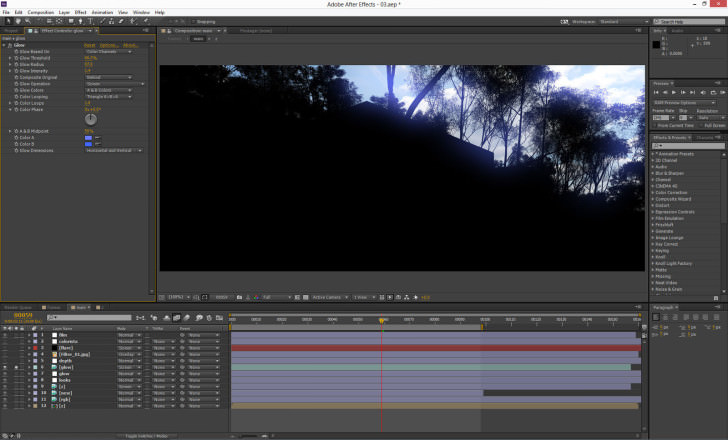
Adjustment layer with glow effect to introduce blown out areas.
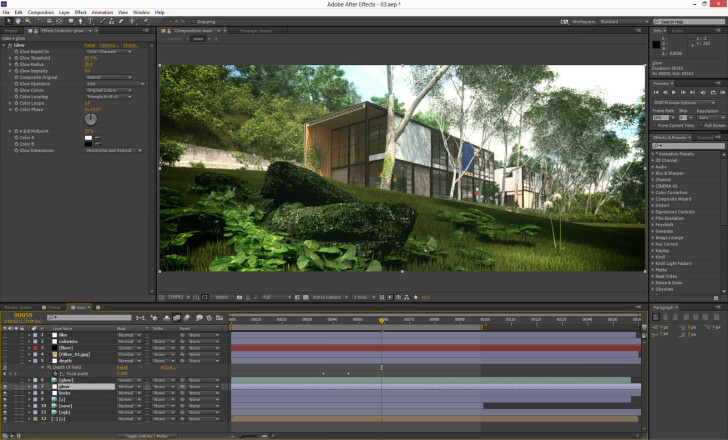
Self illumination pass with glow effect to blow out the sky even further and introduce some of that blue glow that was all over the reference photos.
For the depth of field effect I used the frichluft plugin. It produces beautiful out of focus effect very easily, and the best thing you can control the look of the bokeh and even make your own custom shapes! As I mentioned, I wanted to a achieve a certain anamorphic look so I just used a default circular shape with a thin border and changed the x-y aspect.
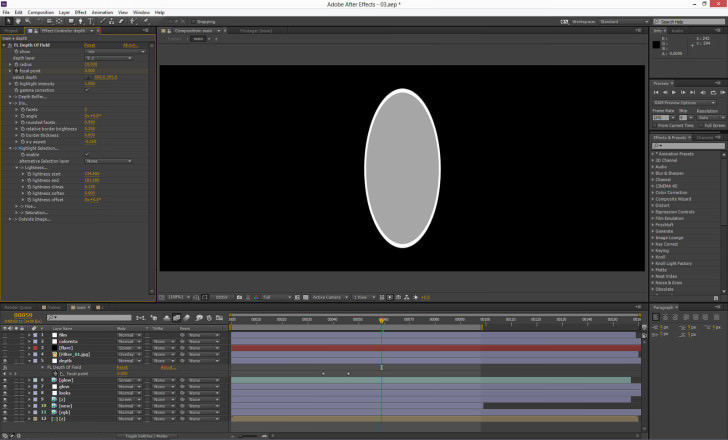
You can see the effect on the tree stump in the foreground :

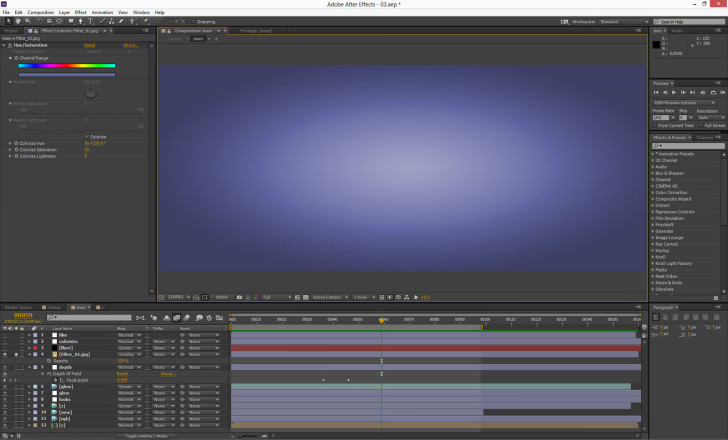
This is just a gradient that Ive made in Photoshop, then applied hue and sat with colorize checked, put it on overlay with 20% opacity. This introduces some cooler light.
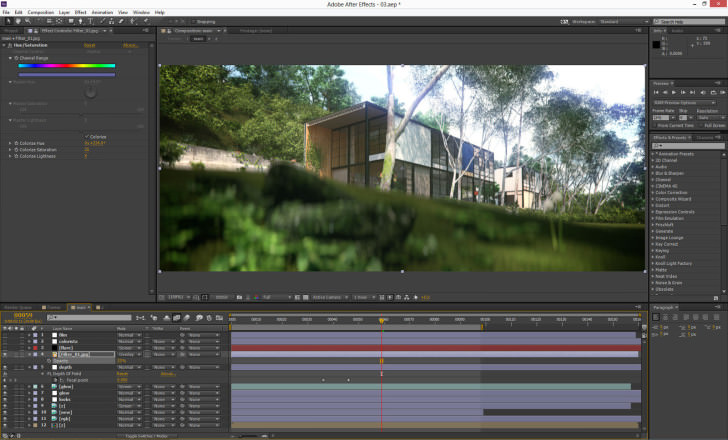
Then for the second grading pass I use colorista. Now this plugin has a ton of options and you can just use that and get a great looking image, but I like layering in different color grades.
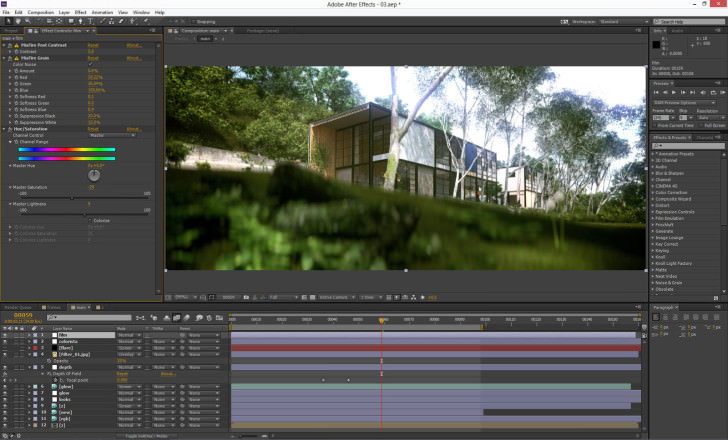
For the last step In After Effects I apply an adjustment layer with some contrast, film grain and desaturate the image just a touch.
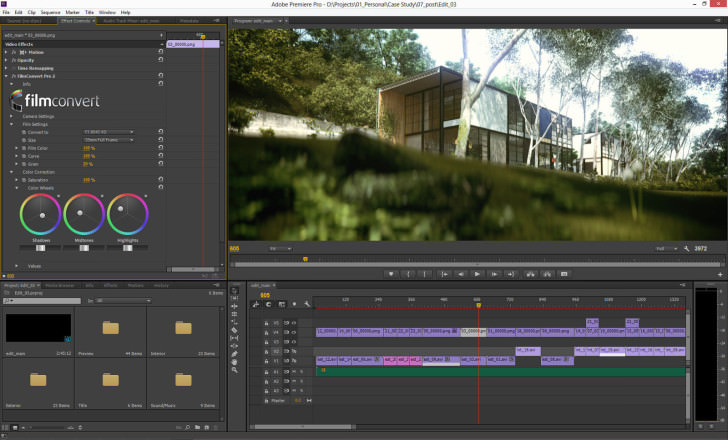
Once Ive done this for every shot Ill import them into premiere on top of my placeholder footage and apply the film convert on all of my finished shots. This is the last grading pass Ill use, and other than converting your footage to film look it has a great option for adding real, organic film grain to your image.
Heres a tutorial :
Thats basically it for the post, just keep in mind that every shot needs to be treated from the bottom up, because what works on one shot doesn’t necessarily work on the other. The color grading is a highly subjective process, theres no set in stone rule on how to do it, what appeals to me may not appeal to you and vice versa.
I also wanted to touch upon a couple of interesting techniques to avoid unnecessary rendering. These two shots were supposed to be still shots, where the camera is locked down or hand held.
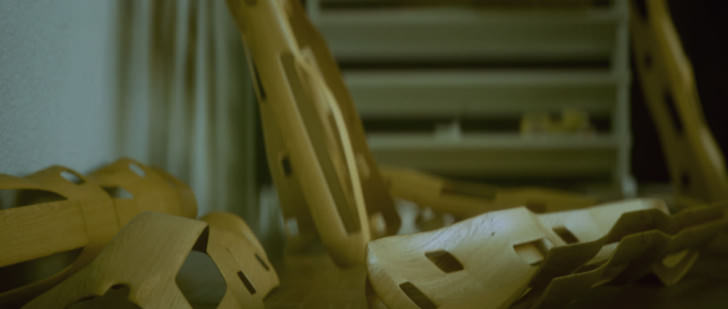
So when rendering a still shot if theres no animation in the scene it doesnt make sense to render the 72 frames. Instead I rendered just a single image in slightly higher resolution and then applied some very slight wiggle position and rotation expressions.
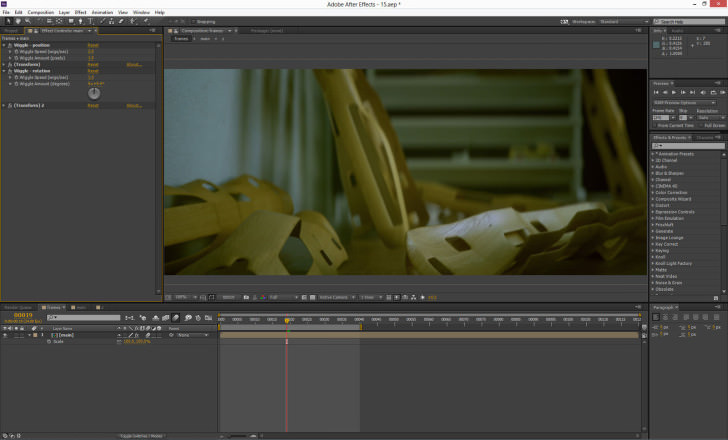
That in conjunction with animated DOF and some film grain made for a convincing hand held shot with just a single frame from max. A lot of time saved.
One other good technique for trimming away render times is the after effects time remapping option. Basically if you need a 4 seconds shot, thats 96 frames at 24frame/sec. Well you can easily render out 72 frames and then use time remapping with frame blending set to pixel motion and now you have 96 frames!
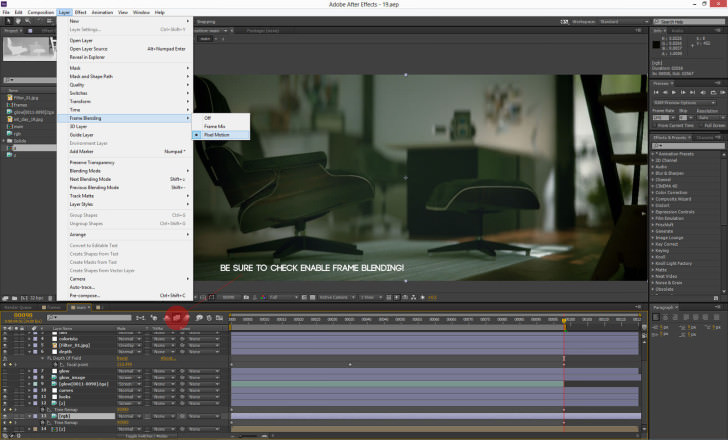
Awesome right? Its a good trick but it has some limitations, namely the camera movement. The slower the better, if the camera moves fast it can produce some nasty artifacts. Also as I found out, it works better in interior shots. If you try to use in on exteriors with a lot of foliage it can produce some slight light flickering.
For the end heres the complete process in one gif
https://dl.dropboxusercontent.com/u/117861/rbblog-gifs/eames_WIP.gif
Conclusion
I think that self initiated projects are very important to becoming better at any creative aspect. Its aplicable to any creative industry from furniture design to 3d animation. This was a passion project and without a doubt the most fun I have ever had working on something. These projects are a great opportunity to learn a ton of new things, you just have to set a bar and strive to reach, and with every new project push that bar higher and higher.
Thanks to all who even took a glance at this making of, and to those who went through it all, youre awesome! I hope you learned something new.
Thank you for the attention.
Sava Zivkovic.


Just WoW! Realy amazing.
Thanks for the post Ronen!
Excelente…un GRAN..trabajo..U0001f44f
I cannot believe this. It is stunning. The modeling and rendering… absolutely incredible. Im currently studying this house for a class, and this is truly inspiring.