


Making of Nylenne Gallery
ORANGEGRAPHICS presented a visual with strong photorealism back in March, supported by great texture work. This has awarded them Best Visualization of the Week NO. 12/2014 and today they share a bit more about the process of making the Nylenne Gallery which was purposely and suitably made to showcase their flooring textures. Enjoy!
![]()

Author : ORANGEGRAPHICS
Orangegraphics is a graphic design studio specializing in creation of photorealistic visualizations.
Project forum thread – Nylenne Gallery
Start-up Process
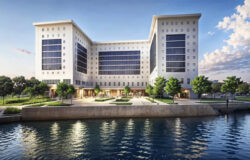
Before starting the work, it is essential to plan it and consider the main purpose of creating the scene, be it in-house or for a client. The Nylenne Gallery was created to act as the stage in which we showcase a collection of floor texture we are developing. The floor in this scene becomes the most important element and so we had to keep clear of obscuring it and get a nice looking interior too.

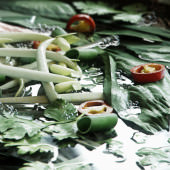
A standard step before starting any project at Orangegraphics is to gather lots of inspiration visuals. We use Adobe Bridge and a great feature it provides suitably named ‘Collections’ to manage it fast and easy.
We found a great inspiration we can build upon (shown in the preview window of the Adobe Bridge screenshot above). It shows a large span with lots of floor in focus, and seemed rather fitting for showcasing various types of flooring.
Once we had our inspiration and the concept for the project… we started modelling.
Modeling
We used 3ds max 2014 and V-Ray v3.0 to model, stage and render this scene.
We based the scene on one of the inspiration images we found and started modeling based on that, to get the proportions and dimensions right as well as set it up for a camera aligned the same as in the photo (even though it was clear we will have more views later on). 3ds max units were set to real world units and the inspiration image was added as a viewport background backdrop.

We’ve set the perspective using a new tool in 3ds max called Perspective Match (SketchUP users among you will be familiar with it since you had this for a long time now).
While using it, it is important to get some “scale reference”. For that we assumed that one window panel on the left has dimensions of about 3M x 1M. It worked well with the highet of the gallery railing so we were set to go.
After some work with the Perspective Match tool we got near to what we wanted to accomplish.

Next thing was to convert the standard 3ds Max camera to a V-Ray Physical Camera using the handy script “Anything
to Physcam v.1.4” from this great pack on scriptspot – Lele’s V-Ray Tools.
Since we were quite happy with the view, we started the modelling part.
To get the basic shape of building we started from the wooden ceiling structure. We poly modeled one set and cloned it with an amazing free plugin – Clone from iToo Software. Clone is a modifier which can be used to create copies of an object. It is similar to the Array tool in 3DS Max, except that it is parametric.

Basic structure done with poly modelling.

Symmetry modifier with turned off “Slice Along Mirror” option.

Ready model with the help of Clone Modifier.

Ceiling structure matched to reference photo.


With the help of simple editable poly modelling we build the rest of main building structure, paying attention to have
as low polygon count as possible. We always start with the main shape of a scene and add details in later steps.
As most of this scene is simple and simple poly modeling methods were used I will only mention a few exceptions.
- Wooden planks on the ceiling and outside the windows was done with the help of the Floor Generator script, which you can read about best in Bertrand Benoit’s post – Using Floor Generator Script.
- Railing outside the window is the Railing Object Type ( Create > AEC Extended > Railing ).
- Everything that can be placed with the clone modifier as windows etc is done that way.
You should always explore and use the tools best suited for the task at hand. Below is the ready base model.

Environment
Using our repositories of models, both bought and free from the web, we added some basic vegetation outside and tiny details inside as air conditioner, switches, etc. We use a script called – Outliner, to help manage the scene as it gets bigger and bigger.
The ready scene with Vegetation outside.


Materials
All objects in the scene are assigned simple V-Ray materials. We do focus on the textures though, making sure we use high quality ones since these affect the final image greatly. Below we show a couple of the more interesting materials from this project.
The Floor
As mentioned, the floor was made using the Floor Generator script along with a MultiTexture Map to handle the variation of textures applied on the floor.

We used our own Walnut Brushed textures for this… obviously.

V-Ray Material is used for base. The Diffuse slot is connected to a MultiTexture Map, with all floorboards textures loaded into it. An important thing to do is to lower the blur value of Filtering.
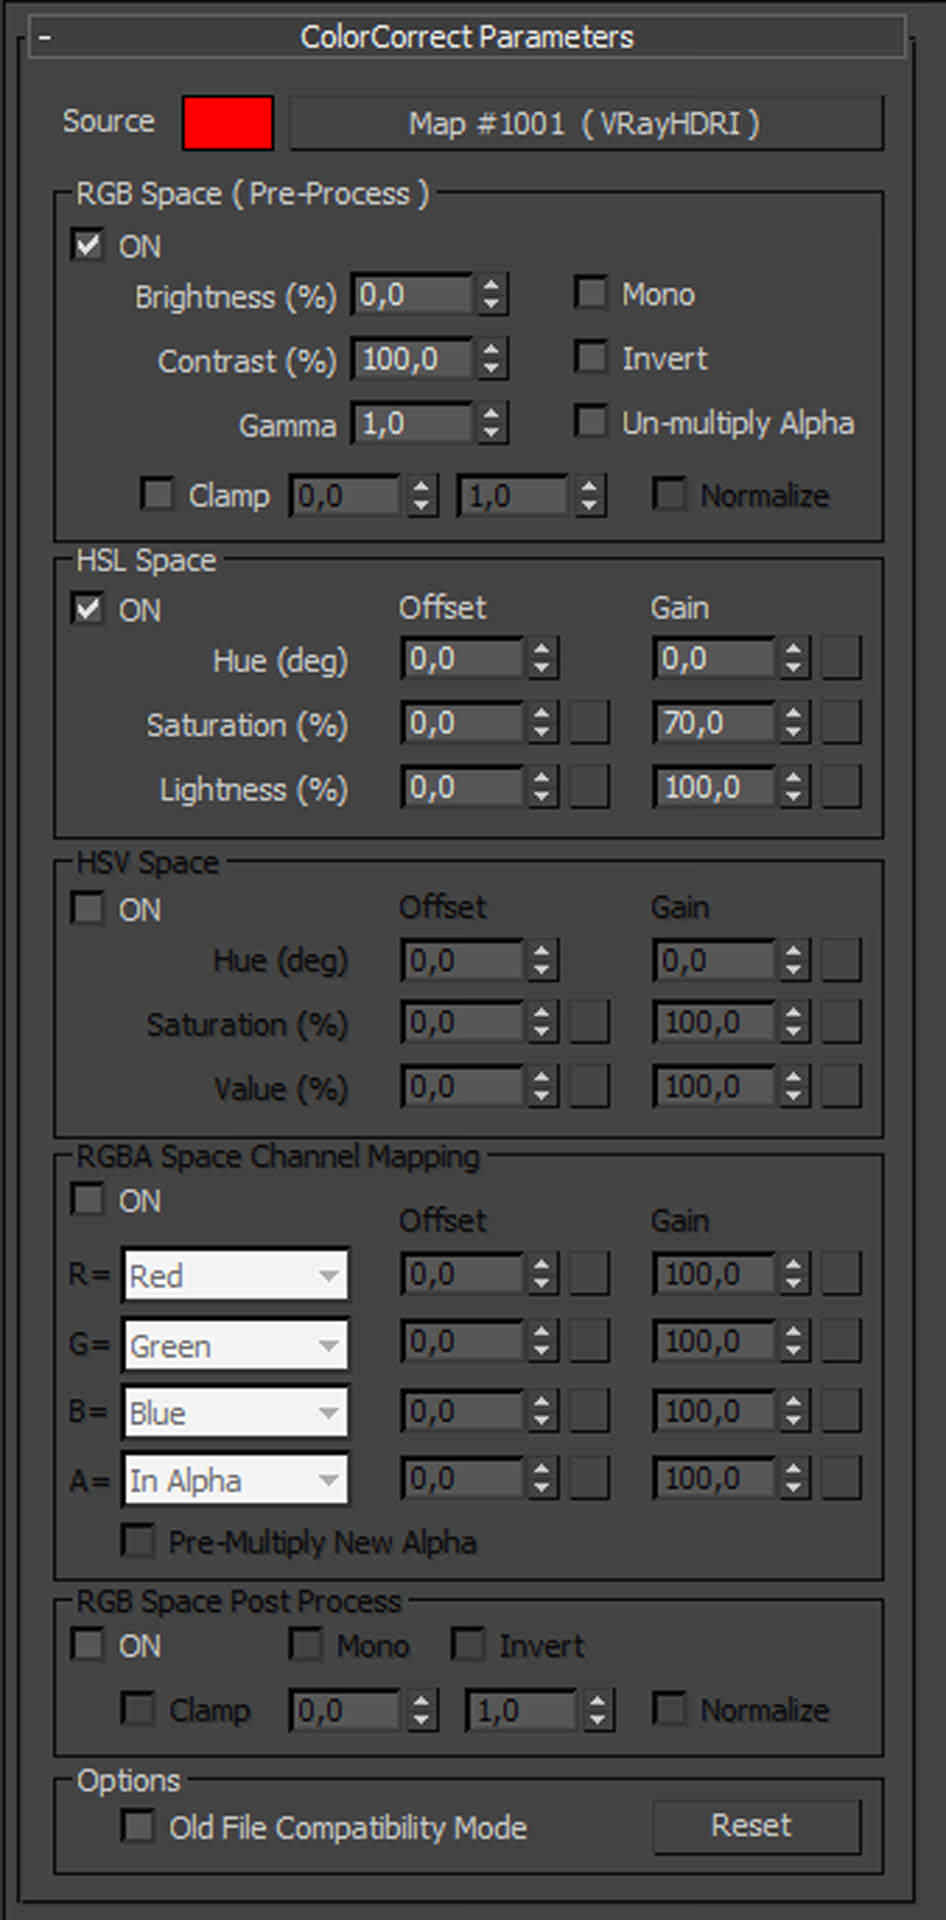
Maps in reflect and bump slots are very similar. With the help of Gamma value and ColorCorrect map we are able to set the proper lightness of our maps to get correct reflections and bumps of the material. We opt to use the ColorCorrect script by cuneytozdas over the standard one as it offers more flexibility for us.
Thanks to Floor Generator and MultiTexture, the planks are randomly placed on the floor with perfect UVW mapping.
The Wood in the Ceiling
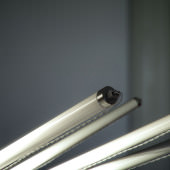
It was a very difficult task to achieve a good result of wooden cracks on the ceiling structure. After some tests, we ended with making a special tileable texture of cracks.


We combined both maps in the 3ds max with help of a Composite map. It gave us more flexibility than combining them
outside in 2d software. The texture of wood is darkened with the ColorCorrect map and placed with the mask of cracks on the top of the base diffuse texture. It gave us the look of cracks being darker than the wood, but not entirely black.
We also added a V-Ray Dirt map to the composite with 80% multiply to give us darker corners.

The bump and reflect maps are done in the same way, combining textures with the help of ColorCorrect and Composite
maps. Every element has a slightly different UVW offset to avoid placing textures and cracks in the same way on all of them.

All other materials are done in a similar way, paying a lot of attention to details and scale of textures. We suggest exploring the possibilities of compositing textures inside 3dsmax over doing it all outside in a 2d application – You stand much more to gain this way, even if it is more tedious at start.

Lighting and Rendering Setup
All scene is done in Gamma 2.2

We don’t set the lighting with the basic grey or white material set on all models since we believe that the variety of materials affect the lighting in such big level that all lighting setup must be build on at least basic materials.
Since we have the scene ready with basic materials we can now start working with lighting and render setup, which is
always the best part of work. The entire scene is lit with 2 lights only.
A V-Ray Light Dome connected with an HDRI image, which seats inside a ColorCorrect map to desaturated it a bit.

And a V-Ray Light Sphere inside for generating the strong visible light on the first floor hanging from the ceiling.

We also added some surrounding elements to act as reflecting / bounce elements for the light. Since our building is situated by the lake we had to simulate it.

Obviously, we did not model the site to perfection, but some minimal additions help to bring more realism into the mix.

Rendering
We utilize render passes a lot. Other then what you might think we use them for, we are also able to find good settings of rendering very fast with them. Thing is – you get the see problematic areas better in passes such as reflection, refraction and lighting vs. the beauty pass.
Two render passes we always use are :
- VraySampleRate : Shows an image where the pixel brightness is directly proportional to the number of samples taken at this pixel.
- VrayRawTotalLighting : The sum of all raw lighting – direct and indirect. Can be used as simple Clay Render, and is best for tweaking the lighting setup (finding over-brightened / too dark areas).

The V-Ray setup is pretty basic, without any special things… settings are quite high, in final renders we used Brute Force with Light Cache to avoid any interpolation of light solution and have small details of light from the HDRI map. It is important when working with Brute Force to increase the Adaptive Amount and lower the noise threshold in Global DMC roll-out as those parameters affect the level of noise in the image.

Post Production
Our raw render from the V-Ray Frame Buffer with all render elements we took to the Adobe After Effects

First thing we did was to increase the light contrast by adding a VrayRawTotalLighting pass with Soft Light mode and adjusting its strength.
Next was adding subtle details with the help of an Ambient Occlusion pass (achieved by putting a V-Ray Dirt Map into a VrayExtraTex render element). On top of that we added a curve correction.

All that was pre-composed and on the result we applied a Red Giant Looks effect, where we worked on contrast,
added a little chromatic aberration, changed color balance, etc.


The first floor was a little too bright and took to much attention so to desaturate it a bit we used VrayLight pass. It was
set as track Matte layer (something as mask in Photoshop) and desaturate with an Adjustment layer.

Again, we pre-composed all layers, and added a high-pass filter with overlay mode to achieve subtle sharpening of our
image, and on top of all is placed an image of glow for the light in the ceiling (lightened with curves).


Last thing was adding a little Lens blur calculated based on the Zdepth Render Element ( tweaked a little by Levels and with small amount of Gaussian Blur to avoid noise on edges) and that’s all.
Below is a comparison of the Raw Render and Post Production final result :


Final Renderings
All other renders were done in the same way…

Same scene with another floor texture :

Thanks a lot for reading this Making-of. We hope that it was interesting for you and we invite you to visit our website and give us feedback about our texture – we just started that project and so your opinion is very valuable to us as we aim to provide the highest quality CGI content.
Really nice job, but i think chairs are not tall enough to allow you to eat. 😉
What i dont really get is why people use a video composition tool for editing photo’s???
rombout I can see how doing animations can get it into your workflow to a point you use it for stills as well… video is just a lot of stills in the end. They do tend to pack more power – one example is the new DEEP Image editing which is super cool… see a glimpse of it in the video
https://vimeo.com/93858929#at=0
That sure is pretty! Great job and thanks for the share.
ronenbekerman rombout Okay that i understand that a video and moving footage, but those other are stills. I mean its more meant for video than for still right.
Example is nice indeed of that lake house
rombout ronenbekerman
Proud to see you talk about my work here! 🙂
In this case after effects doesn’t add really something more than photoshop (Moreover since “looks” plugin exists for photoshop as well).
But as ronen said, when softs for movies is part of your workflow, you’d rather keep working with those even if you are doing still frames.
Deep compositing is indeed very usefull when you have to deal with many differents footages (Plate, 3d, Vfx, object replacement), but it can also helps you reduce edges artifacts. That is valuable for movies and stills alike.
Great!
Kinderstuehle?
Good job, thank you.
camillelymer rombout ronenbekerman I did a quick peek in how it works and what it stands for. Didnt really get the part about those artifacts. If all the maps are clean why would one have artifacts???
Deep compositing seems very powerful, just checked some examples. SOrt of a layer system for video but also with 3 dimensional aspects
rombout
It has something to deal with aliasing. Let’s take a pixel between your foreground and background. Let’s say you want to put a 3d banana between those in nuke (a strawberry works also 🙂 ) .
Nuke can’t really know how to deal with this pixel as it belongs to both foreground and bakground (aliased). So you have to give him a mask (multimatte for instance) to reveal cleany your banana. Now even harder: Imagine you want a banana 50% transparent. Nuke can’t output a clean pixel because the pixel can’t store a foreground sample, a banana transparent sample, and a background one. It will roughly calculate an average, wich can be dirty especailly with animations.
BUT, with deep image, render engine can store many pixels in one (called “deep” pixels).
To see that you have a node in nuke called “deep sample”, wich will show the number of deep pixels, with color, opacity, position for each 2d pixel.
Haven’t found explicit video on the web showing this nuke’s node in action, so you will have to try.
You can find a banana model here:
http://tf3dm.com/3d-model/banana-86117.html
🙂
rombout
Here is a screen shot of an extreme close-up of my scene, showing the 3 deep pixels along an edge.
rombout
Here is a screen shot of an extreme close-up of my scene, showing the 3 deep pixels along an edge.
nice job.
One thing… as per table, chairs seating heights seems very low. I sitting position only heads will be above the table height.
…
camillelymer rombout Thanks for explanation and of course the banana! I think this is a bit over my head. I havent really done animations or moving images. Perhaps ill get their eventually
very useful ?thanks a lot.
thank you
Fantastic work.
Thank you so much for sharing.
i want to ask about the material of the cover on the sofa, is it with displacement or what ??
thanks for the tips !!!
Hi,
Awesome work… nice presentation of the wok.. can I have ur mail id so that I can ask few doubts regarding the post which u put up here nw…
Thanks…
Regards
Vinodh
This is an amazing tutorial.
Only thing omitted is Vray Camera settings.
Care to share?