Adding Fog Using VRayZDepth Render Pass

Adding Fog Using VRayZDepth Render Pass

January 20, 2010  |  Tips, Tutorials

Here’s a quick and flexible way to emulate the look of fog in the background of an image. I recently used this technique in the visualization of the Agami House in Yaffo. It’s true it might not look real enough but for most cases this really looks good enough and you have the added bonus of fast render and flexible edit inside Photoshop if the client ask for tweaks.

Adding the fog layer

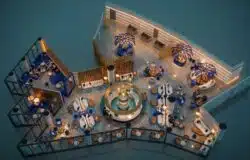
You’ll start with the original render without any fog in it as you see below

agami house fog 0 528x352 Adding Fog Using VRayZDepth Render Pass

Render without any fog

On top of this image you’ll add the fog layer – Full frame of pure white color masked out by the VRayZDepth render pass.

agami house zDepth 528x352 Adding Fog Using VRayZDepth Render Pass

VRayZDepth Render Pass

If you need to adjust the fog location relative to the camera you can play with the ZDepth image levels, instead of re-rendering the image after changing the VRayZDepth parameters, This way you can quicky move the fog in and out as i did in the example below.

agami house zDepth 2 528x352 Adding Fog Using VRayZDepth Render Pass

Getting the fog near camera with levels edit

agami house fog 100 full 528x352 Adding Fog Using VRayZDepth Render Pass

White layer masked out using VRayZDepth on top

But this is not that good since the beautiful sky is now covered with white color. In order to get this right, and actually more true to the way fog behaves in reality, you need to change the pure white layer to a gradient with pure white at the bottom that shifts to transparency as you move up… this way the fog will be limited to near ground areas.

agami house fog 100 528x352 Adding Fog Using VRayZDepth Render Pass

Fog using a gradient instead of pure white layer

You can see above the end result with the fog layer at 100%. You can decrease the impact of this layer to fine tune the general effect, or even mask out specific areas to emphasize exactly what you like.

agami house fog 80 528x352 Adding Fog Using VRayZDepth Render Pass

80% of fog layer

agami house fog 60 528x352 Adding Fog Using VRayZDepth Render Pass

60% of fog layer

agami house fog 40 528x352 Adding Fog Using VRayZDepth Render Pass

40% of fog layer


Subscribe to the Blog

Choose one or more of the options below to get updates about spotlights like this as they are made available.

For more information about this blog, go ahead and visit the .


Post comment as twitter logo facebook logo
Sort: Newest | Oldest

i'm sry but i don't know how i can masked out the zdepth map on the real photo

Thanks for your sharing. But I'm not familiar with VRayZDepth parameters, is there any good tutorial for this parameter?

Thanks again.

This article can help you more about the actual settings.

http://www.ronenbekerman.com/2d-displacment-texture-map-from-3d-model/

It's really as simple as setting 2 values (near & far) to modulate the black to white ration depending on distance.

Thanks a lot man!

thank you my friend

Thanks Ronen for the tutorial... glad you put it on your own web. I like the color saturation that makes the image very rich.
Btw can i link this from my website?

Thanks Galaites! Sure you can.

Trackbacks

  1. [...] with a gradient opacity shift and the background, and voila.  See the full details at his site.via Adding Fog Using VRayZDepth Render Pass – Ronen Bekerman – 3D Architectural Visualization Blog. document.getElementById("post-11300-blankimage").onload(); About the Author: Randall Hand Randall [...]

  2. [...] ° Carpet Tile Collection ° Lighting and Shadows in C4D ° Tuesday Total Textures #3 ° C4D-Workshop-DVD ° PhotoSculpt Textures ° Strata Design 3D CX 6 ° Free Modo Training from Pixel Corps ° ZBrush 3.5 Character Production DVD ° Archmodels vol. 5 für C4D ° 3 Stunden freies V-Ray Video Training ° DAZ 3D Basis Modelle jetzt frei ° My Sun&Sky Personal Workflow ° Liste der Render-Vauxpas ° Blender Multifluid Interactions ° 51 Bangin’ Blender Tutorials ° Prod. Instruction 3ds Max 2010: Vol.3 ° Modo Text and Logos ° Archinteriors 01 für Maya ° Thinking Particles + FumeFX Tuto Serie ° Optical Flares In Action ° Thinking Particles Tuto ° Gamma Correct Lighting in C4D ° Creature FX Volume 1 ° Bodybuilder Pack etc. ° HDR Light Studio Live ° hdrsource.com ° PFlow Toolbox Office: Vol. 2 ° Open Source Shading Language (OSL) ° Adding Fog to a Scene [...]

  3. [...] is an excellent way to go about it. Ronen Bekerman has an easy guide on how to do it on his site, here He also has an interesting 3D Arch-Viz competition happening now Arch-viz challenge I share and [...]

  4. [...] Bekerman detalla en su blog cómo añadir un efecto de niebla realista en Autodesk 3ds Max con la ayuda de los [...]

Recent Posts
Making of CityLIFE's 'Metabolic City' by Jean-Marc Emy

Making of CityLIFE’s ‘Metabolic City’ by Jean-Marc Emy

05/15/2012  |  6 Comments

The first of the CityLIFE Challenge making-of articles is here! Done by the Grand Prize Winner, Jean-Marc Emy will describe... more

3 Free Models by Ramon Zancanaro

3 Free Models by Ramon Zancanaro

05/13/2012  |  6 Comments

Ramon Zancanaro is sharing 3 models he made with you all! The great looking glass blobs pendant lamps from his... more

Free

Free “Glass Buildings” RailClone Scene

05/10/2012  |  1 Comment

Long time blog & challenges sponsor, iToo Software, created a very nice RailClone generated glass buildings 3d urban landscape scene... more

Istanbul Seaport by Squint Opera

Istanbul Seaport by Squint Opera

05/09/2012  |  17 Comments

James Shaw published a making-of the Istanbul Seaport project by Squint Opera on his blog back in January, and it... more

Making of Loft

Making of Loft

05/02/2012  |  39 Comments

Matheus Passos created the Loft scene as a personal project inspired by the works of MIMO Studio and Insomia Architects... more

River Bank House / Balance Associates Architects

River Bank House / Balance Associates Architects

04/29/2012  |  3 Comments

What a remarkable house in a remarkable location! The River Bank House, designed by Balance Associates Architects, sits along Gallatin... more