


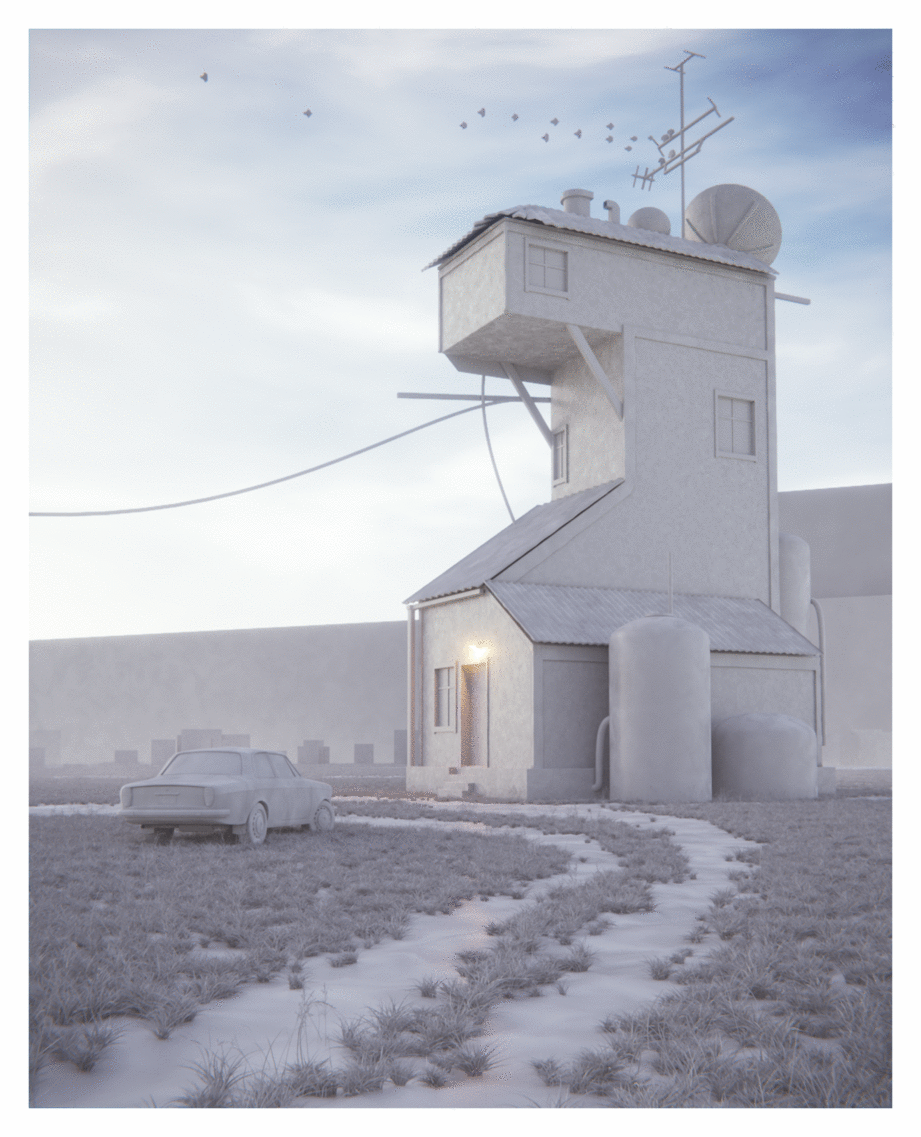
Making of Simon’s House
Blender is getting more attention recently, with Lasse Rode’s Blender & Corona Renderer study as well as some great visuals are being shared by artists using it along with the Cycles render engine. Jonatan Mercado shared his painting to 3d conversion personal work called “Simon’s House” in the showcase section, and today he also shares his process of doing so. Let’s blend things up!
Introduction
Hi!
I’m glad to share my longest personal project so far and the making-of it in this great blog.
I love to dive into any kind of digital artwork out there. Searching for inspiration or just procrastination, but always enjoying finding out great artists.
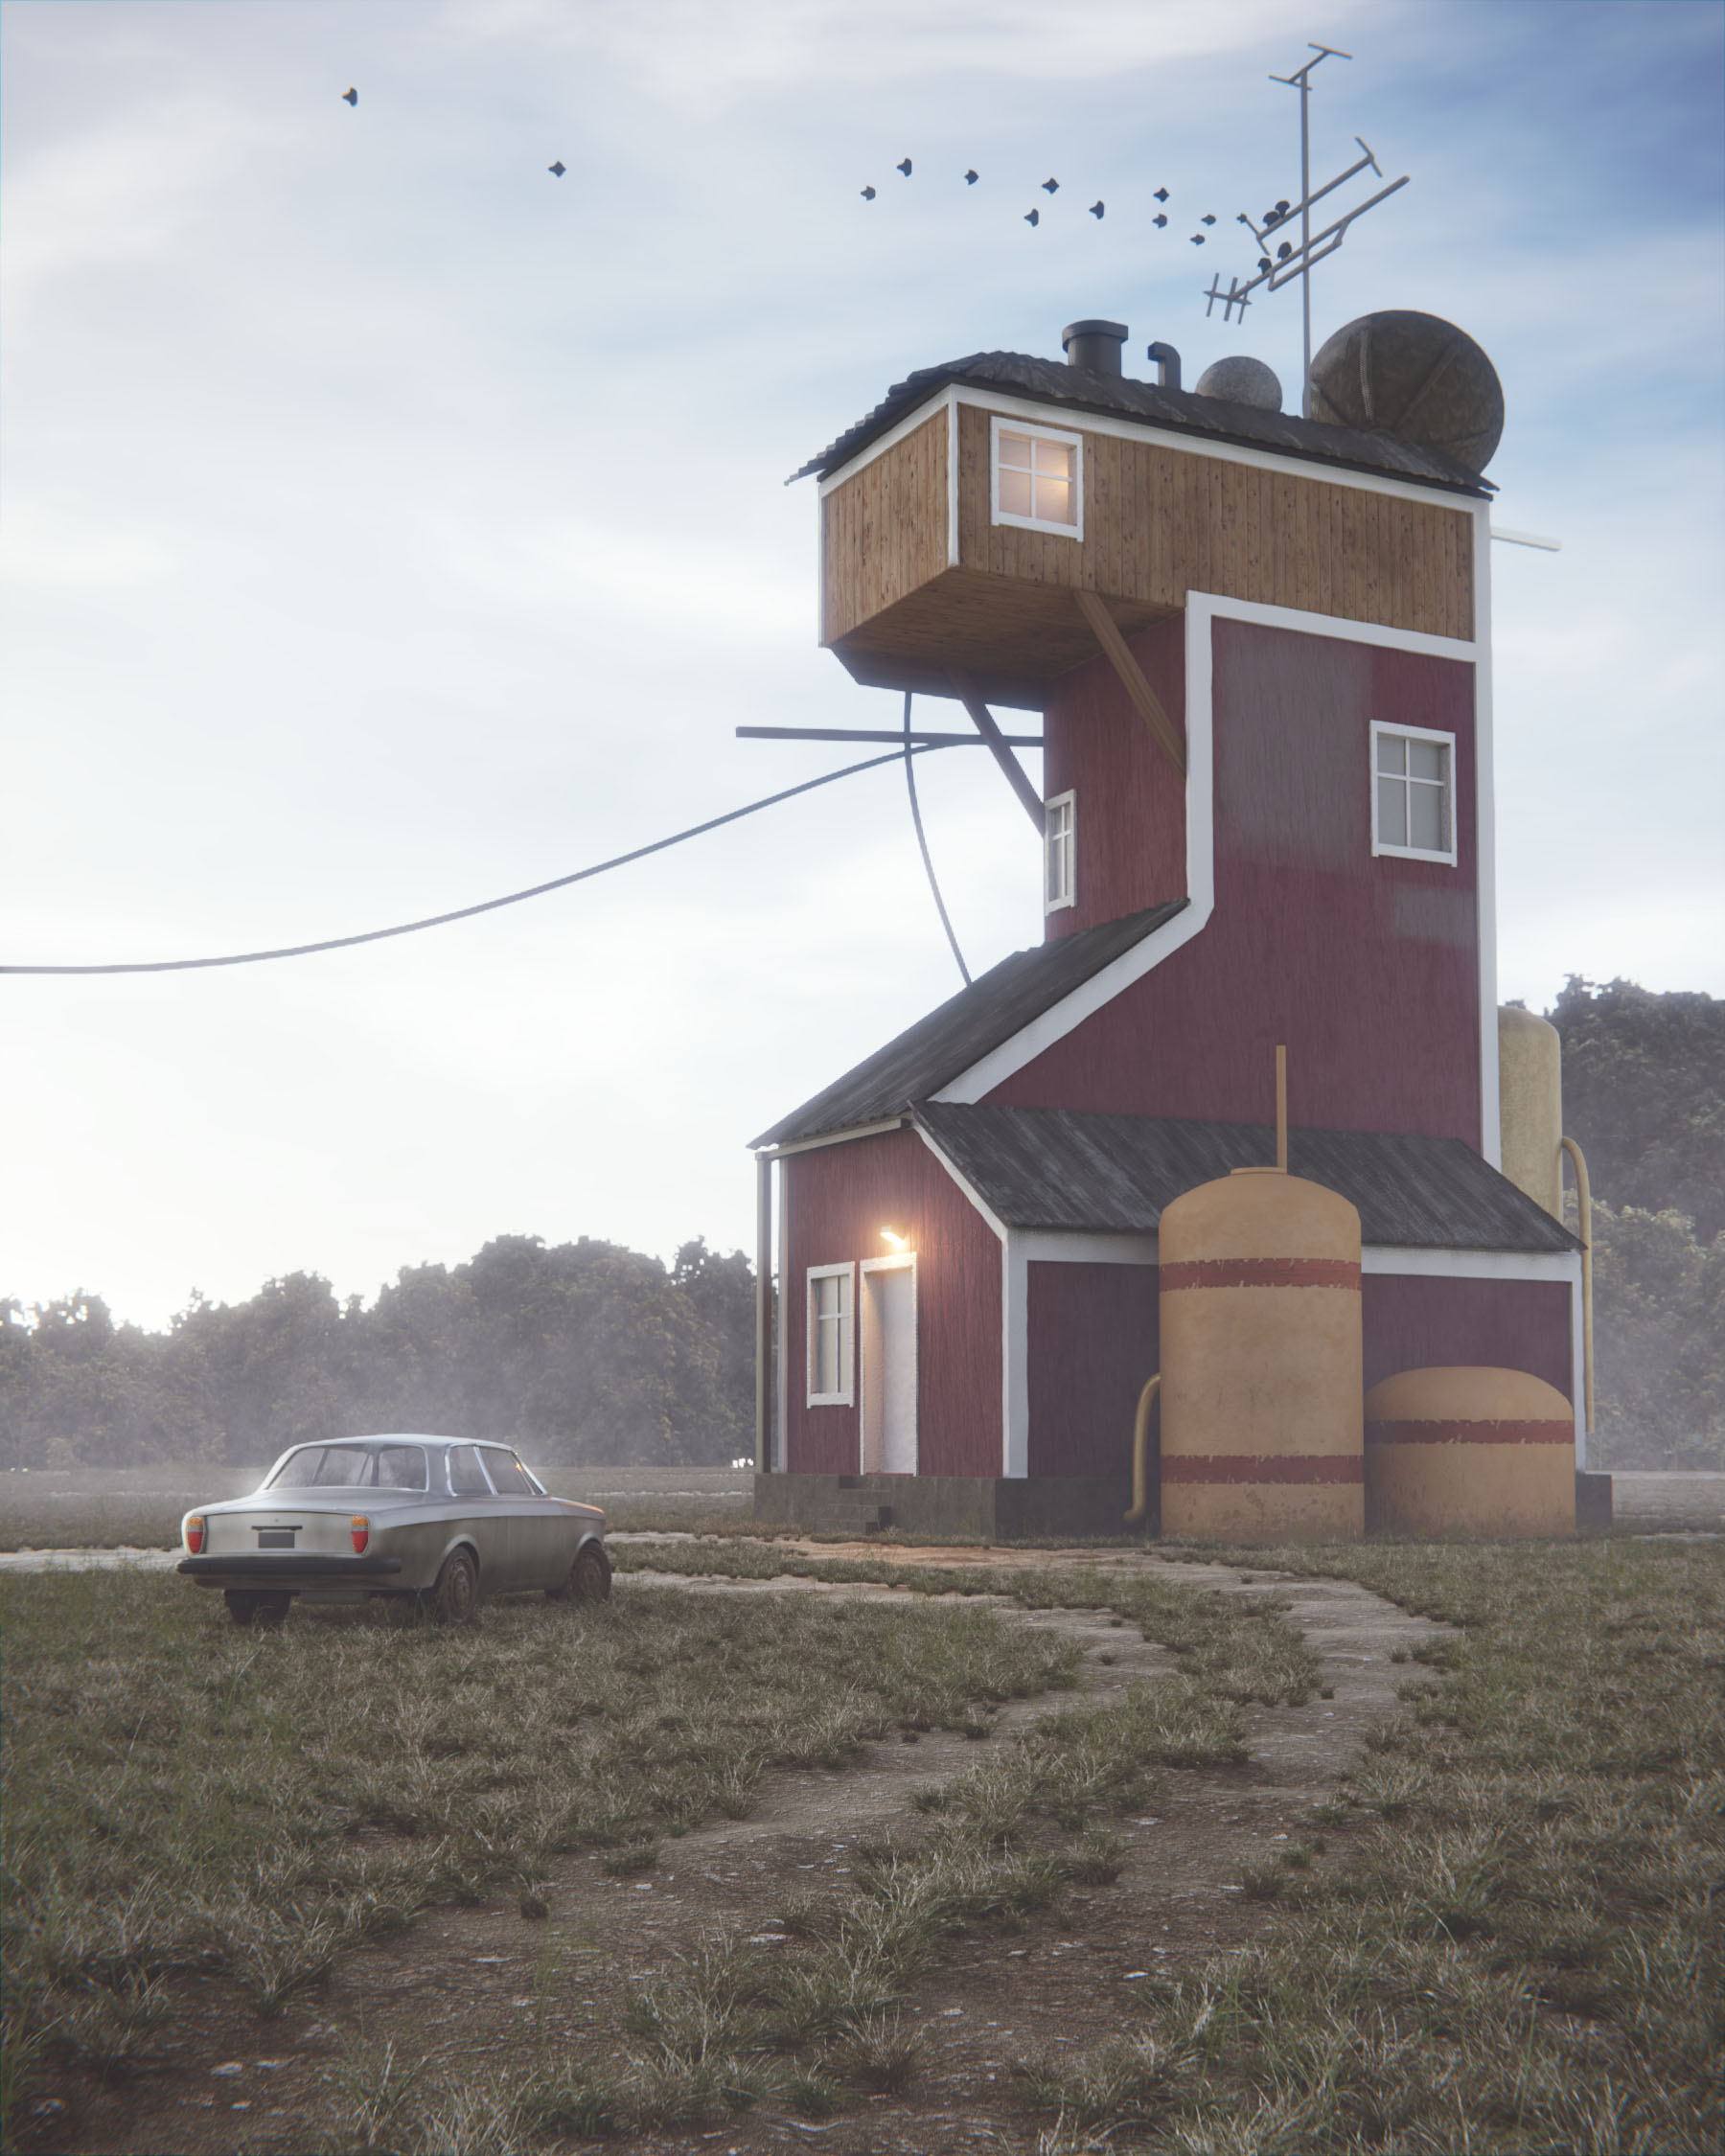
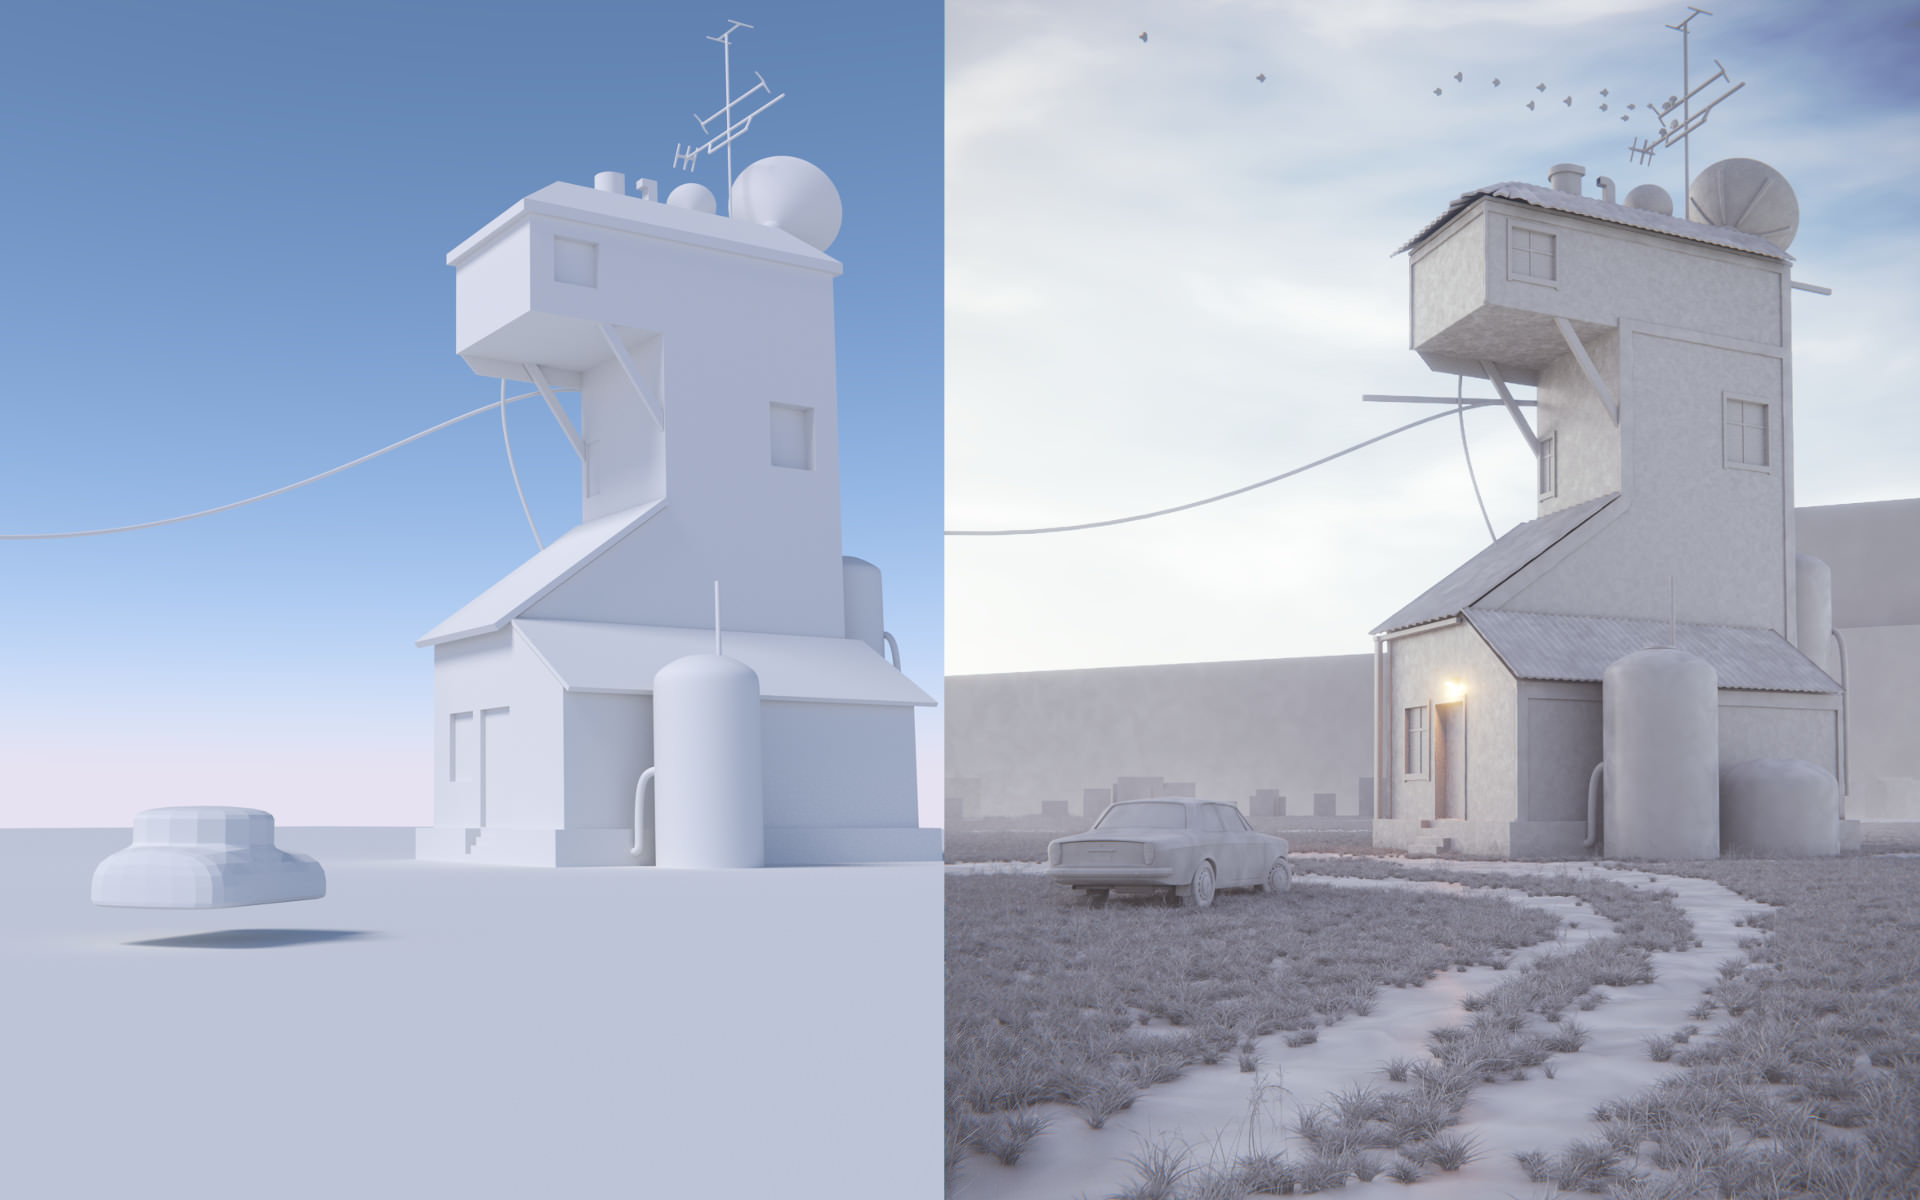
I remember when I found this artist and his artwork last year. It blew my mind. This piece was my break-through into Simon Stalenhag’s universe.
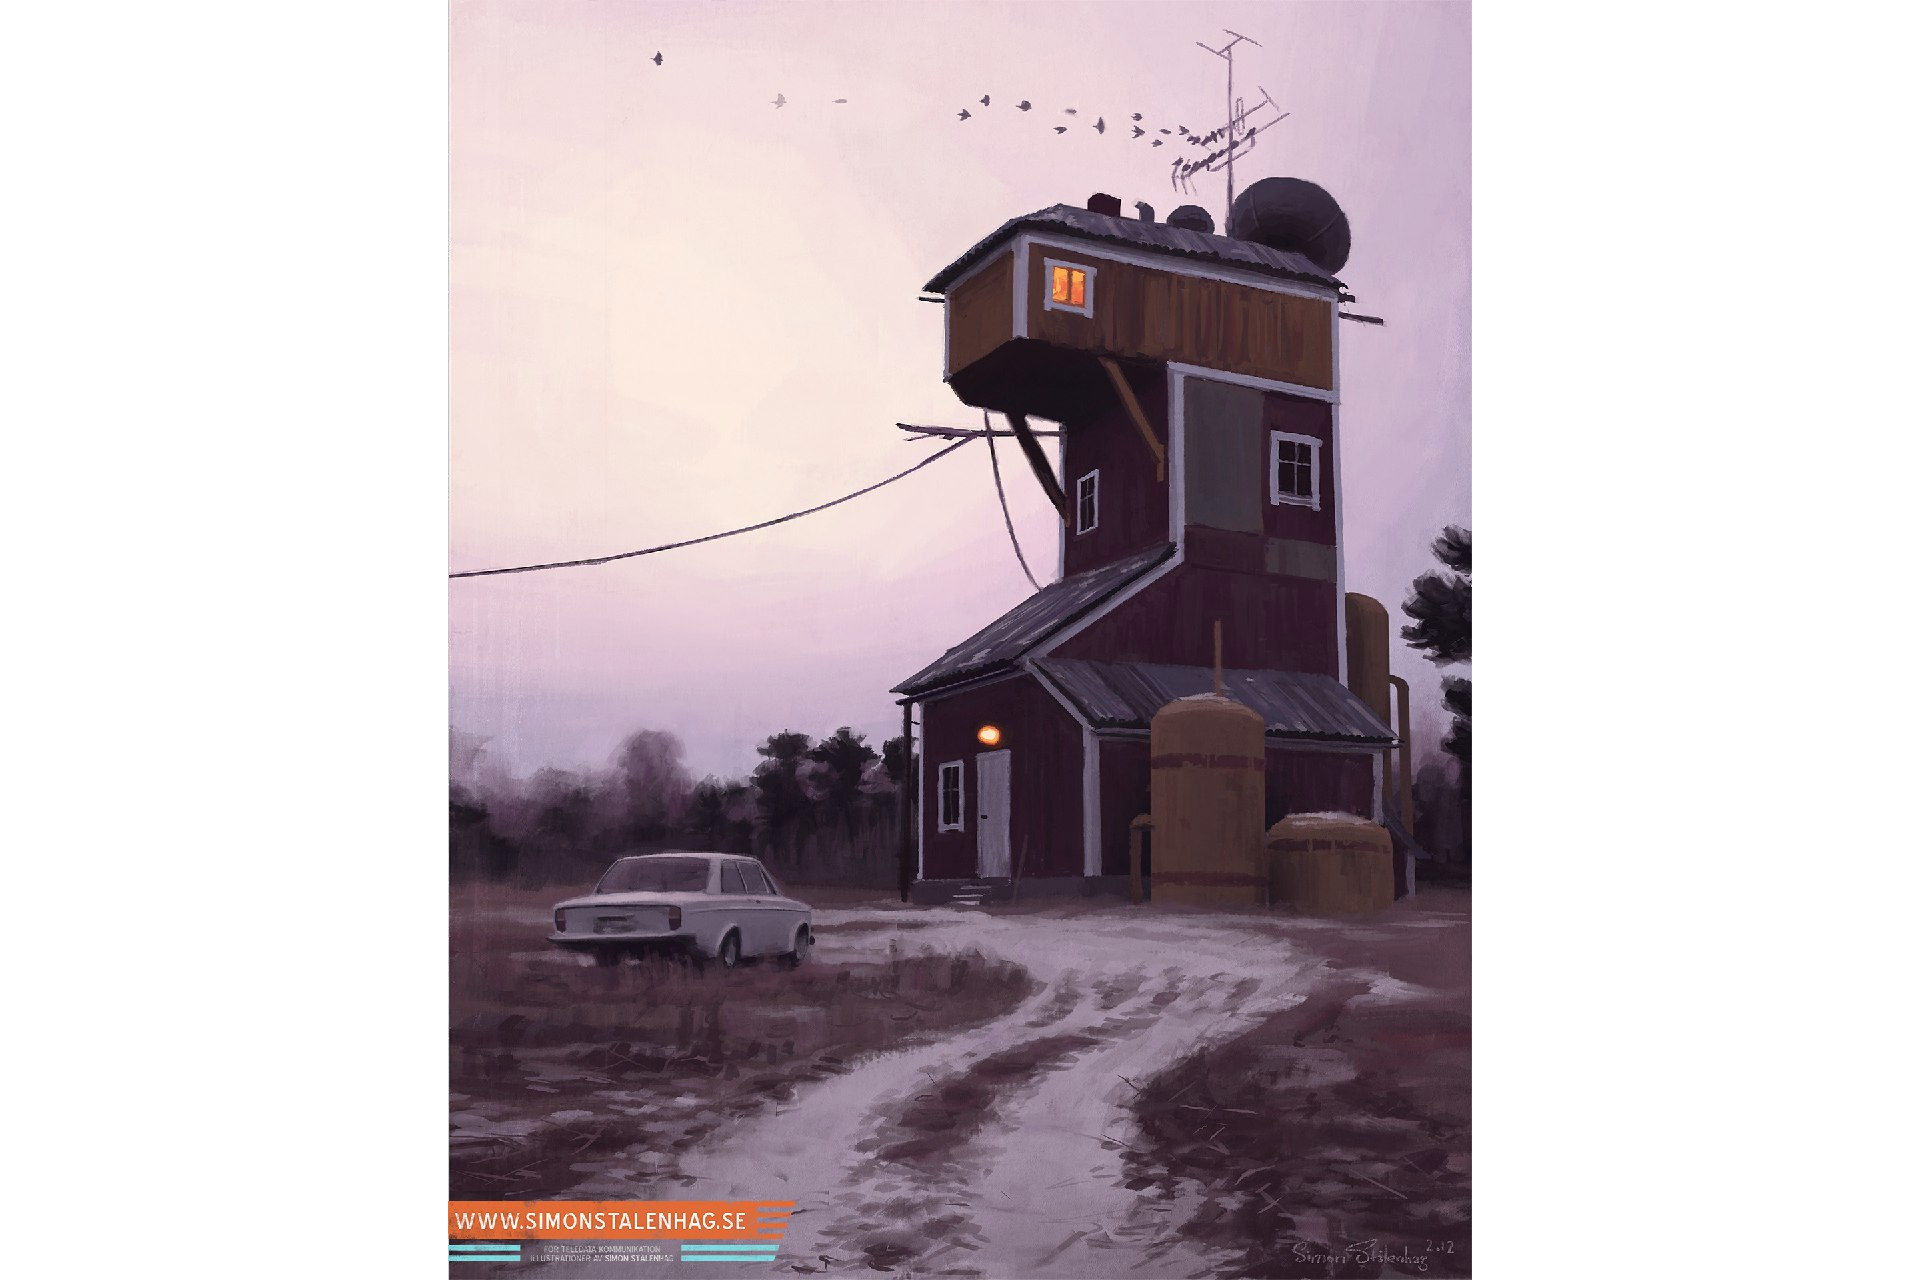
I wanted to convert this piece into 3D immediately.
I will show you how far I got in the task.
CAMERA SETTING
For this kind of projects (from 2D to 3D), my workflow was a bit different.
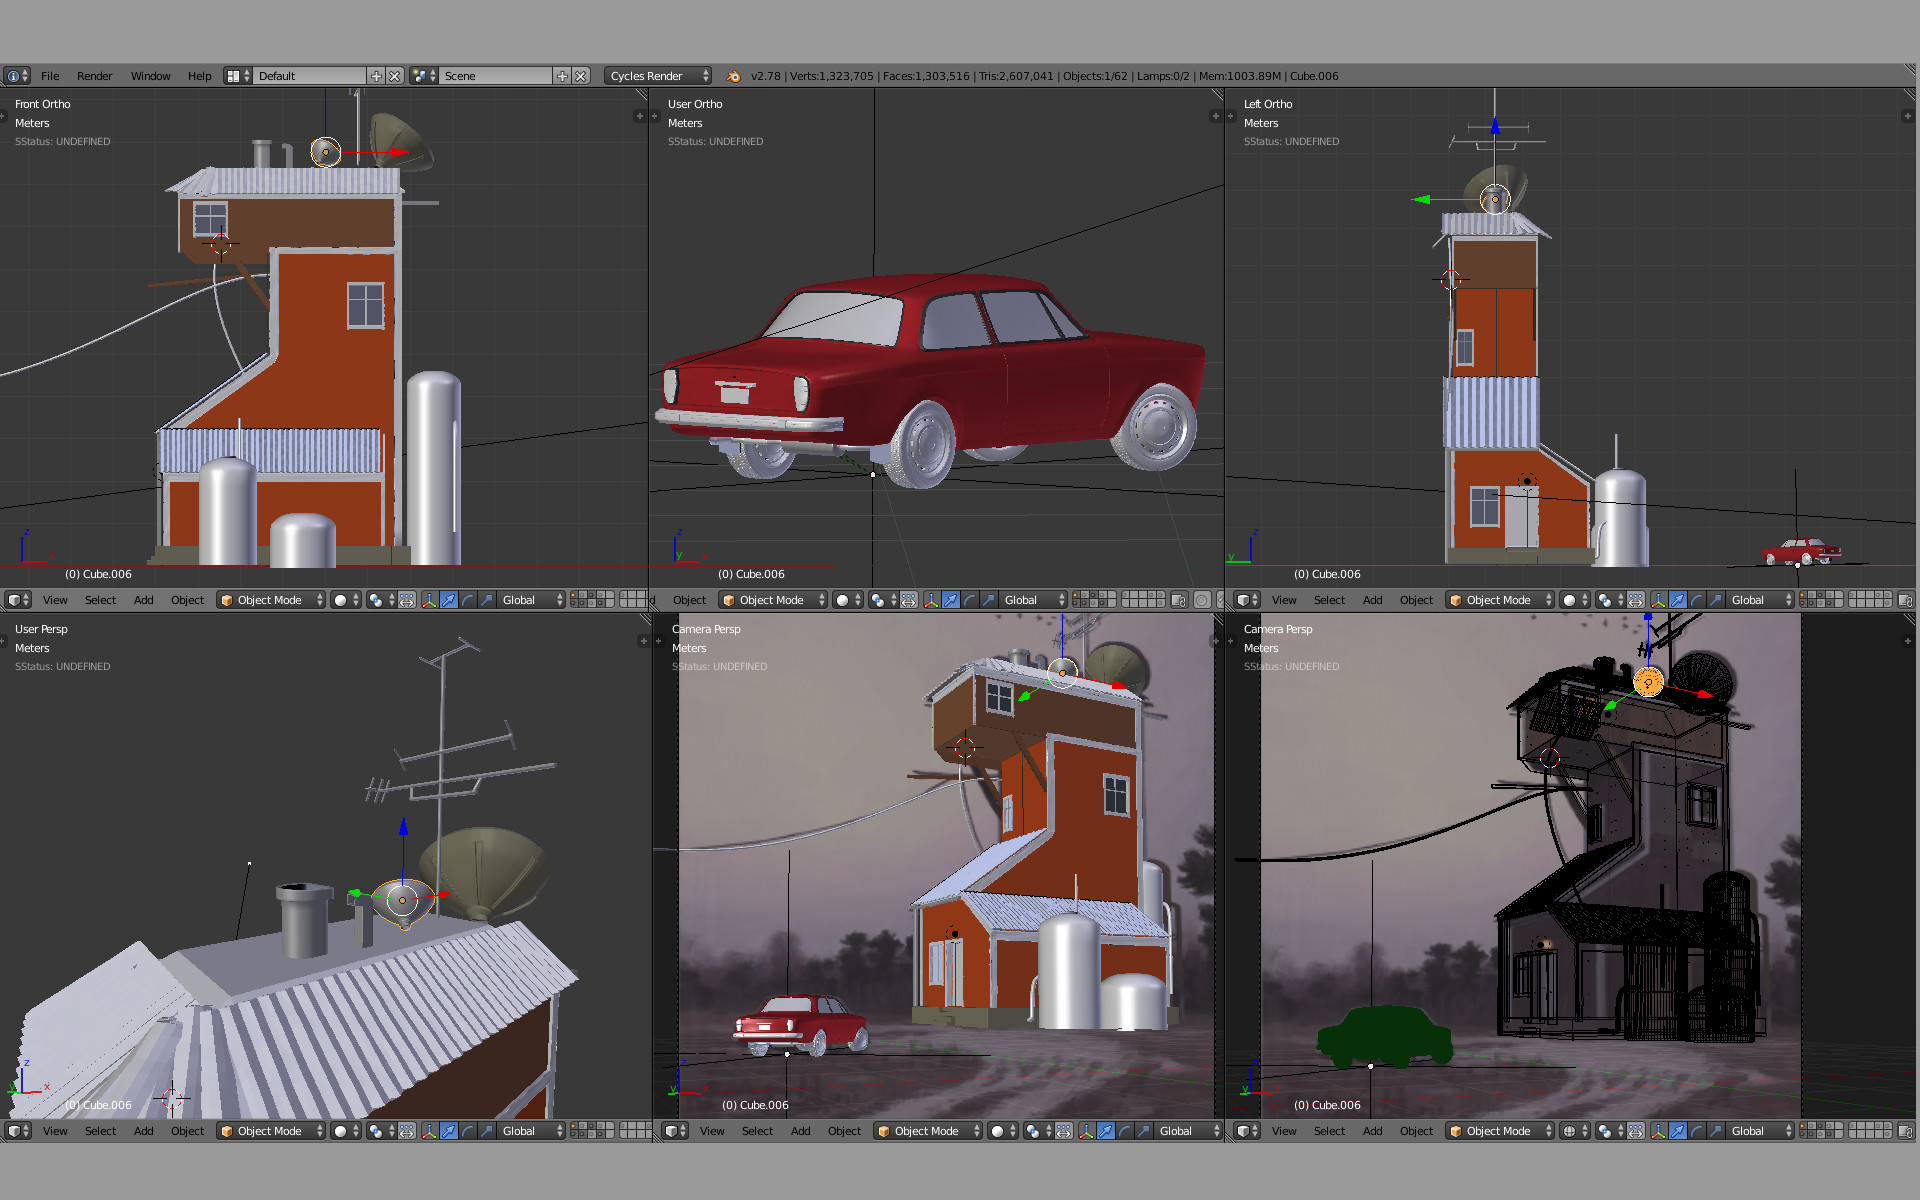
I started calibrating the camera to get a proper angle which could match with the 2D Image.
I used the Blam addon to get this done.
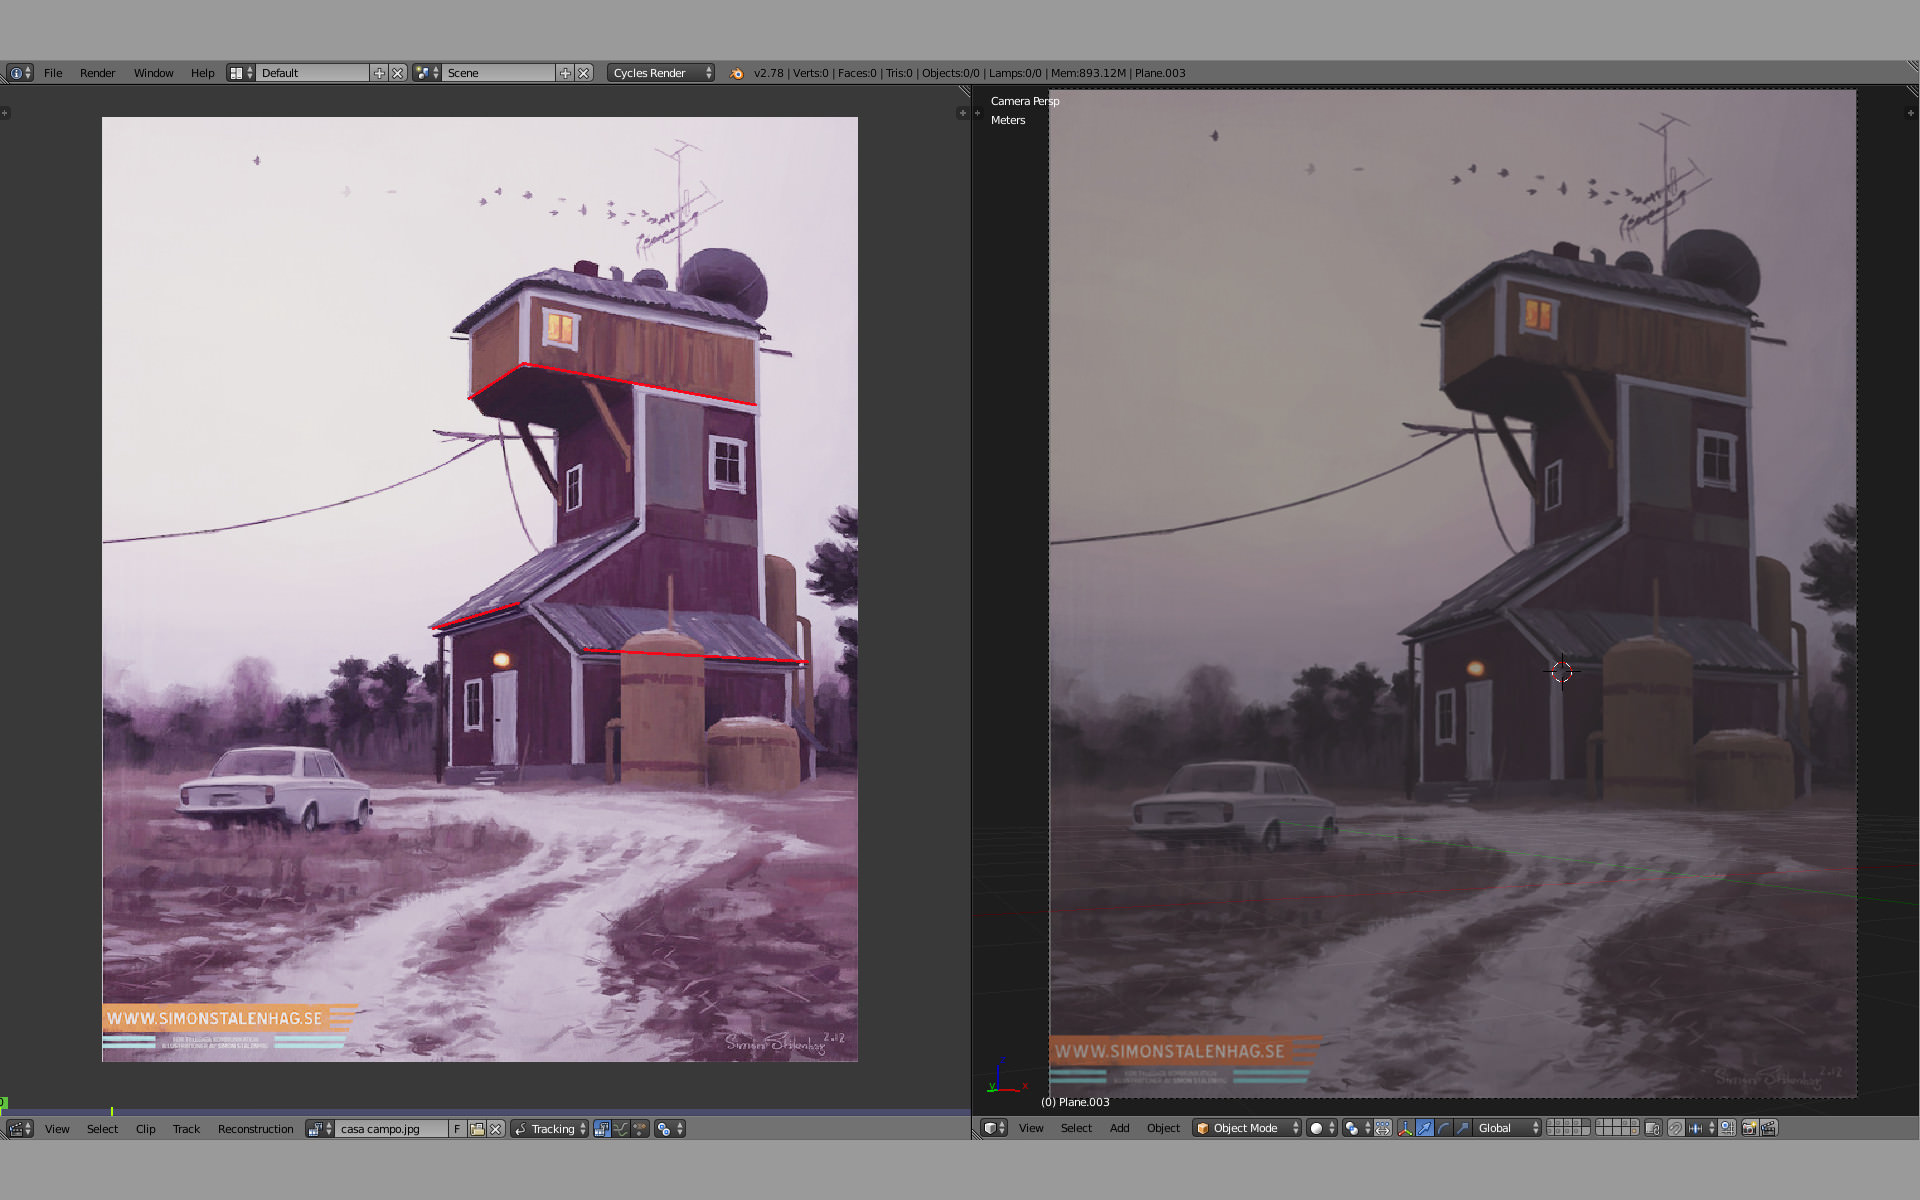
This addon calibrates the focal length and camera orientation. The estimation used for this purpose is based on a scientific paper called “Using vanishing points for camera calibration and coarse 3D Reconstruction from a Single Image”.
3D MODELLING
Once I got the camera angle properly set, I was ready to go. I always start blocking out the scene in the simplest way possible. From rough blocks to detailed geometry.
As I started from a digital painting, I didn’t care too much about precision modeling or even high details; I tried to maintain the right balance between reality and efficiency.
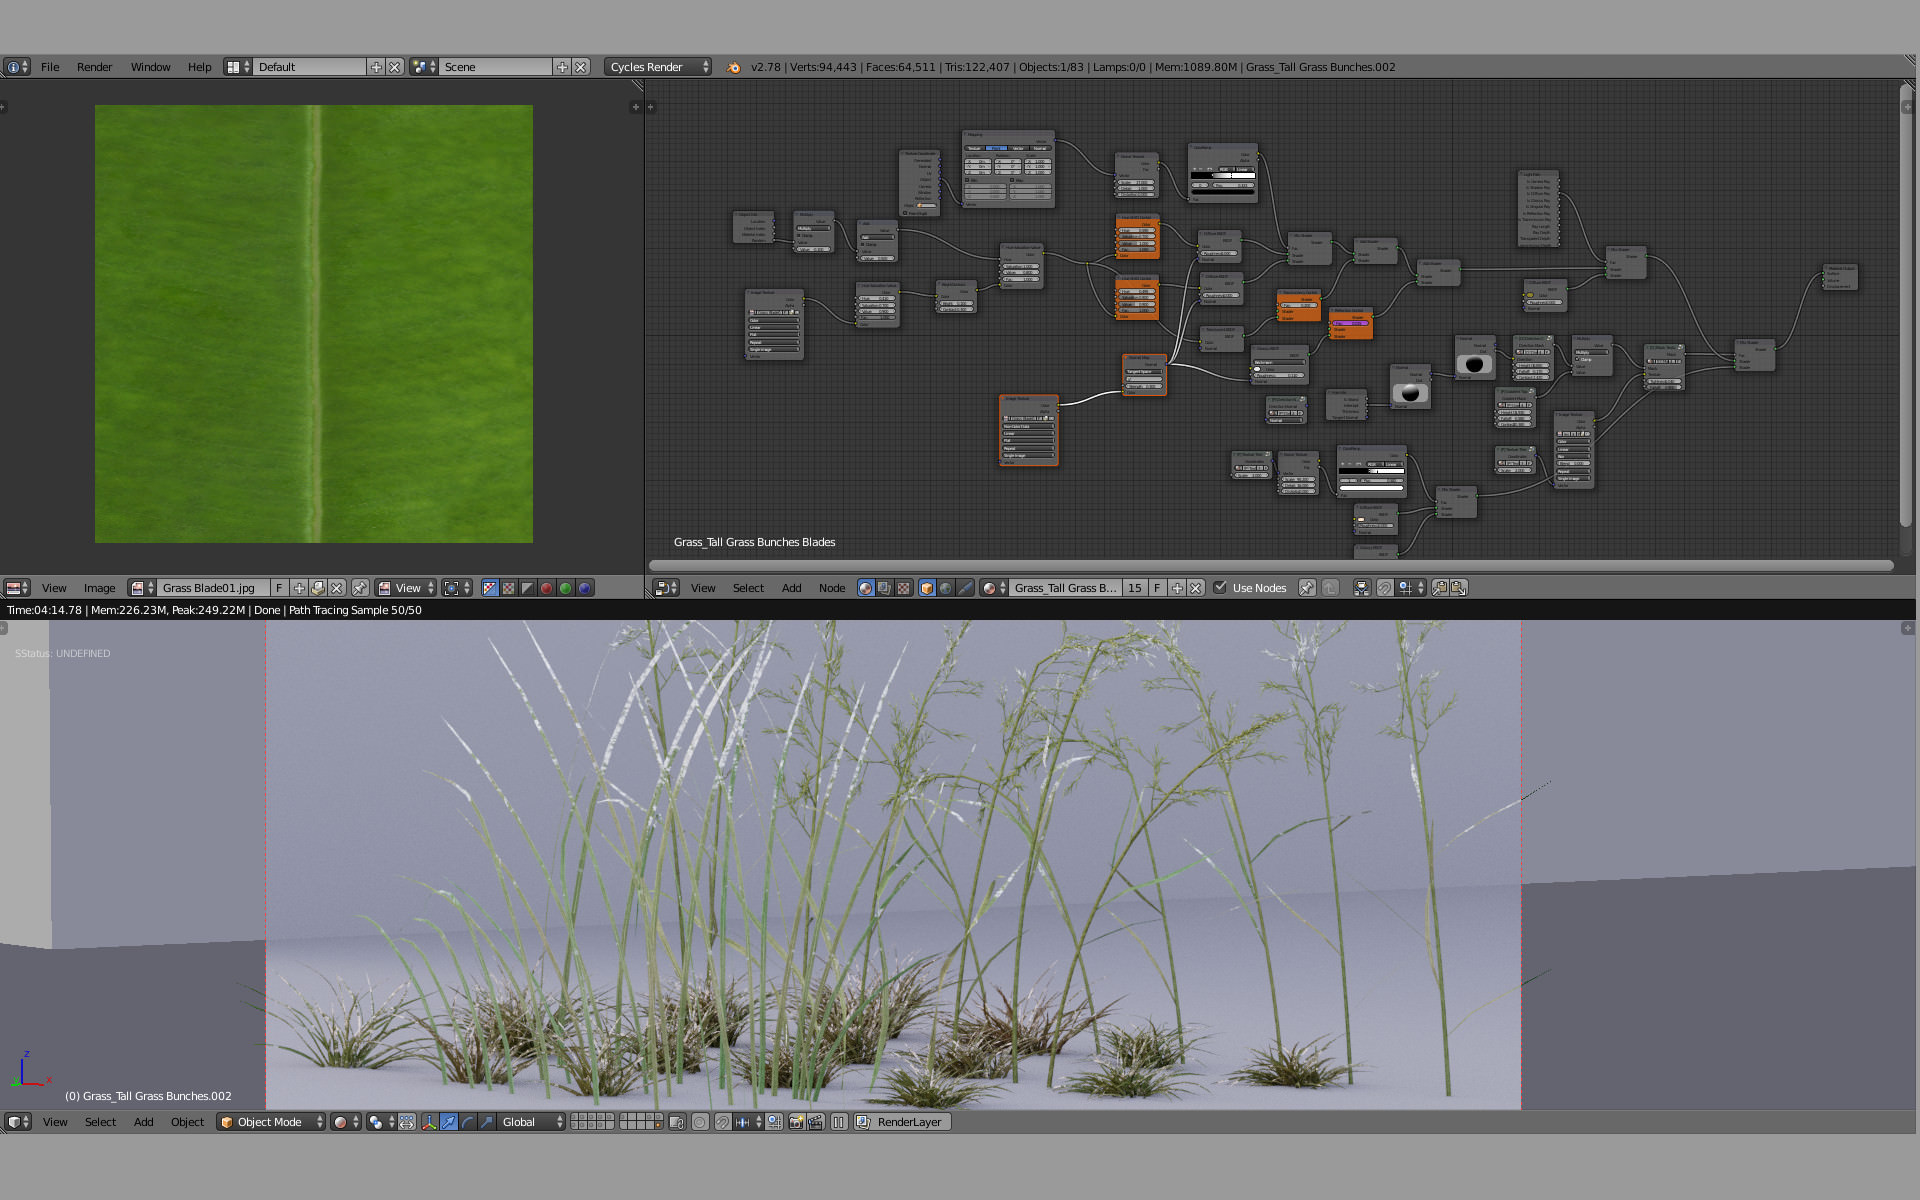
TEXTURE & MATERIALS
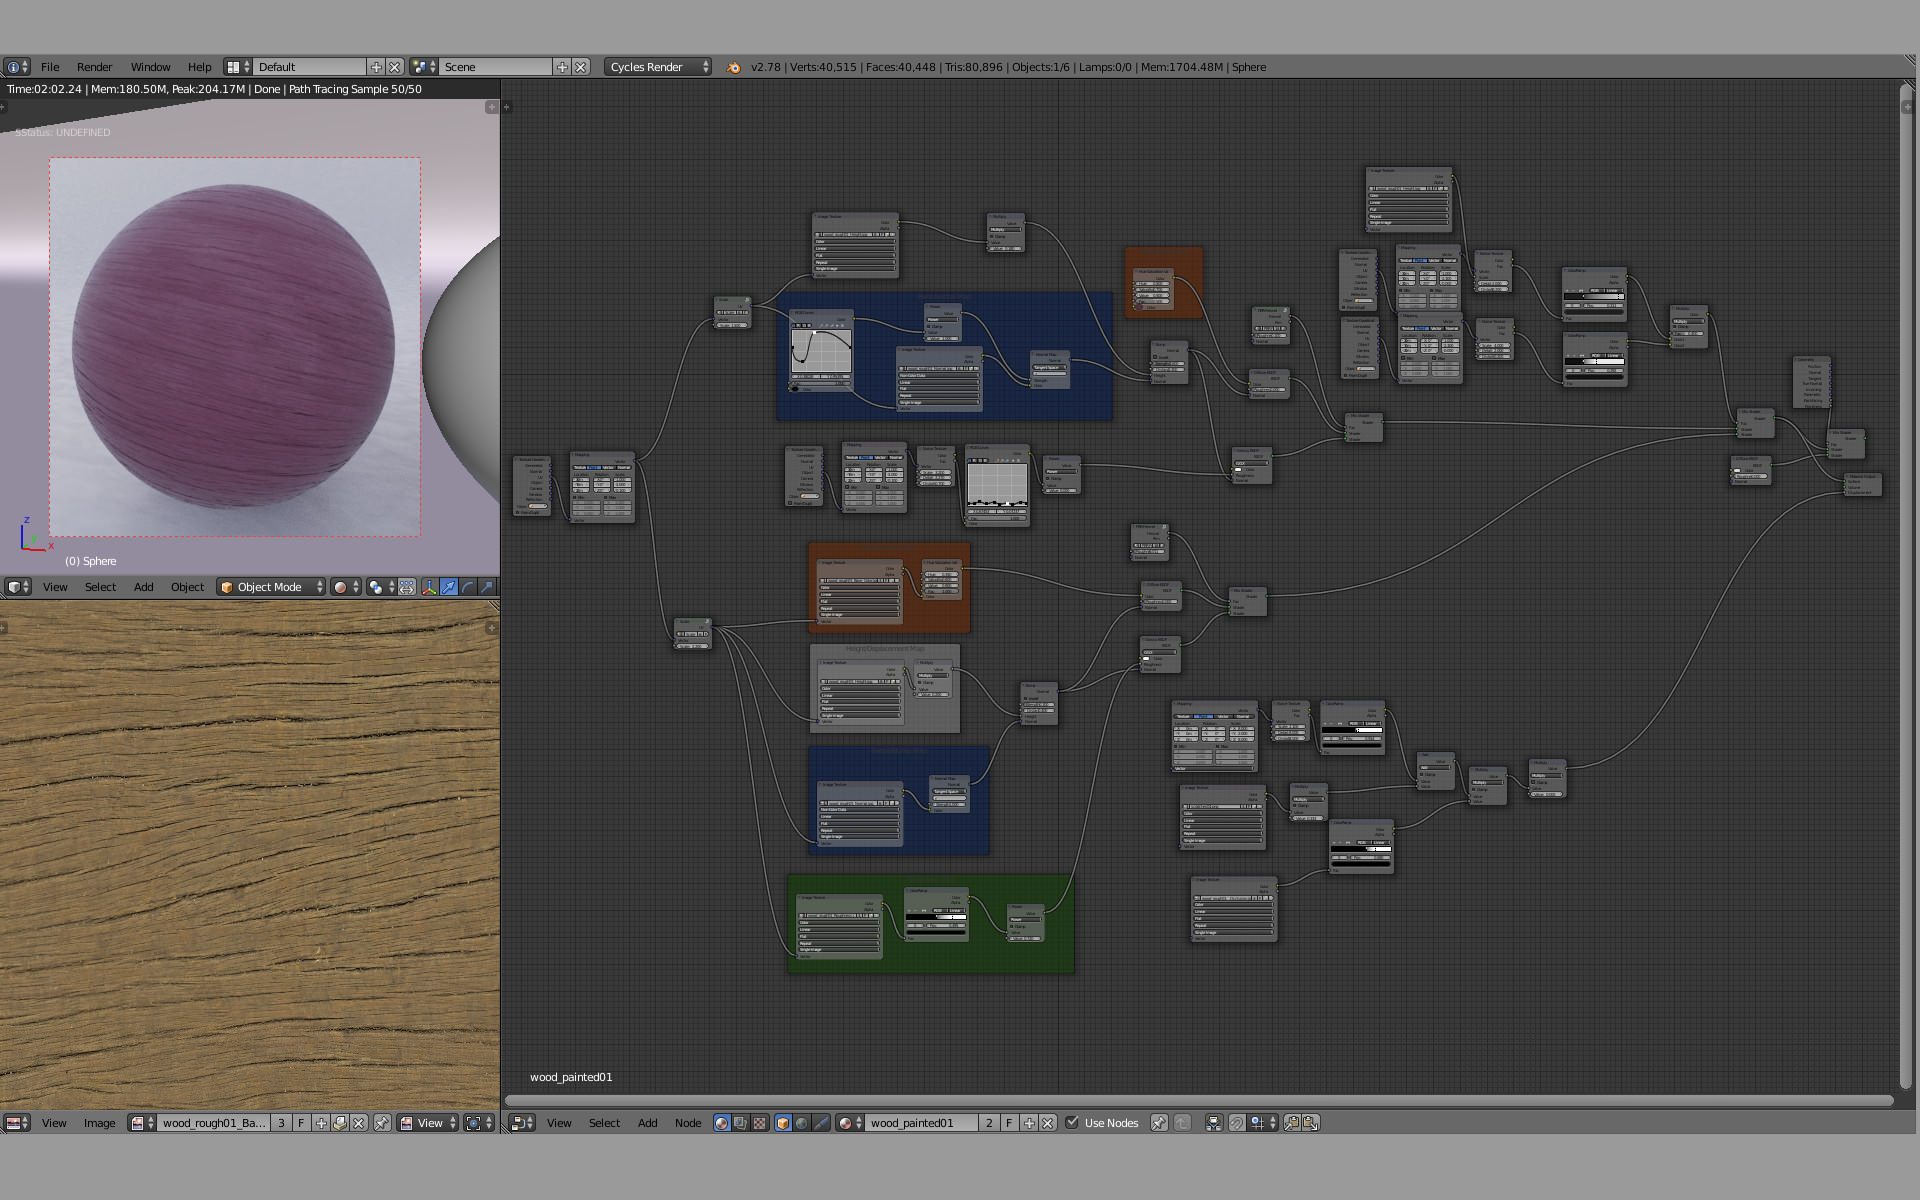
One of the biggest challenges I had in this piece, was to recreate the purple wood of the original painting. Failing in the material creation would take the entire piece down.
I started from a pre-made material addon that I have, kindly donated by The Cycles Material Vault. These set of materials are very flexible and let me play with the node tree according to what I need for each project, so I can select one material and dive in the node tree to modify what I need.
In this case, I played with the roughness value, which is in the Glossy BSDF node.
For the glossy BSDF’s, the roughness parameter controls the sharpness of the reflection, from 0.0 (perfectly sharp) to 1.0 (very soft). Compared to hardness or exponent parameters, it has the advantage of being in the range 0.0-1.0, and as a result, it gives more linear control and is more easily texturable.
The relation is approximately : roughness = 1 – 1/hardness.
So I connect a noise texture to an RGB Curve node and set a wavy relation between low values which represent a high reflectivity but in a non-uniformed way. That creates an appealing reflection for the viewer to look.
Another important part of the render is definitively the ground. It takes half of the frame, and it needs to be saleable.
I took some artistic freedom in this material because I wanted it to be more realistic and defined than the original painting.
Another great addon which I can count on is The Grass Essentials, which let me choose between differents kind of grass and grounds.
Tweaking a pre-made addon becomes fundamental to have an original render, throwing bought add-ons, models and materials to a scene won’t guarantee a well-made scene.
For the ground material, I wanted a morning wet dirty terrain with imperfections in the surface.
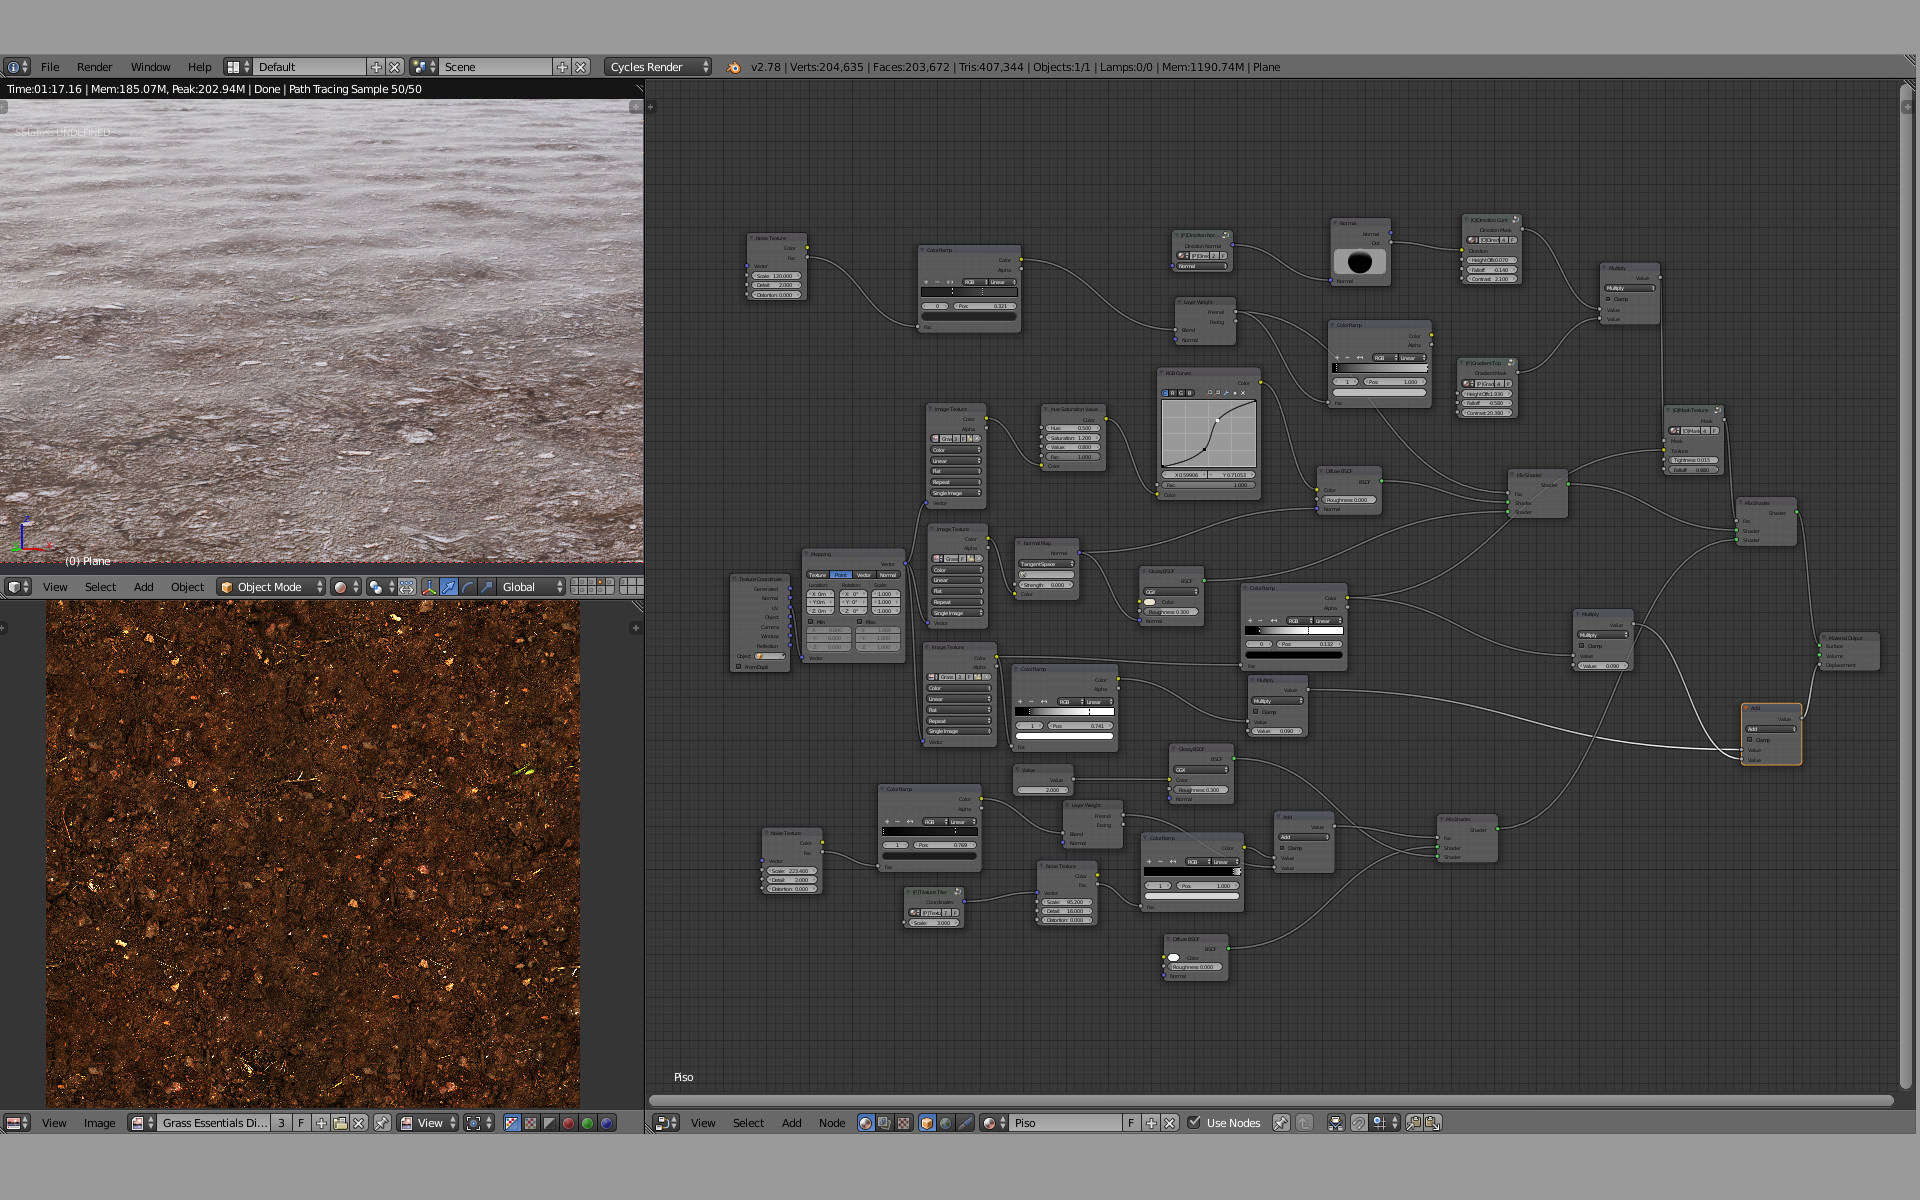
For the grass material, I thought I add some white snow-like spots in the tip of each blade. That would generate a frozen morning look.
LIGHTING
The only light source in this render is a modified version of the procedural Sky Node which can be found in the last Blender release.
With a noise texture, I managed to create a cloudy sky that suits the scene and deliver the proper mood. Sometimes, the simplest choice is the better.

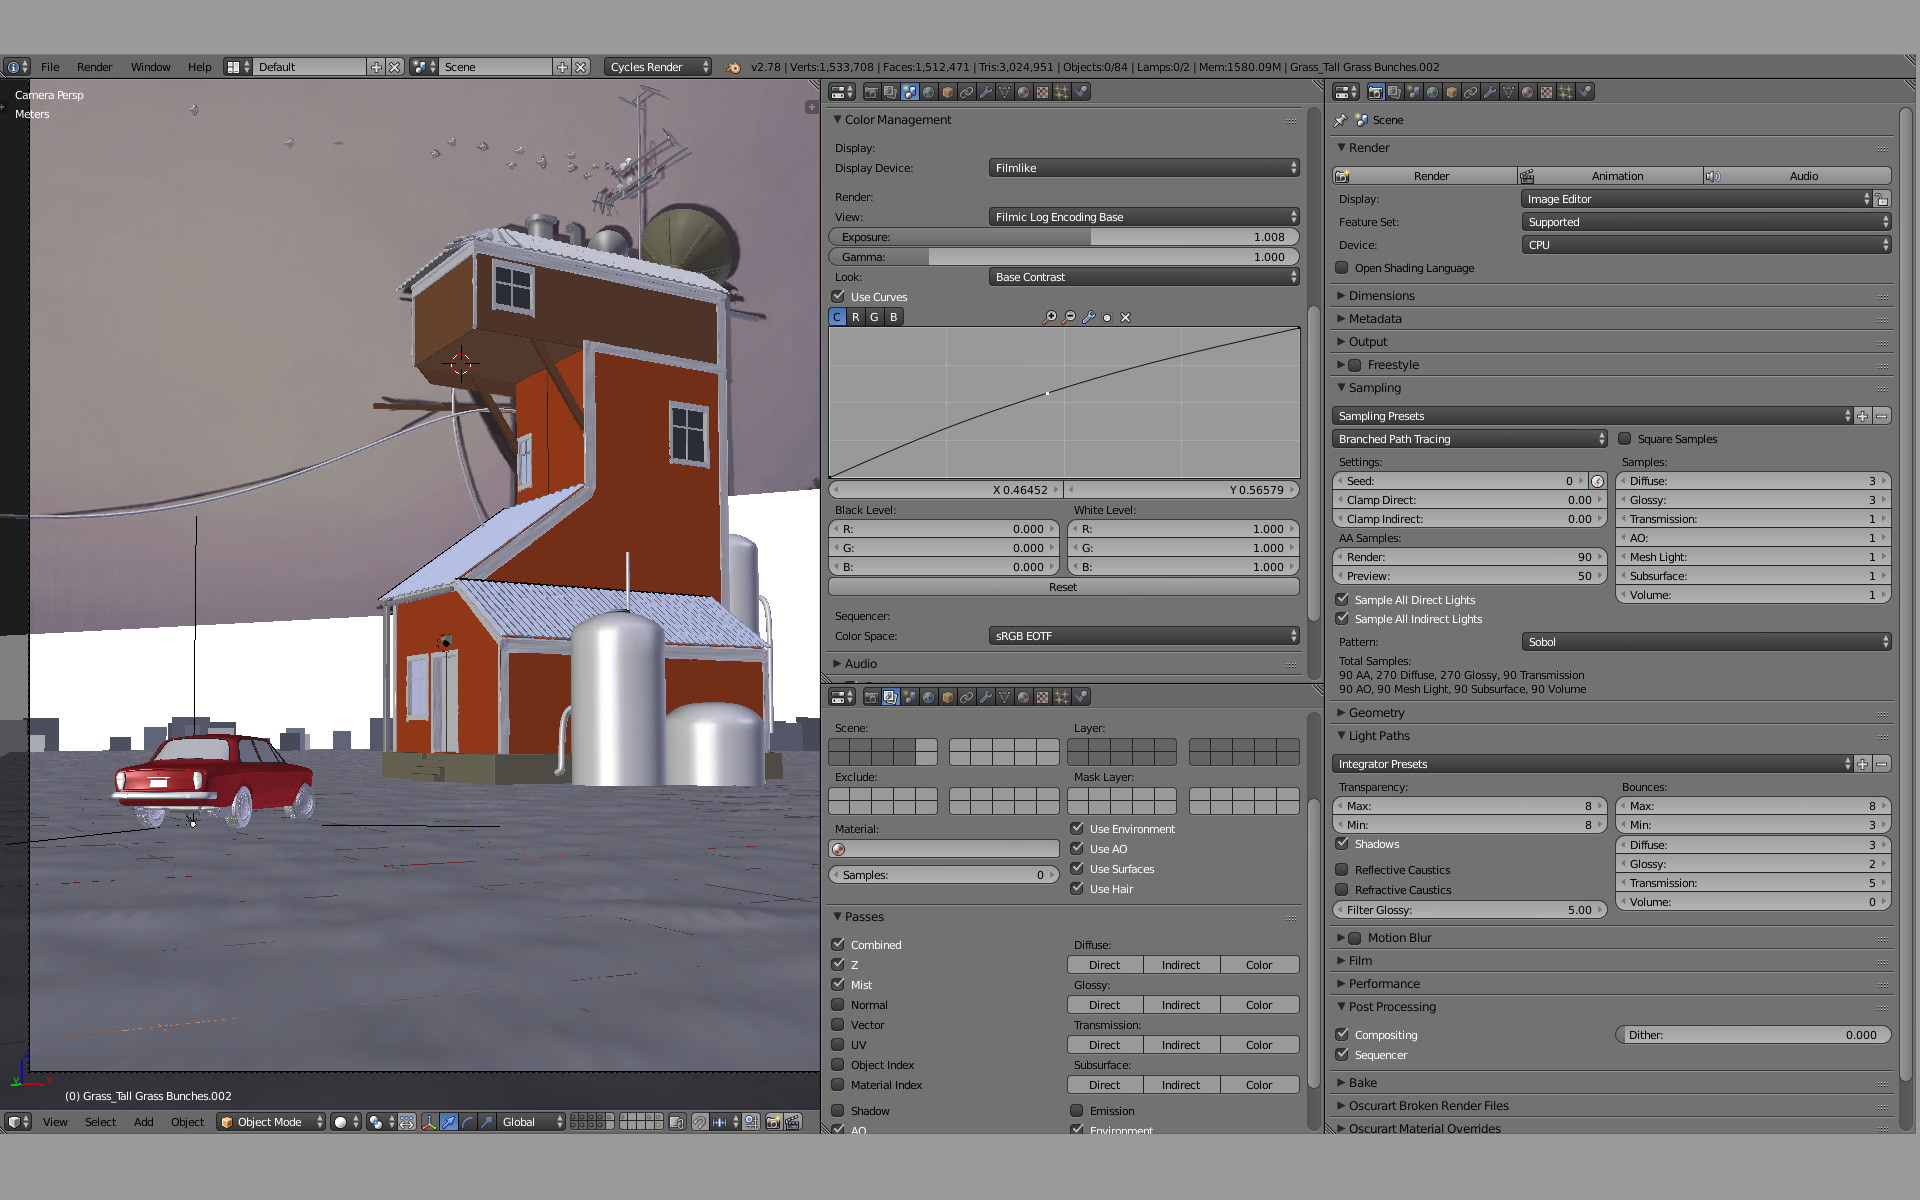
RENDERING
The render engine I use for almost all my projects is Cycles. Cycles is Blender’s ray-tracing production render engine.
I used the Branched Path Tracing to have more control on each pass sample. For this particular scene, the Diffuse and Glossy passes are the key elements.
The total Render Samples I found it should be enough was 270 Diffuse, 270 Glossy and 90 for Transmission. Because of the high amount of overlapping alpha trees I used, the scene needed 8 Bounces on the Transparency Light Pass.
I thought about the Postproduction step, and I knew I’d need to work the mist, so I activated the Mist and Environment Pass in the scene tab.
I should create a single post to explain the color management I used and why is so important for the final render. I won’t create it, though, but I will explain that Blender has recently received a great and free contribution by Troy Sobotka called Filmic_Blender. Which it is essentially an OCIO configuration that enables you to see a photographic-like dynamic range. How is it does that? By tone mapping the scene-referred image into the display range with a better tone distribution, a proper desaturation behavior and a gentle roll off towards highlights
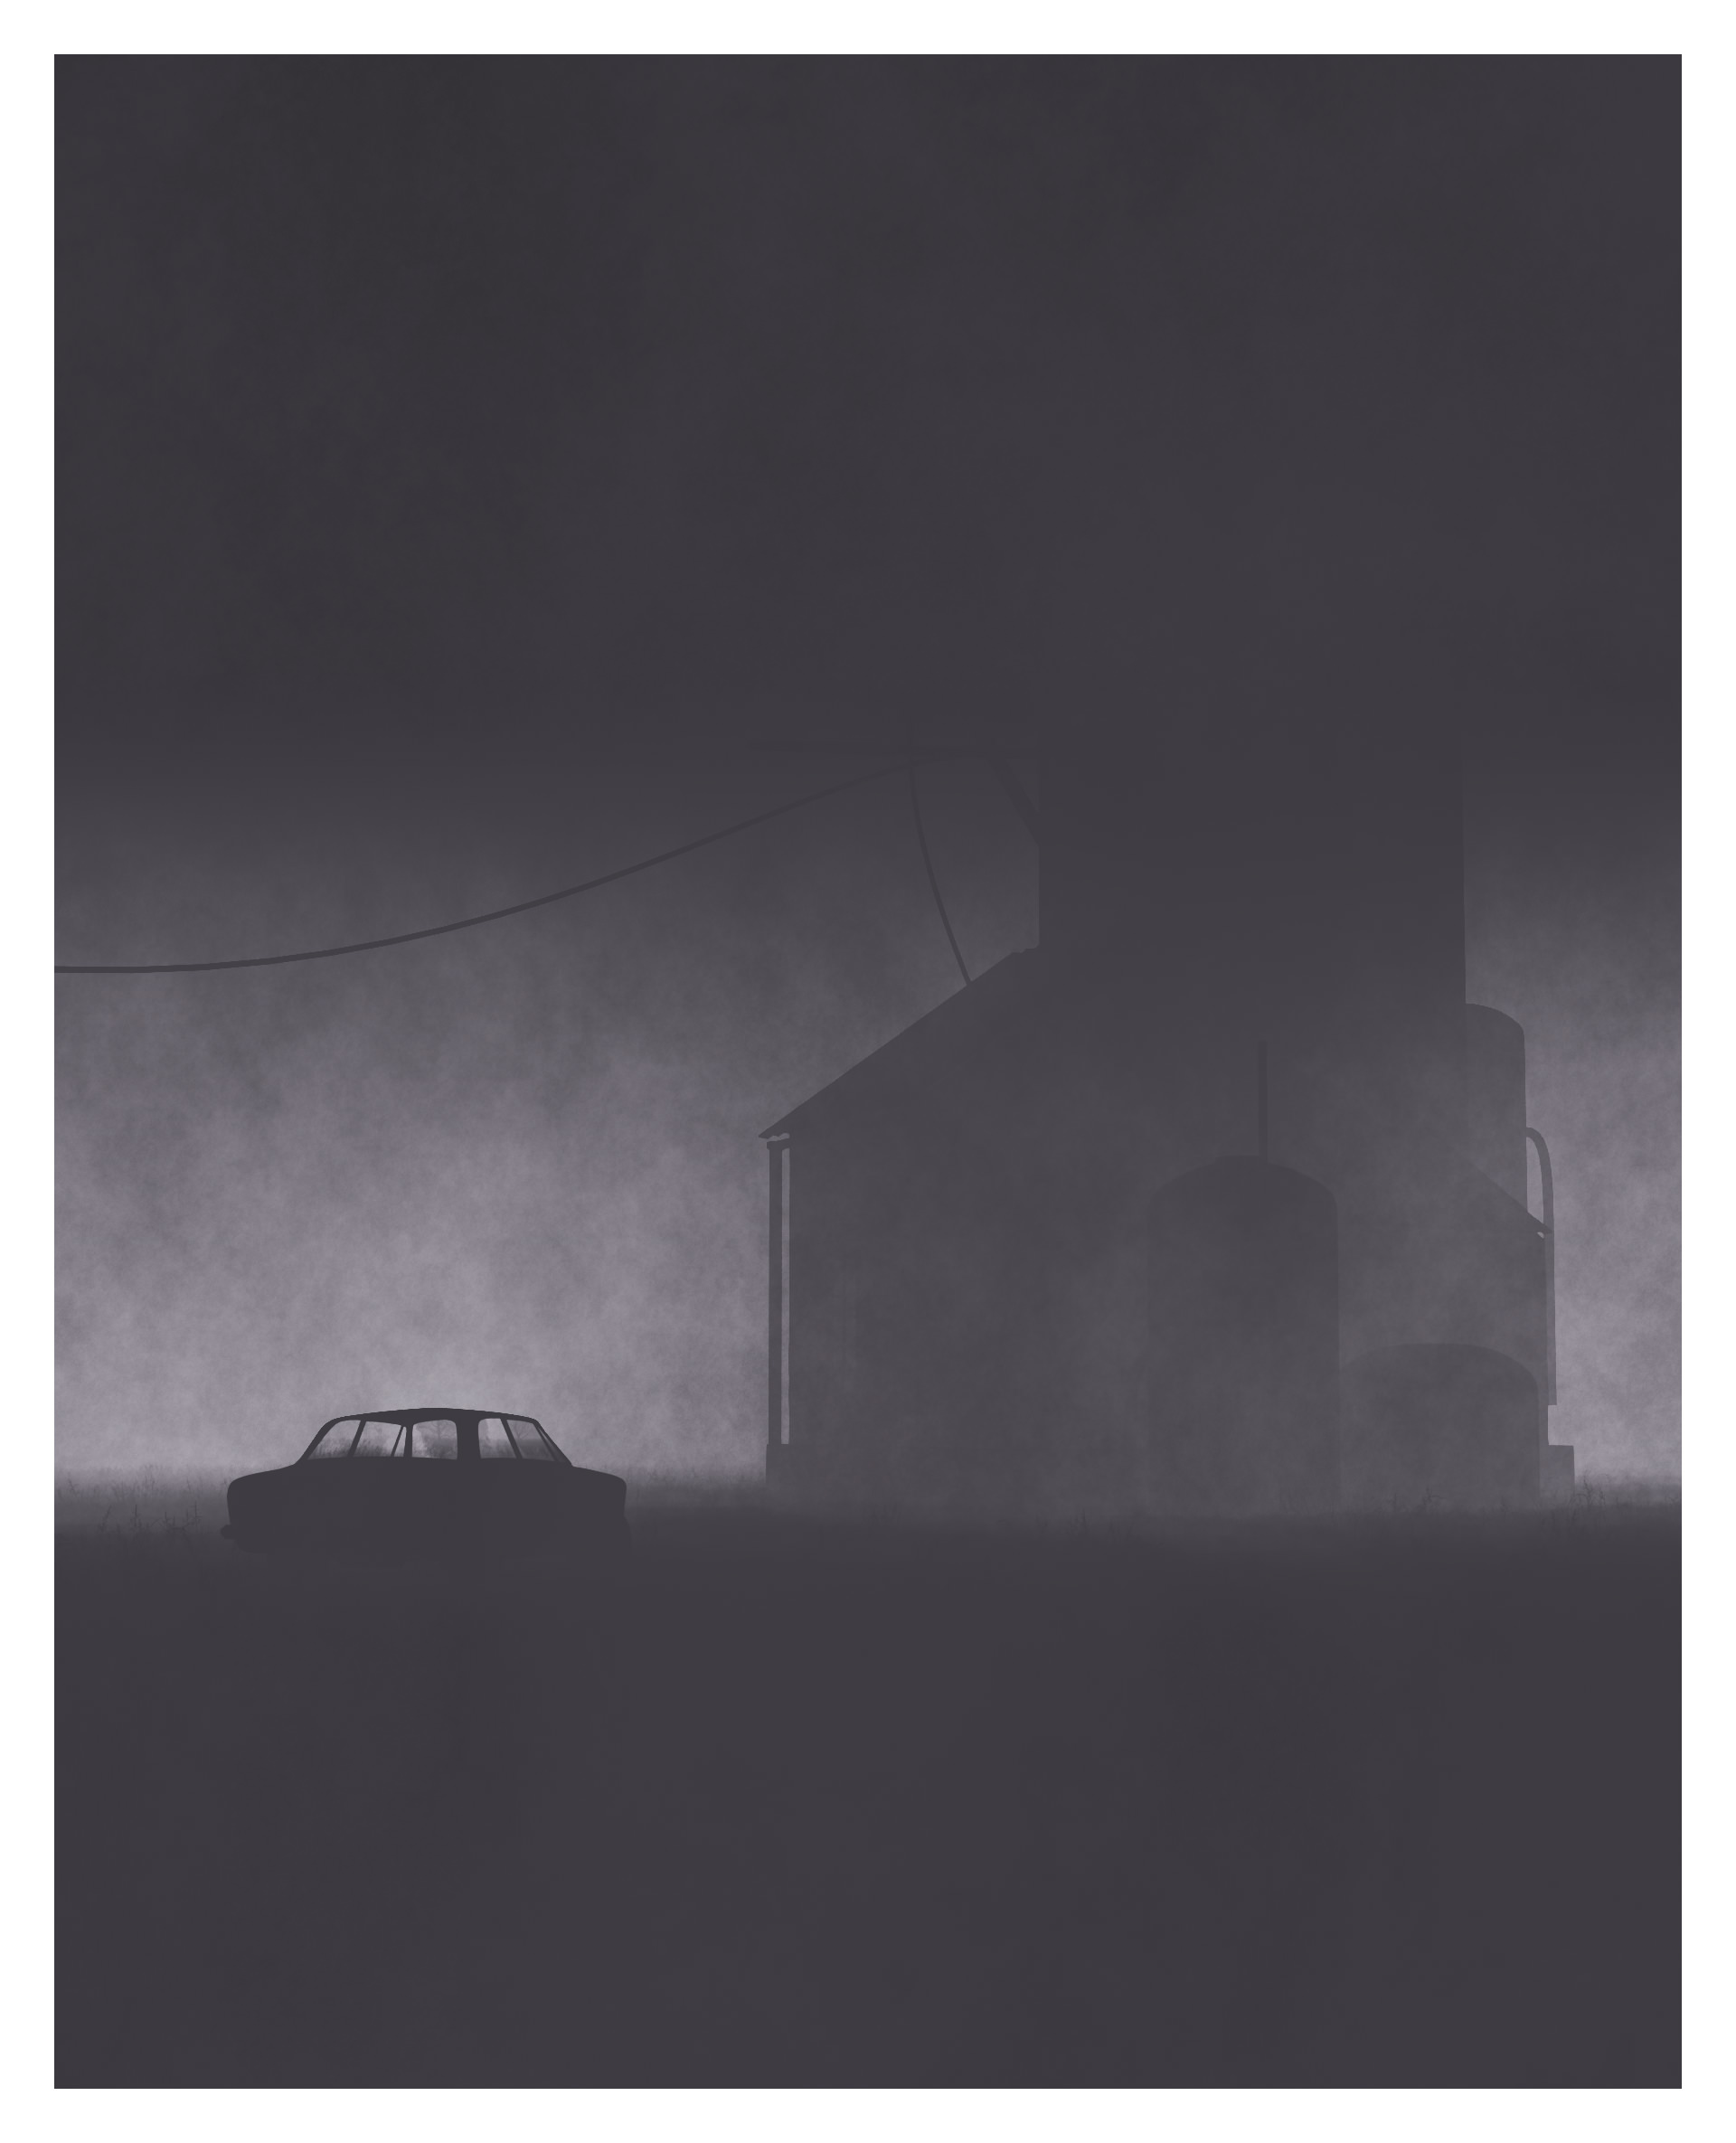
POST PRODUCTION
In this step, there is an essential element which makes a huge difference in the final image…
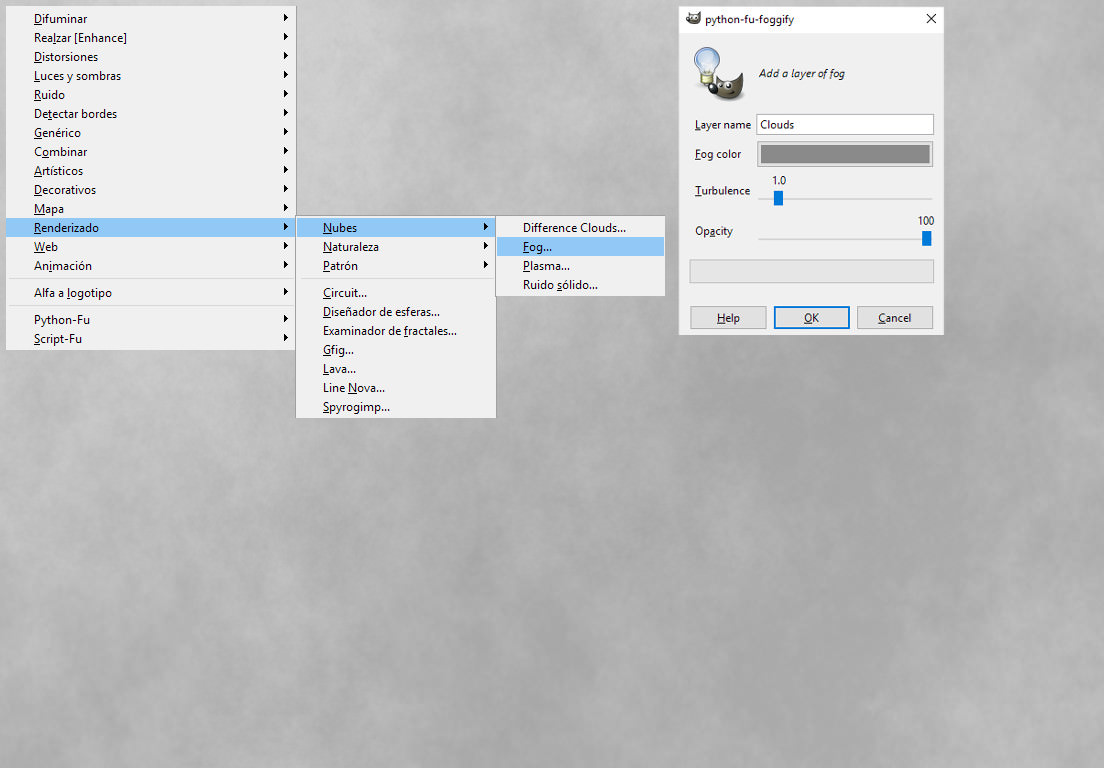
That’s the Fog.
To create the fog, I used the Mist Pass I activated previously and 2 “Generated Masks” I set up in Gimp.

Above you can see the Mist Pass in action. Below you will find the Height Controller and the Volume Controller.


The blend of these three maps will result into the Turbulent Fog I wanted for the scene.
To create these two procedural textures, I used GIMP. For the height controller, I created a simple gradient…
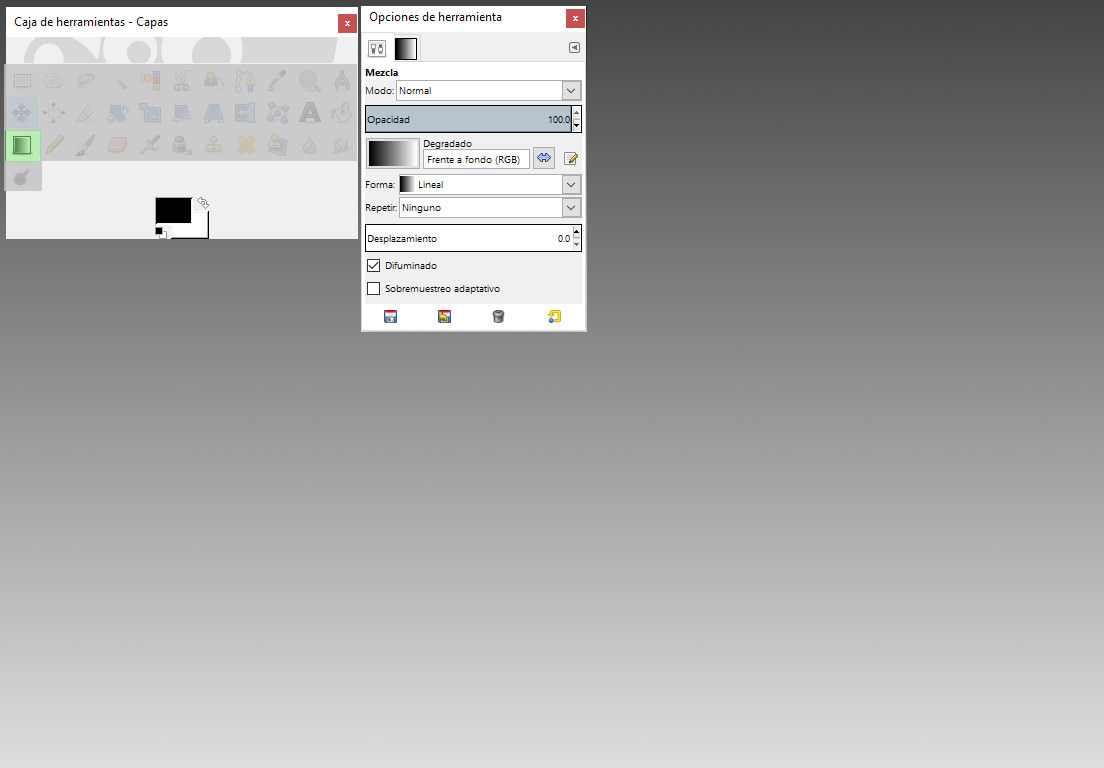
A simple fog texture was needed to create the volume controller.
As the final touches, I added a glare node, which creates an atmospheric haze over the image, a lens distortion with a low dispersion value of 0.006 and an ellipse mask mixed with a blur node to creates a smooth vignette.
Here you have the Breakdown for a better understanding of the layers overlapping.
I must say that converting 2D paintings or photos into 3D artworks, was since I started, an excellent way to understand how the real world behaves and the human eye perceives the little details.
I learned that the little details made the complex reality we try to represent in our 3D renders all the time.
Hope you enjoyed the “how to” article and let’s keep in touch!
Joni.
P.S.
For more on Blender, be sure to read Lasse Rode’s Study with it and Corona Renderer…


Trackbacks & Pingbacks
[…] más completos y de free software. Os dejamos un ejemplo de un trabajo hecho con este programa aquí donde se explica también un poco el sistema de trabajo y deja más […]
[…] Casa con Blender vía Ronen Bekerman […]
Comments are closed.