


Making of Griehallen – Memory
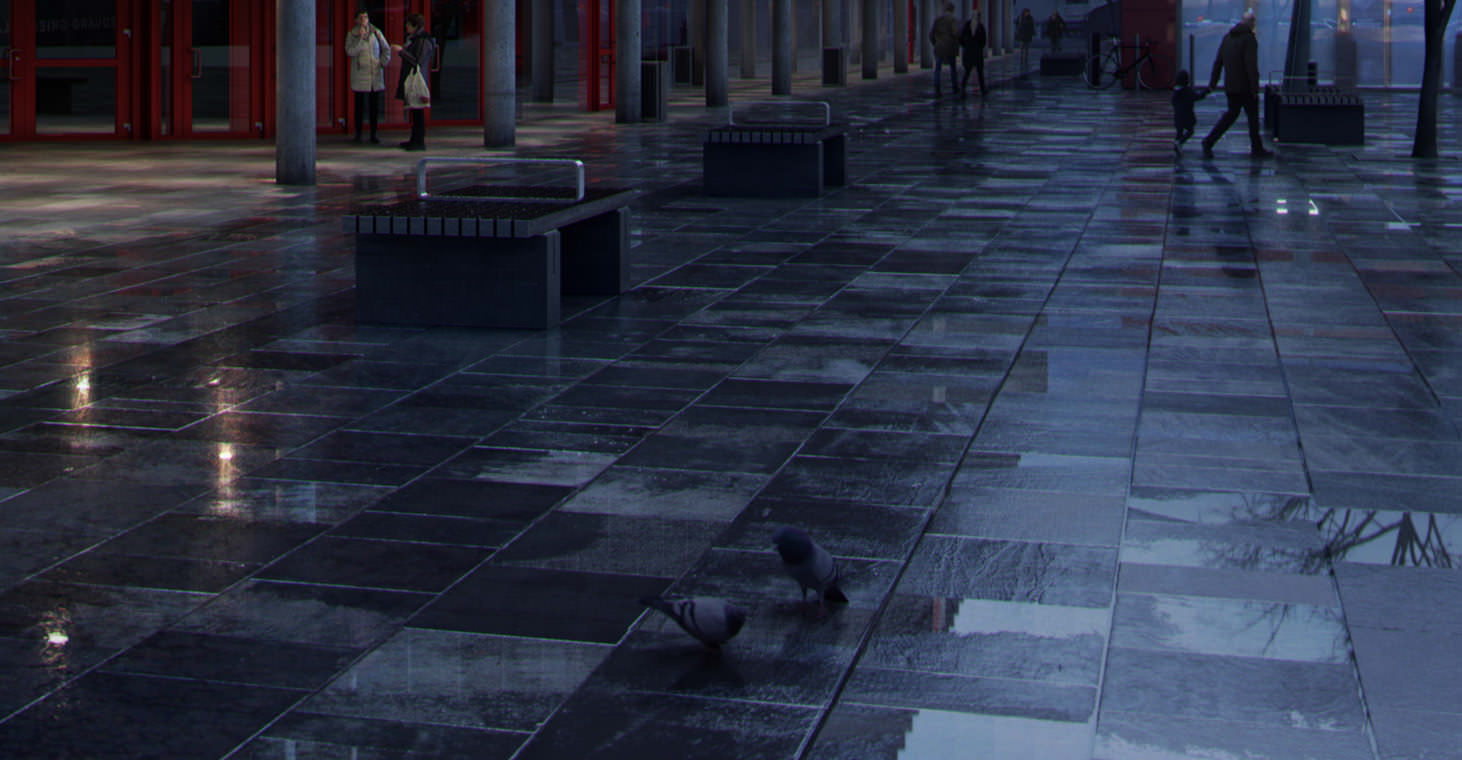
Tamas Medve‘s cold and rainy visual memory of the Grieghallen in Bergen, Norway awarded him Best Visualization of the Week NO. 14/2014 for the great composition and mood he managed to convey, as if we stand there with him next to this concert hall in the rain. Join Tamas in this article, as he describes his process of creating this scene using 3dsmax and V-Ray, with some extra shots at the end. Enjoy!


Author : Tamas Medve
Tamas Medve is 3d Artist from Hungary. He studied architecture for 5 years, getting more serious about 3dsmax during his 4th year and understanding he actually loves doing ArchVIZ. After he left university he got a great opportunity to move to London and work as a visualization artist at Foster+Partners. A year and a half later he sent his portfolio to MIR, where he is now… part of a great talented team.
Project forum thread – Grieghallen – “Memory”
Introduction
Hi Everyone!
Thank you for giving me this opportunity to share my methods used in my recent work entitled Grieghallen – Memory”. It’s a great honor, and so I would like to give a shout out to Ronen for his kind invitation.
First, let’s start with the inspiration behind the project.
Why did I create this image?
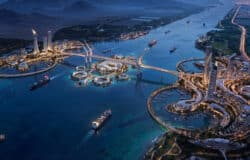
The answer to this is simple. I wanted to make an image in 3d that would always remind me of that great time I spent in Bergen; to remind me of that feeling of the impact of raindrops on my coat and the dynamic weather that makes Bergen so special.
In this tutorial I won’t say too much about the technical details, as I’m not better than you guys (as this article will reveal). You will see how easy it really is to achieve an image like mine with only basic modelling and texturing skills. I have tried to show my workflow in the best way I can, focusing on the most important steps spiced up with some tricks.
I hope that you find some useful ideas here and have fun reading it! Let’s begin…
References
When somebody asks me – “how I did you do this or that…”, my first answer is always “references”!
Always use references before you start a project. these could be photos or a paintings for instance. The reference photo, or any kind of image, is going to help your work from the beginning until applying the final tweaks later in Photoshop.
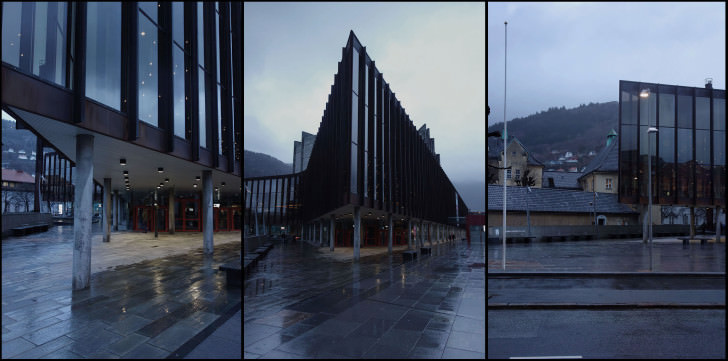
In my case it was easy to get some references, as I pass by Grieghallen all the time, and waiting for rain isn’t a problem we experience in Bergen. So I took a couple of photos when it was raining and a couple when everything was dry and the lighting was overcast, just to see the differences between the two kinds of weather. These photos also helped a lot in the modelling and lighting part of the project.
Lighting and Camera Setup
Some of you might get to lighting and camera a bit later in the process, but starting with this part is more logical for me. Usually I start my personal projects with modelling some basic geometry (like boxes), which helps me to explore the scene and to find exciting angles (or just find that angle which shows the building in the best and most attractive way)

First, I built up my amazing scene of 2 boxes. Next, I set up the lighting.
In this project I only used a V-Ray Dome Light and a few V-Ray IES lights (highlighting the entrance and lighting the ground floor) following the references. The lighting set-up used is very simple.
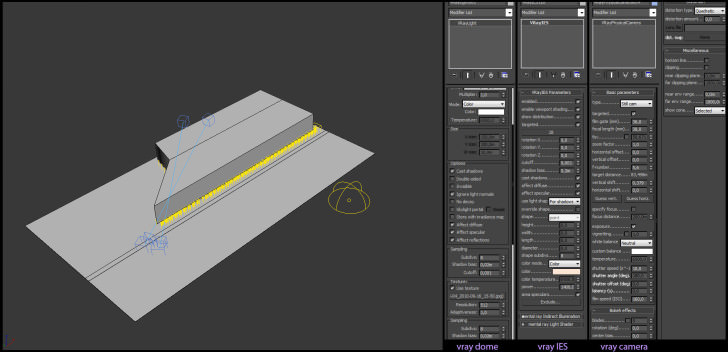
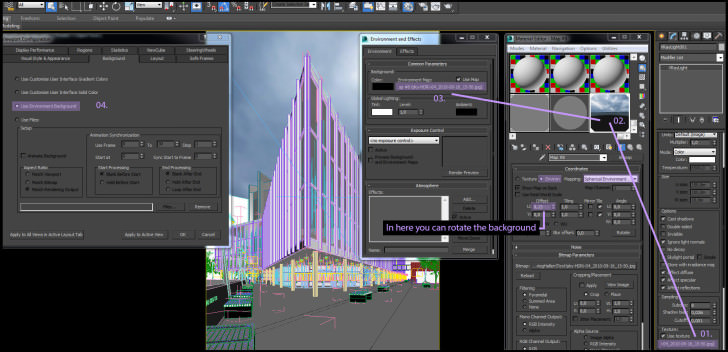
I always like to see the sky in the perspective view and this can sometimes be really helpful especially if your sky is not overcast. For this method I use a JPG from an HDRI image to use as a preview in the viewport.
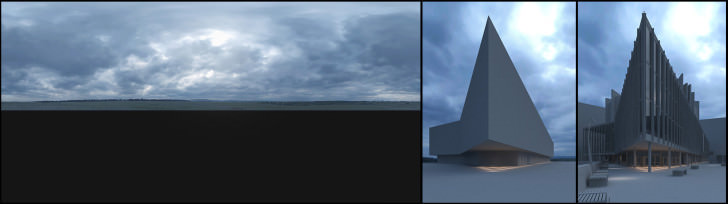
So I grab this JPG image and simply add in the dome texture slot. After this I drag (copy instance) that texture from here into a new material slot and I drag it into the environment window too (copy instance) Finally I press alt+b (viewport configuration) and just change the background solid color to the “use environment background” option. That’s it.
I can see my sky in the viewport and I can rotate it easily in real-time. However, for the final render, make sure you use a higher resolution texture (I just re-scale the original texture in Photoshop before rendering). See the details below.
Modeling
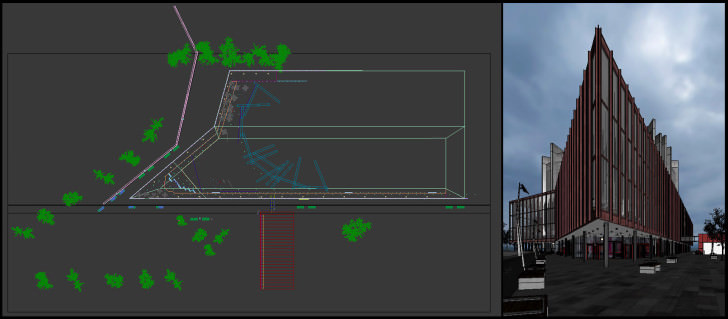
Modelling is definitely not my strength, so I wouldn’t like to go too deep into this subject like speaking about techniques, etc. Actually, starting the model was the hardest part because I didn’t have any plans or section drawings, so I had to model the building by eyesight based on the photos and the 2 boxes that I had made earlier (see the lighting and camera set-up part). I’m 100% sure that my model is not correct but if your eyes can’t discern a difference between real and fake it really doesn’t matter.
For every model I used only the basic poly modelling tools and I just dressed up the scene with these elements.
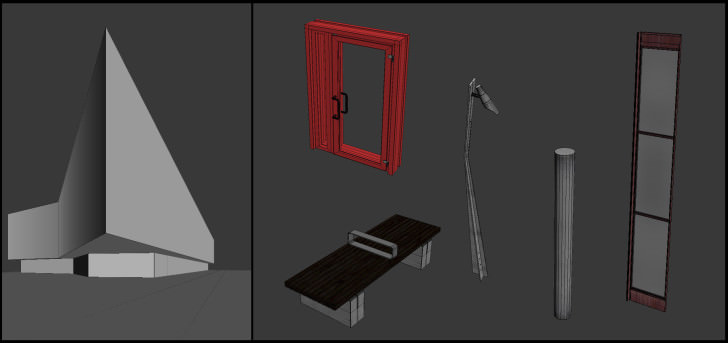
One small piece of advice : if you are using double glazing in the windows you will get nicer (doubled) reflections.
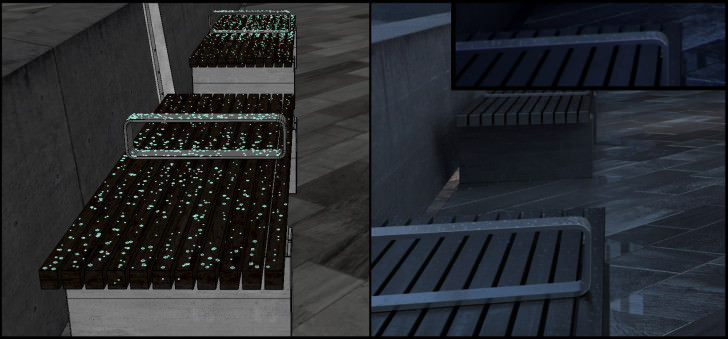
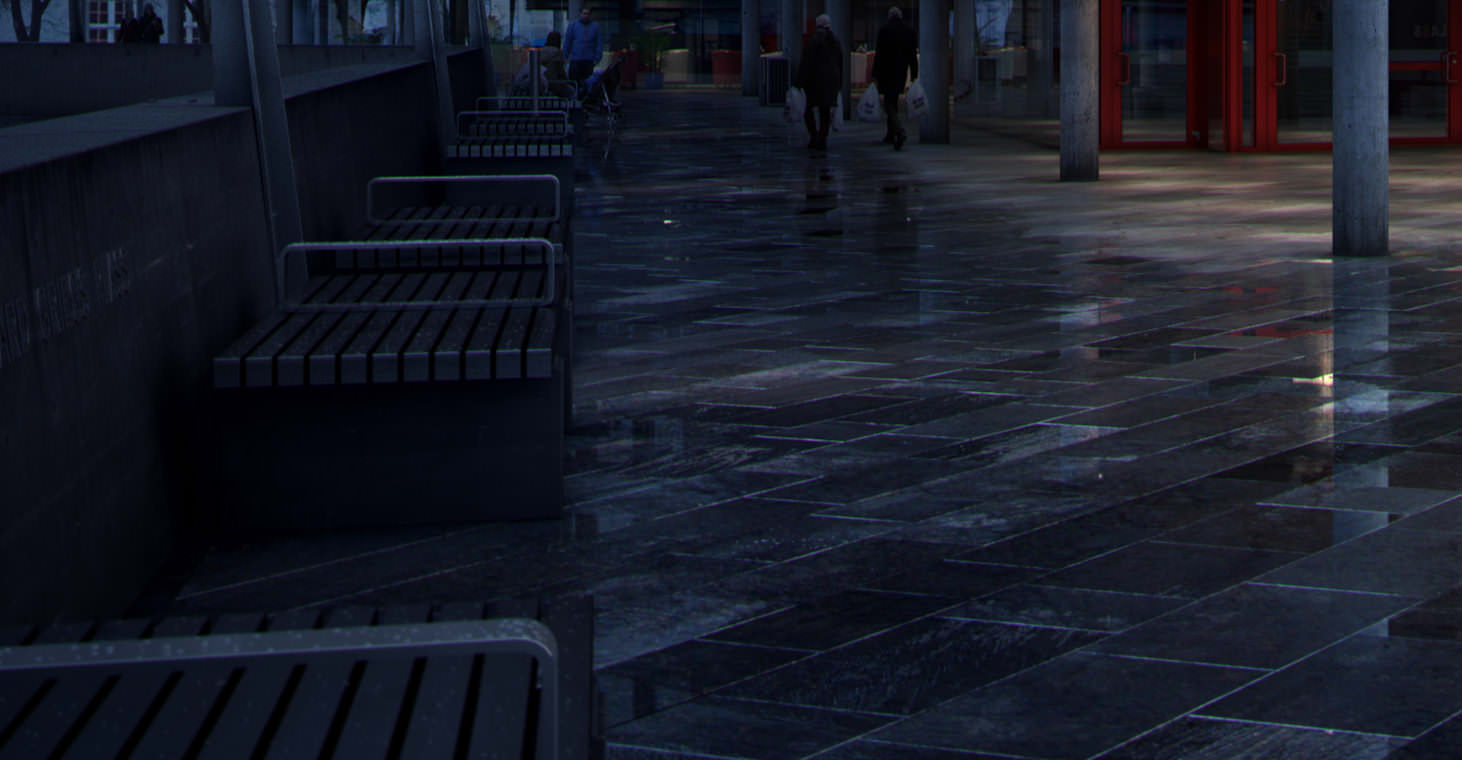
To make the image and the mood believable I have put some raindrops on the foreground benches. Simple squashed spheres painted with the object painter tool in 3ds max.
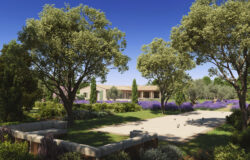
In addition, there is some interior furniture and a few trees (iTrees) around the building.
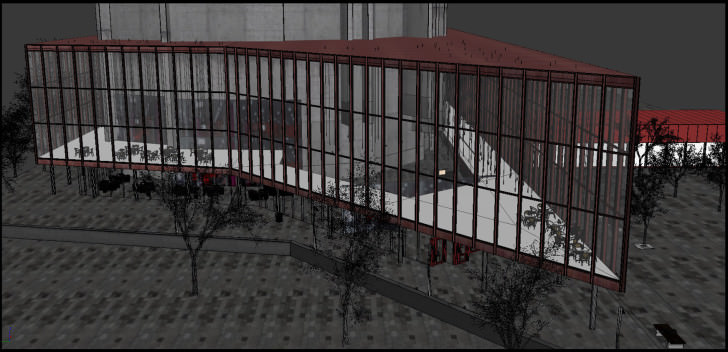
Below you can almost see the result of the scene… just one important thing is missing, so let’s talk about that more.
Texturing
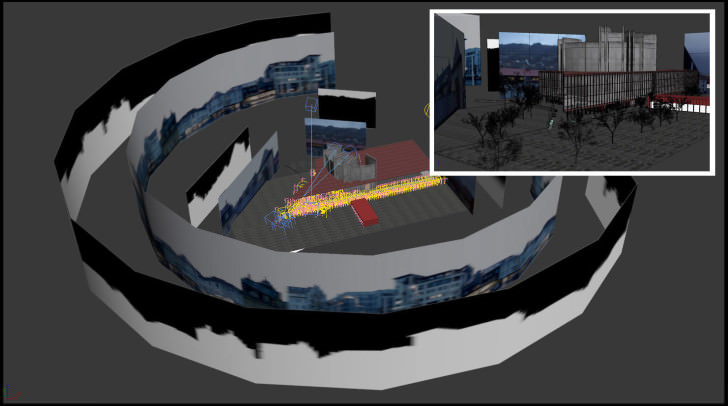
In real life, when you are working on a project, you don’t have as much time as you need to include a lot of details or to make stunning shaders and textures. That is why when I do a personal project I always try to finish it as I would in a commercial environment with a tight deadline (even if I have a lot of time). It’s a bad habit I know. To save a lot of time I didn’t model all the surrounding buildings, so I had to solve this issue another way.
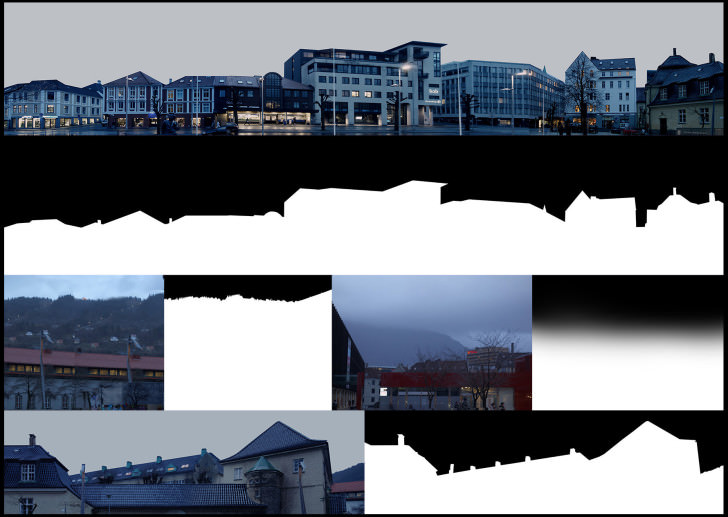
Of course I had to do some small retouching and matte painting corrections on the photos in Photoshop, but it worked out pretty well I think. I used the textures + opacity maps in a V-Ray Light Material and I achieved nice, real reflections and colors in the render.
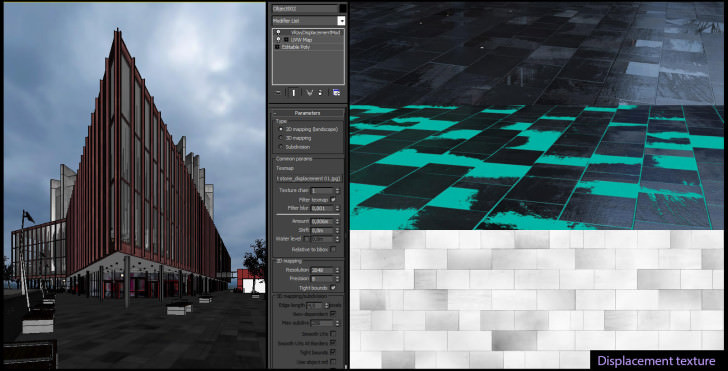
The Ground Material
The ground stone texture is from the Arroway Textures Concrete collection with some small changes in Photoshop (contrast, color). I also made a specific displacement texture to get a better result. Basically, I used 2 planes for the ground. One is for the stone with V-Ray Displacement and another for the puddles of water.
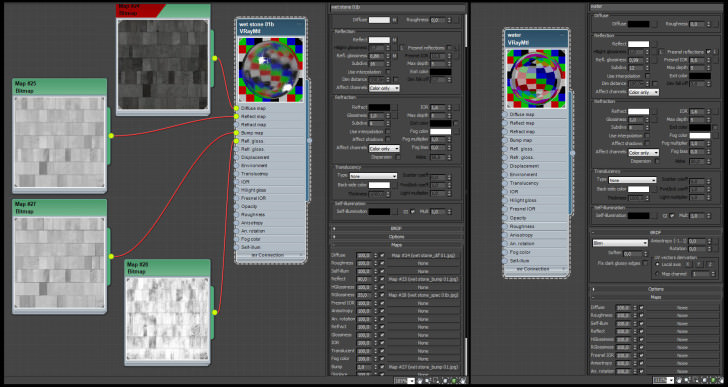
The Rusty Window Frame Material
I have downloaded the textures for it from CGTextures and I mixed about 4 different textures with each other to get the final diffuse map.

The Concrete Wall Material.

Render Setup
In creating this image I used the V-Ray render engine (which is the most common engine). It is fast and easy to handle! These are my render settings that I usually use. Pretty basic, I think.
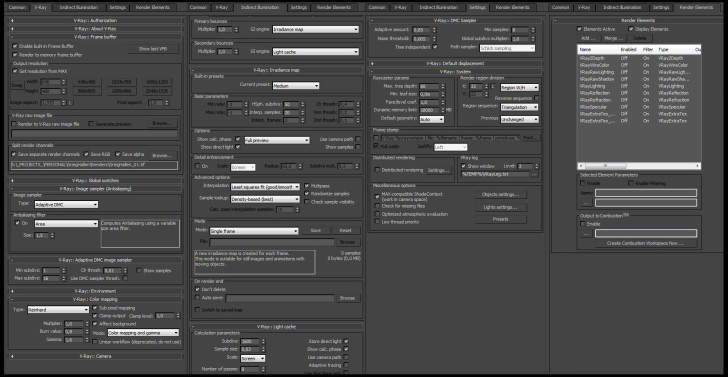
The 4000px high image render time took around 3 hours on a BOX workstation.
Below is the final raw render.
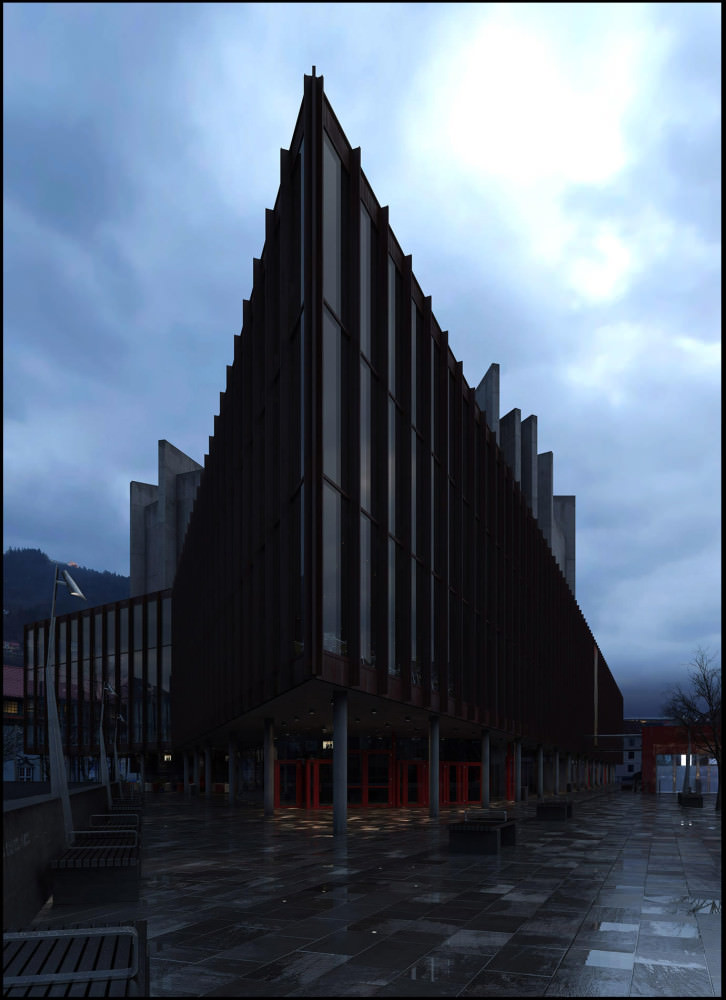
I made another region render with a dry stone material that I blended with the first render in Photoshop. This method gave me much more freedom, because I could easily change the borders between the wet and dry parts.

Post Production
Here we go!
This is one of the most interesting parts of the process, where you make the final tweaks and personal touches to your image. I know some people prefer to do everything in 3d and using Photoshop is just secondary, but I believe that working in Photoshop is as important.
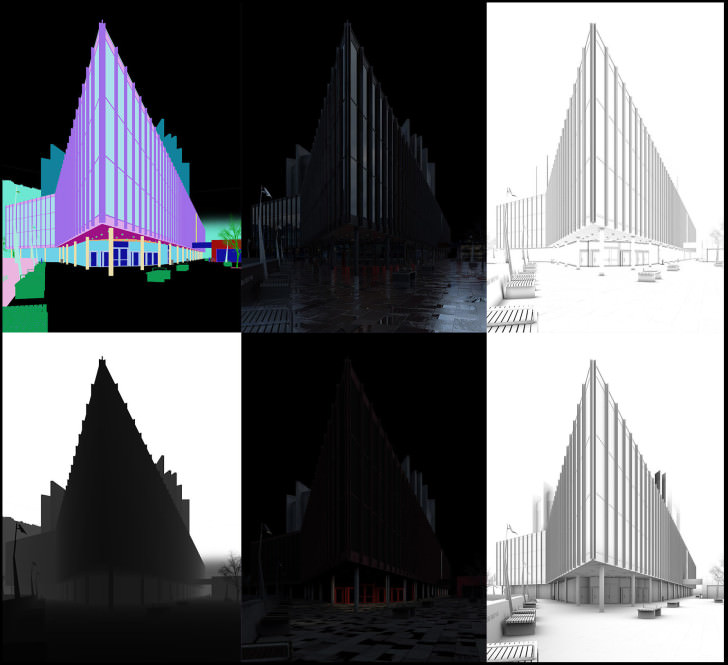
It gives you so much freedom… it’s really hard to tell any general tricks and methods about post-production, because every image needs different tweaks and adjustments. Mainly, I use 3 different render elements for it. The lighting pass is to push up the lighter areas on the image, the reflection pass is to make the reflections stronger if necessary, and finally the z-depth pass which helps you to add some fog or mist (with the z-depth pass you have to use it as a layer mask in Photoshop). One more thing. If you want to add some dirt to your image you can overlay some textures or just use the ambient occlusion pass.
The PSD file that I worked in is a big mess with tonnes of layers but I did a short post-production breakdown video showing the main steps. I pasted the people back in from the original photos so it was quite an easy job blending them with the image.
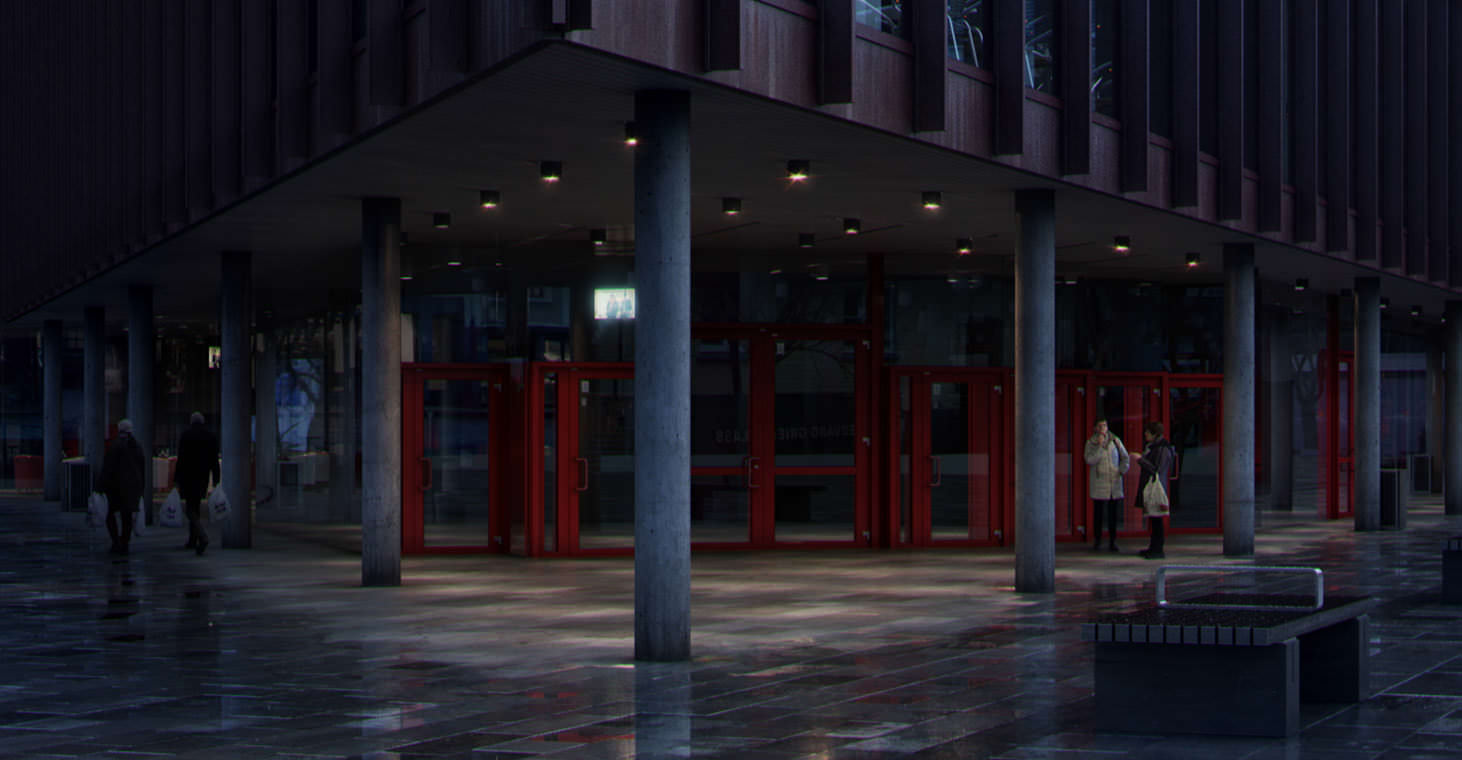
I have another small piece of advice for you : There are many visualization styles existing in our industry but if you are doing an image in a realistic way don’t put people who have different lighting on them. Just find a suitable one or leave it otherwise it will just ruin the image.
Thank you for reading this “making-of” article and I hope you found some interesting and useful advice in it! Feel free to ask question in the comments section below (or next to each image or paragraph).
Best wishes,
Tamas Medve
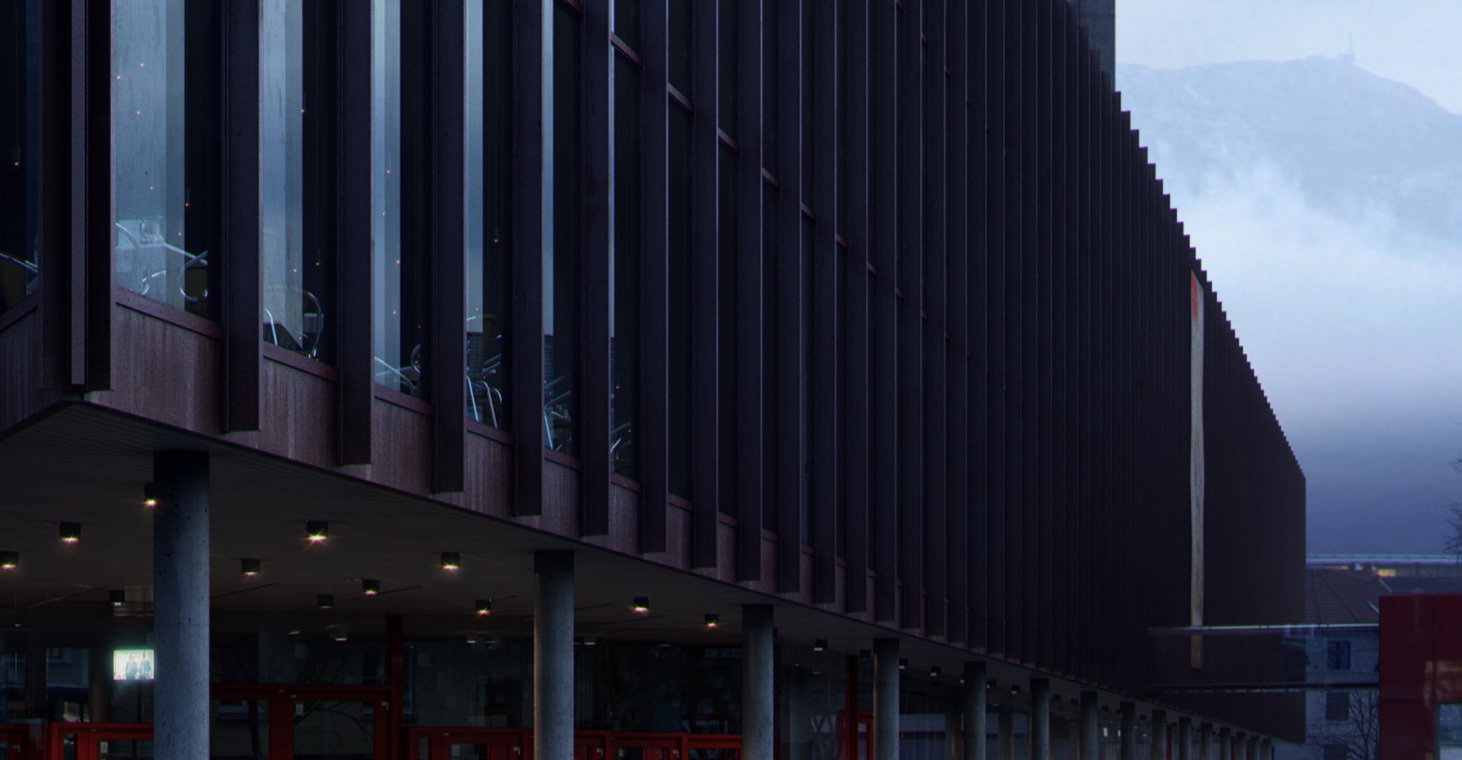
the close-ups really show the amazing detail…it looks amazing from as a shot, but, I’ve seen the details only now.
And the guy is just hyper-active, what is this…one personal project per month with full-time Mir employment ? He needs to do less work so we don’t all look like we suck…
I’d disagree with you Juraj Talcik,, though only partly. I think the overall shot is nice, but nothing groundbreaking, especially considergin the postwork…
But then when you get to see the small details, it really is amazing. I love seeing all of the little nuances that give your eyes something to linger upon.
wow
Great ” Making Of ” Tamas.
Spectacular work and very informative Makign Of ! Thank you
Is this like the first unofficial MIR making of ? 😀
Wonderful work and useful “Making Of” !!!
If it’s possible I just want to ask you a few questions:
For one of my scene, I’ve used the same method as you for the background ( bended plane + bitmap ) so i’d like to know a little more 🙂
What kind of material have you assigned to the planes?
Why you put another plane with the opacity map right behind the first one? It’s just to let us see that the plane has an opacity map too?
Thanks in advance 🙂
Gengismat
Thank you! 🙂 Now I see its a bit confusing that image with the background elements. That one is just showing the method (my mistake sorry)! I just used only one plane with a light material and thats all soo the opacity map you have to use in the vray light material. 🙂
Wonderful work !!! But i dont understand too much how you made the pudles of water !!!
Can you tell more ?? Thanks !!
guimiottosouza
Thx! Well if you check my displacement texture you can see some parts are white some are grey. It means that the white parts are going to raise up soo if you put another simple plane with water material you will get nice pedals but you have to find the right position of it! Basically you will get pedals on the grey part (see on the displacement map). If its not clear just let me know and I will try to explain in another way because my English knowledge is limited ::)
That’s great. Love the lighting scenario. Great to look at, good work.
Very beautiful image and great details 🙂
Really nice Making Of. But I have one question. Where I can find the ground texture?I have Arroway Textures Concrete vol.1, but there is no same textures, I know that you corrected color, but I still can not find texture to make the same result in Arroway Textures Concrete((((