


Making of Garden Office
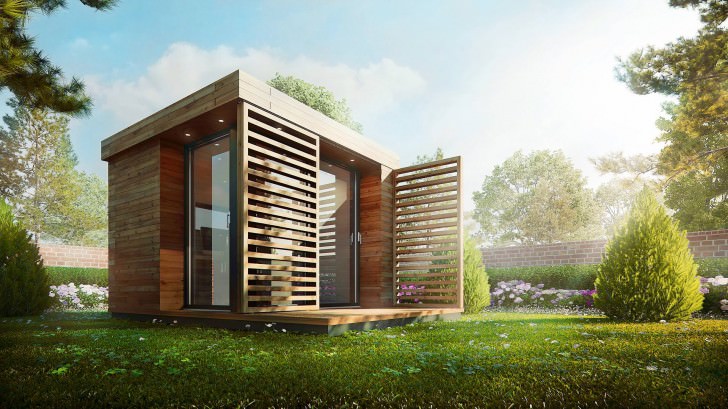
I love PRE-FAB Architecture a lot, which is probably why two artists have been awarded Best Visualization of the Week No. 16. Sérgio Merêces‘s Garden Office image was one of them, and today I’m happy to share his making-of this scene. Follow him as he describe his process from the initial modeling all the way to final post-production. Enjoy!
![]()
Author: Sérgio Merêces
Sérgio Merêces is a 31 years old portuguese 3d artist living in Evora / Lisbon Portugal. He’s working in 3d visualizations for the past ten years, with experience in national and international projects for both architectural and non architectural practices.
Hi all,
I would like to thank Ronen for the opportunity to show my work on the ‘Garden Office’ project and for inviting me to do this making-of. It is always a great pleasure for me to share with all the community some of my tips and workflow that I use in my daily work.
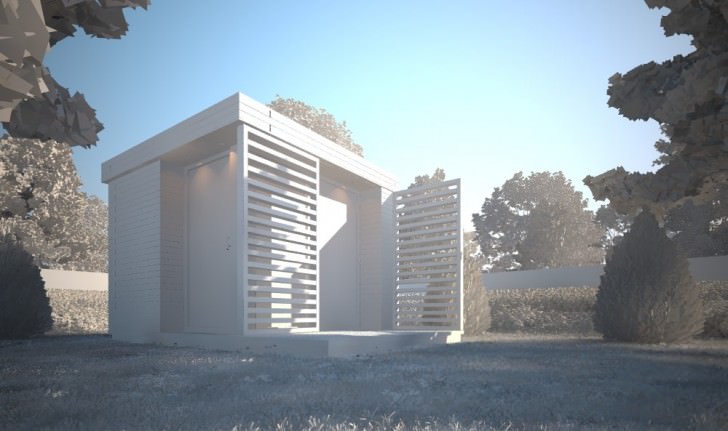
This project was done for a client that makes PRE-FAB small designs of garden modules, which can be used as office, living room, etc.
I made two version of the final image for this project. The first one for the client as per the clients feedback made during the process :
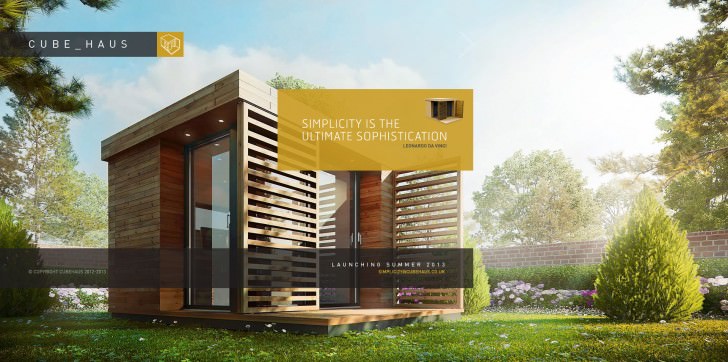
This is how it looks on their website – CUBE_HAUS
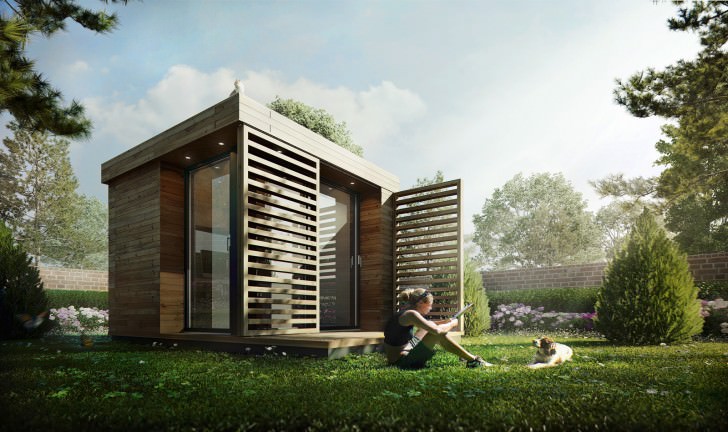
And a personal version I made to be used in my portfolio… Finalizing it after my own taste.
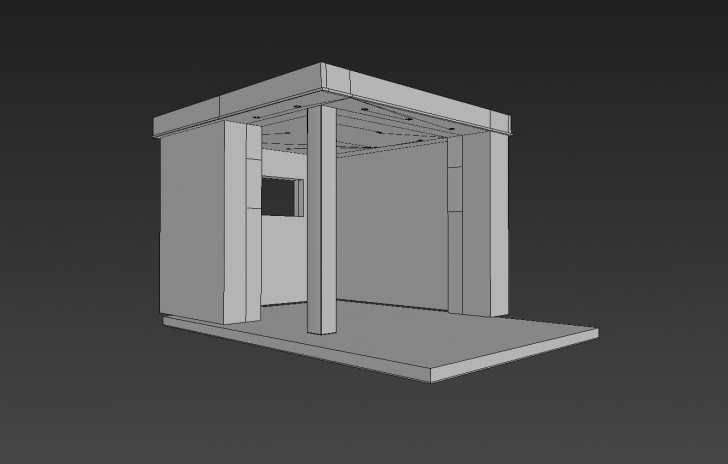
The Modeling
Provided with plans and sketches by the client, I began the modeling the CUBE module.
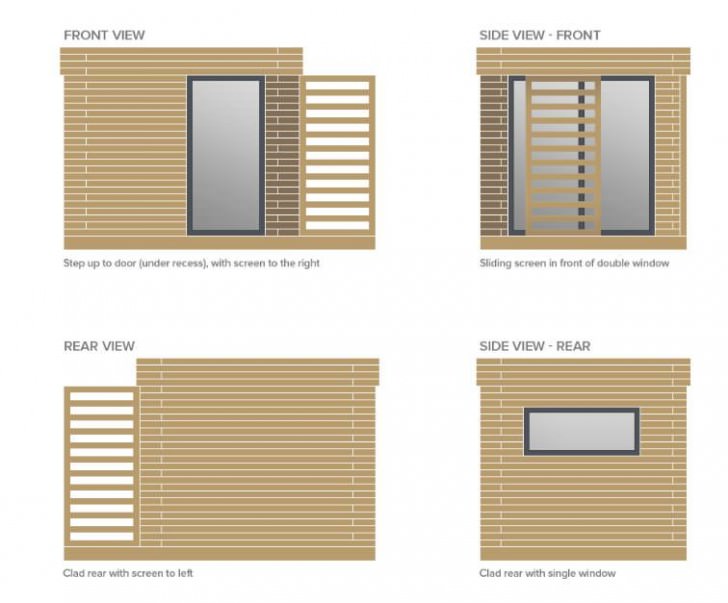
I modeling the base structure using box modeling.
The wood cladding boards are created by first making a single loop of boards and duplicate them up.
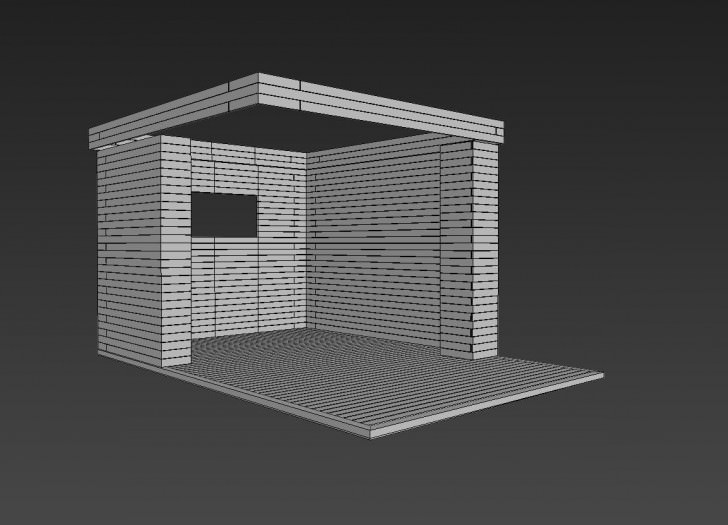
After that I created the window holes and added details.
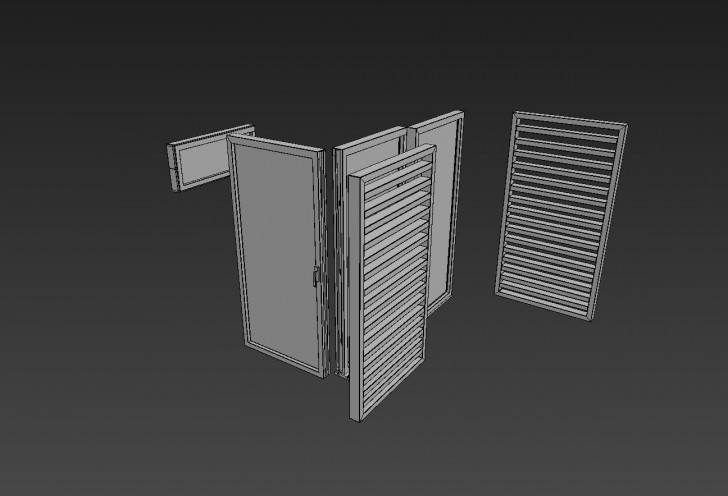
For the windows I like to get as much detail as I can, and in this project even more so as they are a big part of the CUBE module.
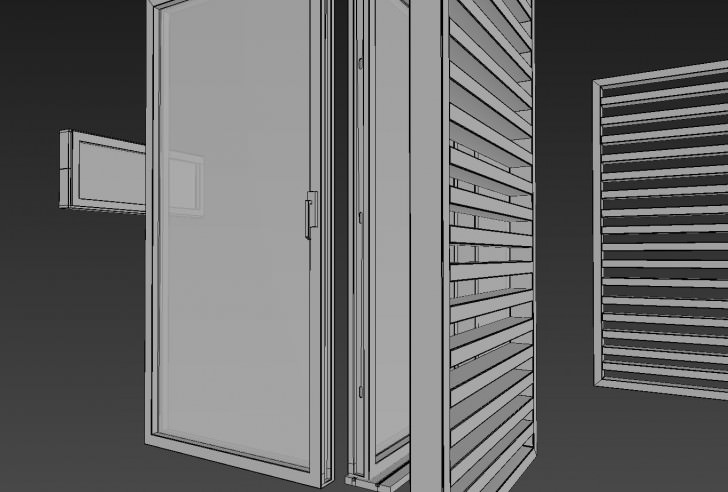
I use a lot of chamfer on the edges, create all the fitting small system details, etc.
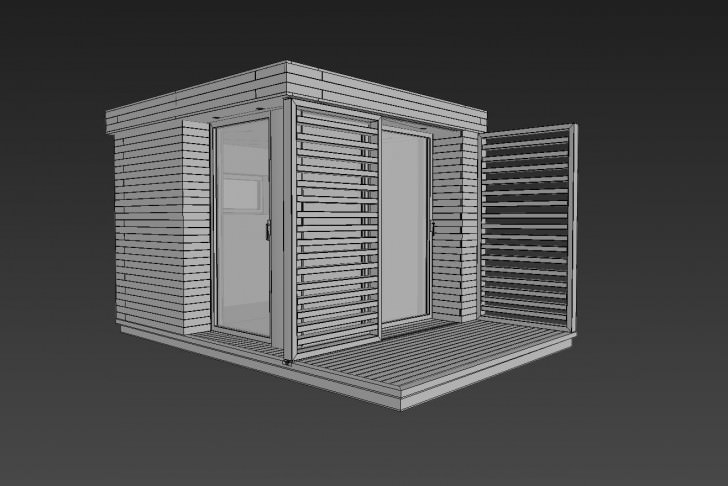
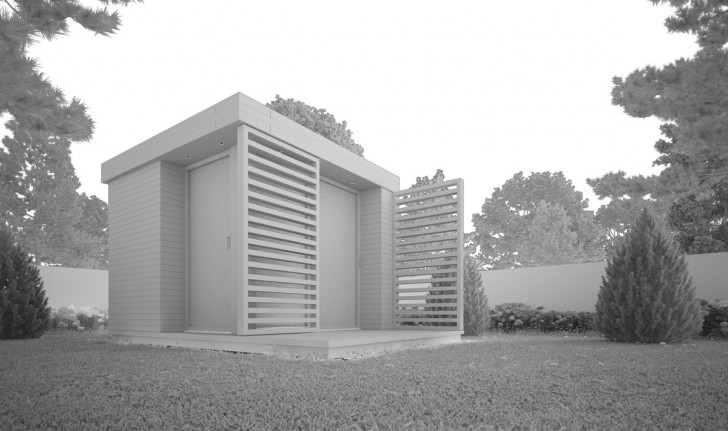
Above is the final model.
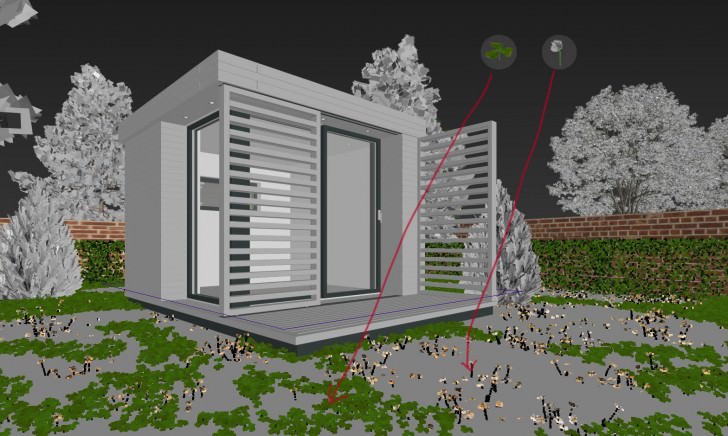
Vegetation
For the vegetation and environment I aimed for the best result possible because this visual was intended to show an actual product application in a garden scenario.
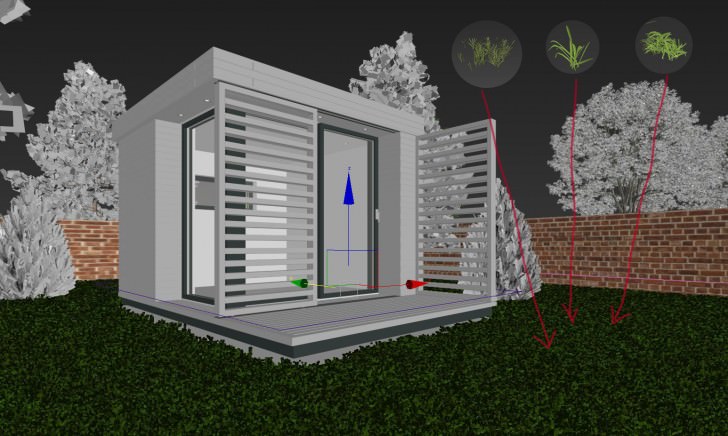
For the grass I used iGrass 3d models and some of my own models.
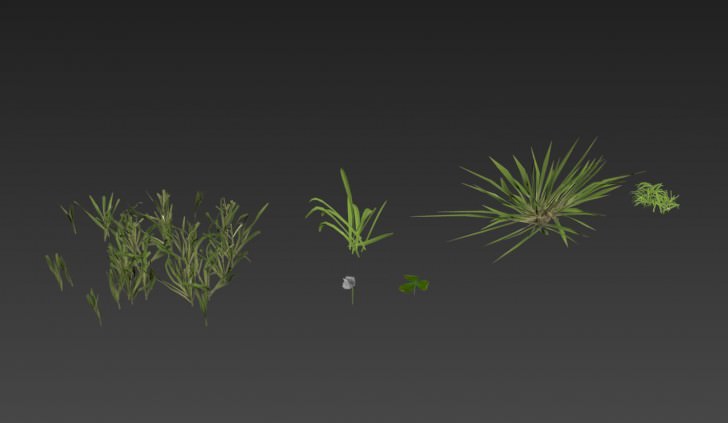
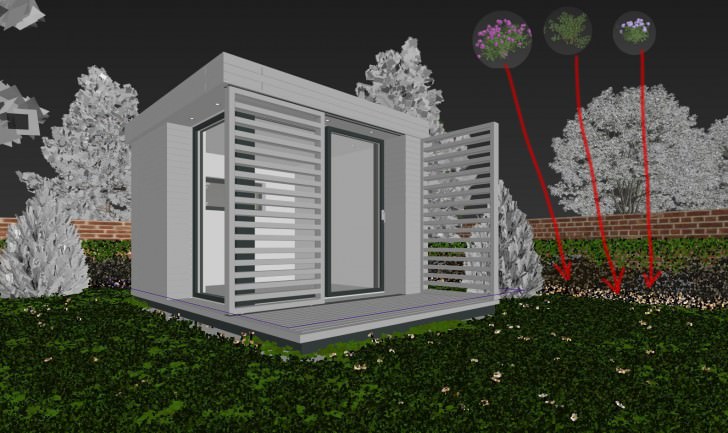
For the flowers I used iGrass too.
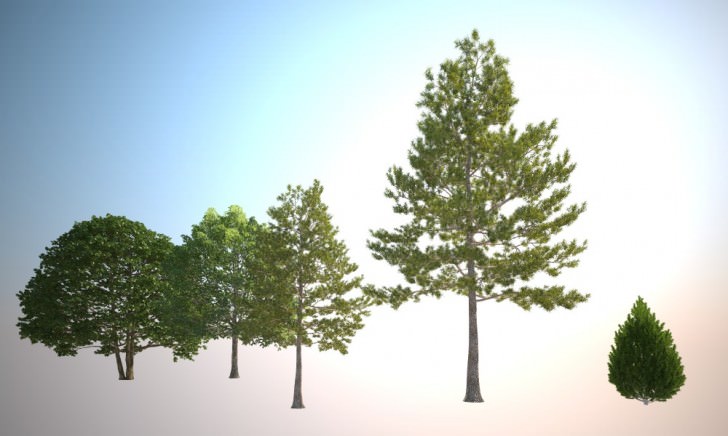
For the trees I use XfrogPlants.
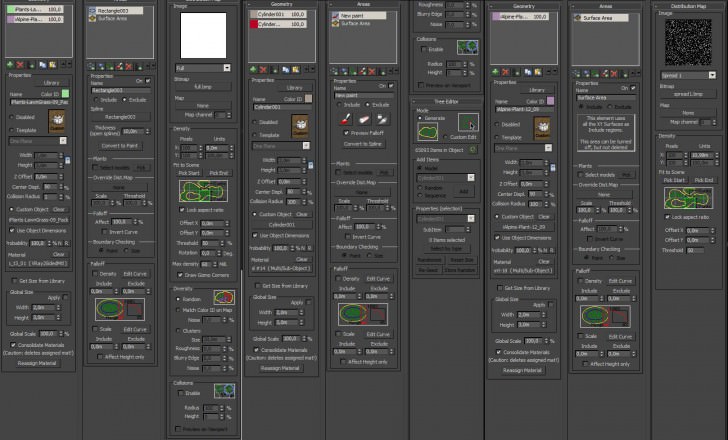
To scatter the vegetation and to create the look I desire I use the Forest Pack Pro scattering plug-in for 3dsmax by iToo Software.
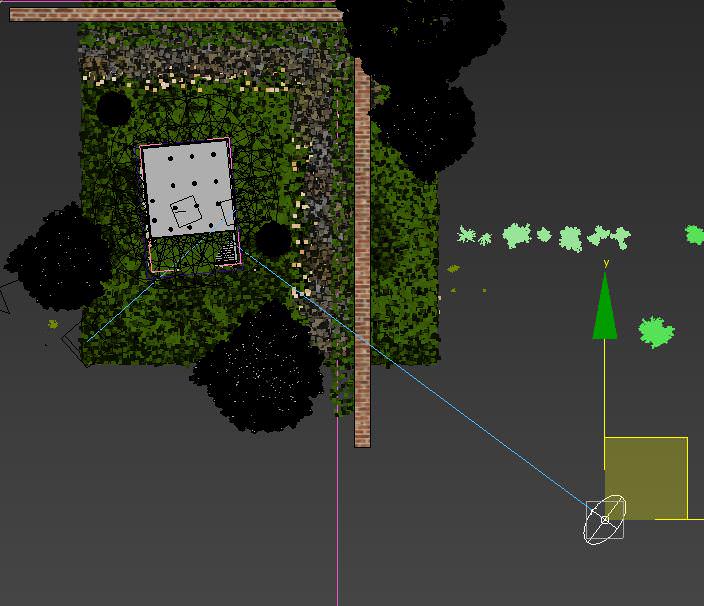
This is how it looks TOP SIDE :
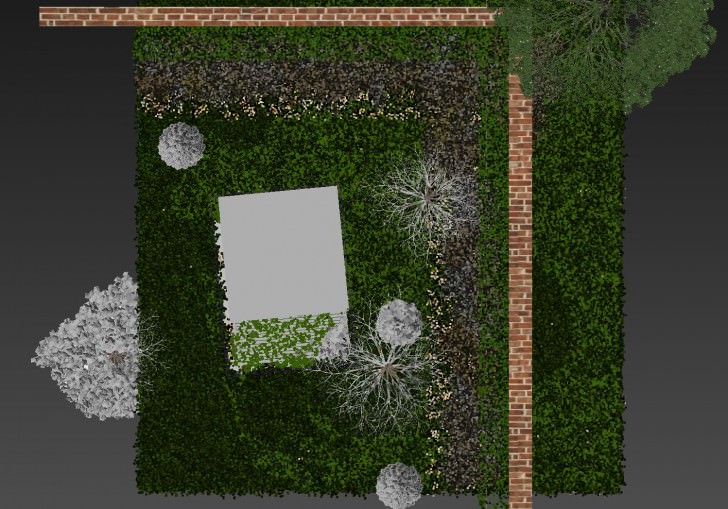
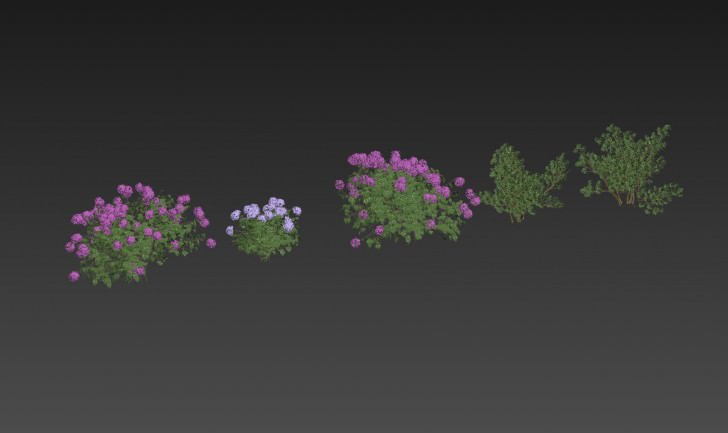
To spread the grass flowers and clovers I used the paint tool feature of Forest Pack Pro. For the grass field I use 3 types of grass where I mix them when I spread them out.
And finally I spread the flowers and scrubs.
Here are the Forest Pack settings docks :
And the initial clay render of the scene…
Materials
I’ll focus on 3 materials used in this scene :
- Wood Material
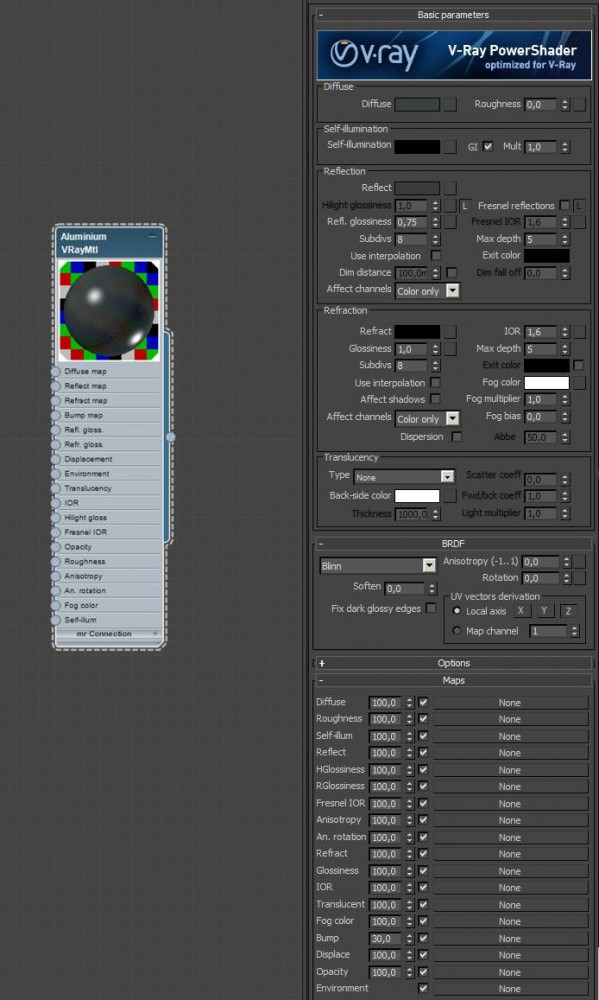
- Metal Aluminum
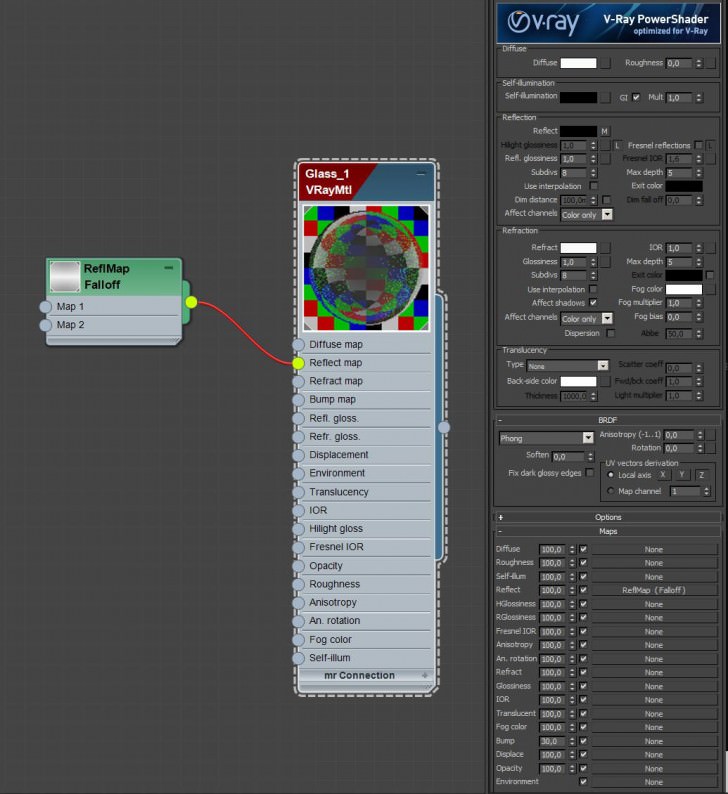
- Glass
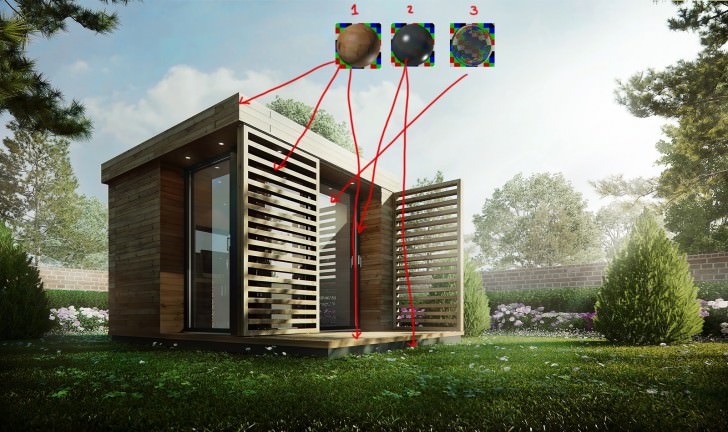
Here are the settings for these materials…
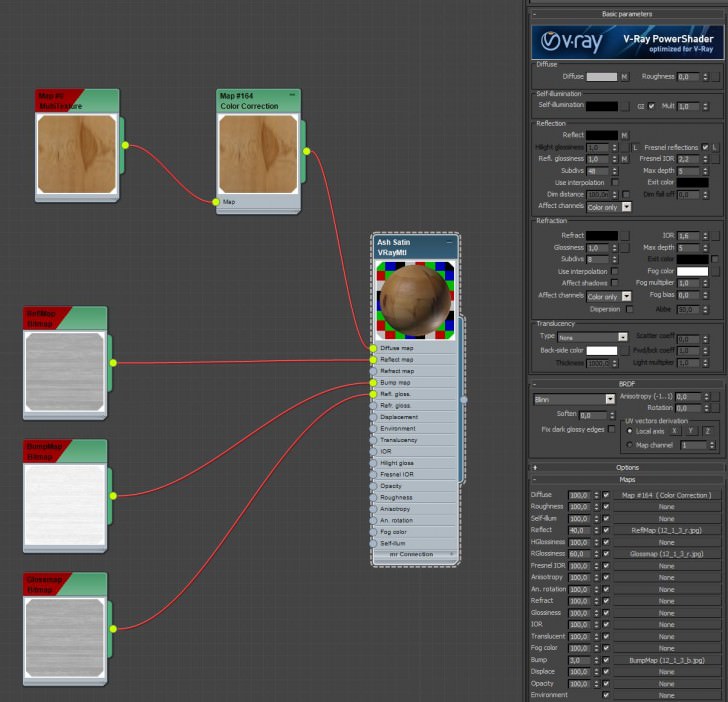
Wood
Metal
Glass
Setting the Lighting
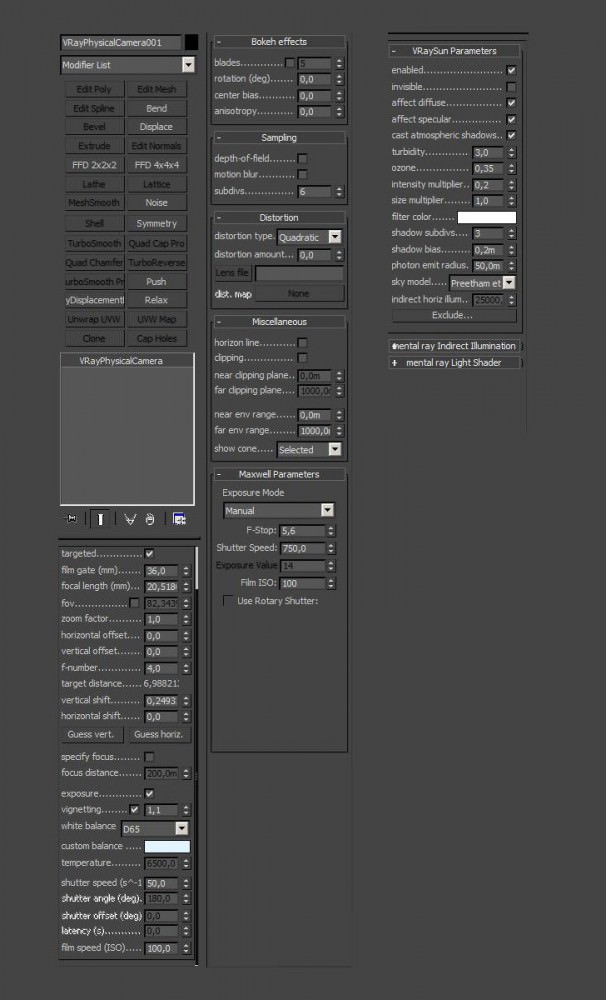
For this project I used a very simple setup of a main VRaySun for the entire environment and a few IES lights for the CUBE lights.
Here are the VRaySun & VRayCamera Settings…
Initial Lighting Preview
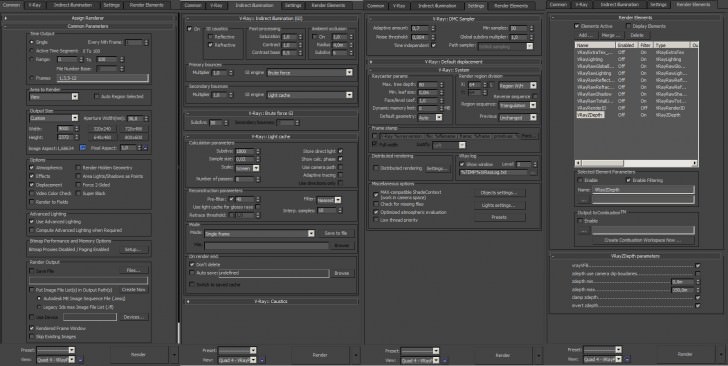
The Render Settings
Post Production
Raw Render

And here are the post production steps recorded inside Photoshop…
https://www.youtube.com/watch?v=QzamnX6wGeY
That is it!
I hope this helped you and some way and feel free to ask any questions in the comment section below…
Thank you guys, is great to know that this tutorial can help you all. Is always a pleasure can share it with all of you.
Thank you guys, is great to know that this tutorial can help you all. Is always a pleasure can share it with all of you.
woderful