


Making of Henrik Bus ART HOUSE
Jeffry Faranial‘s Henerik Bus ART HOUSE renderings awarded him Best Visualization of the Week NO. 24 with lots of requests for more information about his work. It wasn’t easy in the making for him as he says, but he took it upon himself to share with us all more information about the process of making his own art based on henrik’s art. Enjoy!


Author: Jeffrey Faranial
Jeffrey Faranial is the Visualization Manager at DWP. He is working in the 3d Visualization field for five years now after having been in the architecture and interior design field for three years. He worked as an Interior Designer in the beginning of his career in dwp and eventually assigned to do the visualization for the company in early 2008, and had been promoted as a Senior Visualizer after a year and had been put forward to Visualization Manager in the same department the following year.
Hi everyone!
First of all, thanks for your time reading this article and a big thanks to Ronen for inviting me to write it.
The Inspiration
I’ve always envisioned myself having a library with a good selection of books and magazines, something tangible I can always flick through on my spare time. Whilst Im in the process of making this happen I do try to find time to visit any book stand habitually.
When I sew the front cover of the Livingetc Magazine, July 2013 issue, I was struck by the image. It really got to me… From the minimalist style to the black-and-white color palette which is always appealing for my liking. At that instance the image has become a challenge, as I do see a great opportunity in the elements presented to turn it into making my 3D rendition of it. The possible tasks and situations in making such an image are the driving force that made me start doing it. From the raw-looking wood, good lighting, simple composition, down to details like the texture and fur. Overall, the challenge idea has started to grow in my head and now I just needed to make it happen.
The Beginning
The reference interior has 4 sets of images so I decided to add more and amend some to re-create the space in some way with my added personal touch but still with a great respect to the original reference.
The Reference

The finished project has 7 different camera angles, but I chose to walk you through just a couple of views to make it simple. Setups are pretty much the same anyway and it only varies with cameras focal length and f-stops.
The final images…


Software Used
- Autodesk 3ds Max 2013
- Chaos Group V-Ray Adv 2.30
- Adobe Photoshop CS
Basic Scene Setup
Display and System Units setup set to millimeters. Gamma and LUT set to 1.0. Yes! No LWF… There is such a thing still.

Basic Modeling
Every time I do an interior project, I always start with the basic volume defining components – floor, walls, openings and ceiling. This is also the part where I test the main materials, V-Ray Physical Camera, ambient V-Ray lights, and V-Ray sun settings.
All this while in low subdivision settings just to get the basic look and feel as I like.
The Plan…

I’ve added a V-Ray Sun and Lights, set to 3-8 subdivisions for test renders then increasing the value to 16-24 for final rendering. Environment set to the default V-Ray Sky.

V-Ray Sun Position :

I’m using 3ds max native foliage to simulate shadows from the windows. Seems no one uses these, but for this task they are spot on.

The V-Ray Physical Camera placement and settings :

Draft camera view which is always flexible to modify a bit once furniture is in place to make sure that I am happy with the composition.

Basic Materials
Here are some of the main materials used in this scene with textures. Again, these materials were set to default subdivision of 8 and eventually I increased their value to 16-24 for the final rendering.
Concrete Painted Wall with bump map from Arroway Textures :

Wood Floor with Diffuse, Reflect & Bump maps from Arroway Textures. Composite map for Evermotion :

Painted Wood / Cornices, baseboards and moldings.

Rendering
And here is the first test render and the settings used for it :

The Test Render :

The test render shows a lot of noise and splotches due to low render settings but its enough for me to continue to the next step which is modeling the basic furniture and start putting in more details according to the plan.
Furniture Modeling
I’ve used the poly modeling method (box modeling) with the furniture and spline modeling with most of the accessories.


Some of the models I used are from Evermotion and a Sofa from Designconnected – Both excellent products.

And stock models obtained on-line.

Hair & Fur Modeling
Once everything was set, I started working on the details that make it more realistic and pleasing. I have started with the throw on the sofa. Starting from a Plane object with enough segments then simulated using MassFX (mcloth) and sofa as the rigid body.

After a couple of try-out simulations, once Im satisfied with the output, the plane was converted to editable poly and slightly adjusted before being applied with the mesh smooth and hair& fur modifiers.
I will not discuss the styling phase, as it is a long process outside the scope of this article, but I do recommend you to watch the Bambi Chair Videos on Viscorbel website for more on that topic.
And these are the fur throw setups after styling…


And few more models, like the rug in the living and Henriks alternative Christmas Tree in the study room were done using iToo Software’s Forest Pack Plugin.


And here are some of the materials and textures used in final rendering.
Chrome :

Wood :

Glass :

Fabric :

Porcelain :

Now that the modeling and texturing is finally done then is time to do the…
Final Rendering Setup
Here are the final wires :

Final render settings :

Raw renders saved in TIFF 16 bit file :

Render Elements :

Post Production
This is definitely the last but not the least part of my workflow. Photoshop always plays a vital role in making sure I am happy with the final output. The following screenshots shown are the major and important steps I usually do and I wanted to share with you to give a good understanding how I approach and manipulate my rendering to the final image.
Brightness and Contrast :

The use of render elements – Wire color and Raw reflection :

Applied to floor and fireplace :

Giving it a bit of a glow and adjust the brightness. Then duplicate the last layer and change the blending mode to screen. Applied Gaussian Blur set to about 75 Pixels.

Set opacity of that layer to 25% and delete the part where I dont like the effect :

Then a few more steps to move forward into a more detailed editing.
The Fireplace
Add a dirt texture on top of the fireplace from (obtained from CGtexture).

Set blending mode to Overlay with 75% opacity :

Sculpture
The sculpture on the coffee table takes a lot of attention so I toned it down by selecting it via V-Ray Wire Color and applied brightness and contrast.

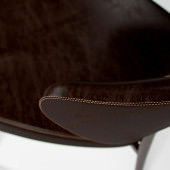
Throw (hair&fur)
During test renders, I tend to save some of the images I think I could use and merging it on the final image. This is what I did for the throw and living room rug and gives a better result.
Original Render :

Test Render :

Result With the original and test render combined :

A hint of color correction plus brightness and contrast manipulation :

Almost there, but wasn’t that happy with the result of the fur. I think it needs to be softer so I decided to select again the fur part, set blending mode to screen and applied Gaussian Blur at 8.4px radius.

And set opacity to 80%.

Then tone down the throw on the foreground.

Done editing the details!
The Finishing Touches
Now its time to add a couple more final touches. The next few steps is what make the images more photo-real (in my eyes anyway). I’m using NIK Software for this stage – NIK Color Efex Pro 4.
Pro Contrast :

Film Efex : Modern …

I wanted the grain to be subtle so I set the opacity to 35 :

After working in NIK Color Efex, last step would be adding a Lens Correction filter to add Vignette and Chromatic aberration :

Following the same process, here are the raw render images juxtapose to the final images.


Then its time to post and share the final image.
As a final note, I have to admit, this was the first time for me to do a broad step-by-step tutorial and its really a daunting task, please do bear with me if I have missed some steps. This gives me a great experience of sharing as well as a respect to other CG artist who do find time for putting their process into words. I just hope that I’ve tackled and shared helpful and beneficial points.
Once again, thanks to Ronen and thanks to everyone who keep on reading up to this LAST word. I hope that you had a good time reading this. Any comments and more questions about the tutorial are more than welcome – Just drop a line in the comment section below.
Cheers to you all,
Jeff.

Hi,
Saw ur works here amazing, awesome no words to tell… can I have ur mail id so that I can ask few doubts regarding the 3d works which you have posted here and about vray settings also… it would be great if u share ur mai id….
Thanks
Regards
Vinodh
Thanks for sharing Jeff. keep it comin 🙂