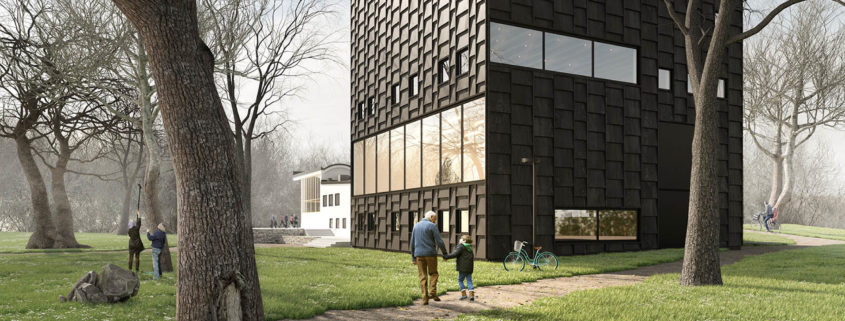
Tomorrow Challenge entry by User-51104926

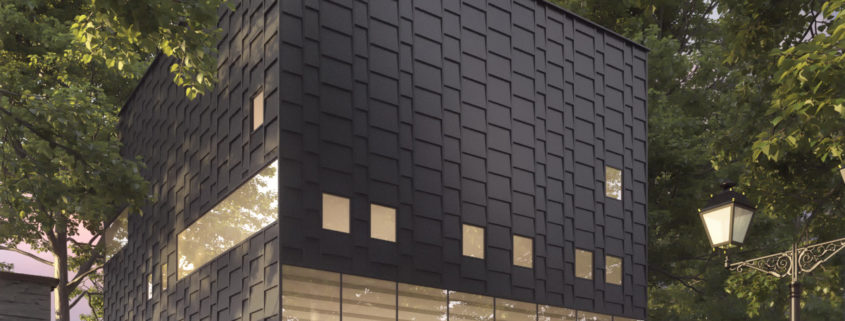
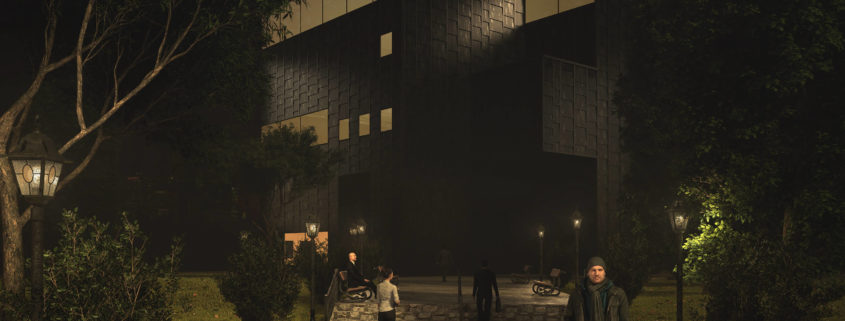
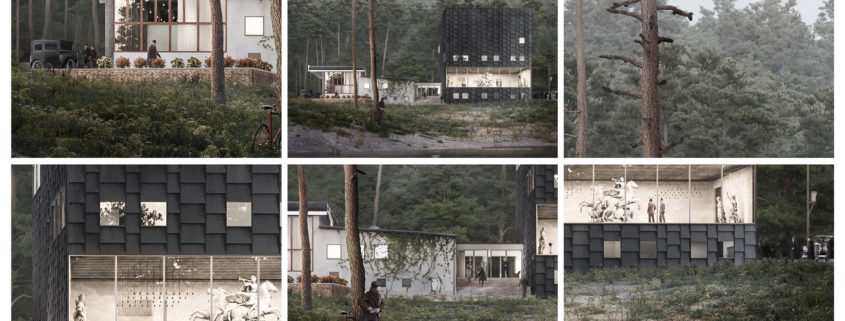
I want to blend in the environment, building, lighting together to have the most perfect mood and feel settlement. In order the get this, I have to take important consideration of its landscape, such as ground texture, material colour, lighting, and shadow, etc.

The most difficult and most challenge of this project is the create the best location for tree shadow, to make the image looks more interesting. I used plugin Fores Pack the generate grass area, but for the tree use create it by myself to make it easy to control.

Tomorrow Challenge entry by User-11033593

I first tried to get to know the museum and the place, I live in Brazil so I used sites, google earth, archdaily …
Knowing the museum I started to model the building, it was a difficult but satisfactory stage since I liked the result
After the modeling I began to make a hand sketch to develop the environment, done that I used the model of the building that was already ready to choose the best angle for the proposed environment
Once this has been done in practice, I have already begun to set and prepare the shaders
So I started doing the rendering tests.
I started doing the work the way I wanted it, I did some small post-production tests to see if all the layers were in accordance with what I would need and rendered it in high resolution.
I tested a daytime render but I did not like it enough and finished the image with the dark weather I had been looking for since the beginning of the project.
The final image came out exactly as I wanted it, I managed to bring a low fog of the night, the effects of the lighting in that fog, and the building was not overshadowed by any effect or ambiance, everything was added generating a unit. Thank you, I hope you have enjoyed the project.

Tomorrow Challenge entry by User-14250172

I had a very simple Lighting setup, the base is a Skydome with a sunset/night map on it and all the other lights are rectangle light.
The hdri used was very blue and it makes the final render also blue. For this, instead of correcting directly the hdri, I decided to correct it in post production. The positioning of the brightest point directly in front of the camera was to make the clouds contrast in the water reflection, giving a very nice atmosphere on the image.
The rectangle lights on the first level of the museum are placed as seen in the pictures of the place so they give this nice effect on the side walls. All other lights are a simple big rectangle near the ceiling of every floor, facing down.
One big element, although in doesn’t have a big presence is the painting inside the showroom. I knew my camera was going to be far so I wanted to pick only one painting but big. The first one that came to mind was the Guernica, by Picasso, and so it remained.
All the vegetation was spreaded using the plugin Forest Pack that makes this process very fast.
As for render settings, I chose a very simple light cache with brute force from v-ray. This offers an amazing image quality and detail, although it took me 8 hours+ to render, the amout of noise was not so big and the reflections were perfect. Ready for post production.