


Tomorrow Challenge 2018 entry by User-67844391
It`s time for a Final Entry!
I`d like to thank Ronen and Tomorrow for this amazing challenge and jop possibility!
Good luck to all participants!
Access the Best Articles about Architectural Visualization. Learn about all aspects of crafting images that tell stories.
Making Of's Case Studies WorkflowsShare your work and get immediate appreciation through discussion, feedback, and a possible nomination for the…
![]()
A weekly experiment, exploring the creative minds in Architectural Visualization and more. Find out what makes us all tick and push the limits.
Listen Now! Subscribe on iTunesOut with the old and in with the new! In Converted, I’m asking you to take an in-depth look at existing architecture near you or one you love worldwide and introduce something new.
See Entries & Join! About ConvertedIt`s time for a Final Entry!
I`d like to thank Ronen and Tomorrow for this amazing challenge and jop possibility!
Good luck to all participants!
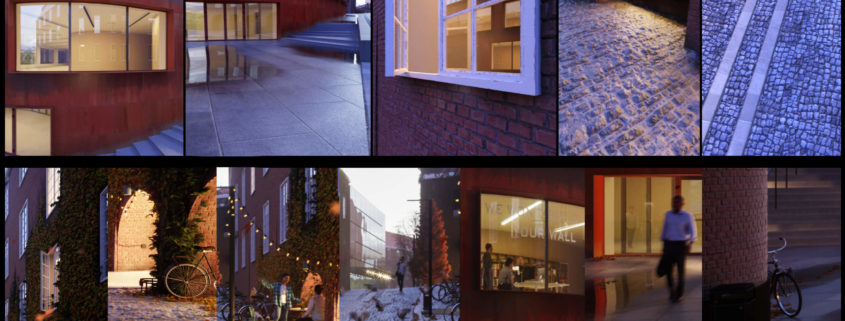
In this update I want to show some details of my scene. I always try to work on small details as much as possible (of course it depend on time) and this project is not an exception.
I had a lot of fun during this process. I decided to fill my scene with small stories full of small details.
First of all I made ivy. I was thinking that I can easily reach nice result with Ivy generator, but I wasn`t really happy with results. So I decided to use ForestPack for it, where I have much more control.
Next step was creating leaves on the ground, which I generated with Debris maker and scattered with ForestPack. For some specific areas I used PhysX Painter.
After this I put people and flying leaves in scene, which I animated to have `true` motion blur.
It was also very important to create good materials to not lose all this details.

During light tests I was playing with volumetric fog. Very foggy render was one of directions in my concept. But I realize that I missed too many details which I want to show. Anyway I was quite happy with results, to it`s nice to show it.
In my final image I used volumetric fog as well, but with much smaller amount.
At this `Work process` I`d like to explain how I created material of corten steel. At the very beginning I was thinking to create nice material with Substance Painter, but it wasn`t a really good decision because in that case I can create one-project-material and I want to make something more multipurpose, material which I can use in future projects.
I found nice corten texture and divide it on few smaller ones to get randomness on my corten panels. So my basic material it`s quite complicated blend material with few levels of dirt and BW masks to looks as realistic as possible, which later I copied few times with different numbers on AO.
I made separate materials for different levels of panels:
1. Wet panels under windows with a different intensity of AO and glossiness.
2. Dry panels from sunny side.
3. Top panels with dirt only on edges.
4. Lower panels with ground dirt.
5. Vertical panels.
6. Material for window frames.
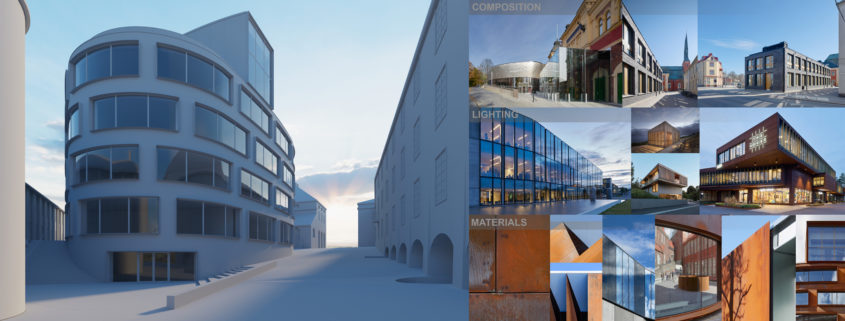
After first acquaintance with the object and available 3d model I decided to start with strategy and `main idea`. I always try to make everything in 3d with small post correction, so everything suppose to be real (real camera hight and lens, environment, weather and lighting). So I created a plan how to move forward and not to stuck.
The Strategy:
0. Moodboard
1. View search.
2. Lighting.
3. Adjustin geometry.
4. Materials and texturing.
5. Tests.
6. Final rendering.
7. Post-production.
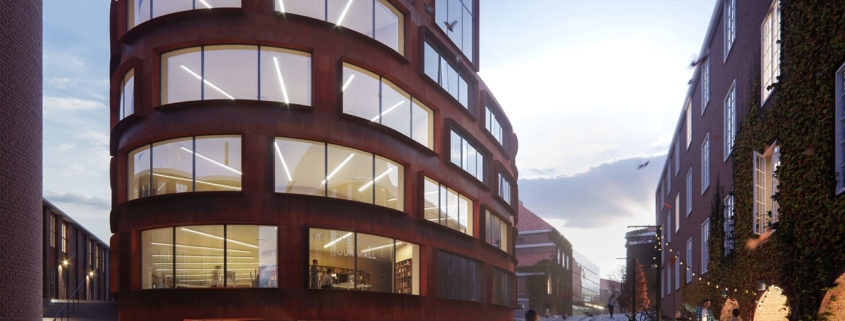
As it`s `one shot` image I found out that the best way in this situation is to do everything comprehensively. My `main idea` is to show how the building collaborates with historical environment and how people interact with it.So I made basic moodboard and according to it I developed some criterias for `perfect shot`:
1. Focused on the buildind, but still consist of surrounding historical buildings.
2. Show main ways of interaction people with the building. Customer expirience as main factor.
3. Dynamic and dramatic. Exterior lights and wet roads. After rain.
4. Evening lighting to show dignity and plastic of the object.
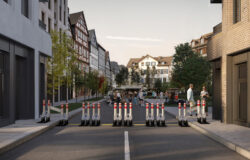
So now I know how to move forward and without any `running` around the building I decided that the only suitable view which works with all my criterias is view from entrance.
I made basic lighting just to be sure that it works with building`s plastic. And after quick camera moves I found perfect view. To be fair it`s really hard to work after such proffesionals as Åke E:son Lindman, because subconsciously you always turns around them. So my view is looks more like attempt to adjust real view.