

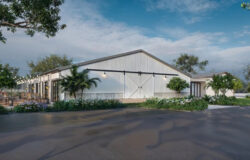


After modelling the building, I placed the camera, following the concept I had in mind. I really liked the great window of the gallery so i decided to show that side of the building. The following step was adding the exterior lamps, the trees, vegetation, snow on the roof and some snow mounds, to create visual interest and guide the viewers eye.
I then placed a dome light with a HDRi map to simulate a sky with an overcast sun. The dome light was linked to a vray sun system with a very low sun contribution, just to light more the side wall of the Museum. To test the light I made some renders with an override material. Then I placed the interior lights, a mix of planar and ies light, balanced the overall lighting setting and started to apply materials. Once satisfied with the lights, I started to apply materials. The materials set up was really simple, but I pushed it a bit more forward for the ground texture, using normal maps to simulate height change, saving resources for the displacement used instead in the snow mounds. The ground material is made by two different textures mixed by a mask in a vray blend material. It was then rendered in two different version, to have some freedom of choice. The trees were rendered apart too, to mantain flexibility in the compositing phase. The main render setup is a combination of brute force and light cache in a linear workflow. I rendered all the passes needed to composite my image such as Zdepth, ObjectID, Reflection, Refraction and so on.
Once all was done i moved to the compositing phase.


